


Sam4s GIANT-100, Giant PRO, ELLIX45, ELLIX40BLACKMARK, ELLIX40 User Manual
...SAM4S Printer Series
Windows Driver & Installer
User Guide
All specifications are subject to change without notice.

Contents
Programming CHAPTER 1. Getting Started·······························3
1.1.Overview··········································4
1.2.Operating Environment····························5
1.3.Requirements·····································5
1.4.Preparations·······································5
CHAPTER 2. Installation of SAM4S printer··················7
2.1.Verify interface type of SAM4S printer··············8
2.2.Installing a Serial printer···························10
2.3.Installing a Parallel printer·························12
2.4.Installing an USB printer··························14
2.5.Installing an USB to Serial printer··················19
2.6.Installing an Ethernet printer······················24
2.7.Checking installed printer·························26
CHAPTER 3. Uninstallation of SAM4S printer··············28
3.1.Uninstalling printer(s)·····························29
3.2.Remain information·······························31
CHAPTER 4. Specifications of SAM4S printer·············32
4.1.Printer fonts······································33
4.2.Printer resolutions & Paper sizes··················36
CHAPTER 5. Properties of SAM4S Printer·················37
5.1.Printer Device Control·····························38
5.2.Additional configurations··························39
CHAPTER 6. Troubleshooting·····························41
6.1.Installation troubleshooting························42
6.2.Uninstallation troubleshooting·····················47
6.3.Printing troubleshooting···························49
APPENDIX.
Testing for SAM4S printer driver using the WordPad·······51

CHAPTER 1.
Getting Started
1.1.Overview
1.2.Operating Environment
1.3.Requirements
1.4.Preparations

CHAPTER 1 Getting Started
1.1. Overview
This document contains how to install/uninstall an SAM4S printer with an interface and contains how to configure an SAM4S printer.
See below on installing SAM4S printer.
1.Verify interface of SAM4S printer (p.8).
2.Install proper SAM4S printer driver.
1)In case of a serial printer. (p.10).
2)In case of a parallel printer. (p.12).
3)In case of an USB printer. (p.14).
4)In case of an USB to Serial printer (p.19).
5)In case of an Ethernet printer. (p.24).
3.Make sure installed printer is properly works (p.26). To uninstall a printer, refer (p.29).
The SAM4S printer driver installer (V2.0.2 or above) supports following models:
1.ELLIX10 (32bit only)
2.ELLIX20 (32bit only)
3.ELLIX20II (32bit / 64bit)
4.ELLIX30/30III/40 (32bit / 64bit)
5.ELLIX35/35III/45 (32bit / 64bit)
6.ELLIX32/42/37 (32bit / 64bit)
7.ELLIX40BlackMark (32bit Only)
8.GIANT-100 (32bit / 64bit)
9.GIANT PRO (32bit / 64bit))
The SAM4S printer driver installer is supported English and Korean.
>> Refer to 1.2. Operating Environment
1 CHAPTER
4
1.2. Operating Environment
WEPOS, POSReady2009, Windows XP, Windows Vista, Windows 7,
x86 (32bit)
Windows 8
Windows XP, Windows Vista, Windows 7, Windows 8
x64 (64bit)
(WEPOS, POSReady2009 doesn’t provide the x64)
1.3. Requirements
 Warning : This requirement should be satisfied for using an SAM4S printer.
·· To install/uninstall a printer, ‘.net Framework 3.0’ or above should have installed.
·· To install an SAM4S printer properly, please make sure any related hardware works fine and interface of printer is well connected.
1.4. Preparations
Preparations for using the SAM4S windows driver installer:
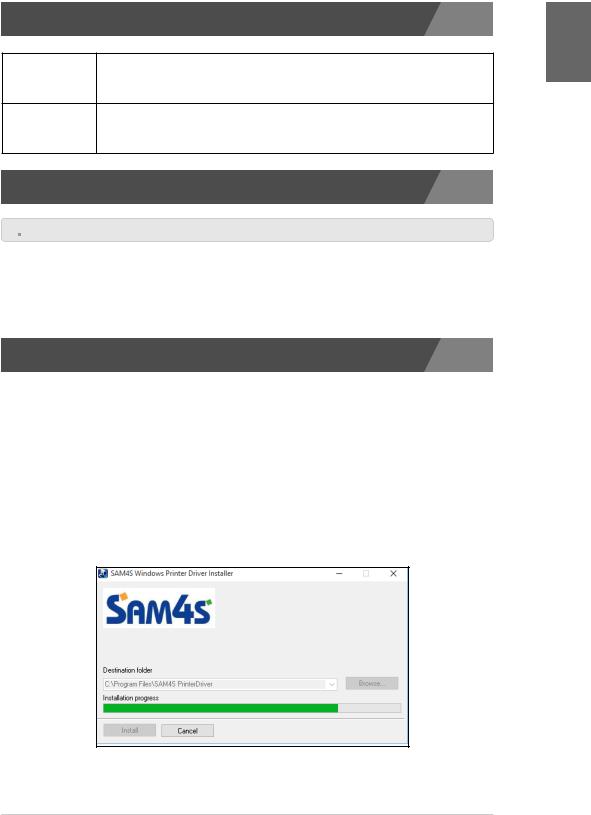
Double click the provided executable file. Files for the SAM4S windows driver installer is extracting to ‘Program Files\SAM4S PrinterDriver’ folder for a 32bit OS.
For a 64bit OS, the files are extracting to ‘Program Files (x86)\SAM4S PrinterDriver’ folder.
1 CHAPTER
5
1.4. Preparations
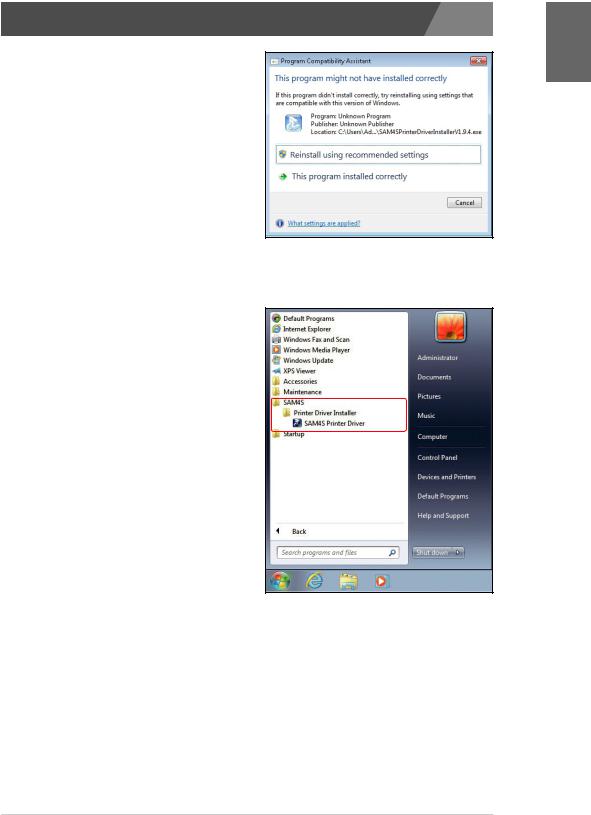
2.This executable file is the ‘WinRAR 32bit executableextracting’ file so compatibility message can be displayed on a 64bit OS.
If following message is shown,
click ‘This program installed  correctly’ to progress. This will
not affect any program or system.
3.The SAM4S windows driver installer will be started automatically after extracting files.
4.You can execute the SAM4S printer driver installer through shortcut that is on the ‘Program Menu’. Please refer below for detail.
1 CHAPTER
6

CHAPTER 2. Installation of SAM4S printer
2.1.Verify interface type of SAM4S printer
2.2.Installing a Serial printer
2.3.Installing a Parallel printer
2.4.Installing an USB printer
2.5.Installing an USB to serial printer
2.6.Installing an Ethernet printer
2.7.Checking installed printer

CHAPTER |
2 |
Installation of |
|
||
|
SAM4S printer |
2.1. Verify interface type of SAM4S printer
Check the interface of printer from the ‘Self-Test’. The self-test checks the following:
1.Make sure paper roll has been installed properly.
2.Turn on the power while holding down the FEED button.
The self-test begins.
pic1) ELLIX20 / ELLIX20II
pic2) ELLIX30 / ELLIX40 / ELLIX35 / ELLIX45
2 CHAPTER
8
2.1. Verify interface type of SAM4S printer
2 CHAPTER
pic3) GIANT-100 / GIANT PRO
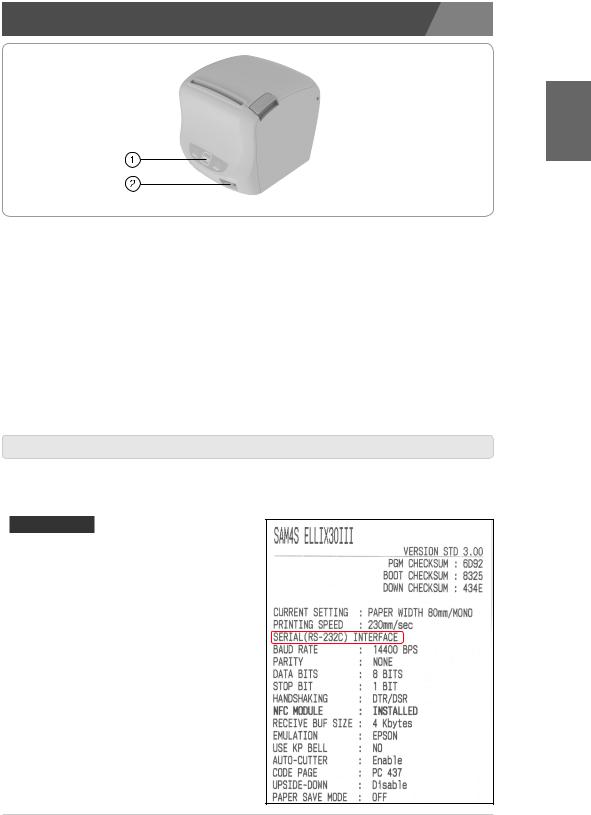
3.The self-test prints the current printer status, which provides the control firmware version and the printer setting.
4.The printer will be pause temporarily after printing the current printer status. (The 'No Paper' LED or the LCD light blinks) The GIANT Series printer will automatically execute 'Step 5' after 2 seconds.
5.Press the FEED button to continue printing. The printer prints a pattern using the built-in character set.
6.The self-test automatically ends and cuts the paper after printing the following.
**Completed **
7.The printer is ready to receive data as soon as it completes the self-test.
8.You can find interface type of SAM4S printer from the self-test as following.
Interface list
·· USB-I INTERFACE for
‘SERIAL / V-COM CONNECTION’
·· USB-II INTERFACE for ‘USB CONNECTION’
·· PARALLEL INTERFACE for ‘PARALLEL CONNECTION’
·· Ethernet-II INTERFACE for ‘ETHERNET CONNECTION’
·· WIRELESS LAN (WLAN) INTERFACE for ‘ETHERNET CONNECTION’
·· SERIAL (RS-232C) INTERFACE - 25 pin for ‘SERIAL / VCOM CONNECTION’
·· SERIAL/WIRELESS INTERFACE - 9 pin for ‘SERIAL / VCOM CONNECTION’
9
2.2. Installing a Serial printer
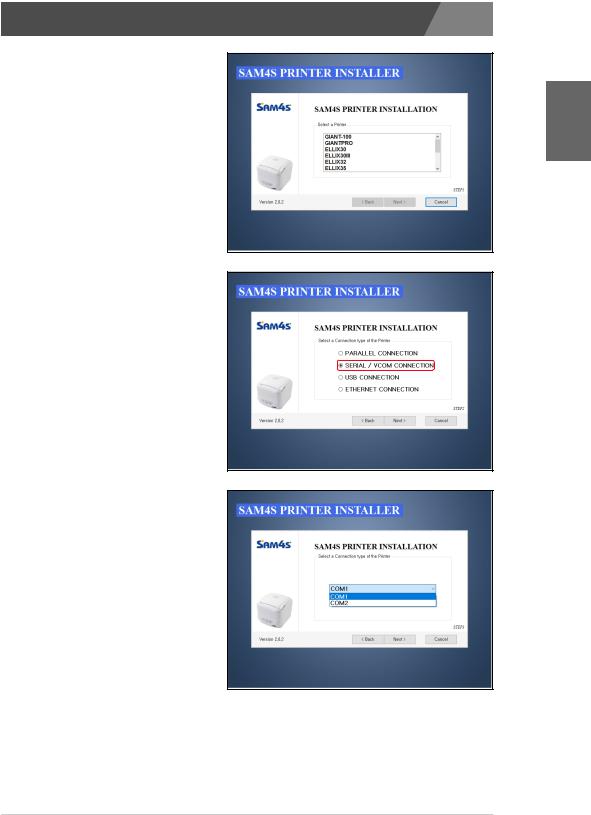
1.Selecting a printer that will be installed.
2 CHAPTER
2.Selecting the ‘SERIAL / VCOM CONNECTION’.
3. Selecting a port.
·· If you don’t have a serial port on your system, you can’t progress further. For solution of this issue, please refer p.42.
10
2.2. Installing a Serial printer
4. Configuring the selected port.
2 CHAPTER
5. Confirming installation.
6. Installation completed.
11

2.3. Installing a Parallel printer
1.Selecting a printer that will be installed.
2 CHAPTER
2.Selecting the ‘PARALLEL CONNECTION’.
3. Selecting a port.
·· If you don’t have a parallel port on your system, you can’t progress further. For solution of this issue, please refer p.44.
12

2.3. Installing a Parallel printer
4. Confirming installation.
2 CHAPTER
5. Installation completed.
13

2.4. Installing an USB printer
 Warning: Before finishing installation of USB printer, printer should not be connected with PC
1. Selecting the printer for install.
2.Selecting the ‘USB CONNECTION’.
3. Confirming installation.
2 CHAPTER
14
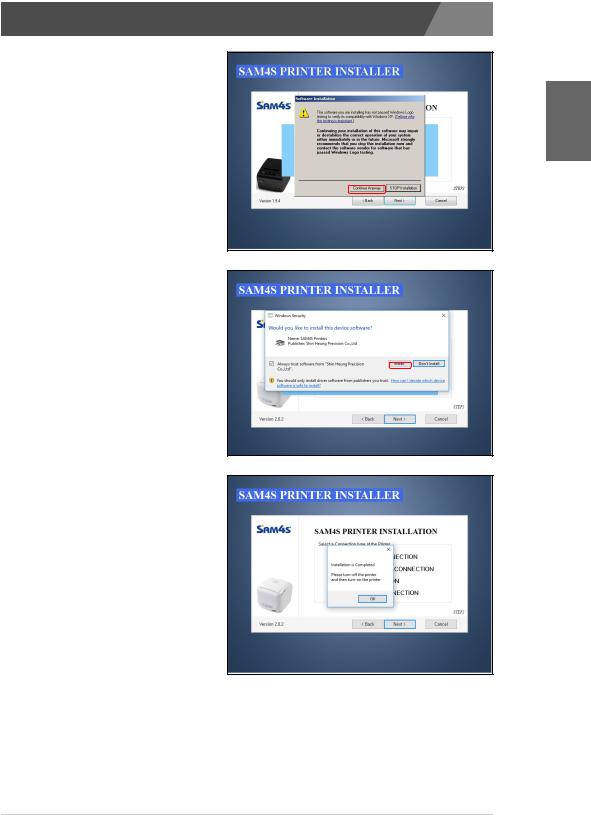
2.4. Installing an USB printer
4. Confirming security check.
·· In case of windows XP
2 CHAPTER
·· In case of Windows Vista / 7 / 8 / 10
>>Once you check the ‘Always trust software …’ and click the install, the Windows Security message will not display any more.
5. Installation completed.
15

2.4. Installing an USB printer
6. Connecting printer so that the printer is installing.
·· In case of windows XP
>> Notification of connection.
>> Hardware Wizard for the USB.
2 CHAPTER
16

2.4. Installing an USB printer
2 CHAPTER
>> Installation completed.
17
 Loading...