

SAM4S ER-380, ER-380M User Manual

ER-380 / ER-380M Electronic Cash Register AU
Operation and
Program Manual
l
y
l
T
s
l
Z
j{y
_
W
v
u
p
G
j
hz
oG
y
ln
pz
{
l
y
All specifications are subject to change without notice
JK68-60962Q(Rev.03)
From ER-380 v1.0, ER-380M v1.0
Up to ER-380 v4.1, ER-380M v4.1

ATTENTION
The product that you have purchased contains a rechargeable Ni-MH battery. This battery is recyclable. At the end of its useful life, under
various state and local laws, it may be illegal to dispose of the battery into the municipal waste system.
Check with your local solid waste officials for details concerning recycling options or proper disposal
.
WARNING
This is a Class A product. In a domestic environment this product may cause radio interference in which case the user may be required to
take adequate measures.

Precaution Statements
Follow these safety, servicing and ESD precautions to prevent damage and to protect against potential hazard s such as
electrical shock.
1-1 Safety Precautions
1. Be sure that all built-in protective devices are
replaced. Restore any missing protective shields.
2. When reinstalling the chassis and its assemblies, be
sure to restore all protective devices, including
nonmetallic control knobs and compartment covers.
3. Make sure there are no cabinet openings through
which people - particularly children - might insert
fingers and contact dangerous voltages. Such
openings include excessively wide cabinet
ventilation slots and improperly fitted covers and
drawers.
4. Design Alteration Warning:
Never alter or add to the mechanical or electrical
design of the SECR. Unauthorized alterations
might create a safety hazard. Also, any design
changes or additions will void the manufacturer’s
warranty.
5. Components, parts and wiring that appear to have
overheated or that are otherwise damaged should
be replaced with parts that meet the original
specifications. Always determine the cause of
damage or over- heating, and correct any potential
hazards.
CAUTION
There is the danger of explosion if battery is incorrectly
replaced.
Replace only with the same or equivalent type
recommended by the manufacturer.
Dispose used batteries according to the manufacturer’s
instructions.
SAFETY NOTICE: "For pluggable equipment, the socket-outlet shall be installed near
the equipment and shall be easily accessible."
6. Observe the original lead dress, especially near the
following areas: sharp edges, and especially the AC
and high voltage supplies. Always inspect for
pinched, out-of-place, or frayed wiring. Do not
change the spacing between components and the
printed circuit board. Check the AC power cord for
damage. Make sure that leads and components do
not touch thermally hot parts.
7. Product Safety Notice:
Some electrical and mechanical parts have special
safety-related characteristics that might not be
obvious from visual inspection. These safety
features and the protection they give might be lost
if the replacement component differs from the
original - even if the replacement is rated for higher
voltage, wattage, etc.
Components that are critical for safety are indicated
in the circuit diagram by shading, (
Use replacement components that have the same
ratings, especially for flame resistance and
dielectric strength specifications. A replacement
part that does n ot have the same safety
characteristics as the original might create shock,
fire or other hazards.
ATTENTION
ll y a danger d’explosion s’il y a remplacement
incorrect de la batterie.
Remplacer uniquement avec une batterie du même type
ou d’un type équivalent recommandé par le
constructeur.
Mettre au rebut les batteries usagées conformément aux
instructions du fabricant.
) or ( ).

1-2 Servicing Precautions
WARNING: First read the-Safety Precautions-section of this manual. If some unforeseen circumstance creates a
conflict between the servicing and safety precautions, always follow the safety precautions.
WARNING: An electrolytic capacitor installed with the wrong p olarity might explode.
1. Servicing precautions are printed on the cabinet.
Follow them.
2. Always unplug the units AC power cord from the
AC power source before attempting to:
(a) Remove or reinstall any component or assembly
(b) Disconnect an electrical plug or connector
(c) Connect a test component in parallel with an
electrolytic capacitor
3. Some components are raised above the printed
circuit board for safety. An insu lation tube or tape
is sometimes used. The internal wiring is
sometimes clamped to prevent contact with
thermally hot components. Reinstall all such
elements to their original position.
4. After servicing, always check that the screws,
components and wiring have been correctly
reinstalled. Make sure that the portion around the
serviced part has not been damaged.
5. Check the insulation between the blades of the AC
plug and accessible conductive parts (examples:
metal panels and input terminals).
6. Insulation Checking Procedure: Disconnect the
power cord from the AC source and turn the power
switch ON. Connect an insulation resistance meter
(500V) to the blades of AC plug.
The insulation resistance between each blade of the
AC plug and accessible conductive parts (see
above) should be greater than 1 megohm.
7. Never defeat any of the B+ voltage interlocks Do
not apply AC power to the unit (or any of its
assemblies) unless all solid-state heat sinks are
correctly installed.
8. Always connect an instrument’s ground lead to the
instrument chassis ground before connecting the
positive lead; always remove the instrument’s
ground lead last.
1-3 Precautions for Electrostatic Sensitive Devices (ESDs)
1. Some semiconductor (solid state) devices are easily
damaged by static electricity. Such components are
called Electrostatic Sensitive Devices (ESDs);
examples include integrated circuits and some fieldeffect transistors. The following techniques will
reduce the occurrence of component damage caused
by static electricity.
2. Immediately before handling any semiconductor
components or assemblies, drain the electrostatic
charge from your body by touching a known earth
ground. Alternatively, wear a discharging wriststrap device. (Be sure to remove it prior to applying
power - this is an electric shock precaution.)
3. After removing an ESD-equipped assembly, place
it on a conductive surface such as aluminum foil to
prevent accumulation of electrostatic charge.
4. Do not use Freon-propelled chemicals. These can
generate electrical charges that damage ESDs.
5. Use only a grounded-tip soldering iron when
soldering or unsoldering ESDs.
6. Use only an anti-static solder removal device. Many
solder removal devices are not rated as anti-static;
these can accumulate sufficient electrical charge to
damage ESDs.
7. Do not remove a replacement ESD from its
protective package until you are ready to install it.
Most replacement ESDs are packaged with leads
that are electrically shorted together by conductive
foam, aluminum foil or other conductive materials.
8. Immediately before removing the protective
material from the leads of a replacement ESD,
touch the protective material to the chassis or
circuit assembly into which the device will be
installed.
9. Minimize body motions when handling unpackaged
replacement ESDs. Motions such as brushing
clothes together, or lifting a foot from a carpeted
floor can generate enough static electricity to
damage an ESD.Contents

Contents
Getting Started 1
About the ER-380 / ER-380M ...................................................................................................1
Unpacking..................................................................................................................................2
Installing the Paper....................................................................................................................2
Basic Features and Functions....................................................................................................6
Memory Clear..........................................................................................................................15
Standard Hardware......................................................................................................6
Optional Hardware......................................................................................................6
Software Features........................................................................................................6
Front Display...............................................................................................................7
Rear Display - VFD...................................................................................................10
Error Code Table.......................................................................................................12
Control Lock .............................................................................................................13
Keyboards..................................................................................................................14
Memory All Clear (RAM Clear)...............................................................................15
Initial Clear (Status Clear).........................................................................................16
Operating Instructions 17
Function Key Descriptions......................................................................................................17
Clerk Sign-On/Sign-Off ..........................................................................................................21
Direct Sign-On ................................................................... .......................................21
Coded Sign-On..........................................................................................................21
Receipt On and Off..................................................................................................................22
Program 99 - Receipt ON/OFF Programming...........................................................22
Item Registrations....................................................................................................................23
Keyboard PLU Entry - Open Price / Preset Price Override ......................................24
Keyboard PLU Entry - Preset Price...........................................................................24
Keyboard PLU Entry - Repeat ..................................................................................25
Keyboard PLU Entry - Multiplication.......................................................................26
Keyboard PLU Entry - Direct Multiplication with Preset Price................................26
Keyboard PLU Entry - Multiplication with Decimal Point.......................................27
Keyboard PLU Entry - Split Pricing .........................................................................28
Keyboard PLU Entry - Single Item...........................................................................28
Code PLU Entry - Open Price...................................................................................29
Code PLU Entry - Preset Price / Single Item ............................................................29
Code PLU Entry - Preset Price Override................................................................... 30
Code PLU Entry - Repeat..........................................................................................30
ER-380 / ER-380M Electronic Cash Register AU Contents • i

Code PLU Entry - Multiplication..............................................................................31
Code PLU Entry - Multiplication with Decimal Point ..............................................31
Code PLU Entry - Split Pricing.................................................................................32
Barcode PLU Entry - Open Price, Single Item..........................................................33
Barcode PLU Entry - Open Price, Multiple Items.....................................................33
Barcode PLU Entry - Preset Price Override, Single Item..........................................34
Barcode PLU Entry - Preset Price Override, Multiple Items ....................................34
Modifier Key.............................................................................................................35
Price Level Key.........................................................................................................36
Promo ........................................................................................................................37
Waste.........................................................................................................................38
Percent Key Operations...........................................................................................................39
Preset Percent Discount on an Item...........................................................................40
Enter a Percent Discount on an Item.........................................................................40
Preset Percent Discount on Sale Total.......................................................................41
Enter a Percent Discount on Sale Total.....................................................................41
For Surcharge Operation ...........................................................................................41
Dollar Amount Discount on Sale...............................................................................42
Dollar Amount Discount on Item..............................................................................42
Return Merchandise Registrations...........................................................................................43
Voids and Corrections .............................................................................................................44
Error Correction (Void Last Item).............................................................................44
Void Previous Item....................................................................................................44
Cancel........................................................................................................................45
Void Mode Operations..............................................................................................45
No Sale Operations..................................................................................................................46
Open Drawer .............................................................................................................46
Non Add Number......................................................................................................46
Received On Account Operations............................................................................................47
Paid Out Operations.................................................................................................................48
Subtotaling a Sale................................. ...... .............................................................................49
Eat In/Take Out/Drive Thru Sales...........................................................................................49
Totaling and Tendering............................................................................................................50
Totaling a Cash Sale..................................................................................................50
Totaling a Check Sale................................................................................................50
Tendering a Cash Sale...............................................................................................51
Tendering a Check Sale.............................................................................................51
Totaling a Charge (EFTPOS) Sale............................................................................52
Tendering a Charge (EFTPOS) Sale .........................................................................52
Cash Out within a Charge (EFTPOS) Sale................................................................53
Check Cashing...........................................................................................................54
Split Tender...............................................................................................................54
Post Tender................................................................................................................55
Currency Conversion.................................................................................................55
Table Management and Clerk Interrupt Operations ................................................................56
Overview...................................................................................................................56
Soft Check - Restaurant Style Billing........................................................................57
Hard Check - Monthly Account Style Billing...........................................................62
Scale Entry...............................................................................................................................66
Direct Scale Entry......................................................................................................66
Automatic Scale Entry...............................................................................................67
Tare Weight Entry.....................................................................................................67
Manual Tare Weight Entry........................................................................................68
Manual Weight Entry................................................................................................69
ii • Contents ER-380 / ER-380M Electronic Cash Register AU

X/Z Mode 71
Introduction .............................................................................................................................71
X/Z Reports .............................................................................................................................72
Running a Report - General Instructions...................................................................72
Report Table..............................................................................................................73
Electronic Journal Table............................................................................................74
Reset Hard Check (Slip) Line # (EPROM v3.1 & Later)........................................................75
Program 10 - Reset Hard Check Line # Programming..............................................75
Cash Declaration......................................................................................................................76
Program 90 - Cash Declaration Programming.......................................................... 76
Service Mode Programming 77
Overview .................................................................................................................................7 7
Memory Allocation Scan.........................................................................................................78
PC Online Mode......................................................................................................................78
Memory Allocation..................................................................................................................79
Program 60 - Memory Allocation Programming.......................................................79
Clear All Sales Totals..............................................................................................................80
Program 20 - Clear All Sales Totals.......................................................................... 80
Clear Grand Total....................................................................................................................80
Program 30 - Clear Grand Total................................................................................ 80
Clear / Delete PLU File...........................................................................................................80
Program 40 - Clear / Delete PLU File.......................................................................80
EPROM Information ...............................................................................................................80
Program 50 - EPROM Information...........................................................................80
Function Key Assignment Programming ................................................................................81
Program 70 - Function Key Assignment Programming............................................81
Function Key Codes - New Version (ER-380 EPROM v2.1 & later / ER-380M
EPROM v1.8 & later)................................................................................................82
Function Key Codes - Old Version (ER-380 EPROM v2.0 & earlier / ER-380M
EPROM v1.7 & earlier) ............................................................................................83
RS232C Serial Port #1 Communication Options.....................................................................84
Program 80 - RS232C Serial Port #1 Communication Options................................84
ER-380M RS232C Serial Port #2 Communication Options....................................................86
Program 81 - RS232C Serial Port #2 Communication Options................................86
Program Mode Programming 87
Default Programming..............................................................................................................87
Descriptor Programming Methods...........................................................................................88
Alpha Overlay Method ..............................................................................................88
Descriptor Code Method...........................................................................................89
Tax Programming....................................................................................................................90
Straight Percentage Tax Rate Programming .............................................................90
PLU Programming...................................................................................................................92
Program 100 - PLU Status Programming..................................................................93
Program 110 - PLU Auto Tare Programming...........................................................96
Program 150 - PLU Group Assignment Programming.............................................97
Program 200 - PLU Price/HALO Programming.......................................................98
Program 250 - PLU Stock Amount Programming ....................................................99
Program 300 - PLU Description Programming....................................................... 100
Program 350 - PLU Link Programming..................................................................101
Program 400 - PLU Delete Programming...............................................................102
Program 450 - PLU MIX & MATCH Programming ..............................................103
ER-380 / ER-380M Electronic Cash Register AU Contents • iii

System Option Programming.................................................................................................104
Program 30 - System Option Programming ............................................................104
System Option Table...............................................................................................105
Note: Price Embedded Barcode Format..................................................................108
Print Option Programming.....................................................................................................109
Program 40 - Print Option Programming................................................................109
Print Option Table...................................................................................................110
Function Key Programming...................................................................................................114
Program 70 - Function Key Options Programming.................................................115
Program 80 - Function Key Descriptor Programming ............................................116
Program 90 - Function Key HALO or Percentage Rate Programming...................117
ADD CHECK (Cafeteria Tray Total)......................................................................118
CANCEL (Cancel a Sale)........................................................................................119
CASH ......................................................................................................................120
CHARGE (1 ~ 8).....................................................................................................121
CHECK (CHEQUE)................................................................................................122
CHECK (CHEQUE) CASHING.............................................................................123
CHECK (CHEQUE) ENDORSEMENT................................................................. 124
CHECK # (Bill or Account No.).............................................................................125
CURRENCY CONVERSION.................................................................................126
DRIVE THRU / EAT IN / TAKE OUT..................................................................127
ERROR CORRECT ................................................................................................128
F/S SUB...................................................................................................................128
F/S TEND................................................................................................................129
GUEST (Bill or Account)........................................................................................130
LEVEL1 - 2 (Price Levels)......................................................................................130
MACRO (1 ~ 10).....................................................................................................131
MDSE RETURN.....................................................................................................131
MODIFIER (1 ~ 5).................................................................................................. 132
#/NS (Non Add#/No Sale).......................................................................................133
PAID OUT (1 ~ 3)...................................................................................................134
PAYMENT (Bill or Account) .................................................................................134
PBAL.......................................................................................................................135
PRINT CHECK (Bill or Account)...........................................................................135
PROMO...................................................................................................................136
RECD ON ACCT (1 ~ 3)........................................................................................137
SCALE ....................................................................................................................138
SERVICE (Bill or Account)....................................................................................139
SUBTOTAL............................................................................................................140
TABLE (Bill or Account)........................................................................................140
TARE.......................................................................................................................141
TAX EXEMPT........................................................................................................142
TIP (Bill or Account)...............................................................................................143
VALIDATE .............................................................................................................144
VOID.......................................................................................................................144
WASTE ...................................................................................................................145
% (1 ~ 5) (Discounts or Surcharges).......................................................................146
Clerk Programming..................................... ....... ....................................................................149
Program 800 - Secret Code Programming...............................................................150
Program 801 - Drawer Assignment & Training Clerk Programming......................151
Program 810 - Clerk Description Programming......................................................152
Mix & Match Programming...................................................................................................153
Program 600 - Trip Level Programming.................................................................154
Program 601 - Price Programming..........................................................................154
Program 610 - Mix & Match Description Programming......................................... 155
iv • Contents ER-380 / ER-380M Electronic Cash Register AU

Group Programming..............................................................................................................156
Program 900 - Group Status Programming.............................................................156
Program 910 - Group Descriptors Programming ....................................................157
Miscellaneous Programming.................................................................................................158
Program 1500 - Macro Key Sequence Programming..............................................158
Program 700 - Logo Description Programming......................................................159
Program 701 - Financial Report Message Programming........................................160
Program 710 - Clerk Report Message Programming ..............................................162
Program 711 - Macro Name Programming.............................................................164
Program 1000 - NLU (Number Look Up) Code Number Programming ................165
Program 1100 - Cash-In-Drawer Limit Programming............................................166
Program 1200 - Check Change Limit Programming...............................................167
Program 1300 - Date and Time Programming ........................................................168
Program 1400 - Scale Tare Weight Programming..................................................169
Program 1600 - Machine Number Programming....................................................170
Program Scans.......................................................................................................................171
Program 15 - Program Scans...................................................................................171
Sample Reports 173
Financial ................................................................................................................................173
Time.......................................................................................................................................177
PLU........................................................................................................................................178
Clerk......................................................................................................................................179
Individual Clerk.....................................................................................................................180
Groups ...................................................................................................................................181
Stock......................................................................................................................................182
Open Check ...........................................................................................................................183
ER-380 / ER-380M Electronic Cash Register AU Contents • v


Getting Started
About the ER-380 / ER-380M
The ER-380 / ER-380M is offered in two different versions.
• The ER-380 / ER-380M features a 44-position keyboard with traditional raised keys. This
keyboard will accommodate up to 12/16 NLU keys and works best in retail stores, or shops
where it is not necessary to place a large number of preset item keys on the keyboard..
• A standard allocation of 300 PLUs and 20 Groups allows for easy item management.
Approximately 1000 PLUs can be allocated. For expansion to 5000 PLUs, please contact
your dealer.
• The ER-380 / ER-380M is an excellent low cost solution for a wide range of retail
environments.
• The ER-380 / ER-380M, with its superb thermal printing system, always provides the
fastest in transaction speeds.
• The ER-380 / ER-380M is preset with 10% GST and Australian rounding as well as a
number of other useful functions.
ER-380 / ER-380M Electronic Cash Register AU Getting Started • 1
Unpacking
1. Unpack and unwrap the cash register.
2. Located in the packing are the following items:
• 1 roll of paper,
• 2 sets of control keys,
• Operation and Program Manual,
3. Remove the cardboard protectors from the cash drawer.
4. Plug the register into a grounded outlet (three prong), insert a control key and turn the key to
the REG control lock position.
*A paper takeup spindle + motor kit is available if Jornal mode is required.
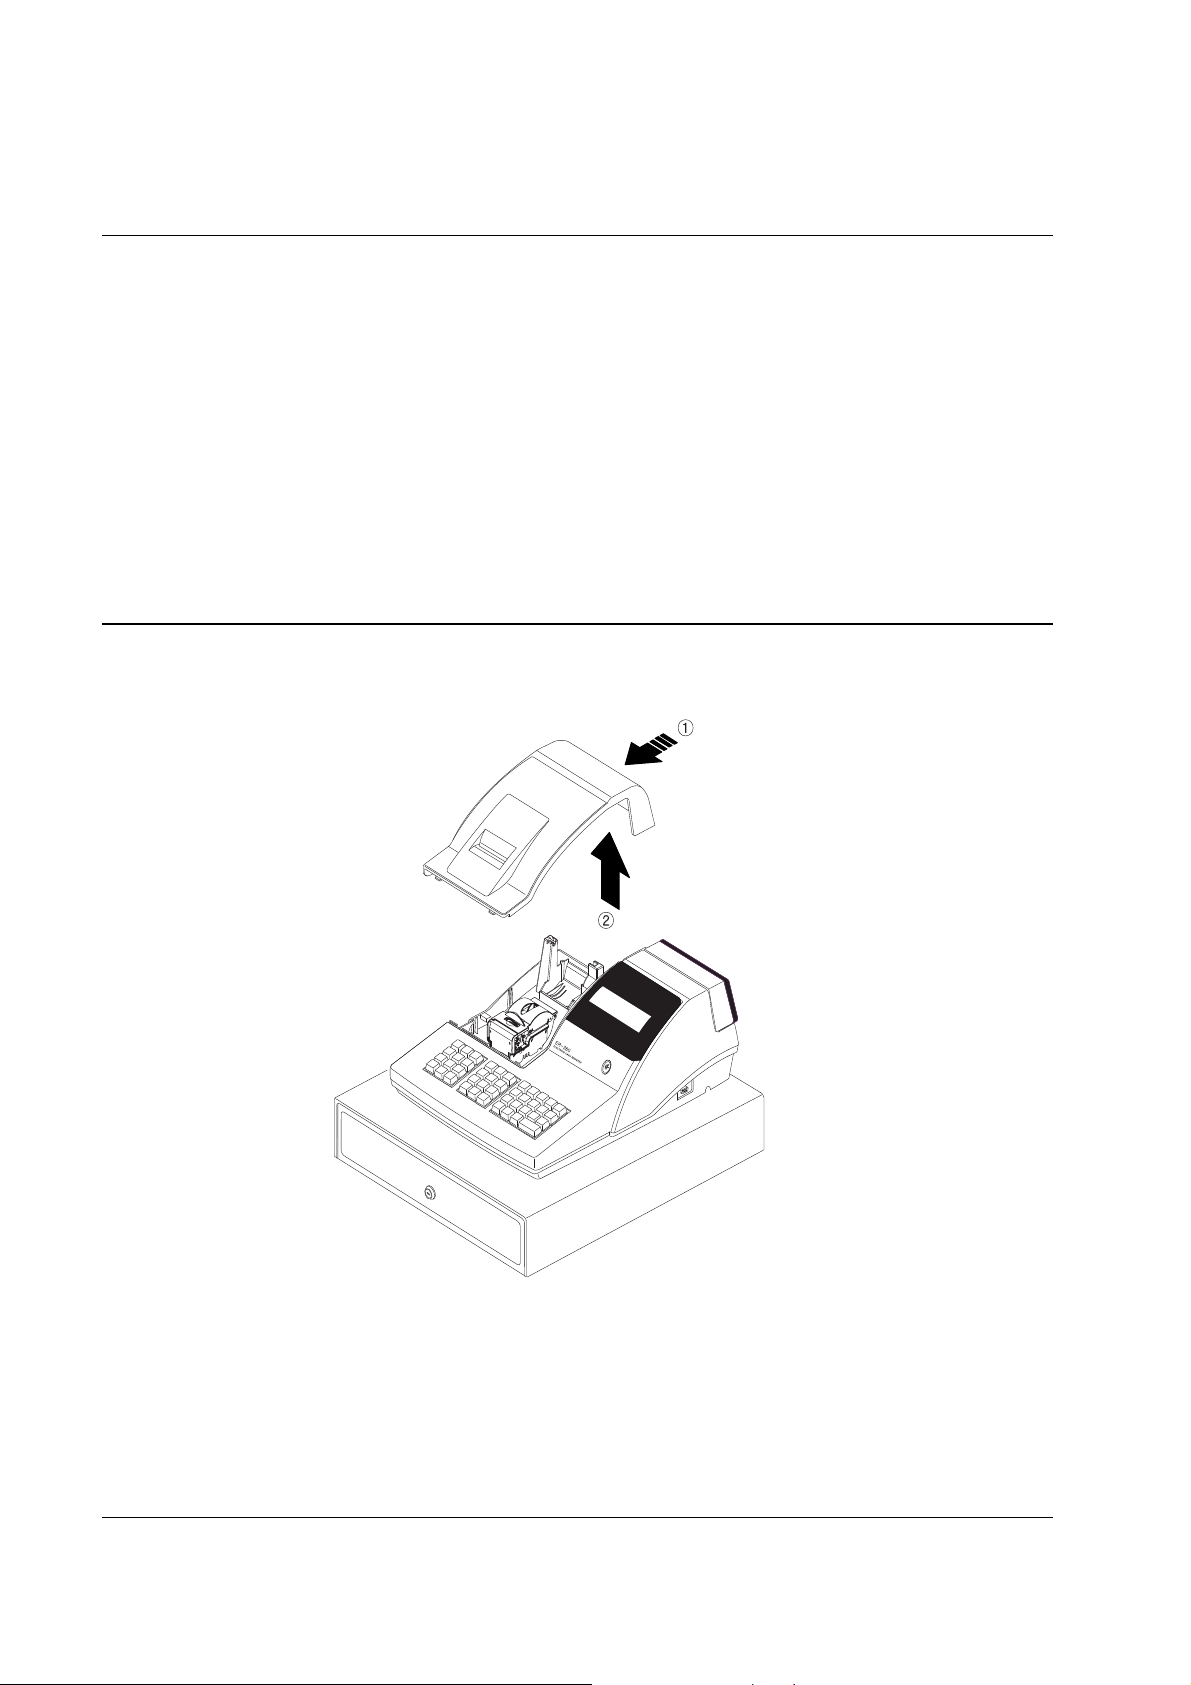
Installing the Paper
1. Remove the printer cover.
2 • Getting Started ER-380 / ER-380M Electronic Cash Register AU

2. Push the blue cap lever and then lift up to open the paper cover.
ER-380 / ER-380M Electronic Cash Register AU Getting Started • 3
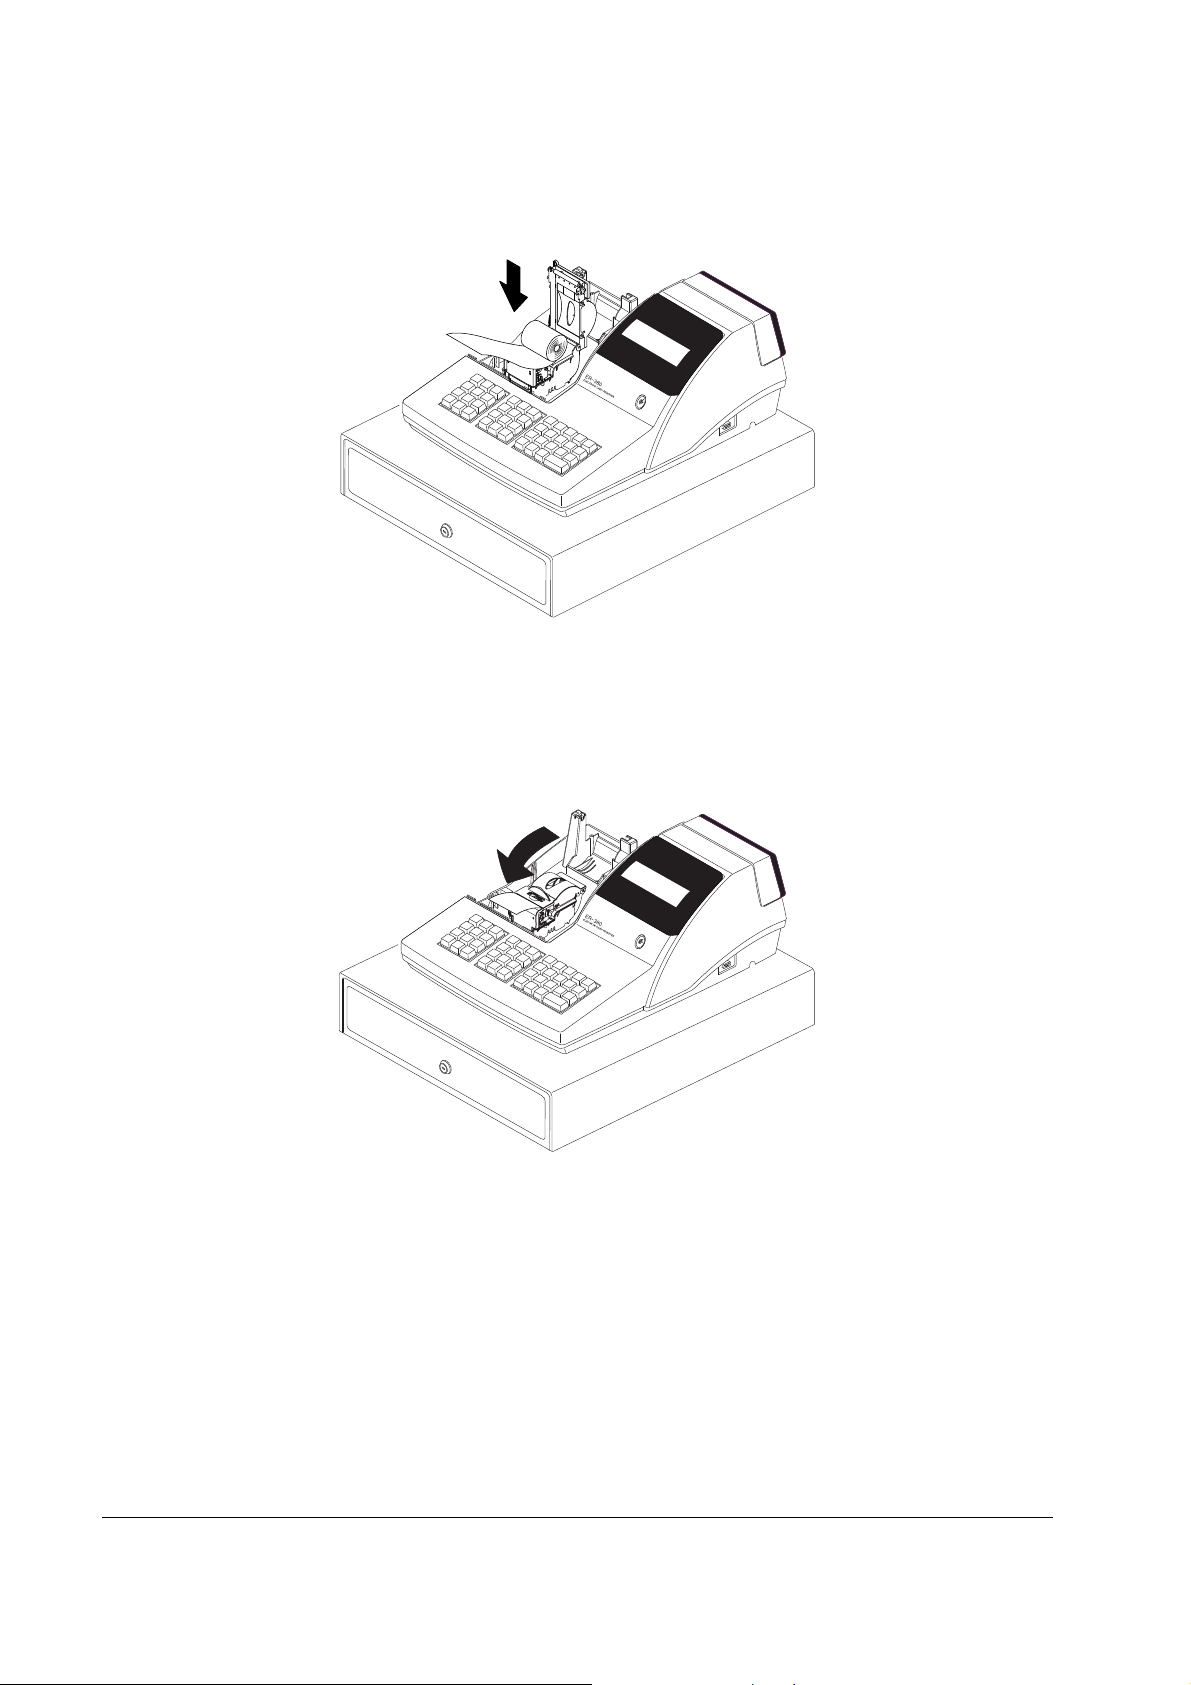
3. Ensure that the paper is being fed from the bottom of the roll.
4. Put the leading edge of the paper over the printer
5. Close the paper cover slowly until it locks firmly
4 • Getting Started ER-380 / ER-380M Electronic Cash Register AU
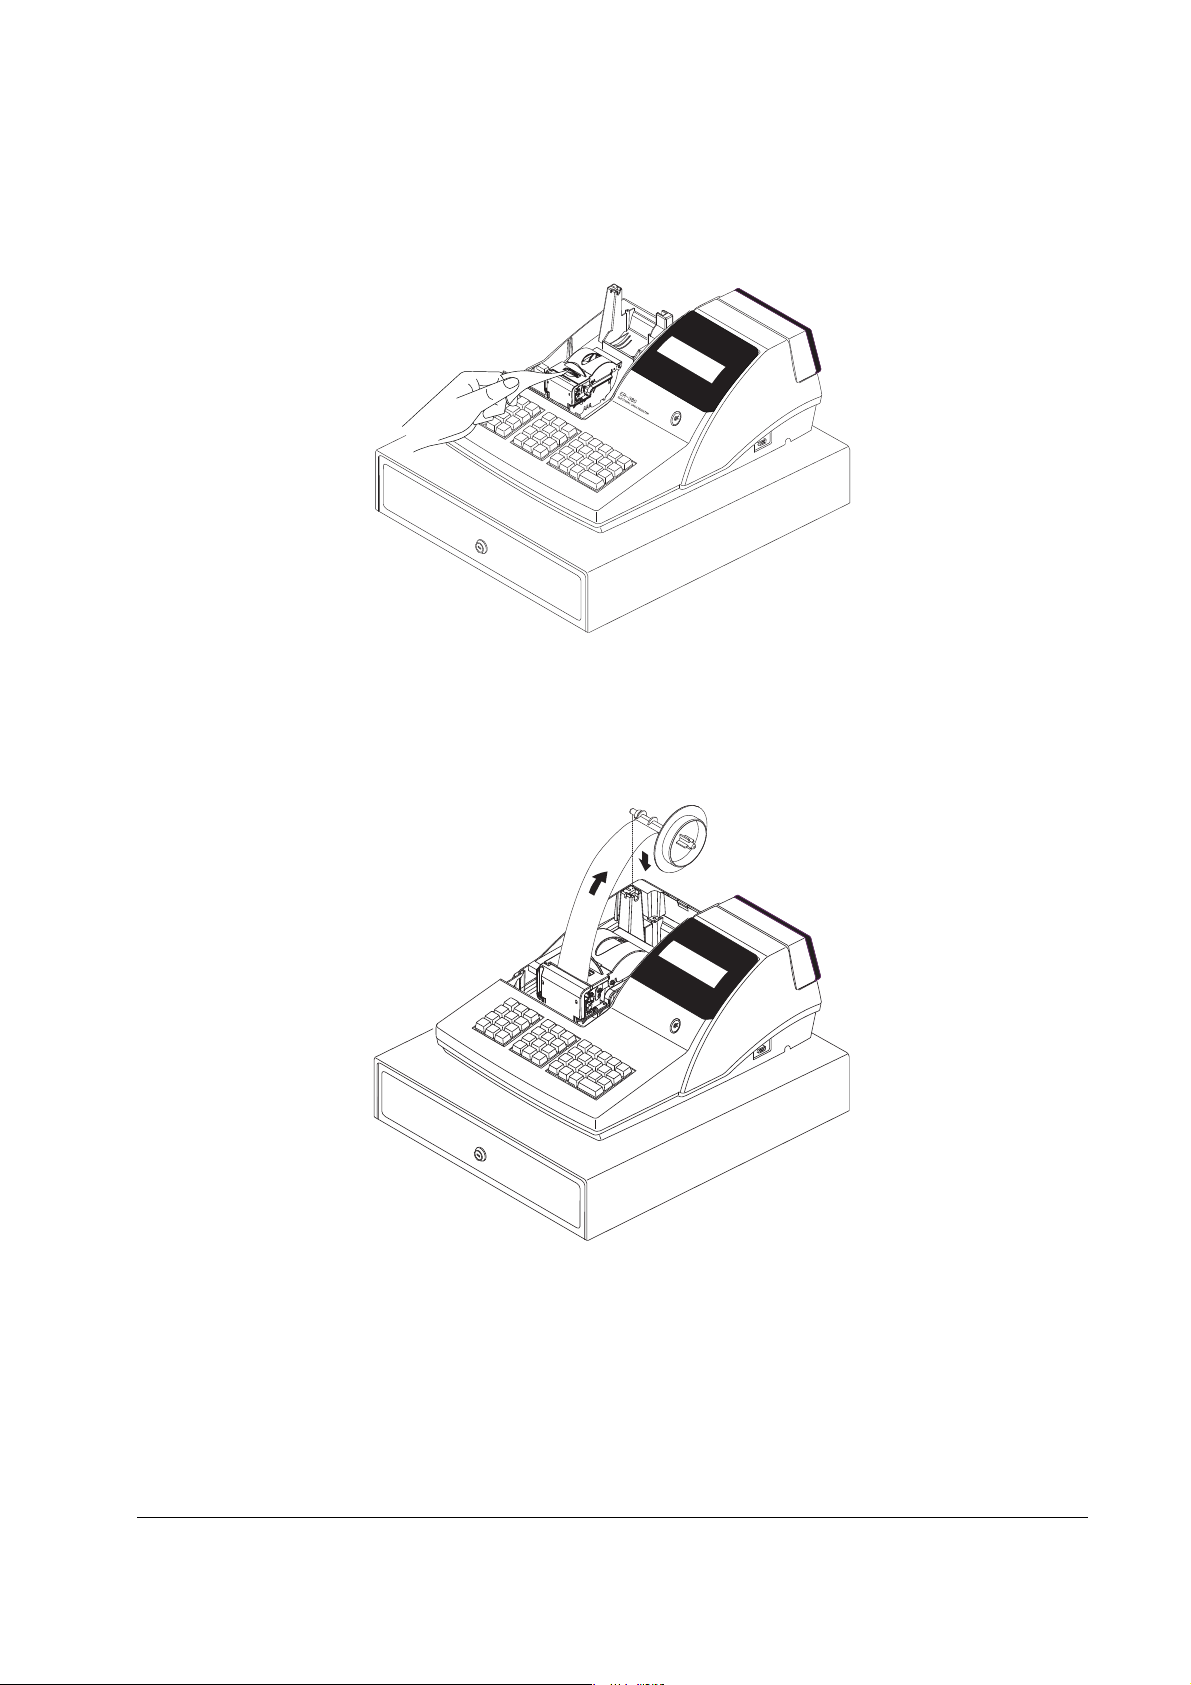
6. Passing the leading edge of the paper through the cutter slot. Tear off the excess paper.
Replace the printer cover.
※ If you wish to use the printer to print a sales journal or electronic journal, insert the paper into
the paper take-up spool. Wind the paper two or three turns around the spool shaft and install
the spool in the mount.
E
R
ELEC
3
TRO
8
0
N
I CA
SH R
EGISTE
R
ER-380 / ER-380M Electronic Cash Register AU Getting Started • 5

Basic Features and Functions
Standard Hardware
• Display
=> ER-380M LCD model: 2 line, 16 character liquid crystal display and ten position rear
displays with a rear pop up display standard.
=> ER-380 VFD model: Ten position front and rear displays with a rear pop up display
standard.
• 44-position keyboard.
• 1 station Thermal 32-column printer with drop-and-print mechanism.
• Sturdy Metal Cash Drawer with removable 4 Bill/8 Coin drawer insert.
• 7-position control lock.
• Standard customer pole display.
• Communications ports:
=> ER-380: 1 RS232C.
=> ER-380M: 2 RS232C.
Optional Hardware
• PC Link.
• Load cell scale.
• Kitchen printer / Bill Printer / Slip Printer / Journal Printer.
• Barcode scanner.
• Pole Display.
• EFTPOS Terminal.
Software Features
• Up to 2 price levels for each PLU.
• Up to 5 PLU modifier keys.
• 300 Price Look Ups (PLUs) default (expandable up to 5,000 with an extend memory chip)
for open or preset item registration. 117 PLUs standard for open or preset item registration.
For direct registrations, 12/16 PLU keys are on the keyboard.
• 18 character programmable descriptors for PLUs and functions.
• Up to 99 PLU Group totals.
• Up to 99 clerks with separate report totals.
6 • Getting Started ER-380 / ER-380M Electronic Cash Register AU
V
V
T
V
Front Display
VFD MODEL - ER-380
The ER-380 comes with a ten position front display. Annotations on the display window
include:
• RPT, where a counter appears when the same item is multiplied or repeated.
• The AMOUNT area shows the amount, i.e. price, subtotal or total.
• RCPT OFF indicates when the receipt is turned off.
• The VOID symbol illuminates during Void operations.
• The SHIFT symbol illuminates during Tax Shift operations
• The CLERK segment remains illuminated as long as a clerk is signed on.
RCPT
OFF
OID SHIFT
AMOUNTRPT
CLERK
The front display offers supplemental descriptors, which appear in the first two display
positions (as shown). These descriptors help the operator by supplying additional information
while operating the register, and may be accompanied by an error tone.
Supplemental descriptors include:
RPT
RCPT
OFF
OID SHIF
AMOUNT RPT
CLERK
Change Due
RCPT
OFF
OID SHIFT
ER-380 / ER-380M Electronic Cash Register AU Getting Started • 7
AMOUNTRPT
CLERK
V
A
V
A
V
T
V
Negative Entry
RCPT
Subtotal
RCPT
OFF
Total of Sale
RPT
OID SHIFT
OID SHIFT
MOUNT
CLERK
AMOUNTRPT
CLERK
MOUNT RPT
RCPT
OFF
OID SHIF
Numbered Error Conditions
RCPT
OFF
OID SHIFT
CLERK
AMOUNTRPT
CLERK
8 • Getting Started ER-380 / ER-380M Electronic Cash Register AU

_
__
_
__________
___
__________
LCD MODEL - ER-380M
The ER-380M comes with a liquid crystal screen, allowing you to view up to 2 lines of
information with up to 16 characters per line. The display is backlit to provide excellent
visibility, regardless of lighting conditions.
When the control lock is in the OFF position, the register cannot be operated. When the
control lock in the REG, VOID, X, Z, PGM or S positions the appropriate message, there are
displayed with the message “CLOSED”. You must sign on a clerk to remove the
“CLOSED” message and begin operation.
REG
REGISTER_MODE
CLOSED
VOID
VOID_MODE
CLOSED
Operator Display Example
Press 1 0 0 0, then PLU12 to register a sale of $10.00 to PLU 12
PLU12
1__________10.00
Press 5 0 0 0, then CASH to tender a sale and change will be shown
CASH_______50.00
CHANGE_____40.00
Displayed Error Conditions
ER-380 / ER-380M Electronic Cash Register AU Getting Started • 9
**_WARNING!_**
SEQUENCE_ERR
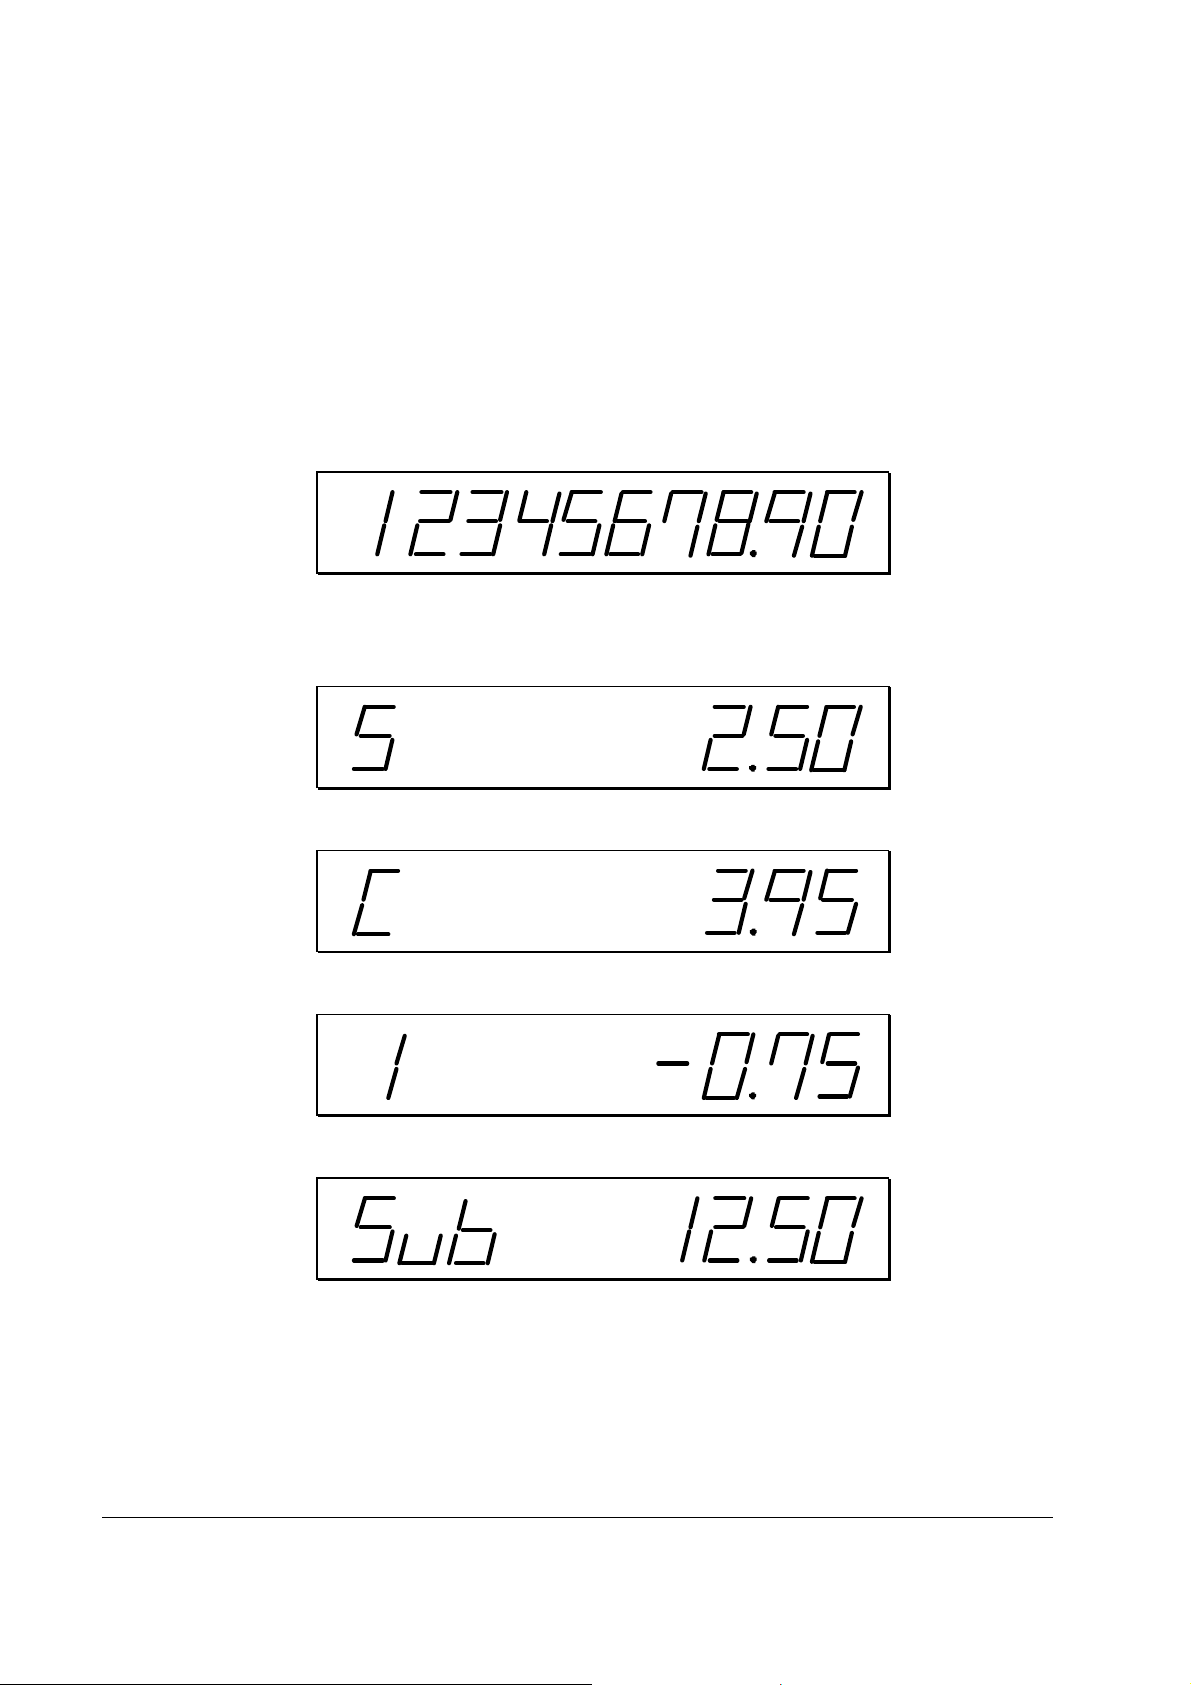
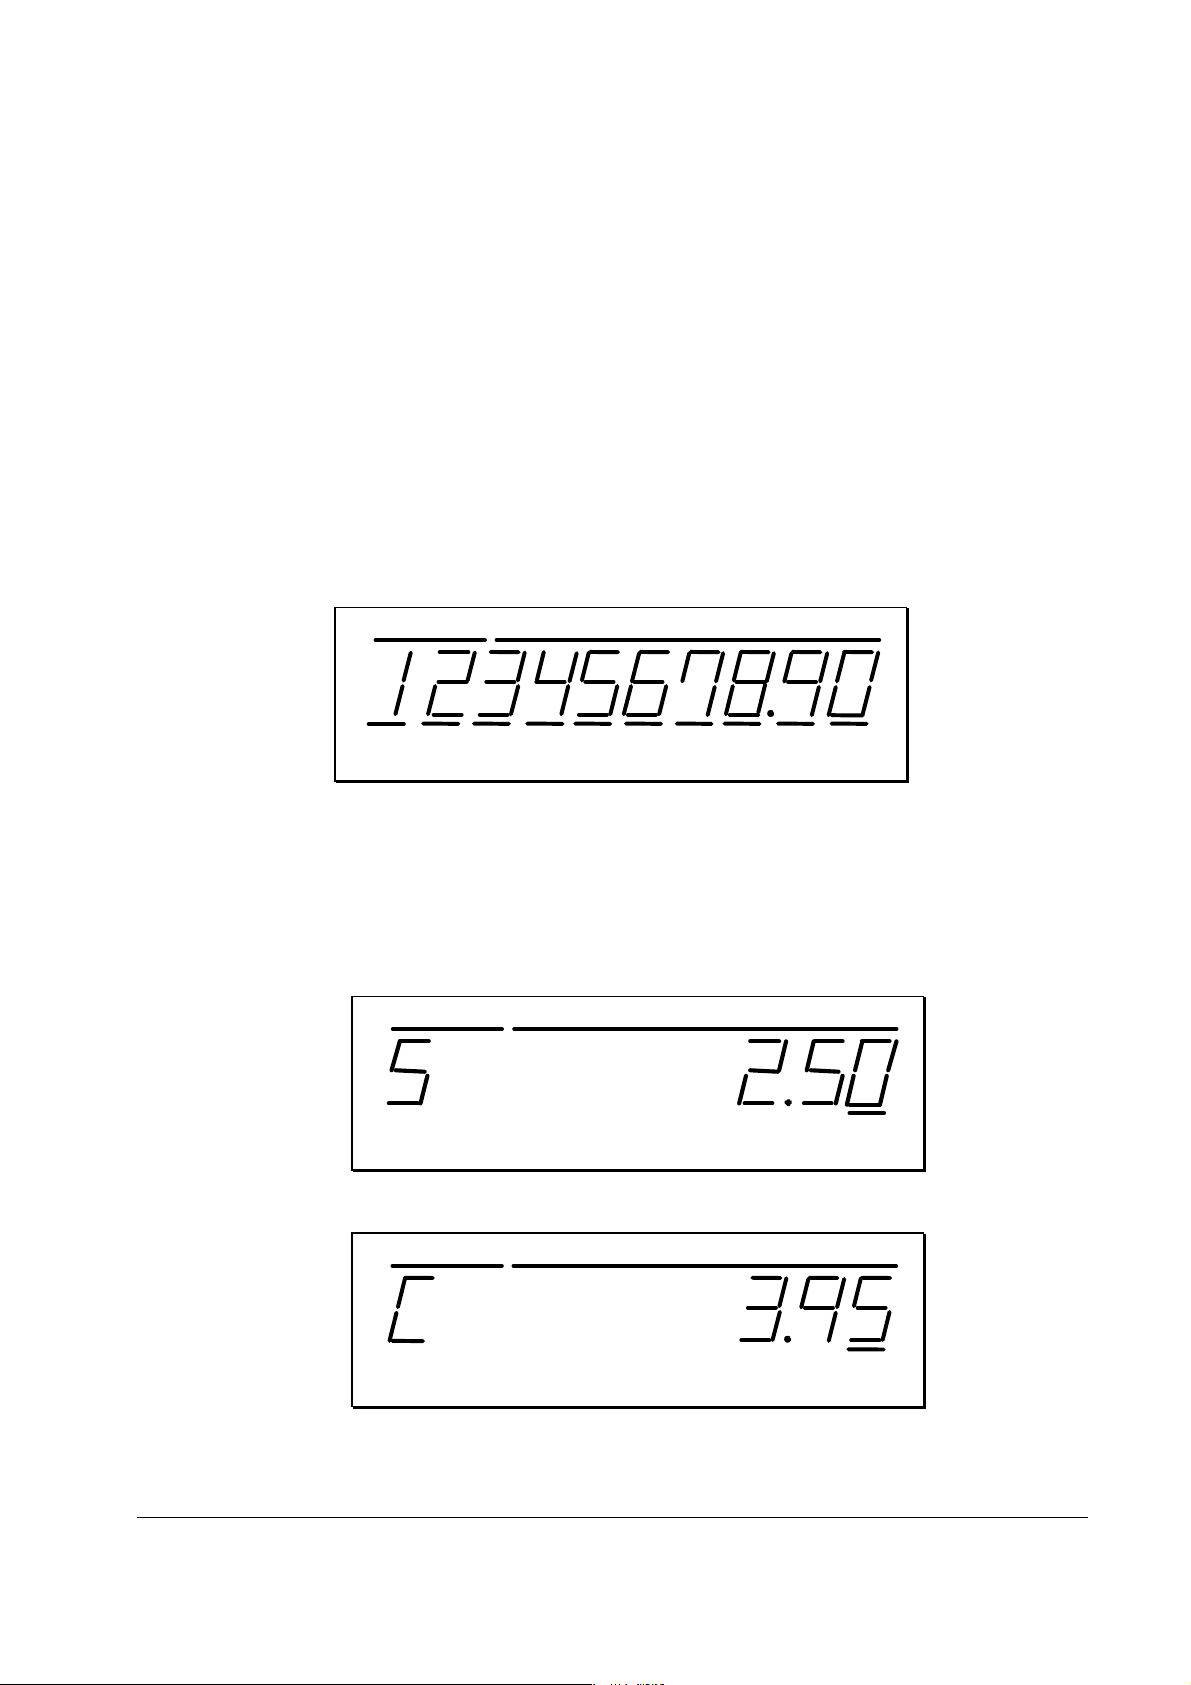
Rear Display - VFD
The rear display is a 10 digit florescent display that allows your customer to monitor the transaction
and view the sale total. The rear display can be lifted and turned for easy customer viewing.
Rear Display Information
Item Count
Amount
The number of times an item has been repeated is displayed
The amount of the item, subtotal or total, is displayed in the
rightmost portion of the display
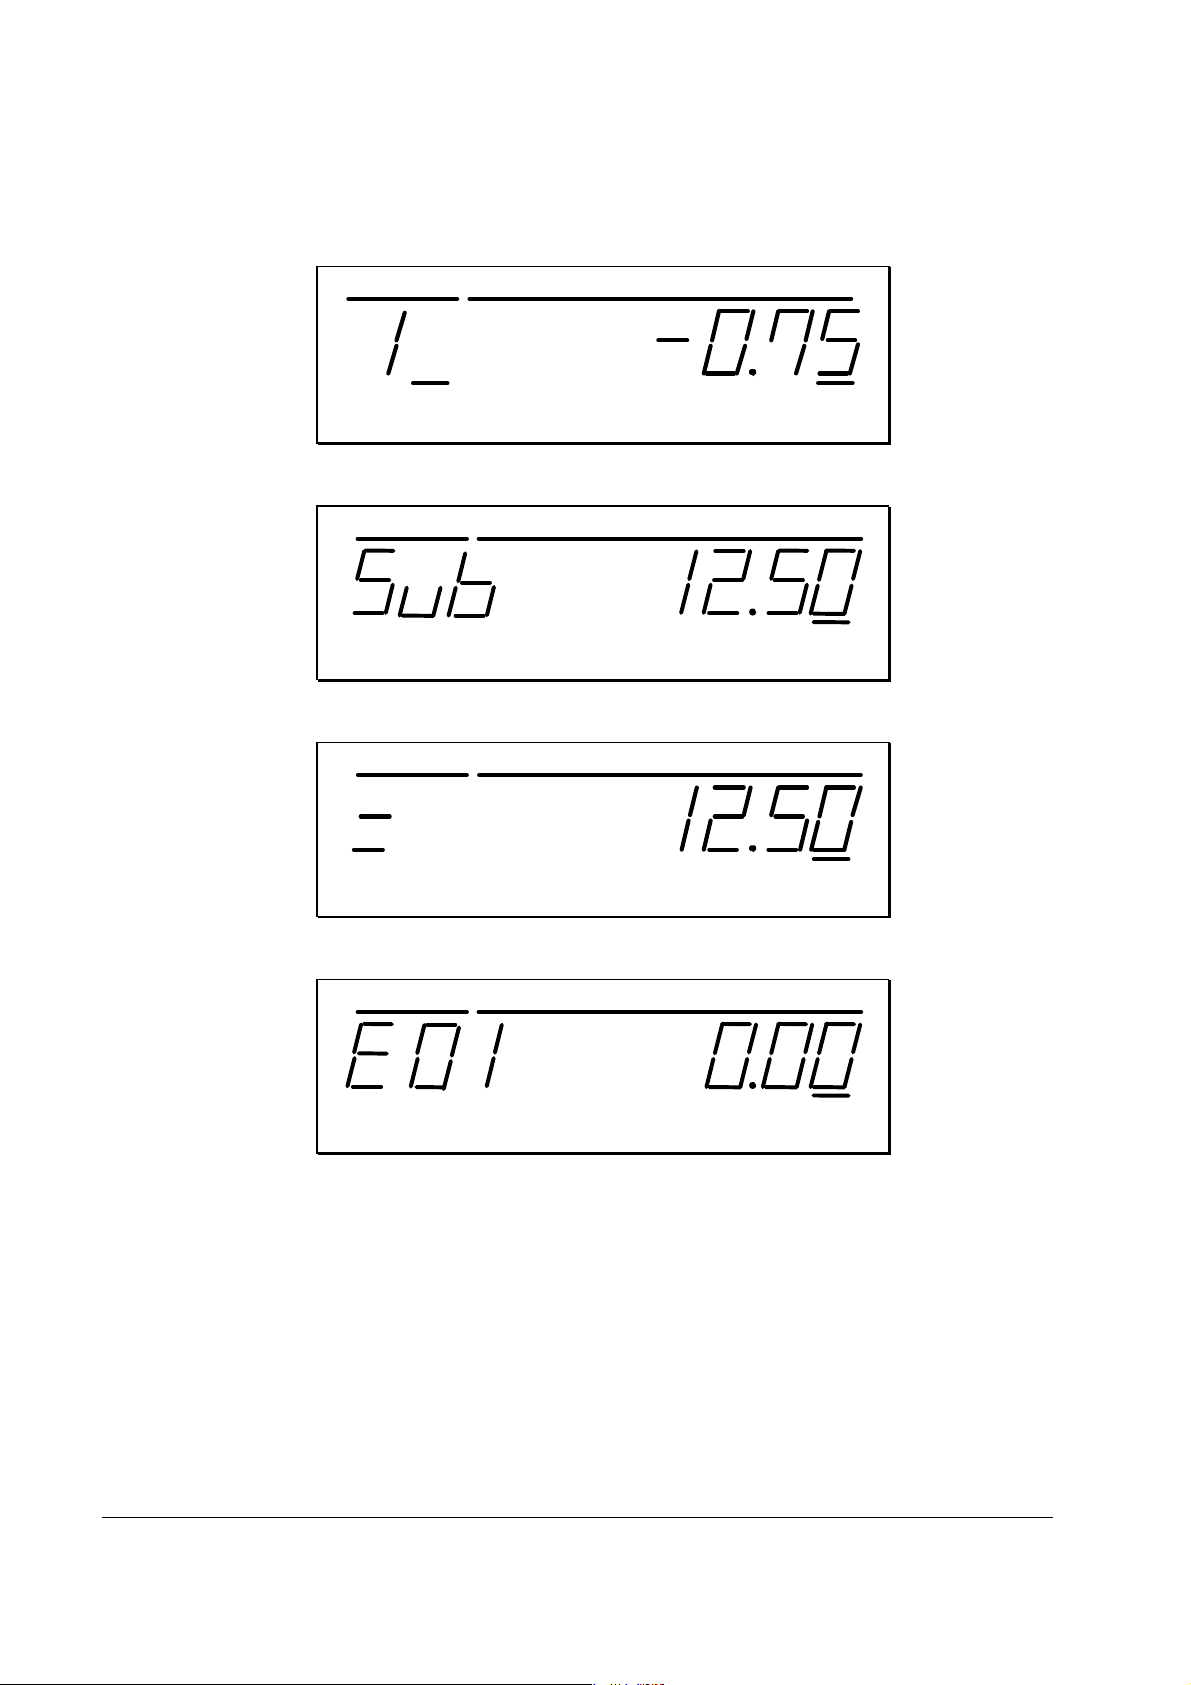
Rear Display Message
RPT
Change Due
Negative Entry
Subtotal
10 • Getting Started ER-380 / ER-380M Electronic Cash Register AU
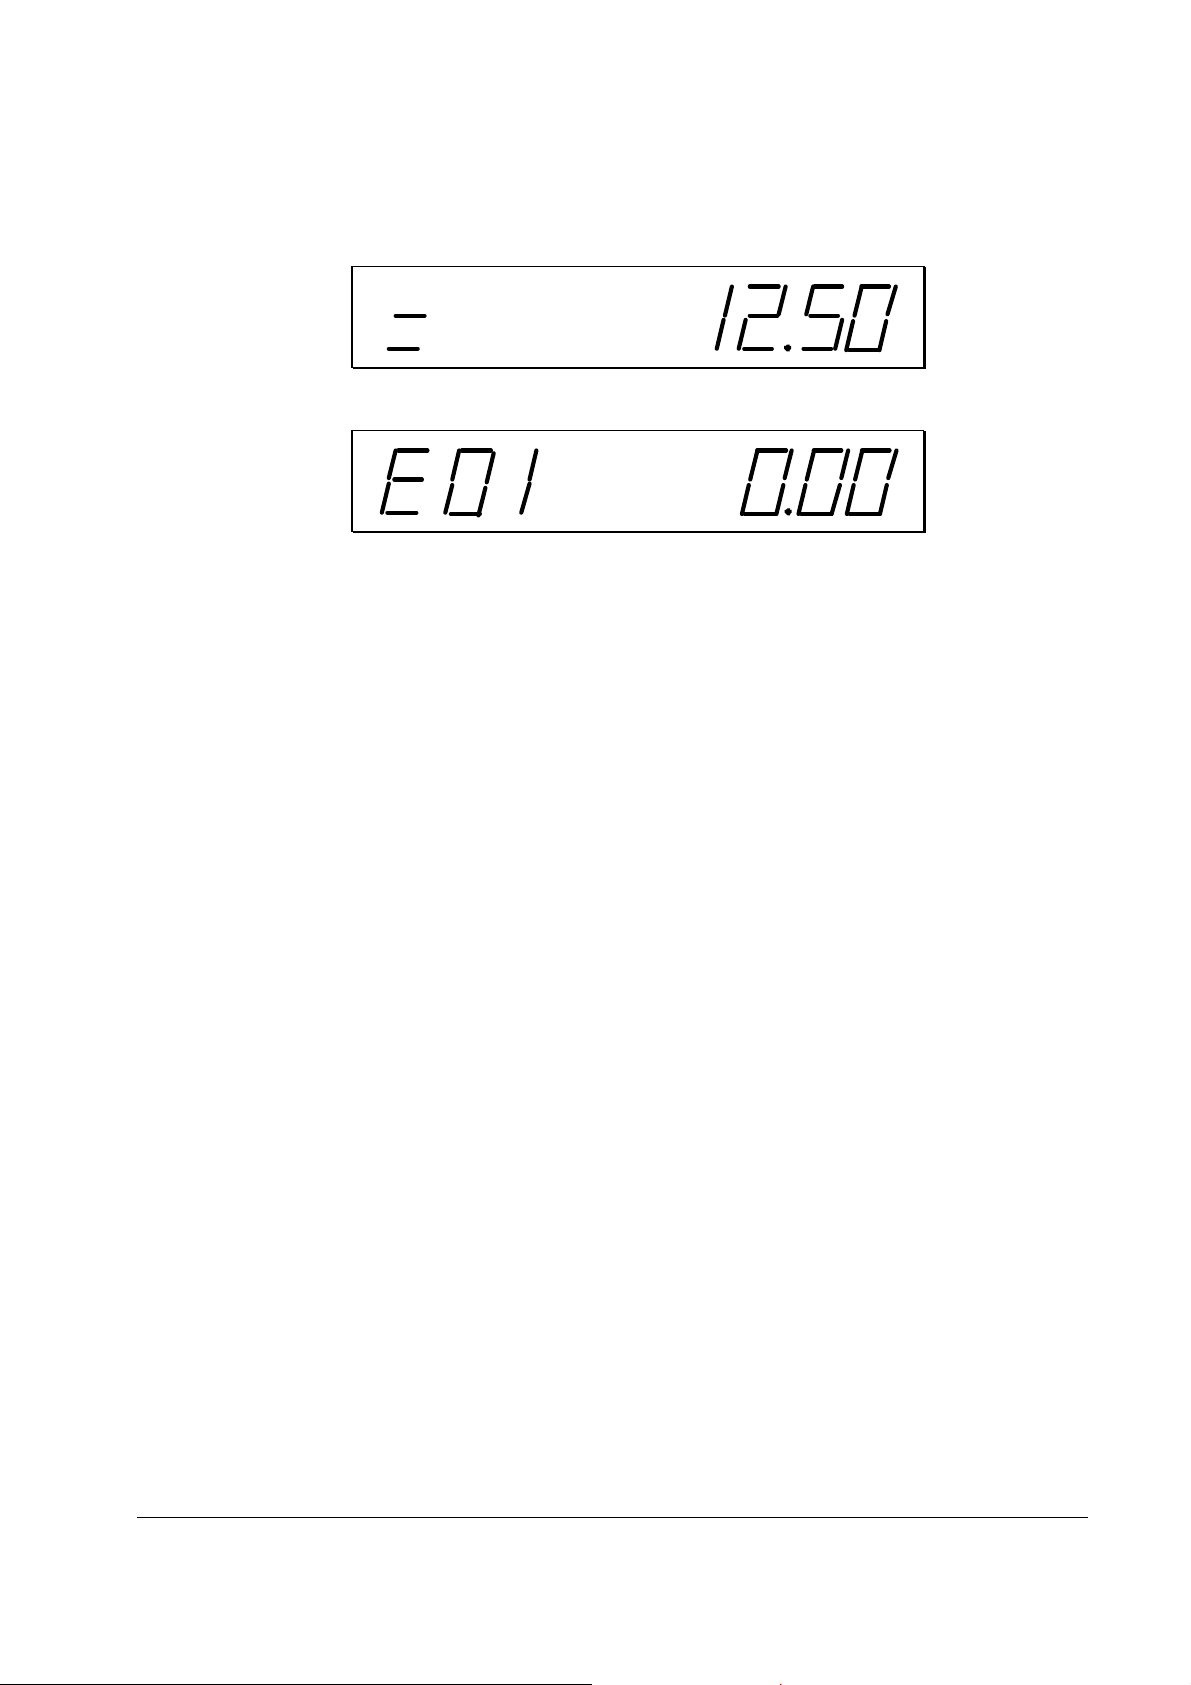
Total of Sale
Numbered Error Conditions
ER-380 / ER-380M Electronic Cash Register AU Getting Started • 11

Error Code Table
E00
E01
E02
E03
E04
E05
E06
E07
E08
E09
E10
E11
E12
E13
E14
E15
E16
E17
E18
E19
E20
E21
SEQUENCE ERROR
PLU NO DATA
CLERK ERROR
AMOUNT COUNT OVER
LAN TRAN
COMMUNICATION ERROR
TIME AND DATE
LIMIT OVER
INACTIVE
XMODE ONLY
NONADD
ADDCHECK ERROR
CONDIMENT ERROR
REQ. EAT IN
REQ. STOCK
REQ. DRAWER
REQ. GUEST
SCALE
CLERK NOT MATCH
COMPULSORY TARE
REQ. DECLARATION
OFF LINE
E22
E23
E24
E25
E26
E27
E28
E29
E30
E31
E32
E33
E34
E35
E36
E37
E38
E39
E43
E44
PER
PCO
REQ. ENDORSEMENT
CONSOL OVER
REQ. SUBTOTAL
PROMO ERROR
CHECK OPEN
REQ. PASSWORD
NO VOID PLU
232C SETUP ERROR
REQ. PRESET VALUE
REQ. OPEN VALUE
REQ. AMOUNT
REQ. PAYMENT
INVALID FUNCTION
REQ. TABLE
REQ. PBAL
REQ. CHECK #
ONLY ONE TABLE
REQ. VALID
MEMORY ALLOCATION ERROR
ELECTRONIC JOURNAL FULL
RECEIPT PRINTER PAPER END
PRINTER COVER OPEN
SLIP CHG
PFP
SLIP PAPER END. CHANGE NEW SLIP PAPER (When using slip printer.)
SYSTEM ERROR (If this problem occurs, call the service engineer.)
12 • Getting Started ER-380 / ER-380M Electronic Cash Register AU

V
Control Lock
The control lock has 7 positions, accessed with 5 keys. Each ECR is shipped with two full sets of
keys.
OID
OFF
REG
X
VOID Use to void (correct) items outside of a sale.
OFF The register is inoperable.
REG Use for normal registrations.
Z
P
X Use to read register reports.
Z U se to read register reports and reset totals to zero.
P Use to program the register.
S
S The S position is a hidden position reserved for
dealer access.
Before performing any operations in Register Mode a clerk must be signed on. See “Clerk SignOn/Sign-Off” for a description of clerk operations.
Control Keys
The ER-380 / ER-380M includes two sets of keys that may be used to access the following
control lock positions.
Key
VOID OFF REG X Z PGM S
Removable
REG
VD
Z
√ √ √ √
√ √ √ √ √
Positions Accessible
√ √
√ √
P
C
ER-380 / ER-380M Electronic Cash Register AU Getting Started • 13
√ √ √ √ √ √
√ √ √ √ √ √ √
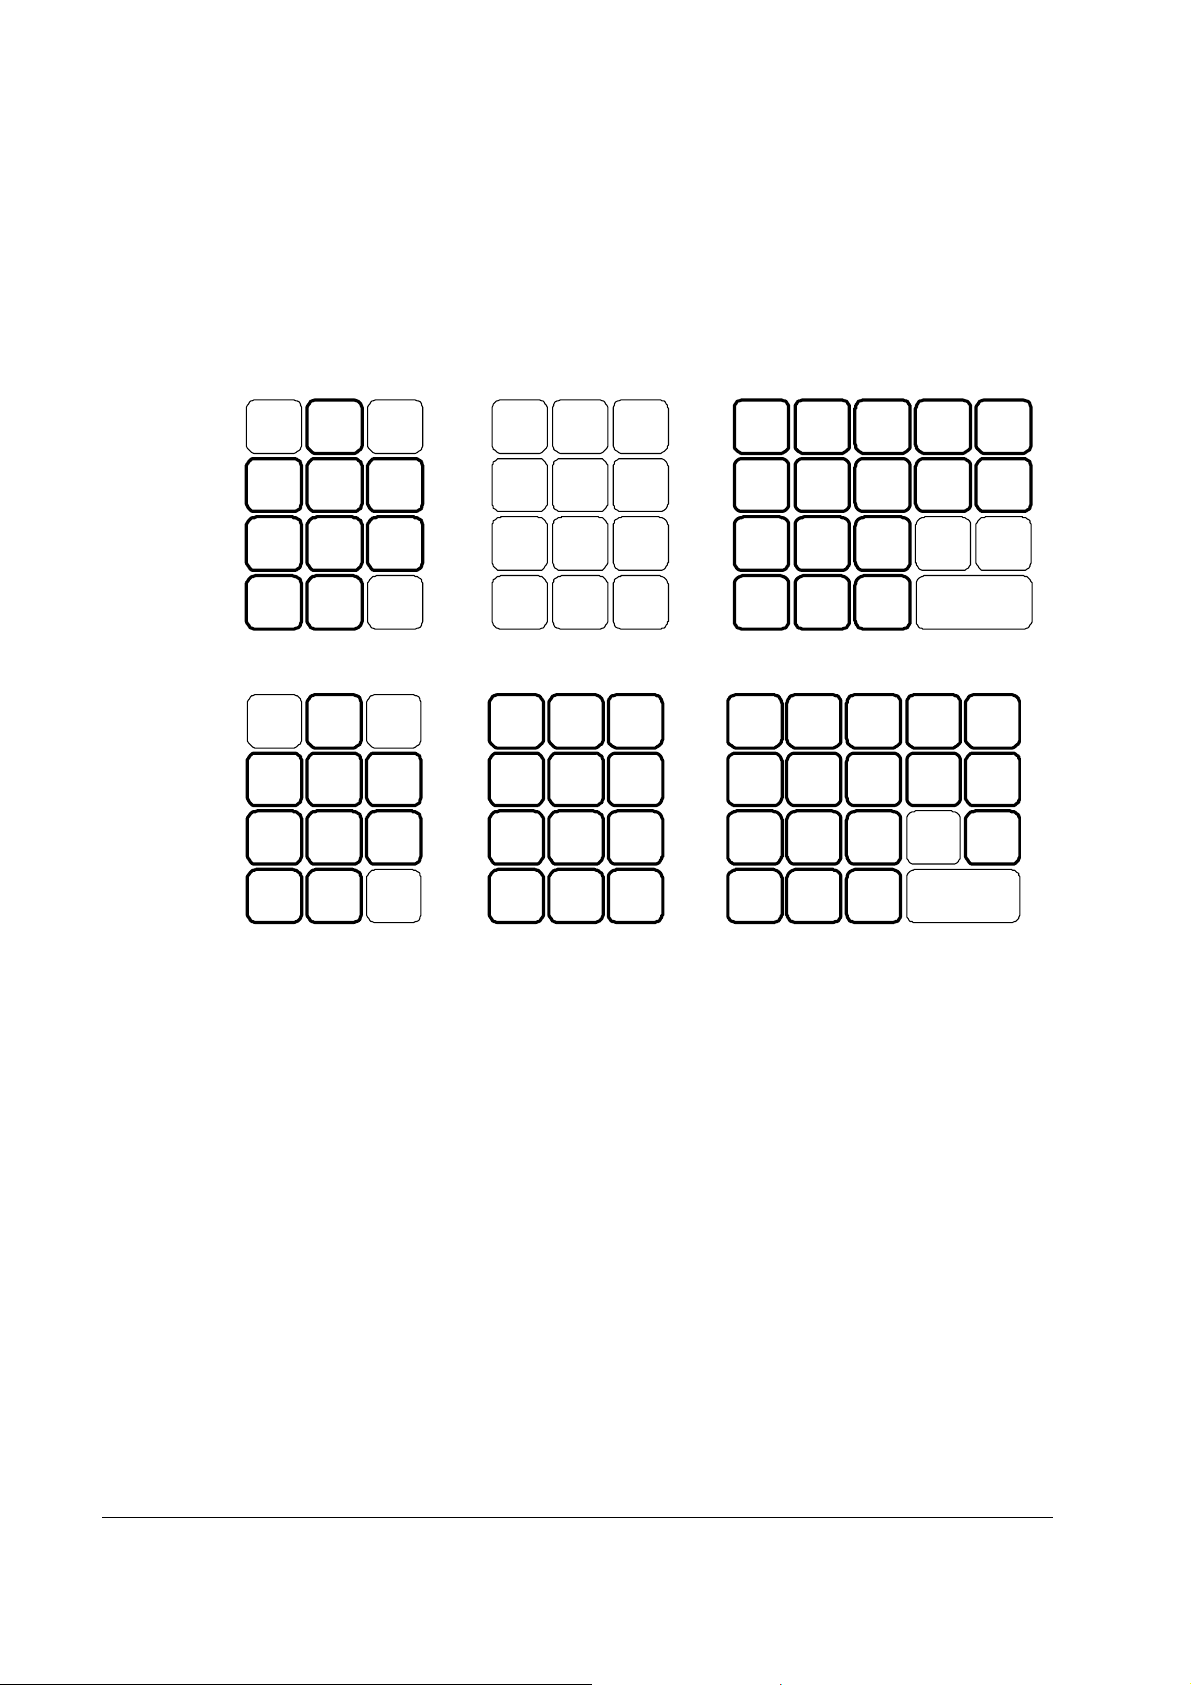
Keyboards
The ER-380 / ER-380M keybo ard includes 44 key positions with the default legends and key
assignments as shown below. This configuration has 16 keyboard NLU locations. The keyboard
legend label can be replaced by removing the protective plastic key cap.
Programmable key locations are shown with a bold border.
FEED
G
CLERK
X/TM
7
8
9
M
Q
4
U
8
12
Y
X
16
14
C
%1
B
CANCEL
A
#/NS
F
RECEIP
T On/Off
E
RETURN
D
PLU
I
MOD 1/
SHIFT
H
VOID
4
1
0 CLEAR
5
2
00
6
3
.
ER-380/ER-380M Alpha Keyboard Overlay
C
B
A
G
F
E 1 3 2
I
H
D
7 9 8
4 6 5
SPACE
0
DOUBLE
SIZE
L
K
J
M
K
L
J
P
3
O
2
N
1
T
7
11
S
6
10
R
5
9
W
13
SUB
TOTAL
Z
15
Y
CHECK
CASH
Q
P
O
N
U
T
S
R
V
X
W
Z
Y
14 • Getting Started ER-380 / ER-380M Electronic Cash Register AU
Y
Memory Clear
Memory All Clear (RAM Clear)
CAUTION: The procedures described in this area are security sensitive. Clearing all or parts of
the ER-380/ER-380M memory may cause damage or loss to the program. Do not
share this information with unauthorized users and distribute the special
SERVICE-Mode key (C-Key) only to those you may want to perform these
functions.
Perform "Clear All Totals", or "Clear PLU File" if you wish to clear only parts of ER-380/ER380M memory. Complete clearing of all memory areas and installation of the default program can be
done through the following special procedure:
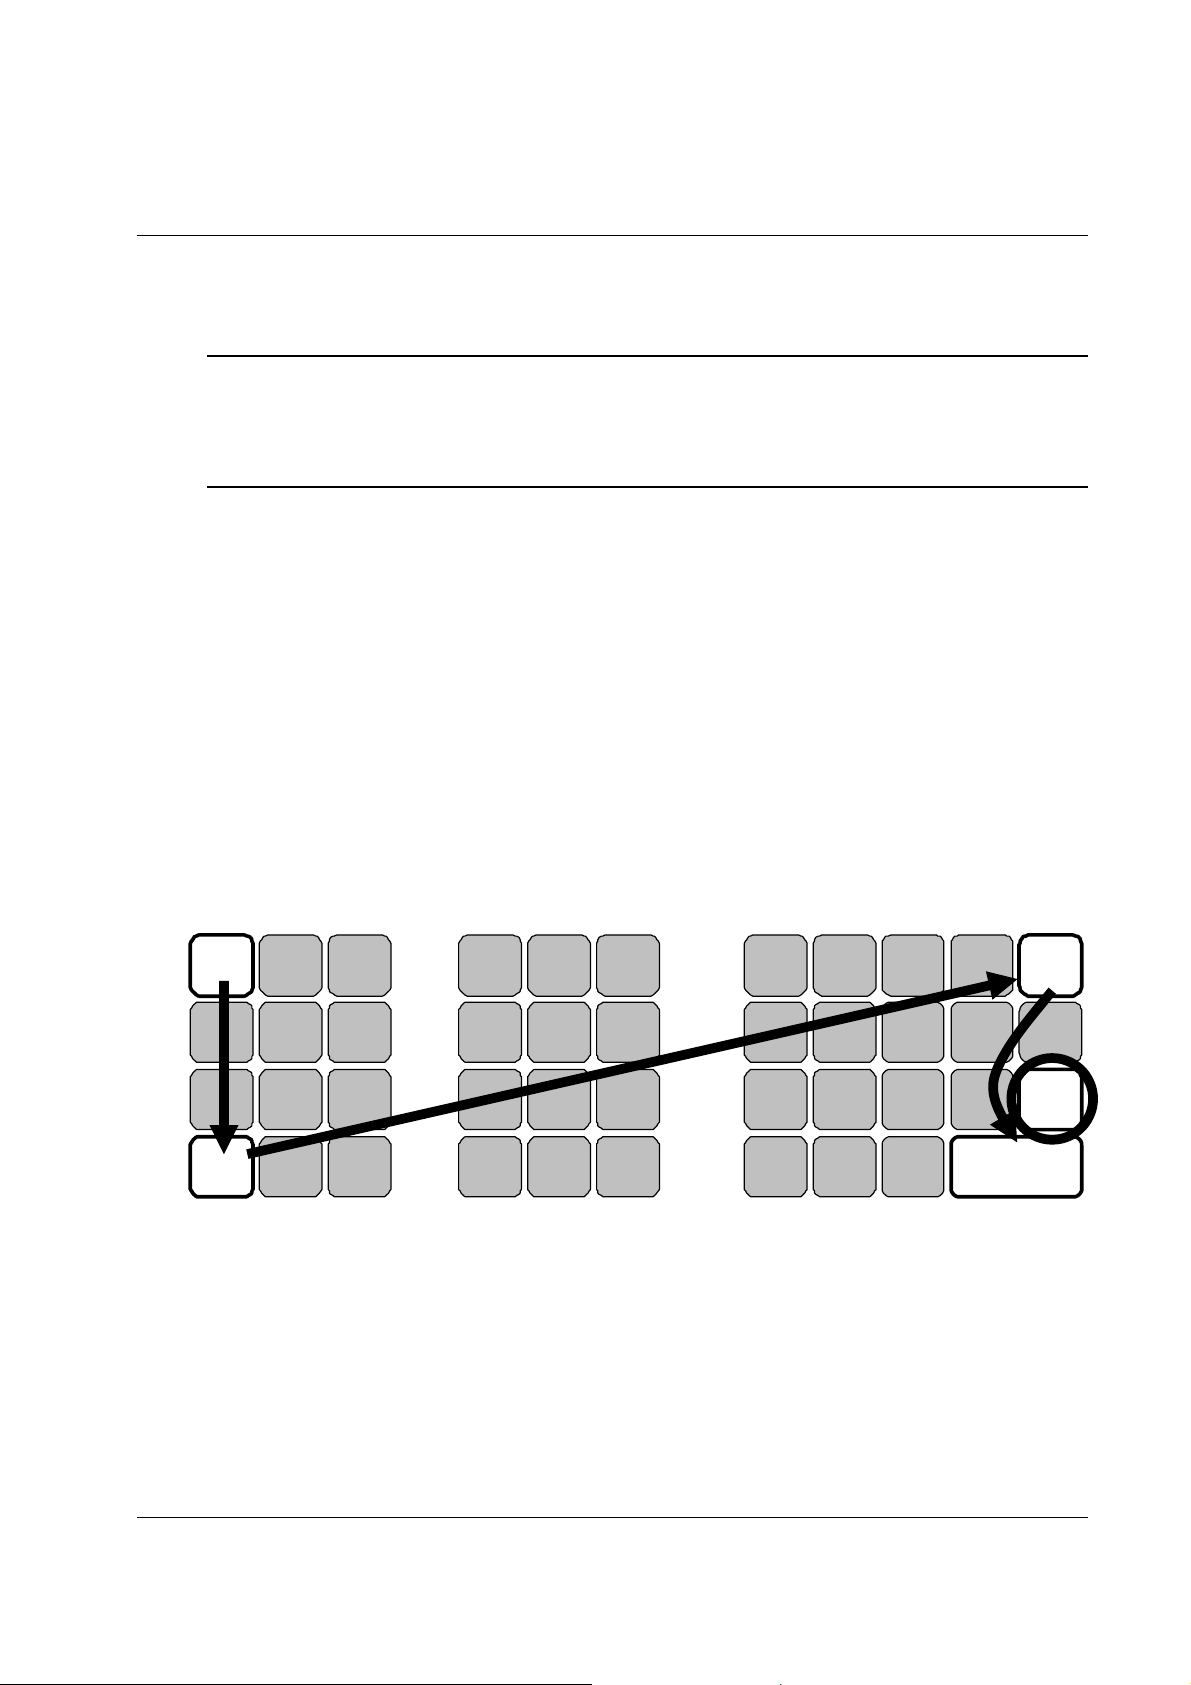
To Perform a Memory All Clear (reset memory completely):
1. Turn the power switch located on the right side of the register to the OFF positi on.
2. Turn the control lock to the S-Mode (one passed PGM-Mode as a hidden position).
FEED
C
%1
B
CANCEL
A
#/N S
3. Press and hold the key position where the CHECK key is located on the default
keyboard layout.
4. Continue to hold the CHECK key while turning the power switch to the ON position.
5. After hear BEEP, release CASH key.
6. Press the upper left key (FEED) of the keyboard, then the lower left key (#/NS), then
the upper right key (PLU 16), and finally press the lower right key (CASH).
G
CLERK
F
RECE IPT
On/Off
E
RETURN
D
PLU
X/TM
I
MOD 1/
SHIFT
H
VOID
CLEAR
7
4
1
0
8
5
2
Space
00
9
6
3
Dbl Size
.
M
L
K
J
Q
4
P
3
O
2
N
1
U
8
T
7
S
6
R
5
12
11
10
X
14
W
13
SUB
TOTAL
9
CASH
7. When memory is cleared, the register prints a message “RAM ALL CLEAR OK!”
16
Z
15
Y
CHECK
ER-380 / ER-380M Electronic Cash Register AU Getting Started • 15

Initial Clear (Status Clear)
CAUTION: Do not share this information with unauthorized users. Distribute the P-Mode key
only to those you may want to perform this function.
The initial clear function allows you to exit any register activity and return to a beginning or
cleared state. Any transaction that is in progress will be exited and totals for th at transaction will not
be updated.
Here are some reasons you may want to perform an initial clear:
• The register is in an unknown state, and you wish to exit the current program or transaction
without following normal procedures.
• You have performed a function that includes a compulsory activity and you wish to bypass
the compulsion.
• An initial clear may be necessary as part of servicing, or troubleshooting.
To Perform an Initial Clear (program restart):
1. Turn the power switch located on the right side of the register to the OFF position.
2. Turn the control lock to the PGM-Mode.
3. Press and hold the key position where the SBTL key is located on the default keyboard
layout.
4. While continuing to hold the SBTL key, turn the power switch to the ON position.
5. The message "INITIAL CLEAR OK!” prints when the initial clear is complete.
16 • Getting Started ER-380 / ER-380M Electronic Cash Register AU

Operating Instructions
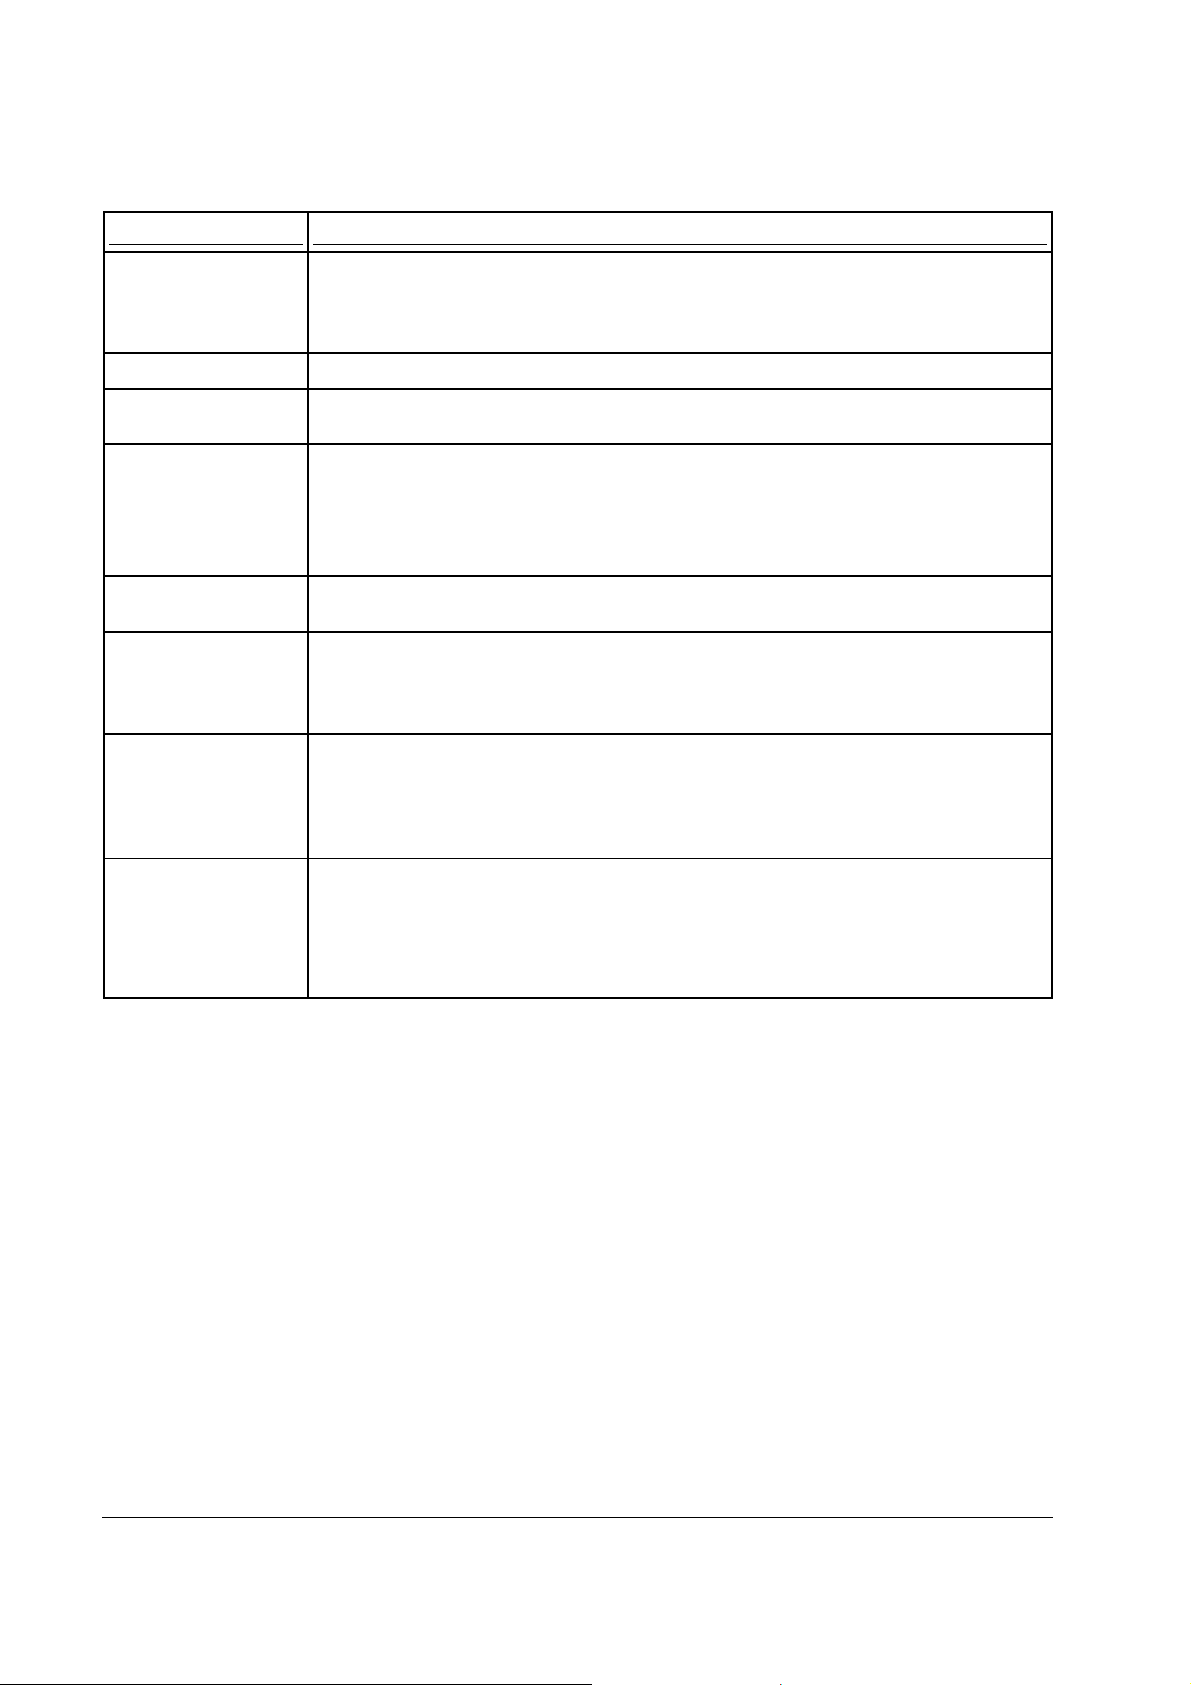
Function Key Descriptions
Keys are listed in alphabetical order. Some of the keys described below are not included on the
default keyboard. See “Function Key Assignment Programming” to add or change programmable
keys.
Keyboard Legend Description
#/NS
(NONADD# /
NO SALE)
X/TIME
00, 0 - 9, Decimal
ADD CHECK
CANCEL
CASH
CASH OUT
Use as a non-add key to print up to an 8-digit numeric entry on the receipt. This entry will not
add to any sales totals. The #/NS key is also used to open the cash drawer without making a sale.
Use to a multiply a quantity of items or calculate split pricing on PLU entries. Also use to display
time.
Use to make numeric entries in REG, X, Z, VOID, or P posit ions . The de cim a l key is use d for
decimal or scale multiplication, when setting or entering fractional percentage discounts, or when
programming fra cti onal tax r at es. D o not use the decimal key when making amount entries into
PLUs.
Use to combine individual trays (in a cafeteria situation) that will be paid together. Each tray
subtotal can advance the consecutive number, depending on pro gramming.
Cancels a transact ion wi thout updat ing P LU, or funct ion key tot als . The C ance l funct ion m ay
only be used prior to ten dering. Onc e t enderi ng be gins , the C ance l func ti on m ay no longe r be
used. The CANCEL key corrects the appropri ate tota ls a nd count ers and th e Fin anci al r eport
records total of transactions canceled.
Calculates the sale total including tax, finalizes the sale, and opens the cash drawer.
Change computation is allowed by entering an amount before pressing the CASH key. The
cash drawer will open only if the amount tendered is equal to or greater than the total amount
of the sale. Post tendering is also available should a second change calculation be
necessary. Re-enter the tendered amount and press the CASH key to show the new change
computation.
Press the CASH key a second time to issue a buffered receipt (up to 200 lines) when the receipt
on/off function is OFF.
Use to allow cash out function when EFTPOS terminal is connected and activated. 0(zero)
amount cash out will generate a sequence error. This function only allowed within a sale.
ER-380 / ER-380M Electronic Cash Register AU Operating Instructions • 17

Keyboard Legend Description
CHARGE (1 - 8) or
EFTPOS
CHECK (CHEQUE)
CHECK (CHEQUE)
CASHING
CHECK (CHEQUE)
ENDORSEMENT
CHECK #
CLEAR (Esc)
CLERK
CONV (1 - 4)
EAT-IN
TAKE OUT
DRIVE THRU
ERROR CORR
F/S SHIFT
F/S SUB
Use to finalize charge sales. Calculates the sale total including tax, finalizes the sale, and
opens the cash drawer. Change computation is allowed by entering an amount before
pressing the CHARGE key. The cash drawer will open only if the amount tendered is equal
to or greater than the total amount of the sale. Change issued will be subtracted from the
cash-in-drawer total.
Use to finalize check sales. Calculates the sale total including tax, finalizes the sale, and
opens the cash drawer. Change computation is allowed by entering an amount before
pressing the CHECK key. The cash drawer will open only if the amount tendered is equal to
or greater than the total amount of the sale. Change issued will be subtracted from the cashin-drawer total.
Use to exchange a check for cash. Cash-in-drawer and check-in-drawer totals are adjusted.
Use to print a check endor sem e nt m ess age o n an opt ional sli p pri nter to progra m an en dorsem e nt
message.
The CHECK # key is used to begin a new, or access an existing balance (hard check) or
itemized bill (soft check.)
Check track numbers that are entered manually may be set at a fixed length of one to nine
digits. Check track numbers assigned automatically will begin with #1.
Existing checks are accessed by entering the check track number and pressing the CHECK
# key.
Use to clear entries m ade i nto t he 10 ke y num eri c pa d or X/T IME key befo re th ey are pri nted .
Also used to clear error condi ti ons.
The register will not operate in register mode unless a clerk has been signed on. Clerk sign-on is
accomplished by “direct” or “secret code” sign-on.
All entries made on the register will report to one of the 15 clerk totals. When a clerk is signed
on, all entries following will add to that clerk’s total until another clerk is signed on. However, a
clerk cannot be changed in the middle of a transaction.
To sign a clerk off, thereby displaying the “CLOSED” message on the display, enter 0, and then
press the CLERK key. This disables the register until another clerk is signed on. The current
clerk must first be signed off before another clerk may be signed on.
The currency conversi on funct ion, a ll owed af ter sub tota l, co nvert s an d displ ay s the new subt ota l
at a preprogrammed exchange rate. Tendering is allowed after using the currency conversion
function. Change is cal cula ted and is sued i n hom e c urrenc y. The am ount of forei gn cur rency
tendered is stored i n a se parat e t otal on the Fina ncia l re port, b ut not added t o the drawe r tot al.
Eat-In, Take Out and Drive Thru are subtotal functions. In areas that have different tax rules
for eat-in and take out sales, the EAT-IN, TAKE OUT and DRIVE THRU keys can be
programmed to automatically charge or exempt taxes. Sales may not be split between Eat-In,
Take Out and Drive Thru. The EAT-IN, TAKE OUT and DRIVE THRU key s maintain
separate totals on the Financial report.
Use to correct the last entry. The ERROR CORR key corrects the appr opriate totals and
counters.
When pressed before a PLU entry, the F/S SHIFT key reverses the preprogrammed food stamp
status of the PLU. For exa mpl e, an ite m not food stamp eligible can be m ade f ood st am p eli gibl e.
Displays the amount of t he sa le t hat i s food st am p el igi ble.
F/S TEND
18 • Operating Instructions ER-380 / ER-380M Electronic Cash Register AU
Use to tender food stamps for eligible sales.

Keyboard Legend Description
GUEST #
INACTIVE
LEVEL (1 - 2)
MACRO (1 - 10)
MODIFIER (1 - 5)
Shift
P/BAL
PAID OUT (1 - 3)
PAYMENT
PFEED
(RECEIPT FEED)
PLU
PRICE INQUIRY
Use to enter the count of guests served as part of a guest check.
Use to inactivate th e key on the key board wi th wa rning/ error m e ssa ge.
Use to switch between different price levels if the price level 2 is activated.
Macro keys may be programmed to record, and then later perform, up to 50 keystrokes.
For example, a macro key could be set to tender (preset tender) a common currency, such as $5
into the cash key.
The Modifier key alters the next PLU registered, either by changing the Code number of the
PLU so that a different item is registered, or by adding the modifier descriptor.
Use one of the Modifier key as Shift key to access additional 16 PLUs directly from
keyboard.
Use to enter the amount of an outstanding balance.
Use to record money taken from the register to pay invoices, etc. The paid out am ount subtracts
from the cash-in-drawe r tot al. P aid ou ts ar e al lowe d outsi de of a sal e onl y.
Allows part payment of bill.
Advances the receipt printer paper one line, or continuously until the key is released.
The PLU key is used to register price look-ups by number entry. PLUs can be programmed open
or preset, and positive or negative.
Used to check the price of PLU.
PRINT CHECK
PROMO
RCPT ON/OFF
(RECEIPT ON/OFF)
RECD ACCT (1 – 3)
RETURN
SCALE
SERVICE
(New Balance)
SUBTOTAL
TABLE #
Use to print a guest chec k. The c heck can be print ed on a n opti onal (RS-2 32C) pri nte r, or ca n be
printed on the receipt printer. The PRINT CHECK key can be set to automatically service the
check.
The PROMO key allows you to account for promotional items, as in "buy two, get one free".
Pressing this key will remove an item's cost from the sale, but will include the sale of the item in
the item's sales counter.
Use to switch receipt printer on/off.
The RECD ACCT (received on account) key is used to record media loaned to the cash drawer,
or payments received outside of a sale. The cash drawer will open. The amount received adds to
the cash-in-drawer total.
Used to return or refund merchandise. Returning an item will also return any tax that may
have been applied.
Use to make weight entries. When a scale is attached, press the scale key to show the weight in
the display, then press (or enter) a PLU to multiple the weight times the price. When a scale is
not attached, you can enter the weight (using the decimal key for fractions). PLUs may be
programmed to requi re an entry thr ough the sca le key .
Use to temporarily finalize Previous Balance or Table tracking transactions.
Displays subtotal of s ale inclu ding t ax. Mus t be p ressed pri or to a s ale disc ount or s ale surcha rge.
Tracks the current balance for a guest check or table.
ER-380 / ER-380M Electronic Cash Register AU Operating Instructions • 19
Keyboard Legend Description
TARE
TAX EXEMPT
TAX SHIFT (1 - 4)
TIP
VALID
VOID
WASTE
% (1 - 5)
(percentage or
dollar amount; and
discount or
surcharge)
Tares are container weights. If you are using the scale function, you can preset up to 5 different
tare weights. The tare can be subtracted automatically when a specific PLU is registered, or
manually inputting the tare number and pressing the TARE key can subtract the tare. Tare #5 can
be programmed for entering tare weights manually.
Press the TAX EXEMPT key to exempt tax 1, tax 2, t ax 3, an d/or t ax 4 from th e ent ire sale .
When pressed before a PLU entry, the tax shift keys reverse the tax status of the PLU, i.e., a PLU
with non-tax status wou ld bec om e ta xabl e or a PLU wit h ta x sta tus w ould be com e non- taxa ble.
The TIP key allows a gratuity to be added to a guest check before payment. The tip amount
is deducted from the Cash-in-Drawer amount for the Clerk/Cashier closing the guest check.
The TIP key may be programmed as either a percentage or amount. If programmed as a
percentage, tax programming defines whether the percentage is calculated on the net amount,
or the amount after taxes.
Press the VALID key to print a one-line validation on a separate form or piece of paper. Any
item registrat ion, di scount o r pay me nt m ay be val ida ted.
Use to correct an item entered earlier within a sale. The VOID key corrects the appropriate totals
and counters. To correct the last item, use the ERROR CORR key. For void operations out side
of a sale (Transaction Void), use the VOID position on the control lock. The Financial report
records totals for each type of void separately.
The WASTE key allows control of inventory by accounting for items that must be removed
from stock due to spoilage, breakage or mistakes. Press the WASTE key before entering wasted
items, and then press the WASTE key again to finalize. The WASTE key may be under
manager control, re quiri ng the c ont rol l ock to be in t he X position. The WASTE key is not
allowed within a sale.
Up to five % keys may be plac ed on t he key board. E ach % key is set with a specific function,
such as item disc ount or s urchar ge, or s ale discoun t or su rchar ge.
The percent rate may be entered or preprogrammed, or the percent keys can be programmed with
a negative open or preset p rice, thus acti ng as c oupon ke ys.
A percentage key may also be set up to accept charge tip entries.
20 • Operating Instructions ER-380 / ER-380M Electronic Cash Register AU
 Loading...