

Operating Instructions
Software Guide
Preparing for Printing
1
Printing Documents
2
Printing Stored Documents
3
Direct Printing from a Digital Camera (PictBridge)
4
Making Printer Settings Using the Control Panel
5
Monitoring and Configuring the Printer
6
Using a Printer Server
7
Mac OS X Configuration
8
Appendix
9
Read this manual carefully before you use this machine and keep it handy for future reference. For safe and correct use, be sure to read "Safety
Information" before using the machine.

Introduction
This manual contains detailed instructions and notes on the operation and use of this machine. For your safety and
benefit, read this manual carefully before using the machine. Keep this manual in a handy place for quick reference.
Do not copy or print any item for which reproduction is prohibited by law.
Copying or printing the following items is generally prohibited by local law:
bank notes, revenue stamps, bonds, stock certificates, bank drafts, checks, passports, driver's licenses.
The preceding list is meant as a guide only and is not inclusive. We assume no responsibility for its completeness or
accuracy. If you have any questions concerning the legality of copying or printing certain items, consult with your
legal advisor.
Important
Contents of this manual are subject to change without prior notice.
In no event will the company be liable for direct, indirect, special, incidental, or consequential damages as a result
of handling or operating the machine.
For good print quality, the manufacturer recommends that you use genuine toner from the manufacturer.
The manufacturer shall not be responsible for any damage or expense that might result from the use of parts
other than genuine parts from the manufacturer with your office products.
Some illustrations in this manual might be slightly different from the machine.
Certain options might not be available in some countries. For details, please contact your local dealer.

TABLE OF CONTENTS
How to Read This Manual.................................................................................................................................8
Symbols...........................................................................................................................................................8
About IP Address............................................................................................................................................8
Model-Specific Information...............................................................................................................................9
Manuals for This Printer...................................................................................................................................10
List of Options...................................................................................................................................................12
1. Preparing for Printing
Before Using the Printer...................................................................................................................................13
Drivers and Utilities......................................................................................................................................13
Using User Authentication...........................................................................................................................13
Accessing the Extended Features...............................................................................................................14
Software Included on the CD-ROM...............................................................................................................15
Viewing the Contents of the CD-ROM.......................................................................................................15
Printer Drivers for This Printer.......................................................................................................................15
Downloading Utility Software.........................................................................................................................17
SmartDeviceMonitor for Admin..................................................................................................................17
DeskTopBinder.............................................................................................................................................17
SmartDeviceMonitor for Client...................................................................................................................18
If User Authentication is Specified..................................................................................................................19
User Code Authentication (Using the Printer Driver).................................................................................19
Log in (Using the Control Panel).................................................................................................................19
Log out (Using the Control Panel)...............................................................................................................20
Log in (Using the Printer Driver)..................................................................................................................20
Log in (Using Web Image Monitor)...........................................................................................................21
Log out (Using Web Image Monitor).........................................................................................................21
2. Printing Documents
Displaying the Printer Driver Settings Screen.................................................................................................23
Making Printer Default Settings - The Printer Properties............................................................................23
Making Printer Default Settings - Printing Preferences..............................................................................23
Making Printer Settings from an Application.............................................................................................24
Making Printer Settings - One Click Presets...............................................................................................25
Frequently Used Print Methods.......................................................................................................................26
Standard Printing.........................................................................................................................................26
1

Printing on Both Sides of Sheets..................................................................................................................28
Combining Multiple Pages into Single Page.............................................................................................31
Advanced Printing............................................................................................................................................36
Menu Names and Brief Overview of Each Function................................................................................36
Specifying Printer Driver or Print Command Priority..................................................................................37
Printing on Cover Sheet...............................................................................................................................39
Inserting Slip Sheets.....................................................................................................................................40
Printing with Watermarks............................................................................................................................41
Collate Function................................................................................................................................................44
Spool Printing...................................................................................................................................................45
Setting Spool Printing...................................................................................................................................45
Viewing or Deleting Spooled Jobs Using Web Image Monitor..............................................................46
Printing a PDF File Directly...............................................................................................................................47
Using DeskTopBinder..................................................................................................................................47
PDF Direct Printing Using Function Palette.................................................................................................48
PDF Direct Print Properties...........................................................................................................................49
Using Commands to Print............................................................................................................................50
Specifying the Classification Code for a Print Job.........................................................................................52
Using the Virtual Printer....................................................................................................................................54
Adding a Virtual Printer...............................................................................................................................54
Changing a Virtual Printer Configuration...................................................................................................55
Confirming a Virtual Printer Configuration.................................................................................................55
Deleting a Virtual Printer..............................................................................................................................56
Printing Using a Virtual Printer.....................................................................................................................56
If Errors Occur with the Specified Paper Size and Type...............................................................................58
Changing the Paper Tray Settings..............................................................................................................58
Printing from a Selected Tray......................................................................................................................59
Canceling a Print Job...................................................................................................................................59
Proceeding with Printing Using the Bypass Tray........................................................................................60
3. Printing Stored Documents
Using the Print Job Function.............................................................................................................................63
Print Job Screen............................................................................................................................................63
Printing from the Print Job Screen....................................................................................................................66
2

Sample Print..................................................................................................................................................66
Locked Print..................................................................................................................................................69
Hold Print......................................................................................................................................................73
Stored Print...................................................................................................................................................76
Printing from the User ID Screen.....................................................................................................................81
Printing the Selected Print Job.....................................................................................................................81
Printing All Print Jobs....................................................................................................................................82
Canceling a Print Job.......................................................................................................................................84
Canceling a Print Job Using the Control Panel..........................................................................................84
Windows - Canceling a Print Job from the computer...............................................................................84
Mac OS X - Canceling a Print Job from the computer..............................................................................85
4. Direct Printing from a Digital Camera (PictBridge)
What is PictBridge?..........................................................................................................................................87
PictBridge Printing.............................................................................................................................................88
What Can be Done on This Printer.................................................................................................................89
Index Printing................................................................................................................................................89
Trimming.......................................................................................................................................................90
Date and File Name Printing.......................................................................................................................91
Paper Size....................................................................................................................................................91
Image Print Size...........................................................................................................................................91
Multi-Image-Layout.....................................................................................................................................92
Duplex Printing.............................................................................................................................................94
Printing Quality.............................................................................................................................................94
Color Matching............................................................................................................................................94
Paper Type Specification............................................................................................................................94
Form Printing.................................................................................................................................................95
Toner Saving................................................................................................................................................95
Camera Memo Printing...............................................................................................................................95
Exiting PictBridge..............................................................................................................................................96
When PictBridge Printing Does Not Work.....................................................................................................97
Other Reference Information...........................................................................................................................98
5. Making Printer Settings Using the Control Panel
Menu Chart.......................................................................................................................................................99
3

Memory Erase Status Menu..........................................................................................................................104
Viewing the Status of Remaining Data in Memory.................................................................................104
Paper Input Menu..........................................................................................................................................105
Paper Input Menu Parameters..................................................................................................................105
Changing the Paper Input Menu..............................................................................................................107
Maintenance Menu.......................................................................................................................................109
Maintenance Menu Parameters...............................................................................................................109
Changing the Maintenance Menu...........................................................................................................114
List/Test Print Menu.......................................................................................................................................116
List/Test Print Menu Parameters...............................................................................................................116
Test Printing................................................................................................................................................117
System Menu..................................................................................................................................................120
System Menu Parameters.........................................................................................................................120
Changing the System Menu.....................................................................................................................125
Print Settings Menu........................................................................................................................................127
Print Settings Menu Parameters................................................................................................................127
Changing the Print Settings Menu............................................................................................................135
Security Options Menu.................................................................................................................................136
Security Options Menu Parameters.........................................................................................................136
Changing the Security Options Menu.....................................................................................................139
Host Interface Menu......................................................................................................................................141
Host Interface Menu Parameters..............................................................................................................141
Changing the Host Interface Menu..........................................................................................................147
Language Menu.............................................................................................................................................148
Language Menu Parameters....................................................................................................................148
Changing the Language Menu................................................................................................................148
Options Menu................................................................................................................................................149
Options Menu Parameters........................................................................................................................149
Checking the Error Log.............................................................................................................................149
6. Monitoring and Configuring the Printer
Using Web Image Monitor...........................................................................................................................151
Introduction to Web Image Monitor........................................................................................................151
Displaying Top Page.................................................................................................................................152
4

When User Authentication is Set..............................................................................................................153
About Menu and Mode............................................................................................................................154
Access in the Administrator Mode...........................................................................................................155
Displaying Web Image Monitor Help.....................................................................................................156
Registering Classification Codes..................................................................................................................158
Configuring Classification Codes.............................................................................................................159
Address Book Backup and Restore..............................................................................................................160
Backing Up Address Book Data..............................................................................................................160
Restoring Address Book Data...................................................................................................................160
Using SmartDeviceMonitor for Admin.........................................................................................................162
When Using IPP with SmartDeviceMonitor for Client.................................................................................163
Printer Status Notification by E-Mail............................................................................................................164
Setting the Account for E-mail Notification.............................................................................................165
Mail Authentication...................................................................................................................................166
Auto E-mail Notification............................................................................................................................168
On-demand E-mail Notification...............................................................................................................168
Format of On-demand E-mail Messages................................................................................................169
7. Using a Printer Server
Preparing Printer Server................................................................................................................................171
Printing Notification via SmartDeviceMonitor for Client........................................................................171
Using NetWare..............................................................................................................................................173
Setting Up as a Print Server (NetWare 3.x)............................................................................................173
Setting Up as a Print Server (NetWare 4.x, 5 / 5.1, 6 / 6.5).............................................................174
Using Pure IP in the NetWare 5 / 5.1 or 6 / 6.5 Environment............................................................175
Setting Up as a Remote Printer (NetWare 3.x).......................................................................................177
Setting Up as a Remote Printer (NetWare 4.x, 5 / 5.1, 6 / 6.5)........................................................179
8. Mac OS X Configuration
Using PostScript 3..........................................................................................................................................183
Job Type.....................................................................................................................................................183
Fit to Paper.................................................................................................................................................189
Resolution...................................................................................................................................................189
Economy Color..........................................................................................................................................190
Image Smoothing......................................................................................................................................190
5

Color Mode...............................................................................................................................................191
Gradation..................................................................................................................................................191
Color Setting..............................................................................................................................................191
Color Profile...............................................................................................................................................192
Dithering.....................................................................................................................................................193
Gray Reproduction (Text/Line Art)..........................................................................................................193
Black Over Print.........................................................................................................................................194
Separate into CMYK.................................................................................................................................194
CMYK Simulation Profile..........................................................................................................................194
Paper Type.................................................................................................................................................194
Watermark.................................................................................................................................................195
Watermark Text.........................................................................................................................................195
Watermark Font.........................................................................................................................................195
Watermark Size.........................................................................................................................................195
Watermark Angle......................................................................................................................................195
Watermark Style........................................................................................................................................196
9. Appendix
When Using Windows Terminal Service/Citrix Presentation Server/Citrix XenApp..............................197
Operating Environment.............................................................................................................................197
Supported Printer Drivers..........................................................................................................................197
Limitations...................................................................................................................................................197
Using DHCP...................................................................................................................................................199
Using AutoNet...........................................................................................................................................199
Configuring the WINS Server......................................................................................................................200
Using Web Image Monitor......................................................................................................................200
Using telnet................................................................................................................................................200
Using the Dynamic DNS Function................................................................................................................201
Updating....................................................................................................................................................201
DNS Servers Targeted for Operation......................................................................................................202
DHCP Servers Targeted for Operation....................................................................................................202
Setting the Dynamic DNS Function..........................................................................................................202
Precautions.....................................................................................................................................................204
Connecting a Dial-Up Router to a Network............................................................................................204
6

When the Wireless LAN Interface Unit Is Installed.................................................................................204
Copyright Information about Installed Applications...................................................................................206
expat...........................................................................................................................................................206
NetBSD......................................................................................................................................................206
FreeBSD 4.6.2/netipx..............................................................................................................................215
Sablotron(Version 0.82)...........................................................................................................................216
JPEG LIBRARY............................................................................................................................................216
SASL...........................................................................................................................................................216
RSA BSAFE®..............................................................................................................................................217
Open SSL...................................................................................................................................................217
Open SSH..................................................................................................................................................219
Open LDAP................................................................................................................................................223
Heimdal......................................................................................................................................................224
IPSTM print language emulations.............................................................................................................225
AppleTalk...................................................................................................................................................225
SPX/IPX......................................................................................................................................................225
WPA Supplicant........................................................................................................................................225
nana...........................................................................................................................................................226
ILU...............................................................................................................................................................226
racoon........................................................................................................................................................227
TrouSerS.....................................................................................................................................................227
Samba........................................................................................................................................................230
Trademarks.....................................................................................................................................................237
INDEX...........................................................................................................................................................239
7

How to Read This Manual
Symbols
This manual uses the following symbols:
Indicates points to pay attention to when using the machine, and explanations of likely causes of paper
misfeeds, damage to originals, or loss of data. Be sure to read these explanations.
Indicates supplementary explanations of the machine's functions, and instructions on resolving user errors.
This symbol is located at the end of sections. It indicates where you can find further relevant information.
[ ]
Indicates the names of keys on the machine's display or control panels.
(mainly Europe and Asia)
(mainly North America)
Differences in the functions of Region A and Region B models are indicated by two symbols. Read the
information indicated by the symbol that corresponds to the region of the model you are using. For details
about which symbol corresponds to the model you are using, see "Model-Specific Information".
About IP Address
In this manual, "IP address" covers both IPv4 and IPv6 environments. Read the instructions that are relevant
to the environment you are using.
8
Model-Specific Information
CBK001
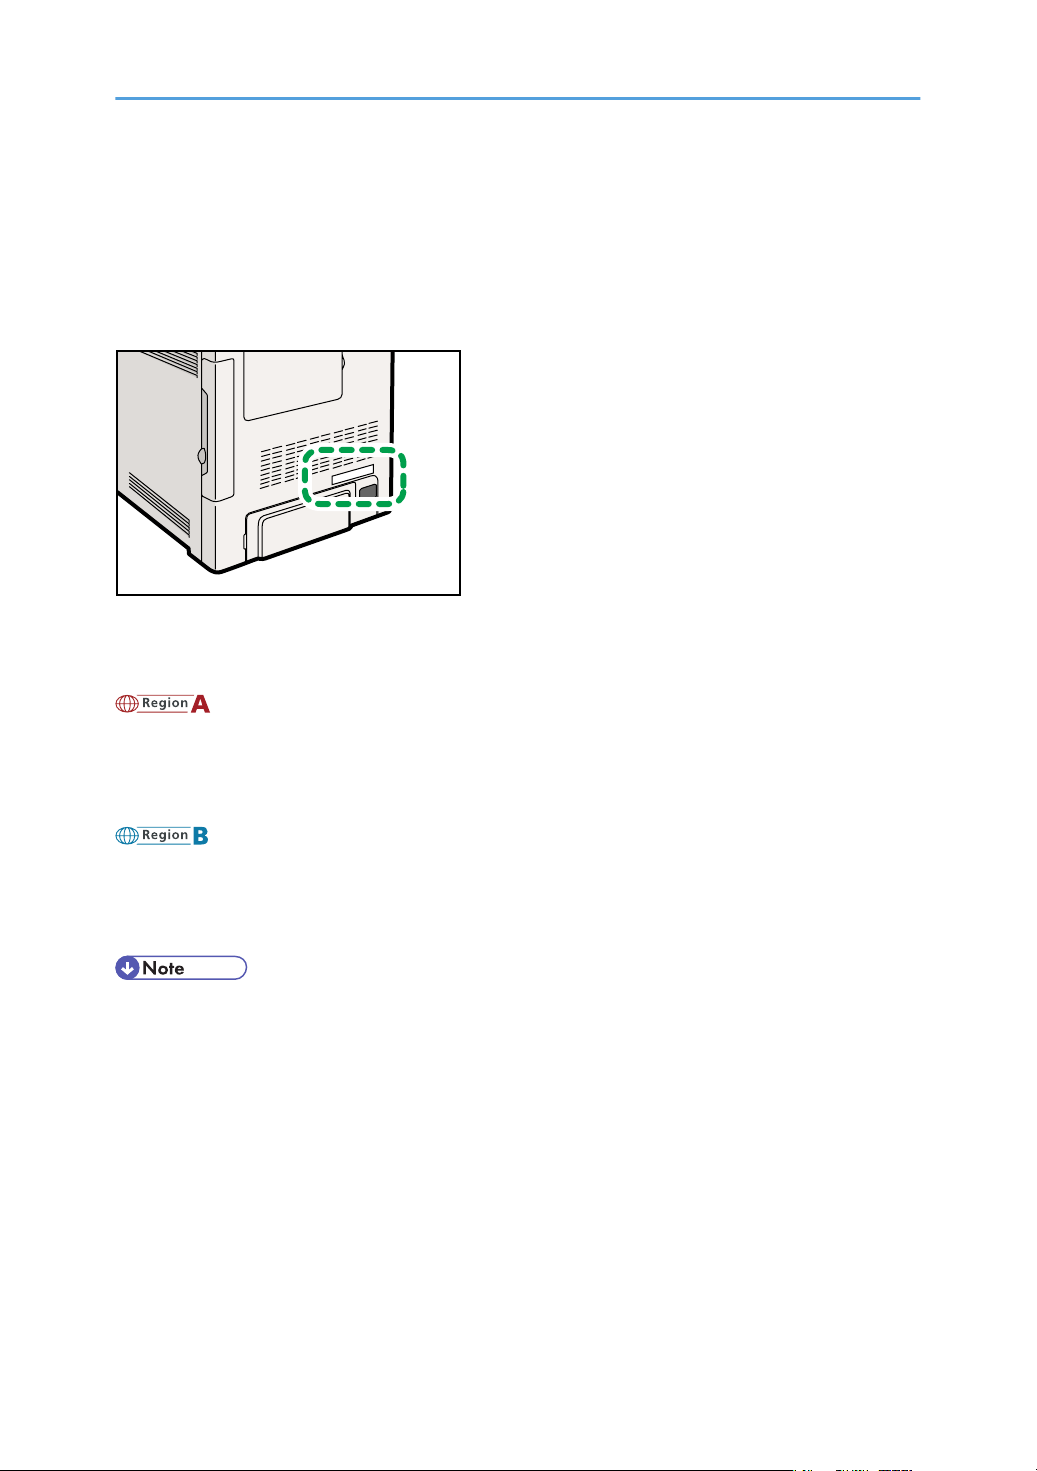
This section explains how you can identify the region your machine belongs to.
There is a label on the rear of the machine, located in the position shown below. The label contains details
that identify the region your machine belongs to. Read the label.
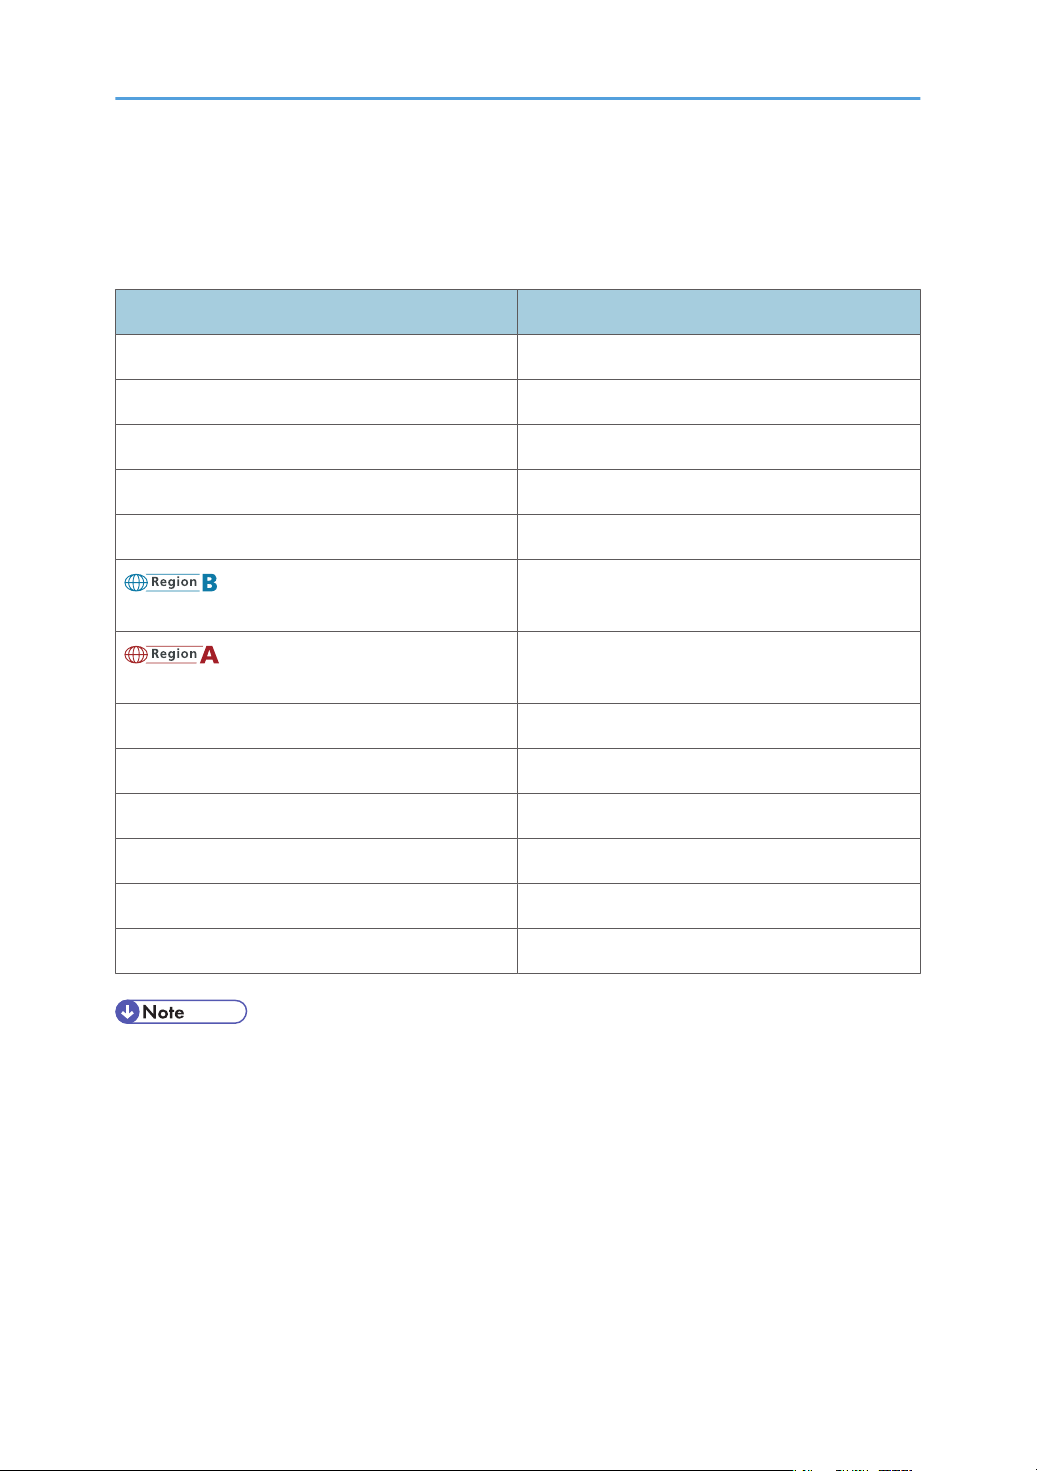
The following information is region-specific. Read the information under the symbol that corresponds to the
region of your machine.
(mainly Europe and Asia)
If the label contains the following, your machine is a region A model:
• CODE XXXX -22, -27
• 220-240V
(mainly North America)
If the label contains the following, your machine is a region B model:
• CODE XXXX -17, -51
• 120 V
• Dimensions in this manual are given in two units of measure: metric and inch. If your machine is a
Region A model, refer to the metric units. If your machine is a Region B model, refer to the inch units.
9

Manuals for This Printer
Read this manual carefully before you use this printer.
Refer to the manuals that are relevant to what you want to do with the printer.
• Media differ according to manual.
• The printed and electronic versions of a manual have the same contents.
• Adobe Acrobat Reader/Adobe Reader must be installed in order to view the manuals as PDF files.
• A Web browser must be installed in order to view the html manuals.
Safety Information
Contains information about safe usage of this printer.
To avoid injury and prevent damage to the printer, be sure to read this.
Quick Installation Guide
Contains procedures for removing the printer from its box, and connecting it to a computer.
Hardware Guide
Contains information about paper; names and functions of the parts of this printer; and procedures
such as installing options, replacing consumables, responding to error messages, and resolving jams.
Driver Installation Guide
Contains procedures for installing the printer driver. This manual is included on the driver CD-ROM.
Software Guide (This manual)
Contains information about using this printer, its software, and its security functions.
Security Guide
This manual is for administrators of the printer. It explains security functions that you can use to prevent
unauthorized use of the printer, data tampering, or information leakage. Be sure to read this manual
when setting the enhanced security functions, or user and administrator authentication.
VM Card Extended Feature Settings Web Reference
Contains information about setting up the extended features settings using Web Image Monitor.
UNIX Supplement
Contains information about the usage of commands to operate this printer.
To obtain the "UNIX Supplement", visit our Web site or consult an authorized dealer.
This manual includes explanations of functions and settings that might not be available on this printer.
This manual is provided in English only.
• The following software products are referred to as using general names:
10

Product name General name
DeskTopBinder Lite and DeskTopBinder
Professional
*1
*1 Optional
DeskTopBinder
11
List of Options
This section provides a list of options for this printer, and how they are referred to as in this manual.
Option List Referred to as
Paper Feed Unit TK1010 Paper feed unit
Hard Disk Drive Option Type C320 Hard disk
Memory Unit Type G 256 MB SDRAM module
Memory Unit Type I 512 MB SDRAM module
Gigabit Ethernet Board Type A Gigabit Ethernet board
IEEE 802.11a/g Interface Unit Type L
IEEE 802.11a/g Interface Unit Type M
IEEE 1284 Interface Board Type A IEEE 1284 interface board
Camera Direct Print Card Type H Camera direct print card
Data Overwrite Security Unit Type L Data overwrite security unit
HDD Encryption Unit Type D HDD encryption unit
SD Card for NetWare Printing Type F NetWare card
VM CARD Type O VM card
• For details about the specifications of each option, see "Specifications", Hardware Guide.
Wireless LAN interface unit
Wireless LAN interface unit
12

1. Preparing for Printing
1
This chapter explains the preparation procedure to use this printer.
Before Using the Printer
This section explains the settings, procedures, items, and other information on which the user is
recommended to check before you can use this printer.
Drivers and Utilities
To use this printer, you must install its driver on your computer.
For details about the procedure for installing the printer driver, see Driver Installation Guide on the driver
CD-ROM.
This printer comes with two CD-ROMs: a driver CD-ROM and a manual CD-ROM.
For details about the contents of the drivers CD-ROM, see "Software Included on the CD-ROM".
Besides drivers, there are other useful utilities available for this printer.
For details about these utilities, see "Downloading Utility Software".
• p.15 "Software Included on the CD-ROM"
• p.17 "Downloading Utility Software"
Using User Authentication
Using authentication, administrators manage the printer and its users. To enable authentication, information
about both administrators and users must be registered in order to authenticate users via their login user
names and passwords.
There are four kinds of administrator. Each administrator manages a specific area of printer usage, such
as settings or user registration.
Access limits for each user are specified by the administrator responsible for user access to printer functions
and documents and data stored in the printer.
When authentication is set on the printer, see “If User Authentication is Specified”.
• p.19 "If User Authentication is Specified"
13
CBK500
1. Preparing for Printing
1
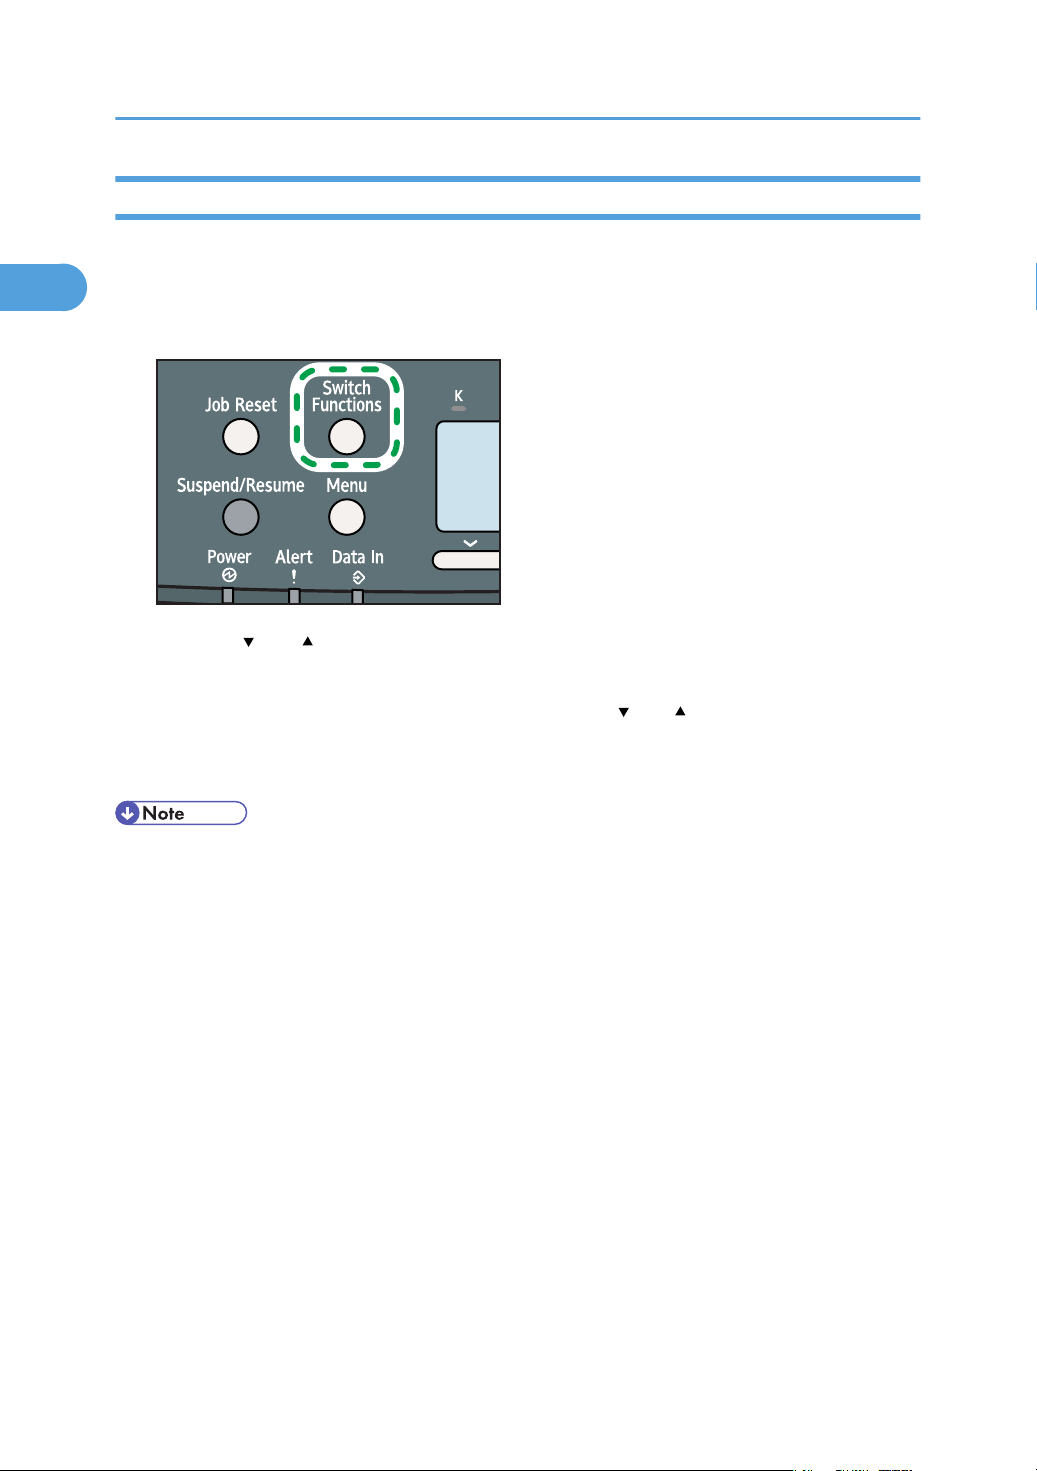
Accessing the Extended Features
Various functions besides printing can be accessed using the [Switch Functions] key on this printer.
Use the following procedure to switch between applications.
1. Press the [Switch Functions] key.
2. Press the [ ] or [ ] key to select the [JavaTM/X].
3. Press the [OK] key.
4. If more than one extended feature is installed, use the [ ] or [ ] key to select the extended
feature you want to access.
5. Press the [OK] key.
• Function switching is possible only when the optional VM card is installed.
• This manual explains the procedure for changing settings when 'Printer' is selected as the application.
14

Software Included on the CD-ROM
1
Software Included on the CD-ROM
This section explains the software included on the "Printer Drivers and Utilities" CD-ROM that comes with
this printer.
Viewing the Contents of the CD-ROM
This section explains how to view the contents of the CD-ROM.
1. Insert the CD-ROM into the CD-ROM drive.
The installer starts.
2. Select a language, and then click [OK].
3. Click [Browse This CD-ROM].
Explorer starts and displays the contents of the CD-ROM.
Printer Drivers for This Printer
This section explains printer drivers for this printer.
• You can install the PCL printer drivers (PCL 5c and PCL 6), and the PostScript3 printer driver from the
CD-ROM provided with this printer or download them from the manufacturer's Web site.
• The provided CD-ROM contains printer drivers for Windows XP x64/Vista x64/7 x64 and Windows
Server 2003 x64/2003 R2 x64/2008 x64/2008 R2.
Printing requires installation of the printer driver that is correct for your operating system. The following
drivers are included on the CD-ROM labeled "Printer Drivers and Utilities".
Operating System PCL 5c PCL 6 PostScript 3
*4
*2
*3
*1
*5
*6
OK OK OK
OK OK OK
OK OK OK
OK OK OK
OK OK OK
OK OK OK
Windows 2000
Windows XP
Windows Vista
Windows 7
Windows Server 2003
Windows Server 2008
Mac OS X
*7
OK
15

1. Preparing for Printing
1
Microsoft Windows 2000 Professional /Microsoft Windows 2000 Server/Microsoft Windows 2000
*1
Advanced Server
Microsoft Windows XP Professional Edition/Microsoft Windows XP Home Edition
*2
Microsoft Windows Vista Ultimate/Microsoft Windows Vista Enterprise/Microsoft Windows Vista Business/
*3
Microsoft Windows Vista Home Premium/Microsoft Windows Vista Home Basic
Microsoft Windows 7 Home Premium/Microsoft Windows 7 Professional/Microsoft Windows 7 Ultimate/
*4
Microsoft Windows 7 Enterprise
Microsoft Windows Server 2003 Standard Edition/Microsoft Windows Server 2003 Enterprise Edition/
*5
Microsoft Windows Server 2003 R2 Standard Edition/Microsoft Windows Server 2003 R2 Enterprise Edition
Microsoft Windows Server 2008 Standard /Microsoft Windows Server 2008 Enterprise/Microsoft Windows
*6
Server 2008 Standard without Hyper-V/Microsoft Windows Server 2008 Enterprise without Hyper-V/
Microsoft Windows Server 2008 R2 Standard/Microsoft Windows Server 2008 R2 Enterprise
Mac OS X 10.2 later
*7
PCL Printer Drivers
Two kinds of PCL printer drivers (PCL 5c and PCL 6) are included. These drivers allow your computer
to communicate with this printer using a printer language.
PostScript 3 Printer Driver
PostScript 3 printer driver allows the computer to communicate with the printer using a printer
language.
PPD files
PPD files allow the printer driver to enable specific printer functions.
Font Manager
For installing new screen fonts, or organizing and managing fonts already in the system. For details
about Font Manager, see the manual on the CD-ROM labeled "Printer Drivers and Utilities".
• Some applications may require installation of the PCL 5c printer driver.
• For details about installation procedure, see Driver Installation Guide.
16

Downloading Utility Software
1
Downloading Utility Software
This section explains the utility software for this printer.
SmartDeviceMonitor for Admin
This section describes the functions available with SmartDeviceMonitor for Admin.
SmartDeviceMonitor for Admin is an application that monitors network printers. It can monitor multiple
network printers using IP address. We recommend that network administrators use this application.
SmartDeviceMonitor for Admin has the following functions:
• Group management for the machines
• Monitoring the machines
• Operation restriction
• Managing the Address Book
• Per-user counters
• User restriction
SmartDeviceMonitor for Admin with full functionality can be purchased from your local dealer. Contact
your local dealer for information on purchasing the software.
SmartDeviceMonitor for Admin with limited functionality is available as a free download. Contact your
local dealer for information on downloading the software.
• For details about the functionality, see the manual for SmartDeviceMonitor for Admin.
DeskTopBinder
This section describes the functions available with DeskTopBinder.
DeskTopBinder is to be installed on the client computers for integration and management of various kinds
of files such as scan files, files created with applications, and existing scan files. This software allows you
to use various functions for stored scan files such as viewing stored files. Also, with the ScanRouter delivery
software, you can view the files stored in in-trays of the delivery server, or use other functions for stored
files.
DeskTopBinder Professional provides the full functionality of the software. Contact your local dealer for
information on purchasing the software.
DeskTopBinder Lite with limited functionality is available as a free download. Contact your local dealer
for information on downloading the software.
17
1. Preparing for Printing
1
• For details about the functionality, see Help of DeskTopBinder.
SmartDeviceMonitor for Client
This section describes the functions available with SmartDeviceMonitor for Client.
SmartDeviceMonitor for Client allows you to manage and print various data such as files created with an
application, images scanned with a scanner, and existing images as one document.
SmartDeviceMonitor for Client has the following functions:
• Checking printer supplies such as paper or toner
• Checking results of print jobs executed from the computer
SmartDeviceMonitor for Client is available as a free download. Contact your local dealer for information
on downloading the software.
• For details about the functionality, see Help of SmartDeviceMonitor for Client.
18

If User Authentication is Specified
1
If User Authentication is Specified
When user authentication (User Code Authentication, Basic Authentication, Windows Authentication, LDAP
Authentication, or Integration Server Authentication) is specified, an authentication screen appears
whenever a user attempts to use the printer. The printer is usable only if the user enters a valid login user
name and password on this screen.
When authentication is specified, users must log in to use the printer and log out when they have finished
using it. Logging out prevents unauthorized usage of the printer, so users must be sure to log out.
• Consult the User Administrator about your login user name, password, and user code.
• For user code authentication, enter a number registered in the Address Book as User Code.
User Code Authentication (Using the Printer Driver)
To specify User Code using the printer driver, you must specify a user code in the printer Printing Preference
of the printer driver.
1. On the [Start] menu, click [Printers and Faxes].
The [Printers and Faxes] window appears.
2. Click the icon of the printer you want to use.
3. On the [File] menu, click [Printing Preferences...].
The [Printing Preferences] dialog box appears.
4. Click the [Detailed Settings] tab.
5. In the [Menu:] box, click the [Job Setup] icon.
6. Enter the user code in [User Code:], using up to 8 numeric characters.
7. Click [OK].
Log in (Using the Control Panel)
Use the following procedure to log in when Basic Authentication, Windows Authentication, LDAP
Authentication, or Integration Server Authentication is enabled.
1. Press the [Menu] key.
2. Press [Login].
3. Enter the login user name, and then press the [OK] key.
4. Enter the login password, and then press the [OK] key.
When the user is authenticated, the screen for the function you are using appears.
19

1. Preparing for Printing
1
Log out (Using the Control Panel)
Use the following procedure to log out when Basic Authentication, Windows Authentication, or LDAP
Authentication is set.
1. Press the [Menu] key.
2. Press [Logout].
3. Press [Yes].
• Users who log in using the printer driver do not have to log out.
Log in (Using the Printer Driver)
When Basic Authentication, Windows Authentication, or LDAP Authentication is set, users must enter a
login user name and password to use the printer and/or print an individual job.
Setting Authentication
1. On the [Start] menu, click [Printers and Faxes].
The [Printers and Faxes] window appears.
2. Click the icon of the printer you want to specify authentication for.
3. On the [File] menu, click [Properties].
The [Printer Properties] dialog box appears.
4. Click the [Advanced Options] tab.
5. On the [Authentication] menu, select [User Authentication].
6. Click [OK].
Setting Authentication for individual print jobs
1. On the [Start] menu, click [Printers and Faxes].
The [Printers and Faxes] window appears.
2. Click icon of the printer you want to specify authentication for.
3. Click [Printing Preferences...].
The [Printing Preferences] dialog box appears.
4. Click the [Detailed Settings] tab.
5. In the [Menu:] box, click the [Job Setup] icon.
6. Click [Authentication...].
The [Authentication] dialog box appears.
20
If User Authentication is Specified
1
7. In [Login User Name:], enter a login user name using up to 32 characters.
8. In [Login Password:], enter a login password using up to 128 characters. Then, in
[Reenter the confirmation password:], enter the login password again, and then click
[OK].
Log in (Using Web Image Monitor)
Use the following procedure to log in to the printer via Web Image Monitor.
1. Click [Login] in the Header area of Web Image Monitor.
2. Enter a login user name and password, and then click [Login].
Depending on the configuration of your Web browser, the login user name and password might be
saved. If you do not want to save them, configure your Web browser's settings so that this information
is not saved.
• For user code authentication, enter a user code in "User Name", and then click [Login].
• The procedure may differ depending on Web Image Monitor used.
• For details about the login user name and password, consult your network administrator.
Log out (Using Web Image Monitor)
Use the following procedure to log out of Web Image Monitor.
1. Click [Logout] to log out.
• Delete the cache memory in Web Image Monitor after logging out.
21

1. Preparing for Printing
1
22
2. Printing Documents
2
This chapter explains how to print documents using the printer driver. It also describes the procedure for
configuring PDF Direct Print and other printing functions.
Displaying the Printer Driver Settings Screen
This section explains how to open and configure the printer driver properties.
The following procedure explains how to configure the printer driver settings under Windows XP. If you
are using another operating system, the procedure might vary slightly.
Making Printer Default Settings - The Printer Properties
• To change the printer's default settings (including settings for options), log on using an account that
has Manage Printers permission. Members of the Administrators group have Manage Printers
permission by default.
• You cannot change the printer default settings for individual users. Settings made in the [Printer
Properties] dialog box are applied to all users.
1. On the [Start] menu, click [Printers and Faxes].
The [Printers and Faxes] window appears.
2. Click the icon of the printer you want to use.
3. On the [File] menu, click [Properties].
The [Printer Properties] dialog box appears.
4. Make the settings you require, and then click [OK].
• Depending on the applications, the settings you make here may not be used as the default settings.
• For details, see the printer driver Help.
Making Printer Default Settings - Printing Preferences
• When the printer driver is distributed from the print server, the setting values specified by the server
are displayed as the default for [Printing Defaults...].
23
2. Printing Documents
2
1. On the [Start] menu, click [Printers and Faxes].
The [Printers and Faxes] window appears.
2. Click the icon of the printer you want to use.
3. On the [File] menu, click [Printing Preferences...].
The [Printing Preferences] dialog box appears.
4. Make the settings you require, and then click [OK].
The setting is temporarily registered as [Unregistered] in the [One Click Preset List:] area.
• Depending on the applications, the settings you make here may not be used as the default settings.
• The [Unregistered] setting is invalid if the other [One Click Presets] icon is selected. If you wish to
confirm the [Unregistered] setting, click [Register Current Settings...]. For details about confirming the
setting, see "Making Printer Settings - One Click Presets".
• For details, see the printer driver Help.
• p.25 "Making Printer Settings - One Click Presets"
Making Printer Settings from an Application
You can make printer settings for a specific application.
To make printer settings for a specific application, open the [Printing Preferences] dialog box from that
application. The following procedure explains how to make printer settings for a specific application using
Windows XP WordPad as an example.
1. On the [File] menu, click [Print...].
The [Print] dialog box appears.
2. In the [Select Printer] list, select the printer you want to use.
3. Click [Preferences].
The [Printing Preferences] dialog box appears.
4. Make the settings you require, and then click [OK].
• Procedures for opening the [Printing Preferences] dialog box vary depending on the application. For
details, see the manuals provided with the application.
• Any settings you make using this procedure apply to the current application only.
• General users can change the properties displayed in the [Print] dialog box of an application. Settings
made here are used the defaults when printing from the application.
24

Displaying the Printer Driver Settings Screen
2
• For details, see the printer driver Help.
Making Printer Settings - One Click Presets
This section explains how to register and use one click presets.
Each function explained in this section is preconfigured and registered under [One Click Preset List:] on the
[One Click Presets] tab.
You can apply the relevant setting simply by clicking on the one click preset name. This helps to avoid
incorrect settings and misprints.
One click presets can be added, modified, and deleted as required. By using registered one click presets,
users without in-depth knowledge of the printer driver can utilize advanced printing functions easily.
Follow the procedure to register one click presets.
1. In the application, on the [File] menu, click [Print].
The [Print] dialog box appears.
2. Select the printer, and then open the [Printing Preferences] dialog box in the document's
native application.
The [Printing Preferences] dialog box appears.
3. Make the settings you require.
4. Click [Register Current Settings...].
Enter a name and comment that describe the setting, and then click [OK]. The newly registered icon
appears with its registered name in the [One Click Preset List:] area.
5. Click [OK].
• Under Windows operating systems, this function is available through the PCL 6 and PostScript 3 printer
driver.
• For details about modifying and deleting one click presets, see the printer driver Help.
25
2. Printing Documents
2
Frequently Used Print Methods
This section explains how to use the various printing functions including normal printing, duplex printing,
and combine printing.
Each function described in this section is configured and registered under "One Click Presets". You can
also change the parameters for each function by modifying "One Click Presets". For details about custom
settings, see "Making Printer Settings - One Click Presets".
• p.25 "Making Printer Settings - One Click Presets"
Standard Printing
Use the following procedure to print documents using the normal printing function with the printer driver.
• Before printing, make sure that the settings for the installed options and loaded paper are correctly
configured.
For the PCL 6 printer driver:
1. In the application, on the [File] menu, click [Print].
The [Print] dialog box appears.
2. Select the printer, and then open the [Printing Preferences] dialog box in the document's
native application.
The [Printing Preferences] dialog box appears.
3. Click the [One Click Presets] tab, if it is not already selected.
4. In the [Job Type:] list, select [Normal Print].
If you want to print multiple copies, specify a number of sets in the [Copies:] box.
5. In the [Document Size:] list, select the size of the original to be printed.
6. In the [Orientation:] list, select [Portrait] or [Landscape] as the orientation of the
original.
7. In the [Input Tray] list, select the paper tray that contains the paper you want to print
onto.
If you select [Auto Tray Select] in the [Input Tray] list, the source tray is automatically selected
according to the paper size and type specified.
8. In the [Paper Type:] list, select the type of paper that is loaded in the paper tray.
9. Select [Color] or [Black and White] in the [Color/ Black and White:] list.
26

Frequently Used Print Methods
2
10. To save current setting in the One Click Preset List, click [Register Current Settings...].
Enter a name and comment that describe the setting, and then click [OK]. The newly registered
icon appears in the [One Click Preset List:] area.
11. Click [OK] to close the Printing Preferences dialog box.
12. Print the document using the print function in the document's native application.
For the PCL 5c printer driver:
1. In the application, on the [File] menu, click [Print].
The [Print] dialog box appears.
2. Select the printer, and then open the [Printing Preferences] dialog box in the document's
native application.
The [Printing Preferences] dialog box appears.
3. In the [Job Type:] list, select [Normal Print].
If you want to print multiple copies, specify a number of sets in the [Copies:] box.
4. In the [Orientation:] list, select [Portrait] or [Landscape] as the orientation of the
original.
5. Select [Color] or [Black and White] in the [Color/ Black and White:] list.
6. Click the [Paper] tab.
7. In the [Document Size:] list, select the size of the original to be printed.
8. In the [Input Tray:] list, select the paper tray that contains the paper you want to print
onto.
If you select [Auto Tray Select] in the [Input Tray:] list, the source tray is automatically selected
according to the paper size and type specified.
9. In the [Type:] list, select the type of paper that is loaded in the paper tray.
10. Click [OK] to close the Printing Preferences dialog box.
11. Print the document using the print function in the document's native application.
• The types of paper loaded in the paper trays are indicated on the printer's display. This allows you
to see which tray the selected paper type is loaded in. However, the paper type setting available in
the printing preference dialog box might be different from the type indicated on the printer's display.
• If a warning message appears notifying you of a paper type or size mismatch see “If Errors Occur
with the Specified Paper Size and Type”.
• If [Color] is selected in the [Color/ Black and White:] list, you can print using special color outputs
suitable for color vision impaired users. To use this function, click the [Detailed Settings] tab. Click the
[Print Quality] menu in the [Menu:] box, and then select [Barrier-free Color Management]. This
function is available with the PCL 6 and PostScript 3 printer driver.
27

2. Printing Documents
2
• p.58 "If Errors Occur with the Specified Paper Size and Type"
Printing on Both Sides of Sheets
This section explains how to print on both sides of each page using the printer driver.
For the PCL 6 printer driver:
1. In the application, on the [File] menu, click [Print].
The [Print] dialog box appears.
2. Select the printer, and then open the [Printing Preferences] dialog box in the document's
native application.
The [Printing Preferences] dialog box appears.
3. To use an existing One Click Presets, click the [One Click Presets] tab, and then click the
icon in the [One Click Preset List:] box.
If you do not wish to modify a custom setting that is already registered in the printer driver, change
settings such as paper size and source tray as required, and then proceed to step 9.
4. Click the [Detailed Settings] tab.
5. In the [Menu:] box, click the [Edit] icon.
6. In the [2 sided:] list, select [Open to Left], or [Open to Top].
7. Change any other print settings if necessary.
8. To save current setting in the One Click Preset List, click [Register Current Settings...].
Enter a name and comment that describe the setting, and then click [OK]. The newly registered
icon appears in the [One Click Preset List:] area.
9. Click [OK] to close the Printing Preferences dialog box.
10. Print the document using the print function in the document's native application.
For the PCL 5c printer driver:
1. In the application, on the [File] menu, click [Print].
The [Print] dialog box appears.
2. Select the printer, and then open the [Printing Preferences] dialog box in the document's
native application.
The [Printing Preferences] dialog box appears.
3. In the [Duplex:] list, select [Open to Left], [Open to Top], or [Booklet:].
4. Change any other print settings if necessary.
5. Click [OK] to close the Printing Preferences dialog box.
28

Frequently Used Print Methods
2
6. Print the document using the print function in the document's native application.
• If the document contains pages with different original sizes, page breaks may occur.
Paper sizes and types supported by duplex printing function
This section explains the paper sizes and types that can be used with the duplex printing function.
Paper sizes supported by duplex printing function
• A4
• B5
• 81/2 × 14
• 81/2 × 13
• 81/2 × 11
• 81/4 × 13
• 8 × 13
• 71/4 × 101/
• 16K
• Custom Paper Size
• Tray 1 supports custom size paper approximately 148 - 216 mm (5.83 - 8.5 inches) in width and
240 - 356 mm (9.45 - 14.01 inches) in length. When loading custom size paper in tray 1, be sure
to specify the custom size using both the control panel and the printer driver.
• Bypass Tray supports custom size paper approximately 90 - 216 mm (3.55 - 8.5 inches) in width
and 240 - 356 mm (9.45 – 14.01 inches) in length. When loading custom size paper on the bypass
tray, be sure to specify the custom size using the control panel or the printer driver.
• When duplex printing on 81/2 × 14 , 81/2 × 13 , 81/4 × 13 , 8 × 13 or custom size paper
longer than 297 mm (11.7 inches) , printing will be slower than usual.
Paper types supported by duplex printing function
• Plain
• Thin
• Middle Thick
• Coated (Glossy)
• Coated (Matted)
2
• Special 1
29

CBK520
CBK521
2. Printing Documents
2
• Special 2
• Color
• Preprinted
• Recycled
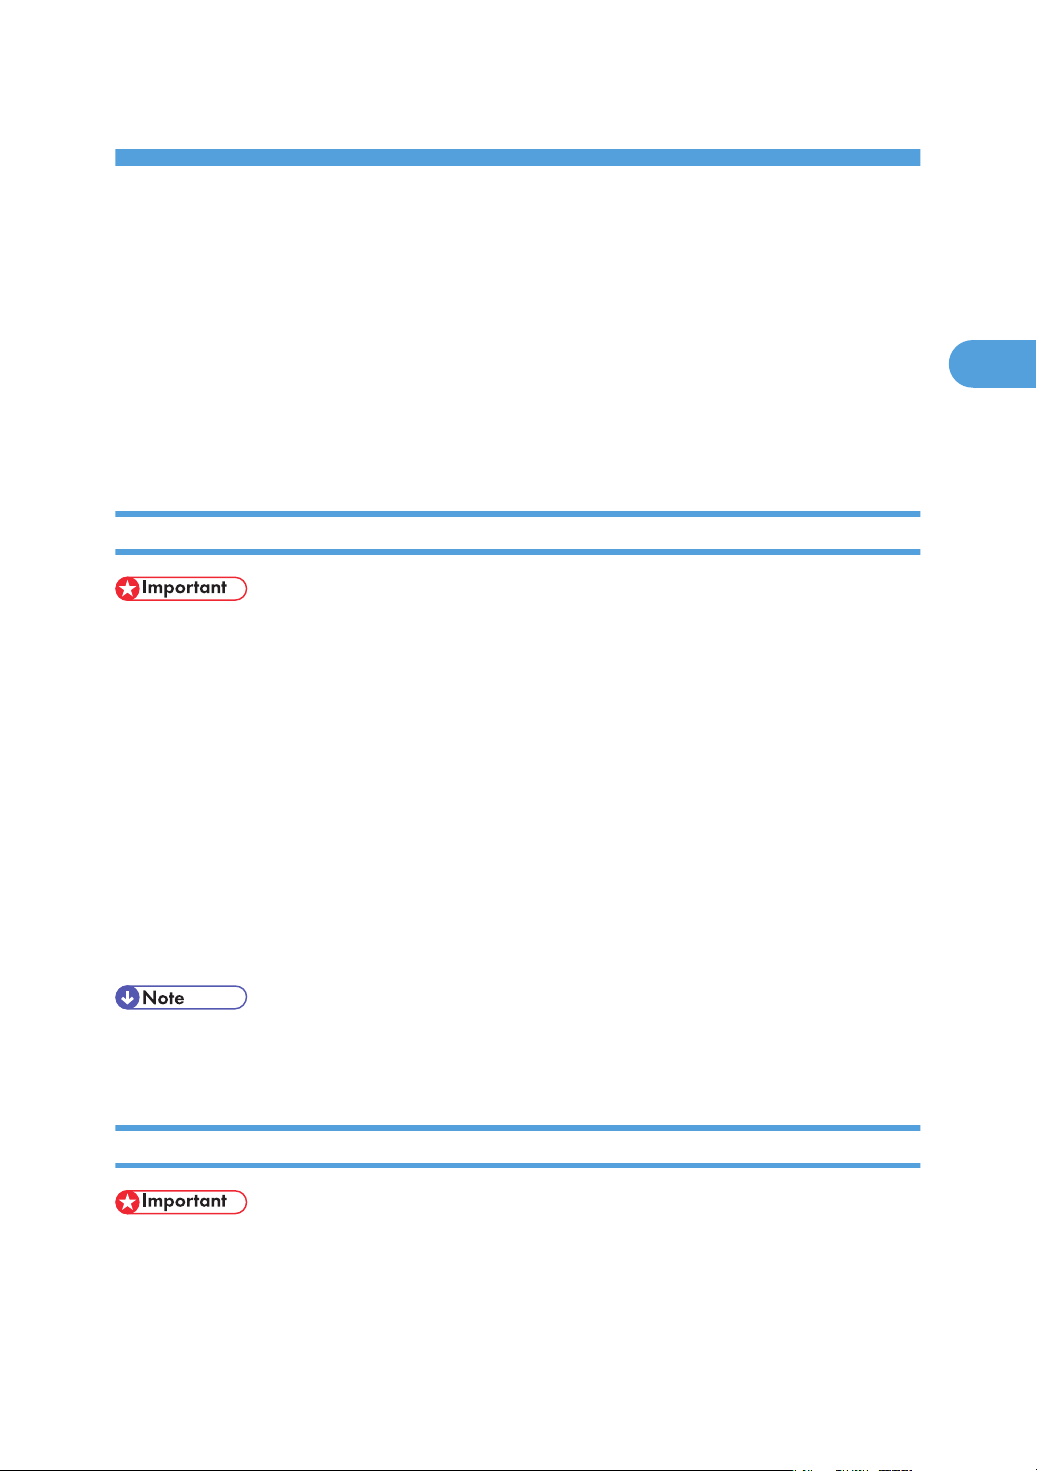
Types of duplex printing
This section explains the page binding methods available when using the duplex printing function. When
using the duplex printing function, you can select whether to bind pages by the left or top edge.
2 sided:
• Open to Left
• Open to Top
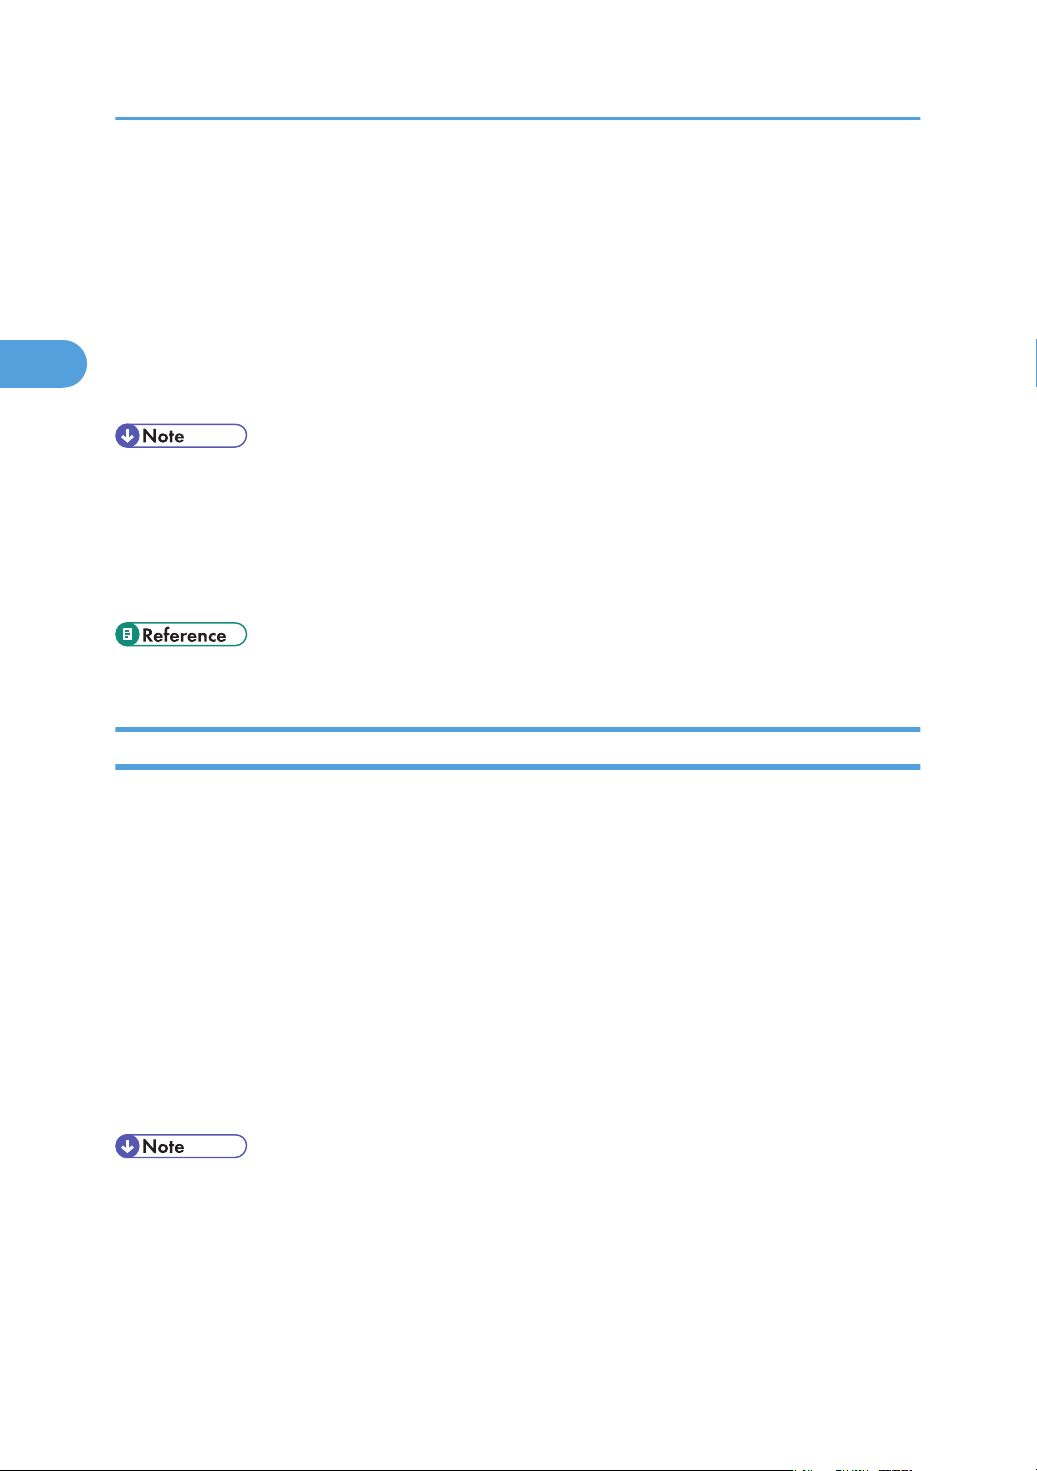
Types of booklet printing
This section explains the page binding methods available when using the booklet printing function. When
using the booklet printing function, you can select the direction to which the pages open.
Booklet:
• Magazine
30

CBK531
CBK532
Frequently Used Print Methods
2
When [Portrait] is selected in the [Orientation:] list in the printer properties dialog box. For details,
see the printer driver Help.
When [Landscape] is selected in the [Orientation:] list in the printer properties dialog box. For
details, see the printer driver Help.
• To specify booklet printing in the PCL 5c printer driver, select [Booklet] in the [Duplex:] list in the printer
properties dialog box.
Combining Multiple Pages into Single Page
This section explains how to print multiple pages onto a single sheet. The combine printing function allows
you to economize on paper by printing multiple sheets at reduced size onto a single sheet.
• The combine printing function is not available on a custom size paper. To use the combine printing
function, specify a standard size paper.
For the PCL 6 printer driver:
1. In the application, on the [File] menu, click [Print].
The [Print] dialog box appears.
31

2. Printing Documents
2
2. Select the printer, and then open the [Printing Preferences] dialog box in the document's
native application.
The [Printing Preferences] dialog box appears.
3. To use an existing One Click Presets, click the [One Click Presets] tab, and then click the
icon in the [One Click Preset List:] box.
If you do not wish to modify a custom setting that is already registered in the printer driver, change
settings such as paper size and source tray as required, and then proceed to step 9.
4. Click the [Detailed Settings] tab.
5. In the [Menu:] box, click the [Edit] icon.
6. In the [Layout:] list, select the combination pattern.
7. Change any other print settings if necessary.
8. To save current setting in the One Click Preset List, click [Register Current Settings...].
Enter a name and comment that describe the setting, and then click [OK]. The newly registered
icon appears in the [One Click Preset List:] area.
9. Click [OK] to close the Printing Preferences dialog box.
10. Print the document using the print function in the document's native application.
For the PCL 5c printer driver:
1. In the application, on the [File] menu, click [Print].
The [Print] dialog box appears.
2. Select the printer, and then open the [Printing Preferences] dialog box in the document's
native application.
The [Printing Preferences] dialog box appears.
3. In the [Layout:] list, select the combination pattern.
4. Change any other print settings if necessary.
5. Click [OK] to close the Printing Preferences dialog box.
6. Print the document using the print function in the document's native application.
• If the document contains pages with different original sizes, page breaks may occur.
• If the application you are using also has a combine function, disable it. If the application's combine
function is also enabled when the driver's combine function enabled, incorrect printing is likely.
• For details about combining pages with different orientations and other advanced functions, see the
printer driver Help.
32

CBK522
CBK528
CBK527
Frequently Used Print Methods
2
Types of combine printing
This section explains the different methods of combine printing that are available. Combine printing allows
you to print 2, 4, 6, 9, or 16 pages at reduced size onto a single sheet and to specify a page ordering
pattern for the combination. For 2 pages per sheet combine, you can select from two patterns. When
combining 4 or more pages onto a single sheet of paper, four patterns are available. The following
illustrations show example page ordering patterns for 2- and 4-page combinations.
2 Pages per Sheet
• From Left to Right/Top to Bottom
• From Right to Left/Top to Bottom
33

CBK528
CBK523
CBK524
2. Printing Documents
2
When using the PCL 5c printer driver, select one of the following four patterns:
[Right, then Down], [Left, then Down], [Down, then Right], [Down, then Left]
4 Pages per Sheet
• Right, then Down
34
• Left, then Down
• Down, then Right

CBK525
• Down, then Left
CBK526
2
Frequently Used Print Methods
35

2. Printing Documents
2
Advanced Printing
This section explains the printer's advanced printing functions.
Other than the functions that can be configured in the [One Click Presets] tab, various print functions can
be setup from each [Menu:] icon in the [Detailed Settings] tab. The settings for each function described in
this section can be changed by using the following menus.
Using the PCL6 printer driver as an example, the following procedure explains how to configure the printer's
advanced printing functions.
Menu Names and Brief Overview of Each Function
The following is an overview of the settings that are available on the [Basic], [Paper], and [Effects] menus.
[Basic] menu
You can specify the type of the paper you want to print on.
• Document Size:
If the printer's trays do not contain paper matching the settings of the print job, you can proceed
with printing by using the bypass tray.
For details about this function, see "Specifying Printer Driver or Print Command Priority".
[Paper] menu
You can enable/disable the cover and slip sheets function.
• Paper Type:
You can specify the type of the paper you want to print on. If the printer's trays do not contain
paper matching the settings of the print job, you can proceed with printing by using the bypass
tray.
For details about this function, see "Specifying Printer Driver or Print Command Priority".
• Front Cover
Using this function, you can insert cover sheets fed from a different tray to that of the main paper,
and print on them. For details, see "Printing on Cover Sheet".
• Slip Sheet
Using this function, you can insert slip sheets fed from a different tray to that of the main paper,
and print on them. For details, see "Inserting Slip Sheets".
[Effects] menu
You can enable/disable the Watermark function.
The Watermark function prints text under the main content of every page of a document. For details
about this function, see "Printing with Watermarks".
36

Advanced Printing
2
• For details about the menu items not explained in this section, see the printer driver Help.
• p.37 "Specifying Printer Driver or Print Command Priority"
• p.39 "Printing on Cover Sheet"
• p.40 "Inserting Slip Sheets"
• p.41 "Printing with Watermarks"
Specifying Printer Driver or Print Command Priority
If you select [Any Size/Type] or [Any Custom Size/Type] for [Bypass Tray] in [Tray Setting Priority] under
[Print Settings] using the control panel, you can print onto a specified paper without changing or confirming
the paper settings for print jobs.
If the printer's trays do not contain paper matching the settings of the print job, you can proceed with printing
by applying the paper settings specified in the print job to paper fed from the bypass tray. You do not need
to change the paper settings using the control panel, even if you frequently use paper of different sizes, or
if you are printing onto an unusual type of paper.
• To continue printing from the bypass tray onto all paper sizes, select [Any Size/Type] for [Bypass
Tray] in [Tray Setting Priority] under [Print Settings]. To continue printing from the bypass tray onto
custom size paper only, select [Any Custom Size/Type] for [Bypass Tray] in [Tray Setting Priority]
under [Print Settings]. For details about each setting on the Print Settings menu, see "Print Settings
Menu".
• Select [Auto Tray Select] in the printer driver. If [Auto Tray Select] is specified when a job is sent to
the printer, the matching tray will be detected in the order specified in [Tray Priority] under [Paper
Input]. If you select [Bypass Tray] for [Tray Priority], paper will always be fed from the bypass tray,
as long as paper is loaded there. For details about printer driver settings, see "Menu Names and Brief
Overview of Each Function". For details about the [Tray Priority] setting, see "Paper Input Menu
Parameters".
If you select [Any Size/Type] or [Any Custom Size/Type] for the bypass tray, jobs will be printed in the
following manner.
Any Size/Type
If the printer's trays do not contain paper matching the settings of the print job, printing can proceed
from the bypass tray with the job's settings applied.
37

CBK507
CBK508
2. Printing Documents
2
Any Custom Size/Type
If the printer's trays do not contain paper matching the settings of the print job but custom paper was
specified using the printer driver or by print command, printing can proceed from the bypass tray with
the job's settings applied.
38
• When this function is enabled, printing may be slower than usual.
• If paper is not loaded in the bypass tray when a job is received, a message prompting you to load
paper will appear on the control panel. When this message appears, load paper of the indicated
size and type print side down on the bypass tray.

CBK512
CBK513
CBK529
Advanced Printing
2
• p.37 "Specifying Printer Driver or Print Command Priority"
• p.105 "Paper Input Menu"
• p.127 "Print Settings Menu"
Printing on Cover Sheet
Using this function, you can insert cover sheets fed from a different tray to that of the main paper, and print
on them.
• To use this function, Collate must be set.
Prints the first page of the document on the sheet for the cover page.
Print on one side
Prints on one side of the cover sheet only, even when duplex printing is selected.
Print on both sides
Prints on both sides of the cover sheet when duplex printing is selected.
• Cover sheet printed on both sides
• Cover sheet printed on one side
39

CBK537
CBK538
CBK517
2. Printing Documents
2
Blank
• When printing one side
• When printing both side
• The cover sheets should be the same size and orientation as the body of the paper.
• If "Auto Tray Select" is set for the body paper feed tray, body paper will be delivered from a tray that
contains paper set in portrait orientation. Therefore, if the cover paper is set to landscape orientation,
the orientation of the cover and body paper will be different.
• For printing methods, see the printer driver Help.
Inserting Slip Sheets
Inserting a slip sheet between each page
• Print
• Blank
40

CBK515
Advanced Printing
2
• Collate cannot be set when using slip sheets.
• When the duplex printing or cover printing is set, you cannot insert slip sheets.
• The slip sheet should be the same size and orientation as the body paper.
• If "Auto Tray Select" has been set as the paper feed tray for the body paper, the paper will be delivered
from a tray containing paper in orientation. Therefore, when the slip sheet has been set to
orientation, the orientation of the output slip sheet and body paper will be different.
• The same paper feed tray cannot be set for the body of the document and slip sheets.
Printing with Watermarks
Using this function, you can print documents with text watermarks.
This function increases a document's security and identifiability by embedding a specified text (watermark)
on every page. You can specify only one type of watermark at a time.
• You can create and apply custom watermarks. For details about creating original watermarks, see
the printer driver Help.
Types of watermarks
This section explains the types of watermarks available.
Following are the pre-registered text watermarks that are available:
• COPY
41

CBK501
CBK502
CBK503
CBK504
2. Printing Documents
2
• URGENT
• CONFIDENTIAL
• DRAFT
42

• ORIGINAL
CBK505
2
Advanced Printing
43

CBK511
2. Printing Documents
2
Collate Function
This section explains the printer's Collate function.
The Collate function allows you to print while sorting printouts into page-ordered sets, such as when printing
multiple copies of meeting materials.
• Up to 150 pages can be stored in the printer's RAM. If the hard disk is installed, up to 1,000 pages
can be stored.
Output can be assembled as sets in sequential order.
• Collate will be canceled if "Auto Continue" is specified during printing of the first set.
• Collate will be canceled if an error occurs during printing of the first set.
44

Spool Printing
2
Spool Printing
Spool Printing allows print jobs transferred from a computer to be temporarily stored, and then prints them
after they are transferred. This shortens printing time as it maximizes printer efficiency.
With Spool Printing, the print data is saved in the hard disk before printing. To use this function, set it from
the menu. See UNIX Supplement.
• This function is available only if the hard disk is installed on the printer.
• Use the "spoolsw clear job" telnet command to clear a spooled print job. Do not turn off the printer
or computer while a print job is being spooled and the Data In is flashing. Print jobs that are interrupted
in this way remain on the printer's hard disk and will finish printing out when the printer is turned back
on.
• The Spool Printing function is available for data received using "diprint", "lpr", "ipp", "ftp", "sftp (TCP/
IP (IPv6))" , and "wsd (printer)".
• When using diprint, the Spool Printing function cannot be used with bi-directional communication.
• The domain reserved for spool printing is about 1 GB.
• When Spool Printing is on, the size of a single print job cannot exceed 500 MB.
• When receiving jobs from multiple computers, the printer can spool a maximum of ten lpr jobs, and
only one "diprint", "ipp", "ftp", "sftp", "smb" , or "wsd (printer)" job. If the printer's spooling capacity
is exceeded, newer jobs cannot be printed. You must wait before sending further jobs.
• Printing the first page with Spool Printing will be slow.
• The computer requires less print processing time when large amounts of data are spooled.
• Stored spool jobs can be viewed or deleted using Web Image Monitor.
• The list of spool jobs cannot be viewed from the printer's control panel.
• For information about the "spoolsw clear job" command on the telnet, see UNIX Supplement.
Setting Spool Printing
Spool printing settings can be made using control panel or telnet or Web Image Monitor.
• Using control panel
In [System] menu, select [On] in [Spool Printing].
• Using Web Image Monitor
In [System] on the [Configuration] menu, click [Active] in [Spool Printing].
• Using telnet
45

2. Printing Documents
2
Enter "spoolsw spool on".
• For details about control panel, see "System Menu".
• For details about Web Image Monitor, see Web Image Monitor Help.
• For details about "Using telnet", see UNIX Supplement.
• p.120 "System Menu"
Viewing or Deleting Spooled Jobs Using Web Image Monitor
Follow the procedure below to check or delete spooled jobs using Web Image Monitor.
1. Open a Web browser.
2. Enter "http://(printer's IP address)/" in the address bar to access the printer whose settings
you want to change.
Top Page of Web Image Monitor appears.
3. Click [Login].
The window for entering the login user name and password appears.
4. Enter the login user name and password, and then click [Login].
Contact your administrator for information about the settings.
5. In the menu area, click [Job].
A submenu will appear.
6. On the [Printer] menu, click [Spool Printing].
A list of spooled jobs appears.
7. To delete a job, select the check box of the job you want to delete, and then click [Delete].
The selected job is deleted.
8. Click [Logout].
9. Quit Web Image Monitor.
• For details about Web Image Monitor, see Web Image Monitor Help.
46

Printing a PDF File Directly
2
Printing a PDF File Directly
This section explains how to print PDF files directly without having to open a PDF application by using
DeskTopBinder or UNIX commands.
Using DeskTopBinder
This section explains how to print PDF files directly without having to open a PDF application by using
DeskTopBinder. To use this function, you must first download DeskTopBinder from the manufacturer's
Website and install it on your computer. Contact your local dealer for information on downloading
DeskTopBinder.
• This function is possible for genuine Adobe PDF files only.
• Version 1.2, 1.3, 1.4, 1.5 and 1.6 PDF files are compatible.
• PDF files created using Public-Key authentication of PDF version 1.5 Crypt Filter function cannot be
printed.
• To print a document that contains data using the transparency function data, the optional memory
unit must be installed. However, the operation might still fail, depending on the data contained in the
document. If this happens, use the printer driver to print the document.
• To print a document that contains transparency function data, the optional hard disk must be installed.
If it is not, transparent area data might not print out correctly.
• PDF files created using the color separation specification function cannot be printed.
• PDF files created using the trapping specification function cannot be printed.
• PDF files created using the OPI (Open Prepress Interface) specification function cannot be printed.
• PDF files created using the “content with marks” function cannot be printed.
• Large PDF files might not be printable using the PDF direct print function.
• Paper size errors may occur when printing on custom size paper.
Expanding DeskTopBinder features
This section explains how to extending the features of DeskTopBinder.
To extend a feature, click on its icon in the [Type:] list.
The following procedure explains how to use the extended features Wizard to print PDF files directly.
47

2. Printing Documents
2
1. On the [Start] menu, point to [All Programs], [DeskTopBinder], and then click [Extended
Features Wizard].
The [Extended Features Wizard] dialog box appears.
2. Select [Easy settings], then click [Start] and then, click [Next] repeatedly until the [Printing
Function2] dialog box appears.
If you have selected [All function settings], click [Start], and then click the [Output] icon in the [Type:]
list. Select [PDF Direct Print] in [Selectable function(s):], and then click [Add].
3. In the [Printing Function2] dialog box, click [Add...].
The [PDF Direct Print Properties] dialog box appears.
4. Select the printer's name, and then click [OK].
The [PDF Direct Print Properties] dialog box closes.
5. Click [Specify...], and then enter the IP address or host name of the printer.
6. Click [Next] repeatedly until [Finish] appears.
7. Click [Finish].
Function palette
The Function Palette contains buttons for functions that are already configured through expanded
DeskTopBinder functions. Using these buttons, you can print Windows files, preview printouts, convert
images, and register scanners for documents without having to open DeskTopBinder. You can also use
these functions simply by dragging a target file to the button corresponding to the required function and
dropping it there.
1. On the [Start] menu, point to [All Programs], [DeskTopBinder], and then click [Function
Palette].
An icon for the Function palette is added to the task tray displayed at the bottom right of the screen.
2. Right-click the new icon that has been added to the task tray, and then click [Properties...].
The [Properties] dialog box appears.
3. Click the [Contents] tab, select the [PDF Direct Print] check box at the center, and then click
[OK].
The [Properties] screen closes and the [PDF Direct Print] icon is added to the palette.
PDF Direct Printing Using Function Palette
Follow the procedure below to print PDF files directly.
48

1
2
3
4
5
6
7
8
9
10
15
11
12
13
14
CBK506
Printing a PDF File Directly
2
1. Drag the PDF file you want to print to the PDF Direct Printing icon on the Function Palette and
drop it there.
The [Output File List - PDF Direct Print] dialog box appears.
2. Highlight the PDF file you want to print, and then click [OK].
The PDF file is printed.
PDF Direct Print Properties
1. Setting name:
Displays the plug-in configuration name (up to 63 single byte characters)
2. Change Icon...
Changes the icon displayed on the tool bar.
3. Printer:
Displays printer's IP address or hostname.
4. Duplex
Prints on both sides of sheets.
5. Layout
Prints multiple pages on a single sheet.
6. Punch (not supported for this printer)
Punches holes in printed sheets.
7. Staple (not supported for this printer)
Staples together printed sheets.
8. Display this dialog box before printing
Appears in PDF direct printing mode if this check box is selected.
49

2. Printing Documents
2
9. Orientation:
Specify the original's orientation.
10. Number of copies
Specify the number of copies to print.
11. Collate
Sorts printed sheets.
12. Range:
Specify which paper to print.
13. Printout paper size:
Specify the paper size you want copies to be printed onto.
14. Color/Black and White:
Specify color or black-and-white printing.
15. Resolution:
Specify a print resolution.
Using Commands to Print
This section explains how to print PDF files directly using printing commands, such as "lpr", "rcp", "ftp", and
"sftp".
Sending a PDF file
Use the following procedure to send a PDF file to this printer using printing commands.
Following is an example when using the "lpr" command to print a PDF file by specifying the printer's IP
address.
c:\> lpr -S printer's IP address -P printer name [-o l] \path\ PDF file name
• Entering the text enclosed in brackets [ ] is optional.
• For details about printing PDF files directly, see UNIX Supplement.
Entering the PDF password
Use the following procedure to print a password protected PDF file directly.
To print a PDF file that is protected by a password, enter the password using the control panel, Web Image
Monitor, or the PJL command. When the password is entered using the PJL command, the password entered
using the control panel or Web Image Monitor is ignored.
50

Printing a PDF File Directly
2
Using the PJL command
To enter the password for a password protected PDF file, use the following command and value in
conjunction with the PJL command.
• Command: SET
• Value: PDFPASSWORD
• Example: @PJL SET PDFPASSWORD=the PDF password
Up to 32 ASCII characters (0x20 - 0x7E (Except 0x22)) can be entered as the PDF password.
Using the Control Panel
To enter a PDF password using the control panel, select [Change PDF Password] on [PDF Menu]
under [Print Settings].
Using Web Image Monitor
To enter the PDF password using Web Image Monitor, select [Set Password], and then set [PDF
Temporary Password].
51

2. Printing Documents
2
Specifying the Classification Code for a Print Job
When printing in an environment where classification codes are required, a classification code must be
specified for each print job.
• The PostScript 3 printer driver does not support the classification codes and it cannot be used to print
under environment which the classification codes are required.
For the PCL 6 printer driver:
1. In the application, on the [File] menu, click [Print].
The [Print] dialog box appears.
2. Select the printer, and then open the [Printing Preferences] dialog box in the document's
native application.
The [Printing Preferences] dialog box appears.
3. Click the [Detailed Settings] tab.
4. In the [Menu:] box, click the [Job Setup] icon.
5. Enter the classification code in the [Classification Code:] box, and then click [OK].
This code identifies the user. The classification code can contain up to 32 alphanumeric (a-z, A-Z,
0-9, "-") characters.
6. Make any other necessary print settings, and then click [OK].
7. A confirmation message appears. Read it, and then click [OK].
8. Execute the print command.
9. The print job is sent to the printer.
For the PCL 5c printer driver:
1. In the application, on the [File] menu, click [Print].
The [Print] dialog box appears.
2. Select the printer, and then open the [Printing Preferences] dialog box in the document's
native application.
The [Printing Preferences] dialog box appears.
3. Click the [Valid Access] tab.
4. Enter the classification code in the [Classification Code:] box.
This code identifies the user. The classification code can contain up to 32 alphanumeric (a-z, A-Z,
0-9, "-") characters.
5. Make any other necessary print settings, and then click [OK].
52

Specifying the Classification Code for a Print Job
2
6. A confirmation message appears. Read it, and then click [OK].
7. Execute the print command.
8. The print job is sent to the printer.
• The specified classification code is stored in the printer driver.
• To switch between different classification codes, install the printer driver under different names, and
specify different classification code for each driver.
• For details about how to view the log collected using Classification Code, see the manual for the
external log collection system.
53

2. Printing Documents
2
Using the Virtual Printer
This section explains virtual printer functions.
A virtual printer is a pseudo printer that can only be recognized on a network. The virtual printer has various
print options, such as feeding tray selection and duplex printing, which you can set in advance. You can
also use the interrupt printing function. This function suspends the ongoing job and gives priority to a new
job.
This function is available only if the hard disk is installed on the printer.
If you use the virtual printer under UNIX, Solaris, and other operating systems, various print functions are
possible without having you manually enter usual print commands.
Adding a Virtual Printer
Use this procedure to add a virtual printer.
• Adding a virtual printer requires Administrators privilege. Log in using an account that has
Administrators privilege.
• The following Virtual Printer protocols are available: "TCP/IP (Unspecified, Normal)", "TCP/IP
(Unspecified, Priority)", "TCP/IP (DIPRINT)", "TCP/IP (RHPP)", "AppleTalk", and "NetWare".
1. Log in to Web Image Monitor as an administrator.
For details about logging in, see "Access in the Administrator Mode".
2. In the menu area, click [Configuration], and then click [Virtual Printer Settings] in the "Printer"
category.
A list of the available virtual printers appears.
3. Click [Add].
The screen for adding virtual printers appears.
4. In [Virtual Printer Name], enter a name for the new printer, and then select the protocol in
the [Protocol] list.
5. Click [OK].
The virtual printer is added.
• If you select [TCP/IP (DIPRINT)], [AppleTalk], or [NetWare] in the [Protocol] list, you cannot specify
a virtual printer name.
• You can specify a virtual printer name using up to 47 characters.
54

Using the Virtual Printer
2
• You can add up to 50 virtual printers. After 50 virtual printers have been added, [Add] will no longer
be displayed.
• p.155 "Access in the Administrator Mode"
Changing a Virtual Printer Configuration
Use this procedure to change a virtual printer configuration.
• You must have Administrators privilege to change the configuration of a virtual printer. Log in using
an account that has Administrators privilege.
1. Log in to Web Image Monitor as an administrator.
For details about logging in, see "Access in the Administrator Mode".
2. In the menu area, click [Configuration], and then click [Virtual Printer Settings] in the "Printer"
category.
A list of the available virtual printers appears.
3. Select the virtual printer whose configuration you want to change, and then click [Change].
If you want to configure this virtual printer for an interrupt printer, select [TCP/IP (Unspecified, Priority)]
in the protocol list.
4. Change the configuration as required.
5. Click [OK].
• For details about virtual printer configuration, see Web Image Monitor Help.
• p.155 "Access in the Administrator Mode"
Confirming a Virtual Printer Configuration
Use this procedure to confirm a virtual printer configuration.
1. Start Web Image Monitor.
2. In the menu area, click [Configuration], and then click [Virtual Printer Settings] in the "Printer"
category.
A list of available virtual printers appears.
55

2. Printing Documents
2
3. Select the virtual printer whose configuration details you want to confirm, and then click
[Details].
A configuration list for the selected virtual printer appears.
• [Details] is not displayed if you log in to Web Image Monitor as an administrator. To confirm a virtual
printer configuration, click [Change].
Deleting a Virtual Printer
Use this procedure to delete a virtual printer.
• You must have Administrators privilege to delete a virtual printer. Log in using an account that has
Administrators privilege.
1. Log in to Web Image Monitor as an administrator.
For details about logging in, see "Access in the Administrator Mode".
2. In the menu area, click [Configuration], and then click [Virtual Printer Settings] in the "Printer"
category.
The list of available virtual printers appears.
3. Select the virtual printer that you want to delete, and then click [Delete].
The delete confirmation screen appears.
4. Click [OK].
• You cannot delete this printer's default virtual printer.
• [Delete] appears only if you have already added a virtual printer.
• p.155 "Access in the Administrator Mode"
Printing Using a Virtual Printer
To print directly from a specified virtual printer, assign the virtual printer in the print command. If you use
the interrupt printing function, enter the name of the virtual printer that you configured for interrupt printing.
Before printing for the first time, specify the virtual printer you want to use.
1. Log in to Web Image Monitor as an administrator.
For details about logging in, see "Access in the Administrator Mode".
56

Using the Virtual Printer
2
2. In the menu area, click [Configuration], and then click [Basic Settings] in the "Printer"
category.
3. Select [Active] in [Virtual Printer], and then click [OK].
4. Send a command from your computer.
Following is an example when using the "lpr" command to print a file.
c:\> lpr -S printer's IP address -P virtual printer name [-o l] \path\file name
• When the ongoing job meets any of the following conditions, interrupt printing is not possible even if
you print with the virtual printer that is configured for interrupt printing. The printer waits to print a new
job until it finishes printing the current job.
• When the ongoing print job is performed using the bypass tray
• When a function related to cover or slip paper is specified for the ongoing print job
• If a large amount of memory is used for the ongoing print job or a large number of sheets are being
printed, there may not be enough memory to process an interrupt print job, or only part of the interrupt
job may be printed. If this happens, certain functions for the interrupt job, such as stapling or storing
data onto the printer, can be canceled or sheets can be sorted in a number smaller than the standard
maximum capacity.
• For details about printing PDF files directly, see UNIX Supplement.
• p.155 "Access in the Administrator Mode"
57

2. Printing Documents
2
If Errors Occur with the Specified Paper Size and Type
If the paper size or type specified for the print job does not match the paper loaded in the paper tray or
on the bypass tray, a message warning you of the mismatch will appear on the control panel. Resolve the
mismatch by following the instructions in the message.
Changing the Paper Tray Settings
Use the following procedure to change the paper size and type specified for a tray and continue printing.
1. On the warning screen, press [Change].
The [Paper Input] screen appears.
2. Press the [ ] or [ ] key to select the tray whose paper size setting you want to change, and
then press the [OK] key.
3. Press the [ ] or [ ] key to select the paper size you require, and then press the [OK] key.
The [Paper Input] screen appears.
4. Press the [ ] or [ ] key to select the tray whose paper type you want to change, and then
press the [OK] key.
5. Press the [ ] or [ ] key to select the paper type you require, and then press the [OK] key.
The [Paper Input] screen appears.
6. Press the [Escape] key
Printing starts if the selected tray contains paper matching the size and type settings specified in the
print job.
58

If Errors Occur with the Specified Paper Size and Type
2
Printing from a Selected Tray
If the printer does not have a tray for the selected paper size or paper type, or if the selected paper loaded
in the printer has run out, a caution message appears. If this message appears, do the following procedure.
1. When the caution message appears, press [FormFeed].
A confirmation message appears.
2. Press the [OK] key.
3. Select the tray for form feed using the [ ] or [ ] key from those that appear on the display
panel, and then press the [OK] key.
• If a tray with a smaller paper size is selected, the print job may be cut short, or other problems may
occur.
Canceling a Print Job
Follow this procedure for canceling the print job if the message prompting form feed appears.
1. Press [JobReset].
2. Press [Current].
59

2. Printing Documents
2
The confirmation message appears.
To resume printing jobs, press [Resume].
3. Press [Yes] to cancel the print job.
4. Press [No] to return to the previous display.
• If the printer is shared by multiple computers, be careful not to accidentally cancel someone else's
print job.
• Under Windows, If the printer is connected to the computer using a parallel cable, sent print jobs may
be canceled if the [Job Reset] key is pressed while "Please wait..." is displayed on the control panel.
After the interval set in [I/O Timeout] in [Host Interface] has passed, the next print job can be sent. A
print job sent from a different client computer will not be canceled in this case.
• You cannot stop printing data that has already been processed. For this reason, printing may continue
for a few pages after you press the [Job Reset] key.
• A print job containing a large volume of data may take considerable time to stop.
• To stop data printing, see "Canceling a Print Job".
• p.84 "Canceling a Print Job"
Proceeding with Printing Using the Bypass Tray
If you select [Any Size/Type] or [Any Custom Size/Type] for the bypass tray, a warning message will
appear whenever the paper fed from the source tray does not match the size specified in the print job.
When this warning message appears, check the size of the loaded paper and do the following.
1. Load paper of the size/type indicated in the message onto the bypass tray.
2. Press [Continue].
Printing resumes from the page in which the error occurred.
60

If Errors Occur with the Specified Paper Size and Type
2
• For details about [Any Size/Type] or [Any Custom Size/Type], see "Specifying Printer Driver or Print
Command Priority" and "Print Settings Menu".
• p.37 "Specifying Printer Driver or Print Command Priority"
• p.127 "Print Settings Menu"
61

2. Printing Documents
2
62

3. Printing Stored Documents
3
This chapter explains how to print documents stored in the printer.
Using the Print Job Function
This describes how to print or delete files stored in the printer. There are following types of print files: Sample
Print, Locked Print, Hold Print, and Stored Print.
Print files sent from computers can be stored in the hard disk of the printer. Using the Print Job function, you
can print or delete the print files.
• This function is available only if the hard disk is installed on the printer.
Print Job Screen
If you press [Prt.Jobs] on the initial screen, a screen prompting to select the type of print job appears.
After selecting a type, you can select print files in the list by pressing:
• [Job List]
Displays the Job List screen.
• [User ID]
Displays the User ID screen.
If you select Sample Print, Locked Print, or Hold Print, the print files saved in the printer are deleted after
printing is completed. If you select Stored Print, the files remain in the printer even after printing is finished.
63

CBK509
3. Printing Stored Documents
3
Job List Screen
1. The type of print jobs
Displays the type of the print job you select.
2. Page number
Displays the current page number. Each time pressing the [
3. User ID, Date/Time, and File Name display
• User ID shows the user's ID set by the printer driver.
• Date and Time show the time at which the print job was stored in the printer.
• File name shows the name of the file. However, "****" is shown instead of the file name for a Locked Print
file.
4. [Print]
Prints a selected file.
5. [Change]
Changes or clears the password of a file if a password is set. To change the password of a Locked/Stored Print
job, press [Change], enter the current password, and then enter the new password on the confirmation screen.
To clear the password, press [Change], leave the entering/confirming a new password box blank, and then
press the [OK] key.
You can also set passwords to the Stored Print files that do not currently have passwords.
6. [Delete]
Deletes a selected file.
] or [ ] key, the screen switches.
• When you press [Change] to change or clear a password, you must first enter the existing password.
If the password you entered is incorrect, you cannot change or clear any current passwords.
• You can use [Change] to set or clear passwords only when Stored Print files are stored in the printer.
64

User ID Screen
CBK510
3
1. The type of print jobs
Displays the type of the print job you select.
2. Page number
Displays the current page number. Each time pressing the [ ] or [ ] key, the screen switches.
3. User ID
• User ID shows the ID of the user who stored the selected type of files.
• User ID set by the printer driver is shown.
4. [PrintAll]
Prints all files stored by the user whose user ID has been selected.
5. [Job List]
Switches the screen to the [Job List] screen.
Displays the print jobs of the selected user only.
Using the Print Job Function
• To cancel selecting a file, press the [Job Reset] key.
• The display is not updated if a new file is stored while the list of stored files is displayed. To update
the display, press the [Menu] key to return to the initial screen, and then press [Prt.Jobs] again.
• If a large number of print jobs are stored in the printer, processing may slow temporarily, depending
on which functions are used.
• For details about printing each type of print job, see the followings:
• p.66 "Sample Print"
• p.69 "Locked Print"
• p.73 "Hold Print"
• p.76 "Stored Print"
65

3. Printing Stored Documents
3
Printing from the Print Job Screen
This section gives instruction about Sample Print, Locked Print, Hold Print, and Stored Print.
• This function is available only if the hard disk is installed on the printer.
Sample Print
Use this function to print only the first set of a multiple-set print job. After you have checked the result,
remaining sets can be printed or canceled using the printer's control panel. This can reduce misprints due
to mistakes in content or settings.
• A Sample Print file cannot be stored if:
• the hard disk is not installed in the printer.
• the total number of Sample Print, Locked Print, Hold Print, and Stored Print files in the printer is
over 100. (The maximum number varies depending on the volume of data in files.)
• the file contains over 1,000 pages.
• sent or stored files in the printer contain over 9,000 pages in total.
• If a Sample Print file has not been stored properly, check the error log in the control panel.
• Even after you turn off the printer, stored documents in the printer remain. However, the[ Auto Delete
Temporary Jobs] or [Auto Delete Stored Jobs] settings are applied first.
• If the application has a collate option, make sure it is not selected before sending a print job. By
default, Sample Print jobs are automatically collated by the printer driver. If a collate option is selected
from the application's Print dialog box, more prints than intended may be produced.
• If the first set of the Sample Print files is not as you expected and you do not want to print remaining
sets, delete the Sample Print file using the display panel. If you print the remaining sets of the Sample
Print file, the job in the printer is deleted automatically.
• Sample Print files printed or deleted using Web Image Monitor, after you select [Sample Print] using
the control panel will appear on the display panel. However, an error message will appear if you try
to print or delete those Sample Print files.
• If stored files have similar and long file names, recognizing the file you want to print on the display
panel may be difficult. Print the file you want to print either by checking the user ID or the time the file
is sent, or by changing the file name to something that can be recognized easily.
• For details about the error log in the display panel, see "Checking the Error Log".
66

Printing from the Print Job Screen
3
• For details about [Auto Delete Temporary Jobs] and [Auto Delete Stored Jobs], see "Maintenance
Menu".
• p.109 "Maintenance Menu"
• p.149 "Checking the Error Log"
Sending a Sample Print file
The following procedure describes how to print a Sample Print file with the PCL 6/PCL5c or PostScript 3
printer driver.
• Applications with their own drivers, such as PageMaker, do not support this function.
1. From an application, select a command to print.
The Print dialog box appears.
2. Select the printer you want to use in the [Name] list, and then click [Properties].
The printer properties dialog box appears.
3. In the [Job Type:] list, click [Sample Print].
4. Click [Details...], and then enter a user ID in the [User ID:] box.
This is used to identify the user. The user ID can contain up to eight alphanumeric characters (a-z, AZ, 0-9).
5. Execute a command to print.
Make sure to set more than two copies.
The Sample Print job is sent to the printer, and the first set is printed.
Printing a Sample Print file using the control panel
1. On the printer's control panel, press [Prt.Jobs].
67

3. Printing Stored Documents
3
2. Select [Sample Print Jobs] using the [ ] or [ ] key, and then press [Job List].
A list of Sample Print files stored in the printer appears.
Depending on the security settings, certain print jobs may not be displayed.
You can print files also by pressing [User ID].
3. Select the file you want to print using the [ ] or [ ] key, and then press [Print].
Enter the new number of sets. You can enter up to 999 sets.
Press the [Escape] key to correct any entry mistakes.
4. Press [Print].
The remaining sets are printed.
To cancel printing, press [Cancel].
• If the set quantity is changed when [User ID] is pressed in step 2, the changed quantity is applied to
all selected files.
• When printing is completed, the stored file will be deleted.
• To stop printing after printing has started, press the [Job Reset] key. The file will be deleted.
• For details about [User ID], see "Printing from the User ID Screen".
• p.81 "Printing from the User ID Screen"
Deleting Sample Print files
If you are not satisfied with the Sample printout, you can delete the Sample Print file, revise it and print it
again until the settings are suitable.
68

Printing from the Print Job Screen
3
1. Press [Prt.Jobs].
2. Select [Sample Print Jobs] using the [ ] or [ ] key, and then press [Job List].
A list of Sample Print files stored in the printer appears.
Depending on the security settings, certain print jobs may not be displayed.
3. Select the file you want to delete using the [ ] or [ ] key, and then press [Delete].
The delete confirmation screen will appear.
4. Press [Delete].
The selected file is deleted.
To cancel deleting, press [Cancel].
Locked Print
Use this function to maintain privacy when printing confidential documents on the printer over a shared
network. Usually, it is possible to print data using the display panel once it is stored in this printer. When
using Locked Print, it is not possible to print unless a password is entered on the printer's display panel.
Your confidential documents will be safe from being viewed by other people.
• A Locked Print file cannot be stored if:
• the hard disk is not installed in the printer.
• the total number of Sample Print, Locked Print, Hold Print, and Stored Print files in the printer is
over 100. (The maximum number varies depending on the volume of data in files.)
• the file contains over 1,000 pages.
69

3. Printing Stored Documents
3
• sent or stored files in the printer contain over 9,000 pages in total.
• If a Locked Print file has not been stored properly, check the error log in the control panel.
• Even after you turn off the printer, stored documents remain. However, the [Auto Delete Temporary
Jobs] or [Auto Delete Stored Jobs] settings are applied first.
• If the application has a collate option, make sure it is not selected before sending a print job. Locked
Print jobs are automatically collated by the printer driver as default. If a collate option is selected in
the application print dialog box, more sets than intended may be printed.
• After the Locked Print file is printed, the job is automatically deleted.
• Locked Print files printed or deleted using Web Image Monitor, after you select [Locked Print] using
the control panel will appear on the display panel. However, an error message will appear if you try
to print or delete those Locked Print files.
• For details about the error log in the display panel, see "Checking the Error Log".
• For details about [Auto Delete Temporary Jobs] and [Auto Delete Stored Jobs], see "Maintenance
Menu".
• p.109 "Maintenance Menu"
• p.149 "Checking the Error Log"
Sending a Locked Print file
The following procedure describes how to print a Locked Print file with the PCL 6/PCL 5c or PostScript 3
printer driver.
• Applications with their own drivers, such as PageMaker, do not support this function.
1. Configure the Locked Print in the printer driver's properties.
For details about configuring the printer drivers, see the corresponding Help files.
2. Start printing from the application's Print dialog box.
The Locked Print job is sent to the printer.
70

Printing from the Print Job Screen
3
Printing a Locked Print file using the control panel
1. On the printer's control panel, press [Prt.Jobs].
2. Select [Locked Print Jobs] using the [ ] or [ ] key, and then press [Job List].
A list of Locked Print files stored in the printer appears.
Depending on the security settings, certain print jobs may not be displayed.
You can print files also by pressing [User ID].
3. Select the file you want to print using the [
The password screen appears.
4. Enter the password, and then press the [OK] key.
The print confirmation screen appears.
A confirmation screen will appear if the password is not entered correctly. Press [Clear] to enter the
password again.
If you forget your password, contact your administrator for help.
5. Press [Print].
The remaining sets are printed.
] or [ ] key, and then press [Print].
To cancel printing, press [Cancel].
71

3. Printing Stored Documents
3
• When printing is completed, the stored file will be deleted.
• To stop printing after printing has started, press the [Job Reset] key. The file will be deleted.
• For details about [User ID], see "Printing from the User ID Screen".
• p.81 "Printing from the User ID Screen"
Deleting Locked Print files
1. Press [Prt.Jobs].
2. Select [Locked Print Jobs] using the [ ] or [ ] key, and then press [Job List].
72
A list of Locked Print files stored in the printer appears.
Depending on the security settings, certain print jobs may not be displayed.
3. Select the file you want to delete using the [ ] or [ ] key, and then press [Delete].
The password screen appears.
4. Enter the password, and then press the [OK] key.
The delete confirmation screen appears.

Printing from the Print Job Screen
3
A confirmation screen will appear if the password is not entered correctly. Press [Clear] to enter the
password again.
If you forget your password, contact your administrator for help.
5. Press [Delete].
The selected file is deleted.
To cancel deleting, press [Cancel].
Hold Print
Use this function to temporarily hold a file in the printer, and print it from the computer or the printer's control
panel later.
• A Hold Print file cannot be stored if:
• the hard disk is not installed in the printer.
• the total number of Sample Print, Locked Print, Hold Print, and Stored Print files in the printer is
over 100. (The maximum number varies depending on the volume of data in files.)
• the file contains over 1,000 pages.
• sent or stored files in the printer contain over 9,000 pages in total.
• If a Hold Print file has not been stored properly, check the error log in the control panel.
• Even after you turn off the printer, stored documents in the printer remain. However, the [Auto Delete
Temporary Jobs] or [Auto Delete Stored Jobs] settings are applied first.
• If the application has a collate option, make sure it is not selected before sending a print job. By
default, Hold Print jobs are automatically collated by the printer driver. If a collate option is selected
from the application's Print dialog box, more prints than intended may be produced.
• Hold Print files printed or deleted using Web Image Monitor, after you select [Hold Print] using the
control panel will appear on the display panel. However, an error message will appear if you try to
print or delete those Hold Print files.
• If stored files have similar and long file names, recognizing the file you want to print on the display
panel may be difficult. Print the file you want to print either by checking the user ID or the time the file
is sent, or by changing the file name to something that can be recognized easily. If you enter the
document name on the printer driver's [Details...], that name appears on the display panel.
• It is possible, but not required, to set a file name or a password to a Hold Print file.
• For details about the error log in the display panel, see "Checking the Error Log".
• For details about [Auto Delete Temporary Jobs] and [Auto Delete Stored Jobs], see "Maintenance
Menu".
73

3. Printing Stored Documents
3
• p.109 "Maintenance Menu"
• p.149 "Checking the Error Log"
Sending a Hold Print file
The following procedure describes how to print a Hold Print file with the PCL 6/PCL 5c or PostScript 3
printer driver.
• Applications with their own drivers, such as PageMaker, do not support this function.
1. Configure Hold Print in the printer driver's properties.
For details about configuring the printer drivers, see the relevant Help files.
2. Click [Details...], and then enter a user ID in the [User ID:] box.
You can also set a file name. The file name you set will be displayed on the printer's Job List screen.
3. Start printing from the application's Print dialog box.
The Hold Print job is sent to the printer and stored.
Printing a Hold Print file using the control panel
1. On the printer's control panel, press [Prt.Jobs].
2. Select [Hold Print Jobs] using the [ ] or [ ] key, and then press [Job List].
A list of Hold Print files stored in the printer appears.
Depending on the security settings, certain print jobs may not be displayed.
You can print files also by pressing [User ID].
74

Printing from the Print Job Screen
3
3. Select the file you want to print using the [ ] or [ ] key, and then press [Print].
The confirmation screen appears.
4. Press [Print].
The Hold Print file is printed.
To cancel printing, press [Cancel].
• When printing is completed, the stored file will be deleted.
• To stop printing after printing has started, press the [Job Reset] key. The file will be deleted.
• For details about setting printer drivers, see the printer driver Help. You can also print or delete a Hold
Print file from Web Image Monitor. For details, see Web Image Monitor Help.
• For details about [User ID], see "Printing from the User ID Screen".
• p.81 "Printing from the User ID Screen"
Deleting Hold Print files
1. Press [Prt.Jobs].
2. Select [Hold Print Jobs] using the [ ] or [ ] key, and then press [Job List].
A list of Hold Print files stored in the printer appears.
Depending on the security settings, certain print jobs may not be displayed.
75

3. Printing Stored Documents
3
3. Select the file you want to delete using the [ ] or [ ] key, and then press [Delete].
The confirmation screen appears.
4. Press [Delete].
The selected file is deleted.
To cancel deleting, press [Cancel].
Stored Print
Use this function to store a file in the printer, and then print it from the computer or the printer's control panel
later.
Jobs are not deleted after they are printed, so the same job need not be resent in order to print multiple
copies.
• A Stored Print file cannot be stored if:
• the hard disk is not installed in the printer.
• the total number of Sample Print, Locked Print, Hold Print, and Stored Print files in the printer is
over 100. (The maximum number varies depending on the volume of data in files.)
• the file contains over 1,000 pages.
• sent or stored files in the printer contain over 9,000 pages in total.
• If a Stored Print file has not been stored properly, check the error log in the control panel.
• Even after you turn off the printer, stored documents in the printer remain. However, the [Auto Delete
Temporary Jobs] or [Auto Delete Stored Jobs] settings are applied first.
• If the application has a collate option, make sure it is not selected before sending a print job. By
default, Stored Print jobs are automatically collated by the printer driver. If a collate option is selected
from the application's Print dialog box, more prints than intended may be produced.
• Stored Print files printed or deleted using Web Image Monitor, after you select [Stored Print] using
the control panel will appear on the display panel. However, an error message will appear if you try
to print or delete those Stored Print files.
76

Printing from the Print Job Screen
3
• If stored files have similar and long file names, recognizing the file you want to print on the display
panel may be difficult. Print the file you want to print either by checking the user ID or the time the file
is sent, or by changing the file name to something that can be recognized easily.
• If you enter the document name on the printer driver's [Details...], that name appears on the display
panel.
• For details about the error log in the display panel, see "Checking the Error Log".
• For details about [Auto Delete Temporary Jobs] and [Auto Delete Stored Jobs], see "Maintenance
Menu".
• p.109 "Maintenance Menu"
• p.149 "Checking the Error Log"
Sending a Stored Print file
The following procedure describes how to print a Stored Print file with the PCL 6/ PCL 5c or PostScript 3
printer driver.
• Applications with their own drivers, such as PageMaker, do not support this function.
1. Configure the Stored Print in the printer driver's properties.
You can select two ways for Stored Print:
• [Stored Print]
Stores the file in the printer and print it later using the control panel.
• [Store and Normal Print] (or [Store and Print])
Prints the file at once and also stores the file in the printer.
For details about configuring the printer drivers, see the relevant Help files.
2. Click [Details...], and then enter a user ID in the [User ID:] box.
You can also set a password. The same password must be entered when printing or deleting.
You can also set a file name. The file name you set will be displayed on the printer's Job List screen.
3. Start printing from the application's Print dialog box.
The Stored Print job is sent to the printer.
77

3. Printing Stored Documents
3
Printing a Stored Print file using the control panel
1. On the printer's control panel, press [Prt.Jobs].
2. Select [Stored Print Jobs] using the [ ] or [ ] key, and then press [Job List].
A list of Stored Print files stored in the printer appears.
You can print files also by pressing [User ID].
3. Select the file you want to print using the [ ] or [ ] key, and then press [Print].
78
The confirmation screen appears.
If you set a password in the printer driver, a password confirmation screen appears. Enter the
password.
If you want to print multiple copies, specify a number of sets in the [Copies:] box.
4. Press [Print].
The Stored Print file is printed.
To cancel printing, press [Cancel].
• When multiple files are selected without setting a quantity, one set less than the minimum number of
all settings is applied. If the least number of settings is one set, all selected files will be printed at one
set.
• If the number of set quantity is changed when [User ID] is pressed in step 2, the changed quantity is
applied to all selected files.
• To stop printing after printing has started, press the [Job Reset] key. A Stored Print file is not deleted
even if the [Job Reset] key is pressed.

Printing from the Print Job Screen
3
• The Stored Print file that sent to the printer is not deleted unless you delete a file or select [Auto Delete
Stored Jobs].
• You can set or delete a password after sending files to the printer. Select the file and press [Change]
in the Print Job List screen. To set a password, enter the new password. To delete the password, leave
the password box blank on entering or confirming the new password, and press the [OK] key.
• For details about the [Auto Delete Stored Jobs], see "Maintenance Menu".
• For details about [User ID], see "Printing from the User ID Screen".
• p.81 "Printing from the User ID Screen"
• p.109 "Maintenance Menu"
Deleting Stored Print files
1. Press [Prt.Jobs].
2. Select [Stored Print Jobs] using the [ ] or [ ] key, and then press [Job List].
A list of Stored Print files stored in the printer appears.
Depending on the security settings, certain print jobs may not be displayed.
3. Select the file you want to delete using the [ ] or [ ] key, and then press [Delete].
The delete confirmation screen will appear.
If you set the password in the printer driver, enter the password to delete.
If you forget your password, contact your administrator for help.
79

3. Printing Stored Documents
3
4. Press [Delete].
The selected file is deleted.
To cancel deleting, press [Cancel].
80

Printing from the User ID Screen
3
This describes how to print the files saved in the printer from the User ID screen.
Printing the Selected Print Job
1. On the initial screen, press [Prt.Jobs].
2. Press [User ID].
Printing from the User ID Screen
A list of user IDs whose files are stored in the printer appears.
3. Select the user ID whose file you want to print using the [ ] or [ ] key, and then press [Job
List].
The print job list of the selected user ID appears.
4. Select the file you want to print using the [ ] or [ ] key, and then press [Print].
The confirmation screen appears.
5. Press [Print].
The selected file is printed.
To cancel printing, press [Cancel].
81

3. Printing Stored Documents
3
• If you print a Sample, Locked, or Hold Print file, the print file saved in the printer is deleted after printing
is completed.
• For details about printing each type of print job, see the followings:
• p.66 "Sample Print"
• p.69 "Locked Print"
• p.73 "Hold Print"
• p.76 "Stored Print"
Printing All Print Jobs
1. On the initial screen, press [Prt.Jobs].
2. Select a type of print jobs you want to print using the [ ] or [ ] key, and then press [User
ID].
A list of user IDs whose files are stored in the printer appears.
3. Select the user ID whose file you want to print using the [ ] or [ ] key, and then press
[PrintAll].
The confirmation screen appears.
4. Press [Print].
The selected files are printed.
To cancel printing, press [Cancel].
82

Printing from the User ID Screen
3
• If you print a Sample, Locked, or Hold Print file, the print file saved in the printer is deleted after printing
is completed.
• You cannot select a print job that is not stored under the selected user ID.
• When printing multiple Sample Print files without specifying the number of sets on the confirmation
screen, one set less than the least number of set specified on the computer is applied for every selected
document. If the number of sets specified on the computer is "1", one set each is printed for every
document.
• When printing multiple Stored Print files without specifying the number of sets on the confirmation
screen, the least number of set specified on the computer is applied for every selected document.
• If you select [Locked Print Jobs], enter the correct password. If there are multiple passwords, the printer
prints only files that correspond to the entered password.
• If you select Stored Print files, and some of these require a password, the printer prints files that
correspond to the entered password and files that do not require a password.
• For details about printing each type of print job, see the followings:
• p.66 "Sample Print"
• p.69 "Locked Print"
• p.73 "Hold Print"
• p.76 "Stored Print"
83

3. Printing Stored Documents
3
Canceling a Print Job
You can cancel printing from either the printer or a client computer. Since canceling procedures vary
depending on the print job status, check the job status and cancel printing according to the following
procedure.
Canceling a Print Job Using the Control Panel
1. Press [JobReset].
A confirmation message appears.
2. Press [Current].
To resume printing jobs, press [Resume].
3. Press [Yes] to cancel the print job.
Press [No] to return to the previous display.
Windows - Canceling a Print Job from the computer
You can cancel a print job from the computer if transferring print jobs is not completed.
1. Double-click the printer icon on the Windows task tray.
A window appears, showing all print jobs currently queued for printing. Check the current status of
the job you want to cancel.
2. Select the name of the job you want to cancel.
3. On the [Document] menu, click [Cancel].
• If the printer is shared by multiple computers, be careful not to accidentally cancel someone else's
print job.
84

Canceling a Print Job
3
• If the printer is connected to the computer using a parallel cable, sent print jobs may be canceled if
[JobReset] is pressed while "Please wait..." is displayed on the control panel. After the interval set in
[I/O Timeout] in Printer Features has passed, the next print job can be sent. A print job sent from a
different client computer will not be canceled in this case.
• You cannot stop printing data that has already been processed. For this reason, printing may continue
for a few pages after you press [JobReset].
• A print job containing a large volume of data may take considerable time to stop.
Mac OS X - Canceling a Print Job from the computer
1. Click the printer icon on the dock.
A window appears showing all print jobs that are currently queuing to be printed. Check the current
status of the job you want to cancel.
2. Select the name of the job you want to cancel.
3. In the application, on the [Jobs] menu, click [Delete Job].
• If the printer is shared by multiple computers, be careful not to accidentally cancel someone else's
print job.
• If the printer is connected to the computer using a parallel cable, sent print jobs may be canceled if
[JobReset] is pressed while "Please wait..." is displayed on the control panel. After the interval set in
[I/O Timeout] in Printer Features has passed, the next print job can be sent. A print job sent from a
different client computer will not be canceled in this case.
• You cannot stop printing data that has already been processed. For this reason, printing may continue
for a few pages after you press [JobReset].
• A print job containing a large volume of data may take considerable time to stop.
85

3. Printing Stored Documents
3
86

4. Direct Printing from a Digital Camera
CBK094
4
(PictBridge)
This chapter explains how to print directly from a digital camera.
What is PictBridge?
You can connect a PictBridge-compatible digital camera to this printer using a USB cable. This allows you
to print photographs taken using the digital camera directly by operating the digital camera.
• Check your digital camera is PictBridge-compatible.
• Up to 999 images can be sent from the digital camera to the printer during one print transaction. If
an attempt is made to send more images, an error message is sent to the camera and printing fails.
• Since printing conditions are specified on the digital camera, specifiable parameters depend on the
particular digital camera. For details, see your digital camera's manual.
87

4. Direct Printing from a Digital Camera (PictBridge)
4
PictBridge Printing
Use the following procedure to start PictBridge printing on this printer.
• Do not disconnect the USB cable while data is being sent. If you do, printing will fail.
• The Gigabit Ethernet board is supplied with a USB cable and a hook onto which you can roll up and
hang the cable.
1. Check the printer is switched on.
2. Connect a USB cable between the printer and the digital camera.
The printer's data-in indicator will flash for a few seconds, and then a message such as "PictBridge
[model of connected digital camera]" will appear on the printer's display. This message indicates the
printer has recognized the digital camera correctly.
3. On your digital camera, select the images you want to print, and specify the printing
conditions.
4. The printer receives settings from the digital camera and starts printing.
• Since printing conditions are specified on the digital camera, specifiable parameters depend on the
particular digital camera. For details, see the digital camera's manual.
• Some digital cameras require settings for manual PictBridge operation. For details, see your digital
camera's manual.
• For details about connection instructions, see "Digital Camera Connection", Hardware Guide.
88

What Can be Done on This Printer
4
This printer can perform the following functions using its PictBridge feature.
The settings available for these functions are as follows:
• Single image printing
• Selected image printing
• All image printing
• Index printing
• Trimming
• Date and file name printing
• Paper size
• Image print size
• Multi-Image-Layout
• Duplex printing
• Printing quality
What Can be Done on This Printer
• Color matching
• Paper type specification
• Form printing
• Toner saving
• Camera memo printing
• This printer does not support the following settings:
• DPOF printing
• Margin-less printing
• The setting parameters and their names may vary depending on the digital camera. For details, see
your digital camera's manual.
Index Printing
A4 (210 × 297 mm)
Horizontal images × Vertical images (in) Paper orientation
8 × 12
89

CBK533
4. Direct Printing from a Digital Camera (PictBridge)
4
Horizontal images × Vertical images (in) Paper orientation
12 × 8
A5 (148 × 210 mm)
Horizontal images × Vertical images (in) Paper orientation
5 × 8
8 × 5
Letter (81/2 " × 11 ")
Horizontal images × Vertical images (in) Paper orientation
8 × 10
10 × 8
• Index printouts vary depending on the orientation of the paper placed on the specified size tray.
• Depending on the digital camera, a form feed may be inserted after one set of images belonging to
one type ends.
• The number of images in each size of paper is fixed.
Trimming
Use this function to print only inside of the trimming area specified on the digital camera.
- - Trimming area
90

BYK508
What Can be Done on This Printer
4
Date and File Name Printing
Use this function to print the date and/or file name under the image.
In the above figure, "aaaaa" indicates the file name and "bbbbb" indicates the date.
Paper Size
Use this function to print on paper with the size specified on the digital camera.
Paper size name Actual size
Postcard (100 mm × 150 mm) 150 mm × 100 mm
Letter (81/2 " × 11 ") 279.4 mm × 216 mm (81/2 × 11)
A4 297 mm × 210 mm
A5 210 mm × 148 mm
A6 148 mm × 105 mm
B5 257 mm × 182 mm
B6 182 mm × 128 mm
• Specify custom size for postcard sizes.
• For details about specifying custom sizes, see Hardware Guide.
Image Print Size
Use this function to print images with the size specified on the digital camera.
91

CBK535
4. Direct Printing from a Digital Camera (PictBridge)
4
- - indicates the image size specified on the digital camera.
You can specify the following image print sizes:
Fixed size
• 3.25 " × 2.5 "
• 5 " × 3.5 "
• 6 " × 4 "
• 7 " × 5 "
• 10 " × 8 "
• 254 mm × 178 mm
• 110 mm × 74 mm
• 89 mm × 55 mm
• 148 mm × 100 mm
• 8 cm × 6 cm
• 10 cm × 7 cm
• 13 cm × 9 cm
• 15 cm × 10 cm
• 18 cm × 13 cm
• 21 cm × 15 cm
• 24 cm × 18 cm
• An error occurs if the specified size is larger than the actual paper size.
Multi-Image-Layout
Use this function to print multiple images on the specified paper.
92

CBK536
The number of images that can be printed on one page are as follows:
4
Paper size Number of images that can be specified
Postcard 2, 4
Letter (81/2 " × 11 ") 2, 4, 8, 9, 16, 25, 32
A4 2, 4, 8, 9, 16, 25, 32
A5 2, 4, 8, 9, 16
What Can be Done on This Printer
A6 2, 4, 8
B5 2, 4, 8, 9, 16, 25
B6 2, 4, 8, 9
The number and arrangement of images that can be specified are as follows:
Vertical images ×
Number of images
Horizontal images
2 2 × 1
4 2 × 2
8 4 × 2
9 3 × 3
16 4 × 4
25 5 × 5
32 8 × 4
Paper orientation
93

4. Direct Printing from a Digital Camera (PictBridge)
4
• A form feed may be inserted between images depending on the digital camera in use.
• Printing in the specified way may not be possible depending on the specification for the number of
images to be printed.
Duplex Printing
Use this function to enable duplex (double-sided) printing.
Duplex printing is disabled by default. When duplex printing is enabled, the printed pages open to the left.
You cannot change the opening direction to the right.
• Duplex printing might not be possible, depending on the paper type or the tray that the paper is being
fed from.
Printing Quality
Use this function to print images at the selected printing quality.
If you select [Default] or [Normal], the printer prints at 600 dpi × 600 dpi (1 bit); if you select [Fine], the
printer prints at 600 dpi × 600 dpi (2 bit).
Color Matching
Use this function to optimize colors when printing images.
If you select [Default] or [OFF], the printer prioritizes gradation for color matching, if you select [ON], the
printer prioritizes saturation.
Paper Type Specification
This function sends the printer's paper type information to the digital camera.
The names of paper types displayed on the digital camera's screen are different to the names displayed
on the printer. Use the table below to match the paper types.
To display a paper type name on the digital camera's screen, use the printer's control panel to set the paper
type of the printer correctly.
Paper type detected by the digital camera Paper type of the printer
Default All Paper types
94

BYK511
What Can be Done on This Printer
4
Paper type detected by the digital camera Paper type of the printer
Plain Paper Plain or recycled paper
Photo Paper HG plain paper
Fast Photo Paper Glazed paper
Form Printing
Use this function to print images in a predetermined layout format.
Toner Saving
By specifying the print density on the digital camera, you can save on toner when printing.
Specification on the digital camera Print density
Default/OFF 100%
Slightly light 75%
Light 50%
Camera Memo Printing
Use this function to print text data together with an image if it is attached to the image.
95

4. Direct Printing from a Digital Camera (PictBridge)
4
Exiting PictBridge
Follow the procedure below to quit the PictBridge mode.
• Do not disconnect the USB cable while data is being sent to the printer. If you do, printing will fail.
1. Check the control panel of this printer is displaying the "Ready" state.
2. Disconnect the USB cable from the printer.
96

When PictBridge Printing Does Not Work
4
When PictBridge Printing Does Not Work
This section explains likely causes and possible solutions for problems that can occur when PictBridge
printing.
Problem Cause Solution
PictBridge is not available. There is a problem with the USB
connection or the PictBridge
settings.
When two or more digital
cameras are connected, the
second and subsequent cameras
are not recognized.
Printing is disabled. The number of originals exceeds
You have connected multiple
digital cameras.
the maximum number of pages
that can be printed at a time.
Use the following procedure to
check the connection and
settings:
1. Disconnect and then
reconnect the USB cable.
2. Check the PictBridge
settings are enabled.
3. Disconnect the USB cable,
and then turn off the printer.
Turn the printer back on.
When the printer has fully
booted up, reconnect the
USB cable.
Connect one digital camera only.
Do not connect multiple cameras.
The maximum specifiable print
quantity at a time is 999.
Respecify the quantity to 999 or
less, and then retry printing.
Printing is disabled. There is no paper of the specified
size remaining.
Printing is disabled. The paper size setting for this tray
cannot be printed on the printer.
There is no paper of the specified
size remaining.
If you have to use paper that is
not of the specified size, perform
Form Feed. To cancel printing,
perform Job Cancel.
Select the paper size setting that
can be printed on the printer.
97

4. Direct Printing from a Digital Camera (PictBridge)
4
Other Reference Information
For further details about printing on this printer, see the following:
• For details about paper size, paper type, or tray settings, see Hardware Guide.
98
 Loading...