

Page 1

Radio Connect R & GO
Page 2

Page 3
1
English ..................................................................
Español .................................................................
Português .............................................................
Polski ....................................................................
Türkçe ...................................................................
Român ...................................................................
ελληνικά ................................................................
GB
E
P
PL
TR
RO
GR
Page 4

Page 5

GB.1
Translated from French. Copying or translation, in part or in full, is forbidden unless prior written permission has been obtained
from the vehicle manufacturer.
User precautions . . . . . . . . . . . . . . . . . . . . . . . . . . . . . . . . . . . . . . . . . . . . . . . . . . . . . . . . . . . . . . . . GB.2
General description . . . . . . . . . . . . . . . . . . . . . . . . . . . . . . . . . . . . . . . . . . . . . . . . . . . . . . . . . . . . . . GB.4
Introduction to the controls . . . . . . . . . . . . . . . . . . . . . . . . . . . . . . . . . . . . . . . . . . . . . . . . . . . . . . . . GB.6
Operation . . . . . . . . . . . . . . . . . . . . . . . . . . . . . . . . . . . . . . . . . . . . . . . . . . . . . . . . . . . . . . . . . . . . . . GB.13
Using voice recognition . . . . . . . . . . . . . . . . . . . . . . . . . . . . . . . . . . . . . . . . . . . . . . . . . . . . . . . . . . . GB.14
Listen to the radio . . . . . . . . . . . . . . . . . . . . . . . . . . . . . . . . . . . . . . . . . . . . . . . . . . . . . . . . . . . . . . . GB.15
Listening to a CD/MP3 player . . . . . . . . . . . . . . . . . . . . . . . . . . . . . . . . . . . . . . . . . . . . . . . . . . . . . . GB.18
Auxiliary audio sources . . . . . . . . . . . . . . . . . . . . . . . . . . . . . . . . . . . . . . . . . . . . . . . . . . . . . . . . . . . GB.20
Pairing/unpairing a phone . . . . . . . . . . . . . . . . . . . . . . . . . . . . . . . . . . . . . . . . . . . . . . . . . . . . . . . . . GB.23
Connecting/disconnecting a phone . . . . . . . . . . . . . . . . . . . . . . . . . . . . . . . . . . . . . . . . . . . . . . . . . . GB.25
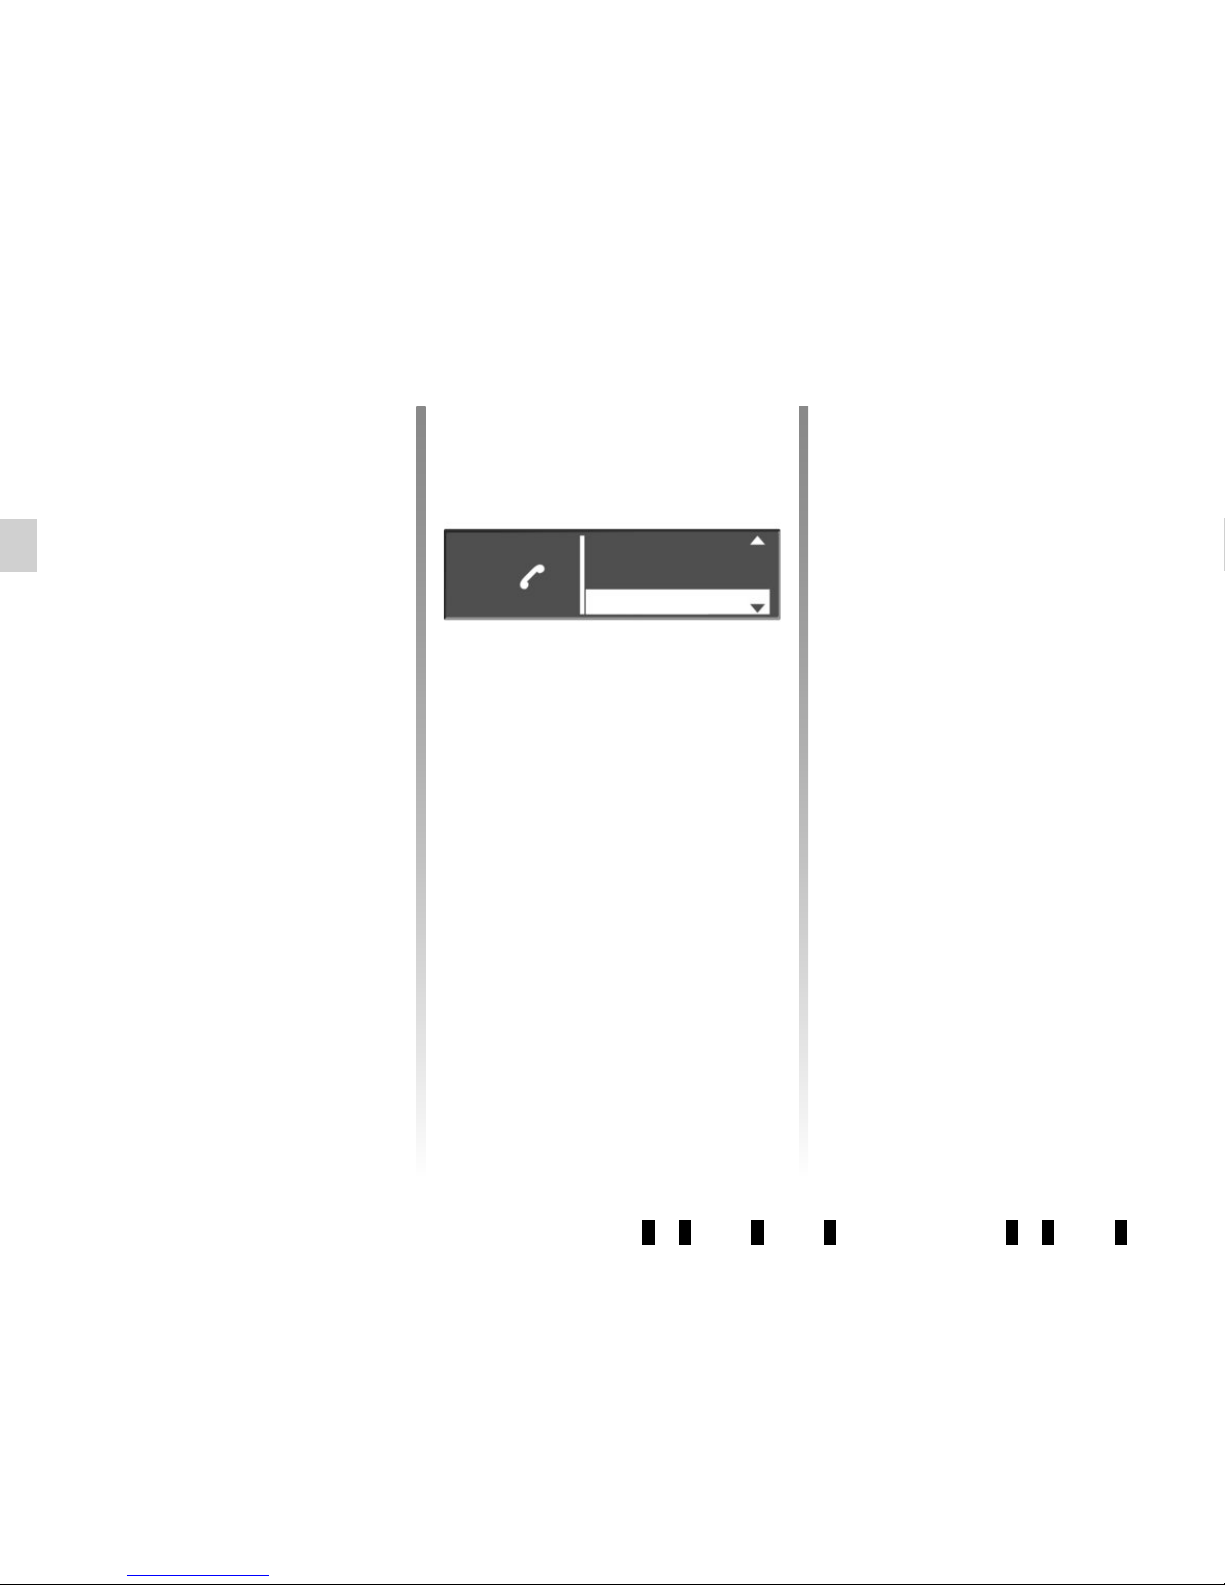
Making, receiving a call . . . . . . . . . . . . . . . . . . . . . . . . . . . . . . . . . . . . . . . . . . . . . . . . . . . . . . . . . . . GB.27
System settings . . . . . . . . . . . . . . . . . . . . . . . . . . . . . . . . . . . . . . . . . . . . . . . . . . . . . . . . . . . . . . . . . GB.30
R & GO: General description . . . . . . . . . . . . . . . . . . . . . . . . . . . . . . . . . . . . . . . . . . . . . . . . . . . . . . . GB.33
R & GO: Telephone function . . . . . . . . . . . . . . . . . . . . . . . . . . . . . . . . . . . . . . . . . . . . . . . . . . . . . . . GB.39
R & GO: Multimedia function . . . . . . . . . . . . . . . . . . . . . . . . . . . . . . . . . . . . . . . . . . . . . . . . . . . . . . . GB.41
R & GO: Navigation function . . . . . . . . . . . . . . . . . . . . . . . . . . . . . . . . . . . . . . . . . . . . . . . . . . . . . . . GB.43
R & GO: Vehicle function . . . . . . . . . . . . . . . . . . . . . . . . . . . . . . . . . . . . . . . . . . . . . . . . . . . . . . . . . . GB.45
R & GO: Setting parameters . . . . . . . . . . . . . . . . . . . . . . . . . . . . . . . . . . . . . . . . . . . . . . . . . . . . . . . GB.47
Operating faults . . . . . . . . . . . . . . . . . . . . . . . . . . . . . . . . . . . . . . . . . . . . . . . . . . . . . . . . . . . . . . . . . GB.49
Page 6
GB.2
USER PRECAUTIONS (1/2)
It is essential to follow the precautions below when using the system, both in the interest of safety and to prevent material damage.
You must always comply with the laws of the country in which you are travelling.
Precautions when operating the audio system
– Operate the controls (on the dash or near the steering wheel) and read the information on the screen only when road
conditions allow.
– Set the volume to a reasonable level so that outside noise can be heard.
Precautions concerning the equipment
– Do not attempt to dismantle or modify the system, as there is a risk of damage to equipment and fire.
– Contact a representative of the manufacturer in the event of malfunction and for all operations involving disassembly.
– Do not insert foreign objects, or damaged or soiled CDCD MP3s into the player.
– Only use 12 cm diameter circular CDCD MP3s.
– When handling discs, hold them by the inner or outer edges, without touching the non-printed face of the CDCD MP3.
– Do not stick paper to the CDCD MP3.
– After prolonged use, remove the CD CD MP3 from the player with care as it may be hot.
– Never expose CDs/CD MP3s to heat or direct sunlight.
– Do not use products containing alcohol and/or spray fluids on the area.
Precautions when using the phone
– There are laws which govern the use of phones in vehicles. They do not necessarily authorise the use of hands-free phone
systems under all driving conditions: drivers must be in control of their vehicles at all times.
– Using a phone whilst driving is a significant distraction and risk factor during all stages of use (dialling, communicating,
searching for a number in the handset memory, etc.).
Maintenance of the fascia
– Use a soft cloth and, if necessary, a small amount of soapy water. Rinse with a soft, slightly damp cloth, then dry with a soft,
dry cloth.
– Do not press on the display on the front panel, and do not use any alcohol-based products.
Page 7
GB.3
USER PRECAUTIONS (2/2)
The description of the models given in this manual is based on the specifications at the time of writing. This manual covers
all existing functions for the models described. Whether or not they are fitted depends on the equipment model, options selected and the country where they are sold. This manual may also contain information about functions to be
introduced later in the model year.
Throughout the manual, the Approved Dealer is that of the vehicle manufacturer.
Page 8

GB.4
GENERAL DESCRIPTION (1/2)
Introduction
The audio system has the following
functions:
– FM (RDS) and AM radio;
– terrestrial digital radio (DR);
– CD/CD MP3 player;
– management of auxiliary audio
sources;
– Bluetooth® hands-free phone
system.
Radio and CD/CD MP3
functions
The radio allows you to listen to radio
stations and play CDs in different audio
formats.
The radio stations are classed by wavelength: FM (frequency modulation) and
AM (amplitude modulation).
The DR system (DAB, DAB+, T-DMB
format) provides better sound reproduction and access to text information stored on the radio (Intellitext) by
scrolling through the text to display:
– news updates;
– sports results, etc.
The RDS system makes it possible to
display the name of some stations or
messages sent by FM stations to be
displayed:
– traffic bulletins (TA);
– emergency messages.
Auxiliary audio function
You can listen to your personal stereo
directly through your vehicle’s speakers. There are several ways of connecting your personal stereo, depending
on the type of device you have:
– USB socket;
– Jack socket;
– Bluetooth® connection.
For more information on the list of com-
patible devices, contact an authorised
dealer.
Page 9
GB.5
GENERAL DESCRIPTION (2/2)
Hands-free phone function
The Bluetooth® hands-free system
provides the following features without
having to handle your phone:
– Pair up to 5 phones;
– send/receive/reject a call;
– transfer the phone’s or SIM card’s
contact list (depending on the
phone);
– view the system’s call log (depend-
ing on the phone);
– dial voicemail.
Bluetooth® function
This function enables the audio system
to recognise and control your portable
audio player or mobile phone using
Bluetooth® pairing.
You can activate/deactivate the
Bluetooth® function in the “Bluetooth”
menu:
– display the settings menu by pres-
sing 9;
– select «Bluetooth» by turning and
pressing 5;
– select «ON»/«Off».
Your hands-free phone
system is only intended to
facilitate communication by
reducing the risk factors,
without removing them completely.
You must always comply with the
laws of the country in which you are
travelling.
ON
OFF
Page 10
GB.6
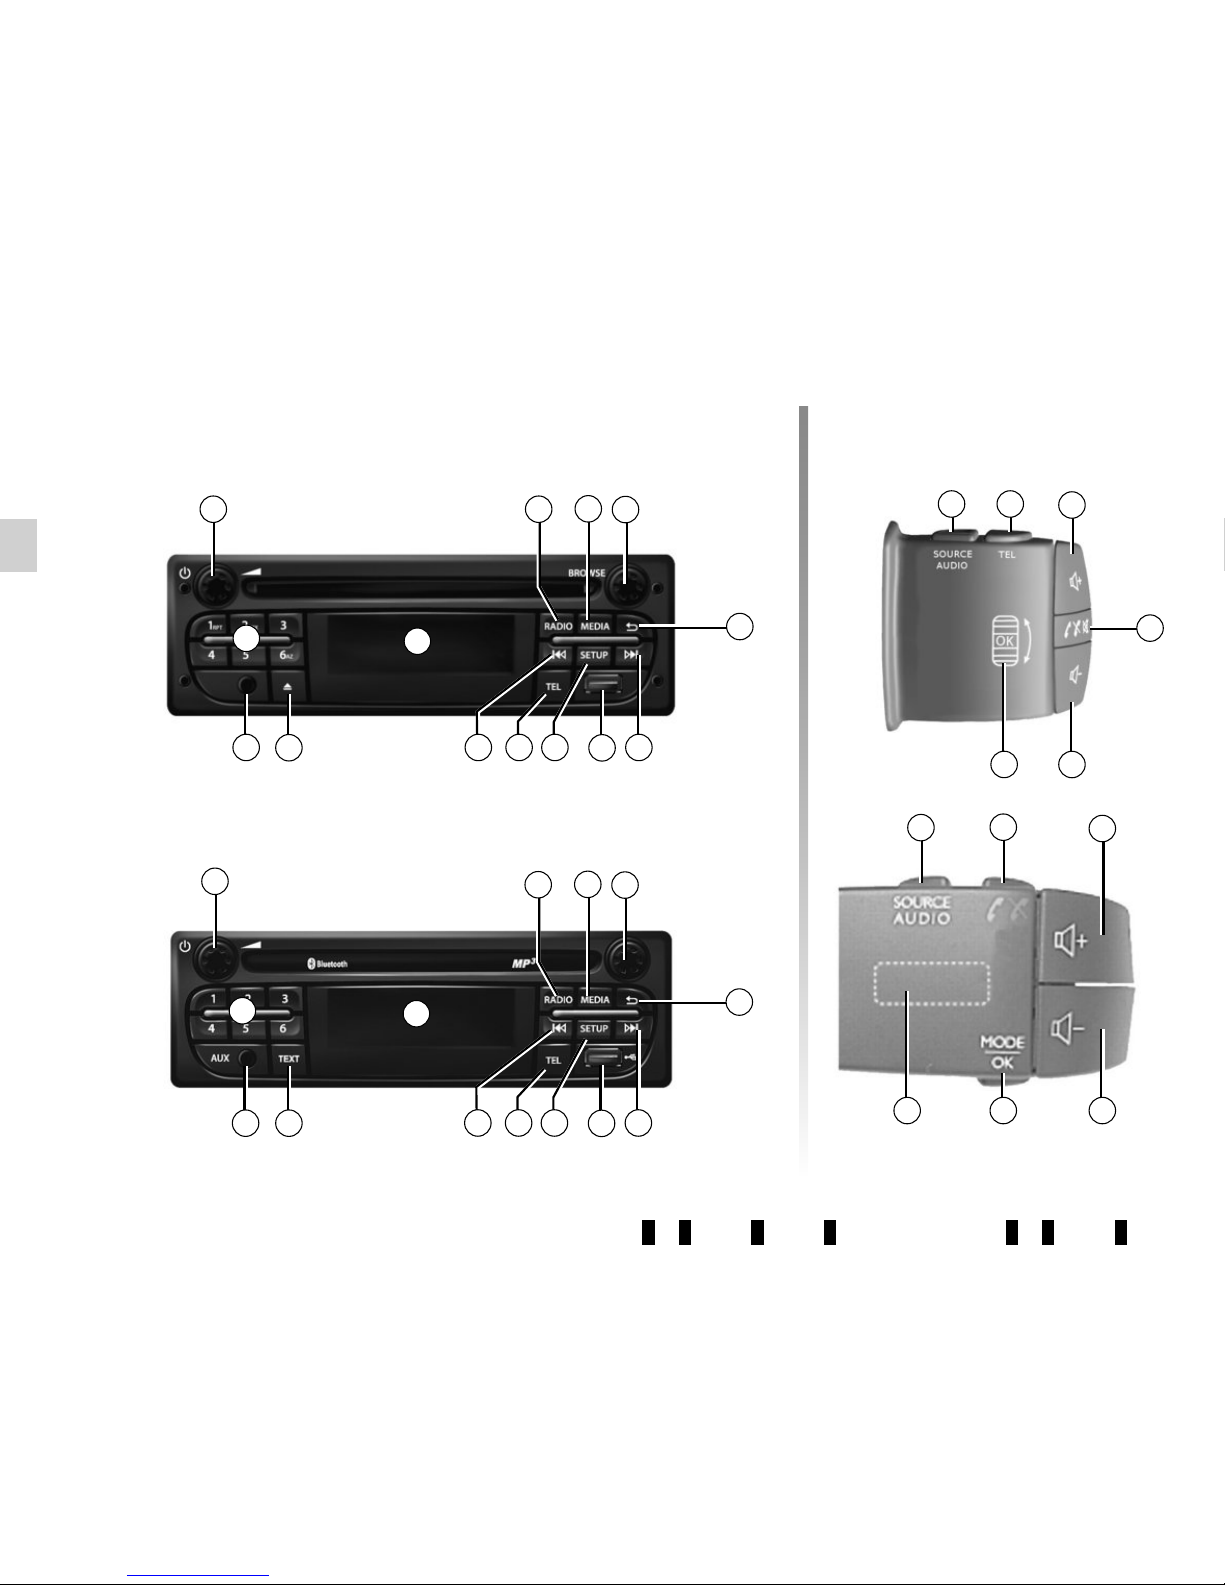
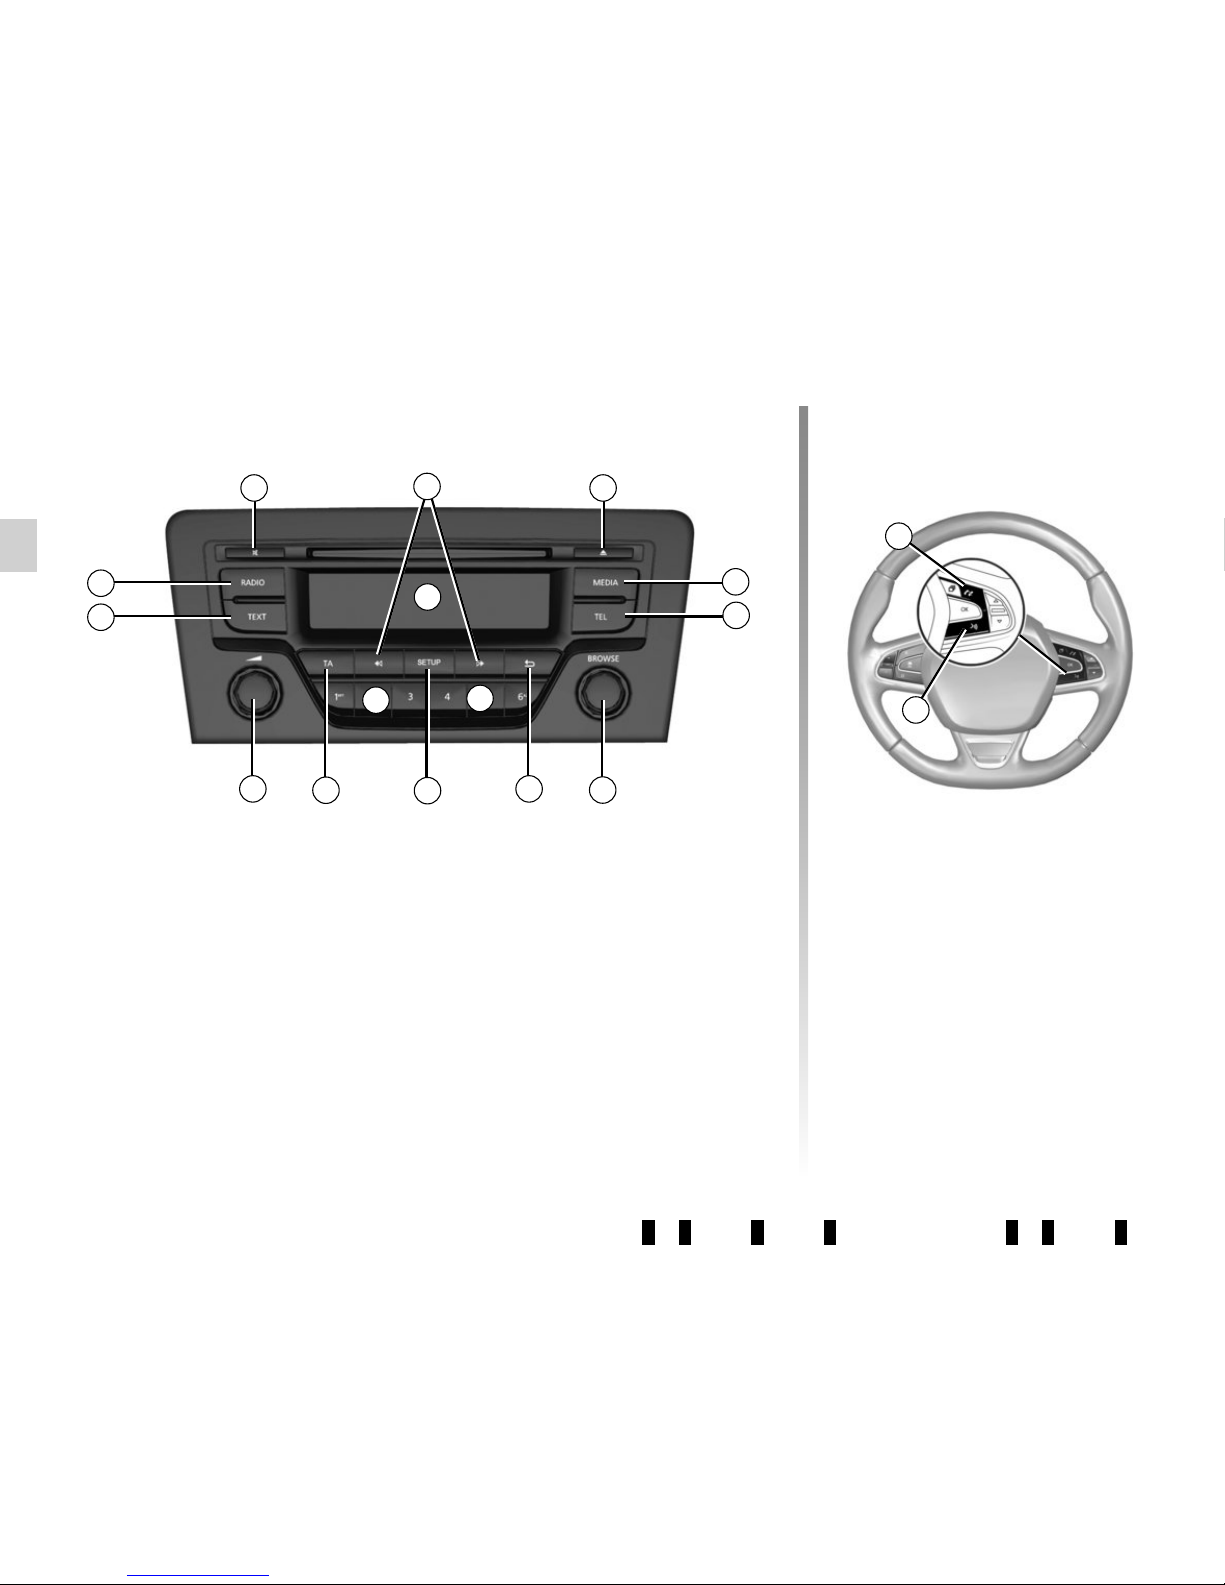
INTRODUCTION TO THE CONTROLS (1/7)
1
12
8
6
5
4
10
Steering column controls
System panels
17
19
15
22
21
7
3
19
18
20
15 1716
20
1
13 9
2
2
7
11
11
8
6
5
4
10 7
3
97
1413
Page 11
GB.7
INTRODUCTION TO THE CONTROLS (2/7)
4
11
3
5
9
1
10118
77
13
14
7
5
9
1
7 813
10
3
4
14
6
12
23
6
Steering column controlsSystem panels
15
16
17
24
19
22
25
2
2
11
17
19
18
20
15
16
Page 12
GB.8
INTRODUCTION TO THE CONTROLS (3/7)
System panels
1
5
2
24 12
4
10
3
14
7
26
6
11
Steering column controls
27
28
9
11
Page 13
GB.9
INTRODUCTION TO THE CONTROLS (4/7)
AUDIO function TELEPHONE function
1
– Press: on/off.
– Rotation: adjust the volume of the source currently in use.
2 Information display.
3
– Short press: choose the radio source and the waveband:
FM1 → FM2 → DR1 → DR2 → AM.
– Long press: updating of the list of radio stations.
4
Select the desired audio source (if connected):
CD / CD MP3 → iPod1/USB1 → iPod2/USB2 → device
Bluetooth® → AUX (Jack socket).
5
– Press: confirm an action.
– Rotation: navigate through the menus or lists.
6
– Return to previous screen/previous level when browsing
through menus;
– cancel current action.
7
– Short press: change tracks (CD/CD MP3, on some port-
able audio players) or change radio frequencies.
– Maintained press: fast forward/rewind a CD/CD MP3 track
on some audio players, or scroll through the radio stations
until the button is released.
8 USB socket for iPod® or auxiliary audio sources.
9
– Short press: access the custom settings menu.
– Long press: activate the «Text» function.
Page 14

GB.10
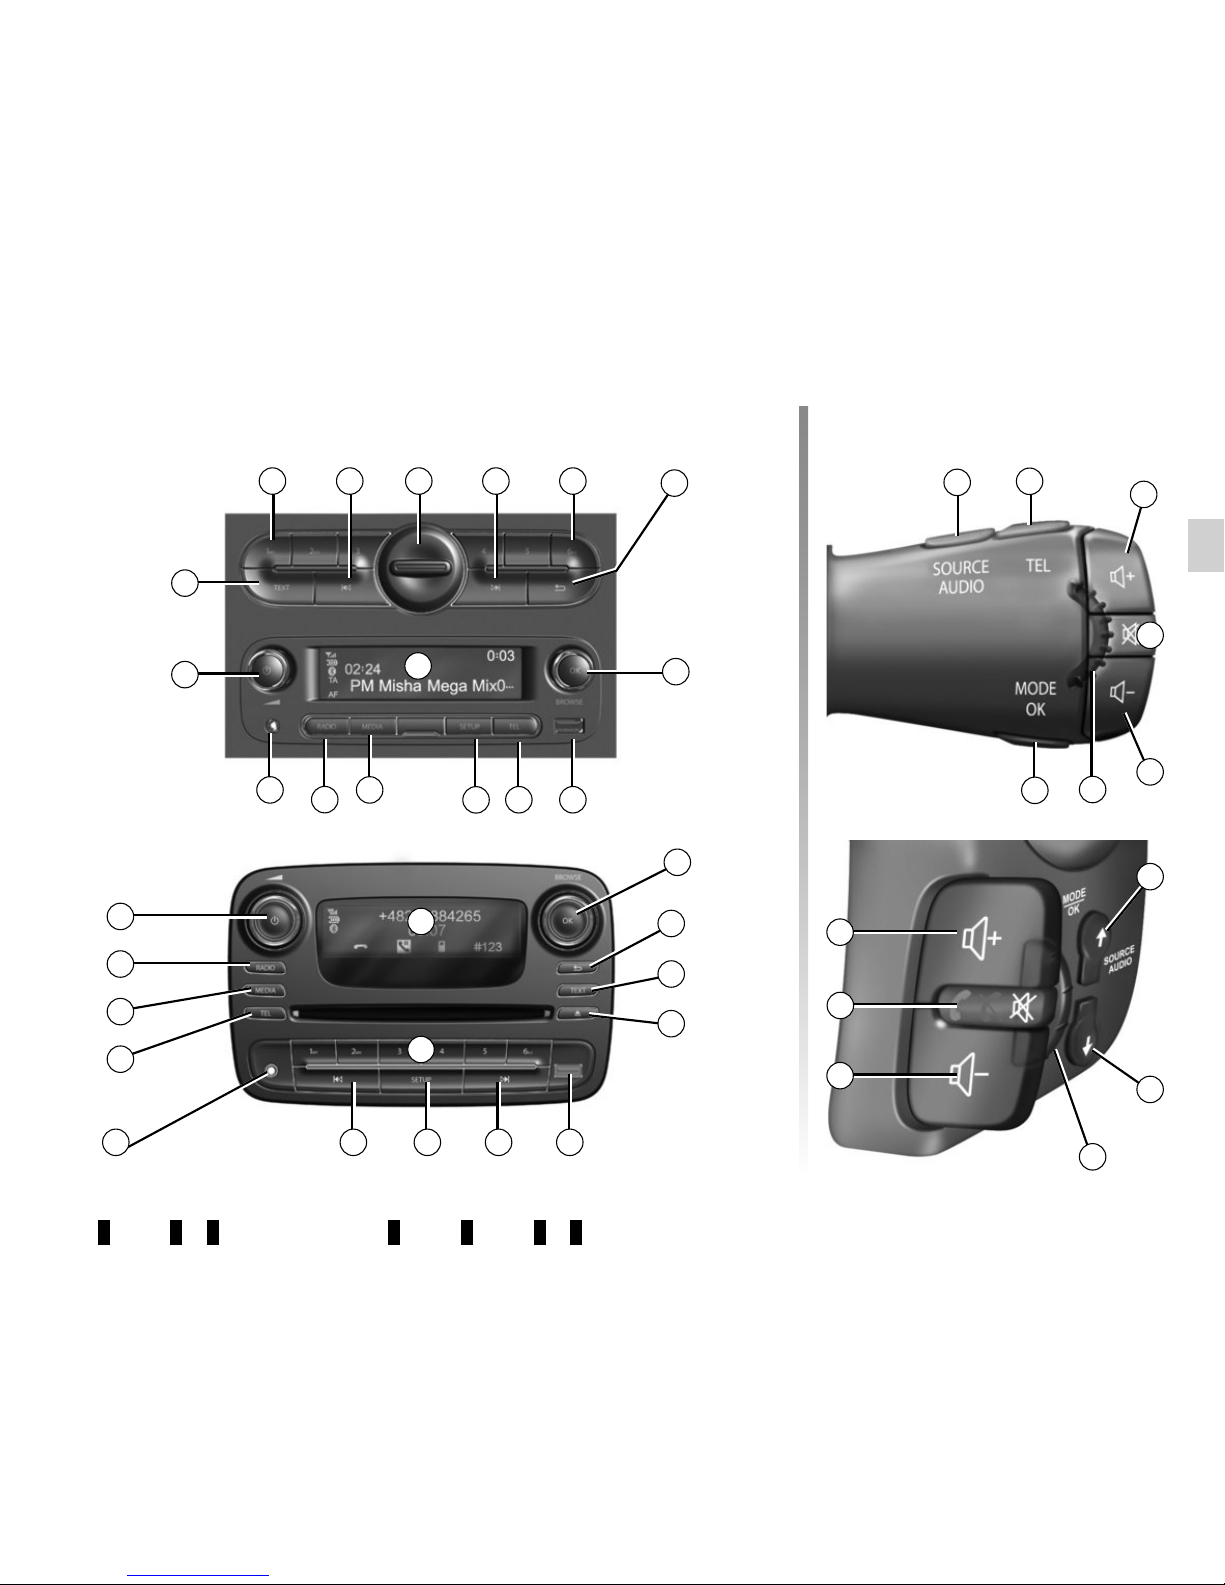
INTRODUCTION TO THE CONTROLS (5/7)
AUDIO function TELEPHONE function
10
– Short press: access the «Phone» menu.
– Long press: redial the last number.
When receiving a call:
– short press: answer the call;
– long press: reject the call.
11
Short press: recall a pre-programmed station.
Press and hold: store a radio station.
12 Eject a CD/CD MP3.
13 Auxiliary input.
14 Activate the “Text” function.
15
Select the audio source: FM1 → FM2 → DR1 → DR2 →
AM → CD / CD MP3 → iPod1/USB1 → iPod2/USB2 →
Bluetooth® Device → AUX (jack input).
16 Access the menu «Phone».
17 Increase the volume of the source currently in use.
18
– Mute the radio source currently playing;
– mute the sound and pause the playback of the CD/CD
MP3, USB, iPod® or Bluetooth® device.
Out of range of the call signal:
– long press: redial the last number.
When receiving a call:
– short press: answer the call;
– long press: reject the call.
Page 15
GB.11
INTRODUCTION TO THE CONTROLS (6/7)
AUDIO function TELEPHONE function
19 Decrease the volume of the source currently in use.
17 + 19
– Mute the radio source currently playing;
– mute the sound and pause the playback of the CD/CD MP3, USB, iPod® or Bluetooth® device.
20
Rotate:
– radio: browse through the radio list;
– media: previous/next track.
Rotate:
– «Phone» menu: browse through the list.
– Short press: open the current playback list.
Long press:
– return to previous screen/previous level when browsing
through menus;
– cancel current action.
– Short press: confirm an action.
Long press:
– return to previous screen/previous level when brows-
ing through menus;
– cancel current action.
21
– Short press: access the «Phone» menu.
– Long press: redial the last number.
When receiving a call:
– short press: answer the call;
– long press: reject the call.
22
– Short press: open the current playback list.
Long press:
– return to previous screen/previous level when browsing
through menus;
– cancel current action.
– Short press: confirm an action.
Long press:
– return to previous screen/previous level when brows-
ing through menus;
– cancel current action.
23 Remove the phone support cover by turning it counter-clockwise.
Page 16
GB.12
INTRODUCTION TO THE CONTROLS (7/7)
AUDIO function TELEPHONE function
24
– Mute the radio source currently playing;
– mute the sound and pause the playback of the CD/CD
MP3, USB, iPod® or Bluetooth® device.
25
Rotate:
– radio: browse through the list of radio stations stored pre-
viously;
– media: previous/next track.
Rotate:
– «Phone» menu: browse through the list.
26
Activate/deactivate the automatic search for and playing of
traffic information as soon as it is broadcast by certain radio
stations in FM or DR mode.
27
When receiving a call:
– short press: answer the call;
– long press: reject the call.
28
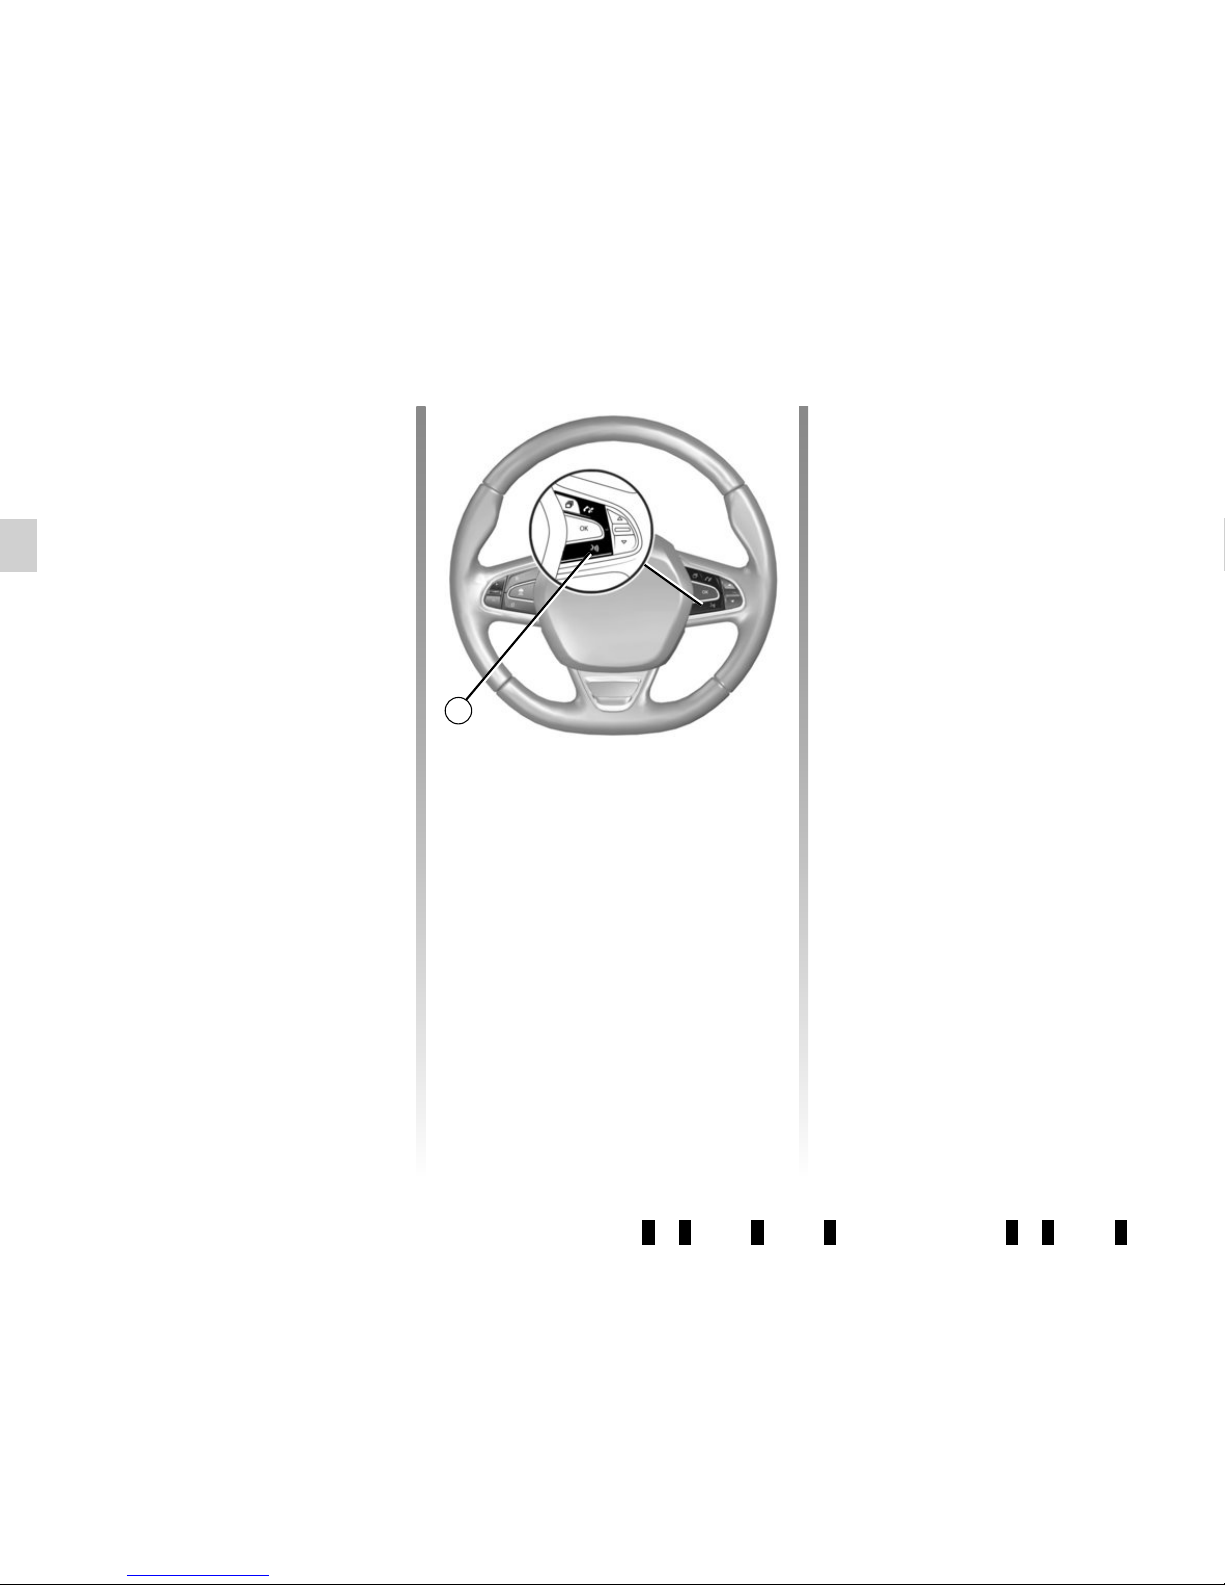
– Short press: activate voice recognition.
– Long press: deactivate voice recognition.
Page 17

GB.13
OPERATION
On and off
Press 1 briefly to switch on your audio
system.
The audio system can be used with the
vehicle ignition off. It will operate for
20 minutes. Press 1 to have it work for
an additional 20 minutes.
Switch off the audio system by briefly
pressing 1.
CHOOSING THE SOURCE
To scroll through the different audio
sources, press 4 repeatedly. The audio
sources scroll in the following order:
CD/CD MP3 → iPod1/USB1 → iPod2/
USB2 → BT Streaming (Bluetooth®) →
AUX.
Note: press 10 to display the telephone
menu.
When you insert a new medium (CD/
CD MP3, USB, AUX) while the radio is
on, the source will switch automatically
and begin to play.
You may also select the radio source
by pressing key 3. Press 3 repeatedly
to scroll through the wavebands in the
following order: FM1 → FM2 → DR1 →
DR2 → AM → FM1…
To change media and radio source,
press 15 on the steering column control.
VOLUME
Adjust the volume by turning 1 or by
pressing 17 or 19 on the steering
column control.
The display reads «Volume» followed
by the current setting value (from 00 to
31).
Mute
Briefly press 18 or 24, or simultaneously 17 and 19 on the steering
column control. The message «MUTE»
is displayed on the screen.
Briefly press 18, 24, 17 or 19 on the
steering column control again to
resume playing the current source.
You can also deactivate the mute function by turning 1.
Page 18
GB.14
Voice recognition system
(depending on the phone)
Using a compatible smartphone, your
audio system enables you to use the
voice recognition system. This makes it
possible to control the functions of your
smartphone by voice, while keeping
your hands on the steering wheel.
Note: your smartphone’s voice recognition system only enables you to use
the functions of your telephone. It does
not enable you to interact with the other
functions of your audio system such as
the radio, the Eco² Driving etc.
Note: when using voice recognition,
the language set on your telephone will
be the language used by your audio
system.
Activation
To activate the voice recognition
system, you must:
– get a 3G, 4G or Wifi connection with
your smartphone;
– activate the Bluetooth® on your
smartphone and make it visible to
other devices (please refer to your
telephone manual for instructions);
– pair and connect your smartphone to
the audio system (please refer to the
section on «Pairing, unpairing a telephone»);
– Briefly press button 28 on the stee-
ring wheel.
An audible signal indicates that voice
recognition is activated. Speak loudly
and clearly.
Deactivation
Press and hold button 28.
An audible signal indicates that voice
recognition is deactivated.
Note: if you try to use your vehi-
cle’s voice recognition system with a
paired smartphone that does not have
voice recognition, a message will be
displayed on the multimedia system
screen to notify you.
USING VOICE RECOGNITION
28
Page 19

GB.15
LISTENING TO THE RADIO (1/3)
Selecting a waveband
Select the desired waveband (FM1,
FM2, DR1, DR2, AM, FM1, etc.) by
pressing 3 repeatedly.
Choose an FM or AM radio
station
There are several different ways to
select and seek a radio station.
Automatic search
This mode performs an automatic scan
to search for stations. Long press 7.
When you release 7, the frequency of
the nearest radio station is displayed.
So long as you press 7, the radio increases or decreases without stopping.
Manual search
This mode allows you to search for stations manually, scrolling through the
frequencies by pressing 7.
Press 7 and the frequency increases or
decreases.
Storage of radio stations
This operating mode allows you to
listen to your pre-set radio stations.
Select a waveband, then select a radio
station using the methods described
above.
To store a station, press and hold one
of the buttons of the keypad 11 until you
hear a beep.
Up to 6 stations can be saved per
waveband.
To recall a stored station, briefly press
one of the keys on the keypad 11.
Choose according to the
name of the station (FM / DR)
To select a radio station turn 5 or the
knob 20 or 25 on the steering column
control.
This list can include up to 100 radio stations having the strongest frequencies
in your area.
To get the most recent list of stations,
update the radio list (FM or DR).
Refer to «Updating the radio list (FM or
DR)" in this section.
Page 20

GB.16
LISTENING TO THE RADIO (2/3)
– display the settings menu by pres-
sing 9 and select «Radio» by turning
and pressing 5;
– select «Ref. FM List» by turning 5,
then short press 5 to validate this
choice.
The automatic update of the FM stations in the area starts. The message
«Updating FM List» is displayed on the
screen.
The automatic frequency scanning is
complete. The message «FM List updated» is displayed on the screen.
Note: if another source is selected, the
FM radio list update continues in the
background.
To switch from one saved frequency to
another, press one of the buttons 7.
Note: you can also update the FM radio
list by pressing and holding 3.
Radio settings
Display the settings menu by pressing 9 and select «Radio» by turning
and pressing 5. The available functions
are as follows:
– «TA»;
– «DR Interrupt…»;
– «Ref. FM List»;
– «Ref. DR List».
«TA»
When this feature is activated, your
audio system allows traffic bulletins to
play automatically as new reports are
issued by some FM or DR radio stations.
NB: On waveband AM, this feature is
not available.
Select the information station and then
choose whether you want another listening source.
Traffic information is broadcast automatically and has priority over the
source being listened to at the time.
To activate or deactivate this feature,
refer to the «Radio settings» paragraph
under «System settings».
«DR Interrupt…» (newscasts)
When this function is activated, it is
possible to automatically listen to news
as it is broadcast by certain «FM» or
«DR» radio stations.
If you then select other sources, when
a broadcast of the selected programme
type is made, it will interrupt the other
sources.
To activate or deactivate this function,
please refer to the information on «DR
Interrupt…» in the «System settings»
section.
«Ref. FM List»
This feature allows you to perform an
update of all FM stations in your area.
Page 21

GB.17
Selecting a station
Select the desired waveband (FM1,
FM2, DR1, DR2 or AM) by pressing 3
repeatedly.
– turn 5, 20 or 25 to scroll through the
radio stations on the FM/DR list or
the AM radio frequencies.
– press 7 to scroll through the FM/AM
radio frequencies or the DR radio
stations.
Display radio text
To display the text menu, briefly
press 14 or press and hold 9. The available functions are as follows:
– «Radiotext»;
– «Intellitext»;
– «EPG».
NB: If no information is provided, the
message “No message” is displayed on
the screen.
LISTENING TO THE RADIO (3/3)
«Ref. DR List»
This feature allows you to perform an
update of all DR stations in your area.
– Display the settings menu by pres-
sing 9 and select «Radio» by turning
and pressing 5 ;
– select «Ref. DR List» by turning 5,
then short press 5 to validate this
choice;
– the automatic update of the list of di-
gital terrestrial radio stations in your
area begins. The message «Updating
DR List» is displayed on the screen.
With the automatic frequency scan finished, the message «DR List updated» is displayed on the screen.
Note: you can update the DR radio list
by pressing and holding 3.
Text information «Radiotext» (FM)
Some FM radio stations broadcast
text information related to the program
being listened to (e.g. the title of a song,
artist name).
NB: This information is only available
for certain radio stations.
«Intellitext» (DR) function
This feature allows access to text information recorded on some radio stations. You can scroll through the text to
display new updates on business, politics, health, weather and sports.
«EPG» (DR) program guide
When this feature is activated, your
audio system will display the station’s
upcoming programs of the day.
Note: This information is only available
for the selected station’s next three
time slots.
Page 22

GB.18
LISTENING TO A CD/CDMP3 (1/2)
Specifications of readable
formats
Only files with an CDA/MP3> extension
can be played.
If a CD contains both audio CD files
and compressed audio files, the compressed audio files will not be recognised.
Note: some protected files (copyright)
cannot be read.
Note: to ensure that folder and file
names are easy to read, we recommend that you use names with fewer
than 64 characters, and avoid the use
of special characters.
CD/CD MP3 maintenance
To protect its readability, never expose
a CD CD MP3 to heat or direct sunlight.
To clean a CDCD MP3, use a soft cloth
and clean from the centre towards the
edge of the CD.
As a general rule, refer to the CD manufacturer's advice concerning maintenance and storage.
Note: some scratched or dirty CDs
cannot be read.
Inserting a CD/CD MP3
Refer to the section entitled
«Precautions during use».
Check that there is no CD in the player,
then insert the CD with the printed side
upwards.
Listening to a CD/CD MP3
When a CD/CD MP3 is inserted (printed surface upward), the audio system
automatically switches to CD/CD MP3
source and starts to play the first track.
If the audio system is switched off and
the ignition is on, inserting a CD/CD
MP3 switches on the audio system and
the CD/CD MP3 starts to play. If the
ignition is not on, the audio system will
not switch on.
If you are listening to the radio and a
CD/CD MP3 is in the player, you can
choose to listen to the CD/CD MP3 by
pressing 4. Playback starts as soon as
the audio system switches to the CD/
CD MP3 source.
Searching for a track
Press 7 to switch from one track to the
next.
Fast winding
Long press 7 to fast forward or rewind.
Playback resumes when the button is
released.
Page 23
GB.19
LISTENING TO A CD/CDMP3 (2/2)
Random playback «Mix»
Once a CD/CD MP3 is inserted, press
button «2» on the keypad 11 to turn on
the shuffle function for all the tracks on
the CD/CD MP3.
The symbol «MIX» appears on the
screen. A track is then selected at
random. The transition from one track
to another takes place randomly.
Press button «2» again on the
keypad 11 to turn the shuffle function
off; the symbol «MIX» goes out.
Turning off the audio system and ejecting the CD/CD MP3 deactivates the
shuffle function.
Note: on a CD MP3, random play runs
on the folder currently being played.
Change folder to run random playback
on another folder.
Repeat «RPT»
This feature allows you to repeat a
track.
Press button «1» on the keypad 11
to activate the repeat function. The
symbol «RPT» appears on the screen.
Press button «1» again on the
keypad 11 to turn off the repeat function; the symbol «RPT» goes out.
Note: if the shuffle function is activated,
enabling the repeat function will deactivate it; the symbol «MIX» will go out.
Pause
Press 17 and 19 simultaneously, or 18
or 24 on the steering column control to
mute the sound temporarily.
This function is automatically deactivated if you change the volume, change
the program source or if an automatic
newscast comes on.
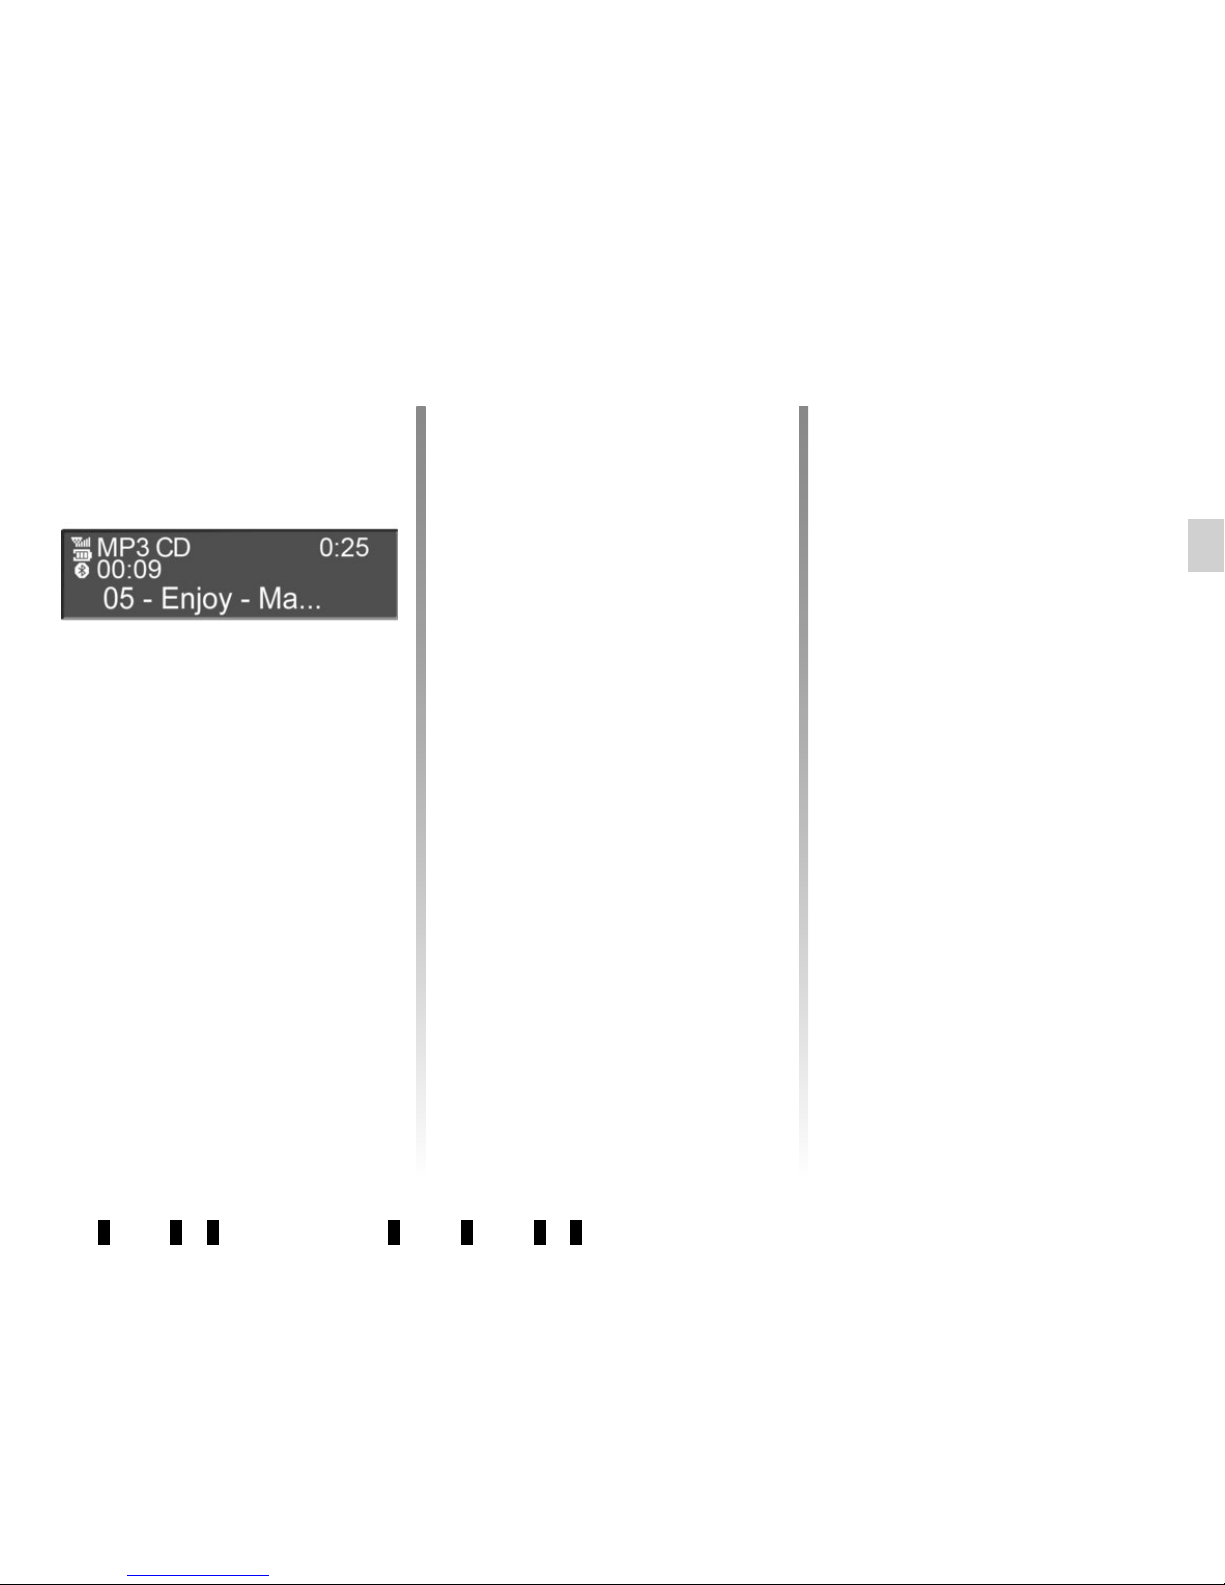
Display text (CD-Text or ID3
tag)
Press 14 to scroll through the ID3 tag
information (artist name, album name,
elapsed time, track name).
To display all the ID3 tag information on
a single page, press and hold 14.
Ejecting a CD/CD MP3
Eject a CD/CD MP3 from the player by
pressing 12.
Note: if an ejected disc is not removed
within 20 seconds, it will automatically
be reinserted into the CD player.
Page 24

GB.20
Your audio system has inputs to
connect one or more external audio
sources (USB key, MP3 player, iPod®,
Bluetooth® portable player, etc.).
You have several ways of connecting
your player:
– USB connection;
– Jack socket;
– Bluetooth® connection.
Note: the auxiliary audio source for-
mats can be MP3, WMA or AAC.
USB connection;
Connection
Connect the iPod® or USB stick to the
USB socket.
Once the device is connected, the track
will be displayed automatically.
AUXILIARY AUDIO SOURCES (1/3)
Use
– iPod®:
After connecting your iPod®, the menus
are accessible from your audio system.
The system keeps the same playlists
as on your iPod®.
– USB key:
The audio files will start playing auto-
matically.
To access the hierarchy of your audio
source, turn or press 5, 20 or 25 on the
steering column control.
Note: random play on a USB key works
in the same way as for a CD MP3.
Refer to the information on “Random
playback Mix” in the section “Listening
to a CD/CD MP3”.
Note: the repeat function on a USB
key works in the same way as for a CD
MP3. Please refer to the paragraph on
“Repeat” under “Listening to a CD/CD
MP3”.
Charging using the USB port
Once your audio player’s USB connector is plugged into the USB port of the
unit, you can charge or maintain the
battery during use.
Note: some devices do not recharge
or maintain battery charge level when
they are connected to the USB port on
the audio system.
Page 25

GB.21
Jack connection
Connection
Using the appropriate cable (not supplied), connect the Jack socket of the
auxiliary input 13 to the device headphones socket (usually a 3.5 mm jack).
Note: you cannot select a track directly
from your audio system. To select a
track, you must do so directly via your
portable audio player, when the vehicle
is stationary.
Use
Only the text “AUX” is displayed on the
system screen. No artist or track name
is visible.
NB: To adjust the sensitivity of the jack
Jack,, refer to the “System settings”
section.
Connection
For a device already paired, perform
the following steps:
– activate the Bluetooth® connec-
tion of the portable audio player and
make it visible to other devices (refer
to the audio player manual);
– select the Bluetooth® audio source
by pressing 4.
Bluetooth® audio playback
In order to use a Bluetooth® digital
device, you must pair it to the vehicle
when it is first used (refer to the information on the “Bluetooth® function” in
the “General description” section).
Pairing allows the audio system to recognise and store a Bluetooth® digital
device.
Note: if your Bluetooth® digital device
has telephone and portable audio
player functions, pairing one of these
functions will automatically pair the
other.
AUXILIARY AUDIO SOURCES (2/3)
Only handle the personal
stereo when traffic conditions permit.
Store the portable audio
player safely while driving (risk of
being thrown in the event of sudden
braking or impact).
Page 26
GB.22
AUXILIARY AUDIO SOURCES (3/3)
Use
Your portable audio player must be
connected to the audio system to
enable all its functions to be accessed.
Note: no digital device can be connected to the audio system unless it has
previously been paired.
Once the Bluetooth® digital portable
audio player is connected, you can
control it from your audio system.
Press 17 and 19 simultaneously or 18
or 24 on the steering column control to
pause the audio track (press again to
resume play).
Press 7 to go to the previous or next
track.
Note: the number of accessible functions varies depending on the type of
portable audio player and its compatibility with the audio system.
Note: in some cases, you will need to
refer to your device’s manual to finalise
the connection procedure.
Only handle the personal
stereo when traffic condi-
tions permit.
Store the portable audio
player safely while driving (risk of
being thrown in the event of sudden
braking or impact).
Page 27
GB.23
PAIRING AND UNPAIRING A TELEPHONE (1/2)
Bluetooth® connection
To activate the audio system’s
Bluetooth® function, press 9, select
«Bluetooth» by turning 5, then select
«ON»/«Off» by pressing 5.
Pairing a phone
To use your hands-free system, pair
your Bluetooth® mobile phone with
the vehicle. Check that the Bluetooth®
of your phone is activated and set its
status to «visible».
Pairing will enable the hands-free
phone system to recognise and store a
phone.
You can pair up to five phones, but only
one can be connected at a time to the
audio system.
Pairing is carried out on the system and
on your phone. Your audio system and
phone must both be switched on.
Note: if a phone is already connected,
during a new pairing procedure, the
existing connection will automatically
be disconnected.
Pair device
Scan devices
Sel. Device
Two ways of pairing your phone are
available:
– the «Scan devices» method;
– the «Pair device» method.
«Scan devices» method
This method allows you to search from
the audio system to the phone.
To pair a phone using this method, perform the following steps:
– Display the telephone menu by pres-
sing 10;
– select «Scan devices» by turning and
pressing 5.
The search for Bluetooth® devices in
the vicinity begins (this search can take
up to sixty seconds.) The message
«Searching... » is displayed on the audio
system screen.
– Follow the steps shown on the audio
system screen;
– when the message «Connected»
is displayed on the audio system
screen, the Bluetooth® device is
stored automatically and connected
to the vehicle.
After sixty seconds, if pairing fails,
repeat these steps. For more information, refer to your phone’s user manual.
For safety reasons, carry
out these operations when
the vehicle is stationary.
Page 28
GB.24
PAIRING, UNPAIRING A TELEPHONE (2/2)
Unpairing a phone
Unpairing deletes a phone from the
hands-free phone system memory.
– Display the phone settings menu by
pressing 10;
– select the menu «Delete phone» by
turning and pressing 5;
– select the phone to be unpaired from
the list by turning 5;
Your hands-free phone
system is only intended to
facilitate communication by
reducing the risk factors,
without removing them completely.
You must always comply with the
laws of the country in which you are
travelling.
«Pair device» method
This method allows you to search from
your phone to the audio system.
– Display the telephone menu by pres-
sing 10;
– select «Pair device» by turning and
pressing 5;
– the message «Please re-enter Pin»
appears on the system screen and
starts a sixty-second countdown;
– follow the steps shown on the audio
system screen.
The message «MyCAR connected»
appears on your phone indicating
that your audio system is paired and
connected to your phone.
If the pairing fails, the system screen
goes back to the initial menu.
If the list of paired phones is full, a new
phone can only be paired if an existing
phone is unpaired.
– press 5 then select «YES»;
– confirm your selection by pressing 5.
Note: unpairing a phone erases all the
contacts from the mobile phonebook
downloaded to the audio system, as
well as the associated history.
YES
Delete iPhone?
NO
For safety reasons, carry
out these operations when
the vehicle is stationary.
Page 29
GB.25
CONNECTING, DISCONNECTING A PHONE (1/2)
Connecting a paired phone
Your phone must be connected to the
hands-free phone system in order to
use all its functions.
No phone can be connected to the
hands-free phone system if it has not
first been paired.
Refer to the paragraph entitled “Pairing
a phone” in the “Pairing/unpairing a
phone” section.
Note: your telephone’s Bluetooth®
connection must be active and set to
“visible”.
Automatic connection
As soon as the vehicle ignition is
switched on, the audio system searches
for paired telephones in the vicinity.
Note: the priority phone is the last to
have been connected.
Searching will continue until a paired
phone is found (this may take up to five
minutes).
Note: For more information on compatible phones, contact an authorised
dealer or visit the manufacturer’s website if available.
Note:
– you can use automatic telephone
connection with the ignition switched
on. You may need to activate the
automatic Bluetooth® connection
function on your hands-free phone
system. To do this, refer to your
telephone's user manual;
– when reconnecting, and when two
paired phones are within range
of the hands-free system, the last
phone to have been connected will
take priority, even if this phone is outside the vehicle but within range of
the hands-free system.
Note: if a call is already in progress
when your hands-free phone system is
connected, the phone will automatically
be connected and the conversation will
switch to the vehicle speakers.
Scan devices
Sel.device
Pair device
Manual connection (changing the
phone connected)
Display the phone settings menu by
pressing 10, then select the “Sel.device”
menu. The list of phones already paired
is displayed. Select the phone that you
wish to connect from the list by turning 5 and confirm by pressing 5. A message informs you that the phone is connected.
Note: if a phone is already connected
when changing phones in the already
paired phone list, the existing connection is automatically disconnected.
Page 30
GB.26
CONNECTING, DISCONNECTING A PHONE (2/2)
Connection failure
If connection fails, check that:
– your phone is switched on;
– your telephone battery is not flat;
– your phone has already been paired
to the hands-free phone system;
– the Bluetooth® on your phone and
on the system are active;
– the phone is configured to accept the
audio system’s connection request.
Note: using your hands-free phone
system for prolonged periods will discharge your phone’s battery more
quickly.
Disconnect a phone
To disconnect your telephone, you can:
– deactivate your audio system’s
Bluetooth® function;
– deactivate your phone’s Bluetooth®
function;
– delete the paired phone via the audio
system. Please refer to the information on “Unpairing a telephone” in the
“Pairing, unpairing a telephone” section.
If the phone is switched off, the telephone will be disconnected.
A message is then displayed on the
audio system screen to confirm that the
phone is disconnected.
Note: if a call is in progress when the
phone is disconnected, the call will
automatically be transferred to your
phone.
To deactivate your audio system’s
Bluetooth®, please refer to the information on the “Bluetooth® Function” in the
“General Description” section.
To deactivate your phone’s Bluetooth®,
refer to your phone's user guide.
To unpair and delete the Bluetooth®
phone, see the information under
“Unpairing a telephone” in the section
“Pairing, unpairing a telephone”.
Pair device
Delete phone
Sel.device
Page 31

GB.27
Making a call by dialling a
number
Display the phone menu by pressing 10, 16 or 21 on the steering column
control, then select "Dial".
Dial the desired number using the numeric keypad by turning and pressing 5
or by turning 20 or 25 and pressing 22
on the steering column control, then
select
þ.
You can call the last number dialled by
pressing and holding 10, 16 or 21 on
the steering column control.
Call a contact from your call
log history
View your call log by pressing 10, 16
or 21 on the steering column control,
then select “Calls”.
Select the “Outgoing”, “Received” or
“Missed” menu. The call log is displayed
on the screen. Select the contact or the
number to call, then confirm by pressing 5, 20 or 22 on the steering column
control to make the call.
MAKING, RECEIVING A CALL (1/3)
Calling a contact from the
telephone directory
When pairing a phone, its phonebook
is automatically uploaded into the audio
system (depending on the model).
Display the phone menu by pressing 10, 16 or 21 on the steering column
control then select “Phonebook” by
turning 5. To view the list of contacts,
press 5.
Select a contact to call from the list,
then confirm by pressing 5 to make the
call.
Note: to return to the previous screen,
press 6.
It is recommended that you
stop your vehicle before
entering a number or sear-
ching for a contact.
The system allows managing call
waiting when your phone is connected (depending on your plan).
Calls
Contacts list
Dial
Page 32

GB.28
MAKING, RECEIVING A CALL (2/3)
During a call
You can:
– adjust the volume by pressing 17
and 19 on the steering column
control;
– hang up by pressing 10, 18 or 21;
– confirm by pressing 5, 20 or 22 on
the steering column control.
Receiving a call
When receiving a call, the caller’s
number is displayed on the screen (this
function depends on the options you
have subscribed to with your service
provider).
If the caller’s number is in one of the
memories, the name of the caller is displayed instead of the number.
If the caller number cannot be displayed, the message “Private number”
is displayed on the screen.
Incoming call
30 32 33
29 30
34
31
To accept a call, press 27 or select 29
by turning and pressing 5 or by turning 20 or 25 and pressing 22 on the
steering column control.
To reject a call, press and hold 27 or
select 30 by turning and pressing 5
or 20 and pressing 22 on the steering
column control.
Page 33

GB.29
MAKING, RECEIVING A CALL (3/3)
Note: to answer the phone, press 27
on the steering column control or briefly
press 18 or 21 from the steering column
control.
To reject a call, press and hold 18, 21
or 27.
To end the call, briefly press 18, 21
or 27.
Turn 5, 20 or 25 on the steering column
control to select the desired icon, then
confirm by pressing 5, 20 or 22. You
can:
– hang up by selecting 30;
– switch the conversation from your
audio system to your phone by selecting 32;
– put a call on hold by selecting 31;
– resume a call placed on hold by se-
lecting 29.
– switch the conversation from your
phone to your audio system by selecting 34;
– control the keypad of your phone
from the audio system by selecting 33.
Page 34

GB.30
SYSTEM SETTINGS (1/3)
Auxiliary (AUX IN)
Display the settings menu by pressing 9. Select “Setup Audio” then
press 5.
Turn 5 , then select “AUX In” to access
the different sections in the following
order:
– “Low”;
– “Medium”;
– “High”.
The values for each setting are as follows:
– “Low” (1200 mV);
– “Medium” (600 mV);
– “High” (300 mV).
Speed Dependent Volume Control
The audio volume of the system varies
with the vehicle speed.
Access the “Setup Audio” menu, then
confirm “Speed Vol.” by pressing 5.
Adjust the volume/speed ratio by turning and pressing 5 to achieve the desired ratio.
Increase the bass (“Bass Boost”)
The “Bass Boost” function increases
the bass levels.
To activate/deactivate this function,
select “ON” or “Off” by turning and
pressing 5.
Default audio
Display the settings menu by pressing 9. Select “Setup Audio”, then
press 5 to display the settings menu
and select “Audio Default”.
Confirm your selection by pressing 5.
All the audio settings return to their default values.
Audio settings
Display the settings menu by pressing 9. Select “Setup Audio” by turning 5, then press 5. The available settings are:
– “Sound”;
– “AUX In”;
– “Speed Vol.”;
– “Bass Boost”;
– “Audio Default”.
Sound
Select “Sound” and press 5 to access
the different sections in the following
order:
– “Bass”;
– “Treble”;
– “Bal.” (left/right sound distribution);
– “Fade” (rear/front sound distribu-
tion).
You can change the value of each setting by turning the dial 5. Press 5 to
confirm and return to the previous selection.
You can exit the menu by pressing 6.
For safety reasons, carry
out any adjustments when
the vehicle is stationary.
Page 35

GB.31
SYSTEM SETTINGS (2/3)
Setting the time
This function allows you to set the time.
Display the settings menu by press-
ing 9. Select “Clock” by turning 5, then
press 5. The available settings are:
– “Set Time”: set the hours and min-
utes;
– “active / deactive”: select “ON” or
“Off” to display or hide the time;
– “Format”: choose the time format
“12h” or “24hr”.
Radio settings
The available settings are:
– «TA»;
– «DR Interrupt…»;
– «Ref. FM List»;
– «Ref. DR List».
«TA»
To activate or deactivate this function:
– display the settings menu by press-
ing 9, select “Radio” by turning 5,
then short press 5 to validate this
choice;
– select “TA” by turning 5, then short
press 5 to validate this choice;
– select “ON” or “Off” to activate or de-
activate the “TA” function.
«DR Interrupt…» (newscasts)
– display the settings menu by press-
ing 9, select “Radio” by turning 5,
then short press 5 to validate this
choice;
– select “DR Interrupt…” by turning 5,
then short press 5 to validate this
choice;
– select the information bulletins you
want to listen to by turning 5, then
short press 5 to validate this choice.
«Ref. FM List»
Please refer to the paragraph on “Ref.
FM List” under “Listening to the radio”.
«Ref. DR List»
Please refer to the paragraph on “Ref.
DR List” under “Listening to the radio”.
Selecting a language
This function allows you to change the
language used in the audio system.
Go to “Language” in the settings menu
by pressing 9, then choose the desired
language.
Page 36

GB.32
“BT settings” (Bluetooth®)
Go to the phone menu by pressing 10,
then select the section “BT Settings” by
pressing 5 or by turning 20 or 25and
pressing 22 on the steering column
control.
The available settings are:
– “Volume”: adjustment of the ringtone
or call volume;
– “Ringtones”: activation of the vehi-
cle’s ringtone or of that transferred
from the phone;
To adjust the volume of the ringtone
when a Bluetooth® phone is connected
to the audio system, select "Volume” by
turning and pressing 5, or by turning 20
or 25 and pressing 22 on the steering
column control.
A new sub-menu appears:
– “Ringtone“;
– “Call”;
SYSTEM SETTINGS (3/3)
– select one of the two items, by turn-
ing 5, 20, 22 or 25, then press 5, 20
or 22 on the steering column control;
– turn 5, 20, 22 or 25 left or right to
raise or lower the volume, then confirm by pressing 5;
To activate the ringtone on the vehicle or the phone via Bluetooth®, select
“Ringtones” by turning 5, 20, 22 or 25
and pressing 5, 20 or 22 on the steering
column control.
A new sub-menu appears:
– “Car”;
– “Phone”;
– select one of the two items to be ac-
tivated by turning 5 and then press 5.
Note: for a phone paired to the audio
system, a new item appears in the
menu: “BT settings”:
– “Update phonebook”: updating of
the phonebook of the phone paired
to the audio system (e.g. addition of
new contacts not yet in the system).
– to update the phonebook on the
audio system, access the “BT settings” menu by pressing 10, then
select “Update phonebook” by
pressing 5, 20 or 22 on the steering
column control.
Display of radio texts
Display the radio text menu by pressing 14. Select “Radio”, then press 5, 20
or 22 on the steering column control.
The radio texts display may contain a
maximum of 64 characters.
NB: if there is no information provided,
the screen displays “No message”.
For safety reasons, carry
out any adjustments when
the vehicle is stationary.
Pressing 6 takes you back to the
previous menu.
Page 37

GB.33
Menu screen
The “R & GO” system has the following
main functions:
40 Access to the “Multimedia” menu:
management of the multimedia resources.
41 Access to the “Phone” menu:
management of the telephone functions.
42 Access to the “Car” menu (Eco²
Driving, fuel consumption, etc.).
43 Access to the “Navigation” menu
(CoPilot navigation application, “find
my vehicle”).
R & GO: GENERAL DESCRIPTION (1/6)
Introduction
“R & GO” is an application that can be
downloaded from your smartphone.
This application lets you access several
menus:
– “Phone”;
– “Multimedia”;
– “Navigation” (CoPilot);
– “Car”.
Note: For more information on com-
patible phones, contact an authorised
dealer or visit the manufacturer’s website if available.
Bluetooth® connection
Check that your phone is paired to the
audio system (refer to the information
on “Pairing a telephone” in the “Pairing,
unpairing a telephone” section.
Note: your telephone’s Bluetooth®
must be activated and set to “visible”
(for further information, please consult
the phone's instructions).
40 41
43 42
Phone mode display
Home screen
35 Return to the menu screen.
36 Telephone information (network,
battery and Bluetooth® connection).
37 Current time.
38 Eco² Driving.
39 Navigation assistance (CoPilot).
Note: You can change the configuration
of the home screen. Refer to Section “R
& GO: setting parameters”.
36 36 37
39 38
35
Page 38

GB.34
The “R & GO” system also provides the
following functions:
44 Return to the home page.
45 Accessing the “R & GO” system
settings.
46 Online help/driver’s handbook.
Your hands-free system is intended to
facilitate communication by reducing
the risk factors, without removing them
completely.
You must always comply with the laws
of the country in which you are travelling.
Tablet mode display
Home screen
47 Tablet information.
48 Online help/driver’s handbook.
49 Exterior temperature.
50 Speed limit on the road taken.
51 Radio station currently playing.
52 Current time.
53 Eco² Driving.
47
49
54 53
R & GO: GENERAL DESCRIPTION (2/6)
44
46
45 5250
5148
54 Navigation map.
55 Accessing the “R & GO” system
settings.
56 Vehicle management.
57 Phone system (depending on the
tablet).
58 Navigation assistance (CoPilot).
59 Management of multimedia re-
sources.
Note: You can change the configuration
of the home screen. Refer to Section “R
& GO: setting parameters”.
47
55
56
57
58
59
Page 39

GB.35
R & GO: GENERAL DESCRIPTION (3/6)
63 the call log lets you view and see
all incoming, outgoing, and missed
calls.
Note: for a phone whose operating
system is “Androïd”, the SMS playback
function is available (“Text-to-Speech”).
The audio system reads the SMS messages aloud.
“Multimedia” function
The “Multimedia” function allows you to
manage listening to the radio, playing
audio files, and allows you to do the following:
65 listen to the radio;
66 listen to music from your smart-
phone on the audio system;
68 listen to music from an exter-
nal source (CD/CD MP3, USB
or iPod® (device with integrated
iPod®) via the USB port ;
69 select and listen to themed radio
stations (webradio) from around
the world via the internet connection on your phone.
“Phone” function
The phone function allows use of your
phone hands-free and provides the following functions:
60 the numeric keypad allows you to
dial a phone number;
61 the phonebook displays a contact
and their details;
62 the calendar, synchronised with
the audio system, allows you to
view one or more tasks recorded
on the phone;
Note: when you use a webradio, transferring the required mobile phone data
may lead to additional costs not included in your phone plan.
The “R & GO” system also provides the
following features:
64 – short press: back to the previ-
ous menu.
– long press: back to the home
page.
67 Adjust the multimedia settings.
65 66
69 68
64 67
60 61
6263
Page 40

GB.36
The navigation function includes all
the satellite navigation features, road
maps, traffic information, CoPilot services and warning areas.
This system incorporates the following
functions:
70 The CoPilot software for route
planning.
71 The “Find my car” feature to find
the current location of your vehicle.
R & GO: GENERAL DESCRIPTION (4/6)
Adjusting the settings
The parameter settings func-
tion allows the various parameters of
the “R & GO” system to be adjusted.
This function is denoted by a shortcut
and has the following functions:
– connection with the system’s radio;
– managing the night mode for the
navigation display;
– managing your favourites on the
home page.
“Car” function
The vehicle function includes management of certain equipment such as
the vehicle’s computer and the Eco²
Driving.
This system performs the following
functions:
72 Eco² Driving.
73 Fuel consumption.
74 “Services” displays the dashboard
information.
75 Rev counter (rpm x 1000).
72 73
75 74
70 71
Page 41

GB.37
R & GO: GENERAL DESCRIPTION (5/6)
– connect the telephone holder 79 to
the audio system’s USB2 socket;
– turn the locking knob 76 of the phone
holder 79 clockwise to secure it;
– place your phone in the telephone
holder 79 and press both clips 80
until the phone is firmly held in place.
To remove the telephone holder 79
from your audio system:
– hold your phone while pressing the
retaining clips 78, then take out your
phone;
– turn the locking knob 76 of the phone
holder 79 anticlockwise to release it
from your vehicle’s audio system;
– disconnect the telephone holder 79
from your vehicle’s audio system;
– replace the telephone holder 23
cover by turning it clockwise to close
the USB2 socket.
Telephone holder
To attach the telephone holder 79 onto
your vehicle’s audio system, follow
these instructions:
– remove the telephone bracket’s
cover 23 by turning counter-clockwise to expose the USB2 socket;
– set the arrow 77 of the locking
knob 76 in the up position before
putting the phone holder 79 on the
audio system for correct connection;
78
80
807776
79
Page 42

GB.38
Note: You can use the telephone
holder 79 in two positions:
– vertically, by placing your phone hor-
izontally and then turning the support 79 to an upright position;
– horizontally, by placing your phone
vertically and then turning the support 79 horizontally.
NB: You can also tilt the telephone
holder to get a better view of the
phone’s screen.
79
Charging using the USB port
Once your telephone’s USB socket is
connected to the USB port of the telephone holder 79, you can charge its
battery during use.
R & GO: GENERAL DESCRIPTION (6/6)
Page 43

GB.39
R & GO: PHONE FUNCTION (1/2)
Note: you can check your voicemail by
holding down key “1” on the keypad 11.
The first long press on key “1” on the
keypad 11 saves the voicemail number
for your telephone.
“Numeric keypad”
To dial a number or call your phone's
voicemail, press the “Digital keypad”
icon.
Dial your number using the numeric
keypad and press the green button to
start the call.
Introduction to the “Phone”
menu
To access the telephone menu, from
the main menu press the “Menu” icon,
then “Phone”.
The “Phone” consists of four large
icons, all accessible:
– dial a number using the numeric
keypad;
– find a contact in the phonebook;
– retrieve a number from your call log;
– access your phone’s calendar.
It is recommended that you
stop your vehicle before entering a number or searching for a contact.
“Phonebook”
Press the “Phonebook” icon to access
the list of contacts in your Bluetooth®
phone.
After connecting the audio system
and your Bluetooth® phone using
Bluetooth® wireless technology, your
phonebook numbers are automatically
accessible from the “R & GO” applica-
tion.
Select the contact (if the contact has
more than one number, you will be requested to select the number to call).
The call will be started automatically
after you press the contact’s number.
Note: To scroll through the list of
contacts, use the “Up” and “Down” buttons.
Page 44

GB.40
R & GO: PHONE FUNCTION (2/2)
“Call log”
From the “Phone” menu, press the
“Call log” icon.
The call log places the various calls in
four tabs:
– All calls (incoming, outgoing,
missed);
– incoming calls;
– missed calls;
– outgoing calls.
For each list, the contacts are listed
from the most recent to the oldest.
To navigate through the call log, you
can press:
– a tab to view its contents;
– the “Up” and “Down” buttons to scroll
through the list of calls;
– an entry from the call log to call the
corresponding contact.
“Calendar”
From the “Phone” menu, press the
“Calendar” icon.
The phone calendar shows all of the
tasks, appointments and events of that
day, etc. listed in your phone on the
audio system.
To browse through the calendar, you
can press:
– a tab to see its contents in detail,
such as the time, description, and
address;
– the “Up” and “Down” buttons to scroll
through the calendar.
From a stored address, you can launch
the “CoPilot” application. Press the red
icon to navigate to the stored address.
“SMS log” (depending on
the phone)
From the “Phone” menu, press the
“SMS log” icon.
The SMS log allows you to listen to
the last three messages received while
using the “R & GO”.
Note: to scroll through the list of SMS,
use the “Up” and “Down” buttons.
“Warning message”
(depending on the phone)
This function is for playing warning
messages. Press the “Warning message” icon to play the message.
Page 45

GB.41
R & GO: MULTIMEDIA FUNCTION (1/2)
”Listen to the radio”
From the main menu, press the icons
“Menu”, “Multimedia”, then the “Listen
to the radio” icon.
This menu allows you to listen to radio
stations and provides the following
functions:
– select a waveband (FM2, FM1, DR1,
DR2, or AM);
– select a station using one of three
search modes “Frequency”, “List” or
“Preset”;
– find a station using the integrated in-
telligent keypad;
– listen to preset stations;
– view text information from certain FM
and DR radio stations while listening.
For further information, please refer to
the section on “Listening to the radio”.
Bluetooth® “Audio
playback”
From the main menu, press the icons
“Menu”, “Multimedia”, then the icon
“Play Bluetooth® audio”.
In order to use your Bluetooth® device,
you must pair it to the vehicle upon first
use.
The “Play Bluetooth® audio” menu provides the following functions:
– access the audio files directly;
– access files, music, genres, artists,
albums and reading lists;
– access files and/or audio files.
NB: Only available sources can be
selected. Unavailable sources will be
greyed out.
Introduction to the
“Multimedia” menu
To access the “Multimedia” menu, from
the main menu, press the “Menu” icon,
then “Multimedia”.
The “R & GO” application is made up of
four main sections, all of which can be
accessed from the “Multimedia” menu:
– listen to the radio;
– listen to the phone’s music via the
Bluetooth® connection;
– listen to the “Webradio”;
– listen to music from an external
source (CD/CD MP3, USB, iPod®
(device with integrated iPod®) via
the USB port, etc.).
Note: to use all the features of the
“Multimedia” menu, you must connect
your Bluetooth® phone or tablet to the
audio system.
For safety reasons, carry
out any adjustments when
the vehicle is stationary.
Page 46

GB.42
R & GO: MULTIMEDIA FUNCTION (2/2)
”Auxiliary audio source”
The “Auxiliary audio source” menu enables you to listen to music from an external audio source.
From the main menu, press the icons
“Menu”, “Multimedia”, then “Auxiliary
audio source”.
From the following list, select an input
source connected to the audio system
to access the audio files:
– CD/CD MP3;
– USB1;
– USB2;
– iPod®: device with integrated iPod®;
– jack connection.
”Multimedia settings”.
From the main menu, press the icons
“Menu”, “Multimedia”, then “Multimedia
Settings”.
This function allows you to change the
following settings:
– “Balance”;
– “Bass”;
– “Navigation instructions”;
– “Auxiliary input level”;
– “Random” (random playback);
– “iTraffic” ;
– “Updating FM List”;
– “Updating DR List”;
– “Apply default value”.
”Webradio”
The “Webradio” menu allows searching, viewing, and listening to radio stations via your phone (BBC World, podcasts, etc.).
You have the option to bookmark one or
more radio stations and/or music.
From the main menu, press the icons
“Menu”, “Multimedia”, then “Webradio”.
The “Webradio” menu provides the following functions:
– manage your favourite stations;
– find a station with the intelligent
keypad;
– view the rankings of radio stations
(history, favourite stations, local sta-
tions);
– accessing an album image, the artist
name and the title of the current
track;
– switch to the vehicle’s audio system
radio.
Note: when you use the webradio,
transferring the required mobile phone
data may lead to additional costs not included in your phone plan.
Sound
Balance / Fader
Bass / Treble
Aux input level Medium
Page 47

GB.43
R & GO: NAVIGATION FUNCTION (1/2)
Map key
The information displayed below may
vary:
81 Back to previous page.
82 Telephone notification information.
83 Points of Interest (POI).
84 Navigation map.
85 Telephone information (net-
work, battery and connection via
Bluetooth®).
86 Current time.
87 Audio source shortcut.
88 Zoom in.
89, 92 Configurable information rela-
tive to your route.
90 Distance to and indication of next
change of direction.
91 Route calculated by the navigation
system.
93 Driving menu.
94 Zoom out.
Introduction to the
«Navigation» menu
To access the navigation menu, from
the main menu press the «Menu» icon,
then «Navigation».
The «Navigation» menu consists of
two large icons, which can be used to
access:
– the “CoPilot” navigation application
for route management;
– the “Find my vehicle” application to
suggest the route to take to access
your vehicle.
”CoPilot” navigation
application
From the “Navigation” menu, press the
“CoPilot navigation application” icon.
The “CoPilot” navigation system enables you to enter a destination, choose
points of interest, configure your travel
mode, access information services in
real time, and more.
14:32
85
899092 91
8281 87
88
94
8684
< 8 km/h
83
Continue for 1.2 km towards Trappes (D36)
Trappes
93
14:32
< 8 km/h
Main Menu
Delete Destination
3D map
Find POIs My route
Instructions Diversion
Driving menu
For safety reasons, carry
out any adjustments when
the vehicle is stationary.
93
Page 48

GB.44
R & GO: NAVIGATION FUNCTION (2/2)
«Find my vehicle»
This function suggests the
route to access your vehicle.
From the «Navigation» menu, press the
«Find my vehicle» icon.
To find your vehicle, you can:
– complete the «Vehicle parking ad-
dress» field;
– press the “Go to my car” button to
launch the “CoPilot” navigation in
pedestrian mode towards the pre-set
address.
Note: to be operational, the application
has to be connected to your vehicle’s
audio system. It saves your vehicle’s
GPS position as soon as:
– the ignition is switched off;
– connection with your vehicle’s audio
system is lost.
If your vehicle has been moved by a
third party between the time of saving
its GPS position and the time you wish
to find it, the application cannot search
for its current position.
Page 49

GB.45
R & GO: VEHICLE FUNCTION (1/2)
«Driving Eco²»
from the «Car» menu, press the
«Driving Eco²» icon. The «Driving Eco²»
function displays a real-time overall
score that reflects your driving style.
This score takes the following criteria
into account:
– acceleration;
– the ability to anticipate braking;
– compliance with speed limits.
You can see your overall score and
personalised advice at the end of every
trip.
You can also check:
– the distance travelled without bur-
ning fuel;
– the scores for your last ten trips.
Note: Depending on the telephone, the
“Driving Eco²” application no longer records your scores in the background.
NB: Press the “Reset” button on the instrument panel to start a new journey
once the application has launched.
Introduction to the «Car»
menu
To access the «Car» menu, from the
main menu, press the «Menu» icon,
then «Car».
The system is made up of four main
sections, all of which can be accessed
from the vehicle menu:
– Driving Eco² ;
– fuel consumption;
– rev counter (rpm x 1000);
– “Services” displays the dashboard
information.
For safety reasons, carry
out any adjustments when
the vehicle is stationary.
A journey has to be more than 400
metres to be taken into account. If the
time between the stopping and starting
the engine is less than four hours, the
application continues to take the journey into account before stopping.
Page 50

GB.46
R & GO: VEHICLE FUNCTION (2/2)
«Rev counter»
From the «Car» menu, press the «Rev
counter» icon.
This function allows you to view the
revolutions of your vehicle in real time
(rpm x 1,000).
«Fuel consumption»
From the «Car» menu, press the «Fuel
consumption» icon.
This function displays the instantaneous fuel consumption compared to
the average consumption of your vehicle.
«Services»
From the «Car» menu, press the
«Services» icon.
The «Services» menu gives you access
to the following:
– data recorded on the dashboard (av-
erage speed, average fuel consumption, total distance and distance travelled since last reset);
– «E-guide», to consult the driver’s
handbook;
– «MYRENAULT», to access custom-
ised services on the Renault® website.
Note: to access «MYRENAULT» and
benefit from its services, you must install the «MYRENAULT» application on
your phone.
If the application is not installed, a message appears asking you to install it.
Page 51

GB.47
R & GO: SETTING PARAMETERS (1/2)
Automatic Bluetooth® connection
Tick this option to activate or deactivate
the audio system’s Bluetooth® when
launching the application.
Connecting to the radio
This menu provides a list of the audio
systems located around you.
Select this menu to display the list of recognised audio systems, then select the
name of your vehicle’s audio system.
Automatic launch of the application
Select this option to activate or deactivate the automatic launch of the application as soon as the connection to
your vehicle’s audio system is established.
Bluetooth® connection
To activate the Bluetooth® connection,
from the home screen, press “Menu”,
“App settings” and select “Automatic
Bluetooth connection”.
Accessing the settings
From the main menu, press “Settings”.
Via the “Settings” menu in the “R & GO”
system, you can adjust the following elements:
– automatic Bluetooth® connection;
– connection with the system’s radio;
– automatic launch of the application
once connected with the radio;
– managing «Night mode» for the navi-
gation display;
– managing your favourites on the
home page.
App settings
Auto bluetooth connection
Link MY CAR radio
Launching R & GO
Launching R & GO
Night mode
Home page widgets
Auto
For safety reasons, carry
out any adjustments when
the vehicle is stationary.
App settings
Automatic
Automatic
Off
Page 52

GB.48
R & GO: SETTING PARAMETERS (2/2)
«Night mode»
To improve the visibility of the navigation screen between day and night, you
can change the combination of the map
colours.
Select by checking one of the following
options:
– «Auto»: automatic switch to day or
night is defined based on your smart-
phone settings.
– «ON»: the map screen is always dis-
played with bright colours.
– «Off»: the map screen is always dis-
played with dark colours.
Night mode
Automatic
ON
Off
Home page widgets
The welcome screen is the default
screen for your audio system. It is
made up of a certain number of shortcuts to other functions, such as navigation and radio.
You can modify and set the two favourites to be displayed on the home
screen.
Press the “Home page widget” menu,
then select only one or two types of favourite at the most.
Navigation
AUDIO
Fuel consumption
SMS
Home page widgets,
etc.
Page 53

GB.49
OPERATING FAULTS (1/3)
Description Possible causes Solutions
No sound can be heard. The volume is set to minimum or pause. Increase the volume or deactivate pause.
The audio system does not work and
the display does not light up.
The audio system is not switched on. Switch the audio system on.
The audio system fuse has blown. Replace the fuse (see the section on «Fuses»
in the vehicle’s driver’s handbook).
The audio system does not work but
the display lights up.
The volume is set to minimum. Press 17 or turn 1.
Speaker short circuit. Please consult an authorised dealer.
No sound comes out of the left- or
right-hand speakers when using the
radio or a CD.
The sound balance setting (left/right) is
incorrect.
Correct the sound balance setting.
Speaker disconnected. Please consult an authorised dealer.
Poor radio reception or no reception. The vehicle is too far from the transmitter
to which the radio is tuned (background
noise and interference).
Search for another transmitter with a better
local signal.
The reception is disrupted by interference from the engine.
Please consult an authorised dealer.
The aerial is damaged or not connected. Please consult an authorised dealer.
Page 54

GB.50
OPERATING FAULTS (2/3)
Description Possible causes Solutions
The initial read time of a CD CD MP3
seems long.
CD soiled. Eject and clean the CD.
CD MP3. Wait: the CD MP3 requires a long time to
be read.
“CD reading error” is displayed or the CD/
CD MP3 is ejected by the audio system.
CD incorrectly inserted or dirty, damaged
or incompatible.
Eject the CD/CD MP3. Insert a CD/CD
MP3 correctly that is clean, undamaged
and compatible.
Some CD MP3 files cannot be read. Audio and non-audio files have been
saved on the same CD.
Save audio and non-audio files on different CDs.
The audio system cannot read the CD
MP3.
The CD has been written at a speed of
less than 8x or more than 16x.
Write your CD at a speed of 8x.
The CD has been written in multi-session
mode.
Write your CD in Disc at Once mode or
write the CD in Track At Once mode, and
finalise the CD after the last session.
The CD MP3 playback quality is poor The CD is black or of a colour with a
lower reflective capacity, which reduces
the playback quality.
Copy your CD to a white or light-coloured CD.
Page 55

GB.51
OPERATING FAULTS (3/3)
Description Possible causes Solutions
The phone does not connect to the
system.
– Your phone is off.
– Your phone’s battery is flat.
– Your phone has not previously been
paired to a hands-free phone system.
– Bluetooth® for your phone and the
system have not been activated.
– The phone is not configured to
accept the audio system’s connection
request.
– Switch on your phone.
– Recharge your phone’s battery.
– Pair your phone to the hands-free
phone system.
– Activate the Bluetooth® for your
phone and the system.
– Configure the phone to accept the
audio system’s connection request.
The Bluetooth® portable audio player
does not connect to the system.
– Your audio player is off.
– Your audio player’s battery is flat.
– Your audio player has not previously
been paired to the audio system.
– The Bluetooth® for your audio player
and the audio system have not been
activated.
– The portable audio player is not confi-
gured to accept the audio system’s
connection request.
– Music does not start to play from your
audio player.
– Switch on your portable audio player.
– Recharge your audio player’s battery.
– Pair your audio player to the audio
system.
– Activate Bluetooth® for your audio
player and the audio system.
– Configure the audio player to accept
the system’s connection request.
– Depending on your phone’s degree of
compatibility, music may need to be
played from your audio player.
The message “Battery low” is shown. Using your hands-free phone system for
prolonged periods of time will run down
your phone’s battery more quickly.
Recharge your phone’s battery.
Page 56

GB.52
ALPHABETICAL INDEX (1/2)
A
AF-RDS frequency tracking ............................................ GB.16
auxiliary source...............................................................GB.20
B
Bluetooth® ............................................................GB.4 – GB.5
buttons .............................................................. GB.6 → GB.12
C
call .................................................................................. GB.27
call history.......................................................................GB.27
call volume......................................................................GB.28
CD text............................................................................GB.19
CD/MP3 CD
eject ..........................................................................GB.19
fast winding ...............................................................GB.18
insert ......................................................................... GB.18
listen .........................................................................GB.18
MP3 CD specifications .............................................. GB.18
random playback ......................................................GB.19
choosing the source .......................................................GB.13
communication ...............................................................GB.28
connect a telephone ....................................................... GB.25
connection
failure ........................................................................ GB.26
controls ............................................................. GB.6 → GB.12
D
disconnect a telephone...................................................GB.26
F
FM/LW/MW bandwidths ........................................GB.4 – GB.5
H
hands-free phone kit ......................................................... GB.5
hands-free telephone system ......................................... GB.27
I
ID3 tag ............................................................................GB.19
L
languages ....................................................................... GB.30
M
mute................................................................................GB.13
O
operating faults ............................................... GB.49 → GB.51
operation.........................................................................GB.13
P
pairing a telephone ...........................................GB.23 – GB.24
pause .............................................................................. GB.19
precautions during use .........................................GB.2 – GB.3
R
radio
automatic mode ........................................................GB.15
automatic station storage .......................................... GB.15
choosing a station .....................................................GB.15
manual mode ............................................................ GB.15
station pretuning .......................................................GB.15
radio-text.........................................................................GB.30
range of wavelengths .....................................................GB.15
RDS .................................................................................. GB.4
receiving a call ................................................................ GB.27
S
settings
audio ......................................................................... GB.30
switching off .................................................................... GB.13
T
telephone contacts list ....................................................GB.27
Page 57

GB.53
ALPHABETICAL INDEX (2/2)
U
unpairing a telephone .....................................................GB.24
USB socket ..................................................................... GB.20
V
volume ............................................................................ GB.13
W
WMA ...............................................................................GB.18
Page 58

GB.54
Page 59

E.1
Traducido del francés. Se prohíbe la reproducción o traducción, incluso parcial, sin la autorización previa y por escrito del titular
de los derechos.
Precauciones de utilización . . . . . . . . . . . . . . . . . . . . . . . . . . . . . . . . . . . . . . . . . . . . . . . . . . . . . . . . E.2
Descripción general . . . . . . . . . . . . . . . . . . . . . . . . . . . . . . . . . . . . . . . . . . . . . . . . . . . . . . . . . . . . . . E.4
Presentación de los mandos . . . . . . . . . . . . . . . . . . . . . . . . . . . . . . . . . . . . . . . . . . . . . . . . . . . . . . . E.6
Operación . . . . . . . . . . . . . . . . . . . . . . . . . . . . . . . . . . . . . . . . . . . . . . . . . . . . . . . . . . . . . . . . . . . . . E.13
Utilizar el reconocimiento de voz . . . . . . . . . . . . . . . . . . . . . . . . . . . . . . . . . . . . . . . . . . . . . . . . . . . . E.14
Escuchar la radio . . . . . . . . . . . . . . . . . . . . . . . . . . . . . . . . . . . . . . . . . . . . . . . . . . . . . . . . . . . . . . . . E.15
Escuchar un CD/CD MP3 . . . . . . . . . . . . . . . . . . . . . . . . . . . . . . . . . . . . . . . . . . . . . . . . . . . . . . . . . E.18
Fuentes audio auxiliares . . . . . . . . . . . . . . . . . . . . . . . . . . . . . . . . . . . . . . . . . . . . . . . . . . . . . . . . . . E.20
Emparejar/desemparejar un teléfono . . . . . . . . . . . . . . . . . . . . . . . . . . . . . . . . . . . . . . . . . . . . . . . . E.23
Conectar/desconectar un teléfono. . . . . . . . . . . . . . . . . . . . . . . . . . . . . . . . . . . . . . . . . . . . . . . . . . . E.25
Realizar / recibir una llamada . . . . . . . . . . . . . . . . . . . . . . . . . . . . . . . . . . . . . . . . . . . . . . . . . . . . . . E.27
Ajustes del sistema . . . . . . . . . . . . . . . . . . . . . . . . . . . . . . . . . . . . . . . . . . . . . . . . . . . . . . . . . . . . . . E.30
R & GO: Descripción general . . . . . . . . . . . . . . . . . . . . . . . . . . . . . . . . . . . . . . . . . . . . . . . . . . . . . . E.33
R & GO: Función Telefonía . . . . . . . . . . . . . . . . . . . . . . . . . . . . . . . . . . . . . . . . . . . . . . . . . . . . . . . . E.39
R & GO: Función Multimedia . . . . . . . . . . . . . . . . . . . . . . . . . . . . . . . . . . . . . . . . . . . . . . . . . . . . . . . E.41
R & GO: Función navegación . . . . . . . . . . . . . . . . . . . . . . . . . . . . . . . . . . . . . . . . . . . . . . . . . . . . . . E.43
R & GO: función Vehículo . . . . . . . . . . . . . . . . . . . . . . . . . . . . . . . . . . . . . . . . . . . . . . . . . . . . . . . . . E.45
R & GO: Ajustes de los parámetros. . . . . . . . . . . . . . . . . . . . . . . . . . . . . . . . . . . . . . . . . . . . . . . . . . E.47
Anomalías de funcionamiento . . . . . . . . . . . . . . . . . . . . . . . . . . . . . . . . . . . . . . . . . . . . . . . . . . . . . . E.49
Page 60

E.2
PRECAUCIONES DE UTILIZACIÓN (1/2)
Es imperativo seguir las precauciones de utilización del sistema que se detallan a continuación, por razones de seguridad o por
riesgo de sufrir daños materiales. Debe respetar obligatoriamente las leyes del país en el que se encuentre.
Precauciones que conciernen a la manipulación del sistema de audio
– Accione los mandos (en el frontal o en el volante) y consulte la información de la pantalla cuando las condiciones de
circulación se lo permitan.
– Ajuste el volumen a un nivel moderado que le permita oír los sonidos del entorno.
Precauciones materiales
– No realice ningún desmontaje ni ninguna modificación del sistema para evitar cualquier riesgo material y posibles quema-
duras.
– En caso de disfuncionamiento y para cualquier operación de desmontaje, consulte con un representante del constructor.
– No introduzca cuerpos extraños ni CD/CD MP3 dañados o sucios en el lector.
– Utilice únicamente CD CD MP3 de forma circular de 12 cm de diámetro.
– Coja los discos sujetándolos por el borde interior y exterior sin tocar la cara no impresa de los CD/CD MP3.
– No pegue papel en los CD/CD MP3.
– En caso de una utilización prolongada, retire el CD/CD MP3 del lector con precaución ya que puede estar caliente.
– No exponga nunca los CD/CD MP3 al calor o a la luz directa del sol.
– No utilice productos a base de alcohol o aerosoles de fluidos en la zona.
Precauciones que conciernen al teléfono
– Determinadas leyes regulan el uso del teléfono en el coche. No autorizan el uso de sistemas de telefonía manos libres en
cualquier situación de conducción: todo conductor debe mantener el control de su conducción.
– Llamar mientras se conduce es un factor importante de distracción y de riesgo en todas las fases de utilización (marcar,
hablar por teléfono, buscar una entrada en la agenda…).
Mantenimiento del frontal
– Emplee un paño suave y, si es necesario, un poco de agua jabonosa. Aclárelo con un paño suave ligeramente húmedo y
después pase un paño suave seco.
– No presione en la pantalla del frontal y no use productos a base de alcohol.
Page 61

E.3
PRECAUCIONES DE UTILIZACIÓN (2/2)
La descripción de los modelos que figuran en este manual se ha establecido a partir de las características conocidas en la
fecha de concepción de este documento. El manual reúne todas las funciones existentes para los modelos descritos. Su
presencia depende del modelo del equipamiento, de las opciones elegidas y del país de comercialización. Asimismo,
en este documento pueden estar descritas ciertas funcionalidades que harán su aparición a lo largo del año.
En el manual, el representante de la marca hace referencia al representante del fabricante del vehículo.
Page 62

E.4
DESCRIPCIÓN GENERAL (1/2)
Introducción
El sistema audio garantiza las funciones
siguientes:
– Radio FM (RDS) y AM;
– Radio digital terrestre (DR);
– CD/CD MP3 reproductor;
– gestión de modos audio auxiliares;
– sistema de telefonía manos libres
Bluetooth®.
Funciones radio y CD/CD
MP3
La autorradio permite la escucha de las
emisoras de radio y la lectura de CD en
diferentes formatos de audio.
Las emisoras de radio están clasificadas por gamas de ondas: FM (frecuencia modulada) y AM (amplitud modulada).
El sistema DR (formato DAB, DAB+,
T-DMB) ofrece mejor reproducción
del sonido y acceso a la información de texto memorizada en la radio
(Intellitext) al desplazarse por el texto
para visualizar:
– novedades;
– resultados deportivos,...
El sistema RDS permite la visualiza-
ción del nombre de algunas emisoras o
de la información difundida por las emisoras de radio FM:
– información sobre el estado general
del tráfico en carretera (TA);
– mensajes de emergencia.
Función audio auxiliar
Puede escuchar su reproductor de
audio directamente en los altavoces de
su vehículo. Tiene varias posibilidades
para conectar su reproductor, según el
tipo de aparato que posea:
– toma USB;
– toma Jack;
– conexión Bluetooth®.
Para obtener más detalles sobre la lista
de aparatos compatibles, consulte con
un Representante de la marca.
Page 63

E.5
DESCRIPCIÓN GENERAL (2/2)
Función de telefonía manos
libres
El sistema de telefonía manos libres
Bluetooth® garantiza las funciones siguientes sin necesidad de manipular el
teléfono:
– emparejar hasta 5 teléfonos;
– realizar/recibir/suspender una lla-
mada;
– transferir la lista de los contactos de
la agenda telefónica o de la tarjeta
SIM (según el teléfono);
– consultar el registro de llamadas
realizadas desde el sistema (según
el teléfono);
– llamar al buzón de voz.
Función Bluetooth®
Esta función permite al sistema de
audio reconocer y controlar el reproductor de audio o el teléfono móvil por
emparejamiento Bluetooth®.
Puede activar/desactivar la función
Bluetooth® en el menú «Bluetooth»:
– visualice el menú de los ajustes pul-
sando 9 ;
– seleccione «Bluetooth» girando y
pulsando 5 ;
– seleccione «ACT.»/ «Desact.».
Su sistema de telefonía
manos libres tiene por
único fin facilitar la comu-
nicación disminuyendo los
factores de riesgo sin eliminarlos totalmente. Debe respetar obligatoriamente las leyes del país en el que
se encuentre.
ACT.
DES.
Page 64

E.6
PRESENTACIÓN DE LOS MANDOS (1/7)
1
12
8
6
5
4
10
Mandos bajo el volante
Frontales del
sistema
17
19
15
22
21
7
3
19
18
20
15 1716
20
1
13 9
2
2
7
11
11
8
6
5
4
10 7
3
97
1413
Page 65

E.7
PRESENTACIÓN DE LOS MANDOS (2/7)
4
11
3
5
9
1
10118
77
13
14
7
5
9
1
7 813
10
3
4
14
6
12
23
6
Mandos bajo el volanteFrontales del
sistema
15
16
17
24
19
22
25
2
2
11
17
19
18
20
15
16
Page 66

E.8
PRESENTACIÓN DE LOS MANDOS (3/7)
Frontales del
sistema
1
5
2
24 12
4
10
3
14
7
26
6
11
Mandos bajo el volante
27
28
9
11
Page 67

E.9
PRESENTACIÓN DE LOS MANDOS (4/7)
Función AUDIO Función TELEFONÍA
1
– Pulsar: encendido/apagado.
– Girar: ajustar el volumen de la emisora que se está escuchando.
2 Visualizador de informaciones.
3
– Presión breve: elegir la fuente radio y la banda de fre-
cuencias: FM1 → FM2 → DR1 → DR2 → AM.
– Presión prolongada: actualizar la lista de emisoras de
radio.
4
Seleccionar la fuente multimedia deseada (si está conectada):
CD/CD MP3 → iPod1/USB1 → iPod2/USB2 → reproductor
Bluetooth® → AUX (toma Jack).
5
– Pulsar: validar una acción.
– Girar: navegar por los menús o listas.
6
– Vuelve a la pantalla/nivel anterior mientras navegamos
por los menús;
– anular una acción en curso.
7
– Pulsación breve: cambiar de pista (CD/CD MP3, algu-
nos reproductores de audio) o cambiar de frecuencia de
radio.
– Mantener pulsado: avance/retroceso rápido a una pista
de CD/CD MP3 de algunos reproductores de audio, o
desplazarse por las emisoras de radio hasta soltar el
botón.
8 Conexión de USB para iPod® o de fuentes de audio auxiliares.
9
– Presión breve: acceder al menú de ajustes personaliza-
dos.
– Presión prolongada: activar la función «Texto».
Page 68

E.10
PRESENTACIÓN DE LOS MANDOS (5/7)
Función AUDIO Función TELEFONÍA
10
– Presión breve: acceder al menú «Teléf.».
– Presión prolongada: volver a llamar al último número.
Recepción de una llamada:
– presión breve: contestar a la llamada;
– presión prolongada: rechazar la llamada.
11
Pulsación breve: recuperar una emisora guardada previamente.
Presión prolongada: memorizar una emisora de radio.
12 Expulsa un CD / CD MP3.
13 Entrada auxiliar.
14 Activar la función «Texto».
15
Elegir la fuente de audio: FM1 → FM2 → DR1 → DR2 →
AM → CD / CD MP3 → iPod1/USB1 → iPod2/USB2 → reproductor Bluetooth® → AUX (toma Jack).
16 Acceder al menú «Teléf.».
17 Sube el volumen de la fuente que se está escuchando.
18
– Quitar el sonido de la fuente de radio que se está escu-
chando;
– silenciar el sonido y pausar la reproducción del disposi-
tivo CD/CD MP3, USB, iPod® o Bluetooth®.
Sin recepción de llamada:
– presión prolongada: volver a llamar al último número.
Recepción de una llamada:
– presión breve: contestar a la llamada;
– presión prolongada: rechazar la llamada.
Page 69

E.11
PRESENTACIÓN DE LOS MANDOS (6/7)
Función AUDIO Función TELEFONÍA
19 Bajar el volumen de la fuente que se está escuchando.
17 + 19
– Silenciar el sonido de la fuente de radio que se está escuchando;
– silenciar el sonido y pausar la reproducción del dispositivo CD/CD MP3, USB, iPod® o Bluetooth®.
20
Rotación:
– radio: navegar por la lista de radio;
– multimedia: retrocede/avanza una pista.
Rotación:
– El menú «Teléfono»: navegar por la lista.
– Presión breve: abrir la lista de reproducción actual.
Pulsación prolongada:
– volver a la pantalla / al nivel anterior mientras se navega
por los menús;
– anular una acción en curso.
– Presión breve: validar una acción.
Pulsación prolongada:
– volver a la pantalla / al nivel anterior mientras se
navega por los menús;
– anular una acción en curso.
21
– Presión breve: acceder al menú «Teléf.».
– Presión prolongada: volver a llamar al último número.
Recepción de una llamada:
– presión breve: contestar a la llamada;
– presión prolongada: rechazar la llamada.
22
– Presión breve: abrir la lista de reproducción actual.
Pulsación prolongada:
– volver a la pantalla / al nivel anterior mientras se navega
por los menús;
– anular una acción en curso.
– Presión breve: validar una acción.
Pulsación prolongada:
– volver a la pantalla / al nivel anterior mientras se
navega por los menús;
– anular una acción en curso.
23 Tapa de soporte del teléfono extraíble girando en el sentido inverso a las agujas del reloj.
Page 70

E.12
PRESENTACIÓN DE LOS MANDOS (7/7)
Función AUDIO Función TELEFONÍA
24
– Quitar el sonido de la fuente de radio que se está escu-
chando;
– silenciar el sonido y pausar la reproducción del disposi-
tivo CD/CD MP3, USB, iPod® o Bluetooth®.
25
Rotación:
– radio: navegar por la lista de emisoras de radio memori-
zada anteriormente;
– multimedia: retrocede/avanza una pista.
Rotación:
– Menú «Teléf.»: navegar por la lista.
26
Activar/desactivar la búsqueda automática y la reproducción de la información de tráfico en cuanto sean emitidas
por ciertas emisoras de radio en el modo FM o DR.
27
Recepción de una llamada:
– presión breve: contestar a la llamada;
– presión prolongada: rechazar la llamada.
28
– Presión breve: activar el reconocimiento de voz.
– Presión prolongada: desactivar el reconocimiento de voz.
Page 71

E.13
PUESTA EN MARCHA
Encendido y apagado
Pulse brevemente 1 para iniciar el sistema de audio.
Puede utilizar su sistema de audio sin
arrancar el vehículo. Funcionará durante 20 minutos. Pulse 1 para que funcione durante 20 minutos más.
Apague el sistema de audio mediante
una pulsación breve en 1.
Selección de la fuente
Para desplazarse por las diferentes
fuentes de audio, pulse 4 sucesivamente. Las fuentes de audio aparecen en el siguiente orden: CD/CD MP3
→ iPod1/USB1 → iPod2/USB2 → BT
Streaming (Bluetooth®) → AUX.
Nota: pulse 10 para visualizar el menú
del teléfono.
Si inserta una nueva fuente multimedia (CD/CD MP3, USB, AUX) cuando la
radio está encendida, el modo cambia
automáticamente y se inicia la escucha
del archivo.
También puede seleccionar el modo
radio pulsando la tecla 3. Pulse 3 sucesivamente para desplazarse por la
banda de frecuencias en el orden siguiente: FM1 → FM2 → DR1 → DR2
→ AM → FM1…
Para cambiar de fuente multimedia y
radio, pulse 15 en el mando de la columna de dirección.
Volumen
Ajuste el volumen sonoro girando 1 o
pulsando 17 o 19 en el mando bajo el
volante.
La pantalla indica «Vol.» seguido del
valor del ajuste en curso (de 00 a 31).
Corte del sonido
Pulse brevemente 18 o 24, o simultáneamente 17 y 19 en el mando de
la columna de dirección. El mensaje
«SILENCIO» se visualiza en la pantalla.
Pulse brevemente 18, 24, 17 o 19 en el
mando de la columna de dirección de
nuevo, para retomar la escucha de la
fuente en curso.
También puede desactivar el corte del
sonido girando 1.
Page 72

E.14
Sistema de reconocimiento
de voz (dependiendo del
teléfono)
El sistema de audio permite utilizar el
sistema de reconocimiento de voz a
través de su smartphone compatible.
Esto hace posible gestionar con la voz
las funcionalidades del smartphone,
manteniendo las manos en el volante.
Nota: el sistema de reconocimiento de
voz de su smartphone solo le permite
utilizar las funciones de su teléfono. No
permite interactuar con las otras funcionalidades del sistema de audio, como
la radio, el Driving-ECO², etc.
Nota: durante la utilización del reconocimiento de voz, el idioma utilizado por
el teléfono será el que tenga definido
en su sistema de audio.
Activación
Para activar el sistema de reconocimiento de voz deberá:
– captar la señal 3G, 4G o el Wifi con
el smartphone;
– activar el Bluetooth® del smartphone
y mantenerlo visible para los otros
dispositivos (consulte el manual de
utilización del teléfono);
– emparejar y conectar el smartphone
al sistema de audio (consulte el capítulo «Emparejar, desemparejar un
teléfono»);
– Pulse brevemente el botón 28 en el
volante.
Una señal acústica indica que el reconocimiento de voz está activado. Hable
en voz alta y clara.
Desactivación
Pulse prolongadamente el botón 28.
Una señal acústica indica que el reco-
nocimiento de voz está desactivado.
Nota: si solicita utilizar el sistema de
reconocimiento de voz de su vehículo
con un smartphone emparejado que no
tiene el reconocimiento de voz, aparecerá un mensaje en la pantalla del sistema multimedia para advertirle de ello.
UTILIZAR EL RECONOCIMIENTO DE VOZ
28
Page 73

E.15
ESCUCHAR LA RADIO (1/3)
Elegir una gama de ondas
Seleccione la banda de frecuencias
deseada (FM1, FM2, DR1, DR2, AM,
FM1, etc.) mediante presiones sucesivas en 3.
Elegir una emisora de radio
FM o AM
Existen diferentes modos para seleccionar y buscar una emisora de radio.
Búsqueda automática
Este modo permite buscar emisoras
disponibles mediante un barrido automático. Mantenga pulsada la tecla 7.
Al dejar de pulsar 7 aparecerá la frecuencia de radio más cercana. Mientras
se mantenga pulsado 7, la radio continua subiendo o bajando las frecuencias.
Búsqueda manual
Este modo le permite buscar emisoras manualmente mediante un barrido
de las frecuencias, pulsando brevemente 7.
Si pulsa 7, la frecuencia aumenta o
desciende.
Memorización de las
emisoras
Este modo de funcionamiento le permite escuchar cualquier emisora que
haya memorizado previamente.
Seleccione una banda de frecuencias
y a continuación una emisora de radio
utilizando los modos descritos anteriormente.
Para memorizar una emisora de radio,
mantenga pulsado uno de los botones
del teclado 11 hasta que se emita una
señal acústica.
Puede memorizar hasta 6 emisoras por
gama de ondas.
Para seleccionar una emisora de radio
memorizada, pulse brevemente una de
las teclas del teclado 11.
Seleccionar por nombre de la
emisora de radio (FM / DR)
Para seleccionar una emisora de radio
gire 5 o la moleta 20, o bien 25 en el
mando de la columna de dirección.
Esta lista puede contener hasta
100 emisoras de radio con la señal de
recepción más fuerte de la región en la
que se encuentra.
Para obtener la lista de emisoras más
recientes, realice una actualización de
la lista de radio (FM o DR).
Consulte «Actualización de la lista de
radio (FM o DR)» de este capítulo.
Page 74

E.16
ESCUCHAR LA RADIO (2/3)
– visualice el menú de los ajustes
pulsando 9 y después seleccione
«Radio» girando y pulsando 5;
– seleccione «Act. lista FM» girando 5,
después pulse brevemente 5 para
validar esta elección.
Se inicia la actualización automática de
las emisoras FM de la región. El mensaje «Actualizando lista FM» se visualiza en la pantalla.
Se termina el barrido automático de las
frecuencias. El mensaje «Lista FM actualizada» se visualiza en la pantalla.
Nota: si hay otra fuente seleccionada,
la actualización de la lista de radio FM
continúa en un plano secundario.
Para pasar de una frecuencia memorizada a otra, pulse uno de los botones 7.
Nota: también puede actualizar la lista
de radio FM manteniendo pulsado 3.
Ajustes de la radio
Visualice el menú de los ajustes pulsando 9 y después seleccione «Radio»
girando y pulsando 5. Las funciones
disponibles son las siguientes:
– «TA»;
– «Interrup. DR»;
– «Act. lista FM»;
– «Act. lista DR».
«TA»
Cuando esta función está activada, su
sistema de audio permite la búsqueda
y la escucha automática de la información de tráfico desde su difusión por
determinadas emisoras de radio en
modo FM o DR.
Nota: En la gama de ondas AM, la función no está disponible.
Seleccione la emisora de información y
a continuación escoja, si lo desea, otro
modo de escucha.
La información de tráfico se emite automática y prioritariamente cualquiera
que sea la fuente escuchada.
Para activar o desactivar esta función,
consulte el párrafo «Ajustes de la
radio» en la sección «Ajustes del sistema».
«Interrup. DR» (boletín informativo)
Cuando esta función está activada, es
posible la escucha automática de noticias desde su difusión por determinadas emisoras de radio «FM» o «DR».
Si selecciona a continuación otras
fuentes, la emisión del tipo de boletín
elegido interrumpirá la lectura de otras
fuentes.
Para activar o desactivar esta función,
consulte el capítulo «Ajustes del sistema», párrafo «Interrup. DR».
«Act. lista FM»
Esta función permite realizar una actualización de todas las emisoras FM
de la región en la que se encuentre.
Page 75

E.17
Selección de una emisora
Seleccione la banda de frecuencias
deseada (FM1, FM2, DR1, DR2 o AM)
mediante presiones sucesivas en 3.
– gire 5, 20 o 25 para recorrer las emi-
soras de radio en la lista FM/DR o
las frecuencias de radio AM.
– pulse 7 para recorrer las frecuencias
de radio FM/AM o las emisoras de
radio DR.
Visualización de los textos de
radio
Para visualizar el menú textual, pulse
brevemente 14 o mantenga pulsado 9.
Las funciones disponibles son las siguientes:
– «Radiotext»;
– «Intellitext»;
– «EPG».
Nota: si no se proporciona ninguna in-
formación, aparece el mensaje «Ningún
mensaje» en la pantalla.
ESCUCHAR LA RADIO (3/3)
«Act. lista DR»
Esta función permite realizar una actualización de todas las emisoras DR
de la región en la que se encuentre.
– Visualice el menú de los ajustes
pulsando 9 y después seleccione
«Radio» girando y pulsando 5 ;
– seleccione «Act. lista DR» girando 5,
después pulse brevemente 5 para
validar esta elección;
– se inicia la actualización automática
de la lista de emisoras de radio digital terrestre de la región. El mensaje
«Actualizando lista DR» se visualiza
en la pantalla.
Una vez terminado el barrido automático de las frecuencias, aparece el
mensaje «Lista DR actualizada» en la
pantalla.
Nota: puede actualizar la lista de radio
DR manteniendo pulsado 3.
Información de texto «Radiotext»
(FM)
Algunas emisoras de radio FM difunden textos informativos relativos al programa en escucha (por ejemplo el título
de una canción o el nombre del artista).
Nota: esta información está disponible
únicamente en algunas emisoras de
radio.
Función «Intellitext» (DR)
Esta función permite acceder a los
textos informativos de radio registrados en algunas emisoras. Puede ver el
texto para visualizar las novedades recientes (empresas, política, salud, meteorología, resultados deportivos).
Guía de los programas «EPG» (DR)
Cuando esta función está activada, su
sistema de audio permite ver la programación de las próximas emisiones del
día de la emisora.
Nota: Esta información está disponible
únicamente para los tres siguientes intervalos de horario de la emisora seleccionada.
Page 76

E.18
ESCUCHAR UN CD, CD MP3 (1/2)
Características de los
formatos leídos
Solo se leen los archivos con extensión
CDA / MP3.
Si un CD contiene a la vez archivos de
CD de audio y archivos de audio comprimidos, los archivos de audio comprimidos no se tendrán en cuenta.
Nota: Puede que no se lean algunos archivos protegidos (derechos de
autor).
Nota: para que puedan leerse más fácilmente los nombres de las carpetas y
de los archivos, se recomienda utilizar
nombres que tengan menos de 64 caracteres, y evitar los caracteres especiales.
Conservación de los CD/CD
MP3
No exponga bajo ninguna circunstancia
un CD CD MP3 al calor o a la luz directa del sol para preservar su calidad
de lectura.
Para limpiar un CD/CD MP3, emplee
un paño suave y frote desde el centro
hacia la periferia del CD.
En general, consulte los consejos de
conservación y almacenamiento del fabricante del CD.
Nota: algunos CD rayados o sucios no
se pueden leer.
Insertar un CD/CD MP3
Consulte la sección «Precauciones de
utilización».
Compruebe que no hay ningún CD en
el lector, y después inserte el CD con la
cara impresa hacia arriba.
Escuchar un CD/CD MP3
Cuando se inserta un CD/CD MP3
(cara impresa hacia arriba), el sistema
audio pasa de forma automática al
modo CD/CD MP3 y empieza la lectura
por la primera pista musical.
Si el sistema de audio está apagado
y el contacto está puesto, la inserción
de un CD/CD MP3 pone el sistema de
audio en marcha y comienza la lectura
del CD/CD MP3. Si el contacto no está
puesto el sistema de audio no se pone
en marcha.
Si está escuchando la radio y hay un
CD/CD MP3 en el reproductor, puede
optar por escuchar el CD/CD MP3
pulsando 4. La lectura comienza en
cuanto el sistema audio pasa al modo
CD/CD MP3.
Buscar una pista
Presione brevemente en 7 para pasar
de una pista a otra.
Lectura acelerada
Mantenga pulsado 7 para avanzar o retroceder rápidamente.
La lectura se reanuda al soltar la tecla.
Page 77

E.19
ESCUCHAR UN CD, CD MP3 (2/2)
Lectura aleatoria «Mix»
Tras insertar un CD/CD MP3, pulse el
botón «2» del teclado 11 para activar la
función de lectura aleatoria de todas
las pistas del CD/CD MP3.
El testigo «MIX» aparece en la pantalla. A continuación, se selecciona una
pista de manera aleatoria. El paso de
una pista a otra se hace de manera
aleatoria.
Al pulsar de nuevo el botón «2» del teclado 11 para desactivar la función de
lectura aleatoria, el testigo «MIX» se
apaga.
El apagado del sistema de audio y la
expulsión del CD/CD MP3 desactivan
la lectura aleatoria.
Nota: en un CD MP3, la lectura aleatoria se efectúa con la carpeta que
se está leyendo. Cambie de carpeta
para lanzar la lectura aleatoria de esta
última.
Repetir «RPT»
Esta función permite repetir una pista
en curso.
Pulse el botón «1» del teclado 11 para
activar la función repetición. El testigo
«RPT» aparece en la pantalla.
Al pulsar de nuevo el botón «1» del teclado 11 para desactivar la función repetición, el testigo «RPT» se apaga.
Nota: al seleccionar la función repetición se desactivará la lectura aleatoria (si estuviese activada) y el testigo
«MIX» se apagará.
Pausa
Para silenciar el sonido temporalmente pulse 17 y 19 al mismo tiempo,
o bien 18 o 24 en el mando de la columna de dirección.
Esta función queda desactivada automáticamente al manipular el volumen,
al cambiar de fuente o durante la difusión de información automática.
Visualizar los textos
informativos (CD-Text o ID3
tag)
Pulse brevemente 14 para ver la información ID3 tag (nombre del artista,
nombre del álbum, tiempo transcurrido,
título de la canción).
Para visualizar toda la información ID3
tag en la misma página, pulse prolongadamente 14.
Expulsar un CD/CD MP3
Expulse un CD/CD MP3 del reproductor pulsando 12.
Nota: un disco expulsado que no se ha
retirado en 20 segundos se reinserta
automáticamente en el lector CD.
Page 78

E.20
Su sistema tiene entradas auxiliares
para conectar una o más fuentes de
audio externas (memoria USB, reproductor de MP3, iPod®, reproductor de
audio Bluetooth®, etc.).
Tiene varias posibilidades para conectar su reproductor:
– toma(s) USB;
– toma Jack ;
– conexión Bluetooth®.
Nota: los formatos de la fuente audio
auxiliar pueden ser MP3, WMA y AAC.
Toma(s) USB
Conexión
Conecte el cable del iPod® o la memoria USB a la toma USB.
Cuando el dispositivo esté conectado a
la toma, la pista leída aparecerá automáticamente.
FUENTES DE AUDIO AUXILIARES (1/3)
Utilización
– iPod®:
Una vez que ha desconectado el
iPod®, se puede acceder a los menús
desde el sistema de audio.
El sistema conserva listas de lectura
idénticas a las de su iPod®.
– lápiz USB:
La lectura de los ficheros de audio se
inicia automáticamente.
Para acceder a la jerarquía de la fuente
de audio, gire o presione 5, 20 o 25 en
el mando de la columna de dirección.
Nota: la reproducción aleatoria en una
memoria USB funciona de la misma
manera que para un CD/MP3. Consulte
el párrafo «Mix de lectura aleatoria» en
el capítulo «escuchar un CD/CD MP3/».
Nota: la función repetición de una memoria USB funciona del mismo modo
que para un CD o MP3. Consulte el
capítulo «Escuchar un CD/CD MP3»,
apartado «Repetir».
Carga utilizando el puerto USB
Cuando el conector de USB del reproductor de audio esté conectado
al puerto USB del dispositivo, puede
cargar o mantener la carga de la batería durante su utilización.
Nota: algunos dispositivos no recargan ni mantienen el nivel de carga de
la batería cuando están conectados al
puerto USB en el sistema de audio.
Page 79

E.21
Toma Jack
Conexión
Con un cable específico (no suministrado), conecte la toma Jack de la
entrada auxiliar 13 a la toma de auriculares del reproductor de audio (normalmente una toma jack de 3,5 mm).
Nota: no se puede seleccionar una
pista directamente desde el sistema
de audio. Para seleccionar una pista,
se debe actuar directamente en el reproductor de audio, con el vehículo
parado.
Utilización
Solo aparece el texto «AUX» en la pantalla del sistema. No se visualiza ninguna indicación sobre el nombre del
artista o de la pista en la pantalla del
sistema.
Nota: Para ajustar la sensibilidad
de la toma Jack, consulte el capítulo
«Ajustes del sistema».
Conexión
Para un dispositivo ya acoplado, efectúe las siguientes operaciones:
– activar la conexión Bluetooth® del
reproductor de audio y hacerla visible para otros dispositivos (consulte
el manual del reproductor de audio);
– seleccione la fuente de audio de
Bluetooth® pulsando 4.
Lectura de audio Bluetooth®
Para poder utilizar un dispositivo digital
Bluetooth®, se debe emparejar al vehículo la primera vez que se use (consulte el párrafo el «función Bluetooth®»
en el capítulo «Descripción General»).
Emparejar permite al sistema de audio
reconocer y memorizar un dispositivo
digital Bluetooth®.
Nota: si su dispositivo digital Bluetooth®
dispone de las funciones de telefonía y
de reproductor de audio, al emparejar
una de estas funciones también se empareja la otra automáticamente.
FUENTES DE AUDIO AUXILIARES (2/3)
Manipule el reproductor de
audio cuando las condiciones de circulación se lo permitan.
Guarde el reproductor audio cuando
circule (riesgo de que salga proyectado en caso de frenazo brusco o
en caso de choque).
Page 80

E.22
FUENTES DE AUDIO AUXILIARES (3/3)
Utilización
Su reproductor debe estar conectado al
sistema de audio para poder acceder a
todas sus funciones.
Nota: no se puede conectar ningún dispositivo digital al sistema de audio si no
ha sido previamente emparejado.
Una vez conectado el reproductor digital Bluetooth®, puede controlarlo
desde el propio sistema de audio.
Pulse 17 y 19 simultáneamente, o
bien 18 o 24 en el mando de la columna de dirección para pausar la pista
de audio (presione de nuevo para reanudar la reproducción).
Pulse 7 para pasar a la pista anterior o
siguiente.
Nota: el número de funcionalidades accesibles varía en función del tipo de reproductor y de su compatibilidad con el
sistema de audio.
Nota: en determinados casos particulares consulte el manual de su equipo
para finalizar el proceso de conexión.
Manipule el reproductor de
audio cuando las condiciones de circulación se lo permitan.
Guarde el reproductor audio cuando
circule (riesgo de que salga proyectado en caso de frenazo brusco o
en caso de choque).
Page 81

E.23
ACOPLAR, DESACOPLAR UN TELÉFONO (1/2)
Conexión Bluetooth®
Para activar la función Bluetooth® del
sistema de audio, pulse 9, seleccione
«Bluetooth» girando 5 y seleccione
«ACT.»/«Desact.» pulsando 5.
Acoplar un teléfono
Para utilizar el sistema manos libres,
empareje su móvil Bluetooth® con
el vehículo. Asegúrese de que el
Bluetooth® de su móvil está activado y
configure su estado a «visible».
El emparejamiento permite al sistema
de telefonía manos libres de reconocer
y memorizar un teléfono.
Puede emparejar hasta cinco teléfonos, pero sólo uno de ellos puede conectarse al sistema de audio en un determinado momento.
El emparejamiento se efectúa en el sistema y en su teléfono. Su sistema de
audio y su teléfono deben estar encendidos.
Nota: si un teléfono ya está conectado,
en caso de un nuevo emparejamiento
la conexión existente se desconecta de
forma automática.
Conectar tel.
Buscar disp.
Sel.disp
Existen dos métodos de acoplamiento
del teléfono:
– el método «Buscar disp.»;
– el método «Conectar tel.».
Método «Buscar disp.»
Este método le permite buscar el teléfono desde el sistema de audio.
Para emparejar un teléfono con este
método, efectúe las siguientes operaciones:
– visualice el menú teléfono pul-
sando 10;
– seleccione «Buscar disp.» girando y
pulsando 5.
Se inicia la búsqueda de dispositivos
Bluetooth® cercanos (esta búsqueda
puede llevar hasta sesenta segundos).
El mensaje «Búsqueda en curso...» se
visualiza en la pantalla del sistema de
audio.
– Siga los pasos que aparecen en la
pantalla del sistema de audio;
– cuando aparezca el mensaje
«Conectado» en la pantalla del
sistema de audio, el dispositivo
Bluetooth® quedará memorizado
automáticamente y conectado al vehículo.
Al cabo de sesenta segundos, si el
acoplamiento falla, repita estas operaciones. Si desea más información, consulte el manual de su teléfono.
Por razones de seguridad,
efectúe estas operaciones
con el vehículo parado.
Page 82

E.24
ACOPLAR, DESACOPLAR UN TELÉFONO (2/2)
Desacoplar un teléfono
El desemparejamiento permite eliminar
un teléfono de la memoria del sistema
de telefonía manos libres.
– Visualice el menú de ajustes del te-
léfono pulsando 10;
– seleccione el menú «Eliminar telé-
fono» girando y pulsando 5;
– seleccione el teléfono que desea
desemparejar de la lista girando 5;
Su sistema de telefonía
manos libres tiene por
único fin facilitar la comu-
nicación disminuyendo los
factores de riesgo sin eliminarlos totalmente. Debe respetar obligatoriamente las leyes del país en el que
se encuentre.
Método «Conectar tel.»
Este método le permite buscar el sistema de audio desde su teléfono.
– Visualice el menú teléfono pul-
sando 10;
– seleccione «Conectar tel.» girando y
pulsando 5;
– aparecerá el mensaje «Reintroducir
PIN» en la pantalla del sistema y se
iniciará una cuenta atrás de sesenta
segundos;
– siga los pasos que aparecen en la
pantalla del sistema de audio.
Aparecerá el mensaje «MyCAR conectado» en su teléfono, que indica que su
sistema de audio está emparejado y
conectado a su teléfono.
Si el acoplamiento falla, la pantalla del
sistema vuelve al menú inicial.
Si la lista de los teléfonos emparejados
está completa, el emparejamiento de
un nuevo teléfono necesita desemparejar un teléfono existente.
– pulse 5 y seleccione a continuación
«SÍ»;
– confirme su selección pulsando 5.
Nota: al desemparejar un teléfono
se eliminan todos los contactos de la
agenda telefónica guardados en el sistema de audio y todos los registros
asociados.
SÍ
¿Eliminar iPhone?
NO
Por razones de seguridad,
efectúe estas operaciones
con el vehículo parado.
Page 83

E.25
CONECTAR, DESCONECTAR UN TELÉFONO (1/2)
Conectar un teléfono
emparejado
Su teléfono debe estar conectado al
sistema de telefonía manos libres para
acceder a todas sus funciones.
No se debe conectar ningún teléfono al
sistema de telefonía manos libres si no
ha sido previamente emparejado.
Consulte el párrafo «Emparejar un
teléfono» del capítulo «Emparejar/
Desemparejar un teléfono».
Nota: la conexión de su teléfono
Bluetooth® debe estar activa y configurada como «visible».
Conexión automática
Desde el momento en el que se enciende el vehículo, el sistema de audio
busca los teléfonos emparejados que
se encuentran cerca.
Nota: el teléfono prioritario es el último
que se ha conectado.
La búsqueda continúa hasta que se
encuentre un teléfono acoplado (esta
búsqueda puede durar hasta 5 minutos).
Nota: Para obtener más información
acerca de la lista de teléfonos compatibles, diríjase a un representante de la
marca o consulte la página web del fabricante, si dispone de ella.
Nota:
– Cuando se haya establecido con-
tacto, podrá disfrutar de la conexión
automática de su teléfono. Puede
que necesite activar la función de
conexión Bluetooth® automática
del teléfono con el sistema manos
libres. Para llevarlo a cabo, consulte
el manual de su teléfono;
– durante la reconexión y si hay dos
teléfonos acoplados en el perímetro de recepción del sistema manos
libres, el último teléfono conectado
tendrá la prioridad aunque se encuentre en el exterior del vehículo
y dentro del perímetro del sistema
manos libres.
Nota: si al conectar con su sistema de
telefonía manos libres usted ya está
en comunicación, entonces el teléfono
será automáticamente conectado y la
conversación pasará a los altavoces
del vehículo.
Buscar disp.
Sel.disp.
Conectar tel.
Conexión manual (cambio de
teléfono conectado)
Visualice el menú de los ajustes del teléfono pulsando 10 y después seleccione el menú «Sel.disp.». Se visualiza
la lista de los teléfonos ya emparejados. Seleccione de la lista el teléfono
al que desea conectar girando 5 y confirme su elección pulsando 5. Un mensaje le informa que el teléfono está conectado.
Nota: si un teléfono ya está conectado,
al realizar un cambio de teléfono en la
lista de teléfonos ya emparejados, se
desconectará automáticamente la conexión existente.
Page 84

E.26
CONECTAR, DESCONECTAR UN TELÉFONO (2/2)
Fallo en la conexión
En caso de conexión fallida, por favor,
compruebe que:
– su teléfono está encendido;
– la batería de su teléfono no está des-
cargada;
– su teléfono ha sido previamente
emparejado al sistema de telefonía
manos libres;
– el Bluetooth® del teléfono y del sis-
tema están activos;
– el teléfono está configurado para
aceptar la solicitud de conexión del
sistema de audio.
Nota: el uso prolongado de su sistema
de telefonía manos libres descargará
con mayor rapidez la batería de su teléfono.
Desconectar un teléfono
Para desconectar su teléfono, puede:
– desactive la función Bluetooth® del
sistema de audio;
– desactive la función Bluetooth® de
su teléfono;
– elimine el teléfono emparejado
a través del sistema de audio.
Consulte el apartado «Desacoplar un
teléfono» del capítulo «Acoplar, desacoplar un teléfono»”.
El apagado del teléfono provoca también la desconexión del teléfono.
Entonces se visualiza un mensaje en
la pantalla del sistema de audio confirmando la desconexión del teléfono.
Nota: si se encuentra en medio de
una comunicación en el momento de
la desconexión de su teléfono, esta se
transferirá automáticamente a dicho teléfono.
Para desactivar el Bluetooth® de su
sistema de audio, consulte el párrafo
sobre la «Función Bluetooth®» en el capítulo «Descripción general».
Para desactivar el Bluetooth® del teléfono, consulte el manual de usuario de
su teléfono.
Para desemparejar y eliminar el teléfono Bluetooth®, consulte el apartado
«Desemparejar un teléfono» en el capítulo «Emparejar, desemparejar un teléfono».
Conectar tel.
Eliminar teléfono
Sel.disp.
Page 85

E.27
Emitir una llamada marcando
un número
Visualice el menú del teléfono pulsando 10, 16 o 21 en el mando de la
columna de dirección y después seleccione «Marcar».
Marque el número deseado en el teclado numérico girando y pulsando 5 o
bien girando 20 o 25 y pulsando 22 en
el mando de la columna de dirección,
después seleccione
þ.
Puede llamar el último número marcado manteniendo pulsando 10, 16
o 21 en el mando de la columna de dirección.
Llamar a un contacto que
figure en el registro de
llamadas
Consulte el registro de llamadas pulsando 10, 16 o 21 en el mando de la
columna de dirección y después seleccione «Llamadas».
Seleccione el menú «Realizadas»,
«Recibidas» o «Perdidas». El registro
de llamadas se visualiza en la pantalla.
Seleccione el contacto o el número al
que desea llamar y después confirme
pulsando 5, 20 o 22 en el mando de la
columna de dirección para realizar la
llamada.
REALIZAR O RECIBIR UNA LLAMADA (1/3)
Llamar a un contacto de la
agenda telefónica
Al emparejar un teléfono, su agenda se
carga automáticamente en el sistema
de audio (según el modelo).
Visualice el menú del teléfono pulsando 10, 16 o 21 en el mando de la
columna de dirección y después seleccione «Agenda» girando 5. Para visualizar la lista de contactos, pulse 5.
Seleccione un contacto de la lista al
que desee llamar y después confirme
pulsando 5 para iniciar la llamada.
Nota: para volver a la pantalla anterior,
pulse 6.
Se recomienda parar para
marcar un número o para
buscar un contacto.
El sistema permite gestionar la función de doble llamada cuando su
teléfono está conectado (según la
suscripción).
Llamadas
Agenda
Marcar un número
Page 86

E.28
REALIZAR O RECIBIR UNA LLAMADA (2/3)
Hablando
Puede:
– ajuste el volumen pulsando 17 y 19
en el mando de la columna de dirección;
– cuelgue pulsando 10, 18 o 21;
– confirme su elección pulsando 5, 20
o 22 en el mando de la columna de
dirección.
Recibir una llamada
Al recibir una llamada, el número del
interlocutor se muestra en la pantalla
(esta función depende de las opciones
que haya suscrito con su operador de
telefonía).
Si el número entrante está guardado
en una de las agendas, el nombre de
su contacto se visualiza en lugar del
número.
Si el número entrante no se puede visualizar, la pantalla muestra el mensaje
«Número privado».
Llamada entrante
30 32 33
29 30
34
31
Para aceptar una llamada, pulse 27 o
seleccione 29 girando y pulsando 5 o
bien girando 20 o 25 y pulsando 22 en
el mando de la columna de dirección.
Para rechazar una llamada, mantenga
pulsado 27 o seleccione 30 girando y
pulsando 5 o 20 y pulsando 22 en el
mando de la columna de dirección.
Page 87

E.29
REALIZAR O RECIBIR UNA LLAMADA (3/3)
Nota: para contestar el teléfono,
pulse 27 en el mando de la columna
de dirección o presione brevemente 18
o 21 desde el mando de la columna de
dirección.
Para rechazar una llamada entrante,
mantenga pulsado 18, 21 o 27.
Para finalizar la llamada, presione brevemente 18, 21 o 27.
Gire el 5, 20 o 25 en el mando de la
columna de dirección para elegir el
icono deseado y después confirme pulsando 5, 20 o 22. Puede:
– cuelgue seleccionando 30 ;
– pase la conversación de su sistema
de audio a su teléfono seleccionando 32;
– ponga una llamada en espera selec-
cionando 31 ;
– recupere una llamada puesta en
espera seleccionando 29.
– pase la conversación de su telé-
fono a su sistema de audio seleccionando 34 ;
– controle el teclado de su teléfono
desde el sistema de audio seleccionando 33.
Page 88

E.30
AJUSTES DEL SISTEMA (1/3)
Auxiliar (AUX IN)
Visualice el menú de los ajustes de
audio pulsando 9. Seleccione «Config.
Audio» y pulse 5.
Gire 5 y después seleccione el apartado «E. AUX» para acceder a los diferentes apartados en el siguiente orden:
– «Bajo»;
– «Medio»;
– «Alto».
Los valores para cada ajuste son los siguientes:
– «Bajo» (1200 mV);
– «Medio» (600 mV);
– «Alto» (300 mV).
Volumen en función de la velocidad
El volumen del sistema de audio varía
con la velocidad del vehículo.
Acceda al menú «Config. Audio» y, a
continuación, seleccione «Volumen»
pulsando 5.
Ajuste la relación volumen/velocidad
girando y pulsando 5 hasta conseguir
la relación deseada.
Aumentar los graves («Ref. graves»)
La función «Ref. graves» permite reforzar el volumen que se aplica al conjunto de graves.
Para activar/desactivar, elija «ACT.» o
«Desact.» girando y pulsando 5.
Audio por defecto
Visualice el menú de los ajustes de
audio pulsando 9. Seleccione «Config.
Audio», después pulse 5 para visualizar
el menú de ajustes y seleccione «Audio
pred.».
Confirme su selección pulsando 5.
Todos los ajustes audio vuelven a su
valor por defecto.
ajustes de audio
Visualice el menú de los ajustes de
audio pulsando 9. Seleccione «Config.
Audio» girando 5, y después pulsando 5. Los ajustes disponibles son
los siguientes:
– «Sonido»;
– «E. AUX»;
– «Volumen»;
– «Ref. graves»;
– «Audio pred.».
Sonido
Seleccione «Sonido» y pulse 5 para acceder a los diferentes apartados en el
siguiente orden:
– «Graves»;
– «Agudos»;
– «Bal.» (distribución izquierda/dere-
cha del sonido);
– «Mezcla» (distribución trasera/frontal
del sonido).
Puede modificar el valor de cada ajuste
girando el botón 5. Pulse 5 para confirmar y volver a la selección anterior.
Puede salir del menú pulsando 6.
Por razones de seguridad,
efectúe estos ajustes con el
vehículo parado.
Page 89

E.31
AJUSTES DEL SISTEMA (2/3)
Ajuste de la hora
Esta función permite ajustar la hora.
Visualice el menú de los ajustes de
audio pulsando 9. Seleccione «Reloj»
girando 5, y después pulsando 5. Los
ajustes disponibles son los siguientes:
– «Cambio hora»: ajuste las horas y los
minutos;
– «activado / desactivado»: seleccionar
«ACT.» o «Desact.» para visualizar o
bien ocultar la hora;
– «Formato»: seleccionar el formato de
hora «12 h» o «24 h».
Ajustes de la radio
Los ajustes disponibles son los siguientes:
– «TA»;
– «Interrup. DR»;
– «Act. lista FM»;
– «Act. lista DR».
«TA»
Para activar o desactivar esta función:
– visualice el menú de ajustes pul-
sando 9 y después seleccione
«Radio» girando 5; a continuación,
pulse brevemente 5 para validar
esta elección;
– seleccione «TA» girando 5, después
pulse brevemente 5 para validar
esta elección;
– seleccione «ACT.» u «Desact.» para
activar o desactivar la función «TA».
«Interrup. DR» (boletín informativo)
– visualice el menú de ajustes pul-
sando 9 y después seleccione
«Radio» girando 5; a continuación,
pulse brevemente 5 para validar
esta elección;
– seleccione «Interrup. DR» girando 5,
después pulse brevemente 5 para
validar esta elección;
– seleccione el(los) boletín(es) infor-
mativos que desea escuchar girando 5 y después pulse brevemente 5 para validar esta opción.
«Act. lista FM»
Consulte la información sobre «Act. lista
FM» en el capítulo «Escuchar la radio».
«Act. lista DR»
Consulte la información sobre «Act. lista
DR» en el capítulo «Escuchar la radio».
Elección del idioma
Esta función permite cambiar el idioma
utilizado en el sistema de audio.
Acceda al apartado «Idioma» en el
menú de ajustes pulsando 9 y después
seleccione el idioma deseado.
Page 90

E.32
«Ajustes BT» (Bluetooth®)
Acceda al menú del teléfono pulsando 10 y después seleccione el
apartado «Ajustes BT» pulsando 5 o
girando 20 o 25y pulsando 22 en el
mando de la columna de dirección.
Los ajustes disponibles son los siguientes:
– «Vol.»: ajuste del tono de llamada o
del volumen;
– «Tonos»: activación del tono de lla-
mada del vehículo o del transferido
desde el teléfono;
Para ajustar el volumen del tono cuando
un teléfono Bluetooth® está conectado
al sistema de audio, seleccione «Vol.»
girando y pulsando 5, o girando 20 o 25
y pulsando 22 en el mando de la columna de dirección.
Se visualiza un nuevo submenú:
– «Tono»;
– «Llam.»;
AJUSTES DEL SISTEMA (3/3)
– seleccione uno de los dos, gi-
rando 5, 20, 22 o 25, luego
pulse 5, 20 o 22 en el mando de la
columna de dirección;
– gire 5, 20, 22 o 25 a la derecha o a la
izquierda para subir o bajar el volumen y después confirme pulsando 5;
Para activar el tono en el vehículo o en
el teléfono mediante Bluetooth®, seleccione «Tonos» girando 5, 20, 22 o 25 y
pulsando 5, 20 o 22 en el mando de la
columna de dirección.
Se visualiza un nuevo submenú:
– «Coche»;
– «Teléf.»;
– seleccione uno de los dos apartados
que desea activar, girando 5 y después pulse 5.
Nota: para un teléfono emparejado al
sistema de audio, aparece en el menú
un nuevo elemento: «Ajustes BT»:
– «Act. agenda»: actualización de la
agenda del teléfono emparejado al
sistema de audio (por ejemplo, adición de contactos nuevos que aún
no están en el sistema).
– para actualizar la agenda en el sis-
tema de audio, acceda al menú
«Ajustes BT» pulsando 10, luego
seleccione «Act. agenda» pulsando 5, 20 o 22 en el mando de la
columna de dirección.
Visualización de los textos de
radio
Visualice el menú de los textos de radio
pulsando 14. Seleccione «Radio» y
pulse 5, 20 o 22 en el mando de la columna de dirección.
La visualización de los textos de radio
puede contener hasta 64 caracteres.
Nota: si no se proporciona ninguna
información, en la pantalla aparece
«Ningún mensaje».
Por razones de seguridad,
efectúe estos ajustes con el
vehículo parado.
Pulsando 6 se vuelve al menú anterior.
Page 91

E.33
Pantalla de menú
El sistema «R & GO» ofrece las
funciones principales siguientes:
40 Acceso al menú «Multimedia»:
gestión de los recursos multimedia.
41 Acceso al menú «Teléf.»: gestión
de las funciones del teléfono.
42 Acceso al menú «Coche»
(Driving-ECO², consumo de carburante, etc.).
43 Acceso al menú «Navegación»
(aplicación de navegación CoPilot,
«encontrar mi vehículo»).
R & GO: DESCRIPCIÓN GENERAL (1/6)
Presentación
«R & GO» es una aplicación que puede
descargarse en su smartphone.
Esta aplicación le permite acceder a
varios menús:
– «Teléf.»;
– «Multimedia»;
– «Navegación» (CoPilot);
– «Coche».
Nota: Para obtener más información
acerca de la lista de teléfonos compatibles, diríjase a un representante de la
marca o consulte la página web del fabricante, si dispone de ella.
Conexión Bluetooth®
Verifique que su teléfono está emparejado al sistema de audio (consulte el
párrafo «Emparejar un teléfono» en el
capítulo «Acoplar o desacoplar un teléfono»).
Nota: su teléfono Bluetooth® debe
estar activado y configurado como «visible» (para más información, consulte
las instrucciones del teléfono).
40 41
43 42
Visualización modo teléfono
Pantalla de inicio
35 Volver a la pantalla de menú.
36 Información del teléfono (red, ba-
tería y conexión Bluetooth®).
37 Hora actual.
38 Driving-ECO².
39 Ayuda a la navegación (CoPilot).
Nota: se puede modificar la configuración de la pantalla de inicio. Consulte el
capítulo «R & GO: ajustes de los parámetros».
36 36 37
39 38
35
Page 92

E.34
El sistema «R & GO» también garantiza las siguientes funciones:
44 Volver a la página de inicio.
45 Acceder a los ajustes del sistema
«R & GO».
46 Ayuda en línea/manual de utiliza-
ción.
Su sistema de telefonía manos libres
tiene como fin facilitar la comunicación
disminuyendo los factores de riesgo sin
eliminarlos totalmente.
Debe respetar obligatoriamente las
leyes del país en el que se encuentre.
Visualización modo tableta
Pantalla de inicio
47 Información de la tableta.
48 Ayuda en línea/manual de utiliza-
ción.
49 Temperatura exterior.
50 Limitación de velocidad de la vía
tomada.
51 Emisora de radio que se escucha
en este momento.
52 Hora actual.
53 Driving-ECO².
47
49
54 53
R & GO: DESCRIPCIÓN GENERAL (2/6)
44
46
45 5250
5148
54 Mapa de navegación.
55 Acceder a los ajustes del sistema
«R & GO».
56 Gestión del vehículo.
57 Sistema de telefonía (dependiendo
de la tableta).
58 Ayuda a la navegación (CoPilot).
59 Gestión de recursos multimedia.
Nota: se puede modificar la configuración de la pantalla de inicio. Consulte el
capítulo «R & GO: ajustes de los parámetros».
47
55
56
57
58
59
Page 93

E.35
R & GO: DESCRIPCIÓN GENERAL (3/6)
63 el registro de llamadas permite vi-
sualizar y consultar todas las llamadas (recibidas, realizadas y
perdidas).
Nota: para un teléfono con sistema
operativo «Androïd», está disponible la
función de lectura de los SMS («Text-toSpeech»). El sistema de audio lee los
mensajes SMS en voz alta.
Función de «Multimedia»
La función «Multimedia» permite gestionar la escucha de la radio y la lectura de los ficheros de audio. Además,
le permite llevar a cabo las siguientes
funciones:
65 escuchar la radio;
66 escuchar la música del smart-
phone en el sistema de audio;
68 escuchar la música de una fuente
externa (CD/CD MP3, USB, iPod®
(dispositivo con iPod® integrado) a
través del puerto USB) ;
69 seleccionar y escuchar emisoras
de radio temáticas (webradio) del
mundo mediante la conexión a
Internet de su teléfono.
Función de «Teléf.»
La función telefonía permite la utilización de su teléfono en modo manos
libres y garantiza las siguientes funciones:
60 el teclado numérico permite
marcar un número de teléfono;
61 la lista de contactos permite visua-
lizar un contacto y sus detalles;
62 la agenda, sincronizada con el sis-
tema de audio, le permite ver una
o varias tareas grabadas en el teléfono;
Nota: al utilizar una webradio, la transferencia de los datos que se requieren
de su teléfono móvil puede ocasionar
costes adicionales no incluidos en su
tarifa telefónica.
El sistema «R & GO» también garantiza las siguientes funciones:
64 – presión breve: volver al menú
anterior.
– presión prolongada: volver a la
página de inicio.
67 Ajustes de los parámetros multi-
media.
65 66
69 68
64 67
60 61
6263
Page 94

E.36
La función de navegación contiene
todas las funciones de navegación por
satélite, mapas de carreteras, información sobre el tráfico, servicios CoPilot y
zonas peligrosas.
Este sistema integra las siguientes funciones:
70 El software CoPilot para la planifi-
cación de itinerarios.
71 La función «Encontrar mi vehí-
culo» para encontrar la posición
actual de su vehículo.
R & GO: DESCRIPCIÓN GENERAL (4/6)
Ajuste de los parámetros
La función configuración de
parámetros permite ajustar los diversos parámetros del sistema «R & GO"
a ajustar.
esta función está diseñada para un
acceso directo y garantiza las siguientes funciones:
– conexión con la radio del sistema;
– gestión del modo noche para la vi-
sualización de la navegación;
– gestión de favoritos en la página de
inicio.
Función de «Coche»
La función vehículo incluye la gestión
de ciertos equipamientos como el ordenador de a bordo y el Driving-ECO².
Este sistema garantiza las siguientes
funciones:
72 Driving-ECO².
73 Consumo de carburante.
74 Los «Servicios» muestran la infor-
mación del cuadro de instrumentos.
75 Cuentavueltas (r.p.m. × 1.000).
72 73
75 74
70 71
Page 95

E.37
R & GO: DESCRIPCIÓN GENERAL (5/6)
– conecte el soporte de teléfono 79 a
la toma USB2 del sistema de audio;
– gire el control rotativo 76 de bloqueo
del soporte de teléfono 79, en el sentido de las agujas del reloj, para fijarlo;
– coloque su teléfono en el soporte
de teléfono 79 y presione las dos
pinzas 80 hasta que el teléfono se
mantenga de forma firme en su sitio.
Para retirar el soporte de teléfono 79 de
su sistema de audio:
– sostenga su teléfono a la vez que
pulsa el botón de sujeción de las
pinzas 78 y, a continuación, saque
su teléfono;
– gire el control rotativo 76 de bloqueo
del soporte de teléfono 79, en el sentido contrario a las agujas del reloj,
para desbloquearlo del sistema de
audio de su vehículo;
– desconecte el soporte de teléfono 79
del sistema de audio de su vehículo;
– vuelva a colocar la tapa del soporte
de teléfono 23 girando en el sentido
de las agujas del reloj, para cubrir la
toma USB2.
Soporte de teléfono
Para fijar el soporte de teléfono 79 en el
sistema de audio de su vehículo, siga
las siguientes indicaciones:
– retire la tapa del soporte de telé-
fono 23 girándolo en el sentido contrario a las agujas del reloj, para ver
la toma USB2;
– coloque la flecha 77 del control ro-
tativo 76 de bloqueo hacia arriba,
antes de introducir el soporte de teléfono 79 en el sistema de audio, con
el fin de conectarlo de forma correcta;
78
80
807776
79
Page 96

E.38
Nota: Puede utilizar el soporte de teléfono 79 en dos posiciones:
– verticalmente, colocando su telé-
fono en posición horizontal y girando
después el soporte 79 a la posición
vertical;
– horizontalmente, colocando su telé-
fono en la posición vertical y girando
después el soporte 79 a la posición
horizontal.
Nota: también puede inclinar el soporte
de teléfono para tener una mejor visibilidad de la pantalla de su teléfono.
79
Carga con el puerto USB
Cuando la toma USB de su teléfono
está conectada al puerto USB del soporte de teléfono 79, puede cargar la
batería durante su utilización.
R & GO: DESCRIPCIÓN GENERAL (6/6)
Page 97

E.39
R & GO: FUNCIÓN TELEFONÍA (1/2)
Nota: tiene la posibilidad de consultar
su buzón de voz con una presión prolongada de la tecla «1» en el teclado 11.
La primera presión prolongada en la
tecla «1» del teclado 11 permite guardar
el número de su buzón de voz.
«Teclado numérico»
Para marcar un número o llamar al
buzón de voz del teléfono, pulse el
icono «Teclado numérico».
Marque su número con el teclado numérico y después pulse el botón verde
para realizar la llamada.
Presentación del menú
«Teléf.»
Para acceder al menú del teléfono
desde el menú principal presione el
icono «Menú» y después «Teléf.».
El menú «Teléf.» está formado por
cuatro iconos grandes, todos accesibles:
– marcar un número con el teclado nu-
mérico;
– buscar un contacto en la agenda;
– buscar un número en el registro de
llamadas;
– acceder a la agenda del teléfono.
Se recomienda parar para
introducir un número o para
buscar un contacto.
«Agenda telefónica»
Pulse el icono «Agenda telefónica» para
acceder a la lista de contactos en su teléfono Bluetooth®.
Tras conectar el sistema de audio y su
teléfono Bluetooth® mediante la tecnología inalámbrica Bluetooth®, los
números de la agenda de su teléfono
estarán disponibles a través de la aplicación «R & GO».
Seleccione el contacto (si el contacto cuenta con varios números, se
le pedirá que seleccione el número al
que desea llamar). La llamada se hará
automáticamente al pulsar el número
de contacto.
Nota: Para ver la lista de contactos, utilice los botones «arriba» y «abajo».
Page 98

E.40
R & GO: FUNCIÓN TELEFONÍA (2/2)
"Registro de llamadas"
Desde el menú "Teléf.", pulse el icono
"Registro de llamadas".
El registro de llamadas clasifica las diferentes llamadas en cuatro pestañas:
– Todas las llamadas (recibidas, reali-
zadas y perdidas);
– las llamadas recibidas;
– las llamadas perdidas;
– las llamadas realizadas.
En cada una de las listas, se indican
los contactos del más reciente al más
antiguo.
Para navegar por el registro de llamadas, puede pulsar:
– una pestaña para ver su contenido;
– los botones "arriba" y "abajo" para
desplazarse por la lista de llamadas;
– una entrada en el registro de llama-
das para llamar al contacto corres-
pondiente.
"Agenda"
Desde el menú "Teléf.", pulse el icono
"Agenda".
La agenda del teléfono muestra todas
las tareas de ese día (citas, acontecimientos, etc.) de su teléfono, en el sistema de audio.
Para navegar por la lista de la agenda,
puede pulsar:
– una pestaña para ver su contenido
en detalle (hora, descripción, dirección);
– los botones "arriba" y "abajo" para
desplazarse por la agenda.
A partir de una dirección memorizada,
puede iniciar la aplicación «CoPilot».
Pulse el icono rojo para iniciar el guiado
hasta llegar a la dirección memorizada.
"Registro de SMS"
(dependiendo del teléfono)
Desde el menú "Teléf.", pulse el icono
"Registro de SMS".
El registro de SMS le permite escuchar
los últimos tres mensajes recibidos con
el "R & GO".
Nota: para ver la lista de SMS, utilice
los botones "arriba" y "abajo".
" Mensaje de alerta"
(dependiendo del teléfono)
Esta función es para reproducir los
mensajes de alerta. Pulse el icono
"Mensaje de alerta" para reproducir el
mensaje.
Page 99

E.41
R & GO: FUNCIÓN MULTIMEDIA (1/2)
«Escuchar la radio»
Desde el menú principal, pulse los
iconos «Menú», «Multimedia», y después el icono «Escuchar la radio».
Este menú le permite escuchar emisoras de radio y proporciona las siguientes funciones:
– elegir una gama de ondas (FM1,
FM2, DR1, DR2 o AM);
– elegir una emisora según tres modos
de búsqueda (modos «Frecuencia»,
«Lista» o «Presintonía») ;
– buscar una emisora con la ayuda del
teclado inteligente integrado;
– escuchar las emisoras memoriza-
das;
– visualizar los textos informativos de
ciertas emisoras de radio FM y DR
que se están escuchando.
Para más información, consulte el capítulo «Escuchar la radio».
Bluetooth® «Lectura de
audio»
Desde el menú principal, pulse los
iconos «Menú», «Multimedia», y después el icono «Leer audio Bluetooth®».
Para poder utilizar su reproductor de
audio Bluetooth®, debe acoplarlo al vehículo cuando lo vaya a utilizar por primera vez.
El menú «Leer audio Bluetooth®» proporciona las siguientes funciones:
– acceder directamente a los archivos
de audio;
– acceder a las carpetas, canciones,
géneros, artistas, álbumes y listas
de visualización;
– acceder a las carpetas y / o los archi-
vos de audio.
Nota: solo pueden seleccionarse las
fuentes disponibles. Las fuentes no disponibles aparecen sombreadas.
Presentación del menú
«Multimedia»
Para acceder al menú «Multimedia»,
pulse el icono «Menu” en el menú principal y luego “Multimedia”.
La aplicación «R & GO» está formada
por cuatro grandes bloques, todos accesibles desde el menú «Multimedia»:
– escuchar la radio;
– escuchar la música del teléfono me-
diante la conexión Bluetooth®;
– escuchar la radio mediante «webra-
dio»;
– escucha de la música de una fuente
externa (CD/CD MP3, USB, iPod®
(dispositivo con iPod® integrado) a
través del puerto USB, etc).
Nota: para utilizar el conjunto de las
funciones del menú «Multimedia»,
debe conectar su teléfono o tablet
Bluetooth® al sistema de audio.
Por razones de seguridad,
efectúe estos ajustes con el
vehículo parado.
Page 100

E.42
R & GO: FUNCIÓN MULTIMEDIA (2/2)
«Fuente audio auxiliar»
El menú «Fuente audio auxiliar» permite
escuchar música procedente de una
fuente externa.
Desde el menú principal, pulse los
iconos «Menú», «Multimedia», y después
«Fuente de audio auxiliar».
En la siguiente lista, seleccione la
fuente conectada al sistema de audio
para acceder a los archivos de audio:
– CD/CD MP3 ;
– USB1;
– USB2;
– iPod®: dispositivo con iPod® inte-
grado;
– toma Jack.
«Sistema multimedia».
Desde el menú principal, pulse los
iconos «Menú», «Multimedia», y después
«Sistema multimedia».
Esta función le permite cambiar los siguientes ajustes:
– «Balance»;
– «Bajo»;
– «Instrucciones de navegación»;
– «Nivel de entradas auxiliares»;
– «Random» (lectura aleatoria);
– «iTraffic» ;
– «Actualizando lista FM»;
– «Actualizando lista DR»;
– «Activar el valor por defecto».
«Webradio»
El menú «Webradio» permite buscar,
visualizar y escuchar las emisoras de
radio pasando por su teléfono (BBC
world, podcast...).
Tiene la posibilidad de añadir a favoritos una o varias emisoras de radio y/o
música.
En el menú principal, pulse los iconos
«Menú», «Multimedia» y después
«Webradio».
El menú «Webradio» garantiza las siguientes funciones:
– gestionar las emisoras favoritas;
– buscar una emisora con la ayuda de
un teclado inteligente;
– consultar la clasificación de las
emisoras de radio (registro, podio,
lugar);
– acceder a la imagen del álbum, al
nombre del artista y al título de la
canción que se está escuchando;
– pasar a la radio del sistema de audio
del vehículo.
Nota: al utilizar webradio, la transferen-
cia de los datos que se requieren de su
teléfono móvil puede ocasionar costes
adicionales no incluidos en su tarifa telefónica.
Sonido
Balance/Fader
Graves/Agudos
Nivel de entrada Aux Medio
 Loading...