

1
2
3
4
5
Operating Instructions
X-MF3DVD-I_En.fm
6
7
8
En-1
2009September 28
IMPORTANT
The lightning flash with arrowhead symbol,
within an equilateral triangle, is intended to
alert the user to the presence of uninsulated
“dangerous voltage” within the product’s
enclosure that may be of sufficient
magnitude to constitute a risk of electric
shock to persons.
CAUTION
RISK OF ELECTRIC SHOCK
DO NOT OPEN
CAUTION:
TO PREVENT THE RISK OF ELECTRIC
SHOCK, DO NOT REMOVE COVER (OR
BACK). NO USER-SERVICEABLE PARTS
INSIDE. REFER SERVICING TO QUALIFIED
SERVICE PERSONNEL.
The exclamation point within an equilateral
triangle is intended to alert the user to the
presence of important operating and
maintenance (servicing) instructions in the
literature accompanying the appliance.
D3-4-2-1-1_A1_En
CAUTION
This product is a class 1 laser product classified
under the Safety of laser products, IEC 60825-1:2007.
CLASS 1 LASER PRODUCT
D58-5-2-2a_A1_En
WARNING
This equipment is not waterproof. To prevent a fire
or shock hazard, do not place any container filled
with liquid near this equipment (such as a vase or
flower pot) or expose it to dripping, splashing, rain
or moisture.
WARNING
Before plugging in for the first time, read the following
section carefully.
The voltage of the available power supply differs
according to country or region. Be sure that the
power supply voltage of the area where this unit
will be used meets the required voltage (220 V-240
V) written on the rear panel.
WARNING
To prevent a fire hazard, do not place any naked
flame sources (such as a lighted candle) on the
equipment.
Operating Environment
Operating environment temperature and humidity:
+5 ºC to +35 ºC (+41 ºF to +95 ºF); less than 85 %RH
(cooling vents not blocked)
Do not install this unit in a poorly ventilated area, or in
locations exposed to high humidity or direct sunlight (or
strong artificial light)
D3-4-2-1-3_B_En
D3-4-2-1-4_A_En
D3-4-2-1-7a_A_En
D3-4-2-1-7c_A_En
VENTILATION CAUTION
When installing this unit, make sure to leave space
around the unit for ventilation to improve heat
radiation (at least 10 cm at top, 10 cm at rear, and
10 cm at each side).
10 cm 10 cm 10 cm
10 cm
DVD MICRO COMPONENT SYSTEM
X-MF3DVD-I
REMOTE
SENSOR
TIMER
STANDBY/
ON
OPEN/
FUNCTION
CLOSE
OPEN
PHONES
WARNING
Slots and openings in the cabinet are provided for
ventilation to ensure reliable operation of the
product, and to protect it from overheating. To
prevent fire hazard, the openings should never be
blocked or covered with items (such as newspapers,
table-cloths, curtains) or by operating the
equipment on thick carpet or a bed.
CAUTION
The STANDBY/ON switch on this unit will not
completely shut off all power from the AC outlet.
Since the power cord serves as the main disconnect
device for the unit, you will need to unplug it from
the AC outlet to shut down all power. Therefore,
make sure the unit has been installed so that the
power cord can be easily unplugged from the AC
outlet in case of an accident. To avoid fire hazard,
the power cord should also be unplugged from the
AC outlet when left unused for a long period of time
(for example, when on vacation).
D3-4-2-1-7b_A_En
D3-4-2-2-2a_A_En
This product is for general household purposes. Any
failure due to use for other than household purposes
(such as long-term use for business purposes in a
restaurant or use in a car or ship) and which
requires repair will be charged for even during the
warranty period.
K041_En
X-MF3DVD-I_En.fm
En-2
2009September 28

CAUTION : USE OF CONTROLS OR ADJUSTMENTS OR PERFORMANCE OF PROCEDURES OTHER THAN THOSE
CAUTION : THE USE OF OPTICAL INSTRUMENTS WITH THIS PRODUCT WILL INCREASE EYE HAZARD.
Information to User
Alterations or modifications carried out without appropriate authorization may invalidate the user’s right to operate
the equipment.
SPECIFIED HEREIN MAY RESULT IN HAZARDOUS RADIATION EXPOSURE.
D6-8-2-1_En
D8-10-2_En
Condensation
If the player is moved suddenly from a cold place into a
warm room (in winter, for example) or if the
temperature in the room in which the player is installed
rises suddenly due to a heater, etc., water droplets
(condensation) may form inside (on operating parts and
the lens). When condensation is present, the player will
not operate properly and playback is not possible. Let
the player stand at room temperature for 1 or 2 hours
with the power turned on (the time depends on the
extent of condensation). The water droplets will
dissipate and playback will become possible.
Condensation can also occur in the summer if the
player is exposed to the direct wind from an
air-conditioner. If this happens, move the player to a
different place.
Copyright Information:
Unauthorised copying, broadcast, public display,
transmission, public performance and rental
(regardless of whether or not such activities are
for profit) of disc contents are prohibited by law.
This system is equipped with copy protection
technology that causes substantial degradation of
images when the contents of a disc are copied to
a video tape.
Copy Protection:
This unit supports Macrovision copy protection.
On DVD discs that include a copy protection code, if
the contents of the DVD disc are copied using a VCR,
the copy protection code prevents the videotape copy
from playing normally.
U.S. Patent Nos. 6,836,549; 6,381,747; 7,050,698;
6,516,132; and 5,583,936.
This product incorporates copyright protection
technology that is protected by method claims of
certain U.S. patents and other intellectual property
rights owned by Macrovision Corporation and other
rights owners.
Use of this copyright protection technology must be
authorised by Macrovision Corporation, and is
intended for home and other limited viewing uses
only unless otherwise authorised by Macrovision
Corporation.
Reverse engineering or disassembly is prohibited.
S005_A1_En
If the AC plug of this unit does not match the AC
outlet you want to use, the plug must be removed
and appropriate one fitted. Replacement and
mounting of an AC plug on the power supply cord of
this unit should be performed only by qualified
service personnel. If connected to an AC outlet, the
cut-off plug can cause severe electrical shock. Make
sure it is properly disposed of after removal.
The equipment should be disconnected by removing
the mains plug from the wall socket when left unused
for a long period of time (for example, when on
vacation).
Manufactured under license from Dolby
Laboratories. Dolby and the double-D symbol are
trademarks of Dolby Laboratories.
Manufactured under license under U.S. Patent #:
5,451,942 & other U.S. and worldwide patents
issued & pending. DTS is a registered trademark &
the DTS logos and symbol are trademarks of DTS,
©
1996 - 2008 DTS, Inc. All Rights Reserved.
Inc.
DivX® is a registered trademark of DivX, Inc., and is
used under license.
iPod is a trademark of Apple Inc., registered in the
U.S. and other countries.
“Made for iPod” means that an electronic accessory
has been designed to connect specifically to iPod
and has been certified by the developer to meet
Apple performance standards.
Apple is not responsible for the operation of this
device or its compliance with safety and regulatory
standards.
En-3
D3-4-2-2-1a_A1_En
1
2
3
4
5
6
7
8
X-MF3DVD-I_En.fm
2009September 28

ENGLISH
X-MF3DVD-I DVD Micro Component System consisting of main unit and speaker system
Introduction
Thank you for purchasing this PIONEER product. To obtain the best performance from this product, please read this manual carefully. It will guide you in operating your PIONEER product.
Special Note
Supply of this product does not convey a license nor imply any right to distribute content created with this product in revenue-generating
broadcast systems (terrestrial, satellite, cable and/or other distribution channels), revenue-generating streaming applications (via
Internet, intranets and/or other networks), other revenue-generating content distribution systems (pay-audio or audio-on-demand
applications and the like) or on revenue-generating physical media (compact discs, digital versatile discs, semiconductor chips, hard
drives, memory cards and the like). An independent license for such use is required. For details, please visit http://mp3licensing.com
MPEG Layer-3 audio coding technology licensed from Fraunhofer IIS and Thomson.
Accessories
Please confirm that the following accessories are included.
.
Adaptor A x 1
(Fixed to main set)
Remote control x 1 AM loop aerial x 1 “AAA” size battery (UM-4,
Adaptor B x 1 Adaptor C x 1 Adaptor D x 1 Adaptor E x 1
R03, HP-16 or similar) x 2
CONTENTS
General Information
Precautions . . . . . . . . . . . . . . . . . . . . . . . . . . . . . . . . . . . . . . . 5
Controls and indicators . . . . . . . . . . . . . . . . . . . . . . . . . . . . .5 - 6
Types of playable discs . . . . . . . . . . . . . . . . . . . . . . . . . . . . . . 7
Description of discs . . . . . . . . . . . . . . . . . . . . . . . . . . . . . . . . . 8
Preparation for Use
System connections . . . . . . . . . . . . . . . . . . . . . . . . . . . . . .9 - 10
Remote control . . . . . . . . . . . . . . . . . . . . . . . . . . . . . . . . . . . . 11
Changing the setup menu . . . . . . . . . . . . . . . . . . . . . . . . 12- 16
Basic Operation
General control . . . . . . . . . . . . . . . . . . . . . . . . . . . . . . . . . . . . 17
Setting the clock (Remote control only) . . . . . . . . . . . . . . . . . 18
iPod
Listening to the iPod . . . . . . . . . . . . . . . . . . . . . . . . . . . . .18 - 20
DVD Operation
DVD playback
Playback . . . . . . . . . . . . . . . . . . . . . . . . . . . . . . . . . . . . . .20 - 21
To resume playback after stopping (resume play) . . . . . . . . . 21
DVD mode operation indicators . . . . . . . . . . . . . . . . . . . . . . . 21
Basic operation
To locate the beginning of a chapter (track) (skip) . . . . . . . . . 21
Fast forward/Fast backward (search) . . . . . . . . . . . . . . . .21 - 22
To play in the desired order (programmed play) . . . . . . . . . . . 22
To start playback from the desired point
(direct play) . . . . . . . . . . . . . . . . . . . . . . . . . . . . . . . . . . . . . . . 22
Useful operation
Still picture. . . . . . . . . . . . . . . . . . . . . . . . . . . . . . . . . . . . . . . . 23
Step function (Frame by frame advance playback) . . . . . . . . . 23
Slow-motion play . . . . . . . . . . . . . . . . . . . . . . . . . . . . . . . . . . . 23
To change the angle . . . . . . . . . . . . . . . . . . . . . . . . . . . . . . . . 23
To zoom images (zoom) . . . . . . . . . . . . . . . . . . . . . . . . . . . . . 23
To play repeatedly (repeat play) . . . . . . . . . . . . . . . . . . . . . . . 24
To play the contents between the specified points repeatedly
(A-B repeat). . . . . . . . . . . . . . . . . . . . . . . . . . . . . . . . . . . . . . . 24
To select a title from the top menu of the disc. . . . . . . . . . . . . 24
To select a subtitle or audio language
from the disc menu . . . . . . . . . . . . . . . . . . . . . . . . . . . . . . . . . 25
Various settings
To change the subtitle language . . . . . . . . . . . . . . . . . . . . . . . 25
To change the audio channel . . . . . . . . . . . . . . . . . . . . . . . . . 25
To change the display on TV screen. . . . . . . . . . . . . . . . . . . . 26
Page
Video CD and Super Video CD Operation
Video CD and Super Video CD playback
Playback of a video CD (super video CD)
with P.B.C. ON . . . . . . . . . . . . . . . . . . . . . . . . . . . . . . . . . . . . .27
To play without activating the playback control function . . . . .27
To start playback from the desired point (direct play) . . . . . . .27
Random play . . . . . . . . . . . . . . . . . . . . . . . . . . . . . . . . . . . . . .28
To change the audio channel . . . . . . . . . . . . . . . . . . . . . . . . . 28
Disc digest selection . . . . . . . . . . . . . . . . . . . . . . . . . . . . . . . .28
Track digest selection . . . . . . . . . . . . . . . . . . . . . . . . . . . . . . .28
CD, CD-R and CD-RW Operation
CD operation
To play in the desired order (programmed play) . . . . . . . . . . .29
To start playback from the desired point (direct play) . . . . . . .29
MP3/WMA and JPEG disc operation
To start playback from the desired point (direct play) .. . . . . . .30
To play in the desired order (playlist) . . . . . . . . . . . . . . . . . . . .30
Playback on the MP3 menu screen . . . . . . . . . . . . . . . . . . . . .30
To play repeatedly (repeat play) . . . . . . . . . . . . . . . . . . . . . . .31
Rotating a picture . . . . . . . . . . . . . . . . . . . . . . . . . . . . . . . . . . .32
Simultaneously playback the MP3 and JPEG . . . . . . . . . . . . .32
Random play (REMOTE CONTROL ONLY) . . . . . . . . . . . . . . 32
MP3/WMA folder mode (only for MP3/WMA files) . . . . . . . . . .33
USB
Listening to USB mass storage device/
MP3 player . . . . . . . . . . . . . . . . . . . . . . . . . . . . . . . . . . . . 34 - 35
Advanced USB playback . . . . . . . . . . . . . . . . . . . . . . . . . . . . .35
Radio Operation
Listening to the radio . . . . . . . . . . . . . . . . . . . . . . . . . . . . . . . .36
Timer
Timer and sleep operation (Remote control only) . . . . . . 37 - 38
Advanced Features
Enhancing your system . . . . . . . . . . . . . . . . . . . . . . . . . . . . . .39
References
Troubleshooting chart . . . . . . . . . . . . . . . . . . . . . . . . . . . 39 - 40
Maintenance . . . . . . . . . . . . . . . . . . . . . . . . . . . . . . . . . . . . . .40
Specifications . . . . . . . . . . . . . . . . . . . . . . . . . . . . . . . . . . . . . .41
En-4
Video cable x 1
(Yellow)
FM aerial x 1
Page
1
2
3
4
5
6
7
8
9
9
X-MF3DVD-I_En.fm
2009September 28
Precautions
DVD MICRO COMPONENT SYSTEM
X-MF3DVD-I
REMOTE
SENSOR
TIMER
STANDBY/
ON
FUNCTION
OPEN/
CLOSE
PHONES
2
3
4
5
6
7
8
9
10
11
1
4
3
2
1
n General
l Use the unit on a firm, level surface free from vibration.
l Keep the unit away from direct sunlight, strong
magnetic fields, excessive dust, humidity and
electronic/electrical equipment (home computers,
facsimiles, etc.) which generate electrical noise.
l Do not place anything on top of the unit.
l Do not expose the unit to moisture, to temperatures
higher than 60°C (140°F) or to extremely low
temperatures.
l If your system does not work properly, disconnect the
AC power lead from the wall socket. Plug the AC power
lead back in, and then turn on your system.
l In case of an electrical storm, unplug the unit for safety.
l Hold the AC power plug by the head when removing it
from the wall socket, as pulling the lead can damage
internal wires.
l The AC power plug is used as a disconnect device and
shall always remain readily operable.
l Do not remove the outer cover, as this may result in
electric shock. Refer internal service to your local
PIONEER service facility.
l The ventilation should not be impeded by covering the
ventilation openings with items, such as newspapers,
tablecloths, curtains, etc.
Controls and indicators
l No naked flame sources, such as lighted candles,
should be placed on the apparatus.
l Attention should be drawn to the environmental aspects
of battery disposal.
l This unit should only be used within the range of 5°C to
35°C (41°F to 95°F).
l The apparatus is designed for use in moderate
climates.
Warning:
The voltage used must be the same as that specified on
this unit. Using this product with a higher voltage other
than that which is specified is dangerous and may result in
a fire or other type of accident causing damage. PIONEER
will not be held responsible for any damage resulting from
use of this unit with a voltage other than that which is
specified.
n Volume control
The sound level at a given volume setting depends on
speaker efficiency, location, and various other factors. It is
advisable to avoid exposure to high volume levels. Do not
turn the volume on to full at switch on and listen to music
at moderate levels. Excessive sound pressure from
earphones and headphones can cause hearing loss.
n Front panel
1. iPod Docking Station. . . . . . . . . . . . . . . . . . . . . . .19
2. Remote Sensor . . . . . . . . . . . . . . . . . . . . . . . . . . .11
3. Timer Indicator. . . . . . . . . . . . . . . . . . . . . . . . . . . .38
4. Standby/On Button . . . . . . . . . . . .12, 17, 19, 20, 36
5. Function Button. . . . . . . . . . . . . . . . . . . . . . . .19, 36
6. Disc Tray. . . . . . . . . . . . . . . . . . . . . . . . . . . . . . . . .20
7. Headphone Socket . . . . . . . . . . . . . . . . . . . . . . . .39
8. Volume Control . . . . . . . . . . . . . . . . . . . . . . . . . . .17
9. Disc / USB / iPod Play or Pause
Button . . . . . . . . . . . . . . . . . . . .19, 20, 21, 27, 29, 34
10. Disc Tray Open / Close Button . . . . . . . . . . . . . . .20
11. USB Terminal . . . . . . . . . . . . . . . . . . . . . . . . . . . . .34
Reference page
1
2
n Speaker system
1. Tweeter
2. Woofer
3. Bass Reflex Duct
4. Speaker Wire
3
4
5
6
7
8
X-MF3DVD-I_En.fm
En-5
2009September 28
Controls and indicators (continued)
DIRECT
STANDBY/ON
OPEN / CLOSE
TUNING
PRESET
X.BOOM
EQUALIZER
VOLUME
MEMORY
TOP
MENU
SUB TITLE
DIGEST
TAG
MENU/
PBC
RETURN
CLOCK /
TIMER
SLEEP
DISPLAY(TV)
MUTE
AUDIO
TUNING
PRESET
SETUP
MENU
1 2 3
4 5 6
7 8 9
0
10
ZOOM
RANDOM
REPEAT
USB/
DVD
iPod
TUNER
AUX
FM/AM
ANGLE
SLOW
STEP
A-B
1 2 3 4 5 6 7 8
11 12 151413
16
17
18
19
n Display
1.
109
Folder Indicator . . . . . . . . . . . . . . . . . . . . . . . . . . . . . . 33
2.
DVD Indicator . . . . . . . . . . . . . . . . . . . . . . . . . . . . . . . . 20
3.
VCD Indicator . . . . . . . . . . . . . . . . . . . . . . . . . . . . . . . . 27
4.
CD Indicator . . . . . . . . . . . . . . . . . . . . . . . . . . . . . . . . . 29
5.
MP3 Indicator . . . . . . . . . . . . . . . . . . . . . . . . . . . . . . . . 33
6.
WMA Indicator . . . . . . . . . . . . . . . . . . . . . . . . . . . . . . . 33
7.
Sleep Indicator . . . . . . . . . . . . . . . . . . . . . . . . . . . . . . . 38
8.
Timer Play Indicator . . . . . . . . . . . . . . . . . . . . . . . . . . . 39
9.
FM Stereo Mode Indicator . . . . . . . . . . . . . . . . . . . . . . 36
10.
FM Stereo Receiving Indicator . . . . . . . . . . . . . . . . . . 36
11.
Memory Indicator . . . . . . . . . . . . . . . . . . . . . . . . . . . . . 36
12.
Chapter Indicator . . . . . . . . . . . . . . . . . . . . . . . . . . . . . 26
13.
Repeat Play Indicator . . . . . . . . . . . . . . . . . . . . . . . 24, 35
14.
Pause Indicator . . . . . . . . . . . . . . . . . . . . . . . . . . . . . . . 20
15.
Play Indicator. . . . . . . . . . . . . . . . . . . . . . . . . . . . . . . . . 20
16.
DTS Indicator . . . . . . . . . . . . . . . . . . . . . . . . . . . . . . . . 25
17.
Dolby Digital Signal Indicator . . . . . . . . . . . . . . . . . . . 25
18.
USB Indicator . . . . . . . . . . . . . . . . . . . . . . . . . . . . . . . . 34
19.
Random Indicator . . . . . . . . . . . . . . . . . . . . . . . . . . . . . 28
Reference page
n Remote control
Reference page
10
11
12
13
14
15
16
17
18
19
20
1.
Remote Control Transmitter . . . . . . . . . . . . . . . . . . . . 11
2.
Standby/On Button . . . . . . . . . . . . . . . . 12, 17, 19, 20, 36
3.
1
2
STANDBY/ON
OPEN / CLOSE
21
3
TOP
MENU
SUB TITLE
DIGEST
TAG
DIRECT
TUNING
PRESET
SETUP
X.BOOM
EQUALIZER
MEMORY
iPod
USB/
DVD
ZOOM
SLOW
DISPLAY(TV)
VOLUME
MENU
FM/AM
TUNER
ANGLE
STE
TUNING
PRESET
CLOCK /
RANDOM
REPEAT
10
AUDIO
TIMER
SLEEP
22
23
MUTE
24
25
26
27
28
MENU/
PBC
29
30
RETURN
31
AUX
A-B
32
33
34
4
5
6
7
8
9
Direct Search Buttons . . . . . . . . . . . . . . . . . . . 22, 27, 28
4.
Direct Button . . . . . . . . . . . . . . . . . . . . . . . . . . . . . 22, 27
5.
DVD/CD/USB/iPod Play and
Pause Button . . . . . . . . . . . . . . . . . 19, 20, 21, 27, 29, 34
6.
Fast Reverse or Tuning Down Button . . . . . . . . . 21, 36
7.
Chapter (Track) Skip Down or Preset
Down Button . . . . . . . . . . . . . . . . . . 21, 27, 28, 29, 36, 37
8.
Display (TV) Button . . . . . . . . . . . . . . . . . . . . . . . . 20, 26
9.
Setup Button . . . . . . . . . . . . . . . . . . . . . . . . . . . . . . . . . 12
10.
Equaliser (X.BOOM) Button . . . . . . . . . . . . . . . . . . . . . 17
11.
Memory Button . . . . . . . . . . . . . . . . . . . . . . . . . . . . . . . 36
12.
Top Menu Button . . . . . . . . . . . . . . . . . . . . . . . . . . . . . 24
13.
MENU Button . . . . . . . . . . . 12, 19, 21, 23, 27, 28, 29, 34
14.
Cursor Buttons . . . . . . . . . . . . . 12, 19, 21, 27, 28, 29, 34
15.
Subtitle/Digest/tag Button . . . . . . . . . . . . . . . . . 8, 25, 28
16.
iPod Button . . . . . . . . . . . . . . . . . . . . . . . . . . . . . . . . . . 19
17.
DVD/USB Button . . . . . . . . . . . . . . . . . . . . . . . . . . . 20, 34
18.
Zoom Button . . . . . . . . . . . . . . . . . . . . . . . . . . . . . . . . . 23
19.
Slow Button . . . . . . . . . . . . . . . . . . . . . . . . . . . . . . . . . 23
20.
Step Button . . . . . . . . . . . . . . . . . . . . . . . . . . . . . . . 23, 27
21.
Disc Tray Open/Close Button . . . . . . . . . . . . . . . . . . . 20
22.
Fast Forward or Tuning Up Button . . . . . . . . . . . . 21, 36
23.
Stop Button . . . . . . . . . . . . . . . . . . . . . . . . . 20, 27, 28, 29
24.
Chapter (Track) Skip Up or Preset
Up Button . . . . . . . . . . . . . . . . . . . . 21, 27, 28, 29, 36, 37
25.
Audio/Mute Button . . . . . . . . . . . . . . . . . . . . . . . . . 17, 25
26.
Volume Up and Down Buttons. . . . . . . . . . . . . . . . . . . 17
27.
Clock/Timer Button . . . . . . . . . . . . . . . . . . . . . . . . . . . 37
28.
Sleep Button . . . . . . . . . . . . . . . . . . . . . . . . . . . . . . . . . 38
29.
Menu/PBC Button . . . . . . . . . . . . . . . . . . . . . . . . . . 20, 27
30.
Return Button . . . . . . . . . . . . . . . . . . . . . . . . . . . . . . . . 27
31.
Tuner/Band Button . . . . . . . . . . . . . . . . . . . . . . . . . . . . 36
32.
AUX Button . . . . . . . . . . . . . . . . . . . . . . . . . . . . . . . . . . 18
33.
Random/Repeat Button . . . . . . . . . . . . . . . . . . 24, 28, 35
34.
A-B Repeat Button . . . . . . . . . . . . . . . . . . . . . . . . . . . . 24
35.
Angle Button . . . . . . . . . . . . . . . . . . . . . . . . . . . . . . . . . 23
35
En-6
X-MF3DVD-I_En.fm
2009September 28
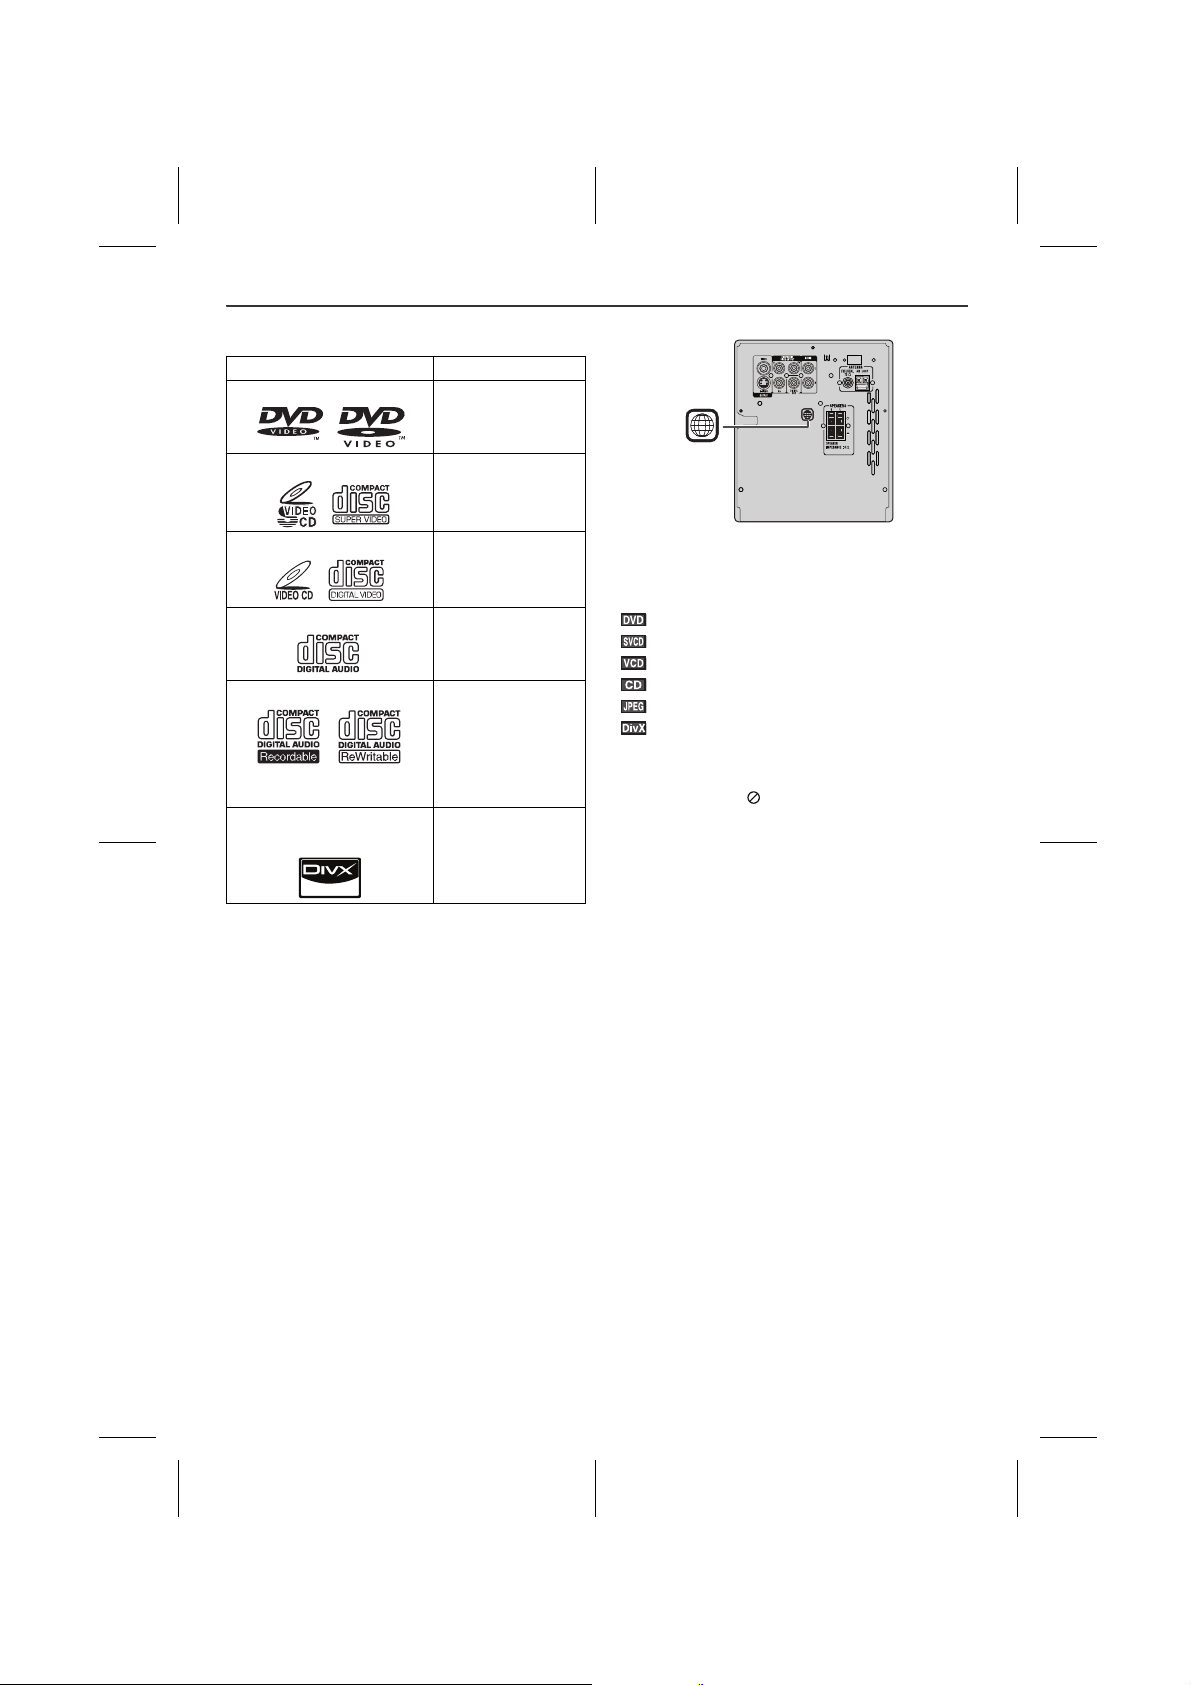
Types of playable discs
3
3
The DVD player can play back discs bearing any of the following marks:
Disc type Disc contents
DVD Video Disc Audio and video
(movies)
Super Video CD Audio and video
Video CD Audio and video
Audio CD Audio
CD-R/CD-RW (*1)
Or CD-R/CD-RW recorded in JPEG format (*2) (*3)
®
Video disc (Ver 5.2 and
DivX
below)
(*1): The CD-R/CD-RW may not be played back properly
depending on the recording equipment or the disc.
(*2): JPEG or JPG picture discs also play on this unit.
However, pictures may not be clear (depends on
resolution and recording method).
(*3): Maximum JPEG file size is 10Mb.
If photo bigger than this size, it will take some time for the file to be displayed.
l For unplayable discs, see page 8.
Types of playable DVD discs vary depending on the region. This unit can play back only DVDs with the same region number are written on the back of the unit.
®
ABOUT DIVX VIDEO: DivX
created by DivX, Inc. This is an official DivX Certified
device that plays DivX video. Visit www.divx.com for more
information and software tools to convert your files into
DivX video.
ABOUT DIVX VIDEO-ON-DEMAND: This DivX Certified
device must be registered in order to play DivX Video-onDemand (VOD) content. To generate the registration code,
locate the DivX VOD section in the device setup menu. Go
to vod.divx.com with this code to complete the registration
process and learn more about DivX VOD.
is a digital video format
(movies)
(movies)
Audio and picture
Audio and video
(movies)
Icons used in this operation manual
Some functions may not be available depending on discs.
The following icons indicate the discs that can be used in
the section.
... Indicates DVDs.
... Indicates Super video CDs.
... Indicates video CDs.
... Indicates audio CDs.
... Indicates CD-R/RW with JPEG recording.
... Indicates DivX
l Some operations may not be performed depending on
discs even if they are described in this manual.
l During operation, “ ” may be displayed on the screen.
This means that the operations described in this
manual are not possible.
Copyright Information:
l Unauthorised copying, broadcast, public display,
transmission, public performance and rental
(regardless of whether or not such activities are for
profit) of disc contents are prohibited by law.
l This system is equipped with copy protection
technology that causes substantial degradation of
images when the contents of a disc are copied to a
videotape.
l This system is protected by U.S. patents and other
intellectual property rights, the copyright for which
belongs to Macrovision Corporation. The use of
Macrovision’s copy protection technology in the system
is authorised by Macrovision and is intended for home
use only, unless otherwise authorised in writing by
Macrovision. Reverse engineering or disassembly is
prohibited.
®
®
Video.
1
2
3
4
5
6
7
8
En-7
X-MF3DVD-I_En.fm
2009September 28

Description of discs
Chapter 1 Chapter 2 Chapter 3 Chapter 1 Chapter 2
Title 1 Title 2
Track 1 Track 2 Track 3 Track 4 Track 5
3
2
2
n Discs that cannot be played
l DVDs without the region
number on the disc.
l DVDs with SECAM system
l DVD-ROM
l DVD-RAM
l DVD-Audio
l The discs above cannot be played at all, or no sound is
heard although images appear on the screen or vice
versa.
l Incorrect operation may damage the speakers and can
have a negative effect on your hearing when played at
high volume settings.
l You cannot play illegally produced discs.
Notes:
l A disc which has scratches or fingerprints may not play
properly. Refer to “Care of compact discs” (page 40)
and clean the disc.
l Do not play the discs of special shapes (heart or
octagon shaped) as they can be ejected whilst rotating
and cause injury.
l CDG
l CDV
l Photo CD
l CD-ROM
l SACD
l Discs recorded in
special formats, etc.
n Title, chapter and track
DVDs are divided into “titles” and “chapters”. If the disc has more than one movie on it, each movie is a separate “title”. “Chapters” are subdivisions of titles.
n Icons used on DVD discs
Check the icons on the DVD case before playing your discs.
Display Description
Region number (playable area number)
Format recorded on the DVD
Recorded in 4:3.
You can enjoy wide images on a wide-screen TV and letterbox size images on the 4:3 size TV.
You can enjoy wide images on a wide-screen TV and 4:3 images with the side edges cut on the 4:3 size TV.
Type of subtitles recorded
Example:
1: English
2: French
Number of camera angles
DVD discs are programmed with region numbers indicating countries in which they can be played. This system can play discs with region number on the back of the unit.
To adopt the video format to the connected TVs (“wide-screen TV” or “4:3 size TV”).
Recorded subtitle languages.
Language can be selected with
the SUB TITLE/DIGEST/TAG
button.
Number of angles recorded on
the DVD.
Angles can be selected with the
ANGLE button.
Audio CDs consist of “tracks”.
A “track” is each tune on an audio CD.
Note:
Title, chapter or track numbers may not be recorded on some discs.
n DivX
l DivX Certified to play DivX video, including premium
content.
®
l DivX
is a registered trademark of DivX, Inc., and is
used under license.
X-MF3DVD-I_En.fm
Number of audio tracks and audio recording systems
En-8
Example:
1: Original
<English>
(Dolby
Digital 2
Surround)
2: English (Dolby Digital 5.1 Surround)
The number of audio tracks and audio recording systems are indicated.
l The audio recorded on the
DVD can be switched by
using the AUDIO button.
l The number of audio tracks
and recording systems vary
depending on the DVD.
Check them in the DVD's
manual.
2009September 28

System connections
Wall socket
(AC 220 V to 240 V ~
50 Hz/60 Hz)
Left speaker
FM aerial
75 ohms coaxial cable
External FM aerial
Right speaker
Red
Black
(supplied)
To video input
socket
(commercially
available)
AM loop aerial
To component
video input
sockets
To S-video
input socket
To coaxial digital
audio input socket
To audio output
sockets
(commercially available)
(commercially available)
(not supplied)
(Black)
(White)
Make sure to unplug the AC power lead before making any connections.
3
n Aerial connection
Supplied FM aerial:
Connect the FM aerial wire to the FM 75 OHMS socket and position the FM aerial wire in the direction where the strongest signal can be received.
Supplied AM loop aerial:
Connect the AM loop aerial to the AM terminal. Position the AM loop aerial for optimum reception. Place the AM loop aerial on a shelf, etc., or attach it to a stand or a wall with screws (not supplied).
Note:
Placing the aerial on the unit or near the AC power lead may cause noise pickup. Place the aerial away from the unit for better reception.
X-MF3DVD-I_En.fm
n External FM aerial
Use an external FM aerial if you require better reception.
Consult your dealer.
Note:
When an external FM aerial is used, disconnect the supplied FM aerial wire.
En-9
2009September 28
1
2
3
4
5
6
7
8

System connections (continued)
n Speaker connection
Connect the black wire to the minus (–) terminal, and the
red wire to the plus (+) terminal.
Caution:
l Use speakers with an impedance of 6 ohms or more, as
lower impedance speakers can damage the unit.
l These speaker terminals carry HAZARDOUS LIVE
voltage. To prevent the risk of electric shock when
connecting or disconnecting the speaker cables,
disconnect the power cord before touching any
uninsulated parts.
l Do not attach these speakers to the wall or ceiling, as
they may cause injury in the event of a fall.
l Do not mistake the right and the left
channels. The right speaker is the
one on the right side when you face
the unit.
l Do not let the bare speaker wires
touch each other.
l Do not allow any objects to fall into or
to be placed in the bass reflex ducts.
l Do not stand or sit on the speakers.
You may be injured.
Incorrect
n AC power connection
After checking all the connections have been made correctly, plug the AC power lead of this unit into the wall socket. If you plug in the unit first, the unit will enter the stand-by mode.
Note:
Unplug the AC power lead from the wall socket if the unit will not be in use for a prolonged period of time.
POWER-CORD CAUTION
Handle the power cord by the plug. Do not pull out the plug
by tugging the cord and never touch the power cord when
your hands are wet as this could cause a short circuit or
electric shock. Do not place the unit, a piece of furniture,
etc., on the power cord, or pinch the cord. Never make a
knot in the cord or tie it with other cords. The power cords
should be routed such that they are not likely to be stepped
on. A damaged power cord can cause a fire or give you an
electrical shock. Check the power cord once in a while.
When you find it damaged, ask your nearest PIONEER
authorized service center or your dealer for a replacement.
X-MF3DVD-I_En.fm
En-10
2009September 28
Remote control
DIRECTDIRECT
STANDBY/ONSTANDBY/ON
STANDBY/ONSTANDBY/ON
OPEN / CLOSEOPEN / CLOSE
TUNINGTUNING
PRESETPRESET
X.BOOMX.BOOM
EQUALIZEREQUALIZER
VOLUMEVOLUME
MEMORYMEMORY
CLOCK / CLOCK /
TIMERTIMER
SLEEPSLEEP
DISPLAY(TV)DISPLAY(TV) MUTEMUTE
AUDIOAUDIO
TUNINGTUNING
PRESETPRESET
SETUPSETUP
1 2 3
4 5 6
7 8 9
0 10
10
DVD MICRO COMPONENT SYSTEM
X-MF3DVD-I
REMOTE
SENSOR
TIMER
STANDBY/
ON
FUNCTION
OPEN/
CLOSE
PHONES
OPEN
Remote sensor
0.2 m to 6 m
n Battery installation
Open the battery cover.
1
Insert the supplied batteries according to the direction
2
indicated in the battery compartment.
When inserting or removing the batteries, push them
towards the battery terminals.
Close the cover.
3
WARNING:
Do not use or store batteries in direct sunlight or other excessively hot place, such as inside a car or near a heater. This can cause batteries to leak, overheat, explode or catch fire. It can also reduce the life or performance of batteries.
Precautions for battery use:
l Replace all old batteries with new ones at the same
time.
l Do not mix old and new batteries.
l Remove the batteries if the unit will not be used for long
periods of time. This will prevent potential damage due
to battery leakage.
Caution:
l Do not use rechargeable batteries (nickel-cadmium
battery, etc.).
l Installing the batteries incorrectly may cause the unit to
malfunction.
Battery removal:
Open the battery cover and pull up the battery to take out.
Notes concerning use:
l Replace the batteries if the operating distance is
reduced or if the operation becomes erratic. Purchase
2 “AAA” size batteries (UM-4, R03, HP-16 or similar).
l Periodically clean the transmitter on the remote control
and the sensor on the unit with a soft cloth.
l Exposing the sensor on the unit to strong light may
interfere with operation. Change the lighting or the
direction of the unit if this occurs.
l Keep the remote control away from moisture, heat,
shock, and vibrations.
l When disposing of used batteries, please comply with
governmental regulations or environmental public
institutionÅfs rules that apply in your country/area.
n Test of the remote control
After installing the unit (see pages 9 - 10), check that the
remote control operates correctly.
Point the remote control directly at the remote sensor on
the unit.
The remote control can be used within the range shown below:
Press the STANDBY/ON button. Does the power turn on? Now, you can use the unit.
1
2
3
4
5
6
7
8
X-MF3DVD-I_En.fm
En-11
2009September 28
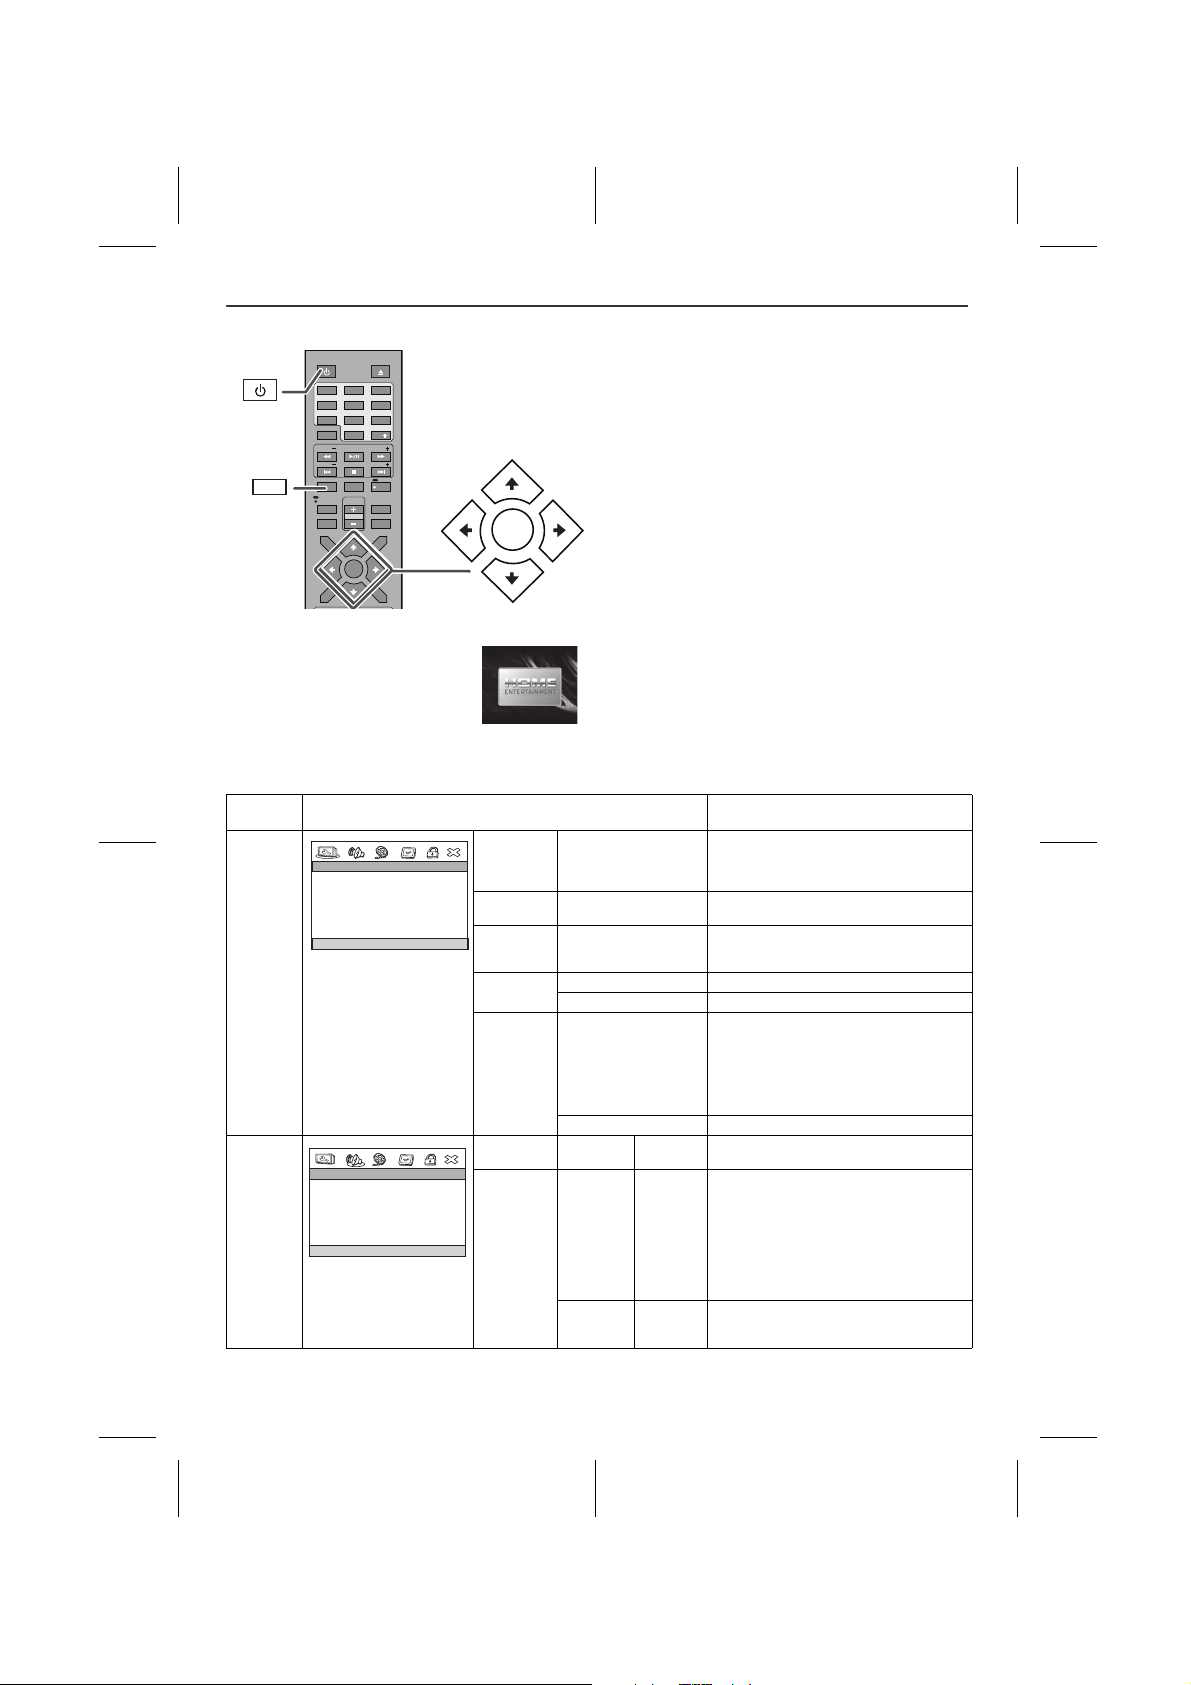
Changing the setup menu
SETUPSETUP
DIRECTDIRECT
STANDBY/ONSTANDBY/ON
OPEN / CLOSEOPEN / CLOSE
TUNINGTUNING
PRESETPRESET
X.BOOMX.BOOM
EQUALIZEREQUALIZER
VOLUMEVOLUME
MEMORYMEMORY
TOPTOP
MENUMENU
SUB TITLESUB TITLE
DIGESTDIGEST
TAGTAG
MENU/MENU/
PBCPBC
RETURNRETURN
CLOCK / CLOCK /
TIMERTIMER
SLEEPSLEEP
DISPLAY(TV)DISPLAY(TV) MUTEMUTE
AUDIOAUDIO
TUNINGTUNING
PRESETPRESET
SETUPSETUP
MENUMENU
1 2 3
4 5 6
7 8 9
0 10
10
MENUMENU
STANDBY/ONSTANDBY/ON
GO TO AUDIO SETUP PAGE
- - AUDIO SETUP PAGE - -
ANALOG AUDIO
DIGITAL AUDIO
DOLBY DIGITAL
Turn on the TV, and switch the input to the “VIDEO 1”, “VIDEO 2”, etc. accordingly.
1 Press the STANDBY/ON button to turn the power on.
l The startup screen appears.
l The startup screen does not
appear when the input is not set to
the disc mode. Press the USB/
DVD button on the remote control
or FUNCTION button on main unit
repeatedly to select DVD/CD
mode.
2 Press the SETUP button.
3 Press the or button to select a menu and press the
MENU button.
l See the list on pages 12 - 15 for setup menu.
4 Press the , , or button to change the setting
and press the MENU button.
l See the list on pages 12 - 15 for the selectable
parameters.
5 Press the SETUP button or select “EXIT SETUP” then
press the MENU button.
l The setting is completed.
l To change other settings, begin from step 2.
Notes:
l During playback, “PREFERENCES” settings cannot be
changed.
l Settings are stored even if the unit is set to the stand-
by mode.
l The backup function protects the stored settings for a
few hours should there be a power failure or the AC
power lead disconnection.
l If the startup screen is blurred, change the TV type in
the setup menu.
Setup menu
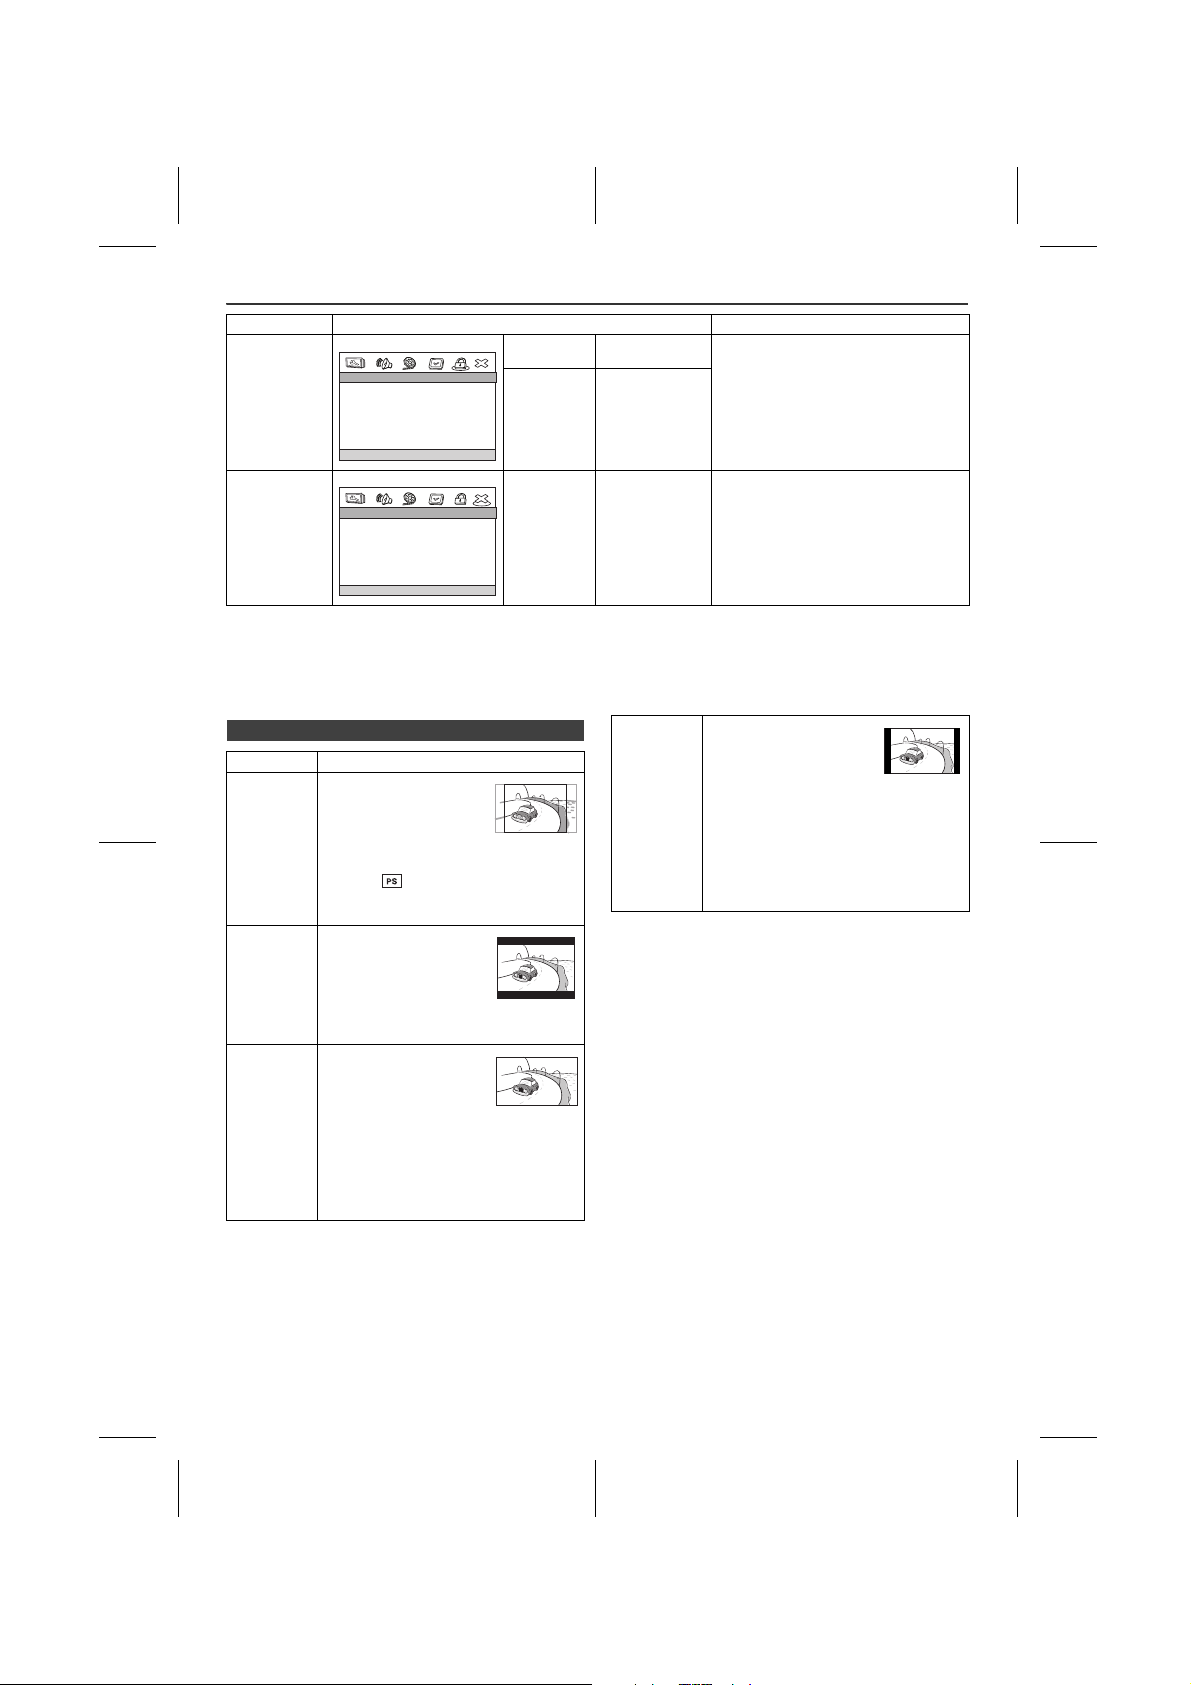
GENERAL SETUP MENU
AUDIO SETUP PAGE
Selectable parameters (* indicates default setting) Description
- - GENERAL SETUP PAGE - -
TV DISPLAY PS
ANGLE MARK ON
OSD LANGUAGE ENG
SCREEN SAVER ON
LAST MEMORY OFF
GO TO GENERAL SETUP PAGE
TV DISPLAY
ANGLE
MARK
OSD
LANGUAGE
SCREEN
SAVER
LAST
MEMORY
4:3 PANSCAN* 4:3 LETTERBOX 16:9 WIDE WIDE SQUEEZE
ON*
OFF
ENGLISH*
CHINESE
The screen mode should be set according to the connected TV type (for details, see page 15).
You can select the desired OSD (On
Screen Display) language for the setup
menu or playback control screen.
ON* A screen saver appears.
OFF The screen saver disabled.
ON* If accidentally push STANDBY/ON or
OPEN/CLOSE or FUNCTION button
during playback mode, you can resume
playback from the point playback is
stopped after power on back or you push
the OPEN/CLOSE button to close the disc
tray. OFF Last memory not function.
ANALOG
AUDIO
DIGITAL
AUDIO
DOWNMIX LT/RT
DIGITAL
OUTPUT
LPCM OUTPUT
STEREO*
SPDIF/
OFF
SPDIF/
RAW*
SPDIF/
PCM
48K*
96K
When playing a disc recorded with Dolby
Digital or DTS, the corresponding digital
signals will be output.
l PCM : Choose this setting if the
decorder cannot support Dolby Digital
or DTS.
l RAW : Choose this setting if the
decorder can support Dolby Digital or
DTS.
Select the sampling frequency at 48 kHz/
16 bit or 96 kHz/24 bit capability after you
select SPDIF/PCM at SPDIF SETUP.
En-12
X-MF3DVD-I_En.fm
2009September 28
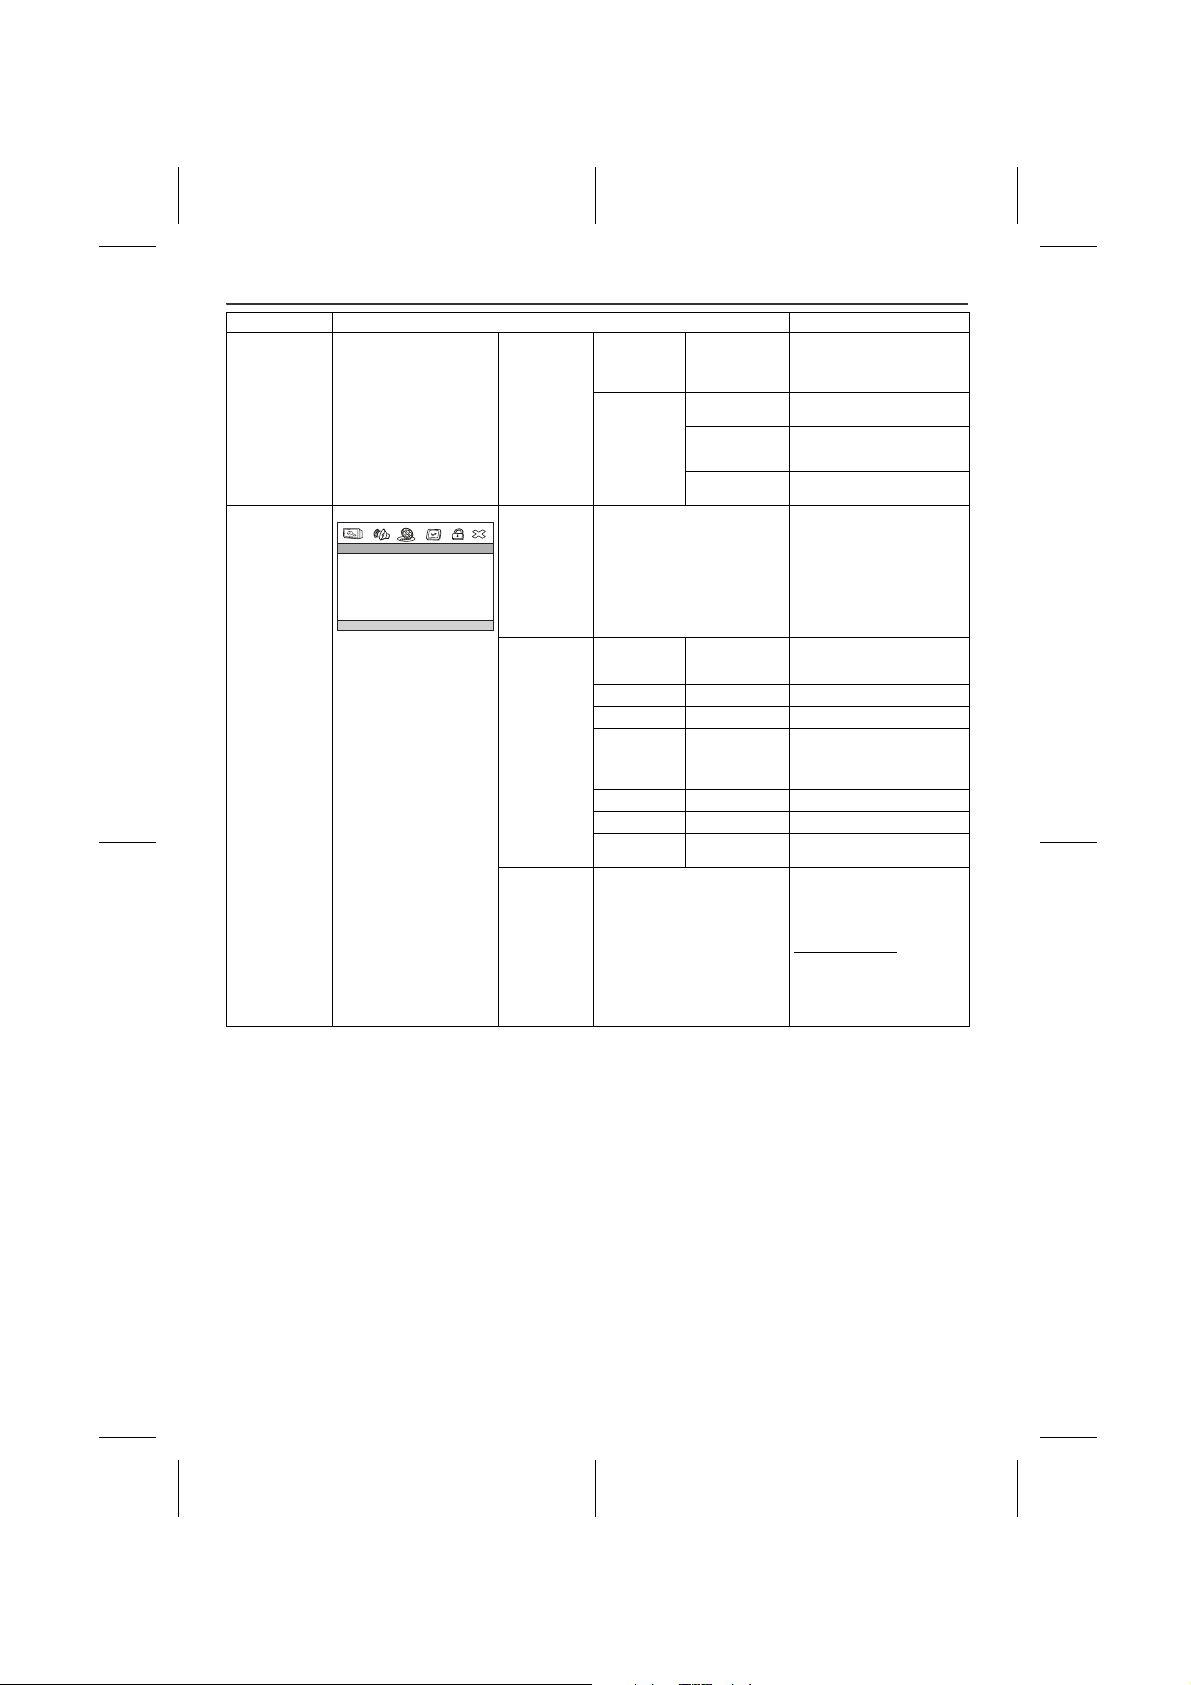
Changing the setup menu (continued)
GO TO VIDEO SETUP PAGE
- - VIDEO SETUP PAGE - -
VIDEO OUTPUT SVIDEO
COLOR SETTING
DivX VOD
Setup menu Selectable parameters (* indicates default setting) Description
VIDEO SETUP PAGE
DOLBY DIGITAL
VIDEO
OUTPUT
COLOR
SETTING
DivX VOD OK PIONEER provide you the
DUAL MONO
DYNAMIC
SVIDEO*
b
COMPONENTS
SHARPNESS HIGH
BRIGHTNESS -20 –> 0* –> +20 CONTRAST -16 –> 0* –> +16 GAMMA HIGH
HUE -9 –> 0* –> +9
SATURATION -9 –> 0* –> +9
LUMA DELAY 0T*
a
c
STEREO*
L-MONO
R-MONO
MIX-MONO
FULL
3/4
1/2
1/4
OFF*
MEDIUM*
LOW
MEDIUM*
LOW
NONE
1T
Audio with fully compressed dynamic range.
Audio with partially compressed dynamic range.
Audio with uncompressed dynamic range.
l
SVIDEO : Choose this
l
COMPONENTS:Choose this
DivX registration code that
allows you to rent and
purchase videos using the
DivX service. Please go to
www.divx.com/vod
information.
setting for SVIDEO
output.
setting for
COMPONENT
output.
for more
X-MF3DVD-I_En.fm
1
2
3
4
5
6
7
8
En-13
2009September 28

PREFERENCE
GO TO PREFERENCE PAGE
- - PREFERENCE PAGE - -
TV TYPE PAL
PBC ON
AUDIO ENG
SUBTITLE ENG
DISC MENU ENG
PARENTAL
DEFAULT
PAGE
TV TYPE PAL*
PBC ON*
AUDIO ENGLISH*
SUBTITLE ENGLISH*
DISC MENU ENGLISH*
PARENTAL 1 KID SAFE
AUTO
NTSC
OFF
CHINESE
CHINESE
CHINESE
2 G
3 PG
4 PG 13
5 PGR
6 R
7 NC 17
8 ADULT*
DEFAULT RESET This resets all setting
Please refer page 16.
Please refer page 27.
Select the language audible from the speakers.
Select the subtitle displayed on the TV screen.
Set a restriction level for DVD viewing. (For details, see page 16)
(Except for Parental and
Password) to factory
default.
X-MF3DVD-I_En.fm
En-14
2009September 28
Changing the setup menu (continued)
Setup menu Selectable parameters (* indicates default setting) Description
PA SS WO RD SETUP PAGE
EXIT SETUP The setting is completed.
(a) Selects the dynamic range compression to fit the individual listening situation of the audience. This function can be
used in DVD playback. Depending on the disc, sounds may become too loud or inaudible during playback. Dolby
Digital's dynamic range control allows you to adjust the sound range.
(b) Change the TV input in accordance with the video setup setting.
(c) If your unit has selected “S-VIDEO” as video output, you will not see a normal screen on COMPONENT input at TV.
- - PASSWORD SETUP PAGE - -
PASSWORD MODE ON
PASSWORD
GO TO PASSWORD SETUP PAGE
- - EXIT SETUP - -
PASSWORD MODE ON
PASSWORD
EXIT SETUP MENU
PASSWORD MODE
PASSWORD CHANGE
ON*
OFF
See page 16 for password setting.
n TV display setting
Indicator Setting
4:3 PANSCAN
4:3 LETTERBOX
16:9 WIDE A wide image (16:9) is
When playing a wide
image (16:9) disc, the left
and right sides of the
image are cut (pan scan)
to display a natural-looking
4:3 size image.
A wide image disc without
pan scan is played
back in 4:3 letterbox.
A 4:3 disc is played in 4:3.
When playing a wide image (16:9) disc, black bands are inserted at the top and bottom and you can enjoy full wide images (16:9) on a 4:3 size TV.
A 4:3 disc is played in 4:3.
displayed when playing a
wide image (16:9) disc.
l When playing a 4:3 image disc, the
image size depends on the setting of
the connected TV.
l If you play back a wide image (16:9)
disc with this unit connected to a 4:3
TV, the vertically shrunk image is
displayed.
WIDE SQUEEZE
Note:
When playing the disc with a fixed video format, it will not change even if the TV screen size is changed.
When play 4:3 disc with
this unit connected to a
16:9 TV (wide screen TV),
the horizontally expended
image is displayed. If you
use this setting, a natural
looking image 4:3 size can
be viewed with the black
bands are inserted at the
left and right of the screen.
l If you playback a wide image (16:9)
disc with 4:3 TV, the vertically shrunk
image is displayed.
1
2
3
4
5
6
7
X-MF3DVD-I_En.fm
8
En-15
2009September 28
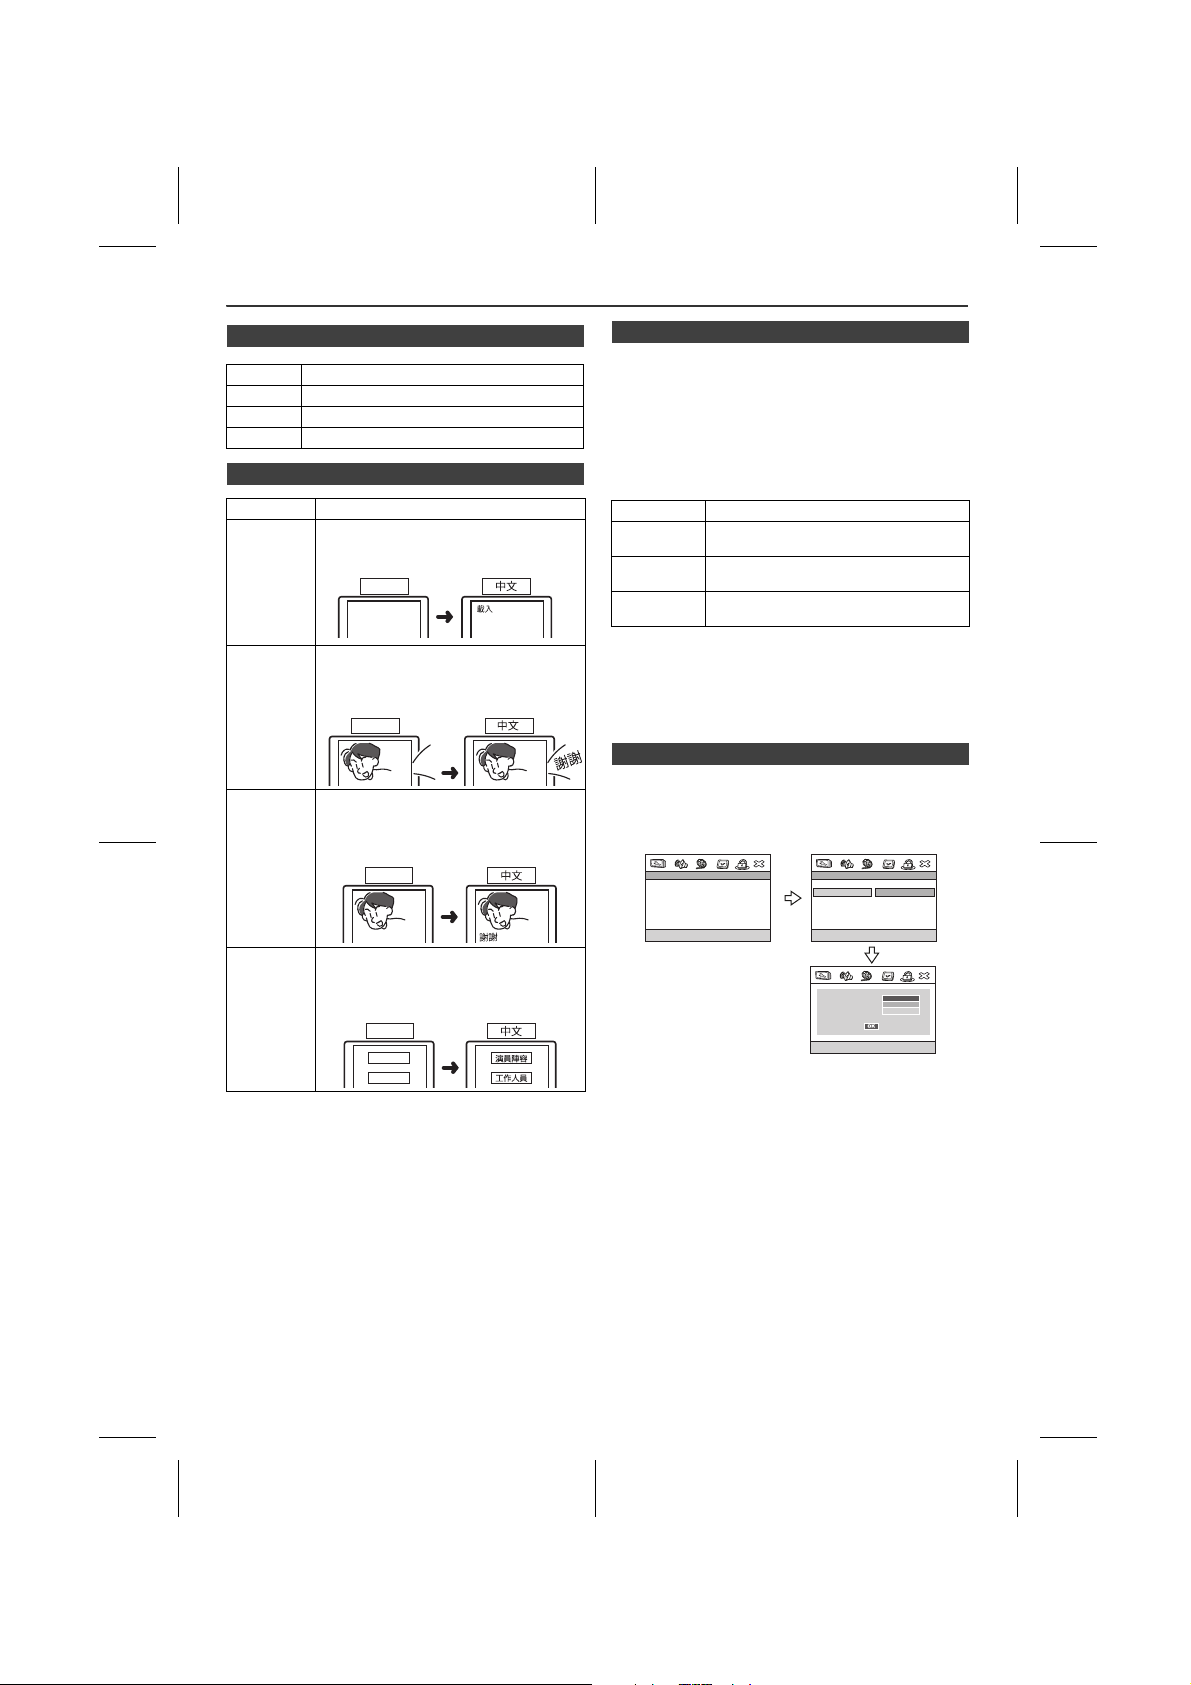
Changing the setup menu (continued)
English
LOADING
English
Thank you
English
Thank you
n TV type setting
Indicator Setting
AUTO Select this mode for the multi-system TV. NTSC Select this mode for the NTSC TV. PAL Select this mode for the PAL TV.
n Language setting
Indicator Setting
OSD
LANGUAGE
AUDIO A language for audio can be set.
SUBTITLE A language for subtitle can be set.
A language for screen display can be set for the setup menu, messages, etc.
You can specify a language for conversation and narration.
The subtitles are displayed in a specified language.
n Parental setting
1 Select “PREFERENCES” on the setup menu screen
(see steps 1 - 4 on page 12).
2 After selecting “PARENTAL” in step 4 on page 12, select
the parental level and press the MENU button.
3 Enter a 6-digit password using the Direct Search
buttons and press the MENU button.
* If this is the first time, enter “000000”.
Indicator Setting
1 KID SAFE Only DVD software intended for children
2 G to 7 NC-17
8 ADULT DVD software of any grade (adult/
Note:
Whilst playing a disc with parental lock, the display may appear requesting a password in order to watch some restricted scenes. In such case, enter the password to temporarily change the parental level.
can be played back.
Only DVD software intended for general
use and children can be played back.
general/ children) can be played back.
n Password setting
From the setup menu, select “PASSWORD SETUP PAGE”, “PASSWORD” and then “CHANGE”. A screen appears.
- - PASSWORD SETUP PAGE - -
PASSWORD MODE ON
PASSWORD
- - PASSWORD SETUP PAGE - -
PASSWORD MODE ON
PASSWORD
CHANGE
DISC
MENU
A language for disc menus can be set.
Menu screens are displayed in a specified
language.
English
CAST
STAFF
X-MF3DVD-I_En.fm
GO TO PASSWORD SETUP PAGE
1 Enter the old password using the Direct Search buttons.
(If this is the first time, enter “000000”).
CHANGE PASSWORD
OLD PASSWORD
NEW PASSWORD
CONFIRM PWD
2 Enter the new password using the Direct Search
buttons.
3 Enter the new password again for confirmation.
Note:
When you forget your password, follow below sequence.
At setup menu, select “PASSWORD SETUP PAGE”, “PASSWORD” and then “CHANGE”.
1 Enter the old password as “000000” using the Direct
Search buttons.
2 Enter the new password. 3 Enter the new password again for confirmation.
En-16
2009September 28
General control
DIRECT
STANDBY/ON
OPEN / CLOSE
TUNING
PRESET
X.BOOM
EQUALIZER
X.BOOM
EQUALIZER
VOLUME
MEMORY
TOP
MENU
SUB TITLE
DIGEST
TAG
MENU/
PBC
RETURN
CLOCK /
TIMER
SLEEP
DISPLAY(TV)
MUTE
AUDIO
MUTE
AUDIO
TUNING
PRESET
SETUP
MENU
1 2 3
4 5 6
7 8 9
0
10
ZOOM
RANDOM
REPEAT
USB/
DVD
iPod
TUNER
AUX
FM/AM
ANGLE
SLOW
STEP
A-B
VOLUME
STANDBY/ON
30 MAXMIN 01
...
DVD MICRO COMPONENT SYSTEM
X-MF3DVD-I
STANDBY/
ON
STANDBY/ON
X.BOOM
EQUALIZER
REMOTE
SENSOR
TIMER
STANDBY/
ON
FUNCTION
PHONES
OPEN
STANDBY/ON
OPEN / CLOSE
OPEN/
CLOSE
VOLUME
DIRECT
10
TUNING
TUNING
PRESET
PRESET
DISPLAY(TV)
MUTE
SETUP
AUDIO
X.BOOM
CLOCK /
EQUALIZER
TIMER
VOLUME
MEMORY
SLEEP
TOP
MENU/
MENU
PBC
MENU
SUB TITLE
DIGEST
RETURN
TAG
FM/AM
iPod
TUNER
AUX
USB/
DVD
ZOOM
RANDOM
ANGLE
REPEAT
SLOW
STE
A-B
AUDIO
MUTE
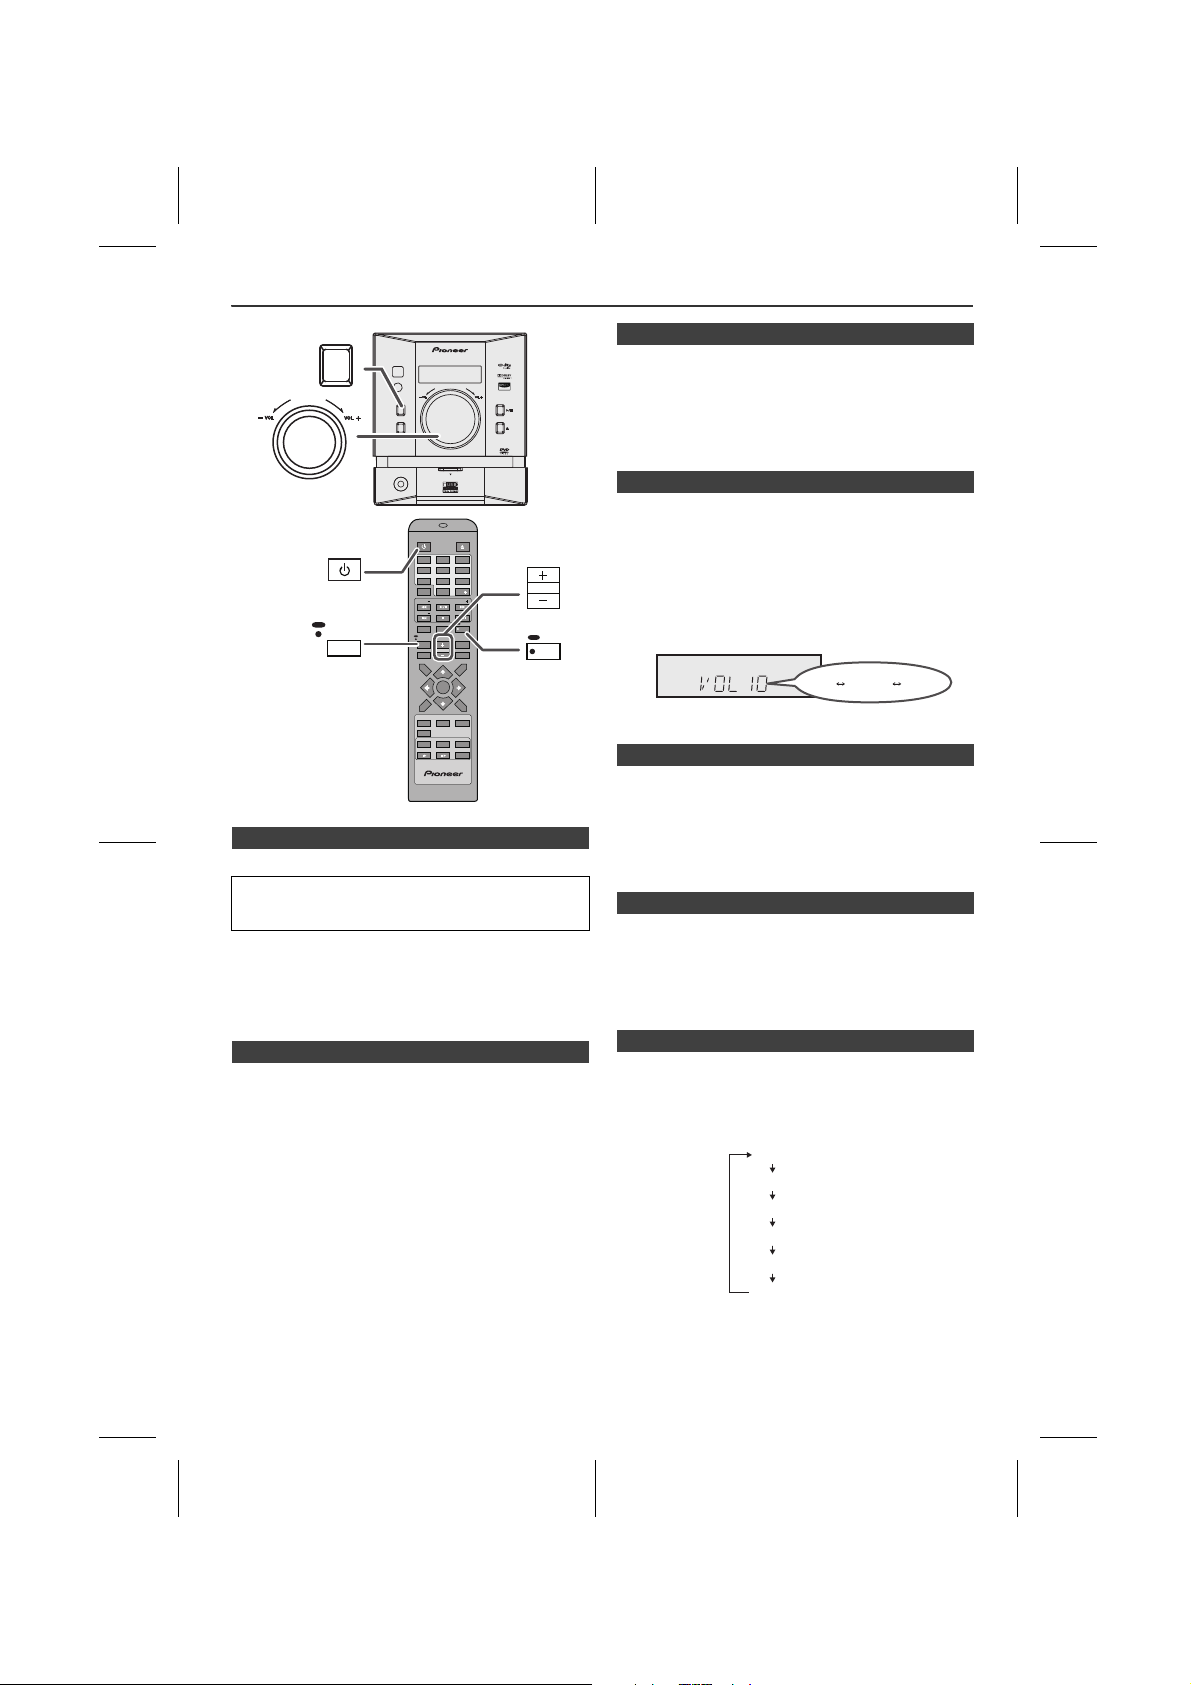
n To turn the power on
Press the STANDBY/ON button to turn the power on.
After use:
Press the STANDBY/ON button to enter the power standby mode.
Note:
Should there be a power failure or the AC power lead becomes disconnected, the backup function will protect the memorised function mode for a few hours.
n Volume auto set-in
l If you turn off and on the main unit with volume set to
16 or higher, the volume will start at 16.
l If you turn the unit off then on again with the volume
level set to less than 15, it will turn on again at the level
set.
n Volume control
Main unit operation:
When the VOLUME control is turned clockwise, the volume will increase. When it is turned anti-clockwise, the volume will decrease.
Remote control operation:
Press the VOLUME (+ or –) button to increase or decrease
the volume.
n Extra bass control (X.BOOM)
When the X.BOOM button is press and hold, the unit will
enter the extra bass mode which emphasises the bass
frequencies and “X_BOOM ON” will appear.
To cancel the extra bass mode, press and hold the
X.BOOM button again.
n Muting
The volume is muted temporarily when press and hold
MUTE button on the remote control. Press again to restore
the volume.
* TV screen will displays “MUTE”. (Only at the DVD or USB
function)
n Auto power off function
In the stop mode of DVD/CD operation, the main unit enters the stand-by mode after 15 minutes of inactivity.
X-MF3DVD-I_En.fm
n Equaliser
When the EQUALIZER button on the remote control is
pressed, the current mode setting will be displayed. To
change to a different mode, press the EQUALIZER button
repeatedly until the desired sound mode appears.
FLAT
ROCK
CLASSIC
POPS
VOCAL
JAZZ
En-17
2009September 28
1
2
3
4
5
6
7
8
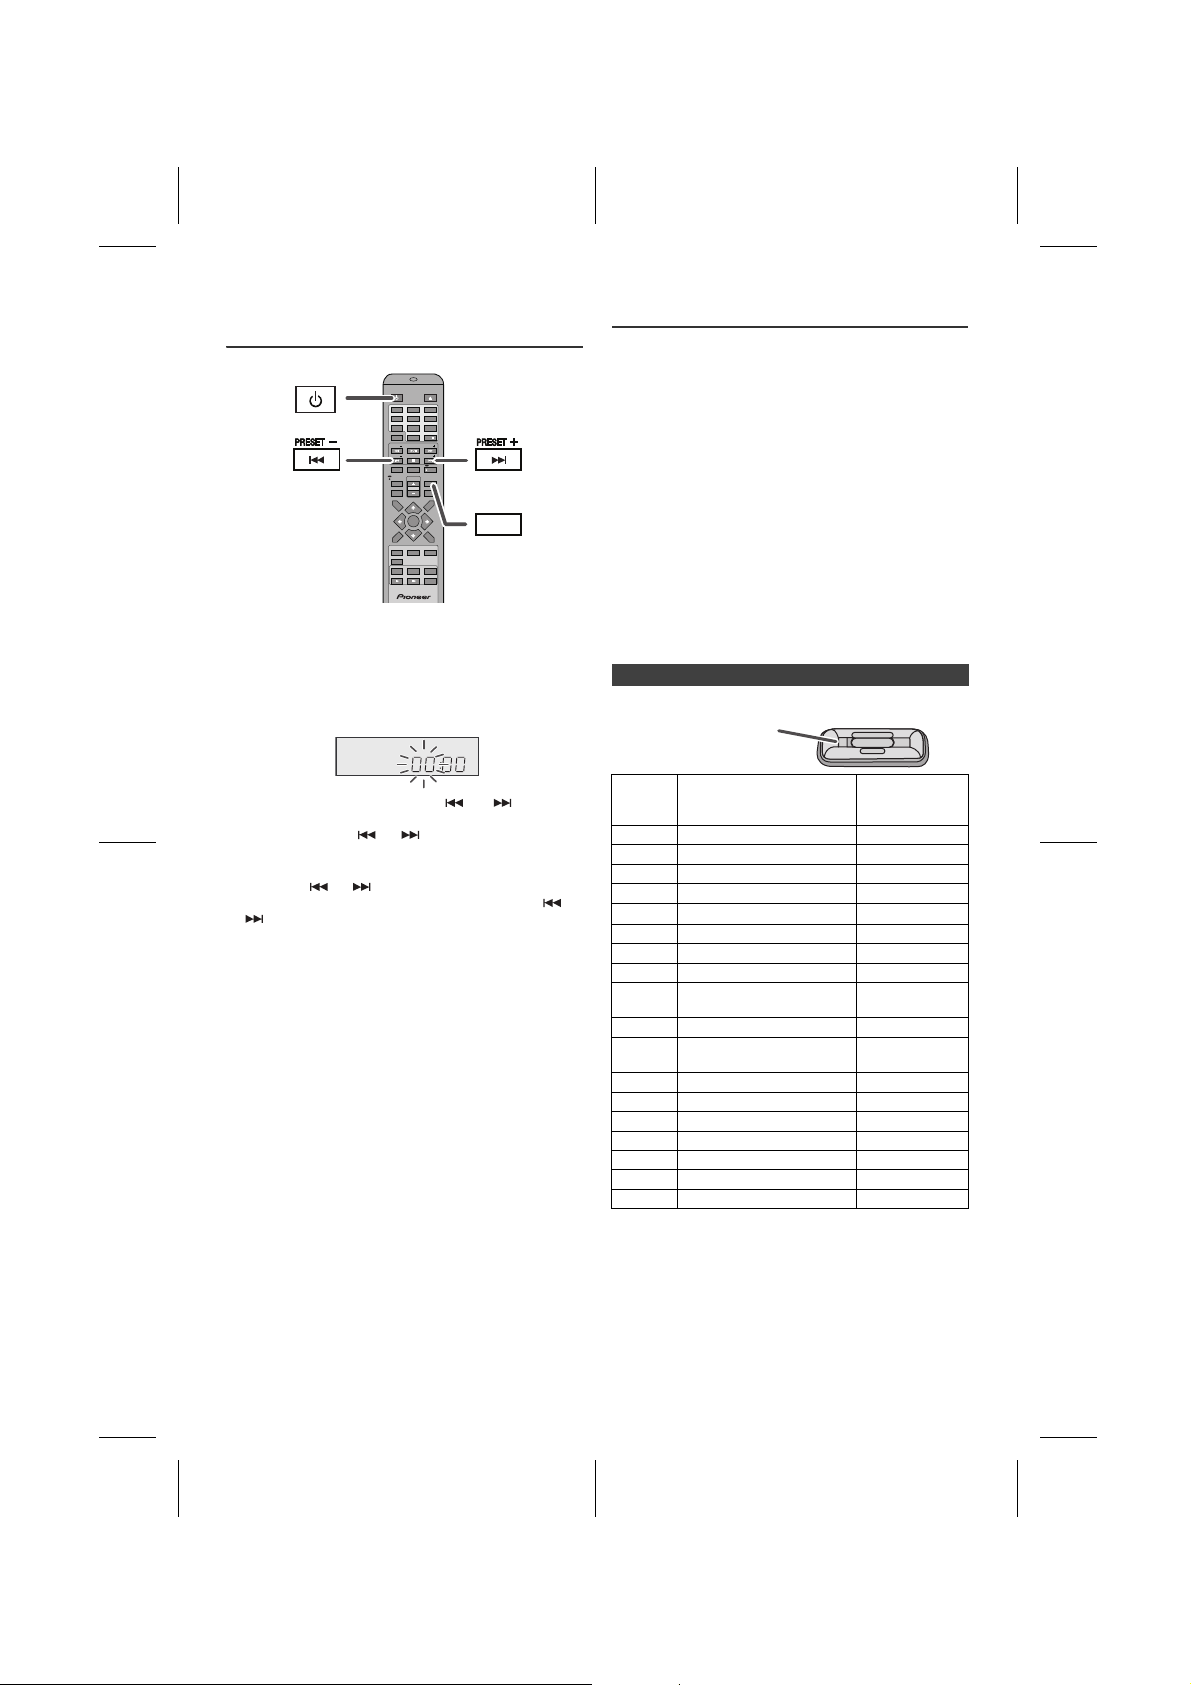
Setting the clock (Remote control
CLOCK /CLOCK /
TIMERTIMER
DIRECTDIRECT
STANDBY/ONSTANDBY/ON
OPEN / CLOSEOPEN / CLOSE
TUNINGTUNING
PRESETPRESET
X.BOOMX.BOOM
EQUALIZEREQUALIZER
VOLUMEVOLUME
MEMORYMEMORY
TOPTOP
MENUMENU
SUB TITLESUB TITLE
DIGESTDIGEST
TAGTAG
MENU/MENU/
PBCPBC
RETURNRETURN
CLOCK / CLOCK /
TIMERTIMER
SLEEPSLEEP
DISPLAY(TV)DISPLAY(TV) MUTEMUTE
AUDIOAUDIO
TUNINGTUNING
PRESETPRESET
SETUPSETUP
MENUMENU
1 2 3
4 5 6
7 8 9
0 10
10
ZOOMZOOM RANDOMRANDOM
REPEATREPEAT
USB/USB/
DVDDVD
iPodiPod
TUNERTUNER AUXAUX
FM/AMFM/AM
ANGLEANGLE
SLOWSLOW STESTEP
A-B
A-B
STANDBY/ONSTANDBY/ON
A
The marking shows
which iPod fits
only)
In this example, the clock is set for the 24-hour (00:00) display.
1 Press the STANDBY/ON button to turn to stand-by
mode.
2 Press and hold the CLOCK/TIMER button until “00:00”
appear.
3 Within 10 seconds, press the or button to
adjust the hour and then press the CLOCK/TIMER
button. Press the or button once to advance
the time by 1 hour. Hold it down to advance
continuously.
4 Press the or button to adjust the minutes and
then press the CLOCK/TIMER button. Press the or
button once to advance the time by 1 minute. Hold
it down to advance continuously.
To confirm the time display:
[When the unit is in the stand-by mode]
Press the CLOCK/TIMER button. The time display will
appear for about 5 seconds.
[When the power is on]
Press the CLOCK/TIMER button. The time display will
appear for about 5 seconds.
Note:
The “00:00” will appear when the AC power supply is
restored after a power failure or unplugging the unit.
Readjust the clock as follows.
To readjust the clock:
Perform “Setting the clock” from step 1.
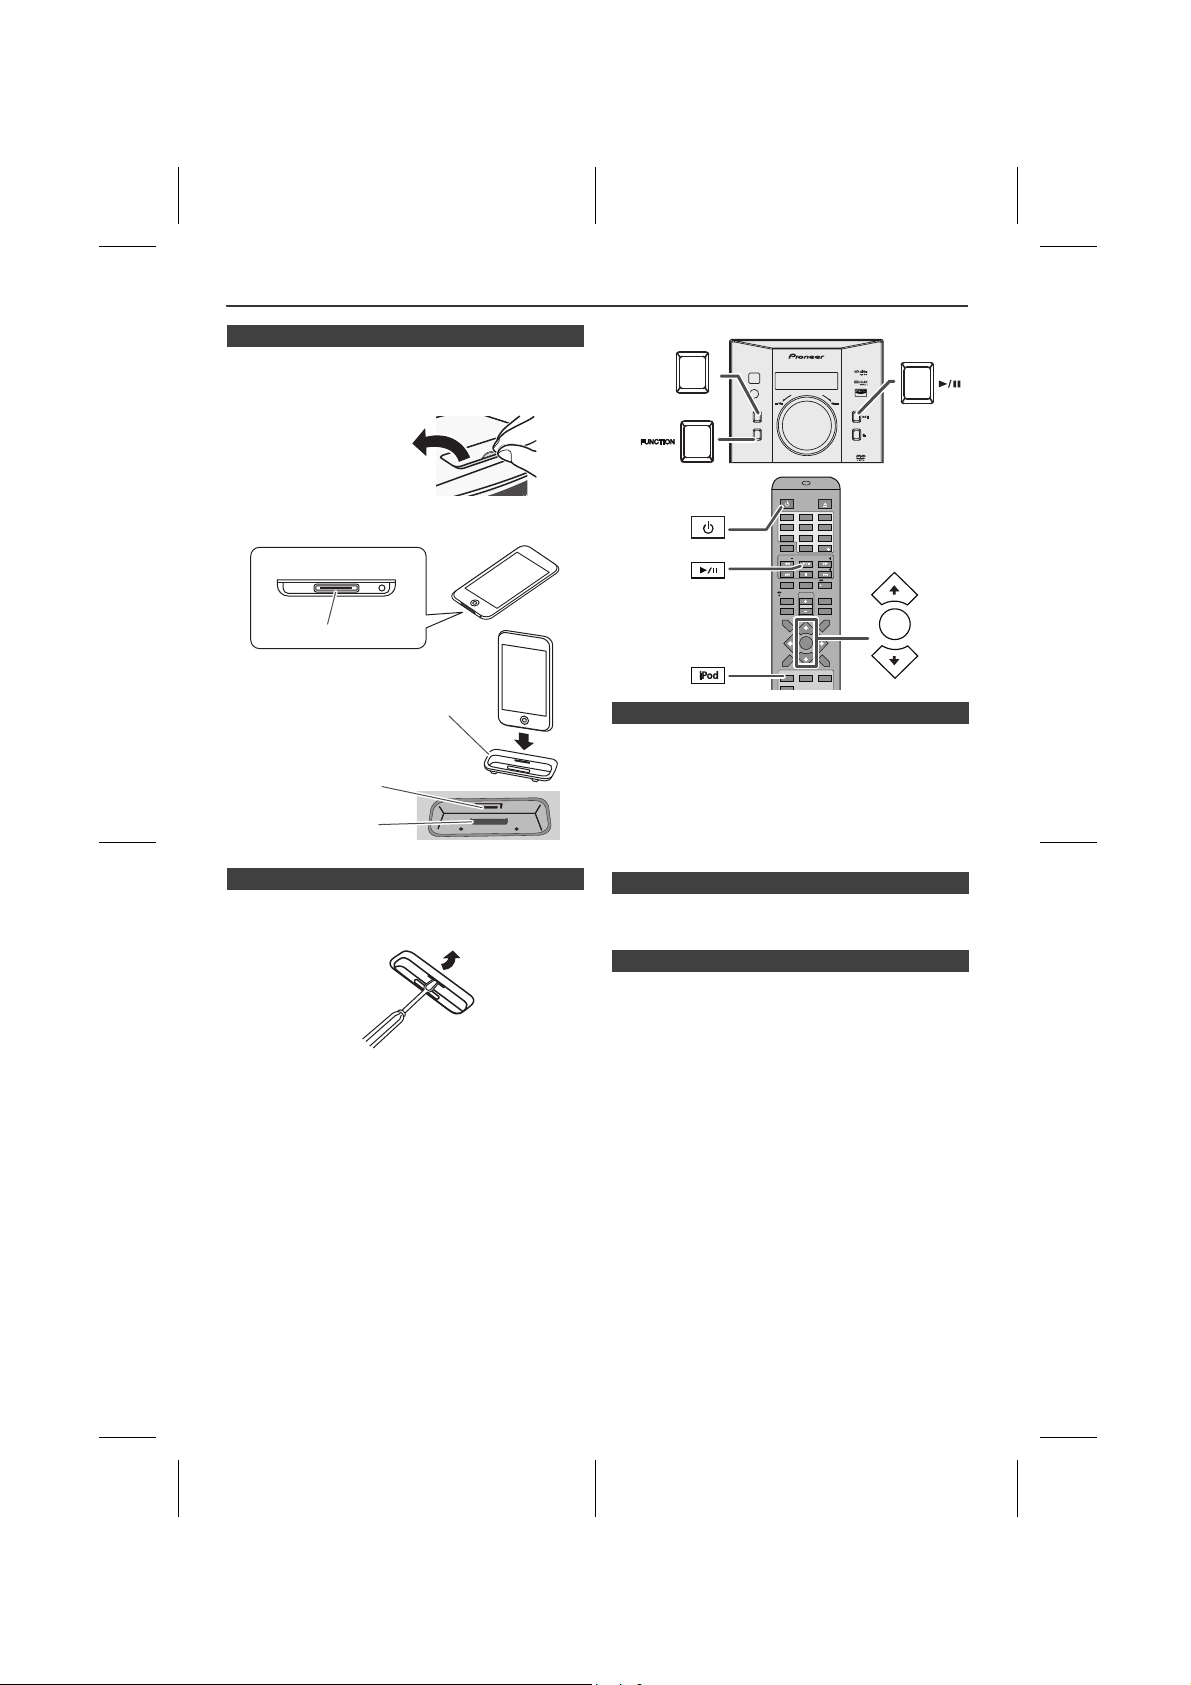
Listening to the iPod
Supported iPod models:
l iPod nano (software 1.2 above)
l iPod mini (software 1.2 above)
l iPod (5
l iPod (4
l iPod nano (2
l iPod nano (3
l iPod nano (4
l iPod classic (software 1.0.3 above)
l iPod touch (software 1.1 above)
l iPod touch (2
Caution:
Please update your iPod unit to the latest software version
from Apple’s homepage before using it.
Notes:
l Once the iPod is connected to the unit it will begin
l The iPod unit cannot be charged whilst the main unit is
n iPod adaptor connection
Adaptor
Notes:
l If you have an iPod that does not have an iPod 30 Pin
l iPhone is not supported by this system.
th
generation) (software 1.3 above) (Dock
connector equipped Click Wheel model)
th
generation) (software 3.0.2 above) (Dock
connector equipped Click Wheel model)
nd
generation) (software 1.0.0 above)
rd
generation) (software 1.0.3 above)
th
generation) (software 1.0.3 above)
nd
generation) (software 2.1 above)
charging.
in USB mode.
iPod
No.
iPod Description Capacity
A 5G iPod (with video) 30GB
A U2 iPod with video 30GB
A iPod classic 80GB, 120GB
A 4G iPod & U2 iPod 20GB
A
4G iPod
40GB
A iPod photo 40GB & 60GB
A iPod with colour display 60GB
A iPod Touch 8GB & 16GB
A iPod Touch (2nd Gen.)
8GB, 16GB &
32GB
B iPod nano 2GB & 4GB
B iPod nano (2nd Gen.) 2GB, 4GB &
8GB
B iPod nano (3rd Gen.) 4GB & 8GB
B iPod nano (4th Gen.) 8GB & 16GB
C iPod mini 4GB & 6GB
D iPod photo & colour U2 iPod 20GB & 30GB
D iPod with colour display 20GB, 60GB
E 5G iPod with video 60GB & 80GB
E iPod classic 160GB
connector, you can use an audio cable to connect it to
the AUX IN socket.
En-18
X-MF3DVD-I_En.fm
2009September 28
Listening to the iPod (continued)
pull up
iPod
Dock connector
iPod (bottom)
iPod dock
iPod
connector
iPod adaptor
DVD MICRO COMPONENT SYSTEM
X-MF3DVD-I
REMOTE
SENSOR
TIMER
STANDBY/
ON
FUNCTION
OPEN/
CLOSE
STANDBY/
ON
DIRECTDIRECT
STANDBY/ONSTANDBY/ON
OPEN / CLOSEOPEN / CLOSE
TUNINGTUNING
PRESETPRESET
X.BOOMX.BOOM
EQUALIZEREQUALIZER
VOLUMEVOLUME
MEMORYMEMORY
TOPTOP
MENUMENU
SUB TITLESUB TITLE
DIGESTDIGEST
TAGTAG
MENU/MENU/
PBCPBC
RETURNRETURN
CLOCK / CLOCK /
TIMERTIMER
SLEEPSLEEP
DISPLAY(TV)DISPLAY(TV) MUTEMUTE
AUDIOAUDIO
TUNINGTUNING
PRESETPRESET
SETUPSETUP
MENUMENU
1 2 3
4 5 6
7 8 9
0 10
10
USB/USB/
DVDDVD
iPodiPod
TUNERTUNER AUXAUX
FM/AMFM/AM
STANDBY/ONSTANDBY/ON
MENUMENU
n To insert iPod adaptor
1
Press the STANDBY/ON button to turn the power on.
2 Open the iPod cover by pulling up the tip.
3 Insert the iPod adaptor into the iPod dock and connect
your iPod.
n iPod playback
1
Press the STANDBY/ON button to turn the power on.
2 Press the iPod button on the remote control or
FUNCTION button repeatedly on the main unit to
select iPod function.
3 Insert iPod unit in iPod dock of main unit.
4 Press the button to start playback.
n To remove iPod adaptor
Insert the tip of a screwdriver (“–” type, small) into the iPod
adaptor hole as shown and lift upward to remove.
n To disconnect iPod
Simply remove the iPod from the iPod dock. It is safe to do so even during playback.
n Navigating the iPod menus
1
Press the MENU/PBC button to view the menu on iPod
unit. Press it again to go back to previous menu.
2 Use the or button to select an item on the menu
and then press MENU button.
Note:
When navigating the iPod menus with remote control, do
not operate any of the buttons on the iPod unit. The volume
level is adjusted by pressing the VOL (+ or –) button on the
main unit or the remote control. Adjusting the volume on
the iPod unit gives no effect.
iPod operation:
The operations described below depend on the generation
iPod you are using.
System on operation:
When the main unit is powered on, the iPod unit will
automatically power on when docked in the unit (including
TIMER function).
System off (stand-by operation):
When the main unit is turned to stand-by mode, the docked
X-MF3DVD-I_En.fm
iPod unit will automatically turn to charging mode.
En-19
2009September 28
1
2
3
4
5
6
7
8
Listening to the iPod (continued)
PRESETPRESET
PRESETPRESET
TUNINGTUNING
TUNINGTUNING
DISPLAY (TV)
RANDOM
REPEAT
RANDOM
REPEAT
MENU/MENU/
PBCPBC
MENU
DVD MICRO COMPONENT SYSTEM
X-MF3DVD-I
REMOTE
SENSOR
TIMER
STANDBY/
ON
FUNCTION
OPEN/
CLOSE
STANDBY/
ON
DIRECTDIRECT
STANDBY/ONSTANDBY/ON
OPEN / CLOSEOPEN / CLOSE
TUNINGTUNING
PRESETPRESET
X.BOOMX.BOOM
EQUALIZEREQUALIZER
VOLUMEVOLUME
CLOCK / CLOCK /
TIMERTIMER
DISPLAY(TV)DISPLAY(TV) MUTEMUTE
AUDIOAUDIO
TUNINGTUNING
PRESETPRESET
SETUPSETUP
1 2 3
4 5 6
7 8 9
0 10
10
STANDBY/ONSTANDBY/ON
n Watching videos on a TV connected to
iPod
Press the DISPLAY(TV) button for more than 2
1
seconds. “TV DISP” will appear on display.
2 Select the desired video from iPod unit to be played.
3 Press the MENU button to start playback.
Notes:
l
If the TV Out setting is already turned on at the iPod's video
menu, the video is automatically displayed on the TV screen
when MENU button is pressed. (Only support by “Video TV”
connection. Not support by “S-Video” or “Component Video”
connection).
l
To return to watching video on iPod screen, press the MENU/
PBC button to enter video menu. Press the DISPLAY(TV)
button for more than 2 seconds until “iPodDISP” appears.
l
During iPod video playback, pressing the DISPLAY(TV)
button will not toggle video out display between iPod and TV.
iPod playback detection function:
Once the play button on the iPod unit is pressed, the main
unit will automatically change to iPod function overriding
the previous function selected.
Caution:
Unplug all accessories for the iPod before inserting it into
the iPod dock.
n Various iPod functions
Function Main
Play Press in the pause
Pause Press in the playback
Track up/
down
Fast
forward/
reverse
Display
Repeat
Shuffle
iPod
Menu
iPod
Enter
iPod
Cursor
Up/Down
unit
____
____
____
____
____
____
____
____
Remote
control
DISPLAY (TV)
RANDOM
REPEAT
RANDOM
REPEAT
MENU
Operation
mode.
mode.
Press in the playback or
pause mode.
If you press the button in
the pause mode, press
the button to start
the desired track.
Press and hold down in
the playback mode.
Release the button to
resume playback.
iPod back light ON.
Press for more than 2
seconds to toggle the
video out display
between iPod or TV.
Press to toggle repeat
mode.
Press and hold down to
toggle shuffle mode.
Press to view the iPod
menu during iPod
function.
Press to confirm the
selection.
Press to select the iPod
menu.
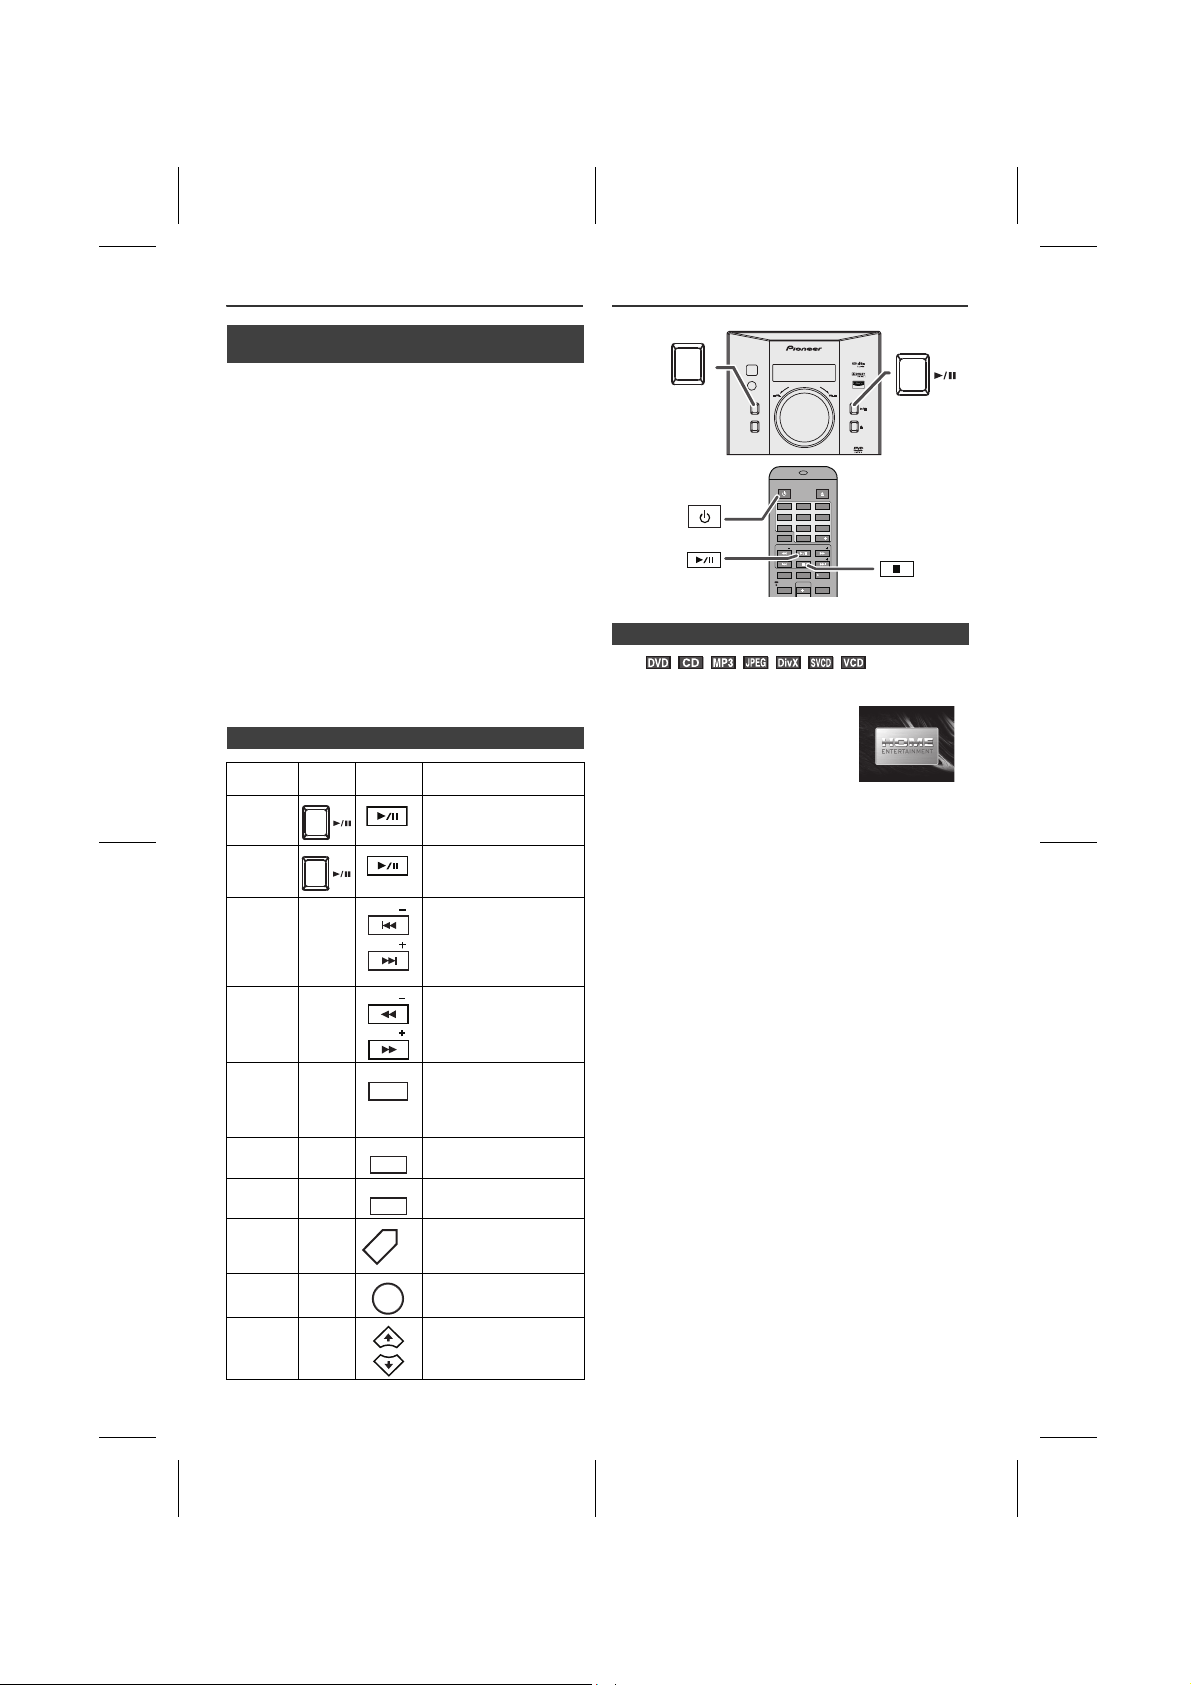
DVD playback
n Playback
Press the STANDBY/ON button to turn the power on.
1
2
When the input is not set to the disc
mode, press the USB/DVD button
on the remote control or FUNCTION
button on the main unit repeatedly to
display the startup screen.
The startup screen appears.
3 Press the button to open the disc tray.
4 Place the disc on the disc tray, label side up.
Be sure to place 8 cm discs in the middle of the disc position.
5 Press the button to close the disc tray.
Discs supporting auto start will start to play once you
close the disc tray even if you do not press the
button.
6 If playback does not start in step 5, press the
button.
Note:
Disc tray will operate in DVD and USB function only.
To interrupt playback:
Press the button.
To resume playback from the same point, press the
button.
To stop playback completely
DVD:
Press the button on remote control twice.
Press and hold the button on main unit again.
Audio CD/MP3/JPEG
Press the button on remote control or press and hold the
button on main unit.
When the unit is left unoperated for more than 5 minutes
after stopped, a screen saver appears (see page 12 when
the screen saver setting is “ON”).
Press any button on the main unit or remote control. The
startup screen returns.
En-20
X-MF3DVD-I_En.fm
2009September 28
DVD playback (continued)
NO DISC
TITLE CHP
A-B
REPEAT1SLEEPPROGPRESETTRK
KHz
MHz
LOADING
A-B
REPEAT1SLEEPPROGCHPPRESETTRKTITLE
KHz
MHz
DIRECTDIRECT
STANDBY/ONSTANDBY/ON
OPEN / CLOSEOPEN / CLOSE
TUNINGTUNING
PRESETPRESET
X.BOOMX.BOOM
EQUALIZEREQUALIZER
VOLUMEVOLUME
MEMORYMEMORY
TOPTOP
MENUMENU
SUB TITLESUB TITLE
DIGESTDIGEST
TAGTAG
MENU/MENU/
PBCPBC
RETURNRETURN
CLOCK / CLOCK /
TIMERTIMER
SLEEPSLEEP
DISPLAY(TV)DISPLAY(TV) MUTEMUTE
AUDIOAUDIO
TUNINGTUNING
PRESETPRESET
SETUPSETUP
MENUMENU
1 2 3
4 5 6
7 8 9
0 10
10
ZOOMZOOM RANDOMRANDOM
REPEATREPEAT
USB/USB/
DVDDVD
iPodiPod
TUNERTUNER AUXAUX
FM/AMFM/AM
ANGLEANGLE
SLOWSLOW STESTEP
A-B
A-B
DIRECTDIRECT
MEMORYMEMORY
TUNINGTUNING
PRESETPRESET
MENUMENU
TUNINGTUNING
PRESETPRESET
RANDOMRANDOM
REPEATREPEAT
2 X 4 X 8 X 16 X 32 X
PLAY (Normal play)
Caution:
l Close the disc tray when not in use. Otherwise, dust
may accumulate inside and cause malfunction.
l The unit gets slightly warm when used for a long time.
It does not mean the unit is damaged.
l When attempting to play discs with scratches or of a
different region number, or unplayable or restricted (*1)
discs, an error message will appear on the TV display
and the disc will not play.
(*1) Viewing is prohibited on some DVDs according to the
audience age.
Notes:
l Stop positions may be recorded on some discs. When
you play such a disc, playback stops there.
l During an operation, “ ” may appear indicating that
the operation is disabled by the disc.
l The main unit detects loaded discs automatically and
then the indicators light up.
n To resume playback after stopping
(resume play)
You can resume playback from the point playback is stopped.
1
Whilst a disc is playing, press the button on remote
control or press and hold the button on main unit.
The system stores the point you stopped.
2 To restart play, press the button.
Play resumes from the point you stopped.
To cancel the resume playback:
Press the button on remote control twice or press and
hold the button on main unit again.
Notes:
l The resume playback feature is disabled on some
discs.
l Depending on the disc, playback may resume from
slightly before the stopped position.
n DVD mode operation indicators
Basic operation
n To locate the beginning of a chapter (track)
(skip)
You can move to other tracks with simple operations. When playing SVCD or VCD, cancel the P.B.C. (playback control) (see page 27).
Whilst a disc is playing, press the or button.
l Use the button to skip to the next chapter (track).
l Use the button to skip to the previous chapter
(track).
l On SVCD, VCD and Audio CD, press the button to
skip to the beginning of the current track. Press the
button again (twice) to skip to the beginning of the
previous track.
Notes:
l Some discs do not display the chapter (track) and the
skip feature is disabled.
l On a DVD, skip does not operate between titles.
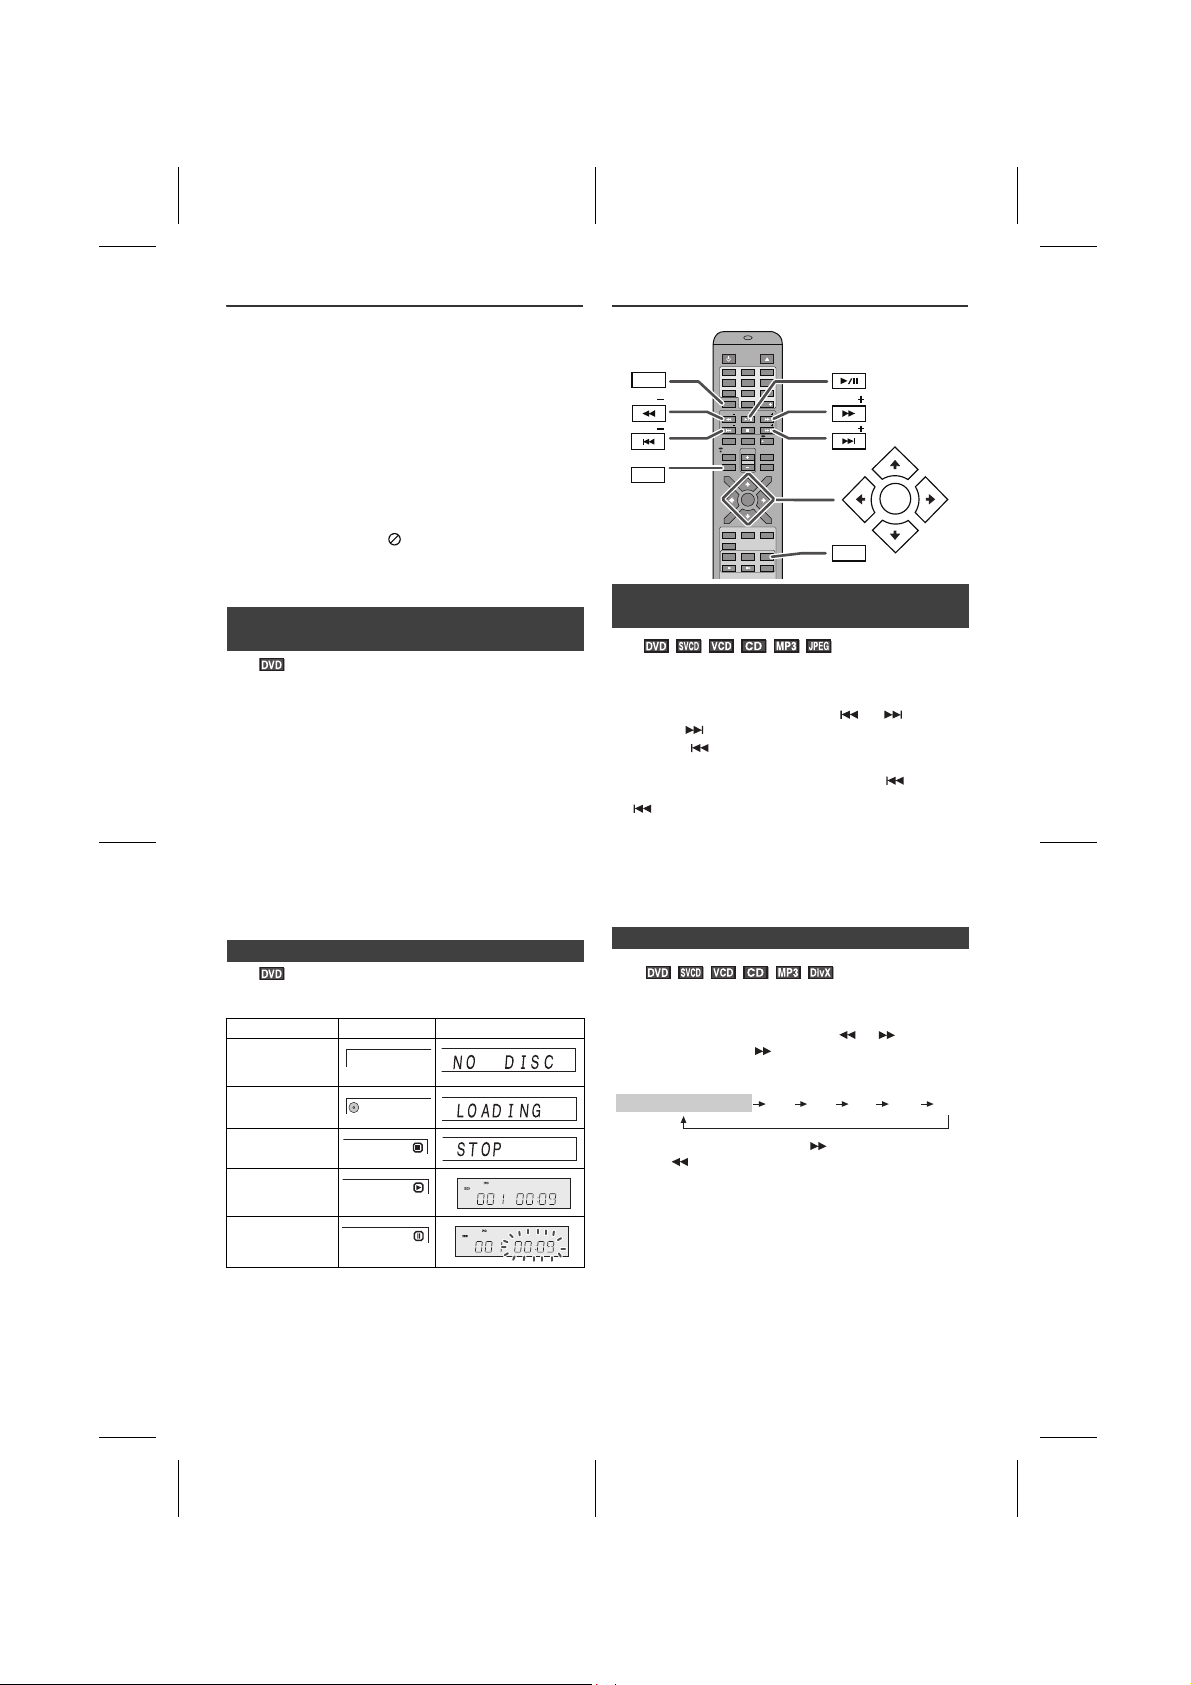
n Fast forward/Fast backward (search)
The following are examples of operation indicators that appear during DVD playback.
Operation TV screen Unit display
When the power is on without a disc.
Disc data is being read.
Stop
Play
Pause
X-MF3DVD-I_En.fm
You can search the desired point as you play the disc.
Whilst a disc is playing, press the or button.
1
Example: When the button is pressed.
On DVD/DivX/SVCD/VCD/Audio CD/MP3, the speed
changes as follows:
The disc is forwarded by the button and backward by the button.
2 Press the button to return to the normal playback.
Notes:
l On some discs, the search function is disabled.
l On a DVD, search does not operate between titles.
l On SVCD, VCD, audio CD and MP3, the search does
not operate between tracks.
l Whilst searching on a DVD, the sound is not heard and
the subtitles do not appear.
En-21
2009September 28
1
2
3
4
5
6
7
8

Basic operation (continued)
Program : Track (01-23)
Track 01/ 23
01
02
03
TT: CH:
TT: CH:
TT: CH:
TT: CH:
TT: CH:
TT: CH:
TT: CH:
TT: CH:
TT: CH:
TT: CH:
04
05
06
07
08
09
10
Exit Next
01:18
TV screen
01
02
03
TT: 01 CH: 02
TT: 02 CH: 02
TT: CH:
TT: CH:
TT: CH:
TT: CH:
TT: CH:
TT: CH:
TT: CH:
TT: CH:
04
05
06
07
08
09
10
Clear
Start
TV screen
TV screen
TV screen
TV screen
1:23:40
TT Time
l Whilst searching on a SVCD or a VCD, the sound is not
heard.
l When search is performed during the DVD playback,
pictures may not be forwarded or reversed in the
search speed specified in this manual, depending on
the disc or the scene being played.
l The search does not operate on JPEG discs.
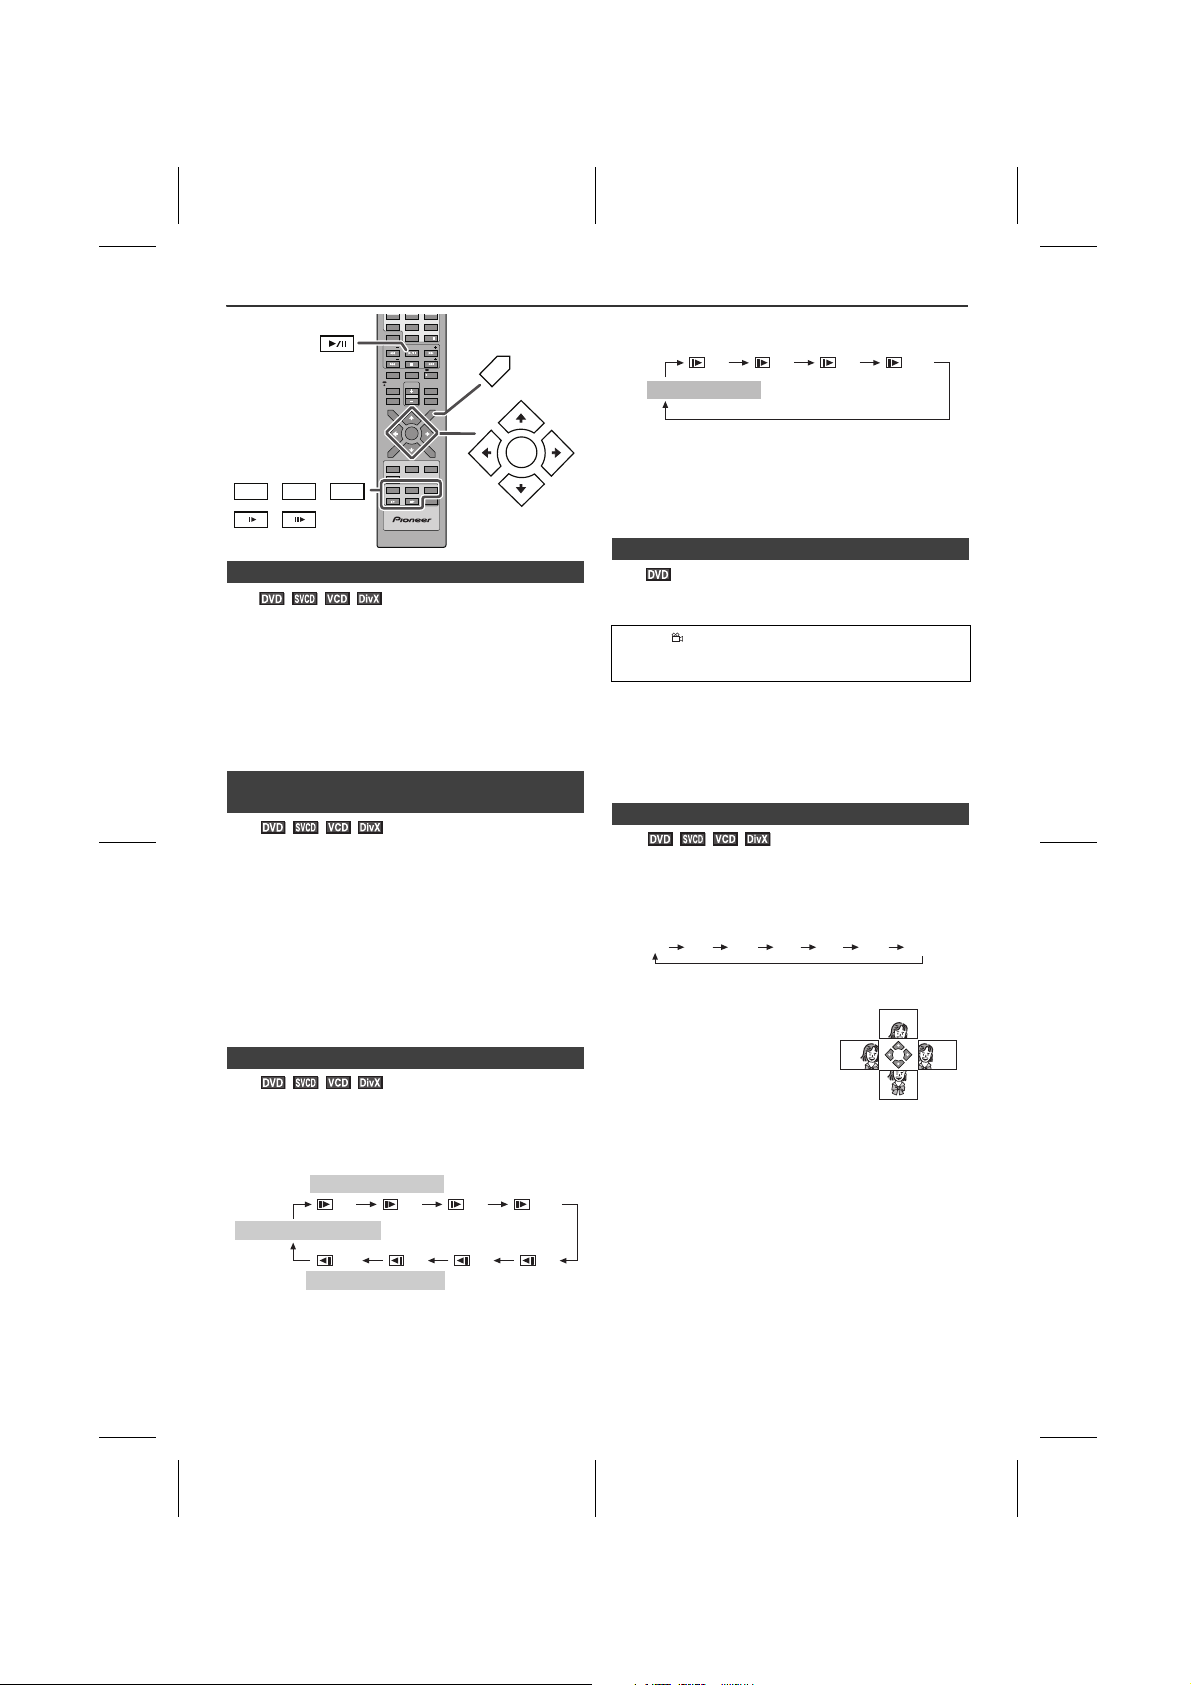
n To play in the desired order (programmed
play)
You can playback the desired tracks with titles or chapters in a specific order. Maximum of 20 tracks can be programmed.
Whilst in the stop or playback
1
mode, press the MEMORY
button.
2 Enter title or chapter number with the Direct Search
buttons.
l To specify title or track 1, enter “1”.
l If you enter the wrong numbers, press or
button to select the concerned track and then
reenter the new numbers.
3 Press button to select
“Start” and then press MENU
button to start playback the
programmed track(s).
To change the programmed contents:
Repeat the above procedures from step 1.
Programmed contents will be cleared when you perform the following operations:
l Change to another function or remove the discs.
l Set to the stand-by mode.
l Press the cursor button to select “Clear” and then press
MENU button.
In the playback mode
1 Whilst in the playback mode, press the DIRECT button.
2 Select the title or chapter by pressing the or
button and press the MENU button.
3 Enter the title or chapter number using the Direct
Search buttons.
To select chapter 1: Press “0” and “1”.
To select chapter 12: Press “1” and “2”.
Playback starts after you complete enter the
number(s).
4 Press the DIRECT button to return to the actual size of
image (standard screen).
Notes:
l Direct play feature is disabled on some discs.
l Some discs may not display the chapter number.
l With DVDs, you can specify the desired point only in the
current title and not in another title.
To play by specifying time (time search):
You can playback from the desired point by specifying the
time.
1 Whilst in the playback mode, press the DIRECT button.
2 Press or button to select “TT Time” then press the
MENU button.
3 Specify the time with the Direct Search buttons.
n To start playback from the desired point
(direct play)
To select and play the desired title and chapter:
In the stop mode
Whilst in the stop mode, press the DIRECT button.
1
T: 01/02 C: 001/002
2 Within 10 seconds, enter the title number first then only
can enter the chapter number by using the Direct
Search buttons. Press or button for title or
chapter selection.
Example:
To select title or chapter 1: Press “1”.
To select title or chapter 12: Press “1” and “2”.
To select title or chapter 22: Press “2” twice.
X-MF3DVD-I_En.fm
l To specify 1 hour 23 minutes and 40 seconds, enter
“12340”.
l If you enter the wrong number, start over from step
1.
l Playback starts after you complete enter the
number(s).
4 Press the DIRECT button to return to the actual size of
image (standard screen).
Notes:
l Some discs cannot play from the specified point.
l Time search feature is disabled on some discs.
En-22
2009September 28
Useful operation
DIRECTDIRECT
STANDBY/ON
OPEN / CLOSE
TUNINGTUNING
PRESETPRESET
X.BOOMX.BOOM
EQUALIZEREQUALIZER
VOLUMEVOLUME
MEMORYMEMORY
TOPTOP
MENUMENU
SUB TITLESUB TITLE
DIGESTDIGEST
TAGTAG
MENU/MENU/
PBCPBC
RETURNRETURN
CLOCK / CLOCK /
TIMERTIMER
SLEEPSLEEP
DISPLAY(TV)DISPLAY(TV) MUTEMUTE
AUDIOAUDIO
TUNINGTUNING
PRESETPRESET
SETUPSETUP
MENUMENU
123
4 5 6
7 8 9
0 1010
ZOOMZOOM RANDOMRANDOM
REPEATREPEAT
USB/USB/
DVDDVD
iPodiPod
TUNERTUNER AUXAUX
FM/AMFM/AM
ANGLEANGLE
SLOWSLOW STESTEP
A-B
A-B
MENUMENU
MENU/MENU/
PBCPBC
ZOOMZOOM RANDOMRANDOM
REPEATREPEAT
ANGLEANGLE
SLOWSLOW STEPSTEP
1/2 1/4 1/8 1/16
1/16
1/8 1/4 1/2
SLOW forward play
PLAY (Normal play)
SLOW reverse play
1/2 1/4 1/8 1/16
PLAY (Normal play)
n Still picture
You can freeze the picture during playback.
1
Whilst a disc is playing, press the button.
2 The image or picture will freeze on TV screen.
“II” appears on the TV screen.
l The unit display counter will blink.
Note:
The sound is muted during still picture.
n Step function (Frame by frame advance
playback)
You can advance frame by frame.
1
Whilst a disc is playing, press the STEP button.
Each press of the STEP button advances the frame.
2 Press the button to return to the normal playback.
Notes:
l Frame playback operates forward only.
l Still picture and frame advance features are disabled
on some discs.
l The sound is muted during step function.
n Slow-motion play
You can slow down the playback speed.
Whilst a disc is playing, press the SLOW button
1
repeatedly to select the desired speed.
On DVD, the speed changes as follows:
On SVCD/VCD/DivX, only forward play is possible and the speed changes as follows:
2 Press the button to return to the normal playback.
Note:
On some discs, the slow-motion play functions are disabled.
n To change the angle
You can change the angle of view when playing a DVD disc that contains scenes recorded from multiple angles.
When “ ” is displayed in the upper right corner of the TV screen, press the ANGLE button repeatedly to select the desired angle number.
Notes:
l The angle number is not displayed if angles are not
recorded on the disc.
l Refer to the manual of the disc as the operation may
vary depending on the disc.
n To zoom images (zoom)
You can magnify images during playback.
Whilst a disc is playing, press the ZOOM button.
1
Each press of the ZOOM button cycles through the
zoom setting as follows:
2 X 3 X 4 X 1/2 1/3 1/4 OFF
2 To shift the view and display the
desired part of a zoomed
image, press the , , or
button repeatedly.
To return to normal view:
Press the ZOOM button repeatedly.
Notes:
l Images may become distorted when zoomed.
l Subtitles cannot be zoomed.
1
2
3
4
5
X-MF3DVD-I_En.fm
6
7
8
En-23
2009September 28
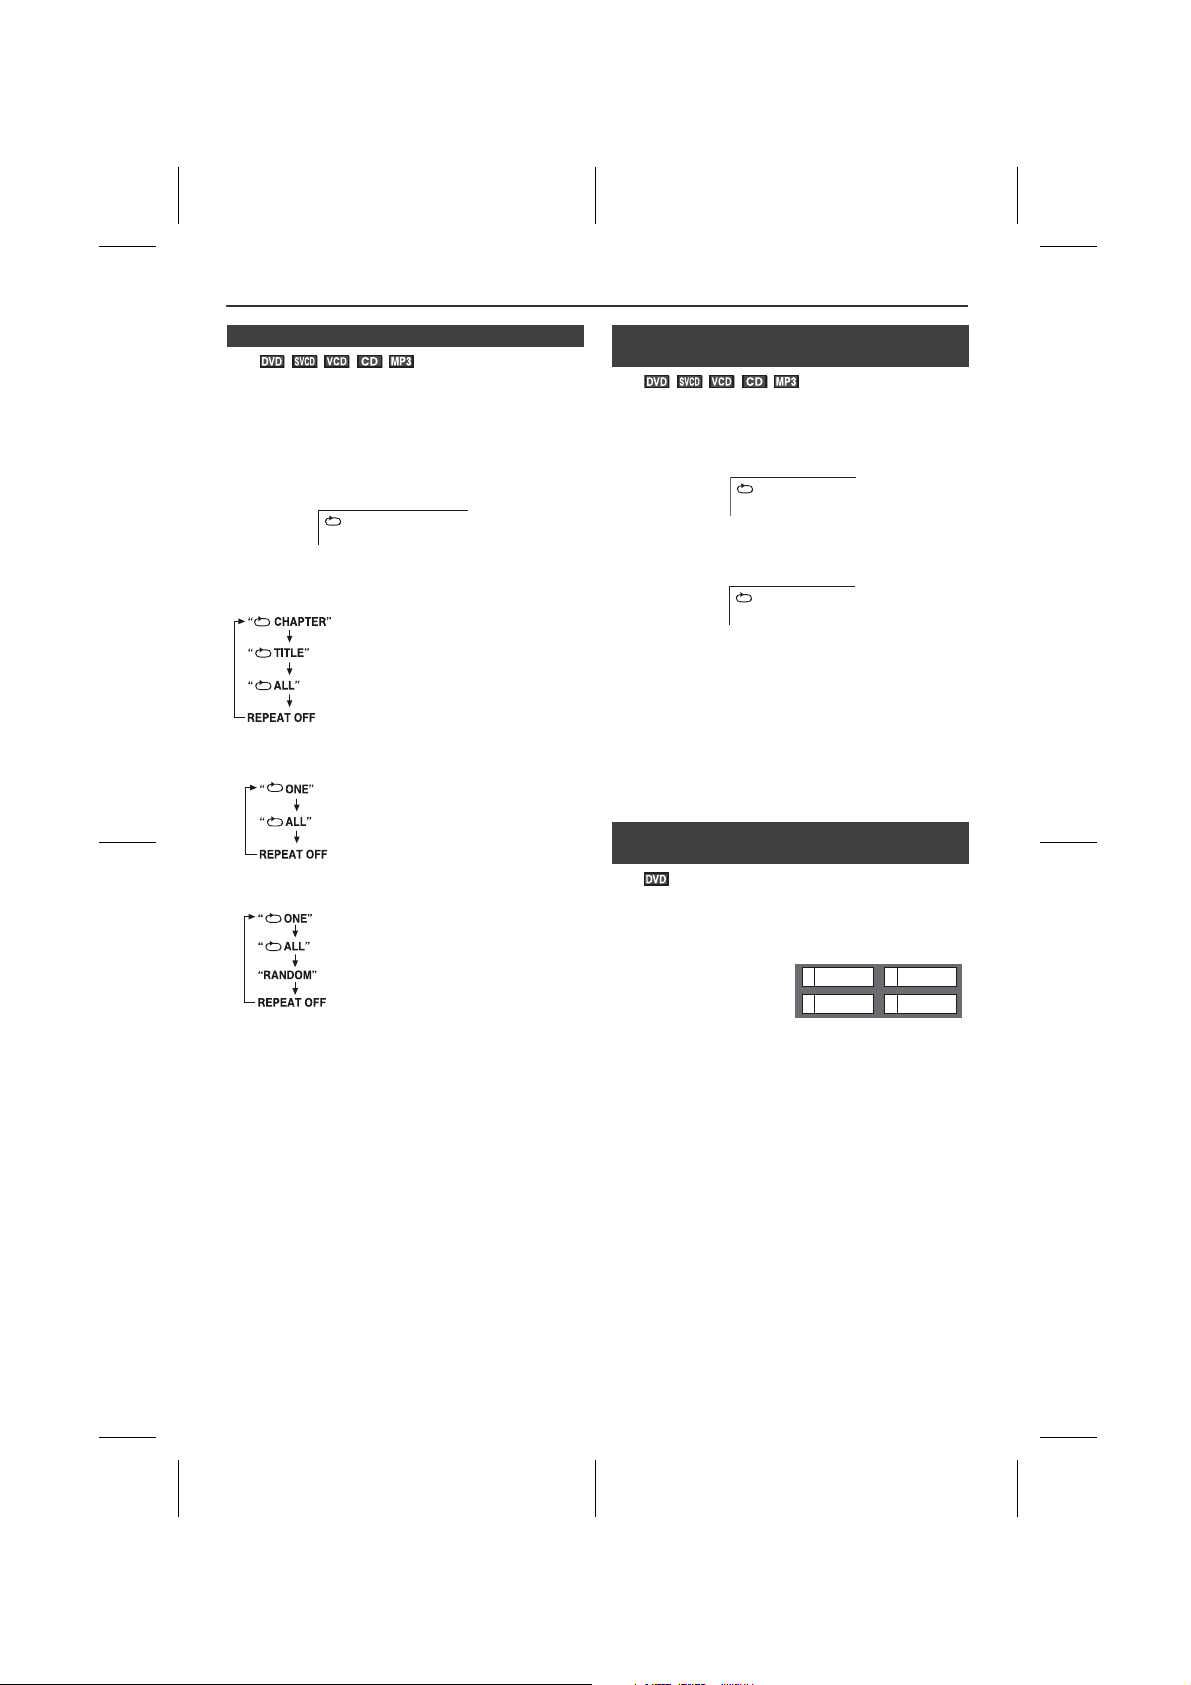
Useful operation (continued)
CHAPTER
TV screen
Repeat the currently playing chapter.
Repeat the currently playing title.
Repeat the currently playing disc.
The normal playback.
Repeat the currently playing track.
Repeat the currently playing disc.
The normal playback.
Repeat the currently playing track.
Repeat the currently playing disc.
Randomly play the track.
The normal playback.
A
TV screen
AB
TV screen
21
4
3SF
Drama Action
Comedy
Example
n To play repeatedly (repeat play)
You can play a chapter (track) or a title repeatedly by
specifying it during playback.
When playing SVCD or VCD, cancel the P.B.C. (playback
control) (see page 26).
Whilst a disc is playing, press the RANDOM/
1
button.
Each time the button is pressed, the repeat play mode
changes in the following order.
The repeat play mode changes as follows on DVD:
The repeat play mode changes as follows on SVCD/
VCD:
The repeat play mode changes as follows on audio CD:
REPEAT
n To play the contents between the specified
points repeatedly (A-B repeat)
You can play the desired portion repeatedly by specifying it during playback.
1
Whilst a disc is playing, press the A - B button.
This registers the start point (A).
2 Press
the A - B
button again to enter the end point (B).
This starts A-B repeat play from the start point (A) to the end point (B).
3 Press
the A - B
button to return to the normal playback.
Notes:
l A-B repeat play is disabled on some discs.
l A-B repeat play for DVD is possible only within a title.
l A-B repeat play for SVCD/VCD is possible only within
a track.
l Some scenes on DVD may not allow A-B repeat play.
n To select a title from the top menu of the
disc
On a DVD with multiple titles, you can select a title from the top menu.
MP3, DivX and JPEG are displayed when menu screen
is “ON” (see page 31).
2
To return to the normal playback, press the RANDOM/
REPEAT button repeatedly until no display on TV
screen.
Caution:
After performing repeat play, be sure to press the button.
Otherwise, the disc will play continuously.
Note:
On some discs, the repeat play function is disabled.
X-MF3DVD-I_En.fm
1
Whilst in the stop or
playback mode, press
the TOP MENU button to
display the title menu.
2 Use the , , or button to select a title, and then
press the MENU button.
l The selected title plays.
l Or use the Direct Search buttons for some discs.
Note:
The procedure shown here provides only general steps. The actual procedure for using the title menu depends on the disc. See the disc jacket for details.
En-24
2009September 28
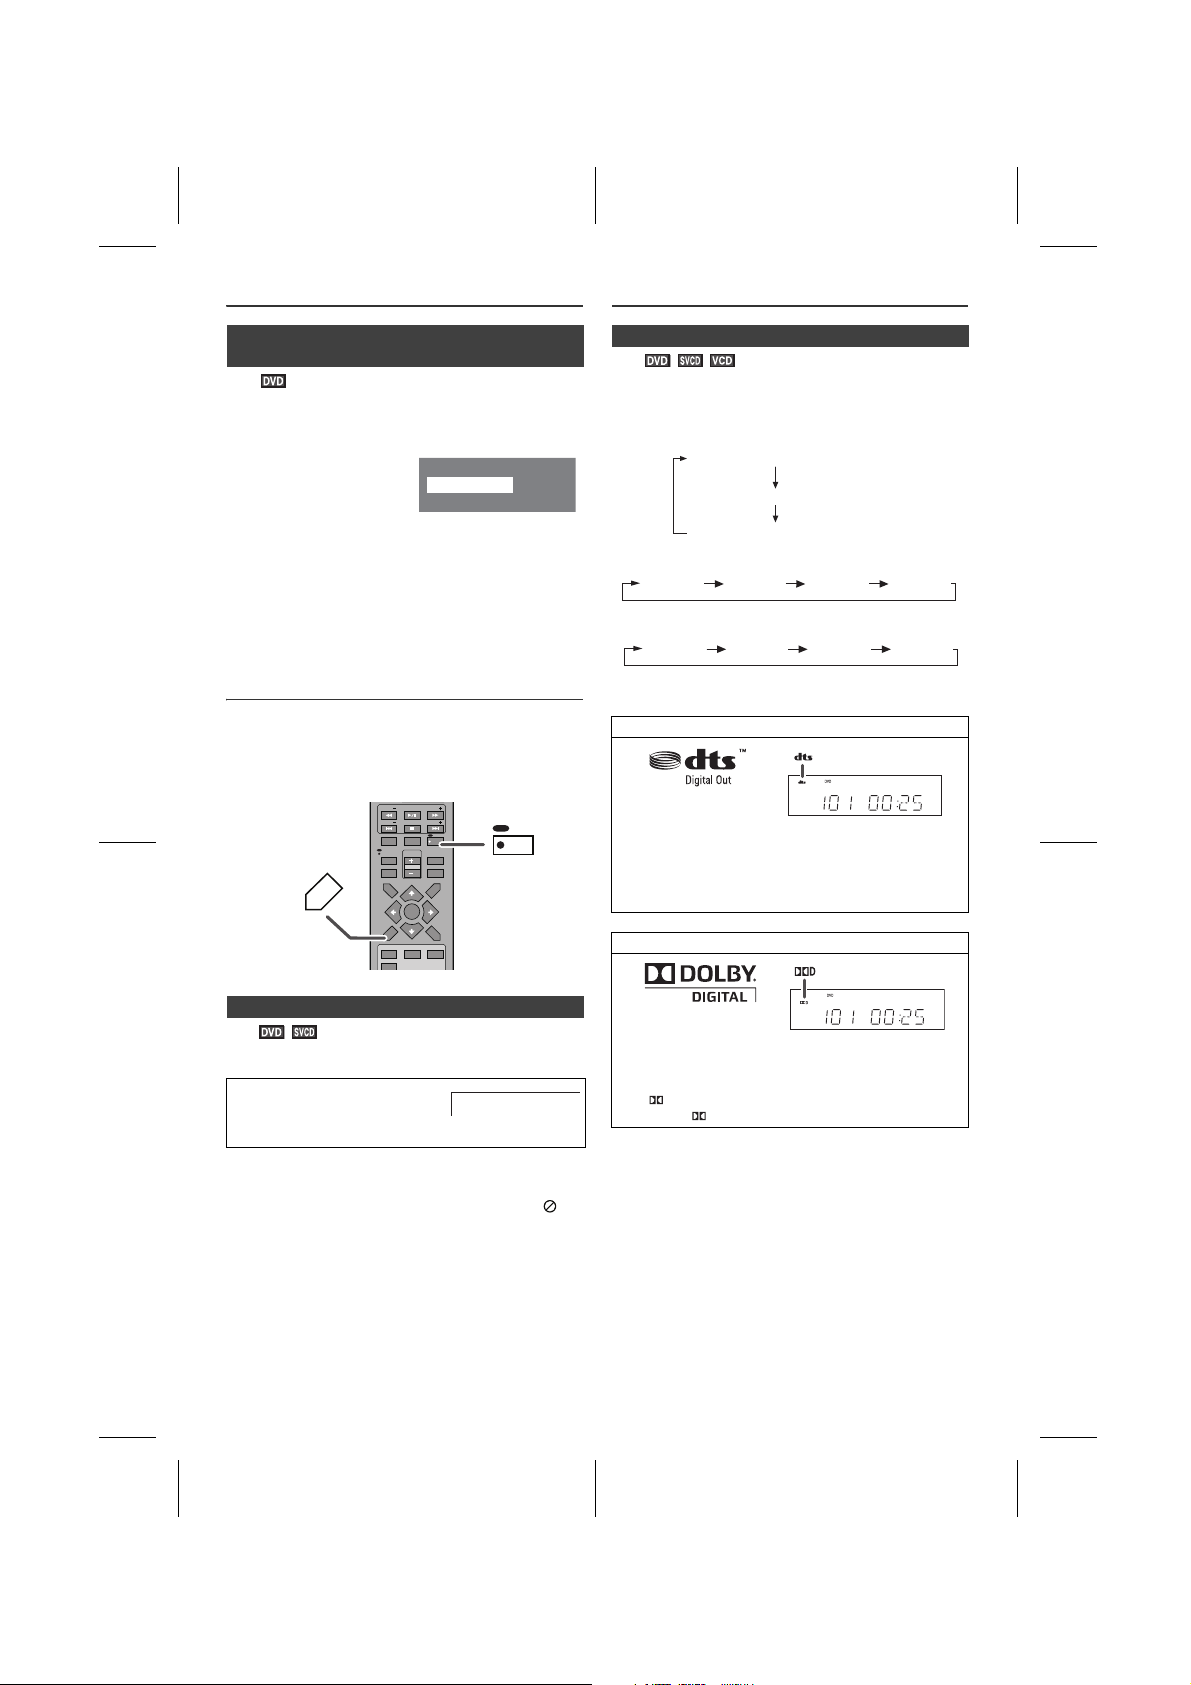
Useful operation (continued)
1.Highlights
2.Start Movie
Main Menu
1.Hightlights
2.Start Movie
Example
DIRECT
STANDBY/ON
OPEN / CLOSE
TUNINGTUNING
PRESETPRESET
X.BOOMX.BOOM
EQUALIZEREQUALIZER
VOLUMEVOLUME
MEMORYMEMORY
TOPTOP
MENUMENU
SUB TITLESUB TITLE
DIGESTDIGEST
TAGTAG
MENU/MENU/
PBCPBC
RETURNRETURN
CLOCK / CLOCK /
TIMERTIMER
SLEEPSLEEP
DISPLAY(TV)DISPLAY(TV) MUTEMUTE
AUDIOAUDIO
TUNINGTUNING
PRESETPRESET
SETUPSETUP
MENUMENU
123
456
789
0
10
USB/USB/
DVDDVD
iPodiPod
TUNERTUNER AUXAUX
FM/AMFM/AM
MUTEMUTE
AUDIOAUDIO
SUB TITLESUB TITLE
DIGESTDIGEST
TAGTAG
Audio 1/3: AC3 5 CH English
Audio 2/3: AC3 2 CH English
Audio 3/3: DTS 5.1 CH English
Audio 1 Audio 2 Audio 3 Audio 4
LEFT
MONO
RIGHT
MONO
MixMono
Stereo
Various settings (continued)
n To select a subtitle or audio language from
the disc menu
You can select the desired subtitle or audio language and sound system on your DVD if it has a disc menu.
1
Whilst in the stop or
playback mode, press the
MENU/PBC button to
display the disc menu.
2 Press the , , or button to change the setting
and press the MENU button.
Or use the Direct Search buttons for some discs.
Note:
The procedure shown here provides only general steps. The actual procedure for using the disc menu depends on the disc. See the disc jacket for details.
Various settings
The subtitle language, audio language and TV type you select during playback are reset each time you set this unit to the stand-by mode or switch the input. To keep your own settings, set them in the Set up menu (see page 12).
n To change the audio channel
You can select an audio channel.
Whilst a disc is playing, press the AUDIO button
repeatedly to select the desired audio channel.
E.g.: The audio channel changes as follows on DVD:
The audio channel changes as follows on SVCD:
The audio channel changes as follows on VCD:
Note:
The audio channel may not be changed on some discs.
DTS (Digital Out)
Digital Input from discs with this trademark
One of the digital audio systems for theatrical use. As the
sound quality is emphasised, you can enjoy the realistic
sound effect in the home theatre system.
The DTS indicator will light up when the disc recorded in
DTS is played back.
n To change the subtitle language
You can change the subtitle language or hide subtitles during playback.
Whilst a disc is playing, press the SUB TITLE/DIGEST/TAG button repeatedly to select the desired subtitle language.
Notes:
l On some discs, the subtitle language cannot be
changed.
l If no subtitles are recorded on the disc, “ ” is
displayed.
l It may take time to switch the subtitle language to the
selected one.
l Subtitles cannot be hidden on some DVDs.
X-MF3DVD-I_En.fm
SUBTITLE 01/03 ENGLISH
En-25
Dolby Digital
Digital Input from discs with this trademark
One of the digital audio systems for theatrical use. You
can enjoy the stereophonic effect in the home theatre
system.
The DIGITAL indicator will light up when the disc
recorded in DIGITAL is played back.
2009September 28
1
2
3
4
5
6
7
8
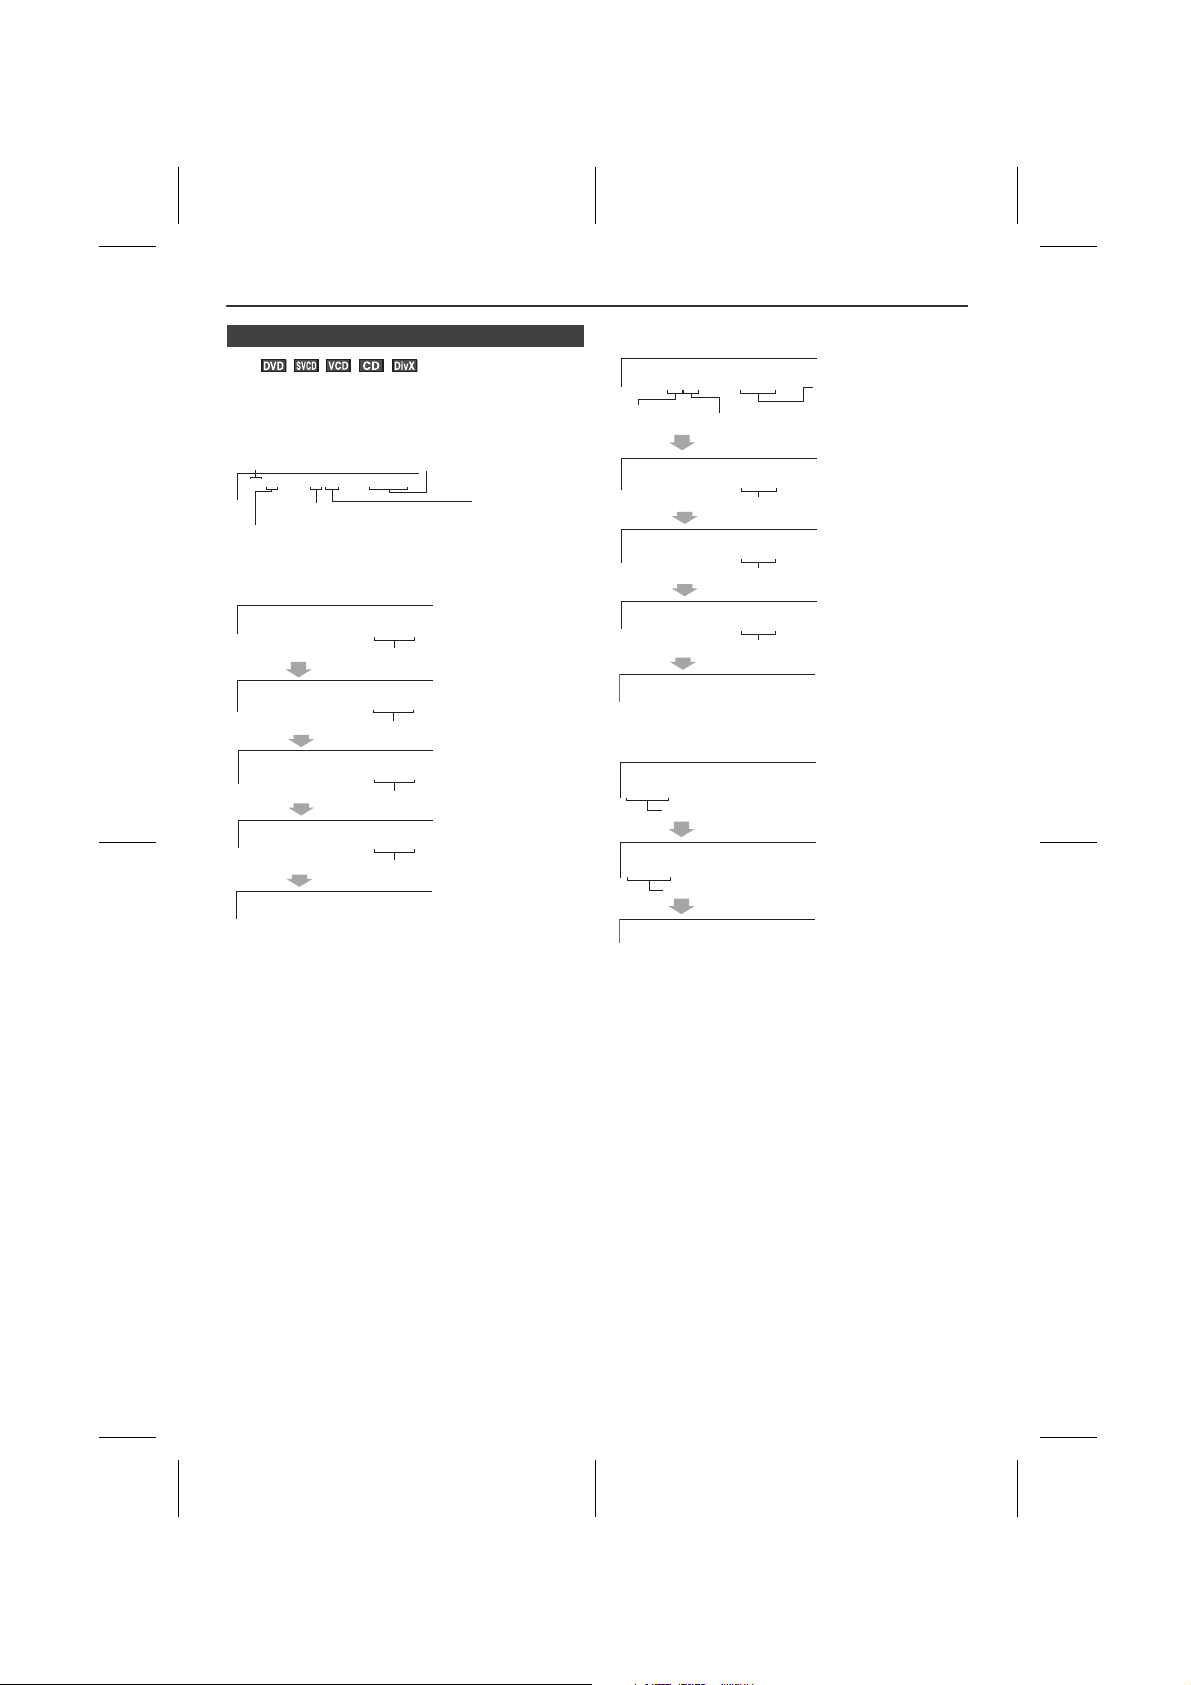
Various settings (continued)
Current title number
Total number of
chapters
Total number
of titles
Current chapter number
Playback time
Elapsed playback time for current title
Remaining playback time for current title
Elapsed playback time for current chapter
Remaining playback time for
current chapter
SINGLE ELAPSED
SINGLE REMAIN
TOTAL ELAPSED
TOTAL REMAIN
DISPLAY OFF
TRACK:01/30
00:54
TRACK:01/30
00:40
TRACK:01/30
00:54
TRACK:01/30
00:50
Elapsed playback
time for the current
track
Remaining playback time for the
current track
Total elapsed playback time
for the disc
Total remain playback time for
the disc
Total track number
Current track
number
SINGLE ELAPSED
0:01:06
SINGLE REMAIN
0:20:05
DISPLAY OFF
Elapsed playback time for the current track
Remaining playback time for the current track
n To change the display on TV screen
You can display or hide the operation indicators on the TV screen.
Whilst a disc is playing, press the DISPLAY(TV) button. (The display is changed at each press.)
C:01/29
T:01/03
DVD:
TITLE ELAPSED
T:01/03 C:01/29
TITLE REMAIN
T:01/03 C:01/29
CHAPTER ELAPSED
T:01/03 C:01/29
CHAPTER REMAIN
T:01/03 C:01/29
DISPLAY OFF
0:17:17
0:15:01
1:26:54
0:15:01
0:20:10
SVCD/VCD/CD:
DivX:
X-MF3DVD-I_En.fm
Note:
When P.B.C. is set to ON for SVCD or VCD, total elapsed playback time and total remaining playback time do not appear.
En-26
2009September 28

Video CD and Super Video CD playback
DIRECTDIRECT
STANDBY/ONSTANDBY/ON
OPEN / CLOSEOPEN / CLOSE
TUNINGTUNING
PRESETPRESET
X.BOOMX.BOOM
EQUALIZEREQUALIZER
VOLUMEVOLUME
MEMORYMEMORY
TOPTOP
MENUMENU
SUB TITLESUB TITLE
DIGESTDIGEST
TAGTAG
MENU/MENU/
PBCPBC
RETURNRETURN
CLOCK / CLOCK /
TIMERTIMER
SLEEPSLEEP
DISPLAY(TV)DISPLAY(TV) MUTEMUTE
AUDIOAUDIO
TUNINGTUNING
PRESETPRESET
SETUPSETUP
MENUMENU
1 2 3
4 5 6
7 8 9
0 10
10
ZOOMZOOM RANDOMRANDOM
REPEATREPEAT
USB/USB/
DVDDVD
iPodiPod
TUNERTUNER AUXAUX
FM/AMFM/AM
ANGLEANGLE
SLOWSLOW STESTEP
A-B
A-B
STEPSTEP
RETURNRETURN
PRESETPRESET
PRESETPRESET
MENUMENU
MENU/MENU/
PBCPBC
1
2
Example
DISC GO TO: -- :- -
1:23:40
Trac k Tim e
The following playback functions are the same as DVD or CD operations.
To locate the beginning of a chapter (track) (skip). . . . 21
Fast forward/Fast backward (search) . . . . . . . . 21 - 22
Still picture. . . . . . . . . . . . . . . . . . . . . . . . . . . . . . . . . . 23
Slow-motion play . . . . . . . . . . . . . . . . . . . . . . . . . . . . 23
To zoom images (zoom) . . . . . . . . . . . . . . . . . . . . . . . 23
To play repeatedly (repeat play) . . . . . . . . . . . . . . . . 24
To play the contents between the specified points
repeatedly (A-B repeat) . . . . . . . . . . . . . . . . . . . . . . . 24
To change the subtitle language . . . . . . . . . . . . . . . . 25
To change the audio channel . . . . . . . . . . . . . . . . . . 25
Page
n To play without activating the playback
control function
You can play a video CD (super video CD) with P.B.C.
without activating the playback control function.
In this case, the menu screen will not appear, and the disc
will play in the same way as a video CD (super video CD)
without P.B.C.
Whilst in the stop or playback mode, press the MENU/ PBC button to cancel the P.B.C. mode.
l TV screen will show “PBC OFF”.
Notes:
Some video CDs (super video CDs) with P.B.C. cannot be played back when the P.B.C. mode is off.
n To start playback from the desired point
(direct play)
To play by specifying time (time search):
Cancel the P.B.C. (playback control).
1
During stop, press the DIRECT button.
n Playback of a video CD (super video CD)
with P.B.C. ON
This unit handles video CDs that support P.B.C. (version
2.0). P.B.C. is an abbreviation of “Playback control”. These
discs have a menu that is displayed on the TV screen. You
can play interactive games and make use of other software
with the retrieval function (menu playback).
Press the MENU/PBC button with PBC ON.
1
The menu will appear on the TV and playback will be paused.
2 Select the desired menu number using the Direct
Search buttons.
l Playback starts.
l After playback stops, the menu will reappear. Select
the menu number to play.
To interrupt playback:
Press the button.
To resume playback from the same point, press the
button.
To stop playback:
Press the button twice.
To stop the current operation and return to the menu:
Press the RETURN button.
The P.B.C. function will not work in the following conditions.
Repeat/programmed/direct play or the skip feature is in operation.
Note:
The menu screen cannot be scrolled on some discs.
2 Specify the time with the Direct Search buttons.
l Enter minutes and seconds.
l To specify 1 hour 23 minutes and 40 seconds, enter
“8340”.
l If you enter the wrong number, start over from step
1.
l Playback starts (automatically) after you complete
enter the number(s).
In the playback mode:
1 Whilst in the playback mode, press the DIRECT button.
TRACK
02/30
DISC TIME
1:06:06
TRACK TIME
0:01:57
REPEAT
OFF
2 Press or
the MENU button.
button to select “Track Time” then press
3 Specify the time with the Direct Search buttons.
l To specify 1 hour 23 minutes and 40 seconds, enter
“12340”.
l If you enter the wrong number, start over from step
1.
l Playback starts (automatically) after you complete
enter the number(s).
4 Press the DIRECT button to return to the actual size of
image (standard screen).
Notes:
l Some discs cannot play from the specified point.
l Time search feature is disabled on some discs.
l Time search feature is not available on MP3 and JPEG
discs.
1
2
3
4
5
6
7
8
En-27
X-MF3DVD-I_En.fm
2009September 28

Video CD and Super Video CD playback (continued)
RANDOMRANDOM
TV screen Unit display
LEFT MONO
RIGHT MONO
MIX-MONO
STEREO
DIRECTDIRECT
STANDBY/ONSTANDBY/ON
OPEN / CLOSEOPEN / CLOSE
TUNINGTUNING
PRESETPRESET
X.BOOMX.BOOM
EQUALIZEREQUALIZER
VOLUMEVOLUME
MEMORYMEMORY
TOPTOP
MENUMENU
SUB TITLESUB TITLE
DIGESTDIGEST
TAGTAG
MENU/MENU/
PBCPBC
RETURNRETURN
CLOCK / CLOCK /
TIMERTIMER
SLEEPSLEEP
DISPLAY(TV)DISPLAY(TV) MUTEMUTE
AUDIOAUDIO
TUNINGTUNING
PRESETPRESET
SETUPSETUP
MENUMENU
1 2 3
4 5 6
7 8 9
0 10
10
SUB TITLESUB TITLE
DIGESTDIGEST
TAGTAG
1 2 3
4 5 6
7 8 9
0 10
10
PRESETPRESET
PRESETPRESET
MENUMENU
14253
6
TV screen
Select Digest Type
14253
6
TV screen
Select Digest Type
n Random play
The tracks on the disc(s) can be played in random order automatically.
1
Whilst in the stop or playback mode, press the
RANDOM/
REPEAT button on the remote control until
“RANDOM” is shown.
2 Random playback will start.
3 To cancel random play, press the
button until the “RANDOM” indicator is gone.
Note:
In random play, the CD player will select and play tracks automatically. (You cannot select the order of the tracks.)
Caution:
After performing repeat or random play, be sure to press
the button. Otherwise, the disc(s) will play continuously.
RANDOM/
REPEAT
n To change the audio channel
You can select an audio channel.
Whilst a disc is playing, press the AUDIO button repeatedly to select the desired audio channel.
The audio channel changes as follows on SVCD/VCD:
Notes:
l The audio channel may not be changed on some discs.
l Audio button cannot function on audio CD.
n Disc digest selection
You can playback a desired track by selecting one from the 6 displayed tracks on the screen.
1 During stop mode, press the SUB TITLE/DIGEST/TAG
button.
2 Select digest type by using cursor or button and
then press MENU button.
l Track digest (disc will be divided by tracks).
l Disc Interval (disc will be divided into 10 minutes
interval).
l Up to 6 tracks will be displayed on the screen.
3 Press the Direct Search buttons on the remote control
to select the desired track.
Playback will be started from the selected track after
pressing the button.
When there are more than 6 tracks on the video CD:
Each press of the button will display the next 6 tracks.
Press the button to return to the previous display.
To cancel the disc digest:
Select EXIT and press MENU button.
n Track digest selection
You can look at the sections and select the scene you want to start watching from. This function is convenient when you want to start from the middle of an undivided track, for example, a movie.
1
During playback, press the SUB TITLE/DIGEST/TAG
button.
2 Select “Track Interval” by using cursor or button
and then press MENU button.
l The current track will be divided into 10 minutes
interval.
The track being played will be divided into 6 sections and playback will be paused.
X-MF3DVD-I_En.fm
3 Press the Direct Search buttons on the remote control
to select the scene you want to watch.
Playback will start from the selected scene after
pressing the button.
To cancel the track digest operation:
Select EXIT and press MENU button.
Notes:
l The track digest function works only during playback.
l One track is divided into six frames of equal playing
time.
En-28
2009September 28

CD operation
DIRECTDIRECT
STANDBY/ONSTANDBY/ON
OPEN / CLOSEOPEN / CLOSE
TUNINGTUNING
PRESETPRESET
X.BOOMX.BOOM
EQUALIZEREQUALIZER
VOLUMEVOLUME
MEMORYMEMORY
TOPTOP
MENUMENU
SUB TITLESUB TITLE
DIGESTDIGEST
TAGTAG
MENU/MENU/
PBCPBC
RETURNRETURN
CLOCK / CLOCK /
TIMERTIMER
SLEEPSLEEP
DISPLAY(TV)DISPLAY(TV) MUTEMUTE
AUDIOAUDIO
TUNINGTUNING
PRESETPRESET
SETUPSETUP
MENUMENU
1 2 3
4 5 6
7 8 9
0 10
10
ZOOMZOOM RANDOMRANDOM
REPEATREPEAT
USB/USB/
DVDDVD
iPodiPod
TUNERTUNER AUXAUX
FM/AMFM/AM
ANGLEANGLE
SLOWSLOW STESTEP
A-B
A-B
SUB TITLESUB TITLE
DIGESTDIGEST
TAGTAG
1 2 3
4 5 6
7 8 9
0 10
10
PRESETPRESET
PRESETPRESET
MENUMENU
TV screen
TV screen
TV screen
Unit display
TV screen
DISC GO TO: -- :- -
This system can play back a standard CD, CD-R/RW in the
CD format and CD-R/RW with MP3 or WMA files, but
cannot record on them.
Some audio CD-R and CD-RW discs may not be playable
due to the state of the disc or the device that was used for
recording.
The following playback functions are the same as DVD or VCD operations.
Playback . . . . . . . . . . . . . . . . . . . . . . . . . . . . . . . 20 - 21
To locate the beginning of a chapter (track) (skip) . . . 21
Fast forward/Fast backward (search) . . . . . . . . 21 - 22
To play repeatedly (repeat play) . . . . . . . . . . . . . . . . 24
To play the contents between the specified points
repeatedly (A-B repeat) . . . . . . . . . . . . . . . . . . . . . . . 24
To change the display on TV screen . . . . . . . . . . . . 26
Page
To change the programmed contents:
Repeat the above procedures from step 1.
Programmed contents will be cleared when you perform the following operations:
l Switch the input or remove the discs.
l Set to the stand-by mode.
l Press the cursor button to select “Clear” and then press
MENU button.
Notes:
l Sequential programming does not work if the disc
disables programming or does not have track
information.
l During programmed play, repeat play can be
performed by pressing the RANDOM/REPEAT button
(see page 24).
n To start playback from the desired point
(direct play)
To select and play the desired track:
Whilst in the stop or playback mode, press the Direct Search buttons to select the track number.
To select track 14: Press “10+” and “4”.
SELECT TRACK: 14/30
To play by specifying time (time search):
1 During stop or playback mode, press the DIRECT
button once and “DISC GO TO” appear on TV screen.
n To play in the desired order (programmed
play)
You can playback the desired tracks in a specific order.
Maximum of 20 tracks can be programmed.
Whilst in the stop or playback
1
mode, press the MEMORY
button.
2 Enter a track number with the
Direct Search buttons.
3 If you enter the wrong numbers,
press or button to select
the concerned track and then
reenter the correct numbers.
4 Press button to select “Start” then press MENU
button to start playback the programmed track(s).
X-MF3DVD-I_En.fm
01
02
03
04
05
Track 01/ 23
01
02
03
04
05
014
022
015
06
07
08
09
10
Exit Next
06
07
08
09
10
Start
Clear Next
01:18
En-29
2 Specify the time with the Direct Search buttons.
l Enter minutes and seconds.
l To specify 1 hour 23 minutes and 40 seconds, enter
“8340”.
l If you enter the wrong number, start over from step
1.
Notes:
l Direct play feature is disabled on some discs.
l Some disc cannot play from the specified point.
l Time search feature is disabled on some discs.
2009September 28
1
2
3
4
5
6
7
8

MP3/WMA and JPEG disc operation
GO TO _: __:__
TV screen
---/150
TV screen
Total of tracks
Indicates folders.
Indicates MP3 data.
Indicates JPEG data.
Indicates DivX data.
Indicates WMA.
MP3:
MP3 is a form of compression. It is an acronym which
stands for MPEG Audio Layer 3.
MP3 is a type of audio code which is processed by
significant compression from the original audio
source with very little loss in sound quality.
l This system supports MPEG 1 Layer 3 and VBR files.
l During VBR file playback, time counter in the display
may differ from its actual playback time.
l
Bitrate which is supported by MP3 is 32 kbps to 320 kbps.
WMA: WMA files are Advanced System Format files that include audio files which are compressed with Windows Media Audio codec. WMA is developed by Microsoft as an audio format file for Windows Media Player.
l
Bitrate which is supported by WMA is 64 kbps to 160 kbps.
The following playback functions are the same as DVD or VCD operations.
Playback . . . . . . . . . . . . . . . . . . . . . . . . . . . . . . . . 20 - 21
To locate the beginning of a chapter (track) (skip)
Fast forward/Fast backward (search) . . . . . . . . 21 - 22
To zoom images (zoom) . . . . . . . . . . . . . . . . . . . . . . . 23
To play repeatedly (repeat play) . . . . . . . . . . . . . . . . 24
To change the display on TV screen . . . . . . . . . . . . . 26
n To start playback from the desired point
(direct play)
To play by specifying time (time search):
1
During playback, press the DIRECT button twice.
2 Specify the time with the Direct Search buttons.
l Enter minutes and seconds.
l To specify 1 hour 23 minutes and 40 seconds, enter
“12340”.
l If you enter the wrong number, start over from step
1.
l You can check the total playback time of the track
by refer to the page 22.
To select and play the desired track:
1 Whilst in the stop or playback mode, press the Direct
Search buttons or press DIRECT button and then enter
the desired track number(s).
If the desired track is 25, press “0”, “2” and “5”.
2 Playback will start automatically on selected track.
Notes:
l Direct play feature is disabled on some discs.
l Some discs cannot play from the specified point.
n To play in the desired order (playlist)
To add track in playlist:
Whilst in the stop/playback mode, select the desired
1
tacks with or buttons
Page
.. . 21
2 Press the ANGLE button to add the desired track into
playlist.
l TV display “Add to playlist” on screen menu.
3 Repeat step 1-2 to add more tracks in playlist.
To view tracks in playlist:
1 Press MEMORY button repeatedly to go playlist view.
l TV display “PLAYLIST” and all playlist tracks are
displayed.
To remove track from playlist:
1 At playlist view, use or buttons to select tracks to
be removed.
2 Press the ZOOM button to remove the track from
playlist.
l TV display “Remove from playlist” on screen menu.
To clear all tracks in playlist:
1 At playlist view, press STEP button.
l All tracks in playlist is cleared.
n Playback on the MP3 menu screen
You can play CD-R/RW recorded in the MP3/WMA and JPEG formats.
Load a disc containing MP3/WMA, JPEG and DivX
1
files, the menu screen appears.
...
...
...
...
...
2 Press the or button to select a track and press the
MENU or button.
l Playback starts when you select a track.
l When the format is JPEG, the next file is
automatically displayed after a whilst.Playback starts
when you select a track.
l You can use the or button to rotate the JPEG
picture (see page 32).
l Using the Direct Search buttons, you can open files
or folders directly. Enter the number on the right of
the display.
Caution:
If you convert MP3 data to “audio CD” data to record on a CD-R/RW, play it as an audio CD. The MP3 operation cannot be performed.
Notes:
l Up to 20 characters can be displayed for a folder name
and a track name. Underlines, asterisks, and spaces
may not be displayed.
l
This function is only visible when unit is connected to TV.
En-30
X-MF3DVD-I_En.fm
2009September 28

MP3/WMA and JPEG disc operation (continued)
Folder
Tr ac k
No repeat the currently playing track.
Repeat the currently playing track.
Repeat all the tracks.
Repeat play is cancelled.
TV screen
Randomly repeat play the tracks (images).
No repeat the currently playing track
(image).
Repeat the currently playing track (image).
Repeat play all the tracks (images) in
the disc.
Repeat play is cancelled.
TV screen
Randomly repeat play the tracks
(images).
No repeat the currently playing track
(image).
Repeat the currently playing track
(image).
Repeat play all the tracks (images) in
the currently playing folder.
Repeat play is cancelled.
TV screen
Randomly repeat play the tracks (songs).
No repeat the currently playing track
(song).
Repeat the currently playing track (song).
Repeat play all the tracks (songs) in the
disc.
Repeat play is cancelled.
TV screen
Randomly repeat play the tracks
(songs).
No repeat the currently playing track
(song).
Repeat the currently playing track
(song).
Repeat play all the tracks (songs) in
the currently playing folder.
Repeat play is cancelled.
TV screen
About folder playback order:
When the MP3/WMA menu screen is on, tracks are played in the following order. Playback is performed in the order of 1 to 11 in the following example.
ROOT
1
Tracks on some discs cannot be played in order.
Notes:
l It will take some time for the disc to be read if there are
too many files and folder.
l Up to 512 numbers of folders and files inclusives of the
folders with non playable files can be read.
2
n To play repeatedly (repeat play)
Repeat play on the DivX menu screen:
Whilst a disc is playing, press the RANDOM/REPEAT
button.
Each time the button is pressed, the repeat play mode
changes in the following order.
3
4
5
6
7
8
9
10
11
Notes:
l To view back the file list, press the MEMORY button
whilst in the main menu screen.
l To return to the main menu screen whilst playback,
press the MENU/PBC button.
Repeat play on the MP3/WMA menu screen:
Condition A
You can play all songs in the disc. Playback will stop after
complete playback all the songs in the disc.
To perform repeat play, press the
button whilst in the stop mode. Each time the button is
pressed, the play mode changes in the following order:
RANDOM/REPEAT
Repeat play on the JPEG menu screen:
Condition A
You can play all images in the disc. Playback will stop after
complete playback all the images in the disc.
To perform repeat play, press the
button whilst in the stop mode. Each time the button is
pressed, the play mode changes in the following order:
Condition B
You can play images after select each folder inside the
disc. Whilst in the main menu screen, press the MEMORY
button. All the folders will be viewed on the TV screen
(folder on). The playback will stop after complete playback
all the images in the currently playing folder.
To perform repeat play, press the
button whilst in the stop mode. Each time the button is
pressed, the play mode changes in the following order:
RANDOM/REPEAT
RANDOM/REPEAT
Condition B
You can play songs after select each folder inside the disc.
Whilst in the main menu screen, press the MEMORY
button. All the folders will be viewed on the TV screen
(folder on). The playback will stop after complete playback
all the songs in the currently playing folder.
To perform repeat play, press the
button whilst in the stop mode. Each time the button is
pressed, the play mode changes in the following order:
Note:
To view back the file list, press the MEMORY button whilst in the main menu screen.
Caution:
After performing repeat or random, be sure to press the button. Otherwise, it will play continuously.
RANDOM/REPEAT
En-31
1
2
3
4
5
6
7
8
X-MF3DVD-I_En.fm
2009September 28

MP3/WMA and JPEG disc operation (continued)
n Rotating a picture
You can rotate images.
During playback, press the or button.
The image rotates as shown below.
button : 90° rotation in a clockwise direction.
button : 90° rotation in an anti-clockwise direction.
n Simultaneously playback the MP3 and
JPEG
You can enjoy to see images of JPEG files whilst listening to the musics of MP3 at the same time.
1
Playback the desired songs.
2 Press MENU/PBC button to return to the main menu.
3 Select JPEG folder using or button.
4 Select the images or pictures those you want to view.
5 Press the MENU button.
Notes:
l Whilst playing the images, you can not select the MP3/
WMA folder or files.
l JPEG maximum resolution is 10Mbytes of file size.
n Random play (REMOTE CONTROL ONLY)
The tracks/images on the disc(s) can be played in random
order automatically.
To random play all tracks/images:
During stop mode, press the
select “RANDOM” then press button to play.
To cancel random playback, press the
button repeatedly until “REPEAT OFF” / “FOLDER”
appear.
Notes:
l In random play, the unit will select and play tracks
automatically. (You cannot select the order of the
tracks.)
l During random play, repeat function is not possible.
RANDOM/REPEAT
RANDOM/REPEAT
button to
Note:
()
When in folder mode, the selected playmode can be used for the files in the selected folder only.
Notes:
l This unit only supports “MPEG-1 Audio Layer-3”
format. (Sampling Frequency is 32 kHz, 44.1 kHz,
48 kHz).
l “MPEG-2 Audio Layer-3”, “MPEG-2.5 Audio Layer-3”
and MP1, MP2 format are not supported.
l Playback order for MP3 files may differ sometimes
depending on the writing software used during file
downloading.
l Bitrate which is supported by MP3 is 32 kbps to 320
kbps, WMA is 64 kbps to 160 kbps.
l For MP3/WMA files, please put “.MP3” “.WMA”
extension. Files cannot be played back if there is no
MP3/WMA extension.
l The display playback time may not be displayed
correctly when playing back a variable bitrate file.
l Copyright protected WMA files cannot be played back.
X-MF3DVD-I_En.fm
En-32
2009September 28

MP3/WMA folder mode (only for MP3/WMA files)
ROOT
(FOLDER 1)
FOLDER A
(FOLDER 2)
FOLDER B
(FOLDER 3)
FILE 9
FILE 10
FILE 3
FILE 4
FILE 5
FILE 6
FILE 7
FILE 8
FOLDER E
(FOLDER 6)
FOLDER C
(FOLDER 4)
FOLDER D
(FOLDER 5)
FILE 1
FILE 2
Total number of tracks
To play back MP3/WMA (Windows Media Audio) file
There are many music sites on the internet that you can
download MP3/WMA (Windows Media Audio) music files.
Follow the instructions from the website on how to
download the music files.
You can then play back these downloaded music files by
burning them to a CD-R/RW disc.
l Your downloaded song/files are for personal use only.
Any other usage of the song without owner’s
permission, is against the law.
n About folder playback order
If MP3/WMA files are recorded in several folders, a folder number will be set to each folder automatically.
These folder can be selected by the or button on the
remote control. If there is not supported file formats inside
the selected folder, the folder is skipped and the next folder
will be selected.
Example: How to set folder number if MP3/WMA format files are recorded as below figure.
ROOT folder is set as folder 1.
1
2 As for folders inside ROOT folder (Folder A and Folder
B), the folder which is recorded earlier on the disc will
be set as folder 2 and folder 3.
3 As for folder inside Folder A (Folder C and Folder D),
the folder which is recorded earlier on the disc will be
set as folder 4 and folder 5.
4 Folder E that is inside Folder D will be set as folder 6.
l The folder and file order information which is recorded
on the disc depends on the writing software. There
maybe possibilities that this unit will playback the files
not according to our expected playback order.
l For CD MP3/WMA, 255 numbers of folders and files
inclusive of the folders which have non playable files
can be read.
2 Press the or button on the remote control to select
the desired playback folder and track.
l To start playback with folder mode, press the
MEMORY button to view Folder mode.
l Use / button on the remote control to move up
and down the folder/file list.
Use button to return to the parent folder. You can
also do this by going to the “..” folder at the top, then
pressing MENU.
3
Press the
or MENU
button and playback will start.
n Procedure to playback MP3/WMA disc
To playback CD-R/RW.
1
Load an MP3/WMA disc and unit display will show total
number of tracks in STOP mode.
X-MF3DVD-I_En.fm
1
2
3
4
5
6
7
8
En-33
2009September 28

Listening to USB mass storage device/MP3 player
STANDBY/
ON
FUNCTION
OPEN/
CLOSE
DIRECTDIRECT
STANDBY/ONSTANDBY/ON
OPEN / CLOSEOPEN / CLOSE
TUNINGTUNING
PRESETPRESET
X.BOOMX.BOOM
EQUALIZEREQUALIZER
VOLUMEVOLUME
MEMORYMEMORY
TOPTOP
MENUMENU
SUB TITLESUB TITLE
DIGESTDIGEST
TAGTAG
MENU/MENU/
PBCPBC
RETURNRETURN
CLOCK / CLOCK /
TIMERTIMER
SLEEPSLEEP
DISPLAY(TV)DISPLAY(TV) MUTEMUTE
AUDIOAUDIO
TUNINGTUNING
PRESETPRESET
SETUPSETUP
MENUMENU
1 2 3
4 5 6
7 8 9
0 10
10
ZOOMZOOM RANDOMRANDOM
REPEATREPEAT
USB/USB/
DVDDVD
iPodiPod
TUNERTUNER AUXAUX
FM/AMFM/AM
ANGLEANGLE
SLOWSLOW STESTEP
A-B
A-B
MENUMENU
n To play back USB/MP3 player with folder
mode on
1
Press the USB/DVD button on the remote control or
FUNCTION button repeatedly on main unit to select
USB function. Connect the USB memory device that
has MP3/WMA format files on the unit. When the USB
memory is connected to the main unit, the device
information will be displayed.
2 Press the MEMORY button to view FOLDER mode and
press the or button to select desired playback
folder. To start playback with folder mode on, go to step
4. To change the playback folder, press the or
button to select another folder.
3 Select desired file to be played back by pressing the
or button.
4 Press the button. Playback will start.
l Title, Artist and Album name are displayed if they are
recorded in the USB memory device.
l Display content can be changed by pressing the
SUB TITLE/DIGEST/TAG button.
n To remove USB memory device
Note:
This USB mass storage device or MP3 player is not
compatible with MTP and AAC file systems.
n To play back USB/MP3 player with folder
mode off
1
Press the USB/DVD button on the remote control or
FUNCTION button repeatedly on main unit to select
USB function. Connect the USB memory device that
has MP3/WMA format files on the unit. When the USB
memory is connected to the main unit, the device
information will be displayed.
2 Select desired file to be played back by pressing the
or button.
3 Press the button. Playback will start.
l Title, Artist and Album name are displayed if they are
recorded in the USB memory device.
l Display content can be changed by pressing the
SUB TITLE/DIGEST/TAG button.
Note:
To pause playback:
Press the button.
Auto power off function:
In the stop mode of USB operation, the main unit enters
the stand-by mode after 15 minutes of inactivity.
1
Press the button on remote control or press hold
button on main unit to stop playback.
2 Disconnect USB memory device from the USB terminal.
Notes:
l PIONEER will not be held liable for the loss of data
whilst the USB memory device is connected to the
audio system.
l Files compressed in MP3 and/or WMA format can be
played back when connected to the USB terminal.
l This USB memory’s format supports FAT 16 or FAT 32.
l PIONEER cannot guarantee that all USB memory
devices will work on this audio system.
l USB cable is not recommended for use in this audio
system to connect to USB memory device. Use of the
USB cable will affect the performance of this audio
system.
l This USB memory cannot be operated via USB hub.
l The USB terminal in this unit is not intended for a PC
connection but is used for music streaming with a USB
memory device.
l External HDD-storage cannot be played back via USB
terminal.
l If the data inside the USB memory is large, it may take
longer time for the data to be read.
En-34
X-MF3DVD-I_En.fm
2009September 28

Listening to USB mass storage
Randomly repeat play the tracks (songs).
No repeat the currently playing track
(song).
Repeat the currently playing track (song).
Repeat play all the tracks (songs) in the
USB.
Repeat play is cancelled.
TV screen
Randomly repeat play the tracks
(songs).
No repeat the currently playing track
(song).
Repeat the currently playing track
(song).
Repeat play all the tracks (songs) in
the currently playing folder.
Repeat play is cancelled.
TV screen
device/MP3 player (continued)
Notes:
l This product can play WMA and MP3 files. It will
automatically detect the file type being played. If
unplayable file is played on this product, the file will be
automatically skipped. This will take a few seconds. If
abnormal indications appear on the display due to the
unspecified file, turn off the unit and then turn it on
again.
l This product relates to USB mass storage devices and
MP3 players. It may however face some irregularities
due to various unforeseen reasons from some devices.
Should this happen, turn off the unit and then turn it on
again.
l The USB port is only intended for direct connection to
a USB memory device without any cable.
Advanced USB playback
n Repeat play
Repeat play can play one track, all tracks or a programme
sequence continuously.
Repeat play on the MP3/WMA menu screen:
Condition A
You can play all songs in the USB. Playback will stop after
complete playback all the songs in the USB.
To perform repeat play, press the
button whilst in the stop mode. Each time the button is
pressed, the play mode changes in the following order:
Condition B
You can play songs after select each folder inside the USB.
Whilst in the main menu screen, press the MEMORY
button. All the folders will be viewed on the TV screen
(folder on). The playback will stop after complete playback
all the songs in the currently playing folder.
To perform repeat play, press the
button whilst in the stop mode. Each time the button is
pressed, the play mode changes in the following order:
RANDOM/REPEAT
RANDOM/REPEAT
Advanced USB playback (continued)
Notes:
To view back the file list, press the MEMORY button whilst in the main menu screen.
Caution:
After performing repeat or random, be sure to press the button. Otherwise, it will play continuously.
n Random play
The tracks can be played in random order automatically.
To random play all tracks:
Press the RANDOM/REPEAT button on the remote control
repeatedly until “RANDOM” icon light up.
To cancel random play:
Press the RANDOM/REPEAT button repeatedly.
“RANDOM” will disappear.
Notes on random play:
l In random play, the unit will select and play tracks
automatically. (You cannot select the order of the
tracks.)
l When folder mode is on, the selected play mode can be
used for the files in the selected folder only.
Notes:
l This unit only supports “MPEG-1 Audio Layer-3”
format. (Sampling Frequency is 32 kHz, 44.1 kHz, 48
kHz)
l Playback order for MP3 files may differ depending on
the writing software used during file download.
l Bitrate which is supported by MP3 is 32 kbps to 320
kbps, WMA is 64 kbps to 160 kbps.
l For MP3/WMA files, please put “.MP3” “.WMA”
extension. Files cannot be played back if there is no
MP3/WMA extension.
l Playlists are not supported on this unit.
l This unit can display Folder Name or File Name up to
32 characters.
l Maximum total number of MP3/WMA files is 1024.
Maximum total number of folders is 255 inclusive of
root directory.
l Folders with non playable files are also counted.
l The display playback time may not be displayed
correctly when playing back a variable bitrate file.
l The ID3TAG information supported are TITLE, ARTIST
and ALBUM only. Title name, artist name and album
name can be displayed by pressing the SUBTITLE/
DIGEST/TAG button during file playback or pause
mode.
l WMA meta tag also supports title, artist and album
name which are recorded in WMA files. Copyright
protected WMA files cannot be played back.
1
2
3
4
5
X-MF3DVD-I_En.fm
6
7
8
En-35
2009September 28

Listening to the radio
DIRECTDIRECT
STANDBY/ONSTANDBY/ON
OPEN / CLOSEOPEN / CLOSE
TUNINGTUNING
PRESETPRESET
X.BOOMX.BOOM
EQUALIZEREQUALIZER
VOLUMEVOLUME
MEMORYMEMORY
TOPTOP
MENUMENU
SUB TITLESUB TITLE
DIGESTDIGEST
TAGTAG
MENU/MENU/
PBCPBC
RETURNRETURN
CLOCK / CLOCK /
TIMERTIMER
SLEEPSLEEP
DISPLAY(TV)DISPLAY(TV) MUTEMUTE
AUDIOAUDIO
TUNINGTUNING
PRESETPRESET
SETUPSETUP
MENUMENU
1 2 3
4 5 6
7 8 9
0 10
10
ZOOMZOOM RANDOMRANDOM
REPEATREPEAT
USB/USB/
DVDDVD
iPodiPod
TUNERTUNER AUXAUX
FM/AMFM/AM
ANGLEANGLE
STANDBY/ONSTANDBY/ON
TUNINGTUNING
MEMORYMEMORY
TUNINGTUNING
PRESETPRESET
PRESETPRESET
STANDBY/
ON
FUNCTION
OPEN/
CLOSE
PHONES
OPEN
n Tuning
Press the STANDBY/ON button to turn the power on.
1
2 Press the FUNCTION button on main unit repeatedly or
press the TUNER/BAND button on remote control to
select the TUNER mode.
3 Press the TUNING (– or +) button to tune in to the
desired station.
Manual tuning:
Press the TUNING (– or +) button as many times as
required to tune in to the desired station.
Auto tuning:
When the TUNING (– or +) button is pressed for more
than 0.5 seconds, scanning will start automatically and
the tuner will stop at the first receivable broadcast
station.
Notes:
l When radio interference occurs, auto scan tuning may
stop automatically at that point.
l Auto scan tuning will skip weak signal stations.
l To stop the auto tuning, press the TUNING (– or +)
button again.
l Tuning will stop when reach to 87.50 MHz or 108.00
MHz.
To receive an FM stereo transmission:
Press the FM/AM button to select FM mono, FM stereo or AM.
l “” will appear when an FM broadcast is in stereo.
l If the FM reception is weak, press the FM/AM button to
extinguish the “ST” indicator. The reception changes to
monaural, and the sound becomes clearer.
FM stereo mode indicator
n Memorising a station
Up to 40 stations for FM band and AM band can be stored
and recalled at the push of a button. (PRESET (– or +) )
Perform steps 1 - 3 in “Tuning”.
1
2 Press the MEMORY button to enter the preset tuning
saving mode.
3 Within 10 seconds, press the Direct Search buttons to
select the preset channel number.
Enter the channel number using the Direct Search
buttons.
To select channel 1: Press “0” and “1”.
To select channel 12: Press “1” and “2”.
4 Press MEMORY button to memorise the station. The
preset is memorised when the “MEMORY” indicator is
gone.
If the “MEMORY” and preset number indicators disappear before the station is memorised, repeat the operation from step 2 onwards.
5 Repeat steps 1 - 4 to set other stations or to change a
preset station.
When a new station is stored in memory, the station
previously memorised for that preset channel number
will be erased.
Note:
The backup function protects the memorised stations for a few hours should there be a power failure or the AC power lead become disconnected.
n To recall a memorised station
Press the PRESET (– or +) button for less than 0.5
seconds to select the desired station.
FM stereo receiving indicator
En-36
X-MF3DVD-I_En.fm
2009September 28

Timer and sleep operation (Remote control only)
CLOCK /
TIMER
DIRECT
STANDBY/ON
OPEN / CLOSE
TUNING
PRESET
X.BOOM
EQUALIZER
VOLUME
MEMORY
TOP
MENU
SUB TITLE
DIGEST
TAG
MENU/
PBC
RETURN
CLOCK /
TIMER
SLEEP
DISPLAY(TV)
MUTE
AUDIO
TUNING
PRESET
SETUP
MENU
1 2 3
4 5 6
7 8 9
0
10
ZOOM
RANDOM
REPEAT
USB/
DVD
iPod
TUNER
AUX
FM/AM
ANGLE
SLOW
STEP
A-B
STANDBY/ON
STANDBY/ON
Timer playback:
The unit turns on and plays the desired source (DISC,
STANDBY/ON
OPEN / CLOSE
DIRECT
10
TUNING
TUNING
PRESET
PRESET
DISPLAY(TV)
MUTE
SETUP
AUDIO
X.BOOM
CLOCK /
EQUALIZER
VOLUME
TIMER
MEMORY
SLEEP
TOP
MENU
MENU
SUB TITLE
DIGEST
TAG
FM/AM
iPod
TUNER
USB/
DVD
ZOOM
ANGLE
SLOW
STE
CLOCK /
MENU/
TIMER
PBC
RETURN
AUX
RANDOM
REPEAT
A-B
TUNER, USB, iPod) at a preset time.
n Timer playback
Before setting timer:
1
Check that the clock is set to the correct time (refer to
page 18).
If it is not set, you cannot use the timer function.
2 For timer playback, load the disc to be played back.
1 Press the STANDBY/ON button to turn the power on.
2 Press the CLOCK/TIMER button for about 2 seconds.
3 Within 10 seconds, press the CLOCK/TIMER button.
4 Press the or button to set hour then press the
CLOCK/TIMER button.
5 Press the or button to set minute and then
press the CLOCK/TIMER button.
6 Switch input with the or button to select “TMR-
OFF” and then press the CLOCK/TIMER button.
7 Press the or button to set hour and then press
the CLOCK/TIMER button.
8 Press the or button to set minute and then
press the CLOCK/TIMER button.
1
2
9 To select the timer playback source, switch input with
or button to select “SOURCE”, then press the
CLOCK/TIMER button.
3
4
5
6
7
8
En-37
X-MF3DVD-I_En.fm
2009September 28

Timer and sleep operation (Remote control only) (continued)
10 - 90 minutes
Sleep operation will
automatically stop
Timer playback setting
Timer playback
start time
End time
Desired time
10 Press the or button to select wake up source
(DISC, USB, Tuner, iPod) then press the CLOCK/
TIMER button to confirm.
11 If “TUNER” is selected, press the CLOCK/TIMER
button to enter the preset selection mode.
12 To select a preset channel number, press the or
button and then press the CLOCK/TIMER button.
13 The “ ” indicator lights up and the unit is ready for
timer playback.
14 Press the STANDBY/ON button to enter the power
stand-by mode. Press the CLOCK/TIMER button to
confirm the timer setting.
15 When the preset time is reached, playback will start.
“ ” indicator will blink to show timer playback. The
volume will increase gradually until it reaches the last
volume level.
16 When the timer end time is reached, the system will
enter the power stand-by mode automatically.
Checking the timer setting:
1 Press the CLOCK/TIMER button repeatedly to view as
follow:
n Sleep operation
The radio, compact disc and USB can all be turned off
automatically.
Play back the desired sound source.
1
2 Press the SLEEP button.
3 Within 10 seconds, press the SLEEP button repeatedly
to select the time.
10 20 30 ... 80 90
4 “SLEEP” will appear.
5 The unit will enter the power stand-by mode
automatically after the preset time has elapsed.
To confirm the remaining sleep time:
1 Whilst “SLEEP” is indicated, press the SLEEP button.
The remaining time is displayed for about 10 seconds.
To cancel the sleep operation:
Press the STANDBY/ON button whilst “SLEEP” is
indicated. To cancel the sleep operation without setting the
unit to the stand-by mode, proceed as follows.
1 Whilst “SLEEP” is indicated, press the SLEEP button.
2 Within 10 seconds, press the SLEEP button repeatedly
to select “SLEEP 00”.
n To use timer and sleep operation together
Sleep and timer playback:
For example, you can fall asleep listening to the radio and
wake up to CD in the next morning.
1
Set the sleep time (see above, steps 1 - 5).
2 Whilst the sleep timer is set, set the timer playback
(steps 2 - 10, pages 37 - 38).
Cancelling the timer setting:
Press the SLEEP button for 2 seconds. The “ ” indicator
disappear and the display show “TMR-OFF”.
Reusing the memorised timer setting:
The timer setting will be memorised once it is entered. To
reuse the same setting, press the SLEEP button for 2
seconds.
The “ ” indicator light up and the display show “TMR-ON”.
Notes:
l After selecting the playback source, when press the
CLOCK/TIMER button to confirm, “SOURCE” will
appear and blink for 2 seconds, then change to last
function.
l When the preset time is reached, playback will start at
current setting if no selected playback source is made.
l The volume cannot be preset during timer setting.
X-MF3DVD-I_En.fm
En-38
2009September 28

Enhancing your system
Troubleshooting chart (continued)
n Headphones
l Before plugging in or unplugging the headphones,
reduce the volume.
l Be sure your headphones have a 3.5 mm diameter plug
and impedance between 16 and 50 ohms. The
recommended impedance is 32 ohms.
l Plugging in the headphones disconnects the speakers
automatically. Adjust the volume using the VOLUME
control.
Troubleshooting chart
Many potential problems can be resolved by the owner
without calling a service technician.
If something is wrong with this product, check the following
before calling your authorised PIONEER dealer or service
centre.
n General
Symptom Possible cause
l The clock is
not set to the
correct time.
l When a
button is
pressed, the
unit does not
respond.
l No sound is
heard.
n CD player
Symptom Possible cause
l Playback
does not start.
l Playback
stops in the
middle or is
not performed
properly.
l Playback
sounds are
skipped, or
stopped in the
middle of a
track.
n MP3/WMA/JPEG files
Symptom Possible cause
l Playback
does not start.
l Some files
cannot
playback.
l Read-in time
takes very
long.
l Did a power failure occur? Reset
the clock.
l Set the unit to the power stand-by
mode and then turn it back on.
l If the unit still malfunctions, reset it.
l Is the volume level set to “MIN”?
l Are the headphones connected?
l Are the speaker wires
disconnected?
l Is the disc loaded upside down?
l Does the disc satisfy the
standards?
l Is the disc distorted or scratched?
l Is the unit located near excessive
vibrations?
l Is the disc very dirty?
l Has condensation formed inside
the unit?
l Is the disc loaded upside down?
l Are the files supported by the unit?
l Are the files supported by the unit?
l Is it a false MP3 file?
l Is the JPEG file size more than
10Mbytes?
l Is the disc contain too many
folders or files?
l Is the file size too big?
l Is the disc distorted or scratched?
n USB
Symptom Possible cause
l Device cannot be
detected.
l Playback does not
start.
l Wrong time
display.
l Wrong file name
display.
l Is there any MP3/WMA file
available?
l Is the device properly
connected?
l Is it an MTP device?
l Does the device contain AAC
file only?
l Is it a copyright protected
WMA file?
l Is it a false MP3 file?
l Is Variable Bitrate file being
played back?
l Is the File Name written in
Chinese or Japanese
characters?
n iPod
Symptom Possible cause
l No sound is
produced.
No image appears
on the TV/monitor.
l iPod will not
charge.
l The iPod is not playing.
l The iPod is not properly
connected to the unit.
l Is the AC power lead of the
unit plugged in?
l The video cable is not
properly connected (Only
support by “Video TV”
connection. Not support by
“S-Video” or “Component
Video” connection).
l “TV Out” Setting on iPod is
not properly set.
l The TV/monitor’s input
selection is not properly set.
l Wrong iPod adaptor is used.
l The iPod is not making full
contact with the iPod
connector.
l Using 3
n Remote control
Symptom Possible cause
l The remote control
does not operate.
l Is the AC power lead of the
unit plugged in?
l Is the battery polarity
correct?
l Are the batteries dead?
l Is the distance or angle
incorrect?
l Does the remote control
sensor receive strong light?
rd
generation iPod.
1
2
3
4
5
6
7
8
X-MF3DVD-I_En.fm
En-39
2009September 28

Troubleshooting chart (continued)
STANDBY/
ON
OPEN/
CLOSE
n Tuner
Symptom Possible cause
l The radio makes
unusual noises
continuously.
l Is the unit placed near the
TV or computer?
l Is the FM aerial or AM loop
aerial placed properly?
Move the aerial away from
the AC power lead if it is
located nearby.
n Condensation
Sudden temperature changes, storage or operation in an
extremely humid environment may cause condensation
inside the cabinet (CD pickup, etc.) or on the transmitter on
the remote control.
Condensation can cause the unit to malfunction. If this
happens, leave the power on with no disc in the unit until
normal playback is possible (about 1 hour). Wipe off any
condensation on the transmitter with a soft cloth before
operating the unit.
n If problem occurs
When this product is subjected to strong external
interference (mechanical shock, excessive static
electricity, abnormal supply voltage due to lightning, etc.)
or if it is operated incorrectly, it may malfunction.
If such a problem occurs, do the following:
1 Set the unit to the stand-by mode and turn the power on
again.
2 If the unit is not restored in the previous operation,
unplug and plug in the unit again, and then turn the
power on.
Note:
If neither operation above restores the unit, clear all the
memory by resetting it.
n Care of compact discs
Compact discs are fairly resistant to damage, however
mistracking can occur due to an accumulation of dirt on the
disc surface. Follow the guidelines below for maximum
enjoyment from your CD collection and player.
l Do not write on either side of the disc, particularly the
non-label side from which signals are read. Do not
mark this surface.
l Keep your discs away from direct sunlight, heat, and
excessive moisture.
l Always hold the CDs by the edges. Fingerprints, dirt, or
water on the CDs can cause noise or mistracking. If a
CD is dirty or does not play properly, clean it with a soft,
dry cloth, wiping straight out from the centre, along the
radius.
Maintenance
n Cleaning the cabinet
Periodically wipe the cabinet with a soft cloth and a diluted soap solution, then with a dry cloth.
Caution:
l Do not use chemicals for cleaning (petrol, paint thinner,
etc.). It may damage the cabinet.
l Do not apply oil to the inside of the unit. It may cause
malfunctions.
n Before transporting the unit
Remove the CD from the unit. Make sure there is no CD in
the disc tray. Then, set the unit to the power stand-by
mode. Carrying the unit with discs left inside can damage
the unit.
n Clearing all the memory (reset)
1 Press the STANDBY/ON button to enter the power
standby mode.
2 Whilst pressing down the OPEN/CLOSE button, press
the STANDBY/ON button on the main unit until
“RESET” appears.
Caution:
l This operation will erase all data stored in memory
including clock, timer, setting, tuner preset, and CD
programme.
X-MF3DVD-I_En.fm
En-40
2009September 28

Specifications
As part of our policy of continuous improvement, PIONEER
reserves the right to make design and specification
changes for product improvement without prior notice. The
performance specification figures indicated are nominal
values of production units. There may be some deviations
from these values in individual units.
n General
Power source AC 220 V to 240 V ~, 50 Hz/60 Hz
Power consumption
Dimensions Width: 155 mm
Weight 2 kg
( * ) This power consumption value is obtained when the
main unit is in stand-by mode without iPod charging.
n Amplifier
Output power MPO: 24 W (12 W + 12 W)
Output terminals
n DVD player
Signal system PAL/NTSC colour Supported disc
types
Video signal Horizontal resolution: 500 lines
Audio signal Frequency
n Tuner
Frequency range
Power on: 35 W
Po w e r s t a n db y : 0 . 6 W *
Height: 178 mm
Depth: 243 mm
(10 % T.H.D.)
RMS: 24 W (12 W + 12 W)
(10 % T.H.D.)
Speakers: 6 ohms
Headphones: 16 - 50 ohms
(recommended: 32 ohms)
DVD (with the same region number on the back of the unit), SVCD, VCD, audio CD, CD-R, CD-RW, JPEG, DivX (version 3.0 ~ 6.0)
S/N ratio: 70 dB
characteristic
S/N radio CD: 94 dB (1 kHz) Dynamic
range
To ta l
harmonic
distortion
ratio
FM: 87.5 MHz to 108 MHz AM: 522 kHz to 1620 kHz
Linear PCM DVD: 20 Hz to 20 kHz (sampling rate: 48 kHz) 20 Hz to 20 kHz (sampling rate: 96 kHz) CD: 20 Hz to 20 kHz
Linear PCM DVD: 95 dB CD: 94 dB
0.01% maximum
n USB
USB host interface
Support file
Bitrate support
Other
File system support
l Complies with USB 1.1 (Full
Speed)/ 2.0 Mass Storage Class.
l Support Bulk only and CBI
protocol.
l MPEG 1 Layer 3
l WMA (Non DRM)
l MP3 (32 kbps to 320 kbps)
l WMA (64 kbps to 160 kbps)
l Maximum total number of MP3/
WMA files is 1024.
l Maximum total number of folders
is 255 INCLUSIVE of root
directory.
l The ID3TAG information
supported are TITLE, ARTIST and
ALBUM only.
l Supports ID3TAG version 1 only.
l Support USB devices with
Microsoft Windows/DOS/FAT 12/
FAT 16/ FAT 32.
l 2 kbyte block length for sector.
n Speaker
Type 2-way 2-speaker system
Maximum input power
Rated input power
Impedance 6 ohms Dimensions Width: 132 mm
Weight 1.98 kg/each
5 cm tweeter 10 cm woofer
24 W
12 W
Height: 260 mm
Depth: 171.5 mm
1
2
3
4
5
6
7
X-MF3DVD-I_En.fm
8
En-41
2009September 28

ݨཏ
Ґ࣐ࠣಒΚ઼ႫৣࠣȂٸႫৣࠣޠԋӓܓጓġ
ŊņńġķıĹijĶĮIJĻijııĸȄ
ಒΚ઼Ⴋৣࠣ
D58-5-2-2a_A1_Zhtw
10 cm 10 cm 10 cm
10 cm
DVD MICRO COMPONENT SYSTEM
X-MF3DVD-I
REMOTE
SENSOR
TIMER
STANDBY/
ON
OPEN/
FUNCTION
CLOSE
OPEN
PHONES
D3-4-2-1-7c_A_ChH
ҐᐡϟһࢻႬྜඩᓟᇅ்మٻңޠһࢻႬྜඩ৵ϛ
ಓȂܷ፝ίඩᓟٯඳαӬᎍޠȄ༊ѠҦཿস
ܼҐᐡޠႬྜٽႬᢠαඳІԋ၇һࢻႬྜඩᓟȄ
Ӷഀ௦ՎһࢻႬඩ৵αϹᘟඩᓟȂѠᏳដ
ႬȄ፝ጃᇰඩᓟܼಌଷࡤϑϡ׃౪Ȅ
࿌ҐᐡܼߞґٻңϟםȞԄϜȟȂ፝
лႬྜඩᓟՍᕔαඩ৵ܧଷпϹᘟႬྜȄ
D3-4-2-2-1a_A1_Zhtw
X-MF3DVD-I_zhtw_new.fm
Zhtw-2
20099 28

୩
ဆะ將؆ධ從ࣿ୩處ᇧፚ溫ഊ༃內˄ஂޅ࿙
時˅ˈড裝؆ධܿ༃內溫ޡሓ開啟ഊ氣݃裝
ߑޑ໐ˈ૰會內ؠ˄غᏮெঽ鏡頭ຢ˅ᄳڈ༽
݉˄୩˅ȃڵ現୩時ˈ؆ධ將無ߟጸ٢غᏮ෩
無ߟ؆ȃۨ時請開啟؆ධ並᭣༃溫約2ড3個
ᄆ時˄時間長ޥ視୩ܿ範圍ߑށ˅ȃܚ༽݉ᄂង
ئ૰進ᄵ؆ȃ
࿙時؆ධፊ對᎑ૼ調ܿ風ےˈᇓ૰會發ໍ
୩ȃ發ໍۨ現ჺˈ請將؆ධᇧፚྊ處ȃ
S005_A1_Zhtw
ޏ᠍ၦଊȈ
ґ௳᠍ፓᇨȃኅክȃϵұȃክଛȃ
ϵߓᅌІ୶Ȟϛ፤၏ࣁ឵
ᕋւܓ፵ȟӏᆆϲৡְ࣐ႃݳȄ
Ґقಜପറԥ٪ࢁѓȂፓᇨӏᆆ
ϲৡژᓄኈழȂཽആԚτഌϸޠኈ
ฬ፵մίȄ
٪ࢁѓȈ
ҐᐡМනġŎŢŤųŰŷŪŴŪŰůġ٪ࢁѓȄ
ŅŗŅӏᆆα֥ԥ٪ࢁѓጇȂٻңŗńœፓ
ᇨŅŗŅӏᆆϟϲৡȂࠍ٪ࢁѓጇཽ٪Цᓄ
ኈழҔளክܺȄ
國專號碼˖7-947-65:˗7-492-858˗8-161-7:9
˗7-627-243ঽ6-694-:47ȃ
Ґࠣܛٻңޠޏ᠍ߴៗڨւ
пІڐу឵ܼŎŢŤųŰŷŪŴŪŰůġńŰųűŰųŢŵŪŰůޠޤ
ᜌ᠍ߴៗȄġٻң၏ޏ᠍ߴៗ҇ڦ
ூŎŢŤųŰŷŪŴŪŰůġńŰųűŰųŢŵŪŰůޠӤཏȂԄݏϛ
စŎŢŤųŰŷŪŴŪŰůġńŰųűŰųŢŵŪŰůޠӤཏȂࠍѬ
ңܼঢ়৴ܗԥጓ൝ޠᢏ፭ȄġЇӪᗚܗ
၍ஞ๊Ҽ឵ܼЦϟӗȄ
ҦŅŰŭţźġōŢţŰųŢŵŰųŪŦŴ௳᠍ᇨആȄȶ؈Щȷȃ
ȶŅŰŭţźȷᇅᚗŅዀᇭŅŰŭţźġōŢţŰųŢŵŰųŪŦŴ
ޠ୧ዀȄ
Ґᐡ߾ᐄւጢဵĶĭĵĶIJĭĺĵijڸϑ
ঠᇅҨ፝Ϝϟڐуڸзࣩւޠ௳
᠍ᇨആȄŅŕŔŅŕŔĭġŊůŤįޠພь୧ዀȂ
ŅŕŔዀᇭڸಓဵŅŕŔĭġŊůŤįޠ୧ዀȄޏ᠍
ܛԥ©IJĺĺķĮijııĹġŅŕŔĭġŊůŤįȄߴܛԥ
᠍ւȄ
®
ŅŪŷřĭġŊůŤįޠພь୧ዀȂٯᕖ௳᠍
ŅŪŷř
ٻңȄ
ŪőŰťłűűŭŦġŊůŤįӶІڐуঢ়ϑစພ
ьϟ୧ዀȄ
ȶŎŢťŦġŧŰųġŪőŰťȷȞ࣐ŪőŰťᇨആȟߓұ
၏Ⴌφପӈ࣐ഀ௦ՎŪőŰťՅ೪ȂՅ
йϑႇึኆ୧ޠᇰᜍпಓӬłűűŭŦޠ
ዀྦȄ
ᄈܼҐ၇ဋޠᐈձܗಓӬԋӓᇅጓ
ዀྦȂłűűŭŦ྆ϛᐋӉեೱӉȄ
1
2
3
4
5
6
7
8
X-MF3DVD-I_zhtw_new.fm
Zhtw-3
20099 28

繁體中文
X-MF3DVD-I DVD 微型元件系統是由主機與揚聲器系統組成。
簡介
感謝您購買先鋒產品。若要獲得本產品最佳效能,請詳閱本手冊。本手冊將提供操作先鋒產品的指導說明。
特別注意
提供本產品並不等於轉讓授權或在產生收益的廣播系統 (地面,衛星、有線及其他配銷通路),產生收益的串流應用 (藉
由網際網路、內部網路及其他網路),其他產生收益的內容發佈系統 (付費音訊或隨需音訊應用程式等類似項目)或產生
收益的實體媒體 (
該類使用方式需個別授權。有關詳細資訊,請參訪
MPEG Layer-3 音訊編碼技術由 Fraunhofer IIS 及 Thomson 授權。
CD、DVD、半導體晶片、硬碟、記憶卡等類似項目)上必須包含任何以本產品建立之發佈內容的權利。
http://mp3licensing.com
配件
請確認包裝中有下列配件。
轉接器 A x 1
(固定用於主機)
遙控器 x 1 AM 環形天線 x 1 「AAA」電池 (UM-4、
轉接器 B x 1
R03、HP-16 等) x 2
轉接器 C x 1
目錄
一般資訊
頁數
注意事項 . . . . . . . . . . . . . . . . . . . . . . . . . . . . . . . . . 5
控制項及指示燈 . . . . . . . . . . . . . . . . . . . . . . . . 5 - 6
可播放光碟類型 . . . . . . . . . . . . . . . . . . . . . . . . . . . . 7
光碟說明 . . . . . . . . . . . . . . . . . . . . . . . . . . . . . . . . . 8
使用準備事項
系統連線 . . . . . . . . . . . . . . . . . . . . . . . . . . . . 9 - 10
遙控器 . . . . . . . . . . . . . . . . . . . . . . . . . . . . . . . . . . 11
變更設定選單 . . . . . . . . . . . . . . . . . . . . . . . . 12 - 16
基本操作
一般控制 . . . . . . . . . . . . . . . . . . . . . . . . . . . . . . . . 17
設定時鐘 (限遙控器) . . . . . . . . . . . . . . . . . . . . . . 18
iPod
聆聽 iPod . . . . . . . . . . . . . . . . . . . . . . . . . . . 18 - 20
DVD 操作
DVD 播放
播放
. . . . . . . . . . . . . . . . . . . . . . . . . . . . . . . 20 - 21
若要在停止後恢復播放 (恢復播放) . . . . . . . . . . . . . 21
模式操作指示燈 . . . . . . . . . . . . . . . . . . . . . . . 21
DVD
基本操作
配置章節 (曲目)(跳過)開頭
快速前進/快速後退 (搜尋) . . . . . . . . . . . . 21 - 22
以所需順序播放 (編程播放) . . . . . . . . . . . . . . . . . 22
從所需時間點開始播放 (直接播放) . . . . . . . . . . . . . 22
實用操作
靜止畫面
. . . . . . . . . . . . . . . . . . . . . . . . . . . . . . . . 23
步驟功能 (逐格進階播放) . . . . . . . . . . . . . . . . . . . 23
慢動作播放 . . . . . . . . . . . . . . . . . . . . . . . . . . . . . . . 23
變更角度 . . . . . . . . . . . . . . . . . . . . . . . . . . . . . . . . 23
縮放影像 (縮放) . . . . . . . . . . . . . . . . . . . . . . . . . . 23
重複播放 (重複播放) . . . . . . . . . . . . . . . . . . . . . . 24
重複播放指定時間點間的內容 (A-B 重複) . . . . . . . . 24
選擇光碟上層選單中的標題 . . . . . . . . . . . . . . . . . . . 24
從光碟選單中選擇字幕或音訊語言 . . . . . . . . . . . . . . 25
各式設定
變更字幕語言
變更音訊頻道 . . . . . . . . . . . . . . . . . . . . . . . . . . . . . 25
變更電視螢幕上的顯示 . . . . . . . . . . . . . . . . . . . . . . 26
. . . . . . . . . . . . . . . . . . . . . . . . . . . . . 25
. . . . . . . . . . . . . . . . 21
Zhtw-4
VCD 及 SVCD 操作
VCD 及 SVCD 播放
開啟
P.B.C. 時播放 VCD (SVCD) . . . . . . . . . . . . . 27
不啟動播放控制功能 . . . . . . . . . . . . . . . . . . . . . . . . 27
從所需時間點開始播放 (直接播放) . . . . . . . . . . . . 27
隨機播放 . . . . . . . . . . . . . . . . . . . . . . . . . . . . . . . . 28
變更音訊頻道 . . . . . . . . . . . . . . . . . . . . . . . . . . . . . 28
光碟摘要選擇 . . . . . . . . . . . . . . . . . . . . . . . . . . . . . 28
曲目摘要選擇 . . . . . . . . . . . . . . . . . . . . . . . . . . . . . 28
轉接器 D x 1
視訊纜線 x 1
(黃色)
轉接器 E x 1
FM天線x 1
CD、CD-R 及 CD-RW 操作
CD 操作
所需順序播放 (編程播放) . . . . . . . . . . . . . . . . . . . 29
從所需時間點開始播放 (直接播放) . . . . . . . . . . . . 29
MP3/WMA 及 JPEG 光碟操作
從所需時間點開始播放 (直接播放) . . . . . . . . . . . . 30
所需順序播放 (播放清單) . . . . . . . . . . . . . . . . . . . 30
在 MP3 選單畫面上播放 . . . . . . . . . . . . . . . . . . . . . 30
重複播放 (重複播放) . . . . . . . . . . . . . . . . . . . . . . 31
旋轉畫面 . . . . . . . . . . . . . . . . . . . . . . . . . . . . . . . . 32
同時播放 MP3 及 JPEG . . . . . . . . . . . . . . . . . . . . . . 32
隨機播放 (限遙控器) . . . . . . . . . . . . . . . . . . . . . . 32
MP3/WMA
資料夾模式 (限 MP3/WMA 檔案). . . . . 33
USB
聆聽 USB 大量儲存裝置 /MP3 播放器 . . . . . . . . 34 - 35
進階 USB 播放 . . . . . . . . . . . . . . . . . . . . . . . . . . . . 35
廣播操作
聆聽廣播 . . . . . . . . . . . . . . . . . . . . . . . . . . . . . . . . 36
定時器
定時器及睡眠操作 (限遙控器) . . . . . . . . . . . .37 - 38
進階功能
強化系統 . . . . . . . . . . . . . . . . . . . . . . . . . . . . . . . . 39
參考
故障排除圖表 . . . . . . . . . . . . . . . . . . . . . . . . .39 - 40
保養 . . . . . . . . . . . . . . . . . . . . . . . . . . . . . . . . . . . 40
規格 . . . . . . . . . . . . . . . . . . . . . . . . . . . . . . . . . . . 41
頁數
1
2
3
4
5
6
7
8
9
9
X-MF3DVD-I_zhtw_new.fm
20099 28

注意事項
一般
• 請於穩固、平坦及無震動處使用本機。
• 請務必讓本機遠離直射陽光、強力磁場、灰塵過多、濕
度過高和會產生電子雜訊的電力/電子設備 (家用電
腦、傳真機等)。
• 請勿在本機上放置任何物品。
• 請勿將本機暴露在潮濕、溫度高於 60 °C 或極低溫的環
境下。
• 若系統異常,請從牆壁插座上拔下 AC 電源線。插回 AC
電源線,再開啟系統電源。
• 若發生狂風暴雨,請拔下本機插頭以策安全。
• 從牆壁插座拔除電源線時,請抓住 AC 電源插頭,因為拉
扯電線可能會破壞線材內部。
• AC電源插頭可當作中斷連接裝置,並請隨時保持使用狀
態。
• 請勿取下外蓋,這麼做可能會導致觸電。請參閱當地的
先鋒維修機構的內部維修服務。
控制項及指示燈
1
DVD MICRO COMPONENT SYSTEM
REMOTE
SENSOR
2
TIMER
3
4
STANDBY/
ON
FUNCTION
5
6
7
PHONES
X-MF3DVD-I
8
9
OPEN/
CLOSE
10
11
• 請勿在通風孔處蓋上物品,如報紙、桌布、簾子等,以
免阻礙通風。
• 請勿將明火來源,如點亮的蠟燭等放置在設備上。
• 請注意,切勿任意棄置電池以維護環境。
• 本機只能在 5 °C 至 35 °C 的溫度範圍內使用。
• 本設備的設計僅適用於一般氣候。
警告:
使用的電壓必須與本機指定的電壓相同。使用高於本產品
指定的電壓非常危險,可能會導致引發火災或其他會造成
破壞的意外類型。對於任何因使用本產品指定外之電壓而
造成之任何破壞,先鋒一概不予負責。
音量控制
規定音量設定的聲音位準視揚聲器效率、位置及多種其他
因素而定。建議避免接觸高音量的環境。請勿在開啟時將
音量轉至最大,聆聽音樂請調至適中音量。耳機產生的巨
大聲音壓力可能會造成聽力喪失。
前面板
1. iPod 擴充座 . . . . . . . . . . . . . . . . . . . . . . . . . . . . . .19
2. 遠端感應器. . . . . . . . . . . . . . . . . . . . . . . . . . . . . . . .11
3. 定時器指示燈. . . . . . . . . . . . . . . . . . . . . . . . . . . . . .38
4. 待機/開啟按鈕 . . . . . . . . . . . . 12、17、19、20、36
5. 功能按鈕 . . . . . . . . . . . . . . . . . . . . . . . . . . . . .19、36
6. 光碟托盤 . . . . . . . . . . . . . . . . . . . . . . . . . . . . . . . . . 20
7. 耳機插孔 . . . . . . . . . . . . . . . . . . . . . . . . . . . . . . . . .39
8. 音量控制 . . . . . . . . . . . . . . . . . . . . . . . . . . . . . . . . .17
9. 光碟 /USB/iPod 播放或暫停
按鈕 . . . . . . . . . . . . . . . . .19、20、21、27、29、34
10. 光碟托盤開啟/關閉按鈕. . . . . . . . . . . . . . . . . . . . .20
11. USB 端子 . . . . . . . . . . . . . . . . . . . . . . . . . . . . . . . . .34
參考頁
1
1
3
2
4
X-MF3DVD-I_zhtw_new.fm
揚聲器系統
Zhtw-5
高頻揚聲器
1.
低音揚聲器
2.
低音反射導管
3.
揚聲器電線
4.
2
3
4
5
6
7
8
20099 28

控制項及指示燈 (續上頁)
DIRECT
STANDBY/ON
OPEN / CLOSE
TUNING
PRESET
X.BOOM
EQUALIZER
VOLUME
MEMORY
TOP
MENU
SUB TITLE
DIGEST
TAG
MENU/
PBC
RETURN
CLOCK /
TIMER
SLEEP
DISPLAY(TV)
MUTE
AUDIO
TUNING
PRESET
SETUP
MENU
1 2 3
4 5 6
7 8 9
0
10
ZOOM
RANDOM
REPEAT
USB/
DVD
iPod
TUNER
AUX
FM/AM
ANGLE
SLOW
STEP
A-B
顯示
1 2 3 4 5 6 7 8
11 12 151413
16
17
18
19
STANDBY/ON
2
3
DIRECT
TUNING
PRESET
SETUP
X.BOOM
EQUALIZER
MEMORY
TOP
MENU
10
11
12
13
4
5
6
7
8
9
14
SUB TITLE
DIGEST
15
16
17
18
19
TAG
iPod
USB/
DVD
ZOOM
SLOW
20
X-MF3DVD-I_zhtw_new.fm
1
DISPLAY(TV)
VOLUME
MENU
FM/AM
TUNER
ANGLE
STE
OPEN / CLOSE
10
TUNING
PRESET
MUTE
AUDIO
CLOCK /
TIMER
SLEEP
RETURN
AUX
RANDOM
REPEAT
A-B
MENU/
109
1. 資料夾指示燈 . . . . . . . . . . . . . . . . . . . . . . . . . . . . .33
2. DVD 指示燈 . . . . . . . . . . . . . . . . . . . . . . . . . . . . . .20
3. VCD 指示燈 . . . . . . . . . . . . . . . . . . . . . . . . . . . . . . 27
4. CD 指示燈 . . . . . . . . . . . . . . . . . . . . . . . . . . . . . . . 29
5. MP3 指示燈 . . . . . . . . . . . . . . . . . . . . . . . . . . . . . .33
6. WMA 指示燈 . . . . . . . . . . . . . . . . . . . . . . . . . . . . .33
7. 睡眠指示燈 . . . . . . . . . . . . . . . . . . . . . . . . . . . . . . 38
8. 定時器播放指示燈 . . . . . . . . . . . . . . . . . . . . . . . . . .39
9. FM 立體聲模式指示燈 . . . . . . . . . . . . . . . . . . . . . . 36
10. FM 立體聲接收指示燈 . . . . . . . . . . . . . . . . . . . . . . .36
11. 記憶指示燈 . . . . . . . . . . . . . . . . . . . . . . . . . . . . . . .36
12. 章節指示燈 . . . . . . . . . . . . . . . . . . . . . . . . . . . . . . 26
13. 重複播放指示燈 . . . . . . . . . . . . . . . . . . . . . . .24、35
14. 暫停指示燈 . . . . . . . . . . . . . . . . . . . . . . . . . . . . . . .20
15. 播放指示燈 . . . . . . . . . . . . . . . . . . . . . . . . . . . . . . .20
16. DTS 指示燈 . . . . . . . . . . . . . . . . . . . . . . . . . . . . . . .25
17. Dolby 數位訊號指示燈 . . . . . . . . . . . . . . . . . . . . . .25
18. USB 指示燈 . . . . . . . . . . . . . . . . . . . . . . . . . . . . . . .34
19. 隨機指示燈 . . . . . . . . . . . . . . . . . . . . . . . . . . . . . . .28
參考頁
遙控器
1. 遙控發射器 . . . . . . . . . . . . . . . . . . . . . . . . . . . . . . .11
2. 待機/開啟按鈕 . . . . . . . . . . . 12、17、19、20、36
3. 直接搜尋按鈕 . . . . . . . . . . . . . . . . . . . . 22、27、28
4. 方向按鈕 . . . . . . . . . . . . . . . . . . . . . . . . . . . . 22、27
5. DVD/CD/USB/iPod 播放及
暫停按鈕 . . . . . . . . . . . . . .19、20、21、27、29、34
6. 快速倒轉或調低音量按鈕 . . . . . . . . . . . . . . . . 21、36
21
22
23
24
25
26
27
28
PBC
29
30
31
32
33
34
7. 向後跳過章節 (曲目)或
預設向下按鈕 . . . . . . . . . .21、27、28、29、36、37
8. 顯示 (電視)按鈕 . . . . . . . . . . . . . . . . . . . . . 20、26
9. 設定按鈕 . . . . . . . . . . . . . . . . . . . . . . . . . . . . . . . . . 12
10. 等化器 (X.BOOM)按鈕 . . . . . . . . . . . . . . . . . . . .17
11. 記憶按鈕 . . . . . . . . . . . . . . . . . . . . . . . . . . . . . . . . . 36
12. 上層選單按鈕 . . . . . . . . . . . . . . . . . . . . . . . . . . . . .24
13. MENU 按鈕 . . . . 12、19、21、23、27、28、29、34
14. 游標按鈕 . . . . . . . . . . 12、19、21、27、28、29、34
15. 字幕/摘要/標籤按鈕 . . . . . . . . . . . . . . . 8、25、28
16. iPod 按鈕 . . . . . . . . . . . . . . . . . . . . . . . . . . . . . . . .19
17. DVD/USB 按鈕 . . . . . . . . . . . . . . . . . . . . . . . . 20、34
18. 縮放按鈕 . . . . . . . . . . . . . . . . . . . . . . . . . . . . . . . . . 23
19. 慢動作按鈕 . . . . . . . . . . . . . . . . . . . . . . . . . . . . . . .23
20. 步驟按鈕 . . . . . . . . . . . . . . . . . . . . . . . . . . . . 23、27
21. 光碟托盤開啟/關閉按鈕. . . . . . . . . . . . . . . . . . . . .20
22. 快速快轉或調高音量按鈕
23. 停止按鈕 . . . . . . . . . . . . . . . . . . . . . 20、27、28、29
24. 向前跳過章節 (曲目)或
預設向上按鈕 . . . . . . . . . .21、27、28、29、36、37
25. 音訊/靜音按鈕 . . . . . . . . . . . . . . . . . . . . . . .17、25
26. 音量調整按鈕 . . . . . . . . . . . . . . . . . . . . . . . . . . . . .17
27. 時鐘/定時器按鈕 . . . . . . . . . . . . . . . . . . . . . . . . . .37
28. 睡眠按鈕 . . . . . . . . . . . . . . . . . . . . . . . . . . . . . . . . . 38
29. 選單 /PBC 按鈕 . . . . . . . . . . . . . . . . . . . . . . . .20、27
30. 返回按鈕 . . . . . . . . . . . . . . . . . . . . . . . . . . . . . . . . . 27
31. 調諧器/頻帶按鈕 . . . . . . . . . . . . . . . . . . . . . . . . . .36
32. AUX 按鈕 . . . . . . . . . . . . . . . . . . . . . . . . . . . . . . . .18
33. 隨機/重複按鈕 . . . . . . . . . . . . . . . . . . . 24、28、35
34. A-B 重複按鈕 . . . . . . . . . . . . . . . . . . . . . . . . . . . . .24
35. 角度按鈕 . . . . . . . . . . . . . . . . . . . . . . . . . . . . . . . . . 23
. . . . . . . . . . . . . . . . 21、36
參考頁
35
Zhtw-6
20099 28

可播放光碟類型
DVD 播放器可播放的光碟有下列記號:
光碟類型 光碟內容
DVD 視訊光碟 影音 (影片)
SVCD
VCD
音訊
CD 音訊
CD-R/CD-RW (*1)
或以
JPEG 格式 (*2)( *3)
錄製的
CD-R/CD-RW
®
DivX
視訊光碟 (5.2 版以下) 影音 (影片)
視錄製設備或光碟而定,CD-R/CD-RW 可能無法正常
(*1):
播放。
(*2):
本機上也可播放 JPEG 或 JPG 圖片光碟。不過,畫面
可能會不清楚 (視解析度及錄製方式而定)。
(*3):
最大 JPEG 檔案大小為 10 Mb。
若相片大於此大小,則需要一些時間才能顯示該檔案。
• 如需不可播放的光碟,請參閱第 8 頁。
DVD 光碟視地區而有不同。本機只能播放與本機
可播放的
後側印製區碼相同的
關於
DIVX 視訊:DivX
格式。此為播放
有關詳細資訊及轉檔為
www.divx.com。
關於
DIVX 隨需視訊:必須登錄此 DivX Certified
才能播放
DivX 隨需視訊 (VOD)內容。若要產生登錄
碼,請在裝置設定選單中找出
碼前往
vod.divx.com 以完成登錄程序,並瞭解更多關於
DivX VOD 的資訊。
DVD。
®
為 DivX, Inc. 所建立之數位視訊
DivX 視訊之正版 DivX Certified 裝置。
DivX 視訊的軟體工具,請參訪
影音 (影片)
影音 (影片)
音訊及畫面
DivX VOD 的區段。利用此
®
裝置,
3
本使用手冊中使用的圖示
視光碟而定,部分功能可能無法使用。下列圖示代表章節中
可使用的光碟。
... 表示 DVD。
... 表示 SVCD。
... 表示 VCD。
... 表示音訊 CD。
... 表示以 JPEG 錄製的 CD-R/RW。
... 表示 DivX
• 視光碟而定,部分操作可能無法執行,即使這些光碟已
在本手冊中說明。
• 在操作期間,畫面上可能會顯示 「 」。這表示手冊中
所說明的操作無法執行。
版權資訊:
• 未經授權複製、廣播、公開展示、播送、公開表演及販
售
( 不論該類活動是否屬營利性質 ) 光碟內容均為違法。
• 本系統配備有防拷功能技術,複製光碟內容到錄影帶時,
會造成大部分的影像畫質低下。
• 本系統受美國專利及其他智慧財產權保護,版權屬於
Macrovision Corporation。系統中所使用之
Macrovision 之防拷技術乃經 Macrovision 授權,僅供
家庭使用,若無
用途。禁止反向編程或反組譯碼。
®
Macrovision 書面授權不得做為其他
3
視訊。
1
2
3
4
5
6
7
X-MF3DVD-I_zhtw_new.fm
8
Zhtw-7
20099 28

光碟說明
無法播放的光碟
• 光碟上無區碼的 DVD。
• 有 SECAM 系統的 DVD
• DVD-ROM
• DVD-RAM
• DVD 音訊
• 以上光碟皆無法播放,或無聲音但畫面上有影像,或有
聲音但畫面上無影像。
• 不正確的操作可能會破壞揚聲器,而在高音量設定下播
放時會對聽覺造成負面影響。
• 您無法播放以違法方式製作的光碟。
註:
• 有刮痕或指紋的光碟可能無法正常播放。請先參閱「CD
照護」(第 40 頁)再清潔光碟。
• 請勿播放特殊形狀的光碟 (心形或五角形 ),因為在退
出這些光碟的同時可能會旋轉且造成人員受傷。
標題、章節與曲目
• CDG
• CDV
• 相片 CD
• CD-ROM
• SACD
• 以特殊格式錄製的
光碟等。
DVD 區分為 「標題」及 「章節」。若光碟上擁有多部影
片,則每部影片都是一個獨立的 「標題」。「章節」則是標
題的分支。
標題 1 標題 2
章節 1 章節 2
章節 3
章節 1
音訊 CD 由 「曲目」組成。
「曲目」為音訊
CD 上的歌曲。
曲目 1 曲目 2 曲目 3 曲目 4 曲目 5
註:
部分光碟上可能無法錄製標題、章節或曲目編號。
章節 2
DVD 光碟上使用的圖示
播放光碟前,請檢查
DVD 外殼上的圖示。
顯示 說明
區碼
(可播放的地區號碼)
以區碼編程的
DVD 光碟,表示只
能在屬於該區碼的國家中播放。本
系統可利用本機後側的區碼來播
3
放光碟。
DVD 上的錄製格式 若要採用連接電視的視訊格式
(「寬螢幕電視」或 「
電視」)。
以
4:3 錄製。
寬螢幕電視上可享受超寬影像,而在
寸電視上則可觀賞
letterbox 尺寸影像。
寬螢幕電視上可享受超寬影像,而
電視則可觀賞側邊裁切的
錄製的字幕類型 錄製的字幕語言。
範例:
2
1: 英文
可使用
SUB TITLE/DIGEST/TAG按
鈕選擇語言。
4:3 尺寸
4:3 尺
4:3 尺寸
4:3 影像。
2: 法文
相機角度數量 DVD 上錄製的角度數量。
ANGLE 按鈕可選擇角度。
使用
2
音訊曲目及音訊錄製
系統數量
範例:
1: 原始
< 英文 >
(Dolby 數
位雙環繞)
音訊曲目及音訊錄製系統數量已
標示。
• DVD 上錄製的音訊可利用
AUDIO 按鈕切換。
• 音訊曲目及錄製系統數量視
DVD 而異。請於 DVD 手冊中
核對。
2: 英文
(
Dolby
數位 5.1
環繞)
DivX
• DivX Certified 可播放 DivX 視訊,包括付費內容。
®
• DivX
是 DivX, Inc. 的註冊商標,並獲授權使用。
X-MF3DVD-I_zhtw_new.fm
Zhtw-8
20099 28

系統連線
進行任何連線前,請確實拔下 AC 電源線。
75 Ω 同軸纜線
(未隨附)
至色差視訊
輸入插孔
外部
FM 天線
(市售)
(市售)
至音訊輸出插孔
至同軸數位音訊輸入
插孔
至視訊輸入
插孔
至
S-video
輸入插孔
AC 220 V 至 240 V ~
(
50 Hz/60 Hz)
天線連線
隨附 FM 天線:
FM 天線至 FM 75 Ω 插座,並調整 FM 天線的方向,
連接
以便接收最強的訊號。
隨附 AM 環形天線:
AM 環形天線至 AM 端子。調整 AM 環形天線的位
連接
置,以便獲得最佳接收。將
或以螺絲 (未隨附)固定在底座或牆壁上。
註:
將天線放置在本機上或靠近
取。請將天線遠離本機以獲得更良好的接收。
(隨附)
(市售)
牆壁插座
AM 環形天線放置在架子上,
AC 電源線可能會產生噪音拾
3
外部 FM 天線
若您需要更佳的接收,請使用外部
商。
註:
FM 天線時,請中斷連接隨附的 FM 天線。
使用外部
(白色)
AM 環形天線
(黑色)
FM 天線
右側揚聲器
左側揚聲器
紅色
FM 天線。請洽詢經銷
黑色
1
2
3
4
5
6
7
8
X-MF3DVD-I_zhtw_new.fm
Zhtw-9
20099 28

系統連線 (續上頁)
揚聲器連線
連接黑色線至減號(–)端子,而紅色線則連接至加號(+)
端子。
注意:
• 請使用 6 Ω 以上阻抗的揚聲器,因為低阻抗的揚聲器可
能會破壞本機。
• 這些揚聲器端子均帶有危險電壓。 為避免在連接或脫離
揚聲器線時發生電擊危險,在觸摸任何未絕緣部分之前,
請先將電源線插頭拔離。
• 請勿將揚聲器安裝在牆上或天花板,可能會因掉落而造
成人員受傷。
• 請勿混淆左右聲道。面對本機時,右
側揚聲器位在右側。
• 請勿讓裸露的揚聲器線相互觸碰。
• 請勿讓任何物品掉落或放置在低音反
射導管中。
• 請勿站立或坐在揚聲器上。這麼做可
能會受傷。
不正確
AC 電源連線
檢查所有連線皆已正確連接後,將本機的 AC 電源線插頭
插入牆壁插座。若先插入本機,則本機將進入待機模式。
註:
若長時間不使用本機,請從牆壁插座拔下
AC 電源線。
電源線注意事項
手拿電源線時請握住插頭部分。
切勿拖著線將插頭拔出,並
不可在您手濕的時候觸摸電線,因為這樣會造成短路或受
到電擊。
請勿將本機、傢俱等放在電源線上或擠壓到電線。
絕不可將線打結或與其他連接線纏繞在一起。
置上不可會有腳踩到的情形。
讓您遭受電擊。
請每隔一段時間檢查一次電源線。 發現受
破損的電源線會引起火災或
電源線在佈
損時,請要求最近的先鋒授權維修中心或經銷商進行更換。
X-MF3DVD-I_zhtw_new.fm
Zhtw-10
20099 28

遙控器
DIRECT
STANDBY/ON
STANDBY/ON
OPEN / CLOSE
TUNING
PRESET
X.BOOM
EQUALIZER
VOLUME
MEMORY
CLOCK /
TIMER
SLEEP
DISPLAY(TV)
MUTE
AUDIO
TUNING
PRESET
SETUP
1 2 3
4 5 6
7 8 9
0
10
電池安裝
1
打開電池蓋。
2
按照電池槽指示的方向插入隨附的電池。
插入或取出電池時,請將電池推向 電池電極。
3
關上蓋子。
警告:
切勿在受到陽光直射或車內、加熱設備附近等極熱的場所
中使用或存放電池。
炸或起火。
如此可能會導致電池滲漏、過熱、爆
會降低電池的使用壽命或效能。
使用電池的注意事項:
• 請同時以全新的電池更換所有舊電池。
• 請勿混用新舊電池。
• 若長時間不使用本機,請取出電池。此舉可避免因電池
漏液所產生的潛在危險。
注意:
• 請勿使用充電式電池 (鎳鎘電池等)。
• 錯誤安裝電池可能會造成本機故障。
取出電池:
打開電池蓋,再向上拉出電池即可取出。
使用注意事項:
• 若操作距離縮減或操作出現錯誤,請更換電池。請購買
2 顆「AAA」電池 (UM-4、R03、HP-16 等)。
• 請定時以軟布清潔遙控器上的發射器及本機上的感應
器。
• 將本機上的感應器暴露在強光下,可能會干擾操作。若
出現此情況,請改變亮度或本機的方向。
• 請將遙控器遠離濕氣、高熱、衝擊及震動。
• 處理廢舊電池時,請遵守政府條例或適用於貴國或地區
的環境公共指令規則。
遙控器測試
安裝本機後(請參閱第
9 - 10 頁 ),請檢查遙控器操作是
否正確。
將遙控器直接指向本機上的遠端感應器。
遙控器可在如下所示的範圍內使用:
STANDBY/ON按鈕。電源是否開啟?現在即可使用本機。
按
遠端感應器
0.2 m 至 6 m
STANDBY/ON
STANDBY/ON
TUNING
PRESET
EQUALIZER
MEMORY
DVD MICRO COMPONENT SYSTEM
X-MF3DVD-I
REMOTE
SENSOR
TIMER
STANDBY/
ON
FUNCTION
PHONES
DIRECT
SETUP
X.BOOM
OPEN
OPEN / CLOSE
10
TUNING
PRESET
DISPLAY(TV)
MUTE
AUDIO
CLOCK /
TIMER
VOLUME
SLEEP
OPEN/
CLOSE
1
2
3
4
5
6
7
8
Zhtw-11
X-MF3DVD-I_zhtw_new.fm
20099 28

變更設定選單
SETUP
DIRECT
STANDBY/ON
OPEN / CLOSE
TUNING
PRESET
X.BOOM
EQUALIZER
VOLUME
MEMORY
TOP
MENU
SUB TITLE
DIGEST
TAG
MENU/
PBC
RETURN
CLOCK /
TIMER
SLEEP
DISPLAY(TV)
MUTE
AUDIO
TUNING
PRESET
SETUP
MENU
1 2 3
4 5 6
7 8 9
0
10
MENU
STANDBY/ON
開啟電視,並依序切換輸入為「VIDEO 1」、「VIDEO 2」等。
STANDBY/ON
DIRECT
TUNING
PRESET
SETUP
X.BOOM
EQUALIZER
MEMORY
DISPLAY(TV)
VOLUME
OPEN / CLOSE
10
TUNING
PRESET
MUTE
AUDIO
CLOCK /
TIMER
SLEEP
MENU/
PBC
MENU
RETURN
MENU
USB/DVD
STANDBY/ON
SETUP
TOP
MENU
SUB TITLE
DIGEST
TAG
1 按 STANDBY/ON 按鈕以開啟電源。
• 啟動畫面出現。
• 當輸入未設為光碟模式時,啟動畫面
不會出現。按遙控器上的
按鈕或重複按主機上的 FUNCTION
按鈕可選擇 DVD/CD 模式。
2 按 SETUP 按鈕。
3 按 或 按鈕選擇選單,再按 MENU 按鈕。
• 如需設定選單的詳細資訊,請參閱第12 - 15頁的清單。
4 按 、、 或 按鈕變更設定,再按 MENU 按鈕。
• 如需可選擇參數的詳細資訊,請參閱第 12 - 15 頁的清
單。
5 按 SETUP 按鈕或選擇「EXIT SETUP」再 按 MENU 按鈕。
• 完成設定。
• 若要變更其他設定,請自步驟 2 開始。
註:
• 播放期間,無法變更 「PREFERENCES」設定。
• 即使本機設為待機模式,仍會儲存設定。
• 若發生停電或AC電源線斷線,備份功能可保護已儲存的
設定約數小時。
• 若啟動畫面模糊不清,請在設定選單中變更電視類型。
設定選單 可選擇的參數 (* 代表預設設定) 說明
GENERAL
SETUP
MENU
- - GENERAL SETUP PAGE - -
TV DISPLAY PS
ANGLE MARK ON
OSD LANGUAGE ENG
SCREEN SAVER ON
LAST MEMORY OFF
GO TO GENERAL SETUP PAGE
TV DISPLAY
ANGLE
MARK
OSD
LANGUAGE
SCREEN
SAVER
LAST
MEMORY
4:3 PANSCAN*
:3 LETTERBOX
4
16:9 WIDE
WIDE SQUEEZE
ON*
OFF
ENGLISH*
CHINESE
ON*
OFF
ON*
畫面模式可依照連接的電視類型設定
(如需詳細資訊,請參閱第
設定選單或播放控制畫面可選擇所需的
OSD (畫面顯示)語言。
出現螢幕保護程式。
停用螢幕保護程式。
若在播放模式中突然按下 STANDBY/ON
或 OPEN/CLOSE 或 FUNCTION 按鈕,在
電源回復或按下
OPEN/CLOSE 按鈕關閉光
碟托盤後,可自停止播放的時間點繼續播
放。
AUDIO
SETUP
PAGE
- - AUDIO SETUP PAGE - -
ANALOG AUDIO
DIGITAL AUDIO
DOLBY DIGITAL
GO TO AUDIO SETUP PAGE
ANALOG
AUDIO
DIGITAL
AUDIO
OFF
DOWN
MIX
DIGITAL
OUTPUT
LPCM
OUTPUT
LT/R T
STEREO*
SPDIF/OFF
SPDIF/
RAW*
SPDIF/
PCM
48K*
96K
最近記憶無作用。
播放以 Dolby 數位或 DTS 技術錄製的光碟
時,將輸出對應的數位訊號。
• PCM:若解碼器不支援 Dolby 數位或
DTS 技術,請選擇此設定。
• RAW:若解碼器不支援 Dolby 數位或
DTS,請選擇此設定。
在 SPDIF SETUP 選擇 SPDIF/PCM 後,選 擇
48 kHz/16 位元或 96 kHz/24 位元功能的
取樣頻率。
15 頁)。
Zhtw-12
X-MF3DVD-I_zhtw_new.fm
20099 28

變更設定選單 (續上頁)
設定選單 可選擇的參數 (* 代表預設設定)
VIDEO SETUP
PAGE
- - VIDEO SETUP PAGE - -
VIDEO OUTPUT SVIDEO
COLOR SETTING
DivX VOD
GO TO VIDEO SETUP PAGE
DOLBY
DIGITAL
VIDEO
OUTPUT
COLOR
SETTING
DivX VOD OK
DUAL
MONO
DYNAMIC
SVIDEO*
b
COMPONENTS
SHARPNESS
BRIGHTNESS
CONTRAST
GAMMA HIGH
HUE
SATURATION
LUMA DELAY
STEREO*
L-MONO
R-MONO
MIX-MONO
a
FULL
3/4
1/2
1/4
OFF*
c
HIGH
MEDIUM*
LOW
–20 –> 0* –>
+20
–16 –> 0* –>
+16
MEDIUM*
LOW
NONE
–9 –> 0* –>
+9
–9 –> 0* –>
+9
0T*
1T
說明
以完整壓縮動態範圍的音
訊。
以部分壓縮動態範圍的音
訊。
以未壓縮動態範圍的音訊。
• SVIDEO:選擇此適用
•
COMPONENTS
先鋒提供 DivX 登錄碼,可
供使用
購買視訊。請前往
www.divx.com/vod 瞭解更
多資訊。
S-VIDEO 輸出
的設定。
:
選擇此適用色
差輸出的設
定。
DivX 服務來租賃及
1
2
X-MF3DVD-I_zhtw_new.fm
3
4
5
6
7
8
Zhtw-13
20099 28

PREFERENCE
PAGE
- - PREFERENCE PAGE - -
TV TYPE PAL
PBC ON
AUDIO ENG
SUBTITLE ENG
DISC MENU ENG
PARENTAL
DEFAULT
GO TO PREFERENCE PAGE
TV TYPE PAL*
AUTO
NTSC
PBC ON*
OFF
AUDIO ENGLISH*
CHINESE
SUBTITLE
ENGLISH*
CHINESE
DISC MENU ENGLISH*
CHINESE
PARENTAL 1 KID SAFE
2 G
3 PG
4 PG 13
5 PGR
6 R
7 NC 17
8 ADULT*
DEFAULT RESET
請參閱第 16 頁。
請參閱第 27 頁。
從揚聲器中選擇可聽見的語
言。
選擇電視螢幕上顯示的
字幕。
設定 DVD 觀看的限制級別。
(如需詳細資訊,請參閱第
16 頁)
重設所有設定 (除家長控制
及密碼外)為原廠預設值。
X-MF3DVD-I_zhtw_new.fm
Zhtw-14
20099 28

變更設定選單 (續上頁)
設定選單 可選擇的參數 (* 代表預設設定) 說明
PASSWORD
SETUP PAGE
EXIT SETUP
(a)選擇動態範圍壓縮,以配合個別聽眾的聆聽情況。本功能可在 DVD 播放時使用。視光碟而定,播放時的聲音可能會
過大或聽不見。
b)依照視頻設置設定變更電視輸入。
(
(
c)若您的裝置已選取 「S-VIDEO」作為視頻輸出,將無法看見電視色差輸入的正常畫面。
- - PASSWORD SETUP PAGE - -
PASSWORD MODE ON
PASSWORD
GO TO PASSWORD SETUP PAGE
- - EXIT SETUP - -
PASSWORD MODE ON
PASSWORD
EXIT SETUP MENU
Dolby 數位的動態範圍控制可讓您調整聲音範圍。
PASSWORD
MODE
ON*
OFF
PASSWORD CHANGE
如需密碼設定的詳細資訊,請參閱
第
16 頁。
完成設定。
電視顯示設定
指示燈 設定
4:3
PAN SCA N
播放寬影像(16:9)光碟
時,影像左右側會被裁切
(
pan scan)為顯示外觀自
然的
4:3 尺寸影像。
pan scan 的寬
不使用
影像光碟,將以
letterbox
播放。
4:3 光碟會以 4:3 播放。
4:3
LETTERBOX
播放寬影像(16:9)光碟
時,黑色帶會插入至上下兩
側,而在
4:3 尺寸電視上
即可享受全寬影像
(
16:9)。
4:3 光碟會以 4:3 播放。
16:9 WIDE
WIDE
SQUEEZE
播放寬影像(16:9)光碟
時,會顯示寬影像
(
16:9)。
• 播放 4:3 影像光碟時,影像尺寸視連接
電視的設定而定。
• 若播放寬影像 (16:9)光碟,在本機
連接
4:3 電視的情況下,則會垂直顯
示縮小影像。
在本機連接 16:9 電視(寬
螢幕電視)的情況下播放
4:3 光碟時,將顯示水平
延伸的影像。若使用此設
定,可在畫面左右側插入黑
色帶的情況下觀看自然的
4:3 尺寸影像。
• 若使用 4:3 電視播放寬影像(16:9)
光碟,則會垂直顯示縮小影像。
註:
以固定視訊格式播放光碟時,即使變更電視螢幕仍不會變
更格式。
4:3
1
2
3
4
5
6
7
8
X-MF3DVD-I_zhtw_new.fm
Zhtw-15
20099 28

變更設定選單 (續上頁)
電視類型設定
指示燈 設定
AUTO
NTSC
PAL
語言設定
OSD
LANGUAGE
AUDIO
SUBTITLE
選擇此項適用於多系統電視的模式。
選擇此項適用於 NTSC 電視的模式。
選擇此項適用於 PA L 電視的模式。
指示燈 設定
可為設定選單、訊息等設定的畫面顯示語
言。
可設定適用音訊的語言。
可指定適用對話及敘述的語言。
可設定適用字幕的語言。
字幕會以指定語言顯示。
家長控制設定
1 在設定選單畫面上選擇 「PREFERENCES」(請參閱
12 頁的步驟 1 - 4)。
第
2 在第 12 頁的步驟 4 選擇 「PARENTAL」後,選擇家長
控制級別,再按
3 使用直接搜尋按鈕輸入 6 位數的密碼,然後再按 MENU
按鈕。
MENU 按鈕。
* 若為第一次設定,請輸入 「000000」。
指示燈 設定
1 KID SAFE
2 G 到 7
NC-17
8 ADULT
ၸΤ
註:
播放含有家長控制鎖的光碟時,顯示幕會顯示要求輸入密
碼,以觀看部分受限的畫面。在此情況下,輸入密碼可暫
時變更家長控制級別。
密碼設定
在設定選單中選擇 「PASSWORD SETUP PAGE」、
「
PASSWORD」,然後再選擇 「CHANGE」。畫面隨即出
現。
只能播放適用於孩童的 DVD 軟體。
只能播放適用一般及孩童的 DVD 軟體。
可播放任何級別的 DVD 軟體 (成人/
一般/孩童)
DISC MENU
可設定適用光碟選單的語言。
選單畫面會以指定語言顯示。
ᅌসଳৡ
Ϗձস
X-MF3DVD-I_zhtw_new.fm
1 使用直接搜尋按鈕輸入舊密碼。(若為第一次設定,請輸
入「
000000」)。
2 使用直接搜尋按鈕輸入新密碼。
3 再輸入一次新密碼以確認。
註:
忘記密碼時,請遵循以下順序。
在設定選單中選擇 「
「
PASSWORD」,然後再選擇 「CHANGE」。
PASSWORD SETUP PAGE」、
1 使用直接搜尋按鈕輸入舊密碼 「000000」。
2 輸入新密碼。
3 再輸入一次新密碼以確認。
Zhtw-16
20099 28

一般控制
DIRECT
STANDBY/ON
OPEN / CLOSE
TUNING
PRESET
X.BOOM
EQUALIZER
X.BOOM
EQUALIZER
VOLUME
MEMORY
TOP
MENU
SUB TITLE
DIGEST
TAG
MENU/
PBC
RETURN
CLOCK /
TIMER
SLEEP
DISPLAY(TV)
MUTE
AUDIO
MUTE
AUDIO
TUNING
PRESET
SETUP
MENU
1 2 3
4 5 6
7 8 9
0
10
ZOOM
RANDOM
REPEAT
USB/
DVD
iPod
TUNER
AUX
FM/AM
ANGLE
SLOW
STEP
A-B
VOLUME
STANDBY/ON
DVD MICRO COMPONENT SYSTEM
X-MF3DVD-I
STANDBY/
ON
STANDBY/ON
X.BOOM
EQUALIZER
REMOTE
SENSOR
TIMER
STANDBY/
ON
FUNCTION
PHONES
OPEN
STANDBY/ON
DIRECT
TUNING
PRESET
DISPLAY(TV)
SETUP
X.BOOM
EQUALIZER
VOLUME
MEMORY
TOP
MENU
MENU
SUB TITLE
DIGEST
TAG
FM/AM
iPod
TUNER
USB/
DVD
ZOOM
ANGLE
SLOW
STE
開啟電源
按 STANDBY/ON 按鈕以開啟電源。
使用後:
STANDBY/ON 按鈕以進入電源待機模式。
按
註:
若發生停電或
AC 電源線斷線,備份功能會保護記憶功能
模式約數小時。
OPEN / CLOSE
10
TUNING
PRESET
CLOCK /
RANDOM
REPEAT
音量自動設定
• 若在音量設為 16或以上時關閉再開啟主機,則音量會以
16 啟動。
• 若在音量設為 15以下時再度關閉及開啟主機,則音量會
OPEN/
CLOSE
以剛才設定的音量開啟。
音量控制
主機操作:
順時針轉動
VOLUME 控制時,音量會增加。逆時針轉動
時,音量會降低。
VOLUME
MUTE
AUDIO
TIMER
SLEEP
MENU/
PBC
RETURN
AUX
A-B
AUDIO
MUTE
遙控器操作:
按
VOLUME (+ 或 –)按鈕可增加或降低音量。
...
30 MAXMIN 01
重低音控制 (X.BOOM)
X.BOOM 按鈕時,本機會進入強調低音頻率的重低音
按住
模式,且 「
若要取消重低音模式,請再次按住
靜音
按住遙控器上的
X_BOOM ON」會出現。
X.BOOM 按鈕。
MUTE 按鈕時,音量會暫時靜音。再按一
次即可還原音量。
* 電視螢幕會顯示 「MUTE」。( 僅 對 DVD 或 USB 功能)
等化器
按遙控器上的
定。若要變更為不同的模式,重複按
所需聲音模式出現為止。
EQUALIZER 按鈕後,將顯示目前的模式設
EQUALIZER 按鈕直到
自動關閉電源功能
在
DVD/CD 操作停止模式中,經過 15 分鐘無任何動作後,
主機會進入待機模式。
X-MF3DVD-I_zhtw_new.fm
Zhtw-17
FLAT
ROCK
CLASSIC
POPS
VOCA L
JAZZ
1
2
3
4
5
6
7
8
20099 28

設定時鐘 (限遙控器)
CLOCK /
TIMER
DIRECT
STANDBY/ON
OPEN / CLOSE
TUNING
PRESET
X.BOOM
EQUALIZER
VOLUME
MEMORY
TOP
MENU
SUB TITLE
DIGEST
TAG
MENU/
PBC
RETURN
CLOCK /
TIMER
SLEEP
DISPLAY(TV)
MUTE
AUDIO
TUNING
PRESET
SETUP
MENU
1 2 3
4 5 6
7 8 9
0
10
ZOOM
RANDOM
REPEAT
USB/
DVD
iPod
TUNER
AUX
FM/AM
ANGLE
SLOW
STEP
A-B
STANDBY/ON
聆聽 iPod
STANDBY/ON
STANDBY/ON
OPEN / CLOSE
DIRECT
10
TUNING
TUNING
PRESET
PRESET
DISPLAY(TV)
MUTE
SETUP
AUDIO
X.BOOM
CLOCK /
EQUALIZER
VOLUME
TIMER
MEMORY
SLEEP
TOP
MENU
MENU
SUB TITLE
DIGEST
TAG
FM/AM
iPod
TUNER
USB/
DVD
ZOOM
ANGLE
SLOW
STE
CLOCK /
MENU/
TIMER
PBC
RETURN
AUX
RANDOM
REPEAT
A-B
在此範例中,時鐘的設定為 24 小時制 (00:00)顯示。
1 按 STANDBY/ON 按鈕可轉為待機模式。
2 按住 CLOCK/TIMER 按鈕,直到 「00:00」出現。
3 在 10 秒內按 或 按鈕調整小時,然後按 CLOCK/
4 按或 按鈕調整分鐘,然後按 CLOCK/TIMER 按
若要確認時間顯示:
按 鈕。每 按 一 下 或 按鈕可調整一個小時
TIMER
的時間。按住不放可連續調整。
鈕。每按一下 或
按鈕可調整一分鐘的時間。按
住不放可連續調整。
[ 本機在待機模式中時 ]
按 CLOCK/TIMER 按鈕。時間顯示會出現約 5 秒鐘。
[ 電源開啟時 ]
按 CLOCK/TIMER 按鈕。時間顯示會出現約 5 秒鐘。
註:
在停電或拔下本機插頭後還原
00:00」。請如下重新調整時鐘。
「
若要重新調整時鐘:
1 「設定時鐘」。
執行步驟
AC 電源時,會出現
支援的 iPod 機型:
• iPod nano (軟體 1.2 以上)
• iPod mini (軟體 1.2 以上)
• iPod(第 5 代)(軟體1.3以上)(配備 Click Wheel 機型
的 Dock 接頭)
• iPod(第 4 代)(軟體 3.0.2以上)(配備Click Wheel機
型的 Dock 接頭)
• iPod nano (第 2 代)(軟體 1.0.0 以上)
• iPod nano (第 3 代)(軟體 1.0.3 以上)
• iPod nano (第 4 代)(軟體 1.0.3 以上)
• iPod classic (軟體 1.0.3 以上)
• iPod touch (軟體 1.1 以上)
• iPod touch (第 2 代)(軟體 2.1 以上)
注意:
在使用
iPod前,請先至蘋果官網更新iPod 主機至最新版本。
註:
• iPod 一連接至本機上,就會開始充電。
• 主機為 USB 模式時,無法為 iPod 充電。
iPod 轉接器連線
此標記表示可相容
iPod
iPod 轉
接器號碼
A
5G iPod (含視訊)
A
U2 iPod 含視訊
A iPod classic
A
4G iPod 及 U2 iPod
iPod 說明 容量
A
80 GB
30 GB
30 GB
、120 GB
20 GB
A 4G iPod 40 GB
A iPod photo
A
iPod 含彩色顯示幕
A iPod Touch
A
iPod Touch (第二代) 8 GB、16 GB 及
B iPod nano
B
iPod nano (第二代) 2 GB、4 GB 及
B
iPod nano (第三代) 4 GB 及 8 GB
B
iPod nano (第四代) 8 GB 及 16 GB
C iPod mini
D
iPod photo 及彩色 U2 iPod 20 GB 及 30 GB
D
iPod 含彩色顯示幕 20 GB、60 GB
E
5G iPod 含視訊 60 GB 及 80 GB
及 60 GB
40 GB
60 GB
8 GB 及 16 GB
32 GB
及 4 GB
2 GB
8 GB
4 GB 及 6 GB
E iPod classic 160 GB
註:
• 若iPod 沒有iPod 30 Pin接頭,可利用音訊纜線連接 iPod
至 AUX IN 插座。
• 本系統不支援 iPhone。
Zhtw-18
X-MF3DVD-I_zhtw_new.fm
20099 28

聆聽 iPod (續上頁)
DIRECT
STANDBY/ON
OPEN / CLOSE
TUNING
PRESET
X.BOOM
EQUALIZER
VOLUME
MEMORY
TOP
MENU
SUB TITLE
DIGEST
TAG
MENU/
PBC
RETURN
CLOCK /
TIMER
SLEEP
DISPLAY(TV)
MUTE
AUDIO
TUNING
PRESET
SETUP
MENU
1 2 3
4 5 6
7 8 9
0
10
USB/
DVD
iPod
TUNER
AUX
FM/AM
STANDBY/ON
MENU
插入 iPod 轉接器
按 STANDBY/ON 按鈕以開啟電源。
1
2 向上拉起尖端以打開 iPod 蓋子。
向上拉起
3 將 iPod 轉接器插入至 iPod dock,再連接 iPod。
iPod (底部)
iPod
Dock
接頭
iPod 轉接器
iPod dock
iPod 接頭
DVD MICRO COMPONENT SYSTEM
X-MF3DVD-I
STANDBY/
ON
STANDBY/ON
REMOTE
SENSOR
TIMER
STANDBY/
ON
FUNCTION
STANDBY/ON
DIRECT
TUNING
PRESET
DISPLAY(TV)
SETUP
X.BOOM
EQUALIZER
VOLUME
MEMORY
TOP
MENU
MENU
SUB TITLE
DIGEST
TAG
FM/AM
iPod
TUNER
USB/
DVD
OPEN / CLOSE
TUNING
PRESET
OPEN/
CLOSE
10
MUTE
AUDIO
CLOCK /
TIMER
SLEEP
AUX
MENU
MENU/
PBC
RETURN
iPod 播放
按 STANDBY/ON 按鈕以開啟電源。
1
2 按遙控器上的iPod按鈕,或重複按主機上的 FUNCTION
按鈕以選擇 iPod 功能。
3 將 iPod 主機插入本機上的 iPod dock。
4 按 按鈕即可開始播放。
取下 iPod 轉接器
如圖所示將螺絲起子 ( 「-」字形,小)的尖端插入至
iPod 轉接器孔,再向上提起即可取下。
X-MF3DVD-I_zhtw_new.fm
中斷 iPod 連接
只需將 iPod 從 iPod dock 取下即可。即使在播放期間,這
麼做仍相當安全。
瀏覽 iPod 選單
按 MENU/PBC 按鈕可觀看 iPod 主機上的選單。再按一
1
次可返回上一個選單。
2 使用或按鈕選擇選單上的項目,然後按MENU按鈕。
註:
使用遙控器瀏覽
何按鈕。按主機或遙控器上的
音量。調整
iPod 操作:
以下說明的操作視使用
系統操作:
開啟主機電源後,在將
開啟電源 (包括定時器功能)。
系統關閉 (待機操作):
主機轉至待機模式時,連接的
式。
iPod 選單時,請勿操作 iPod 主機上的任
iPod 主機上的音量不會有任何效果。
VOL (+ 或 –)按鈕可調整
iPod 的新舊款式而定。
iPod 連接本機時 iPod 主機會自動
iPod 主機會自動轉為充電模
Zhtw-19
20099 28
1
2
3
4
5
6
7
8

聆聽 iPod (續上頁)
PRESET
PRESET
TUNING
TUNING
DISPLAY (TV)
RANDOM
REPEAT
RANDOM
REPEAT
MENU/
PBC
MENU
DIRECT
STANDBY/ON
OPEN / CLOSE
TUNING
PRESET
X.BOOM
EQUALIZER
VOLUME
CLOCK /
TIMER
DISPLAY(TV)
MUTE
AUDIO
TUNING
PRESET
SETUP
1 2 3
4 5 6
7 8 9
0
10
STANDBY/ON
DVD 播放
在連接 iPod 的電視上觀看視訊
按 DISPLAY (TV)按鈕 2 秒以上。顯示幕上會出現
1
「TV DISP」。
2 在 iPod 裝置中選擇要播放的視訊。
3 按 MENU 按鈕即可開始播放。
註:
• 若已在 iPod 視訊選單中開啟電視輸出設定,則按 MENU
按鈕後,視訊會自動顯示在電視螢幕上。(僅支援 「視
訊電視」連線。不支援 「
線)。
• 若要返回觀看iPod畫面上的視訊,按MENU/PBC 按鈕即
可進入視訊選單。按
iPodDISP」出現。
「
• 在 iPod 視訊播放期間,按 DISPLAY(TV)按鈕不會在iPod
及電視間切換視訊輸出顯示。
iPod 播放偵測功能:
只要按下
iPod 主機上的播放按鈕,本機將覆蓋之前選擇的
功能並自動變更為 iPod 功能。
注意:
• 將 iPod 插入至 iPod dock 前,請拔下所有 iPod 的配件。
各種 iPod 功能
功能 主機 遙控器 操作
播放 在暫停模式中按下。
暫停 在播放模式中按下。
上一首/
下一首
快轉/
倒轉
顯示
重複
隨機
iPod 選單
iPod 進入
iPod 游標
上移/
下移
____
____
____
____
____
____
____
____
S-Video」或 「色差視訊」連
DISPLAY(TV) 按鈕 2 秒以上直到
在播放或暫停模式中按
PRESET
下。
若在暫停模式中按下
按鈕,則按 按鈕可
PRESET
開始播放所需的曲目。
TUNING
在播放模式中按住。
釋放按鈕即可恢復播放。
TUNING
DISPLAY (TV)
iPod 後側燈亮起。
按下
或電視間切換視訊輸出
顯示。
按下可切換重複模式。
RANDOM
REPEAT
按住可切換隨機模式。
RANDOM
REPEAT
在 iPod 運作期間按下可
觀看 iPod 選單。
MENU/
PBC
按下可確認選擇。
MENU
按下可選擇 iPod 選單。
2 秒以上可在 iPod
DVD MICRO COMPONENT SYSTEM
X-MF3DVD-I
STANDBY/
ON
STANDBY/ON
REMOTE
SENSOR
TIMER
STANDBY/
ON
FUNCTION
STANDBY/ON
DIRECT
TUNING
PRESET
DISPLAY(TV)
SETUP
X.BOOM
EQUALIZER
VOLUME
OPEN / CLOSE
TUNING
PRESET
OPEN/
CLOSE
10
MUTE
AUDIO
CLOCK /
TIMER
播放
按 STANDBY/ON 按鈕以開啟電源。
1
2 未將輸入設為光碟模式時,按遙控
器上的
USB/DVD 按鈕或重複按主
FUNCTION 按鈕即可顯示啟
機上的
動螢幕。
啟動畫面出現。
3 按 按鈕可打開光碟托盤。
4 將光碟放在光碟托盤上,標籤面朝上。
請確定將 8 cm 的光碟放置在光碟位置的正中央。
5 按 按鈕可關閉光碟托盤。
一關閉光碟托盤,支援自動啟動的光碟將開始播放,即
使未按下 按鈕。
6 若未在步驟 5 開始播放,請按 按鈕。
註:
光碟托盤僅可在
若要中斷播放:
按 按鈕。
若要從原時間點處恢復播放,按 按鈕。
完全停止播放
DVD:
按兩下遙控器上的
再度按住本機上的 按鈕。
音訊 CD/MP3/JPEG
按遙控器上的
停止後,本機處於為操作狀態超過
螢幕保護程式(請參閱第
時)。
按本機或遙控器上的任何按鈕。隨即返回啟動畫面。
DVD 及 USB 功能下操作。
按鈕。
按鈕或按住主機上的 按鈕。
5 分鐘以上,就會出現
12 頁螢幕保護程式設定為「開」
Zhtw-20
X-MF3DVD-I_zhtw_new.fm
20099 28

DVD 播放 (續上頁)
DIRECT
STANDBY/ON
OPEN / CLOSE
TUNING
PRESET
X.BOOM
EQUALIZER
VOLUME
MEMORY
TOP
MENU
SUB TITLE
DIGEST
TAG
MENU/
PBC
RETURN
CLOCK /
TIMER
SLEEP
DISPLAY(TV)
MUTE
AUDIO
TUNING
PRESET
SETUP
MENU
1 2 3
4 5 6
7 8 9
0
10
ZOOM
RANDOM
REPEAT
USB/
DVD
iPod
TUNER
AUX
FM/AM
ANGLE
SLOW
STEP
A-B
DIRECT
MEMORY
TUNING
PRESET
MENU
TUNING
PRESET
RANDOM
REPEAT
注意:
• 不使用時,請關閉光碟托盤。否則,灰塵可能會累積在
內部並造成故障。
• 長時間使用後,本機會稍微發熱。但並不代表本機故障。
• 嘗試播放有刮痕的光碟或不同區碼的光碟時,或無法播
放或受限(
息,且光碟將無法播放。
*1)按照視聽者的年齡,部分 DVD 可能會禁止觀看。
(
註:
• 部分光碟可能會記錄停止位置。播放該類光碟時,播放
會停止在該處。
• 在操作期間,「 」可能會出現,表示光碟已停止操作。
• 主機會自動偵測載入的光碟,接著指示燈會亮起。
若要在停止後恢復播放 (恢復播放)
*1)的光碟時,電視顯示幕上會出現錯誤訊
基本操作
STANDBY/ON
DIRECT
TUNING
PRESET
MEMORY
配置章節 (曲目)(跳過)開頭
OPEN / CLOSE
DIRECT
10
TUNING
TUNING
PRESET
PRESET
DISPLAY(TV)
MUTE
SETUP
AUDIO
X.BOOM
CLOCK /
EQUALIZER
TIMER
VOLUME
MEMORY
SLEEP
TOP
MENU/
MENU
MENU
SUB TITLE
DIGEST
RETURN
TAG
FM/AM
iPod
TUNER
AUX
USB/
DVD
ZOOM
RANDOM
ANGLE
REPEAT
SLOW
STE
A-B
TUNING
PRESET
PBC
RANDOM
REPEAT
MENU
可自停止的時間點恢復播放。
播放光碟時,按遙控器上的 按鈕,或按住主機上的
1
按鈕。系統會儲存停止的時間點。
2 若要重新開始播放,請按 按鈕。
播放將自停止的時間點處恢復。
若要取消恢復播放:
按兩下遙控器上的
註:
• 部分光碟上會停用恢復播放功能。
• 視光碟而定,時間點會稍微自停止位置提前恢復播放。
DVD 模式操作指示燈
下列範例為播放
操作 電視螢幕 本機顯示
開啟電源時無
光碟。
正在讀取光碟
資料。
停止
播放
暫停
,或再度按住主機上的 按鈕。
DVD 期間出現的操作指示燈。
NO DISC
LOADING
TITLE CHP
A-B
REPEAT1SLEEPPROGPRESETTRK
KHz
MHz
A-B
REPEAT1SLEEPPROGCHPPRESETTRKTITLE
MHz
使用簡單的操作即可移至其他曲目。
播放
SVCD 或 VCD 時,將取消 P. B . C . (播放控制)
(請參閱第
播放光碟時,按 或 按鈕。
• 使用 按鈕可跳至下一章節 (曲目)。
• 使用 按鈕可跳至上一章節 (曲目)。
• 在 SVCD、VCD 及音訊 CD 上,按 按鈕可跳至目前曲
註:
• 部分光碟不會顯示章節 (曲目),且會停用跳過功能。
27 頁)。
目的開頭。再按一次 按鈕 (按兩次)可跳至上一曲
目的開頭。
• 在 DVD 上無法於標題間操作跳過功能。
快速前進/快速後退 (搜尋)
播放光碟時可搜尋所需時間點。
播放光碟時,按 或 按鈕。
1
KHz
範例:按 按鈕後。
DVD/DivX/SVCD/VCD/ 音訊 CD/MP3 上,速度變更
在
如下:
播放 (正常播放)
2 X 4 X 8 X 16 X 32 X
使用 按鈕可快轉光碟,而使用 按鈕則可倒轉光碟。
2 按 按鈕可返回正常播放。
註:
• 部分光碟上會停用搜尋功能。
• 在 DVD 上無法於標題間進行搜尋。
• 在 SVCD、VCD、音 訊 CD 及 MP3上無法於曲目間進行搜
尋。
• 在 DVD 上搜尋時,將聽不見聲音,且字幕不會出現。
1
2
3
4
5
6
7
8
Zhtw-21
X-MF3DVD-I_zhtw_new.fm
20099 28

基本操作 (續上頁)
• 在 SVCD 或 VCD 上搜尋時,將聽不見聲音。
• 播放 DVD 期間執行搜尋時,視光碟或播放的場景而定,
可能無法以本手冊中指定的搜尋速度快轉或倒轉畫面。
• 在 JPEG 光碟上無法執行搜尋。
所需順序播放 (編程播放)
在播放模式
1 在播放模式中時,按 DIRECT 按鈕。
電視螢幕
可利用指定順序播放標題或章節中所需的曲目。最多可編
程 20 首曲目。
在停止或播放模式中時,按
1
MEMORY 按鈕。
Track 01/ 23
電視螢幕
Program : Track (01-23)
TT: CH:
01
TT: CH:
02
TT: CH:
03
TT: CH:
04
TT: CH:
05
TT: CH:
06
TT: CH:
07
08
TT: CH:
09
TT: CH:
10
TT: CH:
Exit Next
01:18
2 使用直接搜尋按鈕輸入標題或章節編號。
• 若要指定標題或曲目 1,請輸入 「1」。
• 若輸入錯誤數字,按 或 按鈕選擇所需曲目,然後
再重新輸入新數字。
3 按 按鈕選擇 「Start」, 然
MENU 按鈕開始播放
後再按
編程曲目。
電視螢幕
TT: 01 CH: 02
01
TT: 02 CH: 02
02
TT: CH:
03
TT: CH:
04
TT: CH:
05
TT: CH:
06
TT: CH:
07
08
TT: CH:
09
TT: CH:
10
TT: CH:
Start
Clear
若要變更編程內容:
重複自步驟
執行下列操作後,將清除編程內容:
• 變更為其他功能或取出光碟。
• 設為待機模式。
• 按游標按鈕選擇 「Clear」,然後再按 MENU 按鈕。
從所需時間點開始播放 (直接播放)
1 開始的以上程序。
若要選擇及播放所需標題和章節:在停止模式
1
在停止模式中時,按 DIRECT 按鈕。
電視螢幕
T: 01/02 C: 001/002
2 在 10 秒內先輸入標題編號,接著僅能使用直接搜尋按
鈕輸入章節編號。如需選擇標題或章節,請按 或
按鈕。
範例:
如要選擇標題或章節
如要選擇標題或章節
如要選擇標題或章節
1:按 「1」。
12:按 「1」及 「2」。
22:按兩次 「2」。
2 按 或
按鈕選擇標題或章節,再按 MENU 按鈕。
3 使用直接搜尋按鈕輸入標題或章節編號。
如要選擇章節
如要選擇章節
輸入號碼後即開始播放。
1:按 「0」及 「1」。
12:按 「1」及 「2」。
4 按下 DIRECT 按鈕可返回影像實際大小 (標準畫面)。
註:
• 部分光碟上會停用直接播放功能。
• 部分光碟可能不會顯示章節編號。
• 使用 DVD 時,只能在目前的標題中指定所需的時間點,
而其他標籤則無法指定。
若要按指定時間播放 (時間搜尋):
你可由指定時間來播放所需時間點。
1 在播放模式中時,按 DIRECT 按鈕。
電視螢幕
2 按 或 按鈕選擇「TT Time」,然 後 按 MENU 按鈕。
3 利用直接搜尋按鈕指定時間。
TT 時間
1:23:40
• 若要指定 1 小時 23 分及 40 秒,請輸入 「12340」。
• 若輸入錯誤的號碼,將重新由步驟 1 開始。
• 輸入號碼後即開始播放。
4 按下 DIRECT 按鈕可返回影像實際大小(標準畫面)。
註:
• 部分光碟無法自指定時間點播放。
• 部分光碟上會停用時間搜尋功能。
X-MF3DVD-I_zhtw_new.fm
Zhtw-22
20099 28

實用操作
DIRECT
STANDBY/ON
OPEN / CLOSE
TUNING
PRESET
X.BOOM
EQUALIZER
VOLUME
MEMORY
TOP
MENU
SUB TITLE
DIGEST
TAG
MENU/
PBC
RETURN
CLOCK /
TIMER
SLEEP
DISPLAY(TV)
MUTE
AUDIO
TUNING
PRESET
SETUP
MENU
123
4 5 6
7 8 9
0
10
ZOOM
RANDOM
REPEAT
USB/
DVD
iPod
TUNER
AUX
FM/AM
ANGLE
SLOW
STEP
A-B
MENU
MENU/
PBC
ZOOM
RANDOM
REPEAT
ANGLE
SLOW
STEP
DIRECT
10
TUNING
TUNING
PRESET
PRESET
DISPLAY(TV)
MUTE
SETUP
AUDIO
X.BOOM
CLOCK /
EQUALIZER
TIMER
VOLUME
MEMORY
SLEEP
TOP
MENU/
MENU
PBC
MENU
SUB TITLE
DIGEST
RETURN
TAG
FM/AM
iPod
TUNER
AUX
USB/
ZOOM
SLOW
ANGLE
STEP
RANDOM
REPEAT
DVD
ZOOM
RANDOM
ANGLE
REPEAT
SLOW
STE
A-B
靜止畫面
播放時可靜止畫面。
1
播放光碟時,按 按鈕。
2 電視螢幕上的影像或畫面將會靜止。「II」會出現在電視
螢幕上。
• 本機顯示計數器會閃爍。
註:
靜止畫面期間,聲音為靜音。
MENU/
PBC
MENU
在
SVCD/VCD/DivX 上,只能前進播放,且速度變更如下:
1/2 1/4 1/8 1/16
؆˄ጸ٢؆˅
2 按 按鈕可返回正常播放。
註:
在部分光碟上,會停用慢動作播放功能。
變更角度
播放內含多重角度場景的
電視螢幕的右上角顯示 「 」時,重複按 ANGLE 按鈕
可選擇所需角度編號。
註:
• 若光碟上未錄製角度,則不會顯示角度編號。
• 請參閱光碟手冊,因為操作可能會因光碟而有不同。
縮放影像 (縮放)
DVD 光碟時,可變更觀看角度。
步驟功能 (逐格進階播放)
可逐格進階播放。
1
播放光碟時,按 STEP 按鈕。
STEP 按鈕都會移動畫格。
每次按
2 按 按鈕可返回正常播放。
註:
• 畫格播放操作只能往前。
• 部分光碟會停用靜止畫面及畫格移動功能。
• 在步驟功能期間,聲音為靜音。
慢動作播放
播放速度可減緩。
1
播放光碟時,重複按 SLOW 按鈕可選擇所需速度。
在 DVD 上,速度變更如下:
慢動作前進播放
1/2 1/4 1/8 1/16
播放 (正常播放)
1/16
慢動作倒轉播放
X-MF3DVD-I_zhtw_new.fm
1/8 1/4 1/2
播放時可修改影像。
播放光碟時,按 ZOOM 按鈕。
1
每次按 ZOOM 按鈕,都會循環縮放設定如下:
2 X 3 X 4 X 1/2 1/3 1/4 OFF
2 若要改變觀看及顯示所需的縮
放影像部分,重複按
、、 或 按鈕。
若要返回正常觀看:
重複按
ZOOM 按鈕。
註:
• 縮放時,影像可能會失真。
• 字幕無法縮放。
Zhtw-23
1
2
3
4
5
6
7
8
20099 28

實用操作 (續上頁)
重複播放 (重複播放)
在播放時指定章節 (曲目)或標題即可重複播放。
SVCD 或 VCD 時,將取消 P. B . C . (播放控制)
播放
(請參閱第
1
26 頁)。
播放光碟時,按
每次按下按鈕時,重複播放模式都會依下列順序變更。
RANDOM/
電視螢幕
CHAPTER
REPEAT
按鈕。
DVD 上的重複播放模式變更如下:
重複目前的播放章節。
重複目前的播放標題。
重複目前的播放光碟。
正常播放。
SVCD/VCD 上的重複播放模式變更如下:
重複目前的播放曲目。
重複目前的播放光碟。
正常播放。
CD 上的重複播放模式變更如下:
音訊
重複目前的播放曲目。
重複目前的播放光碟。
隨機播放曲目。
正常播放。
選單畫面為 「
MP3、DivX 及 JPEG。
2
若要返回正常播放,重複按
電視螢幕上沒有顯示為止。
注意:
執行重複播放後,請確定按下
播放。
註:
部分光碟上會停用重複播放功能。
ON」時(請參閱第 31 頁),會 顯示
RANDOM/REPEAT
按鈕。否則,光碟將繼續
按鈕直到
重複播放指定時間點間的內容 (A - B 重複)
在播放時指定所需部分即可重複播放。
播放光碟時,按A - B按鈕
1
這會登錄起始時間點 (
2 再按一次
這會開始自起始時間點 (
A - B
按鈕可輸入結束時間點 (B)。
。
電視螢幕
A
A)。
電視螢幕
AB
A)到結束時間點 (B)的
A - B 重複播放。
3 按
A - B
按鈕可返回正常播放。
註:
• 部分光碟上會停用 A - B 重複播放。
• 對 DVD 而言,只有標題內才能進行 A - B 重複播放。
• 對 SVCD/VCD 而言,只有曲目內才能進行 A - B 重複播
放。
• 部分 DVD 中的場景可能無法進行 A - B 重複播放。
選擇光碟上層選單中的標題
在含多組標題的
1
在停止或播放模式中,
TOP MENU 按鈕可顯
按
示標題選單。
2 使用 、、 或按鈕選擇標題,然後按
• 播放所選的標題。
• 或使用適用部分光碟的直接搜尋按鈕。
註:
此處展示的程序僅提供一般步驟。使用標題選單的實際程
序視光碟而定。如需詳細資訊,請參閱光碟封套。
DVD 上,可自上層選單中選擇標題。
範例
Drama Action
3SF
21
Comedy
4
MENU按鈕。
X-MF3DVD-I_zhtw_new.fm
Zhtw-24
20099 28

實用操作 (續上頁)
DIRECT
STANDBY/ON
OPEN / CLOSE
TUNING
PRESET
X.BOOM
EQUALIZER
VOLUME
MEMORY
TOP
MENU
SUB TITLE
DIGEST
TAG
MENU/
PBC
RETURN
CLOCK /
TIMER
SLEEP
DISPLAY(TV)
MUTE
AUDIO
TUNING
PRESET
SETUP
MENU
123
456
789
0
10
USB/
DVD
iPod
TUNER
AUX
FM/AM
MUTE
AUDIO
SUB TITLE
DIGEST
TAG
各式設定 (續上頁)
在光碟選單中選擇字幕或音訊語言
若 DVD 擁有光碟選單,則可在 DVD 上選擇所需的字幕或
音訊語言及音效系統。
1
在停止或播放模式中,按
MENU/PBC 按鈕可顯示光
碟選單。
2 按 、、 或 按鈕變更設定,再按 MENU 按鈕。
或使用適用部分光碟的直接搜尋按鈕。
範例
Main Menu
1.Highlights
1.Hightlights
2.Start Movie
2.Start Movie
註:
此處展示的程序僅提供一般步驟。使用光碟選單的實際程
序視光碟而定。如需詳細資訊,請參閱光碟封套。
各式設定
在播放時選擇的字幕語言、音訊語言及電視類型,在每次
設定本機為待機模式或切換輸入時都會重設。若要保存自
己的設定,請在設定選單中設定 (請參閱第
TUNING
TUNING
PRESET
PRESET
DISPLAY(TV)
MUTE
SETUP
AUDIO
X.BOOM
CLOCK /
EQUALIZER
TIMER
VOLUME
MEMORY
SUB TITLE
DIGEST
TAG
變更字幕語言
TOP
MENU
SUB TITLE
DIGEST
TAG
SLEEP
MENU
RETURN
FM/AM
iPod
TUNER
AUX
USB/
DVD
12 頁)。
MUTE
AUDIO
MENU/
PBC
變更音訊頻道
可選擇音訊頻道。
播放光碟時,重複按 AUDIO 按鈕可選擇所需音訊聲道。
DVD 上的音訊聲道變更如下:
例如:
Audio 1/3: AC3 5 CH English
Audio 2/3: AC3 2 CH English
Audio 3/3: DTS 5.1 CH English
SVCD 上的音訊聲道變更如下:
音訊 1 音訊 2 音訊 3 音訊 4
VCD 上的音訊聲道變更如下:
左單聲道
註:
部分光碟上可能無法變更音訊聲道。
右單聲道
DTS (數位輸出)
含此商標光碟的數位輸入
其中一套數位音訊系統適用於戲劇表演。由於音質獲得凸
顯,因此在家庭劇院系統可盡情享受逼真的音效。
播放以 DTS 錄製的光碟時,DTS 指示燈會亮起。
Dolby 數位
混合
單聲道
立體聲
含此商標光碟的數位輸入
在播放時可變更字幕語言或隱藏字幕。
播放光碟時,重複按 SUB TITLE/
DIGEST/TAG 按鈕可選擇所需的
字幕語言。
SUBTITLE 01/03 ENGLISH
註:
• 在部分光碟上,可能無法變更字幕語言。
• 若光碟上沒有錄製的字幕,則會顯示 「 」。
• 切換字幕語言為所選語言可能會花一些時間。
• 部分 DVD 上可能無法隱藏字幕。
其中一套數位音訊系統適用於戲劇表演。在家庭劇院系統
中可盡情享受立體聲效果。
播放以 數位錄製的光碟時, 數位指示燈會亮起。
1
2
3
4
5
6
7
8
Zhtw-25
X-MF3DVD-I_zhtw_new.fm
20099 28

各式設定 (續上頁)
變更電視螢幕上的顯示
電視螢幕上的操作指示燈可顯示或隱藏。
播放光碟時,按 DISPLAY (TV)按鈕。(每按一次都會變
更顯示。)
目前標題編號
C:01/29
T:01/03
目前章節編號
播放時間
0:17:17
章節總數
標題總數
DVD:
TITLE ELAPSED
T:01/03 C:01/29
0:15:01
目前標題的經過播放時間
TITLE REMAIN
T:01/03 C:01/29
1:26:54
目前標題的剩餘播放時間
CHAPTER ELAPSED
T:01/03 C:01/29
0:15:01
目前章節的經過播放時間
CHAPTER REMAIN
T:01/03 C:01/29
0:20:10
目前章節的剩餘播放時間
DISPLAY OFF
SVCD/VCD/CD:
SINGLE ELAPSED
TRACK:01/30
目前曲目
編號
SINGLE REMAIN
TRACK:01/30
總曲目數量
00:54
00:40
目前曲目剩餘的播放時間
TOTAL ELAPSED
TRACK:01/30
00:54
光碟的總播放時間
TOTAL REMAIN
TRACK:01/30
00:50
光碟的總剩餘播放時間
DISPLAY OFF
DivX:
SINGLE ELAPSED
0:01:06
目前曲目經過的播放時間
SINGLE REMAIN
0:20:05
目前曲目剩餘的播放時間
DISPLAY OFF
目前曲目經過的
播放時間
X-MF3DVD-I_zhtw_new.fm
註:
SVCD 或 VCD 當 P. B . C . 設為 ON 時,總經過播放時
對於
間與總剩餘播放時間都不會出現。
Zhtw-26
20099 28

VCD 及 SVCD 播放
DIRECT
STANDBY/ON
OPEN / CLOSE
TUNING
PRESET
X.BOOM
EQUALIZER
VOLUME
MEMORY
TOP
MENU
SUB TITLE
DIGEST
TAG
MENU/
PBC
RETURN
CLOCK /
TIMER
SLEEP
DISPLAY(TV)
MUTE
AUDIO
TUNING
PRESET
SETUP
MENU
1 2 3
4 5 6
7 8 9
0
10
ZOOM
RANDOM
REPEAT
USB/
DVD
iPod
TUNER
AUX
FM/AM
ANGLE
SLOW
STEP
A-B
STEP
RETURN
PRESET
PRESET
MENU
MENU/
PBC
下列播放功能皆與 DVD 或 CD 操作相同。
配置章節 (曲目)(跳過)開頭. . . . . . . . . . . . . . . . . . . . 21
快速前進/快速後退 (搜尋). . . . . . . . . . . . . . . . . . 21 - 22
靜止畫面. . . . . . . . . . . . . . . . . . . . . . . . . . . . . . . . . . . . . . . . . 23
慢動作播放 . . . . . . . . . . . . . . . . . . . . . . . . . . . . . . . . . . 23
縮放影像 (縮放). . . . . . . . . . . . . . . . . . . . . . . . . . . . . . . . . 23
重複播放 (重複播放). . . . . . . . . . . . . . . . . . . . . . . . . . . . . 24
重複播放指定時間點間的內容 (A - B 重複). . . . . . . . 24
變更字幕語言 . . . . . . . . . . . . . . . . . . . . . . . .. . . . . . . . . . . . . 25
變更音訊頻道. . . . . . . . . . . . . . . . . . . . . . . . . . . . . . . . . . . . . 25
PRESET
STEP
STANDBY/ON
OPEN / CLOSE
PRESET
DIRECT
10
TUNING
TUNING
PRESET
PRESET
DISPLAY(TV)
MUTE
SETUP
AUDIO
X.BOOM
CLOCK /
EQUALIZER
TIMER
VOLUME
MEMORY
SLEEP
TOP
MENU/
MENU
PBC
MENU
SUB TITLE
DIGEST
RETURN
TAG
FM/AM
iPod
TUNER
AUX
USB/
DVD
ZOOM
RANDOM
ANGLE
REPEAT
SLOW
STE
A-B
MENU/
開啟 P.B.C. 時播放 VCD (SVCD)
本機可處理支援
P. B . C . (版本 2.0)的 VCD。P. B . C . 為「播
放控制」的縮寫。這些光碟都擁有會在電視螢幕上顯示的
選單。利用擷取功能可玩互動式遊戲及使用其他軟體 (選
單播放)。
1
在開啟 PBC 時按 MENU/PBC 按鈕。
電視上會出現選單並暫停播
放。
1
2
2 使用直接搜尋按鈕選擇所需選單編號。
• 開始播放。
• 播放停止後,選單會重新出現。選擇要播放的選單編
號。
若要中斷播放:
按 按鈕。
若要從原時間點處恢復播放,按
若要停止播放:
按兩下 按鈕。
若要停止目前的操作並返回選單:
RETURN 按鈕。
按
在下列環境中,P.B.C. 功能將沒有作用。
重複/編程/直接播放或跳過操作功能使用時。
註:
部分光碟上無法捲動選單螢幕。
按鈕。
頁數
PBC
MENU
RETURN
範例
不啟動播放控制功能
在不啟動播放控制功能的情況下,可在開啟
P. B . C . 時播放
VCD (SVCD)。
在此情況下,選單螢幕不會出現,且光碟將以和
(SVCD)相同的方式播放 (不開啟 P. B . C . )。
在停止或播放模式中,按 MENU/PBC 按鈕可取消 P. B . C .
模式。
• 電視螢幕將顯示 「PBC OFF」。
註:
VCD
P. B . C . 模式關閉時,部分開啟 P. B . C . 的 VCD (SVCD)無
法播放。
從所需時間點開始播放 (直接播放)
若要按指定時間播放 (時間搜尋):
取消 P. B . C . (播放控制)。
在停止期間,按 DIRECT 按鈕。
1
DISC GO TO: -- :- -
2 利用直接搜尋按鈕指定時間。
• 輸入分鐘及秒鐘。
• 若要指定 1 小時 23 分及 40 秒,請輸入 「8340」。
• 若輸入錯誤的號碼,將重新由步驟 1 開始。
• 輸入號碼後即開始 (自動)播放。
在播放模式:
1 在播放模式中時,按 DIRECT 按鈕。
TRACK
02/30
DISC TIME
1:06:06
TRACK TIME
0:01:57
REPEAT
OFF
2 按 或
按鈕選擇「Track Time」,然後按 MENU按鈕。
3 利用直接搜尋按鈕指定時間。
Track Time
1:23:40
• 若要指定 1 小時 23 分及 40 秒,請輸 入 「12340」。
• 若輸入錯誤的號碼,將重新由步驟 1 開始。
• 輸入號碼後即開始 (自動)播放。
4 按下 DIRECT 按鈕可返回影像實際大小 (標準畫面)。
註:
• 部分光碟無法自指定時間點播放。
• 部分光碟上會停用時間搜尋功能。
• 在 MP3 及 JPEG 光碟上無法使用時間搜尋功能。
1
2
3
4
5
6
7
8
Zhtw-27
X-MF3DVD-I_zhtw_new.fm
20099 28

VCD 及 SVCD 播放 (續上頁)
RANDOM
DIRECT
STANDBY/ON
OPEN / CLOSE
TUNING
PRESET
X.BOOM
EQUALIZER
VOLUME
MEMORY
TOP
MENU
SUB TITLE
DIGEST
TAG
MENU/
PBC
RETURN
CLOCK /
TIMER
SLEEP
DISPLAY(TV)
MUTE
AUDIO
TUNING
PRESET
SETUP
MENU
1 2 3
4 5 6
7 8 9
0
10
SUB TITLE
DIGEST
TAG
1 2 3
4 5 6
7 8 9
0
10
PRESET
PRESET
MENU
隨機播放
光碟上的曲目可自動以隨機順序播放。
在停止或播放模式時,按遙控器上的
1
按鈕直到 「RANDOM」顯示為止。
電視螢幕 本機顯示
RANDOM
2 隨機播放即將開始。
3 若要取消隨機播放,按
RANDOM」指示燈熄滅為止。
「
註:
在隨機播放中,
選擇曲目順序。)
注意:
執行重複或隨機播放後,請確定按下 按鈕。否則,光碟
將繼續播放。
變更音訊頻道
可選擇音訊頻道。
播放光碟時,重複按 AUDIO 按鈕可選擇所需音訊聲道。
CD 播放器將自動選擇及播放曲目。(無法
RANDOM/
SVCD/VCD 上的音訊聲道變更如下:
LEFT MONO
STEREO
註:
• 部分光碟上可能無法變更音訊聲道。
• 音訊 CD 上的音訊按鈕無法作用。
光碟摘要選擇
RANDOM/
REPEAT 按鈕直到
RIGHT MONO
MIX-MONO
REPEAT
從螢幕上選擇
6 個顯示曲目之一,以播放所需曲目。
1 在停止模式時,按 SUB TITLE/DIGEST/TAG 按鈕。
2 使用游標 或 按鈕選擇摘要類型,再按 MENU 按鈕。
• 曲目摘要 (光碟將由曲目區分)。
• 光碟播放間隔(光碟將區分成
10 分鐘的播放間隔)。
• 螢幕上最多顯示 6 個曲目。
電視螢幕
Select Digest Type
3 按遙控器上的直接搜尋按鈕選擇所需曲目。
按 按鈕後,將自所選曲目的開頭處播放。
VCD 上有超過 6 個曲目時:
每按一次
按
按鈕都將顯示另外 6 個曲目。
按鈕可返回上一個顯示。
若要取消光碟摘要:
EXIT 後,按 MENU 按鈕。
選擇
曲目摘要選擇
可觀看段落並選擇要欣賞的場景。想要從未分段的曲目中
間開始觀看時,例如影片,此功能相當方便。
播放時按 SUB TITLE/DIGEST/TAG 按鈕。
1
2 使用游標 或 按鈕選擇 「Track Interval」, 再 按
MENU 按鈕。
• 目前曲目將區分為 10 分鐘的播放間隔。
正在播放的曲目將區分為 6 個段落且暫停播放。
電視螢幕
Select Digest Type
14253
6
14253
6
3 按遙控器上的直接搜尋按鈕選擇要觀看的場景。
按 按鈕後,將自所選曲目的開頭處播放。
若要取消曲目摘要操作:
選擇
EXIT 後,按 MENU 按鈕。
註:
• 只有在播放期間曲目摘要功能才有作用。
• 一個曲目會平均區分為六個相同播放時間的畫格。
PRESET
SUB TITLE
DIGEST
TAG
STANDBY/ON
OPEN / CLOSE
10
DIRECT
TUNING
PRESET
DISPLAY(TV)
SETUP
X.BOOM
EQUALIZER
VOLUME
MEMORY
TOP
MENU
MENU
SUB TITLE
DIGEST
TAG
PRESET
10
TUNING
PRESET
MUTE
AUDIO
CLOCK /
TIMER
SLEEP
MENU/
PBC
RETURN
MENU
Zhtw-28
X-MF3DVD-I_zhtw_new.fm
20099 28

CD 操作
DIRECT
STANDBY/ON
OPEN / CLOSE
TUNING
PRESET
X.BOOM
EQUALIZER
VOLUME
MEMORY
TOP
MENU
SUB TITLE
DIGEST
TAG
MENU/
PBC
RETURN
CLOCK /
TIMER
SLEEP
DISPLAY(TV)
MUTE
AUDIO
TUNING
PRESET
SETUP
MENU
1 2 3
4 5 6
7 8 9
0
10
ZOOM
RANDOM
REPEAT
USB/
DVD
iPod
TUNER
AUX
FM/AM
ANGLE
SLOW
STEP
A-B
SUB TITLE
DIGEST
TAG
1 2 3
4 5 6
7 8 9
0
10
PRESET
PRESET
MENU
此系統能以 CD 格式播放標準 CD、CD-R/RW,以 及 含 MP3
或 WMA 檔案的 CD-R/RW,但無法錄製。
因光碟狀態或曾錄製過裝置的緣故,可能無法播放部分音
CD-R 及 CD-RW 光碟。
訊
下列播放功能皆與 DVD 或 VCD 操作相同。
. . . . . . . . . . . . . . . . . . . . . . . . . . . . . . . . . . . . . . . . . .
播放
配置章節 (曲目)(跳過)開頭
快速前進/快速後退 (搜尋)
重複播放 (重複播放)
重複播放指定時間點間的內容 (A - B 重複)
變更電視螢幕上的顯示
10
PRESET
SUB TITLE
DIGEST
TAG
. . . . . . . . . . . . . . . . . . . . .
. . . . . . . . . . . . . . . . . .
. . . . . . . . . . . . . . . . . . . . . . . . . . . .
. . . . . . . . . . . . . . . . . . . . . . . . . . . . .
STANDBY/ON
OPEN / CLOSE
DIRECT
TUNING
PRESET
DISPLAY(TV)
SETUP
X.BOOM
EQUALIZER
VOLUME
MEMORY
TOP
MENU
MENU
SUB TITLE
DIGEST
TAG
FM/AM
iPod
TUNER
USB/
DVD
ZOOM
ANGLE
SLOW
STE
PRESET
10
TUNING
PRESET
MUTE
AUDIO
CLOCK /
TIMER
SLEEP
MENU/
PBC
RETURN
AUX
RANDOM
REPEAT
A-B
20 - 21
21 - 22
. . . . . . . . .
MENU
頁數
24
所需順序播放 (編程播放)
可依指定順序播放所需曲目。
最多可編程 20 首曲目。
在停止或播放模式中時,按
1
MEMORY 按鈕。
2 使用直接搜尋按鈕輸入曲目編
號。
3 若輸入錯誤數字,按 或 按
鈕選擇所需曲目,然後再重新輸
入正確數字。
電視螢幕
01
02
03
04
05
Track 01/ 23
電視螢幕
01
014
02
022
03
015
04
05
06
07
08
09
10
Exit Next
06
07
08
09
10
Start
Clear Next
01:18
若要變更編程內容:
重複自步驟
執行下列操作後,將清除編程內容:
• 切換輸入或取出光碟。
• 設為待機模式。
• 按游標按鈕選擇 「Clear」,然後再按 MENU 按鈕。
1 開始的以上程序。
註:
• 若光碟停用編程或沒有曲目資訊,則順序編程將無作用。
21
• 在編程播放期間,按 RANDOM/REPEAT 按鈕 (請參閱
第
24
26
24 頁)可執行重複播放。
從所需時間點開始播放 (直接播放)
若要選擇及播放所需曲目:
在停止或播放模式中,按直接搜尋按鈕可選擇曲目編號。
如要選擇曲目 14:按 「10+」及 「4」。
電視螢幕
SELECT TRACK: 14/30
本機顯示
若要按指定時間播放 (時間搜尋):
1 在停止或播放模式期間,按一下 DIRECT 按鈕,電視螢
幕上就會出現 「
DISC GO TO」。
電視螢幕
DISC GO TO: -- :- -
2 利用直接搜尋按鈕指定時間。
• 輸入分鐘及秒鐘。
• 若要指定 1 小時 23 分及 40 秒,請輸入 「8340」。
• 若輸入錯誤的號碼,將重新由步驟 1 開始。
註:
• 部分光碟上會停用直接播放功能。
• 部分光碟無法自指定時間點播放。
• 部分光碟上會停用時間搜尋功能。
1
2
3
4
5
4 按 按鈕選「Start」,然後再按 MENU 按鈕開始播放
編程曲目。
6
7
8
Zhtw-29
X-MF3DVD-I_zhtw_new.fm
20099 28

MP3/WMA 及 JPEG 光碟操作
MP3:
MP3 是一種壓縮形式。MP3 為一縮寫,全名為 MPEG
Audio Layer 3。
來自原始音訊來源且音質損失極少的 MP3 是一種透過明顯
壓縮處理的音訊碼。
• 本系統支援 MPEG 1 Layer 3 及 VBR 檔案。
• 播放 VBR 檔案時,顯示幕中的時間計數器可能與實際播
放時間不同。
• MP3 支援的位元率為 32 kbps 至 320 kbps。
WMA:
WMA 檔案屬進階系統格式檔案,其中包括使用
Windows Media Audio 轉碼器壓縮的音訊檔案。WMA
由 Microsoft 開發,是一種專用於 Windows Media
Player 的音訊格式。
• WMA 支援的位元率為 64 kbps 至 160 kbps。
下列播放功能皆與 DVD 或 VCD 操作相同。
播放 . . . . . . . . . . . . . . . . . . . . . . . . . . . . . . . . . . . 20 - 21
配置章節 (曲目)(跳過)開頭.. . . . . . . . . . . . . . . . . . 21
快速前進/快速後退 (搜尋). . . . . . . . . . . . . . . 21 - 22
縮放影像 (縮放). . . . . . . . . . . . . . . . . . . . . . . . . . . . . 23
重複播放 (重複播放) . . . . . . . . . . . . . . . . . . . . . . . . . 24
變更電視螢幕上的顯示 . . . . . . . . . . . . . . . . . . . . . . . . . 26
從所需時間點開始播放 (直接播放)
若要按指定時間播放 (時間搜尋):
在播放期間,按兩下 DIRECT 按鈕。
1
電視螢幕
GO TO _: __:__
2 利用直接搜尋按鈕指定時間。
• 輸入分鐘及秒鐘。
• 若要指定 1 小時 23 分及 40 秒,請輸入 「12340」。
• 若輸入錯誤的號碼,將重新由步驟 1 開始。
• 可參閱第 22 頁以檢查曲目的總播放時間。
若要選擇及播放所需曲目:
1 在停止或播放模式時,按直接搜尋按鈕或 DIRECT 按鈕,
然後輸入所需的曲目編號。
---/150
曲目總數
若所需曲目為
電視螢幕
25,請按 「0」、「 2」及 「5」。
2 所選曲目將自動開始播放。
註:
• 部分光碟上會停用直接播放功能。
• 部分光碟無法自指定時間點播放。
所需順序播放 (播放清單)
頁數
在播放清單觀看曲目:
1 重複按下 MEMORY 按鈕觀看播放清單。
• 電視顯示 「PLAYLIST」並顯示播放清單曲目。
從播放清單刪除曲目:
1 在觀看播放清單時,使用或按鈕選取要刪除的曲目。
2 按下 ZOOM 按鈕從播放清單中刪除曲目。
• 電視在畫面選單顯示 「Remove from playlist」。
從播放清單清除所有曲目:
1 在觀看播放清單時,按下 STEP 按鈕。
• 播放清單中的所有曲目被清除。
在 MP3 選單螢幕上播放
可播放以
MP3/WMA 及 JPEG 格式錄製的 CD-R /RW。
1
載入含 MP3/WMA、JPEG 及 DivX 檔案的光碟後,選
單螢幕便會出現。
...
代表資料夾。
...
代表
MP3 資料。
...
代表
JPEG 資料。
...
代表
DivX 資料。
...
代表
WMA。
2 按 或 按鈕選擇曲目,然後按 MENU 或 按鈕。
• 選擇曲目後,即開始播放。
• 格式為 JPEG 時,需等待一段時間才會自動顯示接下來
的檔案。選擇曲目後即開始播放。
• 您可使用 或 按鈕旋轉 JPEG 圖片 (請參閱
第 32 頁)。
• 使用直接搜尋按鈕後,可直接打開檔案或資料夾。在
顯示幕右側輸入編號。
注意:
MP3 資料轉換為 「音訊 CD」資料,以便錄製在
若將
CD-R/RW 上,即可當成音訊 CD 播放。無法執行 MP3 操作。
註:
• 資料夾名稱及曲目名稱最多可顯示 20 個 字 元。底 線、星
號及空格皆不會顯示。
• 本機連接電視後,才看得見此功能。
在播放清單增加曲目:
1
在停止/播放模式時,按 或 按鈕選擇所需的曲目。
2 按 ANGLE 按鈕將所需的曲目增加至播放清單。
• 電視在畫面選單顯示 「Add to playlist」。
3 重複步驟1-2新增更多曲目至播放清單。
X-MF3DVD-I_zhtw_new.fm
Zhtw-30
20099 28

MP3/WMA 及 JPEG 光碟操作 (續上頁)
取消重複播放
關於資料夾播放順序:
MP3/WMA 選單螢幕開啟後,選單螢幕會開啟,曲目會按
下列順序播放。在下列範例中,將以
ROOT
1
2
部分光碟上的曲目無法依序播放。
註:
• 若檔案及資料夾太多,將花費一些時間讀取光碟。
• 最多可讀取512 個有非播放性檔案的資料夾及含資料夾
的檔案。
重複播放 (重複播放)
在 DivX 選單螢幕上重複播放:
播放光碟時,按
每次按下按鈕時,重複播放模式都會依下列順序變更。
電視螢幕
在 JPEG 選單螢幕上重複播放:
狀況 A
可播放光碟中的所有影像。完成播放光碟中的所有影像後,
將停止播放。
若要執行重複播放,在停止模式中按
鈕。每次按下按鈕時,播放模式都會依下列順序變更:
電視螢幕
狀況 B
選擇光碟中的各資料夾後,即可播放影像。在主選單螢幕
時,請按
夾 (資料夾開啟)。在目前播放資料夾中完成播放所有影
像後,將停止播放。
若要執行重複播放,在停止模式中按
鈕。每次按下按鈕時,播放模式都會依下列順序變更:
RANDOM/REPEAT 按鈕。
不重複目前的播放曲目。
重複目前的播放曲目。
重複所有曲目。
取消重複播放。
隨機重複播放曲目 (影像)。
不重複目前的播放曲目 (影像)。
重複目前的播放曲目 (影像)。
在光碟中重複播放所有曲目 (影像)。
取消重複播放。
MEMORY 按鈕。電視螢幕上將可檢視所有資料
1至11的順序執行播放。
3
4
5
6
7
8
9
10
11
RANDOM/REPEAT
RANDOM/REPEAT
資料夾
曲目
按
按
電視螢幕
註:
• 若要檢視檔案清單,在主選單螢幕上按 MEMORY 按鈕。
• 若要在播放時返回主選單螢幕,請按 MENU/PBC 按鈕。
在 MP3/WMA 選單螢幕上重複播放:
狀況 A
可播放光碟中的所有歌曲。完成播放光碟中的所有歌曲後,
將停止播放。
若要執行重複播放,在停止模式中按
鈕。每次按下按鈕時,播放模式都會依下列順序變更:
電視螢幕
狀況 B
選擇光碟中的各資料夾後,即可播放歌曲。在主選單螢幕
時,請按
夾 (資料夾開啟)。在目前播放資料夾中完成播放所有歌
曲後,將停止播放。
若要執行重複播放,在停止模式中按
鈕。每次按下按鈕時,播放模式都會依下列順序變更:
電視螢幕
註:
若要檢視檔案清單,在主選單螢幕上按
注意:
執行重複或隨機播放後,請確定按下 按鈕。
繼續播放。
隨機重複播放曲目 (影像)。
不重複目前的播放曲目 (影像)。
重複目前的播放曲目 (影像)。
在目前播放的資料夾中重複播放所有
曲目 (影像)。
。
RANDOM/REPEAT
隨機重複播放曲目 (歌曲)。
不重複目前的播放曲目 (歌曲)。
重複目前的播放曲目 (歌曲)。
在光碟中重複播放所有曲目 (歌曲)。
取消重複播放。
MEMORY 按鈕。電視螢幕上將可檢視所有資料
RANDOM/REPEAT
隨機重複播放曲目 (歌曲)。
不重複目前的播放曲目 (歌曲)。
重複目前的播放曲目 (歌曲)。
在目前播放的資料夾中重複播放所有
曲目 (歌曲)。
取消重複播放。
MEMORY 按鈕。
否則,光碟將
按
按
1
2
3
4
5
6
7
X-MF3DVD-I_zhtw_new.fm
8
Zhtw-31
20099 28

MP3/WMA 及 JPEG 光碟操作 (續上頁)
旋轉畫面
影像可旋轉。
播放時,按 或 按鈕。
影像旋轉如下所示。
按鈕:
按鈕:
同時播放 MP3 及 JPEG
聆聽
1
2 按 MENU/PBC 按鈕返回主選單。
3 使用 或 按鈕選擇 JPEG 資料夾。
4 選擇要觀看的影像或畫面。
5 按 MENU 按鈕。
註:
• 播放影像時,無法選擇 MP3/WMA 資料夾或檔案。
• JPEG 最大解析度為 10Mbytes 檔案大小。
隨機播放 (限遙控器)
光碟上的曲目/影像可自動以隨機順序播放。
若要隨機播放所有曲目/影像:
在停止模式時,按
「
若要取消隨機播放,重複按
「
註:
• 在隨機播放中,本機將自動選擇及播放曲目。(無法選
• 在隨機播放期間,無法使用重複功能。
90° 順時針旋轉。
90° 逆時針旋轉。
MP3 音樂的同時,可享受觀看 JPEG 檔案的影像。
播放所需歌曲。
RANDOM/REPEAT
按鈕選擇
RANDOM」,然後按 按鈕播放。
RANDOM/REPEAT
REPEAT OFF」 / 「FOLDER」出現。
擇曲目順序。)
按鈕直到
註:
()
在資料夾模式時,只能在所選資料夾中的檔案上使用播
放模式。
註:
• 本機僅支援 「MPEG-1 Audio Layer-3」格式。(取樣
• 「MPEG-2 Audio Layer-3」、「MPEG-2.5 Audio
• MP3 檔案的播放順序有時可能不同,視下載檔案時寫入
• MP3 支援的位元率為 32 kbps 至320 kbps,WMA 則為
• 若為 MP3/WMA 檔案,請加上 「.MP3」「.WMA」副
• 播放不同位元率的檔案時,顯示播放時間可能不會正確
32 kHz、44.1 kHz、48 kHz)。
頻率為
」及 MP1、MP2 格式皆不支援。
Layer-3
的軟體而定。
64 kbps 至 160 kbps。
檔名。若無
MP3/WMA 副檔名,則無法播放檔案。
顯示。
• 無法播放受版權保護的 WMA 檔案。
X-MF3DVD-I_zhtw_new.fm
Zhtw-32
20099 28

MP3/WMA 資料夾模式 (限 MP3/WMA 檔案)
播放 MP3/WMA (Windows Media Audio)檔案
網際網路上有許多可供下載
Media Audio
下載音樂檔案的方式。
將音樂檔案燒錄至
音樂檔案。
• 下載的歌曲/檔案僅供個人使用。在沒有所有人的允許
下使用歌曲屬違法行為。
關於資料夾播放順序
若在多個資料夾中錄製
動為資料夾設定。
這些資料夾可透過遙控器上的 或 按鈕選擇。若所選的
資料夾中有不支援的檔案格式,則會跳過該資料夾並選擇
下一個資料夾。
範例:若
定資料夾編號。
根資料夾設為資料夾 1。
1
)音樂檔案的音樂網站。請依網站說明瞭解
MP3/WMA 格式檔案錄製為以下數字,該如何設
MP3/WMA (Windows
CD-R/RW 光碟後,即可播放這些下載的
MP3/WMA 檔案,資料夾編號將自
2 至於根資料夾中的資料夾 (資料夾 A 及資料夾 B), 可
更輕易的在光碟上錄製的資料夾將能設為資料夾
3。
料夾
3 至於資料夾 A 中的資料夾(資料夾 C 及資料夾 D),可
更輕易的在光碟上錄製的資料夾將能設為資料夾
5。
料夾
2 及資
4 及資
4 資料夾 D 中的資料夾 E 可設為資料夾 6。
• 在光碟上錄製的資料夾及檔案順序資訊視寫入軟體而
定。有可能出現本機播放的檔案不按照預期的播放順序
播放。
• 至於 CD MP3/WMA、擁有非播放性檔案的 255 個資料
夾及包含資料夾的檔案,則可進行讀取。
ROOT
(FOLDER 1)
播放 MP3/WMA 光碟的程序
播放
1
FOLDER A
(FOLDER 2)
FOLDER B
(FOLDER 3)
CD-R/RW。
載入 MP3/WMA 光碟後,本機顯示幕將在停止模式中
顯示曲目的總數。
FOLDER C
(FOLDER 4)
FOLDER D
(FOLDER 5)
FILE 1
FILE 2
FILE 3
FILE 4
FILE 5
FILE 6
FILE 7
FILE 8
FOLDER E
(FOLDER 6)
FILE 9
FILE 10
2 按遙控器上的 或 按鈕選擇所需播放資料夾及曲目。
• 若要配合資料夾模式開始播放,按 MEMORY 按鈕可
• 使用遙控器上的 / 按鈕上移及下移資料夾∕檔案
3
按
檢視資料夾模式。
清單。
使用
鈕返回父系資料夾。 也可前往上方的 「..」
資料夾,然後按
或 MENU
MENU 來完成。
按鈕後,隨即開始播放。
1
2
3
4
曲目總數
X-MF3DVD-I_zhtw_new.fm
5
6
7
8
Zhtw-33
20099 28

聆聽 USB 大量儲存裝置 /MP3 播放器
DIRECT
STANDBY/ON
OPEN / CLOSE
TUNING
PRESET
X.BOOM
EQUALIZER
VOLUME
MEMORY
TOP
MENU
SUB TITLE
DIGEST
TAG
MENU/
PBC
RETURN
CLOCK /
TIMER
SLEEP
DISPLAY(TV)
MUTE
AUDIO
TUNING
PRESET
SETUP
MENU
1 2 3
4 5 6
7 8 9
0
10
ZOOM
RANDOM
REPEAT
USB/
DVD
iPod
TUNER
AUX
FM/AM
ANGLE
SLOW
STEP
A-B
MENU
STANDBY/
ON
FUNCTION
STANDBY/ON
DIRECT
TUNING
PRESET
DISPLAY(TV)
SETUP
X.BOOM
EQUALIZER
VOLUME
MEMORY
TOP
MENU
MENU
SUB TITLE
DIGEST
TAG
FM/AM
iPod
TUNER
USB/
DVD
ZOOM
ANGLE
SLOW
STE
註:
此
USB 大量儲存裝置或 MP3 播放器不相容於 MTP 及 AAC
檔案系統。
在關閉資料夾模式時播放 USB/MP3 播放器
1
按遙控器上的 USB/DVD 按鈕或重複按主機上的
FUNCTION 按鈕,以選擇 USB 功能。連接本機上有
MP3/WMA 格式檔案的 USB 記憶裝置。連接 USB 記憶
裝置與主機時,將顯示裝置資訊。
2 按 或 按鈕選擇要播放的檔案。
3 按 按鈕。隨即開始播放。
• 若在 USB 記憶裝置中已錄製標題、作者及專輯名稱,
則會顯示。
• 按 SUB TITLE/DIGEST/TAG 按鈕可變更顯示內容。
註:
若要暫停播放:
按 按鈕。
自動關閉電源功能:
在
USB 操作停止模式中,經過 15 分鐘無任何動作後,主
機會進入待機模式。
OPEN / CLOSE
TUNING
PRESET
CLOCK /
RANDOM
OPEN/
CLOSE
10
MUTE
AUDIO
TIMER
SLEEP
MENU/
PBC
RETURN
AUX
REPEAT
A-B
MENU
在開啟資料夾模式時播放 USB/MP3 播放器
按遙控器上的 USB/DVD 按鈕或重複按主機上的
1
FUNCTION 按鈕,以選擇 USB 功能。連接本機上有
MP3/WMA 格式檔案的 USB 記憶裝置。連接 USB 記憶
裝置與主機時,將顯示裝置資訊。
2 按 MEMORY 按鈕可檢視 FOLDER 模式,而按 或
按鈕可選擇所需的播放資料夾。若要在開啟資料夾模式
時開始播放,請前往步驟
按 或
按鈕選擇其他資料夾。
4。若要變更播放資料夾,請
3 按 或 按鈕選擇要播放的檔案。
4 按 按鈕。隨即開始播放。
• 若在 USB 記憶裝置中已錄製標題、作者及專輯名稱,
則會顯示。
• 按 SUB TITLE/DIGEST/TAG 按鈕可變更顯示內容。
移除 USB 記憶裝置
按遙控器上的 按鈕或按住主機上的 按鈕可停止
1
播放。
2 中斷 USB 記憶裝置與 USB 端子的連接。
註:
• 先鋒對於 USB 記憶裝置連接音訊系統時的資料遺失,一
概不予負責。
• 連接至 USB端子後,即可播放以MP3 及WMA 格式壓縮
的檔案。
• 此 USB 記憶格式支援 FAT 16 或 FAT 32。
• 先鋒無法擔保所有USB記憶裝置都能在此音訊系統上運
作。
• 在本系統中不建議使用 USB 纜線連接 USB 記憶裝置。使
用
USB 纜線會影響本音訊系統的效能。
• 此 USB 記憶裝置無法透過集線器操作。
• 本機中的USB 端子非用於PC連線,但可用於搭配USB記
憶裝置的音樂串流。
• 透過 USB 端子無法播放外接的 HDD 儲存裝置。
• 若 USB 記憶裝置中的資料過於龐大,則讀取資料可能會
花費更長的時間。
Zhtw-34
X-MF3DVD-I_zhtw_new.fm
20099 28

聆聽 USB 大量儲存裝置 /MP3 播放器
(續上頁)
註:
• 本產品可播放 WMA 及 MP3 檔案。還可自動偵測正在播
放的檔案類型。若在本產品上播放非播放性的檔案。將
自動跳過該檔案。此動作將花費數秒鐘的時間。若出現
無法辨認的檔案而導致顯示幕上出現異常指示,請先關
閉本機後再重新開啟。
• 本產品與 USB 大量儲存裝置及 MP3 播放器有關。然而,
因部分裝置各種預料外的緣故,本產品需面對部分不正
常的情形。若出現此情況,請先關閉本機後再重新開啟。
• USB連接埠僅適用於直接連線無其他纜線的USB記憶裝
置。
進階 USB 播放
進階 USB 播放 (續上頁)
註:
若要檢視檔案清單,在主選單螢幕上按
注意:
執行重複或隨機播放後,請確定按下 按鈕。
繼續播放。
隨機播放
曲目可依隨機順序自動播放。
若要隨機播放所有曲目:
重複按遙控器上的
RANDOM」圖示亮起。
「
若要取消隨機播放:
RANDOM/REPEAT 按鈕。「RANDOM」就會消失。
重複按
RANDOM/REPEAT 按鈕,直到
MEMORY 按鈕。
否則,光碟將
重複播放
重複播放可播放單一曲目、所有曲目或連續編程順序。
在 MP3/WMA 選單螢幕上重複播放:
狀況 A
USB 中的所有歌曲。完成播放 USB 中的所有歌曲
可播放
後,將停止播放。
若要執行重複播放,在停止模式中按
鈕。每次按下按鈕時,播放模式都會依下列順序變更:
電視螢幕
狀況 B
USB 中的各資料夾後,即可播放歌曲。在主選單螢幕
選擇
時,請按
夾 (資料夾開啟)。在目前播放資料夾中完成播放所有歌
曲後,將停止播放。
若要執行重複播放,在停止模式中按
鈕。每次按下按鈕時,播放模式都會依下列順序變更:
電視螢幕
隨機重複播放曲目 (歌曲)。
不重複目前的播放曲目 (歌曲)。
重複目前的播放曲目 (歌曲)。
USB 中重複播放所有曲目 (歌曲)。
在
取消重複播放。
MEMORY 按鈕。電視螢幕上將可檢視所有資料
隨機重複播放曲目 (歌曲)。
不重複目前的播放曲目 (歌曲)。
重複目前的播放曲目 (歌曲)。
在目前播放的資料夾中重複播放所有
曲目 (歌曲)。
取消重複播放。
RANDOM/REPEAT
RANDOM/REPEAT
隨機播放注意事項:
• 在隨機播放中,本機將自動選擇及播放曲目。(無法選
擇曲目順序。)
• 在資料夾模式開啟時,只能在所選資料夾中的檔案上使
用播放模式。
註:
• 本機僅支援 「MPEG-1 Audio Layer-3」格式。(取樣
頻率為
• MP3 檔案的播放順序可能會有不同,視下載檔案時寫入
按
• MP3 支援的位元率為 32 kbps 至320 kbps,WMA 則為
• 若為 MP3/WMA 檔案,請加上 「.MP3」「.WMA」副
• 本機不支援播放清單。
• 本機可顯示最多 32 個字元的資料夾名稱或檔案名稱。
• MP3/WMA 檔案的最大總數為 1024。資料夾的最大總
• 含非播放性的資料夾也會計算。
• 播放不同位元率的檔案時,顯示播放時間可能不會正確
• 支援 ID3TAG 資訊僅有 TITLE、ARTIST 和 ALBUM。在 檔
• WMA中繼標籤也支援WMA檔案中錄製的標題、作者及
按
32 kHz、44.1 kHz、48 kHz)
的軟體而定。
64 kbps 至 160 kbps。
檔名。若無 MP3/WMA 副檔名,則無法播放檔案。
數為
255,包含根目錄。
顯示。
案播放或暫停模式期間按
可顯示標題名稱、作者名稱及專輯名稱。
專輯名稱。無法播放受版權保護的 WMA 檔案。
SUBTITLE/DIGEST/TAG 按鈕
1
2
3
4
5
6
X-MF3DVD-I_zhtw_new.fm
7
8
Zhtw-35
20099 28

聆聽廣播
DIRECT
STANDBY/ON
OPEN / CLOSE
TUNING
PRESET
X.BOOM
EQUALIZER
VOLUME
MEMORY
TOP
MENU
SUB TITLE
DIGEST
TAG
MENU/
PBC
RETURN
CLOCK /
TIMER
SLEEP
DISPLAY(TV)
MUTE
AUDIO
TUNING
PRESET
SETUP
MENU
1 2 3
4 5 6
7 8 9
0
10
ZOOM
RANDOM
REPEAT
USB/
DVD
iPod
TUNER
AUX
FM/AM
ANGLE
STANDBY/ON
TUNING
MEMORY
TUNING
PRESET
PRESET
STANDBY/
STANDBY/ON
TUNING
PRESET
MEMORY
ON
FUNCTION
PHONES
OPEN
STANDBY/ON
DIRECT
TUNING
PRESET
DISPLAY(TV)
SETUP
X.BOOM
EQUALIZER
VOLUME
MEMORY
TOP
MENU
MENU
SUB TITLE
DIGEST
TAG
FM/AM
iPod
TUNER
USB/
DVD
ZOOM
ANGLE
OPEN / CLOSE
TUNING
PRESET
OPEN/
CLOSE
10
MUTE
AUDIO
CLOCK /
TIMER
SLEEP
MENU/
PBC
RETURN
AUX
RANDOM
REPEAT
TUNING
PRESET
調頻
按 STANDBY/ON 按鈕以開啟電源。
1
2 重複按主機上的 FUNCTION 按鈕或按遙控器上的
TUNER/BAND 按鈕選擇 TUNER 模式。
3 按 TUNING (– 或 +)按鈕調頻至所需的電台。
手動調頻:
視需要按數次
電台。
自動調頻:
TUNING (– 或 +) 按鈕超過 0.5 秒後,將開始自動
按
掃描,且調諧器將停止在第一個可收到的廣播電台。
註:
• 出現無線電干擾時,自動掃描調頻可能會自動停在該頻
段。
• 自動掃描調頻將跳過微弱訊號的電台。
• 若要停止自動調頻,再按一次 TUNING (– 或 +) 按鈕。
• 到達 87.50 MHz 或 108.00 MHz 時,調頻將停止。
若要接收 FM 立體聲廣播節目:
按
FM/AM 按鈕選擇 FM 單聲道、FM 立體聲或 AM。
• FM 廣播為立體聲時,「」便會出現。
• 若 FM 接收訊號微弱,按 FM/AM 按鈕可讓「ST」指 示 燈
消失。接收效果會變為單聲道,且聲音更清晰。
TUNING (– 或 +) 按鈕,以調頻至所需
FM 立體聲模式指示燈
記憶電台
按一下按鈕即可儲存及叫用最多
的電台。(
1
PRESET (– 或 +) )
在 「調頻」中執行步驟 1 - 3。
40 個 FM 頻段及AM 頻段
2 按 MEMORY 按鈕進入預設調頻儲存模式。
3 在 10 秒內按直接搜尋按鈕可選擇預設頻道號碼。
使用直接搜尋按鈕輸入頻道號碼。
若要選擇頻道
若要選擇頻道
1:按 「0」及 「1」。
12:按 「1」及 「2」。
4 按 MEMORY 按鈕可記憶電台。「MEMORY」指示燈消
失後,將記憶預設值。
若在記憶電台前,「
請往前重複步驟
MEMORY」及預設號碼指示燈消失,
2 的操作。
5 重複步驟 1 - 4 以設定其他電台或變更預設電台。
記憶體中存有新電台時,將會清除之前記憶的電台的預
設頻道號碼。
註:
若發生停電或
電台約數小時。
叫用記憶電台
按
PRESET (– 或 +)按鈕低於 0.5 秒內可選擇所需的電台。
AC 電源線斷線,備份功能可保護已記憶的
FM 立體聲接收指示燈
Zhtw-36
X-MF3DVD-I_zhtw_new.fm
20099 28

定時器及睡眠操作 (限遙控器)
CLOCK /
TIMER
DIRECT
STANDBY/ON
OPEN / CLOSE
TUNING
PRESET
X.BOOM
EQUALIZER
VOLUME
MEMORY
TOP
MENU
SUB TITLE
DIGEST
TAG
MENU/
PBC
RETURN
CLOCK /
TIMER
SLEEP
DISPLAY(TV)
MUTE
AUDIO
TUNING
PRESET
SETUP
MENU
1 2 3
4 5 6
7 8 9
0
10
ZOOM
RANDOM
REPEAT
USB/
DVD
iPod
TUNER
AUX
FM/AM
ANGLE
SLOW
STEP
A-B
STANDBY/ON
STANDBY/ON
STANDBY/ON
OPEN / CLOSE
DIRECT
10
TUNING
TUNING
PRESET
PRESET
DISPLAY(TV)
MUTE
SETUP
AUDIO
X.BOOM
CLOCK /
EQUALIZER
VOLUME
TIMER
MEMORY
SLEEP
TOP
MENU/
MENU
PBC
MENU
SUB TITLE
DIGEST
RETURN
TAG
FM/AM
iPod
TUNER
AUX
USB/
DVD
ZOOM
RANDOM
ANGLE
REPEAT
SLOW
STE
A-B
定時器播放:
在預設的時間點會開啟及播放所需的來源(
USB、iPod)。
CLOCK /
TIMER
DISC、調諧器、
定時器播放
設定定時器前:
檢查時鐘是否設為正確的時間 (請參閱第 18 頁)。
1
若尚未設定,則無法使用定時器功能。
2 在定時器播放方面,可載入光碟播放。
1 按 STANDBY/ON 按鈕以開啟電源。
2 按 CLOCK/TIMER 按鈕約 2 秒鐘。
3 在 10 秒內按 CLOCK/TIMER 按鈕。
4 按 或 按鈕設定小時,然後按 CLOCK/TIMER 按
鈕。
5 按 或 按鈕設定分鐘,然後按 CLOCK/TIMER 按
鈕。
6 使用 或 按鈕切換輸入以選擇 「TMR-OFF」, 然
CLOCK/TIMER 按鈕。
後按
7 按 或 按鈕設定小時,然後按 CLOCK/TIMER 按
鈕。
8 按 或 按鈕設定分鐘,然後按 CLOCK/TIMER 按
鈕。
1
2
9 若要選擇定時器播放來源,使用 或 按鈕切換輸入
以選擇 「
SOURCE」,然後按 CLOCK/TIMER 按鈕。
3
4
5
6
7
8
Zhtw-37
X-MF3DVD-I_zhtw_new.fm
20099 28

定時器及睡眠操作 (限遙控器)(續上頁)
10 按 或 按鈕選擇喚醒來源(DISC、USB、調 諧 器、
iPod),然後按 CLOCK/TIMER 按鈕確認。
11 若選擇 「TUNER」, 按 CLOCK/TIMER 按鈕進入預設
選擇模式。
12 若要選擇預設頻道號碼,先按 或 按鈕,然後按
CLOCK/TIMER 按鈕。
13「 」指示燈亮起,且本機的定時器播放準備就緒。
14 按 STANDBY/ON 按鈕以進入電源待機模式。按
CLOCK/TIMER 按鈕確認定時器設定。
15 到達預設時間後,即開始播放。「 」指示燈會閃爍,
表示定時器在播放。音量會逐漸增加,直到達到最近
的音量。
16 到達定時器結束時間後,系統將自動進入電源待機模
式。
檢查定時器設定:
1 重複按 CLOCK/TIMER 按鈕可檢視下列項目:
睡眠操作
CD 及 USB 都可以自動關閉。
廣播、
1
播放所需的聲音來源。
2 按 SLEEP 按鈕。
3 在 10 秒內重複按 SLEEP 按鈕以選擇時間。
10 20 30 ... 80 90
4 「SLEEP」將出現。
5 經過預設時間後,本機將自動進入電源待機模式。
若要確認剩餘睡眠時間:
1 顯示 「SLEEP」時,按 SLEEP 按鈕。剩餘時間會顯示約
10 秒鐘。
若要取消睡眠操作:
SLEEP」時按 STANDBY/ON 按鈕。若要取消睡眠操
顯示 「
作而不設定本機為待機模式,請繼續如下執行。
1 顯示 「SLEEP」時,按 SLEEP 按鈕。
2 在 10 秒內重複按 SLEEP 按鈕以選擇 「SLEEP 00」。
一起使用定時器和睡眠操作
睡眠及定時器播放:
例如,可於臨睡前聆聽廣播,並在隔天早晨由
1
設定睡眠時間 (請參閱以上說明,步驟 1 - 5)。
2 設定睡眠定時器時,請設定定時器播放(步驟 2 - 10,
37 - 38 頁)。
第
ᆄએ೪ۢ
ۢክܺ೪ۢ
CD 喚醒。
๗
取消定時器設定:
按
SLEEP 按鈕約 2 秒。「 」指示燈消失且顯示幕顯示
「
TMR-OFF」。
重複使用記憶定時器設定:
一輸入設定後將記憶定時器設定。若要重複使用相同的設
SLEEP 按鈕約 2 秒。「 」指示燈亮起且顯示幕顯
定,按
示「
TMR-ON」。
註:
• 選擇播放來源後,按 CLOCK/TIMER 按鈕確認時,將出
現「
SOURCE」並閃爍約 2 秒,然後變更為最近使用的
功能。
• 到達預設的時間後,若無選擇的播放來源,將以目前的
設定開始播放。
• 在定時器設定期間無法預先設定音量。
Zhtw-38
X-MF3DVD-I_zhtw_new.fm
ϸយ
ᆄએᐈձՍЦ
ܛሰ10 - 90
ۢክܺۗ
20099 28

強化系統
故障排除圖表 (續上頁)
耳機
• 插入或拔除耳機前,請降低音量。
• 請確定耳機擁有 3.5 mm 直徑的插頭,以及介於 16 Ω 和
50 Ω 間的阻抗。建議阻抗為 32 Ω。
• 插入耳機將自動中斷揚聲器的連接。請使用 VOLUME 控
制調整音量。
故障排除圖表
許多潛在的問題都可以透過使用者自行解決,而無須要求
維修技師協助。
若本產品有異狀,在要求授權的先鋒經銷商或維修中心前
請核對下列項目。
一般
問題 可能原因
• 時鐘未設為正
確時間。
• 按下按鈕後,
本機無反應。
• 聽不見聲音。 • 音量是否設為 「MIN」?
CD 播放器
問題 可能原因
• 播放尚未
開始。
• 播放途中停止
或未正常執
行。
• 跳過播放聲音
或在播放曲目
中停止。
MP3/WMA/JPEG 檔案
問題 可能原因
• 播放尚未開始。• 載入的光碟是否位置顛倒?
• 部分檔案無法
播放。
• 讀取時間過長。• 光碟是否包含過多資料夾或檔案?
• 是否發生停電?重設時鐘。
• 將本機設為電源待機模式,然後再
重新開啟。
• 若本機仍故障,請重設。
• 是否已連接耳機?
• 揚聲器的電線是否中斷連接?
• 載入的光碟是否位置顛倒?
• 光碟是否符合標準?
• 光碟是否歪曲或刮傷?
• 本機位置是否有過多震動?
• 光碟是否非常骯髒?
• 本機內部是否出現冷凝?
• 本機是否支援檔案?
• 本機是否支援檔案?
• 是否為錯誤的 MP3 檔案?
• JPEG 檔案大小是否超過
10Mbytes?
• 檔案是否過大?
• 光碟是否歪曲或刮傷?
USB
問題 可能原因
• 偵測不到裝置。 • 是否有可用的 MP3/WMA 檔
• 播放尚未開始。 • 是否為受版權保護的 WMA 檔
• 時間顯示錯誤。
• 檔案名稱顯示
錯誤。
iPod
案?
• 裝置是否正確連接?
• 是否為 MTP 裝置?
• 該裝置是否只包含 AAC
檔案?
案?
• 是否為錯誤的 MP3 檔案?
• 是否播放變動位元率的檔案?
• 檔案名稱是否為中文或日文字
元?
問題 可能原因
• 未發出聲音。電視
/螢幕上沒有影
像。
• iPod 未充電。 • 使用錯誤的 iPod 轉接器。
遙控器
• iPod 未播放。
• iPod 與本機的連接不正確。
• 是否插入本機的 AC 電源線?
• 視訊纜線連接不正確。(僅支
援 “視頻電視 "連線。不支 援
「
S-Video」或“色差視頻"連
線。)
• iPod 上的“電視輸出"設定未
正確設定。
• 電視/螢幕的輸入選擇未正確
設定。
• iPod 未與 iPod 接頭緊密接合。
• 使用第 3 代的 iPod。
問題 可能原因
• 遙控器無反應。 • 是否插入本機的AC電源線?
• 電池極性是否正確?
• 電池電量是否耗盡?
• 距離或角度是否不正確?
• 遙控感應器是否接收過強亮
光?
1
2
3
4
5
6
7
X-MF3DVD-I_zhtw_new.fm
8
Zhtw-39
20099 28

故障排除圖表 (續上頁)
調諧器
問題 可能原因
• 廣播持續發出異常
噪音。
• 本機是否放置在電視或電腦
附近?
• FM天線或AM 環形天線的擺
設是否正確?若天線放置在
附近,請將天線遠離
線。
AC 電源
CD 照護
CD 不容易損壞,不過由於光碟表面上的累積污垢,可能會
發生音軌錯誤。請遵循以下指南以獲得收藏 CD 及播放器
的最大樂趣。
• 請勿在光碟的正反面書寫,尤其是讀取資料的無標籤面。
請勿在此表面上做記號。
• 盡量讓光碟遠離陽光直射、熱及過重濕氣。
• 請務必由光碟邊緣拿取 CD。CD 上的指紋、污垢或水都
可能會造成噪音或音軌錯誤。若
放,請以柔軟乾布自中心沿圓周擦拭。
CD 髒污或無法正常播
冷凝
溫度突然變更、在極端潮濕的環境中儲存或操作都可能會
造成機櫃內部或遙控發射器上發生冷凝 (
CD 讀取頭等)。
冷凝會造成本機故障。若發生冷凝,讓本機在無光碟的情
況下開啟電源,直到可正常播放為止 (約
1 小時)。操作
本機前,以軟布拭除發射器上的所有冷凝。
若發生問題
本產品遭受強烈的外力干擾 (機械衝擊、過量靜電、因閃
電導致的電壓異常等)時,或以錯誤的方式操作,皆可能
會故障。
若發生此類問題,請按下列操作:
1 將本機設為待機模式,然後再重新開啟電源。
2 若本機未還原回之前的操作,請拔下本機插頭後再插上,
然後開啟電源。
註:
若以上操作皆無法還原本機,請重設本機以清除所有記憶。
搬運本機前
自本機中取出
機設為電源待機模式。攜帶內含光碟的本機移動可能會損
CD。確定光碟托盤中沒有 CD。接著,將本
害本機。
清除所有記憶 (重設)
1 按下 STANDBY/ON 按鍵可進入電源待機模式。
2 按下 OPEN/CLOSE 按鍵時,按住主機上的 STANDBY/
按鍵直到 「RESET」出現。
ON
OPEN/
CLOSE
STANDBY/
ON
保養
清潔機櫃
定時以軟布沾稀釋過的肥皂水擦拭機櫃,然後再以乾布擦
乾。
注意:
• 請勿使用化學藥劑清潔 (汽油、稀釋溶劑等)。這些藥
劑可能會破壞機櫃。
• 請勿在本機內部使用油類物質。可能會因此造成故障。
注意:
• 本操作會刪除所有記憶體中儲存的資料,包括時鐘、定
時器、設定、調諧器預設值及
CD 程式。
Zhtw-40
X-MF3DVD-I_zhtw_new.fm
20099 28

規格
基於本公司一貫不斷改進的政策,為改良產品,先鋒保留變
更設計與規格的權利,恕不事先通知。效能規格數字屬生產
裝置的常態值。個別裝置的數值可能會與這些數值產生部分
誤差。
一般
電源 AC 220 V 至 240 V ~,50 Hz/60 Hz
耗電量 電源開啟:35 W
電源待機: 0. 6 W *
尺寸 寬度: 155 mm
高度: 178 mm
深度: 243 mm
重量
( * )
此項耗電量數值取自主機為待機模式且無 iPod 充電時
的表現。
擴大器
輸出功率 MPO: 24 W (12 W + 12 W)
輸出端子 揚聲器:
DVD 播放器
訊號系統 PAL/NTSC 色彩
支援光碟類型
視訊訊號 水平解析度:
音訊訊號 頻率特性 線性 PCM DVD:
調諧器
頻率範圍 FM:87.5 MHz 至 108 MHz
2 kg
(
10 % T.H.D.)
RMS: 24 W (12 W + 12 W)
(
10 % T.H.D.)
6 Ω
16 - 50 Ω (建議:32 Ω)
耳機
DVD (與本機後側的區碼相同)、
SVCD、VCD、音 訊 CD、CD-R、CD-RW、
JPEG、DivX (版本 3.0 ~ 6.0)
500 條
掃描線噪訊比:
70 dB
20 Hz 至 20 kHz
(取樣率:48 kHz)
20 Hz 至 20 kHz
(取樣率:96 kHz)
CD:20 Hz 至 20 kHz
噪訊比 CD:94 dB (1 kHz)
動態範圍 線性
PCM DVD:
95 dB
CD:94 dB
總諧波失真率 0.01% 最大
AM:522 kHz
至 1620 kHz
USB
USB 主機介面
支援檔案
支援位元率
其他
支援檔案系統
揚聲器
類型 雙向雙揚聲器系統
• 遵守 USB 1.1(全速)/2.0 大量儲
存等級。
• 僅支援 BULK 及 CBI 通訊協定。
• MPEG 1 Layer 3
• WMA (非 DRM)
• MP3 (32 kbps 至 320 kbps)
• WMA (64 kbps 至 160 kbps)
• MP3/WMA 檔案的最大總數
為
1024。
• 資料夾最大總數為 255,包含根目
錄。
• 支援 ID3TAG 資訊僅有 TITLE、
ARTIST 和 ALBUM。
• 僅支援 ID3TAG 版本 1。
• 支援 Microsoft Windows/DOS/
FAT 12/FAT 16/FAT 32 USB
• 2 kbyte 磁區區塊長度。
5 cm 高頻揚聲器
10 cm 低頻揚聲器
最大輸入功率
額定輸入功率
阻抗
尺寸 寬度:
重量 每部 1.98 kg
24 W
12 W
6 Ω
132 mm
高度: 260 mm
深度: 171.5 mm
裝置。
1
2
3
4
5
6
X-MF3DVD-I_zhtw_new.fm
7
8
Zhtw-41
20099 28

Zhtw-42
X-MF3DVD-I_zhtw_new.fm
20099 28

Zhtw-43
1
2
3
4
5
6
7
8
X-MF3DVD-I_zhtw_new.fm
20099 28

Published by Pioneer Corporation.
Copyright © 2009 Pioneer Corporation.
All rights reserved.
PIONEER CORPORATION
4-1, Meguro 1-Chome, Meguro-ku, Tokyo 153-8654, Japan
PIONEER ELECTRONICS (USA) INC.
P.O. BOX 1540, Long Beach, California 90801-1540, U.S.A. TEL: (800) 421-1404
PIONEER ELECTRONICS OF CANADA, INC.
300 Allstate Parkway, Markham, Ontario L3R 0P2, Canada TEL: 1-877-283-5901, 905-479-4411
PIONEER EUROPE NV
Haven 1087, Keetberglaan 1, B-9120 Melsele, Belgium TEL: 03/570.05.11
PIONEER ELECTRONICS ASIACENTRE PTE. LTD.
253 Alexandra Road, #04-01, Singapore 159936 TEL: 65-6472-7555
PIONEER ELECTRONICS AUSTRALIA PTY. LTD.
178-184 Boundary Road, Braeside, Victoria 3195, Australia, TEL: (03) 9586-6300
PIONEER ELECTRONICS DE MEXICO S.A. DE C.V.
Blvd.Manuel Avila Camacho 138 10 piso Col.Lomas de Chapultepec, Mexico,D.F. 11000 TEL: 55-9178-4270
Printed in China
K002_B_En
Zhtw-44
X-MF3DVD-I_zhtw_new.fm
20099 28
 Loading...