

Page 1

VSX-924-K/-S
AV Receiver
Amplificateur AV
AV Receiver
Sintoamplificatore AV
AV Receiver
Receptor AV
AV-ресивер
Quick Start Guide
Guide rapide
Kurzanleitung
Guida di avvio rapido
Snelstartgids
Guía de inicio rápido
Краткое руководство пользователя
Thank you for buying this Pioneer product. This Quick Start
Guide includes instructions for basic connections and operations
to allow simple use of the receiver. For detailed descriptions of
the receiver, see the “Operating Instructions” provided on the
included CD-ROM ( ).
Merci pour l’achat de ce produit Pioneer. Ce guide rapide
contient les instructions relatives aux raccordements et
opérations de base permettant une utilisation simple de ce
récepteur. Pour des descriptions plus détaillées du récepteur,
référez-vous au “Mode d’emploi” sur le CD-ROM ( ) fourni.
Vielen Dank, dass Sie sich für dieses Pioneer-Produkt entschieden
haben. Die Kurzanleitung enthält Anweisungen für grundlegende
Verbindungen und Bedienvorgänge, um eine einfache Bedienung
des Receivers zu ermöglichen. Detaillierte Beschreibungen des
Receivers finden Sie in der „Bedienungsanleitung“ auf der
mitgelieferten CD-ROM ( ).
Vi ringraziamo per avere acquistato questo prodotto Pioneer.
Questa Guida di avvio rapido comprende istruzioni per i
collegamenti fondamentali e per le operazioni essenziali di
questo ricevitore. Per una descrizione dettagliata del ricevitore,
vedere le “Istruzioni per l’uso” contenute nel CD-ROM ( )
accluso.
Hartelijk dank voor de aanschaf van dit Pioneer product. In deze
snelstartgids vindt u de instructies voor de basisaansluitingen en
de basisbediening voor een eenvoudig gebruik van de receiver.
Voor meer gedetailleerde informatie wordt u verwezen naar de
“Handleiding” die op de bijgeleverde CD-ROM ( ) staat.
Muchas gracias por haber adquirido este producto de Pioneer.
Esta Guía de inicio rápido incluye instrucciones para hacer las
conexiones y operaciones básicas que le permitirán hacer un uso
sencillo del receptor. Para conocer una descripción detallada del
receptor, consulte el “Manual de instrucciones” suministrado con
el CD-ROM ( ) incluido.
Благодарим вас за приобретение данного изделия Pioneer.
В данном Кратком руководстве пользователя содержатся
инструкции по основным подключениям и операциям для
упрощенного использования ресивера. Подробное
описание ресивера см. в «Инструкции по эксплуатации»,
содержащихся на поставляемом CD-ROM ( ).
STANDBY/ON
ALL ZONE STBY
SUB ZONE CONTROL
RECEIVER
MAIN
Z2 Z3 HDZ
SOURCE CONTROL
SAT
DVDBD
USBADPTROKU
iPod
BT
MHL
TUNER
TV
CD
VOL
TV
INPUT
STATUS
OUT P.
AUDIO P. VIDEO P.
TOP
MENU
ENTER
HOME
MENU
LISTENING MODE
SURRAUTO
ADV
MPX
BAND PTY
PRESET TUNE
2
13
546
8079
D.ACCESS
CLASS
ENTER
CLRCHCH
DIMMER SLEEP
RECEIVER
What’s in the box
Contenu du carton d’emballage
Lieferumfang
SOURCE
Remote Control
Télécommande
HDMI
Fernbedienung
NET
ALL
Telecomando
VOLUME
Afstandsbediening
MUTE
Mando a distancia
Пульт дистанционного управления
TOOLS
MENU
RETURN
CH LV.
AUDIO
Fav
DISP
RCU SETUP
These quick start guide
Le présent Guide de démarrage
Diese Kurzanleitung
Guida per l’avvio rapido
Deze Quick Start-gids
Esta guía de inicio rápido
Это краткое руководство пользователя
CD-ROM
Contenuto della confezione
Inhoud van de doos
Setup microphone
Microphone de configuration
Mikrofon für die Einstellung
Impostazione microfono
Microfoon voor instellen
Micrófono de configuración
Установочный микрофон
AM loop antenna
Antenne cadre AM
MW-Rahmenantenne
Antenna AM a telaio
AM-raamantenne
Antena de cuadro de AM
Рамочная антенна АМ
Safety Brochure
Brochure sur la Sécurité
Sicherheritsbroshüre
Volantino sulla sicurezza
Veiligheidsbrochure
Folleto de Seguridad
Брошюра по безопасноти
AAA size IEC R03 dry cell batteries x2
Piles à anode sèche AAA IEC R03 x 2
Сухие батарейки размера AAA IEC R03, 2 шт.
Power cord
Cordon d’alimentation
Netzkabel
Cavo di alimentazione
Netsnoer
Cable de alimentación
Кабель питания
Contenido de la caja
Комплект поставки
FM wire antenna
Antenne filaire FM
UKW-Drahtantenne
Antenna FM a filo
FM-draadantenne
Antena de hilos de FM
Проволочная антенна FM
AAA/IEC/R03 Trockenbatterien x2
Pile a secco AAA IEC R03 x2
AAA/IEC/R03 drogecelbatterijen x2
Pilas secas AAA, IEC R03 x 2
Warranty card
Carte de garantie
Garantiekarte
Tarjeta de garantía
Documento di garanzia
Garantiebewijs
Гарантийный сертификат
Page 2

English
Enjoy easy multichannel playback with this unit in 3 steps:
Connecting up
→
Connection and initial setup can be performed by referring to this Quick Start Guide, but it is easier when using the
Initial setup
→
Basic playback
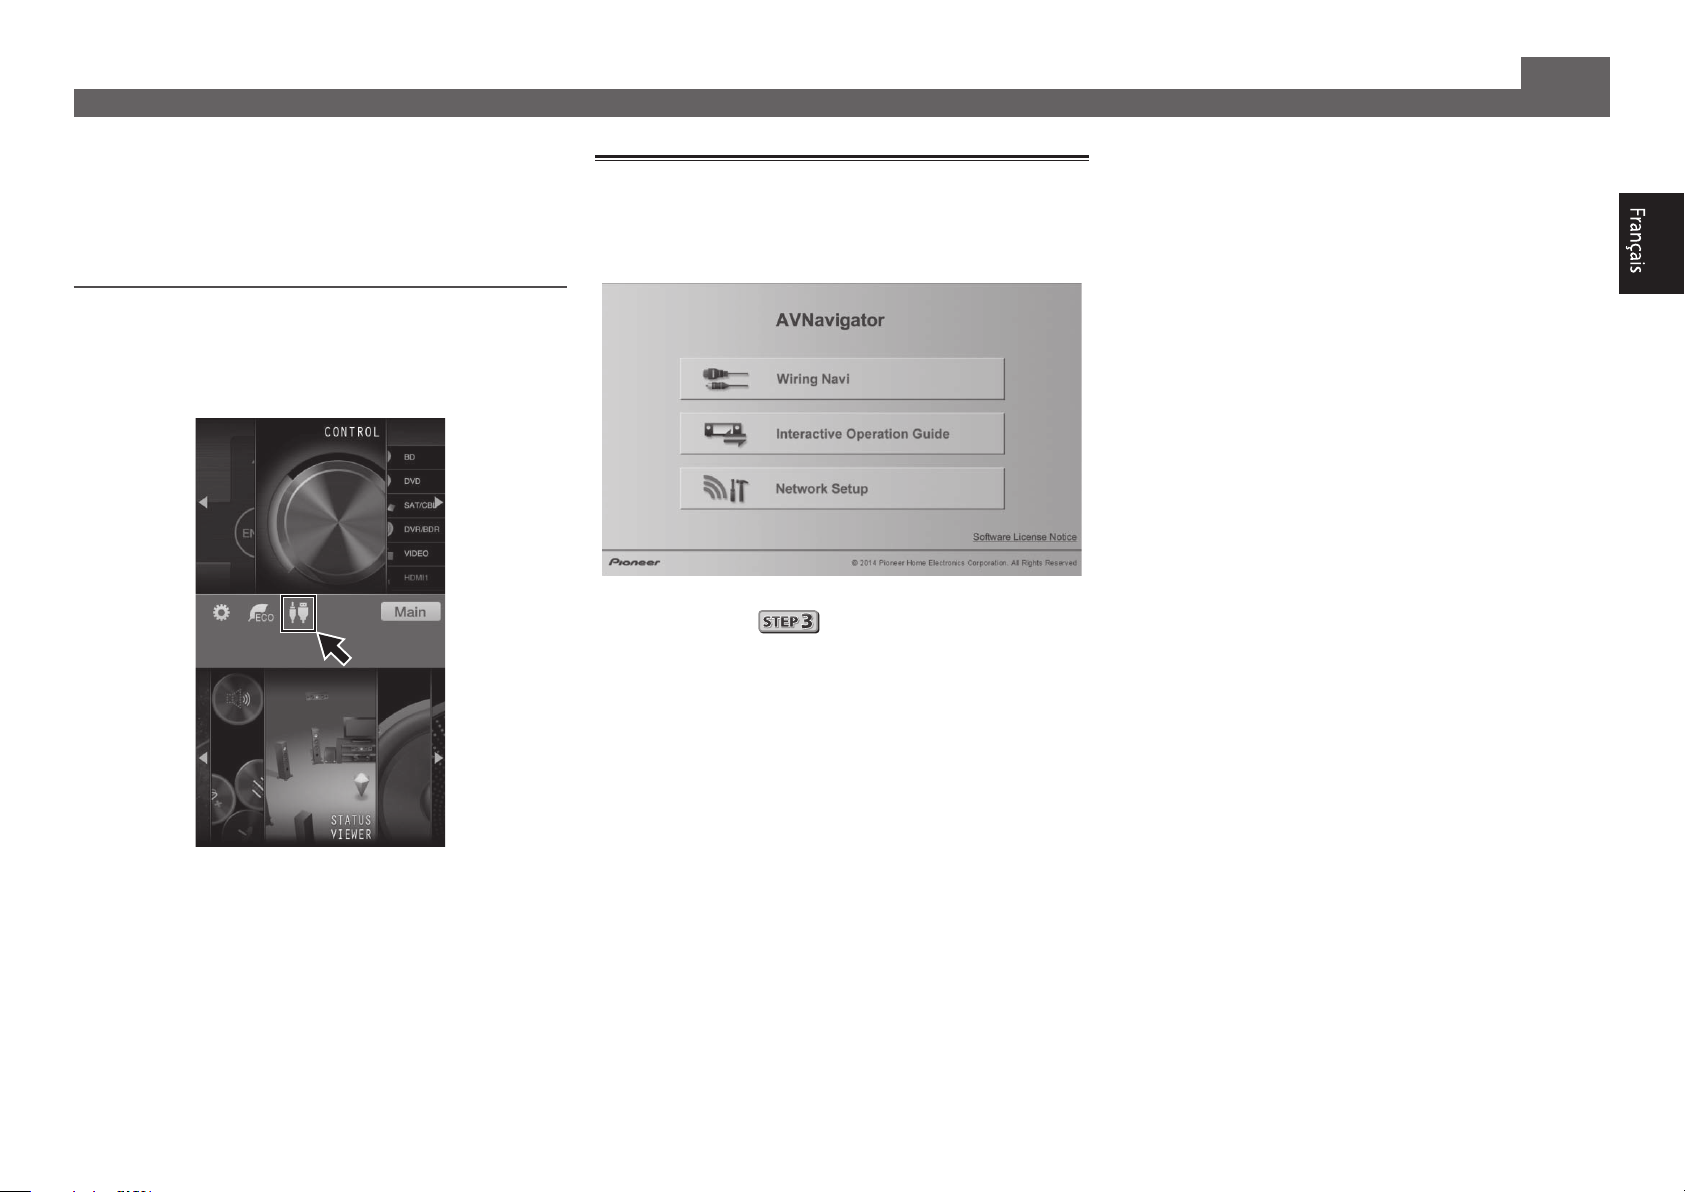
Wiring Navi
Perform connection and initial setup with either method according to the circumstances in which you are using AVNavigator.
Additionally, using the
Interactive Operation Guide
in AVNavigator allows you to learn basic operations effectively.
Connection and initial setup
Connection and initial setup following the instructions
in the “Wiring Navi” in AVNavigator
(Connection to the network is required for the initial setup.)
or
Connection and initial setup by referring to
this Quick Start Guide
Quick Start
Guide
.
in AVNavigator.
It is unnecessary to read this guide for explanations;
will be explained in the
Move on to “Using Built-in AVNavigator” in this guide.
You can use the
The contents are linked interactively with the product, allowing you
to remember them while reading, and actually use the product while
Interactive Operation Guide
becoming used to it.
Wiring Navi
in
.
.
Move on to
in this guide.
2
Page 3

Using Built-in AVNavigator
LAN
(
10/100
)
SCO
Connecting to the network through
LAN interface
Internet
Computer
LAN cable (sold separately)
LAN
Modem
)
(10/100
Router
WAN
LAN
1
2
3
Connecting to a wireless LAN
Wireless connection to the network is possible through a
wireless LAN connection. Use the separately sold AS-WL300
for connection.
• Use only the furnished accessory connecting cable.
• Certain settings are required to use a wireless LAN
converter (AS-WL300). For instructions on making these
settings, see the operating instructions included with the
wireless LAN converter (AS-WL300).
)
LAN
(10/100
DC OUTPUT
)
(10/100
LAN
DC OUTPUT
for WIRELESS LAN
(
OUTPUT 5 V
)
0.6 A MAX
Router
DC 5V WPS
Ethernet
Wireless LAN converter (AS-WL300)
for WIRELESS LAN
(
OUTPUT 5 V
)
0.6 A MAX
Modem
WAN
Internet
ask your nearest Pioneer authorized independent service
company for a replacement.
• Do not use any power cord other than the one supplied
with this unit.
• Do not use the supplied power cord for any purpose other
than that described below.
• The receiver should be disconnected by removing the
mains plug from the wall socket when not in regular use,
e.g., when on vacation.
• Make sure the blue
STANDBY/ON
u
light has gone out
before unplugging.
Plug the supplied power cord into the AC IN
1
socket on the back of the receiver.
Plug the other end into a power outlet.
2
Turning the power on
Press
computer.
Wait a few minutes after turning the power on before
performing the following operation.
STANDBY/ON
u
STANDBY/ON
to switch on the receiver and your
MCACC
PHONES
SETUP MIC
Plugging in the receiver
After connecting to a LAN, connect the power cord of the
receiver to a power outlet.
CAUTION
• Handle the power cord by the plug part. Do not pull out
the plug by tugging the cord, and never touch the power
cord when your hands are wet, as this could cause a short
circuit or electric shock. Do not place the unit, a piece of
furniture, or other object on the power cord or pinch the
cord in any other way. Never make a knot in the cord or tie
it with other cables. The power cords should be routed so
that they are not likely to be stepped on. A damaged power
cord can cause a fire or give you an electric shock. Check
the power cord once in a while. If you find it damaged,
3
Page 4

Using Built-in AVNavigator (continued)
Launching the built-in AVNavigator
Operate AVNavigator by following the screen prompts of your
computer, etc.
Operating environment
• AVNavigator can be used in the following environments.
–Windows PC: Microsoft
Windows
–Mac OS: Mac OSX (10.7, 10.8 or 10.9)
–iPad/iPhone/iPod touch: iOS 7
–Android device: Android 4.0.4
• Some AVNavigator functions use an Internet browser. The
following browsers are supported:
–Windows PC: Internet Explorer
–Mac OS/iPad/iPhone/iPod touch: Safari 6.0
–Android device: Android browser
• To use certain AVNavigator functions, you must install the
latest Adobe
website.
http://www.adobe.com/downloads/
• Depending on the computer network setting or security
setting, AVNavigator may not operate.
®
7/Windows® 8/Windows® 8.1
®
Flash® Player. For details, visit the following
®
Windows® XP/Windows Vista®/
®
8, 9, 10, 11
Using Windows PC
• Launch Internet Explorer and enter the IP address of this
unit in the address field of Internet Explorer. (Access the
IP address“http://(the receiver’s IP address)” from a web
browser.) You can display the IP address of the unit on the
unit’s front panel display by pressing the
on the remote control.
• With a Windows PC other than Windows XP, you can use
the following method to launch AVNavigator.
Launch Explorer and then right-click <VSX-924>
’.
Network
’ folder, then click ‘
displayed in the ‘
webpage
STATUS
View device
Using Mac
Launch Safari and click <VSX-924> displayed in ‘
the Bookmarks bar.
Bonjour
button
’ on
Using iPad/iPhone/iPod touch
Download a free application, iControlAV5, from the App Store.
After launching iControlAV5, follow the instructions on the
screen. After that, on the Home screen, press ‘
the icon.
iPad
iPhone/iPod touch
AVNavigator
’or
Bonjour
• If ‘
the Favorites bar
the Safari ‘
’ is not displayed, tick the ‘
Preferences...
’ check box on the ‘
’ menu.
Include Bonjour in
Advanced
’ tab in
4
Page 5

Using iPad
■
On an iPad, you can operate AVNavigator for iPad. Download
AVNavigator for iPad from the App Store. After launching
AVNavigator for iPad, follow the instructions on the screen.
Using Android device
Download a free application, iControlAV5, from the Google Play
Store. After launching iControlAV5, follow the instructions on
the screen. After that, on the Home screen, press
the icon
.
About using Wiring Navi
Wiring Navi starts when ‘
AVNavigator screen.
• When connection navigation is finished, proceed to
.
Wiring Navi
’ is pressed on the
Using Built-in AVNavigator (continued)
5
Page 6

Connecting up
12 3
Connecting the speakers
The receiver will work with just two stereo speakers (the front speakers in the diagram) but using
at least five speakers is recommended, and a complete setup is best for surround sound.
To achieve the comfortable surround sound, install your speakers as shown below.
7.1 channel surorund system:
L
C
SL
Connecting the speaker cables
Make sure you connect the speaker on
the right to the right (R) terminal and the
speaker on the left to the left (L) terminal.
Also make sure the positive and negative
+/–
(
) terminals on the receiver match those
on the speakers.
Twist exposed wire strands together.
1
Loosen terminal and insert exposed wire.
2
Tighten terminal.
3
10 mm
3
(
/8 in.)
R
SW
SBL
After installing the speakers, connect them as shown below.
Center
(C)
SURROUNDCENTERFRONT
SPEAKERS
SURROUND BACK / HDZONE
(
Single
Front Left
FRONT HEIGHT / WIDE /
)
RLRLRLRL
(L)
B
PRE OUT
SURROUND BACK / HDZONE
SURROUNDCENTERFRONT
SPEAKERS
Subwoofer
FRONT HEIGHT / WIDE /
B
(
)
Single
RLRLRLRL
(SW)
LINE LEVEL
INPUT
SUB
WOOFER
1
2
A
Front Right
(R)
L
– Front Left
C
– Center
R
– Front Right
SL
– Surround Left
SR
– Surround Right
SBL
SR
SBR
– Surround back Left
SBR
– Surround back Right
SW
– Subwoofer
Note
• There are also other speaker connection
PRE OUT
SUB
WOOFER
1
2
A
patterns (front height, front wide, etc.). For
details, see “Connecting your equipment”
of the operating instructions.
CAUTION
• Before making or changing
connections, switch off the power and
disconnect the power cord from the AC
outlet.
• These speaker terminals carry
HAZARDOUS LIVE
voltage. To
prevent the risk of electric shock when
connecting or disconnecting the
speaker cables, disconnect the power
cord before touching any uninsulated
parts.
Surround Right
(SR)
Surround back Right
SBR
(
)
Surround back Left
SBL
(
)
Note
• When only connecting one surround back speaker, connect it to the
(Single)
• This unit supports speakers with a nominal impedance of 6 W to 16 W.
terminals.
Surround Left
(SL)
SURROUND BACK L
6
Page 7
Connecting up (continued)
A
A
ANTENNA
FM UNBAL
75
AM LOOP
VENTILATION CAUTION
When installing this unit, make sure to leave space
around the unit for ventilation to improve heat radiation
(at least 40 cm at top, 10 cm at rear
side)
W
Slots and openings in the cabinet are provided for
ventilation to ensure reliable operation of the product,
and to protect it from overheating.
hazard, the openings should never be blocked or
covered with items (such as newspapers, table-cloths,
curtains) or by operating the equipment on thick carpet
or a bed.
D3-4-2-1-7b*_A1_En
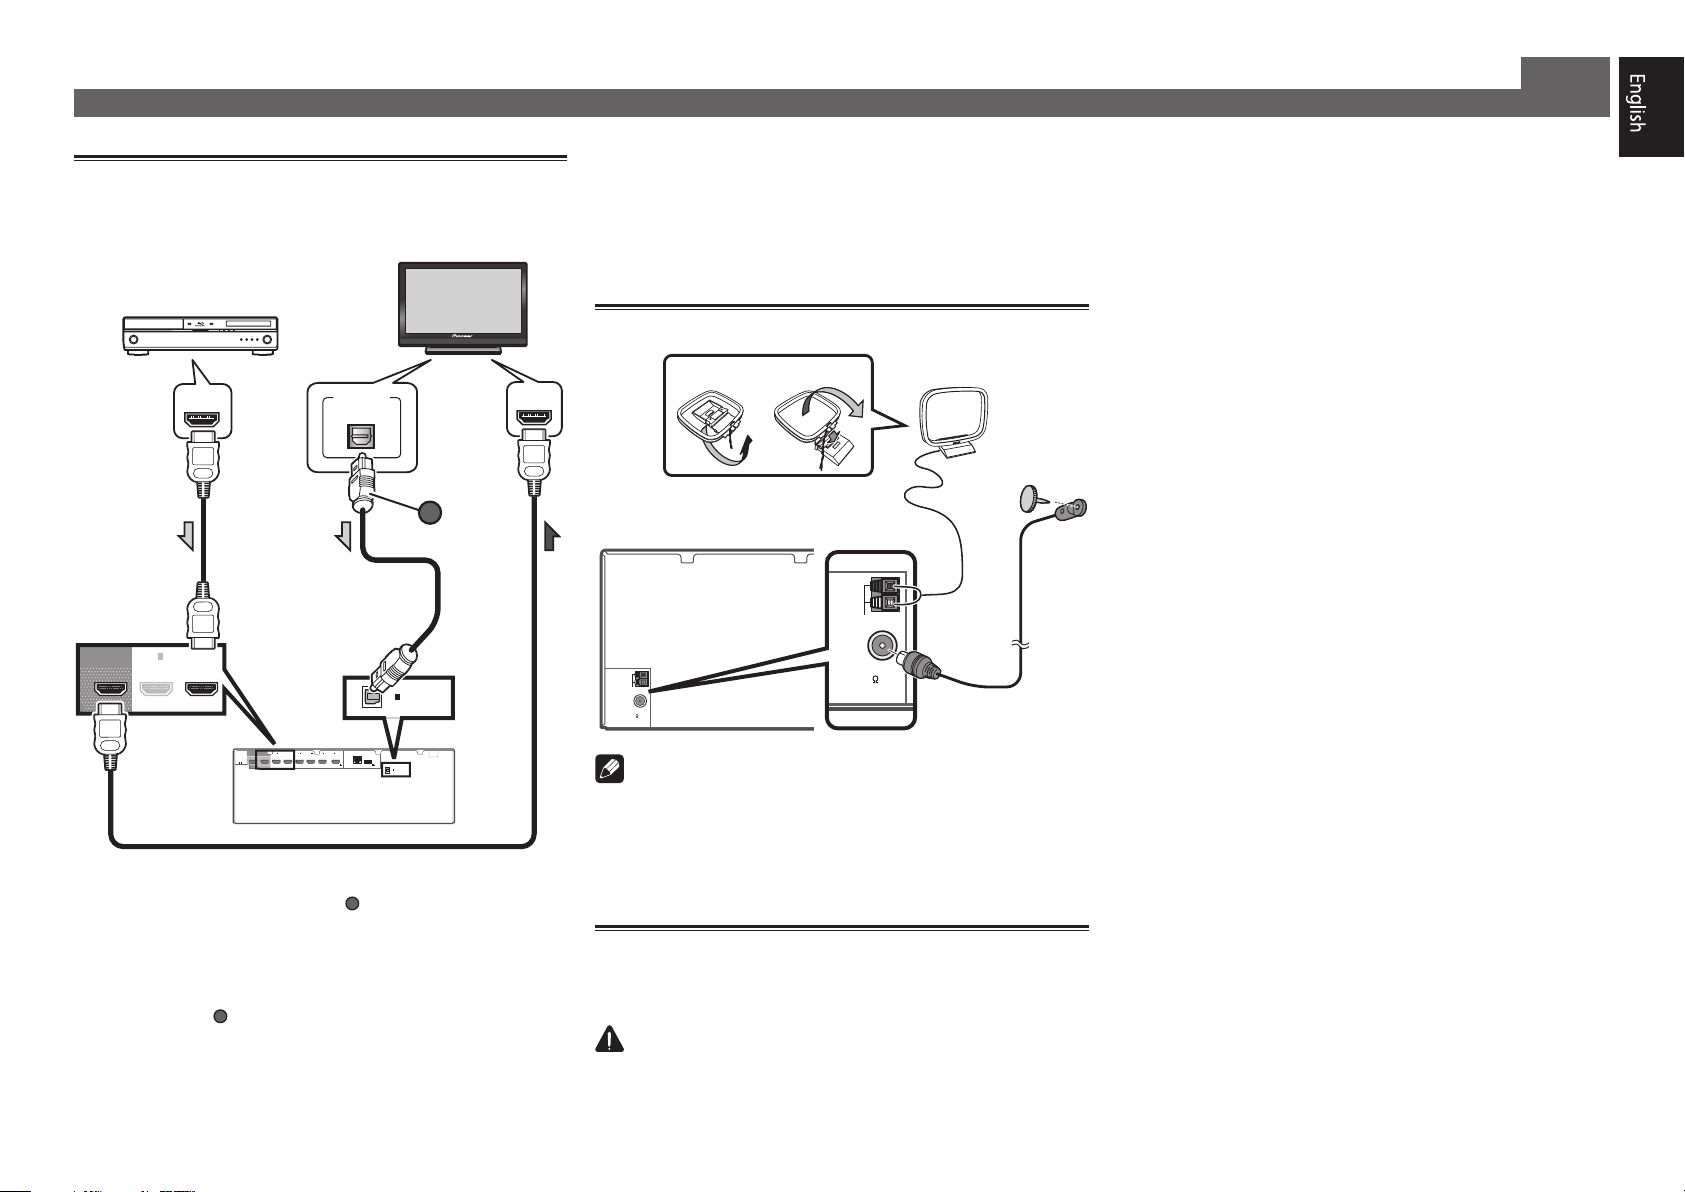
Connecting a TV and playback
components
HDMI/DVI-compatible TV
HDMI/DVI-compatible
Blu-ray DIsc player
BD IN
1
IN2IN3IN4IN /MHL
(
OUTPUT 5 V
(
)
)
SAT/CBL
0.9 A MAX
DIGITAL OUT
OPTICAL
1
IN
)
LAN
(10/100
6
DC OUTPUT
for WIRELESS LAN
(
OUTPUT 5 V
)
)
0.6 A MAX
OPTICAL
(TV)
1
IN
ASSIGNABLE
) connection is required to
ARC
HDMI OUT
OUT 1
(
CONTROL
)
BD IN
1
IN
(
)
DVD
OUT 2
OUT 1
HDMI
IN
(
HDZONE
)
(
CONTROL
)
ASSIGNABLE
-
1 6
(
DVD
SELECTABLE
• If the TV does not support the HDMI Audio Return Channel
function, optical digital cable (
listen to the TV sound over the receiver.
• If the TV supports the HDMI Audio Return Channel
function, the sound of the TV is input to the receiver via the
HDMI terminal, so there is no need to connect an optical
digital cable (
). In this case, set
to ON. For details, see “HDMI Setup” of the operating
instructions.
• Please refer to the TV’s operation manual for directions on
connections and setup for the TV.
A
OPTICAL
(TV)
ASSIGNABLE
HDMI Setup
at
HDMI IN
• With factory default settings, video from the video cable
or component cable will not be output from the HDMI
terminal. To output video, you must switch video input to
the device connected with the video cable or component
cable and set
V.CONV
to ON. For details, see “Setting the
Video options” of the operating instructions.
Connecting antennas
21
AM LOOP
FM UNBAL
75
ANTENNA
Note
• Refer to the operating instructions in the included CDROM if you wish to connect a TV or playback component
in a method other than an HDMI connection.
• Refer to the operating instructions in the included CDROM for other device connections.
AM loop antenna
FM wire antenna
Plugging in the receiver
Only plug in after you have connected all your components to
this receiver, including the speakers.
CAUTION
• Handle the power cord by the plug part. Do not pull out
the plug by tugging the cord, and never touch the power
cord when your hands are wet, as this could cause a short
circuit or electric shock. Do not place the unit, a piece of
furniture, or other object on the power cord or pinch the
cord in any other way. Never make a knot in the cord or tie
it with other cables. The power cords should be routed so
that they are not likely to be stepped on. A damaged power
cord can cause a fire or give you an electric shock. Check
the power cord once in a while. If you find it damaged,
ask your nearest Pioneer authorized independent service
company for a replacement.
• Do not use any power cord other than the one supplied
with this unit.
• Do not use the supplied power cord for any purpose other
than that described below.
• The receiver should be disconnected by removing the
mains plug from the wall socket when not in regular use,
e.g., when on vacation.
• Make sure the blue
STANDBY/ON
u
light has gone out
before unplugging.
Plug the supplied power cord into the AC IN
1
socket on the back of the receiver.
Plug the other end into a power outlet.
2
, and 20 cm at each
.
ARNING
To prevent fire
7
Page 8

ALL ZONE STBY
SOURCE
STANDBY/ON
MAIN
SUB ZONE CONTROL
Z2 Z3 HDZ
RECEIVER
8
Initial Setup
Before you start
Put the batteries in the remote control.
1
The batteries included with the unit are to check initial
operations; they may not last over a long period. We
recommend using alkaline batteries that have a longer life.
Switch on the receiver and your TV.
2
Switch the TV input so that it connects to the
3
receiver.
Turn the subwoofer on and turn up the volume.
4
WARNING
• Do not use or store batteries in direct sunlight or other
excessively hot place, such as inside a car or near a heater.
This can cause batteries to leak, overheat, explode or catch
fire. It can also reduce the life or performance of batteries.
CAUTION
• When inserting the batteries, make sure not to damage
the springs on the battery’s (–) terminals. This can cause
batteries to leak or overheat.
• When disposing of used batteries, please comply with
governmental regulations or environmental public
institution’s rules that apply in your country/area.
Automatically setting up for
surround sound (MCACC)
The Auto Multi-Channel ACoustic Calibration (MCACC) setup
uses the supplied setup microphone to measure and analyze
the test tone that is outputted by the speakers. This setup
enables automatic high precision measuring and settings;
utilizing it will create an optimum user listening environment.
Important
• Measure in a quiet environment.
• If you have a tripod, use it to place the microphone so
that it’s about ear level at your normal listening position.
Otherwise, place the microphone at ear level using a table
or a chair.
• Accurate measurements may not be possible if there are
obstacles between the speakers and the listening position
(microphone).
• When measuring, step away from the listening position,
and operate using the remote control from the external
side of all the speakers.
Connect the supplied setup microphone.
1
ADVANCED
FL OFF
Microphone
Tripod
Full Auto MCACC
The
MCACC
SPEAKERS CONTROL – MULTI-ZONE – ON / OFFBANDTUNER EDIT TUNE PRESET ENTER
AUTO SURR/ALC/
INPUT
SELECTOR
STREAM DIRECT
STANDBY/ON
MCACC
PHONES
SETUP MIC
screen appears on your TV.
1a.Full Auto MCACC
Speaker System : Normal(SB/FH
EQ Type : ---
MCACC : M1.MEMORY 1
Measurement Type : Basic
START
A/V RECEIVER
Exit Return
iPod iPhoneHDMI
iPod iPhone
ADVANCED
STANDARD
DIRECT
CONTROLSTATUS
SURROUND
SURROUND
MCACC
SETUP
MASTER
VOLUME
5V 1 A
HDMI 5 INPUT
MIC
)
Press MAIN RECEIVER on the remote control
2
and operate.
• When the cursor is brought to
Basic
is selected, the
Speaker Distance
Expert
allows you to automatically adjust
Speaker Setting/Channel Level
is adjusted automatically. Selecting
Wave/Acoustic Cal EQ
well.
Bring the cursor to START and press the ENTER
3
Measurement Type
Standing
(frequency characteristics) as
button.
• Automatic measuring will start.
• Measuring will take about 3 to 12 minutes.
Follow the instructions on-screen.
4
• Automatic setting is complete when the Home Menu
screen appears.
HOME MENU
A/V RECEIVER
Exit Return
is displayed, the speaker’s wiring (+ and –)
Reverse Phase
• If
1. Advanced MCACC
2. MCACC Data Check
3. Data Management
4. System Setup
5. Network Information
6. Operation Mode Setup
may be inverted. Check the speaker connections.
Even if the connections are correct,
Reverse Phase
may be
displayed, depending on the speakers and the surrounding
environment. This does not affect measurements, however,
so select
Go Next
.
• If the power cuts out, the core of the speaker cable may be
in contact with the rear panel, or the (+) and (–) cores may
be touching, causing the protection circuits to activate.
Re-twist the core of the speaker cable, and connect it so
that it does not protrude from the speaker terminal.
Make sure the setup microphone is
5
disconnected.
and
/
Page 9
Basic playback
2
3
5
Switch on the playback component.
Multichannel playback
STANDBY/ON
ALL ZONE STBY
RECEIVER
MAIN
SOURCE CONTROL
DVDBD
USBADPTROKU
iPod
TUNER
TV
INPUT
STATUS
AUDIO P. VIDEO P.
TOP
MENU
HOME
MENU
SOURCE
SUB ZONE CONTROL
Z2 Z3 HDZ
HDMI
SAT
VOL
OUT P.
ENTER
MHL
CD
NET
ALL
VOLUME
MUTE
TOOLS
RETURN
BT
TV
MENU
1
E.g.) Turn the Blu-ray Disc player connected to the
BD IN
terminal on.
Switch the input of the receiver.
2
E.g.) Press BD to select the BD input.
Press AUTO to select ’AUTO SURROUND’.
3
Also press
SURR
your preferred listening mode.
Start the playback component’s playback.
4
E.g.) Start playback of the Blu-ray Disc player.
Use VOLUME +/– to adjust the volume level.
5
• When a sound can not be heard from center and rear
speakers, press
E.g.) Press the
EXT.STEREO
When there is no sound from the subwoofer
•
Cause – The front speaker is set to LARGE.
ADV
or
SURR
ADV
for multichannel playback. Select
ADV
or
to change listening modes.
button for several times to select
.
HDMI
When a 2-channel audio source is input, the low-frequency
LISTENING MODE
SURRAUTO
MPX
PRESET TUNE
2
13
546
8
79
D.ACCESS
CLR
0
DIMMER SLEEP
CH LV.
ADV
BAND PTY
AUDIO
DISP
CH
CLASS
ENTER
CH
RCU SETUP
Fav
component is not output from the subwoofer but is output
from the front speaker.
Solution – To output from the subwoofer, change the
speaker setting.
Method 1: Change the front speaker setting to
SMALL
.
The low-frequency component is not output from the front
speaker but is output from the subwoofer. When the lowfrequency playback capability of the front speaker is high,
we recommend the setting not be changed.
Method 2: Change the subwoofer setting to
PLUS
.
The low-frequency component is output from the front
speaker and subwoofer. For that reason, low sounds
are sometimes output too much. In such a case, we
recommend not to change or to change to Method 1.
RECEIVER
• For details, see “Speaker Setting” of the operating
instructions.
• When no sound is emitted, increase the volume to
approximately –30 dB.
Note
• When the remote control cannot be used to operate the unit
–When operating the receiver, press
MAIN RECEIVER
before using it.
–When operating functions such as the network, TUNER, or
iPod, press the appropriate function button (
iPod
, etc.) before using.
NET, TUNER
,
Listening to the radio
Press TUNER to select the tuner.
1
TUNE +/–
MPX
BAND
to select
to change the band (FM or AM).
for about a second. The receiver
FM MONO
and set the receiver
If necessary, press
Press TUNE +/– to tune to a station.
2
• Press and hold
will start searching for the next station.
• If you’re listening to an FM station but the reception is
weak, press
to the mono reception mode.
Saving station presets
If you often listen to a particular radio station, it’s convenient to
have the receiver store the frequency for easy recall whenever
you want to listen to that station.
Press TOOLS while receiving a signal from the
1
station you want to store.
The preset number is blinking.
Press PRESET +/– to select the station preset
2
you want, then press ENTER.
The preset number stop blinking and the receiver stores
the station.
Listening to station presets
You will need to have some presets stored to do this.
Press PRESET +/– to select the station preset
you want.
9
Page 10

Basic playback (continued)
Playing an iPod
• About one minute is required between turning the power
on and completion of startup.
Connect your iPod.
1
An iPod/iPhone can be connected to the receiver.
ADVANCED
FL OFF
MCACC
SPEAKERS CONTROL – MULTI-ZONE – ON / OFFBANDTUNER EDIT TUNE PRESET ENTER
AUTO SURR/ALC/
INPUT
SELECTOR
STANDBY/ON
included with the iPod
Press iPod USB to select the iPod/USB input.
2
STREAM DIRECT
MCACC
PHONES
SETUP MIC
USB cable
When the display shows the names of folders and files,
you’re ready to play music from the iPod.
3
Use
to select a category, then press
/
ENTER to browse that category.
• To return to the previous level any time, press
4
Use
to browse the selected category (e.g.,
/
albums).
• Use
Continue browsing until you arrive at what
5
to move to previous/next levels.
/
you want to play, then press to start
playback.
iPod iPhoneHDMI
iPod iPhone
ADVANCED
STANDARD
STATUS
DIRECT
CONTROL
SURROUND
SURROUND
5 V 1 A
MASTER
VOLUME
5V 1 A
HDMI 5 INPUT
iPod/iPhone
RETURN
Listening to Internet radio stations
• About one minute is required between turning the power
on and completion of startup.
Important
• When using a broadband Internet connection, a contract
with an Internet service provider is required. For more
details, contact your nearest Internet service provider.
• To listen to Internet radio stations, you must have highspeed broadband Internet access. With a 56 K or ISDN
modem, you may not enjoy the full benefits of Internet
radio.
• Access to content provided by third parties requires a
high speed internet connection and may also require
account registration and a paid subscription. Third
party content services may be changed, suspended,
interrupted, or discontinued at any time without notice,
and Pioneer disclaims any liability in connection with such
occurrences. Pioneer does not represent or warrant that
content services will continue to be provided or available
for a particular period of time, and any such warranty,
express or implied, is disclaimed.
Press NET repeatedly to select the INTERNET
1
RADIO input.
It may take several seconds for this receiver to access the
network.
Use
2
play back, and then press ENTER.
.
to select the Internet radio station to
/
To enjoy the many functions of the
unit to the fullest extent
Launch AVNavigator, and use the “Interactive
Operation Guide”.
Load the CD-ROM into your computer and
download the “Operating Instructions” (PDF)
from the menu screen to read.
Functions
Playing a USB device
#
Music playback using Bluetooth wireless technology
#
Playback with NETWORK feature
#
Setting the Audio options
#
Setting the Video options
#
Using the MULTI-ZONE controls
#
FAQ
Glossary
Features index
Note
• This unit supports AirPlay. For details, see “Using AirPlay
on iPod touch, iPhone, iPad, and iTunes” of the operating
instructions and the Apple website (http://www.apple.
com).
• This unit’s software can be updated (“Software Update”
of the operating instructions). With Mac OS, it can be
updated using Safari (“Using Safari to update the firmware”
of the operating instructions).
10
© 2014 PIONEER HOME ELECTRONICS CORPORATION.
All rights reserved.
Page 11

11
Page 12

Français
Profitez de la lecture multicanaux sur cet appareil en 3 points seulement :
Raccordement
→
Conguration initiale
→
Lecture de base
La connexion et la configuration initiale peuvent être réalisées en se référant au présent Guide rapide, mais il est plus facile d’utiliser le
Wiring Navi
dans lesquelles vous utilisez l’AVNavigator. L’utilisation du
dans l’AVNavigator. Réalisez la connexion et la configuration initiale avec l’une ou l’autre méthode, en fonction des circonstances
Interactive Operation Guide
dans l’AVNavigator vous permet en outre d’apprendre effi-
cacement les opérations de base.
Raccordement et configuration initiale
Raccordement et conguration initiale en se référant aux
instructions dans “Wiring Navi” de l’AVNavigator
(Une connexion au réseau est nécessaire
pour la configuration initiale.)
ou
Raccordement et conguration initiale
en suivant le guide rapide
Guide
rapide
.
Il est inutile de lire ce guide pour obtenir des explications ;
seront expliqués dans le
Poursuivez à la rubrique “Utilisation de l’AVNavigator intégré”
dans ce guide.
Vous pouvez utiliser le
Les contenus sont liés de manière interactive avec le produit, ce qui
vous permet de les mémoriser en les lisant et d’utiliser réellement le
produit tout en vous y familiarisant.
Interactive Operation Guide
Wiring Navi
dans
.
.
Passez à
dans ce guide.
2
Page 13

Utilisation de l’AVNavigator intégré
LAN
(
10/100
)
SCO
Raccordement au réseau par
l’interface LAN
Internet
Ordinateur
Câble LAN (vendu séparément)
LAN
(10/100
)
Modem
Routeur
WAN
Raccordement à un réseau LAN
sans fil
La connexion sans fil au réseau s’effectue par une connexion
LAN sans fil. Utilisez le AS-WL300 vendu séparément pour
cette connexion.
• N’utilisez que le câble de liaison d’accessoire fourni.
LAN
1
2
3
• Certains réglages doivent être effectués pour que le
convertisseur LAN sans fils (AS-WL300) puisse être utilisé.
Pour le détail sur ces réglages, reportez-vous au mode
d’emploi fourni avec le convertisseur LAN sans fil (ASWL300).
)
LAN
(10/100
DC OUTPUT
LAN
(10/100
)
DC OUTPUT
for WIRELESS LAN
(
OUTPUT 5 V
0.6 A MAX
)
Routeur
for WIRELESS LAN
(
OUTPUT 5 V
)
0.6 A MAX
Modem
WAN
Internet
cordons d’alimentation doivent être placés de telle sorte
que l’on ne risque pas de marcher dessus. Un cordon
d’alimentation endommagé peut entraîner un incendie
ou une électrocution. Vérifiez le cordon d’alimentation
de temps en temps. Si vous le trouvez abîmé, demandez
à votre service après-vente Pioneer le plus proche de le
remplacer.
• Utilisez exclusivement le cordon d’alimentation fourni avec
cet appareil.
• N’utilisez pas ce cordon à d’autres fins que celle indiquée
ci-dessous.
• Lorsque le récepteur n’est pas utilisé régulièrement
(pendant les vacances, par exemple), il doit être débranché
de la prise d’alimentation murale.
• Avant de le débrancher, assurez-vous que le témoin bleu
STANDBY/ON
u
Branchez le cordon d’alimentation fourni à la
1
est éteint.
prise AC IN située à l’arrière du récepteur.
Branchez l’autre extrémité sur une prise
2
électrique.
Mise en marche
le cordon, et ne le nouez pas avec d’autres câbles. Les
STANDBY/ON
u
pour allumer le récepteur et
DC 5V WPS
Ethernet
Convertisseur LAN sans fil (AS-WL300)
Appuyez sur
votre ordinateur.
Après la mise en marche, patientez quelques minutes avant
d’effectuer l’opération suivante.
Branchement du récepteur
Après la connexion à un réseau LAN, branchez le cordon
STANDBY/ON
PHONES
MCACC
SETUP MIC
d’alimentation du récepteur à une prise électrique.
ATTENTION
• Saisissez le cordon d’alimentation par la prise. Ne
débranchez jamais la fiche en tirant sur le cordon et ne
touchez jamais le cordon d’alimentation lorsque vous avez
les mains mouillées, car cela pourrait causer un courtcircuit ou une électrocution. Ne placez pas l’appareil, un
meuble ou tout autre objet sur le cordon d’alimentation et
ne coincez pas le cordon. Ne faites jamais de nœud sur
3
Page 14

Utilisation de l’AVNavigator intégré (suite)
Lancement de l’AVNavigator
intégré
L’AVNavigator s’utilise en suivant les messages sur l’écran de
votre ordinateur, etc.
Environnement d’exploitation
• L’AVNavigator peut être utilisé dans les environnements
suivants :
–PC sous Windows : Microsoft
®
Vista
/Windows® 7/Windows® 8/Windows® 8.1
–Mac OS : Mac OSX (10.7, 10.8 ou 10.9)
–iPad/iPhone/iPod touch : iOS 7
–Appareil Android : Android 4.0.4
• Certaines fonctions de l’AVNavigator emploient un
navigateur Internet. Les navigateurs suivants sont pris en
charge :
–PC sous Windows : Internet Explorer
–Mac OS/iPad/iPhone/iPod touch : Safari 6.0
–Appareil Android : navigateur Android
• Pour pouvoir utiliser certaines fonctions d’AVNavigator,
vous devez installer la dernière version d’Adobe
Player. Connectez-vous au site ci-après pour plus
d’informations.
http://www.adobe.com/downloads/
• AVNavigator risque de ne pas fonctionner avec certains
paramétrages du réseau informatique ou de la sécurité.
®
Windows® XP/Windows
®
8, 9, 10, 11
®
Flash®
Utilisation d’un PC sous Windows
• Lancez Internet Explorer et saisissez l’adresse IP de cet
appareil dans le champ d’adresse d’Internet Explorer.
(Accédez à l’adresse IP “http://(l’adresse IP du récepteur)”
depuis un navigateur web.) Vous pouvez afficher l’adresse
IP de l’appareil sur l’afficheur de ce dernier en appuyant
sur la touche
• Sur un PC fonctionnant avec une version Windows
différente de Windows XP, vous pouvez utiliser la méthode
suivante pour lancer AVNavigator.
Lancez l’explorateur puis faites un clic droit sur
<VSX-924> qui s’affiche dans le dossier ‘
cliquez sur ‘
STATUS
View device webpage
de la télécommande.
’.
Network
’, puis
Utilisation d’un Mac
Lancez Safari et cliquez sur <VSX-924> qui s’affiche dans
Bonjour
‘
’ sur la barre Bookmarks.
Utilisation d’un iPad/iPhone/iPod touch
Téléchargez une application gratuite, iControlAV5, depuis l’App
Store. Après avoir lancé iControlAV5, suivez les instructions à
l’écran. Effleurez ensuite ‘
d’accueil.
iPad
iPhone/iPod touch
AVNavigator
’ ou l’icône sur l’écran
Bonjour
• Si ‘
Include Bonjour in the Favorites bar
‘
Advanced
‘
’ n’apparaît pas, cochez la case à cocher
’ de l’onglet
’ dans le menu ‘
Preferences...
’ de Safari.
4
Page 15
Utilisation d’un iPad
■
Sur un iPad, vous pouvez utiliser AVNavigator pour iPad.
Téléchargez AVNavigator for iPad depuis l’App Store. Après
avoir lancé AVNavigator for iPad, suivez les instructions à
l’écran.
Utilisation d’un appareil Android
Téléchargez une application gratuite, iControlAV5, depuis le
Google Play Store. Après avoir lancé iControlAV5, suivez les
instructions à l’écran. Effleurez ensuite l’icône sur l’écran
d’accueil.
À propos de l’utilisation de Wiring
Navi
Wiring Navi démarre lorsque vous appuyez sur ‘
sur l’écran d’AVNavigator.
• Lorsque la navigation de connexion est terminée,
poursuivez avec
.
Wiring Navi
’
Utilisation de l’AVNavigator intégré (suite)
5
Page 16

Raccordement
12 3
Raccordement des enceintes
Le récepteur fonctionne avec deux enceintes stéréo seulement (enceintes avant sur le schéma)
mais il est conseillé d’utiliser au moins cinq enceintes, et avec une configuration complète le
son surround sera bien meilleur.
Pour obtenir le son surround le plus agréable, installez vos enceintes comme illustré ci-dessous.
Système surround à 7.1 canaux :
R
L
SW
C
SR
SBR
SL
SBL
Raccordement des câbles d’enceintes
Veillez à bien raccorder l’enceinte de droite
à la borne droite (R) et l’enceinte de gauche
à la borne de gauche (L). Assurez-vous aussi
que les bornes positives et négatives (
sur le récepteur correspondent à celles des
enceintes.
Torsadez les fils ensemble.
1
Dévissez la borne et insérez la partie
2
dénudée des fils.
Serrez la borne.
3
+/–
L
C
R
SL
SR
SBL
SBR
SW
)
– Avant Gauche
– Centre
– Avant Droite
– Surround Gauche
– Surround Droite
– Surround arrière Gauche
– Surround arrière Droite
– Caisson de grave
Remarque
• Il existe aussi d’autres façons de connecter
les enceintes (avant haute, avant large, etc.).
Reportez-vous à la rubrique “Raccordement
de votre équipement” du mode d’emploi
pour plus d’informations.
ATTENTION
• Avant de réaliser ou de modifier des
liaisons, éteignez les appareils et
débranchez le cordon d’alimentation de
la prise électrique.
• Ces bornes d’enceintes sont soumises à
une tension
tout risque de décharge électrique lors
du branchement ou débranchement
des câbles d’enceintes, débranchez le
cordon d’alimentation avant de toucher
les parties non isolées.
DANGEREUSE
. Pour éviter
Après avoir installé les enceintes, raccordez-les de la façon ci-dessous.
Avant Droite
(R)
PRE OUT
SUB
WOOFER
1
2
Surround Droite
(SR)
PRE OUT
FRONT HEIGHT / WIDE /
SURROUND BACK / HDZONE
SURROUNDCENTERFRONT
A
(
)
Single
RLRLRLRL
SPEAKERS
Surround arrière Droite
Caisson de
grave
(SW)
LINE LEVEL
INPUT
SUB
WOOFER
1
2
B
SBR
(
)
A
Centre
(C)
SURROUNDCENTERFRONT
SPEAKERS
Surround arrière Gauche
SBL
(
SURROUND BACK / HDZONE
)
Remarque
Avant
Gauche
(L)
FRONT HEIGHT / WIDE /
(
)
Single
RLRLRLRL
Surround Gauche
(SL)
B
SURROUND
10 mm
• Si vous raccordez une seule enceinte surround arrière, raccordez-la aux bornes
BACK L (Single)
.
• Cet appareil accepte les enceintes ayant une impédance nominale de 6 W à 16 W.
6 6
Page 17

Raccordement (suite)
A
A
ANTENNA
FM UNBAL
75
AM LOOP
PRÉCAUTION DE VENTILATION
Lors de l’installation de l’appareil, veillez à laisser un
espace suffisant autour de ses parois de manière à
améliorer la dissipation de chaleur (au moins 40 cm sur
le dessus, 10 cm à l’arrière et 20 cm de chaque côté).
A
Les fentes et ouvertures du coffret sont prévues pour la
ventilation
l’appareil et pour éviter sa surchauffe. P
risques d’incendie, ne bouchez jamais les ouvertures et
ne les recouvrez pas d’objets, tels que journaux, nappes
ou rideaux, et
épais ou un lit
Raccordement d’un téléviseur et de
lecteurs
Téléviseur compatible HDMI/DVI
Lecteur de disque Blu-ray
compatible HDMI/DVI
HDMI IN
OUT 1
(
CONTROL
HDMI OUT
DIGITAL OUT
OPTICAL
A
BD IN
1
IN
)
OPTICAL
(TV)
1
(
)
DVD
OUT 2
OUT 1
HDMI
BD IN
1
IN
IN2IN3IN4IN /MHL
(
HDZONE
)
(
CONTROL
)
ASSIGNABLE
-
1 6
(
)
(
)
SAT/CBL
DVD
SELECTABLE
IN
ASSIGNABLE
)
LAN
(10/100
6
DC OUTPUT
for WIRELESS LAN
(
(
OUTPUT 5 V
OUTPUT 5 V
)
)
0.6 A MAX
0.9 A MAX
OPTICAL
(TV)
1
IN
ASSIGNABLE
• Avec les paramètres d’usine par défaut, la vidéo depuis
le câble vidéo ou le câble du composant ne sera pas
restituée par la prise HDMI. Pour restituer la vidéo, vous
devez changer l’entrée vidéo sur l’appareil connecté à l’aide
du câble vidéo ou du câble du composant et régler
ON
sur
. Reportez-vous à la rubrique “Réglages des options
vidéo” du mode d’emploi pour plus d’informations.
Raccordement des antennes
AM LOOP
FM UNBAL
75
ANTENNA
Remarque
21
Antenne cadre AM
Antenne fil FM
V.CONV
touchez jamais le cordon d’alimentation lorsque vous avez
les mains mouillées, car cela pourrait causer un courtcircuit ou une électrocution. Ne placez pas l’appareil, un
meuble ou tout autre objet sur le cordon d’alimentation et
ne coincez pas le cordon. Ne faites jamais de nœud sur
le cordon, et ne le nouez pas avec d’autres câbles. Les
cordons d’alimentation doivent être placés de telle sorte
que l’on ne risque pas de marcher dessus. Un cordon
d’alimentation endommagé peut entraîner un incendie
ou une électrocution. Vérifiez le cordon d’alimentation
de temps en temps. Si vous le trouvez abîmé, demandez
à votre service après-vente Pioneer le plus proche de le
remplacer.
• Utilisez exclusivement le cordon d’alimentation fourni avec
cet appareil.
• N’utilisez pas ce cordon à d’autres fins que celle indiquée
ci-dessous.
• Lorsque le récepteur n’est pas utilisé régulièrement
(pendant les vacances, par exemple), il doit être débranché
de la prise d’alimentation murale.
• Avant de le débrancher, assurez-vous que le témoin bleu
STANDBY/ON
u
Branchez le cordon d’alimentation fourni à la
1
est éteint.
prise AC IN située à l’arrière du récepteur.
Branchez l’autre extrémité sur une prise
2
électrique.
• Si votre téléviseur ne prend pas en charge la fonction HDMI
de canal de retour audio, vous devrez effectuer une liaison par
câble numérique optique (
) pour écouter le son du téléviseur
via le récepteur.
• Si votre téléviseur prend en charge la fonction HDMI de
canal de retour audio, le son du téléviseur est transmis au
récepteur par la prise HDMI et il est inutile de raccorder un
câble numérique optique (
HDMI Setup
sur
ON
). Dans ce cas, réglez
. Reportez-vous à la rubrique “Réglage
de l’HDMI” du mode d’emploi pour plus d’informations.
• Veuillez vous reporter au Guide d’utilisation du téléviseur
pour consulter les instructions concernant les connexions
et la configuration du téléviseur.
ARC
dans
• Reportez-vous aux instructions sur le CD-ROM fourni si
vous voulez raccorder un téléviseur ou un lecteur d’une
autre façon que par une liaison HDMI.
• Reportez-vous aux instructions sur le CD-ROM fourni pour
d’autres liaisons.
Branchement du récepteur
N’effectuez le branchement qu’après avoir raccordé tous les
composants au récepteur, y compris les enceintes.
ATTENTION
• Saisissez le cordon d’alimentation par la prise. Ne
débranchez jamais la fiche en tirant sur le cordon et ne
VERTISSEMENT
, pour assurer un fonctionnement stable de
our éviter les
n’utilisez pas l’appareil posé sur un tapis
.
D3-4-2-1-7b*_A1_Fr
7
Page 18

Configuration initiale
ALL ZONE STBY
SOURCE
STANDBY/ON
MAIN
SUB ZONE CONTROL
Z2 Z3 HDZ
RECEIVER
8
Avant de commencer
Insérez des piles dans la télécommande.
1
Les piles fournies avec l’appareil sont destinées à vérifier
le bon fonctionnement de l’appareil et risquent de ne pas
durer longtemps. Nous vous conseillons d’utiliser des
piles alcalines dont l’autonomie est plus longue.
Allumez le récepteur et votre téléviseur.
2
Sélectionnez l’entrée du téléviseur pour qu’il
3
se connecte au récepteur.
Allumez le caisson de grave et augmentez le
4
volume.
AVERTISSEMENT
• N’utilisez pas ou ne rangez pas les piles en plein soleil ou à un
endroit très chaud, comme dans une voiture ou près d’un appareil de
chauffage. Les piles pourraient fuir, surchauffer, exploser ou prendre
feu. Cela peut aussi réduire leur durée de vie et leurs performances.
ATTENTION
• Lors de l’insertion des piles, veillez à ne pas endommager
les ressorts au niveau des bornes (–) des piles. Les piles
pourraient fuir ou surchauffer.
• Pour la mise au rebut des piles/batteries usées, veuillez
vous conformer aux réglementations gouvernementales
ou environnementales en vigueur dans votre pays/région.
Configuration automatique du son
surround (MCACC)
Lors du calibrage acoustique multicanaux automatique
(MCACC), le microphone de configuration fourni est utilisé
pour mesurer et analyser la tonalité de test émise par les
enceintes. Cette configuration permet d’effectuer des mesures
et réglages extrêmement précis et de créer un environnement
d’écoute optimal pour chaque situation.
Important
• Les mesures doivent être faites dans un environnement
calme.
• Positionnez le microphone sur un trépied (si vous en avez un)
pour qu’il se trouve à hauteur d’oreilles en position d’écoute
normale. Sinon, positionnez le microphone à hauteur d’oreille
en le posant sur une table ou sur une chaise.
• Il ne sera pas possible d’obtenir des mesures précises s’il y a des
obstacles entre les enceintes et la position d’écoute (microphone).
• Pendant les mesures éloignez-vous de la position d’écoute
et actionnez la télécommande loin de toutes les enceintes.
Raccordez le microphone de configuration fourni.
1
ADVANCED
FL OFF
Microphone
L’écran
MCACC
SPEAKERS CONTROL – MULTI-ZONE – ON / OFFBANDTUNER EDIT TUNE PRESET ENTER
AUTO SURR/ALC/
INPUT
SELECTOR
STREAM DIRECT
STANDBY/ON
MCACC
PHONES
SETUP MIC
Trépied
Full Auto MCACC
1a.Full Auto MCACC
Speaker System : Normal(SB/FH
EQ Type : ---
MCACC : M1.MEMORY 1
Measurement Type : Basic
START
Exit Return
iPod iPhoneHDMI
iPod iPhone
ADVANCED
STANDARD
DIRECT
CONTROLSTATUS
SURROUND
SURROUND
MCACC
SETUP
MASTER
VOLUME
5V 1 A
HDMI 5 INPUT
MIC
apparaît sur votre téléviseur.
A/V RECEIVER
)
Appuyez sur MAIN RECEIVER de la
2
télécommande pour effectuer les opérations.
• Lorsque le curseur est amené sur
Basic
et que
Level/Speaker Distance
Sélectionner
automatiquement
est sélectionné,
est ajustés automatiquement.
Expert
permet également d’ajuster
Standing Wave/Acoustic Cal EQ
(caractéristiques de fréquence).
Amenez le curseur sur START et appuyez sur la
3
Measurement Type
Speaker Setting/Channel
touche ENTER.
• La mesure automatique commence.
• La mesure dure de 3 à 12 minutes.
Suivez les instructions affichées à l’écran.
4
• Le réglage automatique est terminé lorsque la page Home
Menu apparaît.
HOME MENU
A/V RECEIVER
Exit Return
s’affiche, les fils du cordon d’enceinte
Reverse Phase
• Si
1. Advanced MCACC
2. MCACC Data Check
3. Data Management
4. System Setup
5. Network Information
6. Operation Mode Setup
(+ et –) ont peut-être été inversés. Vérifiez les liaisons des
enceintes.
Même si les liaisons sont correctes,
Reverse Phase
peut s’afficher, selon les enceintes et l’environnement
surround. Ceci n’a cependant aucun effet sur les mesures,
et vous pouvez sélectionner
Go Next
.
• Si l’alimentation électrique se coupe, l’âme du câble des
enceintes est peut-être en contact avec le panneau arrière
ou alors les fils (+) et (–) se touchent, ce qui provoque
l’activation des circuits de protection. Torsadez de nouveau
l’âme du câble des enceintes et raccordez-le de manière à
ce qu’il ne dépasse pas hors de la borne d’enceinte.
Assurez-vous de débrancher le microphone de
5
configuration.
Page 19

Lecture de base
2
3
5
Sélectionnez l’entrée du récepteur.
Lecture multicanaux
STANDBY/ON
ALL ZONE STBY
RECEIVER
MAIN
SOURCE CONTROL
DVDBD
USBADPTROKU
iPod
TUNER
TV
INPUT
STATUS
AUDIO P. VIDEO P.
TOP
MENU
HOME
MENU
SOURCE
SUB ZONE CONTROL
Z2 Z3 HDZ
HDMI
SAT
VOL
OUT P.
ENTER
MHL
CD
NET
ALL
VOLUME
MUTE
TOOLS
RETURN
BT
TV
MENU
2
Ex.) Appuyez sur BD pour sélectionner l’entrée BD.
Appuyez sur AUTO pour sélectionner ‘AUTO
3
SURROUND’.
Appuyez aussi sur
SURR
multicanaux. Sélectionnez votre mode d’écoute préférée.
Démarrez la lecture sur le lecteur.
4
Ex.) Démarrez la lecture sur le lecteur de disque Blu-ray.
Utilisez VOLUME +/– pour régler le volume.
5
• Si aucun son ne sort des enceintes centrales et arrière,
appuyez sur
SURR
ou
d’écoute.
Ex.) Appuyez plusieurs fois sur la touche
sélectionner
Aucun son n’est émis du caisson de grave
•
EXT.STEREO
Cause - les enceintes avant sont réglées sur LARGE.
Si la source audio est à 2 voies, la composante basses
fréquences n’est pas émise par le caisson de grave, mais
ADV
ou
ADV
pour la lecture
pour modifier les modes
.
ADV
pour
par les enceintes avant.
LISTENING MODE
SURRAUTO
MPX
PRESET TUNE
2
13
546
8
79
D.ACCESS
CLR
0
DIMMER SLEEP
CH LV.
ADV
BAND PTY
AUDIO
DISP
CH
CLASS
ENTER
CH
RCU SETUP
Fav
Solution – Pour une écoute du caisson de grave,
modifiez le réglage des enceintes.
Méthode 1 : Modifiez le réglage des enceintes avant en
SMALL
.
La composante basses fréquences est à présent émise
par le caisson de grave et non pas des enceintes avant.
Lorsque les enceintes avant présentes de bonnes
performances de reproduction des basses fréquences,
nous recommandons de ne pas modifier ce réglage.
Méthode 2 : Modifiez le réglage du caisson de grave en
PLUS
.
La composante basses fréquences est émise par les
enceintes avant et le caisson de grave. De ce fait, les
sons graves sont parfois trop puissants. Dans ce cas,
RECEIVER
nous recommandons de ne pas modifier le réglage ou
d’appliquer la méthode 1.
Allumez le lecteur.
1
Ex.) Allumez le lecteur de disque Blu-ray raccordé à la
HDMI BD IN
prise
.
• Reportez-vous à la rubrique “Réglage des enceintes” du
mode d’emploi pour plus d’informations.
• Si aucun son n’est émis, augmentez le volume à environ
–30 dB.
Remarque
• Lorsque la télécommande est inopérante sur l’appareil
–Lorsque vous utilisez le récepteur, appuyez sur
RECEIVER
avant de l’utiliser.
MAIN
–Lorsque vous voulez utiliser des fonctions comme le réseau,
le TUNER ou l’iPod, appuyez sur la touche de fonction
appropriée (
NET, TUNER, iPod
, etc.) avant de l’utiliser.
Écoute de la radio
Appuyez sur TUNER pour sélectionner le tuner.
1
Si nécessaire, appuyez sur
(FM ou AM).
Appuyez sur TUNE +/– pour accorder une station.
2
• Appuyez sur
TUNE +/–
enfoncée. Le récepteur recherche la station suivante.
• Si vous écoutez une station FM mais que la réception est
faible, appuyez sur
MPX
réglez le récepteur sur le mode de réception mono.
Sauvegarde des stations préréglées
Si vous écoutez souvent une station radio précise, il est
intéressant d’en mémoriser la fréquence pour faire l’accord
rapidement sur cette station lorsque vous souhaitez l’écouter.
Appuyez sur TOOLS pendant la réception
1
du signal de la station que vous voulez
sauvegarder.
Le numéro de préréglage clignote.
Appuyez sur PRESET +/– pour sélectionner le
2
numéro de préréglage souhaité, puis appuyez
sur ENTER.
Le numéro de préréglage cesse de clignoter et la station
est sauvegardée.
Écouter des stations préréglées
Pour ce faire, vous devez avoir préréglé des stations.
Appuyez sur PRESET +/– pour sélectionner la
station préréglée de votre choix.
BAND
pour changer de bande
et maintenez une seconde
pour sélectionner FM MONO et
9
Page 20

Lecture de base (suite)
Lecture d’un iPod
• Environ une minute est nécessaire entre la mise sous
tension et la fin de la phase de démarrage.
Raccordez votre iPod.
1
Vous pouvez raccorder un iPod/iPhone au récepteur.
INPUT
SELECTOR
STANDBY/ON
fourni avec l’iPod
Appuyez sur iPod USB pour sélectionner
2
l’entrée iPod/USB.
Lorsque les noms de dossiers et de fichiers apparaissent
sur l’afficheur, vous pouvez écouter la musique enregistrée
sur l’iPod.
10
Utilisez
3
puis appuyez sur ENTER pour naviguer dans
cette catégorie.
• Pour revenir à tout moment au niveau précédent,
appuyez sur
Utilisez
4
sélectionnée (par exemple, albums).
• Utilisez
Poursuivez votre navigation jusqu’à atteindre
5
les éléments que vous souhaitez lire, puis
appuyez sur pour lancer la lecture.
/
RETURN
/
/
ADVANCED
FL OFF
MCACC
SPEAKERS CONTROL – MULTI-ZONE – ON / OFFBANDTUNER EDIT TUNE PRESET ENTER
AUTO SURR/ALC/
STREAM DIRECT
MCACC
PHONES
SETUP MIC
Câble USB
iPod iPhoneHDMI
iPod iPhone
ADVANCED
STANDARD
STATUS
DIRECT
CONTROL
SURROUND
SURROUND
5 V 1 A
MASTER
VOLUME
5V 1 A
HDMI 5 INPUT
iPod/iPhone
pour sélectionner une catégorie,
.
pour naviguer dans la catégorie
pour passer au niveau précédent/suivant.
Ecoute des stations radio Internet
• Environ une minute est nécessaire entre la mise sous
tension et la fin de la phase de démarrage.
Important
• Pour utiliser une connexion Internet à haut débit, il faut
être abonné à un fournisseur de service Internet. Pour le
détail, contactez le fournisseur de service Internet le plus
proche.
• Pour écouter les stations radio Internet, vous devez avoir
un accès haute vitesse à Internet par une large bande.
Avec un modem de 56 K ou ISDN, vous ne pourrez pas
profiter pleinement de la radio Internet.
• L’accès aux contenus fournis par des tiers exige une
connexion Internet haut débit et peut aussi exiger la
création d’un compte et des droits de souscription. Les
services de contenus de tiers peuvent être changés,
suspendus ou interrompus à tout moment sans préavis,
et Pioneer décline toute responsabilité quant à ces
changements. Pioneer ne certifie ou garantit que les
services de contenus continueront d’être fournis ou
disponibles pendant une période précise et décline toute
garantie explicite ou implicite de ce type.
Appuyez plusieurs fois de suite sur NET pour
1
sélectionner l’entrée INTERNET RADIO.
Il faut quelques secondes au récepteur pour accéder au
réseau.
Utilisez
2
radio Internet que vous voulez écouter, puis
appuyez sur ENTER.
pour sélectionner la station
/
Pour proter au maximum des
nombreuses fonctions de l’appareil
Lancez l’AVNavigator et utilisez le “Interactive
Operation Guide”.
Insérez le CD-ROM dans votre ordinateur
et téléchargez le “Mode d’emploi” (PDF)
apparaissant sur le menu pour le lire.
Fonctions
Lecture d’un dispositif USB
#
Lecture de musique à l’aide de la technologie sans fil
#
Bluetooth
Lecture avec la fonction NETWORK
#
Réglage des options audio
#
Réglages des options vidéo
#
Utilisation des commandes MULTI-ZONE
#
FAQ
Glossaire
Index des fonctions
Remarque
• Cet appareil prend en charge AirPlay. Pour les détails,
reportez-vous à la rubrique “Utilisation d’AirPlay sur un
iPod touch, iPhone, iPad et iTunes” du mode d’emploi et au
site d’Apple (http://www.apple.com).
• Le logiciel de cet appareil peut être mis à jour (“Mise à
jour du logiciel” dans le mode d’emploi). Avec Mac OS, il
peut être mis à jour avec Safari (“Utilisation de Safari pour
mettre à jour le micrologiciel” dans le mode d’emploi).
© 2014 PIONEER HOME ELECTRONICS CORPORATION.
Tous droits de reproduction et de traduction réservés.
Page 21

11
Page 22
Deutsch
Genießen Sie leichte Mehrkanal-Wiedergabe mit diesem Gerät in 3 Schritten:
Anschlüsse
→
Anfangseinstellungen
→
Grundlegende Wiedergabe
.
In dieser Kurzanleitung finden Sie Details zum Verbinden und der Ersteinrichtung, doch
Wiring Navi
in AVNavigator erleichtert diese Schritte
erheblich.
Verbinden Sie das Gerät und nehmen Sie die Ersteinrichtung je nach Verwendungszweck von AVNavigator mit der entsprechenden Methode vor.
Darüber hinaus können Sie mit der
Interactive Operation Guide
in AVNavigator Details zu den grundlegenden Vorgängen erfahren.
Anschluss und Anfangseinstellungen
Anschluss und Anfangseinstellungen entsprechend den
Anweisungen in „Wiring Navi“ im AVNavigator
(Anschluss am Netzwerk ist für die
Anfangseinstellungen erforderlich.)
oder
Anschluss und Anfangseinstellungen unter Bezug auf
diese Kurzanleitung
Kurzanleitung
Diese Anleitung muss nicht unbedingt zu Erläuterungszwecken
gelesen werden.
werden unter
Gehen Sie zu „Verwenden des integrierten AVNavigator“
in dieser Anleitung.
Sie können die
Die Inhalte sind interaktiv mit diesem Produkt verbunden, wobei Sie
während der Verwendung des Produkts mit den Funktionen vertraut
Interactive Operation Guide
gemacht werden und sich diese merken können.
Wiring Navi
in
erläutert.
heranziehen.
Gehen Sie zu in dieser Anleitung weiter.
2
Page 23

Verwenden des integrierten AVNavigator
LAN
(
10/100
)
SCO
Herstellen der Verbindung zum
Netzwerk über die LAN-Schnittstel
-
le
Internet
Computer
LAN-Kabel (getrennt erhältlich)
LAN
Modem
)
(10/100
Router
WAN
LAN
1
2
3
Anschluss an ein WLAN
Drahtlose Verbindung mit einem Netzwerk ist über eine WLANVerbindung möglich. Verwenden Sie das separat vertriebene
AS-WL300 zur Verbindung.
• Verwenden Sie nur das als Zubehör mitgelieferte
Verbindungskabel.
• Bestimmte Einstellungen sind zur Verwendung eines
Wireless LAN-Wandlers (AS-WL300) erforderlich. Für
Anweisungen zum Vornehmen dieser Einstellungen siehe
mit dem Wireless LAN-Wandler (AS-WL300) mitgelieferte
Bedienungsanleitung.
)
LAN
(10/100
DC OUTPUT
)
(10/100
LAN
DC OUTPUT
for WIRELESS LAN
(
OUTPUT 5 V
)
0.6 A MAX
Router
DC 5V WPS
Ethernet
Wireless LAN-Wandler (AS-WL300)
for WIRELESS LAN
(
OUTPUT 5 V
)
0.6 A MAX
Modem
WAN
Internet
Netzkabel, und klemmen Sie das Netzkabel nicht ein.
Machen Sie niemals einen Knoten in das Kabel, und
befestigen Sie es auch nicht an anderen Kabeln. Netzkabel
müssen möglichst so verlegt werden, dass niemand
darauf treten kann. Ein beschädigtes Netzkabel kann
einen Brand oder einen elektrischen Schlag verursachen.
Überprüfen Sie das Netzkabel hin und wieder. Wenn Sie
eine Beschädigung feststellen, wenden Sie sich zwecks
eines Austauschs an einen von Pioneer autorisierten,
unabhängigen Kundendienst.
• Verwenden Sie kein anderes als das im Lieferumfang
dieses Gerätes enthaltene Netzkabel.
• Verwenden Sie das im Lieferumfang enthaltene Netzkabel
nur für die unten beschriebenen Zwecke.
• Wenn dieser Receiver über einen längeren Zeitraum nicht
verwendet werden soll (z. B. wenn Sie verreisen), sollte er
vom Stromnetz getrennt werden, indem der Netzstecker
aus der Wandsteckdose herausgezogen wird.
• Vergewissern Sie sich vor dem Herausziehen des
Netzsteckers, dass die blaue u
STANDBY/ON
-Lampe
nicht mehr leuchtet.
Schließen Sie das mitgelieferte Netzkabel
1
an die AC IN-Buchse auf der Rückseite des
Receivers an.
Schließen Sie das andere Ende an eine
2
Steckdose an.
Einschalten des Geräts
Anschluss des Receivers an das
Stromnetz
Stellen Sie eine LAN-Verbindung her und verbinden Sie das
Netzkabel des Receivers mit einer Steckdose.
Drücken Sie auf
Computer einzuschalten.
Warten Sie nach dem Einschalten einige Minuten, bevor Sie
folgende Bedienschritte vornehmen.
AUHTUNG
• Fassen Sie das Netzkabel am Stecker an. Ziehen Sie
den Stecker nicht durch Ziehen am Kabel heraus, und
berühren Sie das Netzkabel niemals mit nassen Händen,
da dies einen Kurzschluss oder einen elektrischen Schlag
verursachen könnte. Stellen Sie weder das Gerät, noch
ein Möbelstück oder einen anderen Gegenstand auf das
STANDBY/ON
u
STANDBY/ON
um den Receiver und Ihren
MCACC
PHONES
SETUP MIC
3
Page 24

Verwenden des integrierten AVNavigator (Fortsetzung)
Starten des integrierten AVNavigator
Bedienen Sie AVNavigator, indem Sie den Anweisungen auf
dem Bildschirm Ihres Computers usw. folgen.
Betriebsumgebung
• Der AVNavigator kann in den folgenden Umgebungen
verwendet werden:
–Windows-PC: Microsoft
Windows
–Mac OS: Mac OSX (10.7, 10.8 oder 10.9)
–iPad/iPhone/iPod touch: iOS 7
–Android-Gerät: Android 4.0.4
• Einige AVNavigator-Funktionen verwenden einen
Internetbrowser. Die folgenden Browser werden
unterstützt:
–Windows-PC: Internet Explorer
–Mac OS/iPad/iPhone/iPod touch: Safari 6.0
–Android-Gerät: Android-Browser
• Um bestimmte AVNavigator-Funktionen nutzen zu können,
muss die aktuellste Version von Adobe
installiert sein. Details finden Sie auf folgender Website:
http://www.adobe.com/downloads/
• AVNavigator funktioniert je nach den Computer-
Netzwerkeinstellungen oder Sicherheitseinstellungen
eventuell nicht.
®
7/Windows® 8/Windows® 8.1
®
Windows® XP/Windows Vista®/
®
8, 9, 10, 11
®
Flash® Player
Verwenden eines Windows-PCs
• Starten Sie Internet Explorer und geben Sie die IP-Adresse
dieses Geräts in die Adressleiste des Internet Explorers ein.
(Geben Sie in einem Webbrowser die IP-Adresse „http://(IPAdresse des Receivers)“ ein.) Sie können die IP-Adresse dieses
Geräts auf seinem vorderen Bedienfeld anzeigen, indem Sie
STATUS
auf die
• Verwenden Sie bei einem Windows-PC mit einem anderen
Betriebssystem als Windows XP die folgende Methode,
um AVNavigator zu starten.
• Starten Sie den Explorer und klicken Sie im ‚
Ordner mit der rechten Maustaste auf <VSX-924> und
klicken Sie dann auf ‚
-Taste auf der Fernbedienung drücken.
Network
View device webpage
‘.
‘-
Verwenden eines Mac
Starten Sie Safari, und klicken Sie auf <VSX-924>, das unter
Bonjour
‚
‘ auf der Lesezeichenleiste angezeigt wird.
Verwenden eines iPad/iPhone/iPod touch
Laden Sie die kostenlose Anwendung iControlAV5 aus dem
App Store herunter.
Starten Sie iControlAV5 und folgen Sie den Anweisungen
auf dem Bildschirm. Drücken Sie anschließend auf dem
Startbildschirm auf ‚
iPad
AVNavigator
iPhone/iPod touch
‘ oder das Symbol.
• Wenn ‚
Bonjour
Kontrollkästchen ‚
der Registerkarte ‚
‘ nicht angezeigt wird, markieren Sie das
Include Bonjour in the Favorites bar
Advanced
‘ im Safarimenü ‚
Preferences...
‘ in
‘.
4
Page 25

Verwenden eines iPads
■
Auf einem iPad kann AVNavigator für iPad genutzt werden.
Laden Sie AVNavigator für iPad aus den App Store herunter.
Starten Sie AVNavigator für iPad und folgen Sie den
Anweisungen auf dem Bildschirm.
Verwenden eines Android-Geräts
Laden Sie iControlAV5 von Google Play Store herunter. Starten
Sie iControlAV5 und folgen Sie den Anweisungen auf dem
Bildschirm. Drücken Sie dann auf dem Startbildschirm auf das
Symbol.
Über die Verwendung von Wiring
Navi
Wiring Navi wird gestartet, wenn ‚
AVNavigator-Bildschirm gedrückt wird.
• Fahren Sie mit fort, wenn die
Verbindungsnavigation abgeschlossen ist.
Wiring Navi
‘ auf dem
Verwenden des integrierten AVNavigator (Fortsetzung)
5
Page 26

12 3
Anschlüsse
Anschluss der Lautsprecher
Der Receiver arbeitet mit nur zwei Stereolautsprechern (den vorderen Lautsprechern in der
Abbildung), aber die Verwendung von mindestens fünf Lautsprechern wird empfohlen, und eine
komplette Einrichtung ist am besten für den Surroundklang.
Stellen Sie Ihre Lautsprecher wie unten dargestellt auf, um einen angenehmen Surroundklang zu erzielen.
7.1-Kanal-Surround-System:
R
L
SW
C
SR
SBR
SL
SBL
Anschluss der Lautsprecherkabel
Stellen Sie sicher, dass Sie den Lautsprecher
rechts an den rechten Anschluss (R) und den
Lautsprecher links an den linken Anschluss (L)
anschließen. Stellen Sie außerdem sicher, dass die
positiven/negativen (
am Receiver den entsprechenden Anschlüssen
der Lautsprecher entsprechen.
Drehen Sie freiliegende Drahtstränge
1
zusammen.
Lösen Sie die Klemme und setzen Sie
2
den freiliegenden Draht ein.
Ziehen Sie die Klemme fest.
3
+/–
) Lautsprecheranschlüsse
L
– Vorne links
C
– Center
R
– Vorne rechts
SL
– Surround links
SR
– Surround rechts
SBL
– Surround hinten links
SBR
– Surround hinten rechts
SW
– Subwoofer
Hinweis
• There are also other speaker connection
patterns (front height, front wide, etc.).
Einzelheiten siehe „Anschluss der Geräte“
in der Bedienungsanleitung.
AUHTUNG
• Bevor Sie Verbindungen herstellen
oder ändern, schalten Sie bitte
die Stromversorgung aus, und
ziehen Sie das Netzkabel aus der
Wechselstromsteckdose.
• Diese Lautsprecheranschlüsse führen
LEBENSGEFÄHRLICHE
beim Anschließen oder Trennen der
Lautsprecherkabel Stromschlaggefahr
zu vermeiden, ziehen Sie den
Netzstecker, bevor Sie nicht isolierte
Teile berühren.
Spannung. Um
Schließen Sie Lautsprecher nach der Installation wie unten dargestellt an.
Vorne rechts
(R)
PRE OUT
SUB
WOOFER
1
2
Surround rechts
(SR)
PRE OUT
FRONT HEIGHT / WIDE /
SURROUND BACK / HDZONE
SURROUNDCENTERFRONT
A
(
)
Single
RLRLRLRL
SPEAKERS
Surround hinten rechts
Subwoofer 1
(SW)
LINE LEVEL
INPUT
SUB
WOOFER
1
2
B
SBR
(
)
A
Center
(C)
Surround hinten links
SURROUNDCENTERFRONT
SPEAKERS
SBL
(
SURROUND BACK / HDZONE
)
Hinweis
FRONT HEIGHT / WIDE /
(
)
Single
RLRLRLRL
Surround links
Vorne links
(L)
B
(SL)
10 mm
6
• Falls Sie nur einen hinteren Surround-Lautsprecher anschließen, schließen Sie diesen an
SURROUND BACK L (Single)
die
-Anschlüsse an.
• Dieses Gerät unterstützt Lautsprecher mit einer Nennimpedanz von 6 W bis 16 W.
Page 27

Anschließen (Fortsetzung)
A
A
ANTENNA
FM UNBAL
75
AM LOOP
VORSICHTSHINWEIS ZUR BELÜFTUNG
Bei der Aufstellung dieses Gerätes muss für einen
ausreichenden
einwandfreie Wärmeabfuhr zu gewährleisten
(mindestens 40 cm oberhalb des Gerätes, 10 cm hinter
dem Gerät und jeweils 20 cm an der Seite des Gerätes)
W
Im Gerätegehäuse sind
Öffnungen vorgesehe
Überhitzung des Gerätes zu verhindern und einen
zuverlässigen Betrieb zu gewährleisten
Brandgefahr auszuschließe
auf keinen
Zeitunge
werden
einem dicken
e
Anschluss eines Fernsehgeräts und
von Wiedergabe-Komponenten
HDMI/DVI-kompatibles
HDMI/DVI-kompatibler
Blu-ray Disc-Player
1
)
BD IN
IN2IN3IN4IN /MHL
(
SAT/CBL
)
DIGITAL OUT
OPTICAL
LAN
(10/100
6
(
OUTPUT 5 V
)
0.9 A MAX
IN
)
DC OUTPUT
for WIRELESS LAN
(
OUTPUT 5 V
)
0.6 A MAX
HDMI OUT
OUT 1
(
CONTROL
)
BD IN
1
IN
(
)
DVD
OUT 2
OUT 1
HDMI
IN
(
HDZONE
)
(
CONTROL
)
ASSIGNABLE
-
1 6
(
DVD
SELECTABLE
• Wenn der Fernseher die HDMI Audio Return Channel-Funktion
nicht unterstützt, erfordert dies den Anschluss eines optischen
Digitalkabels (
) zum Hören des Fernsehtons über den Receiver.
• Wenn der Fernseher die HDMI Audio Return Channel-Funktion
unterstützt, wird der Ton des Fernsehers über den HDMIAnschluss zum Receiver eingespeist, sodass Sie kein optisches
Digitalkabel (
ARC
im
) anschließen müssen. Stellen Sie in diesem Fall
HDMI Setup
auf ON. Einzelheiten siehe „HDMI Setup“
in der Bedienungsanleitung.
• Beachten Sie auch die Bedienungsanleitung des Fernsehgeräts
für Anweisungen zum Anschließen und Einrichten für das
Fernsehgerät.
• Bei den standardmäßigen Werkseinstellungen wird kein Video
Fernsehgerät
A
OPTICAL
(TV)
1
ASSIGNABLE
OPTICAL
(TV)
1
IN
ASSIGNABLE
HDMI IN
über den HDMI-Anschluss ausgegeben, wenn die Verbindung
über ein Video- oder Komponentenkabel erfolgt. Um ein Video
ausgeben zu können, muss der Videoeingang zu dem Gerät
umgeschaltet werden, an den das Video- oder Komponentenkabel
angeschlossen ist, und
V.CONV
muss auf ON. Einzelheiten siehe
„Einstellen der Video-Optionen“ in der Bedienungsanleitung.
Anschluss der Antennen
21
AM LOOP
FM UNBAL
75
ANTENNA
Hinweis
• Siehe Bedienungsanleitung auf der mitgelieferten CD-ROM,
wenn Sie ein Fernsehgerät oder eine Wiedergabekomponente auf
andere Weise als über HDMI-Verbindung anschließen wollen.
• Siehe Bedienungsanleitung auf der mitgelieferten bezüglich
Anschluss anderer Geräte.
Anschluss des Receivers an das
Stromnetz
Schließen Sie den Receiver erst an das Stromnetz an, nachdem
Sie alle gewünschten Komponenten an diesen Receiver
angeschlossen haben, einschließlich der Lautsprecher.
AUHTUNG
• Fassen Sie das Netzkabel am Stecker an. Ziehen Sie den
Stecker nicht durch Ziehen am Kabel heraus, und berühren
Sie das Netzkabel niemals mit nassen Händen, da dies einen
Kurzschluss oder einen elektrischen Schlag verursachen
könnte. Stellen Sie weder das Gerät, noch ein Möbelstück oder
einen anderen Gegenstand auf das Netzkabel, und klemmen Sie
das Netzkabel nicht ein. Machen Sie niemals einen Knoten in
das Kabel, und befestigen Sie es auch nicht an anderen Kabeln.
Netzkabel müssen möglichst so verlegt werden, dass niemand
darauf treten kann. Ein beschädigtes Netzkabel kann einen
Brand oder einen elektrischen Schlag verursachen. Überprüfen
Sie das Netzkabel hin und wieder. Wenn Sie eine Beschädigung
feststellen, wenden Sie sich zwecks eines Austauschs an einen
von Pioneer autorisierten, unabhängigen Kundendienst.
• Verwenden Sie kein anderes als das im Lieferumfang dieses
Gerätes enthaltene Netzkabel.
• Verwenden Sie das im Lieferumfang enthaltene Netzkabel nur
für die unten beschriebenen Zwecke.
• Wenn dieser Receiver über einen längeren Zeitraum nicht
verwendet werden soll (z. B. wenn Sie verreisen), sollte er vom
Stromnetz getrennt werden, indem der Netzstecker aus der
Wandsteckdose herausgezogen wird.
• Vergewissern Sie sich vor dem Herausziehen des Netzsteckers,
dass die blaue u
Schließen Sie das mitgelieferte Netzkabel an die
1
STANDBY/ON
-Lampe nicht mehr leuchtet.
AC IN-Buchse auf der Rückseite des Receivers an.
Schließen Sie das andere Ende an eine Steckdose an.
2
Freiraum gesorgt werden, um eine
ARNUNG
Ventilationsschlitze und andere
n, die dazu dienen, eine
. Um
n, dürfen diese Öffnungen
Fall blockiert oder mit Gegenständen (z.B.
n, Tischdecken und Gardinen) abgedeckt
, und das Gerät darf beim Betrieb nicht auf
Teppich oder Bett aufgestellt sein.
D3-4-2-1-7b*_A1_D
.
7
Page 28

Vor der Inbetriebnahme
ALL ZONE STBY
SOURCE
STANDBY/ON
MAIN
SUB ZONE CONTROL
Z2 Z3 HDZ
RECEIVER
1. Advanced MCACC
2. MCACC Data Check
3. Data Management
4. System Setup
5. Network Information
6. Operation Mode Setup
Exit Return
HOME MENU
A/V RECEIVER
Legen Sie die Batterien in die Fernbedienung ein.
1
Die mit dem Gerät mitgelieferten Batterien sind dazu
gedacht, den anfänglichen Betrieb zu prüfen; sie halten
nicht für längere Zeit. Wir empfehlen die Verwendung von
Alkalibatterien, da diese eine längere Lebensdauer haben.
Schalten Sie den Receiver und Ihr Fernsehgerät ein.
2
Schalten Sie den Fernseheingang um, so dass
3
er mit dem Receiver verbunden ist.
Schalten Sie den Subwoofer ein und steigern
4
die Lautstärke.
WARNUNG
• Verwenden oder lagern Sie Batterien nicht in direktem Sonnenlicht
oder an sehr heißen Orten wie im Inneren eines Fahrzeugs oder in
der Nähe von Heizkörpern. Dadurch können Batterien leck werden,
sich überhitzen oder in Brand geraten. Außerdem kann die
Lebensdauer oder Leistung von Batterien beeinträchtigt werden.
AUHTUNG
• Stellen Sie beim Einsetzen der Batterien sicher, dass nicht die
Federn an den (–)-Batteriepolen beschädigt werden. Dadurch
können die Batterien auslaufen oder sich überhitzen.
• Beachten Sie bei der Entsorgung verbrauchter Batterien
und Akkus die gesetzlichen und umweltrechtlichen
Bestimmungen Ihres Wohnortes.
Automatische Einstellung des Surround-Klangs (MCACC)
Die Auto Multi-Channel ACoustic Calibration (MCACC)
Einrichtung verwendet das mitgelieferte Setup-Mikrofon, um
8
Anfangseinstellungen
den von den Lautsprechern ausgegebenen Testton zu messen
und zu analysieren. Dieses Setup aktiviert automatische
hochpräzise Messung und Einstellungen; seine verwendet
führt zu einer optimalen Hörumgebung für den Anwender.
Wichtig
• Führen Sie die Messung in einer leisen Umgebung aus.
• Wenn ein Stativ zur Verfügung steht, stellen Sie das Mikrofon bitte
in der Höhe auf, die Ihrer Hörposition entspricht. Wenn nicht,
stellen Sie das Mikrofon in Ohrhöhe auf einen Tisch oder Stuhl.
• Genaue Messung kann unmöglich sein, wenn sich
Hindernisse zwischen den Lautsprechern und der
Hörposition (Mikrofon) befinden.
• Treten Sie bei der Messung von der Hörposition zurück
und führen Sie Bedienung mit der Fernbedienung von der
Außenseite aller Lautsprecher aus.
Schließen Sie das mitgelieferte Setup-Mikrofon an.
1
ADVANCED
FL OFF
MCACC
SPEAKERS CONTROL – MULTI-ZONE – ON / OFFBANDTUNER EDIT TUNE PRESET ENTER
INPUT
SELECTOR
STANDBY/ON
MCACC
PHONES
SETUP MIC
Die Bildschirmansicht
Ihrem Fernsehgerät.
Speaker System : Normal(SB/FH
EQ Type : ---
MCACC : M1.MEMORY 1
Measurement Type : Basic
START
Exit Return
AUTO SURR/ALC/
STREAM DIRECT
1a.Full Auto MCACC
iPod iPhoneHDMI
iPod iPhone
ADVANCED
STANDARD
DIRECT
CONTROLSTATUS
SURROUND
SURROUND
MCACC
SETUP
MASTER
VOLUME
5V 1 A
HDMI 5 INPUT
MIC
Full Auto MCACC
A/V RECEIVER
)
erscheint auf
Drücken Sie auf MAIN RECEIVER auf der
2
Fernbedienung, und bedienen Sie das Gerät.
• Wenn der Cursor auf
Basic
ausgewählt ist, werden die Optionen
Setting/Channel Level/Speaker Distance
angepasst. Durch Wahl von
die Einstellungen
(Frequenzmerkmale) automatisch angepasst werden.
Bringen Sie den Cursor auf START, und drücken
3
Measurement Type
zeigt und
Speaker
automatisch
Expert
können ebenfalls
Standing Wave/Acoustic Cal EQ
Sie auf die ENTER-Taste.
• Die automatische Messung beginnt.
• Die Messung dauert etwa 3 bis 12 Minuten.
Befolgen Sie die Anweisungen auf der
4
Bildschirmanzeige.
• Die automatische Einstellung ist beendet, wenn die
Bildschirmansicht Home Menu erscheint.
• Wenn Reverse Phase angezeigt wird, kann die Verdrahtung
(+ und –) des Lautsprechers invertiert sein.
Überprüfen Sie die Lautsprecheranschlüsse.
Selbst wenn die Verbindungen korrekt sind, wird eventuell
je nach den Lautsprechern und der Umgebung
Phase
angezeigt. Dies beeinflusst die Messung nicht,
wählen Sie deshalb
Go Next
.
Reverse
• Wenn die Stromversorgung getrennt wird, steht der
Kern des Lautsprecherkabels eventuell in Kontakt mit
der Geräterückseite, oder die (+)- und (–)-Kontakte
berühren einander, was die Schutzschaltung aktiviert.
Verdrillen Sie den Kern des Lautsprecherkabels erneut,
und schließen Sie das Kabel so an, dass es nicht aus dem
Lautsprecheranschluss herausragt.
Stellen Sie sicher, dass das Setup-Mikrofon
5
nicht angeschlossen ist.
Page 29

Grundlegende Wiedergabe
2
3
5
Schalten Sie den Eingang des Receivers ein.
Mehrkanalwiedergabe
STANDBY/ON
ALL ZONE STBY
SUB ZONE CONTROL
RECEIVER
MAIN
SOURCE CONTROL
DVDBD
USBADPTROKU
iPod
BT
TUNER
TV
INPUT
STATUS
AUDIO P. VIDEO P.
TOP
MENU
HOME
MENU
SOURCE
Z2 Z3 HDZ
SAT
MHL
TV
CD
VOLUME
VOL
MUTE
OUT P.
ENTER
RETURN
HDMI
NET
ALL
TOOLS
MENU
2
Z.B.) Drücken Sie BD, um den BD-Eingang zu wählen.
Drücken Sie AUTO zur Wahl von ‚AUTO SURROUND‘.
3
Drücken Sie auch
SURR
Wählen Sie ihre bevorzugte Hörbetriebsart.
Starten Sie die Wiedergabe der
4
Wiedergabekomponente.
Z.B.) Starten Sie die Wiedergabe des Blu-ray Disc-Players.
Mit dem VOLUME +/– können Sie die
5
Lautstärke einstellen.
• Wenn kein Ton vom Center- und hinteren Lautsprecher
zu hören ist, drücken Sie auf
Hörmodus zu wechseln.
Z.B.) Drücken Sie mehrmals auf die
STEREO
Wenn der Subwoofer keinen Ton ausgibt
•
Ursache – Der vordere Lautsprecher ist auf LARGE
eingestellt.
Wenn eine 2-Kanal-Audioquelle ausgewählt ist, wird die
auszuwählen.
oder
ADV
für Mehrkanalwiedergabe.
SURR
oder
ADV
ADV
, um den
-Taste, um
EXT.
Niederfrequenzkomponente nicht über den Subwoofer,
LISTENING MODE
SURRAUTO
MPX
PRESET TUNE
2
13
546
8
79
D.ACCESS
CLR
0
DIMMER SLEEP
CH LV.
ADV
BAND PTY
AUDIO
DISP
CH
CLASS
ENTER
CH
RCU SETUP
Fav
sondern über den vorderen Lautsprecher ausgegeben.
Lösung – Ändern Sie die Lautsprechereinstellung für
eine Ausgabe über den Subwoofer.
Methode 1: Stellen Sie die Einstellung für den vorderen
Lautsprecher auf
SMALL
.
Die Niederfrequenzkomponente wird nicht über den vorderen
Lautsprecher, sondern den Subwoofer ausgegeben. Wenn die
Niederfrequenz-Wiedergabefähigkeit des vorderen Lautsprechers
hoch ist, wird eine Änderung der Einstellung nicht empfohlen.
Methode 2: Stellen Sie die Subwoofereinstellung auf
PLUS
Die Niederfrequenzkomponente wird über den vorderen
.
Lautsprecher und Subwoofer ausgegeben. Aus diesem
Grund werden gelegentlich zu laute Bässe ausgegeben.
In diesem Fall wird eine Änderung der Einstellung nicht
empfohlen bzw. wechseln Sie zu Methode 1.
RECEIVER
• Einzelheiten siehe „Lautsprechereinstellung“ in der
Bedienungsanleitung.
Schalten Sie die Wiedergabekomponente ein.
1
Z.B.) Schalten Sie den Blu-ray Disc-Player, der an den
HDMI BD IN
-Anschluss angeschlossen ist, ein.
• Wenn kein Ton ausgegeben wird, erhöhen Sie die
Lautstärke auf ca. –30 dB.
Hinweis
• Wenn die Fernbedienung nicht zur Steuerung des Geräts
verwendet werden kann
–Drücken Sie vor der Verwendung des Receivers zuerst auf
MAIN RECEIVER
.
–Drücken Sie bei der Bedienung von Funktionen wie
Netzwerk, TUNER oder iPod vorab auf die entsprechende
Funktionstaste (
NET, TUNER, iPod
usw.).
Radio hören
Drücken Sie TUNER, um den Tuner auszuwählen.
1
Drücken Sie bei Bedarf
(UKW oder MW) zu wechseln.
Drücken Sie TUNE +/–, um auf einen Sender
2
abzustimmen.
• Halten Sie
Receiver beginnt mit der Suche nach dem nächsten Sender.
• Wenn der Empfang eines schwach einfallenden UKWSenders schwach ist, drücken Sie
wählen und den Receiver auf Mono-Empfang umzuschalten.
TUNE +/–
Speichern der Sender-Voreinstellung
Wenn Sie einen bestimmten Radiosender oft hören, ist es
praktisch, die Frequenz zu speichern, um den Sender später immer
dann einfach aufrufen zu können, wenn Sie ihn hören möchten.
Drücken Sie TOOLS, während ein Signal
1
von dem zu Speichern gewünschten Sender
empfangen wird.
Die Festsendernummer blinkt.
Drücken Sie PRESET +/–, um den von Ihnen
2
gewünschten voreingestellten Sender
auszuwählen, und drücken Sie dann ENTER.
Die Festsendernummer hört auf zu blinken, und der
Receiver speichert den Sender.
Hören voreingestellter Sender
Dazu müssen zunächst Sender voreingestellt sein.
Drücken Sie PRESET +/–, um den von Ihnen
gewünschten voreingestellten Sender
auszuwählen.
BAND
, um den Wellenbereich
für ca. eine Sekunde gedrückt. Der
MPX
, um FM MONO zu
9
Page 30

Grundlegende Wiedergabe (Fortsetzung)
Abspielen eines iPod
• Etwa eine Minute ist zwischen Einschalten und
Fertigstellen der Einrichtung erforderlich.
Schließen Sie Ihren iPod an.
1
Ein iPod/iPhone kann an den Receiver angeschlossen
werden.
ADVANCED
FL OFF
MCACC
SPEAKERS CONTROL – MULTI-ZONE – ON / OFFBANDTUNER EDIT TUNE PRESET ENTER
AUTO SURR/ALC/
INPUT
SELECTOR
STANDBY/ON
USB-Kabel mit dem
iPod mitgeliefert
Drücken Sie iPod USB, um den iPod/USB-
2
STREAM DIRECT
MCACC
PHONES
SETUP MIC
Eingang auszuwählen.
Sobald auf dem Display die Namen der Ordner und Dateien
angezeigt werden, können Sie über den iPod Musik abspielen.
3
Mit
können Sie eine Kategorie
/
auswählen. Drücken Sie anschließend ENTER,
um diese Kategorie zu durchsuchen.
• Durch Drücken von
vorhergehenden Ebene gelangen.
4
Mit
können Sie die ausgewählte
/
RETURN
Kategorie durchsuchen (z. B. Alben).
• Mit
nächsten Ebenen.
gelangen Sie zu den vorhergehenden/
/
iPod iPhoneHDMI
iPod iPhone
ADVANCED
STANDARD
STATUS
DIRECT CONTROL
SURROUND
SURROUND
5 V 1 A
MASTER
VOLUME
5V 1 A
HDMI 5 INPUT
iPod/iPhone
können Sie jederzeit zur
Internet-Radiosender hören
• Etwa eine Minute ist zwischen Einschalten und
Fertigstellen der Einrichtung erforderlich.
Wichtig
• Bei Verwendung einer Broadband-Internetverbindung
müssen Sie einen Vertrag mit einem Internet-Provider
haben. Für weitere Einzelheiten wenden Sie sich an Ihren
Internet-Provider.
• Zum Hören von Internet-Radiosendern ist HighspeedBroadband-Internetzugang erforderlich. Mit einem 56-Koder ISDN-Modem können Sie möglcherweise die Vorteile
von Internet-Radio nicht voll nutzen.
• Dienste von Drittanbietern können eine High-SpeedInternet-Verbindung sowie Ihre Registrierung voraussetzen
und ggfs. Gebühren nach sich ziehen. Dienste von
Drittanbietern können ohne Inkenntnissetzung verändert,
ausgesetzt, gestört oder beendet werden. Pioneer schließt
jede Haftung in Verbindung mit solchen Ereignissen
aus. Pioneer gibt keine Gewähr auf die Dauer der
Aufrechterhaltung der Dienstleistungen von Drittanbietern
und weist jede Art von Garantie hierauf von sich.
Drücken Sie NET wiederholt, um den INTERNET
1
RADIO-Eingang zu wählen.
Es kann einige Sekunden dauern, bevor dieser Receiver
auf das Netzwerk zugreift.
Verwenden Sie
2
Radiosender zur Wiedergabe zu wählen, und
drücken dann ENTER.
, um den Internet-
/
Um die zahlreichen Funktionen des
Geräts zum größten Umfang zu genießen
Starten Sie AVNavigator, und verwenden Sie die
„Interactive Operation Guide“.
Legen Sie die CD-ROM in Ihren Computer, und
laden Sie die „Bedienungsanleitung“ (PDF) zum
Lesen vom Menübildschirm herunter.
Funktionen
Abspielen eines USB-Geräts
■
Musikwiedergabe über die Bluetooth-Drahtlostechnologie
■
Wiedergabe mit NETWORK-Merkmal
■
Einstellen der Audio-Optionen
■
Einstellen der Video-Optionen
■
Verwenden der MULTI-ZONE-Regler
■
Häug gestellte Fragen
Glossar
Index der Merkmale
Hinweis
• Dieses Gerät unterstützt AirPlay. Einzelheiten siehe
„Verwenden von AirPlay auf iPod touch, iPhone, iPad und
iTunes“ in der Bedienungsanleitung und der Apple-Website
(http://www.apple.com).
• Die Software des Geräts kann aktualisiert werden
(„Software Update“ in der Bedienungsanleitung). Bei Mac
OS kann sie mit Safari aktualisiert werden („Verwenden
von Safari zum Aktualisieren der Firmware“ in der
Bedienungsanleitung).
10
Fahren Sie mit dem Durchsuchen fort, bis Sie
5
die gewünschte Musik gefunden haben, und
drücken Sie zum Wiedergeben .
© 2014 PIONEER HOME ELECTRONICS CORPORATION.
Alle Rechte vorbehalten.
Page 31

11
Page 32

Italiano
La riproduzione multicanale con questo ricevitore è ottenibile facilmente con tre operazioni:
Collegamenti
→
Impostazione iniziale
→
La connessione e la configurazione iniziale possono essere eseguite facendo riferimento a questa Guida di avvio rapido, ma è più facile utilizzare
Wiring Navi
in AVNavigator.
Eseguire la connessione e la configurazione iniziale usando uno dei due metodi, a seconda delle circostanze in cui si utilizza AVNavigator.
Inoltre, I
nteractive Operation Guide
di AVNavigator spiega in modo chiaro le operazioni di base.
Collegamento ed impostazione iniziali
Riproduzione di base
.
Collegamenti ed impostazione iniziali secondo le
istruzioni date in “Wiring Navi” di AVNavigator.
(Il collegamento alla rete è necessario per l’impostazione iniziale.)
oppure
Non è necessario leggere questa guida per conoscere le spiegazioni;
sono spiegati in
Passare a “Uso dell’applicazione AVNavigator incorporata” in questa guida.
È possibile utilizzare
I contenuti sono collegati in modo interattivo al prodotto, in modo da poterli
ricordare mentre si leggono e utilizzare il prodotto in modo efficace mentre
Interactive Operation Guide
lo si conosce meglio.
Wiring Navi
.
in
.
Collegamento ed impostazione iniziali consultando
questa Guida di avvio rapida.
Guida di
avvio rapido
Passare a di questa guida.
2
Page 33

Uso dell’applicazione AVNavigator incorporata
LAN
(
10/100
)
SCO
Collegamento alla rete LAN via
l’interfaccia LAN
Internet
Computer
Cavo LAN (venduto separatamente)
LAN
Modem
)
(10/100
Router
WAN
LAN
Collegamento ad una LAN wireless
Il collegamento wireless alla rete è possibile attraverso
attrezzature wireless. Per il collegamento, usare un AS-WL300
da acquistarsi separatamente.
• Usare solo il cavo di collegamento accessorio allegato.
• Certe impostazioni sono necessarie per fare uso di un
convertitore LAN wireless (AS-WL300). Per istruzioni su
come fare queste impostazioni, vedere le istruzioni per
1
2
3
l’uso accluse al convertitore LAN wireless (AS-WL300).
)
LAN
(10/100
DC OUTPUT
LAN
(10/100
)
DC OUTPUT
for WIRELESS LAN
(
OUTPUT 5 V
0.6 A MAX
)
Router
for WIRELESS LAN
(
OUTPUT 5 V
)
0.6 A MAX
Modem
WAN
Internet
Se fosse danneggiato, rivolgersi al più vicino centro di
assistenza autorizzato Pioneer per la sostituzione.
• Non utilizzare un cavo di alimentazione diverso da quello
in dotazione all’unità.
• Non utilizzare il cavo di alimentazione in dotazione per altri
scopi, se non quello descritto di seguito.
• Il ricevitore deve essere scollegato estraendo la spina dalla
presa elettrica quando non viene utilizzato, ad esempio
durante una vacanza.
• Assicurarsi che la spia blu
STANDBY/ON
u
si sia spenta
prima di scollegare il amplificatore.
Collegare il cavo di alimentazione in dotazione
1
alla presa AC IN nella parte posteriore del
ricevitore.
Collegare l’altra estremità a una presa a muro.
2
Accensione
Controllare il cavo di alimentazione di tanto in tanto.
STANDBY/ON
u
STANDBY/ON
per accendere il ricevitore e il
MCACC
PHONES
SETUP MIC
DC 5V WPS
Ethernet
Convertitore LAN wireless (AS-WL300)
Premere
computer.
Attendere alcuni minuti dopo l’accensione prima di effettuare
l’operazione seguente.
Collegamento del ricevitore
Dopo aver stabilito la connessione a una rete LAN, collegare il
cavo di alimentazione del ricevitore a una presa di corrente.
ATTENZIONE
• Maneggiare sempre il cavo di alimentazione dall’estremità
dotata di spina. Non estrarre la spina tirando il cavo e non
toccare mai il cavo di alimentazione con le mani bagnate,
poiché potrebbe verificarsi un cortocircuito o scariche
elettriche. Non posizionare l’unità, un mobile o un altro
oggetto sopra al cavo di alimentazione né schiacciarlo
in un altro modo. Non annodare mai il cavo né legarlo
insieme ad altri cavi. Posare i cavi di alimentazione in
modo da evitarne il calpestio. Un cavo di alimentazione
danneggiato può causare incendi o scariche elettriche.
3
Page 34

Uso dell’applicazione AVNavigator incorporata (continua)
Avvio dell’applicazione
AVNavigator incorporata
Utilizzare AVNavigator seguendo le schermate del computer,
ecc.
Ambiente operativo
• AVNavigator può essere utilizzato negli ambienti elencati
di seguito
–PC Windows: Microsoft
Windows
–Mac OS: Mac OSX (10.7, 10.8 o 10.9)
–iPad/iPhone/iPod touch: iOS 7
–Dispositivi Android: Android 4.0.4
• Alcune funzioni di AVNavigator utilizzano un browser
Internet. Sono supportati i seguenti browser:
–PC Windows: Internet Explorer
–Mac OS/iPad/iPhone/iPod touch: Safari 6.0
–Dispositivi Android: browser Android
• Per utilizzare alcune funzioni di AVNavigator, è necessario
installare la versione più aggiornata di Adobe
Player. Per i dettagli, visitare il seguente sito Web.
http://www.adobe.com/downloads/
• A seconda della configurazione di rete del computer o
delle impostazioni di sicurezza, AVNavigator potrebbe non
funzionare.
®
7/Windows® 8/Windows® 8.1
®
Windows® XP/Windows Vista®/
®
8, 9, 10, 11
®
Flash®
PC Windows
• Avviare Internet Explorer e digitare l’indirizzo IP di questa
unità nella barra degli indirizzi (in Internet Explorer,
digitare “http:// seguito dall’indirizzo IP del ricevitore). È
possibile visualizzare l’indirizzo IP dell’unità sul display
premendo il tasto
• Se il PC dispone di una versione di Windows diversa
da Windows XP, è possibile avviare AVNavigator con il
seguente metodo.
Avviare Esplora risorse e fare clic con il pulsante destro
del mouse su <VSX-924> nella cartella ‘
fare clic su ‘
STATUS
View device webpage
sul telecomando.
Network
’.
Mac
Avviare Safari e fare clic su <VSX-924> visualizzato in
Bonjour
‘
’ nella barra dei segnalibri.
’, quindi
iPad/iPhone/iPod touch
Scaricare l’applicazione gratuita iControlAV5 dall’App Store.
Dopo aver avviato iControlAV5, seguire le istruzioni visualizzate
sullo schermo quindi, nella schermata Home, premere
AVNavigator
‘
iPad
’ o l’icona.
iPhone/iPod touch
Bonjour
• Se ‘
controllo ‘
scheda ‘
’ non è visualizzato, selezionare la casella di
Include Bonjour in the Favorites bar
Advanced
’ nel menu ‘
Preferences...
’ di Safari.
’ della
4
Page 35

iPad
■
Su iPad, è possibile utilizzare AVNavigator per iPad. Scaricare
AVNavigator per iPad da App Store. Dopo aver avviato
AVNavigator per iPad, seguire le istruzioni a schermo.
Dispositivo Android
Scaricare l’applicazione gratuita iControlAV5 da Google Play
Store. Dopo aver avviato iControlAV5, seguire le istruzioni
visualizzate sullo schermo quindi, nella schermata Home,
premere l’icona.
Informazioni sull’uso di Wiring
Navi
Wiring Navi viene avviato quando si preme ‘
schermata di AVNavigator.
• Al termine della navigazione, andare al passo .
Wiring Navi
Uso dell’applicazione AVNavigator incorporata (continua)
’ nella
5
Page 36

Collegamenti
12 3
Collegamento dei diffusori
Il ricevitore funziona anche con solo due diffusori stereo (i diffusori anteriori del diagramma) ma si
raccomanda l’uso di almeno cinque, e una dotazione completa è consigliabile per l’audio surround.
Per ottenere un audioo surround confortevole, installare i diffusori nel modo descritto di seguito.
Sistema surround a 7.1 canali:
R
L
SW
C
SR
SBR
SL
SBL
Collegamento dei cavi dei diffusori
Verificare di collegare il diffusore sulla
destra al terminale di destra (R) ed il sinistro
al terminale di sinistra (L). Controllare anche
che i terminali positivo e negativo (
del ricevitore corrispondano a quelli dei
diffusori.
Attorcigliare fra loro i li esposti.
1
Allentare il terminale ed inserire il lo
2
denudato.
Stringere il terminale.
3
+/–
)
L
– Anteriore sinistro
C
– Centrale
R
– Anteriore destro
SL
– Surround sinistro
SR
– Surround destro
SBL
– Surround posteriore sinistro
SBR
– Surround posteriore destro
SW
– Subwoofer
Nota
• Esistono altri tipi di collegamento dei
diffusori (anteriori di altezza, anteriori
di ampiezza, ecc.). Per i dettagli, vedere
“Collegamento dell’apparecchio” nelle
istruzioni per l’uso.
ATTENZIONE
• Prima di effettuare o modificare i
collegamenti, disattivare l’alimentazione
e scollegare il cavo di alimentazione
dalla presa a muro.
• Questi terminali contengono voltaggi
PERICOLOSI
folgorazioni nel collegare o scollegare
i cavi dei diffusori, scollegare il cavo di
alimentazione prima di toccare parti
non isolate.
. Per evitare il rischio di
Installati i diffusori, collegarli nel modo visto in figura.
Anteriore destro
(R)
PRE OUT
SUB
WOOFER
1
2
Surround destro
(SR)
Subwoofer 1
(SW)
LINE LEVEL
INPUT
PRE OUT
FRONT HEIGHT / WIDE /
SURROUND BACK / HDZONE
SURROUNDCENTERFRONT
A
B
(
)
Single
RLRLRLRL
SPEAKERS
Surround posteriore destro
SBR
(
SUB
WOOFER
1
2
)
Centrale
(C)
A
Surround posteriore sinistro
Nota
SURROUNDCENTERFRONT
SPEAKERS
SBL
(
SURROUND BACK / HDZONE
)
Anteriore sinistro
FRONT HEIGHT / WIDE /
(
)
Single
RLRLRLRL
Surround sinistro
(SL)
(L)
B
10 mm
6
• Se si usa un solo diffusore surround posteriore, collegarlo ai terminali
(Single)
.
• Questa unità supporta diffusori con impedenza nominale da 6 W a 16 W.
SURROUND BACK L
Page 37

A
A
Collegamenti (continua)
ANTENNA
FM UNBAL
75
AM LOOP
ANTENNA
FM UNBAL
75
AM LOOP
21
AVVERTENZA PER LA VENTILAZIONE
Installare l’apparecchio avendo cura di lasciare un
certo spazio all’intorno dello stesso per consentire una
adeguata circolazione dell’aria e migliorare la
dispersione del calore (almeno 40 cm sulla parte
superiore, 10 cm sul retr
A
L
di aperture per la ventilazione, allo scopo di garantirne
un funzionamento affidabile, e per proteggerlo dal
surriscaldament
incendi le aperture non devono mai venire bloccate o
coperte con oggetti vari (quali giornali, tovaglie, tende o
tendaggi, ecc.), e l’apparecchio non deve essere
utilizzato appoggiandolo su tappeti spessi o sul letto
Collegamento di un televisore e
componenti di riproduzione
Televisore HDMI/DVI
compatibile
Lettore dischi Blu-ray
HDMI/DVI compatibile
DIGITAL OUT
OPTICAL
IN
1
OPTICAL
(TV)
ASSIGNABLE
A
OUT 1
(
CONTROL
HDMI OUT
BD IN
1
IN
)
(
)
DVD
HDMI IN
dal terminale HDMI. Per emettere il video, è necessario
commutare l’ingresso video sul dispositivo collegato con
il cavo video o il cavo component e impostare
ON
. Per i dettagli, vedere “Impostazione delle opzioni Video”
V.CONV
nelle istruzioni per l’uso.
Collegamento delle antenne
su
poiché potrebbe verificarsi un cortocircuito o scariche
elettriche. Non posizionare l’unità, un mobile o un altro
oggetto sopra al cavo di alimentazione né schiacciarlo
in un altro modo. Non annodare mai il cavo né legarlo
insieme ad altri cavi. Posare i cavi di alimentazione in
modo da evitarne il calpestio. Un cavo di alimentazione
danneggiato può causare incendi o scariche elettriche.
Controllare il cavo di alimentazione di tanto in tanto.
Se fosse danneggiato, rivolgersi al più vicino centro di
assistenza autorizzato Pioneer per la sostituzione.
• Non utilizzare un cavo di alimentazione diverso da quello
in dotazione all’unità.
• Non utilizzare il cavo di alimentazione in dotazione per altri
scopi, se non quello descritto di seguito.
• Il ricevitore deve essere scollegato estraendo la spina dalla
presa elettrica quando non viene utilizzato, ad esempio
durante una vacanza.
• Assicurarsi che la spia blu
STANDBY/ON
u
si sia spenta
prima di scollegare il amplificatore.
Collegare il cavo di alimentazione in dotazione
1
alla presa AC IN nella parte posteriore del
ricevitore.
Collegare l’altra estremità a una presa a muro.
2
OUT 2
OUT 1
HDMI
BD IN
1
IN
IN2IN3IN4IN /MHL
(
HDZONE
)
(
CONTROL
)
ASSIGNABLE
-
1 6
(
(
)
SAT/CBL
DVD
SELECTABLE
)
LAN
(10/100
6
DC OUTPUT
for WIRELESS LAN
(
(
OUTPUT 5 V
OUTPUT 5 V
)
)
)
0.6 A MAX
0.9 A MAX
OPTICAL
(TV)
1
IN
ASSIGNABLE
• Se il televisore non supporta la funzione HDMI Audio Return
Channel, l’ascolto dell’audio del televisore via il ricevitore
richiede il collegamento via cavo digitale a fibre ottiche (
• Se il televisore supporta la funzione HDMI Audio Return
Channel, l’audio del televisore arriva al ricevitore via terminale
HDMI, ed il cavo digitale a fibre ottiche non è necessario (
ARC
In tal caso, regolare
HDMI Setup
in
vedere “HDMI Setup” nelle istruzioni per l’uso.
• Per istruzioni sui collegamenti e le impostazioni del televisore,
consultare il manuale d’uso del televisore.
• Con le impostazioni di fabbrica, il video proveniente dal
cavo video o dal cavo component non viene emesso
).
).
su ON. Per i dettagli,
Nota
• Consultare le istruzioni per l’uso incluse nel CD-ROM per
collegarsi ad un televisore o componente di riproduzione
con metodi diversi da HDMI.
• Per il collegamento di altri dispositivi, consultare le
istruzioni per l’uso incluse nel CD-ROM.
Collegamento del ricevitore
Collegare il ricevitore solo dopo avere collegato tutti i
componenti, compresi gli diffusori.
ATTENZIONE
• Maneggiare sempre il cavo di alimentazione dall’estremità
dotata di spina. Non estrarre la spina tirando il cavo e non
toccare mai il cavo di alimentazione con le mani bagnate,
o, e 20 cm su ciascuno dei lati).
TTENZIONE
’apparecchio è dotato di un certo numero di fessure e
o. Per prevenire possibili pericoli di
.
D3-4-2-1-7b*_A1_It
7
Page 38

Prima di iniziare
ALL ZONE STBY
SOURCE
STANDBY/ON
MAIN
SUB ZONE CONTROL
Z2 Z3 HDZ
RECEIVER
1. Advanced MCACC
2. MCACC Data Check
3. Data Management
4. System Setup
5. Network Information
6. Operation Mode Setup
Exit Return
HOME MENU
A/V RECEIVER
Mettere le batterie nel telecomando.
1
Le batterie accluse a questa unità servono per controllarne
il funzionamento; esse possono però non durare a lungo.
Raccomandiamo l’uso di batterie alcaline, che hanno una
durata superiore.
Accendere il ricevitore e il televisore.
2
Cambiare l’ingresso del televisore in modo che
3
si colleghi al ricevitore.
Accendere il subwoofer ed aumentare il volume.
4
ATTENZIONE
• Non usare o conservare batterie in luce solare diretta o in altri
luoghi eccessivamente caldi, ad esempio in un’automobile
o vicino ad una sorgente di calore. Questo potrebbe causare
perdite di acido, farle surriscaldare esplodere o prendere
fuoco. Può anche ridurne la durata o le prestazioni.
ATTENZIONE
• Nell’inserire le batterie, fare attenzione a non danneggiare le
molle del loro terminale (–). Questo potrebbe causare perdite
o surriscaldamenti delle batterie.
• Quando si smaltiscono le batterie esauste, si raccomanda di
rispettare la normativa vigente o le regole degli enti pubblici in
materia di ambiente applicabili alla propria nazione/regione.
Impostazione automatica dell’audio
surround (MCACC)
L’impostazione Auto Multi-Channel ACoustic Calibration
8
(MCACC) usa il microfono di impostazione allegato per
Impostazione iniziale
misurare ed analizzare il tono di prova emesso dai diffusori.
Questa impostazione permette la misurazione e le impostazioni
automatiche di alta precisione; facendone uso sarà possibile
creare un ambiente di ascolto ottimale per l’utente.
Importante
• Fare la misurazione in un ambiente tranquillo.
• Se è disponibile un treppiedi, utilizzarlo per posizionare il
microfono in modo che sia all’altezza delle orecchie rispetto
alla normale posizione di ascolto. Altrimenti, porre il microfono
ad altezza degli orecchi usando un tavolo o una sedia.
• La misurazione accurata potrebbe non essere possibile se fra i
diffusori e la posizione di ascolto (microfono) ci sono ostacoli.
• Durante la misurazione, allontanarsi dalla posizione di
ascoto ed usare il telecomando stando al di fuori del
cerchio dei diffusori.
Collegare il microfono di impostazione in
1
dotazione.
ADVANCED
FL OFF
Microfono
Treppiedi
La schermata
MCACC
SPEAKERS CONTROL – MULTI-ZONE – ON / OFFBANDTUNER EDIT TUNE PRESET ENTER
AUTO SURR/ALC/
INPUT
SELECTOR
STREAM DIRECT
STANDBY/ON
MCACC
PHONES
SETUP MIC
Full Auto MCACC
1a.Full Auto MCACC
Speaker System : Normal(SB/FH
EQ Type : ---
MCACC : M1.MEMORY 1
Measurement Type : Basic
START
Exit Return
iPod iPhone
ADVANCED
STANDARD
DIRECT
SURROUND
SURROUND
MCACC
SETUP
A/V RECEIVER
iPod iPhoneHDMI
CONTROLSTATUS
MASTER
VOLUME
5V 1 A
HDMI 5 INPUT
MIC
appare sul televisore.
)
Per prima cosa premere MAIN RECEIVER sul
2
telecomando.
• Quando il cursore viene posizionato su
Type
ed è selezionato
impostazioni
Distance
Speaker Setting/Channel Level/Speaker
. Selezionando
configurare automaticamente
Cal EQ
(caratteristiche della frequenza).
Posizionare il cursore su START e premere il
3
Basic
, vengono configurate le
Expert
è possibile inoltre
Standing Wave/Acoustic
Measurement
pulsante ENTER.
• La misurazione automatica ha inizio.
• La misurazione richiede da 3 a 12 minuti.
Seguire le istruzioni sullo schermo.
4
• L’impostazione automatica è completa se la schermata
Home Menu riappare.
Reverse Phase
• Se
appare, i cablaggi dei diffusori (+ e –)
potrebbero essere invertiti. Controllare i collegamenti dei
diffusori.
Anche se i collegamenti sono corretti,
Reverse Phase
potrebbe venire visualizzato a seconda dei diffusori usati
e dell’ambiente circostante. Questo però non influenza le
misurazioni e si può scegliere
Go Next
.
• Se l’alimentazione viene interrotta, è possibile che il
filo centrale del cavo del diffusore sia a contatto con il
pannello posteriore o che i fili (+) e (–) siano a contatto
tra di essi, causando l’attivazione dei circuiti di protezione.
Riavvolgere il filo centrale del cavo del diffusore e
collegarlo in modo che non fuoriesca dal terminale del
diffusore.
Controllare che il microfono di impostazione
5
sia collegato.
Page 39

Riproduzione di base
2
3
5
Cambiare l’ingresso del ricevitore.
Riproduzione multicanale
STANDBY/ON
ALL ZONE STBY
SUB ZONE CONTROL
RECEIVER
MAIN
SOURCE CONTROL
DVDBD
USBADPTROKU
iPod
BT
TUNER
TV
INPUT
STATUS
AUDIO P. VIDEO P.
SOURCE
Z2 Z3 HDZ
SAT
MHL
TV
CD
VOLUME
VOL
MUTE
OUT P.
HDMI
NET
ALL
2
Ad es.) Premere BD per scegliere l’ingresso BD.
Premere AUTO per scegliere ‘AUTO
3
SURROUND’.
Per la riproduzione multicanale, premere
Scegliere la modalità di ascolto preferita.
Avviare la riproduzione del componente
4
desiderato.
Ad es.) Avviare la riproduzione del lettore di dischi Blu-ray
Disc.
Utilizzare VOLUME +/– per regolare il livello
5
del volume.
• Se i diffusori centrale e posteriore non emettono alcun
suono, premere
SURR
ADV
o
per cambiare la modalità di
SURR
o
ADV
.
ascolto.
TOP
MENU
HOME
MENU
ENTER
TOOLS
MENU
RETURN
ad esempio, premere
STEREO
Se il subwoofer non emette alcun suono
•
.
ADV
varie volte per selezionare
Causa: il diffusore frontale è impostato su LARGE.
EXT.
Se l’audio in ingresso e a 2 canali, il componente delle
LISTENING MODE
SURRAUTO
MPX
PRESET TUNE
2
13
546
8
79
D.ACCESS
CLR
0
DIMMER SLEEP
CH LV.
ADV
BAND PTY
AUDIO
DISP
CH
CLASS
ENTER
CH
RCU SETUP
Fav
frequenze basse non viene emesso dal subwoofer, ma dal
diffusore frontale.
Soluzione: per emettere l’audio dal subwoofer,
cambiare l’impostazione del diffusore.
Metodo 1: cambiare l’impostazione del diffusore su
SMALL
.
Il componente delle frequenze basse non viene emesso
dal diffusore frontale, ma dal subwoofer. Se la riproduzione
delle frequenze basse del diffusore frontale è alta, si
consiglia di non cambiare l’impostazione.
Metodo 2: cambiare l’impostazione del diffusore su
PLUS
.
Il componente delle frequenze basse viene emesso dal
diffusore frontale e dal subwoofer. Per questo motivo,
i suoni bassi a volte sono troppo forti. In questo caso,
RECEIVER
si consiglia di non apportare modifiche o di utilizzare il
Metodo 1.
• Per i dettagli, vedere “Impostazione dei diffusori” nelle
Attivare il componente di riproduzione.
1
Ad es.) Accendere il lettore Blu-ray Disc collegato al
terminale
HDMI BD IN
.
istruzioni per l’uso.
• Se non viene emesso alcun suono, aumentare il volume
fino a circa –30 dB.
Nota
• Se non è possibile utilizzare il telecomando per controllare
l’unità
–Quando si utilizza il ricevitore, premere
MAIN RECEIVER
prima di utilizzarlo.
–Se si utilizzano funzioni come rete, TUNER o iPod, premere
il tasto funzione appropriato (
NET, TUNER, iPod
ecc.)
prima dell’uso.
Ascolto della radio
Per selezionare il sintonizzatore, premere
1
TUNER.
Se necessario, premere
Premere TUNE +/– per mettere in sintonia una
2
stazione.
• Tenere premuto
ricevitore inizia a cercare la stazione successiva.
• Se si ascolta una stazione in FM ma la ricezione è
scadente, premere
impostare la modalità di ricezione mono del ricevitore.
Salvataggio delle stazioni preselezionate
Se si ascolta spesso una particolare stazione radio, è utile
memorizzarne la frequenza per richiamarla facilmente ogni
volta che si desidera ascoltarla.
Premere TOOLS durante la ricezione di un
1
segnale dalla stazione da memorizzare.
Il numero di preselezione lampeggia.
Per scegliere la stazione preselezionata
2
desiderata, premere PRESET +/–, poi ENTER.
Il numero di preselezione smette di lampeggiare ed il
ricevitore memorizza la stazione.
Ascolto delle stazioni preselezionate
Questa operazione richiede la presenza di stazioni
preselezionate.
Per scegliere la stazione preselezionata
desiderata, premere PRESET +/–.
BAND
TUNE +/–
MPX
per cambiar banda (FM o AM).
per circa un secondo. Il
per scegliere FM MONO e
9
Page 40

Riproduzione di base (continua)
Riproduzione con un iPod
• Fra l’accensione ed il completarsi dell’avvio passa circa un
minuto.
Collegare l’iPod.
1
Al ricevitore può essere collegato un iPod/iPhone.
ADVANCED
FL OFF
MCACC
SPEAKERS CONTROL – MULTI-ZONE – ON / OFFBANDTUNER EDIT TUNE PRESET ENTER
AUTO SURR/ALC/
INPUT
SELECTOR
STANDBY/ON
accluso all’iPod
Premere iPod USB per scegliere l’iPod/USB.
2
STREAM DIRECT
MCACC
PHONES
SETUP MIC
Cavo USB
Quando sul display verrà visualizzato il nome di cartelle e file,
sarà possibile procedere alla riproduzione di musica dall’iPod.
Per selezionare una categoria, utilizzare
3
quindi premere ENTER per visualizzare il
contenuto della categoria.
• Per tornare in qualsiasi momento al livello precedente,
premere
Per visualizzare il contenuto della categoria
4
RETURN
.
selezionata (ad esempio gli album), utilizzare
.
/
• Per spostarsi ai livelli precedenti o successivi, utilizzare
/
.
iPod iPhoneHDMI
iPod iPhone
ADVANCED
STANDARD
STATUS
DIRECT CONTROL
SURROUND
SURROUND
5 V 1 A
MASTER
VOLUME
5V 1 A
HDMI 5 INPUT
iPod/iPhone
/
Ascolto di stazioni radio da Internet
• Fra l’accensione ed il completarsi dell’avvio passa circa un
minuto.
Importante
• Se si usa una connessione Internet a banda larga, è
necessario un contratto con un Internet provider. Per
dettagli, entrare in contatto con l’Internet provider più
vicino.
• L’ascolto di stazioni radio da Internet richiede l’uso di
connessioni Internet a banda larga. Un modem da 56 K o
ISDN può non essere sufficiente a permettere l’ascolto di
stazione radio da Internet.
• L’accesso a contenuti di terze parti richiede una
connessione a Internet di alta velocità e a volta anche un
account ed un abbonamento a pagamento. La fornitura
di contenuto di terze parti può venire cambiata, sospesa,
interrotta o smessa in qualsiasi momento senza preavviso,
senza che per questo Pioneer debba sostenerne la
responsabilità. Pioneer non afferma o garantisce che la
fornitura di contenuti continui o sia disponibile per un
particolare lasso di tempo, e qualsiasi garanzia del genere,
espressa o implicita, viene negata.
Premere NET più volte per scegliere l’ingresso
1
INTERNET RADIO.
Il ricevitore può richiedere qualche secondo per avere
accesso alla rete.
,
2
Usare
per scegliere la stazione radio da
/
Internet da riprodurre e poi premere ENTER.
Per godere al massimo delle molto
funzioni di questa unità
Avviare AVNavigator e utilizzare “Interactive
Operation Guide”.
Inserire il CD-ROM nel lettore del computer e
scaricare il le “Istruzioni per l’uso” (PDF) dalla
schermata del menu.
Funzioni
Riproduzione con un dispositivo USB
■
Riproduzione musicale con la tecnologia wireless
■
Bluetooth
Riproduzione via RETE
■
Impostazione delle opzioni audio
■
Impostazione delle opzioni Video
■
Uso dei controlli MULTI-ZONE
■
FAQ
Glossario
Indice delle caratteristiche
Nota
• Questa unità supporta AirPlay. Per i dettagli, vedere “Uso
di AirPlay con iPod touch, iPhone, iPad e iTunes” nelle
istruzioni per l’uso e il sito Web di Apple (http://www.apple.
com).
• Il software di questa unità può essere aggiornato
(“Aggiornamento del software” nelle istruzioni per l’uso). In
Mac OS, è aggiornabile mediante Safari (“Aggiornamento
del firmware con Safari” nelle istruzioni per l’uso).
10
Continuare la ricerca nché non si raggiunge
5
il brano che si desidera ascoltare, quindi
premere per avviare la riproduzione.
© 2014 PIONEER HOME ELECTRONICS CORPORATION.
Tutti i diritti riservati.
Page 41

11
Page 42

Nederlands
Geniet van meerkanaals weergave met dit apparaat in 3 gemakkelijke stappen:
Aansluitingen
→
Eerste instellingen
→
Basisbediening voor afspelen
.
U kunt de aansluitingen en de eerste instellingen uitvoeren aan de hand van deze Snelstartgids , maar dit wordt nog gemakkelijker als u de
Navi
in AVNavigator gebruikt.
U kunt zelf kiezen welke methode u gebruikt voor de aansluitingen en de eerste instellingen, afhankelijk hoe u AVNavigator gebruikt.
In AVNavigator kunt u bovendien de
Interactive Operation Guide
gebruiken om eenvoudig de basisbediening te leren.
Aansluitingen en eerste instellingen
Aansluitingen en eerste instellingen volgend op de instructies
in de “Wiring Navi” in AVNavigator
(Aansluiting op het netwerk is vereist voor de eerste instellingen.)
of
Aansluitingen en eerste instellingen aan de hand van
deze snelstartgids
Snelstartgids
Wiring
U hoeft deze gids niet voor uitleg te lezen;
worden uitgelegd in de
Ga verder naar “ De ingebouwde AVNavigator gebruiken” in deze gids.
U kunt de
De inhoud is interactief aan het product gekoppeld, zodat u het product
zelf kunt gebruiken tijdens het lezen en al doende kunt leren.
Interactive Operation Guide
Wiring Navi
gebruiken in
.
.
Ga door naar
in deze gids.
2
Page 43

De ingebouwde AVNavigator gebruiken
LAN
(
10/100
)
SCO
Aansluiten op het netwerk via de
LAN-interface
Internet
Computer
LAN-kabel (los verkrijgbaar)
LAN
Modem
)
(10/100
Router
WAN
LAN
1
2
3
Verbinden met een draadloos LAN
Via een draadloze LAN-verbinding is het mogelijk het toestel
zonder bedrading aan te sluiten op een netwerk. Gebruik de los
verkrijgbare AS-WL300 voor een dergelijke verbinding.
• Gebruik alleen de bijgeleverde aansluitkabel.
• Er zijn bepaalde instellingen vereist voor gebruik van een
draadloze LAN-adapter (AS-WL300). Zie de handleiding die
bij de draadloze LAN-adapter (AS-WL300) wordt geleverd
voor aanwijzingen betreffende het maken van deze
instellingen.
)
LAN
(10/100
DC OUTPUT
)
(10/100
LAN
DC OUTPUT
for WIRELESS LAN
(
OUTPUT 5 V
)
0.6 A MAX
Router
DC 5V WPS
Ethernet
Draadloze LAN-adapter (AS-WL300)
for WIRELESS LAN
(
OUTPUT 5 V
)
0.6 A MAX
Modem
WAN
Internet
knopen in het netsnoer en bind het niet samen met andere
kabels. Leid de netsnoeren zodanig dat de kans klein is
dat iemand erop gaat staan. Een beschadigd netsnoer kan
brand of een elektrische schok veroorzaken. Controleer de
staat van het netsnoer regelmatig. Als u een beschadiging
vaststelt, neemt u contact op met een onafhankelijke,
door Pioneer erkende onderhoudsdienst voor een nieuw
netsnoer.
• Gebruik uitsluitend het bij dit apparaat geleverde netsnoer.
• Gebruik het geleverde netsnoer niet voor andere
doeleinden dan hieronder beschreven.
• Haal de stekker van dit apparaat uit het stopcontact
wanneer u het langere tijd niet gebruikt, bijvoorbeeld
wanneer u op vakantie gaat.
• Controleer of het blauwe
STANDBY/ON
u
-lampje uit is
voordat u de stekker uit het stopcontact haalt.
Sluit het geleverde netsnoer aan op de AC IN-
1
aansluiting aan de achterkant van de receiver.
Steek het andere einde in het stopcontact.
2
Inschakelen
Druk op
te zetten.
Wacht na het inschakelen enkele minuten voordat u verdergaat
met de volgende handelingen.
STANDBY/ON
u
om de receiver en de computer aan
De receiver aansluiten op het
STANDBY/ON
PHONES
MCACC
SETUP MIC
stopcontact
Nadat u de receiver op het LAN hebt aangesloten, steekt u de
stekker van het netsnoer in het stopcontact.
WAARSCHUWING
• Houd het netsnoer bij de stekker vast. Trek de stekker
niet uit het stopcontact door aan het snoer te trekken en
raak het netsnoer nooit met natte handen aan. Dit kan
kortsluiting of een elektrische schok tot gevolg hebben.
Zorg ervoor dat u dit apparaat, een meubel of een ander
voorwerp niet op het netsnoer plaatst en dat het netsnoer
niet op een andere manier wordt afgekneld. Maak geen
3
Page 44

De ingebouwde AVNavigator gebruiken (vervolg)
De ingebouwde AVNavigator
starten
U bedient AVNavigator volgens de schermaanwijzingen op uw
computer of apparaat.
Gebruiksomgeving
• AVNavigator is beschikbaar op de volgende systemen.
–Windows-PC: Microsoft
Windows
–Mac OS: Mac OSX (10.7, 10.8 of 10.9)
–iPad/iPhone/iPod touch: iOS 7
–Android-apparaat: Android 4.0.4
• Voor sommige functies van AVNavigator is een browser
vereist. De volgende browsers worden ondersteund:
–Windows-PC: Internet Explorer
–Mac OS/iPad/iPhone/iPod touch: Safari 6.0
–Android-apparaat: Android-browser
• Voor bepaalde functies van AVNavigator moet de laatste
versie van Adobe
de volgende website voor details.
http://www.adobe.com/downloads/
• Het is mogelijk dat AVNavigator niet werkt afhankelijk van
netwerk- of veiligheidsinstellingen op de computer.
®
7/Windows® 8/Windows® 8.1
®
Windows® XP/Windows Vista®/
®
8, 9, 10, 11
®
Flash® Player geïnstalleerd zijn. Bezoek
Gebruik op een Windows-pc
• Start Internet Explorer en voer in het adresveld ervan het
IP-adres van dit toestel in. (Typ “http://(het IP-adres van
de receiver)”.) U vindt het IP-adres van de receiver op het
display op het voorpaneel als u op de afstandsbediening
STATUS
op
• Op een Windows-pc met een ander systeem dan Windows
XP kunt u AVNavigator als volgt starten.
Start Explorer en klik met de rechtermuisknop op <VSX924> in de map ‘
device webpage
drukt.
Network
’.
’. Klik vervolgens op ‘
View
Gebruik op een Mac
Start Safari en klik op <VSX-924> in ‘
bladwijzerbalk.
Bonjour
’ op de
Gebruik op een iPad/iPhone/iPod touch
Download de gratis applicatie iControlAV5 van de App Store.
Start iControlAV5 en volg de instructies op het scherm. Druk
daarna op het beginscherm op ‘
pictogram.
iPad
iPhone/iPod touch
AVNavigator
’ of op het
Bonjour
• Als ‘
vakje ‘
tabblad ‘
Safari.
’ niet wordt weergegeven, selecteert u het
Include Bonjour in the Favorites bar
Advanced
’ in het menu ‘
Preferences...
’ in het
’ van
4
Page 45

Gebruik van een iPad
■
Op een iPad kunt u AVNavigator voor iPad gebruiken.
Download AVNavigator voor iPad van de App Store. Start
AVNavigator voor iPad en volg de instructies op het scherm.
Gebruik op een Android-apparaat
Download de gratis applicatie iControlAV5 van de Google Play
Store. Start iControlAV5 en volg de instructies op het scherm.
Druk daarna op het beginscherm op het pictogram.
Informatie over Wiring Navi
U start Wiring Navi door te drukken op ‘
scherm van AVNavigator.
• Wanneer de begeleiding voor de aansluitingen is voltooid,
gaat u verder naar
.
Wiring Navi
’ op het
De ingebouwde AVNavigator gebruiken (vervolg)
5
Page 46

Aansluitingen
12 3
De luidsprekers aansluiten
Nadat de luidsprekers zijn opgesteld, sluit u deze aan zoals hieronder is aangegeven.
Deze receiver werkt met slechts twee stereo luidsprekers (de voorluidsprekers in de afbeelding), maar gebruik van
minimaal vijf luidsprekers is aanbevolen en een volledige luidsprekeruitrusting is optimaal voor surroundgeluid.
Om een fraai surroundgeluid te verkrijgen, plaatst u de luidsprekers zoals hieronder is aangegeven.
7.2-kanaals surroundsysteem:
L
– Linksvoor
C
– Midden
R
– Rechtsvoor
SL
R
L
SW
C
SR
– Surround links
SR
– Surround rechts
SBL
– Surround linksachter
SBR
– Surround rechtsachter
SW
– Subwoofer
Opmerking
SL
SBL
De luidsprekerkabels aansluiten
Sluit de luidspreker aan de rechterkant op de
rechterkanaal (R) aansluitingen aan en de
luidspreker aan de linkerkant op de linkerkanaal
(L) aansluitingen. Zorg dat de positieve en
SBR
negatieve (
zijn verbonden met de corresponderende
aansluitingen op de luidsprekers.
1
2
3
+/–
) aansluitingen op de receiver
Draai de losse kerndraadjes in elkaar.
Draai de aansluitschroef los en steek de
kerndraad naar binnen.
Draai de aansluitschroef weer vast.
• Er zijn ook nog andere luidsprekeraansluitpatronen (hoog-voor, breed-voor
enz.). Zie “De apparatuur aansluiten” van
de handleiding voor details.
WAARSCHUWING
• Voordat u aansluitingen maakt of
wijzigt, zet u het apparaat uit en haalt
u de stekker van het netsnoer uit het
stopcontact.
• Deze luidsprekeraansluitingen hebben
GEVAARLIJKE
een
een elektrische schok te voorkomen
bij het aansluiten of losmaken van de
luidsprekerkabels, moet u het netsnoer
losmaken voordat u eventuele nietgeïsoleerde onderdelen aanraakt.
spanning. Om
Surround rechts
Opmerking
Rechtsvoor
(R)
PRE OUT
(SR)
Subwoofer 1
(SW)
LINE LEVEL
INPUT
PRE OUT
SUB
WOOFER
1
2
SURROUND BACK / HDZONE
SURROUNDCENTERFRONT
A
(
Single
SPEAKERS
)
FRONT HEIGHT / WIDE /
RLRLRLRL
SUB
WOOFER
1
2
B
Midden
(C)
A
SURROUNDCENTERFRONT
SURROUND BACK / HDZONE
SPEAKERS
FRONT HEIGHT / WIDE /
(
)
Single
Linksvoor
(L)
RLRLRLRL
B
Surround links
(SL)
Surround rechtsachter
SBR
(
)
Surround linksachter
SBL
(
)
10 mm
6
• Bij gebruik van slechts één surround-achterluidspreker sluit u deze op de
BACK L (Single)
aansluitingen aan.
SURROUND
• Dit apparaat is geschikt voor luidsprekers met een nominale impedantie van 6 W tot 16 W.
Page 47

A
A
Aansluitingen (vervolg)
ANTENNA
FM UNBAL
75
AM LOOP
BELANGRIJKE INFORMATIE BETREFFENDE
DE VENTILA
Let er bij het installeren van het apparaat op dat er
voldoende vrije ruimte rondom het apparaat is om een
goede doorstroming van lucht te waarborgen
(tenminste 40 cm boven
zijkanten van het apparaat).
W
De gleuven en openingen in de behuizing van het
apparaat zijn aangebracht voor de ventilatie, zodat een
betrouwbare werking van het apparaat wordt verkregen
en over
voor
nooit geblokkeerd worden of dat ze afgedekt worden
door voor
door gebruik van het apparaat op een dik tapijt of een
bed.
Een TV en weergave-apparatuur
aansluiten
HDMI/DVI-compatibele TV
HDMI/DVI-compatibele
Blu-ray disc-speler
1
)
BD IN
IN2IN3IN4IN /MHL
(
SAT/CBL
)
DIGITAL OUT
OPTICAL
LAN
(10/100
6
(
OUTPUT 5 V
)
0.9 A MAX
1
IN
)
DC OUTPUT
for WIRELESS LAN
(
OUTPUT 5 V
)
0.6 A MAX
(TV)
1
IN
ARC
HDMI OUT
OUT 1
(
CONTROL
)
BD IN
1
IN
(
)
DVD
OUT 2
OUT 1
HDMI
IN
(
HDZONE
)
(
CONTROL
)
ASSIGNABLE
-
1 6
(
DVD
SELECTABLE
• Als de TV de HDMI Audio Return Channel-functie niet
ondersteunt, is de aansluiting van een optische digitale kabel
(
) vereist om via de receiver naar het TV-geluid te luisteren.
• Als de TV de HDMI Audio Return Channel-functie ondersteunt,
komt het geluid van de TV via de HDMI-aansluiting de receiver
binnen, dus hoeft er geen optische digitale kabel (
worden aangesloten. In dit geval zet u
ON
op
. Zie “HDMI-instellingen” van de handleiding voor
details.
• Raadpleeg de handleiding van de TV voor aanwijzingen
betreffende de aansluitingen en instellingen van de TV.
(TV)
OPTICAL
ASSIGNABLE
A
OPTICAL
ASSIGNABLE
bij
HDMI IN
) te
HDMI Setup
• Met de fabrieksinstellingen wordt geen video van
de videokabel of componentkabel uitgevoerd via de
HDMIaansluiting. Om video uit te voeren moet u de videoingang overschakelen naar het apparaat dat met de
videokabel of componentkabel is aangesloten, en
instellen op ON. Zie “De video-opties instellen” van de
handleiding voor details.
De antennes aansluiten
21
AM LOOP
FM UNBAL
75
ANTENNA
Opmerking
• Zie de handleiding op de bijgeleverde CD-ROM als u een
TV of weergave-apparaat wilt aansluiten via een andere
methode dan een HDMI-verbinding.
• Zie de handleiding op de bijgeleverde CD-ROM voor het
aansluiten van andere apparatuur.
AM-raamantenne
FM-draadantenne
stopcontact
Steek de stekker pas in het stopcontact als u alle andere
apparaten, waaronder de luidsprekers, hebt aangesloten op de
receiver.
WAARSCHUWING
• Houd het netsnoer bij de stekker vast. Trek de stekker
V.CONV
niet uit het stopcontact door aan het snoer te trekken en
raak het netsnoer nooit met natte handen aan. Dit kan
kortsluiting of een elektrische schok tot gevolg hebben.
Zorg ervoor dat u dit apparaat, een meubel of een ander
voorwerp niet op het netsnoer plaatst en dat het netsnoer
niet op een andere manier wordt afgekneld. Maak geen
knopen in het netsnoer en bind het niet samen met andere
kabels. Leid de netsnoeren zodanig dat de kans klein is
dat iemand erop gaat staan. Een beschadigd netsnoer kan
brand of een elektrische schok veroorzaken. Controleer de
staat van het netsnoer regelmatig. Als u een beschadiging
vaststelt, neemt u contact op met een onafhankelijke,
door Pioneer erkende onderhoudsdienst voor een nieuw
netsnoer.
• Gebruik uitsluitend het bij dit apparaat geleverde netsnoer.
• Gebruik het geleverde netsnoer niet voor andere
doeleinden dan hieronder beschreven.
• Haal de stekker van dit apparaat uit het stopcontact
wanneer u het langere tijd niet gebruikt, bijvoorbeeld
wanneer u op vakantie gaat.
• Controleer of het blauwe
STANDBY/ON
u
-lampje uit is
voordat u de stekker uit het stopcontact haalt.
Sluit het geleverde netsnoer aan op de AC IN-
1
aansluiting aan de achterkant van de receiver.
Steek het andere einde in het stopcontact.
2
TIE
, 10 cm achter en 20 cm aan de
AARSCHUWING
verhitting wordt voorkomen. Om brand te
komen, moet u ervoor zorgen dat deze openingen
werpen (kranten, tafelkleed, gordijn e.d.) of
D3-4-2-1-7b*_A1_Nl
7
Page 48

Voordat u begint
ALL ZONE STBY
SOURCE
STANDBY/ON
MAIN
SUB ZONE CONTROL
Z2 Z3 HDZ
RECEIVER
1. Advanced MCACC
2. MCACC Data Check
3. Data Management
4. System Setup
5. Network Information
6. Operation Mode Setup
Exit Return
HOME MENU
A/V RECEIVER
Plaats batterijen in de afstandsbediening.
1
Met de batterijen die bij het apparaat worden geleverd, kunt
u controleren of alles juist werkt; het is mogelijk dat deze
batterijen geen lange levensduur hebben. Wij raden u aan
alkalibatterijen met een lange levensduur te gebruiken.
Zet de receiver en de TV aan.
2
Schakel de ingangsfunctie van de TV om zodat
3
deze verbonden is met de receiver.
Schakel de subwoofer in en verhoog het volume.
4
WAARSCHUWING
• Batterijen mogen niet in direct zonlicht of op een erg
warme plaats, zoals in de buurt van een verwarming of
in een auto die in de zon staat, gebruikt of opgeborgen
worden. Dit kan resulteren in lekkage, oververhitting,
explosie of in brand vliegen van de batterijen. Bovendien
kan de levensduur van de batterijen afnemen.
WAARSCHUWING
• Let er bij het plaatsen van de batterijen op dat u de veren van
de (–) aansluitingen voor de batterijen niet beschadigt. Dit kan
resulteren in lekkage of oververhitting van de batterijen.
• Wanneer u lege batterijen weggooit, gelieve daarbij de geldende
wetgeving en bepalingen na te leven.
De instellingen voor surroundgeluid
automatisch maken (MCACC)
De automatische meerkanaals akoestische kalibratie (MCACC)
8
instelling maakt gebruik van de bijgeleverde instelmicrofoon om
Eerste instellingen
de testtoon die door de luidsprekers wordt uitgevoerd te meten
en analyseren. Deze functie biedt een automatische meting en
instelling met zeer hoge nauwkeurigheid; bij gebruik ervan wordt
een optimale luisteromgeving voor de gebruiker gecreëerd.
Belangrijk
• Meet in een stille omgeving.
• Als u een statief hebt, kunt u dit gebruiken om de
microfoon ongeveer op oorhoogte te plaatsen op de
normale luisterpositie. Zet de microfoon anders op
oorhoogte met behulp van een tafel of stoel.
• Nauwkeurige metingen zijn wellicht niet mogelijk als er
een obstakel is tussen de luidsprekers en de luisterpositie
(microfoon).
• Ga bij het meten verwijderd van de luisterpositie staan en
gebruik de afstandsbediening terwijl u aan de buitenzijde
van alle luidsprekers staat.
Sluit de bijgeleverde instelmicrofoon aan.
1
ADVANCED
FL OFF
Microfoon
Statief
Het scherm
MCACC
SPEAKERS CONTROL – MULTI-ZONE – ON / OFFBANDTUNER EDIT TUNE PRESET ENTER
AUTO SURR/ALC/
INPUT
SELECTOR
STANDBY/ON
STREAM DIRECT
MCACC
PHONES
SETUP MIC
Full Auto MCACC
1a.Full Auto MCACC
Speaker System : Normal(SB/FH
EQ Type : ---
MCACC : M1.MEMORY 1
Measurement Type : Basic
START
Exit Return
iPod iPhoneHDMI
iPod iPhone
ADVANCED
STANDARD
DIRECT
CONTROLSTATUS
SURROUND
SURROUND
SETUP
MCACC
5V 1 A
HDMI 5 INPUT
MIC
verschijnt op uw TV.
A/V RECEIVER
)
MASTER
VOLUME
Druk op de afstandsbediening op MAIN
2
RECEIVER en voer de bediening uit.
• Als u de cursor op
selecteert, worden
Speaker Distance
selecteert, worden ook automatisch
Acoustic Cal EQ
Plaats de cursor op START en druk op de knop
3
Measurement Type
plaatst en
Speaker Setting, Channel Level
automatisch aangepast. Als u
Expert
Standing Wave
(frequentiekarakteristieken) aangepast.
ENTER.
• De automatische meting begint.
• De meting duurt ongeveer 3 tot 12 minuten.
Volg de instructies op het scherm.
4
• De automatische instelling is voltooid wanneer het scherm
Home Menu verschijnt.
Reverse Phase
• Als
luidsprekerdraden (+ en –) verwisseld zijn. Controleer
deaansluitingen van de luidsprekers.
Zelfs als de aansluitingen juist zijn, kan er
worden weergegeven, afhankelijk van de luidsprekers
en de omgevingsomstandigheden. Dit is echter niet van
invloed op de metingen, dus u kunt
• Als de stroom uitvalt, is mogelijk het beveiligingscircuit in
werking getreden omdat de kern van de luidsprekerkabel
het achterpaneel raakt of omdat de (+) en (–) kernen
elkaar raken. Draai de kern van de luidsprekerkabel
opnieuw samen, en sluit hem zo aan dat hij niet uitsteekt
bij de luidsprekeraansluiting.
Zorg dat de instelmicrofoon wordt losgemaakt.
5
wordt aangegeven, kunnen de
Reverse Phase
Go Next
selecteren.
Basic
en
en
Page 49

Basisbediening voor afspelen
2
3
5
Schakel de ingangsfunctie van de receiver om.
Meerkanaals weergave
STANDBY/ON
ALL ZONE STBY
SUB ZONE CONTROL
RECEIVER
MAIN
SOURCE CONTROL
DVDBD
USBADPTROKU
iPod
BT
TUNER
TV
INPUT
STATUS
AUDIO P. VIDEO P.
TOP
MENU
HOME
MENU
SOURCE
Z2 Z3 HDZ
SAT
MHL
TV
CD
VOLUME
VOL
MUTE
OUT P.
ENTER
RETURN
HDMI
NET
ALL
TOOLS
MENU
2
Bijv.: Druk op BD om de BD-ingang te selecteren.
Druk op AUTO om ‘AUTO SURROUND’ te
3
selecteren.
Druk ook op
SURR
kanalen. Selecteer uw gewenste luisterfunctie.
Start met afspelen van het weergave-
4
apparaat.
Bijv.: Start met afspelen van de Blu-ray disc-speler.
Gebruik VOLUME +/– om het volume in te
5
stellen.
• Als er geen geluid klinkt van de midden- en
achterluidsprekers, druk dan op
luisterfunctie te wijzigen.
Voorbeeld) Druk enkele keren op de knop
STEREO
Als er geen geluid komt uit de subwoofer
•
Oorzaak – De voorluidspreker is ingesteld op LARGE.
Als een audiobron met 2 kanalen wordt ingevoerd, wordt
te selecteren.
of
ADV
voor weergave via meerdere
SURR
of
ADV
ADV
om de
EXT.
om
de lagefrequentiecomponent niet weergegeven via de
LISTENING MODE
SURRAUTO
MPX
PRESET TUNE
2
13
546
8
79
D.ACCESS
CLR
0
DIMMER SLEEP
CH LV.
ADV
BAND PTY
AUDIO
DISP
CH
CLASS
ENTER
CH
RCU SETUP
Fav
subwoofer maar via de voorluidspreker.
Oplossing – Wijzig de luidsprekerinstelling om het
geluid weer te geven via de subwoofer.
Methode 1: Wijzig de instelling van de voorluidspreker in
SMALL
.
De lagefrequentiecomponent wordt niet weergegeven
via de voorluidspreker maar via de subwoofer. Als de
voorluidspreker een hoge capaciteit heeft voor weergave
van lage frequenties, dan raden we aan om de instelling
niet te wijzigen.
Methode 2: Wijzig de instelling van de subwoofer in
PLUS
.
De lagefrequentiecomponent wordt weergegeven via de
voorluidspreker en de subwoofer. In dit geval worden lage
tonen soms te sterk weergegeven. Als dat zo is, raden
RECEIVER
we aan om de instelling niet te wijzigen of methode 1 te
gebruiken.
• Zie “Luidsprekerinstelling” van de handleiding voor
Schakel het weergave-apparaat in.
1
Bijv.: Schakel de Blu-ray disc-speler in die op de
IN
-aansluiting is aangesloten.
HDMI BD
details.
• Als er geen geluid wordt weergegeven, verhoogt u het
volume tot ongeveer –30 dB.
Opmerking
• Als het apparaat niet kan worden bediend met de
afstandsbediening
–Druk vóór gebruik van de receiver op
MAIN RECEIVER
.
–Voor gebruik van functies zoals het netwerk, TUNER of iPod
drukt u vóór gebruik ervan op de betreffende functieknop
NET, TUNER, iPod
(
, enz.).
Luisteren naar de radio
Druk op TUNER om de tuner te selecteren.
1
Indien nodig, drukt u op
(FM of AM) te kiezen.
Druk op TUNE +/– om op een zender af te
2
stemmen.
TUNE +/–
• Houd
ongeveer een seconde ingedrukt. De
receiver begint naar de volgende zender te zoeken.
• Als u naar een FM-zender luistert maar de ontvangst zwak
is, drukt u op
MPX
receiver in de mono-ontvangststand te zetten.
Voorkeurzenders opslaan
Als u vaak naar een bepaalde zender luistert, is het handig als
u de frequentie opslaat in het geheugen van de receiver om de
zender later gemakkelijk te kunnen oproepen.
Druk op TOOLS terwijl een uitzending ontvangen
1
wordt van de zender die u wilt opslaan.
Het voorkeurzendernummer knippert.
Druk op PRESET +/– om het gewenste
2
voorkeurzendernummer te selecteren en druk
dan op ENTER.
Het voorkeurzendernummer stopt met knipperen en de
receiver slaat de zender in het geheugen op.
Luisteren naar voorkeurzenders
U moet voorkeurzenders in het geheugen hebben opgeslagen
om naar voorkeurzenders te kunnen luisteren.
Druk op PRESET +/– om de gewenste
voorkeurzender te selecteren.
BAND
om de andere afstemband
om FM MONO te selecteren en de
9
Page 50

Basisbediening voor afspelen (vervolg)
Een iPod afspelen
• Na het inschakelen van de stroom duurt het ongeveer één
minuut totdat het opstarten is voltooid.
Sluit uw iPod aan.
1
Er kan een iPod/iPhone op de receiver worden
aangesloten.
ADVANCED
FL OFF
MCACC
SPEAKERS CONTROL – MULTI-ZONE – ON / OFFBANDTUNER EDIT TUNE PRESET ENTER
AUTO SURR/ALC/
INPUT
SELECTOR
STANDBY/ON
USB-kabel die bij de
iPod wordt geleverd
Druk op iPod USB om de iPod/USB-ingang te
2
STREAM DIRECT
MCACC
PHONES
SETUP MIC
selecteren.
Wanneer u de namen van de mappen en bestanden op het
display ziet, kunt u muziek afspelen van de iPod.
Gebruik
3
om een categorie te selecteren
/
en druk dan op ENTER om door die categorie
te lopen.
• Als u terug wilt naar het vorige niveau, drukt u op
Gebruik
4
RETURN
.
om door de geselecteerde
/
categorie, bijvoorbeeld albums, te bladeren.
• Gebruik
om naar vorige/volgende niveaus te gaan.
/
iPod iPhoneHDMI
iPod iPhone
ADVANCED
STANDARD
STATUS
DIRECT CONTROL
SURROUND
SURROUND
5 V 1 A
MASTER
VOLUME
5V 1 A
HDMI 5 INPUT
iPod/iPhone
Luisteren naar internetradiozenders
• Na het inschakelen van de stroom duurt het ongeveer één
minuut totdat het opstarten is voltooid.
Belangrijk
• Wanneer u een breedband internetverbinding wilt
gebruiken, heeft u een overeenkomst met een internet
service provider nodig. Neem voor meer informatie contact
op met uw plaatselijke internet service provider.
• Om naar internet-radiozenders te kunnen luisteren, moet u
breedband-internet hebben met hoge snelheid. Bij gebruik
van een 56 K of ISDN-modem is het vaak niet mogelijk
om een goede kwaliteit van het geluid van de internetradiozenders te verkrijgen.
• Toegang tot materiaal (“content”) van derden vereist een
internetverbinding met hoge snelheid en mogelijk ook een
accountregistratie en een betaald abonnement. Diensten
met materiaal van derden kunnen op elk moment zonder
kennisgeving worden gewijzigd, opgeschort, onderbroken
of geannuleerd en Pioneer wijst elke aansprakelijkheid
in verband met dergelijke gebeurtenissen van de hand.
Pioneer maakt geen aanspraken en geeft geen garanties
dat diensten voortdurend zullen worden geleverd of een
bepaalde tijd lang beschikbaar zullen zijn en elke garantie
met een dergelijke strekking, uitdrukkelijk of impliciet,
wordt van de hand gewezen.
Druk enkele malen op NET om de INTERNET
1
RADIO-ingang te selecteren.
Het kan een paar seconden duren voordat de receiver
toegang heeft tot het netwerk.
Gebruik
2
selecteren waarnaar u wilt luisteren en druk
dan op ENTER.
om de internet-radiozender te
/
Om optimaal te genieten van de vele
functies van het apparaat
Start AVNavigator en gebruik de “ Interactive
Operation Guide”.
Plaats de cd-rom in de computer en download de
“Handleiding” (PDF) van het menuscherm om te
lezen.
Functies
Een USB-apparaat afspelen
■
Muziek afspelen via Bluetooth
■
Afspelen met de NETWERK-functie
■
De audio-opties instellen
■
De video-opties instellen
■
MULTI-ZONE bediening gebruiken
■
Veelgestelde vragen
Woordenlijst
Functielijst
Opmerking
• Dit toestel ondersteunt AirPlay. Zie voor details “Gebruiken
van AirPlay op iPod touch, iPhone, iPad en iTunes” van de
handleiding en de website van Apple (http://www.apple.
com).
• De software van dit apparaat kan worden bijgewerkt
(“Software-update” van de handleiding). Op Mac OS kan de
software worden bijgewerkt via Safari (“Gebruik van Safari
voor het updaten van de firmware” in de handleiding).
10
Blader net zo lang tot u hebt gevonden wat
5
u wilt afspelen. Druk op om het afspelen te
starten.
© 2014 PIONEER HOME ELECTRONICS CORPORATION.
Alle rechten voorbehouden.
Page 51

11
Page 52

Español
Disfrute de la reproducción multicanal fácil con esta unidad en 3 pasos:
Conexiones
→
La conexión y la configuración inicial se pueden realizar consultando esta Guía de inicio rápido, pero es más fácil cuando se utiliza
Configuración inicial
→
Reproducción básica
Wiring Navi
AVNavigator.
Realice la conexión y la configuración inicial con cualquiera de los métodos en función de las circunstancias en las que use AVNavigator.
Adicionalmente, el uso de la
Interactive Operation Guide
de AVNavigator le permite aprender las operaciones básicas de forma efectiva.
Conexión y configuración inicial
Conexión y conguración inicial siguiendo las
instrucciones del “Wiring Navi” en AVNavigator
(Para hacer la conguración inicial es
necesario estar conectado a la red.)
o bien
Conexión y conguración inicial
consultando esta Guía de inicio rápido
Guía de
inicio rápido
.
en
No es necesario leer esta guía para obtener explicaciones;
se explicarán en
Vaya a “Uso del AVNavigator integrado” en esta guía.
Puede utilizar la
Los contenidos están enlazados de forma interactiva con el producto,
lo que le permite recordarlos durante la lectura y usar el producto
Interactive Operation Guide
mientras se familiariza con él.
Wiring Navi
del
.
.
Vaya a
en esta guía.
2
Page 53

Uso del AVNavigator integrado
LAN
(
10/100
)
SCO
Conexión a la red mediante la
interfaz LAN
Internet
Ordenador
Cable LAN (vendido por separado)
LAN
(10/100
Modem
)
Enrutador
WAN
LAN
Conexión a una LAN inalámbrica
La conexión inalámbrica a la red se puede hacer a través de la
conexión de LAN inalámbrica. Use el AS-WL300 vendido por
separado para hacer la conexión.
• Use solamente el cable de conexión accesorio
suministrado.
• Para usar un convertidor LAN inalámbrico (AS-WL300)
se necesitan ciertos ajustes. Para conocer instrucciones
1
2
3
sobre cómo hacer estos ajustes, consulte el manual de
instrucciones incluido con el convertidor LAN inalámbrico
(AS-WL300).
)
LAN
(10/100
DC OUTPUT
LAN
(10/100
)
DC OUTPUT
for WIRELESS LAN
(
OUTPUT 5 V
0.6 A MAX
)
Enrutador
for WIRELESS LAN
(
OUTPUT 5 V
)
0.6 A MAX
Modem
WAN
Internet
cables. Los cables de alimentación deben ser tendidos
de tal manera que la probabilidad de que alguien los pise
sea mínima. Un cable de alimentación dañado puede
causar fuego y descargas eléctricas. Revise el cable de
alimentación cada cierto tiempo. Si observa que está
dañado, solicite un cable de repuesto en el servicio
técnico Pioneer autorizado más cercano.
• No utilice ningún cable de alimentación que no sea el que
se suministra con esta unidad.
• No utilice el cable de alimentación suministrado para
ningún otro fin distinto del que se describe a continuación.
• Cuando no vaya a usar el receptor durante un período de
tiempo prolongado (por ejemplo, durante las vacaciones),
desconecte la clavija de alimentación de la toma de
corriente mural.
• Asegúrese de que la luz azul
STANDBY/ON
u
se ha
apagado antes de desenchufar la unidad.
Conecte el cable de alimentación suministrado
1
a la toma AC IN de la parte posterior del
receptor.
Nunca haga un nudo con el cable y no lo ate a otros
Conecte el otro extremo a una toma de
2
corriente.
DC 5V WPS
Ethernet
Convertidor de LAN inalámbrica (AS-WL300)
Conexión del receptor
Tras la conexión a una LAN, conecte el cable de alimentación
del receptor a una toma de corriente.
PRECAUCIÓN
Encendido
Pulse
ordenador.
Espere unos minutos tras el encendido antes de realizar la
siguiente operación.
STANDBY/ON
u
para encender el receptor y el
STANDBY/ON
PHONES
MCACC
SETUP MIC
• Al manipular el cable de alimentación, sujételo por la
parte de la clavija. No desconecte la clavija tirando del
cable y nunca toque el cable de alimentación con las
manos mojadas, ya que esto puede causar cortocircuitos
o descargas eléctricas. No coloque el equipo, un mueble
ni ningún otro objeto encima del cable de alimentación,
y asegúrese de no aplastar el cable de ningún otro modo.
3
Page 54

Uso del AVNavigator integrado (continuación)
Inicio del AVNavigator integrado
Controle AVNavigator siguiendo las instrucciones de la
pantalla del ordenador, etc.
Entorno de funcionamiento
• AVNavigator se puede utilizar en los siguientes entornos.
–PC con Windows PC: Microsoft
®
Vista
/Windows® 7/Windows® 8/Windows® 8.1
–Mac OS: Mac OSX (10.7, 10.8 o 10.9)
–iPad/iPhone/iPod touch: iOS 7
–Dispositivo Android: Android 4.0.4
• Algunas funciones de AVNavigator utilizan un navegador
de Internet. Se admiten los siguientes navegadores:
–PC con Windows PC: Internet Explorer
–Mac OS/iPad/iPhone/iPod touch: Safari 6.0
–Dispositivo Android: navegador Android
• Para utilizar ciertas funciones del AVNavigator, debe
instalar la versión más reciente de Adobe
Para conocer detalles, visite el siguiente sitio web.
http://www.adobe.com/downloads/
• En función de la configuración de red o la configuración
de seguridad del ordenador, es posible que AVNavigator
no funcione.
®
Windows® XP/Windows
®
8, 9, 10, 11
®
Flash® Player.
Uso de un PC con Windows
• Inicie Internet Explorer e introduzca la dirección IP de
esta unidad en el campo de dirección de Internet Explorer.
(Acceda a la dirección IP “http://(la dirección IP del
receptor)” desde un navegador de red.) Puede mostrar
la dirección IP de la unidad en la pantalla de la unidad
pulsando el botón
• En un PC con una versión de Windows diferente de
Windows XP, puede utilizar el siguiente método para
iniciar AVNavigator.
Inicie Explorer y haga clic con el botón derecho en
<VSX-924> que se muestra en la carpeta ‘
continuación, haga clic en ‘
STATUS
del mando a distancia.
Network
View device webpage
’.
Uso de Mac
Inicie Safari y haga clic en <VSX-924> que se muestra en
Bonjour
‘
’ en la barra Favoritos.
’ y, a
Uso de un iPad/iPhone/iPod touch
Descargue una aplicación gratuita, iControlAV5, de la App
Store. Tras iniciar iControlAV5, siga las instrucciones de
la pantalla. Posteriormente, en la pantalla Home, pulse
AVNavigator
‘
iPad
’ o el icono.
iPhone/iPod touch
• Si no se muestra ‘
Include Bonjour in the Favorites bar
‘
‘Advanced’ dentro del menú ‘
Bonjour
’ active la casilla de verificación
’ en la pestaña
Preferences...
’ de Safari.
4
Page 55

Uso de un iPad
■
En un iPad, puede utilizar AVNavigator para iPad. Descargue
AVNavigator para iPad desde la App Store. Tras iniciar
AVNavigator para iPad, siga las instrucciones de la pantalla.
Uso de un dispositivo Android
Descargue una aplicación gratuita, iControlAV5, de Google
Play Store. Tras iniciar iControlAV5, siga las instrucciones de la
pantalla. Posteriormente, en la pantalla Home, pulse el icono.
Acerca del uso de Wiring Navi
Wiring Navi se inicia cuando se pulsa ‘
pantalla de AVNavigator.
• Cuando haya finalizado la conexión, vaya al paso .
Wiring Navi
’en la
Uso del AVNavigator integrado (continuación)
5
Page 56

Conexiones
12 3
Conexión de los altavoces
El receptor funcionará con solo dos altavoces estéreo (los delanteros en el diagrama), pero se
recomienda usar un mínimo de cinco, y el juego completo es lo mejor para el sonido envolvente.
Para obtener un sonido envolvente confortable, instale sus altavoces como se indica a
continuación.
Sistema de sonido envolvente de 7.1 canales:
L
C
SL
Conexión de los cables de altavoces
Asegúrese de conectar el altavoz de la
derecha al terminal derecho (R) y el altavoz
de la izquierda al terminal izquierdo (L).
Asegúrese también de que los terminales
positivo y negativo (
concuerden con los de los altavoces.
Retuerza juntos los hilos del cable
1
expuesto.
Afloje el terminal e inserte el cable
2
expuesto.
Apriete el terminal.
3
10 mm
R
SW
SBL
+/–
) del receptor
SR
SBR
L
– Delantero izquierdo
C
– Central
R
– Delantero derecho
SL
– Sonido envolvente izquierdo
SR
– Sonido envolvente derecho
SBL
– Sonido envolvente trasero izquierdo
SBR
– Sonido envolvente trasero derecho
SW
– Subwoofer
Nota
• También hay otras formas de conectar
altavoces (delantero alto, delantero
ancho, etc.). Para conocer los detalles,
consulte“Conexión del equipo” en las
instrucciones de funcionamiento.
PRECAUCIÓN
• Antes de extablecer o modificar las
conexiones, desconecte la alimentación
y desenchufe el cable de alimentación
de la toma de corriente.
• Estos terminales de altavoces tienen
CORRIENTE PELIGROSA
recibir una descarga eléctrica al
conectar o desconectar los cables de
los altavoces, desconecte el cable de la
alimentación antes de tocar cualquier
parte sin aislar.
. Para impedir
Después de instalar los altavoces, conéctelos como se muestra a continuación.
Delantero
derecho
(R)
PRE OUT
SUB
WOOFER
1
2
A
Sonido envolvente
derecho
(SR)
Subwoofer
(SW)
LINE LEVEL
INPUT
PRE OUT
SURROUND BACK / HDZONE
SURROUNDCENTERFRONT
SPEAKERS
(
Single
SUB
WOOFER
1
2
A
FRONT HEIGHT / WIDE /
B
)
RLRLRLRL
Sonido envolvente trasero
derecho
SBR
(
)
Central
(C)
SURROUNDCENTERFRONT
SPEAKERS
Sonido envolvente trasero
izquierdo
SBL
(
SURROUND BACK / HDZONE
)
Delantero
izquierdo
FRONT HEIGHT / WIDE /
(
)
Single
RLRLRLRL
Sonido envolvente
izquierdo
Nota
• Cuando conecte un solo altavoz de sonido envolvente trasero, conéctelo a los terminales
SURROUND BACK L (Single)
• Esta unidad soporta altavoces con una impedancia nominal de 6 W a 16 W.
.
(L)
B
(SL)
6
Page 57

Conexiones (continuación)
A
A
ANTENNA
FM UNBAL
75
AM LOOP
PRECAUCIÓN PARA LA VENTILACIÓN
Cuando instale este aparat
espacio en torno al mismo para la ventilación con el fin
de mejorar la disipación de calor (por lo menos 40 cm
encima, 10 cm detrás, y 20 cm en cada lado)
ADVER
Las ranuras y aberturas de la caja del aparato sir
para su ventilación para poder asegurar un
funcionamiento fiable del aparato y para protegerlo
contra sobrecalentamiento
incendio
cubrirse con nada (como por ejempl
manteles, cortinas) ni ponerse en funcionamiento el
aparato sobre una alfombra gruesas o una cama
D3-4-2-1-7b*_A1_Es
Conexión de un televisor y
componentes de reproducción
Televisor compatible con
IN
IN
(TV)
1
OPTICAL
(TV)
1
ASSIGNABLE
HDMI/DVI
A
OPTICAL
ASSIGNABLE
Reproductor de discos
Blu-ray compatible con
HDMI/DVI
HDMI OUT
OUT 1
(
CONTROL
)
BD IN
1
IN
(
)
DVD
DIGITAL OUT
OPTICAL
OUT 2
OUT 1
HDMI
BD IN
1
IN
IN2IN3IN4IN /MHL
(
HDZONE
)
(
CONTROL
)
ASSIGNABLE
-
1 6
(
(
)
SAT/CBL
DVD
SELECTABLE
)
LAN
(10/100
6
DC OUTPUT
for WIRELESS LAN
(
(
OUTPUT 5 V
OUTPUT 5 V
)
)
)
0.6 A MAX
0.9 A MAX
HDMI IN
• Con los ajustes por defecto, el vídeo conectado con el
cable de vídeo o el cable de componentes no se emite
desde el terminal HDMI. Para reproducir vídeo, debe
cambiar la entrada de vídeo al dispositivo conectado con
el cable de vídeo o el cable de componentes y ajustar
V.CONV
ON
en
. Para conocer los detalles, consulte
“Ajuste de las opciones de vídeo” en las instrucciones de
funcionamiento.
Conexión de antenas
Antena de cuadro
de AM
Antena alámbrica
de FM
AM LOOP
ANTENNA
FM UNBAL
75
21
la clavija. No desconecte la clavija tirando del cable y nunca
toque el cable de alimentación con las manos mojadas, ya
que esto puede causar cortocircuitos o descargas eléctricas.
No coloque el equipo, un mueble ni ningún otro objeto
encima del cable de alimentación, y asegúrese de no aplastar
el cable de ningún otro modo. Nunca haga un nudo con el
cable y no lo ate a otros cables. Los cables de alimentación
deben ser tendidos de tal manera que la probabilidad de
que alguien los pise sea mínima. Un cable de alimentación
dañado puede causar fuego y descargas eléctricas. Revise
el cable de alimentación cada cierto tiempo. Si observa que
está dañado, solicite un cable de repuesto en el servicio
técnico Pioneer autorizado más cercano.
• No utilice ningún cable de alimentación que no sea el que
se suministra con esta unidad.
• No utilice el cable de alimentación suministrado para
ningún otro fin distinto del que se describe a continuación.
• Cuando no vaya a usar el receptor durante un período de
tiempo prolongado (por ejemplo, durante las vacaciones),
desconecte la clavija de alimentación de la toma de
corriente mural.
• Asegúrese de que la luz azul
STANDBY/ON
u
se ha
apagado antes de desenchufar la unidad.
Conecte el cable de alimentación suministrado
1
a la toma AC IN de la parte posterior del
receptor.
Conecte el otro extremo a una toma de corriente.
2
• Si el televisor no soporta la función de canal de retorno de audio
HDMI, la conexión del cable digital óptico (
para escuchar el sonido del televisor a través del receptor.
• Si el televisor soporta la función de canal de retorno de audio
HDMI, el sonido del televisor se introducirá en el receptor
a través del terminal HDMI, así que no será necesario
conectar un cable digital óptico (
ARC
HDMI Setup
de
en
ON
). En este caso, ponga
. Para conocer los detalles,
consulte “Configuración de HDMI” en las instrucciones de
funcionamiento.
• Consulte el manual de instrucciones del televisor para hacer
las conexiones y la configuración del mismo.
) será necesaria
Nota
• Consulte el manual del instrucciones del CD-ROM incluido si
quiere conectar un televisor o componente de reproducción
siguiendo otro método que no sea una conexión HDMI.
• Consulte el manual de instrucciones del CD-ROM incluido
para las conexiones de otros aparatos.
Conexión del receptor
No conecte el receptor hasta que no haya conectado todos los
componentes de este receptor, incluidos los altavoces.
PRECAUCIÓN
• Al manipular el cable de alimentación, sujételo por la parte de
o, asegúrese de dejar
.
TENCIA
ven
. Para evitar el peligro de
, las aberturas nunca deberán taparse ni
o, periódicos,
.
7
Page 58

Configuración inicial
ALL ZONE STBY
SOURCE
STANDBY/ON
MAIN
SUB ZONE CONTROL
Z2 Z3 HDZ
RECEIVER
Antes de comenzar
Ponga las pilas en el mando a distancia.
1
Las pilas suministradas con la unidad son para verificar las
operaciones iniciales; puede que no duren mucho tiempo.
Recomendamos usar pilas alcalinas de duración más larga.
Encienda el receptor y el televisor.
2
Cambie la entrada del televisor para conectarlo
3
al receptor.
Apague el subwoofer y suba el volumen.
4
suministrado para medir y analizar el tono de prueba que
sale por los altavoces. Esta configuración permite hacer
mediciones y ajustes automáticos de alta precisión; al utilizarla
se creará un entorno de audición óptimo para el usuario.
Importante
• Mida en un entorno silencioso.
• Si tiene un trípode, utilícelo para situar el micrófono de
modo tal que quede a nivel del oído en la posición de
audición normal. En caso contrario, sitúe el micrófono a
nivel del oído utilizando una mesa o silla.
• Si hay obstáculos entre los altavoces y la posición de audición
(micrófono) puede que no sea posible tomar medidas precisas.
• Cuando mida, apártese de la posición de audición y opere
utilizando el mando a distancia desde el lado externo de
todos los altavoces.
Conecte el micrófono de configuración
1
suministrado.
ADVANCED
FL OFF
SPEAKERS CONTROL – MULTI-ZONE – ON / OFFBANDTUNER EDIT TUNE PRESET ENTER
INPUT
SELECTOR
STANDBY/ON
MCACC
PHONES
SETUP MIC
MCACC
AUTO SURR/ALC/
STREAM DIRECT
iPod iPhoneHDMI
iPod iPhone
ADVANCED
STANDARD
DIRECT
CONTROLSTATUS
SURROUND
SURROUND
MASTER
VOLUME
5V 1 A
HDMI 5 INPUT
Pulse MAIN RECEIVER en el mando a distancia
2
para controlar el receptor.
• Cuando el cursor se coloque sobre
y se seleccione
Speaker Distance
Si se selecciona
automáticamente
Basic, Speaker Setting/Channel Level
se ajustarán automáticamente.
Expert
también se podrá ajustar
Standing Wave/Acoustic Cal EQ
(características de frecuencia).
Coloque el cursor sobre START y pulse el botón
3
Measurement Type
ENTER.
• La medición automática empezará.
• La medición tardará entre 3 y 12 minutos
aproximadamente.
Siga las instrucciones que aparecen en la
4
pantalla.
• El ajuste automático se completa cuando aparece la
pantalla Home Menu.
HOME MENU
1. Advanced MCACC
2. MCACC Data Check
3. Data Management
4. System Setup
5. Network Information
6. Operation Mode Setup
A/V RECEIVER
/
8
ADVERTENCIA
• No utilice ni guarde las pilas a la luz solar directa ni en
otros lugares de mucho calor como, por ejemplo, dentro de
un automóvil o cerca de una calefacción. Esto puede ser la
causa de que las pilas tengan pérdidas, se sobrecalienten,
revienten o se incendien. También se puede reducir la
duración o el rendimiento de las pilas.
PRECAUCIÓN
• Cuando inserte las pilas, asegúrese de no dañar los resortes
de los terminales (–) de las mismas. Esto puede causar fugas
o recalentamiento en las pilas.
• Cuando tiene que desembarazarte de las baterías usadas, por
favor se adapte a los reglamentos gubernamentales o a las
disposiciones en materia ambiental en vigor en su país/área.
Configuración automática para
sonido envolvente (MCACC)
La configuración de calibración acústica automática de
múltiples canales (MCACC) usa el micrófono de configuración
Micrófono
Trípode
La pantalla
MCACC
SETUP
Full Auto MCACC
1a.Full Auto MCACC
Speaker System : Normal(SB/FH
EQ Type : ---
MCACC : M1.MEMORY 1
Measurement Type : Basic
START
A/V RECEIVER
Exit Return
MIC
aparece en su televisor.
)
Exit Return
• Si se visualiza
Reverse Phase
, las conexiones de los
cables de los altavoces (+ y –) pueden estar invertidas.
Compruebe las conexiones de altavoz.
Aunque las conexiones sean correctas, puede que se
visualice
Reverse Phase
, dependiendo de los altavoces y
del entorno circundante. Sin embargo, esto no afecta a las
mediciones, así que seleccione
Go Next
.
• Si se corta la alimentación, el núcleo del cable del altavoz
puede estar en contacto con el panel trasero o los núcleos
(+) y (–) pueden estar tocándose, lo que hace que los
circuitos de protección se activen. Vuelva a trenzar el
núcleo del cable del altavoz y conéctelo de forma que no
sobresalga del terminal del altavoz.
Asegúrese de que el micrófono de
5
configuración esté desconectado.
Page 59

Reproducción básica
2
3
5
Cambie la entrada del receptor.
Reproducción multicanal
STANDBY/ON
ALL ZONE STBY
SUB ZONE CONTROL
RECEIVER
MAIN
SOURCE CONTROL
DVDBD
USBADPTROKU
iPod
BT
TUNER
TV
INPUT
STATUS
AUDIO P. VIDEO P.
TOP
MENU
HOME
MENU
SOURCE
Z2 Z3 HDZ
SAT
MHL
TV
CD
VOLUME
VOL
MUTE
OUT P.
ENTER
RETURN
HDMI
NET
ALL
TOOLS
MENU
2
Ej.) Pulse BD para seleccionar la entrada BD.
Pulse AUTO para seleccionar ’AUTO SURROUND’.
3
Plse también
SURR
multicanal. Seleccione su modo de audición preferido.
Inicie la reproducción del componente de
4
reproducción.
Ej.) Inicie la reproducción del reproductor de discos
Blu-ray.
Use VOLUME +/– para ajustar el nivel del
5
volumen.
• Cuando no se pueda oír un sonido desde los altavoces
central y trasero, pulse
modos de escucha.
P. ej.) Pulse el botón
EXT.STEREO
Cuando no hay sonido del subwoofer
•
Causa - El altavoz delantero está ajustado en LARGE.
.
ADV
o
para la reproducción
SURR
ADV
ADV
o
para cambiar los
varias veces para seleccionar
Cuando se recibe una fuente de audio de 2 canales, el
LISTENING MODE
SURRAUTO
MPX
PRESET TUNE
2
13
546
8
79
D.ACCESS
CLR
0
DIMMER SLEEP
CH LV.
ADV
BAND PTY
AUDIO
DISP
CH
CLASS
ENTER
CH
RCU SETUP
Fav
componente de baja frecuencia no se emite desde el
subwoofer pero se emite desde el altavoz delantero.
Solución – Para emitir desde el subwoofer, cambie el
ajuste del altavoz.
Método 1: Cambie el ajuste del altavoz delantero a
SMALL
El componente de baja frecuencia no se emite desde
el altavoz delantero pero se emite desde el subwoofer.
Cuando la capacidad de reproducción de baja frecuencia
del altavoz frontal es alta, se recomienda no cambiar el
ajuste.
Método 2: Cambie el ajuste del subwoofer a
PLUS
.
.
El componente de baja frecuencia se emite desde el
altavoz delantero y el subwoofer. Por ese motivo, la
emisión de sonidos bajos a veces es excesiva. En tal caso,
RECEIVER
se recomienda no cambiar al Método 1.
• Para conocer los detalles, consulte “Ajuste de altavoz”
Encienda el componente de reproducción.
1
Ej.) Encienda el reproductor de discos Blu-ray conectado
al terminal
HDMI BD IN
.
en las instrucciones de funcionamiento.
• Cuando no se emita ningún sonido, aumente el volumen a
aproximadamente –30 dB.
Nota
• Cuando no se pueda utilizar el mando a distancia para
controlar la unidad
–Cuando utilice el receptor, pulse
MAIN RECEIVER
antes de
usarlo.
–Cuando controle funciones como la red, TUNER o iPod,
pulse el botón de función adecuado (
NET, TUNER, iPod
,
etc.) antes del uso.
Recepción de radio
Pulse TUNER para seleccionar el sintonizador.
1
Si es necesario, pulse
Pulse TUNER +/– para sintonizar una emisora.
2
• Pulse y mantenga pulsado
segundo. El receptor empezará a buscar la siguiente emisora.
• Si está escuchando una emisora de FM pero la recepción
es débil, pulse
el receptor en el modo de recepción mono.
Presintonización de emisoras
Si escucha una emisora de radio en particular a menudo,
puede ser conveniente almacenar la frecuencia de la emisora
en el receptor para luego recuperarla fácilmente cada vez que
desee escuchar dicha emisora.
Pulse TOOLS mientras recibe una señal de una
1
emisora que quiera presintonizar.
El número de presintonización está parpadeando.
Pulse PRESET +/– para seleccionar la emisora
2
que desea y luego pulse ENTER.
El número de presintonización deja de parpadear y el
receptor almacena la emisora.
Cómo sintonizar emisoras memorizadas
Para poder utilizar esta función, primero deberá presintonizar
alguna emisoras.
Pulse PRESET +/– para seleccionar la emisora
que desea sintonizar.
BAND
para cambiar la banda (FM o AM).
TUNE +/–
MPX
para seleccionar FM MONO y ponga
durante más o menos un
9
Page 60

Reproducción básica (continuación)
Reproducción de un iPod
• Es necesario esperar aproximadamente un minuto desde
que se conecta la alimentación hasta que finaliza el inicio.
Conecte su iPod.
1
Al receptor se puede conectar un iPod/iPhone.
ADVANCED
FL OFF
MCACC
10
SPEAKERS CONTROL – MULTI-ZONE – ON / OFFBANDTUNER EDIT TUNE PRESET ENTER
INPUT
SELECTOR
STANDBY/ON
MCACC
PHONES
SETUP MIC
incluido con el iPod
Pulse iPod USB para seleccionar la entrada
2
Cable USB
iPod/USB.
Cuando la pantalla muestra los nombres de carpetas y
archivos, usted puede empezar a reproducir música del iPod.
3
Utilice
para seleccionar una categoría y,
/
a continuación, pulse ENTER para buscar esa
categoría.
• Para volver al nivel anterior en cualquier momento, pulse
4
RETURN
Utilice
.
para examinar la categoría
/
seleccionada (p. ej., álbumes).
• Utilice
Siga buscando hasta que encuentre lo que
5
para desplazarse al nivel anterior/posterior.
/
quiere reproducir. A continuación, pulse
para iniciar la reproducción.
iPod iPhone
ADVANCED
STANDARD
AUTO SURR/ALC/
STATUS
DIRECT
CONTROL
SURROUND
SURROUND
STREAM DIRECT
5 V 1 A
iPod iPhoneHDMI
MASTER
VOLUME
5V 1 A
HDMI 5 INPUT
iPod/iPhone
Recepción de emisoras de radio de
Internet
• Es necesario esperar aproximadamente un minuto desde
que se conecta la alimentación hasta que finaliza el inicio.
Importante
• Cuando use una conexión de Internet de banda ancha
necesitará firmar un contrato con un proveedor de
servicios de Internet. Para conocer más detalles, contacte
al proveedor de servicios de Internet más cercano.
• Para escuchar emisoras de radio de Internet tendrá que
tener acceso a Internet de banda ancha de alta velocidad.
Con un modem de 56 K o ISDN tal vez no pueda disfrutar
de todos los beneficios de la radio de Internet.
• El acceso al contenido provisto por terceros requiere
una conexión a Internet de alta velocidad, y también
puede que tenga que registrarse una cuenta y pagar una
subscripción. Los servicios de contenido de terceros
pueden ser cambiados, suspendidos, interrumpidos o
finalizados en cualquier momento y sin previo aviso, y
Pioneer no admite ninguna responsabilidad en tales
casos. Pioneer no representa ni garantiza que los
servicios de contenido continúen siendo provistos o estén
disponibles durante un periodo de tiempo particular, y
tampoco admite responsabilidad alguna, bien sea ésta
expresa o implícita.
Pulse repetidamente NET para seleccionar la
1
entrada INTERNET RADIO.
Este receptor puede tardar varios segundos en tener
acceso a la red.
Use
2
de Internet que va a reproducir y luego pulse
ENTER.
para seleccionar la emisora de radio
/
Para disfrutar al máximo de las
muchas funciones de la unidad
Inicie AVNavigator y utilice la “Interactive
Operation Guide”.
Cargue el CD-ROM en su ordenador y descargue
el “Manual de instrucciones” (PDF) desde la
pantalla de menú para leerlo.
Funciones
Reproducción de un aparato USB
#
Reproducción de música utilizando la tecnología
#
inalámbrica Bluetooth
Reproducción con la característica NETWORK
#
Ajuste de las opciones de audio
#
Ajuste de las opciones de vídeo
#
Uso de los controles MULTI-ZONE
#
Preguntas más frecuentes
Glosario
Índice de características
Nota
• Esta unidad es compatible con AirPlay. Para conocer los
detalles, consulte “Usando AirPlay en iPod touch, iPhone, iPad
e iTunes” de las instrucciones del manual de instrucciones y
el sitio web de Apple (http://www.apple.com).
• El software de esta unidad se puede actualizar (“Actualización
de software” de las instrucciones de uso). Con Mac OS,
se puede actualizar mediante Safari (“Uso de Safari para
actualizar el firmware” de las instrucciones de uso).
© 2014 PIONEER HOME ELECTRONICS CORPORATION.
Todos los derechos reservados.
Page 61

11
Page 62

Русский
Многоканальное воспроизведение на данном аппарате можно легко запустить в 3 шага:
Подключение
→
Первоначальная настройка
→
Основные операции воспроизведения
Подключение и первоначальную настройку можно выполнить в соответствии с данным Кратким руководством пользователя, но
проще использовать
Wiring Navi
в AVNavigator.
Выполните подключение и первоначальную настройку любым из этих способов, в соответствии с условиями, в которых ис-
пользуется AVNavigator.
В дополнение к этому, использование
Interactive Operation Guide
в AVNavigator позволяет более эффективно ознакомиться с
основными операциями.
Подключение и первоначальная настройка
.
Подключение и первоначальная настройка следуя ин-
струкциям в «Wiring Navi» в AVNavigator
(Для первоначальной настройки требуется подключение к сети.)
или
Необходимо ознакомиться с пояснениями в указанном руководстве;
описаны в
Перейдите к разделу “Использование встроенного AVNavigator” в
данном руководстве.
Для
Содержание содержит активные ссылки на интерфейс изделия,
что позволяет лучше запомнить их во время чтения и эффективно
можно использовать
пользоваться изделием, привыкнув к нему.
Wiring Navi
Interactive Operation Guide
.
.
Подключение и первоначальная настройка в соответ-
ствии с данным Кратким руководством пользователя
Краткое
руководство
пользователя
Перейдите на
в данном руководстве.
2
Page 63

Использование встроенного AVNavigator
LAN
(
10/100
)
SCO
Подключение к сети через интер-
фейс LAN
Интернет
Компьютеaр
LAN кабель (продается отдельно)
LAN
Модем
)
(10/100
Router
WAN
LAN
Подключение беспроводной сети
LAN
Можно выполнить беспроводное подключение к сети через
беспроводное подключение LAN. Для подключения используйте продающийся отдельно AS-WL300.
•Используйте только поставляемый кабель для подключения
аксессуаров.
1
2
3
•Для использования адаптера беспроводной сети LAN (ASWL300) требуется выполнить определенные настройки.
Подробнее о выполнении данных настроек см. инструкции
по эксплуатации к адаптеру беспроводной сети LAN (ASWL300).
)
LAN
(10/100
DC OUTPUT
LAN
(10/100
)
DC OUTPUT
for WIRELESS LAN
(
OUTPUT 5 V
0.6 A MAX
)
Router
for WIRELESS LAN
(
OUTPUT 5 V
)
0.6 A MAX
Модем
WAN
Интернет
ми. Не допускайте образования на кабеле узлов или его
спутывания с другими кабелями. Кабели питания следует
прокладывать в таких местах, где возможность наступить
на них будет маловероятной. Поврежденный кабель питания может стать причиной возгорания или поражения
электрическим током. Периодически проверяйте кабель
питания. Если обнаружится его повреждение, обратитесь в
ближайший сервисный центр, уполномоченный компанией
Pioneer, по поводу его замены.
•Не используйте никакой другой кабель питания, кроме
поставляемого с данным аппаратом.
•Не используйте поставляемый кабель питания для любой
другой цели, кроме описанной ниже.
•Если ресивер не используется постоянно (например, вы
уезжаете в отпуск), вытащите вилку кабеля питания из
розетки.
•Перед отсоединением, убедитесь в том, что погас синий
свет
STANDBY/ON
u
Подключите поставляемый кабель питания к
1
.
разъему AC IN на задней стороне ресивера.
Подключите другой конец к розетке.
2
Включение питания
предметов и его защемления любыми другими способа-
DC 5V WPS
Ethernet
Адаптор беспроводной сети LAN (AS-WL300)
Нажмите
STANDBY/ON
u
тер.
Прежде чем выполнить следующую операцию, подождите
несколько минут после включения питания.
, чтобы включить ресивер и компью-
Подключение ресивера к розетке
После подключения к беспроводной сети LAN подсоедините
STANDBY/ON
PHONES
MCACC
SETUP MIC
кабель питания ресивера к сети питания.
ПРЕДУПРЕЖДЕНИЕ
Держите кабель питания за вилку. Вынимая вилку из ро-
•
зетки, никогда не тяните за сам кабель, никогда не дотрагивайтесь до кабеля питания влажными руками, так как это
может стать причиной короткого замыкания и поражения
электрическим током. Не допускайте установки на кабель
питания самого аппарата, предметов мебели или других
3
Page 64

Использование встроенного AVNavigator (продолжение)
Запуск встроенного AVNavigator
Пользуйтесь AVNavigator, следуя подсказкам на экране компьютера и т. п.
Рабочее Окружение
•AVNavigator можно использовать в следующих средах.
–Windows: Microsoft
Windows
–Mac OS: Mac OSX (10.7, 10.8 или 10.9)
–iPad/iPhone/iPod touch: iOS 7
–Устройства Android: Android 4.0.4
Некоторые функции AVNavigator используют Интер-
•
нет-браузер. Поддерживаются следующие браузеры:
–Windows: Internet Explorer
–Mac OS/iPad/iPhone/iPod touch: Safari 6.0
–Устройства Android: браузер Android
Для использования некоторых функций AVNavigator не-
•
обходимо установить новую версию Adobe
Более подробную информацию см. на следующем веб-сай-
те.
http://www.adobe.com/downloads/
В зависимости от настроек компьютерной сети или настро-
•
ек безопасности AVNavigator может не работать.
®
7/Windows® 8/Windows® 8.1
®
Windows® XP/Windows Vista®/
®
8, 9, 10, 11
®
Flash® Player.
При использовании Windows PC
•Запустите Internet Explorer и введите IP-адрес данного
устройства в поле адреса Internet Explorer. (Зайдите на
IP-адрес “http://”(IP-адрес ресивера) из браузера.) IP-адрес
устройства можно вывести на экран передней панели,
нажав кнопку
•В ОС Windows, отличной то Windows XP, для запуска
AVNavigator можно использовать следующий способ. Запустите Проводник и щелкните правой кнопкой мыши <VSX924> в папке ‘
webpage
STATUS
Network
’.
на пульте ДУ.
’, затем щелкните ‘
View device
При использовании Mac
Запустите Safari и щелкните <VSX-924> в ‘
закладок.
Bonjour
’ на панели
При использовании iPad/iPhone/iPod touch
Загрузите бесплатное приложение iControlAV5 из App Store.
После запуска iControlAV5 следуйте инструкциям на экране.
Затем, на основном экране, коснитесь значка ‘
iPad
iPhone/iPod touch
AVNavigator
’.
•Если ‘
Bonjour
‘
Include Bonjour in the Favorites bar
‘
Advanced
’ не отображается, установите флажок
’ на вкладке
’ в меню Safari ‘
Preferences...
’.
4
Page 65

Использование встроенного AVNavigator (продолжение)
■При использовании iPad
На iPad можно пользоваться AVNavigator for iPad. Загрузите
AVNavigator for iPad из App Store. После запуска AVNavigator
for iPad следуйте инструкциям на экране.
При использовании устройства Android
Загрузите бесплатное приложение iControlAV5 из Google Play
Store. После запуска iControlAV5 следуйте инструкциям на
экране. Затем, на основном экране, коснитесь соответствующего значка.
Об использовании Wiring Navi
Wiring Navi запускается при нажатии ‘
AVNavigator.
По окончании подключения перейдите к .
•
Wiring Navi
’ на экране
5
Page 66

Подключение
12 3
Подключение громкоговорителей
Ресивер будет срабатывать только с двумя стереофоническими громкоговорителями (на рисунке передние громкоговорители), но рекомендуется как минимум использовать пять громкоговорителей,
так как для объемного звучания будет наилучшим иметь полноценную установку.
Для получения достаточного объемного звучания установите громкоговорители как показано ниже.
7.1-канальная система объеного звучания:
– Передний левый громкоговоритель
L
– Центральный громкоговоритель
C
– Передний правый громкоговоритель
R
– Левый громкоговоритель объемного звуча-
-
SL
ния
– Правый громкоговоритель объемного звуча-
SR
ния
– Задний левый громкоговоритель объемного
SBL
звучания
– Задний правый громкоговоритель объемно-
SBR
го звучания
– Низкочастотный громкоговоритель
SW
Примечание
Существуют также другие схемы подключе-
•
ния громкоговорителей (передние верхние,
передние боковые, др.). Подробную информацию см. в разделе “Подключение оборудо-
вания” инструкций по эксплуатации.
ПРЕДУПРЕЖДЕНИЕ
•Перед выполнением или изменением
подключений, отключите питание и
отсоедините кабель питания от розетки
переменного тока.
•Данные терминалы громкоговорителей
содержат
напряжение. Во избежание риска электрошока при подключении или отсоединении кабелей громкоговорителей,
перед прикосновением к любым неизолированным частям, отсоедините кабель
питания.
ОПАСНОЕ ДЛЯ ЖИЗНИ
R
L
SW
C
SR
SBR
SL
SBL
Подключение кабелей громкогово-
рителей
Будьте внимательны и подключите правый громкоговоритель к правому (R) терминалу и левый
громкоговоритель к левому (L) терминалу. Также
убедитесь в том, что положительный и отрица
тельный (
с терминалами на громкоговорителях.
1
2
3
) терминалы на ресивере совпадают
+/–
Скрутите оголенные жилы провода.
Освободите терминал и вставьте
оголенный провод.
Закрутите терминал.
После установки громкоговорителей подключите их как показано ниже.
Передний правый
громкоговоритель
(R)
PRE OUT
SUB
WOOFER
1
2
A
Правый громкого-
воритель объемного
звучания
(SR)
Низкочастотный
громкоговоритель 1
(SW)
LINE LEVEL
INPUT
PRE OUT
SURROUND BACK / HDZONE
SURROUNDCENTERFRONT
SPEAKERS
(
Single
)
FRONT HEIGHT / WIDE /
RLRLRLRL
SUB
WOOFER
1
2
B
Задний правый громко-
говоритель объемного
звучания
(
)
SBR
Центральный
громкоговоритель
(C)
A
SURROUNDCENTERFRONT
SURROUND BACK / HDZONE
SPEAKERS
Задний левый громкоговоритель объемного
звучания
(
)
SBL
Примечание
Передний левый
громкоговоритель
(L)
FRONT HEIGHT / WIDE /
(
)
Single
RLRLRLRL
Левый громкогово-
ритель объемного
звучания
(SL)
B
10 mm
6
•При подключении только одного заднего громкоговорителя объемного звучания, подключите его
к терминалам
SURROUND BACK L (Single)
.
•Данный аппарат поддерживает громкоговорители с номинальным сопротивлением от 6 W до
16
.
W
Page 67

A
A
Подключение (продолжение)
ANTENNA
FM UNBAL
75
AM LOOP
ОБЯЗАТЕЛЬНАЯ ВЕНТИЛЯЦИЯ
При
пространств
повышения темпера
менее 40 см сверх
справ
ПРЕД
В к
для в
раб
Во и
случае не сле
др
шт
то
D3-4-2-1-7b*_A1_Ru
Подключение телевизора и компо-
нентов воспроизведения
Совместимый с HDMI/
DVI проигрыватель
Blu-ray Disc
HDMI OUT
OUT 1
(
CONTROL
)
•Если телевизор не поддерживает функцию Канала возврата
аудиосигнала на HDMI, требуется выполнить подключение
через оптический цифровой кабель (
прослушивать звучание телевизора через ресивер.
Если телевизор поддерживает функцию Канала возврата ауди-
•
осигнала на HDMI, звучание телевизора поступает на ресивер
через терминал HDMI, поэтому нет необходимости подключать
оптический цифровой кабель (
ARC
разделе “Настройка HDMI” инструкций по эксплуатации.
•Указания по подключению и настройке телевизора, пожалуйста,
смотрите в руководстве по эксплуатации к телевизору.
BD IN
1
IN
(
)
DVD
в
HDMI Setup
HDMI
ASSIGNABLE
OUT 2
OUT 1
BD IN
1
IN
(
HDZONE
)
(
CONTROL
)
-
1 6
(
(
)
SAT/CBL
DVD
SELECTABLE
на
ON
Телевизор, совместимый с
HDMI/DVI
DIGITAL OUT
OPTICAL
HDMI IN
A
OPTICAL
(TV)
1
IN
ASSIGNABLE
)
LAN
(10/100
6
IN2IN3IN4IN /MHL
DC OUTPUT
for WIRELESS LAN
(
(
OUTPUT 5 V
OUTPUT 5 V
)
)
)
0.6 A MAX
0.9 A MAX
OPTICAL
(TV)
1
IN
ASSIGNABLE
), чтобы можно было
). В таком случае установите
. Подробную информацию см. в
•Если используются значения по умолчанию, видео через
терминал HDMI через видеокабель или компонентный кабель
выводиться не будет. Для вывода видео нужно переключить
вход видео на устройство, подключенное с помощью видеокабеля или компонентного кабеля, а затем выбрать для параметра
V.CONV
значение
.
ON
Подробную информацию см. в разде-
ле “Настройка видеоопций” инструкций по эксплуатации.
Подключение антенн
21
AM LOOP
FM UNBAL
75
ANTENNA
Примечание
Если нужно подключить телевизор или компонент воспро-
•
изведения другим образом, а не через подключение HDMI,
то смотрите инструкции по эксплуатации на поставляемом
CD-ROM.
•Для подключения других устройств смотрите инструкции
по эксплуатации на поставляемом CD-ROM.
Рамочная антенна АМ
Проволочная антен-
на FM
Подключение ресивера к розетке
Подключайте ресивер к розетке только после подключения к
нему всех компонентов, в том числе и громкоговорителей.
ПРЕДУПРЕЖДЕНИЕ
Держите кабель питания за вилку. Вынимая вилку из ро-
•
зетки, никогда не тяните за сам кабель, никогда не дотрагивайтесь до кабеля питания влажными руками, так как это
может стать причиной короткого замыкания и поражения
электрическим током. Не допускайте установки на кабель
питания самого аппарата, предметов мебели или других
предметов и его защемления любыми другими способами. Не допускайте образования на кабеле узлов или его
спутывания с другими кабелями. Кабели питания следует
прокладывать в таких местах, где возможность наступить
на них будет маловероятной. Поврежденный кабель питания может стать причиной возгорания или поражения
электрическим током. Периодически проверяйте кабель
питания. Если обнаружится его повреждение, обратитесь в
ближайший сервисный центр, уполномоченный компанией
Pioneer, по поводу его замены.
•Не используйте никакой другой кабель питания, кроме
поставляемого с данным аппаратом.
•Не используйте поставляемый кабель питания для любой
другой цели, кроме описанной ниже.
•Если ресивер не используется постоянно (например, вы
уезжаете в отпуск), вытащите вилку кабеля питания из
розетки.
•Перед отсоединением, убедитесь в том, что погас синий
свет
STANDBY/ON
u
Подключите поставляемый кабель питания к
1
.
разъему AC IN на задней стороне ресивера.
Подключите другой конец к розетке.
2
установке устройства обеспечьте достаточное
о для вентиляции во избежание
туры внутри устройства (не
у, 10 см сзади и по 20 см слева и
а).
УПРЕЖДЕНИЕ
орпусе устройства имеются щели и отверстия
ентиляции, обеспечивающие надежную
оту изделия и защищающие его от перегрева.
збежание пожара эти отверстия ни в коем
дует закрывать или заслонять
угими предметами (газетами, скатертями и
орами) или устанавливать оборудование на
лстом ковре или постели.
7
Page 68

Первоначальная настройка
ALL ZONE STBY
SOURCE
STANDBY/ON
MAIN
SUB ZONE CONTROL
Z2 Z3 HDZ
RECEIVER
1. Advanced MCACC
2. MCACC Data Check
3. Data Management
4. System Setup
5. Network Information
6. Operation Mode Setup
Exit Return
HOME MENU
A/V RECEIVER
Перед началом работы
Установите батарейки в пульт ДУ.
1
Батарейки, поставляемые с данным аппаратом, предназначены
для проверки первоначальных функций управления; их может
не хватить надолго. Рекомендуется использовать щелочные
батарейки, которые обладают продолжительным сроком службы.
Включите ресивер и используемый телевизор.
2
Переключайте вход телевизора до тех пор,
3
пока он не подключится к ресиверу.
Включите низкочатотный громкоговоритель
4
и поднимите уровень громкости.
ПРЕДУПРЕЖДЕНИЕ
•Не используйте или храните батарейки в местах, подвергнутых
прямому падению солнечных лучей, или других предельно
жарких местах, например, внутри машины или возле обогревателя. Это может вызвать протекание, перегрев, разрыв или
возгорание батареек. Это также может привести к уменьшению
срока службы и отразиться на работе батареек.
ПРЕДУПРЕЖДЕНИЕ
•При установке батареек соблюдайте меры предосторожности,
чтобы не повредить пружины на терминалах батарейки (–). Это
может привести к протеканию или перегреву.
•Избавляясь от использованных батареек, пожалуйста, выполняй
те действующие в вашей стране или регионе требования правительственных предписаний или соблюдайте правила, установленные общественной природоохранной организацией.
Автоматическая настройка объемно-
го звучания (МСАСС)
Настройка Auto Multi-Channel ACoustic Calibration (MCACC) с
помощью поставляемого микрофона настройки измеряет и анализи-
8
рует тестовые тональные сигналы, выводимые громкоговорителями.
Данная настройка позволяет автоматически и с высокой точностью
выполнять измерения и настройки; ее использование позволяет
создать оптимальную среду прослушивания для пользователя.
Важное предупреждение
•Выполняйте измерения соблюдая тишину.
Если у вас есть штатив, используйте его для установки ми-
•
крофона приблизительно на уровне уха на обычном месте
слушателя. В противном случае разместите микрофон на
уровне уха на столе или стуле.
•Наличие препятствий между громкоговорителями и местом
слушателя (микрофоном) может препятствовать точному
измерению.
Во время измерения следует находиться вне места слуша-
•
теля и управлять от пульта ДУ за пределами зоны расположения всех громкоговорителей.
Подключите поставляемый микрофон
1
настройки.
ADVANCED
FL OFF
MCACC
SPEAKERS CONTROL – MULTI-ZONE – ON / OFFBANDTUNER EDIT TUNE PRESET ENTER
AUTO SURR/ALC/
INPUT
SELECTOR
STREAM DIRECT
STANDBY/ON
MCACC
PHONES
SETUP MIC
Микрофон
-
Штатив
На телевизоре отображается экран
1a.Full Auto MCACC
Speaker System : Normal(SB/FH
EQ Type : ---
MCACC : M1.MEMORY 1
Measurement Type : Basic
START
Exit Return
ADVANCED
STANDARD
DIRECT
SURROUND
SURROUND
SETUP
A/V RECEIVER
iPod iPhoneHDMI
iPod iPhone
CONTROLSTATUS
MCACC
MASTER
VOLUME
5V 1 A
HDMI 5 INPUT
MIC
Full Auto MCACC
)
Нажмите MAIN RECEIVER на пульте ДУ и
2
начните работу.
•Если курсор находится на
, то параметры
Basic
Speaker Distance
функции
вать параметры
также позволяет автоматически настраи-
Expert
Standing Wave/Acoustic Cal EQ
Measurement Type
Speaker Setting/Channel Level
настраиваются автоматически. Выбор
ные характеристики).
Установите курсор на START и нажмите
3
и выбрано
/
(частот-
кнопку ENTER.
•Запускается автоматическое измерение.
•Измерение займет примерно от 3 до 12 минут.
Следуйте инструкциям, отображаемым на
4
экране.
•Автоматическая настройка завершается при отображении
экрана Home Menu.
•Если отображается Reverse Phase, это значит, что провода
громкоговорителя могли быть подключены наоборот (+ и –).
Проверьте подключения громкоговорителей.
Даже если подключения выполнены правильно, в зависимости от громкоговорителей и окружающей среды может
отображаться Reverse
Reverse Phase
измерения, поэтому выберите
, это не влияет на
Go Next
.
•Если происходит сбой питания, причиной этого может
быть то, что жила кабеля громкоговорителя касается задней
панели или проводники (+) и (–), что вызывает срабатывание цепи защиты. Заново скрутите жилы кабеля и подсоедините кабель таким образом, чтобы они не выступали из
разъема громкоговорителя.
.
Убедитесь, что микрофон настройки
5
отсоединен.
Page 69

Основные операции воспроизведения
2
3
5
Переключите вход на ресивере.
Многоканальное воспроизведение
STANDBY/ON
ALL ZONE STBY
SUB ZONE CONTROL
RECEIVER
MAIN
SOURCE CONTROL
DVDBD
USBADPTROKU
iPod
BT
TUNER
TV
INPUT
STATUS
AUDIO P. VIDEO P.
TOP
MENU
HOME
MENU
SOURCE
Z2 Z3 HDZ
SAT
MHL
TV
CD
VOLUME
VOL
MUTE
OUT P.
ENTER
RETURN
HDMI
NET
ALL
TOOLS
MENU
2
Напр.) Нажмите BD и выберите вход
Нажимая AUTO, выберите ‹AUTO SURROUND›.
3
Также нажмите
SURR
или
для многоканального
ADV
воспроизведения. Выберите нужный режим прослушивания.
Запустите воспроизведение на компоненте
4
воспроизведения.
Напр.) Запустите воспроизведение на проигрывателе Bluray Disc.
С помощью VOLUME +/– отрегулируйте
5
уровень громкости.
•Если звук не воспроизводится через средние и задние
громкоговорители, нажмите
режим прослушивания.
Пример:) Нажмите кнопку
брать
EXT.STEREO
Если звук не воспроизводится через сабвуфер
•
.
Причина – Для переднего громкоговорителя
установлено
LARGE
SURR
несколько раз, чтобы вы-
ADV
.
.
BD
и
, чтобы изменить
ADV
Если ко входу подключен 2-канальный аудиоисточник,
LISTENING MODE
SURRAUTO
MPX
PRESET TUNE
2
13
546
8
79
D.ACCESS
CLR
0
DIMMER SLEEP
CH LV.
ADV
BAND PTY
AUDIO
DISP
CH
CLASS
ENTER
CH
RCU SETUP
Fav
низкочастотный компонент выводится не через сабвуфер, а
через передний громкоговоритель.
Решение – Для вывода звука через сабвуфер
измените настройки громкоговорителя.
Метод 1: измените настройку переднего громкоговорителя
на
SMALL
.
Низкочастотный компонент выводится не через передний
громкоговоритель, а через сабвуфер. Если мощность
переднего громкоговорителя достаточна для воспроизведения
низких частот, настройку менять не рекомендуется.
Метод 2: измените настройку сабвуфера на
PLUS
.
Низкочастотный компонент выводится и через передний
громкоговоритель, и через сабвуфер. По этой причине
громкость низкочастотных звуков может быть слишком
RECEIVER
высока. В этом случае эту настройку рекомендуется не
применять или использовать Метод 1.
•Подробную информацию см. в разделе “Настройка
Включите компонент воспроизведения.
1
Напр.) Включите проигрыватель Blu-ray Disc,
подключенный к терминалу
HDMI BD IN
.
громкоговорителей” инструкций по эксплуатации.
•Если звук не выводится, увеличьте громкость до прибл. –30 дБ.
Примечание
•Если для управления устройством нельзя использовать пульт
дистанционного управления
–Если управление производится с ресивера, перед началом
работы нажмите
MAIN RECEIVER
.
–При использовании таких функций как сеть, TUNER или
iPod перед началом работы нажмите соответствующую
кнопку (
NET, TUNER, iPod
).
Прослушивание радиопередач
Нажмите TUNER для выбора тюнера.
1
При необходимости нажмите
диапазона (FM или AM).
Нажав TUNE +/–, настройтесь на
2
радиостанцию.
•Нажмите и удерживайте нажатой
секунду. Ресивер начнет поиск следуюей раиостанции.
•При плохом приеме прослушиваемой радиостанции FM
нажмите
и выберите FM MONO, чтобы установить
MPX
ресивер в режим монофонического приема.
Сохранение предустановленных радиостанций
Если вы часто слушаете какую-либо определенную радиостанцию, очень удобно, если она будет сохранена в памяти ресивера
для последующего ее быстрого вызова в любой момент с целью
прослушивания.
Нажмите TOOLS во время приема сигнала с
1
радиостанции, которую нужно сохранить.
Мигает номер предустановки.
Нажимая PRESET +/–, выберите нужный
2
номер предустановки для радиостанции,
затем нажмите ENTER.
Номер предустановки перестает мигать и ресивер
запоминает радиостанцию.
Прослушивание предустановленных радио-
станций
Для этого требуется, чтобыл имелись некоторые предустановленные радиостанции.
Нажимая PRESET +/–, выберите нужную
предустановленную радиостанцию.
для переключения
BAND
TUNE +/–
примерно
9
Page 70

Основные операции воспроизведения (продолжение)
Воспроизведение iPod
Для включения питания и завершения инициализации тре-
•
буется около одной минуты.
Подключите iPod.
1
К ресиверу можно подключать iPod/iPhone.
ADVANCED
FL OFF
MCACC
SPEAKERS CONTROL – MULTI-ZONE – ON / OFFBANDTUNER EDIT TUNE PRESET ENTER
STANDARD
AUTO SURR/ALC/
SURROUND
STREAM DIRECT
MCACC
PHONES
SETUP MIC
Кабель USB,
выберите категорию,
/
RETURN
для пролистывания
/
.
10
INPUT
SELECTOR
STANDBY/ON
поставляемый с iPod
Нажав iPod USB, выберите вход iPod/USB.
2
После отображения на дисплее названий папок и файлов
можно будет воспроизводить музыку от iPod.
С помощью
3
затем нажмите ENTER для пролистывания
этой категории.
• Для возврата на предыдущий уровень в любой момент
времени нажмите
С помощью
4
выбранной категории (напр., альбомы).
• Для перемещения на предыдущий/следующий уровень
используйте
Продолжайте пролистывание до тех пор,
5
/
пока не будет выбран материал, который
необходимо воспроизвести, затем нажмите
для запуска воспроизведения.
ADVANCED
SURROUND
iPod iPhone
STATUS
DIRECT CONTROL
5 V 1 A
.
iPod iPhoneHDMI
5V 1 A
HDMI 5 INPUT
iPod/iPhone
Прослушивание Интернет-радио-
станций
Для включения питания и завершения инициализации тре-
•
Максимальное использование все-
возможных функций аппарата
буется около одной минуты.
Запустите AVNavigator и используйте
Важное предупреждение
MASTER
VOLUME
•При использовании широкополосного подключения к
Интернет, в случае необходимости свяжитесь с провайдером Интернет услуги. Подробнее, свяжитесь с ближайшим
провайдером Интернет услуги.
“Interactive Operation Guide”.
Установите CD-ROM в компьютер и загрузите
для чтения “Инструкции по эксплуатации”
(PDF) с экрана меню.
•Для прослушивания Интернет-радиостанций требуется
высокоскоростной широкополосный доступ в Интернет.
При использовании 56 K или ISDN модема, использование
всех функций Интернет-радиостанций может быть невозможным.
Доступ к материалу от третьх сторон требует высоко-
•
скоростного подключения к Интернету и может также
потребовать регистрацию аккаунта и платную подписку.
Услуги по материалам от третьих сторон могут изменяться,
приостанавливаться, прерываться или прекращать предоставляться в любое время без уведомления, и Pioneer не
Функции
■Воспроизведение устройства USB
■Воспроизведение музыки с использованием
беспроводной технологии Bluetooth
■Воспроизведение с помощью функции NETWORK
■Настройка аудиоопций
■Настройка видеоопций
■Использование органов управления MULTI-ZONE
несет никакой ответственности в таких случаях. Pioneer не
заверяет или гарантирует, что услуги по предоставлению
материалов будут продолжаться или будут доступны на
определенный период времени, и любая такая гарантия,
выраженная или подразумеваемая, не будет признаваться.
Повторно нажимая NET, выберите вход
1
INTERNET RADIO.
До доступа к сети, данному ресиверу может потребоваться
несколько секунд.
С помощью
2
выберите Интернет-
/
радиостанцию для воспроизведения, и
затем нажмите ENTER.
Часто задаваемые вопросы
Справочник
Указатель функций
Примечание
• Данное устройство поддерживает AirPlay. Подробную
информацию см. в разделе “Использование AirPlay на iPod
touch, iPhone, iPad и iTunes” инструкций по эксплуатации и
на сайте Apple (http://www.apple.com).
• Программное обеспечение данного устройства можно
обновлять (“Обновление программного обеспечения” в инструкциях по эксплуатации). В Mac OS его можно обновить
с помощью Safari (“Обновление встроенного программного
обеспечения с помощью Safari” в инструкциях по эксплуатации).
Page 71

Дополнительная информация
Устранение неполадок
Неправильные действия пользователя зачастую принимают за сбои и неполадки. Если вы считаете, что в компоненте возникли неисправности, проверьте пункты, перечисленные в Инструкциях
по эксплуатации на диске CD-ROM, входящем в комплект поставки. Иногда причиной неисправности может быть другой компонент. Внимательно проверьте остальные используемые компоненты и электроприборы. Если неполадку не удается устранить даже после выполнения указанных
ниже действий, обратитесь в ближайшую независимую сервисную компанию, уполномоченную
компанией Pioneer для выполнения ремонта.
В случае некорректной работы аппарата, вызванной внешними источниками, например ста-
•
тическим электричеством, выньте вилку из розетки и подключите ее снова, чтобы восстановить нормальные условия эксплуатации.
Если не удается устранить неисправность после выполнения шагов ниже, если экран внезапно
застывает или перестают полностью работать кнопки на пульте ДУ или передней панели, выполните следующее:
•Нажмите u
питание.
Если это не решило проблему, то снова отключите питание затем нажмите и удерживайте
нажатой кнопку u
включается, затем отключается через 5 секунд.)
•Если невозможно отключить питание, нажмите и удерживайте u
панели на более чем 5 секунд. Питание будет отключено. В таком случае могут быть удалены
различные настройки, произведенные на ресивере. (Однако настройки, выполненные тогда,
когда питание было отключено как обычно не удаляются.)
STANDBY/ON
STANDBY/ON
на передней панели и отключите питание, затем снова включите
на передней панели как минимум 5 секунд. (Питание
STANDBY/ON
на передней
11
Page 72

Технические характеристики
Раздел аудио
Номинальная выходная мощность (1 кГц, 6 W, 1 %)
Передний, центральный, объемного звучания, задний объемного звучания ............... 150 Ватт на канал
Номинальная выходная мощность (20 Гц до 20 кГц, 8 W, 0,09 %)
Передний, центральный, объемного звучания, задний объемного звучания ............... 105 Ватт на канал
Для модели для Океании
Передний, центральный, объемного звучания, задний объемного звучания ............... 160 Ватт на канал
Полный коэффициент гармонических искажений ....................0.06 % (от 20 Гц до 20 кГц, 50 Ватт/канал, 8 W)
Гарантированное сопротивление громкоговорителей .....................................................................6 W до 16 W
Соотношение сигнал-шум (IHF, короткозамкнутый, сеть A)
LINE .......................................................................................................................................................100 дБ
Частотная характеристика............................................................5 Гц до 100 000 Гц дБ (Режим Pure Direct)
Вход (Чувствительность/Сопротивление)
LINE ............................................................................................................................................ 315 мВ/47 кW
Раздел тюнера
Частотый диапазон (FM) ......................................................................................................87.5 МГц до 108 МГц
Вход антенны (FM) .....................................................................................................75 W несбалансированный
Частотный диапазон (AM) .................................................................................................... 531 кГц до 1 602 кГц
Антенна (AM) ........................................................................................ Рамочная антенна (сбалансированная)
Раздел видео
Уровень сигнала
Композитное видео ....................................................................................................................1 Vp-p (75 W)
Компонентное видео ....................................................................Y: 1,0 Vp-p (75 W), PB/PR: 0,7 Vp-p (75 W)
Соответствующее максимальное разрешение
Компонентное видео ................................................................................................................1080p (1125p)
Раздел Bluetooth
Версия..........................................................................................................Спецификация
Выход ......................................................................................................................... Стандарт
Приблизительная дальность передачи по линии прямой видимости* ......................................Примерно 10 м
* Дальность передачи по линии прямой видимости указана приблизительно. Реальные поддерживаемые
Диапазон частот ......................................................................................................................................... 2,4 ГГц
Система модуляции ..................................................................... FH-SS (Frequency Hopping Spread Spectrum)
Поддержка профилей
Поддержка кодеков ......................................................................................... SBC (Subband Codec), AAC, aptX
Поддерживаемая защита материала ..................................................................................................... SCMS-T
Раздел цифрового входа/выхода
Терминал HDMI ............................................................................................................... 19-контактный (Не DVI)
Выход HDMI ......................................................................................................................................... 5 В, 100 мА
Вход HDMI/терминал MHL .................................................................................................................. 5 В, 900 мА
Терминал USB ............................................................................................ USB2.0 High Speed (Type A) 5 В, 1 A
Терминал iPod .............................................................................................................. USB, и Video (Composite)
Терминал WIRELESS LAN ADAPTER ................................................................................................ 5 В, 600 мA
Раздел интегрированного управления
Терминал управления (IR) ............................................................................................ø 3,5 мини-джек (MONO)
Сигнал IR ............................................................................................................(Максимальный уровень: 2,0 В)
12
: Максимальная выходная мощность (1 кГц, 6 W, 10 %)
Bluetooth
Bluetooth
расстояния передачи могут различаться в зависимости от условий окружающей среды.
Bluetooth
.................................................................................................... A2DP, AVRCP
версии 3.0
класс 2
Дополнительная информация (продолжение)
Раздел сети
Терминал LAN ...............................................................................................................10 BASE-T/100 BASE-TX
Остальное
Требования к питанию ...........................................................от 220 В до 230 В переменного тока, 50 Гц/60 Гц
Энергопотребление ................................................................................................................................ 550 Ватт
В режиме ожидания ........................................................................................................................... 0.1 Ватт
В режиме ожидания (управление HDMI включено) ............................................................................. 0.3 Вт
В режиме ожидания (сеть включена) ................................................................................................... 2.0 Вт
В режиме ожидания (управление HDMI включено, сеть включена) ................................................... 2.5 Вт
В режиме ожидания
(управление HDMI выключено, сеть включена, беспроводная сеть подключена) ............................ 3.5 Вт
В режиме ожидания
(управление HDMI включено, сеть включена, беспроводная сеть подключена) .............................. 3.5 Вт
Активация и деактивация беспроводной сети ......................Подключение/отключение преобразователя
беспроводной сети (AS-WL300 или AXF7031)
Автоматическое отключение питания.................................... 15 мин. (по умолчанию), 30 мин., 60 мин., выкл.
Габариты ....................................................................................................435 мм (Ш) x 168 мм (В) x 363 мм (Г)
Вес (без упаковки) ......................................................................................................................................... 9.8 кг
Комплектация
Микрофон настройки MCACC .............................................................................................................................1
Пульт ДУ ............................................................................................................................................................... 1
Сухие батарейки IEC R03 размера ААА .............................................................................................................2
Рамочная антенна АМ .........................................................................................................................................1
Проволочная антенна FM .................................................................................................................................... 1
Гарантийный талон .............................................................................................................................................. 1
Кабель питания
CD-ROM
Краткое руководство пользователя
Брошюра по безопасности
Примечание
! Данные технические характеристики применимы при электропитании 230 В.
! В связи с усовершенствованиями технические характеристики и конструкция могут изменяться без
предварительного уведомления.
© 2014 PIONEER HOME ELECTRONICS CORPORATION.
Все права защищены.
Page 73

Дату изготовления оборудования можно определить по серийному номеру, который содержит информацию о
меся
це и годе производства.
D3-7-10-7_A1_Ru
Серийный номер
12 цифр
2 цифры
10 цифр
P1 P2
Дата изготовления оборудования
P1 - Год изготовления
Год 2001A2002B2003C2004D2005E2006F2007G2008H2009I2010
Символ
Год 2011K2012L2013M2014N2015O2016P2017Q2018R2019S2020
Символ
P2 - Месяц изготовления
Месяц 1
Символ
2
A
B
3
C
4
D
5
E
6
F
J
T
7
G
8
H
9
10
I
11
J
12
K
L
13
Page 74

Page 75

Português:
Slovenščina:
English:
Suomi:
Nederlands
Français:
Svenska:
n
Declaration of Conformity with regard to the R&TTE Directive 1999/5/EC
Manufacturer:
PIONEER HOME ELECTRONICS
CORPORATION
1-1, Shin-ogura, Saiwai-ku,
Kawasaki-shi, Kanagawa
EU Representative’s:
Pioneer Europe NV
Haven 1087, Keetberglaan 1,
9120 Melsele, Belgium
http://www.pioneer.eu
212-0031, Japan
[*] VSX-924-K, VSX-924-S
Dansk:
Hereby, Pioneer, declares that this [*] is
in compliance with the essential
requirements and other relevant
provisions of Directive 1999/5/EC.
Undertegnede Pioneer erklærer herved,
at følgende udstyr [*] overholder de
væsentlige krav og øvrige relevante
krav i direktiv 1999/5/EF
Deutsch:
Pioneer vakuuttaa täten että [*]
tyyppinen laite on direktiivin 1999/5/EY
oleellisten vaatimusten ja sitä
koskevien direktiivin muiden ehtojen
mukainen.
:
Hierbij verklaart Pioneer dat het toestel
[*] in overeenstemming is met de
essentiële eisen en de andere
relevante bepalingen van richtlijn
1999/5/EG
Hiermit erklärt Pioneer, dass sich
dieses [*] in Übereinstimmung mit den
grundlegenden Anforderungen und den
anderen relevanten Vorschriften der
Richtlinie 1999/5/EG befindet". (BMWi)
Ελληνικά:
ΜΕ ΤΗΝ ΠΑΡΟΥΣΑ Pioneer ΔΗΛΩΝΕΙ
ΟΤΙ [*] ΣΥΜΜΟΡΦΩΝΕΤΑΙ ΠΡΟΣ ΤΙΣ
ΟΥΣΙΩΔΕΙΣ ΑΠΑΙΤΗΣΕΙΣ ΚΑΙ ΤΙΣ
ΛΟΙΠΕΣ ΣΧΕΤΙΚΕΣ ΔΙΑΤΑΞΕΙΣ ΤΗΣ
ΟΔΗΓΙΑΣ 1999/5/ΕΚ
Italiano:
Par la présente Pioneer déclare que
l’appareil [*] est conforme aux
exigences essentielles et aux autres
dispositions pertinentes de la directive
1999/5/CE
Con la presente Pioneer dichiara che
questo [*] è conforme ai requisiti
essenziali ed alle altre disposizioni
pertinenti stabilite dalla direttiva
1999/5/CE.
Español:
Härmed intygar Pioneer att denna [*]
står I överensstämmelse med de
väsentliga egenskapskrav och övriga
relevanta bestämmelser som framgår
av direktiv 1999/5/EG.
Por medio de la presente Pioneer
declara que el [*] cumple con los
requisitos esenciales y cualesquiera
otras disposiciones aplicables o
exigibles de la Directiva 1999/5/CE
Pioneer declara que este [*] está
conforme com os requisitos essenciais
e outras disposições da Directiva
1999/5/CE.
Čeština:
Pioneer tímto prohlašuje, že tento [*] je
ve shodě se základními požadavky a
dalšími příslušnými ustanoveními
směrnice 1999/5/ES
Eesti:
Käesolevaga kinnitab Pioneer seadme
[*] vastavust direktiivi 1999/5/EÜ
põhinõuetele ja nimetatud direktiivist
tulenevatele teistele asjakohastele
sätetele.
Magyar:
Alulírott, Pioneer nyilatkozom, hogy a
[*] megfelel a vonatkozó alapvetõ
követelményeknek és az 1999/5/EC
irányelv egyéb elõírásainak.
Latviešu valoda:
Ar šo Pioneer deklarē, ka [*] atbilst
Direktīvas 1999/5/EK būtiskajām
prasībām un citiem ar to saistītajiem
noteikumiem.
Lietuvių kalba:
Šiuo Pioneer deklaruoja, kad šis [*]
atitinka esminius
reikalavimus ir kitas 1999/5/EB
Direktyvos nuostatas.
Malti:
Hawnhekk, Pioneer jiddikjara li dan [*]
jikkonforma mal-ħtiġijiet essenzjali u ma
provvedimenti oħrajn relevanti li hemm
fid-Dirrettiva 1999/5/EC
Slovenčina:
Pioneer týmto vyhlasuje, že [*] spĺňa
základné požiadavky a všetky príslušné
ustanovenia Smernice
1999/5/ES.
Pioneer izjavlja, da je ta [*] v skladu z
bistvenimi zahtevami in ostalimi
relevantnimi določili direktive
1999/5/ES.
Română:
Prin prezenta, Pioneer declara ca acest
[*] este in conformitate cu cerintele
esentiale si alte prevederi ale Directivei
1999/5/EU.
български:
С настоящето, Pioneer декларира, че
този [*] отговаря на основните
изисквания и други съответни
постановления на Директива
1999/5/EC.
Polski:
Niniejszym Pioneer oświadcza, że
[*] jest zgodny z zasadniczymi wymogami oraz pozostałymi stosownymi
postanowieniami
Dyrektywy 1999/5/EC
Norsk:
Pioneer erklærer herved at utstyret [*]
er i samsvar med de grunnleggende
krav og øvrige relevante krav i direktiv
1999/5/EF.
Íslenska:
Hér með lýsir Pioneer yfir því að
[*] er í samræmi við
grunnkröfur og aðrar kröfur, sem gerðar
eru í tilskipun 1999/5/EC
Hrvatski:
Ovime tvrtka Pioneer izjavljuje da je
ovaj [*] u skladu osnovnim zahtjevima i
ostalim odredbama Direktive
1999/5/EC.
R-TTE-24L_C1_E
Page 76

Примечание:
В соответствии со статьей 5 Закона Российской Федерации “О защите прав потребителя” и Указанием
Правительства Российской Федерации № 720 от 16 июня 1997 года корпорация Pioneer Europe NV
устанавливает условие на следующую продолжительность срока службы официально поставляемых на
Российский рынок товаров.
Аудио и видеооборудование: 7 лет
Переносное аудиооборудование: 6 лет
Другое оборудование (наушники, микрофон и т.д.): 5 лет
Автомобильная электроника: 6 лет
D3-7-10-6_A1_Ru
http://www.pioneer.co.uk
http://www.pioneer.fr
http://www.pioneer.de
http://www.pioneer.it
http://www.pioneer.nl - http://www.pioneer.be
http://www.pioneer.es
http://www.pioneer-rus.ru
http://www.pioneer.eu
PIONEER HOME ELECTRONICS CORPORATION
1-1, Shin-ogura, Saiwai-ku, Kawasaki-shi, Kanagawa 212-0031, Japan
Корпорация Пайонир Хоум Электроникс
1-1, Син-Огура, Сайвай-ку, г. Кавасаки, префектура Канагава, 212-0031, Япония
Импортер: ООО "ПИОНЕР РУС"
125040, Россия, г. Москва, ул. Правды, д.26 Тел.: +7(495) 956-89-01
PIONEER ELECTRONICS (USA) INC.
P. O. BOX 1540, Long Beach, California 90801-1540, U.S.A. TEL: (800) 421-1404
PIONEER ELECTRONICS OF CANADA, INC.
340 Ferrier Street, Unit 2, Markham, Ontario L3R 2Z5, Canada TEL: 1-877-283-5901, 905-479-4411
PIONEER EUROPE NV
Haven 1087, Keetberglaan 1, B-9120 Melsele, Belgium TEL: 03/570.05.11
PIONEER ELECTRONICS ASIACENTRE PTE. LTD.
253 Alexandra Road, #04-01, Singapore 159936 TEL: 65-6472-7555
PIONEER ELECTRONICS AUSTRALIA PTY. LTD.
5 Arco Lane, Heatherton, Victoria, 3202, Australia, TEL: (03) 9586-6300
PIONEER ELECTRONICS DE MEXICO S.A. DE C.V.
Blvd.Manuel Avila Camacho 138 10 piso Col.Lomas de Chapultepec, Mexico, D.F. 11000 TEL: 55-9178-4270
K002*_B5_Ru
Сделано в Китае Printed in China Imprimé en Chine
© 2014 PIONEER HOME ELECTRONICS CORPORATION.
All rights reserved.
© 2014 PIONEER HOME ELECTRONICS CORPORATION.
Tous droits de reproduction et de traduction réservés.
<5707-00000-888-0S>
 Loading...