

Pioneer AVIC EVO1 Quick Start Guide
1
2
3
4
5
6
7
8
Quick&Start&Guide
NAVIGATION&AV&SYSTEM
AVIC-EVO1
This guide is intended to guide you through the basic functions of
this navigation system. For details, please refer to the Operation
Manual provided with the product.
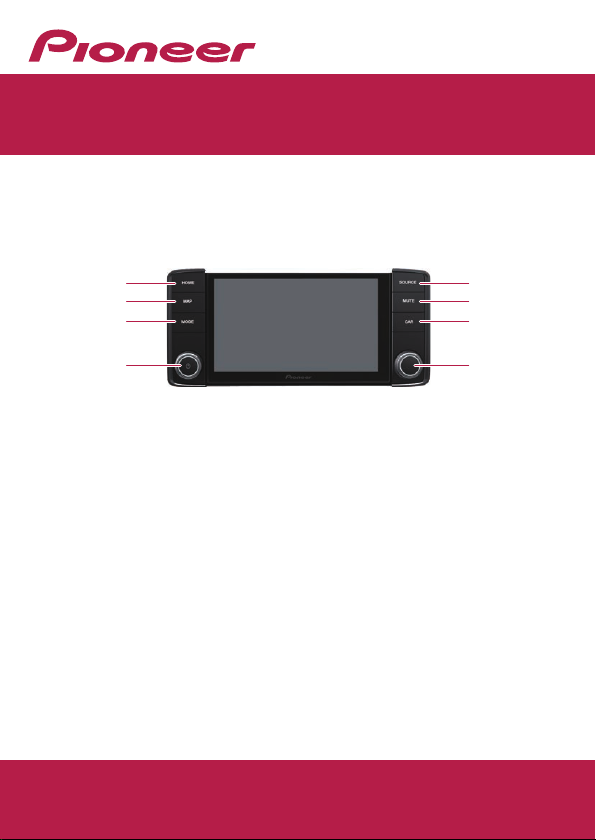
Basic hardware buttons
1 HOME button
Press to display the Top
menu screen.
2 MAP button
Press to display the Map
screen.
3 MODE button
Press to switch between the
Application screen and the
AV operation screen.
4 VOL (+/–) knob
Rotate to adjust the AV
source volume.
Press to switch to the power
off mode.
© 2016 PIONEER CORPORATION.
All rights reserved.
< KKYZ16A >
5 SOURCE button
Press to cycle through all
the available sources.
6 MUTE button
Press to mute the AV
source.
7 CAR button
Press to display the vehicle
information screen.
8 Rotary encoder
Rotate clockwise or anticlockwise to go to the next
track (chapter) or return to
the previous track (chapter).
English
< CRD4960-A > EU
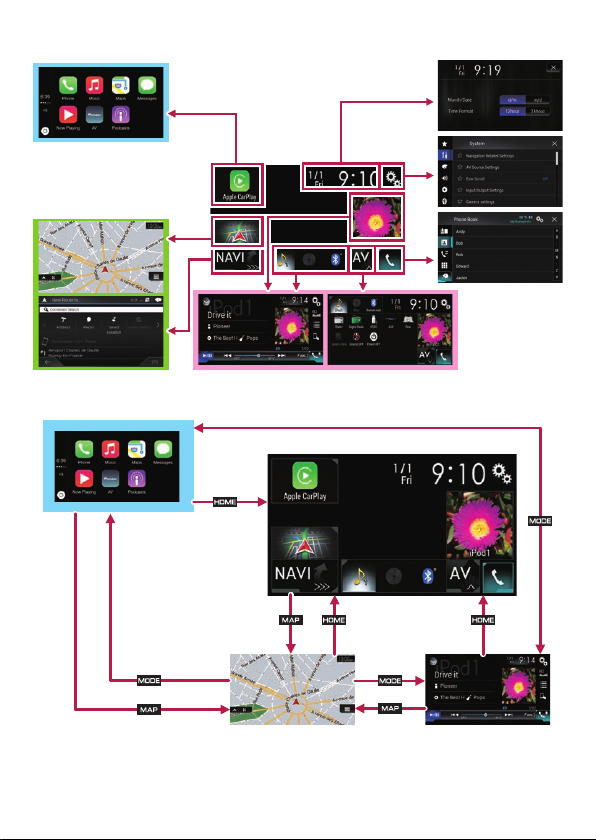
Switching screens using the touch panel keys
Switching screens using the hardware buttons
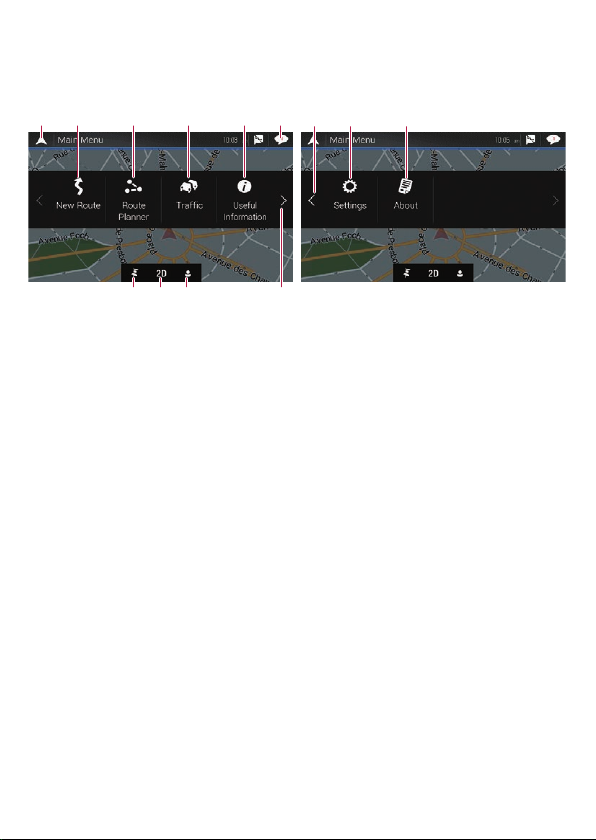
How to use the navigation menu screens
You can use various functions such as the route guidance and
related settings.
21 63 4
5
cb d
789
1 Returns to the Map screen.
2 Searches for your
destination by the address
or coordinates, or searches
for the selected place of
interest, etc.
3 Builds your route or edits
the route currently set.
4 Displays the traffic
information.
Displays useful information
5
to support your driving.
6 Displays notifications
that contain important
information.
Displays the location that
7
you saved as a favourite.
8 Switches among 2D, 3D,
and 2D North up view
modes.
a
Displays the “User Profiles”
9
screen where you can create
new profiles or edit the
existing profiles.
a
Displays the next page of
the navigation menu.
b Displays the previous page
of the navigation menu.
c Configures the navigation-
related settings and
enables you to access the
“SyncTool” screen.
d Displays the information
of your navigation system
(the version information, or
licences, for example).
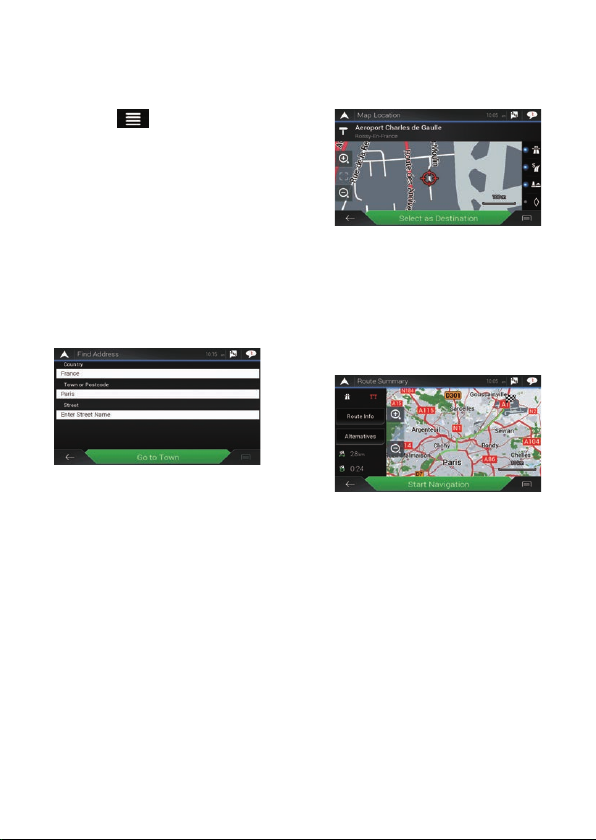
Searching for a location by address
1 Press the MAP button.
The Map screen appears.
2 Touch to display the
navigation menu on the
Map screen.
3 Touch [New Route].
4 Touch [Address].
The “Find Address” screen
appears.
5 Input the information for
the location you want to
set as the destination.
Touching the item next
to each option displays
the screen to enter the
character or select one of
options. After narrowing
down your destination, the
searched location appears
on the Map screen.
6 Touch [Select as
Destination].
After a short summary of
the route parameters, a
map appears showing the
entire route. The route is
automatically calculated.
7 Touch [Start Navigation].
Your navigation system
starts the route guidance.
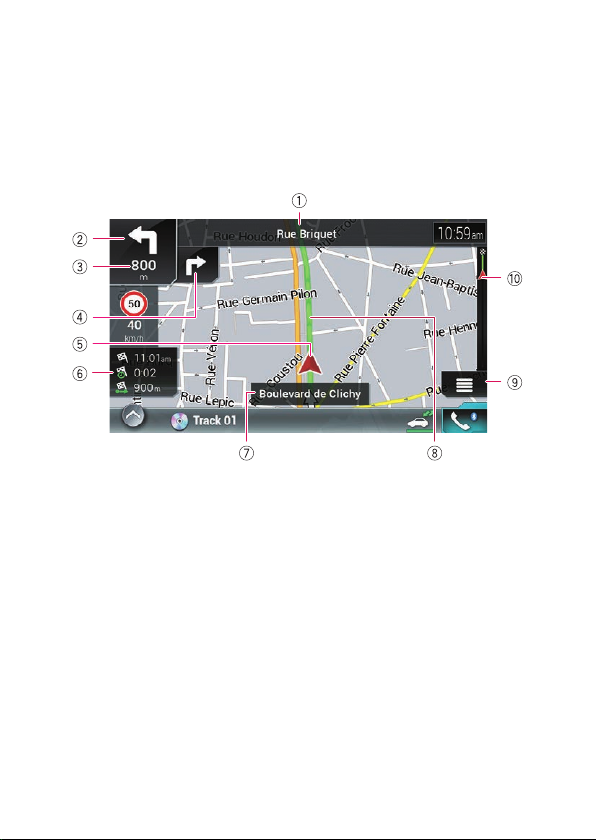
How to use the map
Most of the information provided by your navigation system can
be seen on the map. You need to become familiar with how the
information appears on the map.
The following information marked with an asterisk (*) appears only
when a route is set.
AV information is displayed at the bottom of the Map screen.
1 Shows the number and
name of the street to be
used (or next guidance
point).*
2 Shows the next guidance
point (manoeuvre).*
3 Shows the distance to
the next guidance point
(manoeuvre).*
4 Shows the maneuver after
the next manoeuvre.*
5 Indicates the current
location of your vehicle.
6 Displays the time and
distance information for
your route.*
7 Shows the name of the
street (or city) that your
vehicle is travelling on (or
in).
8 Indicates the current route.*
9 Displays the Navigation
menu screen.
a Indicates the progress to the
final destination.*
 Loading...