

Pioneer AVH-P5200DVD, AVH-P5200BT User Manual

Operation Manual
DVD AV RECEIVER
AVH-P5200DVD
AVH-P5200BT
English
Contents
Thank you for purchasing this PIONEER product.
To ensure proper use, please read through this manual before using this product. It
is especially important that you read and observe WARNINGs and CAUTIONsin
this manual. Please keep the manual in a safe and accessible place for future refer-
ence.
Be sure to read this
! DVD video disc region numbers 8
! Handling guideline 82
Precautions
IMPORTANT SAFEGUARDS 5
To ensure safe driving 5
To avoid battery exhaustion 6
Before You Start
Information to User 7
For Canadian model 7
About this unit 7
Operating environment 8
After-sales service for Pioneer products 8
Visit our website 8
Protecting your unit from theft 8
Resetting the microprocessor 9
Feature demo mode 9
Adjusting the response positions of the
touch panels (Touch Panel Calibration) 9
What’s what
Head unit 10
Optional remote control 10
Basic Operations
Basic Operations 11
Operating the scroll bar and the scrubber
bar 12
Activating the touch panel keys 13
Common operations for menu settings/
lists 13
Opening and closing the LCD panel 13
Ejecting a disc 14
Ejecting an SD 15
Setting the clock 15
2
En
Tuner
Introduction of tuner operations 16
Playing moving images
Introduction of video playback
operations 17
Playing audio
Introduction of sound playback
operations 20
Playing still images
Introduction of still image playback
operations 23
Introduction of still image playback as a
slideshow operations 24
Bluetooth Telephone
Introduction of Bluetooth telephone
operations 25
XM/SIRIUS tuner
Introduction of XM/SIRIUS tuner
operations 27
HD Radioä tuner
Introduction of HD Radioä tuner
operations 29
Using Bluetooth wireless technology
Introduction of Bluetooth telephone
operations 30
Bluetooth audio operations 31
Detailed instructions
Storing and recalling stations 33
Storing the strongest stations 33
Tuning in to strong signals 33
Tuning in to strong HD Radio signals 33
Using iTunes tagging 34
Switching the media file type 34
Operating the DVD menu 35

Contents
Operating this unit’s iPod function from your
iPod 35
Random play (shuffle) 35
Playing all songs in random order (shuffle
all) 36
Repeating playback 36
Playing videos from your iPod 36
Browsing for a video/music on the iPod 36
Resume playback (Bookmark) 37
Frame-by-frame playback 37
Slow motion playback 37
Searching for the part you want to play 38
Changing audio language during playback
(Multi-audio) 38
Changing the subtitle language during
playback (Multi-subtitle) 38
Changing the viewing angle during playback
(Multi-angle) 39
Return to the specified scene 39
Selecting audio output 39
PBC playback 39
Selecting tracks from the track title list 39
Selecting files from the file name list 40
Using advanced sound retriever 40
Changing audiobook speed 40
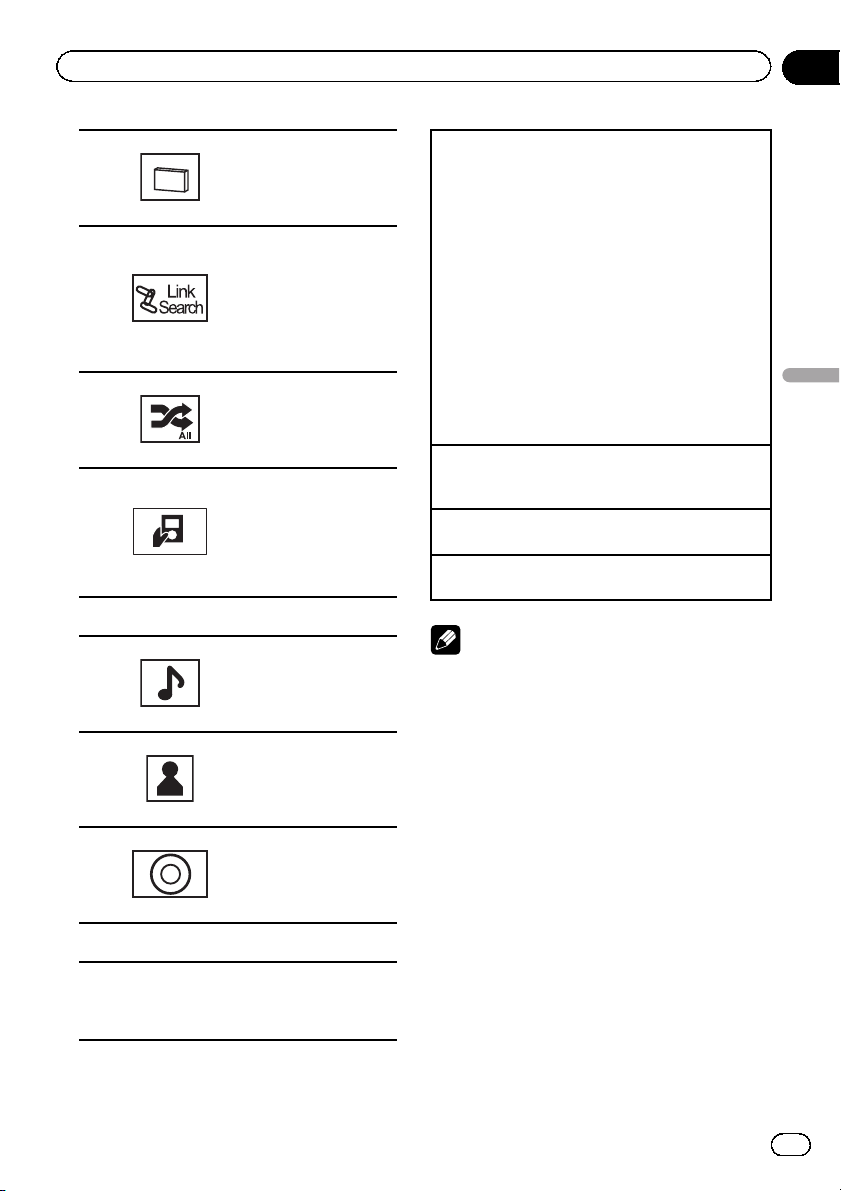
Displaying lists related to the currently
playing song (Link Search) 40
Playing DivXÒ VOD content 40
Capture an image in JPEG files 41
Changing the wide screen mode 41
Switching the XM/SIRIUS channel selection
mode 42
Selecting an XM/SIRIUS channel directly 43
Using the MyMix function 43
Using the Game Alert function 45
Displaying the Radio ID 46
Switching the SIRIUS display 46
Using the Instant Replay function 46
Switching the seek mode 47
Switching the reception mode 47
Calling a number in the phone book 47
Selecting a number by alphabet search
mode 47
Using the missed, received and dialed call
lists 48
Using the missed, received and dialed call
lists 48
Setting automatic answering 49
Adjusting the other party’s listening
volume 49
Switching the ring tone 49
Using the preset dial lists 49
Making a call by entering phone number 49
Setting the private mode 50
Pairing from this unit 50
Using a Bluetooth device to pair 51
Connecting to a Bluetooth device
automatically 51
Switching visible unit 51
Displaying BD (Bluetooth Device)
address 52
Entering PIN code for Bluetooth wireless
connection 52
Using a cellular phone to initiate a
connection 52
Registering a connected cellular phone 52
Voice recognition 53
Connecting a Bluetooth audio player 53
Connecting to a Bluetooth device
automatically 53
Displaying BD (Bluetooth Device)
address 53
Menu operations
Introduction of menu operations 54
Audio Adjustments 55
Setting up the DVD player 58
System settings 62
Entertainment settings 67
En
3

Contents
Customizing menus 68
Other Functions
Changing the picture adjustment 69
Setting rear monitor output 69
Adjusting the response positions of the
touch panels (Touch Panel
Calibration) 70
Using an AUX source 70
Using an external unit 71
Additional Information
Troubleshooting 72
Error messages 74
Understanding auto EQ error messages 77
Understanding messages 78
Indicator list 80
Handling guideline 82
Compressed audio compatibility (disc, USB,
SD) 84
iPod compatibility 85
Sequence of audio files 86
Using the display correctly 86
Copyright and trademark 87
Language code chart for DVD 89
Specifications 91
4
En
Precautions
Section
01
IMPORTANT SAFEGUARDS
Please read all of these instructions regarding
your display and retain them for future reference.
1 Read this manual fully and carefully be-
fore operating your display.
2 Keep this manual handy as a reference for
operating procedures and safety information.
3 Pay close attention to all warnings in this
manual and follow the instructions carefully.
4 Do not allow other persons to use this sys-
tem until they have read and understood
the operating instructions.
5 Do not install the display where it may (i)
obstruct the driver’s vision, (ii) impair the
performance of any of the vehicle’s operating systems or safety features, including air bags, hazard lamp buttons or (iii)
impair the driver ’s ability to safely operate the vehicle.
6 Do not operate this display if doing so in
any way will divert your attention from
the safe operation of your vehicle. Always
observe safe driving rules and follow all
existing traffic regulations. If you experience difficulty in operating the system or
reading the display, park your vehicle in a
safe location and make necessary adjustments.
7 Please remember to wear your seat belt at
all times while operating your vehicle. If
you are ever in an accident, your injuries
can be considerably more severe if your
seat belt is not properly buckled.
8 Never use headphones while driving.
9 To promote safety, certain functions are
disabled unless the parking brake is on,
and the vehicle is not in motion.
10 Never set the volume of your display so
high that you cannot hear outside traffic
and emergency vehicles.
WARNING
Precautions
! Do not attempt to install or service your
display by yourself. Installation or servicing of the display by persons without
training and experience in electronic
equipment and automotive accessories
may be dangerous and could expose you
to the risk of electric shock or other
hazards.
To ensure safe driving
WARNING
! LIGHT GREEN LEAD AT POWER CON-
NECTOR IS DESIGNED TO DETECT
PARKED STATUS AND MUST BE CONNECTED TO THE POWER SUPPLY SIDE
OF THE PARKING BRAKE SWITCH. IMPROPER CONNECTION OR USE OF
THIS LEAD MAY VIOLATE APPLICABLE
LAW AND MAY RESULT IN SERIOUS INJURY OR DAMAGE.
! To avoid the risk of damage and injury and the
potential violation of applicable laws, this unit
is not for use with a video screen that is visible
to the driver.
! To avoid the risk of accident and the potential
violation of applicable laws, no viewing of
front seat video should ever occur while the
vehicle is being driven.
! In some countries or states the viewing of
images on a display inside a vehicle even by
persons other than the driver may be illegal.
Where such regulations apply, they must be
obeyed and this unit’s DVD features should
not be used.
When you attempt to watch a video image
while driving, the warning Viewing of front
seat video source while driving is strictly
prohibited. will appear on the front display.
To watch a video image on the front display,
park your vehicle in a safe place and apply the
parking brake.
En
5
Section
01
Precautions
Parking brake interlock
Certain functions (Video viewing and certain
touch panel keys) offered by this unit could be
dangerous and/or unlawful if used while driving. To prevent such functions from being
used while the vehicle is in motion, there is an
interlock system that senses when the parking
brake is set. If you attempt to use the functions
described above while driving, they will become disabled until you stop the vehicle in a
safe place, and (1) apply the parking brake, (2)
release the parking brake, and then (3) apply
the parking brake again. Please keep the
brake pedal pushed down before releasing the
parking brake.
When using a display connected
to REAR MONITOR OUTPUT
This unit’s REAR MONITOR OUTPUT is for
connection of a display to enable passengers
in the rear seats to watch the DVD or Video
CD.
WARNING
NEVER install the rear display in a location
where the driver can watch a DVD while driving.
! Please note that the edges of the rear view
camera images may differ slightly according
to whether full screen images are displayed
when backing up, and whether the images are
used for checking the rear when the vehicle is
moving forward.
To avoid battery exhaustion
Keep the vehicle engine running when using
this unit to avoid draining the battery power.
! When no power is supplied to this unit,
such as when the vehicle battery is being
replaced, the microcomputer of this unit returns to its initial condition. We recommend that you transcribe the audio
adjustment data.
WARNING
Do not use with vehicles that do not feature an
ACC position.
When using the rear view camera
With an optional rear view camera, this unit
can be used as an aid to keep an eye on trailers, or when backing into a tight parking spot.
WARNING
! SCREEN IMAGE MAY APPEAR RE-
VERSED.
! USE INPUT ONLY FOR REVERSE OR
MIRROR IMAGE REAR VIEW CAMERA.
OTHER USE MAY RESULT IN INJURY
OR DAMAGE.
CAUTION
! The rear view camera function is to be used
as an aid to keep an eye on trailers, or while
backing up. Do not use for entertainment purposes.
6
En
Before You Start
Section
02
FCC ID: AJDK027
MODEL NO.: AVH-P5200BT
IC: 775E-K027
This equipment complies with FCC/IC radiation
exposure limits set forth for uncontrolled
equipment and meets the FCC/IC radio frequency (RF) Exposure Guidelines in Supplement C to OET65. This equipment has very low
levels of RF energy that it deemed to comply
without maximum permissive exposure evaluation (MPE). But it is desirable that it should be
installed and operated with at least 20 cm and
more between the radiator and person’s body
(excluding extremities: hands, wrists, feet and
ankles).
This transmitter must not be co-located or operated in conjunction with any other antenna
or transmitter.
This device complies with part 15 of the FCC
Rules. Operation is subject to the following
two conditions:
(1) This device may not cause harmful interference, and (2) this device must accept any interference received, including interference that
may cause undesired operation.
Information to User
Alteration or modifications carried out without
appropriate authorization may invalidate the
user’s right to operate the equipment.
For Canadian model
This Class B digital apparatus complies with
Canadian ICES-003.
About this unit
The tuner frequencies on this unit are allocated for use in North America. Use in other
areas may result in poor reception.
WARNING
Handling the cord on this product or cords associated with accessories sold with the product
may expose you to chemicals listed on proposition 65 known to the State of California and other
governmental entities to cause cancer and birth
defect or other reproductive harm. Wash hands
after handling..
CAUTION:
USE OF CONTROL OR ADJUSTMENT OR
PERFORMANCE OF PROCEDURES
OTHER THAN THOSE SPECIFIED HEREIN
MAY RESULT IN HAZARDOUS RADIATION
EXPOSURE.
CAUTION:
THE USE OF OPTICAL INSTRUMENTS
WITH THIS PRODUCT WILL INCREASE
EYE HAZARD.
CAUTION
! Do not allow this unit to come into contact
with liquids. Electrical shock could result.
Also, damage to this unit, smoke, and overheating could result from contact with liquids.
! Keep this manual handy for future reference.
! Always keep the volume low enough to hear
outside sounds.
! Avoid exposure to moisture.
! If the battery is disconnected or discharged,
any preset memory will be erased.
Important (Serial number)
The serial number is located on the bottom of
this unit. For your own security and convenience,
be sure to record this number on the enclosed
warranty card.
Before You Start
En
7
Section
02
Before You Start
DVD video disc region numbers
Only DVD video discs with compatible region
numbers can be played on this player. You can
find the region number of the player on the
bottom of this unit and in this manual (refer to
Specifications on page 91).
Operating environment
This unit should be used within the temperature ranges shown below.
Operating temperature range: -10 °C to +60 °C
(14 °F to 140 °F)
EN300328 ETC test temperature: -20 °C and
+55 °C (-4 °F and 131 °F)
After-sales service for
Pioneer products
Please contact the dealer or distributor from
where you purchased this unit for after-sales
service (including warranty conditions) or any
other information. In case the necessary information is not available, please contact the
companies listed below:
Please do not ship your unit to the companies
at the addresses listed below for repair without
advance contact.
U.S.A.
Pioneer Electronics (USA) Inc.
CUSTOMER SUPPORT DIVISION
P.O. Box 1760
Long Beach, CA 90801-1760
800-421-1404
CANADA
Pioneer Electronics of Canada, Inc.
CUSTOMER SATISFACTION DEPARTMENT
300 Allstate Parkway
Markham, Ontario L3R 0P2
1-877-283-5901
905-479-4411
Visit our website
Visit us at the following site:
http://www.pioneerelectronics.com
1 Register your product. We will keep the details
of your purchase on file to help you refer to
this information in the event of an insurance
claim such as loss or theft.
2 Receive updates on the latest products and
technologies.
3 Download owner’s manuals, order product
catalogues, research new products, and
much more.
4 Your feedback is important in our continual ef-
fort to design and build the most advanced,
consumer-focused product in the industry.
Serial number
Protecting your unit from
theft
The front panel can be detached to deter theft.
! If the front panel is not detached from the
head unit within four seconds of turning off
the ignition, a warning tone will sound.
! You can turn off the warning tone. Refer to
Switching the warning tone on page 64.
Important
! Handle gently when removing or attaching
the front panel.
! Avoid subjecting the front panel to excessive
shock.
! Keep the front panel out of direct sunlight and
high temperatures.
! If removed, replace the front panel on the unit
before starting up your vehicle.
For warranty information please see the Limited Warranty sheet included with this unit.
8
En
Before You Start
Section
02
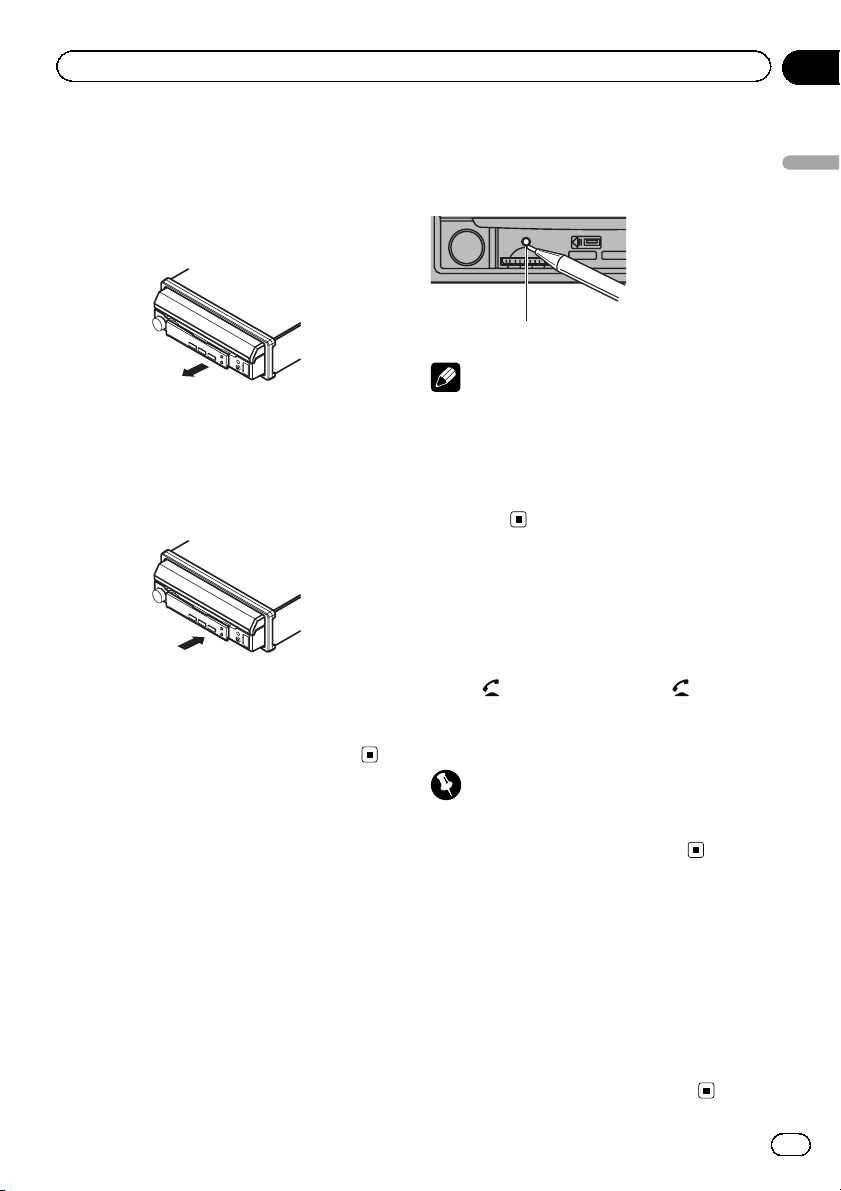
Removing the front panel
% Pinch the top and bottom of its right
side and pull the front panel out.
Take care not pinch it too tightly or to drop it,
and also avoid contact with water or other
fluids to prevent permanent damage.
Re-attaching the front panel
1 Slide the front panel to the left.
Front panel and the head unit are connected
on the left side. Make sure that the front panel
has been properly connected to the head unit.
2 Press the right side of the front panel
until it is firmly seated.
# If you can’t attach the front panel to the head
unit successfully, try again. However, forcing the
front panel into place may result in damage.
Resetting the microprocessor
By pressing RESET, you can reset the microprocessor to its initial settings without changing the bookmark information.
The microprocessor must be reset in the following situations:
! Before using this unit for the first time after
installation
! If the unit fails to operate properly
! When strange or incorrect messages ap-
pear on the display
1 Turn the ignition switch OFF.
2 Press RESET with a pen tip or other
pointed instrument.
For this function, verify the following section
before operation. Refer to this page.
RESET button
Note
Switch your engine ON or set the ignition switch
to ACC ON before pressing RESET in the following situations:
! After completing connections
! When erasing all stored settings
! When resetting the unit to its initial (factory)
settings
Feature demo mode
The feature demo automatically starts when
you select Off for the source and continues
while the ignition switch is set to ACC or ON.
To cancel the feature demo, press and hold
MUTE/
restart. Operating the feature demo while the
car engine is turned off it may drain the battery power.
Failure to connect the red lead (ACC) of this unit
to a terminal coupled with ignition switch on/off
operations may lead to battery drain.
. Press and hold MUTE/ again to
Important
Adjusting the response
positions of the touch panels
(Touch Panel Calibration)
If you feel that the touch panel keys on the
screen deviate from the actual positions that
respond to your touch, adjust the response positions of the touch panel. Refer to Adjusting
the response positions of the touch panels
(Touch Panel Calibration) on page 70.
Before You Start
En
9
Section
03
What’s what
Head unit
Part Part
MUTE/
1
( : AVH-P5200BT
only)
MENU
Displaying the
menu.
2
Returning to the
normal display.
MODE
3
Turning the information display off.
4 Disc loading slot b
5 SRC/OFF c RESET
6 c/d (TRACK) d
7 h (eject)
8 OPEN/CLOSE
AUX input jack (3.5
mm stereo/video
jack)
9
Use to connect an
auxiliary device.
Auto EQ microphone input jack
Use to connect an
a
auto EQ microphone.
USB port
When connecting,
open the USB connector lid.
SD memory card
slot
CAUTION
! Use an optional Pioneer USB cable (CD-U50E)
to connect the USB audio player/USB memory as any device connected directly to the
unit will protrude out from the unit and may
be dangerous.
! Do not use unauthorized products.
! For details on how to operate a navigation unit
from this unit, refer to its operation manual.
Note
When the navigation unit is connected, press
MODE to switch to the navigation display. Press
MODE and hold to turn the display off.
Press MODE again to turn the display on.
Optional remote control
The remote control CD-R55 is sold separately.
For details concerning operations, see the remote control manual.
10
En
ed 28 may
5
1
2
Basic Operations
Section
04
Basic Operations
12:4
3 54 6
Front
Rear
View
Radio
Disc
iPod
SD
SD
AUX
Rear
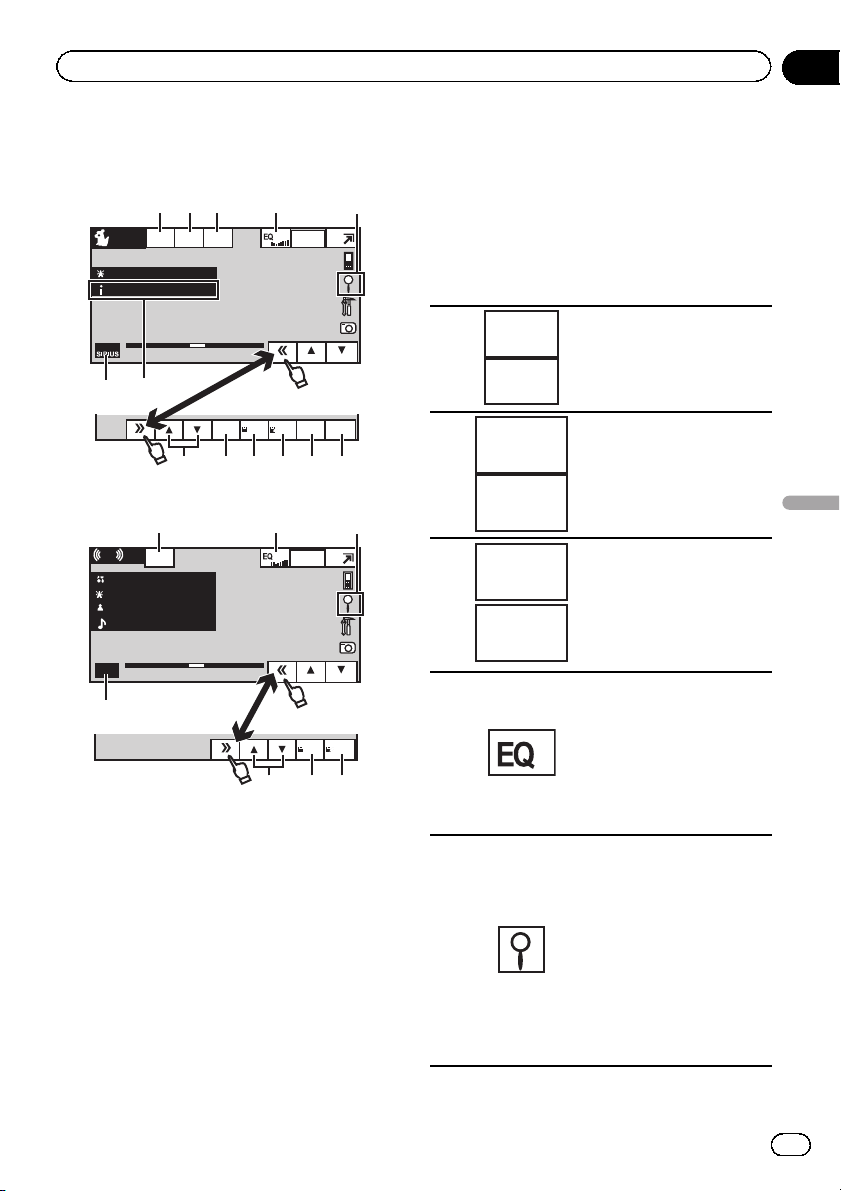
1 Touch panel keys
1 Displaying the source menu.
Wed 28 may
2
12:45 PM
Rear
Radio
Front
Rear
View
3
4
5
6
Switching to clock adjustment display.
Refer to Setting the clock on
page 15.
Source icon
Selecting a favorite source.
When the source icon is not
displayed, it can be displayed
by touching the screen.
Switching the output source
for the rear monitor.
Refer to Setting rear monitor
output on page 69.
Switching the rear view
image on or off.
Turning the unit off.
Selecting a source using the buttons
1 Press SRC/OFF to cycle through the sources
listed below:
Selecting a source using the touch panel keys
1 Touch the source icon and then touch the desired
source name.
! XM – XM tuner
! Sirius – SIRIUS tuner
! HD Radio – Digital Radio tuner
! Radio – Radio
! AV – AV input
! Disc – Built-in DVD player
! USB/iPod – USB/iPod
! SD – SD memor y card
! EXT1 – External unit 1
! EXT2 – External unit 2
! AUX – AUX
! TEL – Bluetooth telephone/audio
(Function of AVH-P5200DVD)
! When the source icon is not displayed, it can be
displayed by touching the screen.
! While operating the menu, you cannot select a
source by touching the source icon.
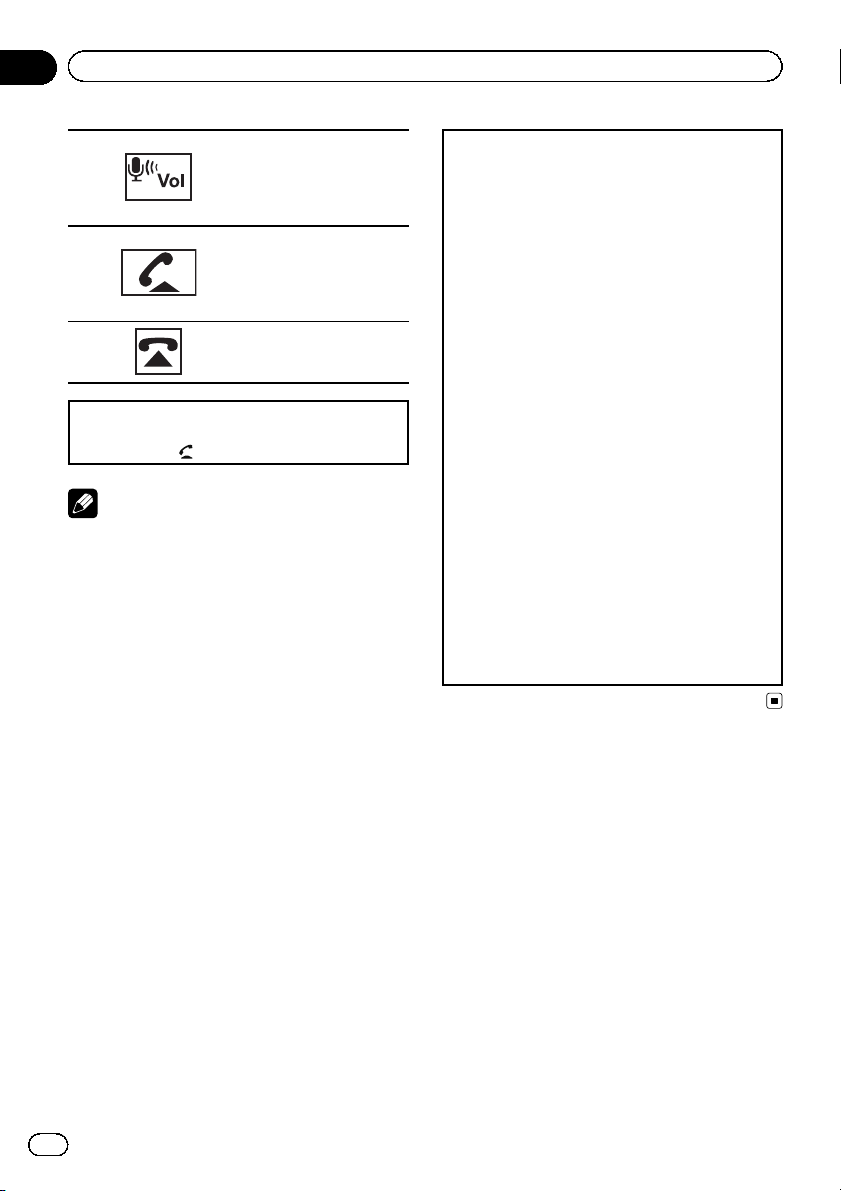
Adjusting the volume
1 Rotate MUTE/
lume.
to increase or decrease the vo-
Notes
! In this manual, iPod and iPhone will be re-
ferred to as “iPod”.
! The USB/iPod icon will change as follows:
— USB is displayed when a USB storage de-
vice is connected.
— iPod is displayed when an iPod is con-
nected.
— USB/iPod is displayed when no device is
connected.
! When appropriately set up, the image from
the rear view camera can be displayed automatically. For details, refer to Setting the rear
view camera (back up camera) on page 65.
Basic Operations
Turning the unit on using the buttons
1 Press SRC/OFF to turn the unit on.
Turning the unit off using the buttons
1 Press SRC/OFF and hold until the unit turns off.
En
11
0
Sup
s
On
Off
0
112
0
5-0
5
2
Section
04
Basic Operations
! An external unit refers to a Pioneer product,
such as those which will be available in the future. Although incompatible as a source, the
basic functions of up to two external units can
be controlled with this unit. When two external units are connected, the external units are
automatically allocated to external unit 1 or
external unit 2.
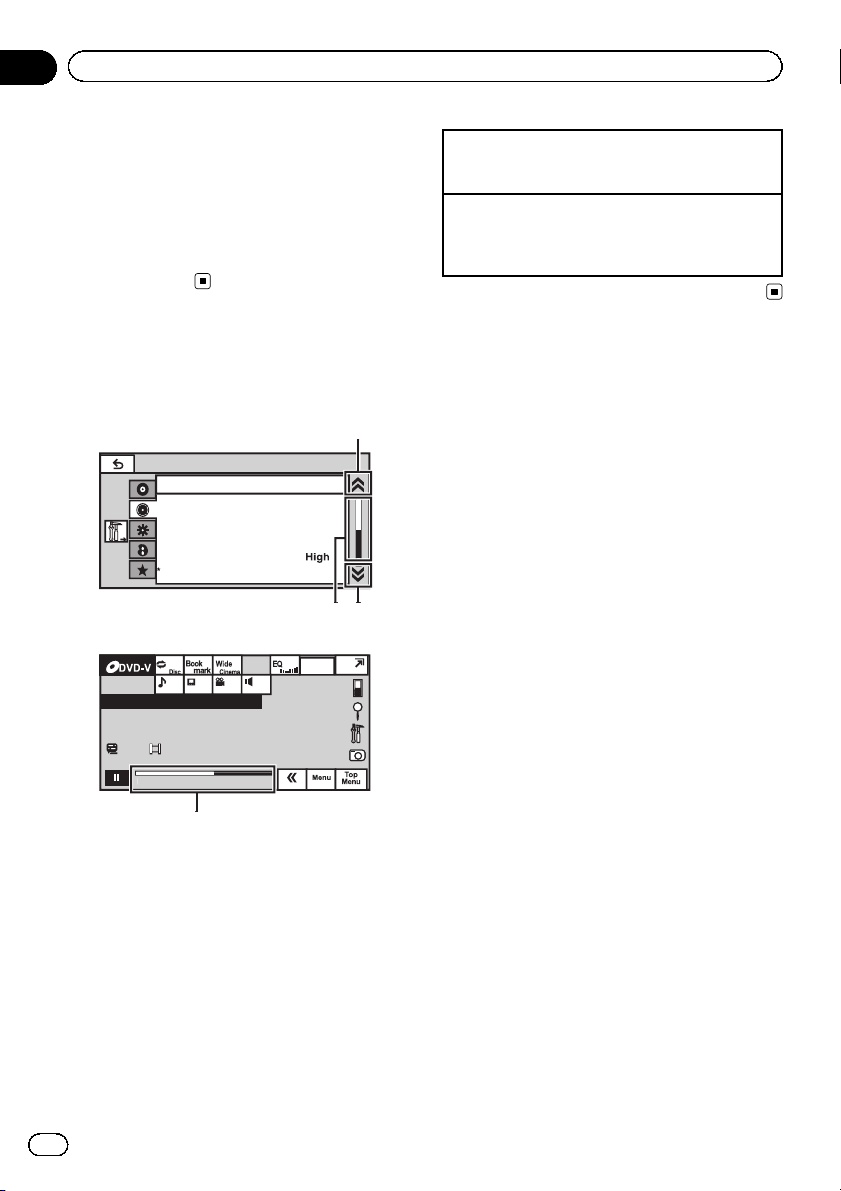
Operating the scroll bar
and the scrubber bar
Audio
Fader/Balance F/R 0 L/R
Graphic EQ
Auto EQ
Sonic Center Control
Loudness
Subwoofer
01 01
Abcdeabcdeabcdeabcdeab
01
L+R
er Bas
L/R:
Wed 28 may
12:45 PM
Viewing the hidden items
1 Touch the scroll icon or drag the scrubber bar to
view any hidden items.
Specifying the playback point
1 Drag the scrubber bar on the screen.
(Not available when the scrubber bar is grayed
out.)
12
812
1:4
2:4
1 Scroll icon
Appears when selectable items are hidden.
2 Scrubber bar
Appears when the playback point can be specified or set by dragging.
En
y
5
01
01
8
0
5
-02:45
01
1
1
112
eturn
:45
45
3
Basic Operations
Section
04
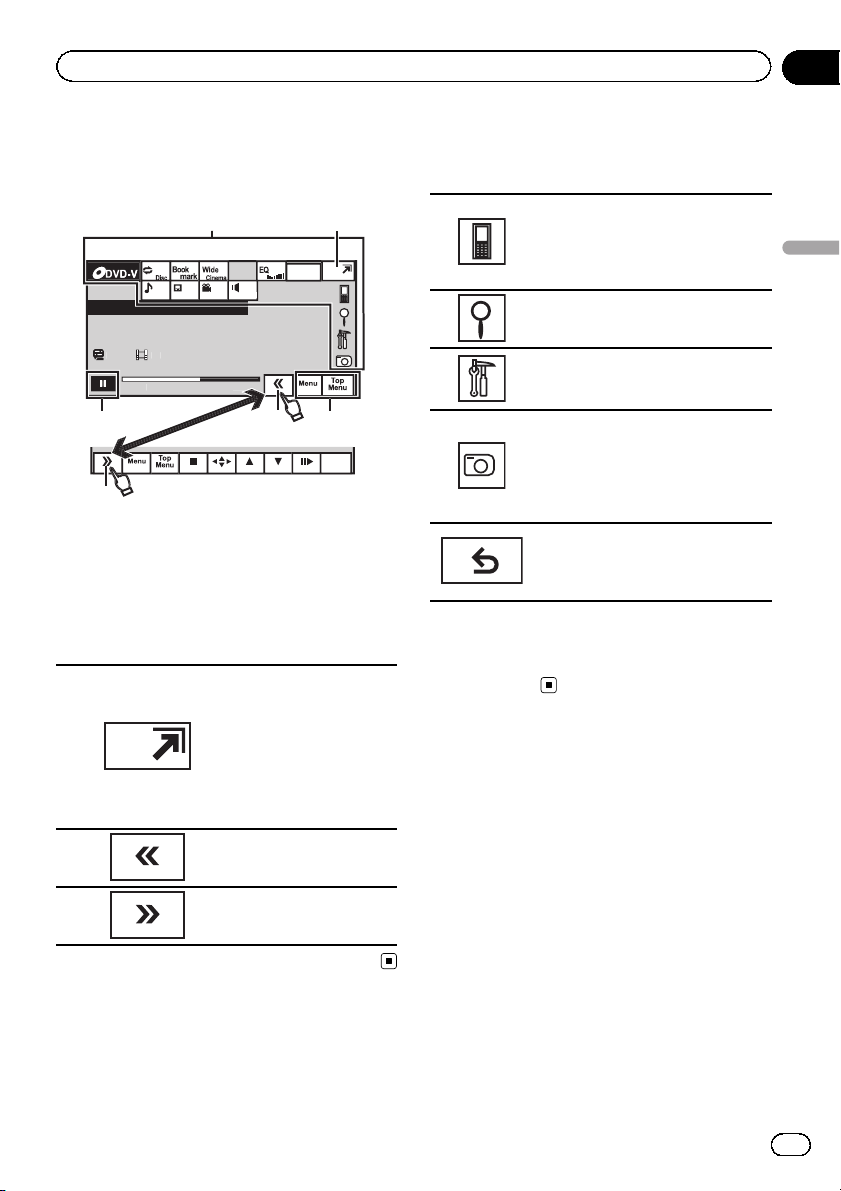
Activating the touch panel
keys
ed 28 ma
12:4
Abcdeabcdeabcdeabcdeab
1:4
1 Touch panel keys
Perform various operations by touching the
panel.
2 Open/close keys
Control the touch panel key area by touching
these keys.
1
2
3
+
R
Turning the display to simplified display.
Returning to the normal display by touching the screen
when playing moving
images.
Returning to the normal display by touching same icon
when playing audio.
Viewing the hidden touch
panel keys.
Shorten the touch panel
area.
Common operations for
menu settings/lists
(AVH-P5200BT only)
Starting the Bluetooth telephone
menu.
Refer to Introduction of Bluetooth tel-
ephone operations on page 25.
Displaying the list menu.
Starting the search function.
Displaying the menu.
Refer to Introduction of menu opera-
tions on page 54.
Displaying still images as a slide
show when listening to another
source.
Viewing slide shows
Refer to Introduction of still image
playback operations on page 23.
Returning to the previous display
Returning to the previous list/category (the folder/categor y one level
higher)
! Press and hold MENU to display
Picture Adjustment.
Refer to Changing the picture adjustment
on page 69.
Opening and closing the
LCD panel
The LCD panel will open or close automatically
when the ignition switch is turned on or off.
You can turn off the automatic close/open
function. (Refer to page 9.)
! Do not close the LCD panel by force with
your hands. That will cause a malfunction.
! The automatic close/open function will op-
erate the display as follows.
— When the ignition switch is turned OFF
while the LCD panel is opened, the LCD
panel will close after six seconds.
— When the ignition switch is turned ON
again (or turned to ACC), the LCD panel
will open automatically.
Basic Operations
13
En
Section
04
Basic Operations
— Removing or attaching the front panel
will automatically close or open the LCD
panel. (Refer to page 64.)
! When the ignition switch is turned OFF
after the LCD panel has been closed, turning the ignition switch ON again (or turning
it to ACC) will not open the LCD panel. In
this case, press OPEN/CLOSE to open the
LCD panel.
! When closing the LCD panel, check to
make sure that it has closed completely. If
the LCD panel has stopped halfway, leaving
it like this could result in damage.
CAUTION
Keep hands and fingers clear of the unit when
opening, closing, or adjusting the LCD panel. Be
especially cautious of children’s hands and fingers.
% Press OPEN/CLOSE to open the LCD
panel.
# To close the LCD panel, press OPEN/CLOSE
again.
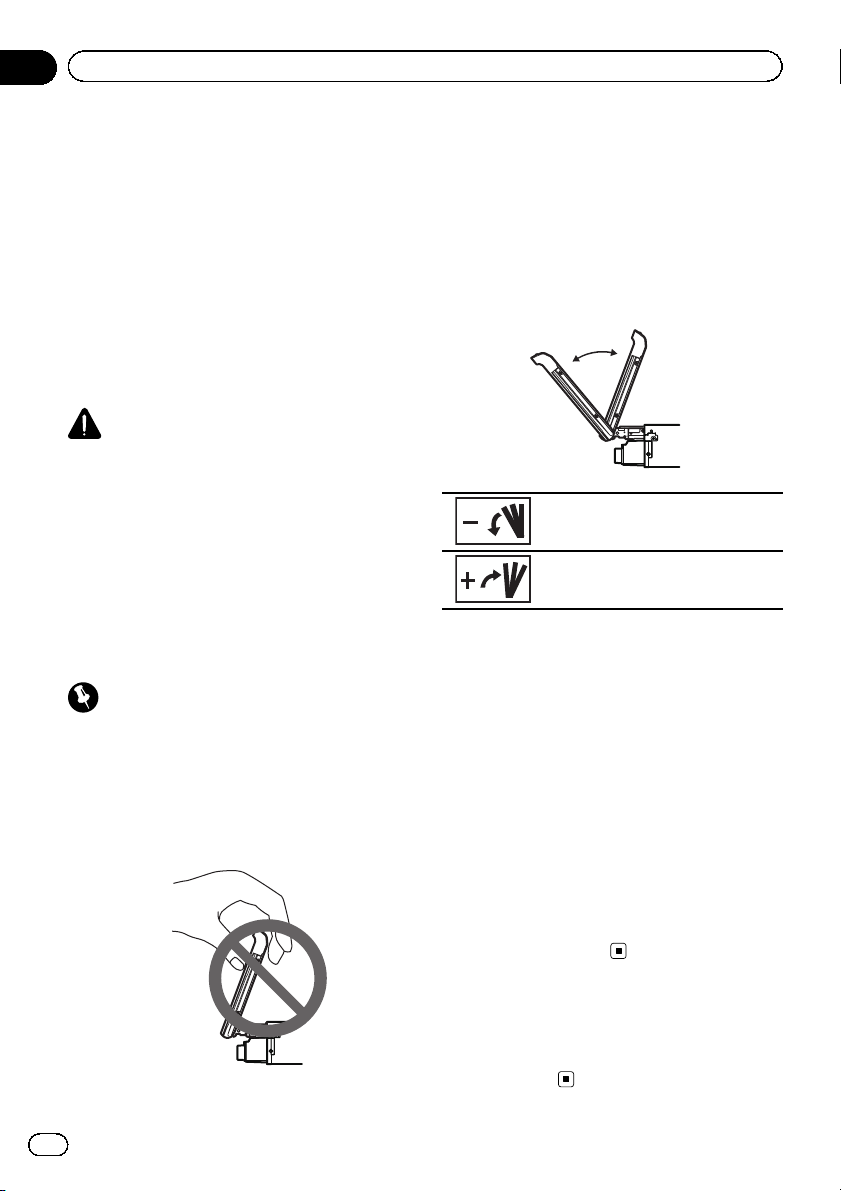
Adjusting the LCD panel angle
Important
! If you can hear the LCD panel knocking
against your vehicle’s console or dashboard,
touch the TILT keys to move the LCD panel a
little forward.
! When adjusting the LCD panel angle, be sure
to touch the TILT keys. Forcibly adjusting the
LCD panel by hand may damage it.
1 Display the system menu.
Refer to Introduction of menu operations on
page 54.
2 Touch TILT.
3 Touch the TILT keys to adjust the LCD
panel to an easily viewable angle.
The LCD panel angle continues changing as
long as you touch and hold the TILT keys.
Laying the panel down.
Returning the panel to the upright
position.
# As the set angle is saved, the LCD panel will
automatically be adjusted to the same position
the next time the LCD panel is opened.
Turning the LCD panel horizontally
When the LCD panel is upright and hinders
the operation of the air conditioner, the panel
can be turned horizontally temporarily.
% Press and hold OPEN/CLOSE to turn the
LCD panel horizontally.
# To return to the original position, press and
hold OPEN/CLOSE again.
# The LCD panel returns to the original position
automatically, indicated with a beeping sound 10
seconds after operation.
14
Ejecting a disc
1 Press h (eject).
2 Eject a disc
En

Basic Operations
Ejecting an SD
1 Removing the front panel
Refer to Removing the front panel on page 9.
2 Push an SD.
3 Ejecting an SD
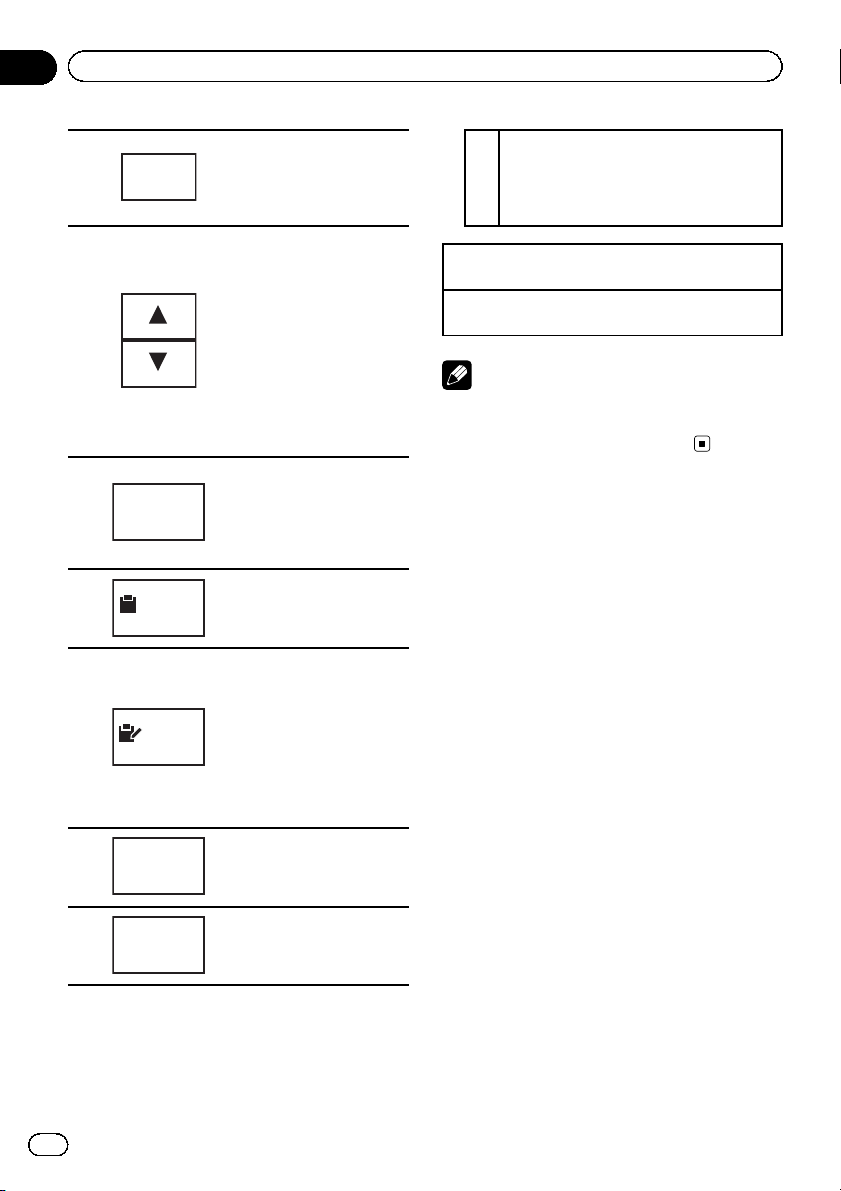
Setting the clock
1 Switch to Clock Adjustment display.
Refer to Basic Operations on page 11.
2 Select the item to set.
3 Touch a or b to set the correct date
and time.
Section
04
Basic Operations
En
15
y
.ch
d:
bcdeabcdeabcde
bcdeabcdeabcde
ocal
o
5
87.5
z
bcdeabcdeabcde
6
123
4
5
Section
05
Tuner
Introduction of tuner
operations
7.
ed 28 ma
12:45
L
Radi
A
A
A
Ban
MH
1 Touch panel keys
1
2
3
4
Band:
Turning local seek tuning on
and off.
Refer to Tuning in to strong
signals on page 33.
Switching the equalizer
curves.
Refer to Using the equalizer
on page 55.
Touch and hold for more
than two seconds to turn the
auto-equalizer on or off.
Refer to Using the auto-
equalizer on page 56.
Displaying the preset channel list.
Refer to Storing and recalling
stations on page 33.
Refer to Storing the strongest
stations on page 33.
Refer to Storing and recalling
stations on page 33.
Selecting a band (FM1, FM2,
FM3 for FM or AM).
Manual tuning (step by step) using the buttons
1 Press c or d (TRACK).
Seek tuning using the buttons
1 Press and hold c or d (TRACK).
Note
Listening AM radio while an iPod is charged from
this unit may generate noise. In this case, disconnect the iPod from this unit.
16
Recalling radio station frequencies assigned to preset
5
6
En
TAG
tuning keys.
Refer to Storing and recalling
stations on page 33.
Saving song information
(tag) from the broadcasting
station to your iPod.
Refer to Using iTunes tagging
on page 34.
eturn
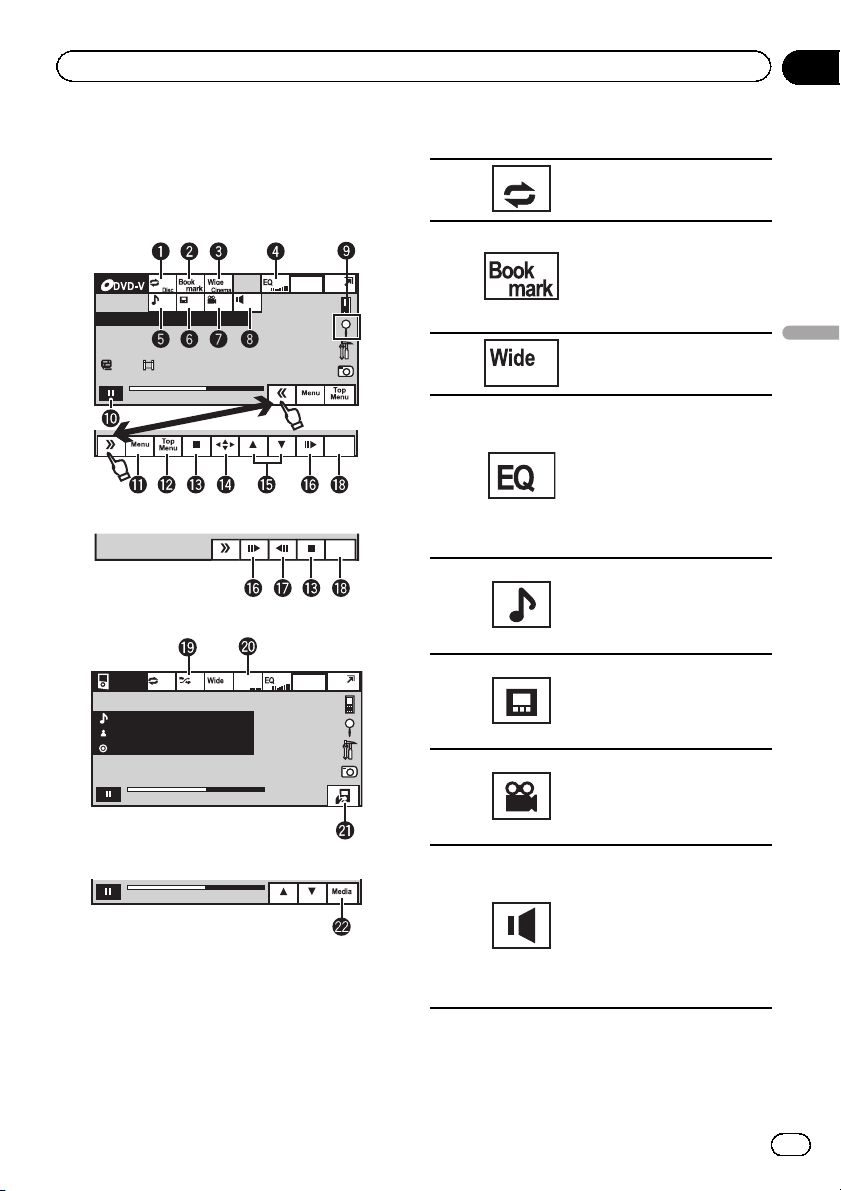
Playing moving images
Section
06
Introduction of video
playback operations
You can view DVD/DVD-R/DVD-RW/CD/CD-R/
CD-RW/USB/SD/iPod.
Wed 28 may
12:45 PM
01 01
Abcdeabcdeabcdeabcdeab
8 12
01:45 -02:45
DVD video
Video CD
iPod
ALL Songs
Abcdeabcdeabcdeabcdeab
Abcdeabcdeabcdeabcdeab
Abcdeabcdeabcdeabcdeab
2067/12345
01:45
iPod video
01:45 -02:45
When playing a disc containing a mixture
of various media file types
! If an iPod with video capabilities is con-
nected to this unit using an interface cable
such as the CD-IU50V (sold separately), you
can enjoy the video contents of the iPod as
an iPod source.
L+R
01
Return
R
Wed 28 may
S.Rtrv
12:45 PM
-02:45
1 Touch panel keys
1
2
3
4
5
6
7
8
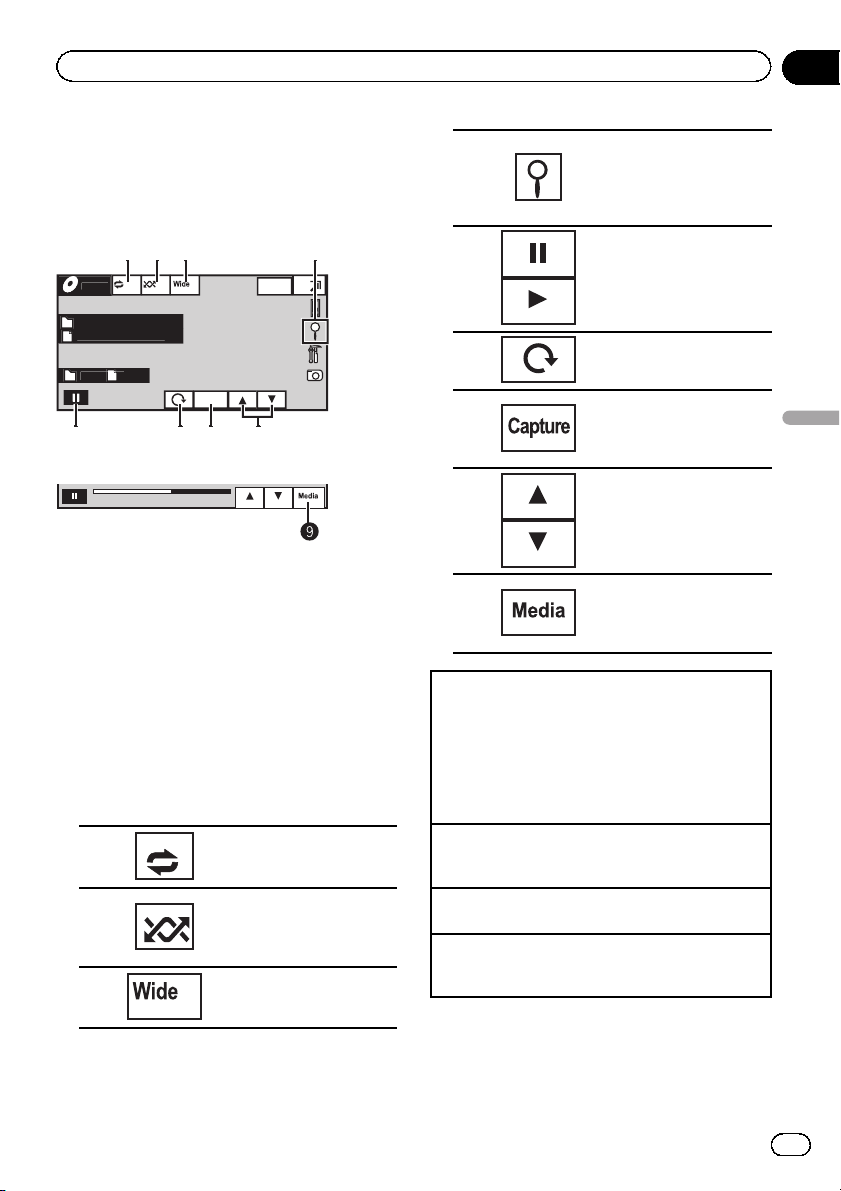
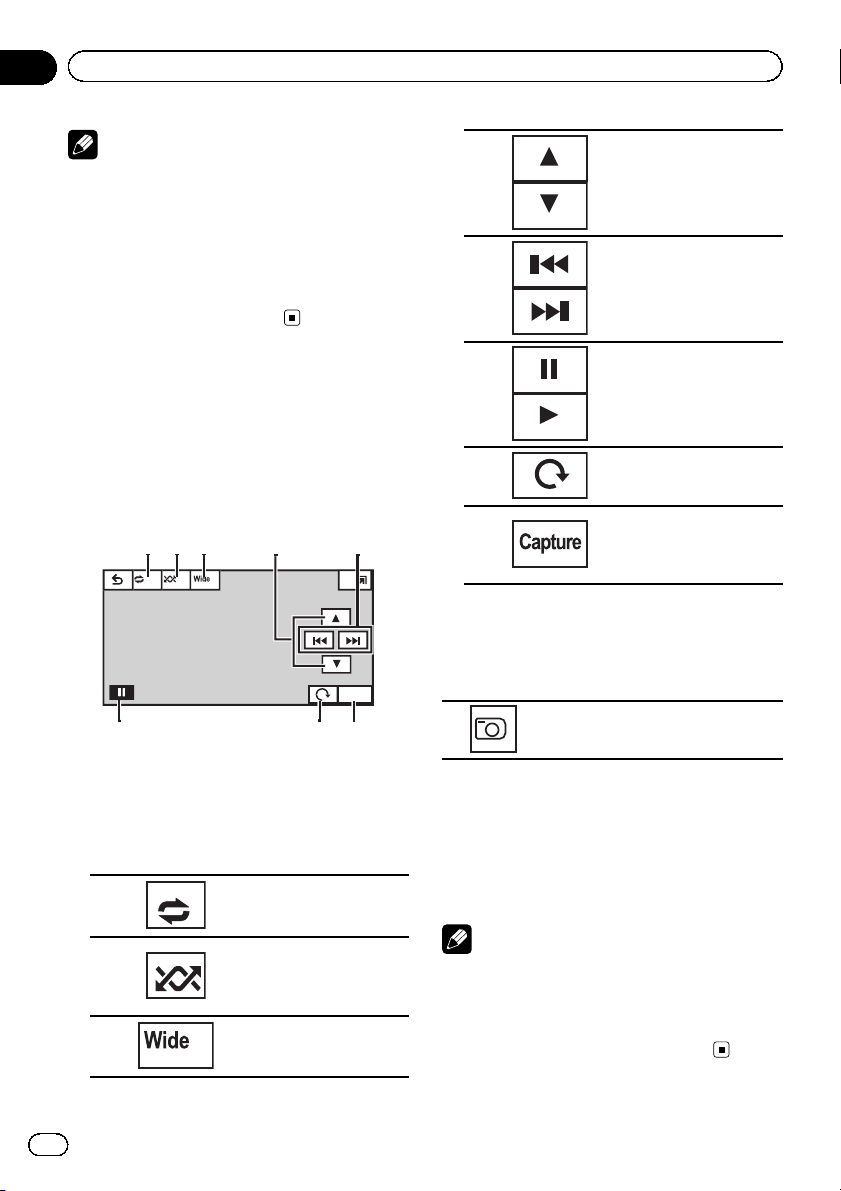
Selecting the repeat range.
Refer to Repeating playback
on page 36.
During playback, touch the
point at which you want to resume playback the next time
the disc is loaded.
Refer to Resume playback
(Bookmark) on page 37.
Changing the screen mode.
Refer to Changing the wide
screen mode on page 41.
Switching the equalizer
curves.
Refer to Using the equalizer
on page 55.
Touch and hold for more
than two seconds to turn the
auto-equalizer on or off.
Refer to Using the auto-
equalizer on page 56.
Switching between audio
languages during playback.
Refer to Changing audio lan-
guage during playback (Multiaudio) on page 38.
Switching between subtitle
languages during playback.
Refer to Changing the subti-
tle language during playback
(Multi-subtitle) on page 38.
Switching among viewing
angles during playback.
Refer to Changing the view-
ing angle during playback
(Multi-angle) on page 39.
Switching the audio output,
when playing video discs recorded with LPCM audio.
Refer to Selecting audio out-
put on page 39.
Switching between stereo
and monaural audio output,
when playing Video CD
discs.
Playing moving images
En
17
Section
06
Playing moving images
Starting the search function.
Refer to Searching for the part
you want to play on page 38.
Refer to Selecting files from
9
a
b
c
d
e
the file name list on page 40.
Displaying iPod menus.
Refer to Playing videos fr om
your iPod on page 36 and
Browsing for a video/music
on the iPod on page 36.
Returning to normal playback during paused, slow
motion, or frame-by-frame
playback.
Pausing playback
Displaying the DVD menu
during DVD playback.
Refer to Operating the DVD
menu on page 35.
Returning to the top menu
during DVD playback.
Stopping playback.
Stopping playback at the
point set in Resume playback.
Touch one more time to stop
playback completely.
Refer to Resume playback
(Bookmark) on page 37.
Displaying arrow keys to operate the DVD menu.
Refer to Using the arrow keys
on page 35.
h
Return
i
j
k
l
m
Speeding down the playback
speed in four steps, during
slow motion playback on
Video CD.
Returning to the specified
scene to which the DVD currently being played has been
preprogrammed to return.
Refer to Return to the speci-
fied scene on page 39.
Playing the video on your
iPod in a random order.
Refer to Random play (shuf-
fle) on page 35.
Switching the Advanced
sound retriever function setting when playing a video on
your iPod.
Refer to Using advanced
sound retriever on page 40.
Conducting operation from
your iPod and listening to it
using your car’s speaker’s.
Refer to Operating this unit’s
iPod function from your iPod
on page 35.
Switching between media
file types to play on DVD/CD/
USB/SD.
Refer to Switching the media
file type on page 34.
18
f
g
En
Skipping to another title.
Selecting a folder during
DivX file playback.
Moving ahead one frame at a
time during playback.
Refer to Frame-by-frame play-
back on page 37.
Touch and hold for more
than two seconds to slow
down playback speed.
Speeding up the playback
speed in four steps durin g
slow motion playback on
DVD video/Video CD.
Playing moving images
Section
06
Playing back videos
1 Insert the disc into the disc loading slot with the
label side up.
Playback will automatically start.
! If you are playing a DVD or Video CD, a menu
may appear. Refer to Operating the DVD menu on
page 35 and PBC playback on page 39.
! When the automatic playback function is on, the
unit will skip the DVD menu and automatically
start playback from the first chapter of the first
title. Refer to Automatic playback of DVDs on page
61.
1 If a disc has already been inserted, press SRC/
OFF or touch the source icon to select the source.
! When the source icon is not displayed, it can be
displayed by touching the screen.
! Disconnect headphones from the iPod before
connecting to this unit.
! Dependin g on the iPod model and the amount of
data stored in the iPod, it may take some time for
playback to begin.
! Use the touch panel keys to select the iPod after
connecting it to this unit.
! No Device is displayed when disconnecting the
iPod.
1 If a message is displayed after loading a disc con-
taining DivX VOD content, touch Play.
Refer to Playing DivX
Ejecting a disc
1 Refer to Ejecting a disc on page 14 or Ejecting an
SD on page 15.
Selecting a chapter using the buttons
1 Press c or d (TRACK).
Fast forwarding or reversing using the buttons
1 Press and hold c or d (TRACK).
! Fast forward/fast rewind may not always be possi-
ble on some discs. In such cases, normal playback will automatically resume.
Ò
VOD content on page 40.
tails, refer to Resume playback (Bookmark) on
page 37.
! Some operations may not be available while
watching a DVD due to the programming of
the disc. In such cases, the
icon appears
on the screen.
! To ensure proper operation, connect the dock
connector cable from the iPod directly to this
unit.
! If the ignition switch is set to ACC or ON, the
iPod battery will be charged while connected.
However, the iPod battery is not charged when
you select an SD as the source.
! While the iPod is connected to this unit, the
iPod cannot be turned on or off.
However, the iPod can be turned on or off
when you select an SD as the source.
Playing moving images
Notes
! This DVD player can play back a DivX file re-
corded on CD-R/RW or DVD-R/RW. (Please
see the following section for files that can be
played back. Refer to page 84.)
! Do not insert anything other than a DVD (-R/-
RW) or CD (-R/-RW) into the disc loading slot.
! If the bookmark function is on, DVD playback
resumes from the selected point. For more de-
En
19
bcdeabcdeabcdeabcdeab
y
5
0
5
OM
gs
g
S.Rtrv
-02:45
bcdeabcdeabcdeabcdeab
bcdeabcdeabcdeabcdeab
87
6
123
4
9
758
Section
07
Playing audio
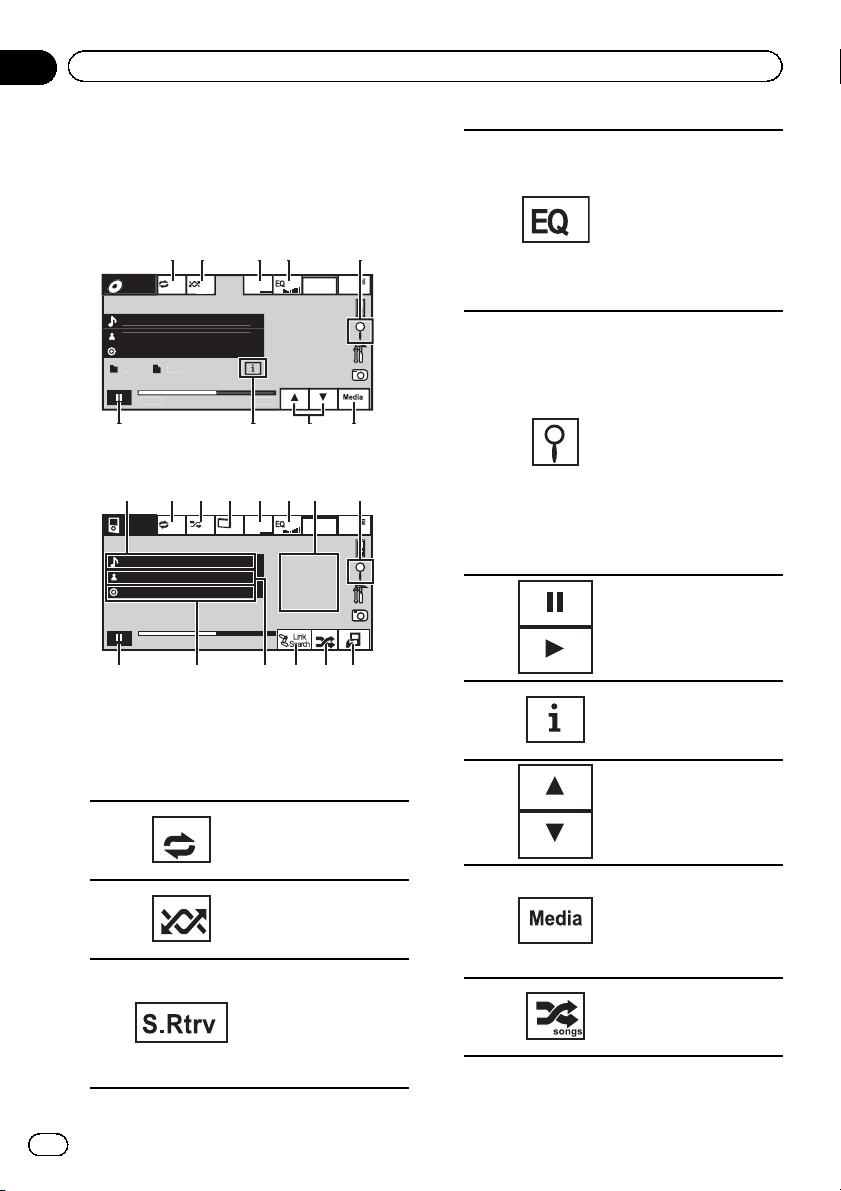
Introduction of sound
playback operations
You can listen to DVD-R/DVD-RW/CD/CD-R/
CD-RW/USB/SD/iPod sound files.
ed 28 ma
R
A
A
A
Son
12
1:4
CD
1 a b 3 4 5
f i
iPod
ALL Songs
Abcdeabcdeabcdeabcdeab
Abcdeabcdeabcdeabcdeab
Abcdeabcdeabcdeabcdeab
2067/12345
01:45
6h
iPod audio
You can control an iPod with this unit by using
a cable such as the CD-IU50 (sold separately).
1 Touch panel keys
1
2
3
12:45
Wed 28 may
S.Rtrv
12:45 PM
-02:45
c d e
g
Selecting the repeat
range.
Refer to Repeating play-
back on page 36.
Playing songs in random
order.
Refer to Random play
(shuffle) on page 35.
Switching the Advanced
sound retriever function
setting when playing
audio.
Refer to Using advanced
sound retriever on page
40.
Switching the equalizer
curves.
Refer to Using the equali-
zer on page 55.
4
Touch and hold for more
than two seconds to turn
the auto-equalizer on or
off.
Refer to Using the auto-
equalizer on page 56.
Displaying a list of track
titles/file names to select
songs on a CD.
Refer to Selecting tracks
from the track title list on
page 39.
Displaying the file name
5
list to select the files.
Refer to Selecting files
from the file name list on
page 40.
Displaying iPod menus.
Refer to Browsing for a
video/music on the iPod
on page 36.
6
Pausing and starting
playback
Switching the text infor-
7
mation to display on this
unit when playing MP3/
WMA/AAC files.
8
Selecting a folder.
Switching between
media file types on a
9
DVD/CD/USB/SD.
Refer to Switching the
media file type on page
34.
Playing songs on the
a
iPod in random order.
Refer to Random play
(shuffle) on page 35.
20
En
Playing audio
Section
07
b
c
d
e
2 Text information
f
g
h
3 Artwork display
Starting Album Link Play on your iPod
when you touch the artwork display.
i
Refer to Displaying lists related to the currently playing song (Link Search) on page 40.
Changing the speed of
audiobook playback on
the iPod.
Refer to Changing audio-
book speed on page 40.
Switching to Link Search
mode to play songs related to the currently
playing song on the iPod.
Refer to Displaying lists
related to the currently
playing song (Link Search)
on page 40.
Playing all songs on the
iPod in random order.
Refer to Playing all songs
in random order (shuffle
all) on page 36.
Conducting operation
from your iPod and listening to it using your car’s
speaker’s.
Refer to Operating this
unit’s iPod function from
your iPod on page 35.
Displaying the Songs list
on the iPod.
Refer to Searching for a
video/music by category
on page 36.
Displaying the Artists list
on the iPod.
Refer to Searching for a
video/music by category
on page 36.
Displaying the Albums
list on the iPod.
Refer to Searching for a
video/music by category
on page 36.
Playing back sound
1 Insert the disc into the disc loading slot with the
label side up.
Playback will automatically start.
1 If a disc has already been inserted, press SRC/
OFF or touch the source icon to select the source.
! When the source icon is not displayed, it can be
displayed by touching the screen.
! Disconnect headphones from the iPod before
connecting to this unit.
! Dependin g on the iPod model and the amount of
data stored in the iPod, it may take some time for
playback to begin.
! Use the touch panel keys to select the iPod after
connecting it to this unit.
! No Device is displayed when disconnecting the
iPod.
Ejecting a disc
1 Refer to Ejecting a disc on page 14 or Ejecting an
SD on page 15.
Selecting a track using the buttons
1 Press c or d (TRACK).
Fast forwarding or reversing using the buttons
1 Press and hold c or d (TRACK).
Notes
! When playing back files recorded as VBR
(variable bit rate) files, the play time will not be
correctly displayed if fast forward or reverse
operations are used.
! To ensure proper operation, connect the dock
connector cable from the iPod directly to this
unit.
! If the ignition switch is set to ACC or ON, the
iPod battery will be charged while connected.
However, the iPod battery is not charged when
you select an SD as the source.
! While the iPod is connected to this unit, the
iPod cannot be turned on or off.
However, the iPod can be turned on or off
when you select an SD as the source.
! If the characters recorded on the disc are not
compatible with this unit, those characters
will not be displayed.
! Text information may not be correctly dis-
played depending on the recorded environment.
Playing audio
En
21

Section
07
Playing audio
! USB storage device that can be charged via
USB will be recharged when plugged in and
the ignition switch is set to ACC or ON.
However, the USB storage device that can be
charged via USB will not be recharged when
you select an SD as the source.
! Disconnect the USB portable audio player/
USB memory when you are done using it.
! When you select Clock or Speana on Select-
ing the background display on page 68, the art-
work is not displayed.
22
En
Capture
oto
y
bcdeabcdeabcde
bcdeabcdeabcde
l
Off
5
123
4
768
Playing still images
Section
08
Introduction of still image
playback operations
You can view still images saved in CD-R/CDRW/USB/SD.
Ph
A
A
Ful
CD
01:45 -02:45
When playing a disc containing a mixture
of various media file types
When loading a CD-R/RW/USB/SD containing
JPEG picture files, this unit starts a slideshow
from the first folder/picture on the disc/device.
The player displays the pictures in each folder
in alphabetical order.
The table below shows the controls for viewing
a slideshow.
1 Touch panel keys
Touch any of the following touch panel keys to
select the function to be adjusted.
1
2
3
ed 28 ma
12:45
Selecting the repeat range.
Refer to Repeating playback
on page 36.
Playing files in a random
order.
Refer to Random play (shuf-
fle) on page 35.
Changing the screen mode
Refer to Changing the wide
screen mode on page 41.
Displaying the file name
4
5
6
7
8
9
Playing still images
1 Insert the disc into the disc loading slot with the
label side up.
Playback will automatically start.
1 If a disc has already been inserted, press SRC/
OFF or touch the source icon to select the source.
! When the source icon is not displayed, it can be
displayed by touching the screen.
Ejecting a disc
1 Refer to Ejecting a disc on page 14 or Ejecting an
SD on page 15.
Selecting a file using the buttons
1 Press c or d (TRACK).
Fast file searching
1 Press and hold c or d (TRACK).
! You can search 10 JPEG files at a time.
list to select the files.
Refer to Selecting files from
the file name list on page
40.
Starting or pausing the slideshow.
Rotating the displayed picture 90° clockwise
Capturing an image in
JPEG files.
Refer to Capture an image
in JPEG files on page 41.
Selecting a folder.
Switching between media
file types.
Refer to Switching the
media file type on page 34.
Playing still images
En
23
l
Off
8
2
163
7
4
5
Section
08
Playing still images
Notes
! This unit can play back a JPEG file recorded
on CD-R/RW/ROM/SD/USB storage device.
(Please see the following section for files that
can be played back. Refer to page 84.)
! Files are played back in file number order and
folders are skipped if they contain no files. (If
folder 01 (ROOT) contains no files, playback
commences with folder 02.)
4
5
Selecting a folder.
Selecting a file.
Introduction of still image
playback as a slideshow
operations
You can view still images saved in CD-R/CDRW/USB/SD as a slideshow when listening to
another source.
Ful
Capture
The table below shows the controls for viewing
a slideshow.
1 Touch panel keys
Touch any of the following touch panel keys to
select the function to be adjusted.
Selecting the repeat range.
1
2
3
Refer to Repeating playback
on page 36.
Playing files in a random
order.
Refer to Random play (shuf-
fle) on page 35.
Changing the screen mode
Refer to Changing the wide
screen mode on page 41.
6
7
8
Starting or pausing the slideshow.
Rotating the displayed picture 90° clockwise
Capturing an image in
JPEG files.
Refer to Capture an image
in JPEG files on page 41.
1 Start slideshow when listening to another source.
Refer to Common operations for menu settings/lists on page 13.
Displaying still images as a slide
show.
2 Select the device containing the files
that you want to display.
! Disc – Built-in DVD player
! USB – USB
! SD – SD memory card
# To cancel searching, touch Cancel.
Notes
! When the USB or SD source is selected, this
unit cannot view still images on USB/SD as a
slideshow.
! When MW/LW band is selected, this unit can-
not view still images as a slideshow.
24
En
y
I
012345678901
01
1
457
216
3
8 ba9
Bluetooth Telephone
Section
09
Introduction of Bluetooth
telephone operations
ed 28 ma
#
C
12:45
ABCDEHGH
Off On
Wed 28 may
12:45 PM
ABCDEHGHI
012345678901
Off
1
01
Radio
Abcdeabcdeabcde
Abcdeabcdeabcde
Abcdeabcdeabcde
P.CH
2
Band:
FM1
87.5 MHz
Telephone standby display
123
456
789
0
*
+
When switching to the entering
phone number mode
You can use Bluetooth telephone (AVH-P5200BT
only).
Important
! Since this unit is on standby to connect with
your cellular phone via Bluetooth wireless
technology, using it without the engine running can drain the battery power.
! Advanced operations that require attention
such as dialing numbers on the monitor, etc.,
are prohibited while driving. Park your vehicle
in a safe place when using these advanced
operations.
! Operations available may be limited depend-
ing on the cellular phone connected to this
unit.
! Be sure to park your vehicle in a safe place
and apply the parking brake when performing
this operation.
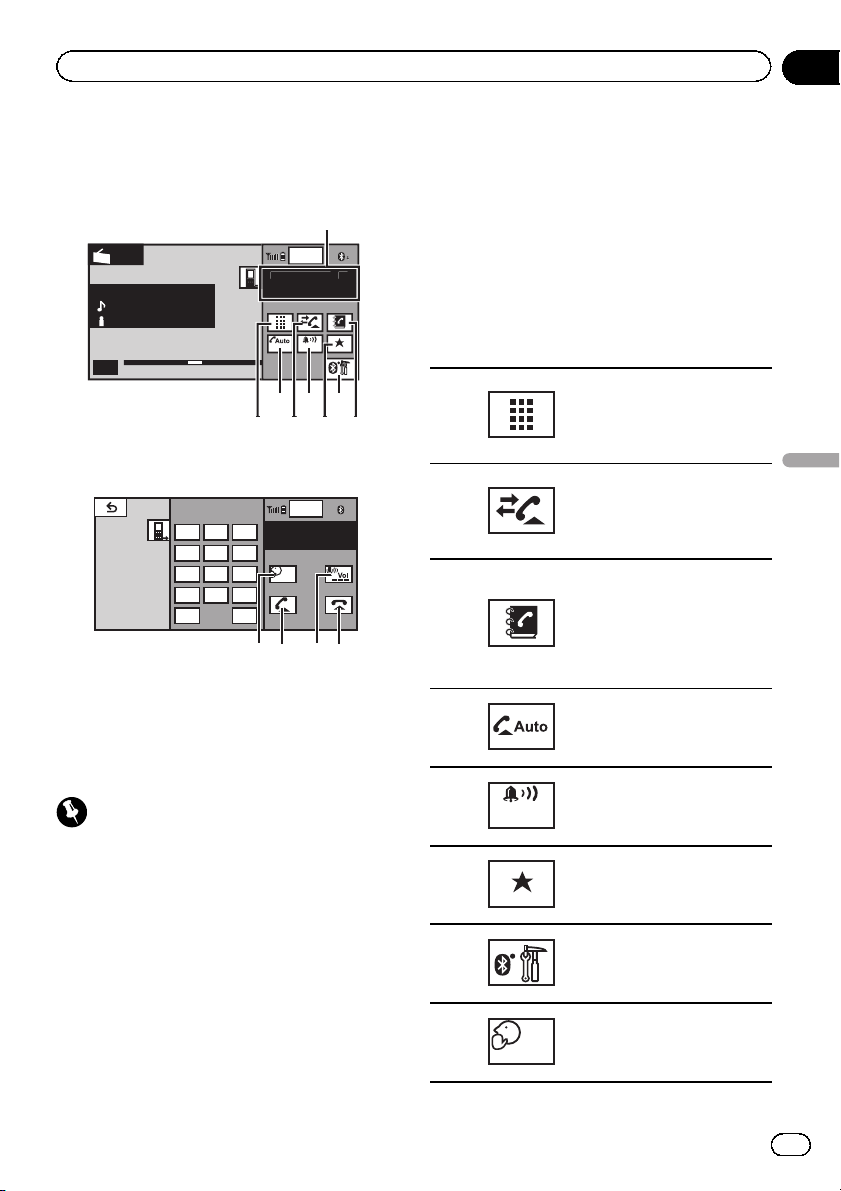
1 Incoming call notice
Indicates that an incoming call has been received and has not been checked yet.
! Not displayed for calls made when your
cellular phone is disconnected from this
unit.
2 Touch panel keys
Switching the mode to enter
the phone number directly.
1
2
3
4
5
6
7
8
Refer to Making a call by entering phone number on page
49.
Switching to the call histor y
list.
Refer to Using the missed, re-
ceived and dialed call lists on
page 48.
Switching to the phone book
mode.
Refer to Calling a number in
the phone book on page 47.
Refer to Selecting a number
by alphabet search mode on
page 47.
Turning automatic answering
on or off.
Refer to Setting automatic an-
swering on page 49.
Turning the ring tone for incoming calls on or off.
Refer to Switching the ring
tone on page 49.
Displaying the preset dial
screen.
Refer to Using the preset dial
lists on page 49.
Displaying the Bluetooth
connection menu.
Refer to the instructions
from page 50 to page 52.
Turning private mode on or
off.
Refer to Setting the private
mode on page 50.
Bluetooth Telephone
25
En
Section
09
Bluetooth Telephone
Adjusting the other party’s
listening volume.
9
a
b
Accepting an incoming call
Ending a call
1 Press MUTE/
Refer to Adjusting the other
party’s listening volume on
page 49.
Accepting an incoming call.
Making a phone call, when
selecting a phone number.
Switching between callers on
hold.
Ending a call.
Rejecting an incoming call.
Canceling call waiting.
.
Notes
! Private mode can only be operated while you
are talking on the phone.
! To end the call, both you and the other caller
must hang up your phones.
Setting up for hands-free phoning
Before you can use the hands-free phoning
function you must set up the unit for use with
your cellular phone. This entails establishing a
Bluetooth wireless connection between this
unit and your phone, registering your phone
with this unit, and adjusting the volume level.
1 Connection
First, you need to connect a Bluetooth telephone
to this unit.
For detailed instructions on connecting your
phone to this unit via Bluetooth wireless technology, see following section. Using a Bluetooth de-
vice to pair on page 51 and Pairing from this unit
on page 50.
! You may also need to enter a PIN code into
this unit. If your telephone requires a PIN
code to establish a connection, look for the
code on the telephone or in its accompanying
documentation. Refer to Entering PIN code for
Bluetooth wireless connection on page 52.
2 Volume adjustment
Adjust the earpiece volume of your cellular phone
to your preference. The unit will record the adjusted volume level as the default setting.
! The volume of the caller ’s voice and ring tone
may vary depending on the type of cellular
phone.
! If there is a large volume difference between
the ring tone and caller ’s voice, the overall volume level may become unstable.
! Make sure to adjust the volume to a proper
level before disconnecting the cellular phone
from the unit. If the volume is muted (zero
level) on your cellular phone, the volume level
of your cellular phone remains muted even
after the cellular phone is disconnected.
26
En
9 a b c d8
8ab
XM/SIRIUS tuner
Section
10
Introduction of XM/SIRIUS
tuner operations
54123
Mode
Memo
All CH
Team
Off
Off
Instant
Replay
SIRIUS
Abcdeabcdeabcde
Abcdeabcdeabcde
P.CH
2
Band:
CH183
6
7
SIRIUS tuner
Mode
XM
XM
All CH
Abcdeabcdeabcde
Abcdeabcdeabcde
Abcdeabcdeabcde
Abcdeabcdeabcde
P.c h
2
Band:
XM
CH183
6
XM tuner
You can use this unit to control an XM satellite
digital tuner (GEX-P920XM), which is sold separately.
For details concerning operation, refer to the
XM tuner’s operation manuals. This section
provides information on XM operations with
this unit which differs from that described in
the XM tuner’s operation manual.
When the SIRIUS tuner is used together with
this unit, some operations differ slightly from
those described in the SIRIUS operation manual. This manual provides information on
Wed 28 may
12:45 PM
CH183
Memo
Game
Memo
Info
Edit
Wed 28 may
12:45 PM
CH183
Memo
Team
Setting
Memo
Edit
541
these points. For all other information on
using the SIRIUS tuner, please refer to the SIRIUS operation manual.
! With this unit, you can operate one addi-
tional function: XM/SIRIUS channel direct
selection. Refer to Selecting an XM/SIRIUS
channel directly on page 43.
1 Touch panel keys
Selecting a channel by number or category.
Refer to Switching the XM/
SIRIUS channel selection
mode on page 42.
Tuning the MyMix function
on or off for the SIRIUS tuner.
Refer to Turning the MyMix
function on or off. on page 44.
Turning the Game Alert on or
off for the SIRIUS tuner.
Refer to Switching the Game
Alert on or off on page 45.
1
2
3
Mode
All CH
Mode
Category
Memo
On
Memo
Off
Team
On
Team
Off
Switching the equalizer
curves.
Refer to Using the equalizer
4
5
on page 55.
Touch and hold for more
than two seconds to turn the
auto-equalizer on or off.
Refer to Using the auto-
equalizer on page 56.
Displaying the preset channel list.
Refer to Storing and recalling
stations on page 33.
Selecting a channel directly.
Refer to Selecting an XM/SIR-
IUS channel directly on page
43.
Selecting a channel from the
XM channel list.
Refer to Selecting a channel
from the XM channel list display on page 42.
XM/SIRIUS tuner
En
27
Section
10
XM/SIRIUS tuner
6
8
9
a
b
c
d
Band:
Instant
Replay
Memo
Memo
Edit
Game
Info
Team
Setting
Selecting a band (XM1, XM2
or XM3) for XM tuner.
Selecting a band (SIRIUS1,
SIRIUS2 or SIRIUS3) for the
SIRIUS tuner.
Recalling radio station frequencies assigned to preset
tuning keys.
Refer to Storing and recalling
stations on page 33.
Selecting the channel category when selecting Mode
Category.
Refer to Switching the XM/
SIRIUS channel selection
mode on page 42 and Selecting a SIRIUS channel from a
channel category on page 42.
Selecting a track, fast forwarding/reversing or pausing/playing for the SIRIUS
tuner.
Refer to Using the Instant Re-
play function on page 46.
Storing the song title and artist name.
Refer to Making the MyMix
playlist on page 43.
Switching to memo edit
mode.
Refer to Setting up a song
alert on page 44.
Refer to Deleting a song from
the MyMix playlist for XM
tuner on page 44.
Refer to Deleting a song from
the MyMix playlist for SIRIUS
tuner on page 44.
Displaying information on
games for the SIRIUS tuner.
Refer to Displaying game in-
formation on page 46.
Selecting teams for game
alert on the SIRIUS tuner.
Refer to Selecting teams for
Game Alert on page 45.
Switching the SIRIUS information.
Refer to Switching the SIRIUS display on
page 46.
7
Touch and hold for more than two seconds
to scroll the text.
Manual tuning (step by step) using the buttons
1 Press c or d (TRACK).
Seek tuning using the buttons
1 Press and hold c or d (TRACK).
Note
You can also perform tuning from a desired channel category. (Refer to Selecting a SIRIUS channel
from a channel category on page 42.)
1 SIRIUS tuner information
28
En

HD Radioä tuner
Section
11
Introduction of HD Radioä
tuner operations
1
Local
Seek
Blending
D/A Auto
All
Digital
Radio
Abcdeabcdeabcde
P.CH
2
Band:
FM1
87.9 MHz
67 89
You can use this unit to control an HD Radio
tuner (e.g. GEX-P20HD), which is sold separately.
For details concerning operation, refer to the
HD Radio tuner’s operation manual.
1 Touch panel keys
1
Seek
2
All
Seek
HD
45
Wed 28 may
12:45 PM
87.9
MHz
TAG
Turning local seek tuning on
or off.
Refer to Tuning in to strong
HD Radio signals on page 33.
Switching between Digital
broadcasting station seek
and normal seek.
Refer to Switching the seek
mode on page 47.
6
8
9
Band:
TAG
Selecting a band (FM1, FM2,
FM3 for FM or AM).
Recalling radio station frequencies assigned to preset
tuning keys.
Refer to Storing and recalling
stations on page 33.
Saving song information
(tag) from the broadcasting
station to your iPod.
1 Digital Radio tuner information
Switching the digital radio tuner informa-
7
tion.
Manual tuning (step by step) using the buttons
1 Press c or d (TRACK).
Seek tuning using the buttons
1 Press and hold c or d (TRACK).
HD Radioä tuner
3
4
5
Blending
Analog
Blending
D/A Auto
Switching to the analog
broadcast of the same frequency.
Refer to Switching the recep-
tion mode on page 47.
Switching the equalizer
curves.
Refer to Using the equalizer
on page 55.
Touch and hold for more
than two seconds to turn the
auto-equalizer on or off.
Refer to Using the auto-
equalizer on page 56.
Displaying the preset channel list.
Refer to Storing and recalling
stations on page 33.
En
29
 Loading...