

PEUGEOT NG4 3D User Manual
The system is protected in such a way that it will only
operate in your vehicle.
For safety reasons, the driver must only carry out
operations which require prolonged attention while the
vehicle is stationary.
When the engine is switched off and to prevent
discharging of the battery, the system switches off
following the activation of the energy economy mode.
01 First steps
02 Voice commands and
steering mounted controls
03 General operation
04 Navigation - Guidance
05 Traffic information
06 Radio
07 Music media players
08 Using the telephone
09 Screen menu map
Frequently asked questions
214
217
231
233
234
239
249
CONTENTS
MULTIMEDIA AUDIO SYSTEM / BLUETOOTH TELEPHONE
GPS EUROPE
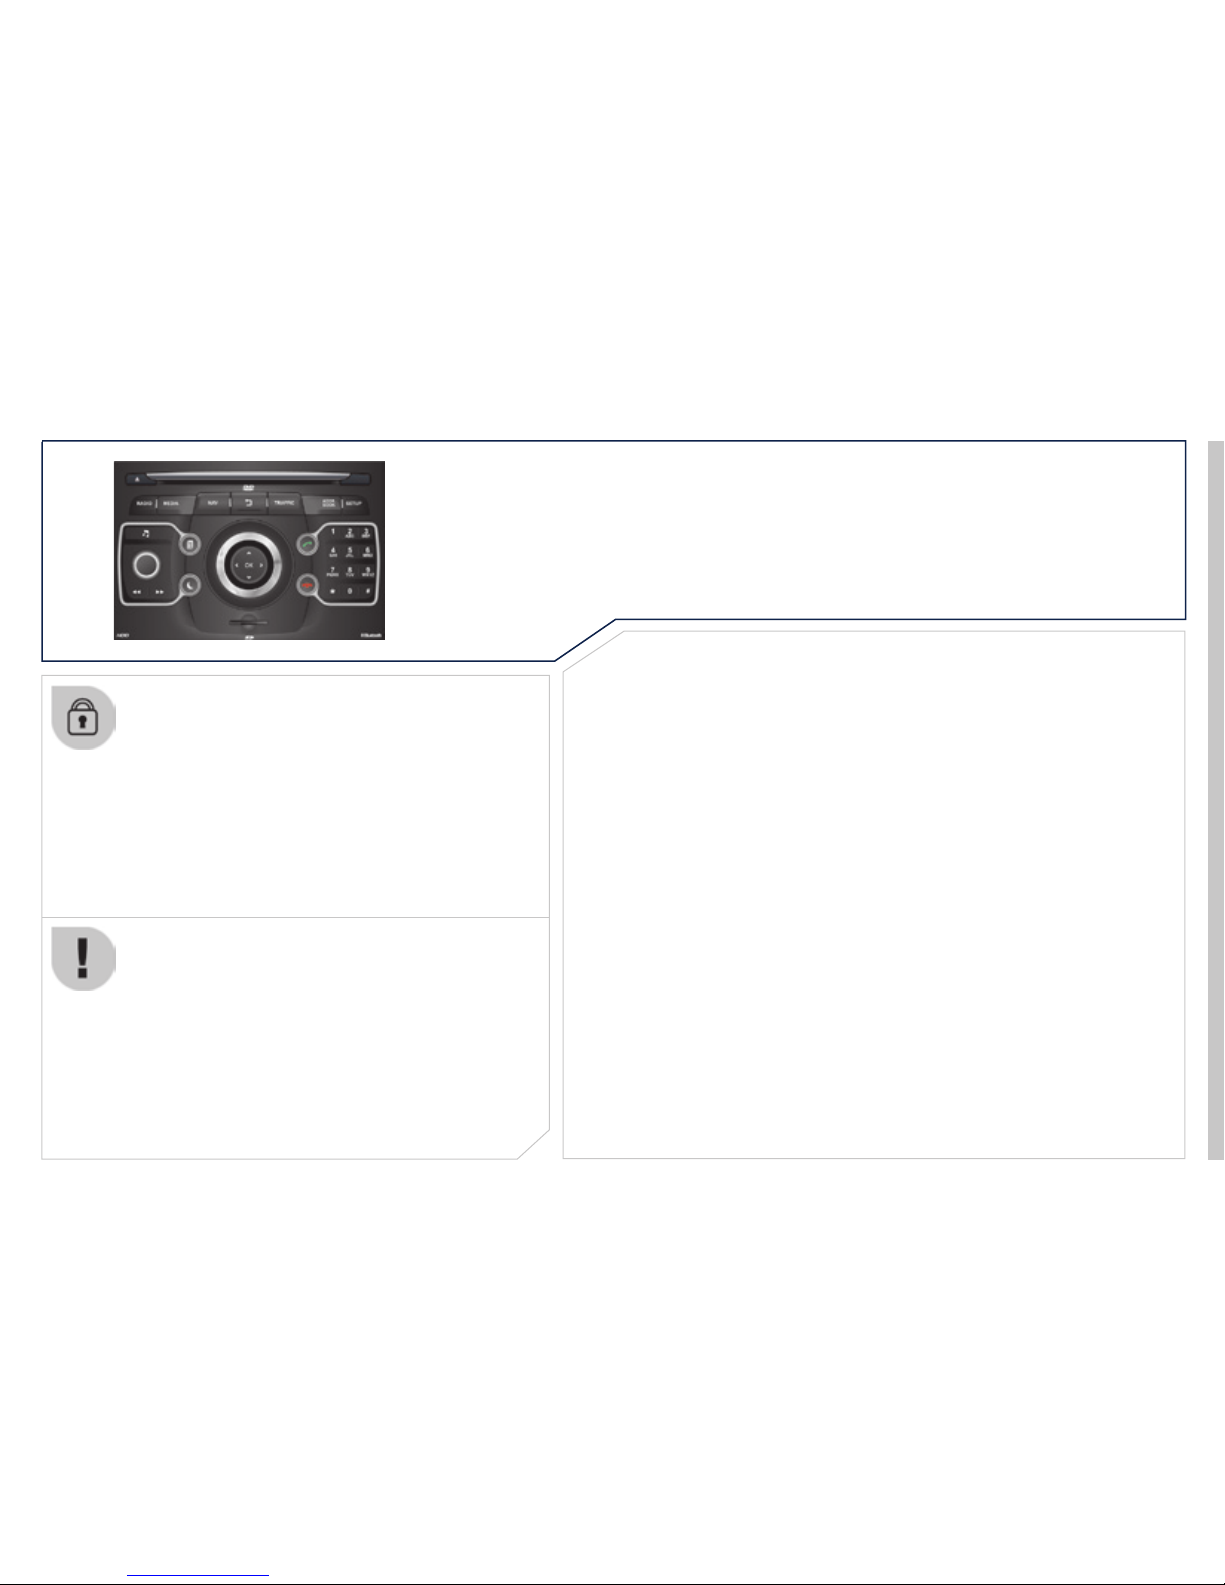
01
FIRST STEPS
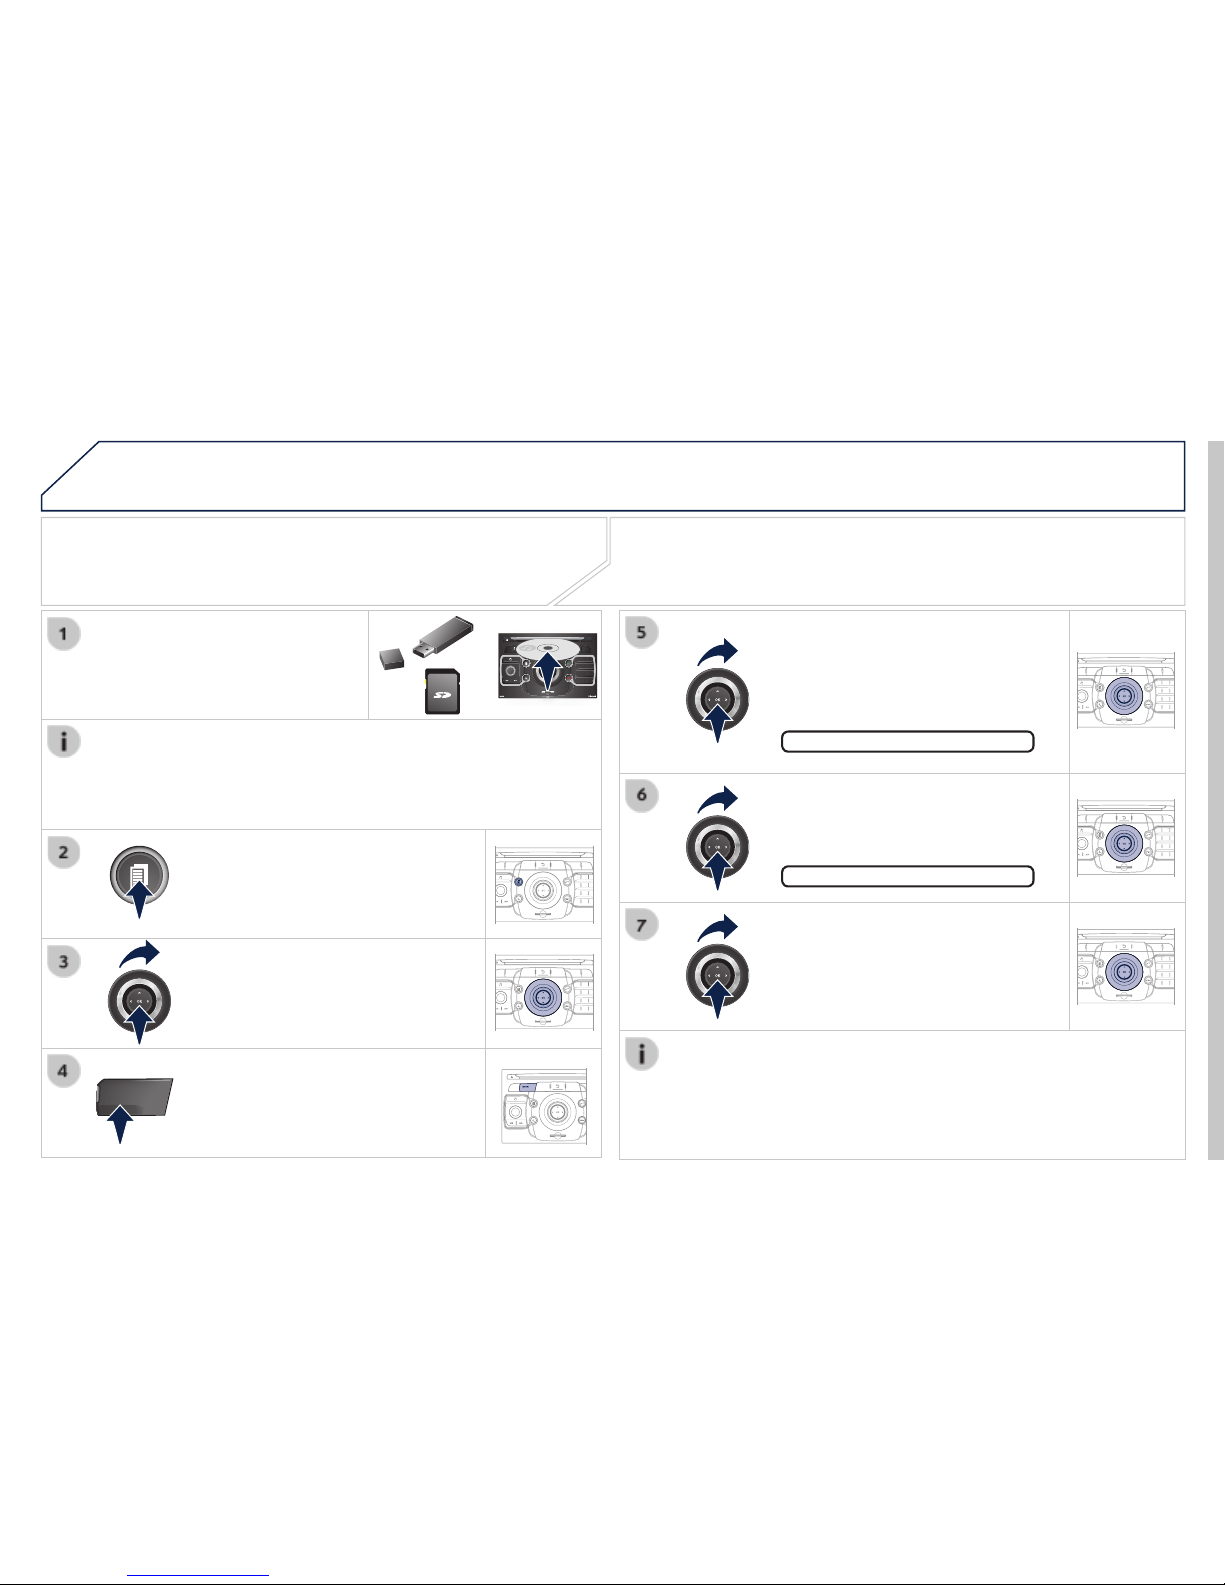
Connect Media Navigation (NG4 3D) control panel
Access to the Radio Menu
Display the list of stations in
alphabetical order (FM band) or
frequency order (AM band).
Access to the Media Menu
(audio CD, Jukebox,
Auxiliary input).
Display the list of tracks.
Change the audio source.
Access to the Navigation
Menu and display recent
destinations.
Abandon the current
operation.
Long press: return to main
display.
Access to the Traffi c Menu.
Access to the Address book
Menu.
Access to the "SETUP" menu
(confi guration).
Long press: GPS coverage.
Audio settings (Balance /
Adjust volume (each source
Long press: reinitialise the
Short press: mute.
Automatic search down/up for
Select previous/next CD or MP3
SD card reader.
Short press: clears the last
Enter the numbers or letters
Presetting 10 radio frequencies.

01
FIRST STEPS
PEUGEOT Connect Media Navigation (NG4 3D) navigator
Press to left / right:
Press up / down:
OK: confi rm the highlighted item.
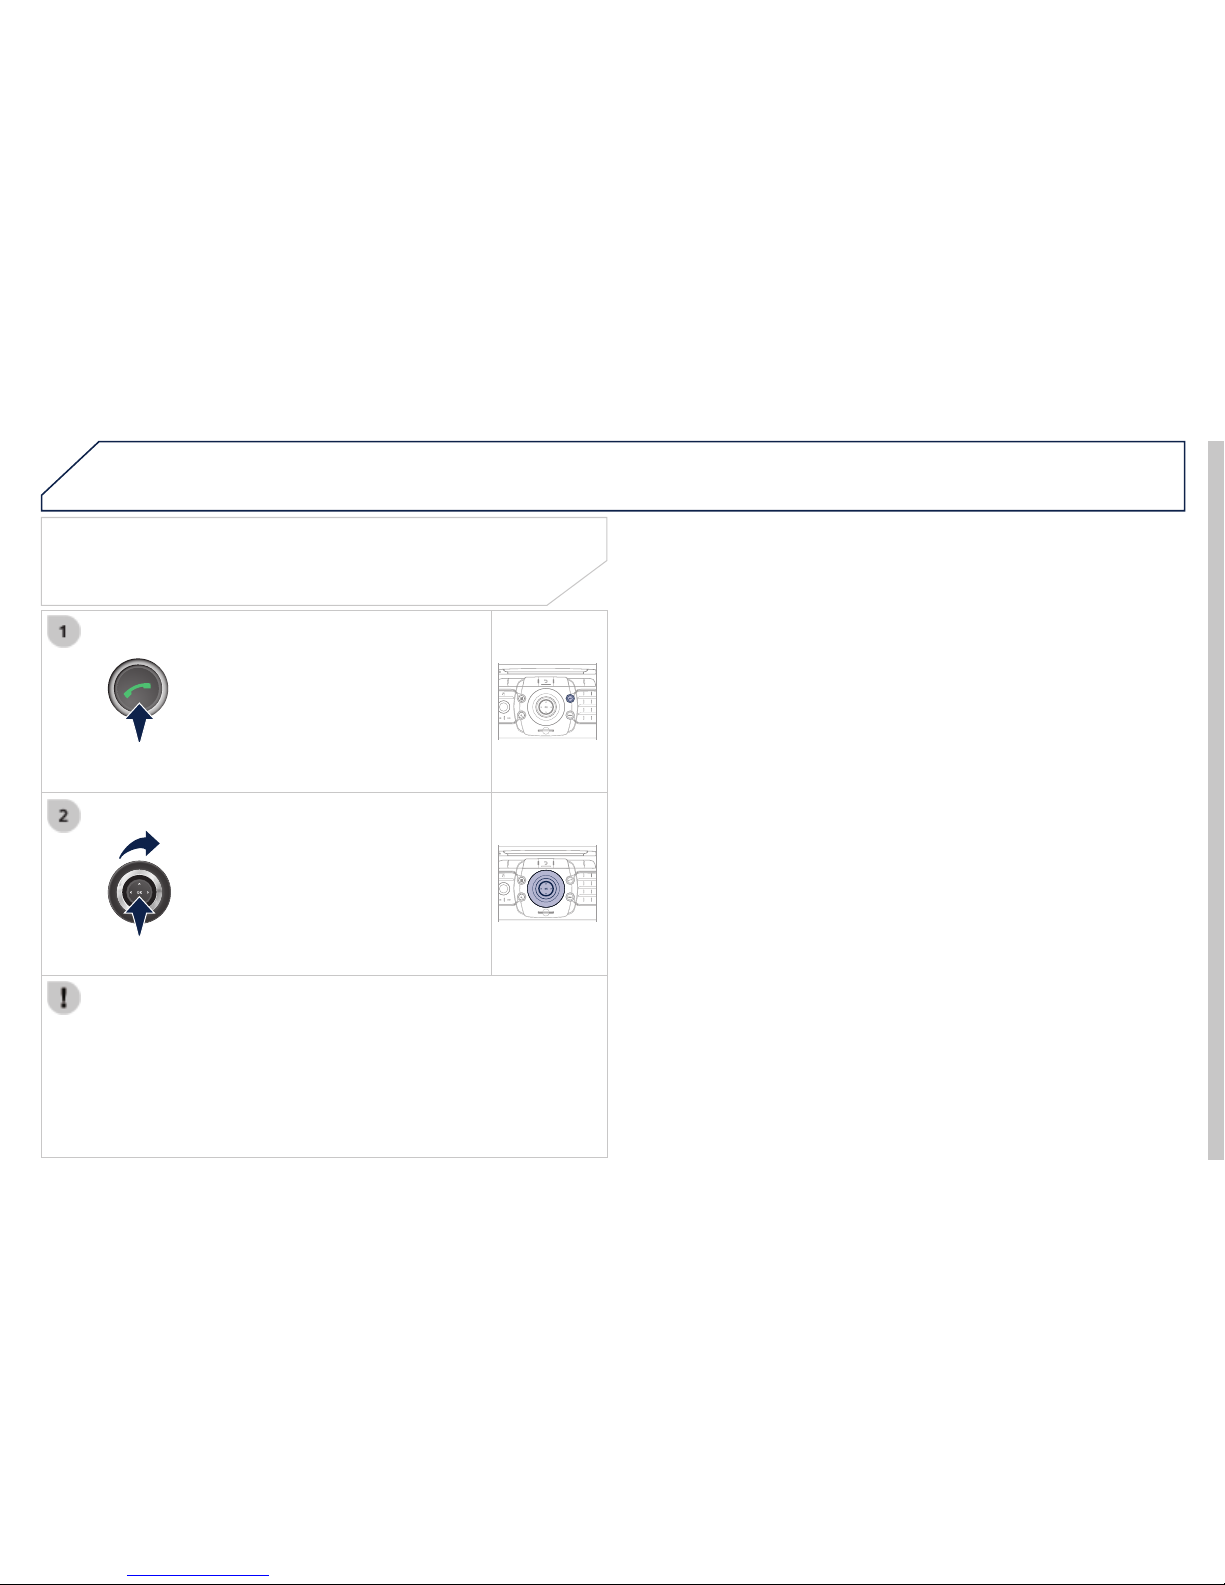
END CALL: access to the
End a call in progress or reject
Normal display or black screen.
Select successive display in the
CALL: access to the Phone
Bluetooth connection, accept
Rotate the dial:
With display of the "RADIO" screen:
With display of the "MEDIA" screen:
With display of the "MAP" or "NAV":
Movement of the menu selection

02
SETUP
2
ABC3DEF
5
JKL4GHI6MNO
8
TUV7PQRS9WXYZ
0
*
#
1
NAV TRAFFIC
ADDR
BOOK
SETUP
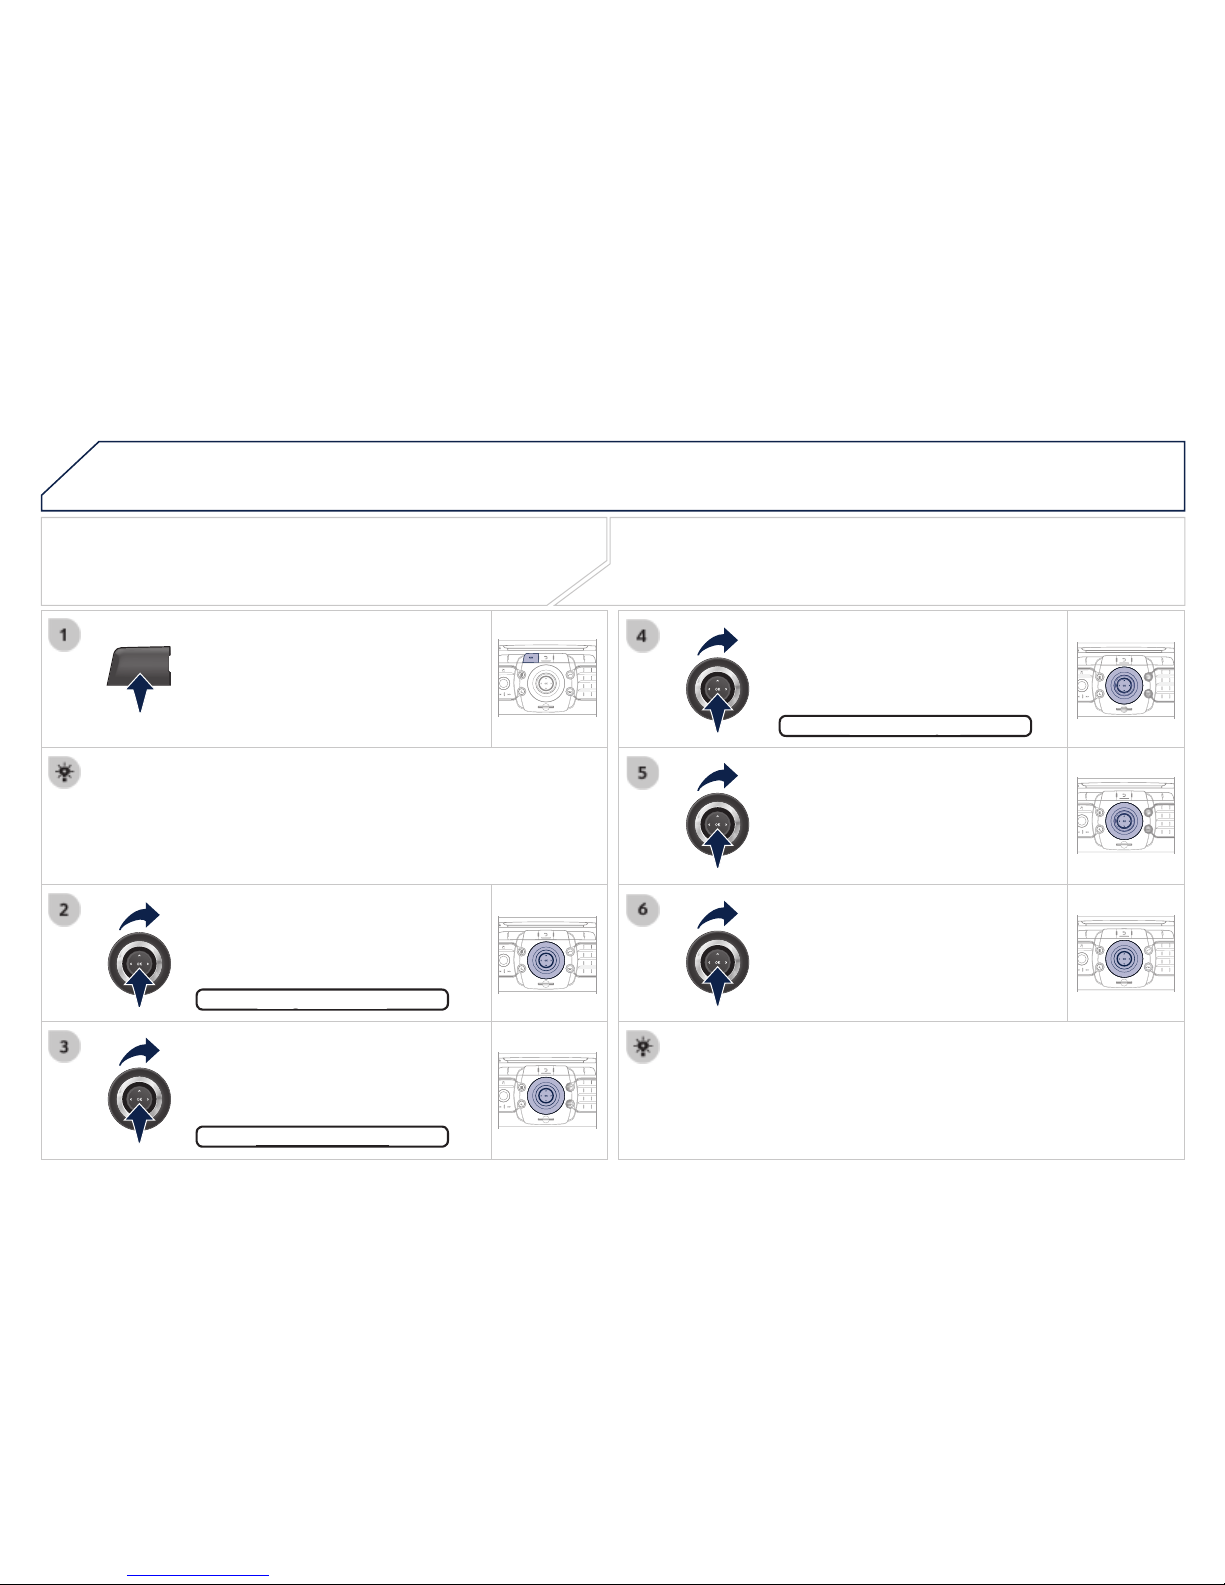
Before using the system for the fi rst time, you are advised to listen
Press the SETUP button and select
Activate voice recognition.
Select "Tutorial".
Initiation of voice commands
Voice recognition
The phrases to be spoken according to the context are indicated in
Speak and PEUGEOT Connect Media Navigation (NG4 3D) acts.
Pressing the end of the lighting
ACTION
Help address book
Help voice control
Help media
Help navigation
Help telephone
Help radio
Cancel
Correction
Access to the address book help
Access to the voice recognition help
Access to the media management help
Access to the guidance, navigation help
Access to the telephone help
Access to the radio help
To cancel a voice command which is in
Request to correct the last voice recognition
Clear
Select station
Station <tts:stationName>
Read out station list
Enter frequency
Select wave band
FM
TA on
TA off
Select a radio station
Select a radio station using its RDS
Listen to the list of stations available
Listen to the frequency of the current radio
Choose the frequency waveband (AM or FM)
Change the frequency waveband to AM
Change the frequency waveband to FM
Activate Traffi c Info (TA)
Deactivate Traffi c Info
Destination input
Voice advice off
Voice advice on
Save address
Start guidance
Abort guidance
Navigate entry
POI Search
Command to enter a new destination
Deactivate the spoken guidance instructions
Activate the spoken guidance instructions
Save an address in the address book
Start guidance (once the address has been
Stop the guidance
Start guidance to an entry in the address
Start guidance to a point of interest
VOICE COMMANDS AND STEERING MOUNTED CONTROLS
02
Initiation of voice commands
Voice recognition
VOICE COMMANDS AND STEERING MOUNTED CONTROLS
CONTEXT
ACTION
Media
Select media
Single slot
Jukebox
USB
External device
SD-Card
Track <1 - 1000>
Folder <1 - 1000>
Select the MEDIA source
Choose a source
Select the CD player source
Select the Jukebox source
Select the USB player source
Select the audio AUX input source
Select the SD card source
Select a specifi c track (number between 1
Select a Folder (number between 1 and
Phone menu
Enter number
Phone book
Dial
Save number
Accept
Reject
Open the Telephone Menu
Enter a telephone number to be called
Open the phone book
Make a call
Save a number in the phone book
Accept an incoming call
Reject an incoming call
ADDRESS
Address book menu
Call <entry>
Navigate <entry>
Open the address book
Call fi le using its <fi le> description as
Start guidance to an address in the address
02
VOICE COMMANDS AND STEERING MOUNTED CONTROLS
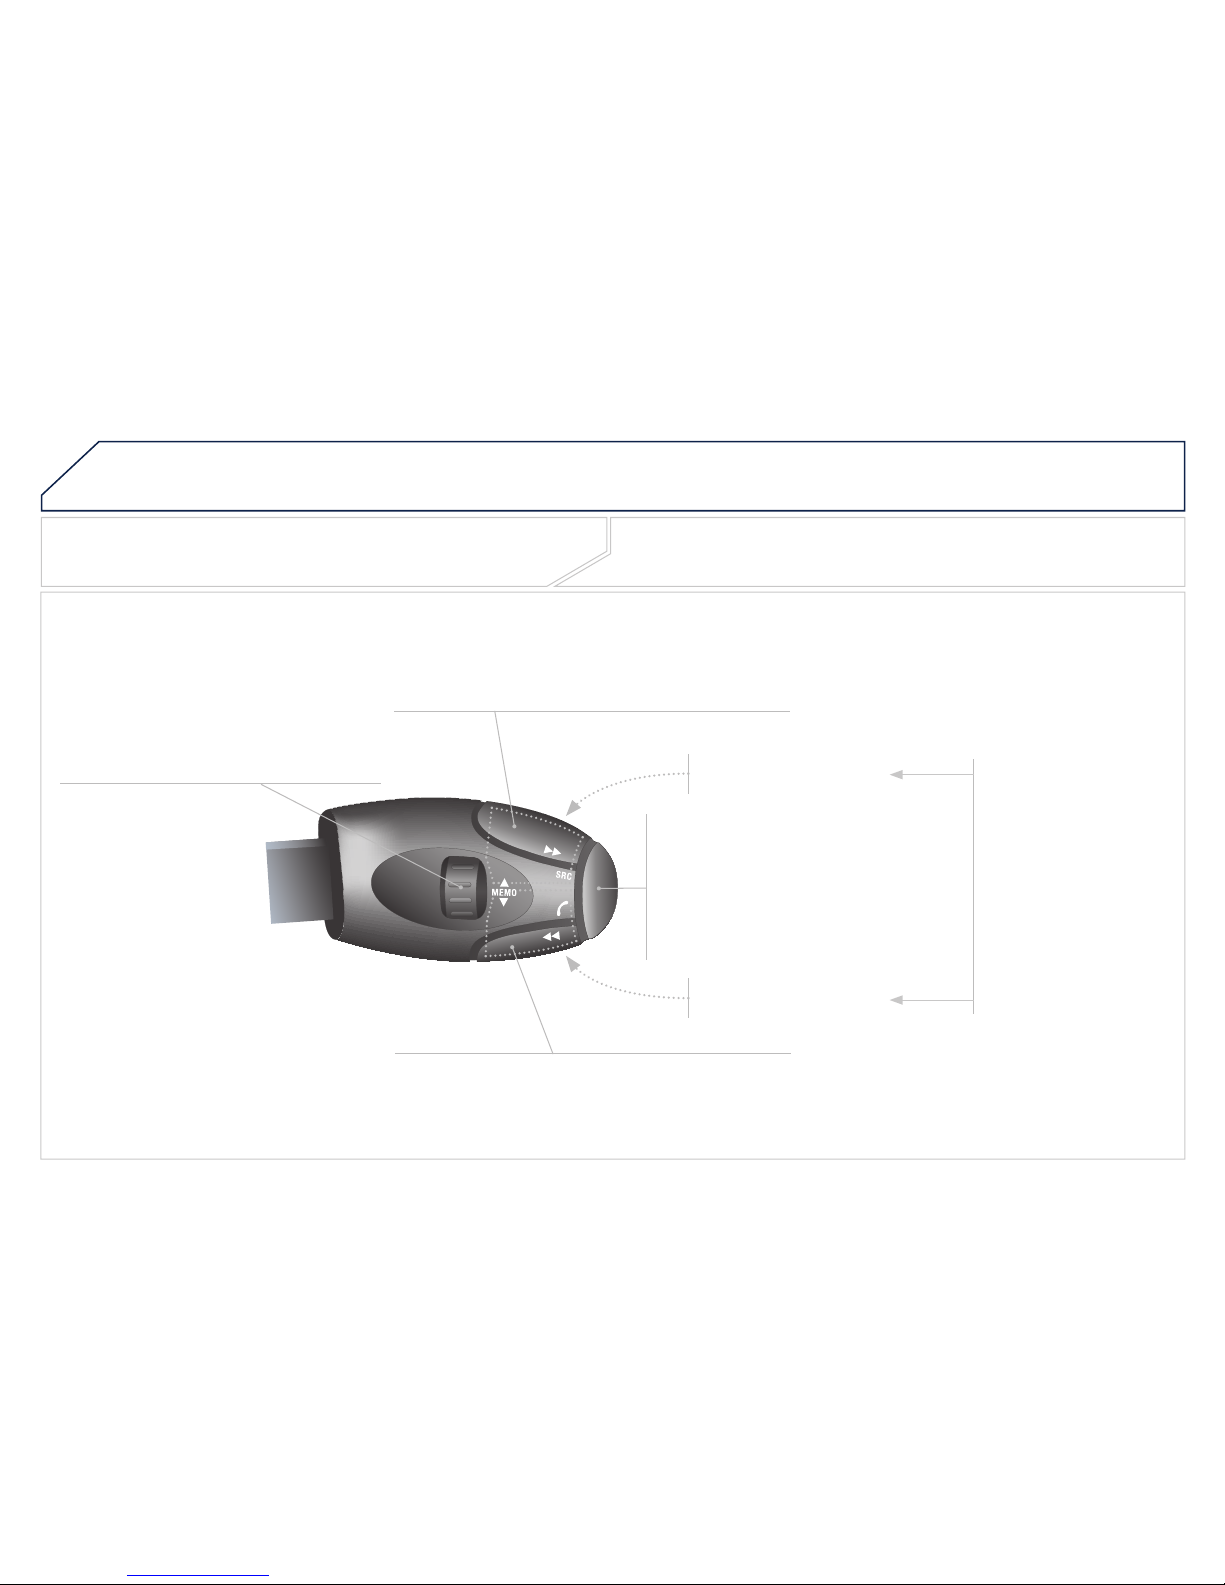
Steering mounted controls
Wiper stalk: display "RADIO" and "MEDIA".
Lighting stalk: activate voice commands with a short press; indication of the
Change audio source.
Start a call from the contacts list .
Call/hang up the telephone.
Confi rm a selection.
Press for more than 2 seconds:
Radio: automatic search for a lower frequency.
CD / SD CARD / JUKEBOX: select the previous track.
CD / SD CARD / JUKEBOX: continuous press: fast
Radio: select the previous/next pre-set
CD audio: select the previous/next track
If "MEDIA" is displayed in the screen:
MP3 CD / SD CARD / JUKEBOX: select the
Select the previous/next item in the contacts list.
Radio: automatic search for a higher frequency.
CD / SD CARD / JUKEBOX: select the next track.
CD / SD CARD / JUKEBOX: continuous press: fast
Volume increase.
Volume decrease.
Mute: press the volume
The sound is restored

03
SETUP
TRAFFIC
MEDIA
GENERAL OPERATION
For a detailed global view of the menus available, refer to the
Press the MODE button several times in succession to gain access to the following displays:
Long press: access to the GPS coverage and to the demonstration
For maintenance of the screen, the use of a soft, non-abrasive cloth
/
(If guidance is in
Contextual display
* Available according to model.
03
GENERAL OPERATION
Pressing OK gives access to short-cut
Contextual display
NAVIGATION (IF GUIDANCE IS IN PROGRESS):
Abort guidance
1
1
1
2
2
Unblock
More
2
Less
3
3
Route type
Avoid
3
Satellites
2
2
Calculate
Zoom/Scroll
2
Browse route
1
2
2
Show destination
Trip info
3
Stopovers
2
2
Browse route
Zoom/Scroll
1
1
Voice advice
2
2
Route type
Route dynamics
2
Avoidance criteria
2
Recalculate
TELEPHONE:
1
1
1
1
1
1
MUSIC MEDIA PLAYERS:
1
1
1
2
2
Normal order
Random track
2
Scan
03
GENERAL OPERATION
Contextual display
RADIO:
1
2
2
TA
RDS
2
Radiotext
2
Regional prog.
FULL SCREEN MAP:
Abort guidance / Resume guidance
1
1
1
1
2
Options
3
3
Navigate to
Dial
3
Save position
3
Zoom/Scroll
1
1
2
2
2D Map
2.5D Map
2
3D Map
2
North Up
2
Heading Up
AUDIO DVD (LONG PRESS):
1
2
Group
3
Group 1 .2/n
1
2
Select media
2
Play options
3
Normal order / Random track / Scan
2
AM
1
2
2
Refresh AM list
2
FM
03
3
3
DVD menu
DVD top menu
3
List of titles
3
List of chapters
VIDEO DVD (LONG PRESS):
1
GENERAL OPERATION
Contextual display
2
2
Stop
DVD menus
3
3
Audio
Subtitles
3
Angle
2
DVD Options
Examples:
-
-
PEUGEOT Connect Media IS:
04
NAV
2
ABC3DEF
5
JKL4GHI6MNO
8
TUV7PQRS9WXY
Z
0
*
#
1
RADIO MEDIA
NAV TRAFFIC
SETUP
ADDR
BOOK
2
ABC3DEF
5
JKL4GHI6MNO
8
TUV7PQRS9WXY
Z
0
*
#
1
RADIO MEDIA
NAV TRAFFIC
SETUP
ADDR
BOOK
2
ABC3DEF
5
JKL4GHI6MNO
8
TUV7PQRS9WXY
Z
0
*
#
1
RADIO MEDIA
NAV TRAFFIC
SETUP
ADDR
BOOK
2
ABC3DEF
5
JKL4GHI6MNO
8
TUV7PQRS9WXYZ
0
*
#
1
RADIO MEDIA
NAV TRAFFIC
SETUP
ADDR
BOOK
2
ABC3DEF
5
JKL4GHI6MNO
8
TUV7PQRS9WXYZ
0
*
#
1
RADIO MEDIA
NAV TRAFFIC
SETUP
ADDR
BOOK
2
ABC3DEF
5
JKL4GHI6MNO
8
TUV7PQRS9WXYZ
0
*
#
1
RADIO MEDIA
NAV TRAFFIC
SETUP
ADDR
BOOK
NAVIGATION - GUIDANCE
Selecting a destination
Press the NAV button again or select
Select the "Destination input"
Press the NAV button.
Select the letters of the town one
Once the country has been selected,
A pre-set list (by entering the fi rst few letters) of the towns in the
Select the "Address input" function
Address input
Address input
The list of the last 20 destinations appears under the Navigation
The "NAVIGATION" voice commands are listed in section 02.

04
2
ABC3DEF
5
JKL4GHI6MNO
8
TUV7PQRS9WXY
Z
0
*
#
1
RADIO MEDIA
NAV TRAFFIC
SETUP
ADDR
BOOK
2
ABC3DEF
5
JKL4GHI6MNO
8
TUV7PQRS9WXY
Z
0
*
#
1
RADIO MEDIA
NAV TRAFFIC
SETUP
ADDR
BOOK
2
ABC3DEF
5
JKL4GHI6MNO
8
TUV7PQRS9WXYZ
0
*
#
1
RADIO MEDIA
NAV TRAFFIC
SETUP
ADDR
BOOK
2
ABC3DEF
5
JKL4GHI6MNO
8
TUV7PQRS9WXYZ
0
*
#
1
RADIO MEDIA
NAV TRAFFIC
SETUP
ADDR
BOOK
2
ABC3DEF
5
JKL4GHI6MNO
8
TUV7PQRS9WXYZ
0
*
#
1
RADIO MEDIA
NAV TRAFFIC
SETUP
ADDR
BOOK
Repeat steps 5 to 7 for the "Street"
To delete a destination; from steps 1 to 3, select "Choose from last
A long press on one of the destinations displays a list of actions
Select the "Save to address book" function to record the address
The PEUGEOT Connect Media allows more than 4 000 contact
To speed up the process, the post code can be entered directly
Use the virtual keypad to enter the letters and digits.
Select the route type:
"Fast route", "Short route", or
Then select "Start route guidance"
It is also possible to select a destination via "Choose from address
It is possible to scroll the map using the 4-direction navigator. It is possible
Select the road with the colour
Turn the ring and select OK.
Press OK to confi rm.
NAVIGATION - GUIDANCE
04
NAV
2
ABC3DEF
5
JKL4GHI6MNO
8
TUV7PQRS9WXY
Z
0
*
#
1
RADIO MEDIA
NAV TRAFFIC
SETUP
ADDR
BOOK
2
ABC3DEF
5
JKL4GHI6MNO
8
TUV7PQRS9WXYZ
0
*
#
1
RADIO MEDIA
NAV TRAFFIC
SETUP
ADDR
BOOK
2
ABC3DEF
5
JKL4GHI6MNO
8
TUV7PQRS9WXY
Z
0
*
#
1
RADIO MEDIA
NAV TRAFFIC
SETUP
ADDR
BOOK
2
ABC3DEF
5
JKL4GHI6MNO
8
TUV7PQRS9WXY
Z
0
*
#
1
RADIO MEDIA
NAV TRAFFIC
SETUP
ADDR
BOOK
NAVIGATION - GUIDANCE
Setting and navigating to my "Home
Press the NAV button twice to display
To be set as the "Home address", an address must fi rst be
Select "Destination input" and confi rm.
Select "Set as Home address" and
Select your home address and confi rm.
To start navigation towards "Home", press NAV twice to display the
Then select "Navigate HOME" and confi rm to start guidance.

04
NAV
2
ABC3DEF
5
JKL4GHI6MNO
8
TUV7PQRS9WXY
Z
0
*
#
1
RADIO MEDIA
NAV TRAFFIC
SETUP
ADDR
BOOK
2
ABC3DEF
5
JKL4GHI6MNO
8
TUV7PQRS9WXY
Z
0
*
#
1
RADIO MEDIA
NAV TRAFFIC
SETUP
ADDR
BOOK
2
ABC3DEF
5
JKL4GHI6MNO
8
TUV7PQRS9WXYZ
0
*
#
1
RADIO MEDIA
NAV TRAFFIC
SETUP
ADDR
BOOK
2
ABC3DEF
5
JKL4GHI6MNO
8
TUV7PQRS9WXYZ
0
*
#
1
RADIO MEDIA
NAV TRAFFIC
SETUP
ADDR
BOOK
2
ABC3DEF
5
JKL4GHI6MNO
8
TUV7PQRS9WXY
Z
0
*
#
1
RADIO MEDIA
NAV TRAFFIC
SETUP
ADDR
BOOK
2
ABC3DEF
5
JKL4GHI6MNO
8
TUV7PQRS9WXY
Z
0
*
#
1
RADIO MEDIA
NAV TRAFFIC
SETUP
ADDR
BOOK
2
ABC3DEF
5
JKL4GHI6MNO
8
TUV7PQRS9WXYZ
0
*
#
1
RADIO MEDIA
NAV TRAFFIC
SETUP
ADDR
BOOK
NAVIGATION - GUIDANCE
Route options
Select the "Route dynamics"
This function provides access to
Select the "Avoidance criteria"
Turn the ring and select the
Press the NAV button.
Press the NAV button again or select
Select the "Route type" function and
Select the "Route options" function
Avoidance criteria
When the map is displayed on the screen, you can select "Map Settings"

04
NAV
2
ABC3DEF
5
JKL4GHI6MNO
8
TUV7PQRS9WXY
Z
0
*
#
1
RADIO MEDIA
NAV TRAFFIC
SETUP
ADDR
BOOK
2
ABC3DEF
5
JKL4GHI6MNO
8
TUV7PQRS9WXY
Z
0
*
#
1
RADIO MEDIA
NAV TRAFFIC
SETUP
ADDR
BOOK
2
ABC3DEF
5
JKL4GHI6MNO
8
TUV7PQRS9WXYZ
0
*
#
1
RADIO MEDIA
NAV TRAFFIC
SETUP
ADDR
BOOK
2
ABC3DEF
5
JKL4GHI6MNO
8
TUV7PQRS9WXYZ
0
*
#
1
RADIO MEDIA
NAV TRAFFIC
SETUP
ADDR
BOOK
2
ABC3DEF
5
JKL4GHI6MNO
8
TUV7PQRS9WXY
Z
0
*
#
1
RADIO MEDIA
NAV TRAFFIC
SETUP
ADDR
BOOK
2
ABC3DEF
5
JKL4GHI6MNO
8
TUV7PQRS9WXY
Z
0
*
#
1
RADIO MEDIA
NAV TRAFFIC
SETUP
ADDR
BOOK
2
ABC3DEF
5
JKL4GHI6MNO
8
TUV7PQRS9WXYZ
0
*
#
1
RADIO MEDIA
NAV TRAFFIC
SETUP
ADDR
BOOK
Adding a stopover
Enter a new address, for example.
Once the new address has
Position the stopover on the list and
Press the NAV button.
Press the NAV button again or select
Select the "Add stopover" function
Select the "Stopovers" function and
Add stopover
Add stopover
Address input
Address input
To change the stopovers, repeat operations 1 to 3 and select
Stopovers can be added to or deleted from the route once the destination
Repeat operations 1 to 7 as many times as necessary then select
NAVIGATION - GUIDANCE
04
NAV
2
ABC3DEF
5
JKL4GHI6MNO
8
TUV7PQRS9WXY
Z
0
*
#
1
RADIO MEDIA
NAV TRAFFIC
SETUP
ADDR
BOOK
2
ABC3DEF
5
JKL4GHI6MNO
8
TUV7PQRS9WXY
Z
0
*
#
1
RADIO MEDIA
NAV TRAFFIC
SETUP
ADDR
BOOK
2
ABC3DEF
5
JKL4GHI6MNO
8
TUV7PQRS9WXYZ
0
*
#
1
RADIO MEDIA
NAV TRAFFIC
SETUP
ADDR
BOOK
2
ABC3DEF
5
JKL4GHI6MNO
8
TUV7PQRS9WXYZ
0
*
#
1
RADIO MEDIA
NAV TRAFFIC
SETUP
ADDR
BOOK
2
ABC3DEF
5
JKL4GHI6MNO
8
TUV7PQRS9WXY
Z
0
*
#
1
RADIO MEDIA
NAV TRAFFIC
SETUP
ADDR
BOOK
2
ABC3DEF
5
JKL4GHI6MNO
8
TUV7PQRS9WXY
Z
0
*
#
1
RADIO MEDIA
NAV TRAFFIC
SETUP
ADDR
BOOK
2
ABC3DEF
5
JKL4GHI6MNO
8
TUV7PQRS9WXYZ
0
*
#
1
RADIO MEDIA
NAV TRAFFIC
SETUP
ADDR
BOOK
2
ABC3DEF
5
JKL4GHI6MNO
8
TUV7PQRS9WXY
Z
0
*
#
1
RADIO MEDIA
NAV TRAFFIC
SETUP
ADDR
BOOK
NAVIGATION - GUIDANCE
Searching for points of interest (POI)
Press the NAV button.
Press the NAV button again or select
Select the "POI nearby" function to
Select the "POI search" function and
Select the "POI in city" function to
Select the "POI near route" function
Select the "POI in country" function
Select the "POI near destination"
A list of cities present in the country selected can be accessed via
The points of interest (POIs) indicate all of the service locations in the

04
NAVIGATION - GUIDANCE
List of principal points of interest (POI)
* According to availability in the country.
This icon appears when several POIs are grouped
Service station
LPG station
Garage
PEUGEOT
Motor racing circuit
Covered car park
Car park
Rest area
Hotel
Restaurant
Refreshment area
Picnic area
Cafeteria
Railway station
Bus station
Port
Industrial estate
Supermarket
Bank
Vending machine
Tennis court
Swimming pool
Golf course
Winter sports resort
Theatre
Airport
Theme parks
Hospital
Pharmacy
Police station
School
Post offi ce
Museum
Tourist information
Risk area *
Cinema
04
NAV
2
ABC3DEF
5
JKL4GHI6MNO
8
TUV7PQRS9WXYZ
0
*
#
1
RADIO MEDIA
NAV TRAFFIC
SETUP
ADDR
BOOK
2
ABC3DEF
5
JKL4GHI6MNO
8
TUV7PQRS9WXYZ
0
*
#
1
RADIO MEDIA
NAV TRAFFIC
SETUP
ADDR
BOOK
NAVIGATION - GUIDANCE
Download the "POIs" update fi le onto
Updating POIs
The fi les must be copied to the root on the chosen medium.
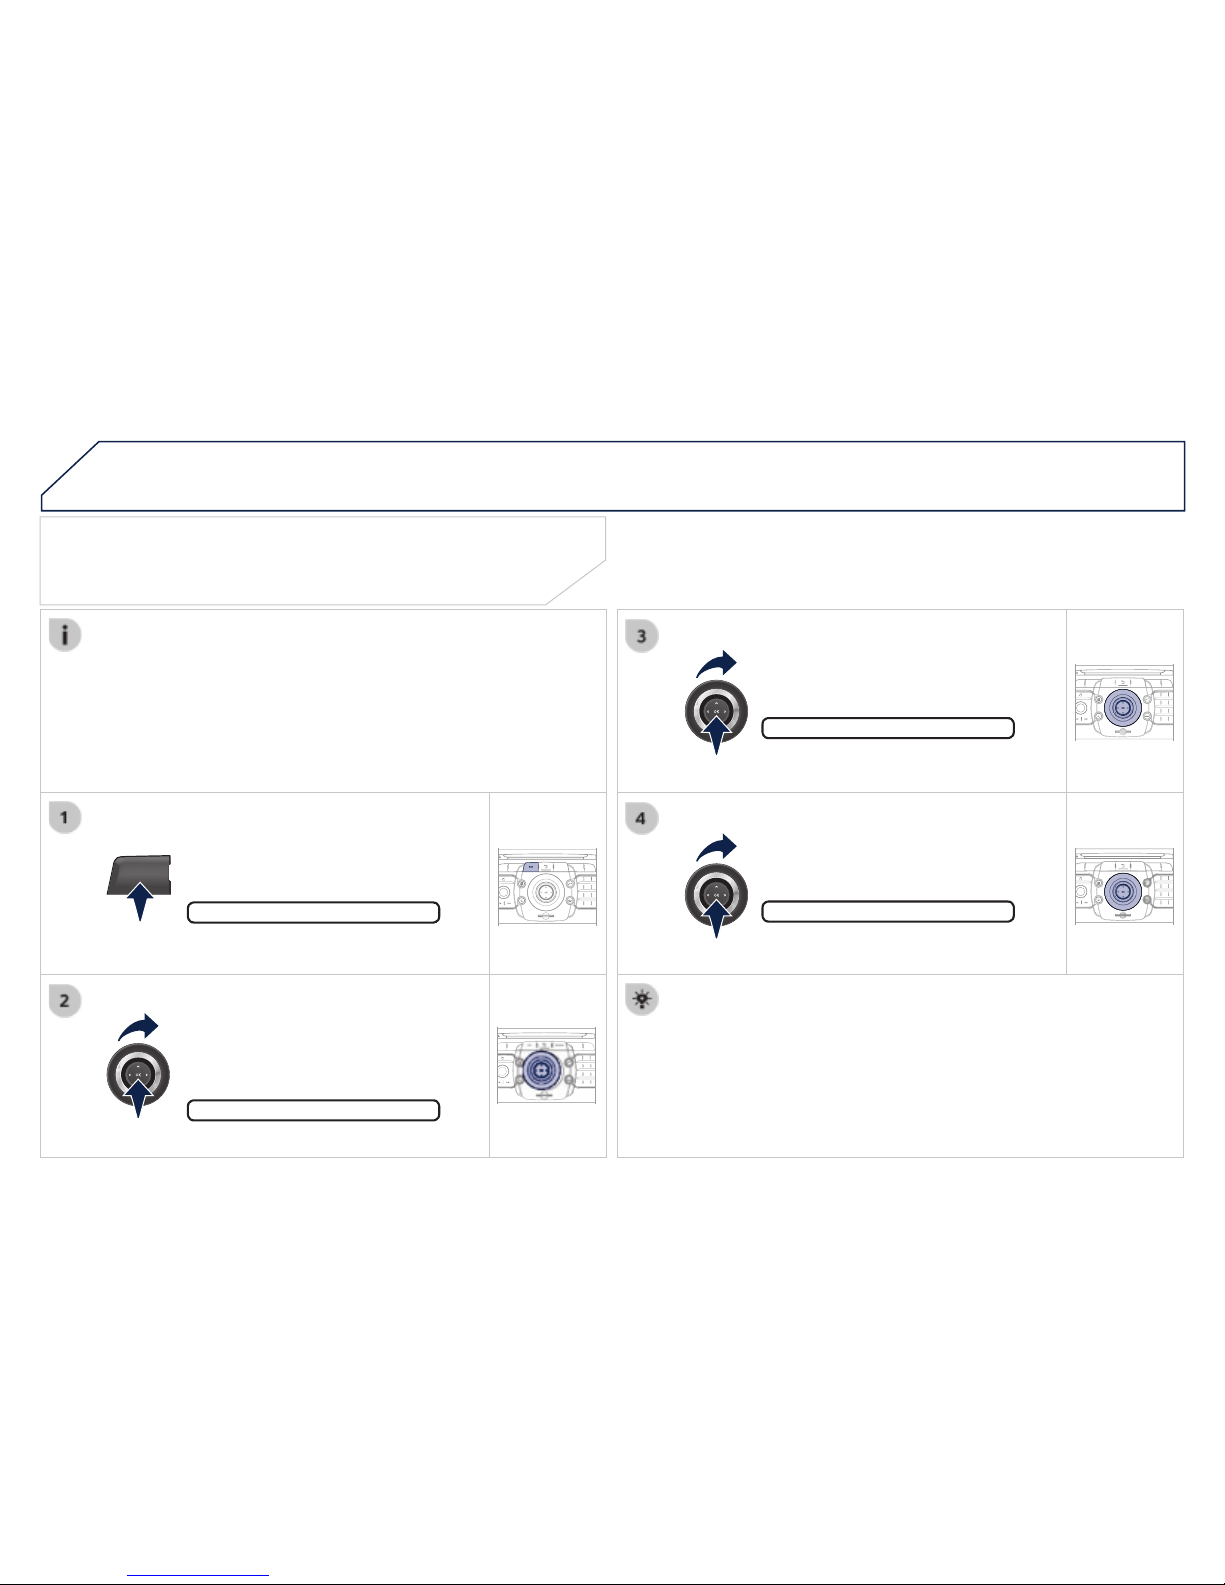
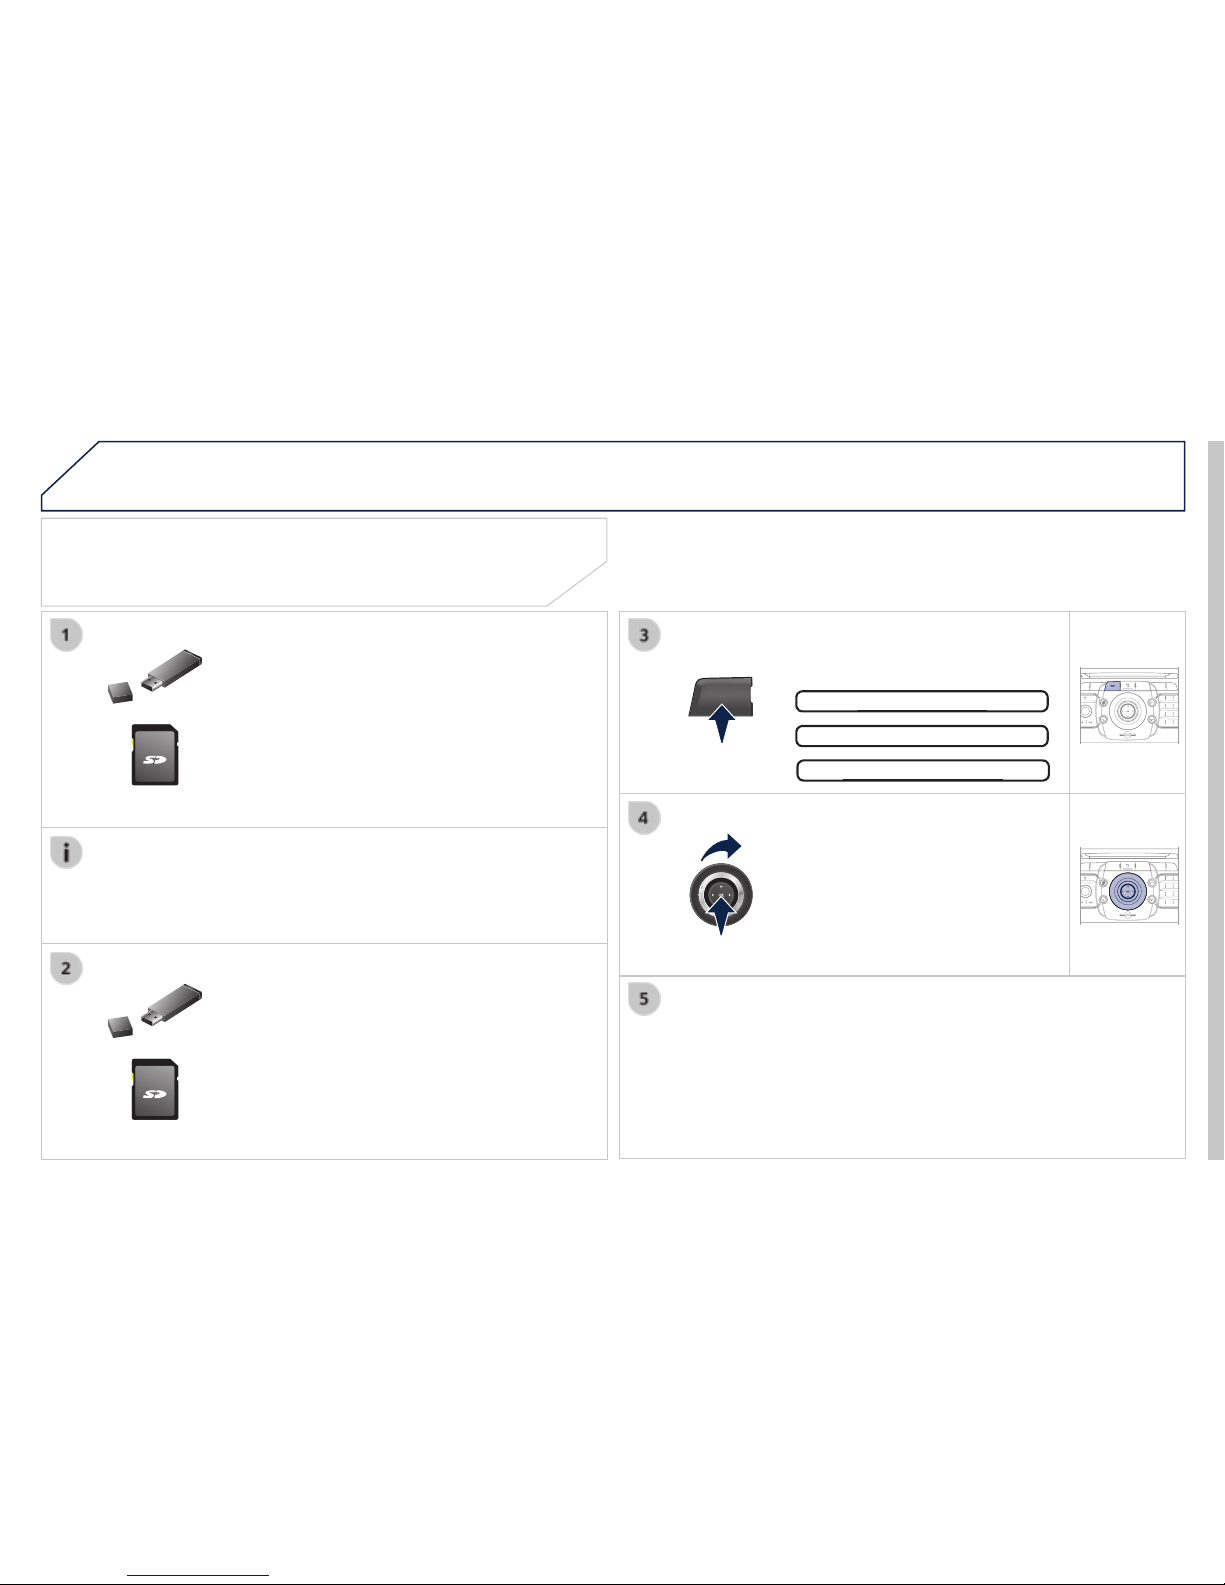
Insert the medium (SD card or USB memory
Select the medium ("USB" or "SD-Card")
Press NAV, select Navigation Menu,
Successful downloading is confi rmed by a message.
The system restarts.
The POIs version can be found in the SETUP \ System menu.
NAV
04
2
ABC3DEF
5
JKL4GHI6MNO
8
TUV7PQRS9WXY
Z
0
*
#
1
RADIO MEDIA
NAV TRAFFIC
SETUP
ADDR
BOOK
2
ABC3DEF
5
JKL4GHI6MNO
8
TUV7PQRS9WXY
Z
0
*
#
1
RADIO MEDIA
NAV TRAFFIC
SETUP
ADDR
BOOK
2
ABC3DEF
5
JKL4GHI6MNO
8
TUV7PQRS9WXY
Z
0
*
#
1
RADIO MEDIA
NAV TRAFFIC
SETUP
ADDR
BOOK
2
ABC3DEF
5
JKL4GHI6MN
O
8
TUV7PQRS9WXY
Z
0
*
#
1
RADIO MEDIA
NAV TRAFFIC
SETUP
ADDR
BOOK
2
ABC3DEF
5
JKL4GHI6MN
O
8
TUV7PQRS9WXY
Z
0
*
#
1
RADIO MEDIA
NAV TRAFFIC
SETUP
ADDR
BOOK
2
ABC3DEF
5
JKL4GHI6MN
O
8
TUV7PQRS9WXY
Z
0
*
#
1
RADIO MEDIA
NAV TRAFFIC
SETUP
ADDR
BOOK
NAVIGATION - GUIDANCE
Spoken instruction settings
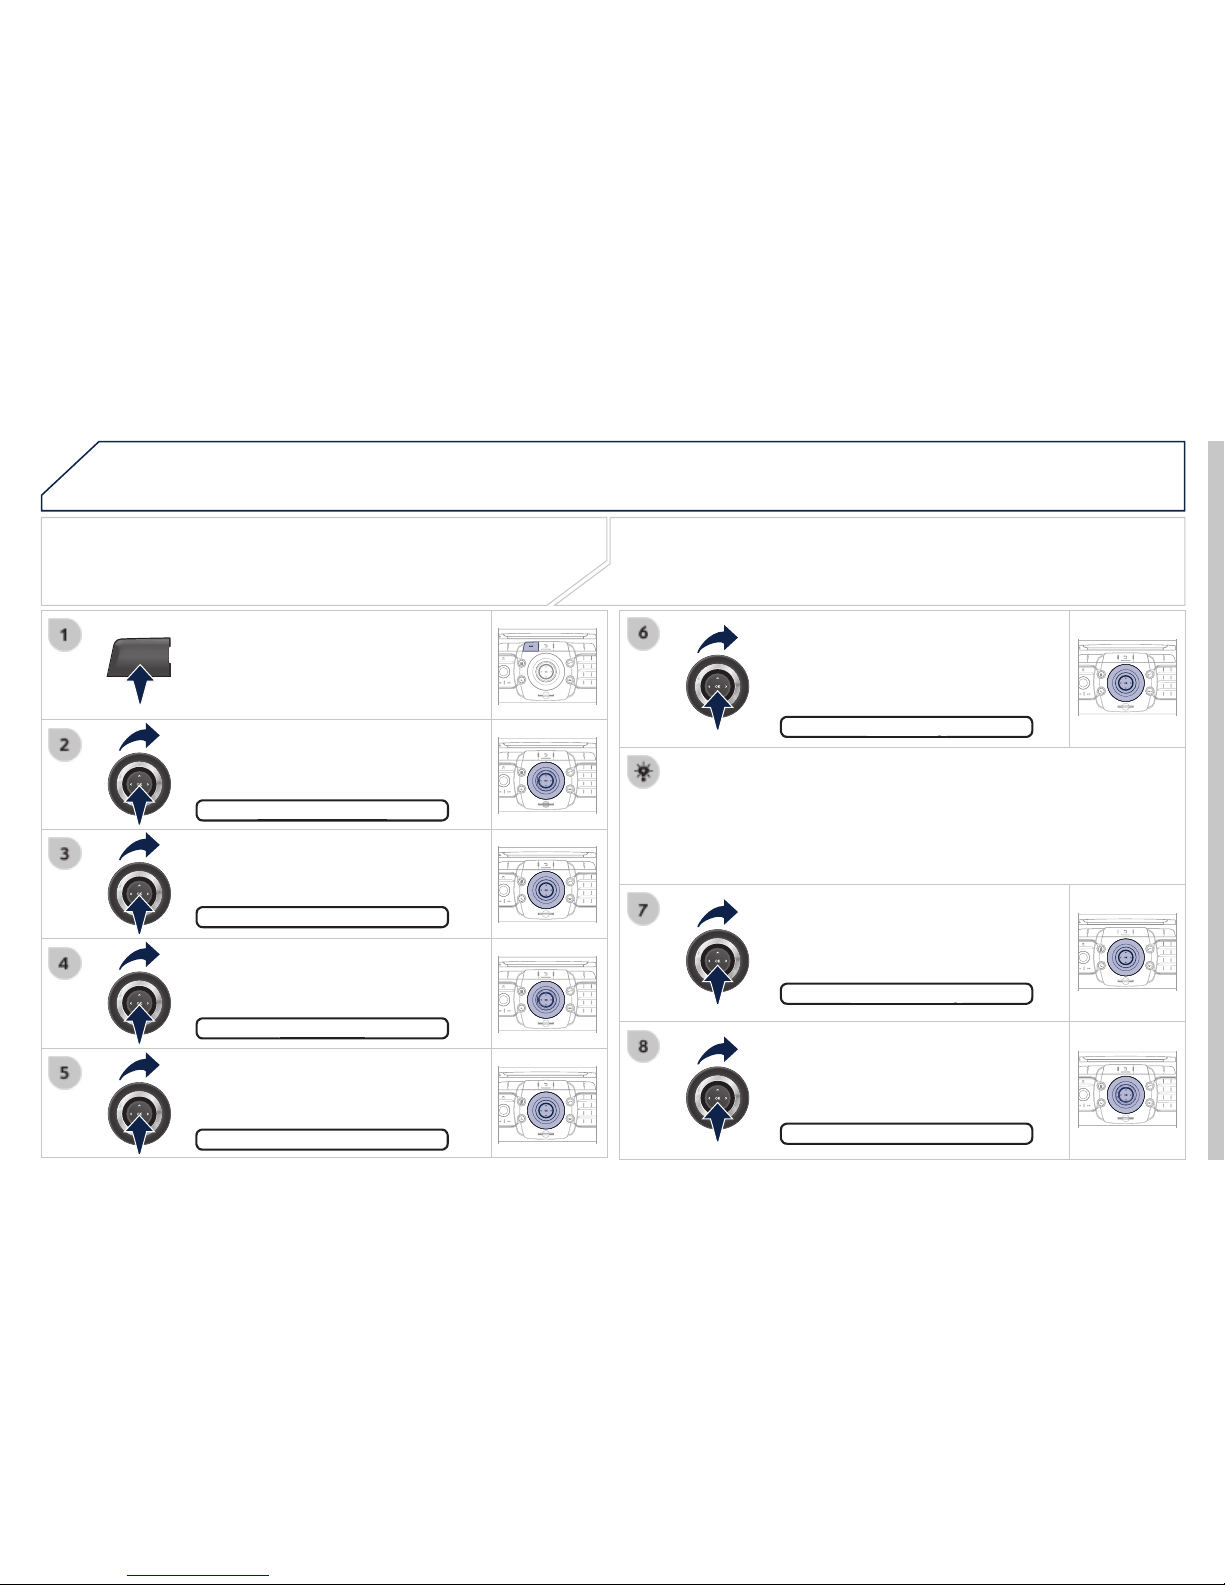
Press the NAV button.
Press the NAV button again or select
Select the "Settings" function and
When the navigation is displayed in
Use the volume button to adjust the
Point of interest and risk area settings
The volume of the Risk Areas POIs alert can only be adjusted
Select "Set parameters for risk areas"
Select the "POI categories on Map"
TRAFFIC
2
ABC3DEF
5
JKL4GHI6MNO
8
TUV7PQRS9WXY
Z
0
*
#
1
RADIO MEDIA
NAV TRAFFIC
SETUP
ADDR
BOOK
2
ABC3DEF
5
JKL4GHI6MNO
8
TUV7PQRS9WXY
Z
0
*
#
1
RADIO MEDIA
NAV TRAFFIC
SETUP
ADDR
BOOK
2
ABC3DEF
5
JKL4GHI6MNO
8
TUV7PQRS9WXYZ
0
*
#
1
RADIO MEDIA
NAV TRAFFIC
SETUP
ADDR
BOOK
2
ABC3DEF
5
JKL4GHI6MNO
8
TUV7PQRS9WXYZ
0
*
#
1
RADIO MEDIA
NAV TRAFFIC
SETUP
ADDR
BOOK
2
ABC3DEF
5
JKL4GHI6MNO
8
TUV7PQRS9WXY
Z
0
*
#
1
RADIO MEDIA
NAV TRAFFIC
SETUP
ADDR
BOOK
TRAFFIC INFORMATION
Configure the filtering and display
When all of the messages on the route are selected, the addition
The fi lters are independent and their results are concealed.
We recommend:
- a fi lter over 6 miles (10 km) around the vehicle in heavy traffi c,
- a fi lter over 30 miles (50 km) around the vehicle or a fi lter on
Press the TRAFFIC button again or
Select "Geo. Filter".
The list of TMC messages appears under the Traffi c Menu sorted
Select the fi lter of your choice:
All warning messages
All warning messages
All messages
All messages
Select "Select preferred list" and
The TMC (Traffi c Message Channel) messages provide information
The guidance system can then suggest an alternative route.
Press the TRAFFIC button.
05
2
ABC3DEF
5
JKL4GHI6MNO
8
TUV7PQRS9WXYZ
0
*
#
1
RADIO MEDIA
NAV TRAFFIC
SETUP
ADDR
BOOK
2
ABC3DEF
5
JKL4GHI6MNO
8
TUV7PQRS9WXYZ
0
*
#
1
RADIO MEDIA
NAV TRAFFIC
SETUP
ADDR
BOOK
TRAFFIC INFORMATION
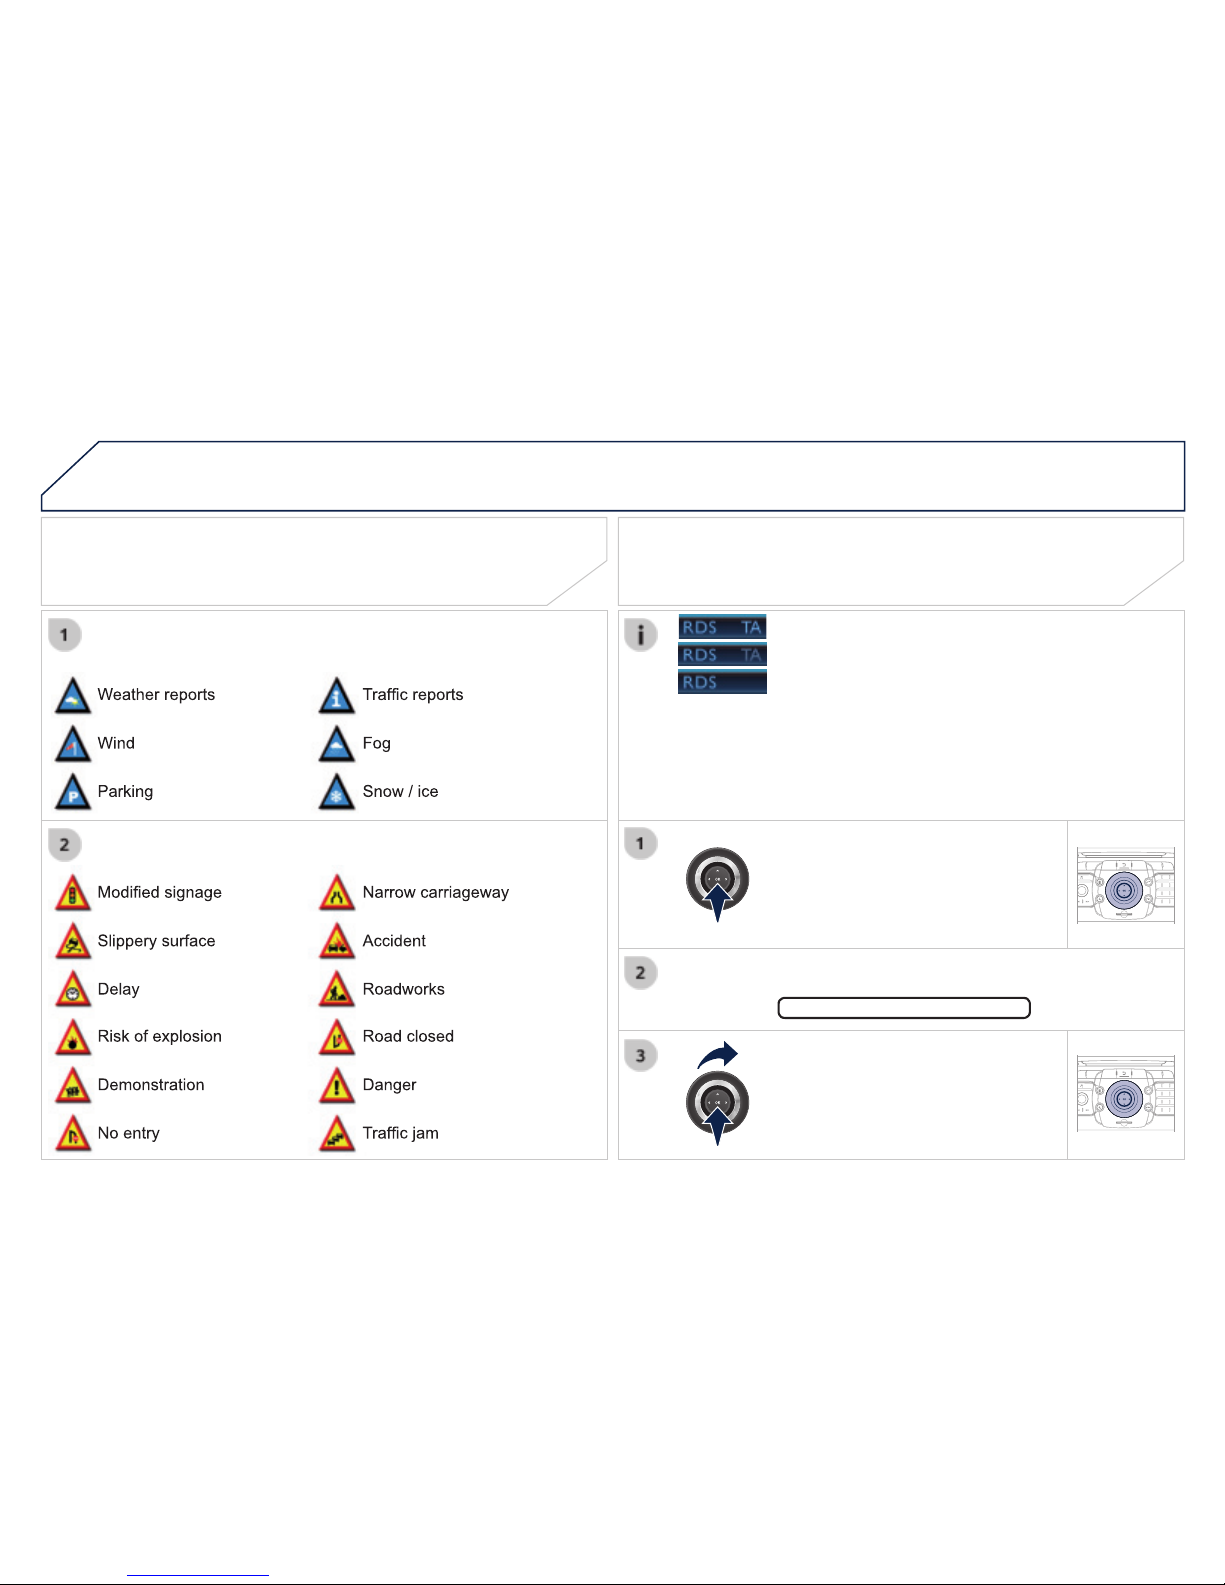
Principal TMC symbols
Red and yellow triangle: traffi c information, for example:
Black and blue triangle: general information, for example:
Weather reports
Modifi ed signage
Risk of explosion
Traffi c reports
Narrow carriageway
Road closed
Wind
Slippery surface
Demonstration
Fog
Accident
Danger
Parking
Delay
No entry
Snow / ice
Roadworks
Traffi c jam
With the current audio source displayed
The shortcut menu for the source appears and gives access to:
Select Traffi c Announcements (TA)
The TA (Traffi c Announcement) function gives priority to TA alert
Receiving TA messages
- the station transmits TA messages.
- the station does not transmit TA messages.
- TA messages are not activated.
06
RADIO
2
ABC3DEF
5
JKL4GHI6MNO
8
TUV7PQRS9WXY
Z
0
*
#
1
RADIO MEDIA
NAV TRAFFIC
SETUP
ADDR
BOOK
2
ABC3DEF
5
JKL4GHI6MNO
8
TUV7PQRS9WXYZ
0
*
#
1
RADIO MEDIA
NAV TRAFFIC
SETUP
ADDR
BOOK
2
ABC3DEF
5
JKL4GHI6MNO
8
TUV7PQRS9WXYZ
0
*
#
1
RADIO MEDIA
NAV TRAFFIC
SETUP
ADDR
BOOK
2
ABC3DEF
5
JKL4GHI6MNO
8
TUV7PQRS9WXY
Z
0
*
#
1
RADIO MEDIA
NAV TRAFFIC
SETUP
ADDR
BOOK
RADIO
NAV TRAFFIC
MEDIA
RADIO
NAV TRAFFIC
MEDIA
Selecting a station
When the current radio station is
The radio source short-cuts menu appears and provides access to
Select the function required and
RDS, if displayed, allows you to continue listening to the same station
The external environment (hill, building, tunnel, underground car park...)
RDS - Regional mode
Press the RADIO button to display the
Press one of the buttons on the numeric keypad for more than
Press the button on the numeric keypad to recall the stored radio
RADIO
When the "RADIO" screen is displayed, turn the
While listening to the radio, press buttons
for the automatic search for a lower or
Select the station required by turning

07
MUSIC MEDIA PLAYERS
CD, MP3 / WMA CD, MP3 / WMA SD card /
In order to be able to play a recorded CDR or CDRW, when
If the disc is recorded in another format it may not be played
It is recommended that the same recording standard is always
In the particular case of a multi-session CD, the Joliet standard is
The audio equipment will only play audio fi les with the extension
It also supports the VBR (Variable Bit Rate) mode.
No other type of fi le (.mp4, .m3u...) can be played.
The MP3 format, an abbreviation of MPEG 1, 2 & 2.5 Audio Layer 3
Connecting an iPod:
To play MP3 type fi les, connect the iPod using the USB port (limited
To play ITunes fi les, connect the iPod using the auxiliary socket (AUX).
In order to be read, a USB memory stick must be formatted to FAT 32.
It is advisable to restrict fi le names to 20 characters, without using
During play, exit the "SD-Card" or "USB" source before removing
To avoid any risk of theft, remove the SD card or the USB memory
Information and advice
MEDIA
2
ABC3DEF
5
JKL4GHI6MNO
8
TUV7PQRS9WXYZ
0
*
#
1
RADIOMEDIA
NAV ESC TRAFFIC
SETUP
ADDR
BOOK
2
ABC3DEF
5
JKL4GHI6MNO
8
TUV7PQRS9WXYZ
0
*
#
1
RADIO MEDIA
NAV TRAFFIC
SETUP
ADDR
BOOK
2
ABC3DEF
5
JKL4GHI6MNO
8
TUV7PQRS9WXYZ
0
*
#
1
RADIO MEDIA
NAV TRAFFIC
SETUP
ADDR
BOOK
2
ABC3DEF
5
JKL4GHI6MNO
8
TUV7PQRS9WXYZ
0
*
#
1
RADIO MEDIA
NAV TRAFFIC
SETUP
ADDR
BOOK
2
ABC3DEF
5
JKL4GHI6MNO
8
TUV7PQRS9WXYZ
0
*
#
1
RADIO MEDIA
NAV TRAFFIC
SETUP
ADDR
BOOK
2
ABC3DEF
5
JKL4GHI6MNO
8
TUV7PQRS9WXYZ
0
*
#
1
RADIO MEDIA
NAV TRAFFIC
SETUP
ADDR
BOOK
RADIO
NAV TRAFFIC
MEDIA
Selecting / Playing
The playing and displaying of an MP3/WMA compilation may
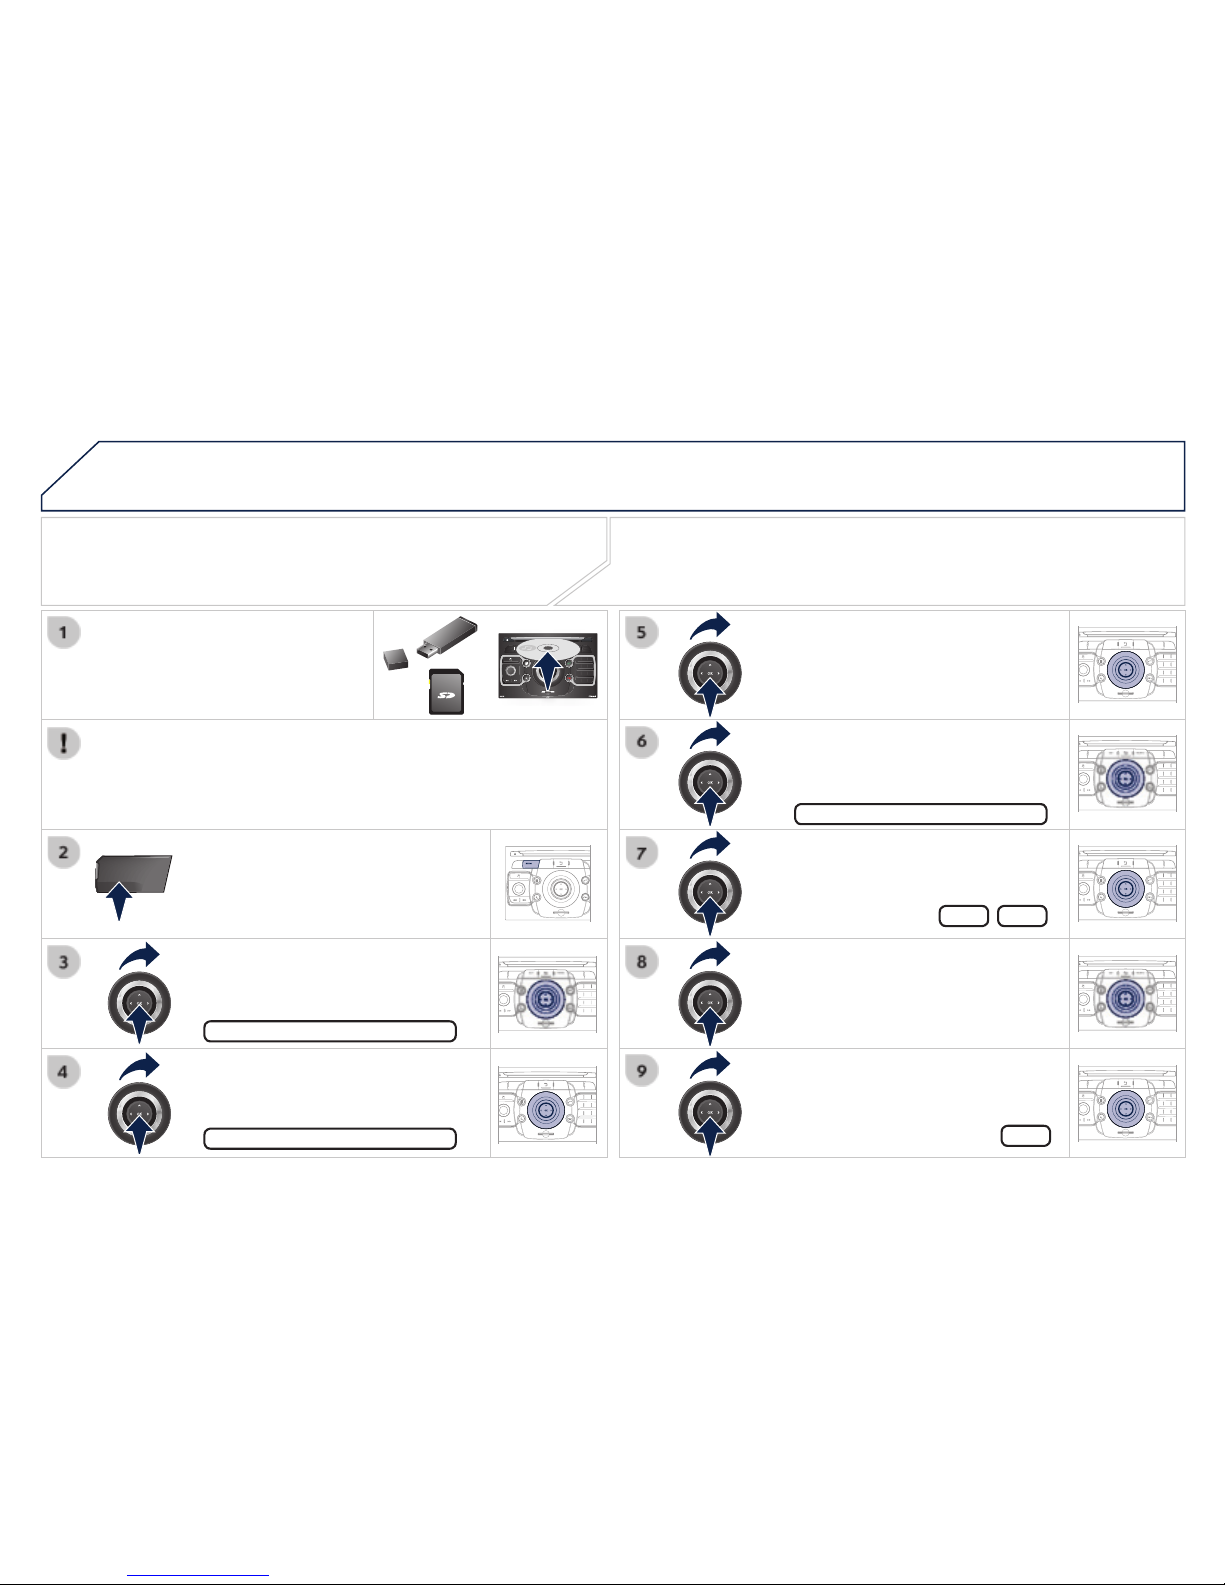
Press the MEDIA button.
Select the "Select media" function
Press this button.
Select the music source required.
Press the MEDIA button again or
When the "MEDIA" screen is
The list of tracks or MP3/WMA fi les appears under "Media" Menu.
Insert the audio or MP3 CD in the
MP3 CDs, SD cards or USB peripherals are the compatible sources.
MUSIC MEDIA PLAYERS
07
MEDIA
2
ABC3DEF
5
JKL4GHI6MNO
8
TUV7PQRS9WXYZ
0
*
#
1
RADIOMEDIA
NAV ESC TRAFFIC
SETUP
ADDR
BOOK
2
ABC3DEF
5
JKL4GHI6MNO
8
TUV7PQRS9WXY
Z
0
*
#
1
RADIO MEDIA
NAV TRAFFIC
SETUP
ADDR
BOOK
2
ABC3DEF
5
JKL4GHI6MNO
8
TUV7PQRS9WXY
Z
0
*
#
1
RADIO MEDIA
NAV TRAFFIC
SETUP
ADDR
BOOK
2
ABC3DEF
5
JKL4GHI6MNO
8
TUV7PQRS9WXYZ
0
*
#
1
RADIO MEDIA
NAV TRAFFIC
SETUP
ADDR
BOOK
2
ABC3DEF
5
JKL4GHI6MNO
8
TUV7PQRS9WXYZ
0
*
#
1
RADIO MEDIA
NAV TRAFFIC
SETUP
ADDR
BOOK
2
ABC3DEF
5
JKL4GHI6MNO
8
TUV7PQRS9WXYZ
0
*
#
1
RADIO MEDIA
NAV TRAFFIC
SETUP
ADDR
BOOK
2
ABC3DEF
5
JKL4GHI6MNO
8
TUV7PQRS9WXYZ
0
*
#
1
RADIO MEDIA
NAV TRAFFIC
SETUP
ADDR
BOOK
2
ABC3DEF
5
JKL4GHI6MNO
8
TUV7PQRS9WXYZ
0
*
#
1
RADIO MEDIA
NAV TRAFFIC
SETUP
ADDR
BOOK
RADIO
NAV TRAFFIC
MEDIA
Select "Jukebox management" then
Press the MEDIA button. Press the
Insert an audio / MP3 CD, a USB
Jukebox
Add fi les
Check that the active MEDIA source is that of the medium used
Select "Add fi les from MP3-Disc" for
Select the tracks required then "Rip
Select "[New folder]" to create a new
Add fi les from MP3-Disc
"Do you want to change the names of
To copy an MP3 CD, then select "Real
Confi rm the warning message by
Yes
When copying is in progress, switching off the ignition will interrupt the
MUSIC MEDIA PLAYERS
Copying a CD, a USB memory stick or an SD card
MEDIA
MEDIA
2
ABC3DEF
5
JKL4GHI6MNO
8
TUV7PQRS9WXY
Z
0
*
#
1
RADIO MEDIA
NAV TRAFFIC
SETUP
ADDR
BOOK
2
ABC3DEF
5
JKL4GHI6MNO
8
TUV7PQRS9WXY
Z
0
*
#
1
RADIO MEDIA
NAV TRAFFIC
SETUP
ADDR
BOOK
2
ABC3DEF
5
JKL4GHI6MNO
8
TUV7PQRS9WXY
Z
0
*
#
1
RADIO MEDIA
NAV TRAFFIC
SETUP
ADDR
BOOK
2
ABC3DEF
5
JKL4GHI6MNO
8
TUV7PQRS9WXYZ
0
*
#
1
RADIO MEDIA
NAV TRAFFIC
SETUP
ADDR
BOOK
2
ABC3DEF
5
JKL4GHI6MNO
8
TUV7PQRS9WXYZ
0
*
#
1
RADIO MEDIA
NAV TRAFFIC
SETUP
ADDR
BOOK
RADIO
NAV TRAFFIC
MEDIA
RADIO
NAV TRAFFIC
MEDIA
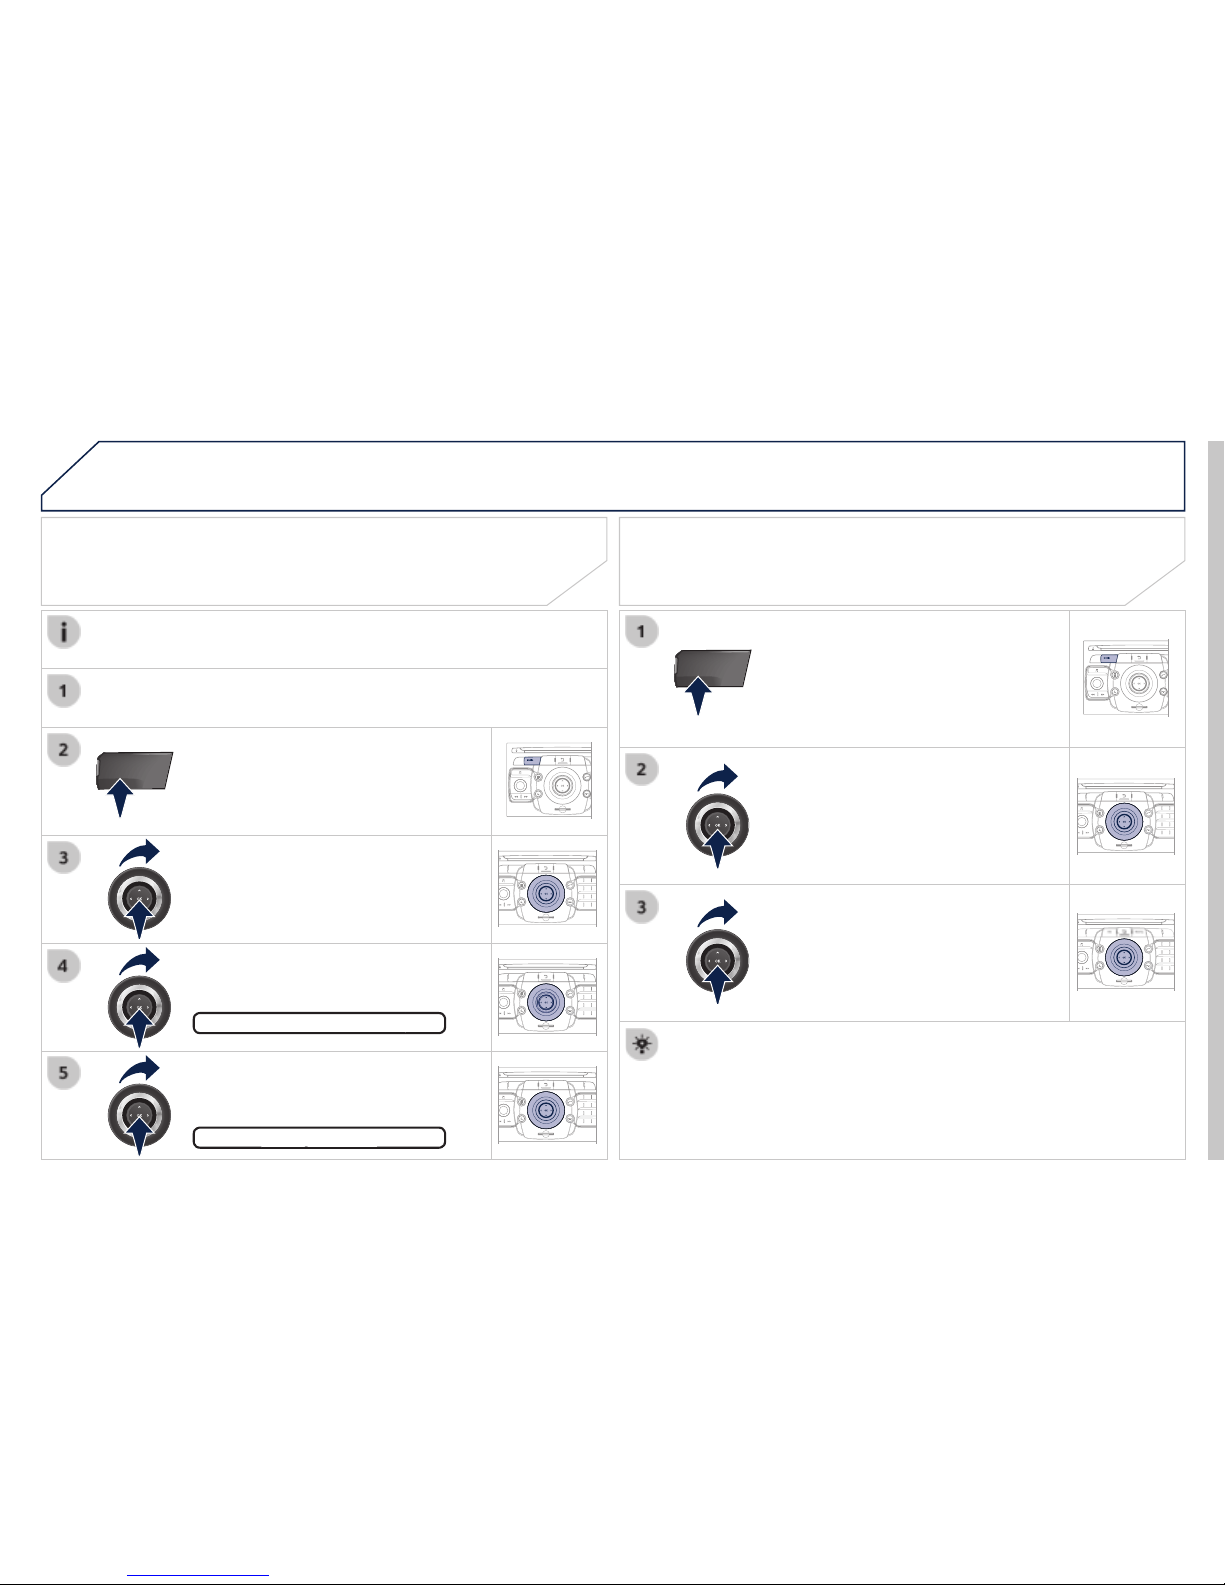
Press the MEDIA button.
Press the MEDIA button again or
Select "Jukebox management" and
Select "Play options" and press OK to
Select "Folders & Files" or "Playlists"
Playing the jukebox
Press the MEDIA button.
Press the MEDIA button again or
Select "Jukebox management" and
Jukebox
Renaming or deleting an album
Activate the playing of a source other than the Jukebox (CD, radio,
Check that the active source is not the Jukebox in order to be able
MUSIC MEDIA PLAYERS
Select "Modify content" and press
Press the ESC button to return to the fi rst fi le level.
Playlists can be created in the Jukebox.
Media Menu> Jukebox management> Create new playlist. Add the
07
MEDIA
2
ABC3DEF
5
JKL4GHI6MNO
8
TUV7PQRS9WXYZ
0
*
#
1
RADIOMEDIA
NAV ESC TRAFFIC
SETUP
ADDR
BOOK
MEDIA
2
ABC3DEF
5
JKL4GHI6MNO
8
TUV7PQRS9WXYZ
0
*
#
1
RADIO MEDIA
NAV TRAFFIC
SETUP
ADDR
BOOK
2
ABC3DEF
5
JKL4GHI6MNO
8
TUV7PQRS9WXYZ
0
*
#
1
RADIO MEDIA
NAV TRAFFIC
SETUP
ADDR
BOOK
2
ABC3DEF
5
JKL4GHI6MNO
8
TUV7PQRS9WXY
Z
0
*
#
1
RADIO MEDIA
NAV TRAFFIC
SETUP
ADDR
BOOK
RADIO
NAV TRAFFIC
MEDIA
RADIO
NAV TRAFFIC
MEDIA
Connect the portable device (MP3 player, camcorder, camera…) to
Press the MEDIA button then press
Select the AUX music source and
Select "Select media" then "External
The display and management of the controls is via the portable
Using an external device (AUX)
If the external input is not activated, select "Ext. Device (Aux)
Viewing a video DVD
Select the video source required ("DVD-Video", "External
Press the MEDIA button to gain
If the DVD does not appear on the
Insert the DVD in the player. Play begins
The 4-direction navigator and the chromed ring allow you to move
or
button.
MUSIC MEDIA PLAYERS
Audio / Video / RCA cable not supplied
08
2
ABC3DEF
5
JKL4GHI6MNO
8
TUV7PQRS9WXY
Z
0
*
#
1
RADIO MEDIA
NAV TRAFFIC
SETUP
ADDR
BOOK
2
ABC3DEF
5
JKL4GHI6MNO
8
TUV7PQRS9WXY
Z
0
*
#
1
RADIO MEDIA
NAV TRAFFIC
SETUP
ADDR
BOOK
Choosing between the Bluetooth
To activate the Bluetooth telephone or
USING THE TELEPHONE
Select Phone menu, then "Select
The system can only be connected to one Bluetooth telephone and
In this case, the phone book is synchronised with the Bluetooth
08
2
ABC3DEF
5
JKL4GHI6MNO
8
TUV7PQRS9WXY
Z
0
*
#
1
RADIO MEDIA
NAV TRAFFIC
SETUP
ADDR
BOOK
2
ABC3DEF
5
JKL4GHI6MNO
8
TUV7PQRS9WXYZ
0
*
#
1
RADIO MEDIA
NAV TRAFFIC
SETUP
ADDR
BOOK
2
ABC3DEF
5
JKL4GHI6MNO
8
TUV7PQRS9WXYZ
0
*
#
1
RADIO MEDIA
NAV TRAFFIC
SETUP
ADDR
BOOK
2
ABC3DEF
5
JKL4GHI6MNO
8
TUV7PQRS9WXYZ
0
*
#
1
RADIO MEDIA
NAV TRAFFIC
SETUP
ADDR
BOOK
2
ABC3DEF
5
JKL4GHI6MNO
8
TUV7PQRS9WXY
Z
0
*
#
1
RADIO MEDIA
NAV TRAFFIC
SETUP
ADDR
BOOK
2
ABC3DEF
5
JKL4GHI6MNO
8
TUV7PQRS9WXYZ
0
*
#
1
RADIO MEDIA
NAV TRAFFIC
SETUP
ADDR
BOOK
* The services available via the telephone depend on the network, the SIM
USING THE TELEPHONE
Pairing a Bluetooth telephone /
Connect Media Navigation (NG4 3D)
Visit www.peugeot.co.uk for more information (compatibility, more help, ...).
Activate the telephone's Bluetooth function and
If no telephone has been paired, the
Enter the authentication code on the
To pair another telephone, press the
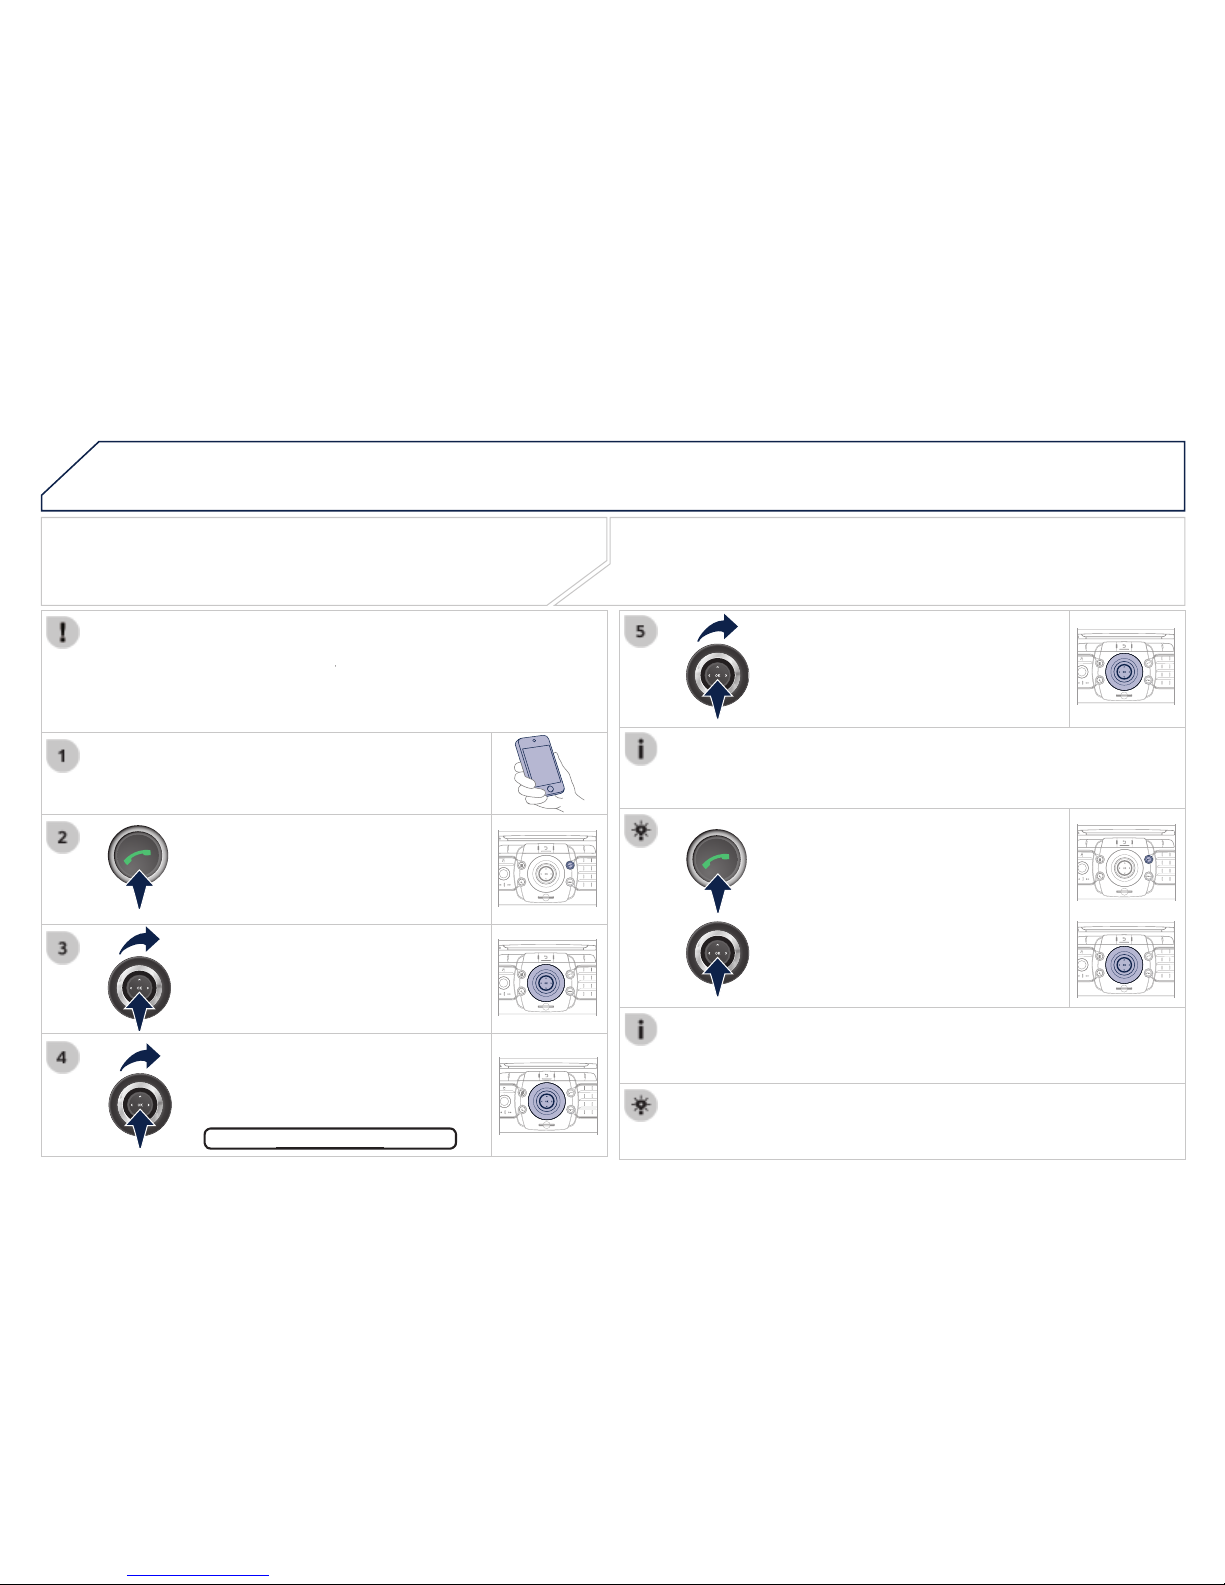
Press OK at each step to confi rm.
Once the telephone has been connected, the
Connect
Pairing can be started from the telephone (refer to the telephone
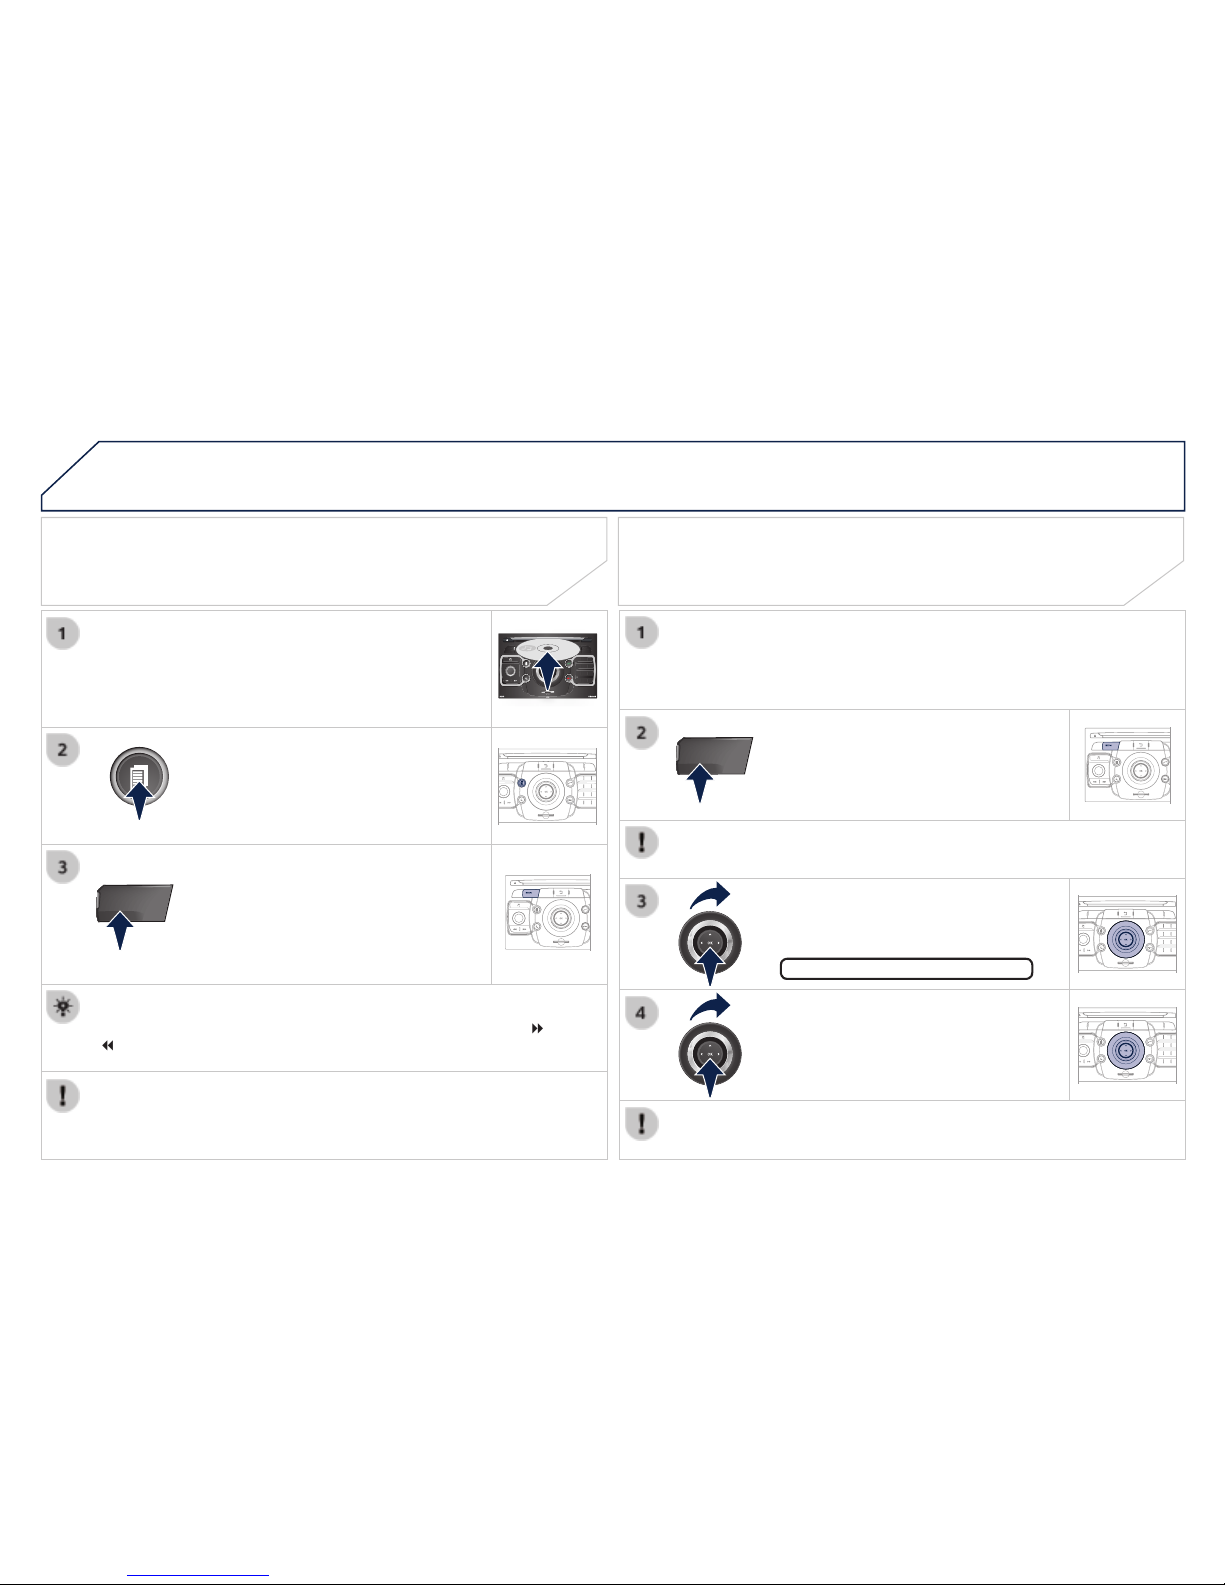
Press the CALL button.
Select "Search phone" and press OK
To delete a pairing, press TEL, select "Connect phone" then
 Loading...