


Parrot
DF7220
User Manual |
7'' Digital photo frame / Cadre photo numérique 7'' |
|
|
Guide utilisateur |
|
Wireless |
USB |
300 |
& |
pictures |
|
|
SD card |
|
ENG FRA ESP |
ITA DUT |
DEU POR |


English |
7 |
|
Français |
21 |
|
Español |
37 |
|
Italiano |
53 |
|
Português |
67 |
|
Deutsch |
81 |
|
Dutch |
97 |
|
|
|
|

General Information
FCC Compliance Statement
This device complies with part 15 of the FCC rules. Operation is subject to the following two conditions:
(1). this device may not cause harmful interference, and
(2). this device must accept any interference received, including interference that may cause undesired operation.
Note: The manufacturer is not responsible for any radio or tv interference caused by unauthorized modifications to this equipment. Such modifications could void the user’s authority to operate the equipment.
This equipment has been tested and found to comply with the limits for a Class B digital device, pursuant to Part 15 of the FCC Rules. These limits are designed to provide reasonable protection against harmful interference in a residential installation. This equipment generates, uses and can radiate radio frequency energy and, if not installed and used in accordance with the instructions, may cause harmful interference to radio communications. However, there is no guarantee that interference will not occur in a particular installation. If this equipment does cause harmful interference to radio or television reception, which can be determined by turning the equipment off and on, the user is encouraged to try to correct the interference by one or more of the following measures:
- Reorient or relocate the receiving antenna.
- Increase the separation between the equipment and receiver.
- Connect the equipment into an outlet on a circuit different from that to which the receiver is connected.
- Consult the dealer or an experienced radio/TV technician for help.
Declaration of Conformity
We, Parrot S.A. of 174 quai de Jemmapes, 75010 Paris, France, declare under our sole responsibility that our
product, the Parrot DF7220 to which this declaration relates is in conformity with appropriate standards EN300328, EN301489-1, EN60950 following the provision of Radio Equipment and Telecommunication Equipment directive (1999/5/EC R&TTE), with requirements covering EMC directive 89/336/EEC.
Identification N. 394 149 496 R.C.S. PARIS Parrot S.A.
Registered Trademarks
The Bluetooth® word mark and logos are owned by the Bluetooth® SIG, Inc..
Any use of such marks and logo by Parrot S.A. is under license. All others names and trademarks mentioned in this document are copyright-protected and are the property of their respective owners.
Bluetooth QDID : B013042, B012423, B012424
Copyrights
Copyright © 2007 Parrot. All rights reserved. The total or even partial reproduction, transmission or storage of this guide in any form or by any process whatsoever (electronic, mechanical, photocopy, recording or otherwise) is strictly prohibited without prior consent from Parrot.
General precaution
Do not expose the Parrot DF7220 system to outside temperatures below 0°C or above 40°C. The system could be damaged or the cabinet warped. Avoid placing the system near a source of heat or exposing it to sunlight (even through a window). Similarly, excessively low temperatures and humidity could damage the device.
English

English

Contents
General information |
09 |
||
Important safety instructions |
10 |
||
Introduction |
|
11 |
|
Kit contents |
|
12 |
|
Quick Start Guide |
12 |
||
Menu structure |
13 |
||
1. |
Scrolling Through the Menus |
13 |
|
2. |
Description of the Icons and Features |
13 |
|
|
2.1 |
Main menu |
13 |
|
2.2 |
SD card menu |
14 |
|
2.3 |
Settings menu |
14 |
Sending pictures to the Parrot DF7220 |
15 |
||
1. |
Via Bluetooth |
15 |
|
|
1.1 |
Pairing Your Phone or Computer |
|
|
|
with the Parrot DF7220 |
15 |
|
1.2 |
Sending from a Phone or PDA |
16 |
|
1.3 |
Sending from a Computer |
16 |
2. |
Via USB |
17 |
|
3. |
Using a memory card |
17 |
|
Settings |
|
18 |
|
1. |
Picture Display Order |
18 |
|
2. |
Deleting pictures |
18 |
|
3. |
Frame Orientation |
18 |
|
4. |
Choosing and Creating a Slideshow |
19 |
|
Updating the software |
19 |
||
Hotline |
|
|
20 |
Technical specifications |
20 |
||

General Information
1. Modifications
The explanations and specifications in this guide are given for information purposes only and may be modified without prior notice. They are deemed to be correct at time of going to press. The utmost care has been taken when writing
this guide, as part of the aim to provide you with accurate information.
However, Parrot shall not be held responsible for any consequences arising from any errors or omissions in the guide, nor for any damage or accidental loss of data
resulting directly or indirectly from the use of the information herein. Parrot reserves the right to amend or improve the product design or user guide without any restrictions and without any obligation to notify users. As part of our ongoing concern to upgrade and improve our products, the product that you have purchased may differ slightly from the model described in this guide.
If so, a later version of this guide might be available
in electronic format at Parrot’s website at www.parrot.com.
2. Correct Disposal of This Product
(Waste Electrical & Electronic Equipment)
(Applicable in the European Union and other European countries with separate collection systems).
This marking shown on the product or its literature, indicates that it should not be disposed
with other household wastes at the end of its working life. To prevent possible harm to the environment or human health from uncontrolled waste disposal, please separate this from other types of wastes and recycle it responsibly to promote the sustainable reuse of material resources. Household users should contact either the retailer where they purchased this product, or their local government office, for details of where and how they can take this item for environmentally safe recycling. Business users should contract their supplier and the terms and conditions
of the purchase contract. This product should not be mixed with other commercial wastes for disposal.
English

 Important safety Instructions
1.This apparatus shall not be exposed to dripping
or splashing and no object filled with liquid, such as vases, shall be placed on the apparatus.
2.The AC/DC adaptor which provides disconnection
from mains supply shall remain readily operable. Unplug this apparatus when unused for long periods of time.
3.Read these instructions
4.Keep these instructions
5.Heed all warnings
6.Follow all instructions
7.Do not use this apparatus near water
8.Clean only with dry cloth
9.Do not block any ventilation openings. Install in accordance with the manufacturer’s instructions.
10.Do not install near any heat as radiators. Heat registers, stoves or other apparatus (including amplifiers )
that produce heat.
11.Do not defeat the safety purpose of the polarized
or grounding type plug. A polarized plug has two blades with one wider than the other. A grounding type plug has two blades and a third grounding prong. The wide blade or the third prong are provided for your safety.
If the provided plug does not fit into your outlet, consult an electrician for replacement of the obsolete outlet.
12.Only use attachments/accessories specified by the manufacturer
13.Unplug this apparatus during lightning storms or when unused for long periods of time.
14.Refer all servicing to qualified service personnel. Servicing is required when the apparatus has been damaged in any way, such as power supply cord or AC/DC adaptor is damaged, liquid has been spilled or objects have fallen into the apparatus, the apparatus has been spilled or objects have fallen into the apparatus, the apparatus has been exposed to rain or moisture, does not operate normally, or has been dropped.
15.WARNING: To reduce the risk of fire or electric shock, do not expose this apparatus to rain or moisture. This apparatus is designed for indoor use only.
16.Use only the power supply provided with the product (PARROT, type FY-5606).
This product is also designed for IT power distribution system with phase-to-phase voltage 230V.
10
Introduction
The Bluetooth® technology enables voice and data to be sent via a short-distance radio link. It allows several electronic
devices to communicate with each other.
Parrot draws on its long years of experience in the Bluetooth technology to offer you the Parrot DF7220, an innovative photo frame. You can send your photos to the Parrot DF7220 via Bluetooth, USB connection or an SD card.
The Parrot DF7220 is an LCD photo frame (410 x 234 pixels) with a stylish design that can store over 300 photos. It allows you to configure the display by programming slideshows or by rotating the frame.
English
11
Kit contents
The kit contains:
•An LCD frame
•A power plug
•A USB cable
•A metal rod to be screwed into the frame
•Four sets of four clips
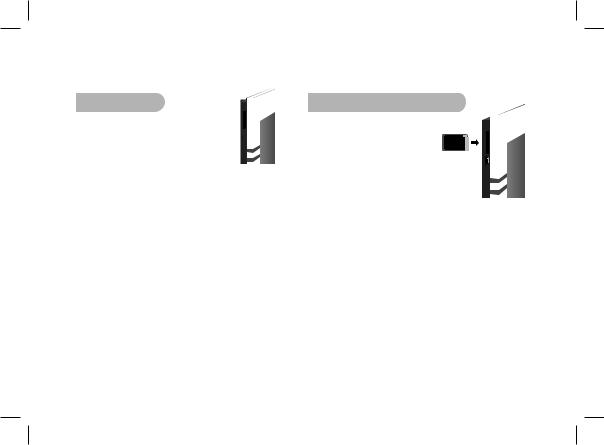
•A wall bracket (1)
•A clip system (for fixing the power cable along the side of the frame) (2)
•A user guide
•A Parrot product guide
1
2
Quick Start Guide
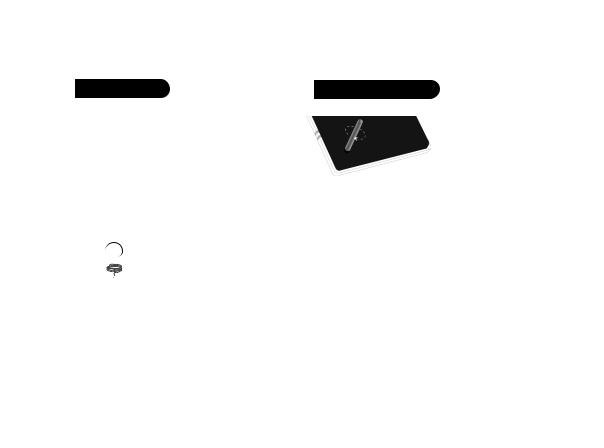
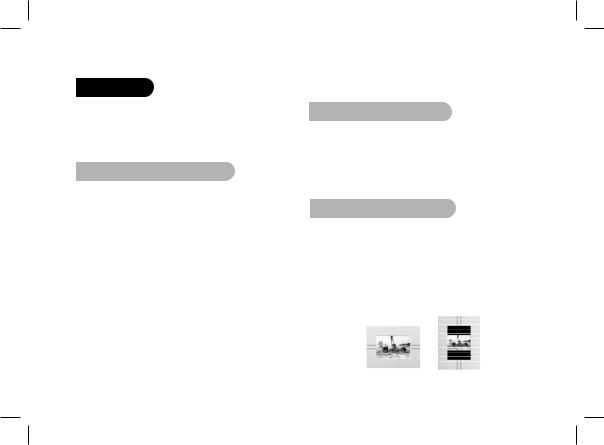
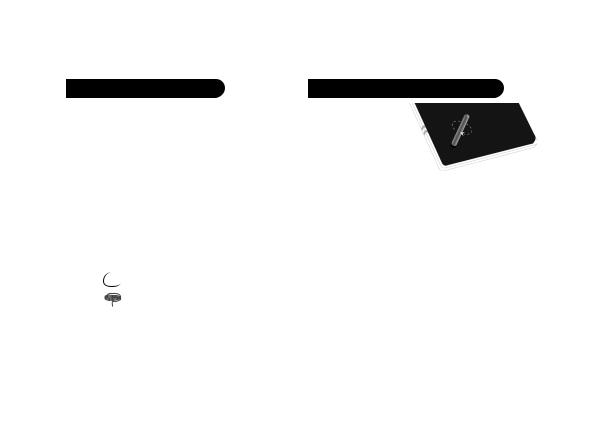
• Screw the metal rod into the back of the frame.
• Connect the power cable connector to the transformer and plug it into an electrical socket. > The Parrot DF7220 automatically switches on.
•Place the frame either in portrait or in landscape position.
•Choose the language to be used by the Parrot DF7220 (refer to the section entitled «Description of the Icons and Features» in the «Settings» chapter)
Note: use the clips as shown in the diagram below.
12
Menu structure
1. Scrolling Through the Menus
You can scroll through the menus using the buttons on the back of the Parrot DF7220. To access the main menu, press the button on the back of the frame.
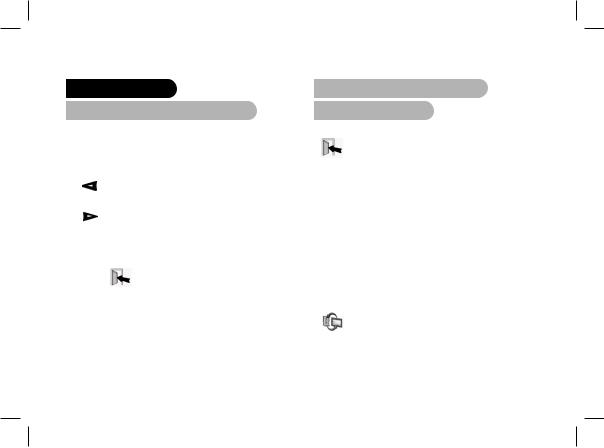
Select buttons:
•: Move left or up, depending on the frame’s orientation. It can also be used to select the previous photo.
•: Move right or down, depending on the frame’s orientation. It can also be used to select the next photo.
Enter button:
 : Enters the selected menu or selects a photo.
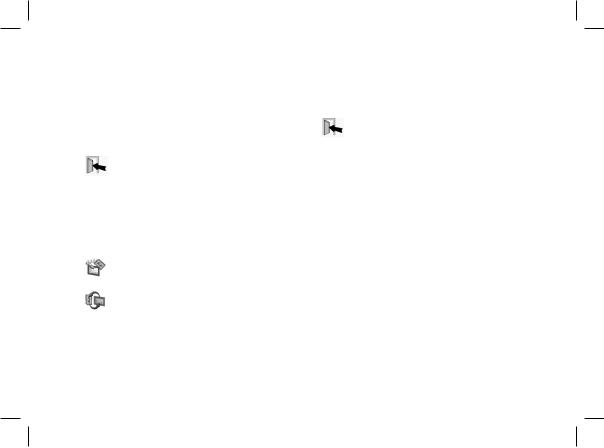
The icon  takes you back to the previous menu or exits the menus.
2.Description of the Icons and Features
2.1Main menu
 : Returns to the previous menu or exits the menus.
 : Turns the photo to the right.
 : Displays the photos as thumbnails.
 : For choosing and creating slideshows.
:Organises the order in which the photos are displayed.
Note: photos on the memory card cannot be sorted.
:Deletes one or more pictures.
Note: pictures on the memory card cannot be deleted.
:Lets you switch from the internal memory to the SD card.
Note: the «Use SD card» icon is inactive if no SD card is inserted to the Parrot DF7220.
English
13

 : For adjusting the display and Bluetooth settings.
:Provides information on the software built into the Parrot DF7220, the memory status and
the picture displayed.
2.2SD card menu
 : Returns to the main menu.
 : Turns the photo to the right.
: Displays the photos as thumbnails.
:Creates a slideshow using the photos on the SD card.
:Copies the pictures on the SD card to the internal memory.
:Lets you switch from the SD card to the internal memory.
: For adjusting the display and Bluetooth settings.
: Provides information on the software built into the
Parrot DF7220, the memory status and the picture displayed.
2.3 Settings menu
The «Settings» menu can be accessed from the main menu.
 : Returns to the main menu.
:Time : - Adjust the time using the «Select» buttons. Press the «Enter» button to confirm.
-Visibility: Enable / Disable the permanent time display. This is the default setting.
-Format: Select the format of the displayed time.(AM/PM)
:- Visibility: makes the Parrot DF7220 visible
or invisible to other Bluetooth devices.
-Frame name: for selecting the pre-recorded Bluetooth name by which the frame will be detected by other Bluetooth devices.
-Advanced mode: for selecting a specific or standard pairing mode depending on the model of your Bluetooth phone (for further information, visit the Support heading on our website at www.parrot.com).
14

:Adjusts the brightness of the display. You can adjust the screen brightness using the «Select» buttons on the back of the Parrot DF7220; press the «Enter» button to confirm.
:Standby mode. Allows you to choose one of the following options:
-Automatic: the screen’s backlight level is controlled by an algorithm that uses a light sensor built into the frame. This is the default setting.
-Manual: the backlight is always on. Use the ON\ OFF button on the power lead to enable the screensaver.
-Predefined Time: a predefined time range determines when the screen is backlit. You will be prompted to set the time on the Parrot DF7220.
Note: to exit the standby mode, press any button or start a connection.
:Select the required language.
:Restores the factory settings (doing so does not delete your photos).
Sending pictures to the Parrot DF7220 1. Via Bluetooth
Depending on the model of your phone / computer you may have to pair your Parrot DF7220 with your device before sending pictures on it for the very first time. This procedure allows both devices to exchange information in order to configure a Bluetooth connection.
1.1Pairing Your Phone or Computer with the Parrot DF7220
•Ensure that the Parrot DF7220 is adjusted so that it is visible to all Bluetooth devices. Refer to the «Settings» chapter In this guide.
•Activate the Bluetooth feature on your phone / computer (refer to your phone’s or computer’s user guide or visit the Support heading on our website at www.parrot.com).
•Search for Bluetooth devices on your phone / computer.
•Select the Parrot DF7220 in the list of Bluetooth devices proposed by your phone / computer.
•On your phone / computer, enter the code «0000».
•Your two devices are now paired.
English
15

Note: with some phones, you must enable the «Specific reception mode» option in the «Advanced mode…» menu prior to pair your phone with the Parrot DF7220
(available in the «Settings \ Bluetooth» menu). For further information, visit our website at www.parrot.com
Note : depending on the model of your phone / computer , this phase might be optional. However , it will enable you to send your photos to the Parrot DF7220 more quickly .
1.2 Sending from a Phone or PDA
•Ensure that the Parrot DF7220 is visible to all Bluetooth devices. Refer to the «Settings» chapter in this guide.
•Make sure the Bluetooth feature is activated on your phone or PDA.
•On your phone/PDA, go to the «Pictures» menu. Select a picture and choose «Send via Bluetooth». Your device starts searching for Bluetooth peripherals.
•Once the search has finished, select your Parrot DF7220. If your device prompts you to enter a code, type «0000». The picture is then sent to the Parrot DF7220. Several pictures can be sent at a time, though this feature will depend on your device.
•During transmission, the Bluetooth icon appears on the screen and the picture is displayed.
1.3Sending from a Computer (Windows, Linux, Mac)
•Ensure that the Parrot DF7220 is visible to all Bluetooth devices. Refer to the «Settings» chapter in this guide.
•Activate the Bluetooth feature on your computer.
•Right-click on the picture that you wish to send and choose «Send via Bluetooth».
•Your PC will search for any nearvia Bluetooth peripherals.
•Select your Parrot DF7220. Type «0000» if your PC prompts you to enter a code.
•During transmission, the Bluetooth icon appears on the screen and the picture is displayed.
Note: if you are unable to detect the Parrot DF7220, you might have inadvertently made the Bluetooth frame invisible to other devices. Refer to the «Settings» chapter in this guide. However, if your Bluetooth device is already paired to the frame, it can always connect to the Parrot DF7220.
Note : for further infor mation on the mode for sending photos , refer to your phone ’s user guide or visit our website at www.parrot.com
16
2. Via USB
1.Connect the Parrot DF7220 to
your PC with the USB cable. 


> The computer detects a new device.
2.Copy your JPEG or GIF pictures to the Parrot DF7220.
3.Disconnect the cable from the Parrot DF7220.
The Parrot DF7220 automatically saves the pictures.
4.Repeat the procedure if you wish to transfer new pictures.
Note: the Parrot DF7220 features 10 MO of storage space: to save space, remember to resize your pictures before copying them to the internal memory. Otherwise transfer your pictures and disconnect the cable when the error message is displayed. Then reconnect the cable and transfer the remaining pictures.
3.Using a memory card
1.Insert the memory card into the
appropriate slot.
> The JPEG and GIF pictures stored on the memory card are displayed.
> You can now navigate through the memory card content using the Select buttons.
2.Select the «Copy» icon.
Select one of the following options as required:
-Copy current picture
-Copy selected pictures (in this case, you must select the pictures that you wish to copy by using the Select and Enter buttons, select the Exit icon and then confirm your choice)
-Copy all pictures
3.Confirm your choice.
>The selected photos are resized and copied to the internal memory.
Note: if you wish to switch back to the internal memory, select the Use internal memory icon.
English
17
Settings
The Parrot DF7220 allows you to adjust several settings. You can fully manage the frame’s display,
such as determining the order in which pictures appear, creating slideshows and displaying the time. You can also change the orientation of the Parrot DF7220.
1.Picture Display Order
•Access the main menu of the Parrot DF7220 and then select the «Arrange the pictures» menu.
•Your pictures are displayed as thumbnails. The display may run over several pages: holding down one of the «Select» buttons will allow you to scroll through the previous and next pages. Simply release the button to stop scrolling.
•Select the picture with the «Select» buttons and then press the «Enter» button on the back of the frame to confirm your choice.
•The selected photo is placed at the top of the screen on the Parrot DF7220 and a cursor indicates the photo’s position in the album. Press the «Select» buttons to change the photo’s position. You can change its position in all the pages of your album.
•Once the cursor is in the position where you want to place
the image, press the «Enter» button.
2. Deleting pictures
The «Delete» submenu provides you with the following options:
•Delete this picture: Deletes the displayed picture.
•Delete these pictures: Deletes the selected images.
•Delete all pictures : Deletes all pictures on the internal memory.
3. Frame orientation
Choose the frame orientation :
•Portrait mode.
•Landscape mode.
Note: the frame can also be hung on the wall . In this case, screw the hoOk into the back, insert the provided clips into the slots and run the power lead through the clips. If you rotate the frame, the photo displayed turns to match the new position of the ParRot DF7220.
18
4. Choosing and Creating a Slideshow
The Parrot DF7220 features five slideshows: a default slideshow with all the photos in the internal memory, three user-definable customised slideshows and an SD card slideshow.
Once the slideshow has been selected, you can enable / disable or configure it. The following options are available for creating a slideshow:
•Picture choice: use the «Select» and «Enter» buttons to select the photos for your slideshow. The selected
photos are marked with a tick (not available for the default slideshow).
•Timer: defines the slideshow display time.
•Picture order: used to define the order in which the photos are displayed in the slideshow (not available
for the default slideshow).
•Random: arranges the photos in the slideshow at random.
•Delete slideshow: resets the slideshow (the selected images will no longer be part of the slideshow, but they will not be deleted from the frame’s memory).
•Transition: defines the transition effect between the photos in your slideshow:
•None
•Fade
•Tile
•Wipe
•Checkerboard
•Random
Updating the software
The Parrot DF7220 can be updated via Bluetooth. Download the Parrot Software Update Tool and the update procedure from our website at www.parrot.com.
English
19
Hotline
Our hotline is at your disposal. You can contact us by email or telephone. Check out our website at www.parrot.com for further information.
Europe: [+33] (0) 1 48 03 60 69 (languages spoken French, English, Spanish and German)
Italy: [+39] 02 86 39 14 63
Spain: [+34] 902 404 202
UK: [+44] (0)870 112 5872
Germany: 0900 172 77 68
USA: [+1] (877) 9 PARROT (toll-free) China: [+ 86] (0)2164 601 944
Technical specifications
1.Screen
•Screen size LCD: 7’’
•Screen resolution: 410 x 234 pixels (QVGA)
•32 768 colours
•Internal memory of 32 MB for storing over 300 photos
•Light sensor for the automatic backlight mode
20
•Weight (frame only): 340 g
•Dimensions: 193 x 147 mm
•Power supply:
-Input: 100-240 V~, 50-60 Hz, 0.2A
-Output: 12Vdc, 1A
•Temperature Max Rating: 40°C
2. Bluetooth
•Bluetooth 2.0 + EDR qualified
•Bluetooth PIN Code : 0000
•Profiles supported :
-FTP (File Transfer Profile)
-OPP (Object Push Profile)
-BIP (Basic Imaging Profile)
-SPP (for Software updates)
•Photo / Picture files supported: GIF/JPEG (except CMYK)
3. Compatible memory cards
•SD, micro SD (with adapter), mini SD (with adapter)
•SDHC (class 2, 4, 6), mini SDHC (with adapter)
•MMC, MMC plus, MMC mobile (with adapter), MMC micro (with adapter), RS-MMC mini (with adapter).
Français
21

Sommaire
Informations générales |
23 |
||
Consignes de sécurité |
25 |
||
Introduction |
|
26 |
|
Contenu de l’emballage |
27 |
||
Démarrage rapide de l’appareil |
27 |
||
Arborescence des menus |
28 |
||
1. |
Navigation dans les menus |
28 |
|
2. |
Description des icônes et fonctionnalités |
28 |
|
|
2.1 |
Menu principal |
28 |
|
2.2 |
Menu Carte SD |
29 |
|
2.3 |
Menu «Préférences» |
29 |
Envoyer des images sur le Parrot DF7220 |
30 |
||
1. |
Envoi par Bluetooth |
30 |
|
|
1.1 |
Appairage de votre téléphone |
|
|
|
avec le Parrot DF7220 |
30 |
|
1.2 |
Envoi depuis un téléphone / PDA |
31 |
|
1.3 |
Envoi depuis un ordinateur |
31 |
2. |
Envoi par USB |
32 |
|
3. |
Utilisation avec une carte mémoire |
32 |
|
Paramétrages |
|
33 |
|
1. |
Ordre d’apparition des images |
33 |
|
2. |
Suppression d’images |
33 |
|
3. |
Position du cadre |
33 |
|
4. |
Choix et création de Diaporama |
34 |
|
Mise à jour du logiciel |
34 |
||
Hotline |
|
|
35 |
Spécifications techniques |
35 |
||
22

Informations générales
1. Modifications
Les explications et spécifications contenues dans ce guide utilisateur ne sont fournies qu’à titre d’information et peuvent être modifiées sans notification préalable. Ces informations sont correctes au moment de l’impression et le plus grand soin est apporté lors de leur rédaction afin de vous fournir des informations les plus précises possible.
Cependant, Parrot S.A. ne saurait être tenu responsable, directement ou indirectement, des éventuels préjudices ou pertes de données accidentelles résultant d’une erreur ou omission au sein du présent document. Parrot S.A. se réserve le droit d’amender ou améliorer le produit ainsi que son guide utilisateur sans aucune restriction ou obligation de prévenir l’utilisateur.
Dans le cadre de l’attention portée par Parrot S.A.
sur l’amélioration de nos produits, il est possible que le produit que vous avez acheté diffère légèrement de celui décrit au sein du présent document. Dans ce cas, vous pourrez éventuellement trouver une nouvelle version du guide utilisateur au format électronique sur le site www. parrot.com.
2. Comment recycler ce produit
(déchets d’équipements électriques et électroniques)
Le symbole sur le produit ou sa documentation indique qu’il ne doit pas être éliminé en fin de vie avec les autres déchets ménagers. L’élimination incontrôlée des déchets pouvant porter préjudice à l’environnement ou à la santé humaine, veuillez le séparer des autres types de déchets et le recycler de façon responsable. Vous favoriserez ainsi la réutilisation durable des ressources matérielles.
Les particuliers sont invités à contacter le distributeur leur ayant vendu le produit ou à se renseigner auprès de leur mairie pour savoir où et comment ils peuvent se débarrasser de ce produit afin qu’il soit recyclé en respectant l’environnement. Les entreprises sont invitées à contacter leurs fournisseurs et à consulter les conditions de leur contrat de vente. Ce produit ne doit pas être éliminé avec les autres déchets commerciaux.
Français
23

3. Déclaration de conformité
Parrot SA, 174 quai de Jemmapes, 75010 Paris, France, déclare sous son unique responsabilité que le produit décrit dans le présent guide utilisateur est en conformité avec
les normes techniques EN300328, EN301489-1, E60950 suivant les dispositions de la directive R&TTE 99/5/EC et les exigences qui se rapportent à la directive EMC 89/336/EEC. N° d’identification : N.394 149 496 R.C.S. Paris
4. Marques déposées
Le nom Bluetooth et le logo Bluetooth sont des marques déposées de Bluetooth ® SIG, Inc. et toute utilisation de ces derniers par Parrot S.A. est faite sous licence.
Toutes les autres marques de commerce et marques déposées mentionnées dans le présent document sont protégées par Copyright et sont la propriété de leurs propriétaires respectifs.
Bluetooth QDID : B013042, B012423, B012424
5. Copyright
Copyright © 2007 Parrot.
Tous droits réservés. Toute reproduction totale ou partielle du contenu de ce document en vue de sa publication ou diffusion par quelque moyen et sous quelque forme que ce soit, même à titre gratuit, est strictement interdite sans autorisation écrite préalable de Parrot.
24

Consignes de sécurité
1.Placer cet appareil de sorte qu’il ne soit pas exposé à des suintements ou projections de liquides. Ne pas
placer d’objets remplis de liquide, comme des vases, sur l’appareil.
2.S’assurer que l’adaptateur AC/DC qui assure la déconnexion avec l’alimentation secteur puisse toujours être facilement manipulé. Débrancher cet appareil lorsqu’il n’est pas utilisé pendant une longue période.
3.Lisez ces instructions
4.Conservez ces instructions.
5.Tenez compte de tous les avertissements.
6.Suivez toutes les instructions.
7.N’utilisez pas cet appareil à proximité de substances liquides.
8.Nettoyez l’appareil uniquement avec un chiffon sec.
9.N’obstruez pas les ouvertures d’aération. Installez l’appareil en respectant les instructions du constructeur.
10.N’installez pas l’appareil à proximité d’une source de chaleur (radiateurs, fours, amplificateurs ou autres appareils qui produisent de la chaleur).
11.Ne modifiez pas les connecteurs polarisés ou de mise à la masse de l’appareil. Les connecteurs polarisés sont composés de deux fiches métalliques, l’une plus large que l’autre. Les connecteurs de mise à la masse sont composés de deux fiches métalliques et d’une branche de masse. La
plus large des fiches métalliques et la branche de masse sécurisent l’utilisation de votre appareil. Si les connecteurs fournis ne correspondent pas à votre installation, consultez un électricien pour le remplacement de votre installation obsolète.
12.Utilisez uniquement les attaches / accessoires spécifiés par le constructeur.
13.Débranchez l’appareil en cas d’orages ou lors d’une longue période d’inutilisation.
14.Pour toute intervention sur l’appareil, veuillez vous adresser aux services qualifiés. Une intervention est requise lorsque l’appareil présente des détériorations (tel un cordon d’alimentation ou le bloc d’alimentation AC/DC défectueux), mais également lorsqu’une
substance liquide a été renversée sur l’appareil ou que des objets étrangers y ont été insérés. Elle est également requise après toute chute, renversement, exposition à la pluie ou
à l’humidité de l’appareil ou lorsqu’il ne fonctionne pas correctement.
15.AVERTISSEMENT : Afin de réduire les risques d’incendie ou de choc électrique, n’exposez pas l’appareil à la pluie ou à l’humidité. L’appareil est destiné uniquement à une utilisation intérieure.
16.Utilisez uniquement l’alimentation fournie avec ce produit (Parrot, type FY-5606). Ce produit est également conçu pour les systèmes d’alimentation électrique informatique, dont la tension par phase est de 230 V.
Français
25
Introduction
La technologie Bluetooth permet d’établir des communications voix et données via une liaison radio courte distance. Elle permet à de nombreux équipements électroniques de communiquer entre eux.
Parrot tire bénéfice de ses longues années d’expérience dans la technologie Bluetooth pour vous proposer
le Parrot DF7220 : un cadre photo innovant.
Vous pouvez transmettre vos photos sur le Parrot DF7220 par Bluetooth, connexion USB ou par l’intermédiaire d’une carte SD.
Le Parrot DF7220 est un cadre photo LCD (410 x 234 pixels) qui peut contenir plus de 300 photos. Vous pourrez configurer son affichage par des diaporamas programmables ou en changeant l’orientation du cadre. Le Parrot DF7220 pourra également vous indiquer l’heure telle une horloge.
26
Contenu de l’emballage
L’emballage contient :
•Un cadre LCD.
•Un transformateur.
•Un câble USB
•Une tige métallique à visser sur le cadre (cette tige constituera le support du cadre).
•4 jeux de 4 languettes
•Un crochet mural (1)
•Un système de clips (permet de fixer le câble d’alimentation le long du cadre) (2)
•Le manuel d’utilisation.
•Un guide produit Parrot.
1
2
Démarrage rapide de l’appareil
•Vissez la tige métallique au dos du cadre.
•Branchez le connecteur du câble d’alimentation dans le transformateur puis branchez le à une prise élecrique. > Le Parrot DF7220 s’allume automatiquement.
• Choisissez la langue dans laquelle vous voulez utiliser le Parrot DF7220 (veuillez vous référer à la partie
«description des icônes et fonctionnalités » dans le chapitre
«Préférences » de ce manuel).
Note : Utilisez les languettes comme indiqué sur le schéma ci-dessous.
Français
27

Arborescence des menus
1. Navigation dans les menus
Le déplacement dans les menus s’effectue à l’aide des boutons situés au dos du Parrot DF7220. Pour accéder au menu principal, appuyez sur le bouton situé au dos du cadre.
Boutons sélection :
•: déplacement à gauche ou en haut selon l’orientation du cadre. Permet également de sélectionner la photo précédente.
• : déplacement à droite ou en bas selon l’orientation du cadre). Permet également de sélectionner la photo suivante.
Bouton validation :
• Le bouton : accède au menu sélectionné ou sélectionne une photo.
L’icône  vous permet de revenir au menu précédent ou de sortir des menus.
2. Description des icônes et fonctionnalités
2.1 Menu principal
 : Retour au menu précédent ou sortie des menus.
  : Tourne la photo vers la droite.
:Affiche les photos en vignettes.
:Choix et composition du Diaporama
:Organise l’ordre d’apparition des images.
Note : Les photos présentes sur la carte mémoire ne peuvent pas être triées.
: Supprime une ou plusieurs images.
Note : Les photos présentes sur la carte mémoire ne peuvent pas être supprimées.
:Permet de passer de la mémoire interne à la mémoire de la carte SD.
Note : L’icône « Utiliser Carte SD » est inactive lorsqu’il n’y a pas de carte SD connectée au Parrot DF7220.
28
: Réglages d’affichage et de paramètres Bluetooth.
:Affiche les informations concernant le logiciel embarqué du Parrot DF7220, l’état de la mémoire et l’image affichée.
2.2Menu Carte SD
 : Retour au menu précédent.
: Tourne la photo vers la droite.  : Affiche les photos en vignettes.
:Composition d’un diaporama à partir des photos présentes sur la carte SD.
:Permet de copier les images de la carte SD sur la mémoire interne.
:Permet de passer de la mémoire de la carte SD à la mémoire interne.
 : Réglages d’affichage et de paramètres Bluetooth.
:Affiche les informations concernant le logiciel embarqué du Parrot DF7220, l’état de la mémoire et l’image affichée.
2.3 Menu «Préférences»
Le menu « Préférences » est accessible depuis le menu principal.
 : Retour au menu principal.
:Heure : Permet de choisir parmi les options suivantes.
-Réglage : Réglage de l’heure par les boutons
«sélection ». Appuyez sur le bouton validation pour valider.
-Visibilité : Permet d’activer ou de désactiver l’affichage de l’heure.
-Format : Permet de choisir le mode d’affichage de l’heure (24 heures ou AM/PM)
:Bluetooth : Permet de choisir parmi les options suivantes.
-Visibilité : Rend visible ou invisible
le Parrot DF7220 des autres appareils
Bluetooth.
-Nom du cadre : sélection de nom Bluetooth préenregistré sous lequel sera découvert le cadre par les autres appareils Bluetooth.
-Mode avancé : Sélection d’un mode de jumelage spécifique ou standard selon le
modèle de votre téléphone Bluetooth.
Français
29

:Règle la luminosité de l’affichage. Vous réglez
la luminosité de l’écran par les boutons « sélection au dos du Parrot DF7220, appuyez sur le bouton « validation » pour valider.
:Economiseur d’écran. Permet de choisir parmi
les options suivantes :
-Automatique : Le niveau du rétro-éclairage de l’écran est contrôlé par un algorithme qui utilise un capteur de lumière situé sur le cadre. C’est le mode utilisé par défaut.
-Manuel : Le rétro éclairage est toujours en fonction. Utilisez le bouton ON\OFF sur le câble d’alimentation pour activer l’économiseur d’écran.
-Horaire prédéfini : Une plage horaire prédéfinie contrôle les heures pendant lesquelles l’écran est allumé. Il vous sera demandé de régler
l’horloge du Parrot DF7220.
Note : Pour sortir du mode veille, appuyez sur n’importe quel bouton ou lancez une connexion.
:Choix de la langue.
:Restaure la configuration d’usine. (Ceci ne provoque pas l’effacement des images).
30
Envoyer des images sur le Parrot DF7220 1. Envoi par Bluetooth
Avant d’utiliser votre Parrot DF7220 avec votre téléphone / ordinateur via une connexion Bluetooth pour la première fois, vous devez tout d’abord effectuer un jumelage des deux appareils.
1.1Mise en service de votre téléphone avec le Parrot DF7220
•Assurez vous que le Parrot DF7220 soit réglé pour être visible par tous les appareils Bluetooth. Veuillez vous référer à la partie « Préférences » de ce manuel.
•Activez la fonction Bluetooth de votre téléphone/ordinateur. (référez-vous à la notice de votre téléphone ou connectez vous sur www.parrot.com, rubrique Support).
•Effectuez une recherche Bluetooth de périphérique depuis votre téléphone/ordinateur.
•Sélectionnez le Parrot DF7220 dans la liste des appareils Bluetooth proposé par votre téléphone / ordinateur.
•Sur votre téléphone / ordinateur entrez le code « 0000 ».
•Vos deux appareils sont désormais jumelés.
 Loading...