

Page 1
ASPIRAPOLVERE-LIQUIDI /
ASPIRADOR DE LÍQUIDOS / PÓ PNTS 1400 D1
ASPIRAPOLVERE-LIQUIDI
Traduzione delle istruzioni d’uso originali
WET AND DRY VACUUM CLEANER
Translation of original operation manual
IAN 100131
ASPIRADOR DE LÍQUIDOS / PÓ
Tradução do manual de instruções original
NASS- UND TROCKENSAUGER
Originalbetriebsanleitung
Page 2
Prima di leggere aprire la pagina con le immagini e prendere confidenza con le diverse funzioni
dell’apparecchio.
Antes de começar a ler abra na página com as imagens e, de seguida, familiarize-se com todas as
funções do aparelho.
Before reading, unfold the page containing the illustrations and familiarise yourself with all functions of the
device.
Klappen Sie vor dem Lesen die Seite mit den Abbildungen aus und machen Sie sich anschließend mit allen
Funktionen des Gerätes vertraut.
IT / MT Traduzione delle istruzioni d’uso originali Pagina 4
PT Tradução do manual de instruções original Página 16
GB / MT Translation of original operation manual Page 28
DE / AT / CH Originalbetriebsanleitung Seite 39
Page 3

1 32 4 5 6
16
17
18
15
14
13
12
11
25
10
7
19
8
9
20
21
22
23
26
24
Page 4
IT MT
Indice
Introduzione ...............................4
Utilizzo ........................................5
Descrizione generale ....................5
Volume di fornitura ........................... 5
Descrizione del funzionamento .......... 5
Sommario .......................................6
Dati tecnici ..................................6
Indicazioni di sicurezza ................6
Simboli riportati nelle istruzioni .......... 6
Norme generali di sicurezza .............7
Montaggio ...................................8
Comando .....................................8
Accensione/spegnimento .................. 8
Pulizia a secco ................................9
Pulizia a umido ................................9
Funzione di sofatura .......................10
Pulizia/manutenzione ................10
Pulizia dell‘apparecchio ..................10
Conservazione ...........................11
Smaltimento/tutela ambientale ..11
Ricerca di guasti .........................12
Pezzi di ricambio/accessori ........13
Garanzia ...................................14
Servizio di riparazione ...............15
Service-Center ............................15
Importatore ...............................15
Traduzione della dichiarazione
di conformità CE originale ..........50
Disegno esploso .........................53
Questo apparecchio può essere usato da bambini a partire da 8 anni
come anche da persone con capaci-
tà siche, sensoriali o mentali ridotte
o senza esperienze e conoscenze,
se sono sorvegliati o istruiti sull’uso
sicuro dell’apparecchio e comprendono i pericoli che ne scaturiscono.
I bambini non devono giocare con
l’apparecchio. La pulizia e la manutenzione da parte dell’utilizzatore
non devono essere eseguite da bam-
bini senza sorveglianza.
Introduzione
Congratulazioni per l’acquisto del Suo
nuovo apparecchio. Ha scelto un prodotto
altamente pregiato.
Questo apparecchio è stato sottoposto a
un controllo di qualità durante la produzione e quindi sottoposto a un controllo
nale. Quindi è garantito il funzionamento
del vostro apparecchio. Non si esclude
tuttavia che in casi singoli possano trovarsi
nell’apparecchio o nelle condutture essibili residui di acqua o lubricanti. Questo
non rappresenta un vizio o difetto e neanche un motivo di preoccupazione.
4
Le istruzioni per l’uso costitui-
scono parte integrante di
questo prodotto. Contengono indicazioni
importanti per la sicurezza, l’uso e lo smaltimento. Prima dell’uso del prodotto, si raccomanda di familiarizzare con tutte le indicazioni di comando e di sicurezza. Usare
il prodotto solo come descritto e per i cam-
pi d’impiego specicati. Conservare le
istruzioni in un luogo sicuro e consegnare
la documentazione in caso di cessione del
prodotto a terzi.
Page 5
IT MT
Utilizzo
L’apparecchio è stato sviluppato per la
pulizia ad umido e a secco nel campo domestico come p. es. in casa. nella stanza
degli hobby, in auto o in garage.
Questo apparecchio non è adatto per l’uso
industriale. In caso di un impiego per uso
industriale decade la garanzia.
È vietato aspirare sostanze combustibili,
esplosive o pericolose per la salute. Il
produttore non risponde di danni causati
dall’uso non conforme alla destinazione o
da utilizzo errato.
Descrizione generale
Le gure si trovano sulle pagine
pieghevoli anteriori e posteriori.
Volume di fornitura
Estrarre l‘apparecchio dall‘imballaggio e
controllare se è completo.
L‘apparecchio viene consegnato con la testa del motore inserita (vedi
Per rimuovere la testa del motore ed estrarre
l’accessorio,
- sbloccare la leva di bloccaggio (
14) e
- ribaltare i montanti dell’impugnatura
ad archetto (
rezione del bocchettone di aspirazione
(
8) .
2) verso il basso in di-
3).
- Carcassa del motore
- Contenitore di acciaio inox
- Impugnatura a staffa
- 4 rotelle pivotanti con alloggiamenti
per gli accessori
- Tubo di aspirazione telescopico
- Tubo d’aspirazione essibile
- Impugnatura con dispositivo di regolazione d’aria
- Filtro di espanso
- Filtro pieghettato + coperchio del ltro
(ormai montato)
- Sacchetto ltro
- Ugello domestico commutabile
- Ugello per giunti
- 6 viti con intaglio a croce
- Istruzioni per l’uso
Smaltire il materiale di imballaggio conformemente alle disposizioni.
Descrizione del
funzionamento
L‘apparecchio è dotato di un resistente contenitore di acciaio inox per l‘assorbimento
di liquidi e polvere. Le rotelle pivotanti
rendono l’apparecchio estremamente maneggevole. Durante l‘aspirazione umida lo
spegnimento della corrente d‘aria di aspirazione avviene mediante un galleggiante,
quando il contenitore di acciaio inox è pieno. Inoltre l‘apparecchio è dotato di una
funzione di sofatura.
Sul fondo dell’apparecchio è stata montata
una catena antistatica per evitare che si
verichi un caricamento elettrostatico durante l’aspirazione.
Per il funzionamento dei componenti leggere le seguenti descrizioni.
5
Page 6

IT MT
Sommario
Dati tecnici
Stazione dell’apparecchio
1 Impugnatura a staffa
2 2 manici dell’impugnatura a
staffa
3 Carcassa del motore
4 Maniglia per il trasporto
5 Cavo di rete
6 Interruttore di accensione / spe-
gnimento (ON / OFF)
7 Bocchette di ventilazione
8 Attacco aspirazione
9 Contenitore di acciaio inox
10 Vite di scarico
11 4 rotelle pivotanti
12 Catena antistatica
13 4 alloggiamenti per gli accessori
14 Leva di arresto
15 Attacco sofatura
16 2 supporti nell’impugnatura
Accessori
17 Tubo di aspirazione telescopico
18 Vano di custodia per il tubo di
aspirazione
19 Tubo d’aspirazione essibile
20 Impugnatura con dispositivo di
regolazione d’aria
Filtri
21 Filtro di espanso per la pulizia a
umido
22 Coperchio del ltro
23 Filtro pieghettato per la pulizia a
secco
24 Sacchetto ltro per l’aspirazione
dello sporco grossolano e
delle particelle più ni
Ugelli
25 Ugello domestico commutabile
per aspirare tappeti
per aspirare superci lisce
26 Ugello per giunti
27 Cestello di ltraggio
Tensione nominale ...... 230-240 V~, 50 Hz
Assorbimento nominale
(potenza installata) .....................1400 W
Lunghezza dei cavi ...........................4 m
Classe di protezione ..........................
Tipo di protezione ...........................IP24
Forza di aspirazione ...16 kPA (160 mbar)
Contenuto del contenitore (brutto) .. ca. 23 l
Capacità utile contenitore ............ca. 15 l
Peso (inclusivo di tutti gli accessori) ....7,7 kg
Si possono effettuare senza preavviso mo-
diche tecniche ed ottiche dopo ulteriori
sviluppi. Tutte le misure, indicazioni ed i
dati di questo manuale d’uso non sono
quindi soggetti a garanzia. Non si possono quindi rivendicare pretese giuridiche in
base al manuale d’uso.
Indicazioni di sicurezza
Simboli riportati nelle
istruzioni
Simboli di pericolo con indi-
cazioni relative alla prevenzione di danni a cose e persone.
Simboli di divieto (al posto del
punto esclamativo il divieto viene
delucidato) con indicazioni relative
alla prevenzione di danni.
Simboli di avvertenza con infor-
mazioni relative ad un uso corretto
dell’apparecchio.
II
6
Page 7

IT MT
Norme generali di sicurezza
Attenzione! Durante l’uso di utensili
elettrici osservarle seguenti misure
di sicurezza di base ai ni della
protezione contro scosse elettriche
e rischi di lesioni e incendi:
In questo modo evitate incidenti e
lesioni:
• Non lasciare mai incustodito un apparecchio pronto al funzionamento sul
posto di lavoro.
• Non usare l’aspirapolvere su persone
ed animali.
• Durante il funzionamento dell’apparecchio non volgere mai il tubo di aspirazione e gli ugelli verso se stessi o altre
persone, in particolare verso occhi e
orecchi. Esiste il pericolo di ferimento.
• Non aspirare sostanze bollenti, incandescenti, combustibili, esplosive o
pericolose per la salute, tra cui anche
ceneri incandescenti, benzina, solventi, acidi o soluzioni alcaline, ci si può
ferire.
• Quando si lavora, far sì che l’ugello
ed il tubo d’aspirazione non raggiungano l’altezza della testa, ci si può
ferire.
In questo modo evitate incidenti e
lesioni a causa di scosse elettriche:
• Accertarsi che il cavo di rete non venga danneggiato tirandolo su spigoli
appuntiti, bloccandolo o tirando il
cavo.
• Controllare prima di ogni uso il cavo
di alimentazione e la prolunga per
vericare la presenza di eventuali
danneggiamenti o usura. Non usare
l’apparecchio se il cavo è danneggiato
o consumato.
• Nel caso in cui la conduttura di colle-
gamento di questo apparecchio venga
danneggiata, deve essere sostituita da
parte del produttore o dal servizio di
assistenza cliente dello stesso oppure
da una persona qualicata, al ne di
evitare pericoli.
• Spegnere l’apparecchio e staccare la
spina di rete:
- quando non si utilizza, quando si
trasporta o quando si lascia incustodito l’apparecchio;
- quando si controlla l’apparecchio,
quando lo si pulisce o si eliminano i
blocchi;
- quando si effettuano lavori di pu-
lizia o manutenzione o quando si
sostituiscono gli accessori;
- quando il cavo di alimentazione o
la prolunga sono danneggiati;
- dopo il contatto con corpi estranei o
se si avvertono strane vibrazioni.
• Non utilizzare il cavo elettrico per
estrarre la spina dalla presa o per
trascinare l’apparecchio. Proteggere il
cavo elettrico da calore, olio e spigoli
vivi.
• Accertarsi che la tensione di rete coincida con i dati della targhetta.
• Collegare l’apparecchio solo ad una
presa protetta con almeno 16A.
• Collegare l’apparecchio a una presa
protetta da interruttore differenziale
(interruttore FI) con corrente di guasto
nominale non superiore a 30 mA.
In questo modo si evitano danni
all’apparecchio ed eventuali danni
consequenziali a persone:
• Accertarsi che l’apparecchio sia montato correttamente e che i ltri si trovino nella posizione giusta.
• Non lavorare senza ltro, si potrebbe
danneggiare l’apparecchio.
• Utilizzare solo i pezzi di ricambio e
7
Page 8
IT MT
gli accessori raccomandati e forniti dal
nostro centro assistenza clienti (vedi
“Pezzi di ricambio/accessori”). L’impiego di pezzi estranei conduce alla
perdita immediata del diritto di garanzia.
• Fare eseguire le riparazioni esclusivamente da servizi d’assistenza alla
clientela da noi autorizzati.
• Rispettare le indicazioni per la pulizia
e manutenzione dell’apparecchio.
• Conservare l’apparecchio in un luogo
asciutto e fuori della portata dei bambini.
Montaggio
Estrarre la spina.
Pericolo di scosse elettriche.
Alla consegna dell’apparecchio, il
ltro pieghettato (
tato.
23) è già mon-
4. Montare gli accessori:
- Collegare il tubo di aspirazione
(19).
- Montare l‘impugnatura (20)
- Montare il tubo di aspirazione telescopico (17).
(premere il pulsante posto sul tubo
di aspirazione telescopico
allungare il tubo nella posizione
desiderata).
- Montare l‘ugello desiderato
(25/26).
Nonaspiraremaisenzaltro!
Per depositare il kit di aspirazione
durante una pausa di lavoro richiudere il tubo di aspirazione telescopico (17) e inserire il supporto del
tubo (18) nella sede sull‘alloggiamento del motore (vedi
piccola).
Comando
e
gura
1. Inserire le 4 rotelle pivotanti (11) nelle
apposite sedi sul contenitore in acciaio
inox (9). In seguito, ssarle con l’ausilio
di viti con intaglio a croce (11a).
2. Inserire l’impugnatura a staffa (1) sui ma-
nici dell’impugnatura stessa (2) e ssarla
con 2 viti con intaglio a croce (1a).
3. Ribaltare l’impugnatura ad archetto
(1) verso il basso in direzione del bocchettone di aspirazione (8). Applicare
la testa del motore (3) sul contenitore in
acciaio inox (9). Chiudere il contenitore
in acciaio inox, ribaltando verso l’alto
l’impugnatura a staffa e bloccandolo
con le leve di arresto (14)
possibile regolare la tensione mediante
la vite di regolazione della leva di arresto. Sono possibili diverse posizioni
dell’impugnatura ad archetto.
8
. E
Per lavorare, srotolare completamente
il tubo essibile di aspirazione (
19).
Accensione/spegnimento
Inserire la spina.
Non aspirare mai senza ltro!
(L‘inserimento del ltro è descritto
nei capitoli „Pulizia a secco“ e „Pulizia a umido“).
Accensione:
Interruttore On/Off (
Spegnimento:
Interruttore On/Off (
6) in posizione „I“.
6) in posizione „0“.
Page 9
IT MT
Pulizia a secco
Alla consegna dell’apparecchio, il
ltro pieghettato (
tato.
23) è già mon-
Aspirazione con ltro
pieghettato:
1. Per l‘aspirazione asciutta inserire il
ltro pieghevole (23) sul cestello di
ltraggio posto sulla testa del motore
(3). A tale proposito il labbro di tenuta
curvata verso l‘alto deve indicare nella
direzione opposta della testa del motore.
2. Inserire il coperchio del ltro (22) e
serrare con una lieve rotazione:
Serrare il coperchio del ltro
Sbloccare il coperchio del ltro
Aspirazione con sacchetto di ltraggio di carta:
È possibile acquistare separata-
mente il sacchetto di ltraggio per
polveri ni (panno microltro), da
utilizzare in sostituzione del sacchet-
to di ltraggio di carta in dotazione
(si veda il capitolo „Pezzi di ricambio/accessori“).
Aspirazione con ltro a secco
(ltro a sacchetto acquistabile
separatamente):
Il ltro a sacchetto antistrappo (si veda il
capitolo “Pezzi di ricambio/Accessori”) è
acquistabile separatamente ed è particolarmente indicato per l’aspirazione dello spor-
co grossolano e delle particelle più ni.
1. Inlare il ltro in espanso (
cestello di ltraggio (
capitolo “Pulizia a umido”).
2. Inserire il ltro a sacchetto sul cestello
di ltraggio.
21) sul
27) (si veda il
Pulizia a umido
Per evitare che il ltro pieghettato
si sporchi troppo rapidamente, si
raccomanda di utilizzarlo assieme
al sacchetto di ltraggio di carta.
1. Montare il ltro pieghevole (23).
2. Piegare verso il basso le linguette laterali
del sacchetto del ltro di carta (24) in
corrispondenza della perforazione.
3. Allargare completamente il sacchetto di
ltraggio di carta (24) e inserirlo sopra
il bocchettone di aspirazione interna (8)
nel contenitore di acciaio inox (9). L‘anello di tenuta sull‘apertura del sacchetto di
ltraggio deve avvolgere completamente
la staffa posta sul bocchettone di aspirazione.
1. Per l‘aspirazione umida o l‘aspirazione
di acqua, inserire il ltro di materiale
espanso (21) sul cestello di ltraggio
(27) posto sulla testa del motore (3).
Per evitare lacerazioni del ltro di
espanso (21),
- inserire solo un ltro di espanso
asciutto;
- per applicarlo, girare leggermente
il bordo del ltro, quindi riportarlo
nella posizione iniziale.
2. Aspirazione (mediante pompa): immer-
gere il essibile di aspirazione (
nel serbatoio dell’acqua afferrandolo
dall’impugnatura (
l’acqua.
20) e aspirare
19)
9
Page 10
IT MT
3. Svuotare il contenitore di acciaio inox
subito dopo l’aspirazione, poiché non
è stato concepito per la conservazione
di liquidi (vedere “Pulizia/manutenzione”).
Non immergersi nell’acqua
da aspirare. Pericolo di scossa elettrica.
Quando il contenitore ( 9) è pie-
no, un galleggiante chiude l‘apertura di aspirazione e interrompe il
processo di aspirazione. Spegnere
l‘apparecchio, staccare la spina
dalla presa e svuotare il contenitore
(vedi “Pulizia/manutenzione”).
Spegnere l’apparecchio in caso di
fuoriuscita di schiuma o liquido.
Funzionedisofatura
Si consiglia l’esercizio senza uso di
un ltro.
• Collegare il tubo essibile di aspirazione (19) al collegamento Sofatura (15)
sulla testa del motore (3).
Pulizia/manutenzione
Estrarre la spina.
Pericolo di scosse elettriche.
Prima di usarlo, controllare che l’ap-
parecchio non abbia difetti visibili,
come per esempio un cavo di rete
difettoso. Nel caso, farli riparare o
sostituire.
Pulizia dell‘apparecchio
Non spruzzare l’apparecchio con
acqua e non usare detergenti o
solventi aggressivi. L’apparecchio
potrebbe venire danneggiato.
• Dopo l’utilizzo svuotare il contenitore
di acciaio inox (
- Dopo avere aperto la vite di scari-
co si potrà far scorrere via il liquido aspirato (
re rimane un residui di liquido.
Per eliminare tutti i residui liquidi,
ribaltare l’impugnatura ad archetto
(1) verso il basso e rimuovere la
testa del motore (
l’impugnatura ad archetto mediante le leve di bloccaggio (14). Afferrare il serbatoio di acciaio inox
(9) con una mano sull’impugnatura
ad archetto e con l’altra sul lato
inferiore del serbatoio e svuotare i
residui liquidi.
• Pulire con un panno umido il contenitore.
• Lavare il ltro d’espanso (
acqua tiepida e sapone e farlo asciugare.
• Pulire il ltro pieghettato (
tendolo con la mano a piccoli colpi e
pulirlo con un pennello o spazzola.
• Sostituire il sacchetto ltro (
quando questo è pieno (per poterlo
ordinare si veda il capitolo “Pezzi di
ricambio/accessori”).
• Battere leggermente sul ltro a secco
acquistabile separatamente (sacchetto
in tessuto). Lavarlo in acqua tiepida
con sapone e lasciarlo asciugare.
9):
10). Nel contenito-
3). Bloccare
21) con
23) bat-
24)
10
Page 11
IT MT
Conservazione
1. Ribaltare l’impugnatura (4) verso
l’alto.
2. Avvolgere il cavo elettrico (5)
attorno all’impugnatura (4).
3. Avvolgere il tubo essibile di
aspirazione (19) attorno all’impugnatura (4). I due supporti
(16) bloccano il tubo essibile di
aspirazione.
4. Per conservare il tubo essibile
telescopico (17) e gli ugelli
(25/26) utilizzare gli alloggiamenti compresi fra gli accessori
(13).
5. Conservare l’apparecchio in un
luogo asciutto e fuori della portata dei bambini.
Smaltimento/tutela
ambientale
Effettuare lo smaltimento dell’apparecchio,
degli accessori e della confezione nel
rispetto dell’ambiente presso un punto di
raccolta per riciclaggio.
Non si devono gettare macchine
nei riuti di casa.
Portare l’apparecchio ad un centro di
riciclaggio. Si possono separare i pezzi in
plastica e metallo secondo il genere e poi
portarli al centro di riciclaggio. Chiedere a
tal proposito al nostro servizio assistenza
clienti.
Lo smaltimento degli apparecchio difettosi
consegnati viene effettuato gratuitamente.
11
Page 12
IT MT
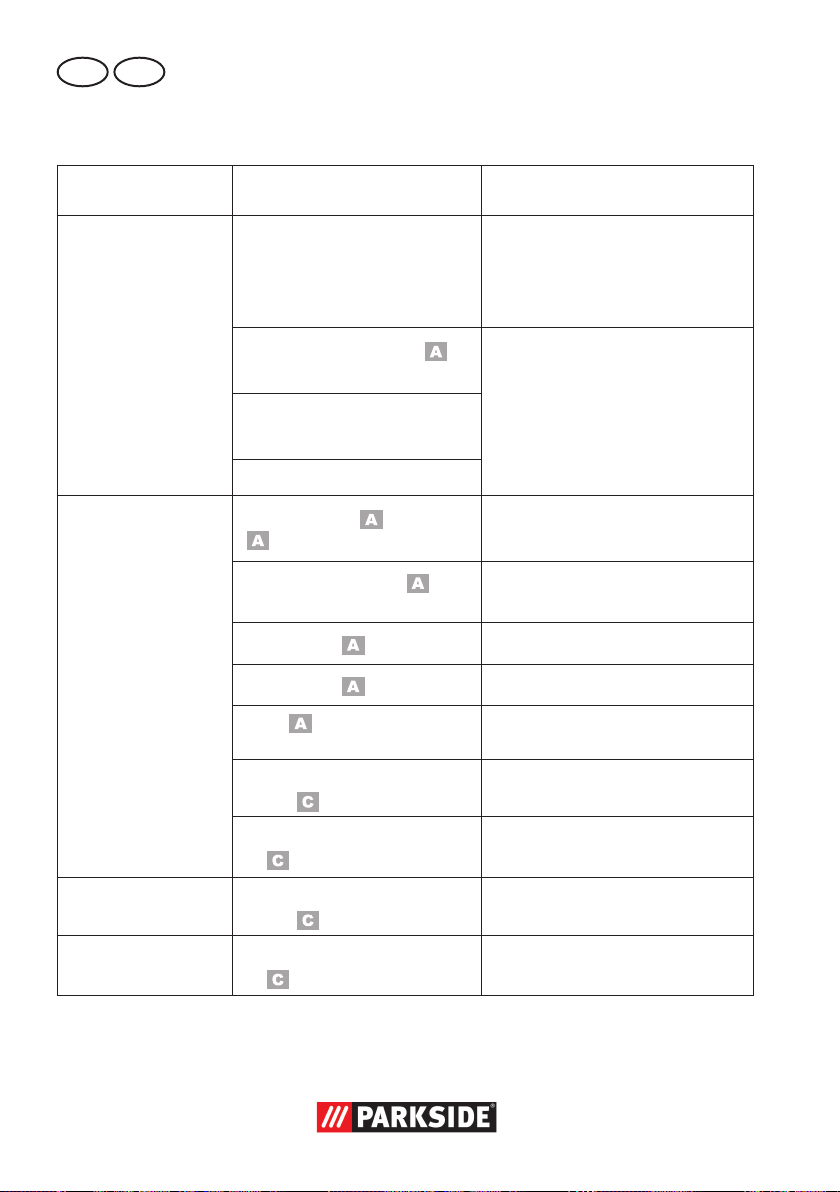
Ricerca di guasti
Guasto Possibile causa Soluzione
Controllare la presa di corrente,
il cavo, la spina e il fusibile, se
necessario far riparare l’apparecchio da un’elettricista quali-
cato
6)
Riparazione tramite Centro Assistenza tecnico
L’apparecchio non si
avvia
Manca la tensione di alimentazione
L’interruttore ON/OFF (
è guasto.
Le spazzole di carbone sono
usurate
Il motore è guasto
Potenza di aspirazione ridotta o
mancante
Il galleggiante non
spegne l'apparecchio
Tubo essibile (
25/26) intasati
(
Tubo di aspirazione (
non assemblati correttamente
Contenitore (
Contenitore (
Filtro (
intasato
Il galleggiante nel cesto ltrante (
Galleggiante nel cesto ltrante (
Il galleggiante nel cesto ltrante (
Galleggiante nel cesto ltrante (
21/23/24) pieno o
27) non si muove
27) difettoso
27) non si muove
27) difettoso
19) o ugelli
17)
9) aperto
9) pieno
Eliminare intasamenti e inceppamenti
Assemblare i tubi di aspirazione
in modo corretto
Chiudere il contenitore
Svuotare il contenitore
Svuotare, pulire o sostituire il
ltro
Liberare il galleggiante
Riparazione al centro assistenza
Liberare il galleggiante
Riparazione al centro assistenza
12
Page 13
IT MT
Pezzi di ricambio/accessori
È possibile ordinare pezzi di ricambio e accessori all’indirizzo
www.grizzly-service.eu
Se non si dispone di una connessione Internet, contattare telefonicamente il centro di assistenza (vedere “Service-Center” a pag. 15). Tenere a portata di mano i numeri d’ordine
riportati in basso.
Position Position Denominazione Numeri
Istruzioni Disegno d’ordine
perl’uso esploso
1,2 1 Impugnatura a staffa, completo 91098994
3 3 Carcassa del motore 91102247
9 9 Contenitore di acciaio inox 91098995
10 Vite di scarico 91098997
12 Catena antistatica 91092034
17/18 17 Tubo di aspirazione telescopico 91099003
19 19 Tubo d’aspirazione essibile 91099004
20 20 Impugnatura con dispositivo
di regolazione d’aria 91099006
21 21 Filtro di espanso, confezione da 3 pz. 30250101
23 23 Filtro pieghettato senza coperchio del ltro
con maglia interna in acciaio 91099009
24 24 Sacchetto ltro, 30 l, confezione da 5 pz. 30250133
25 25 Ugello domestico commutabile 91099008
26 26 Ugello per giunti 91099005
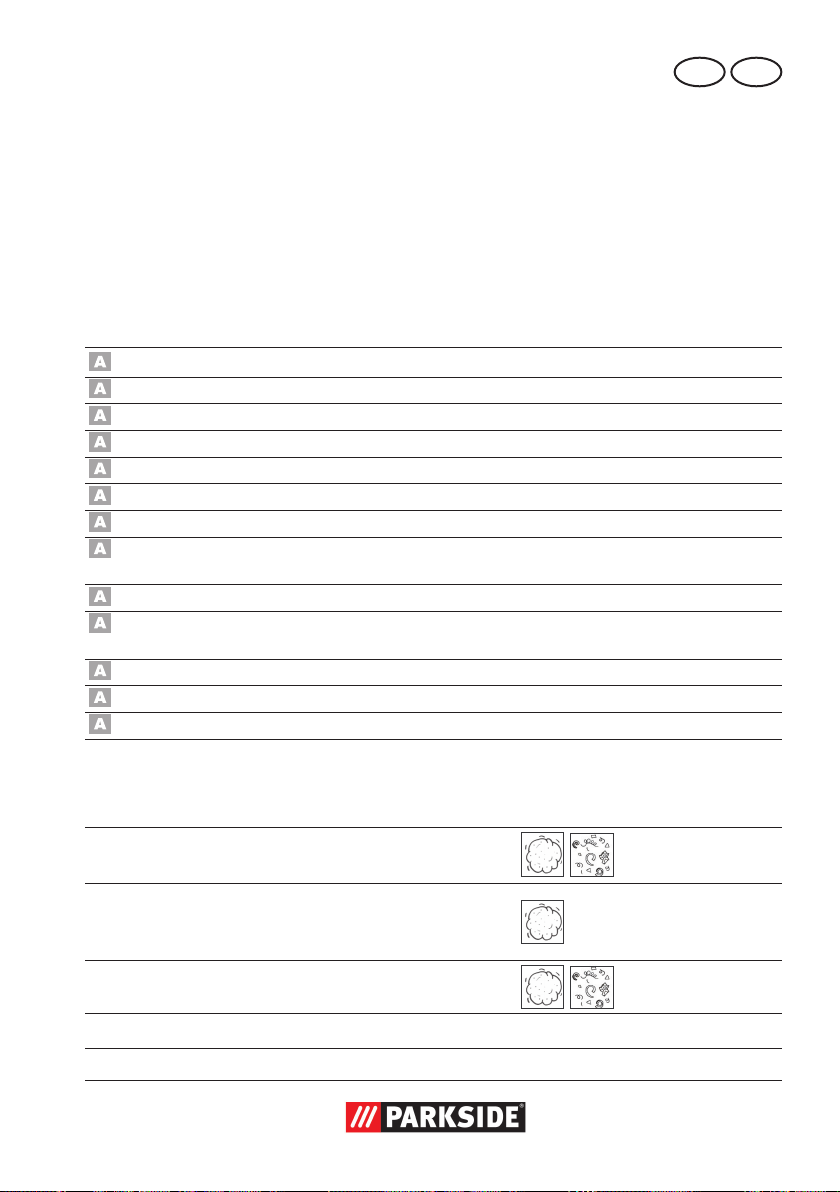
Acquistabile separatamente:
Denominazione Caratteristiche Impiego Numeri d’ordine
Filtro pieghettato con
coperchio
Sacchetto di ltraggio
per polveri ni
30 l, confezione da 5 pz.
Filtro a secco
Ugello per imbottiti 72800040
Ugello “auto” 91096445
senza maglia interna in
acciaio
Panno microltro a
2strati, colore bianco
Sacchetto in tessuto,
colore blu, lavabile
91092030
30250110
30250135
13
Page 14

IT MT
Garanzia
Gentile cliente,
Su questo apparecchio Le viene concessa
una garanzia di 3 anni a partire dalla
data di acquisto.
In caso di difetti di questo prodotto può
avanzare diritti legali nei confronti del
venditore del prodotto. Tali diritti legali non
vengono limitati dalla nostra garanzia qui
di seguito rappresentata.
Condizioni di garanzia
Il termine di garanzia inizia con la data di
acquisto. La preghiamo di conservare in
un luogo sicuro lo scontrino scale originale. Questo documento viene richiesto come
prova d’acquisto.
Qualora subentrasse un difetto di materiale
o di fabbricazione entro tre anni a partire
dalla data di acquisto di questo prodotto,
il prodotto verrà riparato o sostituito – a
nostra discrezione - gratuitamente da noi.
Questa prestazione di garanzia presuppone che venga presentato entro il termine di
tre anni l’apparecchio difettoso e la prova
d’acquisto (scontrino scale) e descritto
brevemente per iscritto in che cosa consiste
il difetto e quando si è vericato.
Se il difetto è coperto dalla nostra garanzia, riceverà il prodotto riparato oppure
un prodotto nuovo. Con la riparazione o
la sostituzione del prodotto non inizia un
nuovo periodo di garanzia.
Tempo di garanzia e diritti legali
per vizi della cosa
Il periodo di garanzia non viene prolungato. Questo vale anche per parti sostituite
e riparate. Difetti e vizi presenti già al momento dell’acquisto devono essere segnalati
immediatamente dopo la rimozione dall’imballaggio. Riparazioni che accorrono dopo
il periodo di garanzia sono a pagamento.
Volume di garanzia
L’apparecchio è stato prodotto accuratamente secondo severe direttive di qualità
e controllato con coscienza prima della
consegna.
La prestazione di garanzia vale per difetti
di materiale o di fabbricazione. Questa
garanzia non si estende ai componenti del
prodotto che sono soggetti a normale usura e che quindi possono essere visti come
parti di usura (p. es. ltri o inserti) oppure
per danneggiamenti delle parti fragili (p.
es. interruttori, accumulatori o elementi di
vetro).
Questa garanzia decade se il prodotto è
stato danneggiato, non usato correttamente o non manutenuto. Per un uso corretto
del prodotto devono essere osservate tutte
le indicazioni riportate nelle istruzioni per
l’uso. Destinazioni d’uso e azioni sconsigliate nelle istruzioni d’uso o dalle quali
si viene avvertiti, sono tassativamente da
evitare.
Il prodotto è destinato esclusivamente all’uso commerciale. In caso di uso improprio,
esercizio della forza e interventi non effettuati dalla nostra liale di assistenza tecnica autorizzata, decade la garanzia.
Svolgimento in caso di garanzia
Per garantire una rapida elaborazione della Sua pratica, La preghiamo di seguire le
seguenti indicazioni:
• per tutte le richieste tenere a portata
di mano lo scontrino scale e il codice
identicazione (IAN 100131) come
prova d’acquisto.
• I codici articolo sono riportati sulla targhetta del tipo.
• Nel caso in cui si dovessero vericare
difetti funzionali o altri vizi, La preghiamo di contattare telefonicamente o per
e-mail. Riceverà ulteriori informazioni
14
Page 15

IT MT
sullo svolgimento del Suo reclamo.
• Un prodotto rilevato come difettoso
può essere inviato con porto franco
all’indirizzo di assistenza comunicato,
previa consultazione del nostro servizio di assistenza tecnica, allegando
la prova d‘acquisto (scontrini scali)
e l’indicazione, in che cosa consiste
il difetto e quando si è vericato. Per
evitare problemi di accettazione e costi
aggiuntivi, usare tassativamente solo
l’indirizzo che Le è stato comunicato.
Assicurarsi che la spedizione non avvenga in porto assegnato, con merce
ingombrante, corriere espresso o altro
carico speciale. Spedire l’apparecchio
inclusi tutti gli accessori forniti insieme
al momento dell’acquisto e garantire
un imballaggio di trasporto sufcientemente sicuro.
Servizio di riparazione
Riparazioni nonsoggetteallagaranzia
possono essere effettuate dietro fattura dal-
la nostra liale di assistenza tecnica previo
preventivo gratuito da parte della stessa.
Possiamo lavorare solo apparecchi che
vengono spediti sufcientemente imballati
e affrancati.
Attenzione: Spedire l’apparecchio alla
nostra liale in condizioni pulite e con l’indicazione del difetto.
Apparecchi spediti in porto assegnato con merce ingombrante, corriere espresso
o altro carico speciale - non vengono
accettati.
Lo smaltimento degli apparecchi difettosi
spediti viene effettuato da noi gratuitamente.
Service-Center
Assistenza Italia
IT
Tel.: 02 36003201
E-Mail: grizzly@lidl.it
IAN 100131
Assistenza Malta
MT
Tel.: 80062230
E-Mail: grizzly@lidl.com.mt
IAN 100131
Importatore
Non dimenticare che il seguente indirizzo
non è un indirizzo di assistenza tecnica.
Contattare prima di tutto il centro di assistenza tecnica sopra nominato.
Grizzly Tools GmbH & Co. KG
Am Gewerbepark 2
64823 Groß-Umstadt
Germania
www.grizzly-service.eu
15
Page 16

PT
Índice
Introdução .................................16
Utilização ...................................17
Descrição Geral ..........................17
Peças incluídas ..............................17
Descrição de funcionamento ...........17
Esquema de descrição técnica ......... 18
Dados técnicos ...........................18
Medidas de segurança ...............18
Símbolos colocados no manual........18
Medidas de segurança gerais .........19
Montagem ................................20
Operação ...................................20
Ligar/Desligar ..............................20
Aspiração a seco ...........................21
Aspiração de líquidos ....................21
Função de sopro ............................22
Limpeza/Manutenção ................22
Limpeza do aparelho .....................22
Conservação ..............................23
Reciclagem/
Protecção ambiental...................23
Peças sobressalentes/
Acessórios ..................................24
Resolução de Problemas ............25
Garantia ....................................26
Serviço de reparação .................27
Service-Center ............................27
Importador ................................27
Tradução do original da
Declaração de conformidade CE .. 50
Vista en corte .............................53
Este dispositivo pode ser utilizado
por crianças a partir de 8 anos de
idade e por pessoas com capaci-
dades físicas, sensoriais ou mentais reduzidas, ou falta de experiência e conhecimento, contanto
que supervisionadas ou instruídas
acerca da utilização segura do
dispositivo e desde que estejam
conscientes dos riscos daí resultantes. As crianças não podem brincar com o aparelho. A limpeza e a
manutenção não podem ser efetuadas por crianças sem supervisão.
Introdução
Parabéns pela compra do seu novo aparelho. Com a sua compra, decidiu-se por um
produto de alta qualidade.
Este aparelho foi testado durante a produção em relação à qualidade e submetido a
uma inspeção nal. A funcionalidade do seu
aparelho está desta forma garantida. Em
casos isolados, não é de excluir a ausência
total de quantidades residuais de água ou
lubricantes no ou dentro do aparelho, ou
nas canalizações de mangueira. Isto não
representa contudo nenhuma deciência ou
defeito e não é motivo para preocupações.
O manual de instruções é uma parte
integrante deste artigo. Ele contém indicações importantes referentes à segurança,
utilização e eliminação. Familiarize-se
com todas as indicações de utilização e
de segurança do artigo. Utilize este artigo
da forma que é descrita e apenas para as
nalidades indicadas.
16
Page 17
PT
Guarde bem o manual e, se transmitir o
artigo a terceiros, entregue também todos
os respetivos documentos.
Utilização
Este aparelho destina-se à utilização como
aspirador de sólidos e de líquidos em casa,
p. ex. nos trabalhos domésticos, nas salas
de recreio, no automóvel ou na garagem.
Este aparelho não é adequado para uso
comercial. A garantia é anulada em caso
de utilização para ns comerciais.
É proibído aspirar substâncias inamáveis,
explosivas ou perniciosas para a saúde. O
fabricante não se responsabiliza por danos
causados pela utilização abusiva ou pelo
uso indevido do aparelho.
Descrição Geral
As ilustrações podem ser en-
contradas no verso e reverso
da página destacável.
Peças incluídas
Retire o aparelho da embalagem e verique a sua integralidade.
O aparelho é fornecido com a cabeça do
motor colocada (ver
Para retirar a cabeça do motor e remover
os acessórios, solte as alavancas de xação (
pega de armação (
direcção da boca de sucção (
14) e rebata as traves da
3).
2) para baixo, na
8).
- Caixa do motor
- Recipiente em aço inoxidável
- Pega da armação
- 4 rodas de direção com pontos de encaixe para acessórios
- Tubo telescópico de aspiração
- Mangueira de aspiração
- Punho com regulação de ar
- Filtro de espuma
- Filtro de pregas com tampa do ltro
(embora montado)
- Saco ltrante de papel
- Escova universal regulável
- Tubo estreito
- 6 parafusos de fenda em cruz
- Manual de Instruções
Elimine de maneira apropriada o material
da embalagem.
Descrição de funcionamento
O aparelho está equipado com um recipiente em aço inoxidável para recolha de
líquidos e de pós. As rodas de direção
permitem uma capacidade de manobra
excelente do aparelho. Aquando da aspiração de líquidos, a corrente de ar de
sucção é desligada por um utuador quando o recipiente em aço inoxidável estiver
cheio. Para além disso, o aparelho possui
uma função de sopro.
Para se impedir uma carga electrostática
durante a aspiração, existe uma corrente
antiestática montada na parte inferior da
máquina.
Para se familiarizar com a função dos
acessórios leia, por favor, as descrições
técnicas seguintes.
17
Page 18

PT
Esquema de descrição
técnica
Chassis
1 Pega da armação
2 2 traves da pega de armação
3 Caixa do motor
4 Pega de transporte
5 Cabo de alimentação
6 Interruptor de ligar/ desligar
7 Aberturas da ventilação
8 Junção de aspiração
9 Recipiente em aço inoxidável
10 Parafuso de escoamento
11 4 rodas de direção
12 Corrente antiestática
13 4 pontos de encaixe para aces-
sórios
14 Alavanca de xação
15 Junção de sopro, ligação de
sopro
16 2 suportes na pega de transporte
Acessórios
17 Tubo telescópico de aspiração
18 Suporte do tubo de aspiração
19 Mangueira de aspiração
20 Punho com regulação de ar
Filtros
21 ltro de esponja para a aspira-
ção de líquidos
22 Tampa do ltro
23 Filtro de pregas para a aspira-
ção a seco
24 Saco ltrante de papel para aspi-
ração de sujidade na e grossa
Escovas
25 Escova universal regulável
para a aspiração de tapetes
para a aspiração de superfí-
cies planas)
26 Tubo estreito para cantos e zo-
nas difíceis
27 Cesto ltrante
Dados técnicos
Tensão atribuída ....... 230-240 V~, 50 Hz
Consumo de energia atribuído
(potência de ligação) ................ 1400 W
Comprimento do cabo ...................... 4 m
Classe de protecção ..........................
Tipo de protecção ........................... IP24
Potência de aspiração ..16 kPA (160 mbar)
Capacidade do recipiente
(brutto) .................................. aprox. 23 l
Volume útil do recipiente ......... aprox. 15 l
Peso (incl. Todos os acessórios) ...... 7,7 kg
Poderemos efectuar modicações técnicas
e no design no decurso da evolução técnica sem avisarmos previamente. Não nos
responsabilizamos, por isso, por todas as
medidas, indicações e informações contidas neste manual de instruções. Títulos que
possam ser feitos valer devido às informações deste manual não poderão, por isso,
ser postos em vigor.
II
Medidas de segurança
Símbolos colocados no
manual
Símbolos de perigo com in-
formações sobre a prevenção
de danos pessoais e materiais.
Símbolos de ordens com informa-
ções sobre a prevenção de danos.
Avisos de instrução, com informa-
ções sobre o melhor manuseamento
com o aparelho.
18
Page 19

PT
Medidas de segurança gerais
Atenção! Ao utilizar as aparelhos
eléctricos, ter em atenção as medidas de segurança fundamentais indicadas a seguir para a protecção
contra choques eléctricos e perigos
de ferimento e incêndio:
Assim poderá evitar acidentes e
ferimentos:
• Nunca deixe um aparelho pronto para
entrar em funcionamento fora de vigilância no local de trabalho.
• Não se deve aspirar pessoas ou animais com este aparelho.
• Nunca direcione a mangueira de
aspiração e as escovas, durante o
funcionamento, para si ou outras pessoas, especialmente para os olhos e
ouvidos. Existe perigo de ferimentos.
• Não aspire nenhumas substâncias
incandescentes, combustíveis, explosivas ou perniciosas para a saúde.
Entre estas contam-se cinzas ardentes,
gasolina, solventes, ácidos ou lixívias.
Perigo de lesões!
• Quando estiver a trabalhar com o
aparelho, o difusor e o tubo de aspiração não devem estar à mesma altura
da cabeça. Perigo de lesões!
Assim poderá evitar acidentes e
ferimentos causados por choque
eléctrico:
• Preste atenção para que, ao puxar
pelo cabo de ligação à corrente, este
não que danicado se passar por
bordas cortantes, se car entalado ou
se se puxar demasiado por ele.
• Antes de usar, vericar sempre a presença de avarias e sinais de desgaste
na linha de ligação à rede e no cabo
de extensão. Não utilizar o aparelho
se o cabo estiver danicado ou gasto.
• Quando o cabo de ligação deste apa-
relho estiver danicado, ele terá de
ser substituído pelo fabricante, por um
Serviço à Clientela por ele autorizado
ou por uma pessoa qualicada para
tal, a m de evitar-se perigos.
• Desligue o aparelho e retire a cha da
tomada de corrente:
- não estiver a trabalhar com o aparelho, quando o quiser transportar
ou o deixar fora de vigilância;
- estiver a inspeccionar o aparelho, a
limpá-lo ou quando quiser eliminar
alguns bloqueios;
- estiver a executar trabalhos de limpeza e de manutenção ou quando
quiser mudar os acessórios;
- o cabo de alimentação ou o cabo
de extensão estiverem danicados;
- tiver tido contacto com corpos estranhos ou se sentir uma vibração
anormal;
• Não utilize o cabo de ligação à rede
para retirar a cha da tomada ou
para retirar o aparelho. Proteja o cabo
de ligação à rede do calor, óleo e
cantos aados.
• Cerique-se de que a tensão de rede
corresponde às indicações da chapa
de características do aparelho.
• Ligue o aparelho somente a uma toma-
da que esteja protegida pelo menos
por 16A.
• Ligue o aparelho a uma tomada com
um dispositivo de proteção contra corrente de avaria (interruptor FI) e com
uma corrente atribuída não superior a
30 mA.
Assim se evitam danos as pessoas
e ao aparelho:
• Certique-se de que o aparelho está
correctamente montado e que os ltros
19
Page 20

PT
estão colocados na posição correcta.
• Nunca ponha a máquina a trabalhar
sem os ltros. O aparelho poderá car
danicado.
• Utilize somente peças sobressalentes
e acessórios originais que são fornecidos e recomendados pelos nossos
Serviços de Assistência Técnica (ver
“Peças sobressalentes/Acessórios”).
O uso de peças não originais leva à
perda imediata da garantia.
• Eventuais reparações devem ser somente efectuadas pelos Serviços de
Atendimento ao Cliente autorizados
por nós.
• Preste atenção às indicações sobre a
limpeza e manutenção do aparelho
contidas neste manual.
• Guarde o aparelho num lugar seco e
fora do alcance das crianças.
Montagem
Desenrole o cabo.
Perigo de choque eléctrico.
O ltro de pregas ( 23) já se
encontra montado aquando o fornecimento.
1. Insira a roda de direcção dianteira
(11) no alojamento da parte da frente
do recipiente de aço inox (9). Fixe a
roda de direcção com 2 parafusos de
fendas cruzadas.
2. Insira a pega da armação (1) nas
duas traves da pega da armação (2) e
aparafuse-a bem com 2 parafusos de
fendas cruzadas (1a).
3. Rebata a pega da armação (1) para
baixo, na direcção da boca de sucção
(8). Coloque a cabeça do motor (3)
sobre o recipiente de aço inox (9).
Feche o recipiente de aço inox, rebatendo a pega da armação para cima
e travando-a com as alavancas de
xação (14)
ajustada no parafuso de ajuste da alavanca de xação. São possíveis várias
posições da pega da armação.
4. Monte o acessório:
- Ligue o tubo exível de aspiração
(19).
- Monte a pega (20)
- Monte o tubo telescópico de aspiração (17).
(puxe o botão no tubo telescópico
de aspiração na direcção
estire-o no comprimento desejado).
- Monte o bico desejado (25/26).
Nuncaaspiresemltro!
Para guardar os acessórios de aspi-
ração durante a pausa do serviço,
recolha o tubo telescópico de aspi-
ração (17) e ene-o no encaixe do
respectivo suporte (18) existente na
caixa do motor (ver
gura).
. A tensão pode ser
e
a pequena
Operação
Desenrole, por completo, a man-
gueira de aspiração (
trabalhar.
Ligar/Desligar
Ligue a cha à tomada .
Nunca aspirar sem o ltro!
(Descreve-se a colocação do ltro
nos capítulos „Aspiração a seco“ e
„Aspiração de líquidos“).
19) para
20
Page 21

PT
Para ligar:
Interruptor liga/desliga (ver
na posição „I“.
Para desligar:
Interruptor liga/desliga (ver
Na posição „0“.
6)
6)
Aspiração a seco
O ltro de pregas ( 23) já se
encontra montado aquando o fornecimento.
Aspiração com o ltro de pregas:
reservatório em aço inoxidável (9). O
anel de vedação na abertura do saco
ltrante deve envolver completamente
a nervura no bocal de aspiração.
Opcionalmente encontra-se dispo-
nível um saco de ltro de papel
(microltro de velo), que pode ser
utilizado em vez do saco ltrante de
papel fornecido (ver “Peças sobressalentes/Acessórios”).
Aspiração com o ltro seco
(saco ltrante opcionalmente
disponível):
1. Para aspirar a seco, coloque o ltro de
pregas (23) no cesto do ltro (27) na
cabeça do motor (3). Neste caso, o
lábio de vedação abaulado para cima
deve estar direccionado ao lado oposto da cabeça do motor.
2. Ponha a tampa do ltro (22) e feche-a
girando levemente:
Para fechar a tampa do ltro
Para abrir a tampa do ltro
Aspiração com saco ltrante de
papel:
Para que o ltro de pregas não
entupa rapidamente, recomendamos a utilização adicional do saco
ltrante de papel.
1. Monte o ltro de pregas (23).
2. Dobre ambas as abas do saco ltrante
de papel (24) para baixo na perfuração.
3. Desdobre totalmente o saco ltrante
de papel (24) e coloque-o sobre os
bocais de aspiração internos (8) no
O saco ltrante, resistente a desgaste, opcionalmente disponível (ver “Peças sobressalentes/Acessórios”) é adequado para
aspirar sujidade na e grossa.
1. Coloque o ltro de espuma (
cesto ltrante (
de líquidos”).
2. Aplique o saco de tecido por cima do
cesto ltrante.
27) (ver “Aspiração
21) no
Aspiração de líquidos
1. Para aspirar água ou a húmido, colo-
que o ltro de esponja (21) no cesto
do ltro (27) existente na cabeça do
motor (3).
Para evitar que o ltro de material es-
pumoso (21) rasgue,
- coloque apenas um ltro seco;
- dobre um pouco a margem do ltro
para a colocação e depois desenrole-o novamente.
2. Aspirar (bombear): Insira a mangueira
de aspiração (
20) no reservatório de água e aspire a
água.
19) na pega (
21
Page 22

PT
3. Esvazie o recipiente em aço inoxidável
imediatamente após a aspiração, visto
que não é construído para armazenar
líquidos (ver “Limpeza/manutenção“).
Deve manter-se fora da água
a ser aspirada. Perigo devido
a choque elétrico.
Quando o recipiente ( 9) estiver
cheio, um utuador fechará a abertura de sucção e a aspiração será
interrompida. Desligar o aparelho,
retirar a cha da tomada e esvaziar o recipiente (ver “Limpeza/
Manutenção”).
Desligue imediatamente o aparelho
se notar qualquer saída de espuma
ou de líquido do aparelho.
Função de sopro
É aconselhável o funcionamento
sem a utilização de um ltro.
• Conecte a mangueira de aspiração
(19) à ligação de sopro (15) na cabeça do motor (3).
Limpeza/Manutenção
Retire a cha da tomada.
Perigo de choque eléctrico.
Verique se o aparelho tem alguns
danos visíveis por exemplo, qualquer defeito no cabo de ligação à
corrente, sempre que o for utilizar
e, em caso de dano, mande-o reparar ou substituir.
Limpeza do aparelho
Não esguiche água no aparelho
e não utilize produtos ou soluções
de limpeza cáusticos. O aparelho
poderá ser danicado.
• Despeje o conteúdo do recipiente
(
9) para recolha de impurezas de-
pois de o aparelho estar desligado:
- O líquido que foi aspirado pode
ser descoado abrindo, para isso, o
parafuso de escoamento (
Um pouco de líquido permanece no
recipiente.
A m de remover todo o líquido re-
sidual, rebata a pega da armação
(1) para baixo e retire a cabeça
do motor (
armação com as alavancas de xação (14). Segure o depósito de aço
inox (9) com uma mão na pega da
armação e com a outra mão na
parte inferior do depósito, e verta o
líquido residual.
• Limpe o reservatório com um pano húmido.
• Lave o ltro de esponja (
água tépida com um detergente suave
e deixe-o secar.
• Sacuda o pó do ltro de pregas (
23) e limpe-o com um pincel ou com
uma vassoura de mão.
• Substitua o seu ltro de papel (
sempre que este esteja cheio (para
encomendar peças, ver “Peças sobressalentes/Acessórios”).
• Sacuda o ltro seco, opcionalmente
disponível (saco de tecido). Se necessário, lave-o com água tépida e detergente e deixe-o secar.
3). Trave a pega da
10).
21) em
24)
22
Page 23

PT
Conservação
1. Dobre a pega de transporte (4)
para cima.
2. Enrole o cabo de ligação à
rede (5) à volta da pega de
transporte (4).
3. Enrole o tubo de aspiração (19)
à volta da pega de transporte
(4). Ambos os suportes (16) xam a mangueira de aspiração.
4. Para armazenar o tubo de aspiração telescópico (17) e os bocais (25/26) estão disponíveis
os alojamentos dos acessórios
(13).
5. Guarde o aparelho num lugar
seco e fora do alcance das
crianças.
Reciclagem/
Protecção ambiental
Por favor, coloque o aparelho, os acessórios e a embalagem nos respectivos ecopontos para serem reciclados.
As máquinas não devem ser deita-
das para o lixo doméstico.
Entregue, por favor, o seu aparelho num
posto de reciclagem. As peças de material
sintético e de metal podem ser sujeitas
a uma escolha selectiva e, deste modo,
prontas para serem recicladas. Para tal,
dirija-se aos nossos Serviços de Assistência Técnica.
A eliminação do aparelhos inutilizado que
nos enviar será realizada por nós gratuitamente.
23
Page 24

PT
Peças sobressalentes/Acessórios
Pode obter as peças de reposição e os acessórios em
www.grizzly-service.eu
Caso não tenha internet entre em contacto, por telefone, com o centro de assistência (ver
“Service-Center “ página 27). Mantenha os números de encomenda, em baixo mencionados, disponíveis.
Pos. Pos. Descrição Artigon.o
Manualde Vistaen
Instruções corte
1,2 1 Pega da armação 91098994
3 3 Caixa do motor 91102247
9 9 Recipiente em aço inoxidável 91098995
10 Parafuso de escoamento 91098997
12 Corrente antiestática 91092034
17/18 17 Tubo telescópico de aspiração 91099003
19 19 Mangueira de aspiração 91099004
20 20 Punho com regulação de ar 91099006
21 21 Filtro de esponja, pacote com 3 unidades 30250101
23 23 Filtro de pregas sem tampa do ltro
(com malha trançada interior em aço) 91099009
24 24 Saco ltrante de papel, pacote com 5 unidades 30250133
25 25 Escova universal regulável 91099008
26 26 Tubo estreito 91099005
Adicionalmente disponível:
Designação Versão Aplicação Artigon.o
Filtro de pregas com tampa
do ltro
Saco de ltro de papel 30l,
pacote com 5 unidades
Filtro seco Saco de tecido azul, lavável
Escova para estofos 72800040
Escova para o automóvel 91096445
sem malha trançada interior
em aço
Microltro de velo de duas
camadas, branco
24
91092030
30250110
30250135
Page 25

PT
Resolução de Problemas
Problema Causapossível Resoluçãodoproblema
Examinar a tomada, o cabo, a
linha, a cha e o fusível e, caso
O aparelho
não arranca
Potência de aspiração baixa
ou inexistente
Flutuador não
desliga o aparelho
Não há tensão de rede
Interruptor de ligar/desligar
(
6) avariado
Motor avariado
Sistema de tubos exíveis
(
19) ou bicos ( 25/26)
entupido/s
Tubo de aspiração (
caixados de maneira incorrecta
Reservatório (
aberto
Reservatório (
cheio
Filtro (
obstruído
Flutuador no cesto do ltro
(
Flutuador no cesto do ltro
(
Flutuador no cesto do ltro
(
Flutuador no cesto do ltro
(
21/23/24) cheio ou
27) não se move
27) com defeito
27) não se move
27) com defeito
17) en-
9) de sujidade
9) de sujidade
seja necessário, levar o aparelho
para reparação a um técnico especialista em electricidade
Reparação pelos Serviços de Assistência TécnicaEscovas de carvão desgastadas
Eliminar os entupimentos e bloqueios
Encaixar o tubo de aspiração da
maneira correcta
Fechar o reservatório de sujidade
Esvaziar o reservatório de sujida-
de
Esvaziar, limpar ou substituir o
ltro
Libertar o utuador
Reparação pelo serviço de assistência
Libertar o utuador
Reparação pelo serviço de assistência
25
Page 26

PT
Garantia
Prezada cliente, prezado cliente,
Este aparelho tem uma garantia de 3 anos
a contar a partir da data da compra.
Em caso de deciências vericadas neste
produto, estão à sua disposição direitos
legais face ao vendedor. Estes direitos legais não são restritos pela nossa garantia
a seguir descrita.
tamente após se ter desembalado o produto. Após decorrido o período de garantia,
as reparações necessárias estão sujeitas a
pagamento.
Âmbito da garantia
O aparelho foi cuidadosamente produzido
de acordo com diretivas de qualidade
rigorosas e devidamente testado antes da
entrega.
Termos de garantia
O período de garantia começa a contar
da data da compra. Mantenha guardado
o talão de compra original. Esse documento é exigido como comprovativo de
compra.
Se no decorrer de três anos a partir da
data de aquisição deste produto, ocorrer
uma falha de material ou defeito de fabrico, o produto será substituído ou reparado
gratuitamente, de acordo com a nossa escolha. Esta garantia exige que o dispositivo defeituoso e o talão de compra (recibo)
sejam apresentados no decorrer de um
prazo de três anos e que seja brevemente
descrito por escrito, qual o defeito e quando é que ele ocorreu.
Se o defeito for coberto pela nossa garantia é coberta, receberá de volta o produto
reparado ou um novo produto. Com a
reparação ou substituição do produto
não é iniciado nenhum novo período de
garantia.
Período de garantia e reclamações
legais por defeitos
O período de garantia não é prolongado
pela prestação de garantia. Isto também
se aplica às peças substituídas e reparadas. Quaisquer danos e defeitos eventual-
mente existentes vericados na altura da
compra deverão ser comunicados imedia-
A prestação de garantia aplica-se a falhas
de material ou defeitos de fabrico. Esta garantia não cobre os componentes do pro-
duto que estão sujeitos a desgaste normal
e que são portanto consideradas como
peças de desgaste (por exemplo, ltros
ou ensaios), nem os danos causados nas
partes frágeis (por exemplo, interruptores,
baterias recarregáveis ou as peças feitas
em vidro).
Esta garantia caduca, se o produto for da-
nicado ou se não for devidamente usado
ou conservado. Para uma correta utilização do produto, deverão ser cumpridas todas as indicações descritas no manual de
instruções. Deverão ser impreterivelmente
evitados os usos e as ações desaconselhados no manual de instruções, ou para os
quais são feitas advertências.
Este produto foi concebido unicamente
para uso privado e não é indicado para
uso comercial. A garantia é anulada em
caso de uso abusivo e inadequado, do
uso de força, e em caso de intervenções
que não tenham sido realizadas pela nossa estação de serviço autorizada.
Procedimento em caso de reclamação de garantia
Para assegurar um processamento rápido
da sua reclamação, siga por favor as seguintes instruções:
26
Page 27

PT
• Mantenha à mão o talão de com-
pra e o número de identicação
(IAN100131), como comprovativo da
compra.
• Pode consultar o número do artigo na
placa de identicação.
• Se ocorrerem erros na funcionalidade
ou outros defeitos, contate imediatamente por telefone ou e-mail o
departamento de serviços a seguir
designado. Receberá informações adicionais acerca do processamento da
sua reclamação.
• Após consulta do nosso serviço de
atendimento a clientes, pode enviar-
-nos um produto defeituoso com despesas de envio gratuitas para si, mediante a anexação do talão de compra
(recibo) e indicando onde e quando
surgiu o defeito, para o endereço de
serviço que lhe for comunicado. Para
evitar problemas de receção e custos
adicionais, use apenas o endereço
que lhe for comunicado. Certique-se
de que o envio não foi enviado livre
de franquia, através de serviço de
transporte de mercadorias pesadas,
serviço de envio expresso, ou qualquer
outro serviço de envio especial. Envie
o aparelho incluindo todas as peças
acessórias fornecidas aquando efetuada a compra e use uma embalagem
de transporte sucientemente segura.
Serviço de reparação
As reparações quenãosejamabrangidas
pelagarantia podem ser efetuadas pelo
nosso centro de serviço, mediante faturação. Ele apresentar-lhe-á de bom grado
um orçamento dos custos.
Podemos reparar apenas os aparelhos que
tenham sido devidamente embalados e
enviados com franquia suciente.
Atenção: Por favor, envie o seu aparelho
limpo e mediante referência da falha ou
defeito para a nossa sucursal de serviços.
Não serão aceites máquinas ou aparelhos
não franqueados, devolvidos como mercadorias volumosas, ou através de serviços
postais por expresso ou especiais.
Efetuamos gratuitamente a eliminação das
suas máquinas defeituosas enviadas.
Service-Center
Assistência Portugal
Tel.: 70778 0005 (0,12 EUR/Min.)
E-Mail: grizzly@lidl.pt
IAN 100131
Importador
Tenha em conta que o endereço seguinte
não é nenhum endereço de serviço. Entre
em contacto com o centro de atendimento
acima referido.
Grizzly Tools GmbH & Co. KG
Am Gewerbepark 2
64823 Groß-Umstadt
Alemanha
www.grizzly-service.eu
27
Page 28

GB MT
Contents
Introduction ...............................28
Application ................................29
General description ....................29
Delivery Contents ........................... 29
Description of operation ..................29
Overview ...................................... 30
Technical data ............................30
Safety information .....................30
Symbols used in the instructions .......30
General notes on safety .................31
Assembly ................................ 32
Operation ..................................32
Switching on/off ............................ 32
Dry vacuuming ..............................32
Wet vacuuming .............................33
Blow Function ................................33
Cleaning/Maintenance ...............34
Cleaning the device .......................34
Storage ......................................34
Disposal/Environmental
protection ..................................34
Spare Parts/Accessories .............35
Trouble shooting ........................36
Guarantee .................................37
Repair Service ............................38
Service-Center ............................38
Importer ....................................38
Translation of the original EC
declaration of conformity ...........51
Exploded Drawing .....................53
This appliance can be used by children aged from 8 years and above
and persons with reduced physical, sensory or mental capabilities
or lack of experience and knowledge if they have been given su-
pervision or instruction concerning
use of the appliance in a safe way
and understand the hazards in-
volved. Children shall not play with
the appliance. Cleaning and user
maintenance shall not be made by
children without supervision.
Introduction
Congratulations on the purchase of your
new device. With it, you have chosen a
high quality product.
During production, this equipment has
been checked for quality and subjected
to a nal inspection. The functionality of
your equipment is therefore guaranteed. It
cannot be ruled out that residual quantities
of water or lubricants will remain on or in
the equipment/hose lines in isolated cases.
This is not a fault or defect and it represents no cause for concern.
28
The operating instructions constitute part of
this product. They contain important information on safety, use and disposal.
Before using the product, familiarise yourself with all of the operating and safety
instructions. Use the product only as de-
scribed and for the applications specied.
Keep this manual safely and in the event
that the product is passed on, hand over
all documents to the third party.
Page 29

MTGB
Application
The appliance is intended for domestic wet
and dry vacuuming in, for example, the
house, work room, car or garage.
This equipment is not suitable for commercial use. Commercial use will invalidate the
guarantee.
Vacuuming of ammable or explosive
materials or those which endanger health
is prohibited. The manufacturer will not be
held responsible for injuries resulting from
use which does not comply with the directions, or from incorrect use.
General description
Motor housing
-
-
Stainless steel container
-
Bow handle
- 4 steering castors with accessory
holders
-
Telescopic suction pipe
- Suction hose
- Handle with air regulation
- Foam lter
- Fluted lter with lter cover
(already mounted)
- Paper lter bag
- Switchable household nozzle
- Crevice nozzle
- 6 cross-head screws
- Instruction Manual
The illustration of the principal
functioning parts can be found on
the front and back foldout pages.
Delivery Contents
Unpack the equipment and check that it is
complete.
The equipment is supplied with the motor
head on (see
head and remove the accessories,
- release the locking lever (
- fold down the bow handle tie bars
(
2) towards the suction nozzle
(
8).
3). To take off the motor
14)
and
Dispose of the packaging material in a
proper manner.
Description of operation
The equipment is tted with a stable stainless steel container to hold liquid and dust.
The steering castors allow for maximum
mobility of the device. For wet vacuuming,
the suction airow is switched off by a oat
when the stainless steel container is full. The
equipment also has a blow function.
To prevent electrostatic charging during
vacuuming, an anti-static chain is tted on
the bottom of the equipment.
The following describes the function of the
operating parts.
29
Page 30

GB MT
Overview
Technical data
Housing
1 Bow handle
2 Bow handle tie bars
3 Motor housing
4 Carry handle
5 Mains lead
6 On/off switch
7 Vent holes
8 Suction connection
9 Stainless steel container
10 Drainage outlet
11 4 steering castors
12 Anti-static chain
13 4 accessory holders
14 Locking lever
15 Blow connection
16 2 Mounts in the handle
Accessories
17 Telescopic suction pipe
18 Vacuum tube holder
19 Suction hose
20 Handle with air regulation
21 Foam lter for wet vacuuming
22 F
23 Fluted lter for dry vacuuming
24 Paper lter bag for vacuuming
Filter
ilter cover
both large and small dirt particles
Rated voltage ........... 230-240 V~, 50 Hz
Rated power input
(Power consumption) ...................1400 W
Cable length.....................................4 m
Safety class ......................................
Protection category...........................IP24
Suction force .............16 kPA, (160 mbar)
Stainless steel container capacity
brutto.................................. approx. 23 l
useful volume ....................... approx. 15 l
Weight (incl. all accessories) ..........7.7 kg
Technical and visual modications may
be carried out due to further development
without prior notice. All dimensions, information and statements provided in these
Operating Instructions are therefore subject
to amendment. Legal claims which are
based on the Operating Instructions can
therefore not be recognised.
II
Safety information
Symbols used in the
instructions
Hazard symbols with in-
formation on prevention of
personal injury and property
damage.
Nozzles
25 Switchable household nozzle
for vacuuming carpets
for vacuuming smooth surfaces
26 Crevice nozzle
27 Filter basket
30
Precaution symbol with information
on prevention of harm / damage.
Notice symbol with information on
how to handle the device properly.
Page 31

MTGB
General notes on safety
Caution! When using electrical ma-
chines, observe the following basic
safety measures for the prevention
of electric shocks and the risk of
injury and re:
To avoid accidents and injuries:
• Never leave a machine which is ready
for operation unattended at the workplace.
• People and animals must not be vacuumed with the machine.
• Do not aim the suction hose and nozzle at yourself or others during use,
particularly not at the eyes and ears;
there is a risk of injury.
• Do not vacuum any hot, incandescent,
ammable, explosive materials, or
those which endanger health. This includes hot ashes, petrol, solvents, acids
or caustic solutions. Personal injury
could occur.
• Nozzles and suction tubes must not
reach head level whilst in use. Personal
injury could occur.
• Switch the machine off and pull the
plug under the following circumstances:
- when you are not using the device,
- transporting it or leaving it unat-
tended;
- when you are checking the device,
cleaning it or removing blockages;
- when you are carrying out cleaning
or maintenance work or replacing
accessories;
- when the power or extension cable
is damaged; after contact with foreign bodies or in case of abnormal
vibration.
• Never use the mains lead to pull the
plug out of the socket or to pull the
appliance. Protect the mains lead from
heat, oil and sharp edges.
• Make sure that the mains voltage corresponds with the information on the
rating plate.
• Only plug the appliance into a socket
which is safeguarded by at least 16A.
• The device must only be connected to
a mains socket via a residual-current
circuit breaker (RCD) with a rated leak-
age current of not more than 30mA.
To avoid accidents and injuries
from electric shocks:
• Ensure that the mains cable is not
damaged by being pulled over sharp
edges, by jamming, or by pulling on
the cable.
• Before each use, check the power supply lead and the extension cable for
damage and ageing. Do not use the
equipment if the cable is damaged or
worn. Danger of electric shock hazard.
• If the power cable for this equipment is
damaged, it must be replaced by the
manufacturer, a customer service agent
of the same or a similarly qualied person in order to prevent hazards.
The following states how damage
to the appliance and possible injury to people can be avoided:
• Ensure that the machine is correctly
assembled and the lters are in the correct position.
• Do not use without the lter. This could
damage the machine.
• Only use Spare parts and accessories
delivered and recommended by our
Service Centre (see “Spare parts/Accessories”). The use of parts by other
manufacturers immediately renders the
guarantee void.
• Only have repairs carried out at our
authorised customer service points.
31
Page 32

GB MT
• Observe the instructions for cleaning
and maintenance of the machine.
• Store the appliance in a dry place and
out of reach of children.
Assembly
Pull out the mains plug.
Danger of electric shock.
The appliance is supplied with the
folded lter (
23) tted.
tion pipe holder (18) into the socket
on the motor housing (see picture
below).
Operation
Fully unwind the suction hose (
19) before commencing work.
Switching on/off
Connect the mains plug.
1. Place the 4 steering castors (11) onto
the mounts on the stainless steel container (9). Attach each steering castor
with a crosshead bolt (11a).
2. Fit the bow handle (1) onto the two
bow handle tie bars (2) and screw it in
place with 2 crosshead bolts (1a).
3. Fold down the bow handle (1) towards
the suction nozzle (8). Place the motor
head (3) on the stainless steel container (9). Close the stainless steel container by folding up the bow handle and
xing it with the locking levers (14)
. The tension can be adjusted
with the locking lever adjusting screw.
Several positions are possible for the
bow handle.
4. Fit the accessories:
- Connect the suction hose (19).
- Fit the handle (20)
- Fit the telescopic suction pipe (17).
(Press the knob on the telescopic
suction pipe in the
separate to the desired length).
- Fit the desired nozzle (25/26).
Nevervacuumwithoutalter!
To store the suction set during
breaks, push together the telescopic
suction hose (17) and plug the suc-
direction and
Do not vacuum without a lter!
(How to insert the lter is described
in the chapters “dry vacuuming“
and “wet vacuuming“).
Switching On:
On/Off Switch (see
Switching Off:
On/Off Switch (see
6) In position “I“.
6) In position “0”.
Dry vacuuming
The appliance is supplied with the
folded lter (
23) tted.
Vacuuming with a uted lter:
1. For dry vacuuming, t the uted lter
(23) onto the lter basket (27) on the
motor head (3). The sealing lip that
curves upward must point away from
the motor head.
2. Fit the lter cover (22) and lock it with
a light turn:
Lock the lter cover
Unlock the lter cover
32
Page 33

MTGB
Vacuuming with the paper lter
bag:
To avoid the uted lter becoming
clogged, we recommend the addi-
tional use of a paper lter bag.
1. Fit the uted lter (23).
2. Fold the side aps on the paper lter
bag (24) down on the perforation.
3. Completely unfold the paper lter bag
(24) and pull it over the internal suction nozzle (8) in the stainless steel
container (9). The connector on the
suction nozzle must be completely en-
closed by the sealing ring on the lter
bag opening.
A ne dirt lter bag made of micro
lter eece is also optionally available, which can be used in place
of the included paper lter bag (see
“Spare parts/Accessories”).
To avoid tearing the foam lter (21):
- Use only a dry lter;
- Before inserting, twist the edge of
the lter slightly and then roll it back.
2. Suctioning up (draining) water: place
the suction hose (
(
20) into the water tank and suc-
tion up the water.
3. Empty the stainless steel container
immediately after suction cleaning because it is not designed to store liquids
(see „Cleaning/Maintenance“).
Never reach into the water to
be suctioned up. Danger of
electric shock.
When the container ( 9) is full, the
suction opening is shut off by a oat,
and suction is then cut off. Switch the
appliance off, remove the plug from
the socket and empty the container
(see “Cleaning/Maintenance”).
19) on the handle
Vacuuming with the dry lter
(fabric lter bag, optionally
available):
The anti-tear fabric lter bag, which is
optionally available (see “Spare parts/Accessories”), is suitable for vacuuming both
large and small dirt particles.
1. Place the foam lter (
basket (
2. Pull the fabric lter bag over the lter
basket.
27) (see “Wet Vacuuming”).
21) on the lter
Wet vacuuming
1. For wet vacuuming or to vacuum wa-
ter, t the foam lter (21) to the lter
basket (27) on the motor head (3).
If foam or liquid exits, switch off the
machine immediately.
Blow Function
Operation without the use of a lter
is recommended.
• Connect the suction hose (19) to the
connecting blower (15) on the motor
head (3).
33
Page 34

GB MT
Cleaning/Maintenance
Pull out the mains plug.
Danger of electric shock.
• Knock the optional dry lter (fabric
bag) out. Where necessary, wash with
lukewarm water and soap, and allow to
dry.
Always check the appliance before
use for any obvious faults such as
a defective mains cable, and have
these repaired or replaced.
Cleaning the device
Never hose the device down with
water. Never use aggressive cleaning agents or solvents. This could
damage the appliance.
• After use, empty the
tainer
( 9):
- Opening the drain plug to allow the
vacuumed liquid to drain out (
10). A liquid residue remains in the
container.
To remove all residual liquids, fold
down the bow handle (1) and
take off the motor head (
the bow handle with the locking
levers (14), hold the stainless steel
container (9) with one hand on the
bow handle and the other on the
bottom of the container and pour
out the residual liquid.
• Clean the waste tank with a damp
cloth.
• Wash the foam lter (
warm water and soap, and allow to
dry.
• Beat the dust out of the uted lter
(
23) and clean it with a paint brush
or hand brush.
• Replace the paper lter bag (
when full (see “Spare parts/Accessories” for reordering)
stainless steel con-
3): x
21) with luke-
24)
Storage
1. Fold the handle (4) upwards.
2. Wind the mains lead (5) around
the handle (4).
3. Wind the suction hose (19)
around the handle (4). Both
mounts (16) fasten the suction
hose.
4. The accessory holders (13) are
used to store the telescopic suction pipe (17) and the nozzles
(25/26).
5. Store the appliance in a dry
place and out of reach of children.
Disposal/Environmental
protection
Be environmentally friendly. Return the
tool, accessories and packaging to a recy-
cling centre when you have nished with
them.
Machines must not be disposed of
with household refuse.
Take the machine to a recycling point. The
waste plastic and metal parts can be separated, accurately graded and passed on
for recycling. Contact our Service Centre
for more details. Defective units returned to
us will be disposed of for free.
34
Page 35

MTGB
Spare Parts/Accessories
Spare parts and accessories can be obtained at
www.grizzly-service.eu
If you do not have internet access, please contact the Service Centre via telephone (see
“Sercice-Center” Page 38). Please have the order number mentioned below ready.
Position Position Description Order No.
instruction exploded
manual drawing
1,2 1 Bow handle, complete 91098994
3 3 Motor housing 91102247
9 9 Stainless steel container 91098995
10 Drainage outlet 91098997
12 Anti-static chain 91092034
17/18 17 Telescopic suction pipe 91099003
19 19 Suction hose 91099004
20 20 Handle with air regulation 91099006
21 21
23 23 Fluted lter without lter cover,
with steel inner mesh 91099009
24 24 Paper lter bags, 30 l, pack of 5 30250133
25 25 Switchable household nozzle 91099008
26 26 Crevice nozzle 91099005
Foam lter
, pack of 3 30250101
Optionally available:
Description Design Use ProductNo.
Fluted lter with
lter cover
Fine dirt lter bag
30l, pack of 5
Dry lter Blue fabric bag, washable
Cushion nozzle 72800040
Car nozzle 91096445
Without steel inner mesh
2-layer micro lter eece, white
91092030
30250110
30250135
35
Page 36

GB MT
Trouble shooting
Problem Possiblecause Faultcorrection
Check plug socket, cable,
Mains voltage is not
present
line, plug and fuse, where
appropriate, repair through
electrical specialist
Device does not start
Low or lack of suction
Float does not switch
the appliance off
Defective on/off switch
(
6)
Worn carbon brushes
Defective motor
Hose system (
(
25/26) blocked
Suction pipe (
assembled incorrectly
Container (
Container (
Filter (
or clogged
Float in the lter basket
(
27) does not move
Float in the lter basket
(
27) faulty
Float in the lter basket
(
27) does not move
Float in the lter basket
(
27) faulty
19) or jets
17)
9) open
9) full
21/23/24) full
Repair by Customer Care
Remove obstructions and
blockages
Assemble suction pipe correctly
Close container
Empty container
Empty, clean or replace lter
Release oat
Repair by Customer Care
Release oat
Repair by Customer Care
36
Page 37

MTGB
Guarantee
Dear Customer,
This equipment is provided with a 3-year
guarantee from the date of purchase.
In case of defects, you have statutory rights
against the seller of the product. These
statutory rights are not restricted by our
guarantee presented below.
Terms of Guarantee
The term of the guarantee begins on the
date of purchase. Please retain the original
receipt. This document is required as proof
of purchase.
If a material or manufacturing defect
occurs within three years of the date of
purchase of this product, we will repair or
replace – at our choice – the product for
you free of charge. This guarantee requires
the defective equipment and proof of purchase to be presented within the three-year
period with a brief written description of
what constitutes the defect and when it occurred.
If the defect is covered by our guarantee,
you will receive either the repaired product
or a new product. No new guarantee period begins on repair or replacement of the
product.
Guarantee Period and Statutory
Claims for Defects
The guarantee period is not extended by
the guarantee service. This also applies for
replaced or repaired parts. Any damages
and defects already present at the time of
purchase must be reported immediately after unpacking. Repairs arising after expiry
of the guarantee period are chargeable.
Guarantee Cover
The equipment has been carefully pro-
duced in accordance with strict quality
guidelines and conscientiously checked
prior to delivery.
The guarantee applies for all material and
manufacturing defects. This guarantee
does not extend to cover product parts that
are subject to normal wear and may therefore be considered as wearing parts (e.g.
lters or attachments) or to cover damage
to breakable parts (e.g. switches, batteries,
or parts made of glass).
This guarantee shall be invalid if the product has been damaged, used incorrectly or
not maintained. Precise adherence to all of
the instructions specied in the operating
manual is required for proper use of the
product. Intended uses and actions against
which the operating manual advises or
warns must be categorically avoided.
The product is designed only for private
and not commercial use. The guarantee
will be invalidated in case of misuse or
improper handling, use of force, or interventions not undertaken by our authorised
service branch.
Processing in Case of Guarantee
To ensure efcient handling of your query,
please follow the directions below:
• Please have the receipt and identication number (IAN 100131) ready as
proof of purchase for all enquiries.
• Please nd the item number on the rating plate.
• Should functional errors or other defects occur, please initially contact the
service department specied below by
telephone or by e-mail. You will then
receive further information on the processing of your complaint.
• After consultation with our customer
service, a product recorded as defec-
37
Page 38

GB MT
tive can be sent postage paid to the
service address communicated to you,
with the proof of purchase (receipt)
and specication of what constitutes
the defect and when it occurred. In order to avoid acceptance problems and
additional costs, please be sure to use
only the address communicated to you.
Ensure that the consignment is not sent
carriage forward or by bulky goods,
express or other special freight. Please
send the equipment inc. all accessories
supplied at the time of purchase and
ensure adequate, safe transport packaging.
Repair Service
For a charge, repairsnotcoveredbythe
guarantee can be carried out by our ser-
vice branch, which will be happy to issue
a cost estimate for you.
We can handle only equipment that has
been sent with adequate packaging and
postage.
Attention: Please send your equipment to
our service branch in clean condition and
with an indication of the defect.
Equipment sent carriage forward or by
bulky goods, express or other special
freight will not be accepted.
We will dispose of your defective devices
free of charge when you send them to us.
Service-Center
Service Great Britain
GB
Tel.: 0871 5000 720
(£ 0.10/Min.)
E-Mail: grizzly@lidl.co.uk
IAN 100131
Service Malta
MT
Tel.: 80062230
E-Mail: grizzly@lidl.com.mt
IAN 100131
Importer
Please note that the following address is
not a service address. Please initially con-
tact the service centre specied above.
Grizzly Tools GmbH & Co. KG
Am Gewerbepark 2
64823 Groß-Umstadt
Germany
www.grizzly-service.eu
38
Page 39

DE AT CH
Inhalt
Einleitung ...................................39
Bestimmungsgemäße
Verwendung .............................. 40
Allgemeine Beschreibung ........... 40
Lieferumfang..................................40
Funktionsbeschreibung .................... 40
Übersicht ......................................41
Technische Daten........................41
Sicherheitshinweise ....................41
Bildzeichen in der Anleitung ............ 41
Allgemeine Sicherheitshinweise .......42
Zusammenbau ...........................43
Bedienung .................................43
Ein-/Ausschalten ............................43
Trockensaugen ............................... 44
Nass-Saugen ................................. 44
Blasfunktion ................................... 45
Reinigung/Wartung ................... 45
Gerät reinigen ...............................45
Aufbewahrung ..........................45
Fehlersuche ................................46
Entsorgung/Umweltschutz..........46
Ersatzteile/Zubehör ...................47
Garantie ....................................48
Reparatur-Service ......................49
Service-Center ............................ 49
Importeur .................................. 49
Original EG-Konformitäts-
erklärung ..................................52
Explosionszeichnung .................. 53
Dieses Gerät kann von Kindern ab
8Jahren und darüber sowie von
Personen mit verringerten physischen, sensorischen oder mentalen
Fähigkeiten oder Mangel an Erfahrung und Wissen benutzt werden,
wenn sie beaufsichtigt oder bezüglich des sicheren Gebrauchs des
Gerätes unterwiesen wurden und
die daraus resultierenden Gefahren verstehen. Kinder dürfen nicht
mit dem Gerät spielen. Reinigung
und Benutzer-Wartung dürfen nicht
von Kindern ohne Beaufsichtigung
durchgeführt werden.
Einleitung
Herzlichen Glückwunsch zum Kauf Ihres
neuen Gerätes. Sie haben sich damit für
ein hochwertiges Produkt entschieden.
Dieses Gerät wurde während der Produktion
auf Qualität geprüft und einer Endkontrolle
unterzogen. Die Funktionsfähigkeit Ihres
Gerätes ist somit sichergestellt. Es ist nicht
auszuschließen, dass sich in Einzelfällen am
oder im Gerät, bzw. in Schlauchleitungen
Restmengen von Wasser oder Schmierstof-
fen benden. Dies ist kein Mangel oder
Defekt und kein Grund zur Besorgnis.
Die Betriebsanleitung ist Be-
standteil dieses Produkts.
Sie enthält wichtige Hinweise für Sicherheit, Gebrauch und Entsorgung. Machen
Sie sich vor der Benutzung des Produkts
mit allen Bedien- und Sicherheitshinweisen
vertraut. Benutzen Sie das Produkt nur wie
beschrieben und für die angegebenen Einsatzbereiche.
Bewahren Sie die Anleitung gut auf und
händigen Sie alle Unterlagen bei Weitergabe des Produkts an Dritte mit aus.
39
Page 40

DE AT CH
Bestimmungsgemäße
Verwendung
Das Gerät ist zum Nass- und Trockensaugen im häuslichen Bereich wie z.B. im
Haushalt, im Hobbyraum, im Auto oder in
der Garage bestimmt.
Dieses Gerät ist nicht zur gewerblichen
Nutzung geeignet. Bei gewerblichem Einsatz erlischt die Garantie.
Das Aufsaugen von brennbaren, explosiven oder gesundheitsgefährdenden Stoffen
ist verboten.
Der Hersteller haftet nicht für Schäden, die
durch bestimmungswidrigen Gebrauch
oder falsche Bedienung verursacht wurden.
Allgemeine
Beschreibung
Die Abbildungen nden Sie auf
der vorderen und hinteren Ausklappseite.
Lieferumfang
Packen Sie das Gerät aus und kontrollieren
Sie, ob es vollständig ist.
Das Gerät wird mit aufgesetztem Motorkopf (
Zum Abnehmen des Motorkopfes und Herausnehmen des Zubehörs
- lösen Sie die Feststellhebel (
- klappen Sie die Bügelgriff-Holme (
3) geliefert.
14)
und
2) nach unten in Richtung Saugstutzen
(
8).
- Motorkopf
- Edelstahlbehälter
- Bügelgriff
- 4 Lenkrollen mit Zubehöraufnahmen
- Teleskop-Saugrohr
- Saugschlauch
- Handgriff mit Luftregulierung
- Schaumstofflter
- Faltenlter mit Verschlussdeckel
(bereits montiert)
- Papierlterbeutel
- Umschaltbare Bodendüse
- Fugendüse
- 6 Kreuzschlitzschrauben
- Originalbetriebsanleitung
Entsorgen Sie das Verpackungsmaterial
ordnungsgemäß.
Funktionsbeschreibung
Das Gerät ist mit einem stabilen Edelstahlbehälter zur Flüssigkeits- und Staubaufnahme ausgestattet.
Die Lenkrollen ermöglichen eine große
Wendigkeit des Gerätes. Beim NassSaugen erfolgt die Abschaltung des SaugLuftstroms durch einen Schwimmer, wenn
der Edelstahlbehälter voll ist. Zusätzlich
besitzt das Gerät eine Blasfunktion.
Zur Verhinderung einer elektrostatischen
Auadung während des Saugens ist an
der Geräteunterseite eine Antistatik-Kette
montiert.
Die Funktion der Bedienteile entnehmen Sie
bitte den nachfolgenden Beschreibungen.
40
Page 41

DE AT CH
Übersicht
Technische Daten
Gehäuse
1 Bügelgriff
2 2 Bügelgriff-Holme
3 Motorkopf
4 Tragegriff
5 Netzanschlussleitung
6 Ein-/Ausschalter
7 Lüftungsöffnungen
8 Anschluss Saugen, Saugstutzen
9 Edelstahlbehälter
10 Schraubdeckel zum Ablassen
von Flüssigkeit
11 4 Lenkrollen
12 Antistatik-Kette
13 4 Zubehöraufnahmen
14 Feststellhebel
15 Anschluss Blasen
16 2 Halterungen am Tragegriff
Zubehör
17 Teleskop-Saugrohr
18 Saugrohrhalter
19 Saugschlauch
20 Handgriff mit Luftregulierung
Filter
21 Schaumstofflter (Nasslter) zum
Nass-Saugen
22 Verschlussdeckel
23 Faltenlter zum Trockensaugen
24 Papierlterbeutel zum Saugen
von Grob- und Feinschmutz
Düsen
25 Umschaltbare Bodendüse
zum Saugen von Teppichen
zum Saugen von glatten Flächen
26 Fugendüse
Bemessungsspannung..230-240 V~, 50 Hz
Bemessungsaufnahme
(Anschlussleistung) ......................1400 W
Länge Netzanschlussleitung ................4 m
Schutzklasse .....................................
Schutzart .........................................IP24
Saugleistung ...............16 kPA (160 mbar)
Inhalt des Edelstahlbehälters
(brutto) .......................................... ca. 23 l
Nutzbares Behältervolumen .......... ca. 15 l
Gewicht (incl. aller Zubehörteile).....7,7 kg
Technische und optische Veränderungen
können im Zuge der Weiterentwicklung
ohne Ankündigung vorgenommen werden.
Alle Maße, Hinweise und Angaben dieser
Betriebsanleitung sind deshalb ohne Gewähr. Rechtsansprüche, die aufgrund der
Betriebsanleitung gestellt werden, können
daher nicht geltend gemacht werden.
II
Sicherheitshinweise
Bildzeichen in der Anleitung
Gefahrenzeichen mit Anga-
ben zur Verhütung von Personen- oder Sachschäden.
Gebotszeichen (anstelle des Aus-
rufungszeichens ist das Gebot erläutert) mit Angaben zur Verhütung
von Schäden.
Hinweiszeichen mit Informationen
zum besseren Umgang mit dem Gerät.
27 Filterkorb
41
Page 42

DE AT CH
Allgemeine
Sicherheitshinweise
Achtung! Beim Gebrauch von Elek-
trogeräten sind zum Schutz gegen
elektrischen Schlag, Verletzungs- und
Brandgefahr folgende grundsätzliche
Sicherheitsmaßnahmen zu beachten:
So vermeiden Sie Unfälle und Verletzungen:
• Hinterlassen Sie ein betriebsbereites Gerät nie unbeaufsichtigt am Arbeitsplatz.
• Menschen und Tiere dürfen mit dem
Gerät nicht abgesaugt werden.
• Richten Sie Saugschlauch und Düsen
während des Betriebs keinesfalls auf
sich selbst oder andere Personen, insbesondere nicht auf Augen und Ohren. Es
besteht Verletzungsgefahr.
• Saugen Sie keine heißen, glühenden,
brennbaren, explosiven oder gesundheitsgefährdenden Stoffe auf. Dazu
zählen unter anderem heiße Asche,
Benzin, Lösungsmittel, Säuren oder
Laugen. Es besteht Brand- und Verletzungsgefahr.
• Düsen und Saugrohr dürfen beim Arbeiten nicht in Kopfhöhe kommen. Es
besteht Verletzungsgefahr.
So vermeiden Sie Unfälle und
Verletzungen durch elektrischen
Schlag:
• Achten Sie darauf, dass die Netzanschlussleitung nicht durch Ziehen über
scharfe Kanten, Einklemmen oder Ziehen am Kabel beschädigt wird.
• Überprüfen Sie vor jeder Benutzung
die Netzanschlussleitung und das
Verlängerungskabel auf Schäden und
Alterung. Benutzen Sie das Gerät
nicht, wenn das Kabel beschädigt oder
abgenutzt ist.
• Wenn die Anschlussleitung dieses Gerätes beschädigt wird, muss sie durch
den Hersteller oder seinen Kunden-
dienst oder eine ähnliche qualizierte
Person ersetzt werden, um Gefährdungen zu vermeiden.
• Schalten Sie das Gerät aus und ziehen
Sie den Netzstecker:
- wenn Sie das Gerät nicht benutzen,
es transportieren oder unbeaufsichtigt lassen;
- wenn Sie das Gerät kontrollieren,
es reinigen oder Blockierungen entfernen;
- wenn Sie Reinigungs- oder War-
tungsarbeiten vornehmen oder
Zubehör auswechseln;
- wenn die Anschlussleitung beschä-
digt oder verwickelt ist;
- nach dem Kontakt mit Fremdkörpern
oder bei abnormaler Vibration.
• Benutzen Sie die Netzanschlussleitung
nicht, um den Stecker aus der Steckdose zu ziehen oder um das Gerät
zu ziehen. Schützen Sie die Netzanschlussleitung vor Hitze, Öl und scharfen Kanten.
• Achten Sie darauf, dass die Netzspannung mit den Angaben des Typenschildes übereinstimmt.
• Schließen Sie das Gerät nur an eine
Steckdose an, die mit mindestens 16A
abgesichert ist.
• Schließen Sie das Gerät an eine Steckdose mit Fehlerstrom-Schutzeinrichtung
(FI-Schalter) mit einem Bemessungsfehlerstrom von nicht mehr als 30 mA an.
So vermeiden Sie Geräteschäden
und eventuell daraus resultierende
Personenschäden:
• Achten Sie darauf, dass das Gerät korrekt zusammengebaut ist und die Filter
in der richtigen Position sind.
42
Page 43

DE AT CH
• Arbeiten Sie nicht ohne Filter. Das Gerät könnte beschädigt werden.
• Benutzen Sie nur Ersatz- und Zubehörteile (siehe „Ersatzteile/Zubehör“), die
von unserem Service-Center geliefert
und empfohlen werden. Der Einsatz
von Fremdteilen führt zum sofortigen
Verlust des Garantieanspruches.
• Lassen Sie Reparaturen nur von uns
ermächtigten Kundendienststellen ausführen.
• Beachten Sie die Hinweise zur Reinigung und Wartung des Gerätes.
• Bewahren Sie das Gerät an einem trockenen Ort und außerhalb der Reichweite von Kindern auf.
Zusammenbau
Ziehen Sie den Netzstecker. Es
besteht Verletzungsgefahr durch
elektrischen Schlag.
einstellen. Es sind mehrere Bügelgriffpositionen möglich.
4. Montieren Sie das Zubehör:
- Schließen Sie den Saugschlauch
(19) an.
- Montieren Sie den Handgriff (20).
- Montieren Sie das Teleskop-Saugrohr (17). (Schieber am TeleskopSaugrohr in Richtung
und auf die gewünschte Länge
auseinanderziehen).
- Montieren Sie die gewünschte Düse
(25/26).
SaugenSienieohneFilter!
Zur Aufbewahrung der Sauggarnitur
während einer kurzen Arbeitspause
schieben Sie das Teleskop-Saugrohr
(17) zusammen und stecken Sie den
Saugrohrhalter (18) in die Aufnahme
am Motorgehäuse (siehe
Bild).
drücken
kleines
Bei Lieferung des Gerätes ist der
Faltenlter (
1. Setzen Sie die 4 Lenkrollen (11) auf
die Aufnahmen am Edelstahlbehälter
(9) auf. Fixieren Sie jede Lenkrolle mit
einer Kreuzschlitzschraube (11a).
2. Stecken Sie den Bügelgriff (1) auf
die beiden Bügelgriff-Holme (2) und
schrauben Sie diese mit 2 Kreuzschlitzschrauben (1a) fest.
3. Klappen Sie den Bügelgriff (1) nach
unten in Richtung Saugstutzen (8).
Setzen Sie den Motorkopf (3) auf den
Edelstahlbehälter (9) auf. Verschließen
Sie den Edelstahlbehälter, indem Sie
den Bügelgriff hochklappen und ihn
mit den Feststellhebeln (14) arretieren
der Stellschraube des Feststellhebels
23) bereits montiert.
. Die Spannung lässt sich an
Bedienung
Wickeln Sie den Saugschlauch (
19) zum Arbeiten ganz ab.
Ein-/Ausschalten
Stecken Sie den Netzstecker des Ge-
rätes ein.
Saugen Sie nie ohne Filter!
(Das Einsetzen der Filter ist in den
Kapiteln „Trockensaugen“ und
„Nass-Saugen“ beschrieben).
Einschalten:
Ein-/Ausschalter (
Ausschalten:
Ein-/Ausschalter (
6) in Stellung „I“.
6) in Stellung „0“.
43
Page 44

DE AT CH
Trockensaugen
Bei Lieferung des Gerätes ist der Fal-
tenlter (23) bereits montiert.
Saugen mit dem Faltenlter:
1. Zum Trockensaugen setzen Sie den Fal-
tenlter (23) auf den Filterkorb (27) am
Motorkopf (3) auf. Dabei muss die nach
oben gewölbte Dichtlippe vom Motorkopf wegzeigen.
2. Setzen Sie den Verschlussdeckel (22)
auf und verriegeln Sie ihn durch eine
leichte Drehung:
Verschlussdeckel verriegeln
Verschlussdeckel entriegeln
Saugen mit dem Papierlterbeutel:
Damit sich der Faltenlter nicht zu
schnell zusetzt, empfehlen wir die
zuätzliche Verwendung des Papierlterbeutels.
1. Montieren Sie den Faltenlter (23).
2. Knicken Sie die seitlichen Laschen am
Papierlterbeutel (24) an der Perforation
nach unten.
3. Falten Sie den Papierlterbeutel (24)
komplett auf und stülpen Sie diesen
über den innen liegenden Einsaugstutzen (8) im Edelstahlbehälter (9). Der
Dichtungsring an der Filterbeutelöffnung
muss den Steg am Einsaugstutzen vollständig umschließen.
Optional ist ein Feinstaublterbeutel
aus Vlies erhältlich, der anstelle des
im Lieferumfang enthaltenen Papier-
lterbeutels verwendet werden kann
(siehe „Ersatzteile/Zubehör“).
Saugen mit dem Trockenlter
(Textillterbeutel, optional er-
hältlich):
Der optional erhältliche reißfeste Textil-
lterbeutel (siehe „Ersatzteile/Zubehör“)
ist zum Saugen von grobem und feinem
Schmutz geeignet.
1. Setzen Sie den Schaumstofflter (
21) auf den Filterkorb ( 27) auf (siehe „Nass-Saugen).
2. Stülpen Sie den Textillterbeutel über
den Filterkorb.
Nass-Saugen
1. Zum Nass-Saugen oder Wasser absau-
gen setzen Sie den Schaumstofflter
(21) auf den Filterkorb (27) am Motorkopf (3) auf:
Um das Einreißen des Schaumstoflters
(21) zu vermeiden,
- setzen Sie nur einen trockenen Filter
ein;
- schlagen Sie den Rand des Filters
zum Einsetzen etwas um und rollen
Sie ihn danach wieder zurück.
2. Absaugen (Abpumpen): Tauchen Sie
den Saugschlauch (
griff (
ein und saugen Sie das Wasser ab.
3. Entleeren Sie den Edelstahlbehälter
sofort nach dem Absaugen, da er nicht
zum Aufbewahren von Flüssigkeiten konstruiert ist (siehe „Reinigung/Wartung“).
20) in das Wasserbehältnis
Stellen Sie sich nicht in das
abzusaugende Wasser. Gefahr
durch elektrischen Schlag.
Ist der Edelstahlbehälter ( 9)
voll, schließt ein Schwimmer die
Saugöffnung, der Saugvorgang
19) am Hand-
44
Page 45

DE AT CH
wird unterbrochen. Schalten Sie
das Gerät ab und entleeren Sie den
Edelstahlbehälter (siehe „Reinigung/
Wartung“).
Schalten Sie das Gerät bei Schaum-
oder Flüssigkeitsaustritt sofort aus.
Blasfunktion
Die Blasfunktion ist ohne Verwen-
dung eines Filters zu empfehlen.
• Schließen Sie den Saugschlauch (19)
an den Anschluss Blasen (15) am Motorkopf (3) an.
Reinigung/Wartung
Ziehen Sie den Netzstecker.
Es besteht Verletzungsgefahr durch
elektrischen Schlag.
Kontrollieren Sie das Gerät vor
jedem Gebrauch auf offensichtliche Mängel wie z.B. eine defekte
Netzanschlussleitung und lassen Sie
diese reparieren oder ersetzen.
Um sämtliche Flüssigkeitsreste zu
entfernen, klappen Sie den Bügelgriff (1) nach unten und nehmen
Sie den Motorkopf (
retieren Sie den Bügelgriff mit den
Feststellhebeln (14). Fassen Sie den
Edelstahlbehälter (9) mit einer Hand
am Bügelgriff und mit der anderen
an der Behälterunterseite und gießen Sie den Flüssigkeitsrest aus.
• Reinigen Sie den Edelstahlbehälter mit
einem feuchten Lappen.
• Waschen Sie den Schaumstofflter
(
21) mit lauwarmem Wasser und
Seife aus und lassen Sie ihn trocknen.
• Klopfen Sie den Faltenlter (
aus und reinigen Sie ihn mit einem Pinsel oder Handfeger.
• Tauschen Sie einen vollen Papierlterbeutel (
siehe Kapitel „Ersatzteile/Zubehör“).
• Klopfen Sie den optional erhältlichen
Trockenlter (Textillterbeutel) aus.
Waschen Sie ihn ggf. mit lauwarmem
Wasser und Seife und lassen Sie ihn
trocknen.
24) aus (Nachbestellung
3) ab. Ar-
23)
Aufbewahrung
Gerät reinigen
Spritzen Sie das Gerät nicht mit
Wasser ab und verwenden Sie
keine scharfen Reinigungs- bzw.
Lösungsmittel. Das Gerät könnte
beschädigt werden.
• Leeren Sie nach dem Betrieb den Edelstahlbehälter (
- Die aufgesaugte Flüssigkeit können
Sie nach Öffnen des Schraubdeckels (
bleibt ein Flüssigkeitsrest im Edelstahlbehälter zurück.
9) aus:
10) abießen lassen. Es
1. Klappen Sie den Tragegriff (4)
nach oben.
2. Wickeln Sie die Netzanschlussleitung (5) um den Tragegriff (4).
3. Wickeln Sie den Saugschlauch
(19) um den Tragegriff (4). Die
beiden Halterungen (16) xieren
den Saugschlauch.
4. Zur Aufbewahrung des TeleskopSaugrohres (17) und der Düsen
(25/26) dienen die Zubehöraufnahmen (13).
5. Bewahren Sie das Gerät an einem trockenen Ort und außerhalb
der Reichweite von Kindern auf.
45
Page 46

DE AT CH
Entsorgung/Umweltschutz
Führen Sie Gerät, Zubehör und Verpackung einer umweltgerechten Wiederverwertung zu.
Elektrogeräte gehören nicht in den Hausmüll.
Geben Sie das Gerät an einer Verwertungsstelle ab. Die verwendeten Kunststoff- und
Metallteile können sortenrein getrennt werden und so einer Wiederverwertung zugeführt
werden. Fragen Sie hierzu unser Service-Center.
Die Entsorgung Ihrer defekten eingesendeten Geräte führen wir kostenlos durch.
Fehlersuche
Problem Mögliche Ursache Fehlerbehebung
Steckdose, Netzanschlussleitung,
Netzstecker, Leitung und Sicherung
prüfen, ggf. Reparatur durch Elektrofachmann
Reparatur durch Kundendienst
Verstopfungen und Blockierungen
beseitigen
Saugrohr richtig zusammensetzen
Behälter schließen
Behälter entleeren
Filter entleeren, reinigen oder
ersetzen
27)
Schwimmer freimachen
27)
Reparatur durch Kundendienst
27)
Schwimmer freimachen
27)
Reparatur durch Kundendienst
Gerät startet
nicht
Geringe oder
fehlende
Saugleistung
Schwimmer
schaltet das
Gerät nicht
ab
Netzspannung fehlt
Ein-/Ausschalter (
Kohlebürsten abgenutzt
Motor defekt
Saugschlauch (
sen ( 25/26) verstopft
Teleskop-Saugrohr (
korrekt zusammengesetzt
Edelstahlbehälter (
Edelstahlbehälter (
Filter (
zugesetzt
Schwimmer im Filterkorb (
bewegt sich nicht
Schwimmer im Filterkorb (
defekt
Schwimmer im Filterkorb (
bewegt sich nicht
Schwimmer im Filterkorb (
defekt
21/23/24) voll oder
6) defekt
19) oder Dü-
17) nicht
9) offen
9) voll
46
Page 47

DE AT CH
Ersatzteile/Zubehör
Ersatzteile und Zubehör erhalten Sie unter www.grizzly-service.eu
Sollten Sie kein Internet haben, so wenden Sie sich bitte telefonisch an das Service-Center
(siehe „Service-Center“ Seite 49). Halten Sie die unten genannten Bestellnummern bereit.
Position Position Bezeichnung Bestell-Nr.
Betriebs- Explosionsanleitung zeichnung
1,2 1 Bügelgriff, komplett 91098994
3 3 Motorkopf 91102247
9 9 Edelstahlbehälter 91098995
10 Schraubdeckel zum Ablassen von Flüssigkeit 91098997
12 Antistatik-Kette 91092034
17/18 17 Teleskopsaugrohr 91099003
19 19 Saugschlauch 91099004
20 20 Handgriff mit Luftregulierung 91099006
21 21 Schaumstoff-Filter, 3er Pack 30250101
23 23 Faltenlter ohne Verschlussdeckel
mit Stahlinnengeecht 91099009
24 24 Papierlterbeutel, 30l, 5er Pack 30250133
25 25 Umschaltbare Bodendüse 91099008
26 26 Fugendüse 91099005
Zusätzlich erhältlich:
Bezeichnung Ausführung Einsatz Artikel-Nr.
Faltenlter mit
Verschlussdeckel
Feinstaublterbeutel
30l, 5er-Pack
Trockenlter
Polsterdüse 72800040
Autodüse 91096445
ohne Stahlinnengeecht
2-lagiger Microlter-Vlies, weiß
Textillterbeutel, blau, aus-
waschbar
91092030
30250110
30250135
47
Page 48

DE AT CH
Garantie
Sehr geehrte Kundin, sehr geehrter Kunde,
Sie erhalten auf dieses Gerät 3 Jahre Garantie ab Kaufdatum.
Im Falle von Mängeln dieses Produkts
stehen Ihnen gegen den Verkäufer des
Produkts gesetzliche Rechte zu. Diese
gesetzlichen Rechte werden durch unsere
im Folgenden dargestellte Garantie nicht
eingeschränkt.
Garantiebedingungen
Die Garantiefrist beginnt mit dem Kaufdatum. Bitte bewahren Sie den Original Kassenbon gut auf. Diese Unterlage wird als
Nachweis für den Kauf benötigt.
Tritt innerhalb von drei Jahren ab dem Kaufdatum dieses Produkts ein Material- oder
Fabrikationsfehler auf, wird das Produkt von
uns – nach unserer Wahl – für Sie kostenlos
repariert oder ersetzt. Diese Garantieleistung setzt voraus, dass innerhalb der DreiJahres-Frist das defekte Gerät und der Kaufbeleg (Kassenbon) vorgelegt und schriftlich
kurz beschrieben wird, worin der Mangel
besteht und wann er aufgetreten ist.
Wenn der Defekt von unserer Garantie
gedeckt ist, erhalten Sie das reparierte oder
ein neues Produkt zurück. Mit Reparatur
oder Austausch des Produkts beginnt kein
neuer Garantiezeitraum.
Garantiezeit und gesetzliche
Mängelansprüche
Die Garantiezeit wird durch die Gewährleistung nicht verlängert. Dies gilt auch
für ersetzte und reparierte Teile. Eventuell
schon beim Kauf vorhandene Schäden und
Mängel müssen sofort nach dem Auspacken gemeldet werden. Nach Ablauf der
Garantiezeit anfallende Reparaturen sind
kostenpichtig.
Garantieumfang
Das Gerät wurde nach strengen Qualitätsrichtlinien sorgfältig produziert und vor
Anlieferung gewissenhaft geprüft.
Die Garantieleistung gilt für Material- oder
Fabrikationsfehler. Diese Garantie erstreckt
sich nicht auf Produktteile, die normaler Abnutzung ausgesetzt sind und daher als Verschleißteile angesehen werden können (z.B.
Filter oder Aufsätze) oder für Beschädigungen an zerbrechlichen Teilen (z.B. Schalter,
Akkus oder die aus Glas gefertigt sind).
Diese Garantie verfällt, wenn das Produkt
beschädigt, nicht sachgemäß benutzt oder
nicht gewartet wurde. Für eine sachgemäße
Benutzung des Produkts sind alle in der Betriebsanleitung aufgeführten Anweisungen
genau einzuhalten. Verwendungszwecke
und Handlungen, von denen in der Betriebsanleitung abgeraten oder vor denen gewarnt wird, sind unbedingt zu vermeiden.
Das Produkt ist lediglich für den privaten
und nicht für den gewerblichen Gebrauch
bestimmt. Bei missbräuchlicher und unsachgemäßer Behandlung, Gewaltanwendung
und bei Eingriffen, die nicht von unserer
autorisierten Service-Niederlassung vorgenommen wurden, erlischt die Garantie.
Abwicklung im Garantiefall
Um eine schnelle Bearbeitung Ihres Anliegens zu gewährleisten, folgen Sie bitte den
folgenden Hinweisen:
• Bitte halten Sie für alle Anfragen den
Kassenbon und die Identikationsnummer (IAN100131) als Nachweis für
den Kauf bereit.
• Die Artikelnummer entnehmen Sie bitte
dem Typenschild.
• Sollten Funktionsfehler oder sonstige
Mängel auftreten kontaktieren Sie
zunächst die nachfolgend benannte
48
Page 49

DE AT CH
Serviceabteilung telefonischoder per
E-Mail. Sie erhalten dann weitere In-
formationen über die Abwicklung Ihrer
Reklamation.
• Ein als defekt erfasstes Produkt können
Sie, nach Rücksprache mit unserem
Kundenservice, unter Beifügung des
Kaufbelegs (Kassenbons) und der
Angabe, worin der Mangel besteht
und wann er aufgetreten ist, für Sie
portofrei an die Ihnen mitgeteilte
Service-Anschrift übersenden. Um Annahmeprobleme und Zusatzkosten zu
vermeiden, benutzen Sie unbedingt nur
die Adresse, die Ihnen mitgeteilt wird.
Stellen Sie sicher, dass der Versand
nicht unfrei, per Sperrgut, Express oder
sonstiger Sonderfracht erfolgt. Senden
Sie das Gerät bitte inkl. aller beim
Kauf mitgelieferten Zubehörteile ein
und sorgen Sie für eine ausreichend
sichere Transportverpackung.
Reparatur-Service
Sie können Reparaturen, dienichtderGarantieunterliegen, gegen Berechnung von
unserer Service-Niederlassung durchführen
lassen. Sie erstellt Ihnen gerne einen Kostenvoranschlag.
Wir können nur Geräte bearbeiten, die
ausreichend verpackt und frankiert eingesandt wurden.
Achtung: Bitte senden Sie Ihr Gerät gereinigt und mit Hinweis auf den Defekt an
unsere Service-Niederlassung.
Nicht angenommen werden unfrei - per
Sperrgut, Express oder mit sonstiger Sonderfracht - eingeschickte Geräte.
Die Entsorgung Ihrer defekten eingesendeten Geräte führen wir kostenlos durch.
Service-Center
Service Deutschland
DE
Tel.: 0800 54 35 111
E-Mail: grizzly@lidl.de
IAN 100131
Service Österreich
AT
Tel.: 0820 201 222
(0,15 EUR/Min.)
E-Mail: grizzly@lidl.at
IAN 100131
Service Schweiz
CH
Tel.: 0842 665566
(0,08 CHF/Min.,
Mobilfunk max. 0,40 CHF/Min.)
E-Mail: grizzly@lidl.ch
IAN 100131
Importeur
Bitte beachten Sie, dass die folgende
Anschrift keine Serviceanschrift ist. Kontaktieren Sie zunächst das oben genannte
Service-Center.
Grizzly Tools GmbH & Co. KG
Am Gewerbepark 2
D-64823 Groß-Umstadt
www.grizzly-service.eu
49
Page 50

IT
MT
Traduzione della di-
chiarazione di confor-
mità CE originale
PT
Tradução do original
da Declaração
de conformidade CE
Con la presente dichiariamo che
l‘aspirapolvere-liquidi
seriePNTS1400D1
Numero di serie
201406000001 - 201408101132
corrisponde alle seguenti direttive UE in
materia nella rispettiva versione valida:
2004/108/EC•2006/95/EC•2011/65/EU*
Per garantire la conformità sono state
applicate le seguenti norme armonizzate
e anche le norme e disposizioni nazionali
che seguono:
EN60335-1:2012•EN60335-2-2/A11:2012
EN55014-1/A2:2011•EN55014-2/A2:2008
EN61000-3-2/A2:2009•EN61000-3-3:2013•EN62233:2008
Il produttore è il solo responsabile della
stesura della presente dichiarazione di conformità (14)**:
Grizzly Tools GmbH & Co. KG
Am Gewerbepark 2
D-64823 Groß-Umstadt, Germany
08.08.2014
Vimos, por este meio, declarar que o
Aspiradordeliquidos/pó
da série PNTS1400D1
Número de série
201406000001 - 201408101132
corresponde às respectivas normas da UE
na sua versão em vigor:
Para garantir a conformidade, foram aplicadas as seguintes normas harmonizadas
bem como normas e disposições nacionais:
O fabricante é o único responsável pela
emissão desta declaração de conformidade
(14)**:
Volker Lappas
(Responsabile documentazione tecnica,
Encarregado de documentação)
* L’oggetto descritto sopra è conforme alle prescrizioni
della Direttiva 2011/65/EU del Parlamento Europeo
e del Consiglio dell’8 giugno 2011 sulla restrizione
dell’uso di determinate sostanze pericolose nelle apparecchiature elettriche ed elettroniche.
** Le ultime due cifre dell’anno nel quale è stato apportato il marchio CE.
50
* O objeto acima descrito da declaração cumpre as
normas da diretiva 2011/65/UE do Parlamento Europeu e do Conselho do dia 8 de junho de 2011 sobre
a restrição da utilização de determinadas substâncias
em aparelhos elétricos e eletrónicos.
** Os últimos dois algarismos do ano, em que a marca CE foi aplicada.
Page 51

GB
MT
We hereby conrm
that the
PNTS 1400 D1series
wetanddryvacuumcleaner
Serial no.
201406000001 - 201408101132
conforms with the following applicable relevant version of the EU guidelines:
2004/108/EC•2006/95/EC•2011/65/EU*
In order to guarantee consistency, the following harmonised standards as well as national standards and stipulations have been applied:
EN60335-1:2012•EN60335-2-2/A11:2012
EN55014-1/A2:2011•EN55014-2/A2:2008
EN61000-3-2/A2:2009•EN61000-3-3:2013•EN62233:2008
Translation of the original
EC declaration of conformity
This declaration of conformity (14)** is issued under the sole responsibility of the manufacturer:
Grizzly Tools GmbH & Co. KG
Am Gewerbepark 2
D-64823 Groß-Umstadt, Germany
08.08.2014
Volker Lappas
(Documentation Representative)
* The object of the declaration described above satises the provisions of Directive 2011/65/EU
of the European Parliament and the Council of 8 June 2011 on limiting the use of certain harmful
substances in electrical and electronic appliances.
** The last two digits of the year in which the CE marking was afxed.
51
Page 52

DE
AT
Original EG-Konformitätserklärung
CH
Hiermit bestätigen wir, dass der
Nass-undTrockensauger
BaureihePNTS1400D1
Seriennummer
201406000001 - 201408101132
folgenden einschlägigen EU-Richtlinien in ihrer jeweils gültigen Fassung entspricht:
2004/108/EG•2006/95/EG•2011/65/EU*
Um die Übereinstimmung zu gewährleisten, wurden folgende harmonisierte Normen
sowie nationale Normen und Bestimmungen angewendet:
EN60335-1:2012•EN60335-2-2/A11:2012
EN61000-3-2/A2:2009•EN61000-3-3:2013•EN62233:2008
EN55014-1/A2:2011•EN55014-2/A2:2008
Die alleinige Verantwortung für die Ausstellung dieser Konformitätserklärung (14)** trägt
der Hersteller:
Grizzly Tools GmbH & Co. KG
Am Gewerbepark 2
D-64823 Groß-Umstadt
08.08.2014
(Dokumentationsbevollmächtigter)
* Der oben beschriebene Gegenstand der Erklärung erfüllt die Vorschriften der Richtlinie
2011/65/EU des Europäischen Parlaments und des Rates vom 8. Juni 2011 zur Beschränkung
der Verwendung bestimmter gefährlicher Stoffe in Elektro- und Elektronikgeräten.
** Die beiden letzten Ziffern des Jahres, in dem die CE-Kennzeichnung angebracht wurde.
Volker Lappas
52
Page 53

Disegno esploso • Vista en corte
Explosionszeichnung • Exploded Drawing
PNTS 1400 D1
1 1
3
1
9
1 7
1 9
2 0
2 1
2 2
2 3
2 4
2 5
2 6
informativo, informativ, informative
2014-08-01_rev02_gs
53
Page 54

1a
1
3
20
18
17
27
19
24
3
8
9
31519
8
25
23
22
9
2
9
11a
11
26
11
1
17
14
25
27
21
3
4
16
5
19
1
17
9
14
26
13
Page 55

Page 56

GRIZZLY TOOLS GMBH & CO. KG
Am Gewerbepark 2
D-64823 Groß-Umstadt
Versione delle informazioni · Estado das
informações · Last Information Update
Stand der Informationen: 06 / 2014
Ident.-No.: 72080356062014-IT / PT
IAN 100131
 Loading...