

Page 1

Paradigm™ Infusion Pump
Model MMT-511
User Guide
Page 2

2005, Medtronic MiniMed. All rights reserved.
©
This product is covered by U.S. Patent Nos. 6,551,276 and 6,554,798. Other U.S.
and/or foreign patents may be pending.
Bolus Wizard
®
is a registered trademark of Medtronic MiniMed.
Dual Wave™ is a trademark of Medtronic MiniMed.
Easy Bolus™ is a trademark of Medtronic MiniMed.
Square Wave™ is a trademark of Medtronic MiniMed.
BD Logic™ is a trademark of Becton, Dickinson and Company
Energizer
Glucagon Emergency Kit
Paradigm
®
is a registered trademark of Eveready Battery Company.
®
is a registered trademark of Eli Lilly and Company.
®
is a registered trademark of Medtronic MiniMed.
Paradigm Link™ is a trademark of Medtronic MiniMed.
The Link™ is a trademark of Becton, Dickinson and Company (Canada only)
Quick-serter
Quick-set
Silhouette
®
is a registered trademark of Medtronic MiniMed.
®
is a registered trademark of Medtronic MiniMed.
®
is a registered trademark of Medtronic MiniMed.
®
Sof-set
is a registered trademark of Medtronic MiniMed
U.S., international, and foreign patent applications are pending.
D9195890-015 040705
Page 3

Important Safety Information Regarding Your
Paradigm Insulin Infusion Pump (includes all models)
Avoid Immersing Your Pump In Water
Although it is unlikely that water damage will occur if your pump is splashed
or briefly dunked, you should avoid immersing your Paradigm infusion pump
in water. To swim or participate in other water activities, always disconnect
from your Paradigm pump and reconnect after water play.
If you inadvertently submerge your pump in water, dry the pump quickly
using a soft, clean towel and verify that it is working properly by selecting
“self test” from the pump’s Utilities Menu. If you believe that water has
entered your pump or you observe any other possible pump malfunction,
please check your blood glucose, treat high blood glucose (if necessary) with
an injection and contact our 24-Hour Help Line at 1-800-MINIMED
(1-800-646-4633) for further assistance. Symptoms of high blood glucose
include fatigue, excessive thirst and nausea. You should always contact your
healthcare professional if you experience excessively high or low blood
glucose levels, or if you have any questions about your care.
Electrostatic Discharge
Although your Paradigm pump is designed to be unaffected by typical levels
of electrostatic discharge (ESD), very high levels of ESD can result in a reset
of the pump’s software with an associated pump error alarm. In most cases,
exposure to high levels of ESD will trigger the pump’s E-13 alarm although,
under certain circumstances, high level ESD exposure can cause E-44, Bolus
Stopped or Max Delivery alarms. High levels of ESD are more likely in
situations where the relative humidity is very low, such as inside a heated
building during the winter in areas where it is cold outside.
If your pump experiences an E-13 or other error alarm, press the “ESC” and
“ACT” buttons to clear the alarm. If you are unable to clear the alarm by
pressing “ESC” and “ACT”, you may need to remove and replace the pump’s
battery to clear the alarm. After clearing the alarm, you should always verify
that your pump is set to the correct date and time and that all other settings
(basal rate, max basal and bolus limits, etc.) are programmed to the desired
values, since the software reset could erase your previously programmed
settings. Please see the Alarms and Alerts section of this User Guide for
more details regarding what to do if your pump displays an error alarm or
other alert message.
Please contact our 24-Hour Help Line at 1-800-MINIMED (1-800-646-4633)
to report any error alarms or other problems that occur with your pump.
Page 4

Page 5

Table of Contents
• • • • • •
Chapter 1
Introduction . . . . . . . . . . . . . . . . . . . . . . . . . . . 1
For your records . . . . . . . . . . . . . . . . . . . . . . . . . . . . . . 1
Assistance . . . . . . . . . . . . . . . . . . . . . . . . . . . . . . . . . . . . 2
Availability . . . . . . . . . . . . . . . . . . . . . . . . . . . . . . . . . . . 2
Emergency kit . . . . . . . . . . . . . . . . . . . . . . . . . . . . . . .3
Pump and user guide conventions . . . . . . . . . . . . . . . . 4
Your pump . . . . . . . . . . . . . . . . . . . . . . . . . . . . . . . . . . . 5
Installing the battery the first time. . . . . . . . . . . . . . . . 6
Home screen . . . . . . . . . . . . . . . . . . . . . . . . . . . . . . . .8
Modes of operation . . . . . . . . . . . . . . . . . . . . . . . . . . . .8
Normal . . . . . . . . . . . . . . . . . . . . . . . . . . . . . . . . . . .8
Special . . . . . . . . . . . . . . . . . . . . . . . . . . . . . . . . . . . .8
Attention . . . . . . . . . . . . . . . . . . . . . . . . . . . . . . . . . .9
Pump buttons . . . . . . . . . . . . . . . . . . . . . . . . . . . . . . .10
Main menu . . . . . . . . . . . . . . . . . . . . . . . . . . . . . . . . . . 12
Bolus menu . . . . . . . . . . . . . . . . . . . . . . . . . . . . . . . .13
Suspend . . . . . . . . . . . . . . . . . . . . . . . . . . . . . . . . . . .13
Basal menu . . . . . . . . . . . . . . . . . . . . . . . . . . . . . . . . .14
Prime menu . . . . . . . . . . . . . . . . . . . . . . . . . . . . . . . .14
Utilities menu . . . . . . . . . . . . . . . . . . . . . . . . . . . . . . .14
Initial pump settings . . . . . . . . . . . . . . . . . . . . . . . . . . 15
Basal rate information . . . . . . . . . . . . . . . . . . . . . . . .16
Meal boluses . . . . . . . . . . . . . . . . . . . . . . . . . . . . . . . .16
Correction bolus . . . . . . . . . . . . . . . . . . . . . . . . . . . .16
i
Page 6

Blood glucose targets . . . . . . . . . . . . . . . . . . . . . . . . 16
Chapter 2
Getting Started . . . . . . . . . . . . . . . . . . . . . . . . 17
Reservoir and infusion sets . . . . . . . . . . . . . . . . . . . . . 17
Preparing your pump for use . . . . . . . . . . . . . . . . . . . 18
Setting the time and date . . . . . . . . . . . . . . . . . . . . . 18
Installing the reservoir . . . . . . . . . . . . . . . . . . . . . . . 21
Removing the reservoir . . . . . . . . . . . . . . . . . . . . . . . 22
Rewinding the pump . . . . . . . . . . . . . . . . . . . . . . . . . 22
Verifying insulin type . . . . . . . . . . . . . . . . . . . . . . . . 23
Changing insulin type . . . . . . . . . . . . . . . . . . . . . . . . 24
Manual Prime . . . . . . . . . . . . . . . . . . . . . . . . . . . . . . 28
Priming with fixed prime . . . . . . . . . . . . . . . . . . . . . 30
Reviewing the prime history . . . . . . . . . . . . . . . . . . . 32
How to wear the pump . . . . . . . . . . . . . . . . . . . . . . . . 33
Chapter 3
Status . . . . . . . . . . . . . . . . . . . . . . . . . . . . . . . 35
Checking pump status. . . . . . . . . . . . . . . . . . . . . . . . . 35
Chapter 4
Bolus Menu . . . . . . . . . . . . . . . . . . . . . . . . . . . 37
Delivering a normal bolus. . . . . . . . . . . . . . . . . . . . . . 39
Dual/Square bolus . . . . . . . . . . . . . . . . . . . . . . . . . . . . 40
Square wave bolus . . . . . . . . . . . . . . . . . . . . . . . . . . . 41
Delivering a square wave bolus . . . . . . . . . . . . . . . 42
Normal bolus during a square wave bolus . . . . . . 44
Dual wave bolus . . . . . . . . . . . . . . . . . . . . . . . . . . . . . 46
Delivering a dual wave bolus . . . . . . . . . . . . . . . . . 46
Delivering an express bolus . . . . . . . . . . . . . . . . . . . . 49
When square/dual wave bolus option is off . . . . . . . 49
When square/dual wave bolus option is on . . . . . . . 50
Maximum bolus limit (max bolus) . . . . . . . . . . . . . . . 50
Setting the maximum bolus limit . . . . . . . . . . . . . . 50
ii
Page 7

Easy bolus . . . . . . . . . . . . . . . . . . . . . . . . . . . . . . . . . . . 52
Setting up easy bolus . . . . . . . . . . . . . . . . . . . . . . . . 53
Delivering an easy bolus . . . . . . . . . . . . . . . . . . . . . . 55
Bolus history. . . . . . . . . . . . . . . . . . . . . . . . . . . . . . . . . 56
Chapter 5
Basal . . . . . . . . . . . . . . . . . . . . . . . . . . . . . . . . 59
Basal menu . . . . . . . . . . . . . . . . . . . . . . . . . . . . . . . . . . 60
What are start and stop times? . . . . . . . . . . . . . . . . . 61
Delivering a basal . . . . . . . . . . . . . . . . . . . . . . . . . . . 62
Maximum basal rate (max basal) . . . . . . . . . . . . . . . . . 64
Setting max basal rate . . . . . . . . . . . . . . . . . . . . . . . 64
Temporary basal rate (temp) . . . . . . . . . . . . . . . . . . . . 65
How does it work? . . . . . . . . . . . . . . . . . . . . . . . . . . 66
Delivering a temporary basal rate . . . . . . . . . . . . . . 66
Verifying temporary basal delivery . . . . . . . . . . . . . 67
Canceling a temporary basal rate . . . . . . . . . . . . . . . 68
Personal basal patterns . . . . . . . . . . . . . . . . . . . . . . . . 69
Turning on personal basal patterns . . . . . . . . . . . . . 70
Delivering personal basal patterns . . . . . . . . . . . . . . 71
Selecting a pattern . . . . . . . . . . . . . . . . . . . . . . . . . . 73
Basal review . . . . . . . . . . . . . . . . . . . . . . . . . . . . . . . 74
Standard basal rates . . . . . . . . . . . . . . . . . . . . . . . 74
Chapter 6
Suspend . . . . . . . . . . . . . . . . . . . . . . . . . . . . . 77
Suspending the pump . . . . . . . . . . . . . . . . . . . . . . . . . 78
Resuming pump delivery . . . . . . . . . . . . . . . . . . . . . . . 79
iii
Page 8

Chapter 7
Utilities . . . . . . . . . . . . . . . . . . . . . . . . . . . . . . . 81
Alarms . . . . . . . . . . . . . . . . . . . . . . . . . . . . . . . . . . . . . 81
Setting the alert type. . . . . . . . . . . . . . . . . . . . . . . . . . 82
Using Auto-off . . . . . . . . . . . . . . . . . . . . . . . . . . . . . . . 84
Stop auto off . . . . . . . . . . . . . . . . . . . . . . . . . . . . . . . 85
Reviewing the alarms . . . . . . . . . . . . . . . . . . . . . . . . . 85
Daily totals. . . . . . . . . . . . . . . . . . . . . . . . . . . . . . . . . . 86
Reviewing the daily totals . . . . . . . . . . . . . . . . . . . . . . 87
Block . . . . . . . . . . . . . . . . . . . . . . . . . . . . . . . . . . . . . . 88
Setting up block . . . . . . . . . . . . . . . . . . . . . . . . . . . . . 88
Setting the time and date . . . . . . . . . . . . . . . . . . . . . . 90
Language . . . . . . . . . . . . . . . . . . . . . . . . . . . . . . . . . . . 93
Setting the language . . . . . . . . . . . . . . . . . . . . . . . . . . 93
RF options (remote control) . . . . . . . . . . . . . . . . . . . . 94
Adding an RF ID . . . . . . . . . . . . . . . . . . . . . . . . . . . . . 94
Deleting an RF ID . . . . . . . . . . . . . . . . . . . . . . . . . . . . 96
Reviewing the RF ID codes . . . . . . . . . . . . . . . . . . . . . 98
Clear pump . . . . . . . . . . . . . . . . . . . . . . . . . . . . . . . . . 99
Clearing pump . . . . . . . . . . . . . . . . . . . . . . . . . . . . . 100
Selftest . . . . . . . . . . . . . . . . . . . . . . . . . . . . . . . . . . . . 103
Chapter 8
Remote Control . . . . . . . . . . . . . . . . . . . . . . . 107
Using your remote control . . . . . . . . . . . . . . . . . . . . 108
Remote control buttons . . . . . . . . . . . . . . . . . . . . . 108
Waking up your pump . . . . . . . . . . . . . . . . . . . . . . . 109
Deliver an easy bolus. . . . . . . . . . . . . . . . . . . . . . . . . 110
Suspend/resume the pump . . . . . . . . . . . . . . . . . . . 110
Installing a new remote battery . . . . . . . . . . . . . . . . 111
Cleaning your remote control . . . . . . . . . . . . . . . . . 112
If the remote control is dropped. . . . . . . . . . . . . . . . 112
If the remote control falls in water. . . . . . . . . . . . . . 112
iv
Page 9

Chapter 9
Troubleshooting & Care . . . . . . . . . . . . . . . . . 113
Troubleshooting . . . . . . . . . . . . . . . . . . . . . . . . . . . . . 113
My pump has a no delivery alarm . . . . . . . . . . . . . 113
What happens if I leave the battery out too long? . 114
What is a check settings alarm? . . . . . . . . . . . . . . . 115
I submerged my pump in water . . . . . . . . . . . . . . . 115
My screen appears distorted . . . . . . . . . . . . . . . . . . 116
Pump maintenance . . . . . . . . . . . . . . . . . . . . . . . . . . 117
Battery . . . . . . . . . . . . . . . . . . . . . . . . . . . . . . . . . . 117
Installing a new pump battery . . . . . . . . . . . . . . 117
Cleaning your pump. . . . . . . . . . . . . . . . . . . . . . . . . . 119
Storing your pump. . . . . . . . . . . . . . . . . . . . . . . . . . . 119
Precautions. . . . . . . . . . . . . . . . . . . . . . . . . . . . . . . . . 120
Avoiding extreme temperatures . . . . . . . . . . . . . . . 120
Avoiding dunking the pump in water . . . . . . . . . . 120
Special circumstances . . . . . . . . . . . . . . . . . . . . . . . . 120
If the pump is dropped . . . . . . . . . . . . . . . . . . . . . . 120
Chapter 10
User Safety . . . . . . . . . . . . . . . . . . . . . . . . . . 123
Indications . . . . . . . . . . . . . . . . . . . . . . . . . . . . . . . . . 123
Contraindications. . . . . . . . . . . . . . . . . . . . . . . . . . . . 123
Warnings. . . . . . . . . . . . . . . . . . . . . . . . . . . . . . . . . . . 124
Diabetic ketoacidosis (DKA) . . . . . . . . . . . . . . . . . . 124
Hypoglycemia . . . . . . . . . . . . . . . . . . . . . . . . . . . . . 124
Skin infections . . . . . . . . . . . . . . . . . . . . . . . . . . . . 124
Reservoir and infusion sets . . . . . . . . . . . . . . . . . . 125
X-rays, MRIs and CT scans . . . . . . . . . . . . . . . . . . . 125
General precautions . . . . . . . . . . . . . . . . . . . . . . . . . . 125
Precautions - hypoglycemia. . . . . . . . . . . . . . . . . . . . 127
Precautions - hyperglycemia . . . . . . . . . . . . . . . . . . . 128
Precautions - infusion sets and sites . . . . . . . . . . . . . 129
v
Page 10

Adverse reactions. . . . . . . . . . . . . . . . . . . . . . . . . . . . 130
Hyperglycemia and diabetic ketoacidosis (DKA) . . 130
Hypoglycemia . . . . . . . . . . . . . . . . . . . . . . . . . . . . . 131
Site infection/abscesses . . . . . . . . . . . . . . . . . . . . . . 131
Notice. . . . . . . . . . . . . . . . . . . . . . . . . . . . . . . . . . . . . 132
Insulin pump and remote control . . . . . . . . . . . . . 132
Chapter 11
Alarms and Alerts . . . . . . . . . . . . . . . . . . . . . 135
Alarms . . . . . . . . . . . . . . . . . . . . . . . . . . . . . . . . . . . . 135
E (Error) . . . . . . . . . . . . . . . . . . . . . . . . . . . . . . . . 136
Off no power . . . . . . . . . . . . . . . . . . . . . . . . . . . . 136
Auto off . . . . . . . . . . . . . . . . . . . . . . . . . . . . . . . . 137
Empty reservoir . . . . . . . . . . . . . . . . . . . . . . . . . . 137
No reservoir . . . . . . . . . . . . . . . . . . . . . . . . . . . . . 137
No delivery . . . . . . . . . . . . . . . . . . . . . . . . . . . . . . 138
Motor error . . . . . . . . . . . . . . . . . . . . . . . . . . . . . . 138
Batt out limit . . . . . . . . . . . . . . . . . . . . . . . . . . . . 138
Max delivery . . . . . . . . . . . . . . . . . . . . . . . . . . . . . 139
Button error . . . . . . . . . . . . . . . . . . . . . . . . . . . . 139
Check settings . . . . . . . . . . . . . . . . . . . . . . . . . . . 139
Bolus stopped . . . . . . . . . . . . . . . . . . . . . . . . . . . . 140
Failed batt test . . . . . . . . . . . . . . . . . . . . . . . . . . . 140
Alerts . . . . . . . . . . . . . . . . . . . . . . . . . . . . . . . . . . . . . 141
Low battery . . . . . . . . . . . . . . . . . . . . . . . . . . . . . 141
Low reservoir . . . . . . . . . . . . . . . . . . . . . . . . . . . . 141
Message in Alarm History . . . . . . . . . . . . . . . . . . . . 142
vi
Page 11

Chapter 12
Pump Specifications . . . . . . . . . . . . . . . . . . . . 143
Specifications . . . . . . . . . . . . . . . . . . . . . . . . . . . . . . . 143
Alarms and error messages . . . . . . . . . . . . . . . . . . 143
Backlight . . . . . . . . . . . . . . . . . . . . . . . . . . . . . . . . . 143
Insulin delivery . . . . . . . . . . . . . . . . . . . . . . . . . . . . 144
Block . . . . . . . . . . . . . . . . . . . . . . . . . . . . . . . . . . . . 144
Delivery accuracy . . . . . . . . . . . . . . . . . . . . . . . . . . 144
Displacement accuracy . . . . . . . . . . . . . . . . . . . . . . 144
Drive motor . . . . . . . . . . . . . . . . . . . . . . . . . . . . . . 144
Dual wave bolus . . . . . . . . . . . . . . . . . . . . . . . . . . . 144
Easy bolus . . . . . . . . . . . . . . . . . . . . . . . . . . . . . . . . 145
Infusion pressure . . . . . . . . . . . . . . . . . . . . . . . . . . 145
Insulin concentration/type . . . . . . . . . . . . . . . . . . . 145
Normal bolus . . . . . . . . . . . . . . . . . . . . . . . . . . . . . 145
Occlusion detection . . . . . . . . . . . . . . . . . . . . . . . . 146
Personal basal delivery patterns . . . . . . . . . . . . . . . 146
Power supply . . . . . . . . . . . . . . . . . . . . . . . . . . . . . . 146
Prime function . . . . . . . . . . . . . . . . . . . . . . . . . . . . 147
Program safety checks . . . . . . . . . . . . . . . . . . . . . . 147
Pump size . . . . . . . . . . . . . . . . . . . . . . . . . . . . . . . . 147
Pump weight . . . . . . . . . . . . . . . . . . . . . . . . . . . . . . 147
Remote control . . . . . . . . . . . . . . . . . . . . . . . . . . . . 147
Reservoir . . . . . . . . . . . . . . . . . . . . . . . . . . . . . . . . . 147
Square wave bolus . . . . . . . . . . . . . . . . . . . . . . . . . 148
Temporary basal rate . . . . . . . . . . . . . . . . . . . . . . . 148
Time and date display . . . . . . . . . . . . . . . . . . . . . . . 148
Water tight . . . . . . . . . . . . . . . . . . . . . . . . . . . . . . . 148
Factory default settings . . . . . . . . . . . . . . . . . . . . . . . 149
Icon table . . . . . . . . . . . . . . . . . . . . . . . . . . . . . . . . . . 150
Index . . . . . . . . . . . . . . . . . . . . . . . . . . . . . . . 153
vii
Page 12

viii
Page 13

Chapter 1
Introduction
• • • • • •
Whether you are beginning pump therapy for the first time, or
upgrading from a previous model, we are pleased that you have
chosen Medtronic MiniMed as your partner to help you gain better control of your diabetes. We believe that the combination of
state-of-the-art technology and the simple, menu-driven programming of the Paradigm pump will provide many benefits.
This User Guide is designed to help you use your pump; however,
working with your healthcare professional is strongly recommended for your safety and to simplify your familiarity with the
pump and pump therapy.
For your records
The pump serial number is located on the back of your pump.
Please enter the serial number, purchase date, and pump start
date in the table below.
Serial Number Purchase Date
Pump start date:
1
Page 14

Assistance
Medtronic MiniMed provides a 24-hour help line for assistance in
the United States. The help line is staffed with technicians who are
trained in the set-up and operation of the Paradigm pump and are
able to answer pump-related questions. When calling the help-line,
please have your pump and serial number available. The help-line
telephone number is also on the back of your pump.
24-hour Product Help-line
if calling from inside the United States
if calling from outside of the United
States
Web site www.minimed.com
800.646.4633
(800-MiniMed)
818.576.5555
Availability
The Paradigm insulin pump and its components are available
through Medtronic MiniMed and from authorized distributors.
2 Chapter 1
Page 15

Emergency kit
Keep an emergency kit with you at all times to make sure that you
always have necessary supplies. This kit should include:
■
Fast-acting glucose tablets
■
Blood glucose monitoring supplies
■
Urine ketone monitoring supplies
■
Short acting insulin and insulin syringe with directions from
your healthcare professional regarding how much insulin to
take
■
An extra Paradigm infusion set and Paradigm reservoir
■
Dressing and adhesive
■
Extra AAA Alkaline and A23 batteries (Energizer
recommended)
■
Paradigm Quick Reference Card
■
Glucagon Emergency Kit
Inform a family member, co-worker, and/or friend where this
emergency kit is kept.
Please refer to Chapter 10, User Safety for more information on
pump safety.
Introduction 3
Page 16

Pump and user guide conventions
The following terms and icons are used to describe the pump in
this User Guide.
“Press” means to push and release the button.
“Hold” means to push and maintain pressure on the button.
Flashing words or numbers on the screen indicate information
that can be changed in the pump.
Information that cannot be changed appears on the screen in characters that do not flash.
“Select” means to use the arrow buttons to access a pump
feature.
Buttons and screen names are always uppercase; for example, ESC
and HOME.
A note is additional, helpful information.
The word “CAUTION,” warns you of a potentially hazardous situation which, if not avoided, may result in minor or moderate injury
to the user or damage to the equipment.
The word “WARNING,” alerts you about a situation which, if not
avoided, could result in death or serious injury. It may also describe
potential serious adverse reactions and safety hazards.
4 Chapter 1
Page 17
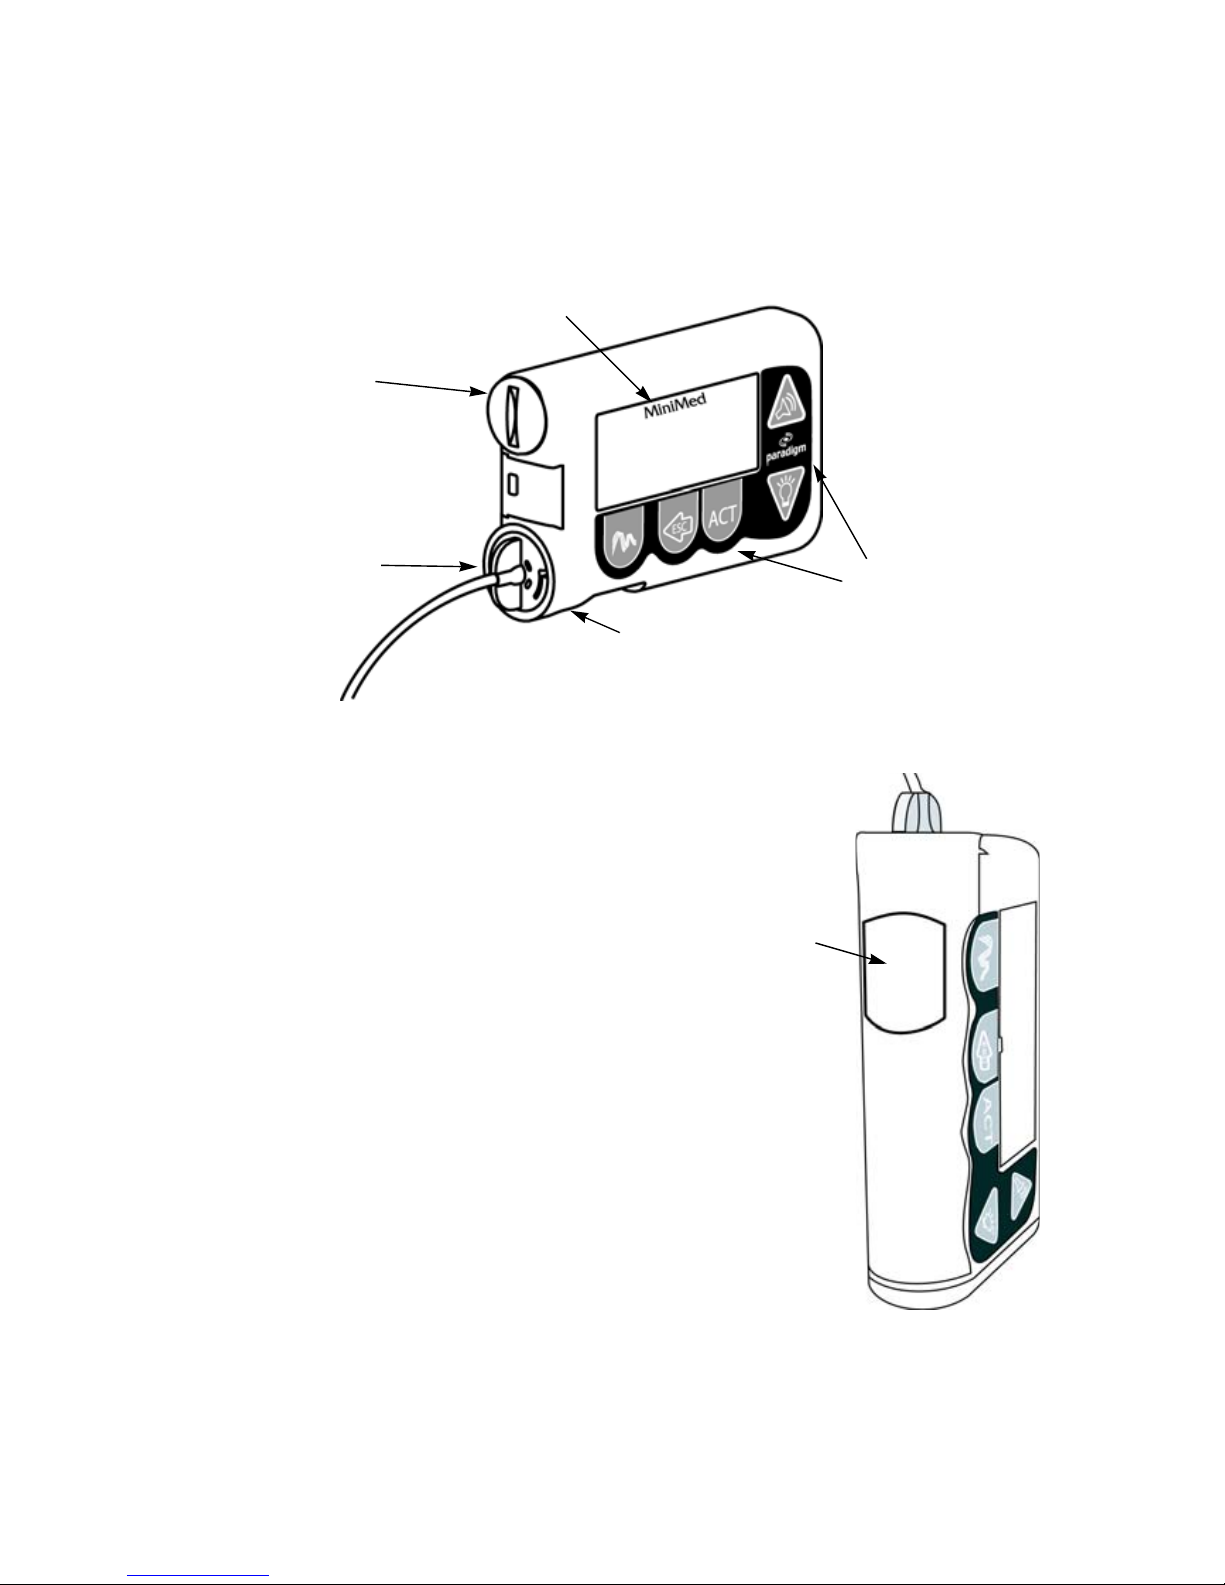
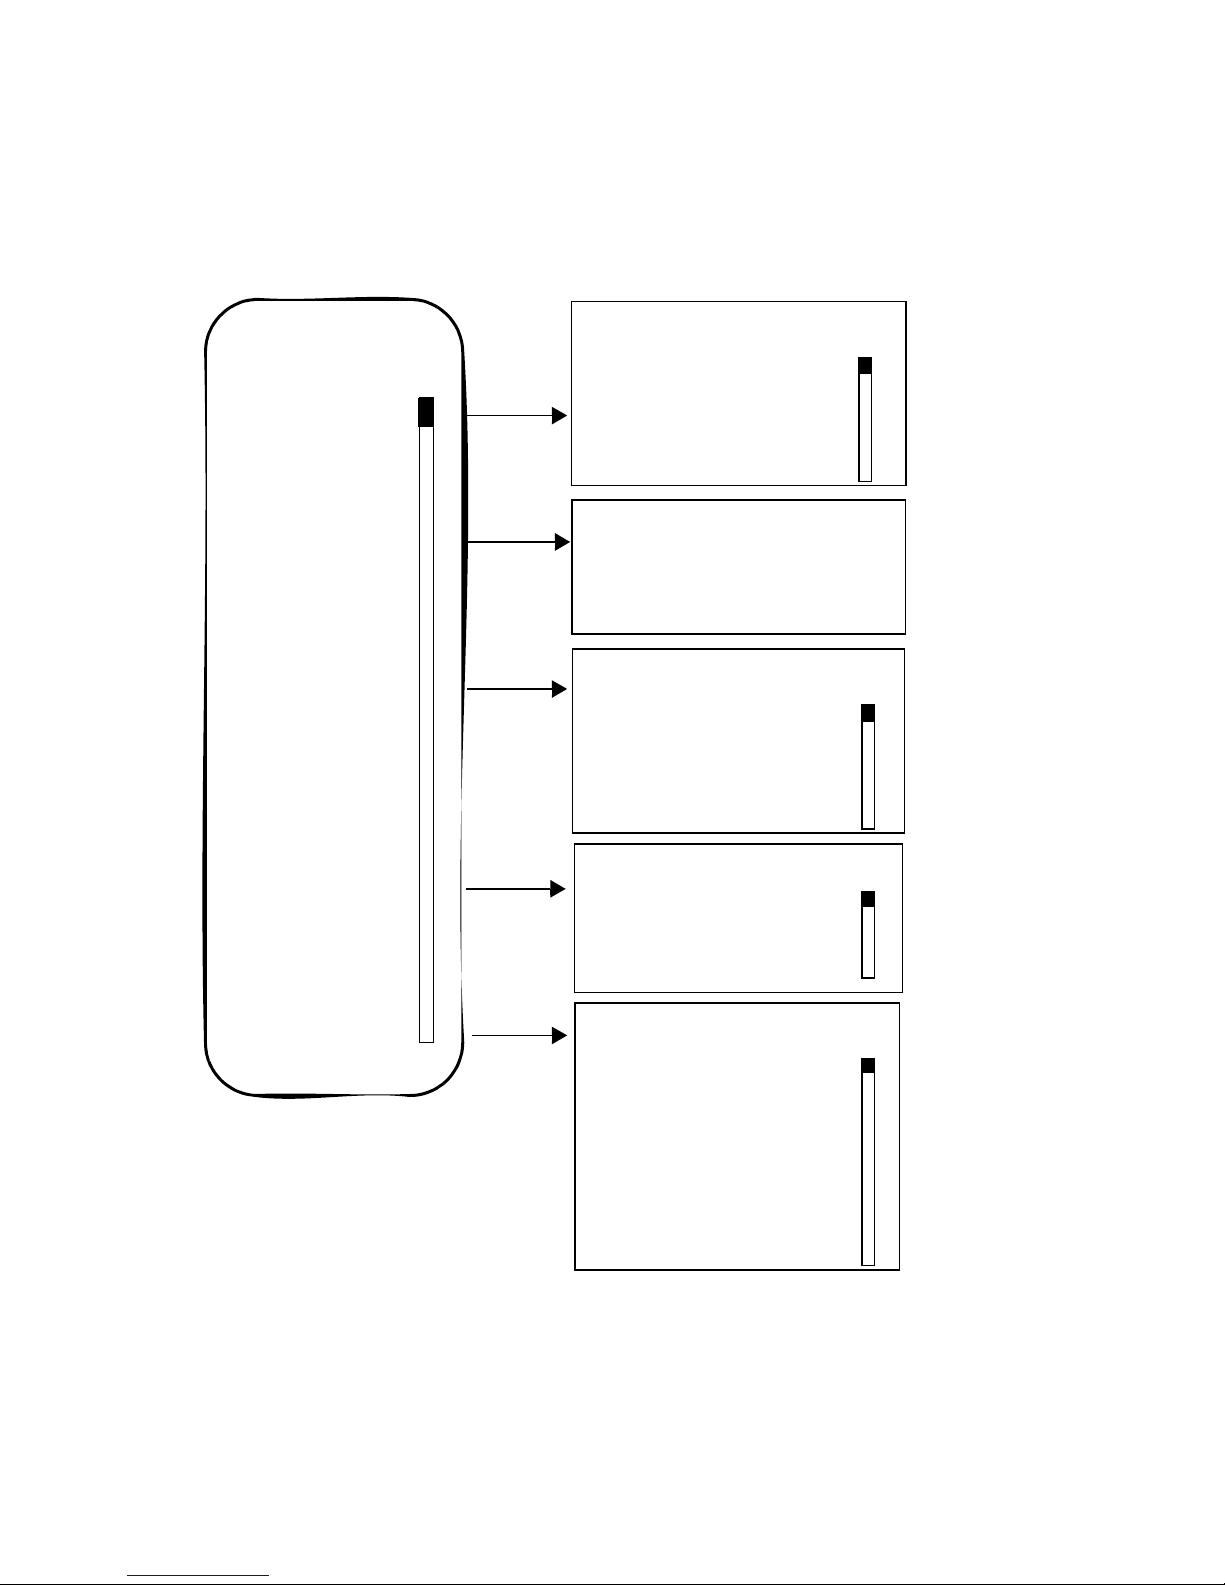
Your pump
Take a look at your pump.
battery
compartment
tubing
connector
display
screen
buttons
reservoir
compartment
The pump is smart. It remembers
your settings and stores a record of
its actions.
Turn your pump on its side.
Look at the reservoir compartment
window. This window lets you see the
reservoir. You can also find the
approximate remaining reservoir volume by looking at the STATUS
screen.
The reservoir compartment only
accepts the Paradigm reservoirs. The
reservoir and tubing connector are
inserted into the compartment.
reservoir
window
Introduction 5
Page 18
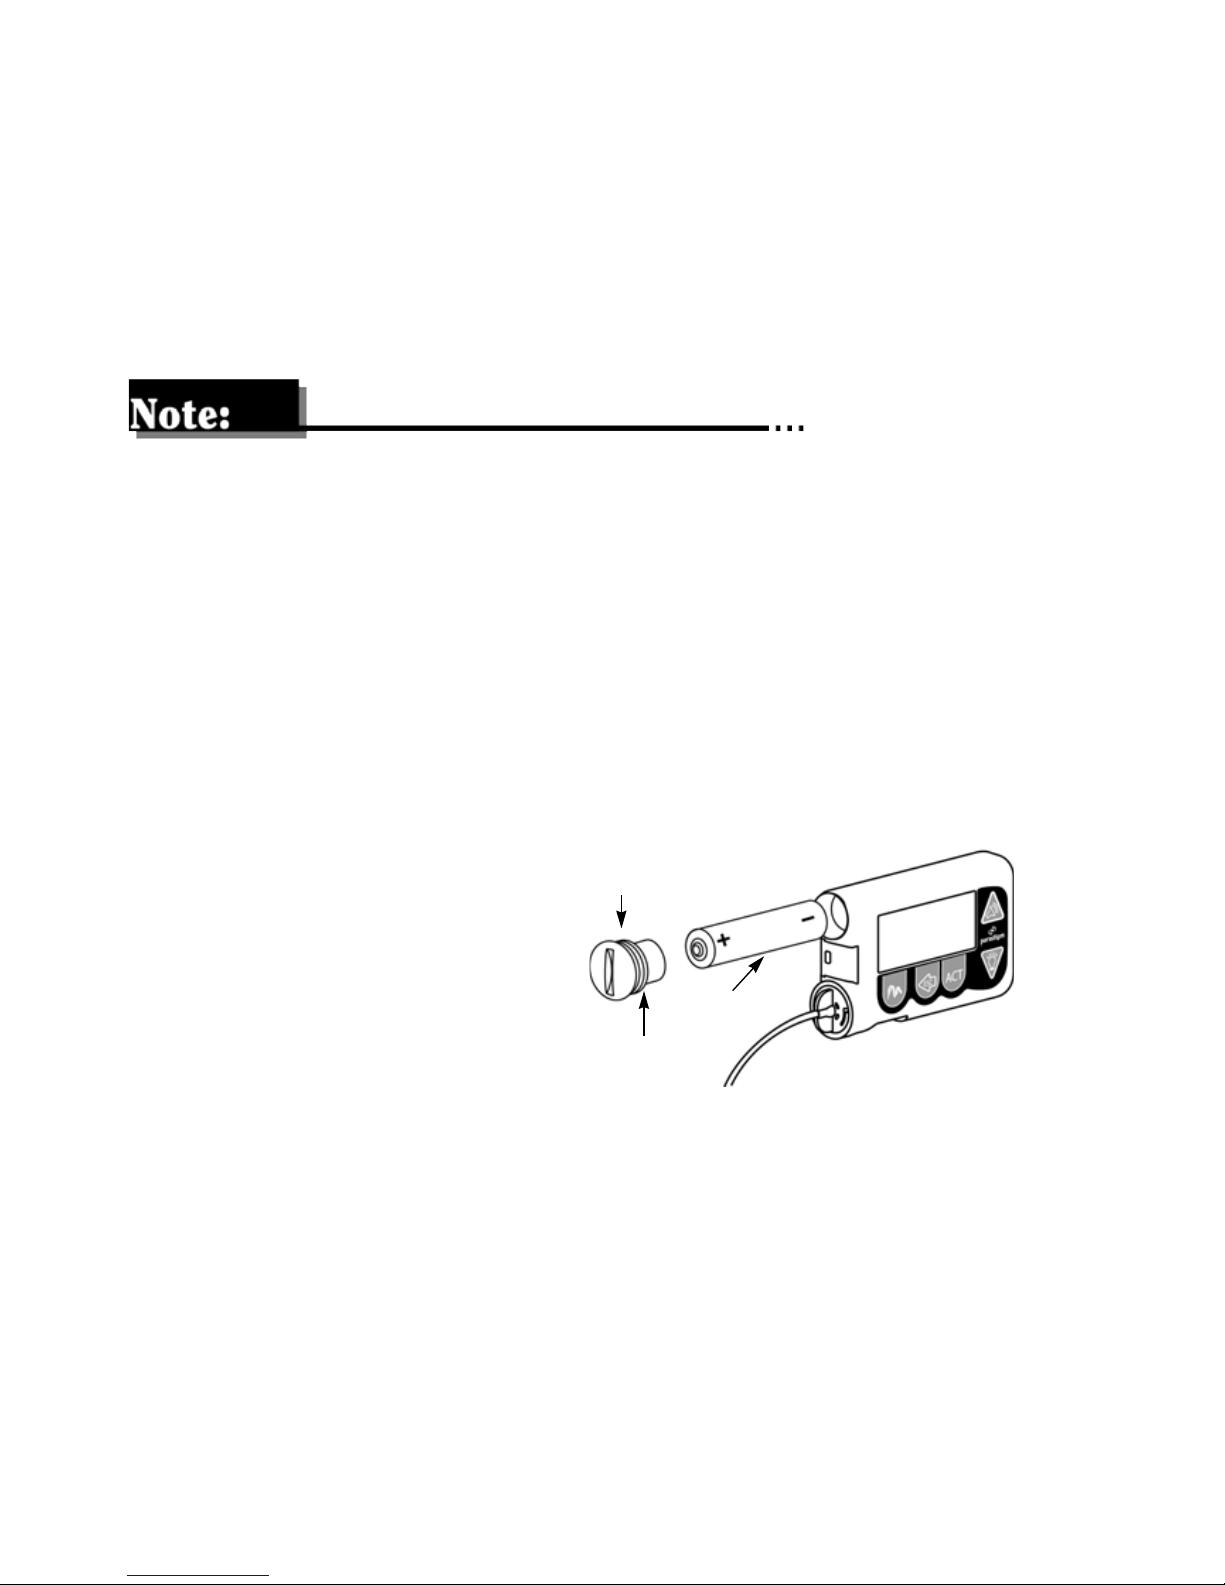
Installing the battery the first time
The Paradigm pump uses a AAA alkaline battery. As a safety measure, Medtronic MiniMed has designed the pump to only accept a
NEW battery. The pump is very particular, if you insert a used battery, an alarm will be triggered.
If your batteries have been in a cold place, (i.e., your car in the
winter), allow the battery to warm to room temperature (up to 30
minutes) before inserting into the pump.
CAUTION: It is highly recommended that you use an AAA alkaline
Energizer battery. Do not use a carbon zinc battery in the
pump.
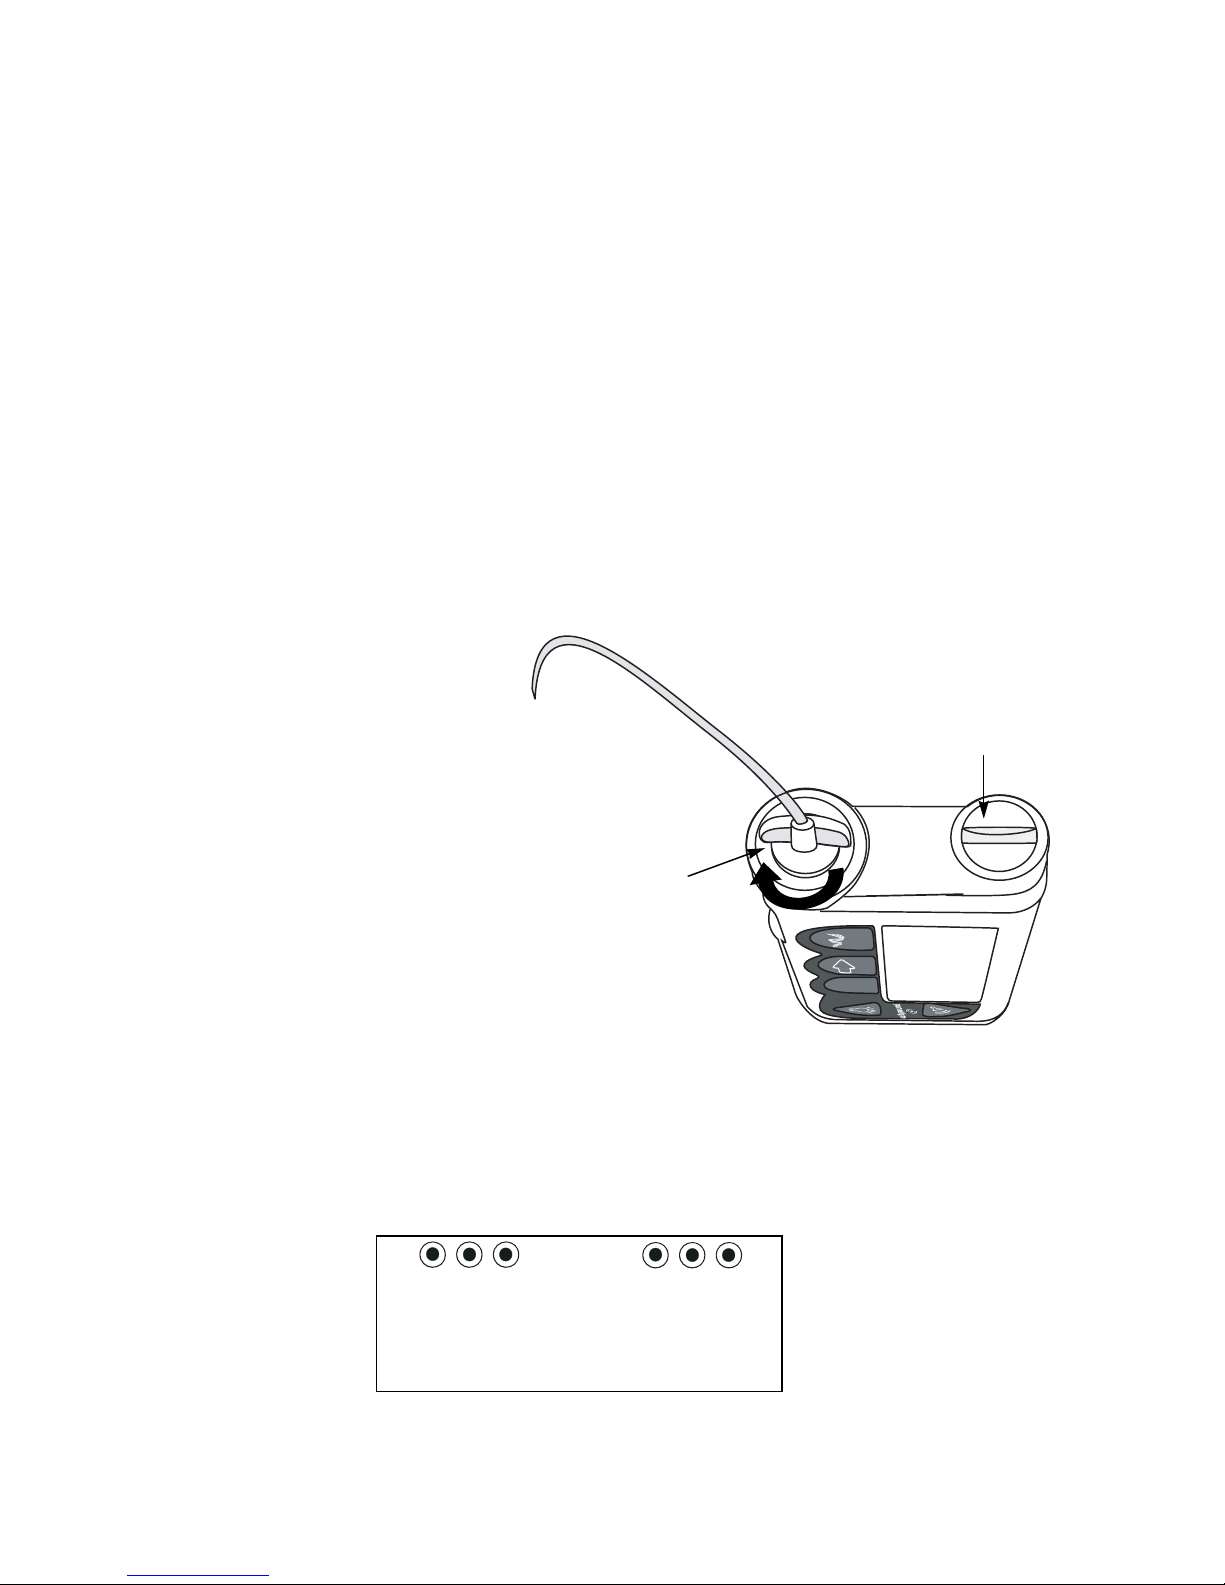
1. Use the edge of a coin
and unscrew the battery cap in a counter-
battery
cap
clockwise manner.
Insert a new AAA alkaline battery. Insert the
o-ring
battery
battery with the negative (-) symbol going
into the battery compartment first. Check the label on the back
of the pump to make sure you are inserting the battery correctly.
2. Replace the battery cap by inserting the cap into the pump,
turning it clockwise until it is fully closed.
6 Chapter 1
Page 19

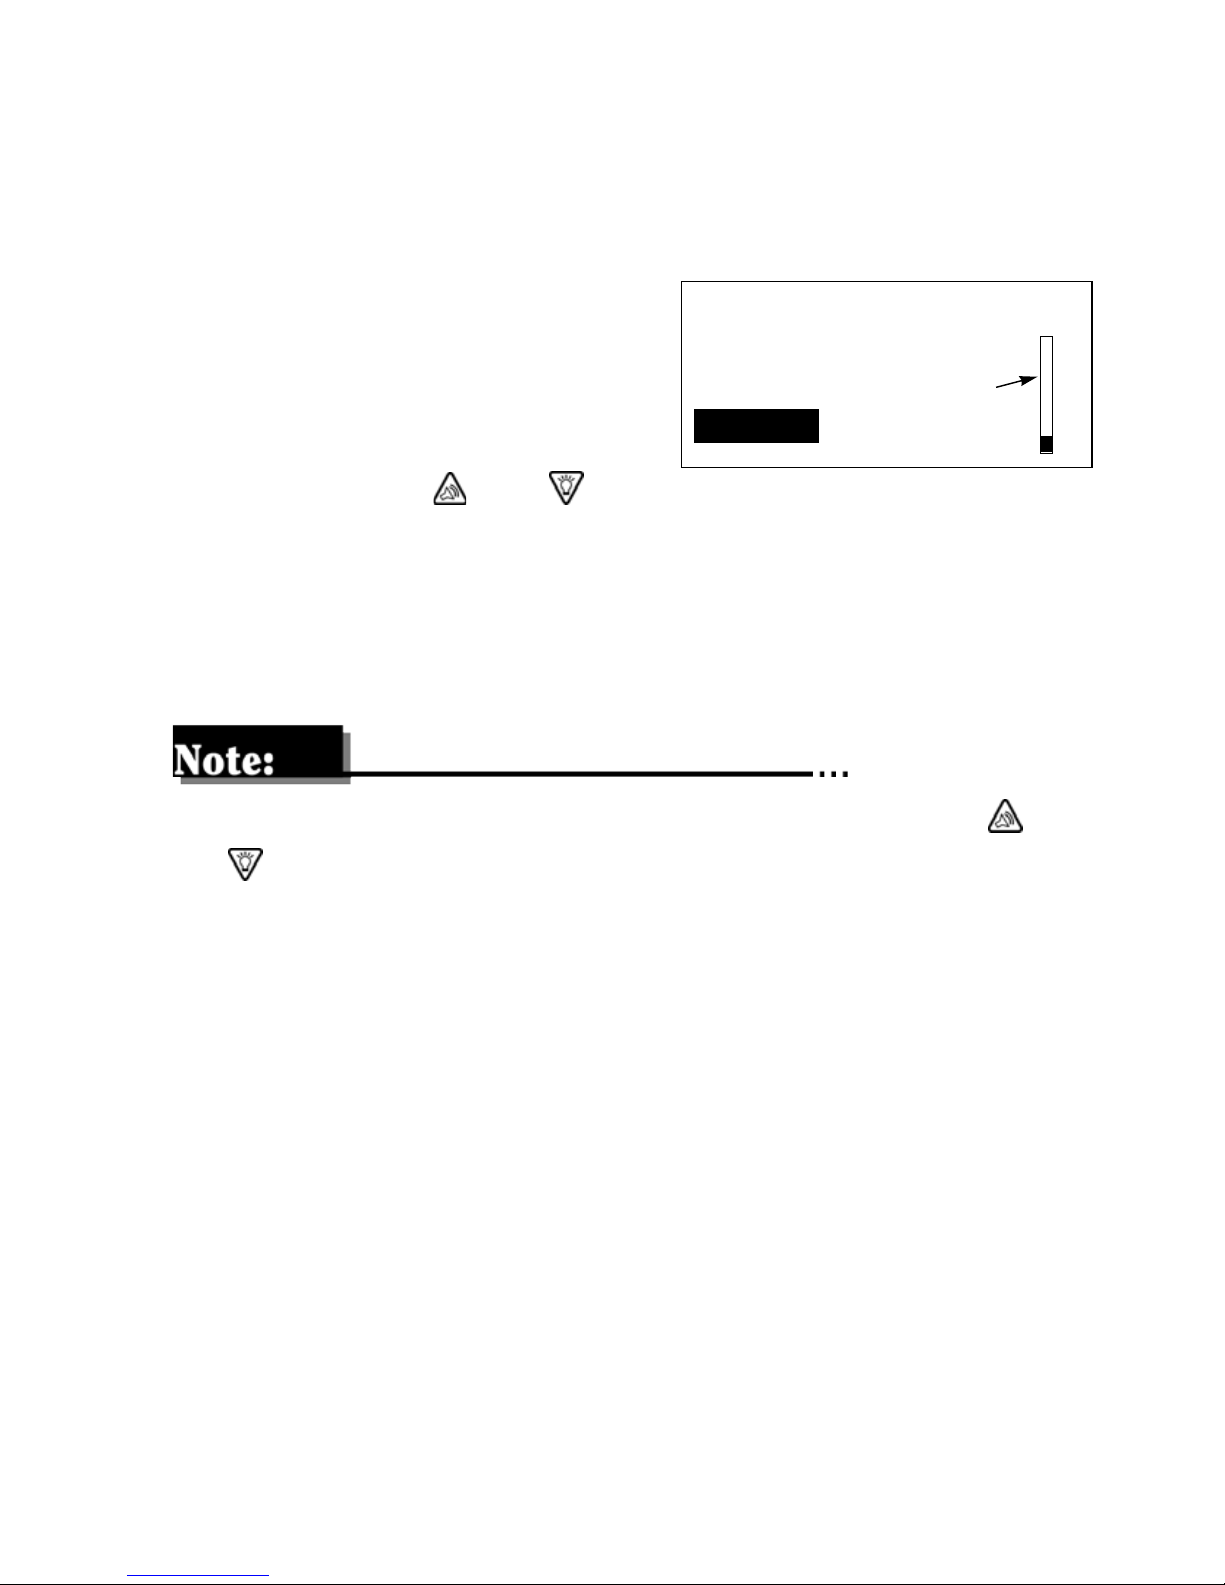
3. Numbers will appear on the pump screen as the pump turns
on. Then the following screen will appear.
MiniMed
4. If this does not happen:
a. Check to see if the battery is inserted properly. If the battery
has been installed backwards, discard the battery and install
a NEW battery.
b. If the battery is inserted properly and your pump still does
not turn ON, try a new battery (repeat steps 1 through 4).
c. If the pump is still not ON, call the 24-hour Product Help-
line.
5. The software version screen will appear and then the HOME
screen.
MiniMed
6. You can now explore your pump by pressing the buttons and
scrolling through the menus. Refer to Chapter 2: Getting
Started for instructions for programming your pump for use.
If you perform the Rewind function, program your pump or the
Check Settings alarm will occur.
Introduction 7
Page 20
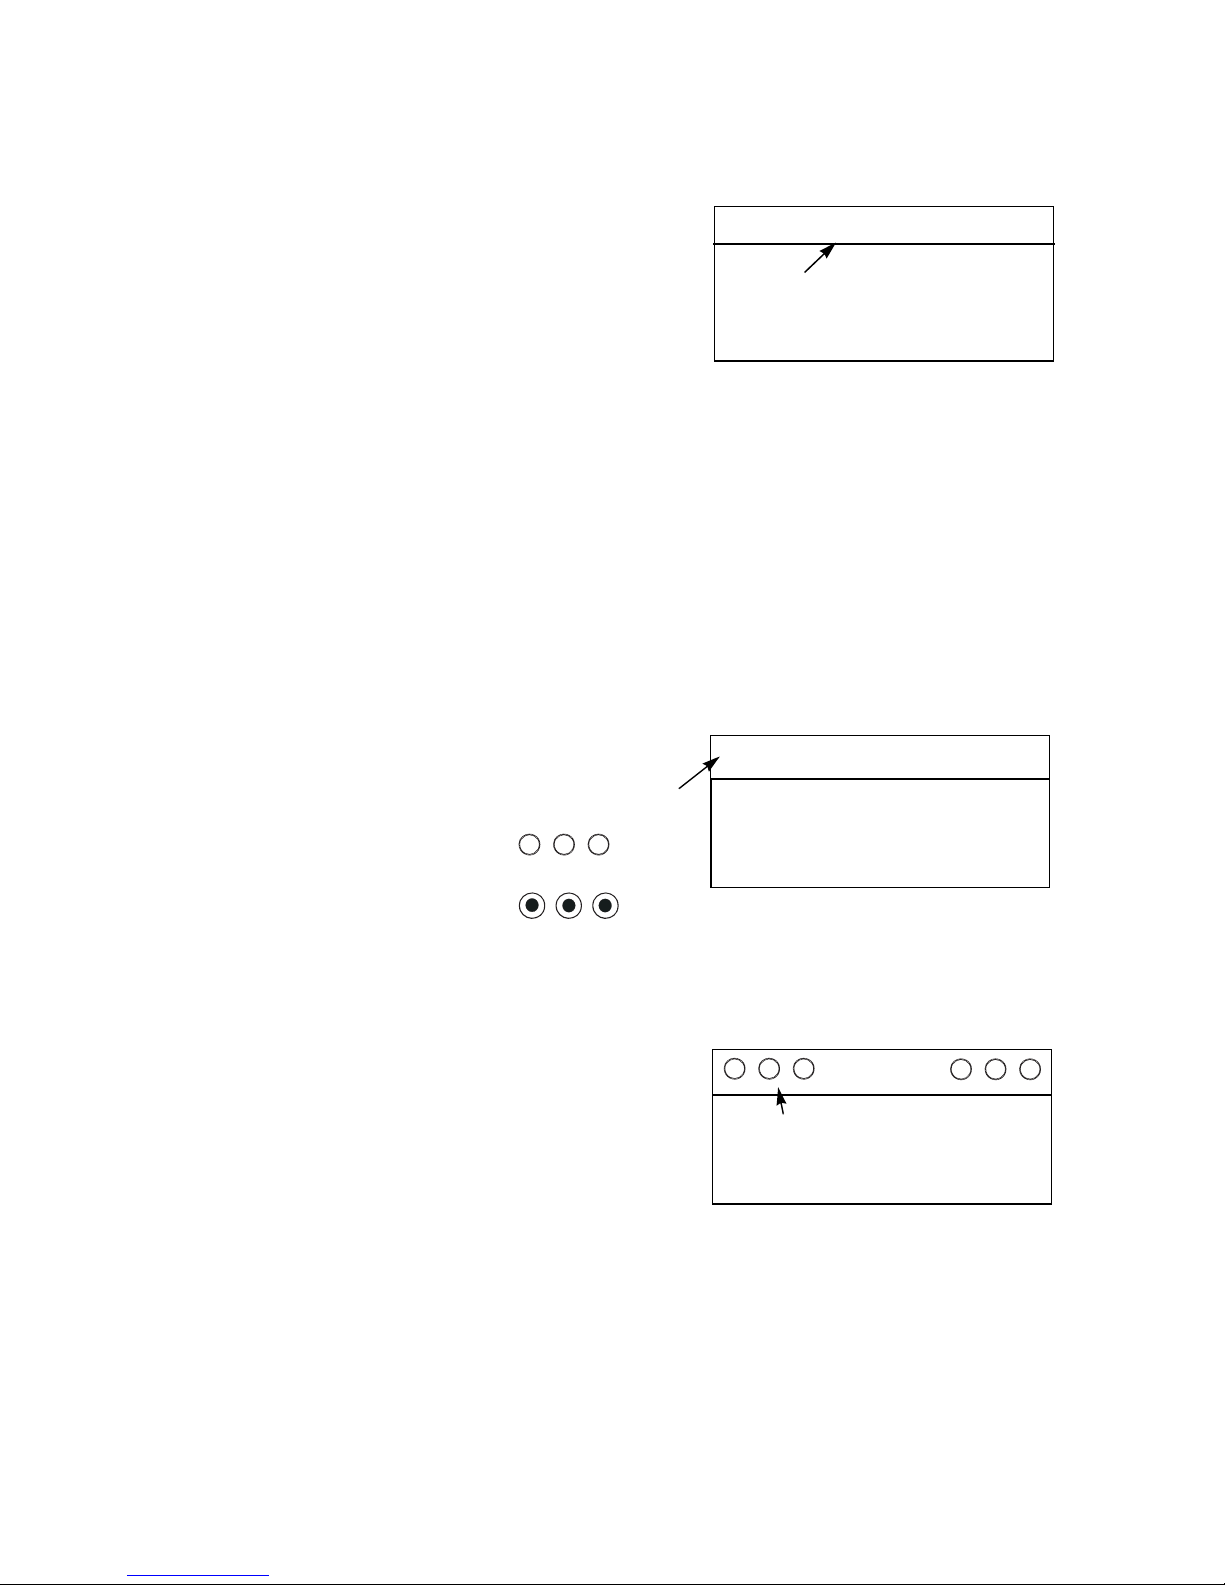
Home screen
The HOME screen serves as the start-
MiniMed
ing point to access the programming
screens by pressing ACT, or to access
the STATUS screen by pressing ESC.
Area below the line
is blank.
The word MiniMed is always ON when
the pump is running. When
“MiniMed” does not appear, the pump
is not running.
Modes of operation
There are three modes of pump operation: Normal, Special and
Attention.
Normal
In the Normal mode,
the word MiniMed
This area
will not have
MiniMed
appears without
or
circles.
Special
The Special mode indicates certain
features have been activated. Programming of other features is still allowed
when the pump is in the Special mode.
These circles indicate
Special mode.
The open circles will appear on top of
all the screens until the pump is returned back to Normal mode or
the Attention mode is triggered.
MiniMed
8 Chapter 1
Page 21

The following features or alarms turn on the open circles:
■
Dual/square wave bolus delivery
■
Basal patterns A or B
■
Temporary basal delivery
■
Block
■
Low reservoir
■
Low battery
Attention
Solid circles appear when insulin
MiniMed
delivery has stopped. This will happen if operator interaction is
required, an alarm warning is
These circles indicate
Attention mode.
received, or when the pump is suspended. Alarm text; such as, Empty Reservoir will appear on the
screen if activated. The warnings will be explained on the screen
when programming buttons are pressed. Use the to view all of
the instructions on the screen. Press ESC and then ACT to clear
the alarm. Until the alarm is cleared, the pump is not delivering
insulin.
Solid circles indicate that INSULIN DELIVERY HAS BEEN
STOPPED.
The pump will beep/vibrate periodically when in the Attention or
Special modes to remind you of the condition. The beep/vibrate
frequency varies depending on the alarm.
Introduction 9
Page 22
The screens that will display solid circles are:
■
Suspend
■
Empty Reservoir
■
Rewind
■
Insulin Type
■
Prime
■
Alarms
■
Errors
■
No Reservoir
■
Check Settings
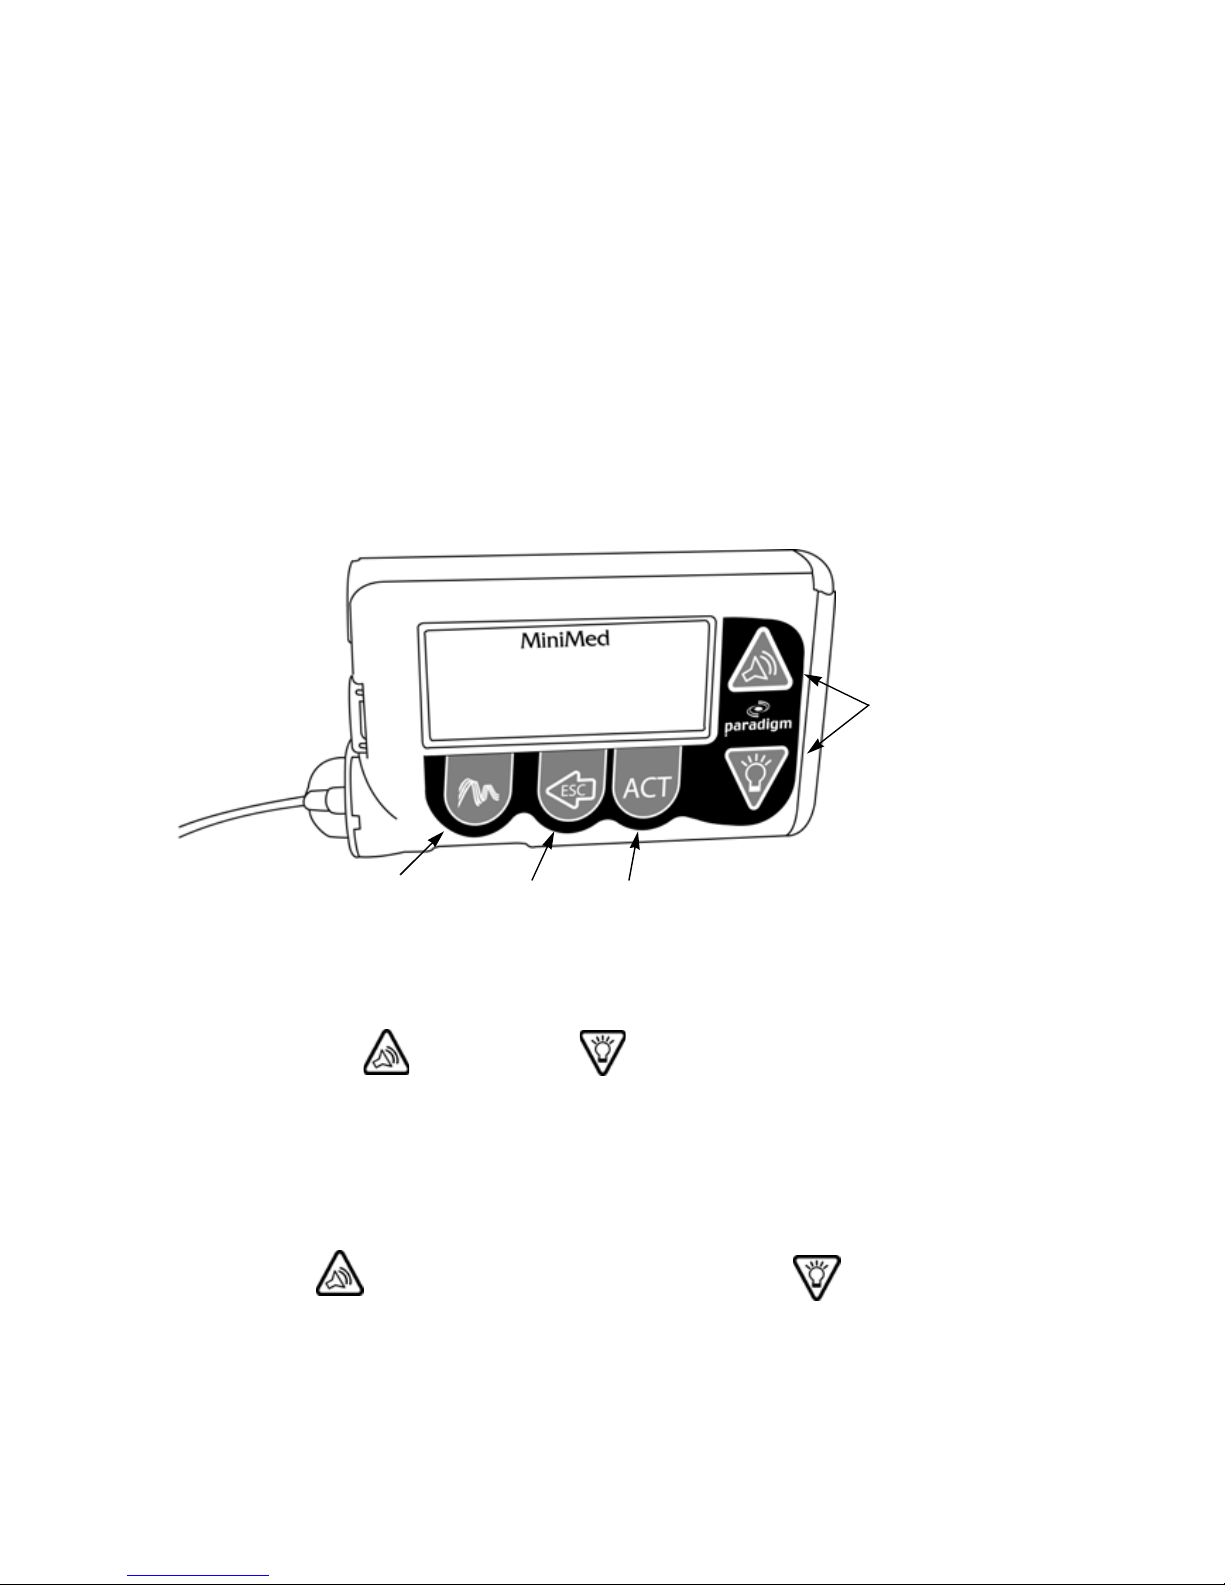
Pump buttons
Five buttons are used to program and access the pump features.
UP
and
DOWN
buttons
EXPRESS
BOLUS
ESC
button
ACT
button
button
■
The UP and DOWN buttons have several functions.
✒ They allow you to scroll through the menus for entry
choices.
✒ When a numerical entry is required, these buttons allow
you to change the number to the value of your choice.
scrolls the number higher and scrolls the
number lower.
10 Chapter 1
Page 23

■
From the HOME screen, the and buttons have
special functions:
✒ The button lets you set an Easy Bolus.
✒ The button lets you turn the backlight On or Off.
■
The ESC button is used to move backwards in the menu
structure. Use this button to back out of an unintentional
menu selection.
■
The ESC button is used to view the STATUS screen from the
HOME screen.
■
Press the ACT button to select or activate menu items. You
will hear a beep or feel a vibration after you have successfully
activated a change.
■
The EXPRESS BOLUS button provides a shortcut to the
bolus set-up screens.
The pump screen text shown in this User Guide might not exactly
match the text on your pump screen. Please follow the instructions on your pump screen. If you have any questions call the 24hour Product Help-line.
Introduction 11
Page 24
Main menu
When you press ACT from the HOME screen, the Main menu will
appear.
MiniMed
MAIN MENU
Bolus
Suspend
Basal
Prime
ACT
ACT
ACT
ACT
MiniMed
BOLUS MENU
Set Bolus
Bolus History
Max Bolus
Dual/Square Bolus
Easy Bolus
MiniMed
SUSPEND
Press ACT to Stop Pump
MiniMed
BASAL MENU
Set/Edit Temp Basal
Set/Edit Basal
Basal Review
Max Basal Rate
Patterns
MiniMed
PRIME MENU
Rewind
Manual Prime*
Fixed Prime
Prime History
Utilities
* Manual Prime is
only displayed as part
of the rewind process.
12 Chapter 1
ACT
MiniMed
UTILITIES MENU
Alarm
Daily Totals
Block
Time/Date
Language
RF Options
Clear Pump
Selftest
Page 25
Five lines of text is always viewable on your pump screen. The top
line will always display the word “MiniMed.” The lines that follow
identify the name of the menu and the choices/information available in that menu.
If there are more choices available in a menu than permitted
by the five-line screen size, a
scroll bar will appear on the
right side of the display. You will
Basal
Prime
Utilities
MiniMed
MAIN MENU
scroll
bar
need to use the and buttons to move through the menu choices.
The choices which appear on the Main menu graphic on the previous page show all the choices available in each of the Main
Programming menus.
You will not see items printed in gray unless you use the and
buttons to scroll through the menus.
Bolus menu
The Bolus menu is used to give a meal bolus for food and to program a correction bolus for high blood glucose.
Suspend
The Suspend function will stop all insulin deliveries (Basal, Bolus,
and Fixed Prime) programmed into your pump. You must resume
your pump for Basal insulin delivery to restart.
WARNING: A Bolus and Fixed Prime will not restart automatically,
and will need to be reprogrammed.
Introduction 13
Page 26

Basal menu
Use the Basal menu to program a continuous amount of insulin 24
hours-a-day. Your basal rate is the amount of insulin required to
maintain your target glucose values when you are not eating. Your
healthcare professional will calculate this rate for you.
Prime menu
Use the Prime menu to fill the infusion set with insulin before use.
Utilities menu
The utilities menu allows you to customize your pump. Utility
features that can be set for your personal lifestyle are:
■
Alarms
■
Daily Totals
■
Block
■
Time/Date
■
Language
■
RF Options
■
Clear Pump
■
Selftest
14 Chapter 1
Page 27

Initial pump settings
This is the information you need on the day that you begin using
your pump with insulin.
If your pump start is to take place in your healthcare professional’s
office, you will be given the settings that day.
If your pump start is going to take place in another location, make
sure to contact your healthcare professional to determine your
basal rate and bolus amounts. This may require making an
appointment to review your blood glucose logs in order for your
healthcare professional to make an accurate determination.
Enter your settings in the tables on the next page and onto the
Quick Reference Card provided. This card is designed to fit into
your wallet or pocket, so it is always with you.
Introduction 15
Page 28

Basal rate information
Basal Rate Number Start Time Units per Hour
#1
#2
#3
#4
Most people will only have one basal rate when starting pump
therapy.
Meal boluses
Carbohydrate Ratio:
1.0 unit of insulin for ______ grams of carbohydrate
Correction bolus
1.0 unit of insulin will lower blood glucose by approximately
_______ mg/dl(mmol/l)
Blood glucose targets
Before Meals: between ____ and____mg/dl(mmol/l)
2 hours after meals: less than ________mg/dl(mmol/l)
Bedtime: between ____ and____mg/dl(mmol/l)
2-3 a.m.: more than _______mg/dl(mmol/l)
16 Chapter 1
Page 29

Chapter 2
Getting Started
• • • • • •
This chapter will guide you through the set-up procedures to get
your pump ready to use. Make sure you have read Chapter 1,
Introduction and are familiar with all the pump features.
Do not continue with this section unless you have watched your
video and completed your pump start training.
Reservoir and infusion sets
WARNING: For your protection the model 511Paradigm infusion
pump has undergone extensive testing to confirm
appropriate operation when used with Paradigm reservoirs and Paradigm infusion sets manufactured or distributed by Medtronic MiniMed. We cannot guarantee
appropriate operation if the pump is used with reservoirs or infusion sets offered by third-parties and therefore we are not responsible for any injury or
malfunctioning of the pump that may occur in association with such use.
The Medtronic MiniMed Paradigm infusion system (MMT-511)
includes the Paradigm pump, reservoir and infusion sets. The
Paradigm pump is intended for use with a Paradigm reservoir and
Paradigm infusion sets. Medtronic MiniMed provides a variety of
Paradigm infusion sets to fit your different needs.
17
Page 30
Refer to the Instructions for Use included with the Paradigm reservoir and infusion sets you have chosen for detailed information.
Preparing your pump for use
This section guides you through the procedures that you need to
complete to prepare your pump for use. You will need the following
items:
■
Paradigm Pump
■
Insulin
■
Paradigm Infusion Set
■
Paradigm Reservoir
These procedures are sequential. Perform the following procedures
in order.
Setting the time and date
1. From the HOME screen, press ACT. Press the button to
select Utilities. Press ACT.
MiniMed
MAIN MENU
Basal
Prime
Utilities
2. Press the button to select Time/Date. Press ACT.
MiniMed
UTILITIES MENU
Daily Totals
Block
Time/Date
18 Chapter 2
Page 31

3. Press the and button to select your preferred time
format. Press ACT.
MiniMed
TIME/DATE SETUP
12 Hour Setup
24 Hour Setup
If you have selected the 12 Hour Setup, when pressing the
and buttons the AM/PM will change. Make sure that the
desired time indicator is displayed.
4. Press ACT to program the time and date.
MiniMed
TIME/DATE SET
12:00 PM
1JAN2001
Press ACT to change
5. Press the and buttons to set the hour. Press ACT.
MiniMed
SET HOUR
10:12 PM
Getting Started 19
Page 32

6. The minutes will flash. Press the and buttons to set
the minutes. Press ACT.
MiniMed
SET MINUTE
10:12 PM
7. The year will flash. Press the and buttons to set the
current year. Press ACT.
MiniMed
SET YEAR
2001
8. The month will flash. Press the and buttons to set the
month. Press ACT.
MiniMed
SET MONTH
11
9. The day will flash. Use the and buttons to select the
day. Press ACT.
MiniMed
SET DAY
18
20 Chapter 2
Page 33

10. The time and date will be shown.
MiniMed
TIME SET AT
10:12 PM
18NOV2001
11. Press the ACT button to return to the UTILITIES menu.
Installing the reservoir
If using the pump for the first time, remove the shipping cap from
the reservoir compartment before installing the reservoir.
To install a reservoir into your pump or replace an empty reservoir
you will access the PRIME menu to rewind the pump. The pump
will prompt you through the following steps:
■
Remove empty reservoir
■
Rewind — moves the drive arm back to the starting point
inside the reservoir compartment, so a new reservoir can be
installed.
■
Install new reservoir
■
Select insulin type
■
Preparing to prime — pump finds the back of reservoir.
■
Manual prime
■
Insert set into body
■
Fixed prime
The following procedures must be followed in order. The pump
will prompt you through these procedures.
Getting Started 21
Page 34

Removing the reservoir
1. Remove the infusion set from your body or disconnect the
tubing from the infusion site.
2. Using a counter-clockwise motion, unscrew the tubing
connector from the pump with a 1/2 turn.
3. Pull the reservoir and the connector away from the pump.
4. Dispose of your used reservoir and infusion set in a safe
manner.
Rewinding the pump
WARNING: Always disconnect the infusion set from your body
before inserting or removing the reservoir from the
pump.
1. From the HOME screen, press ACT. Select Prime.
MiniMed
MAIN MENU
Suspend
Basal
Prime
2. Make sure the reservoir is removed from the pump. Press ACT
and Rewind will be selected.
MiniMed
PRIME MENU
Rewind
Fixed Prime
Prime History
22 Chapter 2
Page 35

WARNING: Never rewind the pump while it is connected to your
body or contains a reservoir.
Never insert the reservoir into pump while it is connected to your body.
3. Press ACT and the REWIND screen will appear.
MiniMed
REWIND
Disconnect from Body
Press ACT to Rewind
4. Press ACT to rewind.
5. The pump will now rewind.
MiniMed
REWINDING
Wait for Notification
6. Once finished, the pump will beep three times and the screen
will change to the INSULIN TYPE screen.
Verifying insulin type
Make sure that you select the Insulin Type prescribed to you by
your medical doctor.
MiniMed
INSULIN TYPE
User-fill
User-fill
U100u
U50u
Getting Started 23
Page 36

7. Use the and buttons to select your reservoir type/insu-
lin concentration. Press ACT.
8. Use the button to select Yes and press ACT to verify insulin
type. To change the insulin type, select No and press ACT, or
press ESC to return to the INSULIN TYPE screen.
MiniMed
VERIFY INSULIN TYPE
No
Yes
9. If the MANUAL PRIME screen appears go to step 14 on the next
page.
U100
u
WARNING: Do not change your Insulin Type without consulting with
your medical doctor. Make sure that you select the Insulin
Type that you are currently using. Proper selection of
insulin concentration is necessary for accurate insulin
delivery.
Changing insulin type
The pump knows if you have changed your insulin type. For example: If you have been using an Insulin Type of U100 and select U50,
the pump will know that you have changed your Insulin Type. The
following screens will appear:
MiniMed
24 Chapter 2
INSULIN
CHANGE!
Page 37
10. Press ESC to return to the INSULIN TYPE screen to change
your Insulin Type if you have selected the wrong insulin type.
11. Press ACT to continue.
MiniMed
Consult your
physician before
changing insulin
therapy.
12. Press ESC to return to the INSULIN TYPE screen or if you
have consulted with your physician press ACT to verify the
insulin change.
MiniMed
VERIFY INSULIN CHANGE
No
Yes
U100
u
13. Select Yes to verify the insulin change. Press ACT.
Select No if you do not wish to change your insulin type.
14. The MANUAL PRIME screen will appear.
MiniMed
MANUAL PRIME
Disconnect from Body
Insert/Lock Reservoir
Hold ACT to Prime
WARNING: The pump must be rewound prior to inserting the new
reservoir. Failure to disconnect and rewind the pump
could result in an accidental infusion of insulin.
15. Be sure the infusion set is disconnected from your body.
Getting Started 25
Page 38
16. Fill the reservoir with your insulin. Refer to the Instructions
for Use provided with the reservoir.
WARNING: Your pump will not accurately deliver insulin if air
bubbles are present in the reservoir or infusion set. Take
care to remove air bubbles when filling your reservoir
and priming your infusion set.
17. Attach the tubing connector to the top of the filled reservoir as
described in the instructions that came with the reservoir.
18. Once the tubing connector is securely in place, insert the reservoir into the top of the pump case.
19. Once the reservoir is
inserted, rotate the
tubing
battery cap
connector approximately 1/2 turn
clockwise until
seated. When seated,
the tubing connector should be
tubing
connector
ESC
ACT
aligned horizontally
as shown in graphic.
20. Make sure the following screen is showing on the pump. Press
ACT if the screen is not visible.
MiniMed
MANUAL PRIME
Disconnect from Body
Insert/Lock Reservoir
Hold ACT to Prime
26 Chapter 2
Page 39

WARNING: Improper placement of the reservoir may result in inac-
curate delivery of insulin. Check to make sure the tubing
connector is locked onto the reservoir and the pump
case correctly, before connecting to the infusion set
quick release.
If you have already connected the infusion set quick
release, disconnect BEFORE correcting the reservoir
placement.
Once the tubing connector is seated properly, do not
partially unscrew and re-tighten the tubing connector
while the infusion set is connected to your body.
Getting Started 27
Page 40

Manual Prime
1. Make sure that the infusion set is disconnected from your
pump to your body.
MiniMed
MANUAL PRIME
Disconnect from Body
Insert/Lock Reservoir
Hold ACT to Prime
2. Hold ACT to Prime. The pump will prepare to prime and will
beep six times.
If you let go of the ACT button, either hold down ACT again to continue or press ESC to repeat the entire “Rewind” procedure.
MiniMed
PREPARING TO PRIME
Hold ACT
3. Continue to hold the ACT button until you hear a second set of
six beeps.
WARNING: DO NOT continue until you hear the second set of beeps
and the screen from step 4 appears. Call the 24-hour
Product Help-line for assistance.
28 Chapter 2
Page 41
4. After the second set of six beeps, the number of units used will
count up on the screen and begin filling the tubing with insulin. The pump will beep every two seconds.
MiniMed
PRIMING - HOLD ACT
ESC if
done
U
0.0
5. Hold the ACT button until insulin droplets form at the infu-
sion set tip.
MiniMed
PRIMING - HOLD ACT
ESC if
done
U
10.6
6. When droplets form at the tip of the infusion set and you do
not have any bubbles in your infusion set, release the ACT button and press ESC. Your Manual Prime is complete. Fixed
Prime will automatically be selected in the Prime Menu for
two minutes.
MiniMed
PRIME MENU
Rewind
Manual Prime
Fixed Prime
7. Insert your infusion set per the Instructions for Use provided
with the set.
8. If you have NOT performed steps 4, 5, and 6, do not attach the
infusion set connection to the pump tubing.
Getting Started 29
Page 42

Priming with fixed prime
Fixed priming provides a pre-determined volume for priming the
infusion set soft cannula after the introducer needle is removed.
Fixed prime is used after the infusion set has been inserted into
your body and the quick release connected to the pump. A Fixed
Prime is also used if you have disconnected your quick release and
you need to reprime the infusion set.
Refer to your Instructions for Use, for the type of infusion set you
are using, for approximate priming volumes. (Priming volumes
vary depending on type of infusion set you are using.)
The fixed prime cannot exceed the maximum bolus amount you
have set.
1. If two minutes have passed, the HOME screen will appear. (Go
to step 3 if two minutes have not passed.) Press ACT from the
HOME screen, to get back to the PRIME menu. Select Prime
from the Main menu. Press ACT.
MiniMed
MAIN MENU
Suspend
Basal
Prime
2. Select Fixed Prime. Press ACT.
MiniMed
PRIME MENU
Rewind
Manual Prime
Fixed Prime
30 Chapter 2
Page 43

Manual Prime will ONLY appear in the Prime menu after you
have performed “Rewind” when changing your reservoir. The
Manual Prime feature will not reappear once Fixed Prime, or the
Prime Menu has been exited.
3. The prime amount will flash. Use the and buttons to
set the prime. Press ACT.
If a Fixed Prime has been performed previously, the following
screen will automatically default to the last entered prime
amount.
MiniMed
FIXED PRIME
U
0.5
4. Once the prime has begun, the PRIME DELIVERY screen will
count up the units as they are delivered.
MiniMed
PRIME DELIVERY
6:26PM
U
0.3
5. A “beep” will sound when priming is complete.
Getting Started 31
Page 44

If you need to stop a Fixed Prime, select Suspend, and then
Resume.
Reviewing the prime history
Review the prime history to see the primes you have delivered.
The prime amounts are not counted into your daily total quantity
of insulin.
1. From the HOME screen, press ACT. Press the button to
select Prime. Press ACT.
MiniMed
MAIN MENU
Basal
Prime
Utilities
2. Press the to select Prime History. Press ACT.
MiniMed
PRIME MENU
Rewind
Fixed Prime
Prime History
32 Chapter 2
Page 45

3. Use the and buttons to review the primes. The “F” at
the end of the line indicates a fixed prime. An “M” indicates a
manual prime.
MiniMed
PRIME HISTORY
21FEB 08:09P
21FEB 08:07P 22.1M
21FEB 06:51A
.5F
.5F
F (fixed prime)
M (manual prime)
4. Press ESC button to exit.
How to wear the pump
A holster is provided with your pump. The holster is designed to fit
on your belt or waistband, where you can access it easily. Using the
holster helps protect your pump from impact and scratches.
Other cases to hold your pump are available through Medtronic
MiniMed.
Getting Started 33
Page 46

34 Chapter 2
Page 47

Chapter 3
Status
• • • • • •
Checking pump status
The different operations of the Paradigm pump can be easily
reviewed by accessing the STATUS screen.
1. From the HOME screen, press
ESC to show the STATUS
screen. Use the and
button to scroll and view all of
the information.
The STATUS screen to the right
is a sample of what you will see
on the screen. The “XX” indicate
the software version number.
STATUS 9:28A U100u
Temp Basal 0.1U/H
Last Bolus N
Basal 3: 0.5U/H
Units Remaining: 30U
Battery: Normal
Thur 22 FEB 2001
S/N# 000542
VER X.XX X.00 OB OB
MiniMed
Duration 0:30
Time left 0:05
6:29A 22 Feb
9.2U
35
Page 48

The following list is information that appears on the STATUS
screen. All this information will not appear all the time or at the
same time.
■
Time and date (always present)
■
Insulin type (always present)
■
Status of pump (examples: Rewind, Suspended, Low
Reservoir)
■
Bolus delivered by type: Square (S), and Dual (D)
■
Basal pattern: A or B
■
Special basal messages, such as, temporary basal with total
units, duration, and time left.
■
Last bolus delivered, type (‘S’-Square, ‘N’-Normal, ‘D’-Dual),
units delivered, and time and date of delivery.
■
Current programmed basal rate (present, but not active if
temporary basal is being delivered).
■
Units remaining in reservoir (always present [insulin may
remain after counter reaches zero])
■
Battery Status: Normal, Low, or Off (always present)
■
Special settings will display, if set to On. Auto Off, Block: On,
and Remote: On.
■
The serial number and software version of the pump (always
present).
36 Chapter 3
Page 49

Chapter 4
Bolus Menu
• • • • • •
During a bolus delivery most pump features are disabled until
after the bolus has been delivered. Suspend and the STATUS
screen are always available.
The Paradigm pump can be programmed to deliver different types
of boluses:
■
Normal Bolus - Delivers a bolus to cover current needs.
■
Square Wave Bolus - Delivers a bolus evenly over a period of
time, from 30 minutes to 8 hours.
■
Dual Wave Bolus - Delivers a normal bolus followed by a
square wave bolus.
Additional bolus features are available for your safety and
convenience:
■
Express Bolus - The EXPRESS BOLUS button is a
short-cut to the Bolus Type Menu.
■
Maximum Bolus Limit (Max Bolus) - A feature you set that
limits the units delivered for a single bolus. The range is 0.0-
25.0 units. Factory setting is 10.0 Units.
■
Easy Bolus - the EASY BOLUS button is used to deliver
a normal bolus without looking at your pump. This feature
is programmed using the Bolus Menu/Easy Bolus option.
■
Bolus History- The Bolus History allows you to review and
verify your bolus deliveries.
37
Page 50
MiniMed
BOLUS MENU
Set Bolus
ACT
MiniMed
SET BOLUS
--.-
MiniMed
BOLUS TYPE MENU
Normal Bolus
Square Wave Bolus
Dual Wave Bolus
*
U
Bolus History
Max Bolus
Dual/SquareBolus
Easy Bolus
ACT
ACT
ACT
ACT
MiniMed
BOLUS HISTORY
Last
11NOV
10 NOV
12:00P
11:50A
12:00P
12.4N
18.7S
20.5N
MiniMed
MAX BOLUS SETUP
0-25
10.0
MiniMed
DUAL/SQUARE OPTION
Off
On
MiniMed
EASY BOLUS OPTION
Off
On/Set
U
* The SET BOLUS screen is the default Bolus screen. If
Dual/Square is ON the BOLUS TYPE MENU screen will appear.
38 Chapter 4
Page 51
Delivering a normal bolus
1. From the HOME screen, press ACT. Bolus will be selected.
Press ACT.
MiniMed
MAIN MENU
Bolus
Suspend
Basal
2. The Set Bolus option will be selected. Press ACT.
MiniMed
BOLUS MENU
Set Bolus
Bolus History
Max Bolus
3. The dashes for the Set Bolus amount will flash. Use the
and buttons to set the desired bolus amount. Press
ACT.
MiniMed
SET BOLUS
U
2.0
Bolus Menu 39
Page 52

4. The bolus will be delivered now. A beep or vibration will occur
at the start and end of the bolus. As the bolus is delivered, the
amount will count up, until the entire bolus has been delivered.
MiniMed
BOLUS DELIVERY
12:30PM
U
0.1
Dual/Square bolus
When you turn the Dual/Square Bolus feature ON, new options will
appear when you select Set Bolus.
1. From the HOME screen press ACT. Bolus will be selected. Press
ACT.
MiniMed
MAIN MENU
Bolus
Suspend
Basal
2. Select Dual/Square Bolus. Press ACT.
MiniMed
BOLUS MENU
Bolus History
Max Bolus
Dual/Square Bolus
40 Chapter 4
Page 53

3. Select ON. Press ACT.
MiniMed
Dual/Square Option
Off
On
4. Repeat these steps to turn OFF this feature if desired.
Square wave bolus
The square wave bolus can be used for insulin delivery when you
have eaten a long meal, with extended snacking, or if you have
delayed digestion of food. By extending the bolus delivery over a
period of time, the insulin is more likely to be available to match
your individual needs.
➤
What can I do if I want to eat more food than the square wave bolus I
have programmed will cover?
If you need additional insulin, the Paradigm pump will let you program a normal bolus during a square wave delivery. The normal
bolus will interrupt the square wave that is being delivered. The
square wave delivery will continue once the normal bolus delivery
is finished.
The square and dual wave boluses are optional. You may want to
explore these options after you become familiar with the basic
functions of your pump. It is important that you consult with
your healthcare professional before using these features.
Bolus Menu 41
Page 54

Delivering a square wave bolus
A square wave bolus delivers a bolus evenly over a period of time,
from 30 minutes to 8 hours.
During a Square Wave Bolus other programming cannot be accomplished, except for a Normal Bolus and Suspend.
1. From the HOME screen press ACT. Bolus will be selected. Press
ACT.
MiniMed
MAIN MENU
Bolus
Suspend
Basal
2. Set Bolus will be selected. Press ACT.
MiniMed
BOLUS MENU
Set Bolus
Bolus History
Max Bolus
3. Select Square Wave Bolus. Press ACT.
MiniMed
BOLUS TYPE MENU
Normal Bolus
Square Wave Bolus
Dual Wave Bolus
42 Chapter 4
Page 55

4. The SET SQUARE BOLUS screen will appear. The bolus
amount will flash. Use the and buttons to set the
bolus. Press ACT.
MiniMed
SET SQUARE BOLUS
--:--
U
--.-
5. The duration will flash in the upper left corner. Use the
and buttons to set the length of the delivery. Press ACT.
MiniMed
SET DURATION
00:30
Square
6. The BOLUS DELIVERY screen will show the square bolus
units as they are delivered, starting from zero up to the
amount programmed.
MiniMed
Bolus Delivery
5:00PM
Square
0.6
0.0
U
U
7. After 30 seconds, the pump will return to the HOME screen. If
you would like to check the progress of your Bolus delivery,
press ESC to view the STATUS screen.
Bolus Menu 43
Page 56

Normal bolus during a square wave bolus
Use this feature if you need additional insulin. You can program a
normal bolus during the delivery of a square wave bolus. The normal bolus will interrupt the square wave bolus that is being delivered. The square wave delivery will continue once the normal bolus
delivery is finished.
1. From the HOME screen, press ACT. Suspend will be selected.
Select Bolus. Press ACT.
MiniMed
MAIN MENU
Bolus
Suspend
Basal
2. Set Bolus will be selected. Press ACT.
MiniMed
BOLUS MENU
Set Bolus
Bolus History
Max Bolus
3. The screen will now show that a square wave bolus is in
progress. Press ACT.
MiniMed
SQUARE: Set
Delivered
Time Left
ACT to Program
0.6U
0.2U
1:29
44 Chapter 4
Page 57

4. The bolus amount will flash. Use the and buttons
to set the bolus. Press ACT.
MiniMed
SET BOLUS
U
5.0
5. The BOLUS DELIVERY screen will appear and will display the
units as they are delivered.
MiniMed
BOLUS DELIVERY
12:30PM
Normal
6. Once the Normal Bolus has been delivered, the pump will
beep/vibrate once and return to the BOLUS DELIVERY screen.
MiniMed
BOLUS DELIVERY
1:10PM
Square
0.1
0.3
U
U
7. After 30 seconds, the pump will return to the HOME screen. If
you would like to check the progress of your Bolus delivery,
press ESC to view the STATUS screen.
Bolus Menu 45
Page 58

Dual wave bolus
A dual wave bolus is a combination of a normal bolus and a square
wave bolus. Programming a dual wave bolus will deliver an immediate bolus followed by another bolus delivered evenly over a period
of time, from 30 minutes to 8 hours.
➤
What is the advantage of the dual wave bolus?
This bolus option is useful for meals that contain both rapidly and
slowly absorbed carbohydrates. Example: Fruit and crackers followed by pasta. This option meets both immediate and extended
insulin needs.
Delivering a dual wave bolus
1. From the HOME screen, press ACT. Bolus will be selected. Press
ACT.
MiniMed
MAIN MENU
Bolus
Suspend
Basal
2. Set Bolus will be selected. Press ACT.
MiniMed
BOLUS MENU
Set Bolus
Bolus History
Max Bolus
46 Chapter 4
Page 59

3. Select Dual Wave Bolus. Press ACT.
MiniMed
BOLUS TYPE MENU
Normal Bolus
Square Wave Bolus
Dual Wave Bolus
4. The SET DUAL BOLUS screen will appear. The bolus amount
will flash. Use the and buttons to set the immediate
bolus amount for the Normal bolus. Press ACT.
MiniMed
SET DUAL BOLUS
U
Dual Now
5. The SET SQUARE BOLUS screen will appear. The bolus
amount will flash. Use the and buttons to set the
bolus. Press ACT.
MiniMed
SET SQUARE BOLUS
--:--
Dual
5.0
U
4.4
Bolus Menu 47
Page 60

6. The duration icon will flash. Use the button to set the
length of the delivery, in 30 minute increments. Press ACT.
MiniMed
SET DURATION
00:30
U
Dual
7. The BOLUS DELIVERY screen will appear, showing you the
number of units of insulin as they are delivered.
MiniMed
BOLUS DELIVERY
1:32PM
Dual
4.4
U
0.1
8. Once the immediate bolus delivery is completed, the screen
will automatically show you the progress of the extended
square bolus delivery. You will notice that “Square” appears in
the bottom of the screen.
MiniMed
9. After 30 seconds, the pump will return to the HOME screen. If
you would like to check the progress of your bolus delivery,
press ESC to access your pump’s STATUS screen.
48 Chapter 4
BOLUS DELIVERY
1:32PM
Square
0.0
U
Page 61

Delivering an express bolus
The EXPRESS BOLUS button is a short-cut to the Bolus Type
menu.
When square/dual wave bolus option is off
1. From the HOME screen, press the button.
MiniMed
SET BOLUS
U
--.-
2. The dashes for the Set Bolus amount will flash. Use the
and buttons to set the bolus. Press ACT.
MiniMed
SET BOLUS
U
0.6
3. The BOLUS DELIVERY screen will appear, showing you the
number of units of insulin as they are delivered.
MiniMed
BOLUS DELIVERY
12:30PM
U
0.1
Bolus Menu 49
Page 62

When square/dual wave bolus option is on
1. From the HOME screen, press the button.
2. The Bolus Type menu will appear.
MiniMed
BOLUS TYPE MENU
Normal Bolus
Square Wave Bolus
Dual Wave Bolus
3. Select the desired bolus type. Press ACT. The screen that
appears will be different, depending on the type of bolus you
selected. Program your desired settings.
Maximum bolus limit (max bolus)
A maximum bolus limit sets a safety limit for the amount of insulin
that can be delivered in a single bolus.
It’s important to discuss this feature with your healthcare professional to decide on the maximum bolus amount of insulin that can
be delivered at one time. The Maximum Bolus Limit can be set
from 0.0 to 25.0 units. The factory setting is 10.0 units.
Setting the maximum bolus limit
1. From the HOME screen, press ACT. Bolus will be selected.
Press ACT.
MiniMed
MAIN MENU
Bolus
Suspend
Basal
50 Chapter 4
Page 63

2. Select Max Bolus. Press ACT.
MiniMed
BOLUS MENU
Set Bolus
Bolus History
Max Bolus
3. The current maximum bolus will flash. Use the and
buttons to set the maximum amount and press ACT.
MiniMed
MAX BOLUS SETUP
0-25
U
10.0
Bolus Menu 51
Page 64

Easy bolus
When using vibrate mode, Easy Bolus is limited to 20 steps or
maximum bolus, whichever comes first.
An Easy Bolus is an optional way to deliver a bolus without looking
at your pump. With each press of the button, you increase
the bolus amount by a set amount, called a “step.” Prior to deliver-
ing an Easy Bolus, you program how many units of insulin will
equal each step. The maximum number of steps depends on the
Easy Bolus step size and the maximum bolus. For example: If the
maximum bolus is set to 15 units and the step size amount is set to
.5, the number of steps is 30.
Example of an Easy Bolus with step amount set at 0.5 units
Total # Steps = 4
Total # Button Presses = 4
4
1 Step = 0.5 units
3
1 Step = 0.5 units
2
1 Step = 0.5 units
1
1 Step = 0.5 units
0
0
0.5
1.0
Total # Units
1.5
2
Once the step amount is set, you are ready to program an Easy
Bolus. From the HOME screen, with each press of the button,
you will hear a beep or feel a vibration for each step being
52 Chapter 4
Page 65
programmed. Each beep is a different tone. This makes it easy for
you to count the beeps, which equal the number of steps you have
programmed for your easy bolus delivery.
You can set the step at a level between 0.1 to 2.0 units. Set the step
to a number that is convenient to use and easy to multiply. Your
pump is programmed at the factory with the easy bolus feature
turned ON, and the step is set at 0.5 units.
Setting up easy bolus
Turns ON Easy Bolus and sets the step size. Easy Bolus is set to ON
at the factory.
1. From the HOME screen, press ACT. Bolus will be selected.
MiniMed
MAIN MENU
Bolus
Suspend
Basal
2. Press ACT.
3. Use the and buttons to select Easy Bolus. Press ACT.
MiniMed
BOLUS MENU
Max Bolus
Dual/Square Bolus
Easy Bolus
Bolus Menu 53
Page 66

4. On/Set will be selected. Press ACT.
MiniMed
EASY BOLUS OPTION
Off
On/Set
If you do not wish to set the Easy Bolus Option, use the button
and select OFF. Press ACT. If your Easy Bolus is turned off, you will
not be able to use your Remote Control to deliver a bolus.
5. The unit value will flash. The default is 0.5 units. Use the
and buttons to set the value to be used as the “step” for the
Easy Bolus.
MiniMed
EASY BOLUS ENTRY
U
0.5
6. Press ACT. The screen will return to the Bolus menu. Your Easy
Bolus step amount has now been programmed.
54 Chapter 4
Page 67

Delivering an easy bolus
The feature is used to easily deliver a Normal Bolus. To deliver
other types of boluses, use the Main menu or the button.
Practice using this feature while looking at the pump.
1. From the HOME screen, press the button. The “step”
amount will appear.
MiniMed
SET EASY BOLUS
U
0.5
2. Press the button the number of times needed to deliver
your bolus amount. Each time you press the button, the units
increase by the “step” amount. For a step size of 0.5 units, the
button is pressed twice and the screen will display 1.0
units. At each press of the button, the pump will sound a
different tone so you can keep track of the number of but-
ton presses.
MiniMed
SET EASY BOLUS
U
1.0
Bolus Menu 55
Page 68

Pressing the or ESC button will cancel the programming.
3. Press ACT when the desired bolus amount is reached. The
pump will beep or vibrate back the amount you just selected.
4. Count the beeps or vibrations. If this amount is correct, press
ACT to start the bolus delivery. The BOLUS DELIVERY screen
will appear.
MiniMed
BOLUS DELIVERY
1:32PM
U
Normal
5. The BOLUS DELIVERY screen will display the units being
delivered. When the total amount of the programmed bolus has
been delivered, a beep will sound or a vibration will be felt.
0.1
Bolus history
The Bolus History provides a record of the last 24 delivered boluses.
➤
What was the amount of my last bolus?
Review the BOLUS HISTORY screen to verify the amount of your
bolus deliveries.
➤
Why should I review my bolus deliveries?
Comparing your bolus deliveries to your blood glucose records
helps you and your healthcare professional identify your optimal
bolus amount(s).
56 Chapter 4
Page 69
1. From the HOME screen, press ACT. Bolus will be selected.
Press ACT.
MiniMed
MAIN MENU
Bolus
Suspend
Basal
2. Select Bolus History. Press ACT.
MiniMed
BOLUS MENU
Set Bolus
Bolus History
Max Bolus
3. The BOLUS HISTORY screen will appear. Use the and
buttons to review your recent bolus deliveries.
MiniMed
BOLUS HISTORY
Last
11NOV
11NOV
05:30P
01:05P
06:30P
5.0N
6.0S
4.8N
The above screen indicates the following: Date of delivery, time of
delivery, units delivered, and type of bolus delivered (‘S’- Square,
‘N’-Normal, ‘D’-Dual).
Bolus Menu 57
Page 70

58 Chapter 4
Page 71

Chapter 5
Basal
• • • • • •
Basal rate is the amount of insulin that the body needs to maintain target glucose values without food.
The basal rate should account for approximately one half of the
body’s total daily insulin requirements. Your pump mimics your
pancreas by delivering insulin continuously over 24 hours.
You can set your insulin pump to change rates during the day to
match your needs. Some people only use one rate, while others
find they need more. Your needs depend on your lifestyle and
insulin requirements.
Once set, these individual basal rates create your complete basal
pattern and are repeated every 24 hours.
59
Page 72

Basal menu
The menu choices that appear on the BASAL MENU screens will
change if a temporary basal rate has been set or if the Patterns
Option has been turned ON.
MiniMed
BASAL MENU
Set/Edit Temp Basal
*Select Patterns
Set/Edit Basal
Basal Review
ACT
ACT
ACT
ACT
MiniMed
SET DURATION
--:--
Temp
MiniMed
SELECT PATTERN
Standard 48.0U
Pattern A 32.0U
Pattern B
---.-U
MiniMed
SET BASAL RATE
12:00A
MiniMed
STANDARD
1) 12:00A
2) 06:30A
3) 08:30A
--.
1
0.
6.2
0.0
0.0
-
0
9.8 U
U/H
U/H
U/H
U
-
H
U
-
H
Max Basal Rate
Patterns
* Select Patterns will appear on the menu if the Patterns feature is
turned ON.
60 Chapter 5
ACT
ACT
MiniMed
MAX BASAL RATE
2.
MiniMed
PATTERNS OPTION
off
on
0
U
-
H
Page 73

What are start and stop times?
Start and stop times are the times that one basal rate stops and the
next basal rate starts.
It is recommended that you record your basal rates on paper. For
best results, discuss setting or changing your basal rate(s) with
your healthcare professional.
Basal Rate 2
start #2
Basal Rate 1
Basal Rate 3
start #1
stop #1
Midnight
*12 a.m
00:00
* Basal Rate 1 start time cannot be changed — only the rate. Basal
Rate 1 always starts at 12 a.m. or 00:00 depending on the time format selected.
■
The start time of one basal rate is the stop time of the
7:00 a.m.
stop #2
3:00 p.m.
or
15:00
start #3
stop #3
12:00 p.m.
or
00:00
previous one — giving you continuous basal insulin over 24
hours.
■
You cannot set a start time for one basal rate to overlap the
next basal rate. The addition of a new basal rate will erase any
basal rates that follow.
Basal 61
Page 74

Delivering a basal
It is recommended that you set basal rates with the assistance of
your healthcare professional.
1. From the HOME screen, press ACT. Select Basal. Press ACT.
MiniMed
BASAL MENU
Bolus
Suspend
Basal
2. Select Set/Edit Basal. Press ACT.
MiniMed
BASAL MENU
Set/Edit Temp Basal
Set/Edit Basal
Basal Review
3. The basal rate will flash indicating that it can be changed. Use
the and buttons to set Basal Rate 1. Press ACT.
MiniMed
SET BASAL RATE 1
12:00A
0.
6
U
-
H
Basal Rate 1
62 Chapter 5
Page 75

4. The screen will change to Basal Rate 2. The start time for rate
2 will flash. If you require only one basal rate, press ACT again.
MiniMed
SET START TIME 2
--:--
--.
U
-
-
H
Basal Rate 2
5. The screen will show the current rate and the 24-hour total.
After 30 seconds, the screen will return to the HOME screen.
MiniMed
BASAL RATE
Current Rate 0.6U/H
Started #1-12:00A
24 Hr. Total 14.4U
6. If you need to program additional basal rates, continue to set
the rate and time. Each basal rate will be identified by a number (Basal Rate 1, Rate 2, Rate 3, etc.).
Press ACT after you have finished. The screen will show the
current rate and the time it started, as well as the daily total.
The pump will return to the HOME screen after 30 seconds.
Basal 63
Page 76

Maximum basal rate (max basal)
■
A maximum basal rate is a safety limit for the amount of basal
insulin that is able to be delivered per hour.
■
It’s important to discuss your maximum basal rate with your
healthcare professional.
Setting max basal rate
The Max Basal Rate sets the maximum basal rate (units/hour) that
the pump will deliver. This maximum rate will apply to every basal
rate that is set, including a temporary basal rate.
Your pump is programmed at the factory with a maximum basal
setting of two (2.0) units per hour. A maximum basal rate of up to
35.0 units per hour can be set. Discuss with your healthcare professional what your limit should be. You CANNOT set a maximum
basal rate that is less than any of the currently programmed basal
rates – this includes patterns and temporary basal rates.
1. From the HOME screen, press ACT. Select Basal, then press
ACT.
MiniMed
MAIN MENU
Bolus
Suspend
Basal
64 Chapter 5
Page 77

2. Select Max Basal Rate. Press ACT.
MiniMed
BASAL MENU
Set/Edit Basal
Basal Review
Max Basal Rate
3. The maximum basal rate will flash. Use the and
buttons to change the rate. Rate range is 0.0 to 35.0 u/h. Press
ACT.
MiniMed
MAX BASAL RATE
U
-
0
2.
H
Temporary basal rate (temp)
Provides a temporary change to programmed basal rates to match
a change in short-term insulin requirements. Temporary basal
rates offer an easy way to meet situations that may affect your
insulin needs.
Two examples of when a temporary basal rate would be used are:
■
The stress of illness can elevate your blood glucose. Setting a
higher temporary basal rate can help to meet this rise in
blood glucose.
■
Setting a lower temporary basal rate when you exercise may
help prevent exercise-related hypoglycemia.
The Basal Patterns feature may be more appropriate for longer
periods of increased or decreased activity.
Basal 65
Page 78

How does it work?
■
While it is active, a temporary basal rate overrides all other
basal rate programming. When the temporary basal delivery is
completed, your pump will return to the basal rate that is
currently programmed.
■
The temporary basal rate is delivered only once. It does not
repeat. If you want another temporary basal rate, you must
program the temporary basal rate delivery again.
Delivering a temporary basal rate
1. From the HOME screen, press ACT. Select Basal. Press ACT.
MiniMed
MAIN MENU
Bolus
Suspend
Basal
2. SET/EDIT TEMP BASAL will be selected. Press ACT.
MiniMed
BASAL MENU
Set/Edit Temp Basal
Set/Edit Basal
Basal Review
3. The duration will flash. Use the and buttons to set the
desired basal duration (30 minutes to 24 hours). Press ACT.
MiniMed
SET DURATION
--:--
Temp
--.
U
-
-
H
66 Chapter 5
Page 79

4. The temporary basal rate will flash. Use the and but-
tons to set the desired basal rate. Press ACT.
MiniMed
SET EDIT TEMP BASAL
03:30
0.
6
U
-
H
Verifying temporary basal delivery
The pump will beep/vibrate three times every hour while delivering temporary basal rate. You can also verify that a temporary
basal rate is delivering by checking the STATUS screen.
1. From the HOME screen, press ESC to access the STATUS
screen. Use the and buttons to scroll through the
information. Once you have completed your review, press ESC
to return to the HOME screen.
This shows
Temporary
Basal is active
at 0.6 U/H.
Basal rate that
would have
been delivered
if not for the
Temporary
Basal rate.
MiniMed
STATUS 7:07A U100u
Temp Basal 0.6 U/H
Duration 0:30
Time left 0:24
Last Bolus N 3.8U
9:07A 11 NOV
Basal 1: 0.8 U/H
Units Remaining: 128U
Battery: Normal
Tue 11NOV2000
S/N# 000000
In the example above the Temp Basal is programmed for 0.6 u/h
for 30 minutes. The time left is 24 minutes, this indicates that 6
minutes have elapsed.
Basal 67
Page 80
Canceling a temporary basal rate
Cancels a temporary basal rate and returns to the programmed
basal rate delivery.
1. From the HOME screen, press ACT. Select Basal. Press ACT.
MiniMed
Bolus
Suspend
Basal
2. Select Cancel Temp Basal. Press ACT.
Set/Edit Temp Basal
MAIN MENU
MiniMed
BASAL MENU
Cancel Temp Basal
Set/Edit Basal
3. You can verify that a temporary basal rate has been stopped by
checking the status screen. The words “Temp Basal” will not
appear on the status screen. From the HOME screen, press
ESC.
MiniMed
STATUS 2:12P U100u
Last Bolus N 3.8U
This is now
the basal
rate.
9:07A 11 NOV
Basal 1: 0.8 U/H
Units Remaining: 128U
Battery: Normal
Remote: On
Tue 11NOV2000
S/N #000000
68 Chapter 5
Page 81

Personal basal patterns
The personal basal patterns feature is optional for pump users. You
may want to explore this option after you become familiar with the
basic functions of your pump. It is important that you consult
your healthcare professional before using this feature.
Personal basal patterns allow you to establish different sets of basal
rates in order to match different needs, such as:
■
Do your sleep patterns change?
■
Do weekday and weekend activities change?
Before you are able to use this feature and set different personal
basal patterns, you must first turn ON the Patterns Option.
■
You can set up to three different patterns (Standard, A and B).
■
Each pattern must have at least one basal rate set or it will
not be accepted as a pattern.
■
Keep a paper copy of the pattern(s) and basal rate(s) you have
programmed with you at all times.
■
For best results discuss this option with your healthcare
professional.
Basal 69
Page 82

Turning on personal basal patterns
Your pump is programmed at the factory with this feature turned
OFF. Discuss what uses and settings are best for you with your
healthcare professional.
New selections will appear in the basal menu when you turn this
feature ON.
1. From the HOME screen, press ACT. Select Basal. Press ACT.
MiniMed
MAIN MENU
Bolus
Suspend
Basal
2. Select Patterns. Press ACT.
MiniMed
BASAL MENU
Basal Review
Max Basal Rate
Patterns
3. Select ON. Press ACT.
MiniMed
PATTERNS OPTION
Off
On
4. Select OFF if you do not want to use this feature. If OFF is
selected, the Standard Basal will be active.
70 Chapter 5
Page 83

Delivering personal basal patterns
Personal Basal Patterns allow you to set different basal delivery
patterns.
1. From the HOME screen, press ACT. Select Basal. Press ACT.
MiniMed
MAIN MENU
Bolus
Suspend
Basal
2. To set your patterns, select Set/Edit Basal. Press ACT.
MiniMed
BASAL MENU
Set/Edit Temp Basal
Select Patterns
Set/Edit Basal
If you select Set/Edit Basal and edit a Pattern, this Pattern will be
the basal in use by the pump. Make sure that you select the Basal
type desired before exiting the EDIT BASAL screen.
3. Select the pattern you want to set. Press ACT.
MiniMed
EDIT BASAL
Standard
Pattern A
Pattern B
16.8 U
24.2 U
----.- U
Basal 71
Page 84
4. The SET BASAL RATE screen will appear. Set the Basal Rates
desired, then press ACT.
MiniMed
SET BASAL RATE 1
12:00A
U
_
A
0.8
H
5. The BASAL RATE screen will appear. The screen will show the
current rate, the time it started, and the 24-hour total.
The pump will return to the HOME screen if no buttons are
pressed.
MiniMed
BASAL RATE A
Current Rate 0.8U/H
Started #1 - 12:00A
24 Hr. Total
19.2U
6. The HOME screen will show open circles, indicating the pattern has been set. Check the status screen to verify that the pattern has been programmed.
This indicates
that Pattern A
is active.
Current basal
rate from
Pattern A.
STATUS 9:12A
Pattern A
Last Bolus: N 3.8U
9:07am 11 NOV
Basal 1: 0.8 U/H
Units Remaining: 128U
Battery: Normal
Remote: On
Tue 11NOV2000
S/N# 000000
MiniMed
U100u
72 Chapter 5
Page 85

Selecting a pattern
This feature allows delivery of a personal basal pattern. Only patterns that have been programmed can be selected.
1. From the HOME screen, press ACT. Select Basal. Press ACT.
MiniMed
MAIN MENU
Bolus
Suspend
Basal
2. To view the 24-hour totals of your patterns, choose Select Patterns. Press ACT.
MiniMed
BASAL MENU
Set/Edit Temp Basal
Select Patterns
S
et/Edit Basal
3. Select desired pattern. Press ACT.
MiniMed
SELECT PATTERN
Standard
Pattern A
Pattern B
16.8 U
19.6 U
28.6 U
Selecting Pattern A or B will result in open circles on the HOME
screen.
Basal 73
Page 86

Basal review
Basal Review provides a review of daily basal insulin deliveries. You
should review your basal rates to make sure they match the rates
selected by you and your healthcare professional. There are two
types of basal rates to review, Standard and Pattern. You will only
see pattern if you set a pattern in the SELECT PATTERN screen
from the Basal Menu.
Standard basal rates
1. From the HOME screen, press ACT. Select Basal. Press ACT.
MiniMed
MAIN MENU
Bolus
Suspend
Basal
2. Select Basal Review. Press ACT.
MiniMed
BASAL MENU
Select Patterns
Set/Edit Basal
Basal Review
3. If you do not have any Patterns set, you will see the screen
below. Use the and buttons to review your basal rate
totals. Press ACT.
STANDARD
1) 12:00A
2) 11:30A
3) 12:00P
MiniMed
23.1U
0.6U/H
1.0 U/H
0.8U/H
74 Chapter 5
Page 87

4. If you do have Patterns set, you will see the screen below. The
current setting will be highlighted. Use the and but-
tons to select the basal you want to review. Press ACT.
MiniMed
BASAL REVIEW
Standard
16.8 U
Pattern A
Pattern B
19.6 U
24.5 U
Basal 75
Page 88

76 Chapter 5
Page 89

Chapter 6
Suspend
• • • • • •
The Suspend function stops all insulin deliveries (Basal, Bolus,
and Fixed Prime) that you have programmed into your pump.
While the pump is in Suspend, you will only be able to view the
STATUS screen. No other menu choices are available.
You must resume your pump in order for the delivery of basal
insulin to restart. Bolus and Fixed Prime will not restart. You
must reprogram and activate the Bolus and Fixed Prime
settings.
MiniMed
MAIN MENU
Bolus
Suspend
Basal
Prime
Utilities
ACT
MiniMed
SUSPEND
Press ACT to Stop Pump
77
Page 90

Suspending the pump
The pump will beep/vibrate in fifteen minute intervals starting at
the closest quarter hour mark while in the Suspend mode.
Example: You Suspend the pump at 11:20 AM, the pump will
beep/vibrate at 11:30 AM, 11:45 AM, 12:00 PM, 12:15 PM, and so on,
until the pump is taken out of the Suspend mode.
1. From the HOME screen, press ACT. Select Suspend. Press ACT.
To Suspend the pump while a bolus is being delivered, press ACT.
The screen will be returned to the MAIN MENU screen with
Suspend selected. Then press ACT.
MiniMed
Bolus
Suspend
Basal
Main Menu
2. The screen will instruct you to press ACT if you want to stop
your pump.
MiniMed
SUSPEND
Press ACT to Stop Pump
3. Press ACT. The pump will beep three times, and you will see the
time that pump delivery was stopped.
78 Chapter 6
MiniMed
Stopped at 11:20 A
SUSPEND
Page 91

4. After 30 seconds, your pump will return to the HOME screen
which now will show solid circles, indicating your pump is in
the Attention mode.
MiniMed
5. Press ESC to show the STATUS of your suspended pump.
MiniMed
STATUS 11:30A U100u
Suspended at 11:20A
Last Bolus N 3.8U
7:58A 22 AUG
pump
suspended
Resuming pump delivery
u
1. Press ACT from the HOME screen and the RESUME screen will
appear.
MiniMed
Stopped at 11:20A
RESUME
ACT-Restart Basal
2. Press ACT again to restart basal insulin delivery. Pump will
beep once.
3. The pump will return to the HOME screen and will resume
your previously programmed basal insulin deliveries.
Suspend 79
Page 92

80 Chapter 6
Page 93

Chapter 7
Utilities
• • • • • •
The Paradigm pump can be programmed from the
Utilities Menu to perform different functions for your safety and
convenience.
➤
The Utilities features are:
■
Alarm
■
Daily Totals
■
Block
■
Time/Date
■
Language
■
RF Options
■
Clear Pump
■
Selftest
Alarms
➤
Why are alarms important?
■
Your pump monitors activities and alerts you if there is any
unusual operation behavior, or an action is required by you.
For example, you are notified when you need to replace the
reservoir or replace your pump battery.
■
The alert type lets you adjust the way your pump
communicates with you. There are two types of alerts: beep
or vibrate (silent). There are three duration levels of sound
for the “beep” alarm: low (short), medium (intermediate),
and high (long).
81
Page 94

■
You can review your past alarms in the alarm history screen.
■
Alarms result in closed circles on the screen.
■
Pressing any button will result in a display that explains the
alarm. Press the button for instructions on responding to
the alarm.
Setting the alert type
Designates whether a “beep” or “vibration” will serve as the alarm
type for your pump. This screen also enables you to set the beep
volume level.
Vibrate mode will be disabled while you are using the Block feature.
Using the vibrate option uses more battery power than the audio
“beep” alarm and may shorten battery life. When you receive a
LOW BATTERY alert, your pump will revert to the beep alert to
conserve battery power.
Factory setting for the alert type is Beep Med.
1. From the HOME screen, press ACT. Press the button to
select Utilities. Press ACT.
MiniMed
MAIN MENU
Basal
Prime
Utilities
82 Chapter 7
Page 95

2. The Alarm option will be selected. Press ACT.
MiniMed
UTILITIES MENU
Alarm
Daily Totals
Block
3. History will be selected. Press the button to select Alert
Type. Press ACT.
MiniMed
History
Alert Type
Auto Off
ALARM MENU
4. Select your preferred alarm from the ALERT TYPE menu.
Press ACT.
MiniMed
ALERT TYPE
Beep Med
Beep Low
Vibrate
Utilities 83
Page 96

Using Auto-off
Provides a safety mechanism that stops insulin delivery after a
defined period of time (1 to 24 hours) if no button presses are
detected. Your pump is programmed at the factory with this feature
turned OFF (0 hours). Discuss with your healthcare professional
what uses and settings are best for you.
1. From the HOME screen, press ACT. Press the button to
select Utilities. Press ACT.
MiniMed
MAIN MENU
Basal
Prime
Utilities
2. Alarm will be selected. Press ACT.
MiniMed
Alarm
Daily Totals
Block
UTILITIES MENU
3. History will be selected. Press the arrow button to select
Auto-off. Press ACT.
MiniMed
ALARM MENU
History
Alert Type
Auto Off
Press the and buttons to set the AUTO OFF
DURATION. In this example, the pump will stop delivery of
84 Chapter 7
Page 97
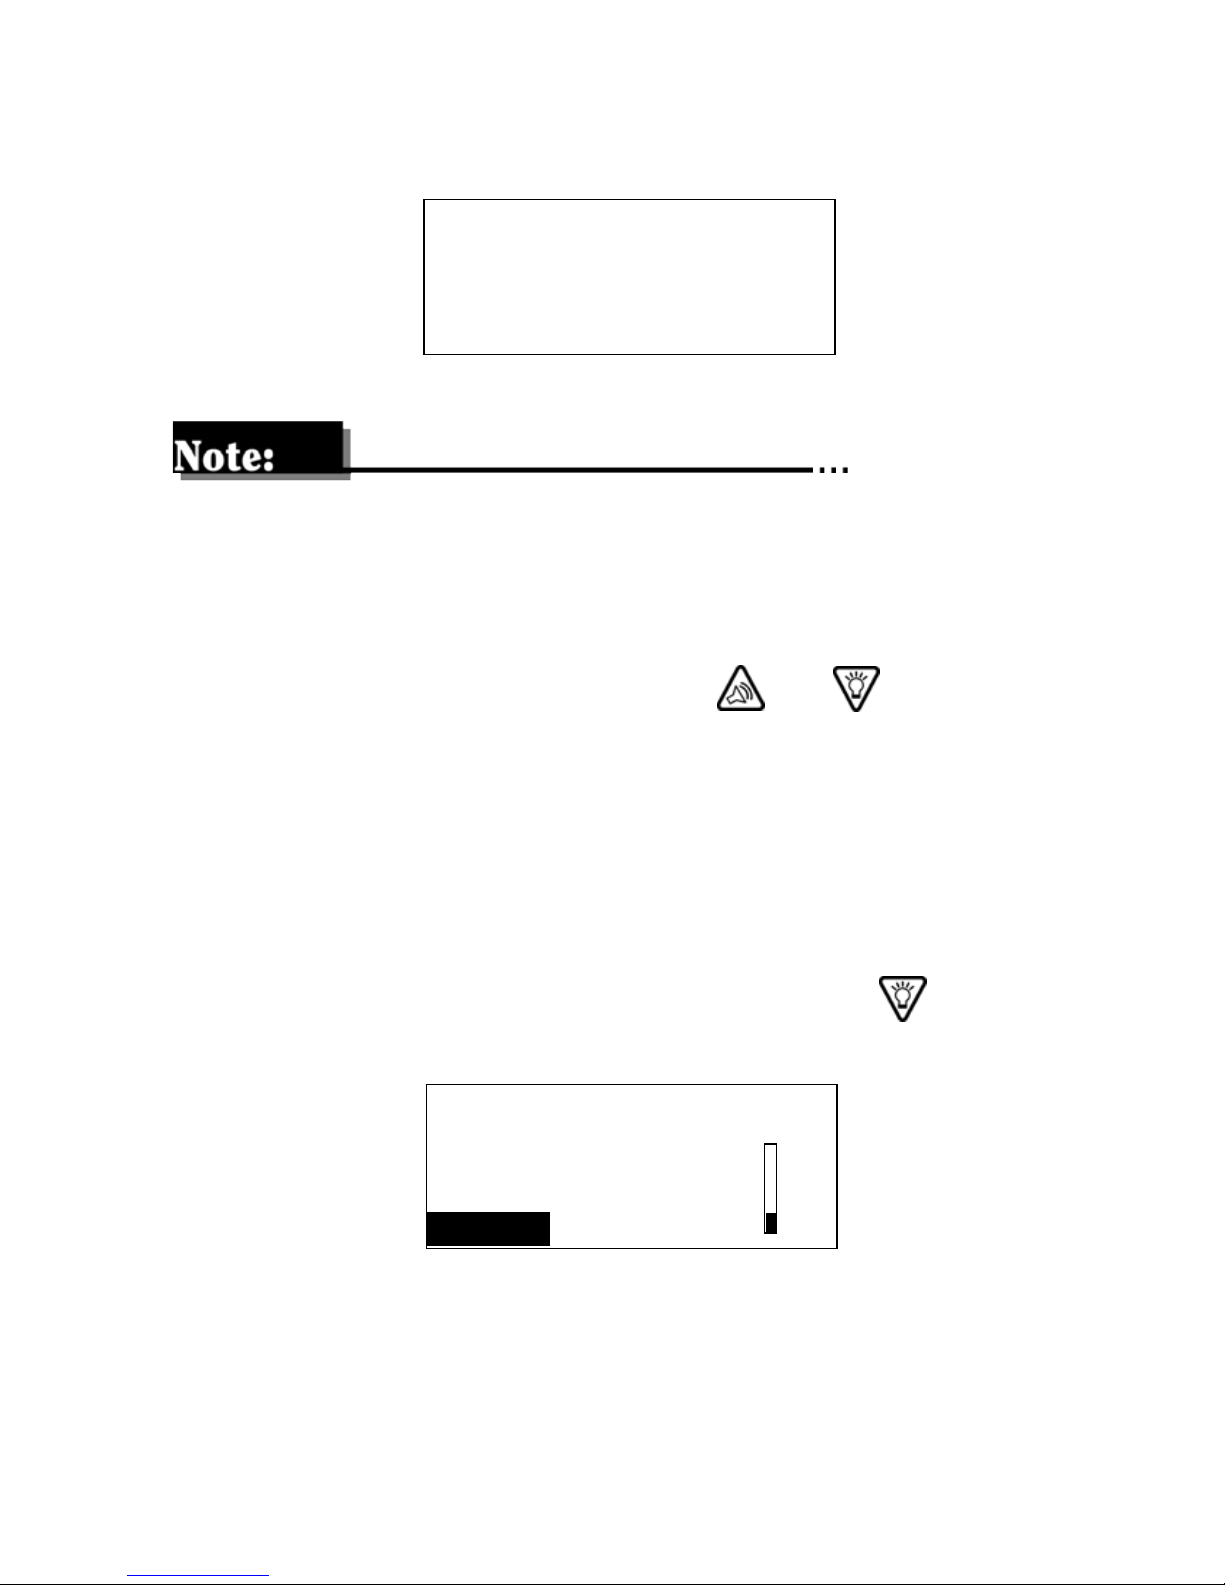
insulin, and an alarm will sound after 12 hours if no buttons
are pressed. Press ACT.
MiniMed
AUTO OFF DURATION
12
Hours
You can set Auto Off from 0 (off) to 24 hours.
Stop auto off
To turn off the Auto Off feature after it has been programmed.
Repeat steps 1 through 3 and use the and to program 0
(zero) hours. Press ACT and the Auto Off will no longer be On.
Reviewing the alarms
Allows you to review the past twelve alarms and/or errors that have
occurred.
1. From the HOME screen, press ACT. Press the arrow but-
ton to select Utilities. Press ACT.
MiniMed
MAIN MENU
Basal
Prime
Utilities
Utilities 85
Page 98

2. The Alarm option will be selected. Press ACT.
MiniMed
UTILITIES MENU
Alarm
Daily Totals
Block
3. The History option will be selected. Press ACT.
MiniMed
ALARM MENU
History
Alert Type
Auto Off
4. Use the and buttons to review your past alarms.
MiniMed
ALARM HISTORY
11OCT
08OCT
05OCT
10:35P
04:08P
11:35A LoBat
NoDel
E-Res
Daily totals
➤
Why should I Review My Daily Totals?
■
Comparing your daily insulin deliveries to your blood glucose
records helps you and your healthcare professional identify
your optimal daily insulin rate(s).
■
Daily totals include all basal and bolus insulin deliveries, but
they do not include insulin used for priming your pump. Each
total reflects all basal and bolus insulin delivered that day.
86 Chapter 7
Page 99

Reviewing the daily totals
Allows you to review the total amount of insulin that you have
received in each of the past 14 days. The daily totals include all
bolus and basal amounts delivered for that day since midnight, but
they do not include amounts delivered through the Prime feature.
1. From the HOME screen, press ACT. Press the button to
select Utilities. Press ACT.
MiniMed
MAIN MENU
Basal
Prime
Utilities
2. Press the button to select Daily Totals. Press ACT.
MiniMed
UTILITIES MENU
Alarm
Daily Totals
Block
3. Use the and buttons to review your DAILY TOTALS.
MiniMed
DAILY TOTALS
Today 26.5U
11NOV 48.5U
10NOV 54.5U
Utilities 87
Page 100

Block
The block feature restricts access to the pump programming. This
is an important safety feature if the pump users are young children
or disabled individuals whose parents, guardians or caretakers are
required to maintain complete control of the pump operation.
The Suspend and Easy Bolus can be administered by using the
remote control.
Setting up block
Your pump is programmed at the factory with this feature OFF.
With block ON, the only features that are available are suspend,
block, selftest or the use of the remote control. You can still view
the Status, History, Basal Review, and the Daily Totals screens. Discuss what uses and settings are best for you with your healthcare
professional.
Vibrate mode is disabled when the block is ON.
1. From the HOME screen, press ACT. Press the button to
select Utilities. Press ACT.
MiniMed
MAIN MENU
Basal
Prime
Utilities
88 Chapter 7
 Loading...