

Page 1
Steps for programming CZ-RTC2Remote Controller
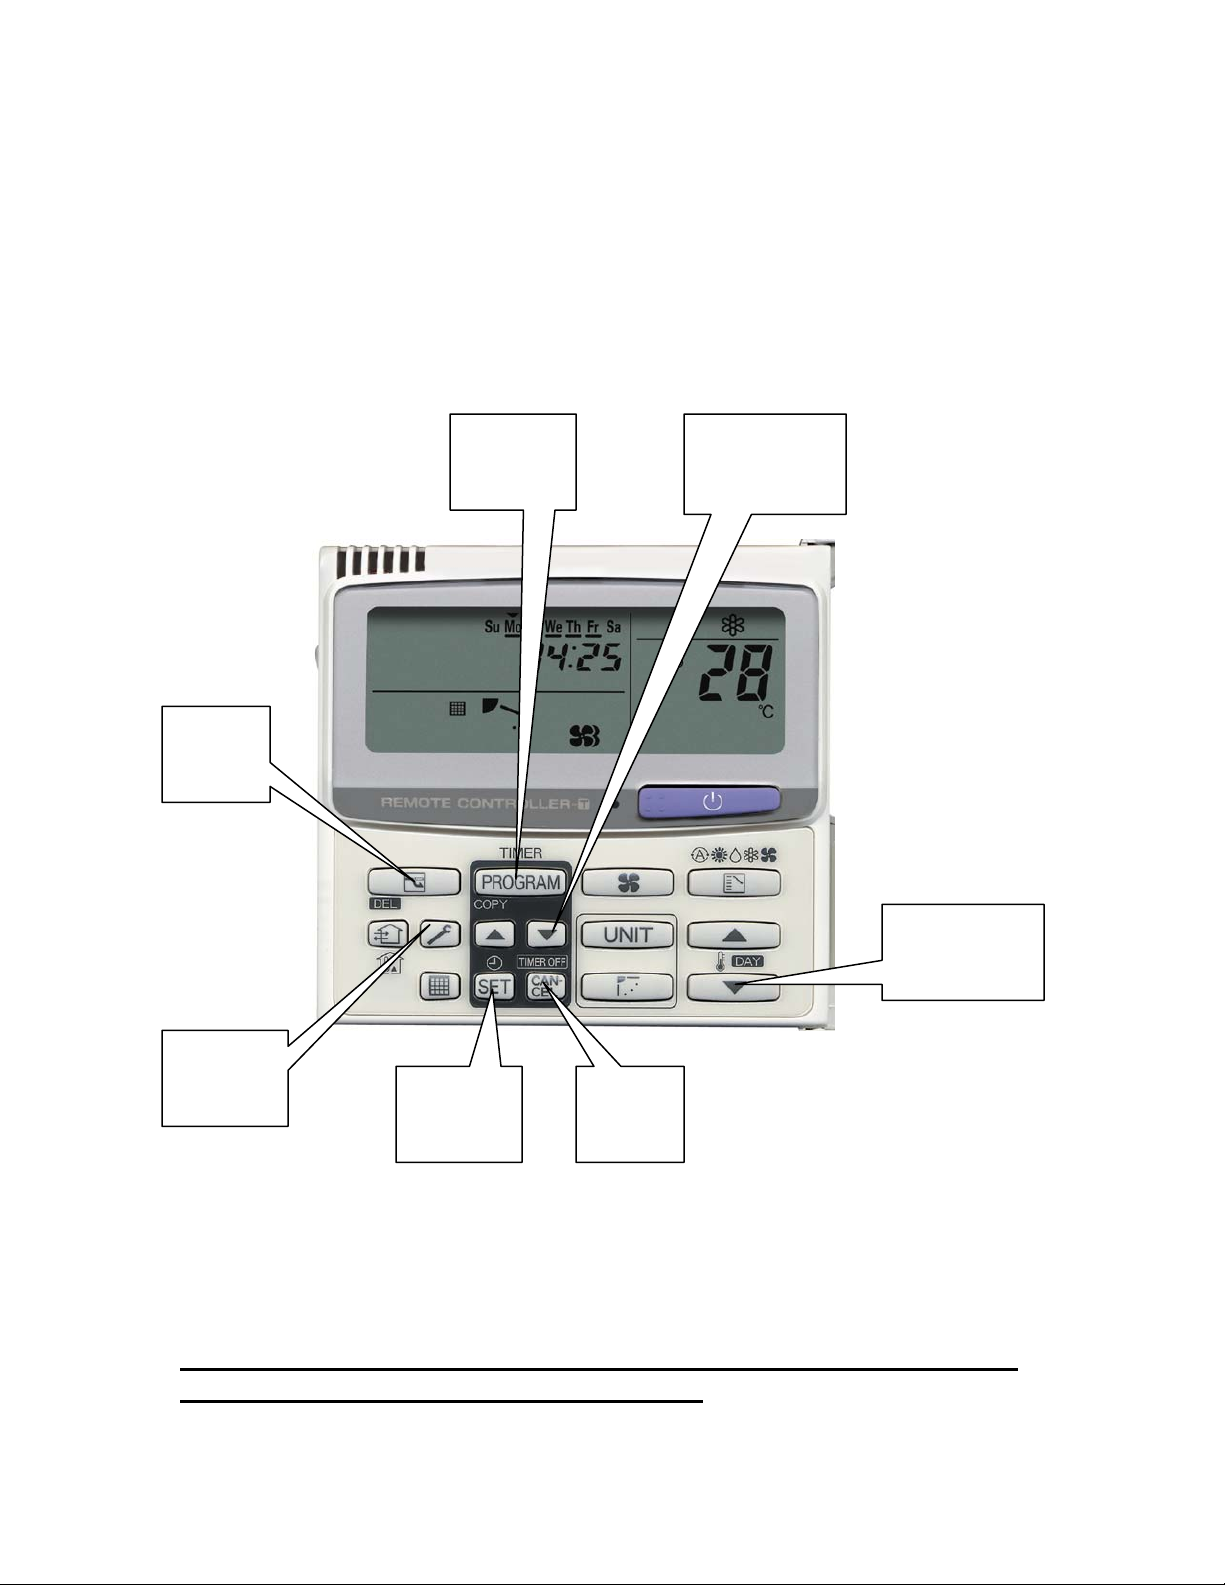
These are the locations of the keys used in this procedure.
Delete
Key
Program
Key
Up or Down
Timer keys
Up or Down
Day Keys
Wrench
Key
Set Key
Cancel
Key
Steps for programming
Note: There can be up to 6 timed functions entered per day. Functions
must be entered in the order they occur 1-6.
CZ-RTC2Remote Controller
Page 2
1. Setting day of the week and current time of day: Push and hold the
“SET” KEY and the hours will start blinking. While hours or
minutes are blinking, you can also now set the day of the week. Press
the “UP” or “DOWN” DAY KEY until desired day is highlighted.
Set the correct hour of the day using the “UP” or “DOWN”
ARROW KEY followed by the “SET” KEY. The minutes will now
start blinking. Set the correct minutes using the TIMER “UP” or
“DOWN” ARROW KEY followed by the “SET” KEY.
The time Note: on the remote is set in “military time”, this range
will be from 0:00 a.m. (representing midnight) - 23:59 hours p.m.
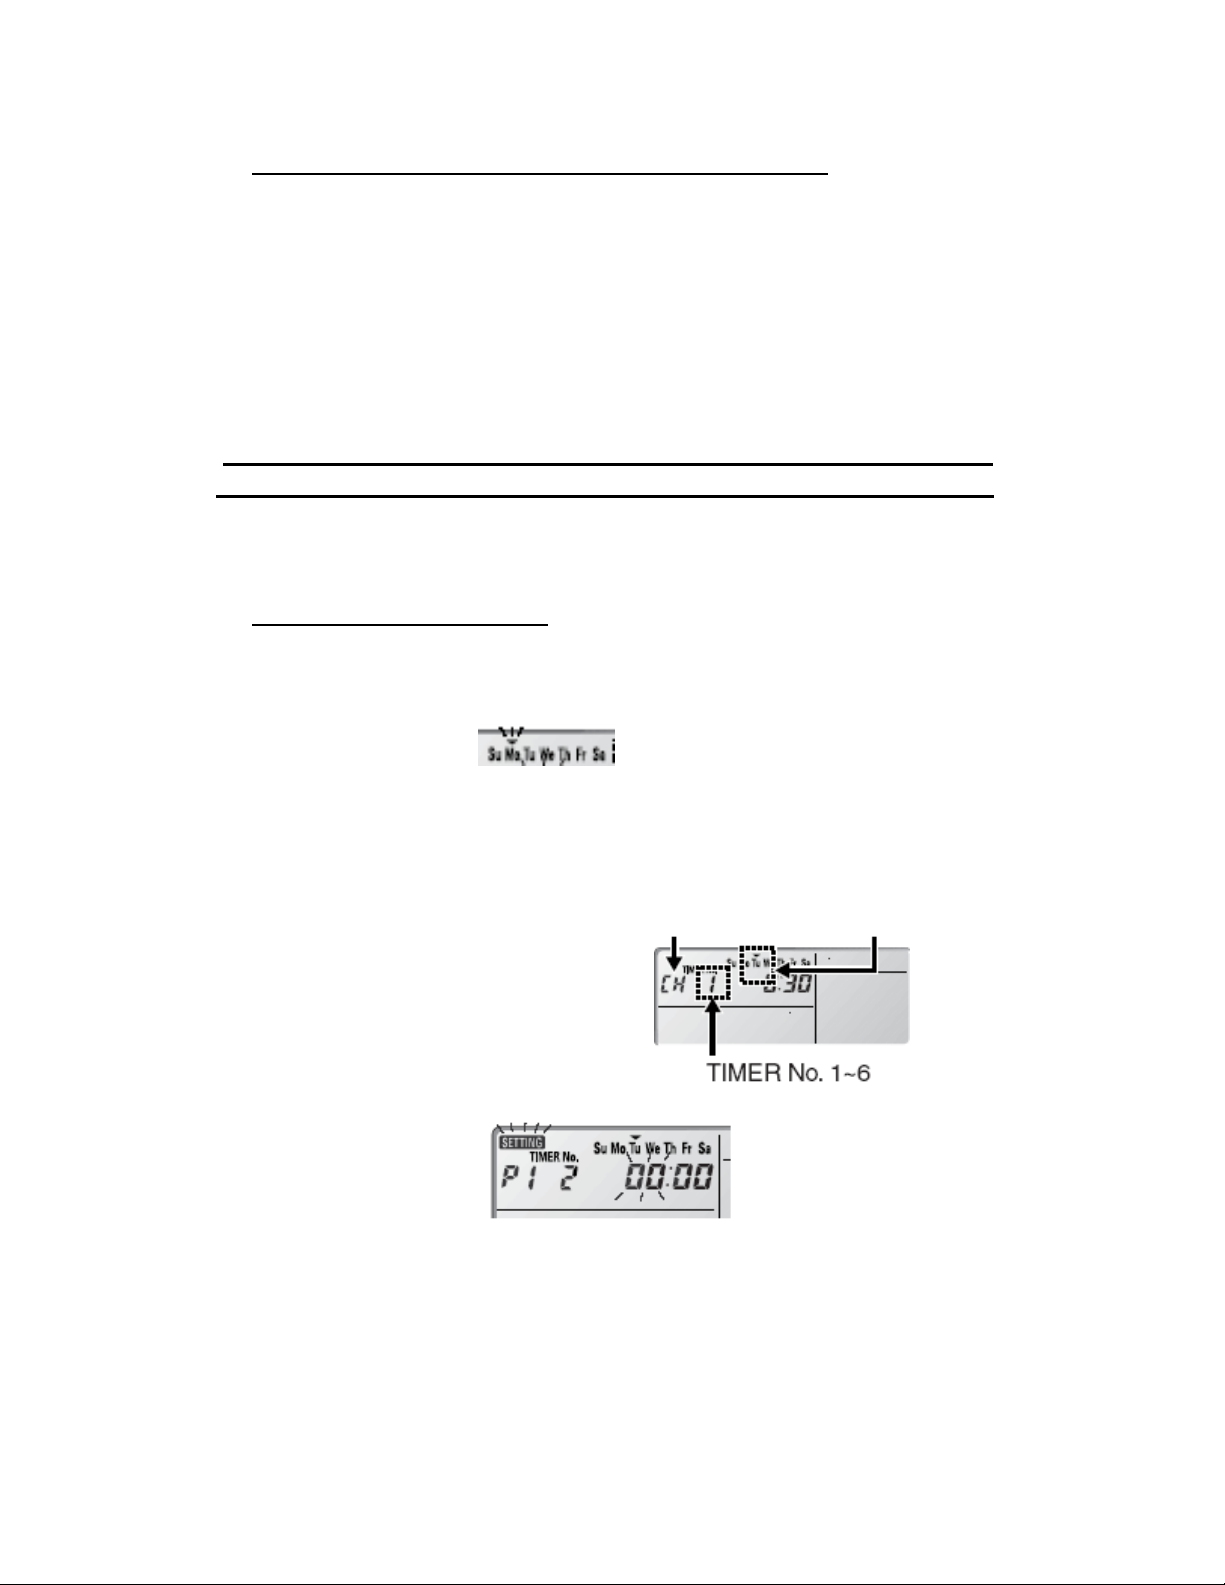
2. Setting a timed function:
will then appear in LCD display. Set the day of the week you want to
schedule an On/Off timed function, by pressing the “UP” or
“DOWN” DAY KEY, until the arrow emblem appears above the day
Press the “PROGRAM” KEY “CH 1”
to be programmed.
There can be up to 6 timed functions per day. Press the
“UP” or “DOWN” TIMER KEY and set the function from
1 to 6. Example: If only one timed function is needed for a
particular day you would select timer No. 1 then you would
see the following display.
example we are showing timer No. 2. Next press the “SET”
KEY then
display.
.
For this
will appear on the LCD
Page 3

“P1” is for setting the hour the unit will be turned on. Press
the “UP” or “DOWN” TIMER KEY and set the hour.
Once desired hour is shown then press the “SET” KEY and
will appear on the LCD display.
“P2” is for setting the desired minutes. Using the “UP” or
“DOWN “TIMER KEY, set the desired minutes, then
press the “SET” key.
Now “P3” will be displayed and is for setting on and off
times and the desired temperature set-point.
Using the UP KEY ONLY of the “UP” or “DOWN”
ARROW KEYS will toggle between on or off and the
temperature set-point.
By default the “ON” icon will be flashing.
Press the “UP” arrow once and the “OFF” icon will appear.
Press the “UP” arrow again and the “ON” icon will appear
Press the “UP” arrow again and you can set the temperature
Press the “SET” KEY to complete.
Press the “CANCEL” KEY to exit the programming.
Note: Each day of the week that has a set timed on or off function w
be represented by a black line under its particular day of the week.
This icon represents the “OFF” position.
This icon represents the “ON” position.
and you can now set the temperature set-point with the
“UP” or ”DOWN DAY KEY.
set-point only with the “UP” or “DOWN ARROW KEY.
.
ill
Example:
Page 4

3. Copying program from one day to the next:
“PROGRAM” KEY. Make sure the desired day of the week to
be copied is highlighted by using the “UP” or “DOWN” DAY
First press the
ARROWS.
“PROGRAM” KEY one more time and the following will be
displayed.
the “UP” or “DOWN” DAY KEY to select the day you wish to
copy to. Press the “SET” KEY. Press the “CANCEL” KEY to
return to normal operation. Repeat the above steps to copy to each
day of the week you wish to copy to.
4. Turning off the timer without deleting the timer program:
To keep the system from following the programmed On/OFF time schedule,
press the “CANCEL” KEY for 3-4 seconds and the following will appear
in the LCD window.
press the “CANCEL” KEY for 3-4 seconds until the
disappears from the LCD window.
5. Deleting the Program Timer:
Press the “PROGRAM” KEY once.
To re-enable the programmed time schedule
Press the “SET” KEY. Now use
Now press the
emblem
Press the “UP” or “DOWN” DAY KEYS to select the day you want
to delete.
Press the “UP” or “DOWN TIMER KEYS to select a timer number.
(From 1-6).
Press the “SET” KEY to display the P1 programming mode.
Press the “DELETE” KEY to delete the program.
Press the “CANCEL” KEY to exit.
 Loading...