

Page 1
Tuning into a Radio Station
Tuning into stations automatically
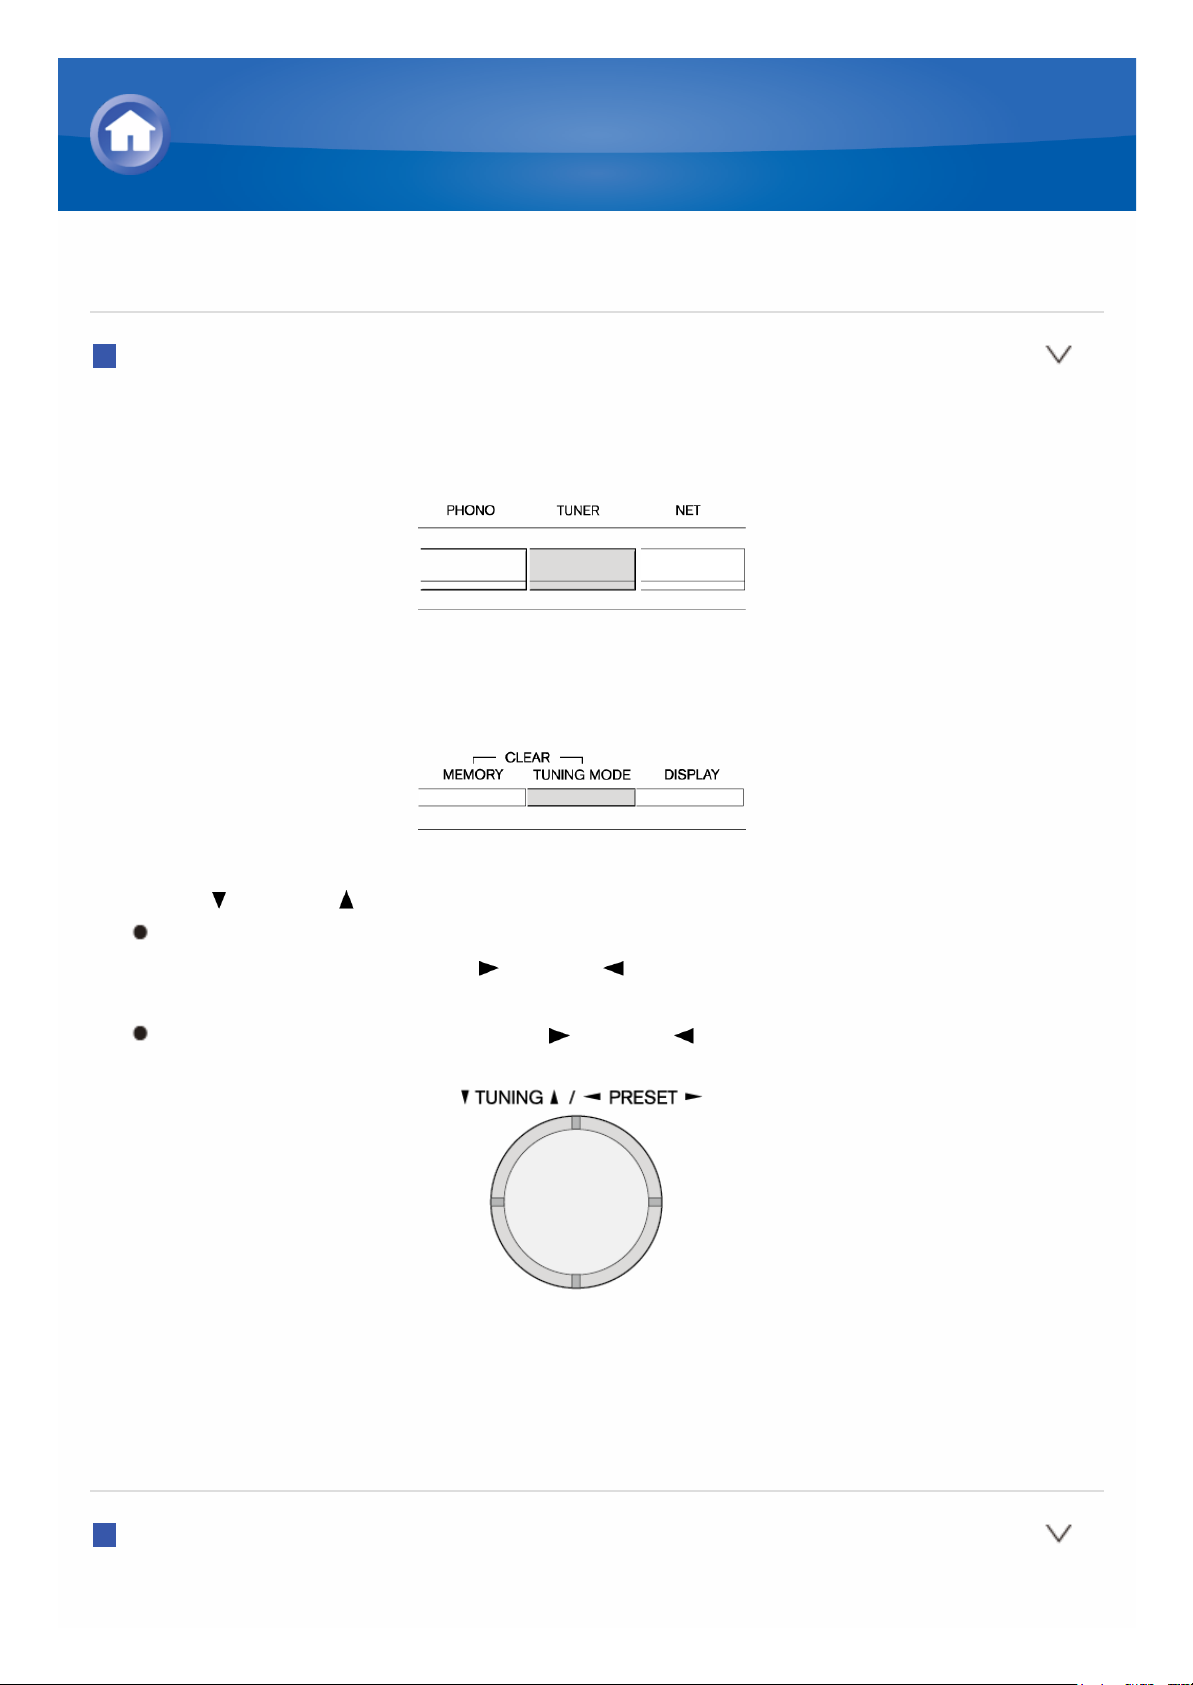
1. Press TUNER on the main unit several times to select either "AM" or
"FM".
2. Press TUNING MODE so that the "AUTO" indicator on the display lights.
3. Press TUNING to start Auto tuning.
Searching automatically stops when a station is found. When tuned
into a radio station, the " TUNED " indicator on the display lights. If
FM stereo broadcasting is tuned, the "FM STEREO" indicator lights.
No sound is output while the " TUNED " indicator is off.
When the signal from an FM radio station is weak: Radio wave may be
weak depending on the building structure and environmental conditions. In
that case, manually tune into the radio station of your choice by referring to
the next section.
Tuning into stations manually
1. Press TUNER on the main unit several times to select either "AM" or
AM/FM Radio Receiving Function
Page 2
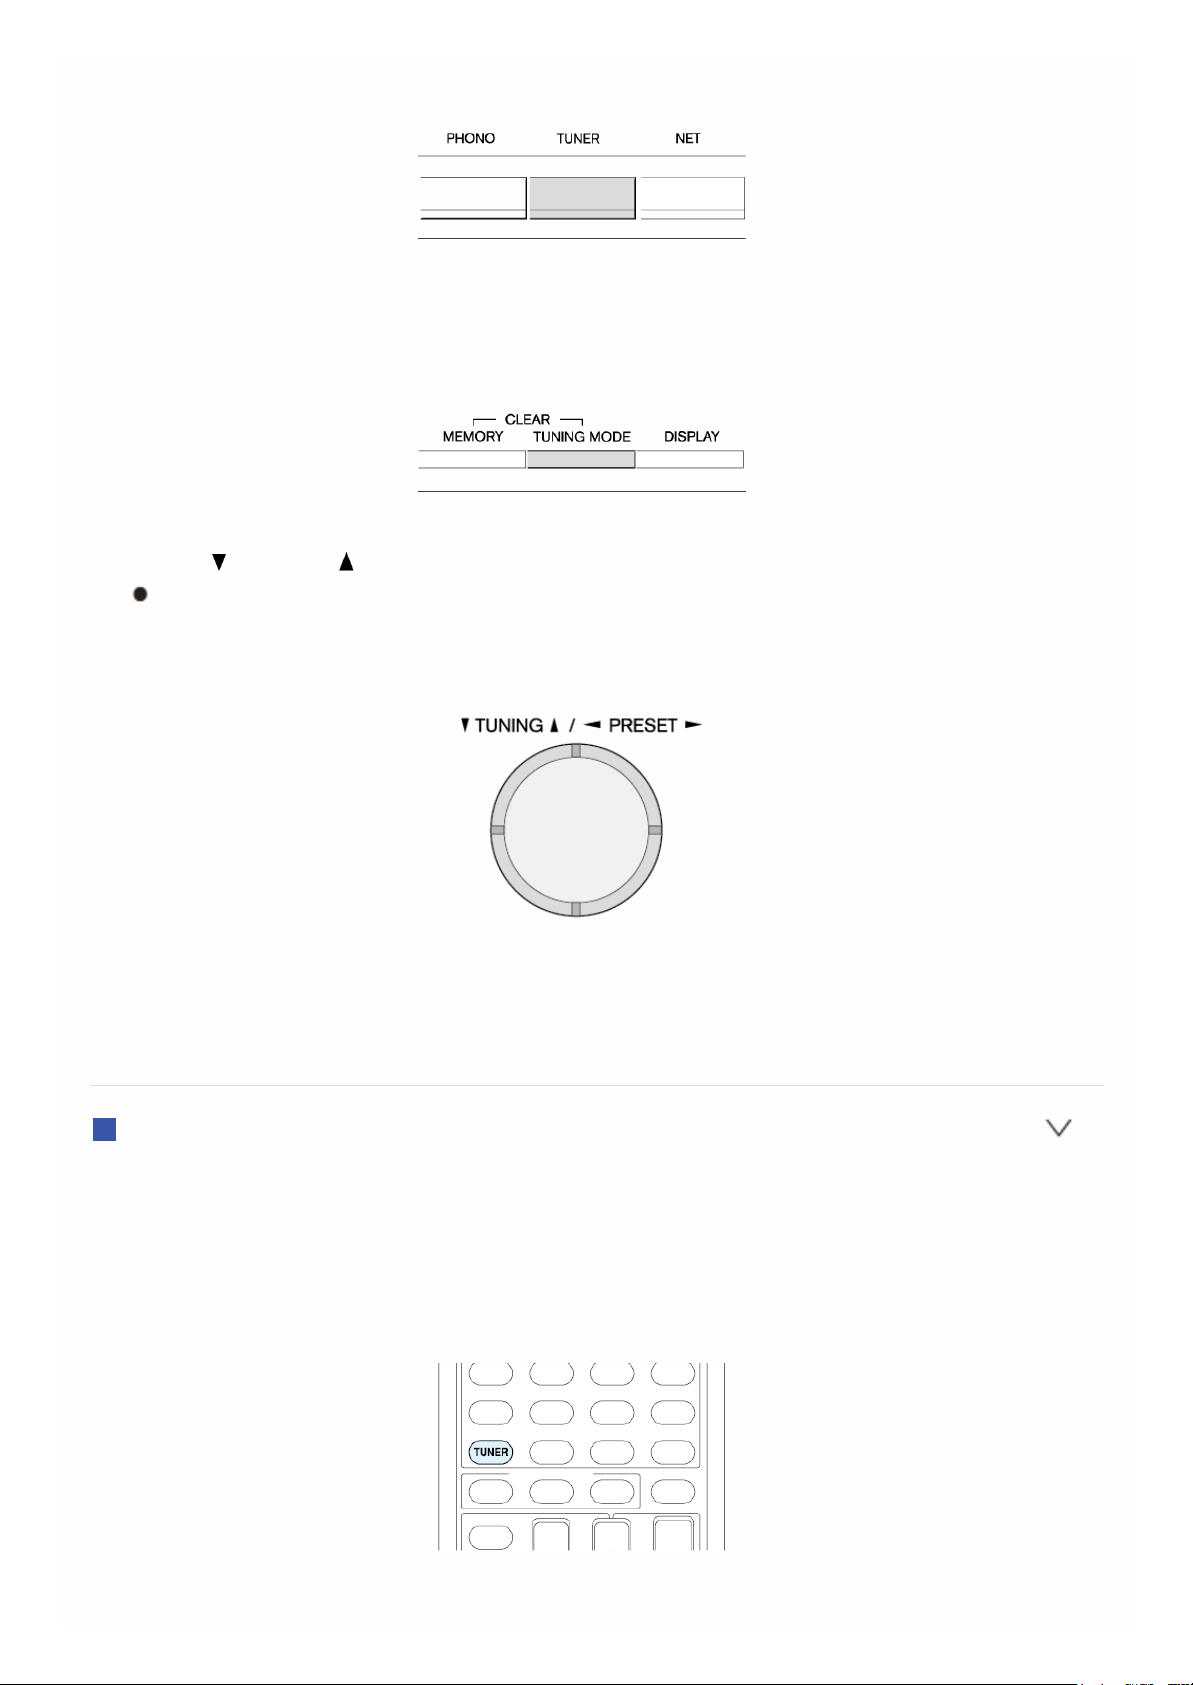
"FM".
2. Press TUNING MODE so that the "AUTO" indicator on the display goes
off.
3. Press TUNING to select the desired radio station.
The frequency changes by 1 step each time you press the button. The
frequency changes continuously if the button is held down and stops
when the button is released. Tune by looking at the display.
To return to the auto tuning mode: Press TUNING MODE again on the
main unit. FM stereo broadcasting is automatically tuned. Normally, leave the
indicator in "AUTO".
Tuning into stations by frequency
It allows you to directly enter the frequency of the radio station you want to
listen to.
1. Press TUNER on the remote controller several times to select either "AM"
or "FM".
2. Press D.TUN.
Page 3
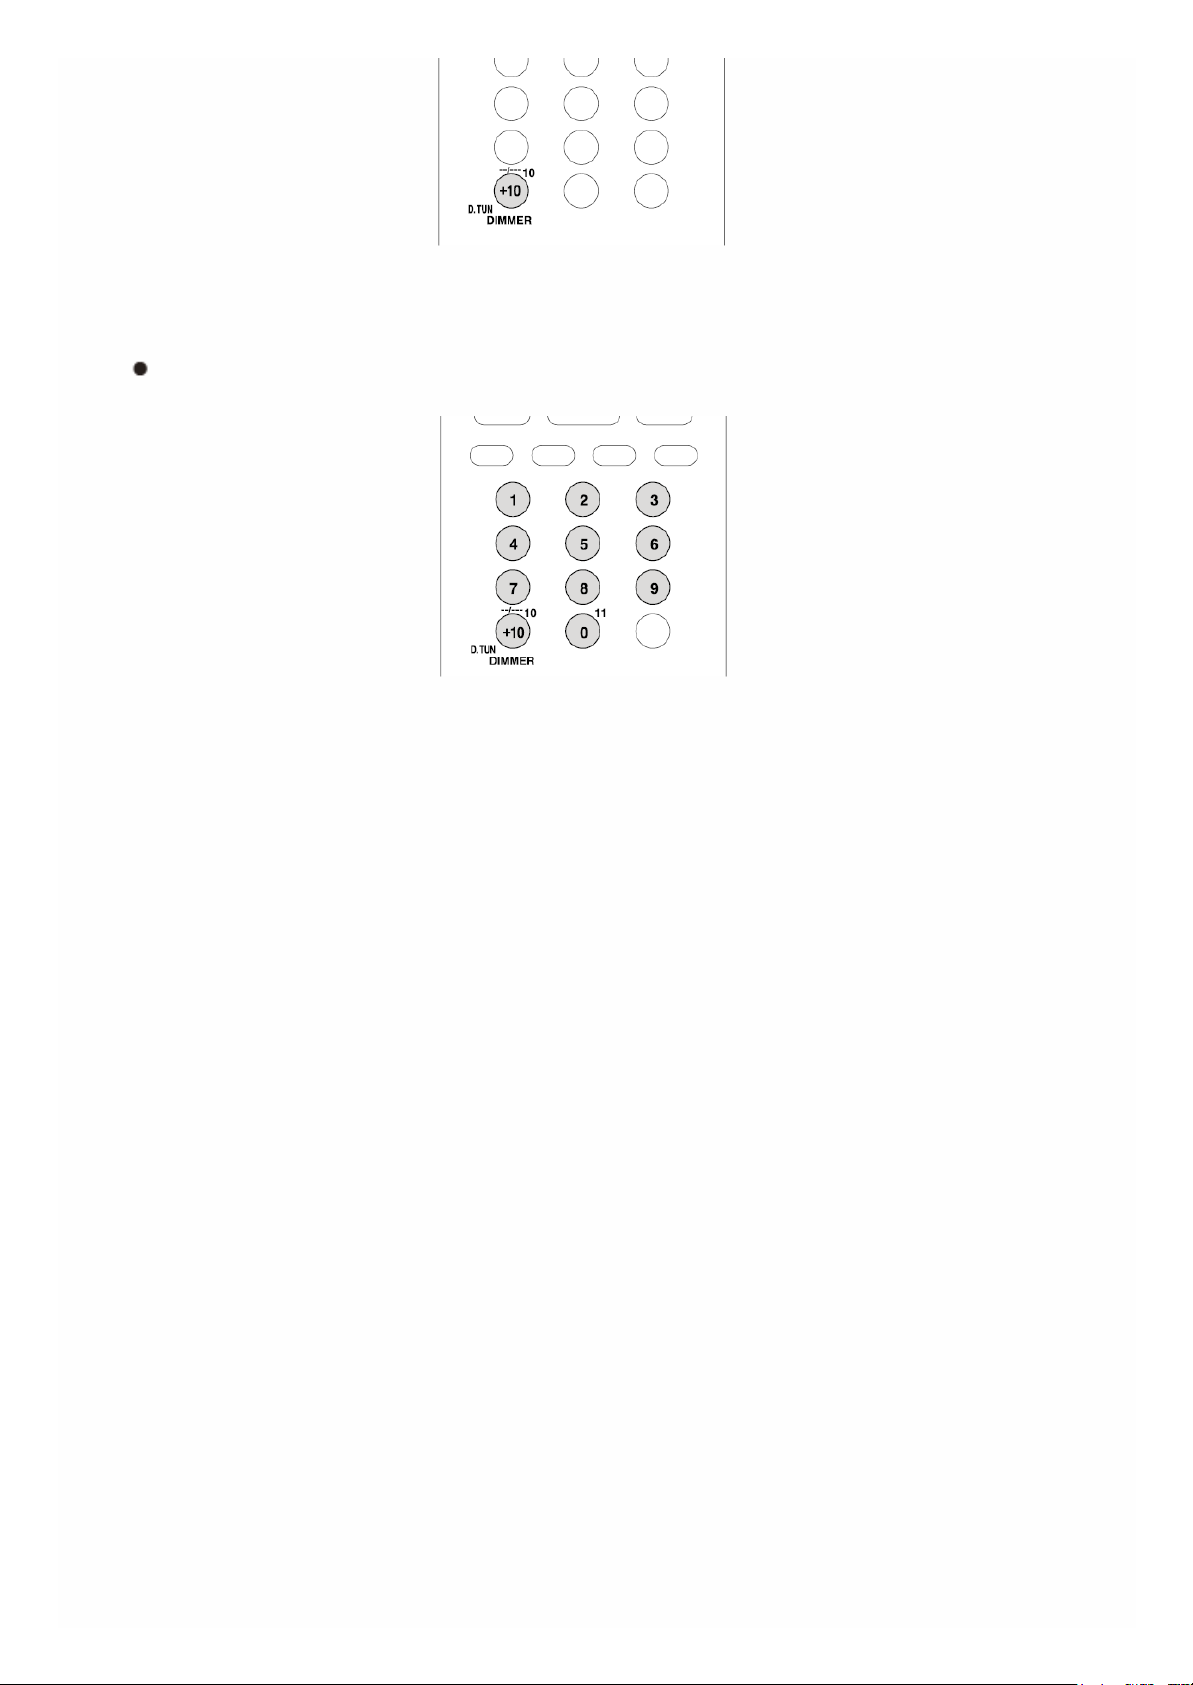
3. Using the number buttons, enter the frequency of the radio station within
8 seconds.
To enter 87.5 (FM), for example, press 8, 7, 5, or 8, 7, 5, 0.
Page 4
Presetting an AM/FM Radio Station
It allows you to register up to 40 of your favorite AM/FM radio stations.
Registering radio stations in advance allows you to tune into your radio
station of choice directly.
Registering a Station
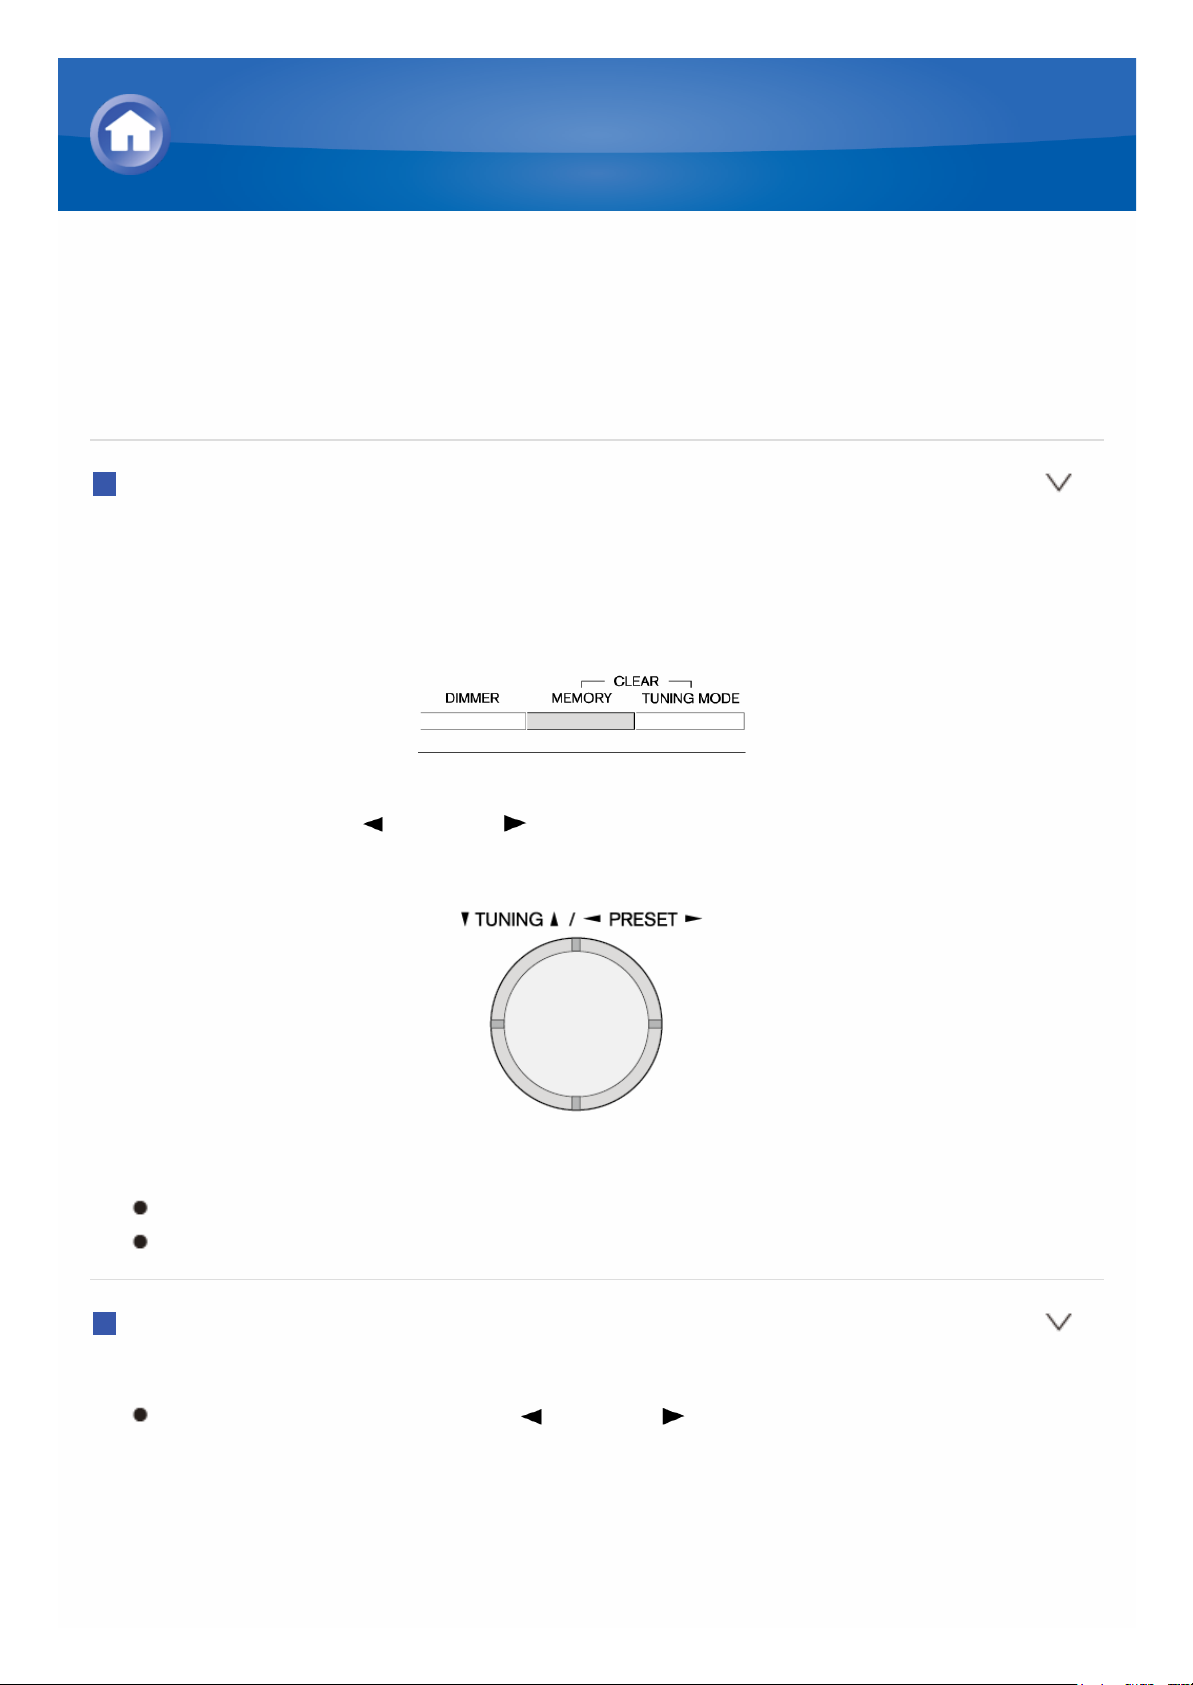
1. Tune into the AM/FM radio station you want to register.
2. Press MEMORY on the unit so that the preset number on the display
flashes.
3. Repeatedly press PRESET to select a number between 1 and 40
while the preset number is flashing (about 8 seconds).
4. Press MEMORY again to register the station.
When registering, the preset number stops flashing.
Repeat this procedure for all of your favorite AM/FM radio stations.
Selecting a Preset Radio Station
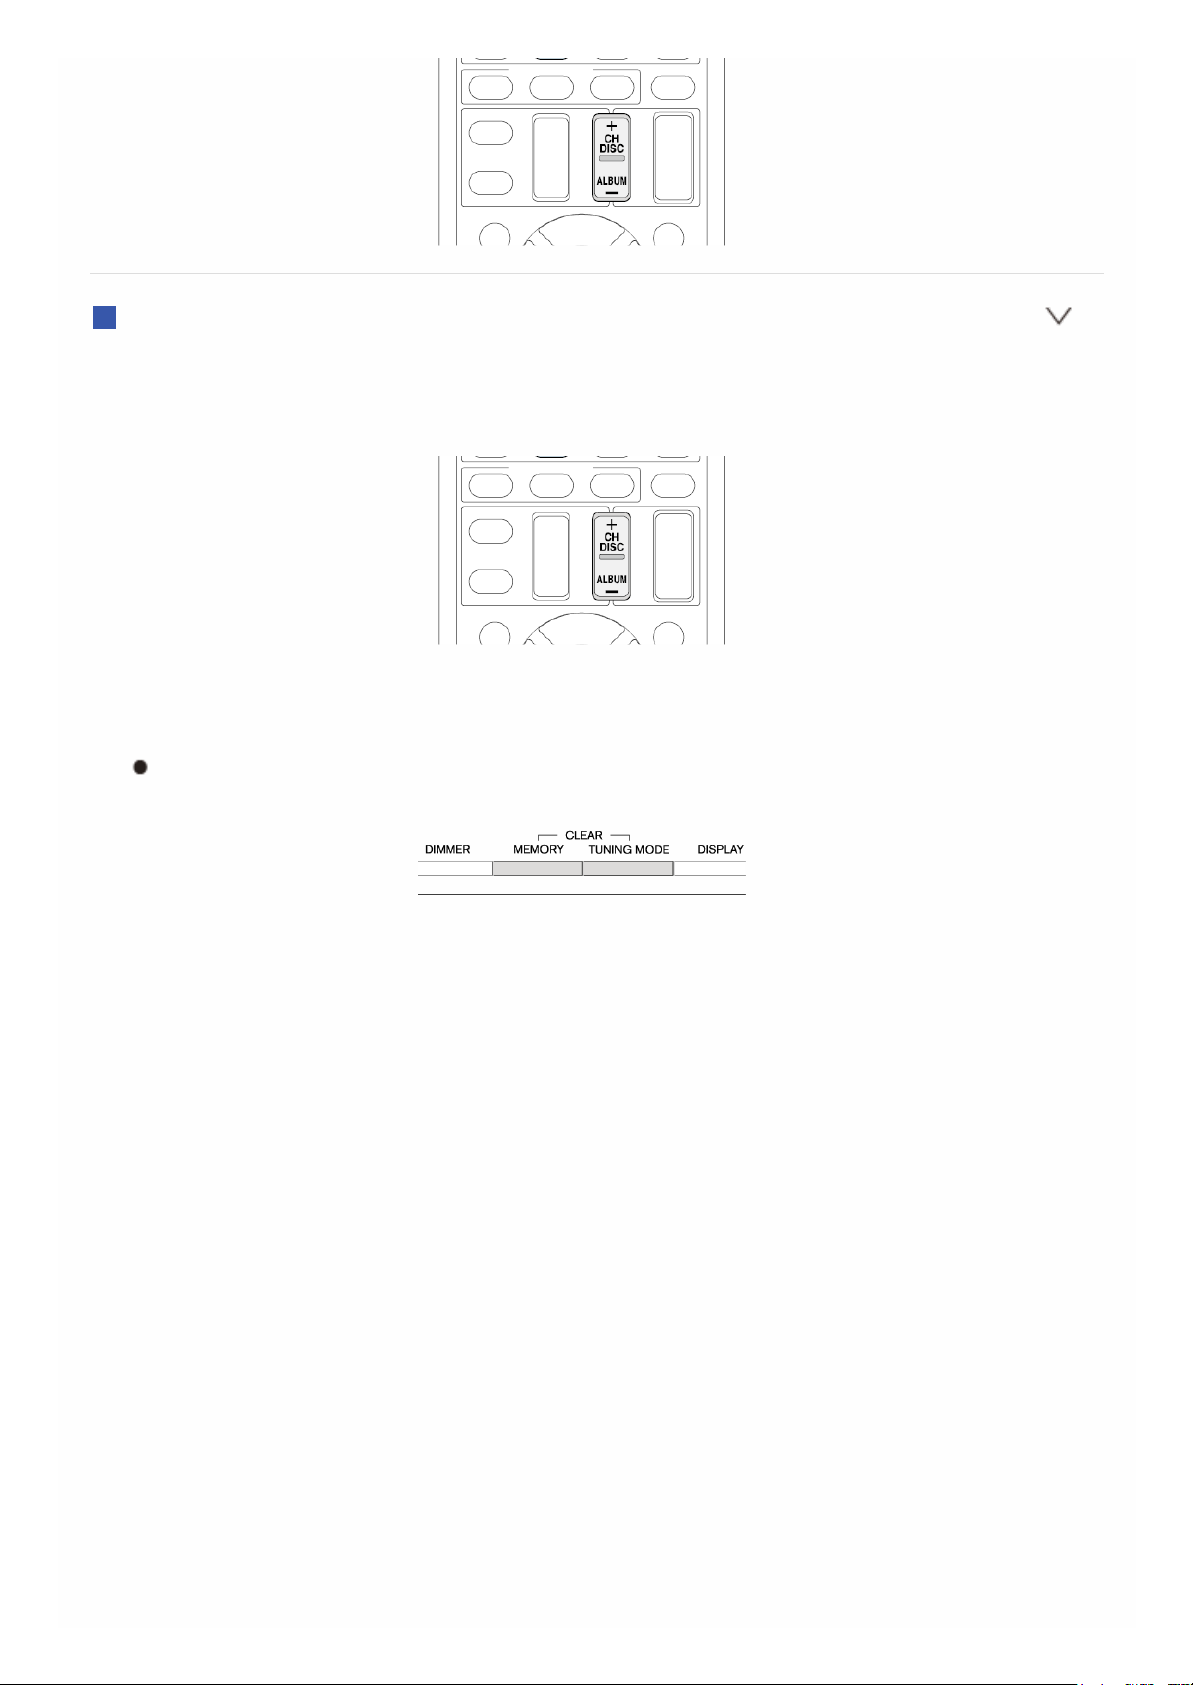
1. Press CH +/- on the remote controller to select a preset number.
Alternatively you can press PRESET on the main unit. You can
also select by directly entering the preset number with the number
buttons on the remote controller.
AM/FM Radio Receiving Function
Page 5
Deleting a Preset Radio Station
1. Press CH +/- on the remote controller to select the preset number to
delete.
2. Press and hold MEMORY on the main unit and press TUNING MODE to
delete the preset number.
When deleting, the number on the display goes off.
Page 6
Using RDS (European model)
RDS stands for Radio Data System and is a method of transmitting data in
FM radio signals.
RDS works only in areas where RDS broadcasts are available.
In some cases, the text information appeared on the display is not
identical to the content transmitted by the RDS station. Furthermore,
unexpected characters may be displayed when the unit receives
unsupported characters. However, this is not a malfunction.
If the signal from an RDS station is weak, the RDS data may be displayed
continuously or not at all.
PS (Program Service): Tuning into a radio station distributing Program
Service information displays the radio station name. Pressing DISPLAY
displays the frequency for 3 seconds.
RT (Radio Text): Tuning into a radio station transmitting Radio Text
information displays text on the display of the unit.
PTY (Program Type): Allows you to search for RDS stations by program
type.
TP (Traffic Program): Allows you to search for radio stations transmitting
traffic information.
Displaying Radio Text (RT)
1. Press RT/PTY/TP on the main unit once.
The Radio Text (RT) is displayed scrolling across the display. "No
Text Data" is displayed when no text information is available.
Searching by Type (PTY)
1. Press RT/PTY/TP on the main unit twice.
The current program type appears on the display.
AM/FM Radio Receiving Function
Page 7
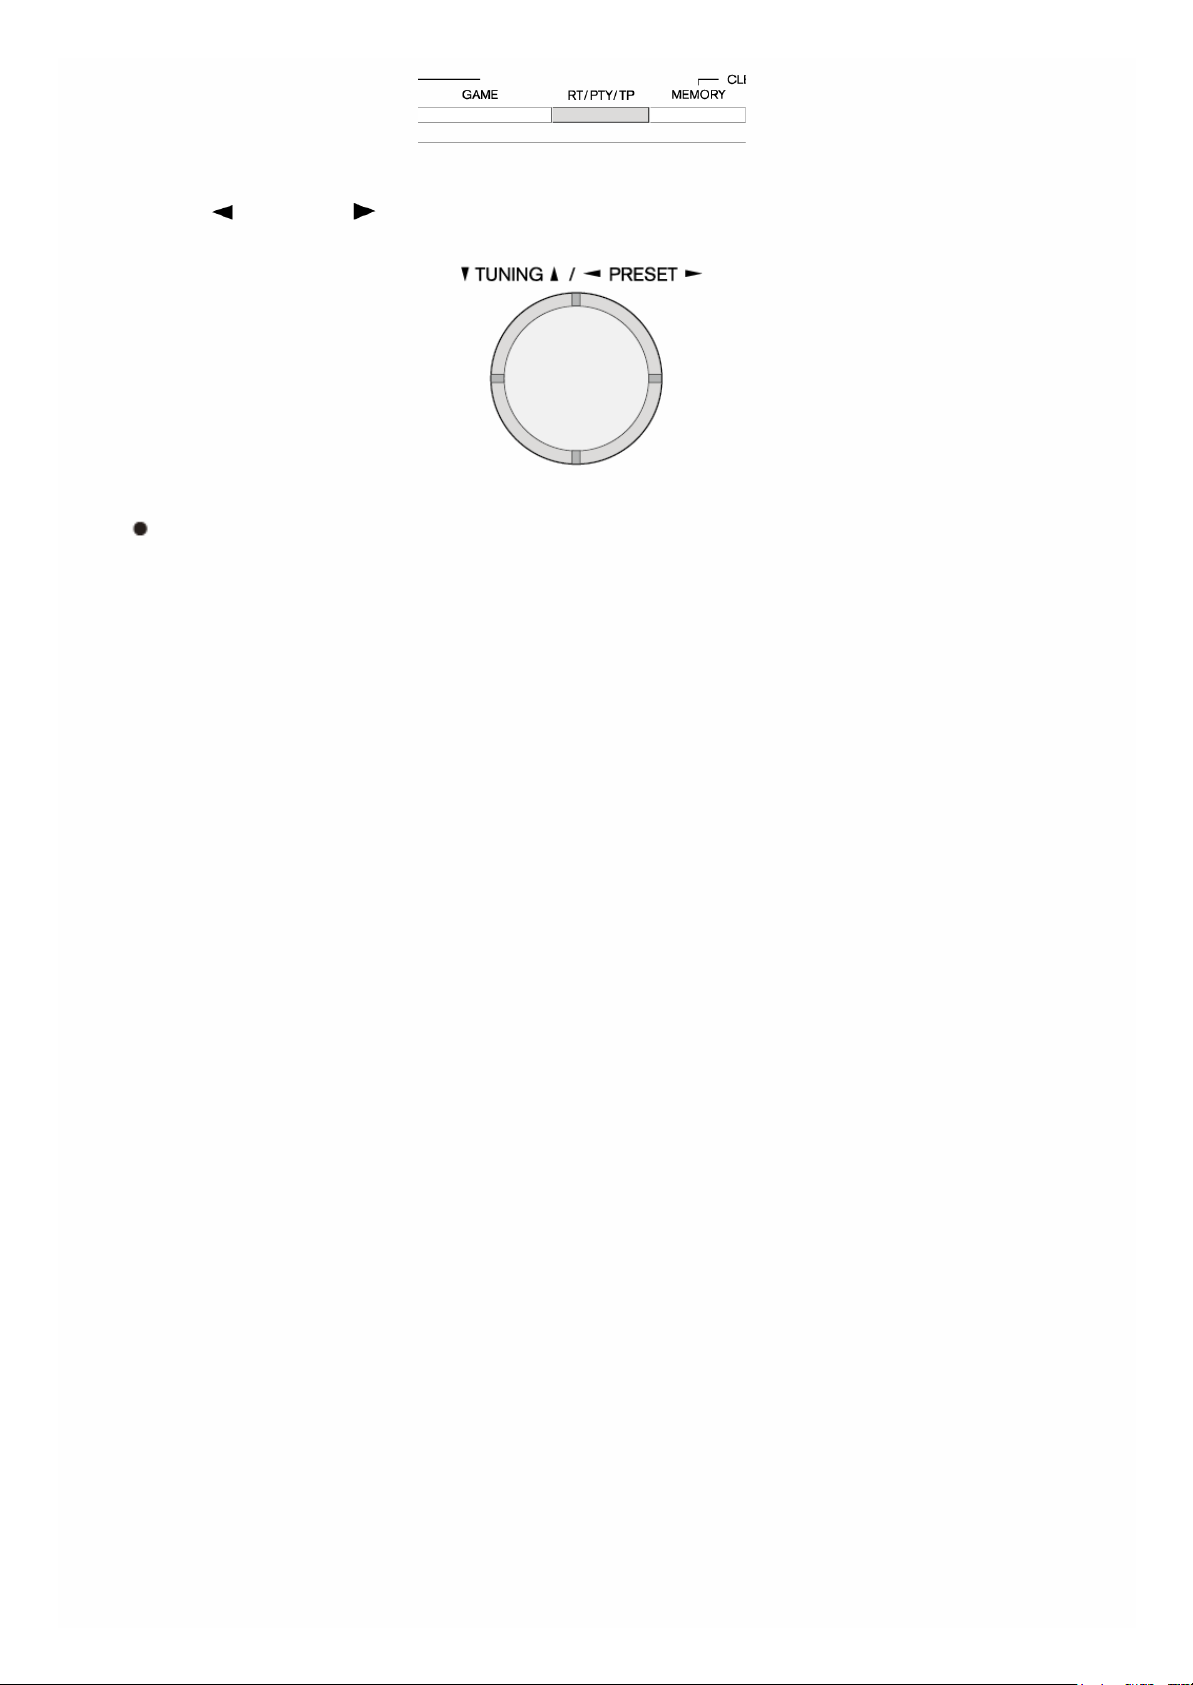
2. Press PRESET to select the type of program to search for.
The following RDS station types are displayed:
None
News (News reports)
Affairs (Current affairs)
Info (Information)
Sport
Educate (Education)
Drama
Culture
Science (Science and technology)
Varied
Pop M (Pop music)
Rock M (Rock music)
Easy M (Middle of the road music)
Light M (Light classics)
Classics (Serious classics)
Other M (Other music)
Weather
Finance
Children (Children’s programmes)
Social (Social affairs)
Religion
Phone In
Travel
Leisure
Jazz (Jazz music)
Country (Country music)
Nation M (National music)
Oldies (Oldies music)
Folk M (Folk music)
Document (Documentary)
3. Press ENTER to search the radio stations of the selected type.
Page 8

4. When the desired radio station is found, the station name on the display
flashes. Then, press ENTER again.
If no stations are found, the message "Not Found" is displayed.
Listening to Traffic Information (TP)
1. Press RT/PTY/TP on the main unit thrice.
When the traffic information is transmitted from the radio station you
selected, "[TP]" is displayed. "TP" only is displayed if no traffic
information is available.
2. Press ENTER to search a radio station distributing traffic information.
3. When such a radio station is found, searching stops and playing traffic
information starts.
"Not Found" is displayed if no radio station distributing traffic
information is found.
Page 9
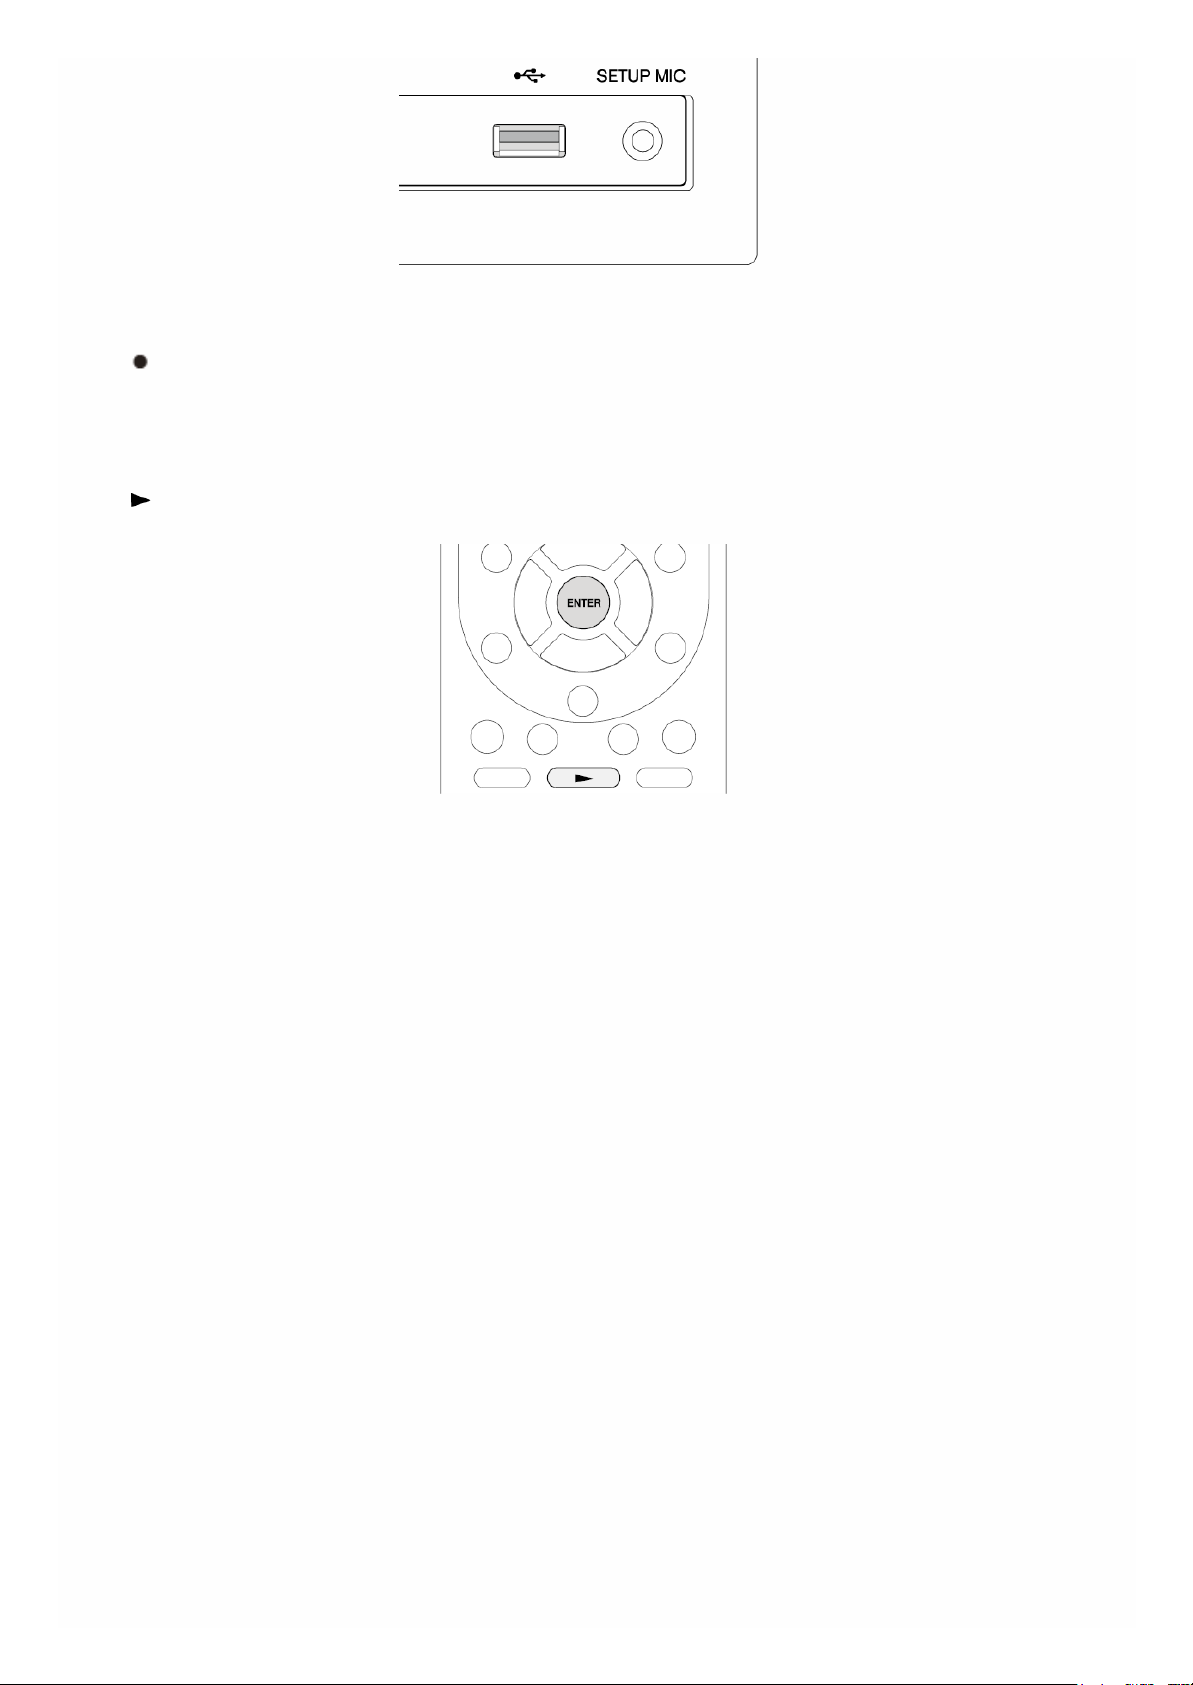
Operation: You can set up by viewing the guidance displayed on the TV
screen. To display the guidance, you need to make HDMI connection
between the unit and TV. Select the item with the cursor buttons of the
remote controller and press ENTER to confirm your selection. To return to
the previous screen, press RETURN.
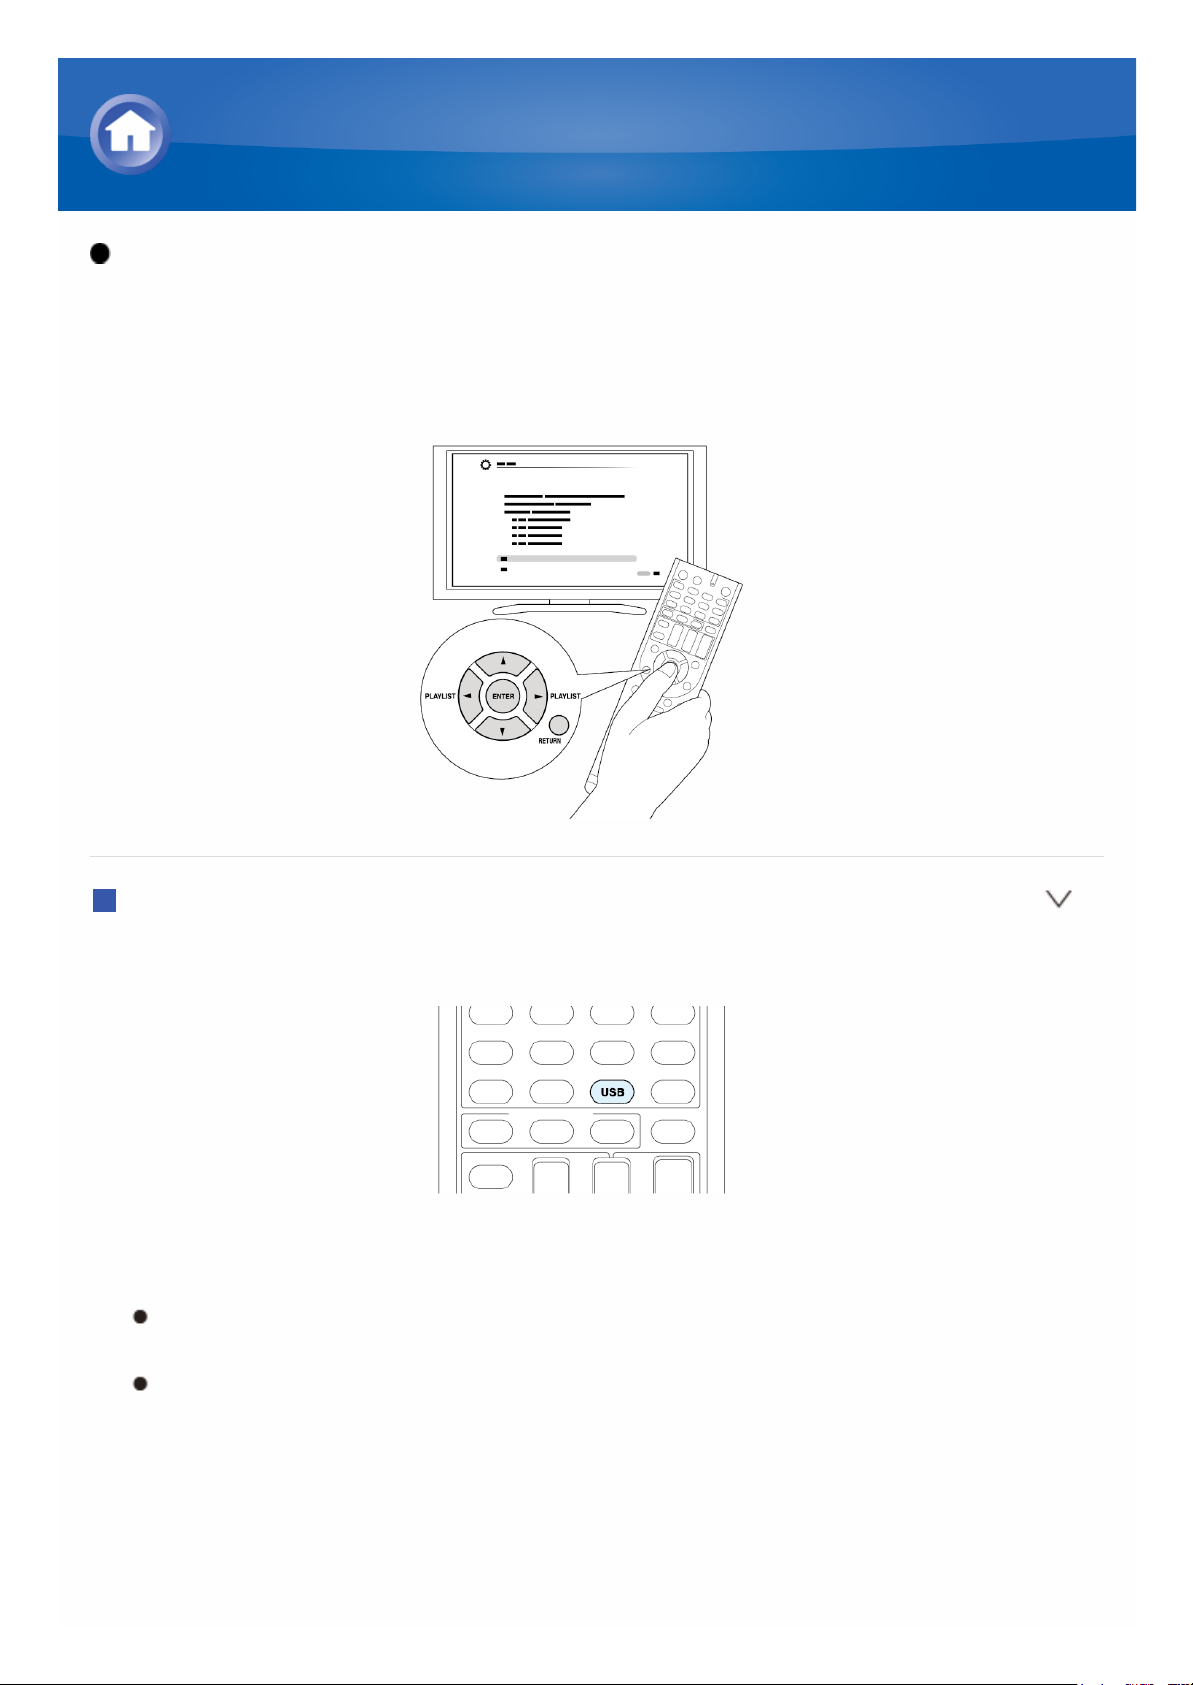
Playing Back
1. Press USB on the remote controller to select "USB".
2. Plug your USB storage device with the music files into the USB port of the
unit so that "USB" lights on the display.
If the "USB" indicator flashes, check whether the USB storage device
is plugged in properly.
Do not unplug the USB storage device while "Connecting..." is
appeared on the display. This may cause data corruption or
malfunction.
Playing Content from a USB Storage Device
Page 10
3. Press ENTER.
The list of folders and music files on the USB storage device is
displayed on the screen, select the folder with the cursors and press
ENTER to confirm your selection.
4. With the cursors, select the music file to play, and then press ENTER or
to start playback.
Page 11

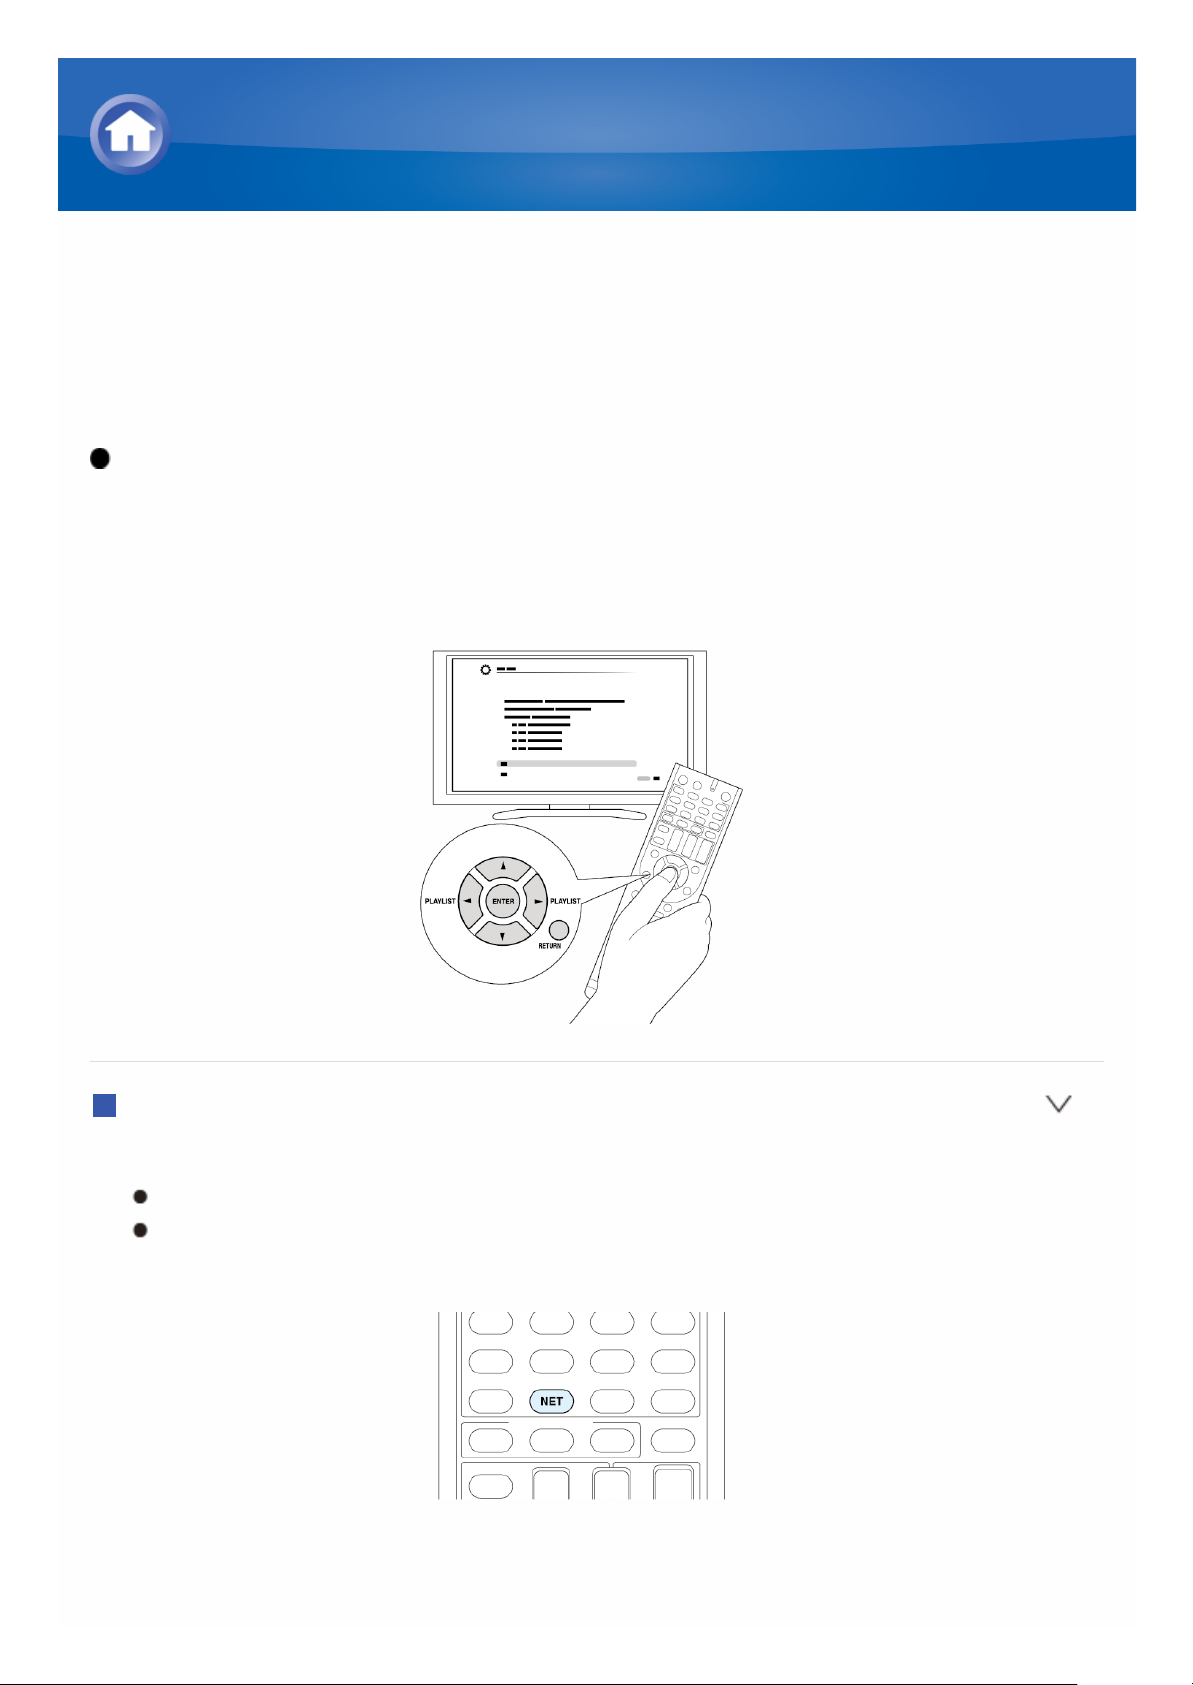
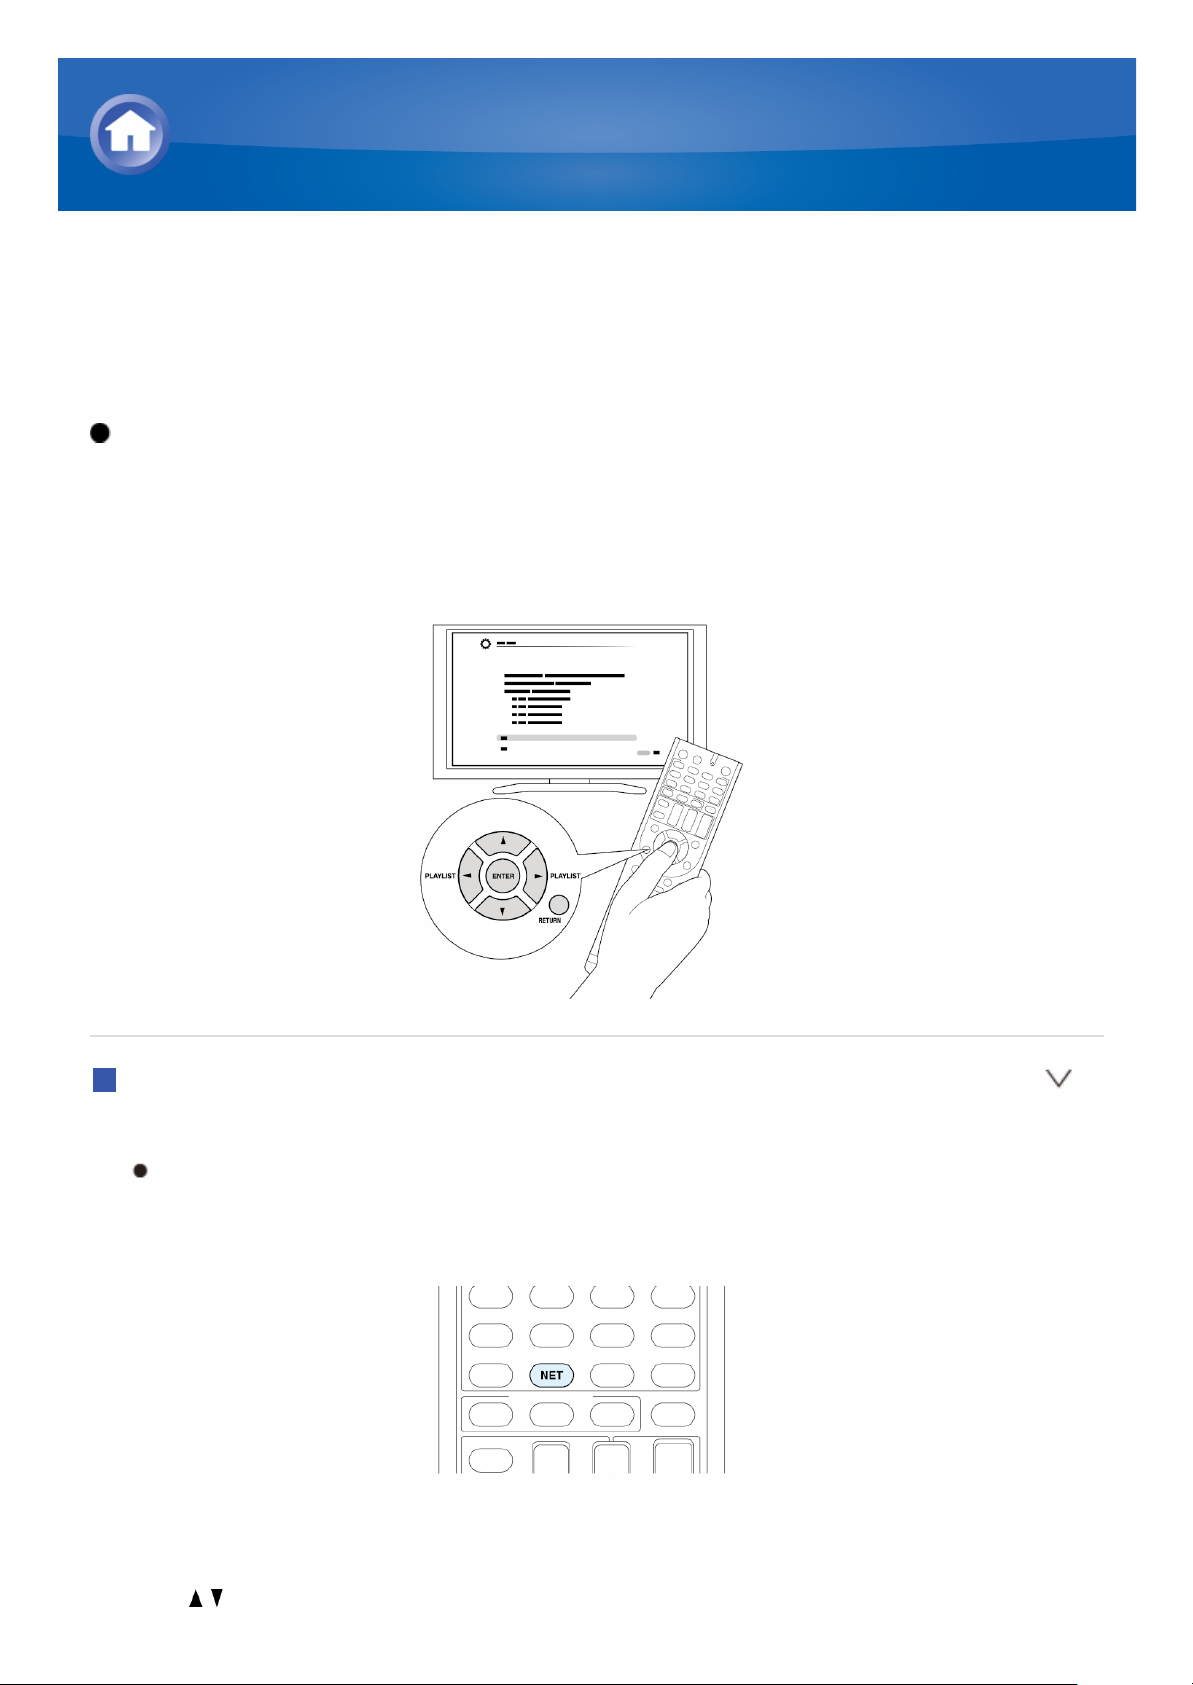
About Internet Radio
Internet radio, also called net radio, web radio or streaming radio, is an audio
service accessible at the websites of service providers who distribute music
and audio programs in digital format. There are numerous websites all over
the world, from terrestrial station, special station to personal website that
provide such a service.
The unit comes preset with Internet radio stations (*) such as TuneIn for
you to enjoy these services, just by connecting the unit to the Internet.
* Network services or contents may become unavailable if the service
provider terminates its service.
Listening to Internet Radio
Page 12
TuneIn
With more than 70,000 radio stations and 2 million on-demand programs
registered, TuneIn is a service where you can enjoy music, sports and news
from all over the world.
Operation: You can set up by viewing the guidance displayed on the TV
screen. To display the guidance, you need to make HDMI connection
between the unit and TV. Select the item with the cursor buttons of the
remote controller and press ENTER to confirm your selection. To return to
the previous screen, press RETURN.
Playing Back
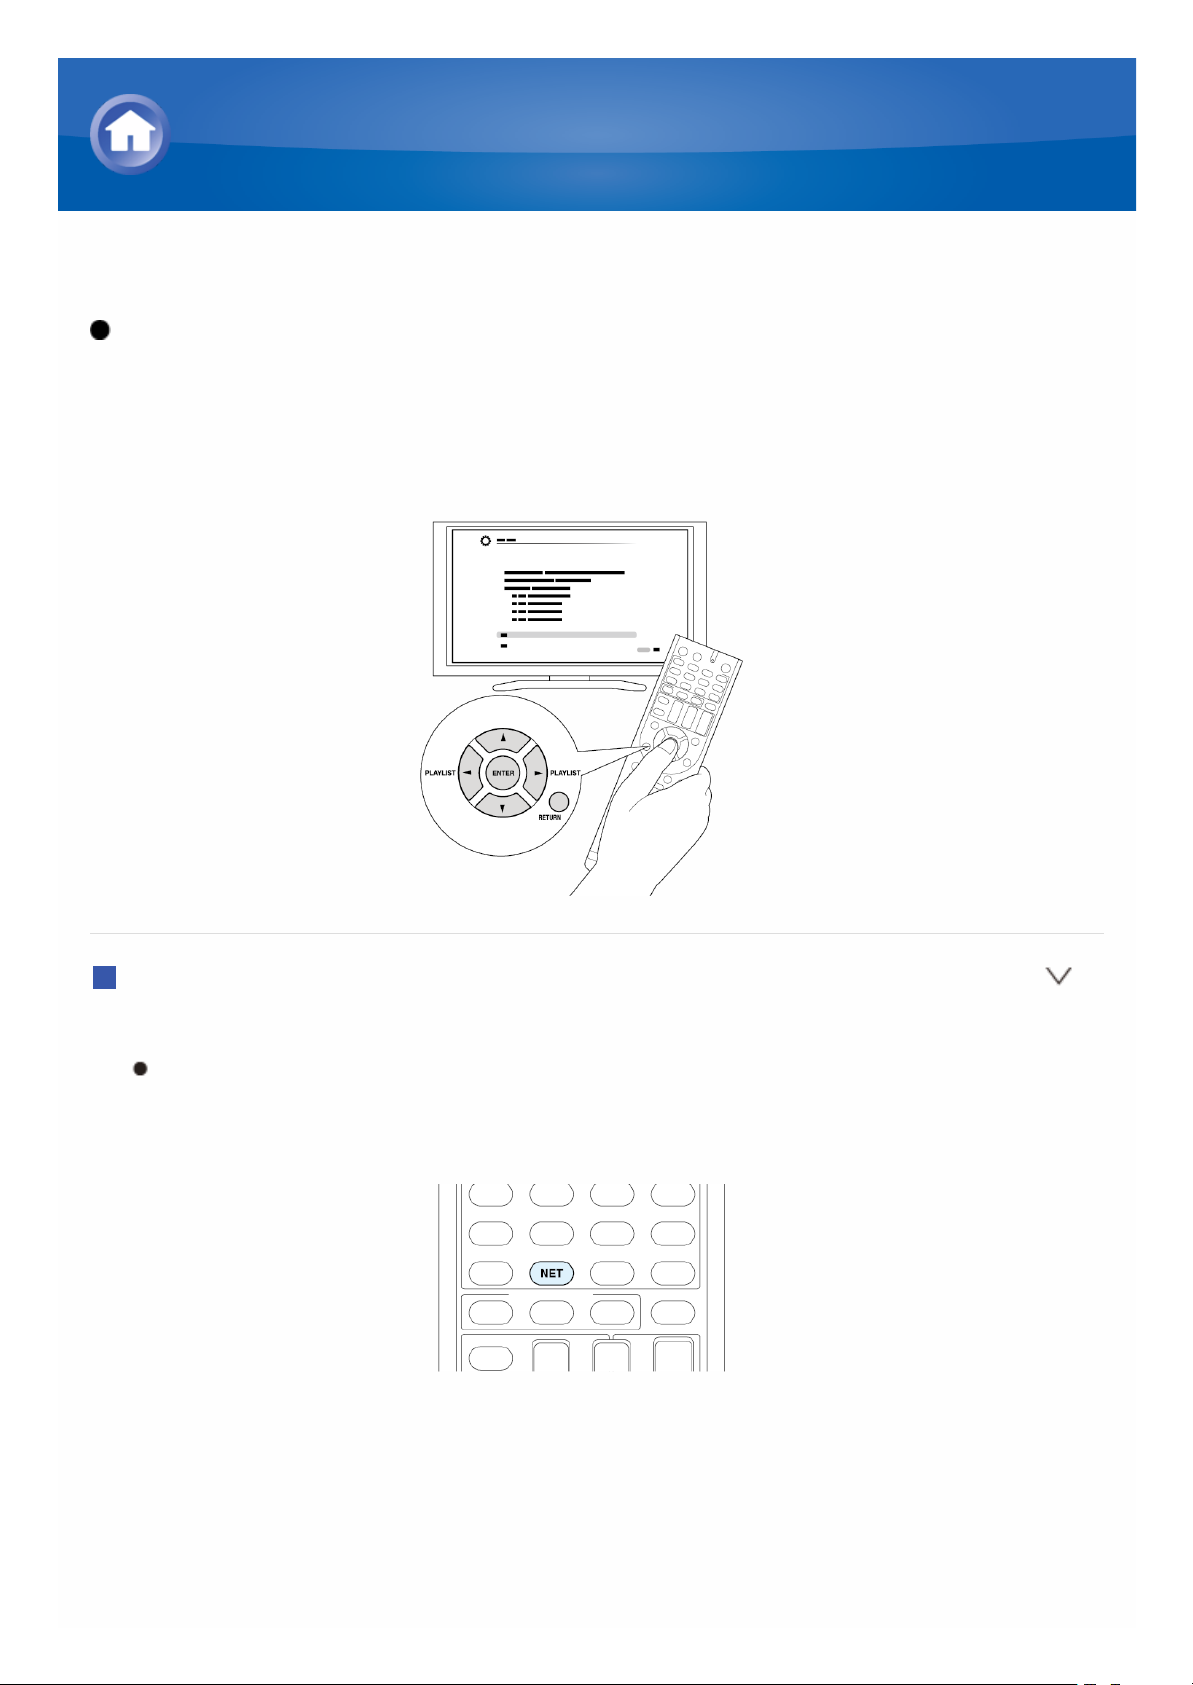
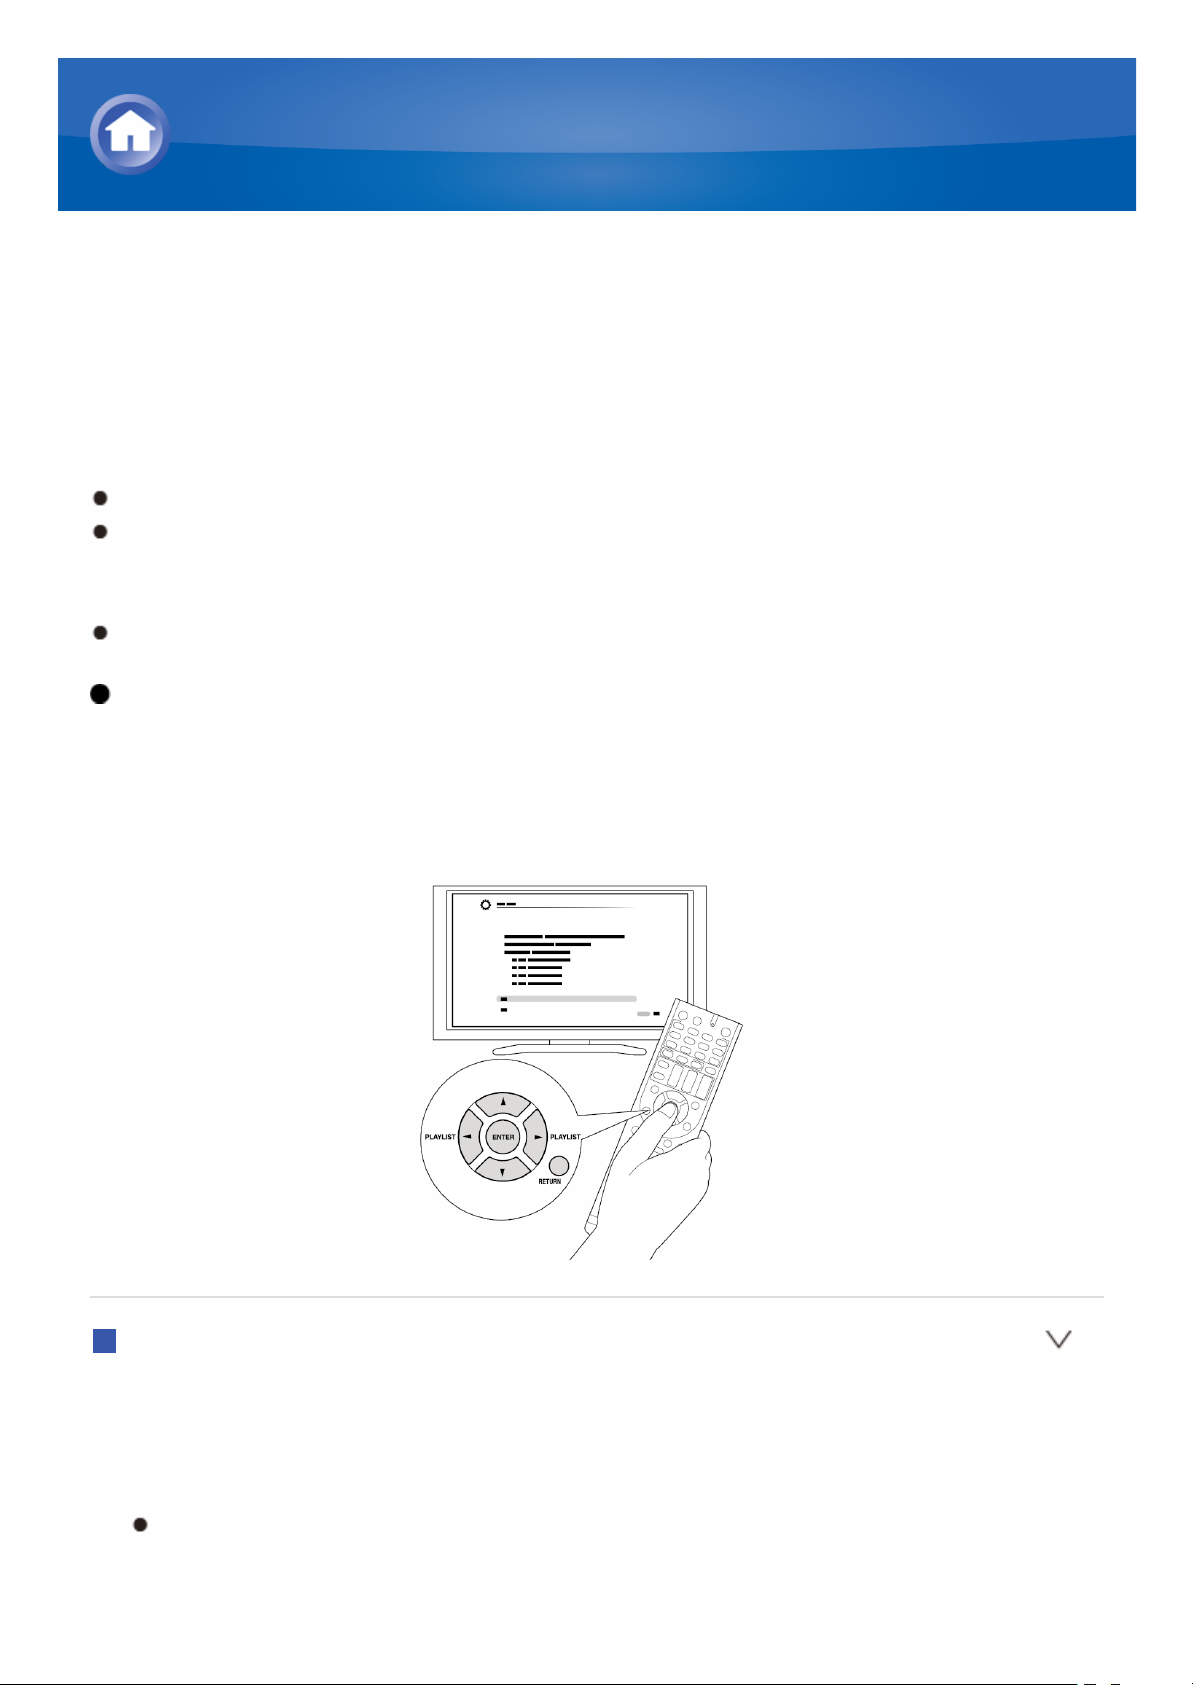
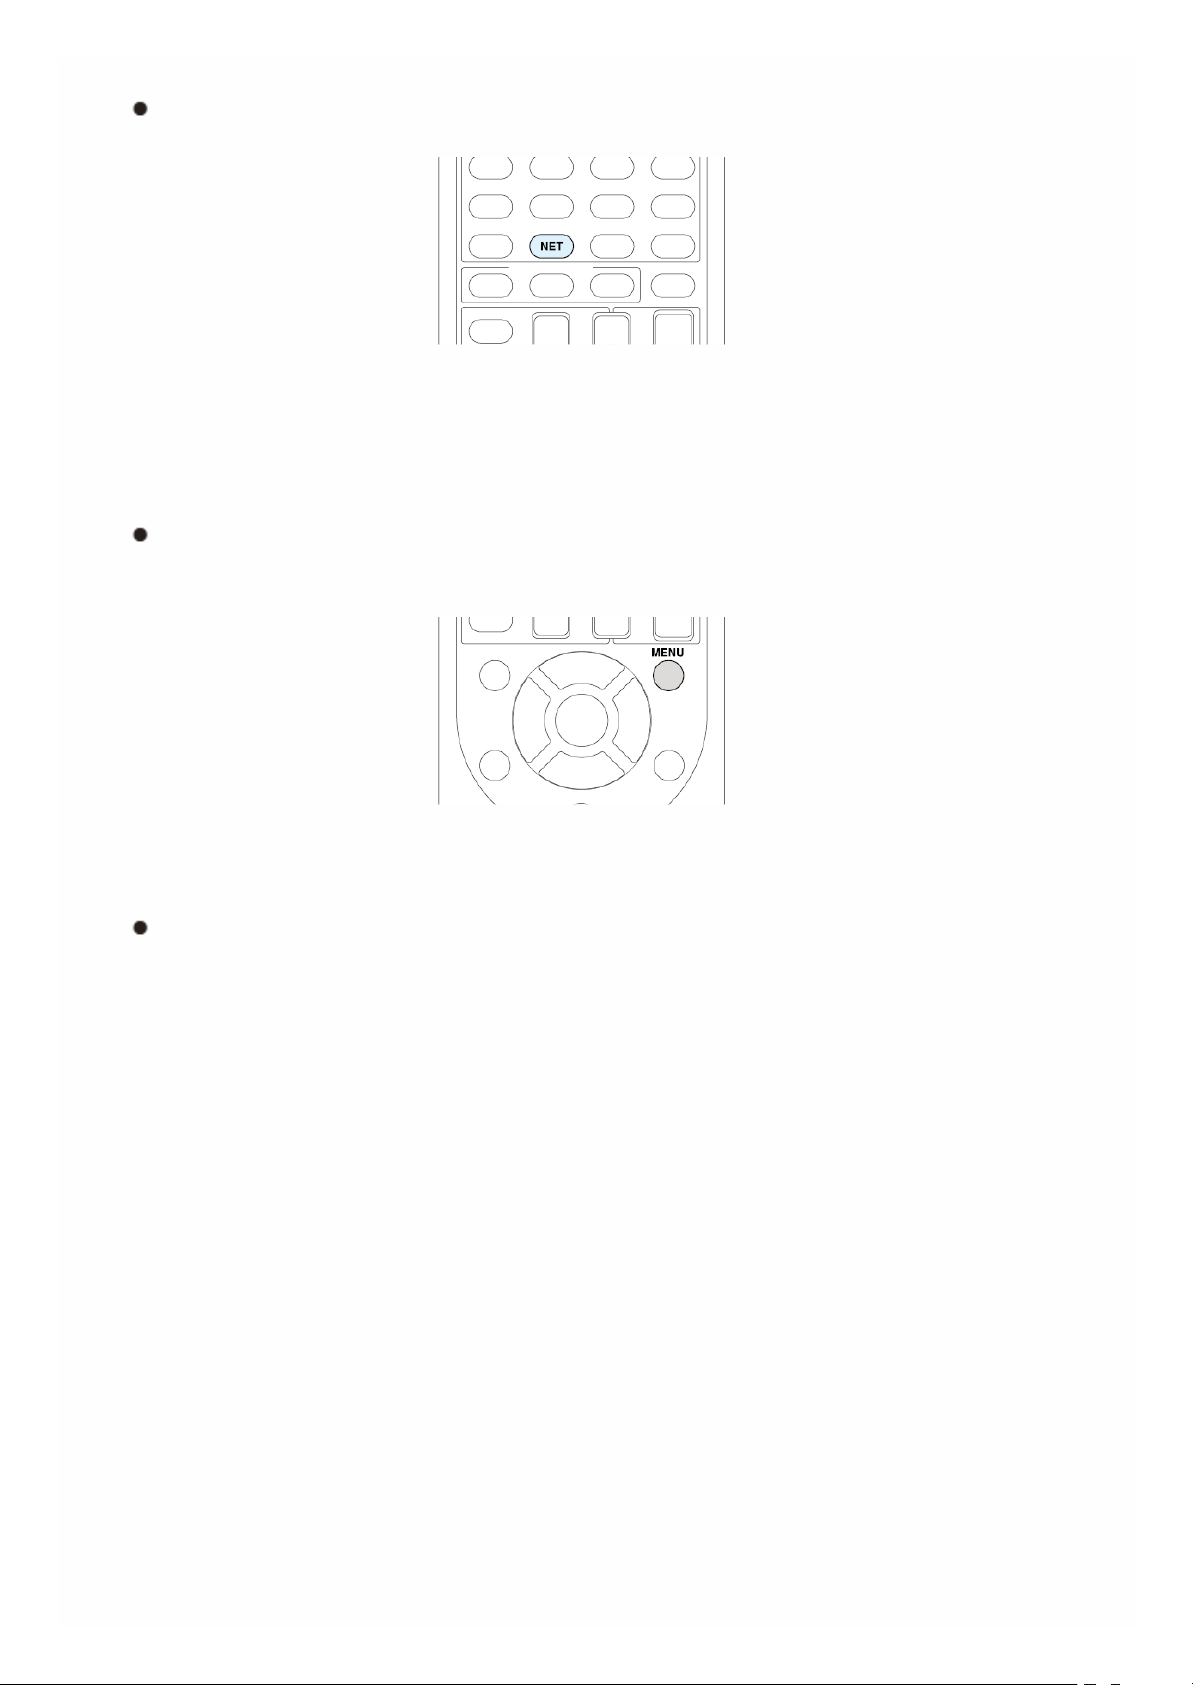
1. Press NET on the remote controller to display NET TOP screen.
"NET" lights on the display.
Alternatively you can press Home and select "Network Service" in the
Home menu.
2. With the cursors, select "TuneIn", and then press ENTER to display
TuneIn top screen.
Listening to Internet Radio
Page 13

3. With the cursors, select a radio station or program and press ENTER to
start playing.
Regarding the TuneIn Menu
To display the TuneIn menu, press MENU while playing a radio station, or
select "Go to Menu" and press ENTER. Selecting the corresponding menu
item with the cursors and pressing ENTER allows you to perform the
following operations:
Add to My Presets: Registers radio stations and programs in your "My
Presets" within TuneIn. This allows you to play registered radio stations
and programs with a simple operation. ("My Presets" is not displayed if it
is empty.)
Remove from My Presets: Deletes a radio station or program from your
"My Presets" within TuneIn.
Report a problem: Reports a problem or interactively solves a problem
related to TuneIn.
View Schedule: Displays the radio station or program schedule.
Clear recents: Clears all radio stations and programs from the "Recents"
within TuneIn. (This menu is displayed only when a radio station or
program inside the "Recents" is being played.)
Add to My Favorites: Registers radio stations and programs in "My
Favorites" of "Network Service". This allows you to play registered radio
stations and programs with a simple operation.
Regarding the TuneIn Account
Creating an account on the TuneIn website (tunein.com) and logging in it
from the unit allows you to automatically add radio stations and programs to
your "My Presets" on the unit as you save them on the website .
To display a radio station registered in "My Presets", you must log into
TuneIn from the unit. To log in, select "Login" - "I have a TuneIn account" in
the "TuneIn" top list on the unit, and then enter your user name and
password.
If you associate the device on My Page within the TuneIn website using
the registration code obtained by selecting "Login" - "Login with a
registration code" on the unit, you can log in without entering the user
name and password.
Page 14
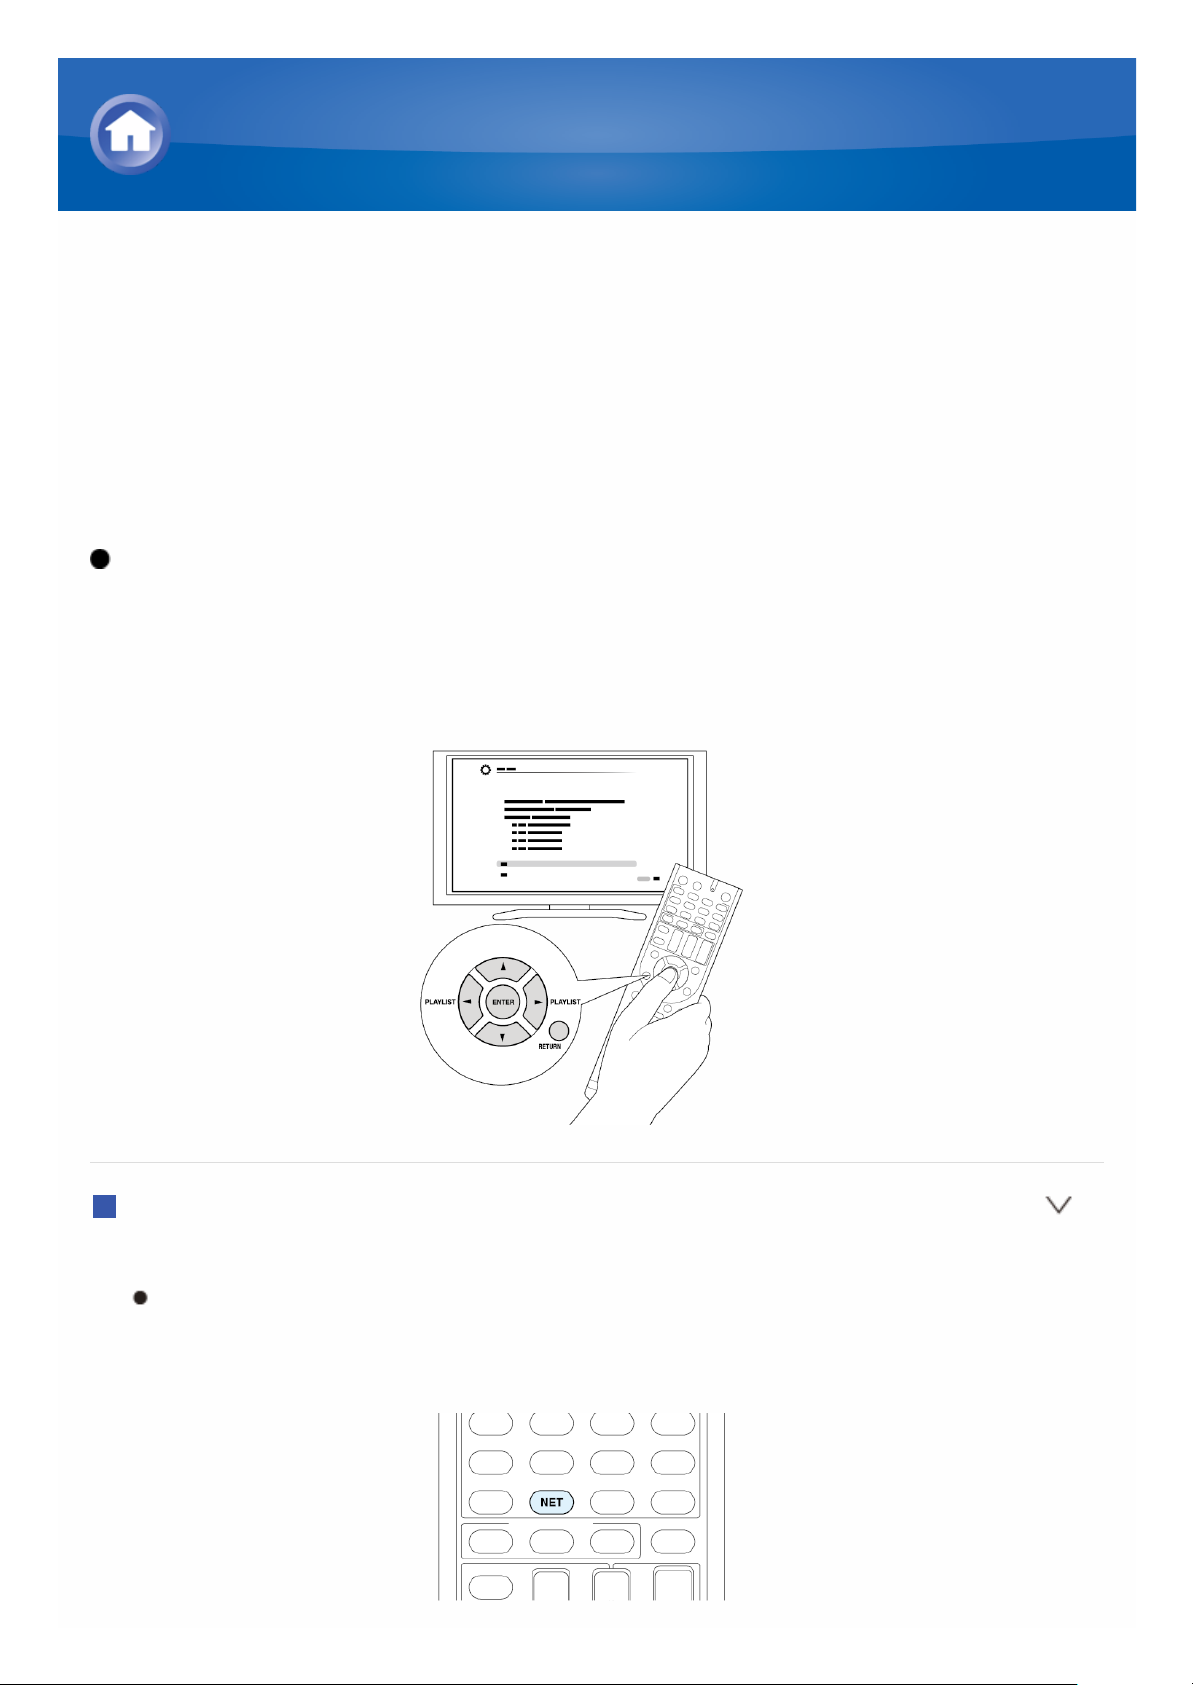
Pandora®–Getting Started (U.S. only)
Pandora is a free, personalized Internet radio service that plays the music
you know and helps you discover music you’ll love.
Operation: You can set up by viewing the guidance displayed on the TV
screen. To display the guidance, you need to make HDMI connection
between the unit and TV. Select the item with the cursor buttons of the
remote controller and press ENTER to confirm your selection. To return to
the previous screen, press RETURN.
Playing Back
1. Press NET on the remote controller to display NET TOP screen.
"NET" indicator on the unit’s display lights. To display the NET TOP
screen, you can alternatively press HOME, select "Network Service"
on the displayed Home menu, and then press ENTER.
2. With the cursors on the remote controller, select "Pandora", and then
press ENTER.
3. Use / to select "I have a Pandora Account" or "I’m new to Pandora" and
Listening to Internet Radio
Page 15

then press ENTER.
If you are new to Pandora select "I’m new to Pandora". You will see an
activation code on your TV screen. Please write down this code. Go to an
Internet connected computer and point your browser to
www.pandora.com/onkyo. Enter your activation code and then follow the
instructions to create your Pandora account and your personalized
Pandora stations. You can create your stations by entering your favorite
tracks and artists when prompted. After you have created your account
and stations you can return to your Onkyo receiver and press ENTER to
begin listening to your personalized Pandora.
If you have an existing Pandora account, you can add your Pandora
account to your Onkyo receiver by selecting "I have a Pandora Account"
and logging in with your email and password.
If you want to use multiple user accounts, see "Using Multiple
Accounts". Login can be made from the "Users" screen.
4. To play a station, use / to select the station from your station list, and
then press ENTER. Playback starts and the playback screen appears.
Create a New Station
Enter the name of a track, artist, or genre and Pandora will create a unique
radio station for you based on the musical qualities of that track, artist, or
genre.
I like this track: Give a track "thumbs-up" and Pandora will play more
music like it.
I don’t like this track: Give a track "thumbs-down" and Pandora will ban
that track from the current station.
Why is this track playing?: Discover some of the musical attributes that
Pandora uses to create your personal radio stations.
I’m tired of this track: If you are tired of a track, you can put the track to
sleep and Pandora will not play it for one month.
Create station from this artist: Creates a radio station from this artist.
Create station from this track: Creates a radio station from this track.
Delete this station: This will permanently delete a station from your
Pandora account. All of your thumbs feedback will be lost should you
choose to re-create the station with the same track or artist.
Rename this station: Lets you rename the current radio station.
Bookmark this artist: Pandora will bookmark your favorite artist for your
profile on www.pandora.com.
Page 16

Bookmark this track: Pandora will bookmark the current track and allow
you to buy them all from Amazon or iTunes in one step!
Add to My Favorites: Adds a station to My Favorites list.
PANDORA, the PANDORA logo, and the Pandora trade dress are
trademarks or registered trademarks of Pandora Media, Inc. Used with
permission.
Page 17
SiriusXM Internet Radio (North American only)
If you want to listen to the service, you must subscribe. To subscribe go to
www.siriusxm.com/internetradio with your computer. When you subscribe,
you will be provided with a username and password which has to be entered
into the AV receiver. To use SiriusXM Internet Radio, you must have your AV
receiver connected to the Internet. Using the remote control, follow these
steps:
Operation: You can set up by viewing the guidance displayed on the TV
screen. To display the guidance, you need to make HDMI connection
between the unit and TV. Select the item with the cursor buttons of the
remote controller and press ENTER to confirm your selection. To return to
the previous screen, press RETURN.
Playing Back
1. Press NET on the remote controller to display NET TOP screen.
"NET" indicator on the unit’s display lights. To display the NET TOP
screen, you can alternatively press HOME, select "Network Service"
on the displayed Home menu, and then press ENTER.
Listening to Internet Radio
Page 18

2. With the cursors on the remote controller, select "SiriusXM Internet
Radio", and then press ENTER.
3. Select "Sign In", and then press ENTER. If you have an existing SIRIUS
account, you can sign in by selecting "Sign In". Enter your user name and
password in the next keyboard screen, or in Web Setup. If you don’t know
your username or password, call Sirius XM at (888) 539-7474 for
assistance.
If you want to use multiple user accounts, see "Using Multiple
Accounts". Login can be made from the "Users" screen.
Using the keyboard screen
1 Use / / / and ENTER to enter your user name and password.
2 Select "OK".
3 Press ENTER. The "Confirm your entries" screen appears.
4 Press ENTER. "Please wait..." appears and then "SiriusXM Internet
Radio" screen appears which displays the category available for
selection.
4. Use / to select the category and then press ENTER. The channel list
screen for the selected category appears.
5. Use / to select the desired channel and then press ENTER.
The playback screen for the selected channel appears and you can listen
to SiriusXM Internet Radio. You can control the tracks with the buttons on
the remote control.
Enabled buttons: , , ,
Add to My Favorites: Adds a channel to My Favorites list.
Add to Presets: Adds the currently playing station to presets list.
Delete from Presets: Deletes the currently playing station from presets
list.
SiriusXM Internet Radio subscriptions are sold separately and are governed
by the Sirius Terms and Conditions (see www.sirius.com). Be sure to read
this agreement before you purchase your subscription.
Sirius, XM and all related marks and logos are trademarks of Sirius XM Radio
Inc. and its subsidiaries. All rights reserved.
Page 19
Slacker Personal Radio (North American only)
Operation: You can set up by viewing the guidance displayed on the TV
screen. To display the guidance, you need to make HDMI connection
between the unit and TV. Select the item with the cursor buttons of the
remote controller and press ENTER to confirm your selection. To return to
the previous screen, press RETURN.
Playing Back
1. Press NET on the remote controller to display NET TOP screen.
"NET" indicator on the unit’s display lights. To display the NET TOP
screen, you can alternatively press HOME, select "Network Service"
on the displayed Home menu, and then press ENTER.
2. With the cursors on the remote controller, select "Slacker Personal
Radio", and then press ENTER.
3. If you do not have an account, create one on the Slacker website
(www.slacker.com) with your computer. If you already have a Slacker
account, select "Sign in to your account" and then press ENTER. The
keyboard screen appears. You can enter information from the remote
Listening to Internet Radio
Page 20

control or the keys on the main unit.
4. If there are no mistakes in the information you have entered, use / / /
to select "OK" then press ENTER. An account information confirmation
screen appears.
5. If you do not have an account, select "Access without Sign In" and press
ENTER to use a restricted version of the service. Note that use will be
restricted.
If you want to use multiple user accounts, see "Using Multiple
Accounts". Login can be made from the "Users" screen.
6. Use / to select a menu item and then press ENTER. To sign out, use /
to select "Sign out" from this screen and then press ENTER.
7. Use / to select a station and then press ENTER or to start playback
from the station. The playback screen appears.
8. You can control the tracks with the buttons on the remote control.
Enabled buttons: , , ,
Rate Song as Favorite: Stores information to server, making it more
likely that the song will be played again.
Ban Song: Stores information to server, making it less likely that the song
will be played again.
Ban Artist: Stores information to server, making it less likely that the
songs from this artist will be played again.
Mark Favorite: Adds the currently playing station to your favorites.
Unmark Favorite: Deletes the currently playing station from your
favorites.
Add song to Library: Adds the currently playing track to your library.
Delete song from Library: Deletes the currently playing track from your
library.
Add to My Favorites: Adds a station or song to My Favorites list.
Using Multiple Accounts: The AV receiver supports multiple user accounts,
which means you can freely switch between several logins. After registering
user accounts, login is performed from the "Users" screen.
Press MENU while the Users screen is displayed. "Add new user", "Remove
this user" menu appear. You can either store a new user account, or delete
an existing one.
Some of the services don’t allow the use of multiple user accounts.
You can store up to 10 user accounts.
To switch between accounts you must first log out from the current
account, and log in again on the "Users" screen.
Page 21
Registering Other Internet Radios
To listen to other Internet radio program, register the program in the "My
Favorites" list on the NET TOP screen as described below. The unit
supports Internet radio stations stored in the following formats: PLS (URL
ending in .pls), M3U (URL ending in .m3u) and RSS (URL ending in
rss/rdf/xml).
You can register up to 40 Internet radio stations.
Depending on the data type and file format for playback, you may not be
able to play an Internet radio station even when its format is PLS, M3U or
Podcast (RSS).
Available services may vary depending on your area of residence.
Operation: You can set up by viewing the guidance displayed on the TV
screen. To display the guidance, you need to make HDMI connection
between the unit and TV. Select the item with the cursor buttons of the
remote controller and press ENTER to confirm your selection. To return to
the previous screen, press RETURN.
Registering a Station
Before operation: The name and URL of the additional radio station will be
needed for this procedure. Check the specifications before use.
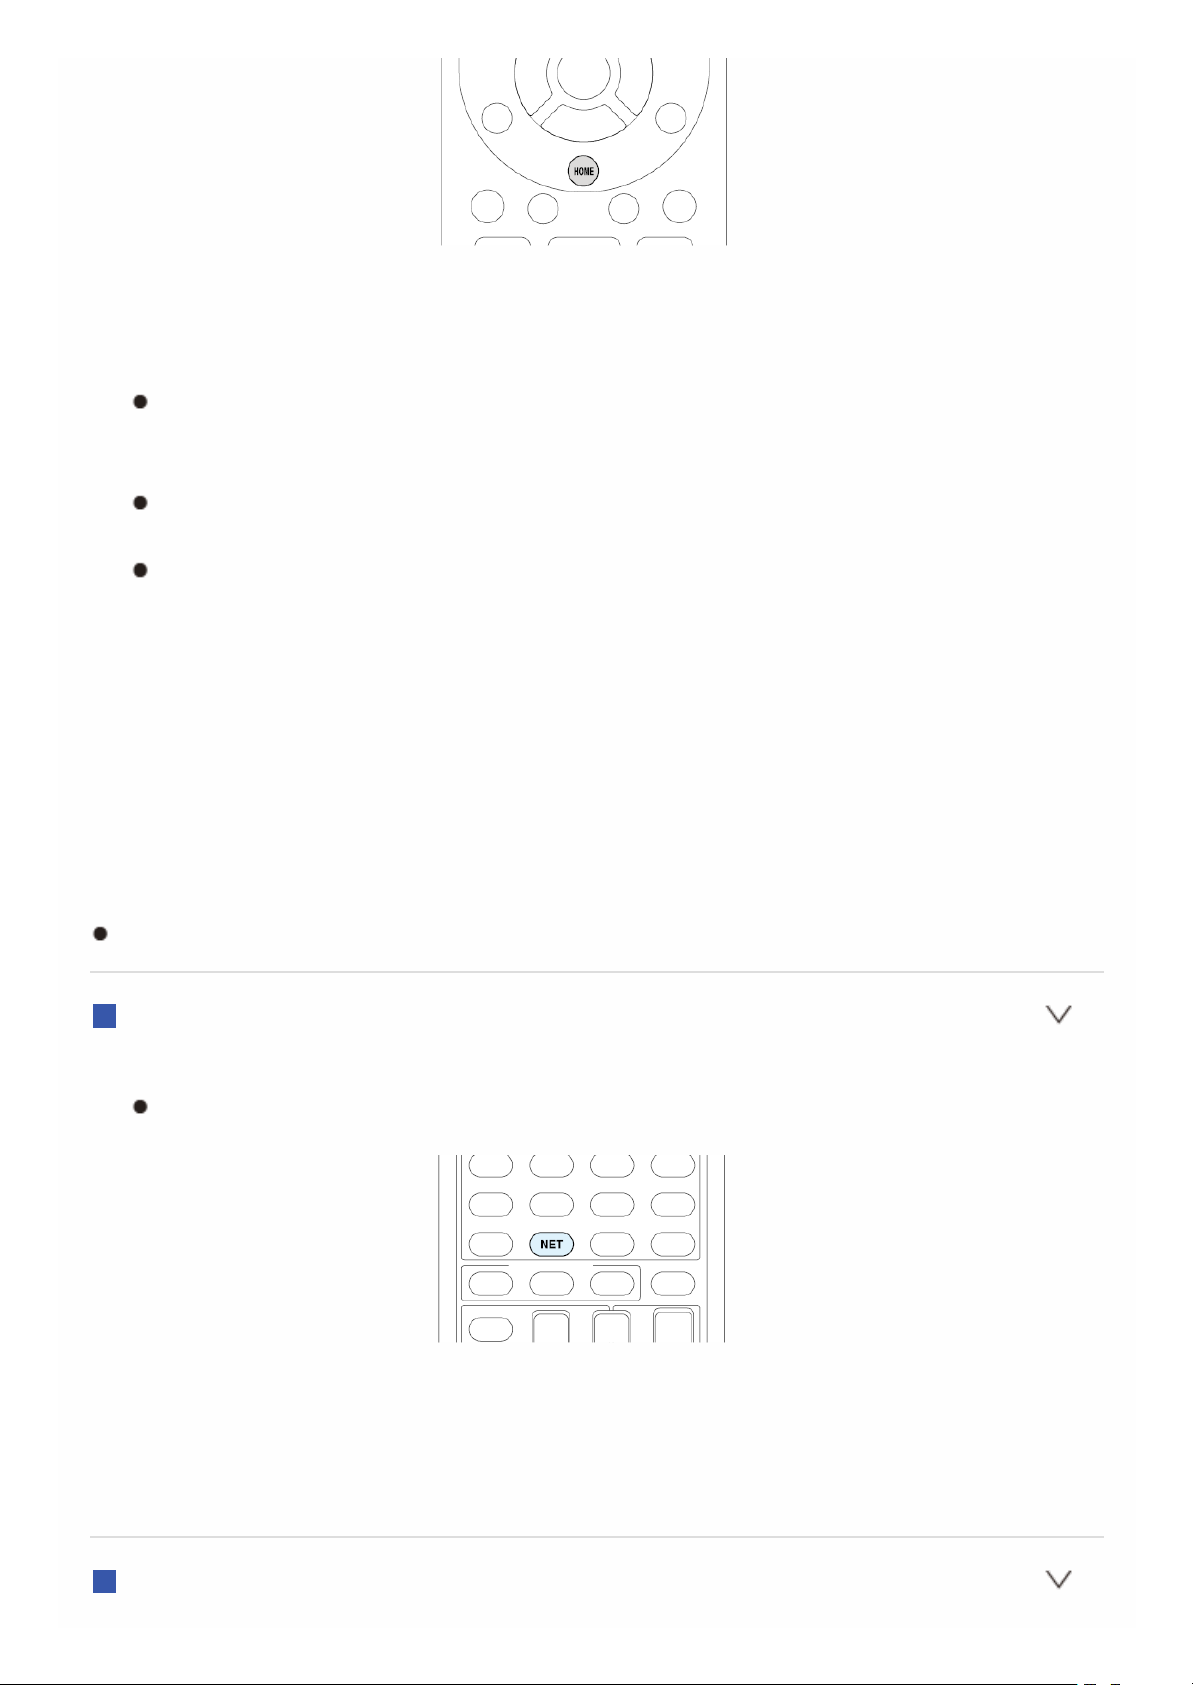
1. Press NET on the remote controller to display NET TOP screen.
"NET" lights on the display.
Listening to Internet Radio
Page 22
2. With the cursors, select "My Favorites", and then press ENTER to display
the "My Favorites" list screen.
3. With the cursors, select a blank area of "My Favorites" and press MENU
to display the menu screen.
4. With the cursors, select "Create new station", and then press ENTER to
display a keyboard screen.
5. Enter the name and URL of the radio station to add.
Select "Shift" and press ENTER to toggle between upper and lower
case. Select " " or " " and press ENTER to move the cursor to the
selected direction. Select "Back Space" and press ENTER to remove
a character on the left of the cursor.
Registering a Station with PC
Before operation: The name and URL of the additional radio station will be
needed for this procedure. Check the specifications before use.
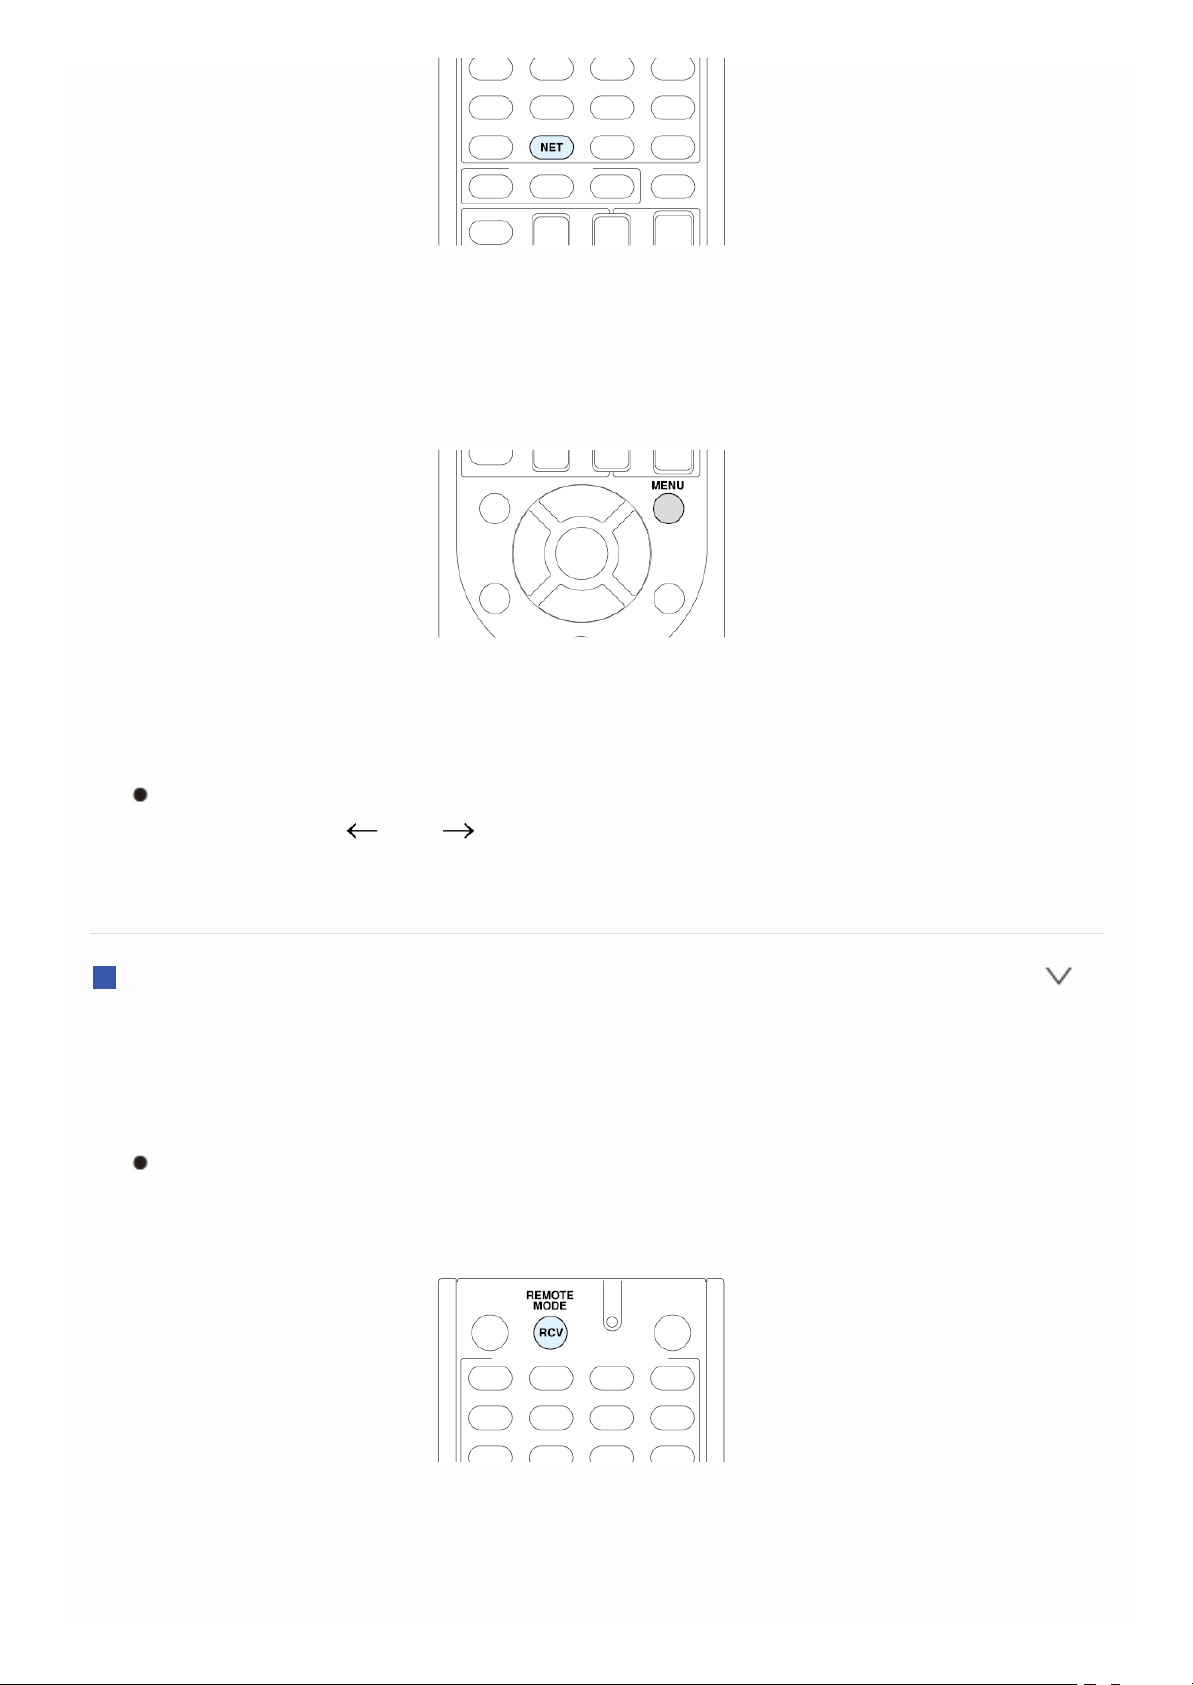
1. Press RCV on the remote controller.
Always press RCV first to change the remote controller to RECEIVER
mode (the mode to operate this unit) since its mode may be changed
to operate another component.
2. Press HOME to display the Home menu.
Page 23
3. With the cursors, select "Setup", and then press ENTER.
4. With the cursors, select "7. Hardware Setup" - "Network" - "IP Address" to
display the IP address.
Write down the IP address since you will need it later.
5. Open the Internet browser on your PC or smartphone and enter the IP
address of the unit in the URL field.
If you are using Internet Explorer, you can also enter the URL by
selecting "Open..." on the "File" menu.
Information of the unit is displayed on the browser. ("WEB Setup")
6. Click "My Favorites" tab, then enter the name and URL of the Internet
radio station.
7. Click "Save" to register the entered Internet radio station in "My
Favorites".
To rename the registered radio station: While the radio station is being
played or when it is selected from the "My Favorites" list, press MENU to
display the menu screen. Select "Rename this station" with the cursors and
press ENTER to display the keyboard screen. Rename the station as
desired.
Radio stations can be renamed also from "WEB Setup".
Playing a Registered Radio Station
1. Press NET on the remote controller to display NET TOP screen.
"NET" lights on the display.
2. With the cursors, select "My Favorites", and then press ENTER to display
the registered Internet radio stations.
3. With the cursors, select the radio station to delete and press MENU to
display the menu screen.
Deleting a Registered Radio Station
Page 24
1. Press NET on the remote controller to display NET TOP screen.
"NET" lights on the display.
2. With the cursors, select "My Favorites", and then press ENTER to display
the registered Internet radio stations.
3. With the cursors, select the radio station to delete and press MENU to
display the menu screen.
You can also display the menu screen by pressing MENU while the
radio station is being played.
4. With the cursors, select "Delete from My Favorites", and then press
ENTER.
Radio stations can be deleted also from "WEB Setup".
Page 25
About DLNA
Digital Living Network Alliance (DLNA) can be referred to as a technology
standard or the industry group to develop the technology standard to
interconnect and use AV components, PCs and other devices in a home
network (more precisely the technology standard is called the DLNA
guidelines).
The unit allows you to use DLNA to play music files stored on a PC or a hard
disk connected to your home network (NAS device). Make sure the unit and
PC or NAS device are connected to the same router.
To play a music file with DLNA, you need a NAS device or the like with
DLNA server functions and a DLNA player (software) to stream the music.
You can also stream music files using a PC installed with Windows Media
Player 11 or 12 as they are equipped with both DLNA server and player
functions. To enable streaming, you must first configure the Windows
Media Player 11 or Windows Media Player 12.
With Windows Media Player 12 Remote Playback function, you can
stream music files stored on your PC to the unit by operating the PC.
DLNA Music Streaming
Page 26

Configuring the Windows Media Player
Windows Media Player 11
1. Turn on your PC and start Windows Media Player 11.
2. In the "Library" menu, select "Media Sharing" to open a dialog box.
3. Select the "Share my media" check box, and then click "OK" to display a
list of supported devices.
4. Select this unit, and then click "Allow".
The corresponding icon is checked.
5. Click "OK" to close the dialog.
Windows Media Player 12
1. Turn on your PC and start Windows Media Player 12.
2. In the "Stream" menu, select "Turn on media streaming" to open a dialog
box.
If media streaming is already turned on, select "More streaming
options..." in the "Stream" menu to list players in the network. Proceed
to step 4.
3. Click "Turn on media streaming". A list of players in the network is
displayed.
4. Select this unit in "Media streaming options" and check that it is set to
"Allow".
5. Click "OK" to close the dialog.
DLNA Music Streaming
Page 27
DLNA Playback
Operation: You can set up by viewing the guidance displayed on the TV
screen. To display the guidance, you need to make HDMI connection
between the unit and TV. Select the item with the cursor buttons of the
remote controller and press ENTER to confirm your selection. To return to
the previous screen, press RETURN.
Playing Back
1. Start the server (Windows Media Player 11, Windows Media Player 12, or
NAS device) storing the music files to play.
2. Press NET on the remote controller to display NET TOP screen.
"NET" lights on the display. If the "NET" indicator flashes, the unit is
not properly connected to the network. When using a wired LAN
connection, check the Ethernet cable connection, and when using a
wireless LAN connection, check whether the "Wi-Fi" indicator on the
left side of the unit stays lit.
3. Select "DLNA" with the cursors and press ENTER.
4. With the cursors, select the target server, and then press ENTER to
DLNA Music Streaming
Page 28
display a list of items on the selected server.
Searching does not work in servers that do not support search
functions.
The unit cannot access pictures and videos stored on servers.
Contents stored on the server may not be displayed depending on the
server sharing settings.
5. With the cursors, select the music file to play, and then press ENTER or
to start playback.
If "No Item." is displayed, check whether the network is properly
connected.
Page 29
Controlling Remote Playback from a PC
You can use this unit to play music files stored on your PC by operating the
PC inside your home network. The unit supports remote playback with
Windows Media Player 12. To use the remote playback function with
Windows Media Player 12, Windows Media Player 12 must be configured in
advance.
Using a DLNA-compatible controller (such as an Android application), you
can select a music file stored on Windows Media Player 12 and stream to
this unit by operating the controller. For information on how to remotely
play using the controller, refer to the controller's instruction manual.
Setting PC
1. Turn on your PC and start Windows Media Player 12.
2. In the "Stream" menu, select "Turn on media streaming" to open a dialog
box.
If media streaming is already turned on, select "More streaming
options..." in the "Stream" menu to list players in the network. Proceed
to step 4.
3. Click "Turn on media streaming" to display a list of players in the network.
4. Select this unit in "Media streaming options" and check that it is set to
"Allow".
5. Click "OK" to close the dialog box.
6. Open the "Stream" menu and check that "Allow remote control of my
Player..." is checked.
Remote playback
1. Turn on the power of the unit.
2. Turn on your PC and start Windows Media Player 12.
3. Select the music file to play with Windows Media Player 12 and right-
click.
To remotely play a music file on another server, open the target server
from "Other Libraries" and select the music file to play.
4. Select this unit in "Play to" and open the "Play to" window of Windows
Media Player 12 to start to playback music file on the unit.
Operations during remote playback are possible from the "Play to"
window on the PC. The playback screen is displayed on the TV
connected to the HDMI output of the unit. If your PC is running on
DLNA Music Streaming
Page 30

Windows 8, click "Play to", and then select this unit.
5. Adjust the volume using the volume bar on the "Play to" window.
Some times, the volume displayed on the remote playback window
may differ from that appeared on the display of the unit.
When the volume is adjusted from the unit, the value is not reflected in
the "Play to" window.
This unit cannot play music files remotely in the following conditions.
– It is using a network service.
– It is playing a music file on a USB storage device.
– "Agree" was not selected in the DISCLAIMER screen that was
displayed when the NET input was selected on the unit for the first
time.
Page 31

About Shared Folder
A shared folder is configured in a network device such as a PC or NAS (hard
disk connected to your home network) for access from other users.
You can play music files in a shared folder on your PC or NAS connected to
the same home network as that of the unit. To play music files in a shared
folder, you must first configure Windows 8 or Windows 7. Make sure the unit
and PC or NAS device are connected to the same router.
The sharing options must be configured and a shared folder created on
the PC in advance.
For information on how to configure the NAS device and create a shared
folder, refer to the NAS device's instruction manual.
Music Streaming from a Shared Folder
Page 32

Setting PC
Configuring the Sharing Options
1. Select "Choose Home group and Sharing Options" on the "Control Panel".
If the menu is not displayed, check whether "View by" is set to
"Category".
2. Select "Change advanced sharing settings".
3. Check whether the following radio buttons are selected in "Home or
Work":
"Enable network discovery"
"Turn on file and printer sharing"
"Turn on sharing so anyone with network access can read and write files
in the Public folders"
"Turn off password protected sharing"
4. Select "Save Changes" and click "OK" on the dialog box.
Creating a Shared Folder
1. Select the folder to share and right-click.
2. Select "Properties".
3. Select "Advanced Sharing" on the "Sharing" tab.
4. Select the "Share this folder" check box and click "OK".
5. Select "Share" for "Network File and Folder Sharing".
6. Select "Everyone" from the pull-down menu. Click "Add", and then
"Share".
To set user name and password to a shared folder, set "Permissions"
in "Advanced Sharing" on the "Sharing" tab.
Check whether a workgroup is set.
Music Streaming from a Shared Folder
Page 33

Playing from a Shared Folder
Operation: You can set up by viewing the guidance displayed on the TV
screen. To display the guidance, you need to make HDMI connection
between the unit and TV. Select the item with the cursor buttons of the
remote controller and press ENTER to confirm your selection. To return to
the previous screen, press RETURN.
Playing Back
1. Press NET on the remote controller to display NET TOP screen.
"NET" lights on the display.
If the "NET" indicator flashes, the unit is not properly connected to the
network. When using a wired LAN connection, check the Ethernet
cable connection, and when using a wireless LAN connection, check
whether the "Wi-Fi" indicator on the left side of the unit is lit.
2. With the cursors, select "Home Media", and then press ENTER.
3. With the cursors, select the target server, and then press ENTER.
You can check the server name of your PC from the PC properties.
4. With the cursors, select the target shared folder, and then press ENTER.
Music Streaming from a Shared Folder
Page 34

5. If a username and password is required, enter the necessary login
information.
The login information is the account information set at the time of
creating the shared folder.
Once entered, the login information will be remembered from the next
time onward.
6. With the cursors, select the music file to play, and then press ENTER or
to start playback.
Page 35

About the Remote Controller
The remote controller of this unit allows you to play music files stored on
USB storage devices, Internet radio, PCs and NAS devices on your home
network, as well as on Bluetooth-enabled devices. It also allows you to view
information of the music file being played and perform various other
operations.
Available buttons may vary depending on the service and device to play.
Some buttons cannot be used with Bluetooth-enabled devices.
Furthermore, the Bluetooth-enabled devices must support the AVRCP
profile. Some devices may not be operated, even when they support
AVRCP profile.
Using Remote Controller for Playing Music Files
Page 36

Remote Controller Buttons
1. Press INPUT SELECTOR (PC, NET, USB or BLUETOOTH) appropriate
for the input source on the remote controller.
2. Operate the remote controller by referring to the name and function of
each of the buttons below.
1 TOP MENU: This button displays the top menu for each media or
server.
2 / , ENTER: These buttons navigate through items and activate the
selected item.
/ : These buttons cycle through pages.
3 : This button fast-reverses the current track. This button is not
operable from 10 seconds before the playback ends.
4 : This button plays the current track from the beginning. Pressing
this button twice plays the previous track.
5 CH +/- button: Moves the cursor on the Internet radio stations list in
"My Favorites".
6 MENU: This button displays the menu of each Internet radio service.
7 RETURN: This button returns to the previous screen.
8 : This button fast-forwards the current track. This button is not
operable from 10 seconds before the playback ends.
9 : This button plays the next track.
Using Remote Controller for Playing Music Files
Page 37

F : This button starts the playback.
G : This button pauses the playback.
H SEARCH: This button toggles between the playback screen and list
screen during playback.
I : This button stops the playback.
J RANDOM: This button performs random playback.
K REPEAT: This button replays the track(or tracks). Pressing this button
repeatedly cycles through the repeat modes.
L DISPLAY: This button changes the displayed track information during
playback. Pressing this button when the list screen is displayed
toggles the screen to playback.
Bluetooth-enabled devices: Usable buttons are , , , ,
, , and .
Page 38

Icons Displayed during Playback
Icons are displayed on the display during music file playback. The meaning
of each icon is as follows:
: Folder
: Track
: Play
: Pause
: Fast-forward
: Fast-reverse
: Artist
: Album
: Repeat One Track
: Repeat within a folder
: Repeat
: Shuffle
Using Remote Controller for Playing Music Files
Page 39

Selecting Listening Mode
The listening modes allow you to select the best sound effect for your input
source.
1. Press RCV on the remote controller.
Always press RCV first to change the remote controller to RECEIVER
mode (the mode to operate this unit) since its mode may be changed
to operate another component.
2. Press one of the following buttons depending on your choice from among
the four listening modes.
Pressing a button changes the listening mode to that chosen. Set the
listening mode of your choice by listening to the actual sound.
For details on the types and difference of listening modes, see "Contents
of Listening Modes".
MOVIE/TV button
You can select a mode suitable for movies and TV programs.
Selectable listening modes:
All Ch Stereo
Direct
Dolby D
Dolby D+
Dolby Atmos
Dolby Surround
Dolby TrueHD
Using the Listening Modes
Page 40

DSD
DTS
DTS 96/24
DTS Express
DTS-HD HR
DTS-HD MSTR
ES Discrete
ES Matrix
Full Mono
Mono
Multichannel
Neo:6
Neo:6 Cinema
T-D
TV Logic
MUSIC button
You can select a mode suitable for music.
Selectable listening modes:
All Ch Stereo
Direct
Dolby D
Dolby D+
Dolby Atmos
Dolby Surround
Dolby TrueHD
DSD
DTS
DTS 96/24
DTS Express
DTS-HD HR
DTS-HD MSTR
ES Discrete
ES Matrix
Full Mono
Multichannel
Neo:6
Neo:6 Music
Orchestra
Pure Audio
Stereo
Studio-Mix
Unplugged
GAME button
Page 41

You can select a mode suitable for games.
Selectable listening modes:
All Ch Stereo
Direct
Dolby D
Dolby D+
Dolby Atmos
Dolby Surround
Dolby TrueHD
DSD
DTS
DTS 96/24
DTS Express
DTS-HD HR
DTS-HD MSTR
ES Discrete
ES Matrix
Full Mono
Neo:6
Game-Action
Game-Rock
Game-RPG
Game-Sports
Multichannel
T-D
STEREO button
You can select a listening mode for stereo and all channel stereo sources.
Selectable listening modes:
All Ch Stereo
Stereo
PURE AUDIO button (on the main unit only) (European model)
The display and analog video circuit is cut off to switch the unit to PURE
AUDIO mode (European model) and provide purer sound. Selecting this
mode lights the PURE AUDIO indicator on the unit. Pressing the button again
reselects the previous listening mode.
Page 42

Selecting Pure Audio for listening mode turns off the display and analog
video circuitry, but the video signals input through HDMI input are output
from HDMI output.
Page 43

Contents of Listening Modes
Selectable listening modes will differ depending on the number of input
source channels and the actual speaker configuration. Listening modes
available when headphones are connected are: Pure Audio (European
model), Mono, Direct, and Stereo.
Lists in alphabetic order (A-Z)
All Ch Stereo
Ideal for background music, this mode fills the entire listening area with
stereo sound from the front, surround, and surround back speakers.
Input source: MONO, STEREO, 5.1 ch, 7.1 ch
Speaker configuration: 3.1 ch, 5.1 ch, 7.1 ch
Direct
In this mode, audio from the input source is output as-is. For example, if a 2
ch source from a music CD is input, the output will be stereo, or if Dolby
Digital signal is input, the sound field will be controlled in accordance with the
number of channels present.
Input source: MONO, STEREO, 5.1 ch, 7.1 ch
Speaker configuration: 2.1 ch, 3.1 ch, 5.1 ch, 7.1 ch
Dolby D (Dolby Digital)
This mode is for use with Dolby Digital sources. The audio from the input
source is output as-is, without surround sound processing.
Input source: 5.1 ch
Speaker configuration: 3.1 ch, 5.1 ch, 7.1 ch
This listening mode can be selected only if your Blu-ray Disc/DVD player
is digitally connected to the unit or the player's output setting is bitstream.
Dolby D + (Dolby Digital Plus)
This mode is for use with Dolby Digital Plus sources. The audio from the
input source is output as-is, without surround sound processing.
Input source: 5.1 ch, 7.1 ch
Speaker configuration: 3.1 ch, 5.1 ch, 7.1 ch
Using the Listening Modes
Page 44

This listening mode can be selected only if your Blu-ray Disc/DVD player
is digitally connected to the unit or the player's output setting is bitstream.
When playing back 3.1 ch or 5.1 ch sources from Blu-ray Discs, Dolby
Digital is automatically applied.
Dolby Atmos
Introduced first in the cinema, Dolby Atmos brings a revolutionary sense of
dimension and immersion to the Home Theater experience. Dolby Atmos is
an adaptable and scalable object based format that reproduces audio as
independent sounds (or objects) that can be accurately positioned and move
dynamically throughout the 3 dimensional listening space during playback. A
key ingredient of Dolby Atmos is the introduction of a height plane of sound
above the listener.
Speaker configuration requirements: 7.1 ch
This listening mode can be selected only if the input signal is Dolby
Atmos.
Dolby Surround
Dolby surround is a next generation surround technology that intelligently up
mixes stereo; 5.1 and 7.1 content for playback through your surround
speaker system. Dolby surround is compatible with traditional speaker
layouts, as well as Dolby Atmos enabled playback systems that employ inceiling speakers or products with Dolby speaker technology.
Input source: STEREO, 5.1 ch, 7.1 ch
Minimum required speaker configuration: 2 ch
Dolby TrueHD
This mode is for use with Dolby TrueHD sources. The audio from the input
source is output as-is, without surround sound processing.
Input source: 7.1 ch
Speaker configuration: 3.1 ch, 5.1 ch, 7.1 ch
This listening mode can be selected only if your Blu-ray Disc/DVD player
is digitally connected to the unit or the player's output setting is bitstream.
DSD
This mode is for use with DSD sources. The audio from the input source is
output as-is, without surround sound processing.
Input source: 5.1 ch
Speaker configuration: 3.1 ch, 5.1 ch, 7.1 ch
This unit supports DSD signals input through HDMI IN. However,
depending on the connected player, better sound is possible when output
from the PCM output of the player. In that case, configure the player for
Page 45

PCM output.
This listening mode can be selected only if your Blu-ray Disc/DVD
player's output setting is DSD.
DTS
This mode is for use with DTS sources. The audio from the input source is
output as-is, without surround sound processing.
Input source: 5.1 ch
Speaker configuration: 3.1 ch, 5.1 ch, 7.1 ch
This listening mode can be selected only if your Blu-ray Disc/DVD player
is digitally connected to the unit or the player's output setting is bitstream.
DTS 96/24
This mode is for use with DTS 96/24 sources. The audio from the input
source is output as-is, without surround sound processing. With 96 kHz
sampling rate and 24-bit resolution, it provides superior fidelity.
Input source: 5.1 ch
Speaker configuration: 3.1 ch, 5.1 ch, 7.1 ch
Depending on the settings, this listening mode becomes DTS.
This listening mode can be selected only if your Blu-ray Disc/DVD player
is digitally connected to the unit or the player's output setting is bitstream.
DTS Express
This mode is for use with DTS Express sources. The audio from the input
source is output as-is, without surround sound processing.
Input source: 5.1 ch
Speaker configuration: 3.1 ch, 5.1 ch, 7.1 ch
This listening mode can be selected only if your Blu-ray Disc/DVD player
is digitally connected to the unit or the player's output setting is bitstream.
DTS-HD HR (DTS-HD High Resolution Audio)
This mode is for use with DTS-HD High Resolution Audio sources. The
audio from the input source is output as-is, without surround sound
processing.
Input source: 5.1 ch, 7.1 ch
Speaker configuration: 3.1 ch, 5.1 ch, 7.1 ch
This listening mode can be selected only if your Blu-ray Disc/DVD player
is digitally connected to the unit or the player's output setting is bitstream.
DTS-HD MSTR (DTS-HD Master Audio)
Page 46

This mode is for use with DTS-HD Master Audio sources. The audio from the
input source is output as-is, without surround sound processing.
Input source: 5.1 ch, 7.1 ch
Speaker configuration: 3.1 ch, 5.1 ch, 7.1 ch
This listening mode can be selected only if your Blu-ray Disc/DVD player
is digitally connected to the unit or the player's output setting is bitstream.
DTS Neo:6
This mode expands any 2 ch source for 5.1 ch multichannel surround
playback. It offers full-bandwidth on all channels, with great independence
between the channels. There are two variants for this mode: one ideal for
movies and another ideal for music.
– Neo:6 Cinema: Use this mode with any 2 ch movie.
– Neo:6 Music: Use this mode with any 2 ch music source.
– Neo:6: Use this mode to expand any 5.1 ch music source for 6.1 ch or 7.1
ch playback using Neo:6.
Input source: STEREO (Neo:6 Cinema and Neo:6 Music only), 5.1 ch
(Neo:6 only)
Speaker configuration: 3.1 ch, 5.1 ch, 7.1 ch (Neo:6 Cinema and Neo:6
Music only), 7.1 ch surround back (Neo:6 only)
ES Discrete (DTS-ES Discrete)
This mode is for use with DTS-ES Discrete sources and enables 6.1 ch or
7.1 ch playback using surround back channel. Completely discrete seven
channels will improve spatial imaging and enable 360-degree sound
localization producing a sound crossing between the surround channels.
Input source: 6.1 ch, 7.1 ch
Speaker configuration: 7.1 ch surround back
This listening mode can be selected only if your Blu-ray Disc/DVD player
is digitally connected to the unit or the player's output setting is bitstream.
Use on the DVD with DTS ES logo, particularly on the software
containing DTS-ES Matrix soundtrack.
Playback becomes DTS if no surround back speaker is connected.
ES Matrix (DTS-ES Matrix)
This mode is for use with DTS-ES Matrix soundtrack and enables 6.1 ch or
7.1 ch playback using matrix-encoded back channel.
Input source: 6.1 ch
Speaker configuration: 7.1 ch surround back
This listening mode can be selected only if your Blu-ray Disc/DVD player
is digitally connected to the unit or the player's output setting is bitstream.
Use on the CD, DVD or LD with DTS ES logo, particularly on the software
containing DTS-ES Matrix soundtrack.
Page 47

Playback becomes DTS if no surround back speaker is connected.
Full Mono
In this mode, all speakers output the same sound in mono, so the sound you
hear is the same regardless of where you are within the listening room.
Input source: MONO, STEREO, 5.1 ch, 7.1 ch
Speaker configuration: 3.1 ch, 5.1 ch, 7.1 ch
Game-Action
In this mode, sound localization is distinct with emphasis on bass.
Input source: MONO, STEREO, 5.1 ch, 7.1 ch
Speaker configuration: 5.1 ch, 7.1 ch
Game-Rock
In this mode, sound pressure is emphasized to heighten live feel.
Input source: MONO, STEREO, 5.1 ch, 7.1 ch
Speaker configuration: 5.1 ch, 7.1 ch
Game-RPG
In this mode, the sound has a dramatic feel with a similar atmosphere to
Orchestra mode.
Input source: MONO, STEREO, 5.1 ch, 7.1 ch
Speaker configuration: 5.1 ch, 7.1 ch
Game-Sports
Suitable for audio source with much reverberation.
Input source: MONO, STEREO, 5.1 ch, 7.1 ch
Speaker configuration: 5.1 ch, 7.1 ch
Mono
Use this mode when watching an old movie with a mono soundtrack, or use it
to separately reproduce soundtracks in two different languages recorded in
the left and right channels of some movies. It is also suitable for DVDs or
other sources containing multiplexed audio.
Input source: MONO, STEREO, 5.1 ch, 7.1 ch
Speaker configuration: 2.1 ch, 3.1 ch, 5.1 ch, 7.1 ch
Multichannel
Page 48

This mode is for use with PCM multichannel sources. The audio from the
input source is output as-is, without surround sound processing.
Input source: 5.1 ch, 7.1 ch
Speaker configuration: 3.1 ch, 5.1 ch, 7.1 ch
Orchestra
Suitable for classical or operatic music, This mode emphasizes the surround
channels in order to widen the stereo image, and simulates the natural
reverberation of a large hall.
Input source: MONO, STEREO, 5.1 ch, 7.1 ch
Speaker configuration: 5.1 ch, 7.1 ch
Pure Audio (European model)
This mode reproduces the original sound accurately. Since the audio from
the input source is output without surround sound processing and the display
and video circuitry are turned off, possible noise sources are minimized for a
realistic audio reproduction.
Input source: MONO, STEREO, 5.1 ch, 7.1 ch
Speaker configuration: 2.1 ch, 3.1 ch, 5.1 ch, 7.1 ch
This mode cannot be selected when Zone 2 is active. Activating Zone 2
when this mode is selected, automatically switches the listening mode to
Direct.
Stereo
In this mode, sound is output from the front left and right speakers and
subwoofer.
Input source: MONO, STEREO, 5.1 ch, 7.1 ch
Speaker configuration: 2.1 ch, 3.1 ch, 5.1 ch, 7.1 ch
Studio-Mix
Suitable for rock or pop music, Listening to music in this mode creates a
lively sound field with a powerful acoustic image, like being at a club or rock
concert.
Input source: MONO, STEREO, 5.1 ch, 7.1 ch
Speaker configuration: 5.1 ch, 7.1 ch
T-D (Theater-Dimensional)
In this mode, you can enjoy a virtual playback of multichannel surround
sound even with only two or three speakers. This works by controlling how
sounds reach the listener’s left and right ears.
Page 49

Input source: MONO, STEREO, 5.1 ch, 7.1 ch
Speaker configuration: 2.1 ch, 3.1 ch, 5.1 ch, 7.1 ch
Good results may not be possible if there is too much reverb, so we
recommend that you use this mode in an environment with little or no
natural reverb.
TV Logic
Suitable for TV shows produced in a TV studio, This mode enhances the
surround effects to the entire sound to give clarity to voices and create a
realistic acoustic image.
Input source: MONO, STEREO, 5.1 ch, 7.1 ch
Speaker configuration: 5.1 ch, 7.1 ch
Unplugged
Suitable for acoustic instruments, vocals and jazz, This mode emphasizes the
front stereo image, giving the impression of being right in front of the stage.
Input source: MONO, STEREO, 5.1 ch, 7.1 ch
Speaker configuration: 5.1 ch, 7.1 ch
Page 50

Checking the Input Format
You can check the audio format of the input signals. While audio from the
player is being input, press DISPLAY on the remote controller several times
to switch the information shown on the main unit display. If "Dolby D 5.1" is
displayed in Signal format, the Dolby Digital 5.1 ch signals are being input.
The number of channels is not displayed when the input signal format is
"Dolby Atmos".
Using the Listening Modes
Page 51

How to Set
The unit allows you to configure advanced settings, such as to remap the
input and input selector, or configure various speaker settings in order to
provide even better experience. Make the settings in "Setup" of the Home
menu.
Operation: You can set up by viewing the guidance displayed on the TV
screen. To display the guidance, you need to make HDMI connection
between the unit and TV. Select the item with the cursor buttons of the
remote controller and press ENTER to confirm your selection. To return to
the previous screen, press RETURN. To return to the Home menu, press
HOME.
Operation
1. Press RCV on the remote controller.
Always press RCV first to change the remote controller to RECEIVER
mode (the mode to operate this unit) since its mode may be changed
to operate another component.
Advanced Settings
Page 52

2. Press HOME to display the Home menu.
3. With the / cursors, select "Setup", and then press ENTER.
4. Press / to select the desired menu, and then press ENTER.
5. With the / / / cursors, select the desired item to configure the settings.
When "ENTER" is displayed on the setting item, press ENTER.
To save changes and finish the setting: Press HOME to exit.
Page 53

1.Input/Output Assign
Monitor Out
The video input signals input to the unit will be converted when they are
output from the HDMI OUT jack to the TV so that their resolution can match
that of the TV used.
Monitor Out
Default Value: MAIN
Select the HDMI jack to be connected with the TV.
"MAIN": When connecting the TV to the HDMI OUT MAIN jack
"SUB": When connecting the TV to the HDMI OUT SUB jack
The resolution of the input signal does not change when output
through HDMI OUT SUB jack.
"MAIN+SUB": When connecting to both the MAIN and SUB jacks
Video signals input to the composite video input jack or the
COMPONENT VIDEO input jacks will be upconverted to HDMI
signals and then output from the HDMI OUT jack.
If "MAIN+SUB" is selected
– Only "Through" or "Auto" can be selected in "Resolution".
– The resolution of the input signal does not change when output
through HDMI OUT SUB jack.
HDCP2.2 protected video from HDMI OUT SUB will not be
displayed.
Resolution
Default Value: Through
Specify the output resolution of the HDMI OUT jacks. The image
resolution of the unit will be converted so that it can match the
resolution supported by the TV used.
"Through": The output resolution will be the same as that of the input
signals.
"Auto": The resolution will automatically be converted according to
the resolution supported by the TV.
"480p (480p/576p)", "720p", "1680×720p", "1080i", "1080p",
"2560×1080p": Select the desired resolution.
"4K": About four times as high resolution as 1080p (3840×2160 or
Advanced Settings
Page 54

4096×2160 pixels depending on the resolution supported by the
connected TV)
If "1080p" is selected, 1080p/24 input signals will be output with
an unchanged resolution.
If the selected resolution is not supported by the monitor, the
video is output in the same resolution as the input signal.
If "4K" is selected, video signals may not be output to some types
of TV. For details, see "Supported Video Resolution of HDMI OUT
MAIN/SUB Jacks" in "Troubleshooting".
If "Monitor Out" is set to "SUB", this setting will be set to
"Through".
Press ENTER if you output signals from the HDMI OUT MAIN jack
and check the video on the TV while making this setting. Press
RETURN if no video is displayed. (except when "NET", "USB" or
"BLUETOOTH" is selected)
HDMI Input
It is possible to change assignment of input selector buttons and the HDMI IN
jacks.
BD/DVD
Default Value: HDMI 1
"HDMI 1" to "HDMI 6": Desired HDMI IN jack can be assigned to
BD/DVD button. If you do not assign a jack, select "-----". To select an
HDMI IN jack already assigned to another input selector, change its
setting to "-----" first.
CBL/SAT
Default Value: HDMI 2
"HDMI 1" to "HDMI 6": Desired HDMI IN jack can be assigned to
CBL/SAT button. If you do not assign a jack, select "-----". To select an
HDMI IN jack already assigned to another input selector, change its
setting to "-----" first.
STB/DVR
Default Value: HDMI 3 (HDCP2.2)
"HDMI 1" to "HDMI 6": Desired HDMI IN jack can be assigned to
STB/DVR button. If you do not assign a jack, select "-----". To select an
HDMI IN jack already assigned to another input selector, change its
setting to "-----" first.
Page 55

GAME
Default Value: HDMI 4
"HDMI 1" to "HDMI 6": Desired HDMI IN jack can be assigned to GAME
button. If you do not assign a jack, select "-----". To select an HDMI IN
jack already assigned to another input selector, change its setting to "---
--" first.
PC
Default Value: HDMI 5
"HDMI 1" to "HDMI 6": Desired HDMI IN jack can be assigned to PC
button. If you do not assign a jack, select "-----". To select an HDMI IN
jack already assigned to another input selector, change its setting to "---
--" first.
AUX
Default Value: Front/MHL
The setting cannot be changed.
TV/CD
Default Value: -----
"HDMI 1" to "HDMI 6": Desired HDMI IN jack can be assigned to TV/CD
button. If you do not assign a jack, select "-----". To select an HDMI IN
jack already assigned to another input selector, change its setting to "---
--" first.
PHONO
Default Value: -----
"HDMI 1" to "HDMI 6": Desired HDMI IN jack can be assigned to
PHONO button. If you do not assign a jack, select "-----". To select an
HDMI IN jack already assigned to another input selector, change its
setting to "-----" first.
Component Video Input
CBL/SAT button is assigned to COMPONENT VIDEO IN jack as factory
default setting. This assignment can be changed if necessary. If you do not
assign a jack, select "-----".
BD/DVD
Page 56

Default Value: -----
"COMPONENT": COMPONENT VIDEO IN jack is assigned to BD/DVD
button.
CBL/SAT
Default Value: COMPONENT
"COMPONENT": COMPONENT VIDEO IN jack is assigned to CBL/SAT
button.
STB/DVR
Default Value: -----
"COMPONENT": COMPONENT VIDEO IN jack is assigned to
STB/DVR button.
GAME
Default Value: -----
"COMPONENT": COMPONENT VIDEO IN jack is assigned to GAME
button.
PC
Default Value: -----
"COMPONENT": COMPONENT VIDEO IN jack is assigned to PC
button.
AUX
Default Value: -----
The setting cannot be changed.
TV/CD
Default Value: -----
"COMPONENT": COMPONENT VIDEO IN jack is assigned to TV/CD
button.
PHONO
Default Value: -----
Page 57

"COMPONENT": COMPONENT VIDEO IN jack is assigned to PHONO
button.
When you convert video signals input to the COMPONENT VIDEO IN
jacks and output them from the HDMI OUT jack, set the output resolution
of the player to 480i. If the input has 480p or higher resolution, an error
message will appear.
When "Monitor Out" is set to "SUB", the 480i/576i component signals only
will be output with an unchanged resolution. Video will not be displayed if
the TV does not support the resolution.
When "Monitor Out" is set to "MAIN" or "MAIN+SUB" and "Resolution" is
set to "Through", the 480i/576i component signals will be output with their
resolution unchanged. So, TV sets not supporting these resolutions will
not be able to display video.
Composite Video Input
It is possible to change assignment of input selector buttons and the
COMPOSITE VIDEO IN V1 to 3 jacks.
BD/DVD
Default Value: -----
"VIDEO 1" to "VIDEO 3": Desired COMPOSITE VIDEO IN V jack can be
assigned to BD/DVD button. If you do not assign a jack, select "-----".
CBL/SAT
Default Value: VIDEO 1
"VIDEO 1" to "VIDEO 3": Desired COMPOSITE VIDEO IN V jack can be
assigned to CBL/SAT button. If you do not assign a jack, select "-----".
STB/DVR
Default Value: VIDEO 2
"VIDEO 1" to "VIDEO 3": Desired COMPOSITE VIDEO IN V jack can be
assigned to STB/DVR button. If you do not assign a jack, select "-----".
GAME
Default Value: VIDEO 3
"VIDEO 1" to "VIDEO 3": Desired COMPOSITE VIDEO IN V jack can be
assigned to GAME button. If you do not assign a jack, select "-----".
Page 58

PC
Default Value: -----
"VIDEO 1" to "VIDEO 3": Desired COMPOSITE VIDEO IN V jack can be
assigned to PC button. If you do not assign a jack, select "-----".
AUX
Default Value: -----
The setting cannot be changed.
TV/CD
Default Value: -----
"VIDEO 1" to "VIDEO 3": Desired COMPOSITE VIDEO IN V jack can be
assigned to TV/CD button. If you do not assign a jack, select "-----".
PHONO
Default Value: -----
"VIDEO 1" to "VIDEO 3": Desired COMPOSITE VIDEO IN V jack can be
assigned to PHONO button. If you do not assign a jack, select "-----".
When "Monitor Out" is set to "SUB", the 480i/576i composite signals only
will be output with an unchanged resolution. Video will not be displayed if
the TV does not support the resolution.
When "Monitor Out" is set to "MAIN" or "MAIN+SUB" and "Resolution" is
set to "Through", the 480i/576i composite signals will be output with their
resolution unchanged. So, TV sets not supporting these resolutions will
not be able to display video.
Digital Audio Input
It is possible to change assignment of input selector buttons and the DIGITAL
IN COAXIAL 1 to 2/OPTICAL jacks.
BD/DVD
Default Value: COAXIAL 1
"COAXIAL 1", "COAXIAL 2", "OPTICAL": Desired DIGITAL IN jack can be
assigned to BD/DVD button. If you do not assign a jack, select "-----".
CBL/SAT
Page 59

Default Value: COAXIAL 2
"COAXIAL 1", "COAXIAL 2", "OPTICAL": Desired DIGITAL IN jack can be
assigned to CBL/SAT button. If you do not assign a jack, select "-----".
STB/DVR
Default Value: -----
"COAXIAL 1", "COAXIAL 2", "OPTICAL": Desired DIGITAL IN jack can be
assigned to STB/DVR button. If you do not assign a jack, select "-----".
GAME
Default Value: -----
"COAXIAL 1", "COAXIAL 2", "OPTICAL": Desired DIGITAL IN jack can be
assigned to GAME button. If you do not assign a jack, select "-----".
PC
Default Value: -----
"COAXIAL 1", "COAXIAL 2", "OPTICAL": Desired DIGITAL IN jack can be
assigned to PC button. If you do not assign a jack, select "-----".
AUX
Default Value: -----
The setting cannot be changed.
TV/CD
Default Value: OPTICAL
"COAXIAL 1", "COAXIAL 2", "OPTICAL": Desired DIGITAL IN jack can be
assigned to TV/CD button. If you do not assign a jack, select "-----".
PHONO
Default Value: -----
"COAXIAL 1", "COAXIAL 2", "OPTICAL": Desired DIGITAL IN jack can be
assigned to PHONO button. If you do not assign a jack, select "-----".
Supported sampling rates for PCM signals (stereo, mono) from a digital
input are 32/44.1/48/88.2/96 kHz/16, 20, 24 bit.
Page 60

2.Speaker Setup
Allows you to change the speaker configuration such as existence of
subwoofer, crossover frequency, and so on. Settings are automatically
configured if you use the Automatic Speaker Setup.
Furthermore, you will not be able to select this setting if you have a pair of
headphones connected or you are listening through your TV speakers.
Speaker Settings
Change the impedance of the connected speakers, the type of front speaker
connection, and other speaker settings.
Speaker Impedance (European model)
Default Value: 6ohms
Set the impedance (Ω) of the connected speakers.
"4ohms": When any of the connected speakers have 4 Ω or more to less
than 6 Ω impedance
"6ohms": When the connected speakers all have 6 Ω or more
impedance
Front Speakers Type
Default Value: Normal
Select the type of front speaker connection.
"Normal": When front speakers are connected in a normal manner
"Bi-Amp": When front speakers are bi-amp connected
Height Speakers Type
Default Value: Bundled Dolby Enabled Speaker (Front)
Set the type of speakers connected to BACK or HEIGHT speaker
terminals. Select from the following options according to the type and
layout of the connected speakers: "Not Use", "Front High", "Top Front",
"Top Middle", "Dolby Enabled Speaker (Front)", "Dolby Enabled
Speaker (Surround)", or "Bundled Dolby Enabled Speaker (Front)".
If "Front Speakers Type" is set to "Bi-Amp", this setting will be set to
"Not Use".
Advanced Settings
Page 61

"Dolby Enabled Speaker (Surround)" cannot be set when "Surround"
is set to "None".
Powered Zone 2
Default Value: No
Set presence of speaker terminal connection of Zone 2
"Yes": When speakers are connected to ZONE2 speaker terminals
"No": When speakers are not connected to ZONE2 speaker terminals
If "Front Speakers Type" is set to "Bi-Amp", this setting will be set to
"No".
For impedance, check the indications on the back of the speakers or their
instruction manual.
Speaker Configuration
Allows you to change the speaker configuration such as presence or not of
each speaker, crossover frequency, and so on. Settings are automatically
configured if you use the Automatic Speaker Setup. Audio will not be output
while you are making this setting.
Subwoofer
Default Value: Yes
Set whether a subwoofer is connected or not.
"Yes": When subwoofer is connected
"No": When subwoofer is not connected
Front
Default Value: 100Hz
Select the frequency to start outputting bass frequencies (crossover
frequency) for each channel from "40Hz" to "200Hz".
"Full Band": Full band will be output.
"Front" will be fixed to "Full Band" if "Subwoofer" is set to "None",
and the bass frequencies of the other channels will be output from
the front speakers. To make the settings, refer to the instruction
manual of the speakers used.
Center
Default Value: 100Hz
Select the frequency to start outputting bass frequencies (crossover
frequency) for each channel from "40Hz" to "200Hz".
Page 62

"Full Band": Full band will be output.
"None": When no compatible speaker is connected
This setting cannot be set to "Full Band" unless "Front" is set to "Full
Band".
Surround
Default Value: 100Hz
Select the frequency to start outputting bass frequencies (crossover
frequency) for each channel from "40Hz" to "200Hz".
"Full Band": Full band will be output.
"None": When no compatible speaker is connected
This setting cannot be set to "Full Band" unless "Front" is set to "Full
Band".
Back
Default Value: None
Select the frequency to start outputting bass frequencies (crossover
frequency) for each channel from "40Hz" to "200Hz".
"Full Band": Full band will be output.
"None": When no compatible speaker is connected
In the following cases, this setting will be set to "None":
– "Surround" is set to "None".
– "Front Speakers Type" is set to "Bi-Amp".
– "Height Speakers Type" is set to other than "Not Use".
– "Powered Zone 2" is set to "Yes" and also Zone2 is set to on.
This setting cannot be set to "Full Band" unless "Surround" is set to
"Full Band".
Back ch
Default Value: 2ch
Select the number of channels of the connected surround back speaker.
"1ch": When one speaker is connected (Connect to the BACK or
HEIGHT L terminal)
"2ch": When two speakers are connected
The setting cannot be changed if "Surround" or "Back" is set to
"None".
Height
Default Value: None
Select the frequency to start outputting bass frequencies (crossover
Page 63

frequency) for each channel from "40Hz" to "200Hz".
"Full Band": Full band will be output.
"None": When no compatible speaker is connected
In the following cases, this setting will be set to "None":
– "Surround" is set to "None".
– "Front Speakers Type" is set to "Bi-Amp".
– "Height Speakers Type" is set to "Not Use".
– "Powered Zone 2" is set to "Yes" and also Zone2 is set to on.
This setting cannot be set to "Full Band" unless "Front" is set to "Full
Band".
LPF of LFE
Default Value: 120Hz
Set the low-pass filter for LFE (low-frequency effect) signals in order to
pass lower frequency signals than the set value and thus cancel
unwanted noises. The low-pass filter will be effective only on sources
with LFE channel.
"Off": Do not use this function
Double Bass
Default Value: -----
Boost bass output by feeding bass sounds from the front left and right,
and center speakers to the subwoofer.
"On": Bass output will be boosted.
"Off": Bass output will not be boosted.
The setting will not automatically be configured even if you
performed the automatic speaker setup.
If "Subwoofer" is set to "No" or if "Front" is set to other than "Full
Band", the setting will be fixed to "-----".
Speaker Distance
Set the distance from each speaker to the listening position. Settings are
automatically configured if you use the automatic speaker setup.
Unit
Default Value: feet/meters
Specify the unit of distance for configuring settings.
"feet": When setting in feet (0.1 ft to 30.0 ft, in increments of 0.1 ft)
"meters": When setting in meters (0.03 m to 9.00 m, in increments of
0.03 m)
Page 64

Front Left
Default Value: 12.0 ft/3.60 m
Specify the distance between each speaker and the listening position.
Center
Default Value: 12.0 ft/3.60 m
Specify the distance between each speaker and the listening position.
Front Right
Default Value: 12.0 ft/3.60 m
Specify the distance between each speaker and the listening position.
Surround Right
Default Value: 7.0 ft/2.10 m
Specify the distance between each speaker and the listening position.
Back Right
Default Value: 7.0 ft/2.10 m
Specify the distance between each speaker and the listening position.
This setting cannot be changed when "Powered Zone 2" is set to
"Yes" and Zone 2 is turned on.
Back Left
Default Value: 7.0 ft/2.10 m
Specify the distance between each speaker and the listening position.
This setting cannot be changed when "Powered Zone 2" is set to
"Yes" and Zone 2 is turned on.
Surround Left
Default Value: 7.0 ft/2.10 m
Specify the distance between each speaker and the listening position.
Subwoofer
Default Value: 12.0 ft/3.60 m
Page 65

Specify the distance between each speaker and the listening position.
Height Left
Default Value: 9.0 ft/2.70 m
Specify the distance between each speaker and the listening position.
This setting cannot be changed when "Powered Zone 2" is set to
"Yes" and Zone 2 is turned on.
Height Right
Default Value: 9.0 ft/2.70 m
Specify the distance between each speaker and the listening position.
This setting cannot be changed when "Powered Zone 2" is set to
"Yes" and Zone 2 is turned on.
When the speaker is set to "No" or "None" in "Speaker Configuration", the
settings for "Speaker Distance" cannot be changed:
Default values vary depending on the regions.
Level Calibration
Adjust the level of each speaker with the built-in test tone. Settings are
automatically configured if you use the Automatic Speaker Setup.
Front Left
Default Value: 0 dB
Select a value between "-12 dB" to "+12 dB". A test tone will be output
each time you change the value. Select the desired level.
Center
Default Value: 0 dB
Select a value between "-12 dB" to "+12 dB". A test tone will be output
each time you change the value. Select the desired level.
Front Right
Default Value: 0 dB
Select a value between "-12 dB" to "+12 dB". A test tone will be output
each time you change the value. Select the desired level.
Surround Right
Page 66

Default Value: 0 dB
Select a value between "-12 dB" to "+12 dB". A test tone will be output
each time you change the value. Select the desired level.
Back Right
Default Value: 0 dB
Select a value between "-12 dB" to "+12 dB". A test tone will be output
each time you change the value. Select the desired level.
This setting cannot be changed when "Powered Zone 2" is set to
"Yes" and Zone 2 is turned on.
Back Left
Default Value: 0 dB
Select a value between "-12 dB" to "+12 dB". A test tone will be output
each time you change the value. Select the desired level.
This setting cannot be changed when "Powered Zone 2" is set to
"Yes" and Zone 2 is turned on.
Surround Left
Default Value: 0 dB
Select a value between "-12 dB" to "+12 dB". A test tone will be output
each time you change the value. Select the desired level.
Subwoofer
Default Value: 0 dB
Select a value between "-15 dB" to "+12 dB". A test tone will be output
each time you change the value. Select the desired level.
Height Left
Default Value: 0 dB
Select a value between "-12 dB" to "+12 dB". A test tone will be output
each time you change the value. Select the desired level.
This setting cannot be changed when "Powered Zone 2" is set to
"Yes" and Zone 2 is turned on.
Height Right
Default Value: 0 dB
Page 67

Select a value between "-12 dB" to "+12 dB". A test tone will be output
each time you change the value. Select the desired level.
This setting cannot be changed when "Powered Zone 2" is set to
"Yes" and Zone 2 is turned on.
In the following cases, the settings for "Level Calibration" cannot be
changed:
– The speaker is set to "No" or "None" in "Speaker Configuration".
– Mute (MUTING) is set.
Page 68

3.Audio Adjust
Configure various settings related to sound, such as settings for listening to
multiplex audio or multilingual TV broadcasts and sound field settings for
listening modes.
Multiplex/Mono
Multiplex Input Channel
Default Value: Main
Set the audio channel or language to be output when playing multiplex
audio or multilingual TV broadcasts etc.
"Main": Main channel only
"Sub": Sub channel only
"Main/Sub": Main and sub channels will be output at the same time.
If multiplex audio is being played, "1+1" will be displayed when
DISPLAY is pressed.
Mono Input Channel
Default Value: Left+Right
Set the input channel to use for playing any 2 ch digital source such as
Dolby Digital, or 2-ch analog/PCM source in the Mono listening mode.
"Left": Left channel only
"Right": Right channel only
"Left + Right": Left and right channels
Dolby
Make the settings for Dolby listening mode.
Loudness Management
Default Value: On
Enable the Late Night function that allows you to enjoy surround sound
of Dolby TrueHD playback even in low volume.
"On": Use this function
Advanced Settings
Page 69

"Off": Do not use this function
Center Spread
Default Value: Off
Adjust the width of the front sound field created during Dolby Surround
listening mode playback.
"On": The sound field is spread to left and right.
"Off": The sound field is centralized.
The setting cannot be changed if "Center" is set to "None" in
"Speaker Configuration".
DTS
Make the settings for DTS Neo:6 Music listening mode.
Neo:6 Music
Center Image
Default Value: 2
Adjust the width of the sound field of the front channel when playing in
the DTS Neo:6 Music listening mode.
"0" to "5": Selecting a smaller value brings the sound field of the front
channel to the center while selecting a larger value spreads the sound
field of the front channel to left and right.
Theater-Dimensional
Make the settings for Theater-Dimensional mode.
Listening Angle
Default Value: Wide
Set the angle of the front left and right speakers relative to the listening
position when playing in the Theater-Dimensional listening mode.
"Narrow": Less than 30°
"Wide": Greater than 30°
Values recommended for "Listening Angle" are: 20° when "Narrow" is
selected and 40° when "Wide" is selected.
Page 70

4.Source Setup
Adjust the volume level difference among the multiple devices connected to
this unit, rename an input selector, or adjust the image quality. The setting
can be separately set to each input selector button. When you select a
desired input to check the video or audio, start playback of the connected
device.
IntelliVolume
IntelliVolume
Default Value: 0 dB
Adjust the volume level difference between the devices connected to
the unit. Select a value between "-12 dB" to "+12 dB". Set a negative
value if the volume of the target device is larger than the others and a
positive value if smaller.
This function is not effective in Zone 2.
Name Edit
Set an easy name to each input. The set name will be shown on the main
unit display.
Name
Default Value: Input name
1. Select a character or symbol with the cursors and press ENTER.
Repeat it to input 10 or less characters.
"Shift": Switches between upper and lower cases. (Pressing +10 on
the remote controller also toggles between upper and lower cases.)
" " " ": Moves the cursor to the arrow direction.
"Back Space": Removes a character on the left of the cursor.
"Space": Puts a space.
Pressing CLR on the remote controller will remove all the input
characters.
2. After inputting, select "OK" with the cursors and press ENTER.
The input name will be saved.
Advanced Settings
Page 71

To name a preset radio station, press TUNER on the remote controller,
select AM/FM and select the preset number.
It cannot be set if the input is "NET", "USB" or "BLUETOOTH".
Picture Adjust
Adjust the image quality. (Possible only when the video player is connected
to the HDMI OUT MAIN jack) If you adjust it by checking the video, press
ENTER. Press RETURN to return the screen to the previous status.
Wide Mode
Default Value: Auto
Set the aspect ratio.
"Auto": The aspect ratio will automatically be set according to the input
signals and the monitor output setting.
"4:3":
"Full":
"Zoom":
"Wide Zoom":
When a 3D or 4K video source is input, this setting is set to "Full".
Furthermore, for some resolutions, this setting may be disabled and
set to "Full".
Picture Mode
Default Value: Custom
An appropriate image quality setting for cinema or game will be
Page 72

selected. You can also adjust each item to obtain your favorite image
quality.
"Custom": The items from "Game Mode" to "Color Temperature" below
can be adjusted as desired.
"Cinema": When the video source is cinema
"Game": When the video source is game
"Standard": The resolution will be changed but the image quality will not
be adjusted.
"Bypass": Both the resolution and image quality will not be adjusted.
If you select "Bypass", the on-screen display function will be
disabled.
Game Mode
Default Value: Off
Change to the setting suitable for game. Also correct the delay of
video signals of the game console if any.
"On": Use this function
"Off": Do not use this function
If you select "On", the delay will be corrected but the image quality
will be lower.
The setting will be fixed to "Off" if "Resolution" is set to "4K".
Film Mode
Default Value: Auto
Change to the setting suitable for film.
"Auto": Image processing suitable for film will be executed.
"Video": "Film Mode" will not be applied and the input signals will be
processed as video source.
Edge Enhancement
Default Value: Off
Adjust the sharpness of the outline of image. Select from "Off", "Low",
"Mid" (Middle), and "High".
The setting will be fixed to "Off" if "Game Mode" is set to "On".
When the horizontal resolution of the output video is 2,000 TV
lines or more, this setting is set to "Off".
Noise Reduction
Default Value: Off
Reduces the noise of the screen. Select from "Off", "Low", "Mid"
(Middle), and "High".
The setting will be fixed to "Off" if "Game Mode" is set to "On".
Page 73

Brightness
Default Value: 0
Adjust brightness of the screen. Select a value between "-50" to
"+50".
Contrast
Default Value: 0
Adjust contrast of the screen. Select a value between "-50" to "+50".
Hue
Default Value: 0
Correct hue of the screen. Select a value between "-50" to "+50".
Saturation
Default Value: 0
Adjust saturation of the screen. Select a value between "-50" to
"+50".
Color Temperature
Default Value: Normal
Set color temperature of the screen. Select from "Warm", "Normal"
and "Cool".
In the following cases, the settings for "Picture Adjust" cannot be
changed:
– "NET", "USB" or "BLUETOOTH" is selected.
– "Monitor Out" is set to "SUB".
Press CLR on the remote controller if you return all the settings from
"Game Mode" through "Color Temperature" to their default value.
Audio Selector
Make the audio input setting. The setting can be separately set to each input
selector button. Select the input selector to configure.
Audio Selector
Default Value: –
Allows you to select prior input source.
"ARC": When giving priority to input signal from ARC compatible TV.
Page 74

The setting can be selected only when "Audio Return Channel" is set
to "Auto" and also the "TV/CD" input is selected.
"HDMI": When giving priority to input signal from HDMI jacks
The setting can be selected only when the input is assigned to the
HDMI IN jack in the "HDMI Input" setting.
"COAXIAL (Coaxial input)": When giving priority to input signal from
COAXIAL IN jacks.
The setting can be selected only when the input is assigned to the
COAXIAL jack in the "Digital Audio Input" setting.
"OPTICAL (Optical input)": When giving priority to input signal from
OPTICAL IN jacks.
The setting can be selected only when the input is assigned to the
OPTICAL jack in the "Digital Audio Input" setting.
"Analog": To always output analog audio independently of the input
signal
Fixed Mode
Default Value: Off
Specify an input signal when "HDMI", "COAXIAL (Coaxial input)", or
"OPTICAL (Optical input)" is selected for "Audio Selector". Set this
item if noise is produced, or truncation occurs at the beginning of a
track that follows a gap when playing PCM or DTS sources.
"Off": To play an analog signal when there is no digital signal.
"PCM": To fix the input source to PCM.
"DTS": To fix the input source to DTS (except for DTS-HD)
Changing "Audio Selector" changes the setting to "Off".
The setting cannot be changed when "TUNER", "NET", "USB" or
"BLUETOOTH" is selected.
Page 75

5.Listening Mode Preset
You can preset your favorite listening mode to each input. (For example, you
can always apply straight decode to the Dolby TrueHD source of Blu-ray
Disc to play it in unchanged sound field.) Select the input, signal type and
listening mode.
Although it is possible to select the listening mode during playback, the
selected mode will be reset when the unit enters standby mode.
Analog/PCM
Default Value: Last Valid
Set the listening mode for playing PCM signals of CD and analog
signals of record and cassette tape.
Mono/Multiplex Source
Default Value: Last Valid
Set the listening mode for playing Dolby Digital, AAC and other digital
signals recorded in monaural or multiplex audio.
2ch Source
Default Value: Last Valid
With this setting, you can specify the listening mode used when 2channel (2/0) stereo digital sources, such as Dolby Digital or DTS, are
played.
Dolby D/Dolby D Plus/TrueHD
Default Value: Last Valid
Set the listening mode for playing Dolby Digital, Dolby Digital Plus and
Dolby TrueHD signals.
DTS/DTS-ES/DTS-HD
Default Value: Last Valid
Advanced Settings
Page 76

Set the listening mode for playing digital audio signals in DTS and DTSHD High Resolution formats. Select the listening mode specified for Bluray or such other DTS-HD Master Audio source.
Other Multich Source
Default Value: Last Valid
Set the listening mode for playing DSD signals of AAC, DVD-Audio and
Super Audio CD that are input from HDMI IN jack.
Available listening modes vary depending on the input signal.
Setting "Last Valid" will always select the last selected mode.
Only "Analog" can be set to the "TUNER" input.
"Digital" and "TrueHD" can be set to the "NET" and "USB" inputs.
Only "Digital" can be set to the "BLUETOOTH" input.
Page 77

6.Miscellaneous
Volume Setup
Make the detailed volume setting of the unit.
Maximum Volume
Default Value: Off
Set the maximum value to avoid too high volume. Select a value from
"Off", "30" to "79".
Power On Volume
Default Value: Last
Set the volume level of when the power is turned on. Select a value
from "Last" (Volume level before entering standby mode), "Min", "1" to
"79" and "Max".
You cannot set a higher value than that of "Maximum Volume".
Headphone Level
Default Value: 0 dB
Adjust the volume level difference between speakers and headphones.
Select a value between "-12 dB" to "+12 dB".
OSD Setup
Make the setting of on-screen display function that can display the setting
menu screen, volume operation screen and the like on the TV.
On Screen Display
Default Value: On
Set whether or not to display the operation screen on the TV.
"On": The operation screen will be displayed on the TV.
"Off": The operation screen will not be displayed on the TV.
The operation screen may not be displayed depending on the input
signal even if "On" is selected. If the operation screen is not
Advanced Settings
Page 78

displayed, change the resolution of the connected device.
Language
Default Value: English
Select the on-screen display language.
Screen Saver
Default Value: 3min
Set the time to start the screen saver. Select a value from "3min",
"5min", "10min" and "Off".
Page 79

7.Hardware Setup
Tuner
AM/FM Frequency Step (North American model)
Default Value: 10kHz/200kHz
Select a frequency step depending on your area of residence.
Select "10kHz/200kHz" or "9kHz/50kHz".
When this setting is changed, all radio presets are deleted.
Default values vary depending on the regions.
AM Frequency Step (European model)
Default Value: 9kHz
Select a frequency step depending on your area of residence.
Select "10kHz" or "9kHz".
When this setting is changed, all radio presets are deleted.
HDMI
HDMI CEC (RIHD)
Default Value: Off
Setting to "On" enables the input selection link and other link functions
with HDMI connected CEC compliant device.
"On": Use this function
"Off": Do not use this function
Depending on the TV set, a link may need to be configured on the
TV.
This function is effective only when the device is connected to the
HDMI OUT MAIN terminal.
Setting to "On" and closing the on-screen menu displays the name of
the CEC-compatible components and "RIHD On" on the display.
Power consumption in standby mode may increase if "On" is set.
(Depending on the TV status, the unit will enter the normal standby
mode.)
Advanced Settings
Page 80

If you operate the MASTER VOLUME control of the unit when this
setting is set to "On" and you are listening to the audio through the
speakers of your TV, audio will be output also from the speakers
connected to the unit. If you want to output from only either of them,
change the unit or TV settings, or reduce the volume of the unit.
If abnormal operation occurs when you set the setting to "On", set it
to "Off".
When connecting a non-CEC compatible component, or when you
are not sure whether it is compatible, set the setting to "Off".
When changing this setting, turn off and then on again the power of
all connected components.
HDMI Through
Default Value: Off
You can display the video of an HDMI connected player on the TV even
if the unit is in standby mode. This setting is effective only for an input
selector to which an HDMI jack is assigned in "HDMI Input". It cannot be
set to any other input selector unless an HDMI jack is assigned to it.
"Off": The setting is disabled. Video of device connected to any jack will
not be displayed.
"BD/DVD", "CBL/SAT", "STB/DVR", "GAME", "PC", "AUX", "TV/CD",
"PHONO": Video of the device connected to the HDMI IN jack assigned
to each input will be displayed on the TV.
"Last": Video of the device connected to the HDMI IN jack assigned to
the input selector that was selected immediately before the unit enters
standby mode will be displayed on the TV.
"Auto": Video of all the devices connected to the HDMI IN jacks will be
output to the TV.
"Eco": Video of all the devices connected to the HDMI IN jacks will be
output to the TV. If you select this setting when using a CEC-compatible
TV, you can reduce the power consumption in standby mode.
"Auto" or "Eco" cannot be selected if "HDMI CEC (RIHD)" is set to
"Off".
When "HDMI Through" is enabled, the power consumption increases
even when the unit is on standby. However, the increase in power
consumption is kept to a minimum by automatically entering the
HYBRID STANDBY mode, where only the essential circuit is
operating.
When changing the setting, turn off and then on again the power of
all connected components.
Audio TV Out (MAIN)
Default Value: Off
Page 81

You can enjoy audio through the speakers of the HDMI connected TV
while this unit is on.
"On": Use this function
"Off": Do not use this function
If you select "On", set "HDMI CEC (RIHD)" to "Off."
The setting is fixed to "Auto" if "HDMI CEC (RIHD)" is set to "On".
Listening mode cannot be changed if "Audio TV Out (MAIN)" is set to
"On" and audio is being output through the speakers of the TV.
Depending on your TV set or input signal of the component, audio
may not output through the speakers of the TV even if this setting is
set to "On". In such case, audio is output from the speakers of the
unit.
If you operate the MASTER VOLUME control of the unit when "Audio
TV Out (MAIN)" or "HDMI CEC (RIHD)" is set to "On" and you are
listening to the audio through the speakers of your TV, audio will be
output from the unit. If you do not want to output audio from the unit,
change the unit or TV settings, or reduce the volume of the unit.
"Audio TV Out (MAIN)" is fixed to "Off" if "Monitor Out" is set to
"SUB".
Audio TV Out (SUB)
Default Value: Off
You can enjoy audio through the speakers of the HDMI connected TV
while this unit is on.
"On": Use this function
"Off": Do not use this function
Listening mode cannot be changed while "Audio TV Out (SUB)" is
set to "On" and audio is being output through the speakers of the
TV.
Depending on your TV set or input signal of the component, audio
may not output through the speakers of the TV even if this setting is
set to "On". In such case, audio is output from the speakers of the
unit.
If you operate the MASTER VOLUME control of the unit when "Audio
TV Out (SUB)" or "HDMI CEC (RIHD)" is set to "On" and you are
listening to the audio through the speakers of your TV, audio will be
output from the unit.. If you do not want to output audio from the unit,
change the unit or TV settings, or reduce the volume of the unit.
"Audio TV Out (SUB)" is fixed to "Off" if "Monitor Out" is set to
"MAIN".
Audio Return Channel
Default Value: -
Page 82

You can enjoy sound of the HDMI connected ARC compatible TV
through the speakers connected to the unit. To use this function, set
"HDMI CEC (RIHD)" to "On" in advance.
"Auto": When enjoying the TV sound through the speakers connected to
the unit
"Off": When not using the ARC function
Lip Sync
Default Value: On
This setting automatically corrects any desynchronization between the
video and audio signals based on data from the HDMI LipSync
compatible TV.
"On": Automatic correction will be enabled.
"Off": Automatic correction will be disabled.
InstaPrevue
Sub Window
Default Value: Multi
Change the preview display of the video input through HDMI, which will
be displayed using "InstaPrevue" in the Home menu.
Set how to display preview thumbnails.
"Multi": Displays all the thumbnails of HDMI IN1, 2, 3, 4 and FRONT at
once.
"Single": Displays each thumbnail individually.
Depending on the video source, the preview thumbnails configured
in "InstaPrevue" may not be displayed properly.
InstaPrevue
Position
Default Value: Bottom/Lower Right
Change the preview display of the video input through HDMI, which will
be displayed using "InstaPrevue" in the Home menu.
Set the position to display preview thumbnails.
When "Multi" is selected for "Sub Window": Select from "Top", "Bottom",
"Left" and "Right".
When "Single" is selected for "Sub Window": Select from "Upper Left",
"Upper Right", "Lower Left" and "Lower Right".
Depending on the video source, the preview thumbnails configured
in "InstaPrevue" may not be displayed properly.
If "Monitor Out" is set to "MAIN+SUB" and "Audio TV Out (SUB)" is set to
Page 83

"On"
– Set the audio output of the connected device to "2ch PCM".
– If the audio input is via other than HDMI, sound of the TV connected to
the HDMI OUT SUB jack will not be output.
Auto Standby
Auto Standby
Default Value: On/Off
This setting places the unit on standby automatically after 20 minutes of
inactivity without any video or audio input.
"On": The unit will automatically enter standby mode ("ASb" will light).
"Off": The unit will not automatically enter standby mode.
"Auto Standby" is appeared on the display and menu screen 30
seconds before the Auto Standby comes on.
"Auto Standby" does not work when Zone 2 is active.
Default values vary depending on the regions.
HDMI Through
Default Value: Off
Enable or disable "Auto Standby" while "HDMI Through" is on.
"On": The setting will be enabled.
"Off": The setting will be disabled.
"HDMI Through" cannot be set to "On" if "Auto Standby" is set to
"Off".
When "HDMI Through" is used, the power consumption increases even
when the unit is on standby. However, the increase in power consumption
is kept to a minimum by automatically entering the HYBRID STANDBY
mode, where only the essential circuit is operating.
Network
Make the network setting.
When LAN is configured with a DHCP, set "DHCP" to "Enable" to
configure the setting automatically. ("Enable" is set by default) To assign
fixed IP addresses to each components, you must set "DHCP" to
"Disable" and assign an address to this unit in "IP Address" as well as set
information related to your LAN, such as Subnet Mask and Gateway.
Network Standby
Default Value: Off
Page 84

You can turn on the power of the unit via network using an application
such as Onkyo Remote.
"On": Use this function
"Off": Do not use this function
When "Network Standby" is used, the power consumption increases
even when the unit is on standby. However, the increase in power
consumption is kept to a minimum by automatically entering the
HYBRID STANDBY mode, where only the essential circuit is
operating.
Wi-Fi
Default Value: Off (Wired)
Connect the unit to network via wireless LAN router.
"On": Wireless LAN connection
"Off (Wired)": Wired LAN connection
Wi-Fi Setup
Default Value: –
You can configure wireless LAN settings by pressing ENTER when
"Start" is displayed.
Wi-Fi Status
Default Value: –
The information of the connected access point will be displayed.
"SSID": SSID of the connected access point.
"Security": Security method of the connected access point.
"Signal": Signal strength of the connected access point.
"Status": Status of the connected access point.
MAC Address
Default Value: –
This is the MAC address of the AV receiver.
This value is specific to the component and cannot be changed.
DHCP
Default Value: Enable
"Enable": Auto configuration by DHCP
"Disable": Manual configuration without DHCP
If selecting "Disable", you must set "IP Address", "Subnet Mask",
Page 85

"Gateway", and "DNS Server" manually.
IP Address
Default Value: –
Displays/Sets the IP address.
Subnet Mask
Default Value: –
Displays/Sets the subnet mask.
Gateway
Default Value: –
Displays/Sets the gateway address.
DNS Server
Default Value: –
Displays/Sets the primary DNS server.
Proxy URL
Default Value: –
Displays/Sets the proxy server URL.
Proxy Port
Default Value: –
Displays/Sets the proxy server port number when you enter "Proxy
URL".
Network Check
Default Value: –
You can check the network connection.
Press ENTER when "Start" is displayed.
Wait for a while if "Network" is not shown on the screen. It will appear
when the network function is started up.
Bluetooth
Page 86

Bluetooth
Default Value: On
Select whether or not to use the Bluetooth function.
"On": Enables connection with a Bluetooth-enabled device by using the
Bluetooth function. Select "On" also when making various Bluetooth
settings.
"Off": When not using the Bluetooth function
Direct Change
Default Value: On
The input of the unit will automatically be switched to "BLUETOOTH"
when connection is made from a Bluetooth-enabled device to the unit.
"On": The input will automatically become "BLUETOOTH" when a
Bluetooth-enabled device is connected.
"Off": The function is disabled.
If the input is not switched automatically, set to "Off" and change the
input manually.
Auto Reconnect
Default Value: On
This function automatically reconnects to the Bluetooth-enabled device
connected last when you change the input selector to "BLUETOOTH".
"On": Use this function
"Off": Do not use this function
This function may not work depending on your Bluetooth-enabled
device.
Wakeup via Bluetooth
Default Value: Off
This function wakes up the unit on standby by connecting a Bluetoothenabled device.
"On": Use this function
"Off": Do not use this function
Setting to "On" increases the power consumption even when the unit
is on standby. However, the increase in power consumption is kept
to a minimum by automatically entering the HYBRID STANDBY
mode, where only the essential circuit is operating.
"Wakeup via Bluetooth" is fixed to "Off" if "Direct Change" is set to
"Off".
Page 87

Pairing Information
Default Value: -
When paring is performed, the information of the previous pairing stored
in this unit will be initialized.
Pressing ENTER when "Clear" is displayed initializes the pairing
information stored in this unit.
This function does not initialize the pairing information on the
Bluetooth-enabled device. When pairing the unit again with the
device, be sure to clear the pairing information on the Bluetooth-
enabled device in advance. For information on how to clear the
pairing information, refer to the Bluetooth-enabled device's
instruction manual.
Device
Default Value: –
Displays the name of the Bluetooth-enabled device connected to the
unit.
The name is not displayed when "Status" is "Ready" and "Pairing".
Status
Default Value: –
Displays the status of the Bluetooth-enabled device connected to the
unit.
"Ready": Not paired
"Pairing": Paired
"Connected": Successfully connected
Firmware Update
Update Notice
Default Value: Enable
Availability of a firmware update will be notified via network.
"Enable": Notify updates
"Disable": Do not notify updates
Version
Default Value: –
The current firmware version will be displayed.
Page 88

Update via NET
Default Value: –
Press ENTER to select when you want to update the firmware via
network.
You will not be able to select this setting if you do not have
Internet access or there is nothing to update.
Update via USB
Default Value: –
Press ENTER to select when you want to update the firmware via
USB.
You will not be able to select this setting if a USB storage device
is not connected or there is nothing to update in the USB storage
device.
Initial Setup
You can make the initial setup from the setup menu.
Setting is not possible if "Monitor Out" is set to "SUB".
Page 89

8.Remote Controller Setup
Remote ID
Default Value: 1
Select an ID for the unit's remote controller from "1", "2", and "3" to
prevent interference between the unit and other Onkyo components that
are installed in the same room. After changing the ID on the main unit,
change the ID on the remote controller accordingly with the following
procedure.
1. While holding down RCV, press Q SETUP for about 3 seconds until
the remote indicator lights.
2. With the number buttons, press one of 1, 2, and 3. The remote
indicator flashes twice.
Remote Mode Setup
Default Value: –
Input and register the remote controller code of other devices.
For registration of the remote control code, refer to "Operating Other
Components using the Remote Controller".
Advanced Settings
Page 90

9.Lock Setup
Setup
Default Value: Unlocked
The Setup menu will be locked to protect the settings.
"Locked": The menu is locked.
"Unlocked": The menu is unlocked.
Advanced Settings
Page 91

Functions of REMOTE MODE Buttons
You can control any other device than this unit by programming a specified
remote control code to a REMOTE MODE button of the remote controller.
Register a remote control code to a desired REMOTE MODE button and
press it to enter the remote mode that allows you to operate the
corresponding device.
* The RCV and ZONE2 buttons cannot be programmed.
Operating Other Components Using Remote Controller
Page 92

Programming Remote Control Codes
For information on the configuration and operation of Onkyo components
with RI jack, refer to "Connecting and Operating Onkyo RI Components".
Furthermore, the following REMOTE MODE buttons are preprogrammed with
remote control codes.
BD/DVD: Onkyo Blu-ray Disc/DVD player
TV/CD: Onkyo CD player
STB/DVR: Apple TV
Searching in the Setup Menu
You can search a remote control code and register it to a desired REMOTE
MODE button in the unit's Setup menu.
1. Press RCV and then press HOME on the remote controller.
2. With the cursors, select "Setup", and then press ENTER.
3. With the cursors, select "8.Remote Controller Setup" - "Remote Mode
Setup" and press ENTER.
4. With the cursors, select the remote mode for which you want to search a
remote control code and press ENTER to display the category selection
screen.
5. With the cursors, select the target category, and then press ENTER to
display the brand name input screen.
6. Select a character with the cursors and press ENTER. Repeat it to enter
the first three characters of the brand name.
Operating Other Components Using Remote Controller
Page 93

7. With the cursors, select "Search", and then press ENTER.
After a search is done, the list of possible brand names is displayed. If
the brand name list is not displayed, select "Not Listed" with the
cursors and press ENTER to return to the brand name input screen in
step 6.
8. With the cursors, select the target brand name, and then press ENTER.
Once you decided the corresponding brand name, the remote control
code of the brand and how to register it will be displayed on the TV
screen.
9. Follow the guidance displayed on the TV screen.
10.If the component can successfully be operated with its registered remote
control code, select "OK" with the cursors and press ENTER.
Only TV remote control codes can be entered for TV.
Program a remote control code in accordance with the input since
each button also works as the input selector. (For example, when the
CD player is connected to the TV/CD jack, program the remote control
code for the CD player to TV/CD)
If the component cannot be operated, select "Try Next Code" with the
cursors and press ENTER to display another code.
It is possible to operate an MHL-enabled mobile device with the unit's
remote controller by registering the code of the MHL-enabled mobile
device below to the unit's remote controller. Operation may be
unstable or incorrect depending on the mobile device used.
33101 (North American model)
32910 (European model)
Consulting the Remote Control Code List
Find the remote control code in the remote control code list.
1. Look up the Remote Control Code List for the corresponding remote
control code.
The codes in the Remote Control Code List are those known as of the
date of publication and may be changed.
Only TV remote control codes can be entered for TV.
Program a remote control code in accordance with the input since
each button also works as the input selector. (For example, when the
CD player is connected to the TV/CD jack, program the remote control
code for the CD player to TV/CD)
2. Press DISPLAY for 3 or more seconds while holding down the REMOTE
MODE button to which you want to register the remote control code.
Once you entered the input mode, the remote indicator will light.
Page 94

3. With the number buttons, enter the 5-digit remote control code within 30
seconds.
The registration is complete when the remote indicator flashes twice.
The remote indicator flashes once slowly when registering the remote
control code fails. Try the registration again.
Remapping the Colored Buttons
The colored button assignment on the AV receiver's remote controller can be
remapped to match that on the remote controller of the component whose
remote control code you programmed to REMOTE MODE. However, you will
not be able to remap the colored buttons if Zone 2 is selected.
1. Hold down the REMOTE MODE button to map and A (Red)
simultaneously until the remote indicator lights (about 3 seconds).
Remapping is possible only for codes included in the categories of the
Remote Control Code List such as DVD player and TV.
2. Within 30 seconds, press the colored buttons from left to right, in the
order you want to remap.
For example, if the colored buttons on the remote controller of the
other component are yellow, green, blue, and red from left to right,
press the buttons on the AV receiver's remote controller in that order.
Programming is complete when the remote indicator flashes twice. The
Page 95

remote indicator flashes once slowly when programming the remote
control code fails. Try the remapping again.
Pressing any other button than a colored button cancels the remap
operation.
Resetting the REMOTE MODE Buttons
You can reset the remote control code registered in the REMOTE MODE
button to its default status. This operation can be executed on a single
REMOTE MODE button.
1. Press HOME for 3 or more seconds while holding down the REMOTE
MODE button you want to reset.
The remote indicator will light.
2. Within 30 seconds, press the REMOTE MODE button again.
Reset is complete when the remote indicator flashes twice.
To reset all the remote controller settings, while holding down RCV,
press and hold down HOME until the remote indicator lights (about 3
seconds). Press RCV again within 30 seconds.
Reset is complete when the remote indicator flashes twice.
Page 96

TV operation
Press the REMOTE MODE button programmed with the remote control code
for the relevant AV component to switch the remote controller mode to that
for the AV component. Then, operate by using the corresponding buttons.
Available buttons vary depending on the product category of the component.
Operation may be incorrect or impossible depending on the product.
1 REMOTE MODE
2 , INPUT, VOL /
3 MUTING
4 CH +/-
5 GUIDE
6 / / / , ENTER
7 SETUP
8 PREV CH
9 RETURN
F AUDIO (*)
Operating Other Components Using Remote Controller
Page 97

G , , , , , , (*)
H A (Red) (*), B (Green) (*), C (Yellow) (*), D (Blue) (*)
I Number 1 to 9, 0, +10
J CLR, DISPLAY
* Not CEC-compatible.
Page 98

Blu-ray Disc player/DVD player/DVD recorder
operation
Press the REMOTE MODE button programmed with the remote control code
for the relevant AV component to switch the remote controller mode to that
for the AV component. Then, operate by using the corresponding buttons.
Available buttons vary depending on the product category of the component.
Operation may be incorrect or impossible depending on the product.
1 REMOTE MODE
2 SOURCE
3 MUTING
4 CH +/-, DISC +/-
5 TOP MENU
6 / / / , ENTER
7 SETUP
8 MENU
9 RETURN
F AUDIO (*)
Operating Other Components Using Remote Controller
Page 99

G , , , , , ,
H A (Red) (*), B (Green), C (Yellow) (*), D (Blue) (*)
I Number 1 to 9, 0, +10 (*)
J CLR, DISPLAY
* Not CEC-compatible. ("A (Red) (*), B (Green), C (Yellow) (*), D
(Blue) (*)" are intended only for "DVD player/DVD recorder")
Page 100

VCR/PVR operation
Press the REMOTE MODE button programmed with the remote control code
for the relevant AV component to switch the remote controller mode to that
for the AV component. Then, operate by using the corresponding buttons.
Available buttons vary depending on the product category of the component.
Operation may be incorrect or impossible depending on the product.
1 REMOTE MODE
2 SOURCE
3 MUTING
4 CH +/-
5 GUIDE
6 / / / , ENTER
7 SETUP
8 PREV CH
9 RETURN
Operating Other Components Using Remote Controller
 Loading...