

Page 1

C-160/D-395
C. ADJUSTMENT METHOD
[1] TABLE FOR SERVICING TOOLS.....................................................................................C-2
[2] EQUIPMENT........................................................................................................................C-2
[3] ADJUSTMENT ITEMS AND ORDER................................................................................C-2
[4] SET UP..................................................................................................................................C-2
[5] ADJUSTMENT.....................................................................................................................C-2
1. SELF TEST.......................................................................................................................C-2
2. SHUTTER ADJUSTMENT.............................................................................................C-3
3. CCD OFFSET ADJUSTMENT......................................................................................C-3
4. CCD BAD PIXEL ADJUSTMENT .................................................................................C-3
5. EFA ADJUSTMENT........................................................................................................C-3
6. FLASH ADJUSTMENT...................................................................................................C-4
7. COLOR ADJUSTMENT..................................................................................................C-4
8. WRINTING OF SERIAL NO ...........................................................................................C-4
9. DESTINATION SETUP..................................................................................................C-5
[6] ADJUSTMENT ITEMS........................................................................................................C-5
[7] EFACHART...........................................................................................................................C-6
Rev.1
C-1 Ver.1
Page 2
C. ADJUSTMENT METHOD C-160/D-395
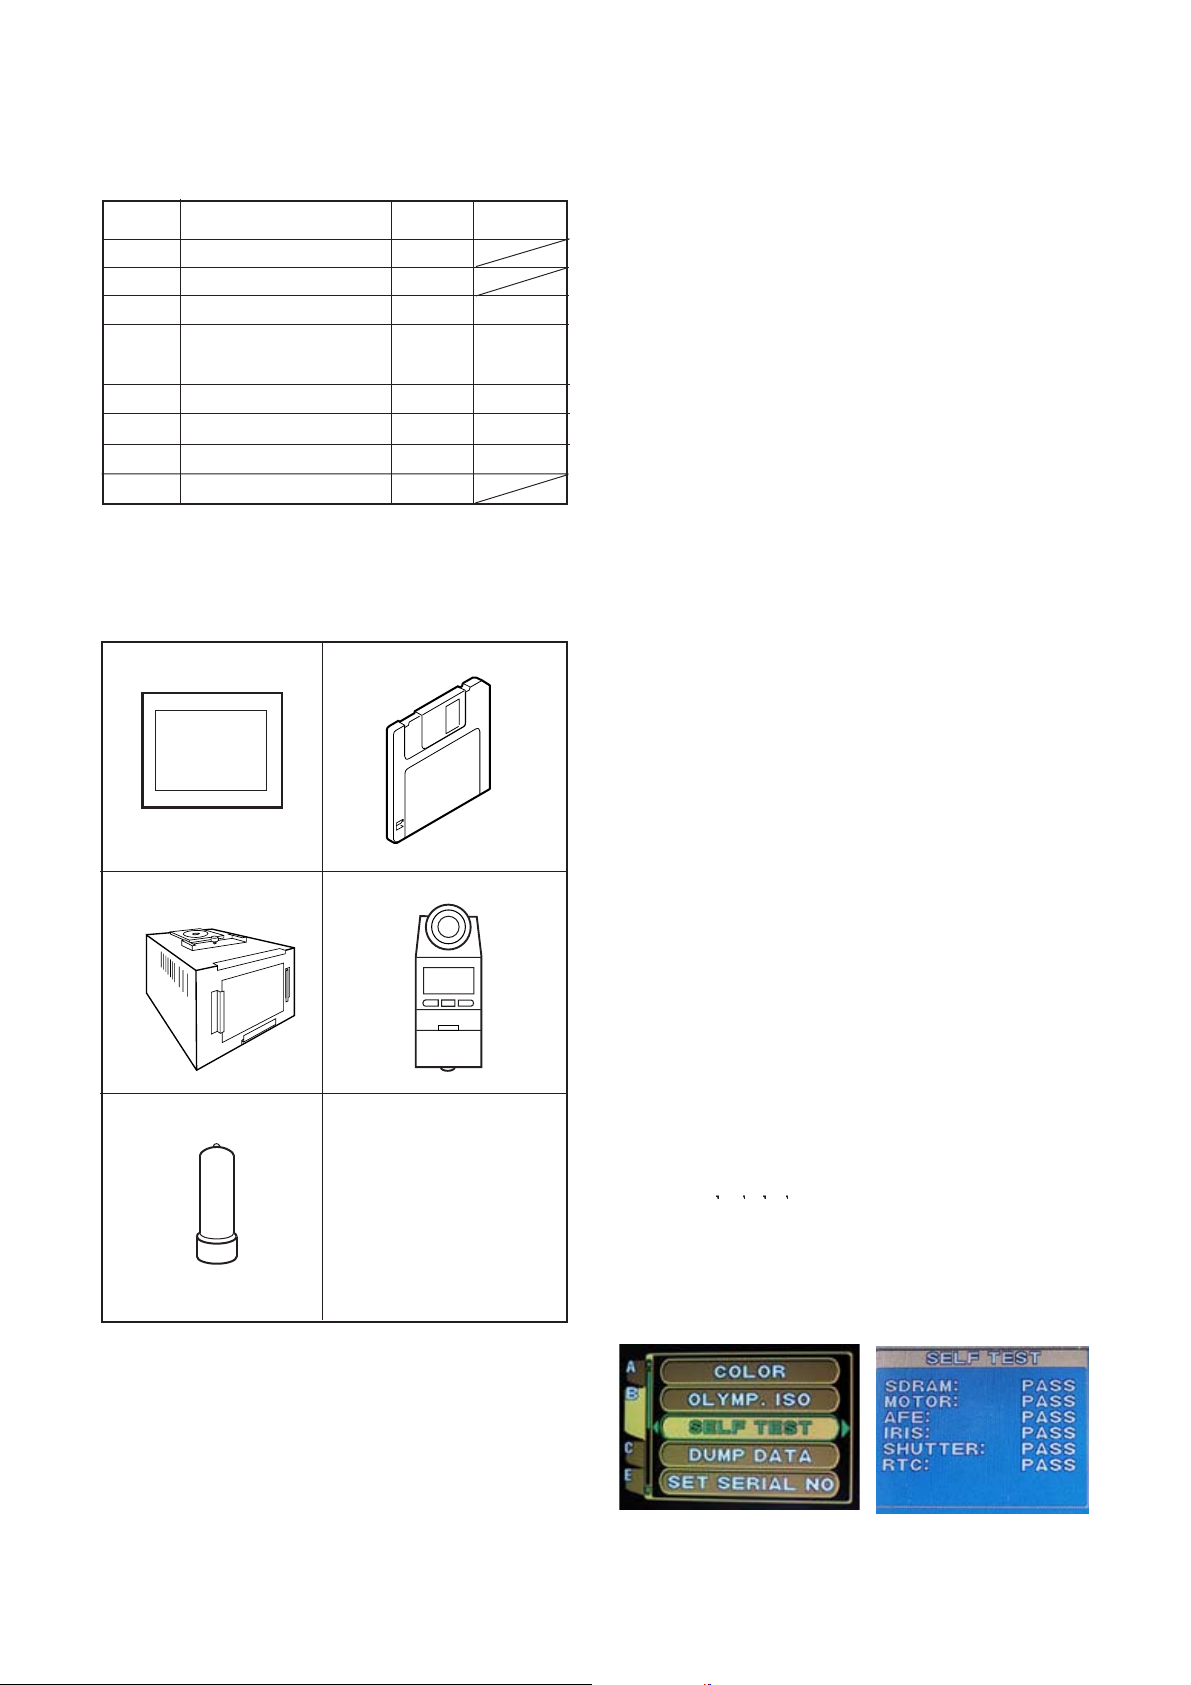
[1] Table for Servicing Tools
Ref. No. Name
J-1
E.F.A Chart
J-2
Calibration software
Pattern box (color viewer)
J-3
J-4
Reflective sheet
(18% of reflectance)
J-5
Black curtain
J-6
Note :
*We supply the data of an EFA chart by electronic data.
Print out when you adjust it.
Chroma meter KC0337
Spare lamp
J-7
AE CAMERA TESTER
J-3 Pattern box (color viewer) is 100 ± 10 VAC only.
J-1
J-3
J-6
Number
J-2
1
1
1
1
1
1
1
1 J-8
Part code
KC0336
KC0272
KC0321
KC0339
[3] Adjustment Items/Order
1. SELF-TEST
2. SHUTTER Adjustment
3. CCD OFFSET Adjusutment
4. CCD BAD PIXEL Adjustment
5. EFA Adjustment
6. FLASH Adjustment
7. COLOR Adjustment
8. Writing of SERIAL NO
9. Destination setup
Note : When LENS, CCD, Circuit Board, and other parts
are exchanged, it is necessary to adjust again.
[4] Setup
1. System requirements
Windows 98SE/ME/2000
IBM®-compatible PC with Pentium processor
CD-ROM drive
3.5-inch high-density diskette drive
USB port
8 MB RAM
Hard disk drive with at least 15 MB available
VGA or SVGA monitor with at least 256-color display
2.Creation of the Adjustment card
Copy the Adjustment software to xD-Picture Card.
Files are "menu" ,"_serial no" and "menu.dat".
3. Pattern box (color viewer)
Turn on the switch and wait for 30 minutes for ageing to
take place before using Color Pure. It is used after adjusting the chroma meter (KC0337) adjust color temperature
to 3100 ± 20 K and luminosity to 900 ± 20 cd/m
of handling the lamp and its circumference are high temperature during use and after power off for a while.
2
. Be careful
J-7
[2] Equipment
1. IBM®-compatible PC
2. USB Read/Writer
3. AC Adaptor E-7AC
[5] Adjustment
Execution of "SELF TEST" initialize the
data.
1. SELF-TEST
1. Set the xD-picture card to a camera, then open the lens
barrier.
2. Press "
3. "SELF -TEST" starts and the result appears. In case
Note : Fix to a tripod and leave an any photograpic
W T X T T
select "SELF TEST" (fig. 1), then press "X" on a button.
of Good, it displays as "pass".(fig. 2)
subjects 50cm or more.
fig.1
" on a navigation button (page B)
fig.2
Rev.1
C-2 Ver.1
Page 3

C. ADJUSTMENT METHODC-160/D-395
2. SHUTTER Adjustment
Adjusting method:
1. Set the AE CAMERA TESTER’s luminosity at LV=15.
2. Set an adjustment xD-picture card to a camera, then open the lens barrier.
3. Align the lens center with the AE CAMERA TESTER.
4. Press "
T" on a navigation button (page A) to select "CALI SHUTTER" (fig. 3),
then press "X" on a button.
5. "CALI SHUTTER" starts and the result appears.
Conditions: Turn on the switch and wait for 30 minites for ageing to take place
before using AE CAMERA TESTER.
3. CCD OFFSET Adjustment
Adjusting method:
1. Set the Pattern box’s color temperature to 3100 ± 20 K and luminosity to
2
900 ± 20 cd/m
.
2. Set an adjustment xD-picture card to a camera, then open the lens barrier.
3. Align the lens center with the Pattern box.
4. Press "W T X T" on a navigation button (page B) to select "OLYMP.ISO" (fig. 4),
then press "X" on a button.
5. "OLYMP.ISO" starts and the result appears.
Conditions: Turn on the switch and wait for 30 minites for ageing to take place
before using Pattern box.
fig. 3
fig. 4
4. CCD BAD PIXEL Adjustment
Adjusting method:
1. Set the AE CAMERA TESTER’s luminosity at LV=15.
2. Set an adjustment xD-picture card to a camera, then open the lens barrier.
3. Align the lens center with the Pattern box.
4. Press "T T T" on a navigation button (page A) to select "BAD PIXEL" (fig. 5),
then press "X" on a button.
5. "BAD PIXEL" starts and the result appears.
5. EFA Adjustment
Adjusting method:
1. Set the camera 50 cm from the EFA chart. (fig. 6)
2. Set an adjustment xD-picture card to a camera, then open the lens barrier.
3. Press "X" on a navigation button (page A) to select "EFA" (fig. 7), then press "X" on a button.
4. "EFA" starts and the result appears.
CAMERA
50cm
EFA chart
fig. 5
Rev.1
Ver.1
fig. 6
fig.7
C-3
Page 4

C. ADJUSTMENT METHOD C-160/D-395
6. FLASH Adjustment
1. Set the camera 30 cm from the Reflective sheet. (fig. 8)
2. Set an adjustment xD-picture card to a camera, then open the lens barrier.
3. Cover the camera and the Reflecive sheet by a black curtain.
4. Press "T T " on a navigation button (page A) to select "CALI FLASH" (fig. 9), then press "X" on a button.
5. "CALI FLASH" starts and the result appears.
Black curtain
CAMERA
30cm
fig. 8
7. COLOR Adjustment
1. Set the camera 30 cm from the Reflective sheet. (fig. 8)
2. Set an adjustment xD-picture card to a camera, then open the lens barrier.
3. Cover the camera and the Reflecive sheet by a black curtain.
4. Press "W
5. "CALI FLASH" starts and the result appears.
T X" on a navigation button (page B) to select "COLOR" (fig. 10), then press "X" on a button.
Reflective sheet
fig.9
fig.10
8. Writing of Serial Number
1. Set an adjustment xD-picture card to the camera and connects with personal computer and AC power supply.
2. Press "PLAY" button to turn on the camera with USB storage class mode. (Do not open the lens barrier.)
3. Open the file of "_serial no" in an adjustment xD-picuture card by NOTE PAD or some text editor.
4. Input a serial number of the camera and overwrite the file.
5. Disconnect personal computer, then open the lens barrier.
6. Press "W T X T T T T" on the navigation button to select "SET SERIAL NO" ( Page B) and press "X" on the button.
Then "SERIAL NO" appears on a LCD monitor. (fig.11-12)
7. Close the barrier cover and remove the xD-picture card.
fig. 11
fig.12
Rev.1
C-4 Ver.1
Page 5

C. ADJUSTMENT METHODC-160/D-395
9. Destination setup
1. Insert the adjustment xD-picture card to the camera and connect with AC power supply.
2. Open the lens barrier and press "W
3. Select the serial label as same alphabet as the destination indicated and press "X" on a button. (fig.13-14)
4. Close the lens barrier and take out an adjustment xD-picture card. Check the language (default) of the destination of
a camera.
* Cautions ... It will become specification change if a destination setup is mistaken.
fig. 13
Destination
SHIP J ...... JAPAN (C-160-J)
SHIP U......CANADA,USA (D-395U)
SHIP E......EUROPA (C-160-E/D-395E)
SHIP G.......OTHERS (C-160-G)
SHIP K.......KOREA (C-160-K)
SHIP CC...CHINA (C-160-C)
T T" on a navigation button (page C).
Destination
fig.14
[6] Adjustment Items
ADJUSTMENT ITEMS EXCHANGED PARTS
LENS # CCD LP MAIN BOARD
1. SELF TEST
2. SHUTTER Adjustment
3. CCD OFF SET Adjustment
4. CCDBADPIXELAdjustment
5. E.F.A Adjustment
6. FLASH Adjustment
7. COLOR Adjustment
8. Writing of SERIAL NO
9. Destination setup
Note :
Not each adjustment can be performed individually. Please be sure to adjust from "1.SELF TEST."
Rev.1
Ver.1
C-5
Page 6

C. ADJUSTMENT METHOD C-160/D-395
EFA CHART
Rev.1
C-6 Ver.1
 Loading...