

Page 1
Page 2

Contents
Replacement Supplies...................... 3
Where to Purchase ...................... 3
Part Numbers ..............................3
Measuring Usage ..............................5
Take Advantage of
OKI’s Supply Manager! .............5
Check Out OKI Managed
Services .......................................5
Control Panel Keys............................ 6
Status Panel........................................ 9
Loading Documents ........................ 10
In the ADF......................................10
On the Glass ...................................11
Sending Documents Via E-mail.... 12
Sending Documents to FTP ........... 14
Making Copies.................................. 15
Increasing Copy Count .............15
Improve Copy Quality ..............15
Changing Scale .........................16
Adjusting Density .....................16
Using the Address Book................. 17
Using Profiles.................................... 18
Loading Media.................................. 19
Paper Cassette Tray ........................19
Face Down Stacker ...................20
Face up Stacker .........................20
Multi-purpose Tray .........................21
Transparencies & Labels ...........22
Envelopes .................................. 23
Setting Power Save Mode.............. 24
Immediate Power Save Mode .........24
Set Power Save Time Interval ........24
Cleaning the ADF ............................. 25
Rollers and Pad ...............................25
Glass................................................26
Replacing the ADF Pad ................... 27
Replacing the Toner Cartridge ...... 29
Cleaning the LED heads .................32
1
59371602
Page 3

Contents
Troubleshooting............................... 33
Paper Jams......................................33
In the ADF ................................33
In the Printing unit .................... 33
Codes/Messages .............................38
Service and Support........................ 41
• For the latest information, go to
http://my.okidata.com
• For more detailed information,
see your on-line User’s Guide.
2
Page 4
Replacement Supplies
Where to Purchase
• Consult the dealer where you
purchased your MFP
• Consult an Oki Data Authorized Sales
or Service Dealer. For the nearest
dealer, call 1-800-654-3282.
• U.S., Puerto Rico, Guam, U.S. Virgin
Islands: Order on the Internet
www.okidata.com.
• U.S. only: Order toll-free at
®
1-800-654-3282, using VISA
®
MasterCard
or AMEX®.
,
• Check office supply catalogs.
Part Numbers
ADF Pad................................ 43103001
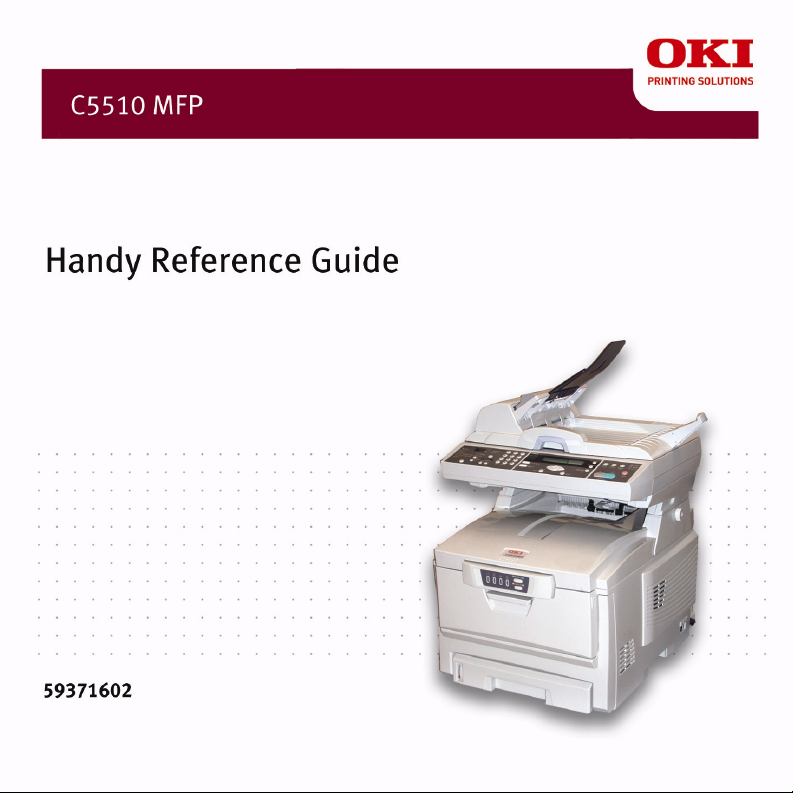
Toner Cartridges, Type C6
STANDARD
Color OKI Part #
Black ..................................... 42804504
Cyan ...................................... 42804503
Magenta................................. 42804502
Yellow ................................... 42804501
HIGH CAPACITY
Black ..................................... 42127404
Cyan ...................................... 42127403
Magenta................................. 42127402
Yellow ................................... 42127401
3
Page 5
Replacement Supplies
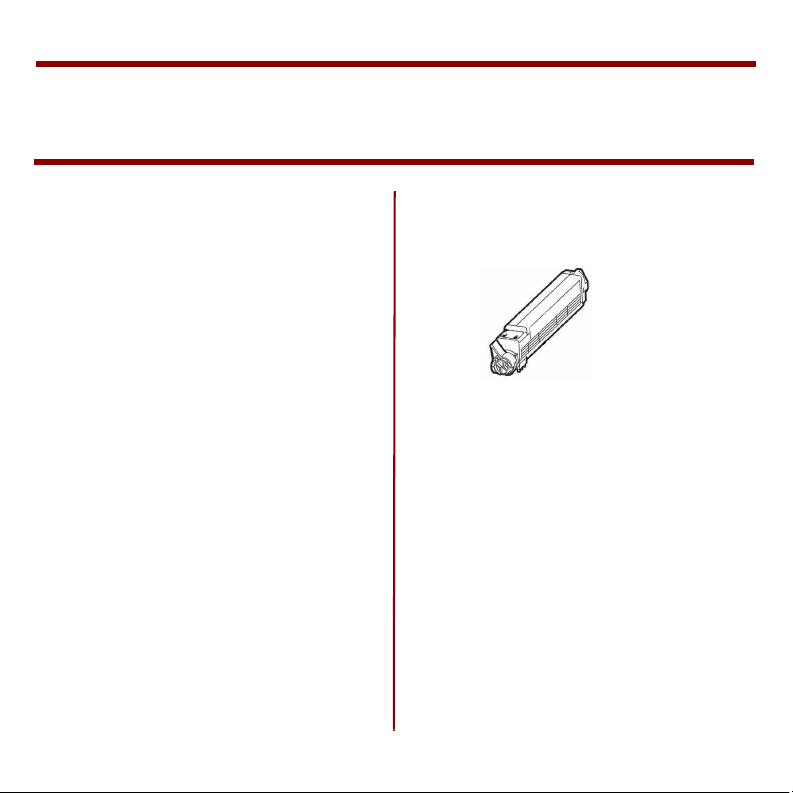
Image Drums, Type C6
Color OKI #
Black ..................................... 42126604
Cyan ...................................... 42126603
Magenta................................. 42126602
Yellow ................................... 42126601
Other Consumables
Consumable Oki #
Fuser .......................... 42625501, 120V
................... 42625502, 230V
Transfer Belt ......................... 42158711
4
Page 6

Replacement Supplies
Measuring Usage
Take Advantage of
OKI’s Supply Manager!
• Calculates your usage based on
information you provide.
• Sends you an E-mail when it’s time to
reorder.
To register, go to
www.okidata.com.
Check Out
OKI Managed Services
A document output analysis of your
business which could save you up to
30% on your printing costs.
Call 1-888-654-6264 today to schedule
an appointment with an OKI Managed
Services project manager.
Or, for more information, go to
www.okidata.com.
5
Page 7
Control Panel Keys
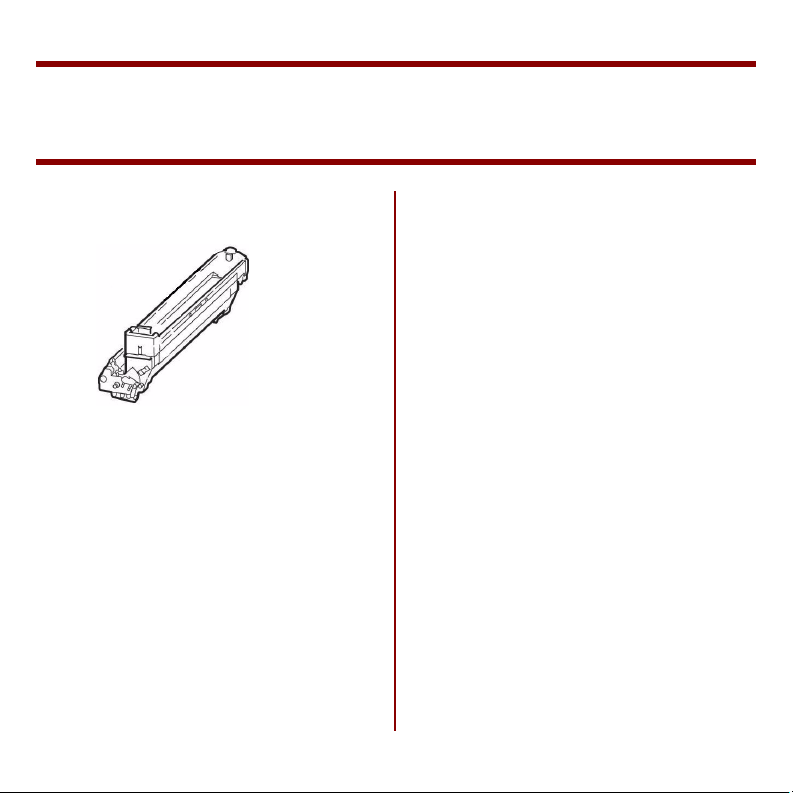
Copy Area
1. Zoom - Increase or decrease scaling
in 1% increments up to 400% and
down to 25%.
2. Copy Quality - Select copy quality.
3. Copy Density - Change the density
level.’’
4. Copy Count - Enter copy quantity or
e-mail address.
Display and Function Area
5. Copy Count - Indicates the number
of copies selected.
6. Copy Mode - Select copy mode.
7. Scan Mode - Select the Scan mode
(also the default working mode).
6
Page 8

Control Panel Keys (cont’d)
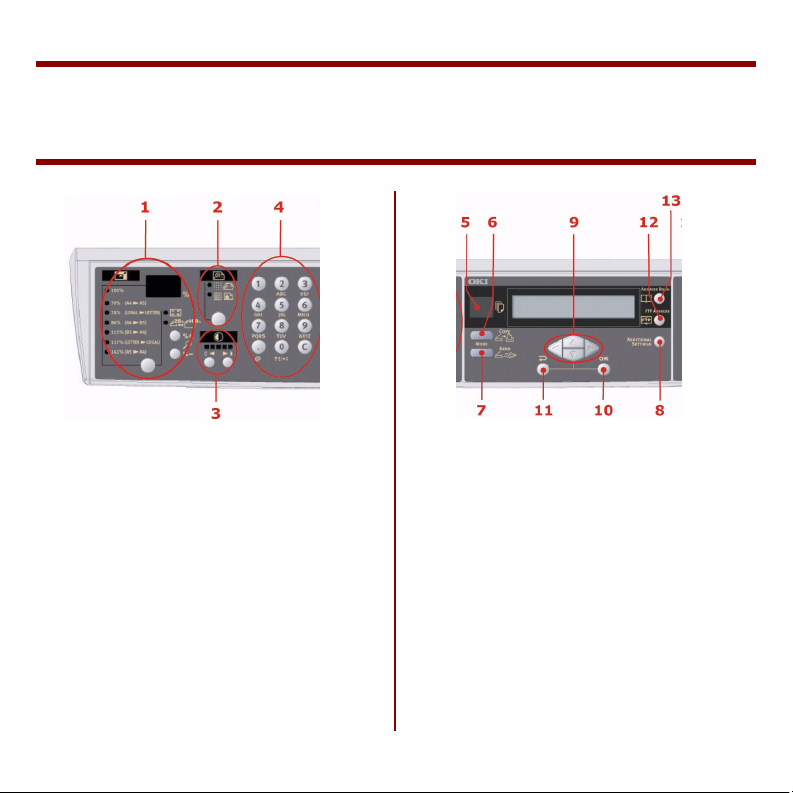
8. Additional Settings - Execute
additional settings of "Copy" and
"Scan" modes. (The settings are
available only for three minutes.
After three minutes, the settings
automatically return to the default
value).
9. Up/Down/Left/Right Keys - Move
the cursor in the display up/down/
left/right. The up/down keys
switches function indication. The left
key returns to the upper level of the
setting. The right key goes to the
lower lever of the setting.
10. OK/Select - Select and confirm
current setting selections.
11. Cancel/Return - Cancel selections
and go back to the top level of the
setting. The key cancels any previous
input.
12. FTP Address - Indicates the existing
FTP address for the "Scan to" mode.
13. Address book - Indicates the
existing mail address for the "Scan
to" function. This key is only
available in the "Scan to" mode.
7
Page 9

Control Panel Keys (cont’d)
Start and Other Keys
14. Menu - Access the menu to set up
the MFP.
15. Reset - Change the scanner to the
factory default settings.
16. Power save - Press once to go to
"sleep" mode (continuous press is
invalid).
17. Power LEDs
Power - Lights to indicate "power on
and ready".
Alarm - Lights to indicate error
conditions.
Sleep - Lights to indicate power save
mode.
18. Mono - Select to send or copy
document(s) in black/white.
19. Color - Select to send or copy in
color.
20. Stop - Select to stop all operations
(display shifts to stand-by screen for
each function). Does not affect
settings.
8
Page 10
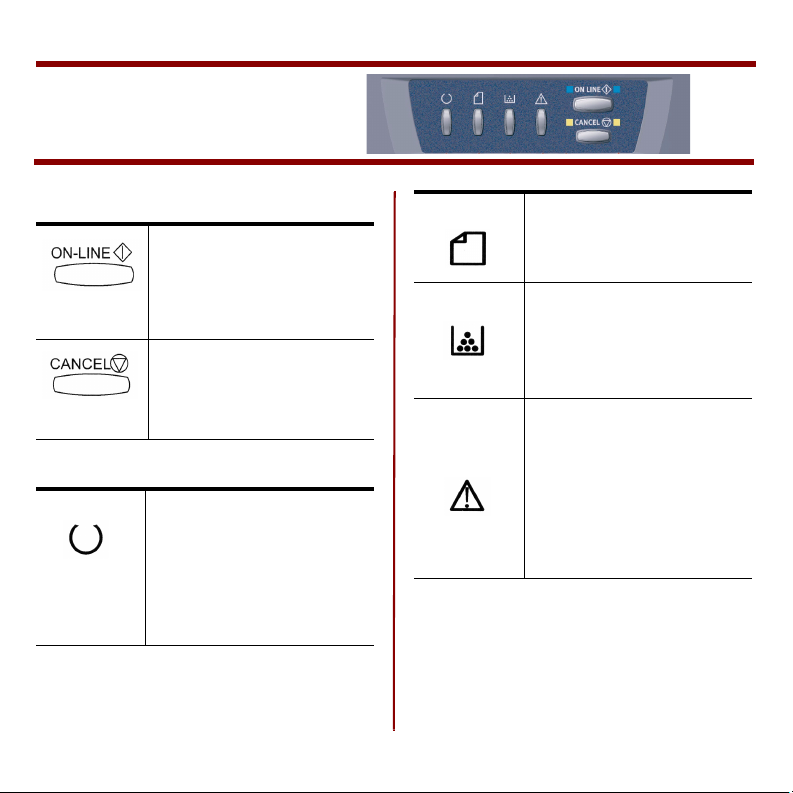
Status Panel
SWITCH Operation.
1 sec press: Start paper
supply in MP Tray; recover
from memory overflow error
2 sec press: Print Status Page*
5 sec press: Print Demo Page
2 sec press: Job Cancel
STATUS Lights:
POWER/ONLINE/OFFLINE
Warm-up, Data Printing,
temperature/density adjusting
2 sec blink: off-line error is
(Green)
occurring
3 sec blink: job cancelled
4 sec blink: Power Save Mode
PAPER OUT WARNING
Empty Tray
Manual Feed Request
CONSUMABLE LIFE
WA R N IN G
Example: Order toner (See
scanning unit display panel for
specific toner cartridge.)
ALARM
1 sec blink: Error, press ONLINE or CANCEL to continue
printing.
2 sec blink: Cover open, Paper
Jam, Replace consumable
3 sec blink: serious error, call
service.
* The Status Page provides details of printer
settings and status information.
9
Page 11
Loading Documents
The MFP can scan/copy/send documents
either in the ADF (Automatic Document
Feeder) or on the glass. The ADF can
hold up to 50 pages.
Using the ADF
Make sure your documents meet the
following specifications:
• Size: 4.5" x 5.5" (114.3 x 139.7mm)
to 8.5" x 14" (215.9 x 355.6mm)
• Weig h t : 16 to 28 lb. (9.002" to
0.006" sheet thickness)
• Document(s) should be: square or
rectangular and in good condition
(not fragile or worn); free of curl,
wrinkle, tears, wet ink, or punch
holes, staples, paper clips, paper
sticky notes.
For irregular type of documents, use the
glass or make a copy first and then
transmit the copy.
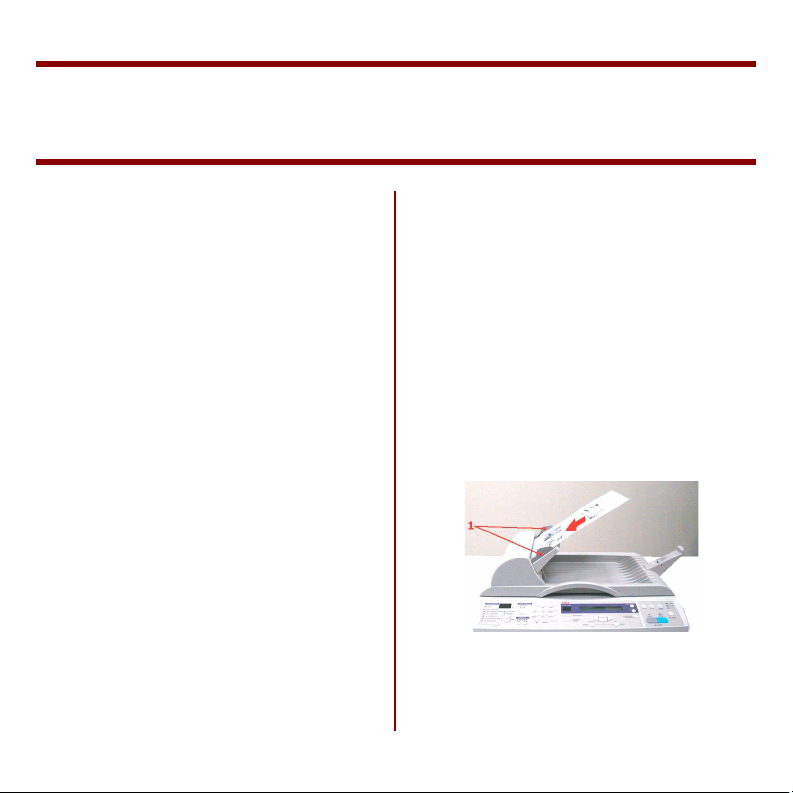
In the ADF
1. Make sure your document is free of
staples, paper clips and is not torn.
2. If your have multiple pages, fan your
documents to avoid occasional paper
jams. The ADF holds up to 50 pages
sheets of 20 lb. paper.
3. Place your document with the text
FACE UP in the ADF and make sure
that the top of each page feeds in
first.
4. Adjust the paper guides (1) to center
the document in the ADF.
10
Page 12
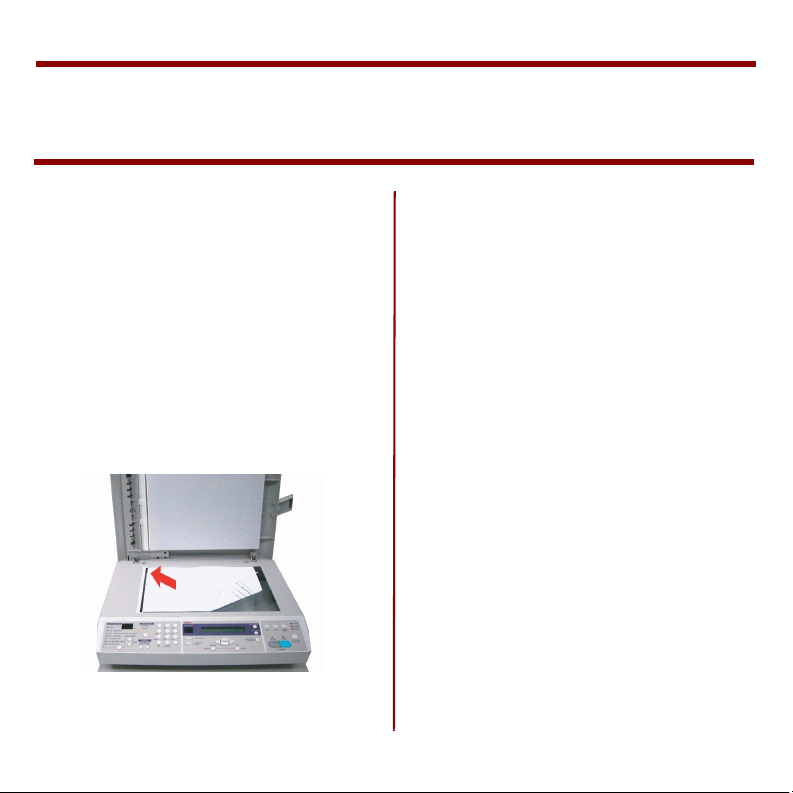
Loading Documents (cont’d)
On the Glass
If you need to scan/copy/send pages
from books, newspaper clippings, or
paper with wrinkles, use the glass.
1. Open the document cover to reveal
the glass.
2. Place your document with the text
FACE DOWN on the glass and align
the document(s) in the upper-left
corner.
3. Close the document cover.
Keep the glass clean and do not leave
documents on it.
11
Page 13
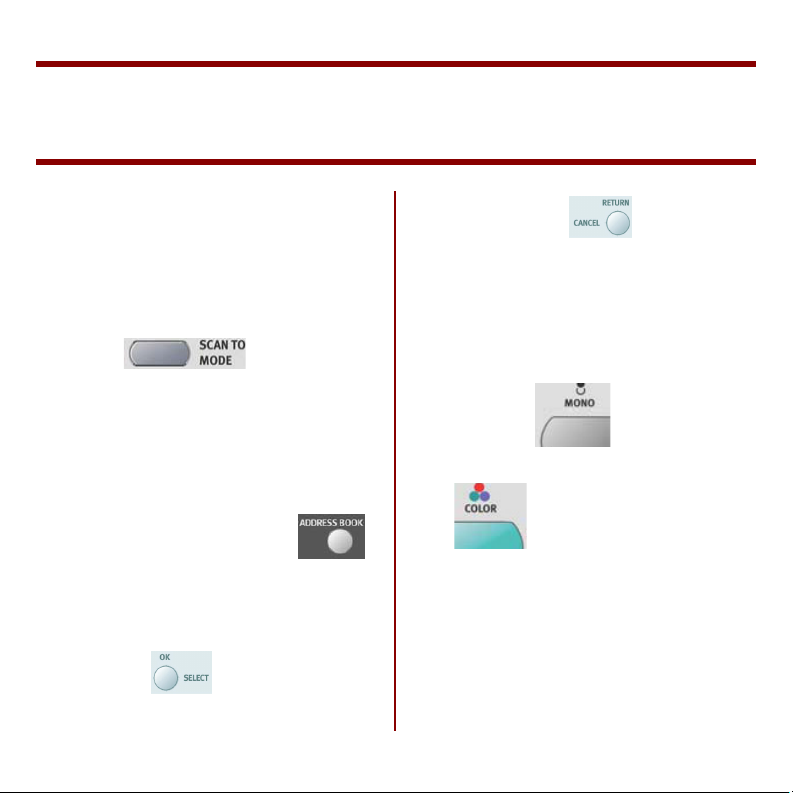
Sending Document(s) Via E-mail
Note: An Address Book is created using the
Homepage web tool or Network Setup Tool
(NST). See “Using the Address Book” on
page 17.
1. Place document(s) with text face UP
in the ADF or DOWN on the glass.
2. Press on the
control panel. The e-mail screen
appears. (Press the down key to
display next item.)
3. In the “To” field, enter the
destination e-mail address from the
4. Enter or select CC and BCC address
5. Press the to send your
address. Press to return to
the e-mail main screen.
as well, if necessary. Enter the
subject of your e-mail. If not entered,
“Default Subj.” displays.
document(s) in black and white, or
Address Book by pressing
on the control panel. Use the up and
down arrows on the control panel to
select multiple e-mail addresses and
press the button. Or simply
type the initial letter of the e-mail
to send your document
in color.
Note: If you make a mistake, press STOP to
cancel the operation.
If you stop typing in the From, Subject, To, CC,
or BCC fields for 3 minutes, the display clears
what you have typed.
12
Page 14

Sending Document(s) Via E-mail (cont’d)
To send scanned document(s) to multiple e-mail
addresses, add a comma between each address.
To scan a multi-page document and convert it
to a single image file, choose MTIFF or PDF
(default) output file.
13
Page 15

Sending Document(s) to FTP
Profiles are created using the Homepage web
tool or Network Setup Tool (NST). See “Using
Profiles” on page 18.
1. Place your document(s) with text
face UP in the ADF or face DOWN
on the glass.
2. Press and
button on the Control Panel. The
display prompts the profile filing
screen.
3. Choose the required profile (filing
destination) and press .
4. Press to send your
document(s) in black and white, or
to send your document(s)
in color.
14
Page 16

Making Copies
1. Place your document with text face
UP in the ADF or face DOWN on the
glass.
2. Press to copy your
document in black and white, or
1. Press to prompt the
Copy screen.
2. Enter the desired copy count using
the numeric keypad. The display
shows the copy count.
Improve Copy Quality
to copy your document in
color.
Note: If you make a mistake, press STOP to
cancel the operation.
Increasing Copy Count
To make more than one copy:
The machine is preset to Speed mode.
Change to Fine mode to improve copy
quality.
1. Press to prompt the
copy screen.
2. Click the Copy Quality button
to choose Fine.
15
Page 17

Making Copies (cont’d)
Changing Scale
To enlarge your original up to 400% or
reduce it down to 25%:
1. Press to prompt the
Copy screen.
1
2
2. Press Variable (1), then press ▲ or ▼
to enlarge or reduce your document
in 1% increments. Or, press the
Select button (2) to choose a preset
value.
Adjusting Density
Adjust quality by changing your original
document to a lighter or darker contrast.
Press the “Copy” button on the panel to
prompt the Copy screen. Press the
Density button
to choose your desired density.
Note: After you have completed copying, the
machine will return to the preset value.
16
Page 18

Using the Address Book
Note: The address book cannot be assigned on
the control panel.
Create an address book, by entering
either the machine’s web page or the
Network Setup Tool.
Note: Requires a password.
Using the Homepage Web Tool
1. Type the Address of the MFP in the
URL field of your browser and then
press Enter.
2. Click Address Book Manager and
follow the instructions.
Using the Network Setup Tool
1. Install the Network Setup Tool (Oki
MFP Management) from the
supplied CD.
2. To start it, from the Taskbar, click
Start > Settings > OKI MFP Network
Setup Tool.
3. Click Address Book Manager and
follow the instructions.
17
Page 19

Using Profiles
A profile contains a list of filing
parameters such as your filing protocol,
directory, file name, and other scanner
parameters. You can create up to 20
profiles. To create a filing profile:
Note: Requires a password.
Using the Web Page
1. Type the Address of the MFP in the
URL field of your browser and then
press Enter.
2. Click Profile Manager and follow the
instructions.
Using the Network Setup Tool
1. Install the Network Setup Tool (Oki
MFP Management) from the
supplied CD.
2. To start it, click Start > Settings >
OKI MFP Network Setup Tool.
3. Click Profile Manager and follow the
instructions.
18
Page 20

Loading Media
Paper Cassette Tray
For more information, see the on-line
User's Guide.
Recommended Paper weight=17 to 32 lb.
1. Remove the paper Tray from the
printer.
2. Fan the paper to be loaded.
3. Load the paper.
4. Adjust the rear stopper (1) and paper
guides (2).
5. Replace the paper tray.
Letterhead
Load paper face down, top edge towards
the front of printer unit.
19
Page 21

Loading Media
Paper Stackers
Face Down Stacker
The face down stacker is on the top of
the printer unit
> Holds up to 250 sheets of 20 lb.
standard paper
> Feeds documents face down, last
page on top.
Face up Stacker
1
2
The face up stacker (1) at the rear of the
printer unit should be opened and the
tray extender (2) pulled out when
required for use.
The face up stacker
> Feeds documents face up
> Holds up to 100 sheets of 20 lb.
standard paper,
> Handles stocks up to 54 lb.
> Always use this stacker and the
multi-purpose feeder for paper
stock heavier than 32 lb. (120g/m
20
2
.)
Page 22

Loading Media
Multi-purpose Tray
Recommended paper weight = 20-54 lb.
1.
2.
3.
4. Print side up.
Letterhead
Load letterhead printed side up and top
edge into the printer.
Always use the face up (rear) stacker for
heavy paper (card stock etc.).
21
Page 23

Loading Media
Multi-purpose Tray (cont’d)
Transparencies & Labels
Envelopes, transparencies and labels
must be able to withstand 446°F.
(230°C) for 0.2 seconds, including
mechanical pressures to 25 psi (1.8 kg/
cm2.
Insert transparencies and labels print
side up.
> Sizes: Letter, A4
> Feed Tray: MP Tray only
> Exit Tray: Rear Exit only
> Type Tranparencies: 3M CG3720
> Type Labels:
Letter size carrier- Avery 5161
White
A4 size carrier - Avery 7162,
7664, 7666 White
22
Page 24

Loading Media
Multi-purpose Tray (cont’d)
Envelopes
> Size: COM-10
> Feed Tray: MP Tray only
> Exit Tray: Rear Exit only
Flap side down, aimed into the printer.
23
Page 25

Setting Power Save Mode
Immediate Power Save
Mode
Press to immediately enable
power save mode.
Set Power Save Time
Interval
1. Press Menu. The printer menu
displays.
2. Use the ∇ key to scroll down to
Management. Press SELECT.
3. Enter the password.
4. Press ∇ key
Saving
5. Press ∇ key το select the time
interval. Choices: Off, 5, 15, 30, 60,
240 minutes.
6. Press SELECT.
7. Press CANCEL to save the setting
and exit the menu mode.
24
to scroll down to Power
. Press SELECT.
Page 26

Cleaning the ADF
Rollers and Pad
If documents are not feeding smoothly
through the ADF, please follow these
cleaning procedures.
1. Moisten a cotton swab with isoropyl
alcohol (95%).
2. Open the ADF front cover to the
left.
3. Wipe the feeding roller (1). Move
the swab from side to side while
rotating the rollers. Be careful not to
snap or damage the pick springs (2).
4. Wipe the pad (3) in the direction
from top to bottom.
1
2
3
5. Close the ADF cover.
25
Page 27

Cleaning the ADF
Glass
To ensure optimum image quality and
performance, clean the glass
occasionally to remove dust or any toner
particles.
1. Open the document cover.
2
1
2. Dip a soft clean cloth with isopropyl
alcohol (95%).
3. Gently wipe the document glass (1)
and the white sheet beneath the
document cover (2).
4. Close the document cover.
26
Page 28

Replacing the ADF Pad
After scanning approximately 100,000
pages through the ADF, the pad module
may be worn out cause feeding
problems.
Note: One replacement pad is included with
your unit. To order additional pads see
"Replacement Supplies Purchasing
Information."
1. Open the ADF front cover to the left.
2. Press white plastic arms on the sides
of the ADF snap-in pad module
inward and pull the pad out.
3. Take the new ADF pad module from
it’s box.
27
Page 29

Replacing the ADF Pad (cont’d)
4. Press both arms of the new pad
module inward.
5. Place the pad into the holder until it
snaps into place.
28
Page 30

Replacing the Toner Cartridge
CAUTION
To avoid toner waste and possible
toner sensor errors, do not change
the toner cartridge(s) until "TONER
EMPTY" is displayed.
Note: If you do spill any toner, lightly brush it
off. If necessary, use a cool, damp cloth to
remove any residue. Do not use hot water or
solvents, which will make stains permanent.
Switch off the machine and allow the
fuser to cool for about 10 minutes before
opening the cover.
1. Press the cover release button and
open the top cover fully.
2. Note the positions of the four toner
cartridges.
3. Pull the colored toner release lever
(1) on the cartridge to be replaced
fully towards the front of the
machine, in the direction of the
arrow.
1
WARNING!
If the machine has been powered
on, the fuser may be hot. This area
is clearly labeled. Do not touch.
29
Page 31

Replacing the Toner Cartridge (cont’d)
4. Lift the right-hand end of the
cartridge (1) and draw it to the right
and out (2).
2
5. Dispose of the old cartridge
responsibly, using the package that
the new cartridge came in.
6. Remove the new cartridge from its
packaging.
7. Gently shake the new cartridge from
end to end several times to loosen
and distribute the toner.
1
30
Page 32

Replacing the Toner Cartridge (cont’d)
8. Remove the wrapping material and
peel off the adhesive tape.
9. Holding the cartridge by it top center,
insert the left end (1) into the image
drum first, pushing it against the
spring on the drum unit, then lower
the right end onto the image drum
(2).
10. .Press gently down on the cartridge
to ensure it is firmly seated.
11. Push the colored lever (1) towards
the rear of the machine to lock the
cartridge in place.
31
Page 33

Replacing the Toner Cartridge (cont’d)
Cleaning the LED heads
Clean the LED heads
> whenever you install a new toner
cartridge.
> if the printed sheets show signs of
faded images, white stripes, or
blurred letters.
1. Open the printer top cover.
2. Use the lens cleaner supplied with
the toner cartridges (or a clean, soft
cloth) to gently clean the LED head.
3. Close the top cover.
32
Page 34

Troubleshooting
Paper Jams
In the ADF
1. Gently open the ADF front cover to
the left.
2. Carefully pull the paper out of the
ADF unit.
3. Close the ADF front cover.
In the Printing unit
1. If a sheet is well advanced out of the
top of the printer, grip it and pull
gently to draw it fully out. If it does
not remove easily, do not use
excessive force. It can be removed
from the rear later.
2. Press the cover release and open the
printer’s top cover fully.
WARNING!
If the printer has been powered
on, the fuser will be hot. This
area is clearly labeled. Do not
touch.
3. Note the position of the four
cartridges as you will need to remove
them.
33
Page 35

Troubleshooting
Paper Jams (cont’d)
4. Lift the black image drum, complete
with its toner cartridge, up and out of
the printer.
5. Place the cartridge on a piece of
paper to prevent toner leak marks and
protect the green drum surface.
6. Repeat removal procedure for each
of the remaining toner/image drum
units.
CAUTION
The green image drum surface of the
cartridge is very delicate and light
sensitive. Do not touch it and do not
expose it to normal room light for
more than 5 minutes.
7. Look into the printer to check for any
sheets of paper on any part of the belt
unit.
3
2
1
34
4
Page 36

Troubleshooting
Paper Jams (cont’d)
(a)To remove a sheet with its leading
edge at the front of the belt (1),
carefully lift the sheet, pull it forward
into the drum cavity and withdraw it.
(b)To remove a sheet from the central
area of the belt (2), carefully separate
the sheet from the belt surface and
withdraw the sheet.
3
2
1
(c)To remove a sheet just entering the
fuser (3), separate the trailing edge of
the sheet from the belt, push the fuser
pressure release lever (4) towards the
front and down to release the fuser’s
grip. Withdraw the sheet through the
drum cavity area. Then allow the
pressure release lever to rise again.
Note: If the sheet is well advanced into
the fuser (only a short length is still
visible), do not attempt to pull it back.
Follow the next step to remove it.
4
8. Starting with the cyan image drum
(1) unit nearest the fuser, replace the
four image drum units making sure
to locate them in the correct order.
35
Page 37

Troubleshooting
5
6
Paper Jams (cont’d)
9. Lower the top cover but do not press
down to latch it closed yet. This will
protect the drums from excessive
exposure to room light.
10. Open the rear exit tray (5) and check
for a sheet of paper in the rear path
area (6). Pull out any sheets found.
If the sheet is low down in this area
and difficult to remove, it is probably
still gripped by the fuser. Raise the
top cover, reach around and press
down on the fuser pressure release
lever (7).
7
11. If you are not using the rear exit tray,
close it once jammed paper is
removed.
12. Lift the front cover release and pull
open the front cover.
36
Page 38

Troubleshooting
Paper Jams (cont’d)
13. Check inside the cover and remove
any jammed sheets. Close the cover.
14. Pull out the paper tray and ensure
that all paper is stacked properly, is
undamaged, and that the paper
guides are properly positioned
against the edges of the paper stack.
15. Close the top cover being sure the
cover latches are closed.
37
Page 39

Troubleshooting
Codes/Messages
N
OTES
: F=
FLASHING
, 1=ON, X=
OFF
SCANNING
UNIT DISPLAY
Paper Jam - X
Open Top Cover
Printing...
Paper Size Error
Tray X E m p ty
Load YY in Tray X
Printing... FFXX Manual Feed
X Toner Empty
Replace X Toner
40959 (K)
40960 (Y)
40961 (M)
40962 (C)
Printer Error
Check the Printer
PRINTING
UNIT OP
PANEL
FFXF Paper Jam Remove jammed paper from the
FFXX Paper Size
11XX Tray Empty Load YY size paper in appropriate tray.
FXFF Toner Empty Replace appropriate toner cartridge
FXFF Tone r S en s o r
MFP STATUS SOLUTION
Error
Request
Error
38
appropriate X location.
Press On Line button or cancel job and
ensure that the paper size in the print
job matches paper in tray. Power cycle
printer.
Press On Line.
(K,Y,M or C).
Check that toner cartridge indicated is
seated in the drum unit correctly and
the lock lever is pushed all the way
forward to back of printing unit.
Page 40

Troubleshooting
Codes/Messages (cont’d)
SCANNING
UNIT DISPLAY
40033
Printer Error
Check the Printer
40034 (Y)
40035 (M)
40036 (C)
Printer Error
Check the Printer
40992
Printer Error
Check the Printer
40037
Printer Error
Check the Printer
Failed t o Dete ct
Printer
PRINTING
UNIT OP
PANEL
FXFF Belt lock or
FXFF Image drum
FXFF Fuser unit is
FXFF Transfer belt is
N/A Failed to detect
MFP STATUS SOLUTION
black drum
installation
problem
not installed
correctly.
not installed
correctly.
not installed
correctly.
printer.
39
Check that transfer belt locks are in
locked position. Check that black drum
is properly installed.
Check that the image drum indicated
is properly installed and fully seated.
Reseat the Fuser Unit, make sure it is
locked in place.
Reseat the transfer belt, make sure it
is locked in place.
Power OFF printing and scanning units.
Check that the USB cable is connected
properly. Power ON printing unit, wait
until initialized, then power ON
scanning unit.
Page 41

Troubleshooting
Codes/Messages (cont’d)
SCANNING
UNIT DISPLAY
Failed t o get
printer
information.
Set Supported
Paper Size
40994
Printer Error
Check Printer
30114
Printer Error
Check Printer
PRINTING
UNIT OP
PANEL
N/A Communication
N/A Incorrect paper
1XXF Memory
1XXF Invalid data
MFP STATUS SOLUTION
between
scanner and
printer failed.
size set in
printer menu.
overrun
received
40
Power OFF printing and scanning units.
Check that the USB cable is connected
properly. Power ON printing unit, wait
until initialized, then power ON
scanning unit.
Only letter/legal paper sizes are
supported when making copies. Set
the appropriate size in the tray and
printer menu.
Reduce the amount of copies being
sent at one time.
Press the On Line button to cancel job.
Error occurs when the printer receives
an unsupported command.
Page 42

Service and Support
First...
Consult the store where you purchased
your MFP.
Additional OKI Resources
Available 24 hours a day, 7 days a
week:
> visit our Web site at
www.okidata.com
> Visit my.okidata.com
> Call 1-800-654-3282
41
Page 43

OKI is a registered trademark of Oki Electric Industry Company, Ltd.
3M is a trademark or registered trademark of 3M.
AmEx is a registered trademark of American Express Co.
Avery is a registered trademark of Avery Dennison Corporation.
HammerMill is a registered trademark of HammerMill.
MasterCard is a registered trademark of MasterCard International, Inc.
VISA is a registered trademark of Visa.
Windows is either a registered trademark or trademark of Microsoft Corporation
in the United States and other countries.
Xerox is a trademark of Xerox Corporation.
 Loading...