


PaperPort 5.0 Software
User’s Guide
FOR MACINTOSH

COPYRIGHT INFORMATION
PaperPort 5.0 Software for Macintosh. Copyright ©1997 Visioneer, Inc. All rights reserved.
Reproduction, adaptation, or translation without prior written permission is prohibited, except as allowed under the copyright laws.
AnyPort, AutoFix, AutoLaunch, FormTyper, MicroChrome, PaperEnable, PaperLaunch, PaperPort, PaperPort Deluxe, PaperPort ix, PaperPort Links, PaperPort
mx, PaperPort PowerBar, PaperPort vx, PaperPortation, PaperPort Strobe, ScanDirect, SimpleSearch, SharpPage, and Visioneer are trademarks of Visioneer, Inc.
PaperPort, Paper-driven, and the Visioneer logo are registered trademarks of Visioneer, Inc.
Apple, the Apple logo, AppleLink, LaserWriter, and Macintosh are registered trademarks of Apple Computer, Inc. Finder and QuickDraw are trademarks of A pple
Computer, Inc. All other products mentioned herein may be trademarks of their respective companies.
Information is subject to change without notice and does not represent a commitment on the part of Visioneer, Inc. The software described is furnished under a
licensing agreement. The software may be used or copied only in accordance with the terms of such an agreement. It is against the law to copy the software on any
medium except as specifically allowed in the licensing agreement. No part of this document may be reproduced or transmitted in any form or by any means,
electronic or mechanical, including photocopying, recording, or information storage and retrieval systems, or translated to another language, for any purpose other
than the licensee’s personal use and as specifically allowed in the licensing agreement, without the express written permission of Visioneer, Inc.
Part Number: 05-0228-000
Photo Credits: Tony Martin
Restricted Rights Legend
Use, duplication, or disclosure is subject to restrictions as set forth in contract subdivision (c)(1)(ii) of the Rights in Technical Data and Computer Software Clause
52.227-FAR14. Material scanned by this product may be protected by governmental laws and other regulations, such as copyright laws. The customer is solely
responsible for complying with all such laws and regulations.
Visioneer’s Limited Product Warranty
If you find physical defects in the materials or the workmanship used in making the product described in this document, Visioneer will repair, or at its option,
replace, the product at no charge to you, provided you return it (postage prepaid, with proof of your purchase from the original reseller) during the 12-month
period after the date of your original purchase of the product.
THIS IS VISIONEER’S ONLY WARRANTY AND YOUR EXCLUSIVE REMEDY CONCERNING THE PRODUCT, ALL OTHER
REPRESENTATIONS, WARRANTIES OR CONDITIONS, EXPRESS OR IMPLIED, WRITTEN OR ORAL, INCLUDING ANY WARRANTY OF
MERCHANTABILITY, FITNESS FOR A PARTICULAR PURPOSE OR NON- INFRINGEMENT, ARE EXPRESSLY EXCLUDED. AS A RESULT,
EXCEPT AS SET OUT ABOVE, THE PRODUCT IS SOLD “AS IS” AND YOU ARE ASSUMING THE ENTIRE RISK AS TO THE PRODUCT’S
SUITABILITY TO YOUR NEEDS, ITS QUALITY AND ITS PERFORMANCE,
IN NO EVENT WILL VISIONEER BE LIABLE FOR DIRECT, INDIRECT, SPECIAL, INCIDENTAL OR CONSEQUENTIAL DAMAGES RESULTING
FROM ANY DEFECT IN THE PRODUCT OR FROM ITS USE, EVEN IF ADVISED OF THE POSSIBILITY OF SUCH DAMAGES.
All exclusions and limitations in this warranty are made only to the extent permitted by applicable law and shall be of no effect to the extent in conflict with the
express requirements of applicable law.
FCC Radio Frequency Interference Statement
This equipment has been tested and found to comply with the limits for the class B digital device, pursuant to part 15 of the FCC Rules. These limits are designed
to provide reasonable protection against interference in a residential installation. This equipment generates, uses and can radiate radio frequency energy and if not
installed, and used in accordance with the instructions, may cause harmful interference to radio communications. However, there is no guarantee that interference
will not occur in a particular installation. If this equipment does cause harmful interference to radio or television reception, which can be determined by turning the
equirpment off and on, the user is encouraged to try and correct the interference by one or more of the following measures:
• Reorient or relocate the recemng antenna.
• Increase the separation between the equipment and receiver.
• Connect the equipment into an outlet on a circuit different from that to which the receiver is connected.
• Consult the dealer or an experienced radio/TV technician for help.
This equipment has been certified to comply with the limits for a class B computing device, pursuant to FCC Rules. In order to maintain compliance with FCC
regulations, shielded cables must be used with this equipment. Operation with non-approved equipment or unshielded cables is likely to result in interference to
radio and TV reception. The user is cautioned that changes and modifications made to the equipment without the approval of manufacturer could void the user's
authority to operate this equipment.
This device complies with part 15 of the FCC Rules. Operation is subject to the following two conditions: (1) This device may not cause harmful interference, and
(2) this device must accept any interference received, including interference that may cause undesired operation.

TABLE OF CONTENTS
Chapter 1: Welcome
Features at a Glance . . . . . . . . . . . . . . . . . . . . . . . . . . . . . . . . . 2
What’s Next . . . . . . . . . . . . . . . . . . . . . . . . . . . . . . . . . . . . . . . 8
Chapter 2: Scanning Items
Choosing a Target Application and Scanning . . . . . . . . . . . . . 10
Using the ScanDirect To Menu . . . . . . . . . . . . . . . . . . . . 11
Using the Scan Settings Dialog Box . . . . . . . . . . . . . . . . . 11
Using ScanDirect Function Keys . . . . . . . . . . . . . . . . . . . 12
Selecting Scan Settings . . . . . . . . . . . . . . . . . . . . . . . . . . . . . . 14
Selecting PaperPort Desktop Scan Settings . . . . . . . . . . . 15
Selecting the Page Viewer Scan Settings . . . . . . . . . . . . . . 15
Selecting Photocopy Scan Settings . . . . . . . . . . . . . . . . . . 16
Selecting Fax Scan Settings . . . . . . . . . . . . . . . . . . . . . . . 17
Selecting E-Mail Scan Settings . . . . . . . . . . . . . . . . . . . . . 18
Selecting Word Processing Scan Settings . . . . . . . . . . . . . 19
Selecting Image Editing Scan Settings . . . . . . . . . . . . . . . 20
Selecting Other Application Scan Settings . . . . . . . . . . . . 21
Working with Scan Modes . . . . . . . . . . . . . . . . . . . . . . . . . . . 21
Scan Mode Samples . . . . . . . . . . . . . . . . . . . . . . . . . . . . . 23
About Bit Depth and Resolution . . . . . . . . . . . . . . . . . . . 24
Selecting Predefined Scan Modes or Creating Your Own . 25
Scanning Color and Grayscale Items . . . . . . . . . . . . . . . . 28
Scanning to Get the Best Image . . . . . . . . . . . . . . . . . . . . . . . 29
Changing Brightness and Contrast . . . . . . . . . . . . . . . . . 30
Straightening Pages and Removing Black Edges . . . . . . . . 30
Setting the Compression . . . . . . . . . . . . . . . . . . . . . . . . . 31
Setting Paper Insertion Delay and Edge Detection . . . . . . . . . 32
Turning the Communications Port On and Off . . . . . . . . . . 33
. . . . . . . . . . . . . . . . . . . . . . . . . . . . . . . . . . 1
. . . . . . . . . . . . . . . . . . . . . . . . . . . . . 9
iii

Chapter 3: Viewing Items
. . . . . . . . . . . . . . . . . . . . . . . . . . . . . 35
Viewing Items on the PaperPort Desktop . . . . . . . . . . . . . . . . 36
Starting and Quitting the PaperPort Desktop . . . . . . . . . 37
Moving Items on the PaperPort Desktop . . . . . . . . . . . . . 38
Viewing Items by Icon or Name . . . . . . . . . . . . . . . . . . . 39
Working in the Page Viewer . . . . . . . . . . . . . . . . . . . . . . . . . . 40
Starting and Quitting the Page Viewer . . . . . . . . . . . . . . . 41
The Annotation Tool Bar . . . . . . . . . . . . . . . . . . . . . . . . 42
Displaying and Hiding the Annotation Tool Bar . . . . . . . 43
Zooming In or Out on a Page . . . . . . . . . . . . . . . . . . . . . 43
Arranging the Page Viewer Windows . . . . . . . . . . . . . . . . 44
Navigating Between Pages . . . . . . . . . . . . . . . . . . . . . . . . . . . 44
Switching Between the PaperPort Desktop and
Page Viewer . . . . . . . . . . . . . . . . . . . . . . . . . . . . . . . . . . . 45
Chapter 4: Filing Items into Folders
. . . . . . . . . . . . . . . . . . . . 47
Displaying Folders and Items . . . . . . . . . . . . . . . . . . . . . . . . . 48
Renaming Items . . . . . . . . . . . . . . . . . . . . . . . . . . . . . . . . . . . 50
Filing Items Into Folders . . . . . . . . . . . . . . . . . . . . . . . . . . . . 50
Creating Folders . . . . . . . . . . . . . . . . . . . . . . . . . . . . . . . . . . . 52
Adding a Favorite Folder . . . . . . . . . . . . . . . . . . . . . . . . . . . . 54
Removing a Favorite Folder . . . . . . . . . . . . . . . . . . . . . . . . . . 55
Locating Favorite Folders and Items . . . . . . . . . . . . . . . . . . . . 55
Finding Items . . . . . . . . . . . . . . . . . . . . . . . . . . . . . . . . . . . . . 56
Chapter 5: Working with Stacks
. . . . . . . . . . . . . . . . . . . . . . . . 61
Stacking Items on the PaperPort Desktop . . . . . . . . . . . . . . . 62
Using Drag and Drop to Create Stacks . . . . . . . . . . . . . . 62
Using the Stack Command . . . . . . . . . . . . . . . . . . . . . . . 63
Moving Between Pages in a Stack . . . . . . . . . . . . . . . . . . . . . . 64
Unstacking Pages . . . . . . . . . . . . . . . . . . . . . . . . . . . . . . . . . . 65
Reordering Pages in a Stack . . . . . . . . . . . . . . . . . . . . . . . . . . 66
Inserting a Page into a Stack . . . . . . . . . . . . . . . . . . . . . . . . . . 67
Duplicating Items . . . . . . . . . . . . . . . . . . . . . . . . . . . . . . . . . 68
Creating Stacks When You Scan . . . . . . . . . . . . . . . . . . . . . . 68
iv

Chapter 6: Fine-Tuning Images
. . . . . . . . . . . . . . . . . . . . . . . . 69
Straightening and Trimming Pages . . . . . . . . . . . . . . . . . . . . 69
Cleaning Black-and-White Pages . . . . . . . . . . . . . . . . . . . . . . 70
Rotating Pages . . . . . . . . . . . . . . . . . . . . . . . . . . . . . . . . . . . . 71
Sharpening the Focus of an Image . . . . . . . . . . . . . . . . . . . . . 72
Adjusting and Enhancing Images . . . . . . . . . . . . . . . . . . . . . . 73
Adjusting a Picture with the Picture Wizard . . . . . . . . . . 74
Automatically Adjusting a Picture . . . . . . . . . . . . . . . . . . 76
Adjusting a Picture Yourself . . . . . . . . . . . . . . . . . . . . . . . 76
Undoing an Adjustment . . . . . . . . . . . . . . . . . . . . . . . . . . . . . 79
Chapter 7: Annotating Items
. . . . . . . . . . . . . . . . . . . . . . . . . . 81
A Look at the Annotation Tools . . . . . . . . . . . . . . . . . . . . . . . 82
Copying, Cutting, and Pasting PaperPort Images . . . . . . . . . . 83
Adding Images from Other Applications . . . . . . . . . . . . . . . . 84
Cropping a Page . . . . . . . . . . . . . . . . . . . . . . . . . . . . . . . . . . . 85
Working with Notes . . . . . . . . . . . . . . . . . . . . . . . . . . . . . . . 86
Adding Notes . . . . . . . . . . . . . . . . . . . . . . . . . . . . . . . . . 87
Collapsing and Expanding Notes . . . . . . . . . . . . . . . . . . . 87
Highlighting Information . . . . . . . . . . . . . . . . . . . . . . . . . . . 89
Adding Freehand Annotations . . . . . . . . . . . . . . . . . . . . . . . . 90
Drawing Lines and Arrows . . . . . . . . . . . . . . . . . . . . . . . . . . . 92
Fine-Tuning Annotations . . . . . . . . . . . . . . . . . . . . . . . . . . . 93
Selecting the Font and Color . . . . . . . . . . . . . . . . . . . . . . 93
Editing Annotation Text . . . . . . . . . . . . . . . . . . . . . . . . . 95
Moving and Resizing Annotations . . . . . . . . . . . . . . . . . . 95
Copying, Cutting, and Pasting Annotations . . . . . . . . . . . . . . 96
Displaying and Hiding Annotations . . . . . . . . . . . . . . . . . . . . 97
Finding Annotations in the Page Viewer . . . . . . . . . . . . . . . . 97
Deleting Annotations . . . . . . . . . . . . . . . . . . . . . . . . . . . . . . . 99
Filling in Forms and Adding Text Using the
Mark-Up Tool . . . . . . . . . . . . . . . . . . . . . . . . . . . . . . . . . 99
Filling in Forms Using the FormTyper Software . . . . . . . . . 101
v

Chapter 8: Importing, Saving, and Deleting Items
. . . . . . . . 103
Importing Files from Other Applications . . . . . . . . . . . . . . . 103
Using Drag and Drop . . . . . . . . . . . . . . . . . . . . . . . . . . 104
Importing an Item . . . . . . . . . . . . . . . . . . . . . . . . . . . . . 105
Opening an Item . . . . . . . . . . . . . . . . . . . . . . . . . . . . . . 106
Printing from Other Applications . . . . . . . . . . . . . . . . . . . . 107
Saving Items . . . . . . . . . . . . . . . . . . . . . . . . . . . . . . . . . . . . . 108
Saving Items in Other Formats . . . . . . . . . . . . . . . . . . . . . . 109
Deleting Folders and Items . . . . . . . . . . . . . . . . . . . . . . . . . 111
Chapter 9: Using the Link Bar
. . . . . . . . . . . . . . . . . . . . . . . . 113
What Is the Link Bar? . . . . . . . . . . . . . . . . . . . . . . . . . . . . . 114
Basic Steps for Using the Link Bar . . . . . . . . . . . . . . . . . . . . 116
Photocopying an Item . . . . . . . . . . . . . . . . . . . . . . . . . . . . . 117
Setting Photocopy Preferences . . . . . . . . . . . . . . . . . . . . 117
Photocopying (Printing) Items . . . . . . . . . . . . . . . . . . . . 118
Sending an Item as an Electronic Fax . . . . . . . . . . . . . . . . . . 119
Setting Fax Preferences . . . . . . . . . . . . . . . . . . . . . . . . . 119
Sending an Item as a Fax . . . . . . . . . . . . . . . . . . . . . . . . 120
Sending an Item as an E-Mail Message . . . . . . . . . . . . . . . . . 121
Setting E-Mail Preferences . . . . . . . . . . . . . . . . . . . . . . . 121
Sending an Item by Using E-Mail . . . . . . . . . . . . . . . . . 122
Displaying E-Mail Messages Sent from PaperPort . . . . . 123
Working with a Word Processing Link
(and OCR Software) . . . . . . . . . . . . . . . . . . . . . . . . . . . 124
Setting Preferences for the Provided OCR Software . . . . 125
Setting Preferences for a Word Processing Link . . . . . . . 126
Sending an Item to a Word Processor . . . . . . . . . . . . . . 127
Getting the Best OCR Results . . . . . . . . . . . . . . . . . . . . 128
Sending an Item to an Image Editor . . . . . . . . . . . . . . . . . . . 129
Setting Image Editor Preferences . . . . . . . . . . . . . . . . . . 129
Sending an Item to an Image Editing Application . . . . . 130
vi

Managing the Link Bar . . . . . . . . . . . . . . . . . . . . . . . . . . . . 130
Setting Link Bar Preferences . . . . . . . . . . . . . . . . . . . . . 131
Showing and Hiding the Link Bar . . . . . . . . . . . . . . . . . 132
Starting and Quitting the Link Bar . . . . . . . . . . . . . . . . 132
Adding Links . . . . . . . . . . . . . . . . . . . . . . . . . . . . . . . . . 133
Deleting Links . . . . . . . . . . . . . . . . . . . . . . . . . . . . . . . . 135
Showing or Hiding Link Icons on the Link Bar . . . . . . . 135
Reordering Links . . . . . . . . . . . . . . . . . . . . . . . . . . . . . . 136
Glossary
Index
. . . . . . . . . . . . . . . . . . . . . . . . . . . . . . . . . . . . . . . . . . 137
. . . . . . . . . . . . . . . . . . . . . . . . . . . . . . . . . . . . . . . . . . . . . 145
vii

viii
of Contents
CHAPTER 1
Welcome
Welcome to Visioneer’s award-winning PaperPort software with which you
can annotate, organize, file, adjust, and find scanned items. This guide
explains how to use the PaperPort software. In addition to this guide, you
can get more information from a variety of sources:
Table
EXPLORE
APERPORT
P
PaperPort CD
Your source for installing additional software that works with
the PaperPort software and printing the documentation.
▼
TIP: You can also directly access Visioneer’s Web site for information
and support. Assuming you have an I nternet pr o vider and that Netscape
Navigator is installed on y our computer, choose Go T o PaperPort on the
Web from the Visioneer menu. Otherwise, you can find us at
http://www.Visioneer.com.
One-Minute Guide
An online tour of the PaperPort
software features.
PaperPort Getting Started Guide
The fastest way to get acquainted
with the PaperPort software and start
using it.
PaperPort Installation Guide
Information about how to install the
software and connect and use your
scanner.
Help
Everything you want to know about the
PaperPort software—“how-to” procedures,
dialog box reference, and troubleshooting
advice. Choose PaperPort Help from the
Visioneer menu
1
F
EATURES AT A GLANCE
This section gives you a quick look at the key features of the PaperPort
software.
of Contents
Table
Choose a target application
from the ScanDirect To
menu or just press a
ScanDirect function key.
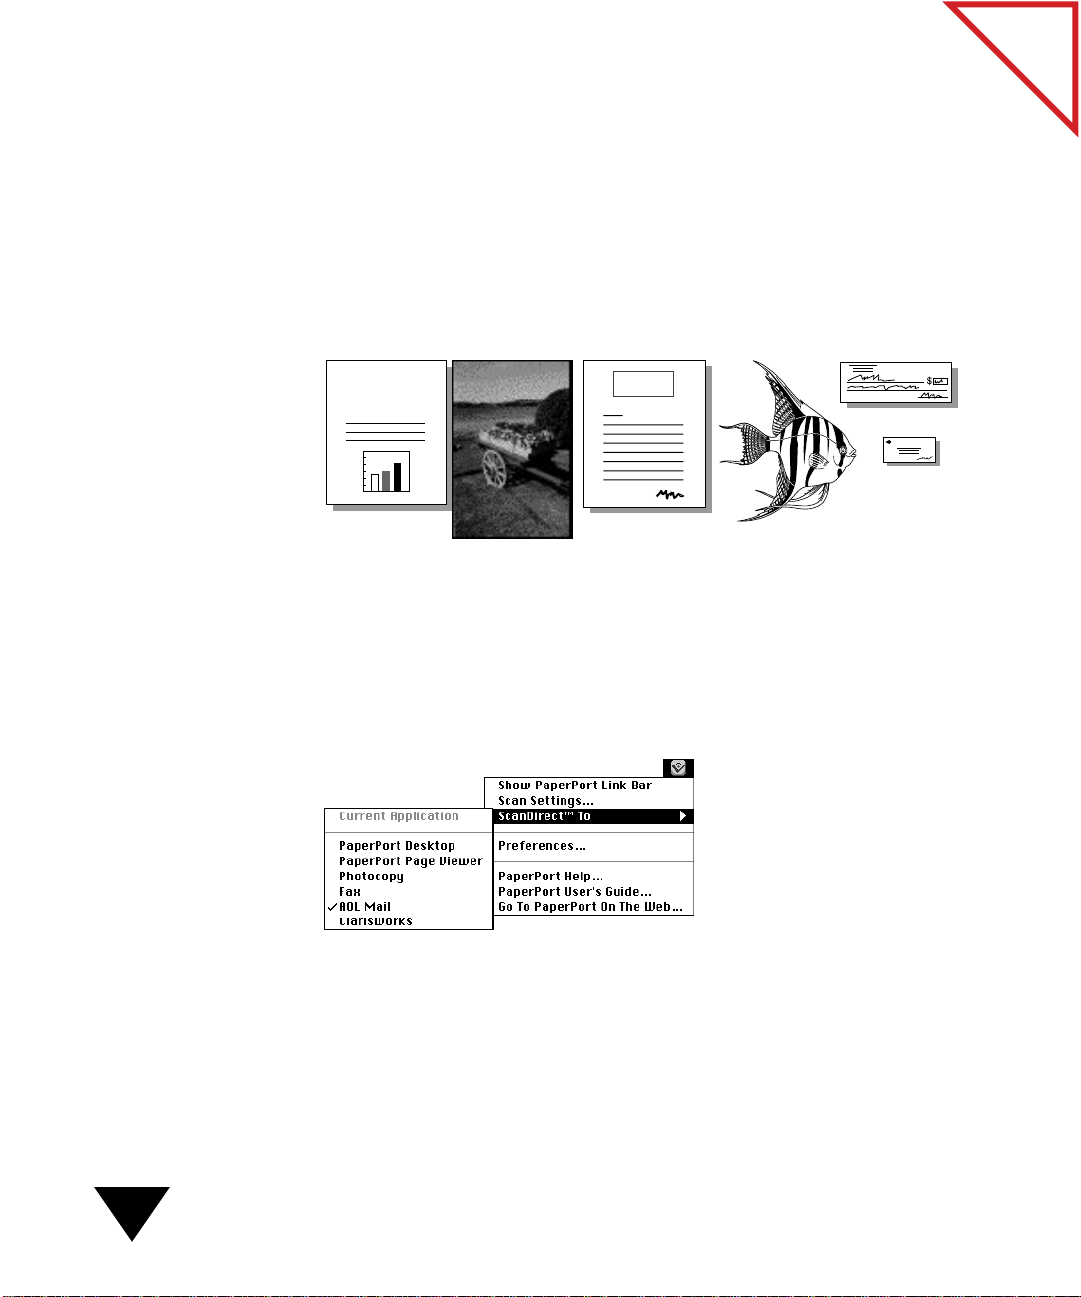
Scan many types of items.
The scanner can scan most paper items,
including newspaper clippings, reports, magazine articles, brochures,
letters, memos, receipts, canceled checks, business cards, photographs,
and line art.
SALES
REPORT
FAX
Scan items directly to other applications. With ScanDirect you can
scan items directly to different applications—the PaperP ort Desktop, the
Page Viewer , electr onic fax software, e-mail softwar e, a wor d processor, an
image editor, and more. You can scan an item directly to any PaperPortsupported application on your computer while simultaneously saving a
copy on your hard disk for later use.
2
1: Welcome
Select the best scan setting for the item and its use.
With the
PaperPort software, you select the scan setting that is best for a particular
type of item and how you want to use that item. You can select a scan
setting for storing color photos, filing articles, editing text (OCR), faxing
items, making photocopies, and filing business cards. You can also
customize a mode or create a new mode.
of Contents
Table
PaperPort Desktop
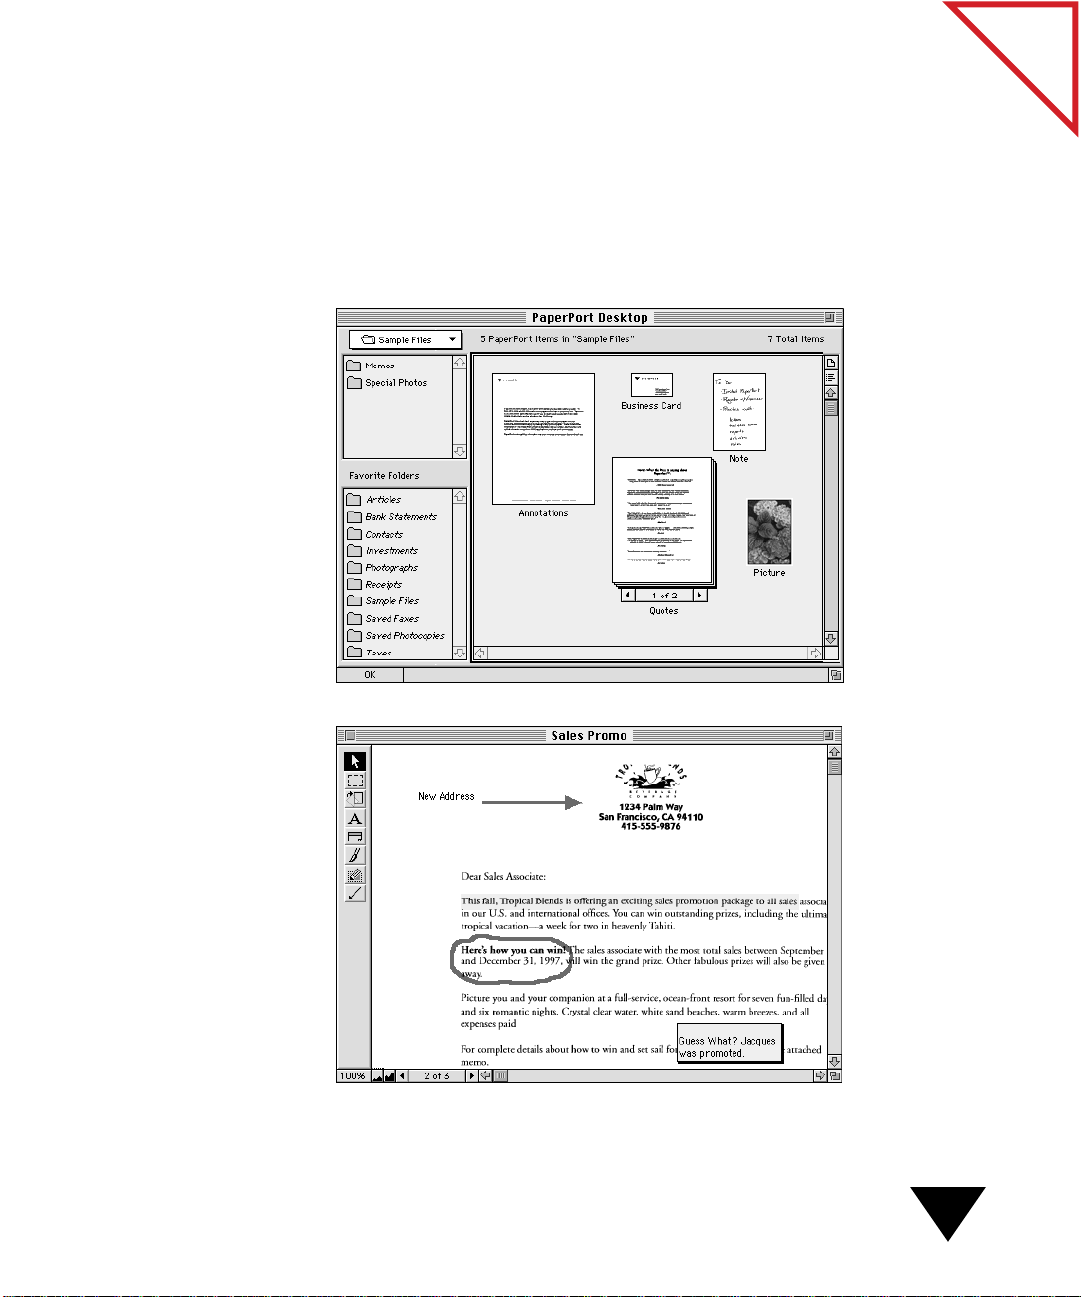
View items in two ways.
With the PaperPort software, you can view
items in two ways: on the PaperPort Desktop or in the Page Viewer.
The PaperPort Desktop displays a
thumbnail
, a small graphic that
represents each item. The Page Viewer displays a close-up of a single page
at a time. (You can however, open multiple Page Viewer windows at the
same time.) The PaperPort Desktop and the Page Viewer are separate
applications that you can use alone or together.
Page Viewer
Features at a Glance
3
of Contents
Table
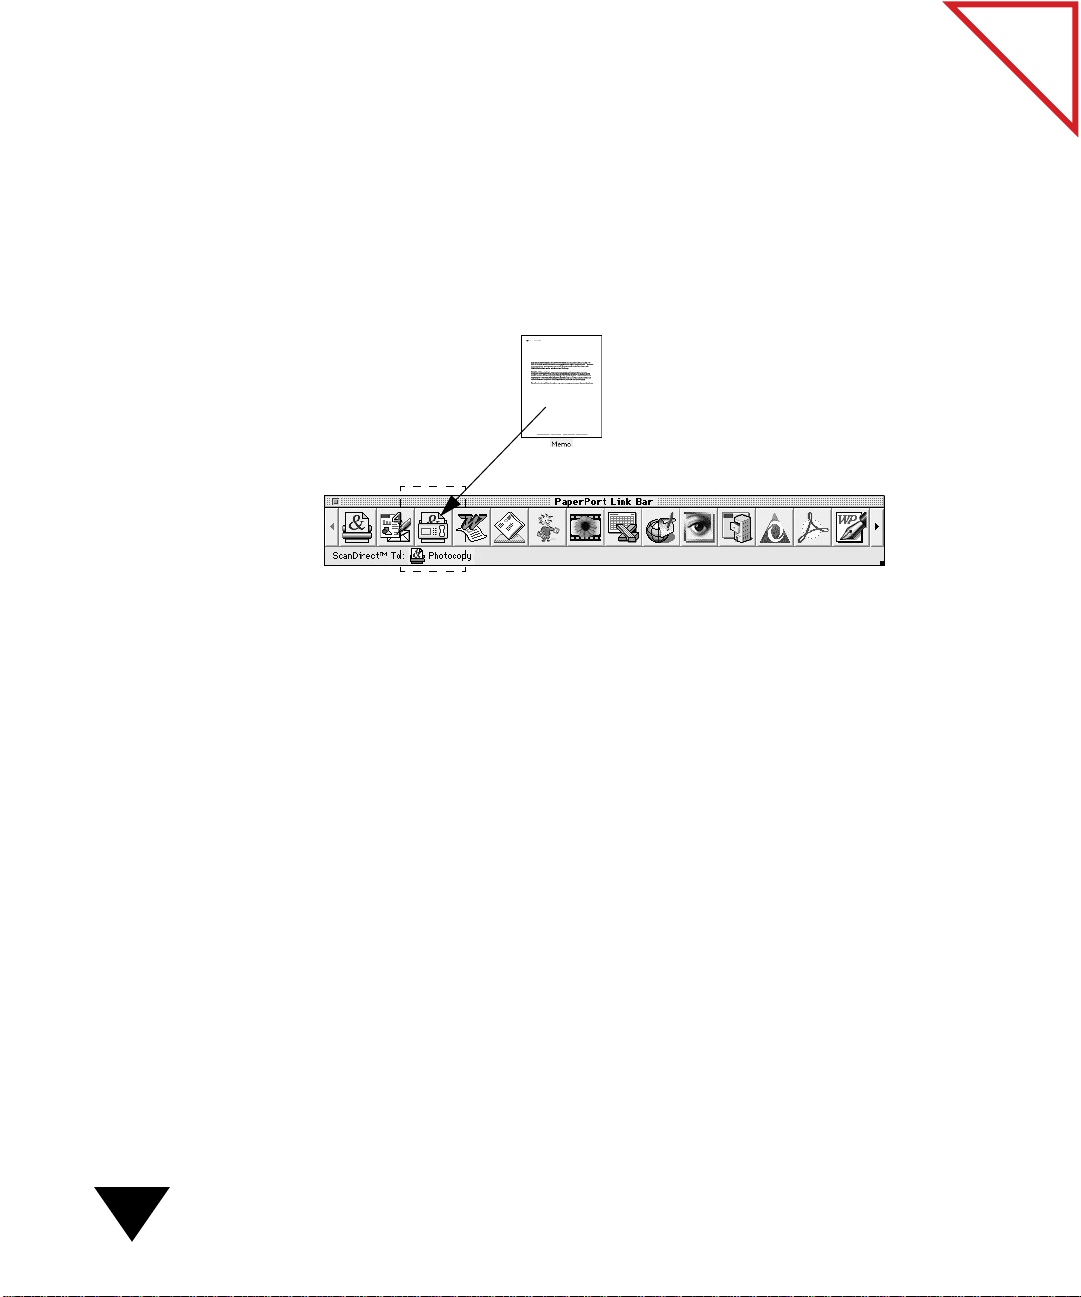
Send items already on your computer to other linked applications.
If items already reside on your computer, you can send them directly to
other applications by using the PaperPort Link Bar. For example, you can
send an item to your electronic fax software or quickly convert an item
into text by using your word processing application along with the
optical character recognition (OCR) software that came with the
PaperPort software. The Link Bar is a separate application that you can
use alone or together with the PaperPort Desktop and the Page Viewer.
Send an electronic fax
by dragging an item
onto the Fax link icon.
Create your own filing system.
To help you get organized, you can file
PaperPort items into different folders. The Navigation pop-up menu on
the PaperPort Desktop lets you easily navigate to different areas on your
Macintosh computer. From the F older directory, you can select the folder
containing the items you want to view. You can also create Favorite
Folders—folders that you want to use often and that always appear on
the PaperPort Desktop. The folders and PaperPort items that appear in
the PaperPort Desktop navigation pane directly reflect the folders and
items that you have on your Macintosh computer. That means you have
the flexibility of creating and managing folders from either the PaperP ort
Desktop or the Macintosh desktop.
4
1: Welcome
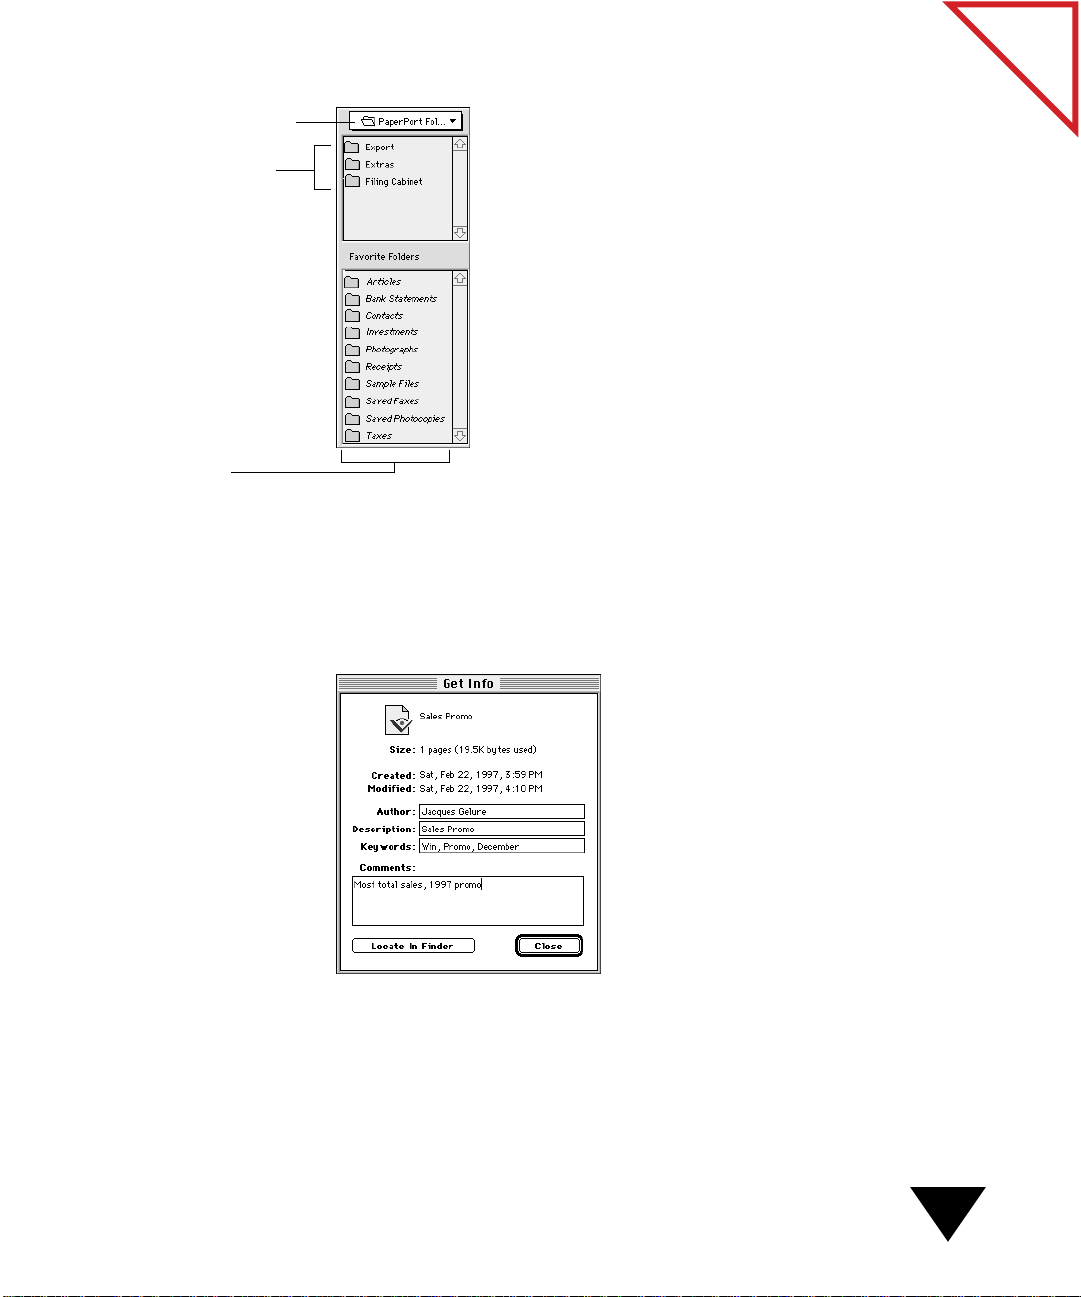
Navigation pop-up menu.
Directory of folders for
the location shown in the
Navigation pop-up menu.
Navigation pane.
of Contents
Table
Find items quickly.
After you file items safely into folders, y ou can easily
find them again by using the F ind D ocument command on the PaperPort
Desktop. Additionally, you can identify
an item for quick retrieval by
typing information in the Get Info dialog box to associate comments,
keywords, or an author’s name with an item.
Features at a Glance
5
of Contents
Y
S
Table
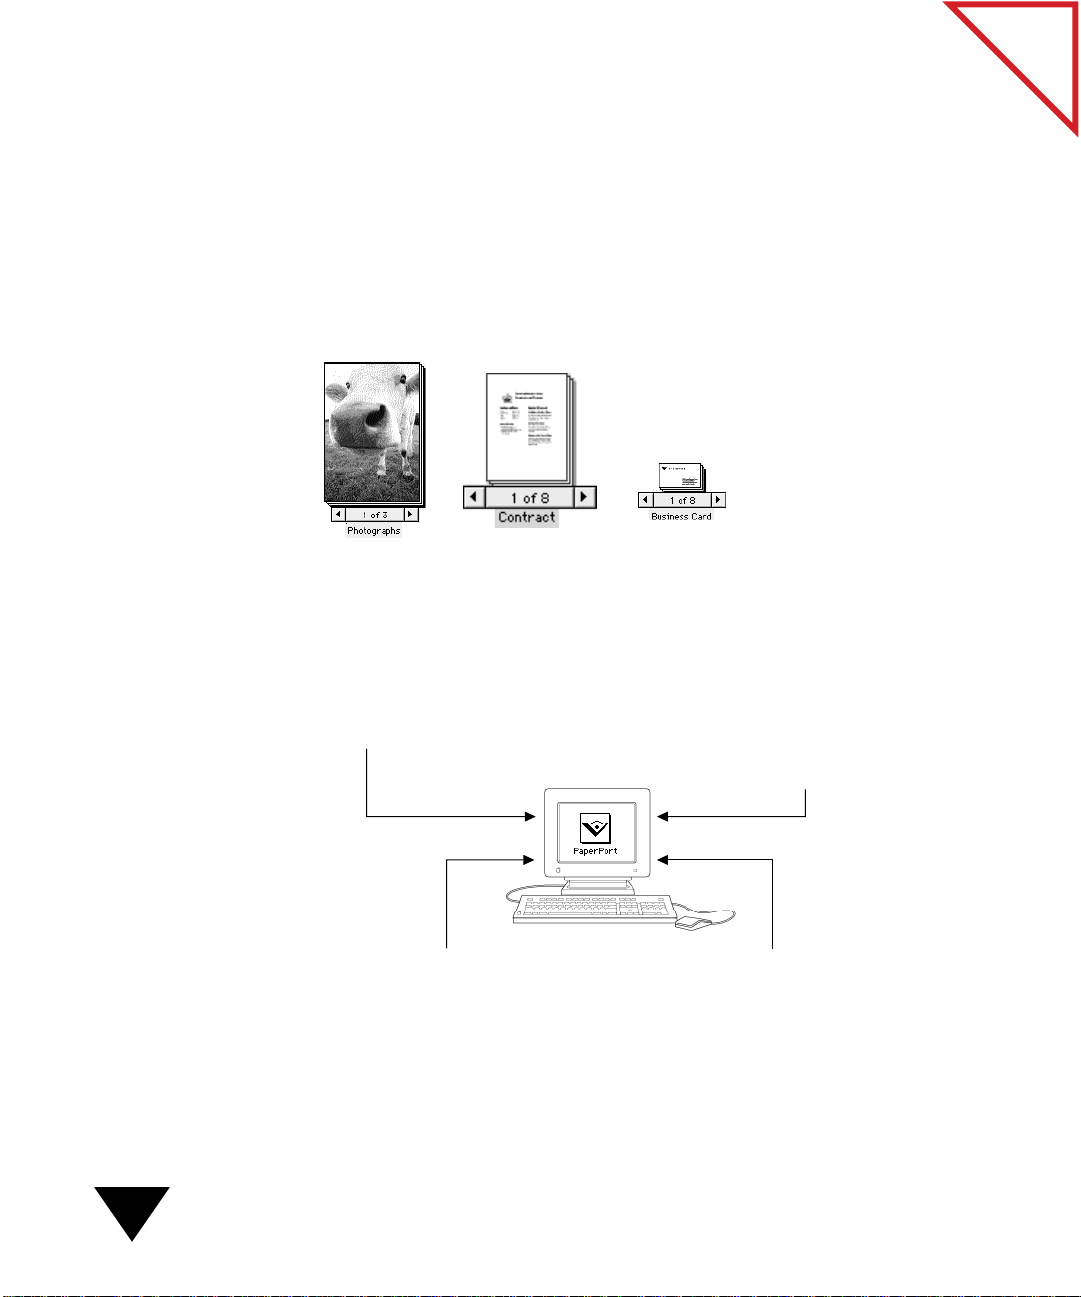
ou can stack all types of
items, such as photographs
and artwork or pages of a
document.
Combine single items into stacks.
Many items you scan will probably
be more than one page. You can combine individual items into a multipage document called a
stack
. For example, to save receipts from a
business trip, you scan the receipts, combine the receipts into a stack,
and then stack the receipts on a scanned expense report. If you are
creating a catalog of photographs, you can scan all the photographs to
the PaperPort Desktop, and then catalog them using different stacks.
You can stack single pages on the PaperPort Desktop or scan multiple
items as a stack.
Import items from other applications on the PaperPort Desktop or
in the P age Viewer.
In addition to scanning, you can convert items that
are saved in other file formats into PaperPort items. Then you can use all
of the PaperPort software features with those items. The following figure
shows the various ways of converting items.
can an item.
Create a new item by printing
from another Macintosh
1: Welcome
6
application to the PaperPort
Drag and drop an item from another
application onto the PaperPort Desktop
or Page Viewer Link Bar icon.
Import a file saved in another
format, such as PICT, TIFF,
GIF, or JPEG.
of Contents
w
Table
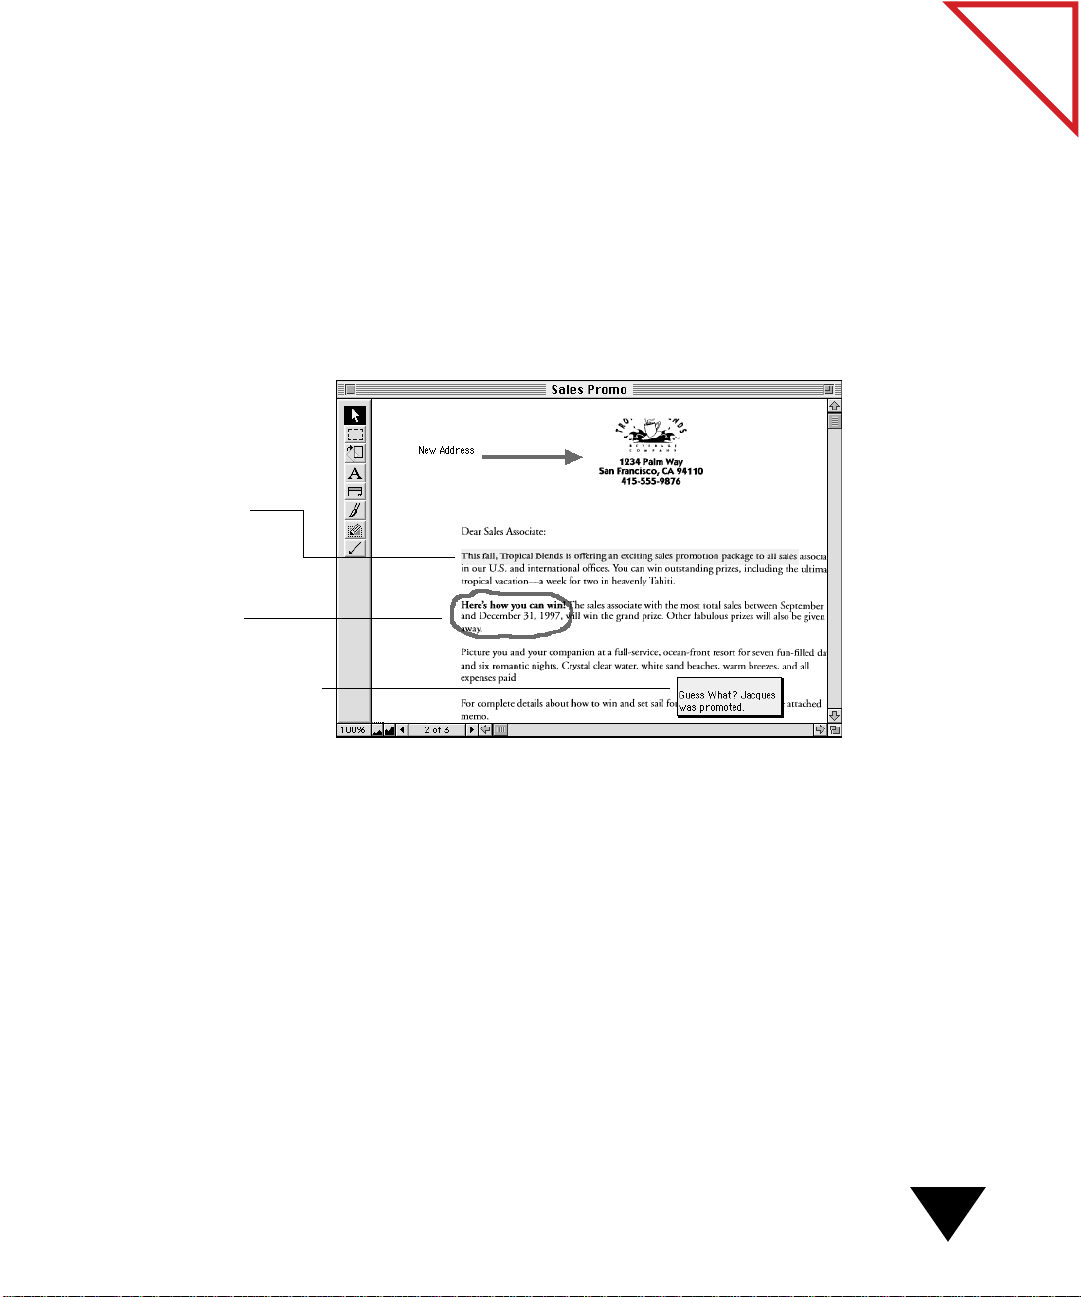
Use the Highlighter
tool to draw the
reader’s attention
to an area.
Circle information
ith the Freehand tool.
Use the electronic Note tool to
add notes to an item.
Save items in other formats.
You can also save PaperPort items in other
popular file formats, such as Joint Photographic Experts Group (JPEG)
or Tag Image File Format (TIFF). For example, you can scan a
photograph to the P aperPort Desktop and then save it as a JPEG. You can
open that JPEG file in an application that reads JPEG files.
Add notes, highlight areas, and mark up a page.
With the Annotation
tools in the P age V iew er, you can add a note, highlight text, draw lines or
arrows, circle information, or fill in preprinted forms. The following
figure shows a sample of how you can use some of the Annotation tools.
Features at a Glance
7
of Contents
Table
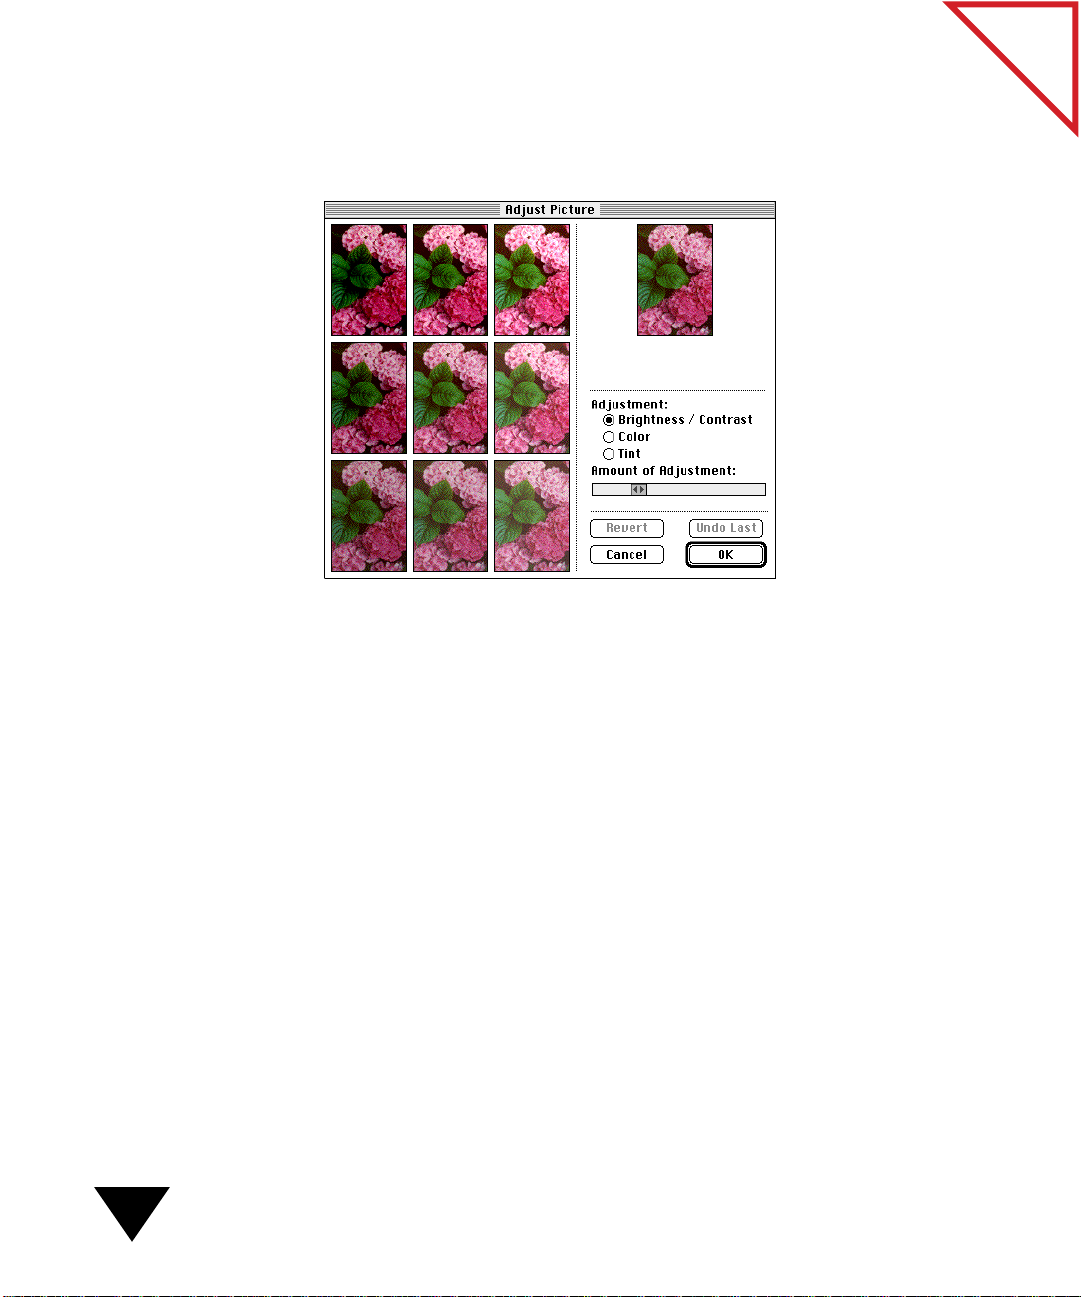
With Adjust Picture, you
control the way a picture
looks.
Fine-tune an image.
such as Picture Wizard and Adjust Picture to fine-tune the exposure,
color, and tint of an image.
HAT’S NEXT
W
Use the Page Viewer image editing commands,
8
1: Welcome
It’s time to start using the PaperPort software. For information about
installing the PaperPort software and using the scanner, see the
Installation Guide
software, see the
information about a PaperPort feature, see the remaining chapters of this
guide and the PaperPort Help.
NOTE:
▼
share PaperPort items with others even if they do not own the
PaperPort software. Others can view PaperPort items by using
PaperPort Viewer for Macintosh or Windo ws, which is fr eely available
from Visioneer or many popular online services. (Do not install the
PaperPort software and the PaperPort Viewer software on the same
computer.)
. For a quick overview of how to use the PaperPort
PaperPort Getting Started Guide.
PaperPort Viewer, another application, makes it possible to
For more detailed
PaperPort

CHAPTER 2
Scanning Items
This chapter tells you how to use PaperPort ScanDirect features to scan
items directly to the PaperPort Desktop, the Page Viewer, or any
supported link application, such as electronic fax, image editing, or OCR
software. Basically, all you need to do is:
• Choose a target application
• Scan the item
of Contents
Table
The PaperPort software automatically selects appropriate scan settings for
each application. However, you can customize the specific settings and
scan modes. In this chapter, you will learn how to:
• Choose a target application
• Select scan settings
• Select a scan mode
• Select options to get the smallest file size or best quality image
• Set the paper insertion delay and edge detection
• Turn the communications port on and off
9

C
HOOSING A TARGET APPLICATION AND SCANNING
By default when you scan an item, the P aperPort software places an image
of the item on the PaperPort Desktop and automatically saves a copy of
the item to your hard disk. By using ScanDirect, you can send scanned
items directly to a different target application, such as:
• The Page View er. Immediately see a close-up view of the scanned item.
You can modify the image in the Page Viewer, and then save the
changes.
• Photocopy. Make a copy of the scanned image on your printer.
• Electronic fax or e-mail software. Send a fax or attach an item to an
e-mail message.
• Word processor. Display editable text automatically converted by the
PaperPort OCR software.
• Image editor. Fine-tune and enhance a photograph or other art work.
of Contents
Table
• Other third-party applications that display the “PaperPort Ready”
logo.
• Any supported application installed on your computer.
There are several ways to select a ScanDirect target application:
• Don’t do anything. If you don’ t select a different target application, the
PaperPort Desktop is the default target application.
• Choose an application from the ScanDirect To menu located under the
Visioneer menu.
• Choose an application from the Scan Settings dialog box.
• Press a ScanDirect function key. The function key you press selects the
target application.
• On the Link Bar , drag the link icon representing the target application
into the area that says “ScanDirect To.”
10
2: Scanning Items
of Contents
Table
U
SING THE SCANDIRECT TO MENU
Use the ScanDirect To menu as a fast way to select a target application
and scan an item. This method is appropriate if you do not want to first
change scan settings or scan modes.
To use the ScanDirect To menu:
1. From the Visioneer menu (located below the Visioneer icon on the
Macintosh desktop menu bar), choose the ScanDirect To submenu,
and then choose a target application.
2. Insert the item into the scanner. The scanner scans the item.
The PaperPort software converts the image into a compatible format
for the target application and opens it in the target application.
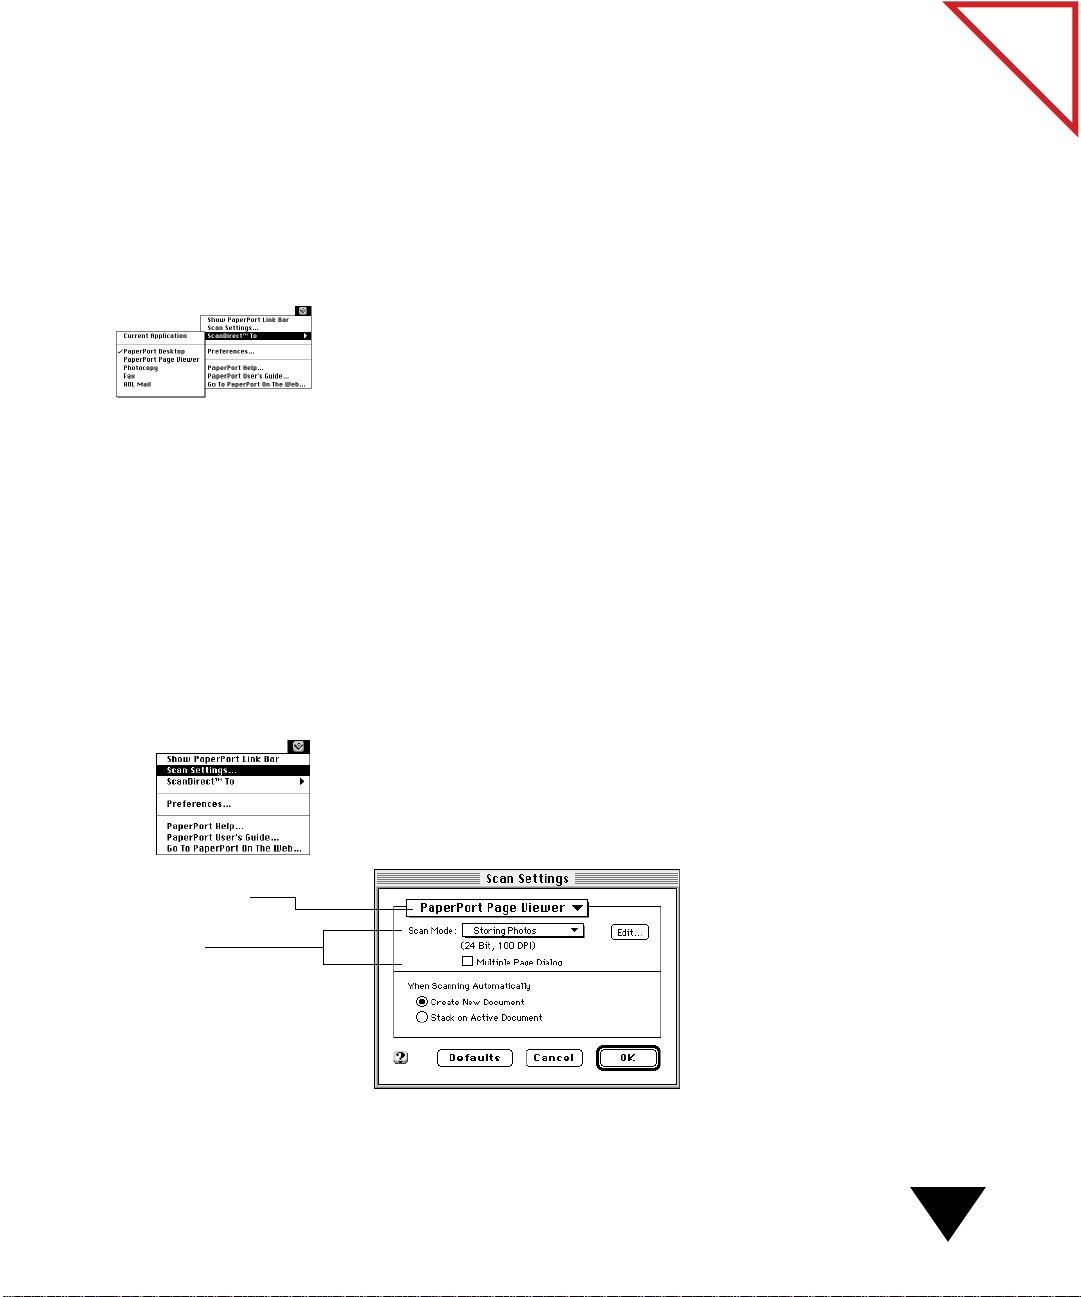
USING THE SCAN SETTINGS DIALOG BOX
If you want to first change settings or scan modes and then select a target
application, use the Scan Settings dialog box to select scan settings and
start the scan. For more information about scan settings, see “Selecting
Scan Settings” later in this chapter.
Target Application
pop-up menu.
Specific Page
Viewer settings.
To use the Scan Settings dialog box:
1. From the Visioneer menu (located below the Visioneer icon on the
Macintosh desktop menu bar), choose Scan Settings.
The Scan Settings dialog box appears.
Choosing a Target Application and Scanning
11

2. From the Target Application pop-up menu, choose an application.
Scan settings and a scan mode appropriate for the application appear.
In the previous figure, the Page Viewer settings appear.
3. Click OK.
4. Insert the item into the scanner. The scanner scans the item.
The PaperPort software converts the image into a compatible format
for the target application and opens it in the target application.
USING SCANDIRECT FUNCTION KEYS
The ScanDirect function keys are programmed keys that you can use to
send a scanned item directly to an application. When y ou press a function
key, the PaperPort software uses the scan settings associated with a
function key’s target application. The keys are:
• F5 PaperPort Desktop. Sends the scanned item to the PaperPort
Desktop.
of Contents
Table
• F6 Page Viewer. Sends the scanned item to the Page Viewer.
• F7 Photocopy. Prints a copy of the scanned item on your printer.
• F8 Fax. Sends the scanned item to your electronic fax software.
• F9 Word Processor. Converts the scanned item using the PaperPort
OCR software, and then opens the item in your word processor.
• F10 Image Editor. Sends the scanned item to the image editing
application supplied with the PaperPort software.
• F11 Settings. Displays the Scan Settings dialog box.
• F12 Show or Hide. Shows or hides the Link Bar on the Macintosh
desktop.
If you press function keys F5–F10, the application associated with the key
becomes the selected ScanDirect target application in the ScanDirect To
menu and on the Link Bar.
12
2: Scanning Items
The PaperPort software automatically selects applications for each key,
including the word processor and image editor functions keys. However,
you can change an application if you want, or you can disable the
function keys.
To scan using a function key:
1. Press a ScanDirect function key.
2. Insert the item into the scanner. The scanner scans the item.
The PaperPort software converts the image into a compatible format
for the target application and opens it in the target application.
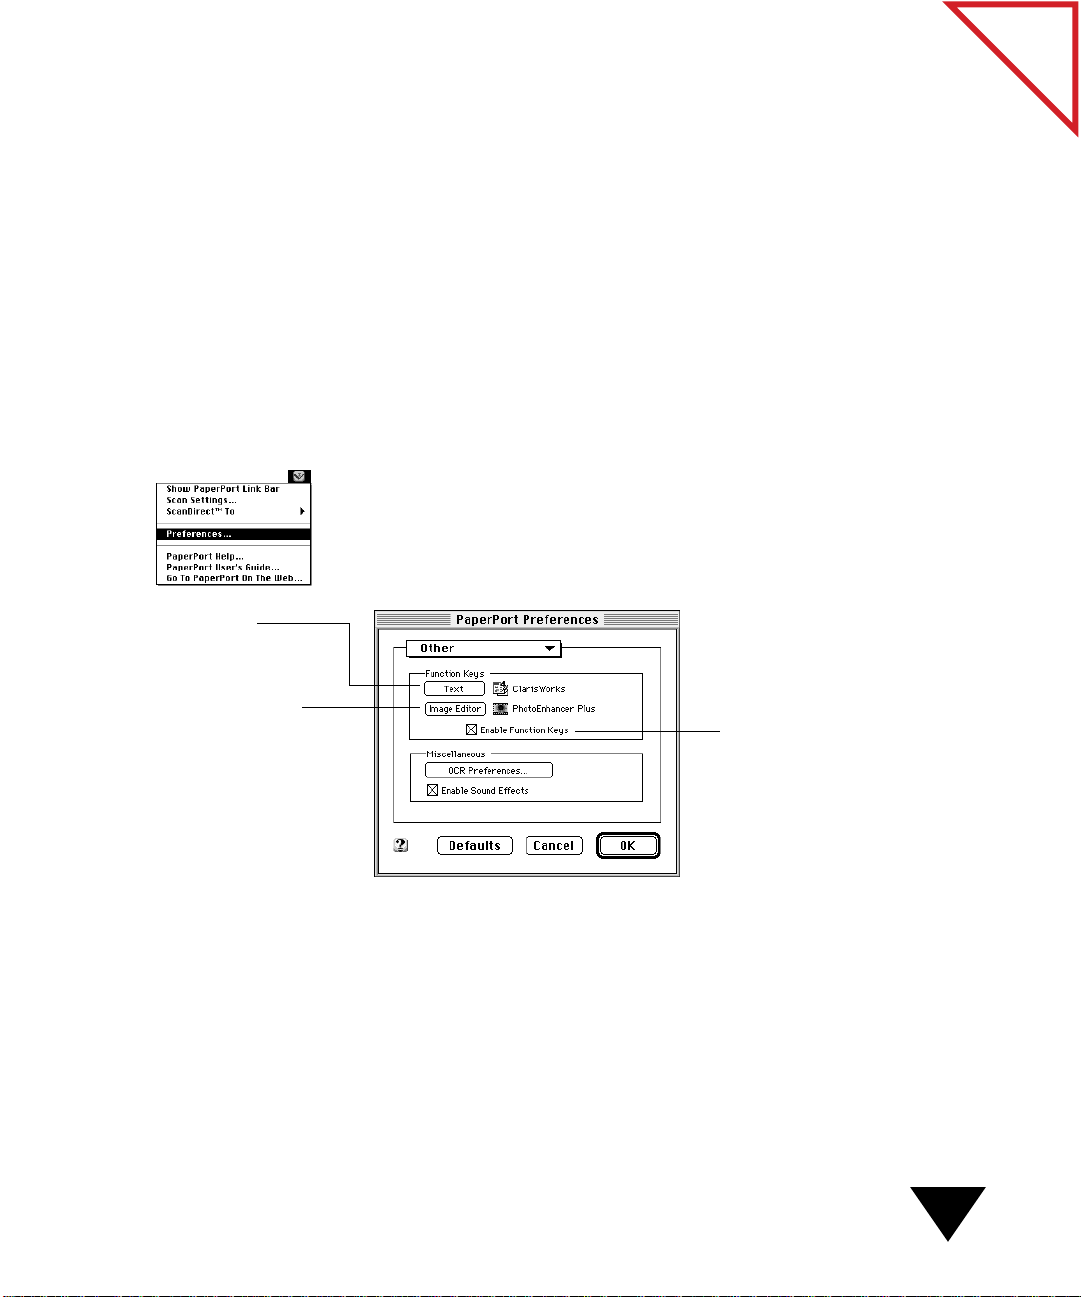
To set function key preferences:
1. From the Visioneer menu, choose Preferences. The Preferences
dialog box appears.
2. From the Preferences pop-up menu, choose Other. The Other
preferences appear.
of Contents
Table
Selects a target word
processor for the F9
function key.
Selects a target image editor
for the F10 function key.
Activates the ScanDirect
function keys.
3. To disable the function keys, deselect the Enable Function Keys
checkbox.
Choosing a Target Application and Scanning
13
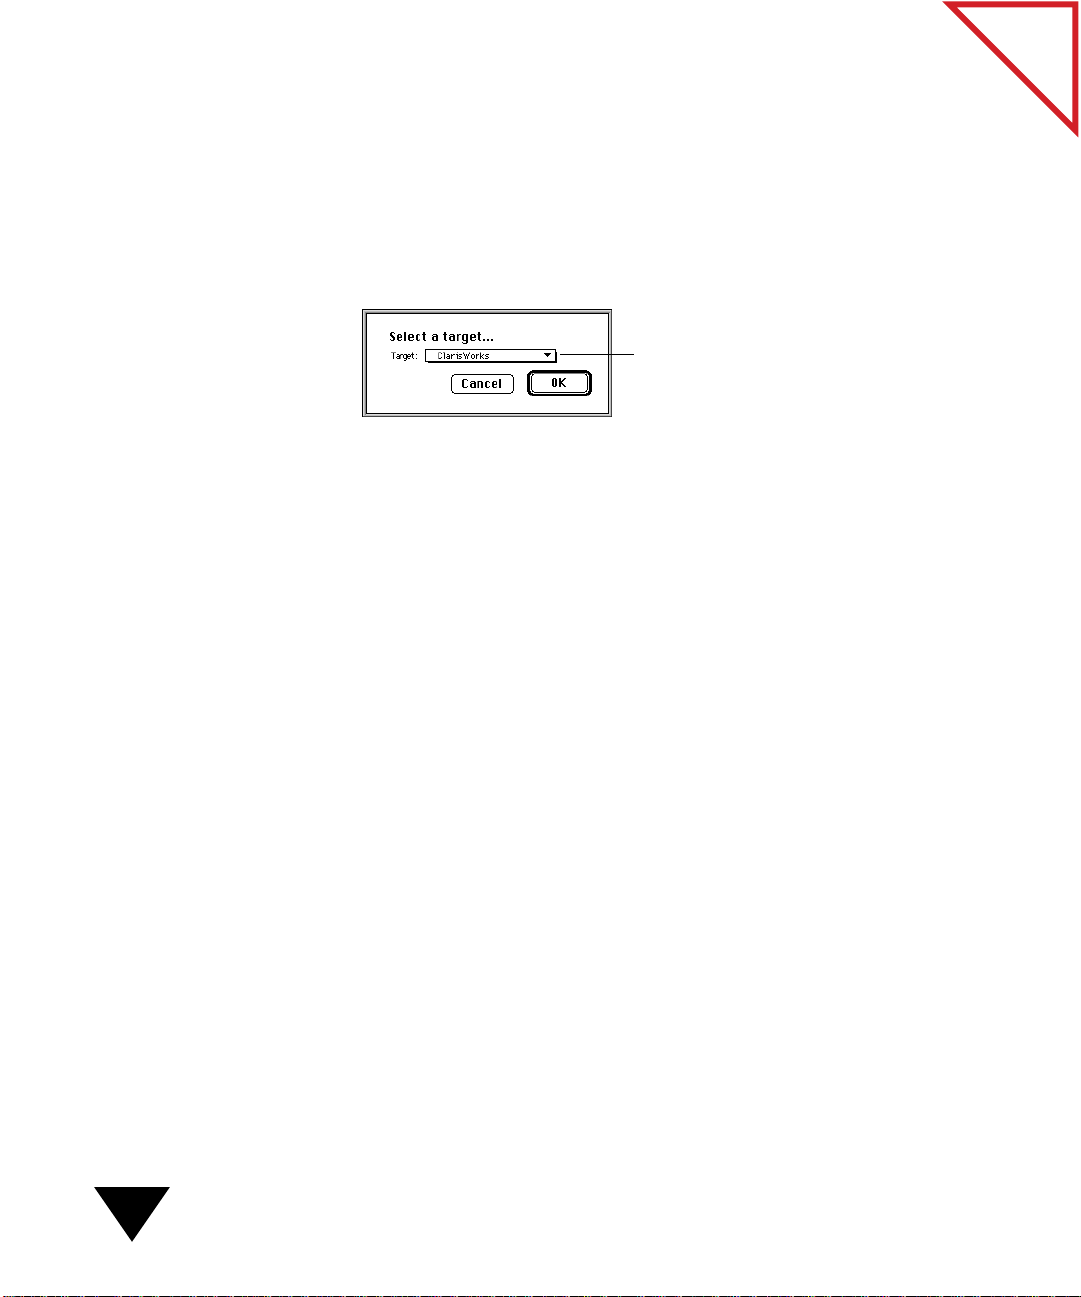
4. To select a word processor for the Word Processor function key , click
the Text button. To select an image editor for the Image Editor
function key, click the Image Editor button. A dialog box appears
asking you to select the target application. The following figure shows
the dialog box that appears when you choose a word processor.
The applications available in the pop-up menu depend on the
applications installed on your Macintosh computer.
Target pop-up menu.
5. From the Target pop-up menu, choose an application and click OK.
The selected application name and icon appear in the Preferences
dialog box.
of Contents
Table
SELECTING SCAN SETTINGS
Each target application has a set of scan settings that defines the way the
scanner works and how the PaperPort software handles the scanned
image. The PaperPort software chooses default settings that are often the
most appropriate for a target application. H o wever, if you want to change
the settings, use the Scan Settings dialog box. This section tells you how
to select scan settings for a specific target application. For information
about selecting scan modes (also defined in the Scan Settings dialog box),
see “Working with Scan Modes” later in this chapter.
▼ TIP: There are three ways to display the Scan Settings dialog box:
(1) Press the button on the left side of the scanner to display the
settings; (2) Choose Scan Settings from the Visioneer menu; (3) Press
the F11 function key.
14
2: Scanning Items
Target Application pop-up
menu.
Prompts for the next page when
you want to scan a multi-page
item, and then creates a stack of
the pages on the PaperPort
Desktop.
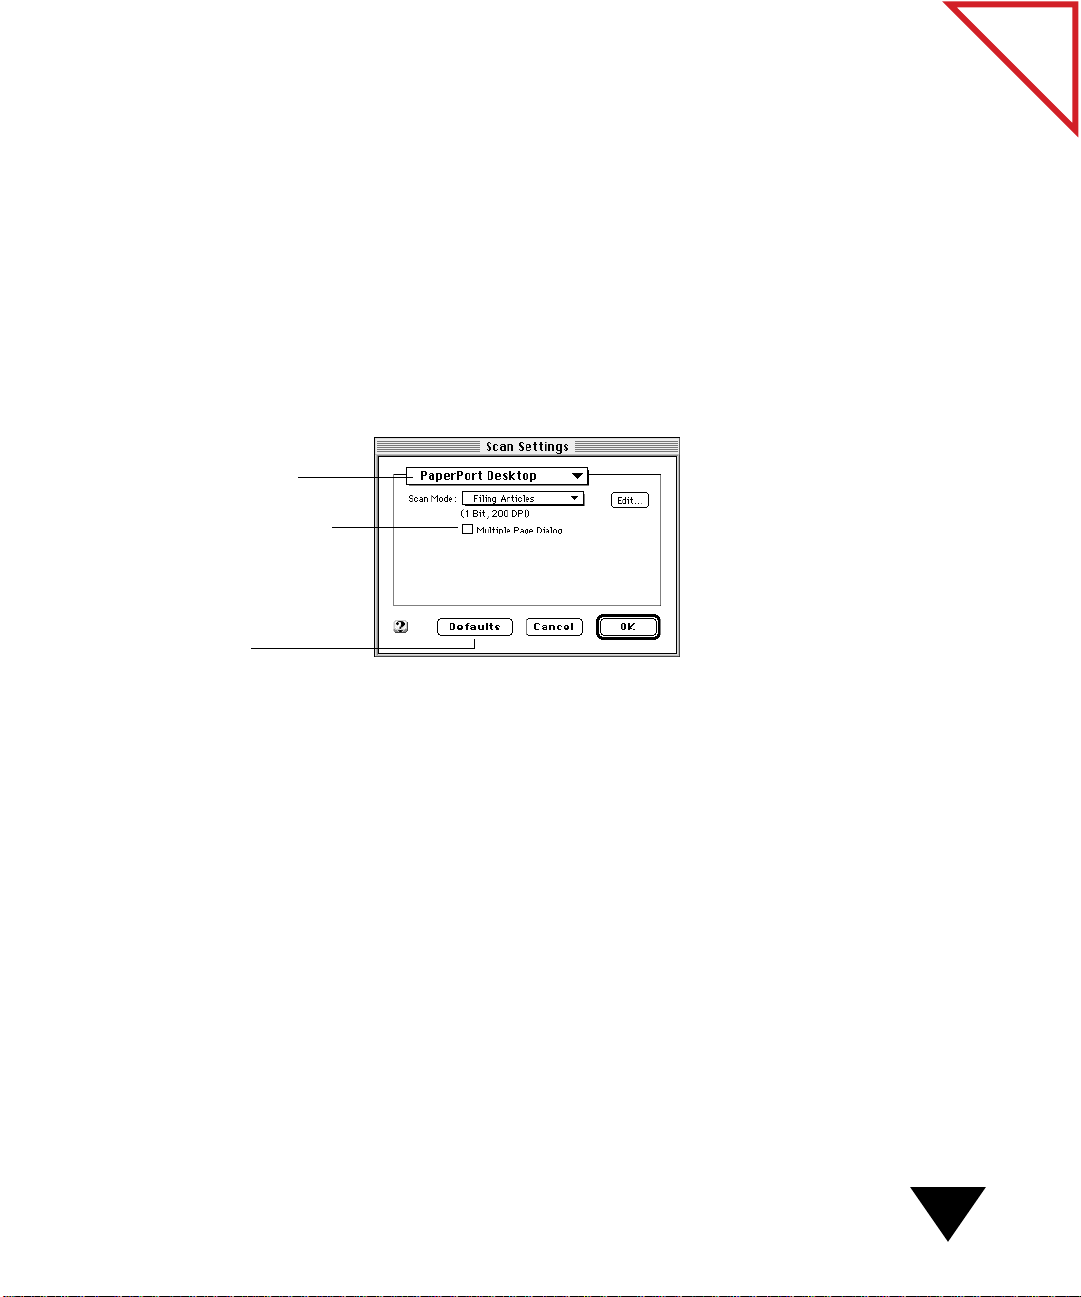
SELECTING PAPERPORT DESKTOP SCAN SETTINGS
If you want to scan several pages and automatically create a stack of the
pages on the PaperPort Desktop, select the Multiple Scan option in the
PaperPort Desktop scan settings.
To select PaperPort Desktop scan settings:
1. From the Visioneer menu, choose Scan Settings. The Scan Settings
dialog box appears.
2. From the Target Application pop-up menu, choose PaperPort
Desktop. The PaperPort Desktop settings appear.
of Contents
Table
Restores the default
settings.
3. Select the scan settings you want to use and click OK.
SELECTING THE PAGE VIEWER SCAN SETTINGS
The Page Viewer scan settings provide options for creating a new item
when you scan or stacking the scanned item onto an item currently open
(active) in the Page Viewer.
Selecting Scan Settings
15
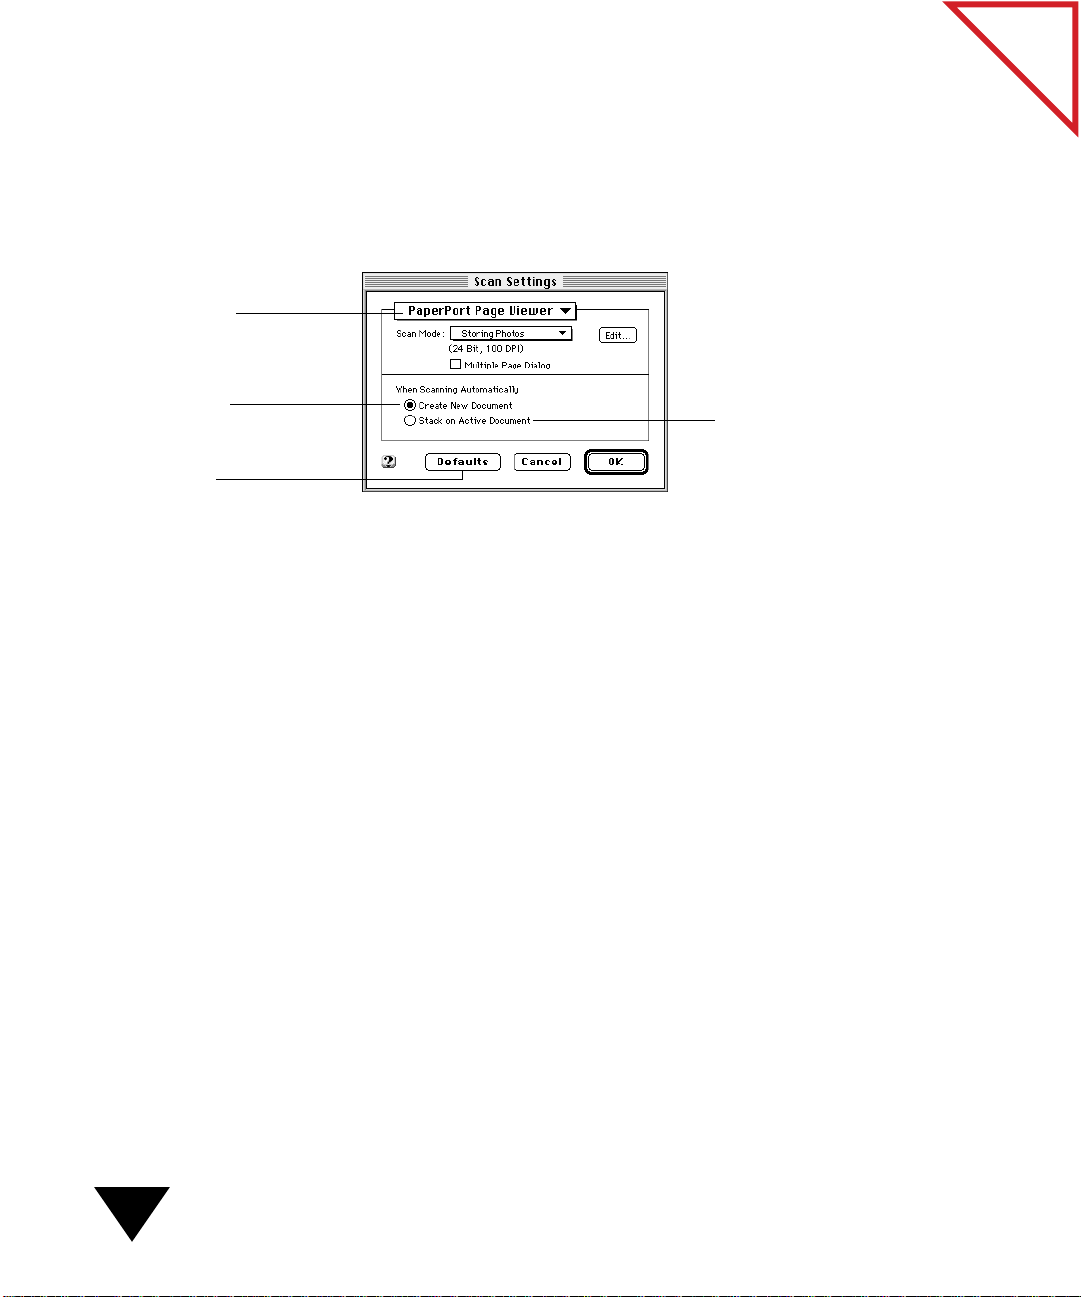
w
Target Application
pop-up menu.
To select the Page Viewer scan settings:
1. From the Visioneer menu, choose Scan Settings. The Scan Settings
dialog box appears.
2. From the Target Application pop-up menu, choose the PaperPort
Page View er . The Page Viewer settings appear.
of Contents
Table
Creates a new item
hen you scan.
Restores the
default settings.
Stacks the item that you scan
onto the item currently
displayed in the active Page
Viewer window.
3. Select the scan settings you want to use and click OK.
SELECTING PHOTOCOPY SCAN SETTINGS
When you choose Photocopy as the target application, the PaperPort
software scans a copy of the item to your printer software and prints the
item, just like a photocopy machine.
2: Scanning Items
16

To select Photocopy scan settings:
T
1. From the Visioneer menu, choose Scan Settings. The Scan Settings
dialog box appears.
2. From the Target Application pop-up menu, choose Photocopy.
The Photocopy settings appear.
of Contents
Table
arget Application pop-up
menu.
Prompts for the next page when
you want to print a multi-page
item.
Displays the Print dialog
box, so that you can make
selections before you print.
Customizes the scan mode.
Saves a copy to the Favorite
Folder you specify.
Shrinks images that have
printable material extending to
the edge of the paper, so that
the entire image is printed.
3. Select the scan settings you want to use and click OK.
SELECTING FAX SCAN SETTINGS
The Fax scan settings let you choose a fax package and other fax features.
This feature is available only if your computer has fax software and a
modem.
Selecting Scan Settings
17
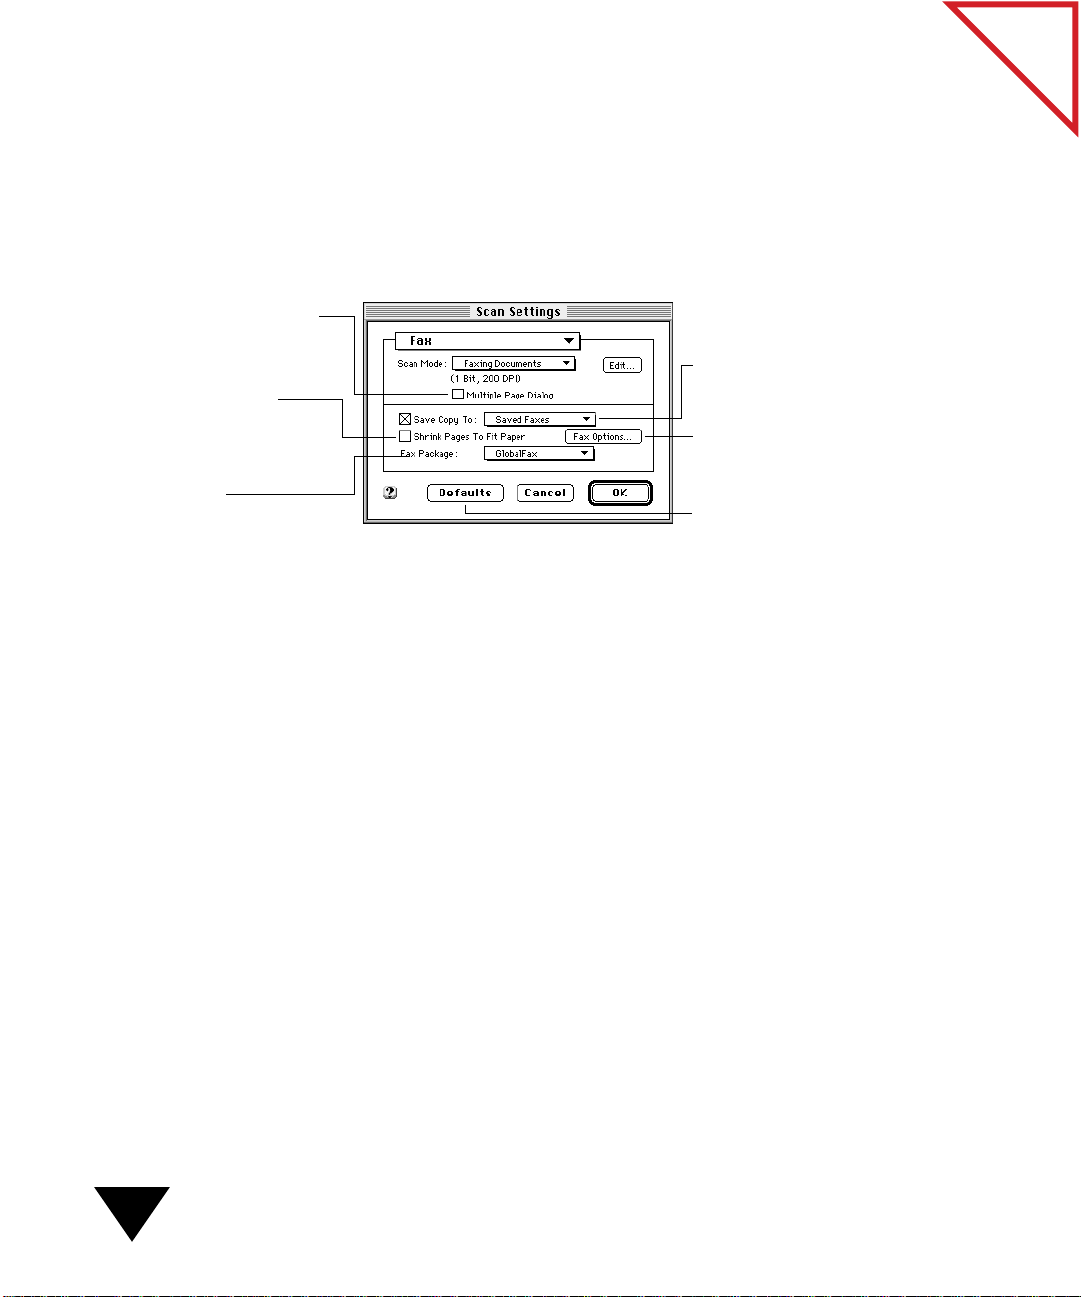
Prompts for the next page when
you want to fax a multi-page
item.
Shrinks images that have
printable material extending to
the edge of the paper, so that
the entire image is printed.
To select Fax scan settings:
1. From the Visioneer menu, choose Scan Settings. The Scan Settings
dialog box appears.
2. From the Target Application pop-up menu, choose Fax. The Fax
settings appear.
Saves a copy to the folder you
choose.
Sets options specific to the fax
software you use.
of Contents
Table
Identifies the fax
package you want to use.
Restores the default
settings.
3. Select the scan settings that you want to use and click OK.
SELECTING E-MAIL SCAN SETTINGS
The E-Mail scan settings let you select the format of the attached scanned
item. For example, if you choose PaperPort, the item is attached to the
e-mail message as a PaperPort item. If the recipient does not have the
PaperPort software or PaperPort Viewer, save the item in a different
format.
To select E-Mail scan settings:
1. From the Visioneer menu, choose Scan Settings. The Scan Settings
dialog box appears.
18
2: Scanning Items

Prompts for the next page when
you want to scan and send a
multi-page item.
2. From the Target Application pop-up menu, choose the e-mail
package you want to use. The e-mail settings appear. The following
example shows settings for AOL mail.
of Contents
Table
Selects the format for the
attached item.
Use the Editing Text scan
mode when you scan a
document that you want to
convert to editable text.
Saves a copy to the folder you choose.
3. Select the settings you want to use and click OK.
SELECTING WORD PROCESSING SCAN SETTINGS
When you select word processing scan settings, you select the format of
the item that is sent to your word processing application.
To select word processing scan settings:
1. From the Visioneer menu, choose Scan Settings. The Scan Settings
dialog box appears.
2. From the Target Application pop-up menu, choose a word
processing application. The word processing settings appear for the
selected word processor. The following figure shows settings for
ClarisWorks.
Select the format for the
file that is sent to the word
processor.
Selecting Scan Settings
19
Use the Storing
w
Photos scan mode
hen you scan a color
item.
3. Select the settings you want and click OK.
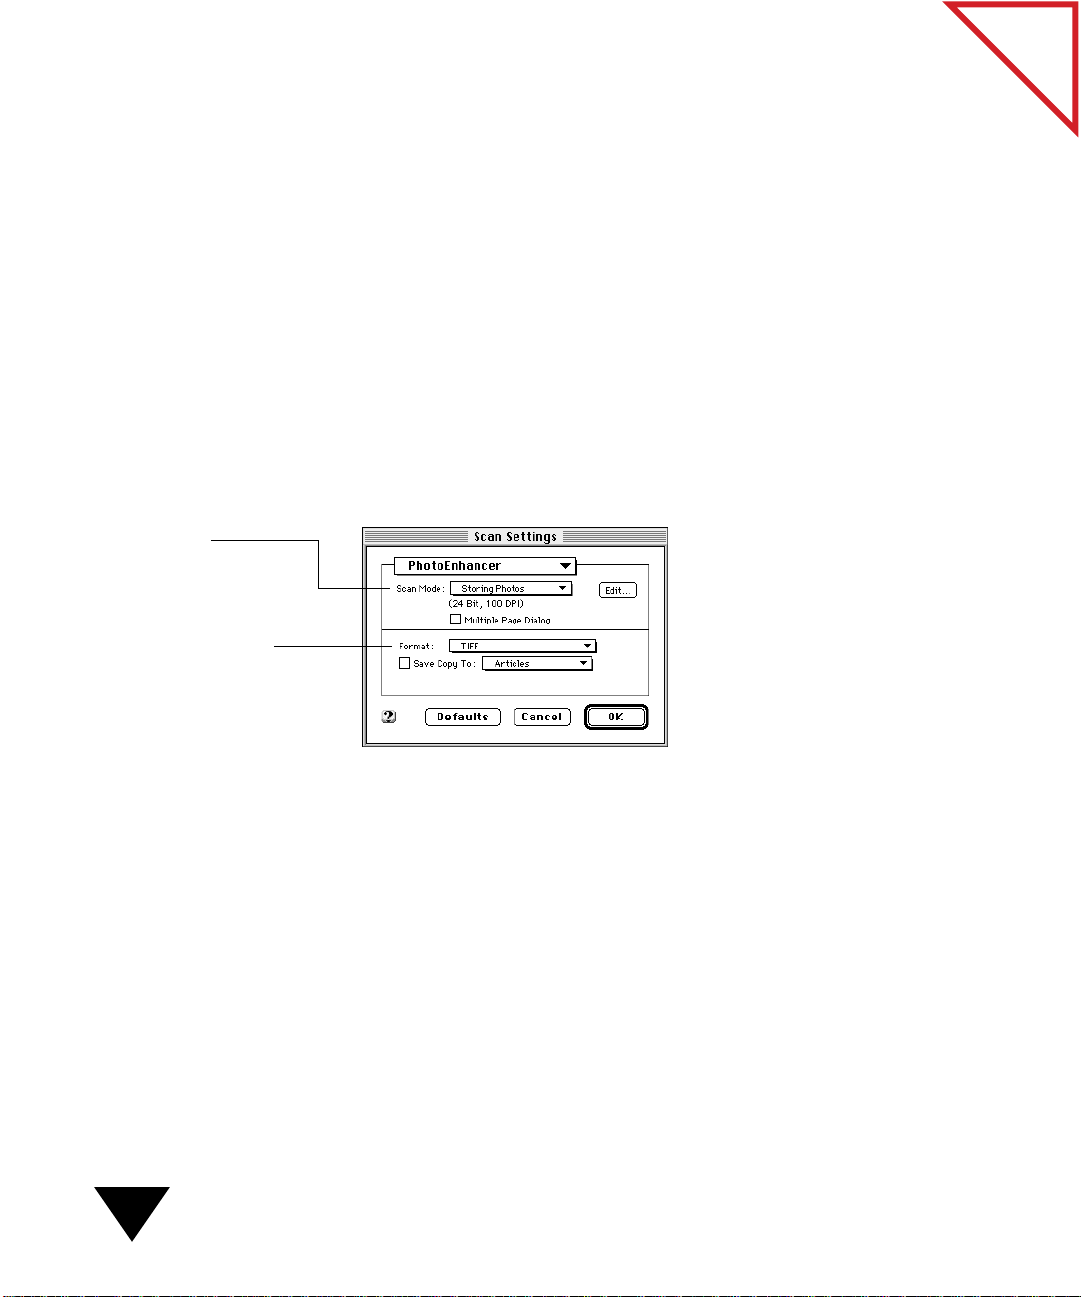
SELECTING IMAGE EDITING SCAN SETTINGS
With the image editing scan settings, you select the format of the item
that is sent to your image editing application. The default scan mode for
an image editor assumes you are scanning a color image.
To select Image Editing scan settings:
1. From the Visioneer menu, choose Scan Settings. The Scan Settings
dialog box appears.
2. From the Target Application pop-up menu, choose your image
editing application. The image editing settings appear for the selected
image editor. The following figure shows settings for PhotoEnhancer.
of Contents
Table
Select the format for the
file that is sent to the image
editor.
3. Select the settings you want and click OK.
2: Scanning Items
20

SELECTING OTHER APPLICATION SCAN SETTINGS
In addition to the previously mentioned applications, you can scan items
directly to other supported applications on your Macintosh computer.
Many of your applications automatically appear in the ScanDirect To
menu and the Scan Settings dialog box. The PaperPort software selects
logical default scan settings for each application, such as selecting a word
processor file format for a target word processing application. You can
change the settings for a target application in the Scan Settings dialog
box, if you want.
▼ NOTE: If an application name does not appear in the ScanDirect To
menu and Scan Settings dialog box, and it is supported by the
PaperPort software, you can add it as an application link. After adding
it as a link, its name appears in the ScanDirect To menu and Scan
Settings dialog box. For more information, see Chapter 9, “Using the
Link Bar.”
of Contents
Table
WORKING WITH SCAN MODES
The scan mode helps to define each target application’s scan settings.
Usually, you do not need to change the scan mode associated with a target
application. But at times, you may want to select a different mode or
create a new mode. For example, assume you want to make a photocopy
of a color document. The mode associated with Photocopy scans in black
and white. To scan a color page and then print it on a color printer, you
should select Storing Photos for the Photocopy target application.
From the Scan S ettings dialog box, you can select predefined scan modes,
customize predefined scan modes, and create new scan modes. The scan
mode determines the sharpness of the image and the number of possible
shades of gray or color. These selections affect the speed of the scan and
the file size. The following table describes the different predefined scan
modes.
Working with Scan Modes
21

of Contents
Table
Scan Mode
Setting
Filing
Articles
Editing Text
(OCR)
Filing
Business
Cards
Making
Photocopies
To Scan Description
Newspaper and
magazine articles,
receipts, forms, and
other text items
Business letters,
contracts, memos, and
other documents that
you want to edit
Business cards and
other documents
with small or fine text
Pages with many
graphics, or mixed
graphics and text,
line art, or photos
that require a quick
scan
Provides the fastest scan time
and smallest file size. This is
the PaperPort software
default setting for scanning to
the PaperPort Desktop.
Enhances the use of OCR
software for converting image
text to editable text. Provides
higher quality and a larger file
size than the Filing Articles
scan mode.
Provides the best setting for
cards linked to other
applications, such as a contact
database. Pro vides the highest
quality text setting.
Creates a reasonable scanned
image in a file that is not too
large.
22
2: Scanning Items
Storing
Photos
Photographs and
color images
Provides the ideal setting for
color images, image editing,
desktop publishing, and
high-quality output.
Results in a color scan with
slower scan time and a larger
file size.
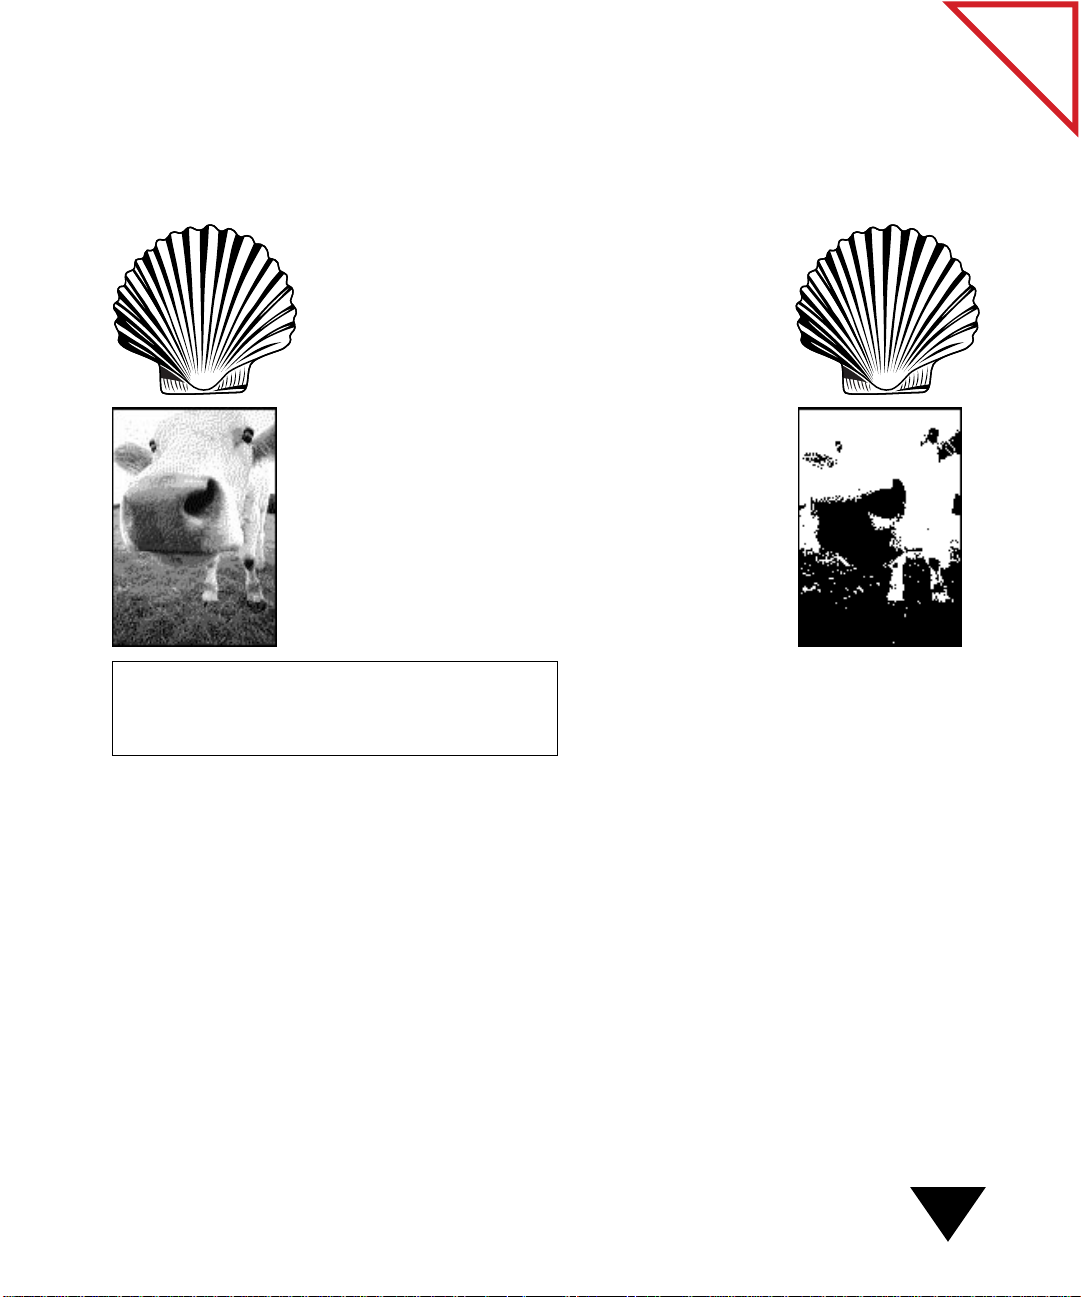
SCAN MODE SAMPLES
Selecting the proper scan mode pr ovides the best scanned image. Here are
some samples of items scanned at various scan modes:
The shell on the left was scanned with the Storing Photos
setting, and the one on the right with the Filing Articles
setting. As you can see, there is no appreciable difference in
quality, because the shell is drawn in black and white.
However, the file size is much greater if you use the Storing
Photos mode. For this reason, Filing Articles is the more
appropriate mode.
The original photo of the cow on the left was scanned
with the Storing Photos setting. The image on the right
is the same photo scanned with the Filing Articles mode.
The Storing Photos mode is more appropriate.
of Contents
Table
Dear Sir,
In response to your recent ad in the Food Is Great Journal , I am
submitting my resume for your review.
The Filing Articles mode is the most appropriate for
this letter because it has large, clear type and the 200
dpi resolution is sufficient. If the typeface were smaller,
you would use the Filing Business Cards mode or
Editing Text mode, which scans at a higher resolution.
Working with Scan Modes
23
ABOUT BIT DEPTH AND RESOLUTION
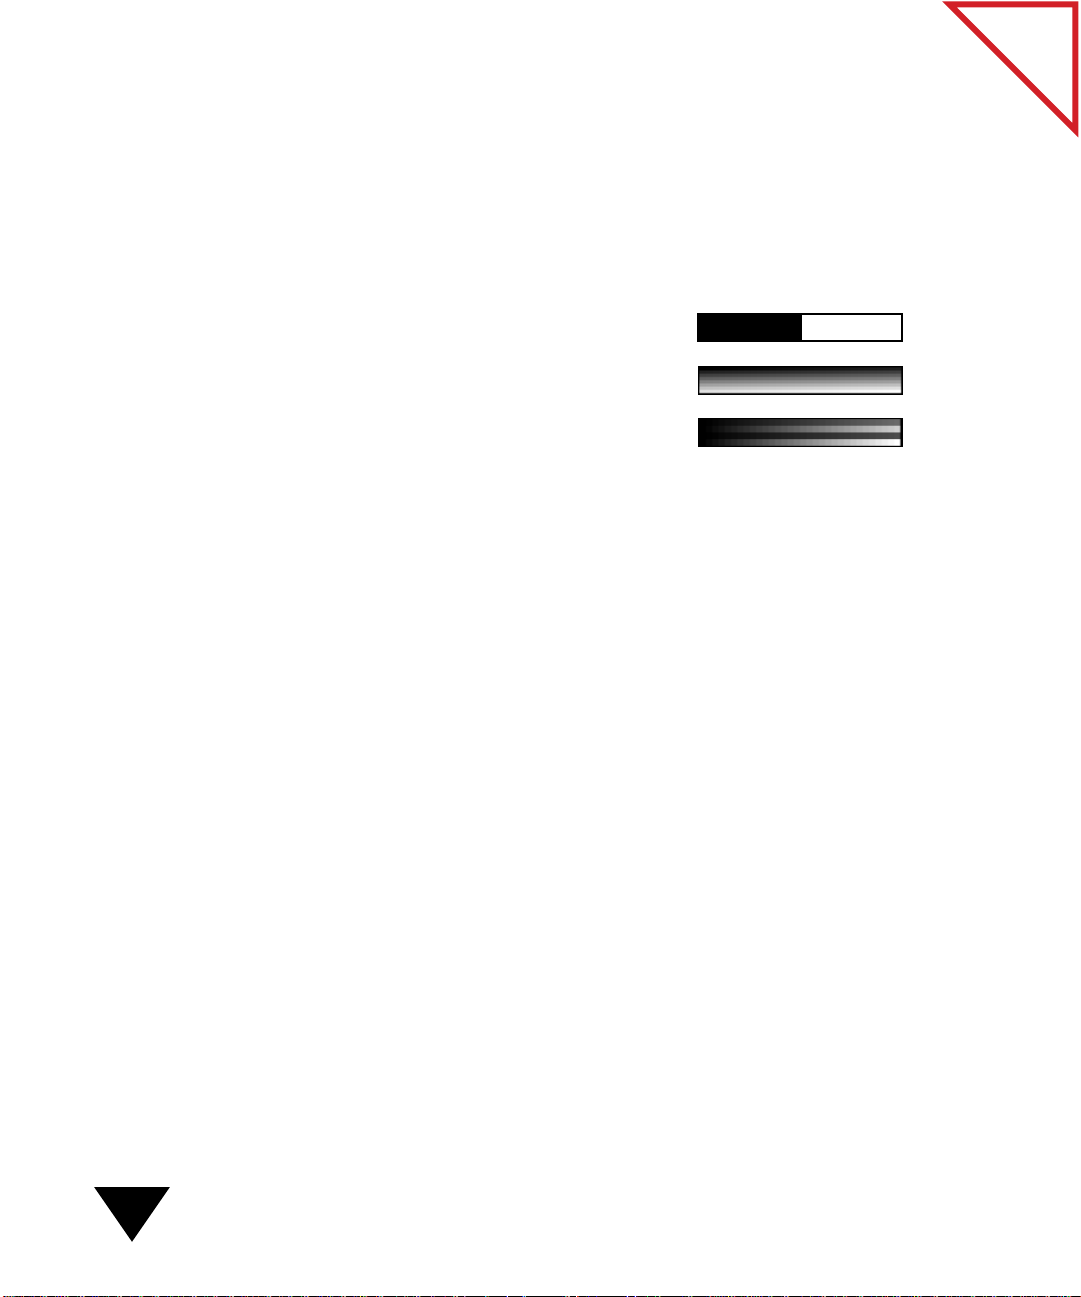
Two factors that define a scan mode are bit depth and resolution.
Bit depth refers to the number of bits that the PaperP ort softwar e uses to
recreate the paper image on the screen. The greater the bit depth, the
more colors and shades of gray that are possible in the image.
1 bit provides the fewest levels of gray and
produces a black-and-white image that is best
for letters and articles.
8 bit produces an image that can have up to 256
shades of gray or colors.
24 bit produces an image in millions of colors.
When you scan a color or grayscale image, the scanner reproduces the
image’s colors or grayscale based on the bit depth setting.
Resolution refers to the sharpness of the image and is measured in dots
per inch (dpi). The higher the dpi, the greater the image’s resolution. But
as resolution increases, so does the file size and the length of time to scan
an item. Therefore, use the higher dpi settings only when necessary.
of Contents
Table
24
In addition to bit depth and resolution, the PaperPort software provides
the SharpPage option. This option optimizes the scan for items that you
scan in black and white (1 bit) and want to fax or convert using the
PaperPort software’s OCR. SharpPage enhances the scan of an item that
has colored text on colored background, so that the scanned image is
more readable.
2: Scanning Items
SELECTING PREDEFINED SCAN MODES OR CREATING YOUR OWN
In the Scan Settings dialog bo x, y ou can select a different predefined scan
mode for a target application or you can customize a predefined mode by
selecting color, the number of grays, the resolution, or the brightness of
the scan. You can also create new scan modes.
▼ CAUTION: If you change a predefined scan mode, the changes are
applied to all target applications that use that scan mode. For example,
if you change the Storing Photos mode, target applications such as
image editors and the Page Viewer that are set by default to use the
Storing Photos mode, will be changed to use the new customized
mode. It’s a good idea to create a new mode for use with a specific
application or specific use instead of modifying a predefined mode.
To choose a predefined scan mode:
1. From the Visioneer menu, choose Scan Settings. The Scan Settings
dialog box appears.
of Contents
Table
Target Application
pop-up menu.
Scan Mode pop-up menu.
Restores the
default settings.
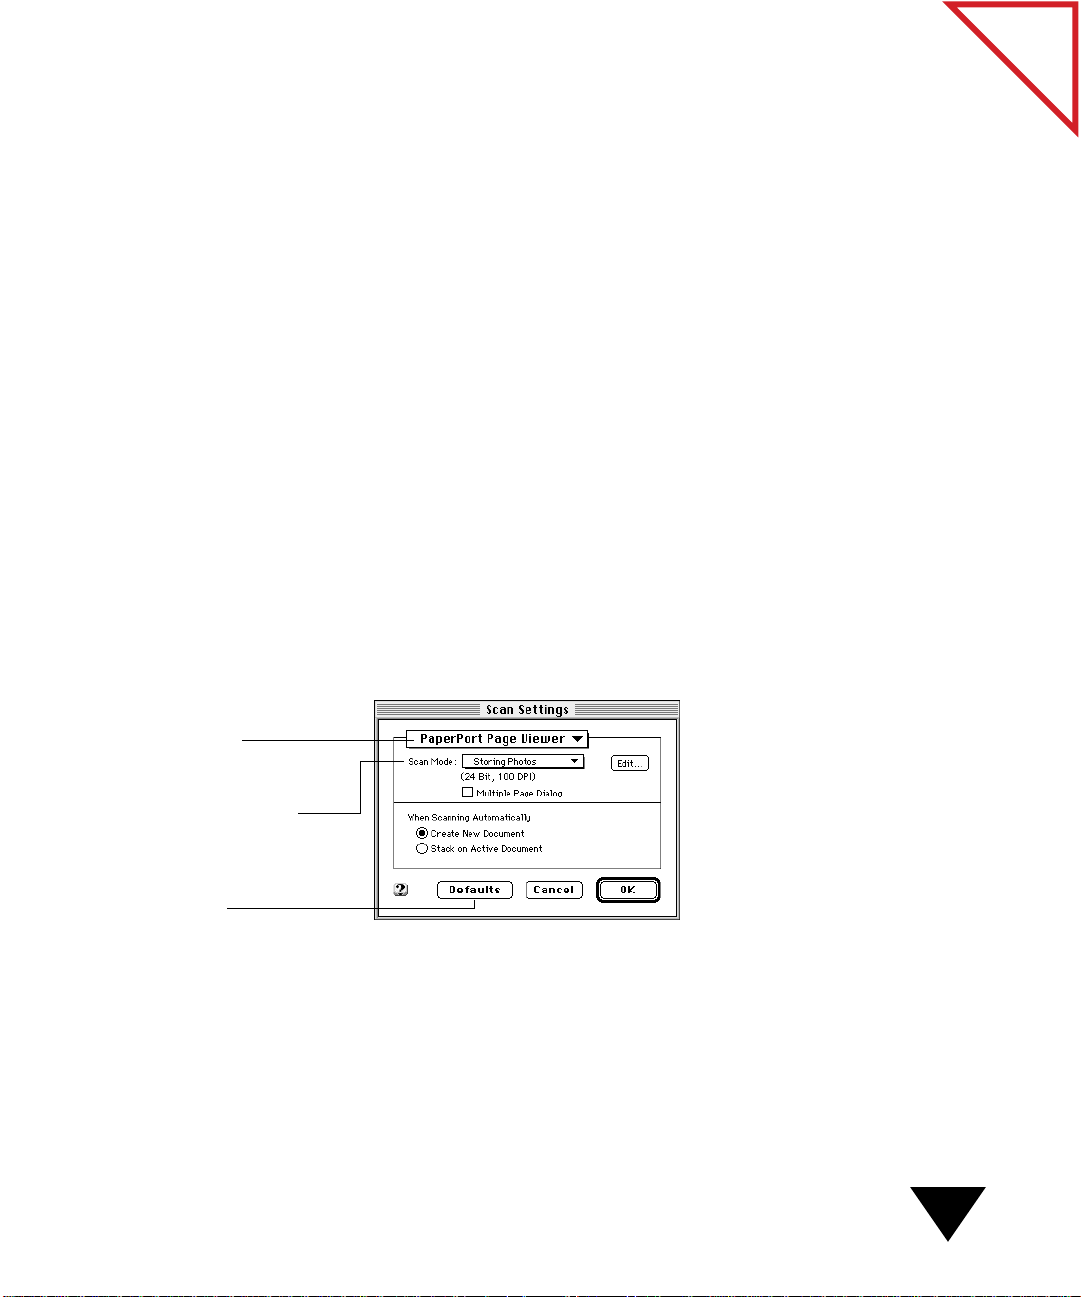
2. From the Target Application pop-up menu, choose the target
application for which you want to set the scan mode. Settings for the
application appear . The follo wing figur e shows the Page Viewer settings.
3. From the Scan Mode pop-up menu, choose the mode setting you
want. Notice that when you select a setting, the description below it
changes. For example, the previous figure shows the description for
the Storing Photos mode (24 bit, 100 dpi).
4. Click OK.
Working with Scan Modes
25
Target Application
pop-up menu.
Scan Mode pop-up menu.
Restores the
default settings.
To customize a predefined scan mode:
1. From the Visioneer menu, choose Scan Settings. The Scan Settings
dialog box appears.
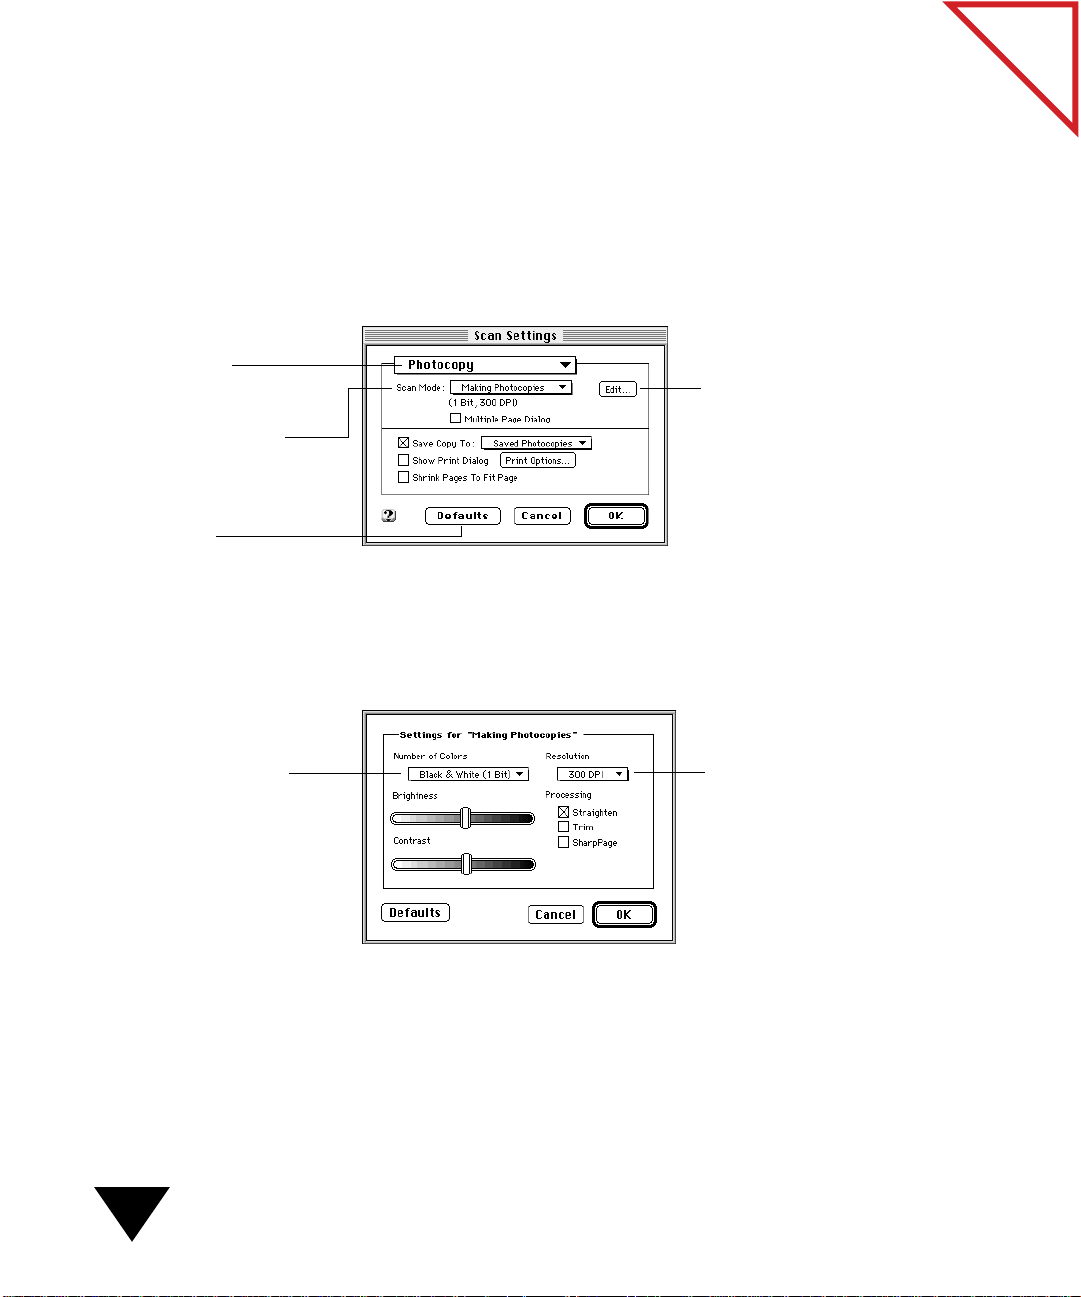
2. From the Target Application pop-up menu, choose the application
for which you want to set the scan mode. S ettings for the application
appear. The following figure shows the settings for Making
Photocopies.
Edit button. Customizes the
scan mode.
of Contents
Table
Number of Colors pop-up
menu. Choose Color if you
want to scan a color item.
Choose Black & White to
scan black-and-white
items.
3. Click the Edit button. The Settings For dialog box appears so that
you can select the bit depth (number of grays or color), brightness,
and resolution. The following figure shows the Settings for the
Making Photocopies dialog box.
Resolution pop-up menu.
4. Choose settings and click OK. The Scan Settings dialog box appears.
The new settings now become the settings used by the Predefined
mode.
26
2: Scanning Items
▼ TIP: To revert to the original settings for a predefined mode, click the
Defaults button.
To create a new scan mode:
1. From the Visioneer menu, choose Scan Settings. The Scan Settings
dialog box appears.
2. From the Target Application pop-up menu, choose the application
for which you want to create a new scan mode. Settings for the
application appear. (After you create a new mode, you can choose it
for use with any application you want.)
3. If you want to base the new mode on a predefined mode, choose the
mode from the Scan Mode pop-up menu.
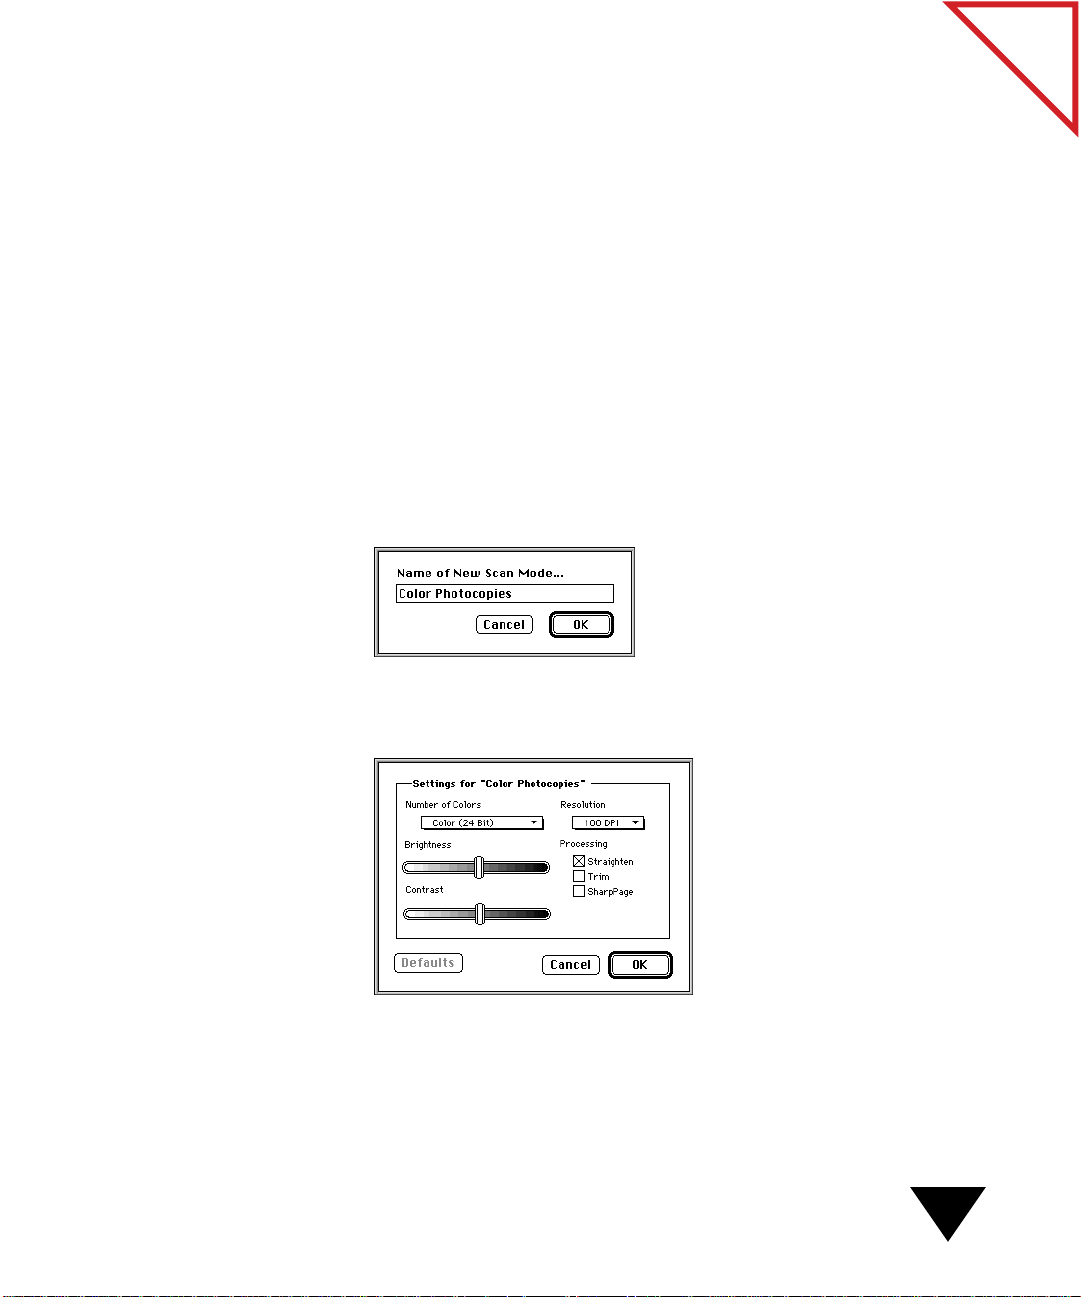
4. From the Scan Mode pop-up menu, choose Create. A dialog box
appears asking you to name the new scan mode.
of Contents
Table
5. Type a name and click OK. The Settings For dialog box appears.
The following figure shows a new mode named Color Photocopies.
6. Select settings for the mode and click OK. The Scan Settings dialog
box appears. The new scan mode appears in the Scan Mode pop-up
menu.
Working with Scan Modes
27

To delete a created scan mode:
1. From the Visioneer menu, choose Scan Settings. The Scan Settings
dialog box appears.
2. From the Scan Mode pop-up menu, choose Delete. A dialog box
appears asking you to select the scan mode you want to delete.
You cannot delete predefined scan modes.
3. Select the scan mode you want to delete and click OK. The scan
mode is removed from the Scan Mode pop-up menu.
▼ NOTE: You cannot change the name of a created scan mode.
You must first delete the scan mode, and then create it again.
of Contents
Table
SCANNING COLOR AND GRAYSCALE ITEMS
By default, your scanner is set up to scan black-and-white items that you
typically want to fax, file, or copy. All of the scan modes, except for
Storing Photos, scan your items in black and white. If y ou want to scan
color or grayscale items, you should either choose the Storing Photos
mode for a target application, or change the scan mode Number of Colors
to Grayscale (8 bit) for grayscale items and Color (24 bit) for color items.
▼ NOTE: For some target applications, such as PhotoEnhancer, Storing
Photos is the default mode. Therefore, you do not need to complete
the following procedure to scan color items to this type of target
application.
28
2: Scanning Items

To scan color or grayscale items:
1. From the Visioneer menu, choose Scan Settings. The Scan Settings
dialog box appears.
2. From the Target Application pop-up menu, choose the target
application for which you want to set the scan mode. Settings for the
application appear.
3. From the Scan M ode pop-up menu, choose S toring P hotos, or click
the Edit button and then choose Color or Grayscale from the
Number of Colors pop-up menu. The new settings now become the
settings used by the selected target application.
4. Scan your color or grayscale item.
After you scan the color or grayscale item, it is a good idea to change
the target application scan mode back to its original setting, unless
you will routinely be scanning color or grayscale items to the
application.
▼ NOTE: Color scanning takes longer and creates a larger file.
of Contents
Table
SCANNING TO GET THE BEST IMAGE
Using the scan settings, you can improve the quality of an image by:
• Changing the brightness and contrast of a scan
• Straightening a crooked page
• Removing the black edges
• Changing the file compression
You select these settings before you scan an item. For information about
adjusting an image, such as changing the tint, brightness, and color after
you scan an item, see Chapter 6, “Fine-Tuning Images.”
Scanning to Get the Best Image
29

CHANGING BRIGHTNESS AND CONTRAST
Sometimes an image is scanned with the brightness too light or too dark.
For example, a note written with a light pencil may need to be scanned
darker to improve legibility. Lightening or darkening the scan brightness
can improve image quality and make it easier to read. Changing the
brightness is similar to changing the setting on a photocopy machine to
make the image lighter or darker.
To change the brightness and contrast:
1. From the Visioneer menu, choose Scan Settings. The Scan Settings
dialog box appears.
2. From the Target Application pop-up menu, choose the application
for which you want to set the brightness. Settings for the application
appear.
3. Click the Edit button. The Settings For dialog box appears.
It contains brightness and contrast control bars.
of Contents
Table
4. Drag the lever on the Brightness bar or Contrast bar to change the
image.
5. Click OK. The ScanDirect Settings dialog box appears.
6. Click OK to save the scan settings.
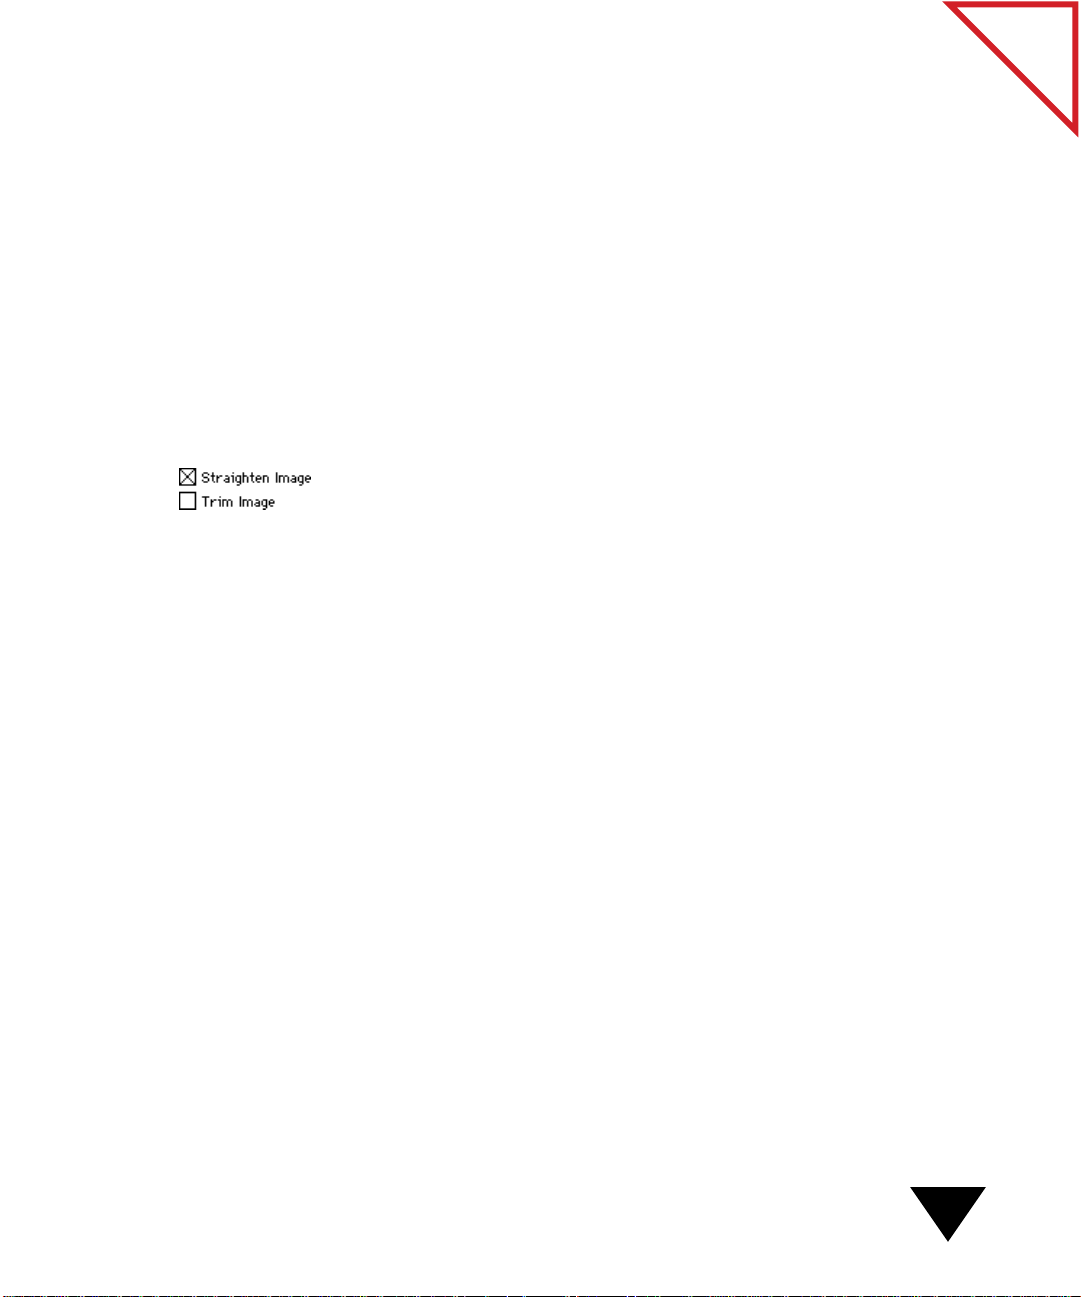
STRAIGHTENING PAGES AND REMOVING BLACK EDGES
If you inadvertently insert an item into the scanner at an angle, the
Straighten Image option can automatically straighten the image on the
screen. The option works with any item that has squared edges, which
includes most business items. If you insert the page at a sharp angle, the
Straighten Image option cannot always straighten the image. When this
option is selected, scanning speed is slower.
When you scan an item that is narrower than 8that has torn edges, the Trim Image option can remove the black edges
and fill them with white.
1/2 inches (21.6 cm) or
30
2: Scanning Items
▼ TIP: If you do not use the automatic options to correct these
problems before scanning, use the Straighten Page command or the
Straighten Page tool, and the Trim Page command to correct these
problems after scanning. For more information, see Chapter 6, “FineTuning Images.”
To straighten pages and remove black edges when you scan:
1. From the Visioneer menu, choose Scan Settings. The Scan Settings
dialog box appears.
2. From the Target Application pop-up menu, choose the application
for which you want to set options. Settings for the application
appear.
3. Click the Edit button. The Settings For dialog box appears.
It contains the Straighten Image and Trim Image checkboxes.
4. Select the checkboxes that you want.
5. Click OK. The Scan Settings dialog box appears.
of Contents
Table
6. Click OK to save the settings.
▼ TIP: If you scan an item with black edges, the Trim Image option
produces poor results. The PaperPort software looks for a white edge
when performing this operation.
SETTING THE COMPRESSION
The compression of a gray-scale or color item affects the quality and size
of a saved file. The default selection is Good, a setting that is fine-tuned
for the PaperPort software. If you have limited disk space or require a
higher quality scanned image, you can adjust the compression. If you
change the compression and then open and save the item again, you may
increase the file size or change the quality of an image.
▼ NOTE: You usually do not need to change the compression setting.
Scanning to Get the Best Image
31
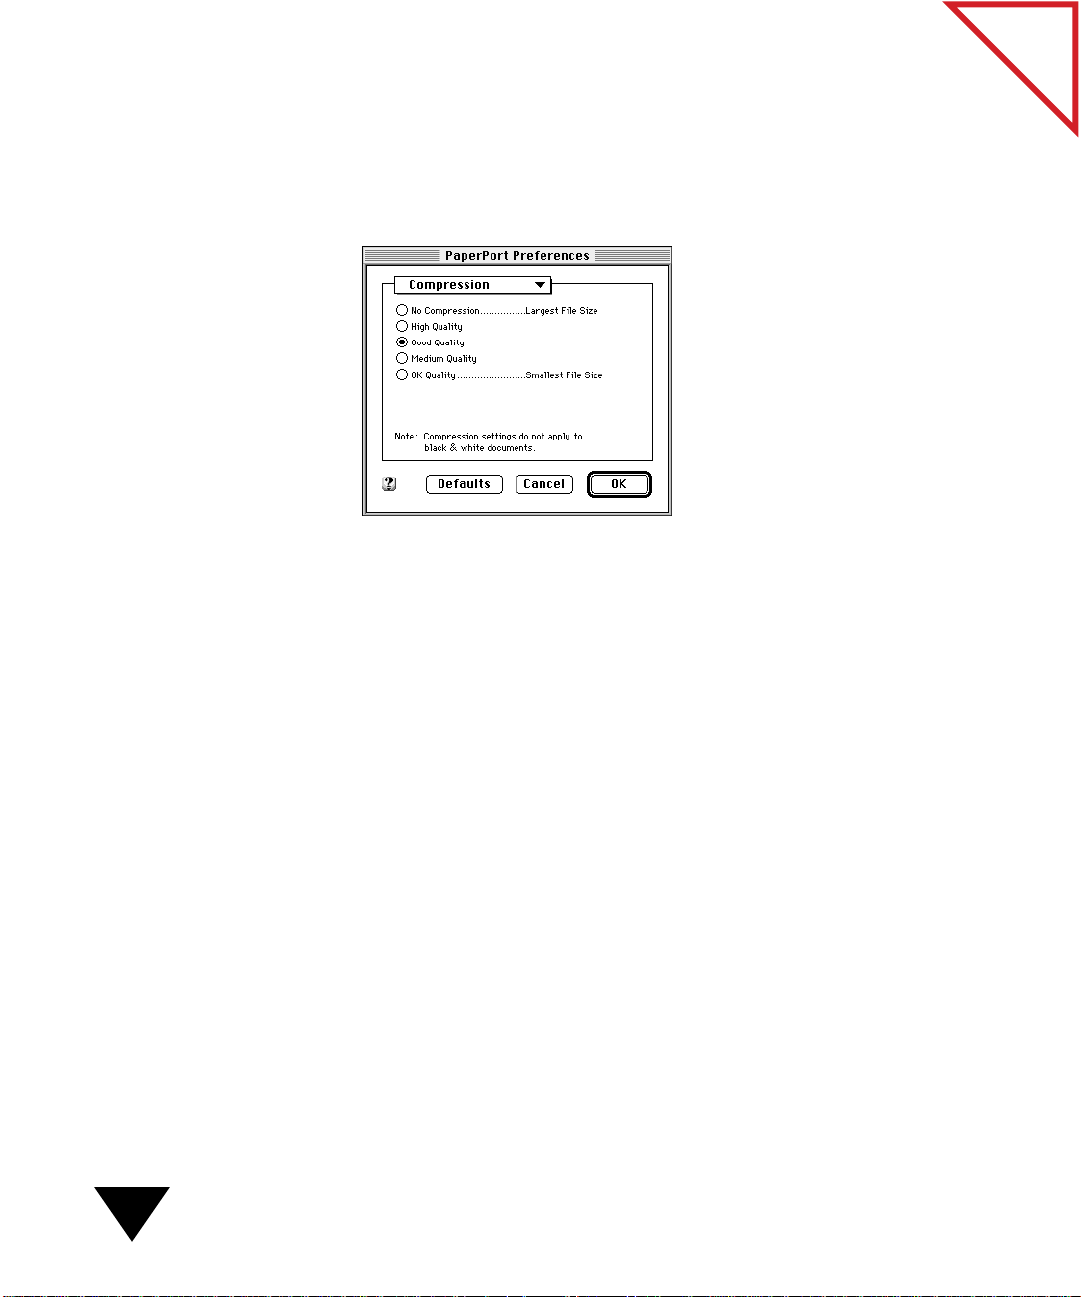
To set the compression:
1. From the Visioneer menu, choose Preferences.
2. From the Preferences pop-up menu, choose Compression. Settings
for compression appear.
3. Select the quality of the compression that you want and click OK.
of Contents
Table
32
SETTING PAPER INSERTION DELAY AND EDGE DETECTION
The scanner waits a certain amount of time between the moment you
insert a page and when the scanner actually grabs that page and begins
scanning it. You can increase or decrease this delay.
If you select the Edge Detection option and inser t an item at an angle, the
scanner can detect when the item gets too close to either side of the feed
slot, and automatically ejects it to prevent damage. A message warns you
when this happens.
2: Scanning Items
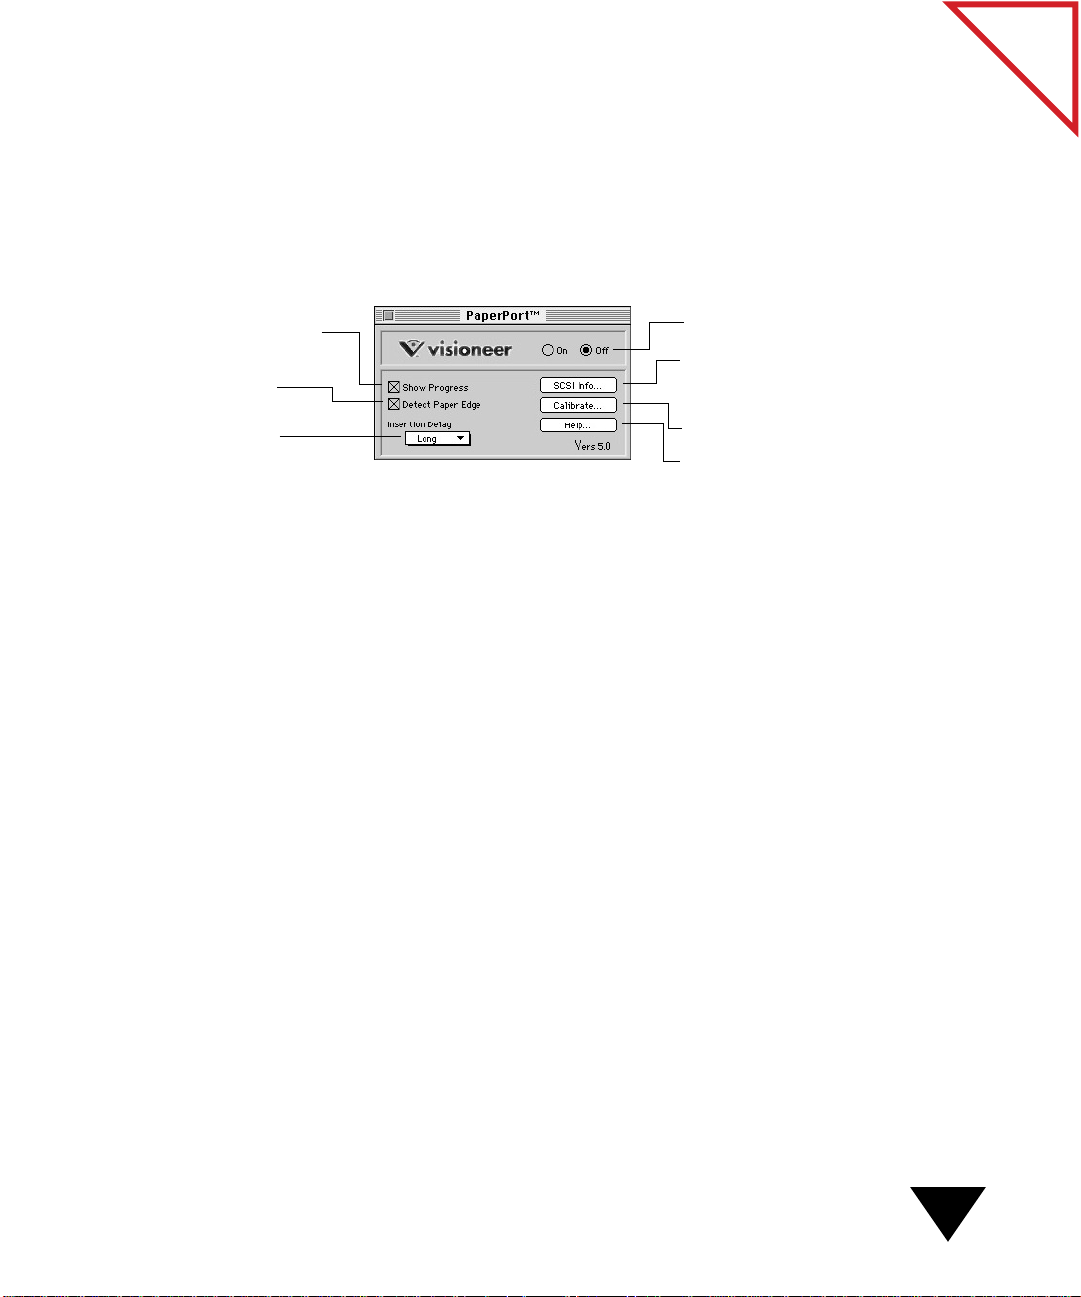
To change the paper insertion delay and edge detection:
w
1. Double-click the PaperPort icon in the Control Panels folder.
The PaperPort Control Panel dialog box appears.
2. From the Insertion Delay pop-up menu, choose the Paper
Insertion Delay that you want. For example, in the following figure
Long is chosen.
of Contents
Table
Shows the progress dialog box
hen you scan an item.
Detects the edge of the
paper when you scan.
Insertion Delay pop-up
menu.
Turns the port on or off.
Provides SCSI port information, such
as which port is assigned to the
scanner.
Calibrates the PaperPort scanner.
Displays PaperPort Help.
3. To turn off the Detect Paper Edge option, deselect it.
TURNING THE COMMUNICATIONS PORT ON AND OFF
You can turn off the communications port where the scanner is
connected. If you want to unplug the scanner SCSI cable, shut down
your Macintosh computer first.
To turn the port off, use one of these methods:
• Press Command-Shift-9. (This works as a toggle for turning the
connection to the communications port on or off.)
• Double-click the PaperPort icon in the Control Panels folder and
click the Off button in the PaperPort Control Panel dialog box.
Turning the Communications Port On and Off
33

of Contents
Table
34
2: Scanning Items

CHAPTER 3
Viewing Items
With the PaperPort software, you can view an item in two ways: on the
PaperPort Desktop or in the Page Viewer. The P aperPort Desktop and the
Page Viewer are separate applications that are tightly integrated. You can
run each application individually or together.
The PaperPort Desktop displays thumbnails of your items after you scan
or display them on the P aperPort Desktop. It also pr ovides an easy way to
file items into different folders and navigate between the folders.
of Contents
Table
The Page Viewer displays a close-up view of an item so that it is readable
on the screen, and lets you adjust and edit the quality and color of the
image and add annotations to a page.
This chapter tells you how to:
• View items on the PaperPort Desktop
• View items in the Page Viewer
• Navigate between pages on the PaperPort Desktop or in the Page
Viewer
• Switch between the PaperPort Desktop and the Page Viewer
35

VIEWING ITEMS ON THE PAPERPORT DESKTOP
The PaperPort Desktop is a work area like your o wn desk, where you can
open different folders to display differ ent papers, photographs, and stacks
on the desktop. The following figure shows the P aperPort Desktop with a
few sample items.
of Contents
Table
The number of
PaperPort items
contained in the
selected folder and
displayed on the
PaperPort Desktop.
Navigation pop-up
menu.
The Folder directory
displays all folders
included in the
location named in
the Navigation
pop-up menu.
Favorite Folders.
These aliases
always appear on
the PaperPort
Desktop.
The total
number of
items in the
selected folder.
View by icon.
View by list.
A PaperPort
item in the
location
named in the
Navigation
pop-up menu.
Navigation pane. Thumbnail item. Stack.
Page Navigator
of a stack.
The left side of the PaperPort Desktop provides a Navigation pane.
Y ou use the Navigation pop-up menu to navigate to different locations on
your Macintosh computer (such as a folder or disk) similarly to the way
you navigate through the hierarchy of folders on your Macintosh
computer when using a directory dialog box to save or open a file.
36
Below the pop-up menu is a list (dir ectory) of the folders contained in the
location named in the Navigation pop-up menu. You can go to a higherlevel directory by choosing a location at a higher level in the pop-up
menu. You can go to a lower-level dir ectory by double-clicking a folder in
the directory. For more information about selecting different folders, see
Chapter 4, “Filing Items into Folders.”
3: Viewing Items

The right side of the PaperPort Desktop displays the PaperPort items
contained in the location named in the Navigation pop-up menu.
The items can be single pages or multi-paged items called stacks.
The status bar at the top of the PaperPort Desktop lists the number of
PaperPort items in a folder and the number of total items in a folder.
(A folder can contain items other than PaperPort items, but they will not
appear on the PaperPort Desktop.)
▼ TIP: You can use the Import command to convert an item created
using another application into a PaperPort item. For more
information about importing, see Chapter 8, “Importing, S aving, and
Deleting Items.”
STARTING AND QUITTING THE PAPERPORT DESKTOP
You can start the PaperPort Desktop and display items several different
ways.
of Contents
Table
To start and display the PaperPort Desktop, use one of these
methods:
• Scan an item directly to the PaperPort Desktop. The PaperPort
Desktop is the default target application when you scan. For more
information about selecting a target application, see Chapter 2,
“Scanning Items.”
• Drag an item to the PaperPort Desktop link icon on the Link Bar.
For more information about using the Link Bar, see Chapter 9, “U sing
the Link Bar.”
• Double-click the PaperPort Desktop application icon.
• Double-click the PaperPort Desktop link icon on the Link Bar.
To quit the PaperPort Desktop application:
• From the File menu, choose Quit.
Viewing Items on the PaperPort Desktop
37

MOVING ITEMS ON THE PAPERPORT DESKTOP
If the PaperPort Desktop becomes cluttered, you can r earrange the items.
To move an item:
1. Click to select the item that you want to move, or use Shift-click to
select multiple thumbnail items.
2. Drag the item to the new location on the PaperPort Desktop, or
choose Clean U p D esktop fr om the Desktop menu to r earrange the
selected items.
▼ TIP: To select all the items, choose Select All from the Edit menu.
To arrange all items:
• From the Desktop menu, choose Clean Up Desktop. The items are
automatically reordered in neat rows starting from the upper-left
corner of the PaperPort Desktop.
of Contents
Table
38
▼ TIP: To arrange items alphabetically, hold down the Option key and
choose the Clean Up Desktop command.
3: Viewing Items

Click a column
title—Name, Pages,
Size, or Last Modified—
to sort the list in that
order.
VIEWING ITEMS BY ICON OR NAME
You can view items on the PaperPort Desktop in icon view or list view.
The following figure shows items in list view.
Click either
the View by
Icon or View
by List icon.
of Contents
Table
To display an item list:
• From the View menu, choose View by List, or click the View by List
icon in the upper-right corner of the PaperPort Desktop. Each item’s
filename, number of pages, file size, and date last modified appears.
To display item thumbnails:
• From the View menu, choose View by Icon, or click the View by I con
icon in the upper-right corner of the PaperPort Desktop.
Viewing Items on the PaperPort Desktop
39
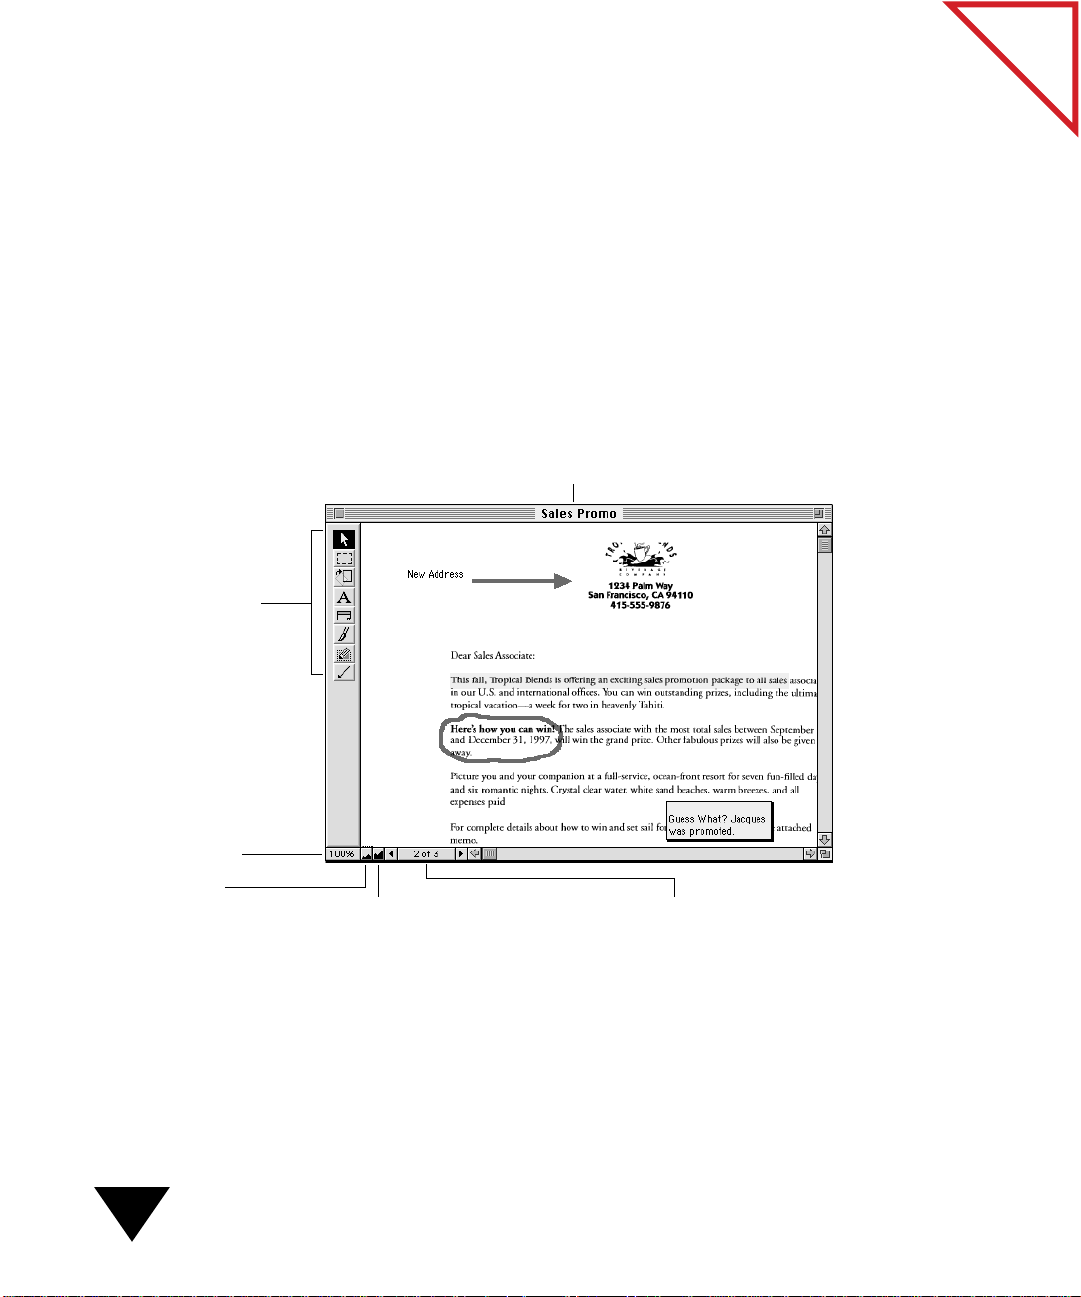
WORKING IN THE PAGE VIEWER
While the PaperPort Desktop gives you an overall picture of all of the
items on the P aperPort Desktop, the Page Viewer displays the details of a
single page, so it is easy to edit an image, add annotations, or select
information.
The Page Viewer displays a full-size or close-up view of one page.
Although a stack has multiple pages, you can display only one page of a
stack at a time in the Page Viewer. However, you can display multiple
Page Viewer windows for different items. The following figure shows a
sample page in the Page Viewer.
Name of the item
you are viewing.
of Contents
Table
The Annotation tools
are for adding notes,
highlighting areas, or
selecting a section.
Page magnification.
Reduces the page
(zoom out).
Magnifies the page
(zoom in).
The Page Navigator displays the previous or next page of a
multi-page item (stack) when you click the left or right arrow.
40
3: Viewing Items

STARTING AND QUITTING THE PAGE VIEWER
You can start the Page Viewer in several different ways.
To start the Page Viewer and display an item, use one of these
methods:
• Scan an item directly to the Page Viewer. For more information about
selecting the Page Viewer as the target application, see Chapter 2,
“Scanning Items.”
• Double-click the Page View er application icon, and then choose the
Open command in the File menu to select and open an item.
• Double-click a thumbnail item on the PaperPort Desktop.
• Select an item on the PaperPort Desktop and choose Open from the
File menu.
• Double-click a PaperPort item on your hard disk.
• Drag an item onto the P age Viewer link icon on the Link Bar.
of Contents
Table
• Double-click the Page View er link icon on the Link Bar.
To close an item in the Page Viewer:
1. From the File menu, choose Close, or click the close box. A message
asks if you want to save changes.
2. Click Yes to save the changes to an item. If you scan or link an item
to the Page Viewer, you must click Yes to save a copy of the item on
your hard disk.
To quit the Page Viewer:
• From the File menu, choose Quit.
Working in the Page Viewer
41
THE ANNOTATION TOOL BAR
After you display an item in the Page Viewer , you can use the Annotation
Tool Bar to annotate items. For example, you can highlight text, circle
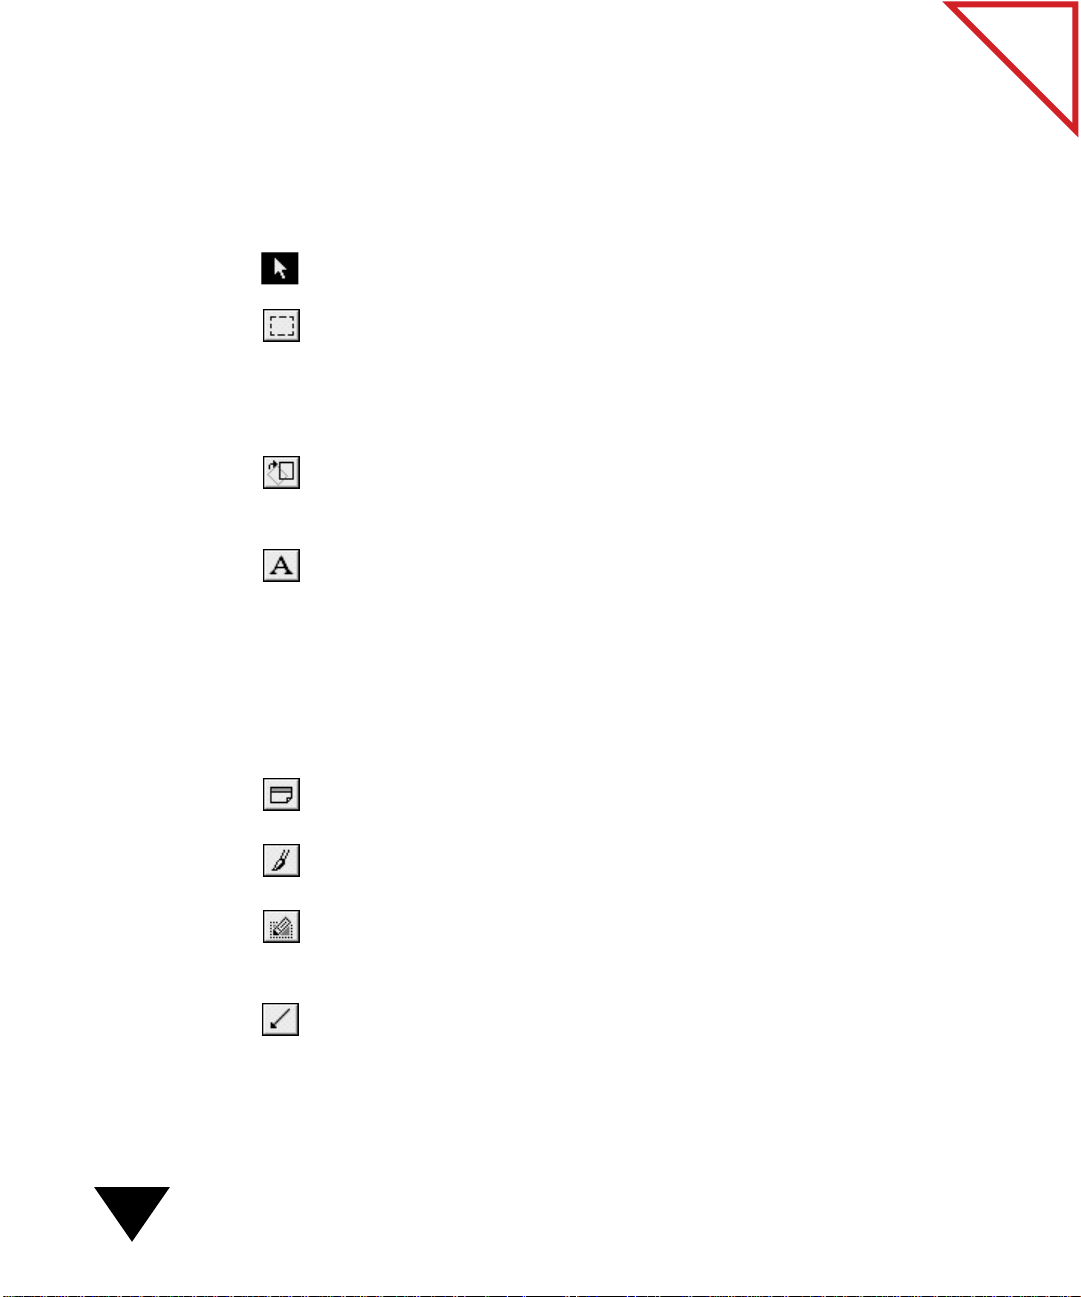
information, or add a sticky note. The Annotation tools are as follows:
Pointer. Selects, moves, and resizes annotations on a page.
Selection. Selects a section of a page that you want to crop, cut or copy.
For example, you may want to copy a graphic for use in another
application, such as in a word pr ocessing document. You also use this tool
for cropping an area of a page or processing selected text with the OCR
software provided with the PaperPort software.
Straighten Page. Draws a line that serves as a guide for straightening a
page. For more information about how to use this tool, see Chapter 6,
“Fine-Tuning Images.”
Mark-U p. A dds one or more lines of text in a transparent frame. This tool
is especially useful for filling in forms because the form remains visible
when you type text on it.
of Contents
Table
42
▼ TIP: Contact Visioneer for information about purchasing the
FormTyper software, an application that automatically creates form
fields on a scanned form and makes it easy to tab between fields and
enter information.
Note. Writes a note. F or example, you can add y our comments or identify
important information.
Freehand. Draws freehand marks. For example, circle text and underline
sentences.
Highlighter. Highlights an area, item, or text on a page. This directs a
reader’s attention to specific details. If used in the opaque mode, it blocks
out information that you don’t want shown on a printed or faxed copy.
Arrow. Draws straight lines, with or without arrowheads, to point to
specific items or text. This tool works well with mark-ups or sticky notes
when you want to point out an item on a page.
3: Viewing Items

DISPLAYING AND HIDING THE ANNOTATION TOOL BAR
The Annotation Tool Bar is displayed by default when you view a page in
the Page Viewer, unless you choose to hide it.
To hide or display the Annotation Tool Bar:
• From the View menu, choose Hide Tool Bar or Show Tool Bar .
The following sections show you how to use the Page Viewer. For more
information about how to use the Annotation tools, see Chapter 7,
“Annotating Items.”
ZOOMING IN OR OUT ON A PAGE
In the Page Viewer, you can zoom in to display the details of a page, or
zoom out to make the page smaller on the scr een.When y ou z oom in, the
page contents appear larger on the screen and are easier to see.
of Contents
Table
Making the page smaller, or zooming out, reduces the size of the entire
page to fit onto the screen. Notice that while you can see more of the
page, you may not be able to read the text.
To zoom in or out on a page:
1. Display the item in the Page Viewer.
2. To zoom in, choose Zoom In from the View menu, or click the
Zoom In icon.
3. To zoom out, choose Zoom Out from the View menu, or click the
Zoom Out icon.
▼ NOTE: To display the page at 100 percent, click the page
magnification area, or choose Actual Size from the View menu.
Working in the Page Viewer
43

ARRANGING THE PAGE VIEWER WINDOWS
You can open multiple Page Viewer windows at the same time.
Sometimes you will be able to wor k more easily if the windo ws ar e side by
side or are placed on top of each other. You can arrange the windows in
three ways using the Window menu.
To arrange the Page Viewer windows:
1. In the Page Viewer, open the items that you want to view.
2. From the Window menu, choose the W indo w menu command that
you want. The following table describes the commands that are available.
Command Description
Tile Vertical Arranges the Page Viewer windows one
above the other.
Tile Horizontal Arranges the Page Viewer windows side by
side.
of Contents
Table
44
Overlay Windows Arranges the Page Viewer windows on top
of each other so that all windows can be
seen.
NAVIGATING BETWEEN PAGES
You can move between pages in a stack on the PaperPort Desktop or in
the Page Viewer by:
• Clicking the Page Navigator
• Choosing commands from the View menu
3: Viewing Items

To move between pages:
1. Select the item on the PaperPort Desktop, or display it in Page View.
of Contents
Table
Previous Next
Click the middle of
the Page Navigator to
display the Go To
Page dialog box.
2. Click the right arrow of the Page Navigator to display the next page;
click the left arrow to display the previous page.
You can also move between pages by choosing the View menu
commands: First Page, Last Page, Previous Page, and Next Page. You can
also use the Go To Page command to move directly to a specific page in
the stack.
To go to a specific page in a stack:
1. From the View menu, choose Go To Page, or click the middle
button of the Page Navigator. The Go To Page dialog box appears.
2. T ype the page number that you want to go to, and click OK.
SWITCHING BETWEEN THE PAPERPORT DESKTOP AND
AGE VIEWER
P
If both the PaperPort Desktop and the Page Viewer applications are
active, you can switch between them by clicking the window that you
want to make active, or choosing the application from the Macintosh
Finder menu.
Switching Between the PaperPort Desktop and Page Viewer
45

of Contents
Table
46
3: Viewing Items

CHAPTER 4
Filing Items into Folders
One of the primary benefits of using the PaperPort software is that it
helps you get organized. Scanning the papers on your desk cleans up the
clutter, but then what? Without some way of organizing your electronic
copies of paper, you are simply trading clutter on your desk for clutter on
your computer.
This chapter tells you how to save these items into separate folders that
are like ordinary manila file folders, except that they are electronic.You’ll
also learn how to create Favorite Folders—folders that you want to use
often and that always appear on the PaperPort Desktop so you can
quickly and easily file information.
of Contents
Table
This chapter tells you how to:
• Display folders and items
• Rename items
• File items into folders
• Create folders
• Make a Favorite Folder
• Remove a Favorite Folder
• Locate folders and items on your Macintosh computer
• Find items and annotated text
47

Navigation pop-up
menu.
The Folder
directory displays all
folders included in
the location named
in the Navigation
pop-up menu.
DISPLAYING FOLDERS AND ITEMS
When you scan an item to the PaperPort Desktop or the Page Viewer,
The PaperPort software saves the item on your hard disk. The folder in
which it is saved is determined by the folder currently named in the
Navigation pop-up menu. The PaperPort Folder is the default folder the
first time you use the PaperPort software. The following figure shows the
PaperPort Desktop with a few sample items.
of Contents
Table
Favorite Folders.
These aliases
always appear on
the PaperPort
Desktop.
Navigation pane. Thumbnail item.
The left side of the PaperPort Desktop provides a Navigation pane that
you use to navigate to different locations on your Macintosh computer.
The right side of the PaperPort Desktop displays PaperPort items
contained in the location named in the Navigation pop-up menu.
To navigate and display PaperPort items:
1. From the N avigation pop-up menu in the N avigation Pane, choose a
location, such as a folder or disk.
Below the pop-up menu, a list (directory) of the folders contained in
the location named in the pop-up menu appears.
4: Filing Items into Folders
48

1. Choose the Hard Disk in
the Navigation pop-up
menu.
Folders on the Hard
Disk appear in the
Folder directory.
2. Double-click the
PaperPort Folder to
open it.
2. To go to a higher-level directory, choose an item at a higher level in
the pop-up menu. To go to a lower-level directory, double-click a
folder in the directory.
The PaperPort items contained in the location named in the
Navigation pop-up menu appear on the right side of the PaperPort
Desktop.
The following figure shows the navigation from the Macintosh hard
disk to the PaperPort Folder. The PaperPort items in the folder
appear on the PaperPort Desktop.
The PaperPort Folder
name now appears in the
Navigation pop-up menu.
The items in the folder
appear on the right side of
the PaperPort Desktop.
of Contents
Table
This folder contains
five PaperPort items
and a total of seven
items.
Displaying Folders and Items
49

When you quit the PaperPort Desktop, the folder that is currently
selected remains as the selected folder the next time that you start the
PaperPort Desktop application.
RENAMING ITEMS
When you first place an item on the PaperPort Desktop, it appears as an
untitled item. It’s a good idea to rename your items with a unique name.
To rename an item on the PaperPort Desktop:
1. Click the title of the item. The text becomes highlighted.
2. Position the cursor in the text area of the title and click the mouse.
As you position the cursor, it changes to an I-beam. When you click
the mouse, the cursor starts to flash.
3. Type a new title for the item.
of Contents
Table
4. After you type the name, click another place on the PaperPort
Desktop.
▼ TIP: You can also rename items in the Page Viewer by using the Save
As command. For more information, see Chapter 8, “Importing,
Saving, and Deleting Items.”
FILING ITEMS INTO FOLDERS
The PaperPort software provides several ways to file items into folders:
• Scan directly to a folder or another target application, such as your
e-mail application, and save a copy of the scanned item on the
PaperPort Desktop in one of your Favorite Folders. For more
information about saving a copy of a scanned item into a folder, see
Chapter 2, “Scanning Items.”
• Drag items from the PaperPort Desktop into a folder or Favorite
Folder on the PaperPort Desktop.
4: Filing Items into Folders
50
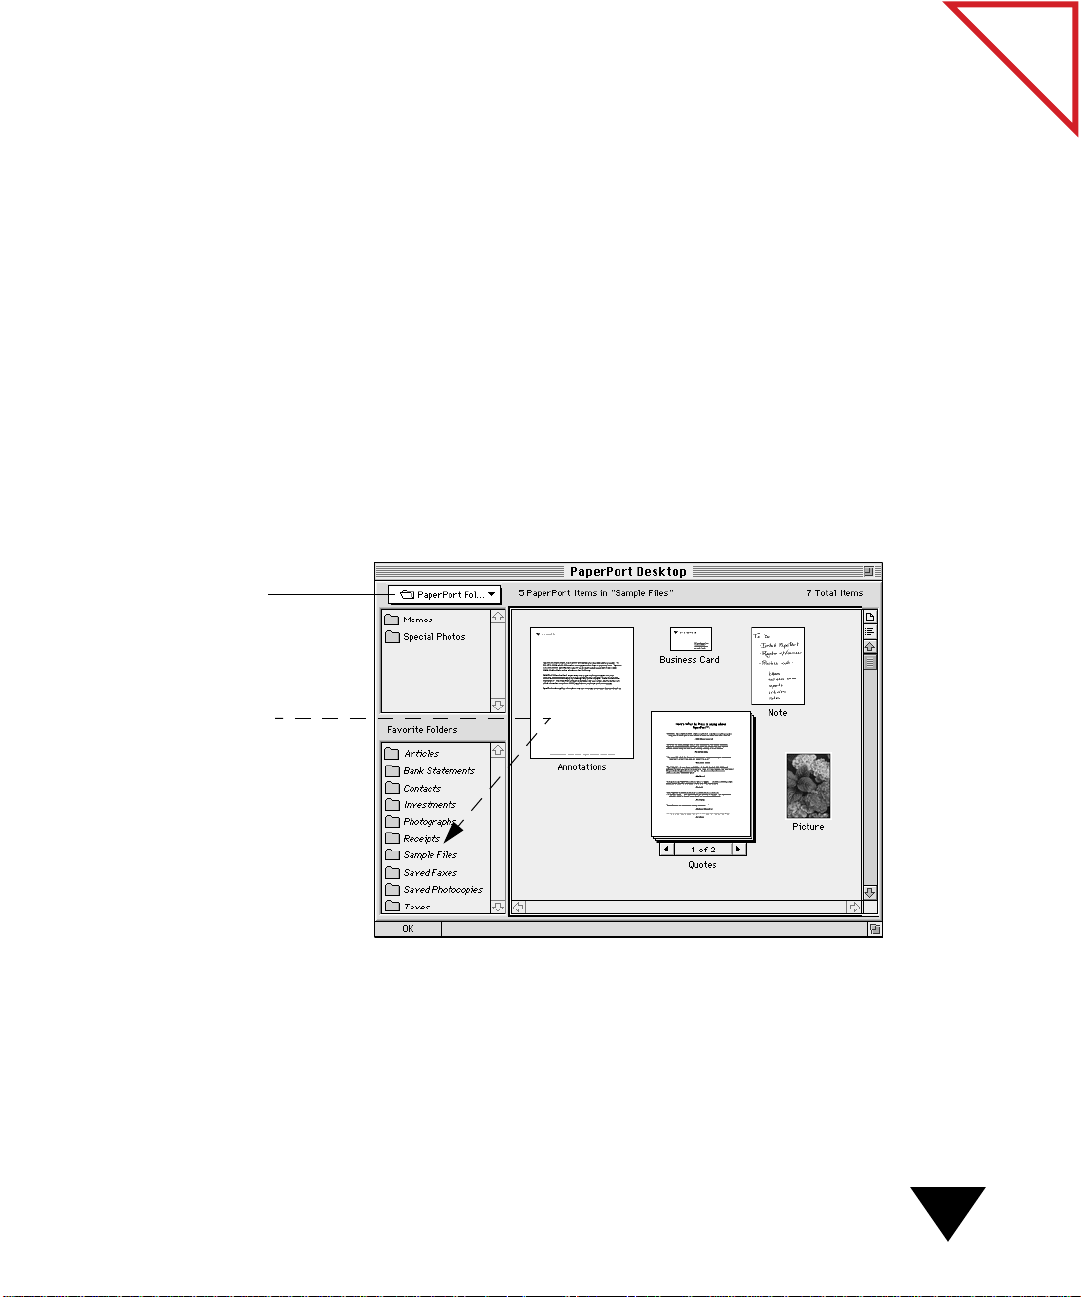
Name of the location
containing the item you
want to file.
• Drag items from the PaperPort Desktop into a folder on the
Macintosh desktop.
• Drag items between folders on the Macintosh desktop.
▼ TIP: You can use other M acintosh commands, such as O ption-drag to
copy an item into another folder, or Shift-click to select multiple items
to file into a folder.
To drag an item into a folder:
1. On the PaperPortDesktop, use the Navigation pane to navigate to
the location containing the item you want to file. The item appears
on the PaperPort Desktop.
2. Drag the item into the folder in which you want to file it. Shift-click
to select multiple items. The following figure shows an item dragged
into a Favorite Folder.
of Contents
Table
Drag the item into the
folder in which you want
to file it. Shift-click to
select multiple items.
Filing Items Into Folders
51

To drag an item from the PaperPort Desktop to the Macintosh
desktop:
1. On the PaperPort Desktop, select the folder that contains the item
you want to move.
2. Drag the item from the PaperPort Desktop into a folder on the
Macintosh desktop.
To drag an item between folders on the Macintosh desktop:
1. On the Macintosh desktop, navigate to the folder that contains the
PaperPort item you want to move.
2. Select the item and drag it into another folder.
On the Macintosh
desktop, you can drag
an item into a different
folder.
of Contents
Table
4: Filing Items into Folders
52
CREATING FOLDERS
You can create folders on the PaperPort Desktop or the Macintosh
desktop. You can create a folder at any level—on the Macintosh hard
drive, on an external drive, or within another existing folder. F or example,
you may want to create a folder named Business Travel and then create
other folders within Business Travel for various categories, such as
Receipts, Maps, and Accommodations.

▼ TIP: A good way to archive information is to scan items and then file
them in folders that you create on a removable medium, such as a
floppy disk, removable hard drive, or zip drive. For example, you may
want to scan a variety of refer ence articles, and then file them on a ZIP
drive in various folders based on subject matter.
To create a folder on the PaperPort Desktop:
1. From the Navigation pane, navigate to the location where you want
to create a new folder. The location name appears in the pop-up
menu.
2. From the File menu, choose New Folder. A dialog box appears
asking you to name the folder.
of Contents
Table
3. Type a name for the folder.
4. Select the Add to Favorites checkbox if you want to automatically
make the folder a Favorite Folder.
5. Click Create. The new folder is selected as the current folder in the
Navigation menu.
To create a folder on the Macintosh desktop:
• On the Macintosh desktop, choose New Folder from the File menu.
On the P aperPort Desktop, navigate to the folder using the N avigation
pop-up menu as described in “Displaying Folders and Items ” earlier in
this chapter.
Creating Folders
53

▼ NOTE: Delete a folder the same way you would any folder from your
Macintosh computer—by dragging it from the Macintosh desktop to
the trash can. If you want to delete a Favorite Folder, you must first
remove the folder fr om the list of favorites. For more information, see
“Removing a Favorite Folder” later in this chapter.
ADDING A FAVORITE FOLDER
A Favorite Folder is an alias—a folder that represents an actual folder on
your Macintosh computer. Favorite Folders always appear in the Favorite
Folders section of the PaperPort Desktop, regardless of the folder you
choose from the Navigation pop-up menu. You can drag and drop items
into Favorite Folders or use Favorite Folders to file a copy of an item that
is scanned directly to another target application, such as your e-mail or
fax application.
▼ NOTE: When you install the PaperPort software, several Favorite
Folders, such as Articles, Receipts, Sample Files, and Photographs
appear automatically in your list of Favorite Folders. You can keep
these folders in your list of Favorite Folders or remove them as
described in “Removing a Favorite Folder” later in this chapter.
of Contents
Table
4: Filing Items into Folders
54
To add a Favorite Folder:
1. From the Navigation pane, navigate to the folder that you want to
make a Favorite Folder. The folder name appears in the Navigation
pop-up menu.
2. From the File menu, choose Add folder to Favorites, where folder is
the name of the selected folder. The selected folder appears in the list
of Favorite Folders.
▼ TIP: To find the actual location of a Favorite folder on your
Macintosh computer, use the Locate in Finder command. For more
information, see “Locating Favorite Folders and Items” later in this
chapter.

REMOVING A FAVORITE FOLDER
If you no longer want a folder designated as a Favorite Folder, you can
remove it from the Favorite Folders list.
▼ NOTE: If you delete a folder from your Macintosh computer that is
designated as a favorite, you should also remove the Favorite Folder
from the list of Favorite Folders. Otherwise, an error message appears
if you try to file items into the Favorite Folder.
To remove a Favorite Folder:
1. From the list of Favorite Folders, select the folder.
2. From the Edit menu, choose Remove folder from Favorites, where
folder is the name of the selected folder. The selected folder is
removed from the list of Favorite Folders.
▼ NOTE: For information about deleting items, see Chapter 8,
“Importing, Saving, and Deleting Items.”
of Contents
Table
LOCATING FAVORITE FOLDERS AND ITEMS
Designating a folder as a favorite makes it easy to fi le information because
the folder is always available on the PaperPort Desktop. However, at
times you may want to find the physical location of a Favorite Folder.
To locate a Favorite Folder, use the Locate in Finder command. You can
also use this command to locate any item on the PaperPort Desktop.
Removing a Favorite Folder
55

To locate a Favorite Folder or item on the Macintosh computer:
1. On the PaperPort Desktop, select the Favorite Folder or item that
you want to locate.
2. From the File menu, choose Locate in Finder. The location
containing the Favorite Folder or item appears as an open window
with the F av orite Folder or item selected. The follo wing fi gur e shows
the location results when the Articles Favorite Folder is located.
of Contents
Table
The Articles Favorite
Folder is selected.
After you
choose the
Locate in
Finder
command, the
window
containing the
Articles folder
appears with
the folder
FINDING ITEMS
Filing items into folders helps you keep your PaperPort Desktop
organized, but you need to also be able to quickly locate those items.
To search for items, use the Find Document command. With Find
Document, you search for items by using different information called
search criteria. You can search for an item by its filename, location,
annotation text, and date modified. You can use one criterion or several
criteria to help you find the item. For example, you can search for all files
named Tax Laws that were modified between January 1, 1997 and
June 1, 1997. At least one criterion must be met before a file is found.
4: Filing Items into Folders
56
To help ensure that an item is even easier to find at a later date, you can
add information in the Get Info dialog box associated with an item. This
data can include keywords, comments, or an author’s name. For example,
you may want to add keywords or comments that describe the content of
the item, such as new laws for 1997, competitor’s products, or health
insurance information.

Displays the location
of this item on your
Macintosh computer.
▼ TIP: You can also search for added annotations. For more
information, see Chapter 7, “Annotating Items.”
To add Get Info data:
1. On the PaperPort Desktop or in the Page Viewer, select the item for
which you want to add information.
2. From the File menu, choose Get Info. The Get Info dialog box
appears.
You can also use the filename
and modified date as search
criteria.
Type information that you
want to use to search for this
item at a later date.
Closes the dialog box.
of Contents
Table
3. Type information in one or more of the fields that y ou want to use to
identify the item.
4. Click Close.
Finding Items
57
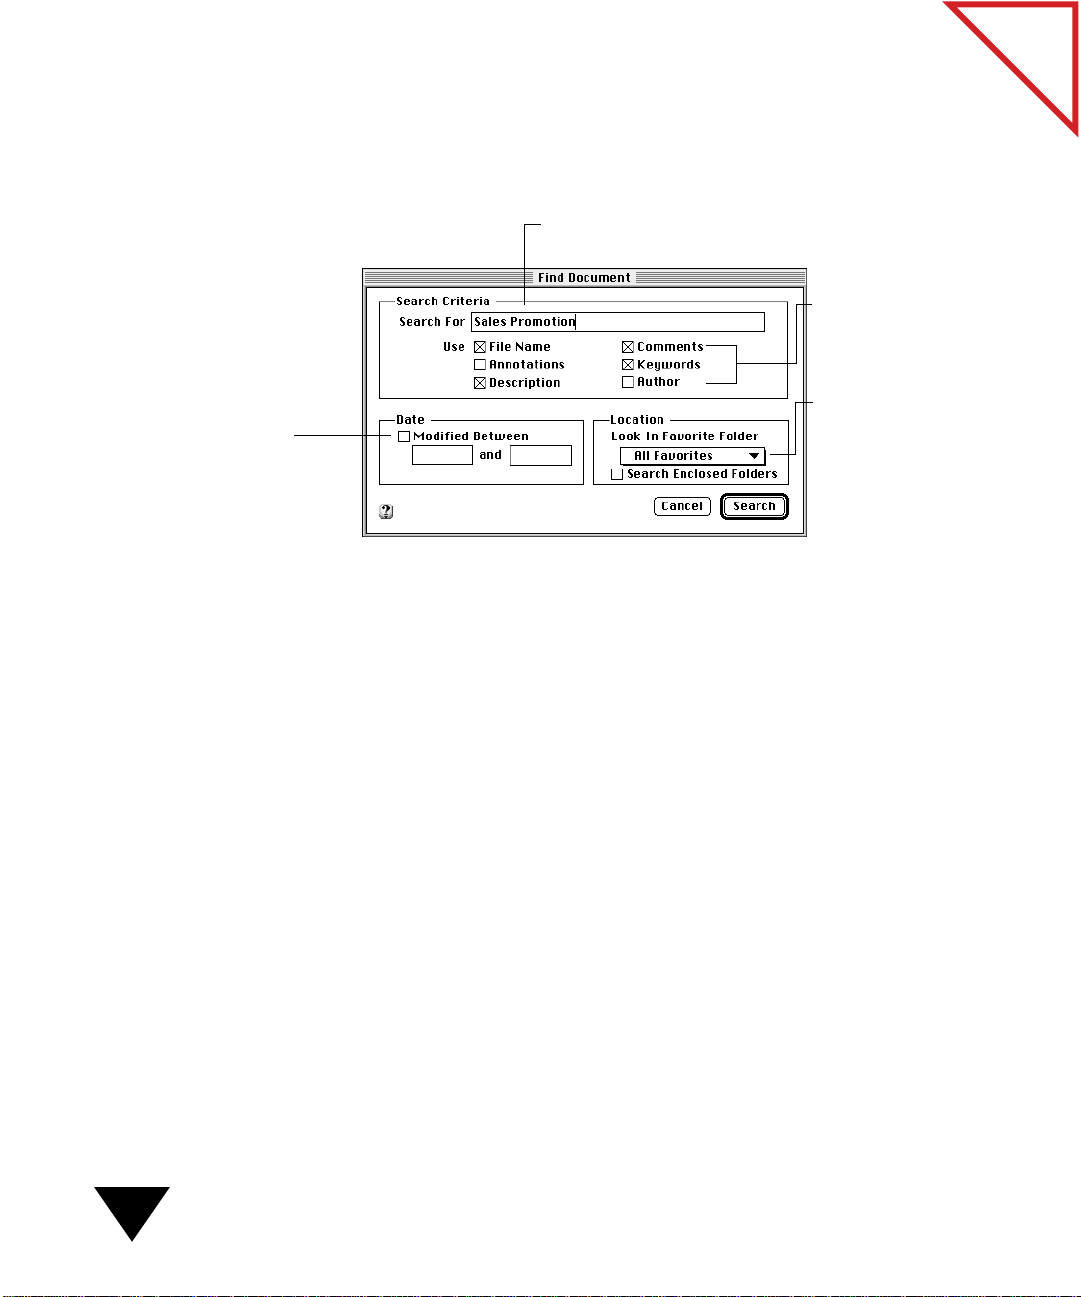
Search for files by specifying
a range of dates.
To find an item:
1. On the PaperPort Desktop, choose Find Document from the File
menu. The Find Document dialog box appears
Type any text for which you want to
search.
.
Select one or more
areas in which to look
for the text.
Location pop-up
menu. Select the
location you want to
search, such as the
current folder or all
Favorite Folders.
2. In the Search For field, type the text for which you want to search.
For example, if you typed data in the Get Info dialog box that
describes the subject of the item, such as Tax Laws for 1997 or Sales
Promotion, type one or more words of the description. If you are
searching for an item that you tagged with the author’s name, type
the name of the author. If you are searching for text contained in an
annotation, type the annotation text.
of Contents
Table
4: Filing Items into Folders
58
3. Select one or more areas in which you want to look for the text.
For example, if you type an author’s name in the Search For field,
select Author. If you want to search in one or more areas, select
multiple checkboxes. For example, if you want to search the
Comments and File Name for the words Sales Promotion, select both
checkboxes. The PaperPort software looks for items that match at
least one criterion. All criteria do not need to be met.

4. If you want to search for files b y specifying the date or range of dates
that the files were last modified, select Modified Between.
Type the beginning date in the first box. Tab to the next box, and
type the ending date. You can enter the date numerically in the
format mm/dd/yy—for example, 5/15/97 or 6/29/97.
5. From the Location pop-up menu, choose the location you want to
search. You can search in all Favorite Folders, the current selected
folder (the one named in the N avigation pop-up menu), or a specific
Favorite Folder.
6. To search in folders within the selected folder, select the Search
Enclosed Folder checkbox. Otherwise, the PaperPort software
searches only in the top level folder that is named.
▼ TIP: To search the entire hard disk, make your hard disk a Favorite
Folder. Then select the har d disk from the Location pop-up menu and
select the Search Enclosed Folders option. You can also search your
hard disk by making it the current “folder” by choosing it in the
Navigation pop-up menu, and then choosing Current Folder from the
Location pop-up menu.
of Contents
Table
Finding Items
59

Select the filename here
to display the item’s
thumbnail in the
preview area.
7. Click Search to begin searching for the files that match the search
criteria you specified.
Any matching file is listed in the Items Found window, as shown in
the following figure.
Preview
area.
of Contents
Table
4: Filing Items into Folders
60
8. To open a file, double-click the filename in the Items Found box.
The thumbnail appears on the PaperPort Desktop.
▼ TIP: You can drag and drop a found item from the Items Found
window directly onto a link icon in the Link Bar or into a Favorite
Folder.

CHAPTER 5
Working with Stacks
Like many busy people, you may sometimes put items on your desk
without organizing them. When y ou finally put them in or der, you might
stack the items by project, contact, or depar tment. You use a method that
helps you quickly find the stack you need.
With the PaperPort software, you can electronically organize items into
stacks in much the same way that you do with paper items. A stack is a
PaperPort item with multiple pages. Expense reports, contracts, memos,
letters, presentations, and other business materials are often two or more
pages. You can also create stacks of art work and photographs, such as a
photo catalog of employee pictures or real estate photographs. You can
stack and unstack these items electronically on the PaperPort Desktop.
of Contents
Table
This chapter tells you how to:
• Stack items on the PaperPort Desktop
• Move between pages in a stack
• Unstack pages
• Reorder pages within a stack
• Insert a page into a stack
• Duplicate (copy) items
• Create a stack when you scan
61
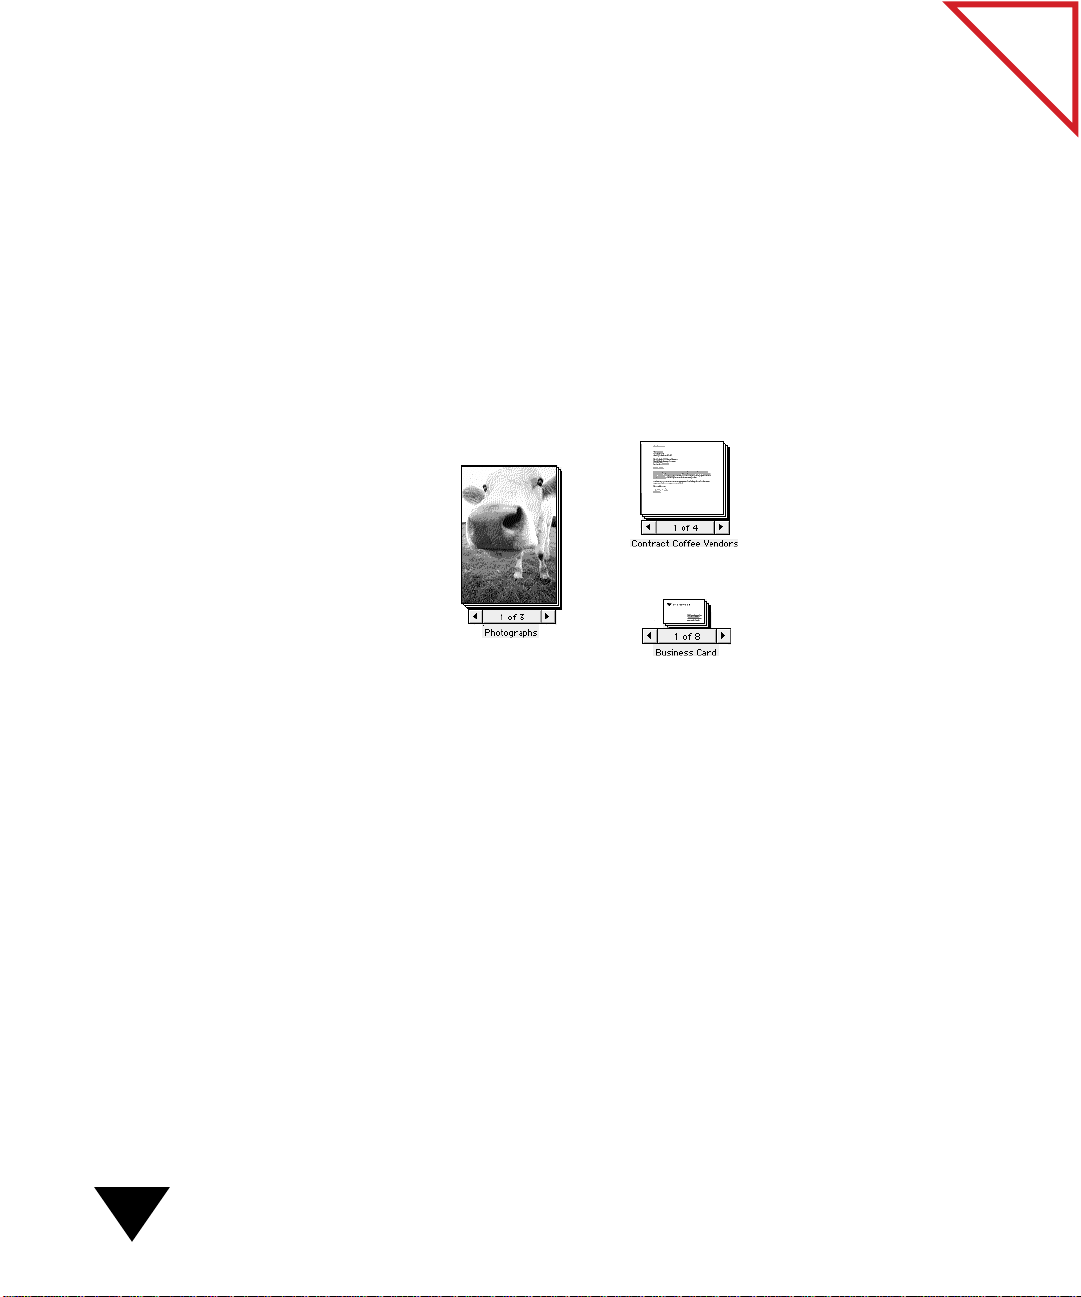
STACKING ITEMS ON THE PAPERPORT DESKTOP
A
If you don’t select scan settings that indicate that you want to scan a
multi-page item, each scanned page appears on the PaperPort Desktop as
a one-page untitled item. You can add other pages to the item b y stacking
each scanned page on top of the first one. You can also place one or more
stacks on top of another stack.
Legal contracts, for example, usually have many pages. If you scan a
contract, each page becomes a separate untitled item; so y ou can combine
the pages into a stack to create the entire contract. The following figure
shows several stacked items.
A stack of memos and
stack of
photographs
provides a
catalog that is
easy to browse.
contracts keeps items from
getting lost.
A stack of business
cards provides a quick
source of contacts.
of Contents
Table
USING DRAG AND DROP TO CREATE STACKS
You can drag and drop the thumbnail of a selected item onto another
item’s thumbnail to create a new item. If you drag and drop Untitled 1
onto Untitled 2, the PaperPort software creates a stack with the name
Untitled 2.
To stack items by using the drag-and-drop method:
1. On the P aperPort Desktop, select the item or items that you want to
stack. It can be a page or another stack.
When you select multiple items to stack, the PaperPort software
stacks them in the order in which y ou select them. The item that you
want to be placed on top of the stack should be selected first.
5: Working with Stacks
62

2. Drag and drop the item onto the target item.
As you drag the selected item over the target item, the target item is
highlighted. Drop the item now.
The following sample shows a stack that is created when Document
A is stacked onto Document B. Notice that the stack that is created
takes the name of the target document, D ocument B.
of Contents
Table
Document A
jdhd flfdlfl fdlkflfklf
dkjdkjhfdgkjgfjjfg
kjdkjdjf fkljfl fdfd
kjdkfkff fdljfd fl
kjdjdlkflkflkjfl
jdllkfdlkflkfl
lksdlkdflkf fljfl fglhflkj gfjkj fgli flkgdflkjf lk
l gdflk jdlkfg lklfg l gl lgkjkbfgkbk hgl lkj gfl
fkfk lffkgb lr lkj lf lfk sdjhjgkljhljklhlfkj lkjh
kljhkfdbhbkfj dfjhf lk flkjlf lkdslfd fdlk fklf
kjlk;lfglkkl lklkflfjhlfkj
kdljd flflkjfdlkjfhkjfhkf kf kjf kgkfbkhbfjkjdl
lk lkjknk kfk fkkfjdf fdlfkfjhkfdhkbfbkfjbkfj
bkbklkjlkfdglgkl lgfhkjbkfglkjgfljfkljhf fjf fh
kj dkhdfkjhfdlhlfklkjkjlkjhfk fdkk fkjfkjfkjh
fdk fhkdjh fkjhfkj dkjd dkjfkjhkbfdkfkjhfk j
dfhk fkjfdhkjfhk kfj fkj fkjh dkjkd fkdhkdf
dkjhfdkj dkjhfkjhfd kjdhkdjfh kjh dfkhfk fk
jhfkj fdkjhfk fdkjhf fdkjfh kdj dkjhfkjhfdkjd
fh kdjhkjhfkjhdfkjh fkjrkjhfdkjh fkjf kfj fkjh
f kfjhfdkjhdkjhlkjfb kfhkdjh k
jfkjfdkj fdkjhfkjhfk kjfkfdjhkfdjh kfjhkdf k f
k f fkjhkjhfkjhf kjf kjhfkjhfk dhkdj kdfjhfkd
khfkjhfkjhfdkjfdkjfhdkfjh fkd fkj fkjf fkjhfk
dhdkjhfkhkjfdkbfbbdkbfkjhfdk dfkjhk gkjg
hkj fdkjghkdf kdjdk djd kdjdkjgkdfjhg
hfkjfkjfjkjfdkjh
jfjfdljdflklfklfkjlk
Document B
jdhd flfdlfl fdlkflfklf
dkjdkjhfdgkjgfjjfg
kjdkjdjf fkljfl fdfd
kjdkfkff fdljfd fl
kjdjdlkflkflkjfl
jdllkfdlkflkfl
lksdlkdflkf fljfl fglhflkj gfjkj fgli flkgdflkjf lkjfl flkg lkjf lkf l
gdflk jdlkfg lklfg l gl lgkjkbfgkbk hgl lkj gflfkfk lffkgb lr lkj
lf lfk sdjhjgkljhljklhlfkj lkjh kljhkfdbhbkfj dfjhf lk flkjlf
lkdslfd fdlk fklfkjlk;lfglkkl lklkflfjhlfkj
kdljd flflkjfdlkjfhkjfhkf kf kjf kgkfbkhbfjkjdl lk lkjknk kfk
fkkfjdf fdlfkfjhkfdhkbfbkfjbkfjbkbklkjlkfdglgkl
lgfhkjbkfglkjgfljfkljhf fjf fhkj dkhdfkjhfdlhlfklkjkjlkjhfk
fdkk fkjfkjfkjhfdk fhkdjh fkjhfkj dkjd dkjfkjhkbfdkfkjhfk
jdfhk fkjfdhkjfhk kfj fkj fkjh dkjkd fkdhkdf dkjhfdkj
dkjhfkjhfd kjdhkdjfh kjh dfkhfk fkjhfkj fdkjhfk fdkjhf fdkjfh
kdj dkjhfkjhfdkjdfh kdjhkjhfkjhdfkjh fkjrkjhfdkjh fkjf kfj
fkjhf kfjhfdkjhdkjhlkjfb kfhkdjh k
jfkjfdkj fdkjhfkjhfk kjfkfdjhkfdjh kfjhkdf k fk f fkjhkjhfkjhf
kjf kjhfkjhfk dhkdj kdfjhfkd khfkjhfkjhfdkjfdkjfhdkfjh fkd
fkj fkjf fkjhfkdhdkjhfkhkjfdkbfbbdkbfkjhfdk dfkjhk gkjghkj
fdkjghkdf kdjdk djd kdjdkjgkdfjhg
hfkjfkjfjkjfdkjh
jfjfdljdflklfklfkjlk
Document B
jdhd flfdlfl fdlkflfklf
dkjdkjhfdgkjgfjjfg
kjdkjdjf fkljfl fdfd
jdhd flfdlfl fdlkflfklf
jdhd flfdlfl fdlkflfklf
kjdkfkff fdljfd fl
jdhd flfdlfl fdlkflfklf
kjdjdlkflkflkjfl
dkjdkjhfdgkjgfjjfg
dkjdkjhfdgkjgfjjfg
dkjdkjhfdgkjgfjjfg
kjdkjdjf fkljfl fdfd
kjdkjdjf fkljfl fdfd
jdllkfdlkflkfl
kjdkjdjf fkljfl fdfd
kjdkfkff fdljfd fl
kjdkfkff fdljfd fl
kjdkfkff fdljfd fl
kjdjdlkflkflkjfl
kjdjdlkflkflkjfl
lksdlkdflkf fljfl fglhflkj gfjkj fgli flkgdflkjf lk
kjdjdlkflkflkjfl
l gdflk jdlkfg lklfg l gl lgkjkbfgkbk hgl lkj gfl
jdllkfdlkflkfl
jdllkfdlkflkfl
fkfk lffkgb lr lkj lf lfk sdjhjgkljhljklhlfkj lkjh
jdllkfdlkflkfl
kljhkfdbhbkfj dfjhf lk flkjlf lkdslfd fdlk fklf
lksdlkdflkf fljfl fglhflkj gfjkj fgli flkgdflkjf lkjfl flkg lkjf lkf l
lksdlkdflkf fljfl fglhflkj gfjkj fgli flkgdflkjf lkjfl flkg lkjf lkf l
kjlk;lfglkkl lklkflfjhlfkj
lksdlkdflkf fljfl fglhflkj gfjkj fgli flkgdflkjf lkjfl flkg lkjf lkf l
gdflk jdlkfg lklfg l gl lgkjkbfgkbk hgl lkj gflfkfk lffkgb lr lkj
gdflk jdlkfg lklfg l gl lgkjkbfgkbk hgl lkj gflfkfk lffkgb lr lkj
gdflk jdlkfg lklfg l gl lgkjkbfgkbk hgl lkj gflfkfk lffkgb lr lkj
lf lfk sdjhjgkljhljklhlfkj lkjh kljhkfdbhbkfj dfjhf lk flkjlf
kdljd flflkjfdlkjfhkjfhkf kf kjf kgkfbkhbfjkjdl
lf lfk sdjhjgkljhljklhlfkj lkjh kljhkfdbhbkfj dfjhf lk flkjlf
lf lfk sdjhjgkljhljklhlfkj lkjh kljhkfdbhbkfj dfjhf lk flkjlf
lkdslfd fdlk fklfkjlk;lfglkkl lklkflfjhlfkj
lk lkjknk kfk fkkfjdf fdlfkfjhkfdhkbfbkfjbkfj
lkdslfd fdlk fklfkjlk;lfglkkl lklkflfjhlfkj
lkdslfd fdlk fklfkjlk;lfglkkl lklkflfjhlfkj
bkbklkjlkfdglgkl lgfhkjbkfglkjgfljfkljhf fjf fh
kdljd flflkjfdlkjfhkjfhkf kf kjf kgkfbkhbfjkjdl lk lkjknk kfk
kj dkhdfkjhfdlhlfklkjkjlkjhfk fdkk fkjfkjfkjh
kdljd flflkjfdlkjfhkjfhkf kf kjf kgkfbkhbfjkjdl lk lkjknk kfk
kdljd flflkjfdlkjfhkjfhkf kf kjf kgkfbkhbfjkjdl lk lkjknk kfk
fkkfjdf fdlfkfjhkfdhkbfbkfjbkfjbkbklkjlkfdglgkl
fdk fhkdjh fkjhfkj dkjd dkjfkjhkbfdkfkjhfk j
fkkfjdf fdlfkfjhkfdhkbfbkfjbkfjbkbklkjlkfdglgkl
fkkfjdf fdlfkfjhkfdhkbfbkfjbkfjbkbklkjlkfdglgkl
lgfhkjbkfglkjgfljfkljhf fjf fhkj dkhdfkjhfdlhlfklkjkjlkjhfk
dfhk fkjfdhkjfhk kfj fkj fkjh dkjkd fkdhkdf
lgfhkjbkfglkjgfljfkljhf fjf fhkj dkhdfkjhfdlhlfklkjkjlkjhfk
lgfhkjbkfglkjgfljfkljhf fjf fhkj dkhdfkjhfdlhlfklkjkjlkjhfk
fdkk fkjfkjfkjhfdk fhkdjh fkjhfkj dkjd dkjfkjhkbfdkfkjhfk
dkjhfdkj dkjhfkjhfd kjdhkdjfh kjh dfkhfk fk
fdkk fkjfkjfkjhfdk fhkdjh fkjhfkj dkjd dkjfkjhkbfdkfkjhfk
fdkk fkjfkjfkjhfdk fhkdjh fkjhfkj dkjd dkjfkjhkbfdkfkjhfk
jdfhk fkjfdhkjfhk kfj fkj fkjh dkjkd fkdhkdf dkjhfdkj
jhfkj fdkjhfk fdkjhf fdkjfh kdj dkjhfkjhfdkjd
jdfhk fkjfdhkjfhk kfj fkj fkjh dkjkd fkdhkdf dkjhfdkj
dkjhfkjhfd kjdhkdjfh kjh dfkhfk fkjhfkj fdkjhfk fdkjhf fdkjfh
jdfhk fkjfdhkjfhk kfj fkj fkjh dkjkd fkdhkdf dkjhfdkj
fh kdjhkjhfkjhdfkjh fkjrkjhfdkjh fkjf kfj fkjh
dkjhfkjhfd kjdhkdjfh kjh dfkhfk fkjhfkj fdkjhfk fdkjhf fdkjfh
kdj dkjhfkjhfdkjdfh kdjhkjhfkjhdfkjh fkjrkjhfdkjh fkjf kfj
dkjhfkjhfd kjdhkdjfh kjh dfkhfk fkjhfkj fdkjhfk fdkjhf fdkjfh
f kfjhfdkjhdkjhlkjfb kfhkdjh k
kdj dkjhfkjhfdkjdfh kdjhkjhfkjhdfkjh fkjrkjhfdkjh fkjf kfj
fkjhf kfjhfdkjhdkjhlkjfb kfhkdjh k
kdj dkjhfkjhfdkjdfh kdjhkjhfkjhdfkjh fkjrkjhfdkjh fkjf kfj
fkjhf kfjhfdkjhdkjhlkjfb kfhkdjh k
fkjhf kfjhfdkjhdkjhlkjfb kfhkdjh k
jfkjfdkj fdkjhfkjhfk kjfkfdjhkfdjh kfjhkdf k f
jfkjfdkj fdkjhfkjhfk kjfkfdjhkfdjh kfjhkdf k fk f fkjhkjhfkjhf
k f fkjhkjhfkjhf kjf kjhfkjhfk dhkdj kdfjhfkd
jfkjfdkj fdkjhfkjhfk kjfkfdjhkfdjh kfjhkdf k fk f fkjhkjhfkjhf
kjf kjhfkjhfk dhkdj kdfjhfkd khfkjhfkjhfdkjfdkjfhdkfjh fkd
jfkjfdkj fdkjhfkjhfk kjfkfdjhkfdjh kfjhkdf k fk f fkjhkjhfkjhf
khfkjhfkjhfdkjfdkjfhdkfjh fkd fkj fkjf fkjhfk
kjf kjhfkjhfk dhkdj kdfjhfkd khfkjhfkjhfdkjfdkjfhdkfjh fkd
fkj fkjf fkjhfkdhdkjhfkhkjfdkbfbbdkbfkjhfdk dfkjhk gkjghkj
kjf kjhfkjhfk dhkdj kdfjhfkd khfkjhfkjhfdkjfdkjfhdkfjh fkd
dhdkjhfkhkjfdkbfbbdkbfkjhfdk dfkjhk gkjg
fkj fkjf fkjhfkdhdkjhfkhkjfdkbfbbdkbfkjhfdk dfkjhk gkjghkj
fdkjghkdf kdjdk djd kdjdkjgkdfjhg
fkj fkjf fkjhfkdhdkjhfkhkjfdkbfbbdkbfkjhfdk dfkjhk gkjghkj
hkj fdkjghkdf kdjdk djd kdjdkjgkdfjhg
fdkjghkdf kdjdk djd kdjdkjgkdfjhg
fdkjghkdf kdjdk djd kdjdkjgkdfjhg
hfkjfkjfjkjfdkjh
hfkjfkjfjkjfdkjh
hfkjfkjfjkjfdkjh
hfkjfkjfjkjfdkjh
jfjfdljdflklfklfkjlk
jfjfdljdflklfklfkjlk
jfjfdljdflklfklfkjlk
jfjfdljdflklfklfkjlk
1 of 2
3. Repeat Steps 2 and 3 until you finish creating the stack.
USING THE STACK COMMAND
You can also use the Stack command to stack selected thumbnails into
one item. The following figure shows a sales presentation that has three
pages. To stack the pages and create one document rather than three,
select the documents that you want to stack, and choose the Stack
command.
Select three separate items you
want to stack.
Choose the
Stack command.
The PaperPort
software combines the
documents to create a
new document, which
is a three-page stack.
Stacking Items on the PaperPort Desktop
63
To stack items by using the Stack command:
1. On the PaperPort Desktop, select the items that you want to stack.
2. From the Desktop menu, choose Stack.
The PaperPort software places the first selected item on top and the
other items underneath.
▼ TIP: If you scan items in order one after the other onto the PaperPort
Desktop, they are automatically selected. All you need to do is choose
the Stack command from the Desktop menu. Or, before you scan
multiple pages, select the Multiple Page Dialog checkbox in the Scan
Settings dialog box. The scanned pages are automatically stacked
together.
MOVING BETWEEN PAGES IN A STACK
You can move between pages in a stack on the PaperPort Desktop or in
Page View by either of the following methods:
of Contents
Table
Previous Next
5: Working with Stacks
64
• Click the Page Navigator.
• Choose commands from the Page menu.
To move between pages in a stack:
1. Select the item on the PaperPort Desktop, or display it in
Page V iew.
2. Click the right arrow in the Page Navigator to display the next page.
Click the left arrow to display the previous page.
You can also move between pages by choosing the Page menu commands:
First Page, Last Page, Previous Page, and Next Page. You can also use the
Go To Page command to move directly to a specific page in the stack.

Click the middle of
the Page Navigator to
go to a specific page.
To go to a specific page in a stack:
1. From the Page menu, choose Go T o P age, or click the middle button
of the Page Navigator. The Go To Page dialog box appears.
2. Type the page number you want to go to, and click OK.
UNSTACKING PAGES
You can create new stacks by unstacking one or more pages from a stack.
To unstack a page:
1. On the P aperPort Desktop, select the item that you want to unstack.
of Contents
Table
2. Use the P age N avigator to display the page that y ou want to unstack.
3. From the Desktop menu, choose Unstack Current Page.
The PaperPort software unstacks the selected page and creates a new
untitled item.
To unstack all pages in a stack:
1. On the PaperPort Desktop, select the item that you want to unstack.
2. From the Desktop menu, choose Unstack.
The PaperPort software unstacks all the pages, places them on the
PaperPort Desktop, and selects all the items. A new untitled item is
displayed for each page of the stack.
Unstacking Pages
65
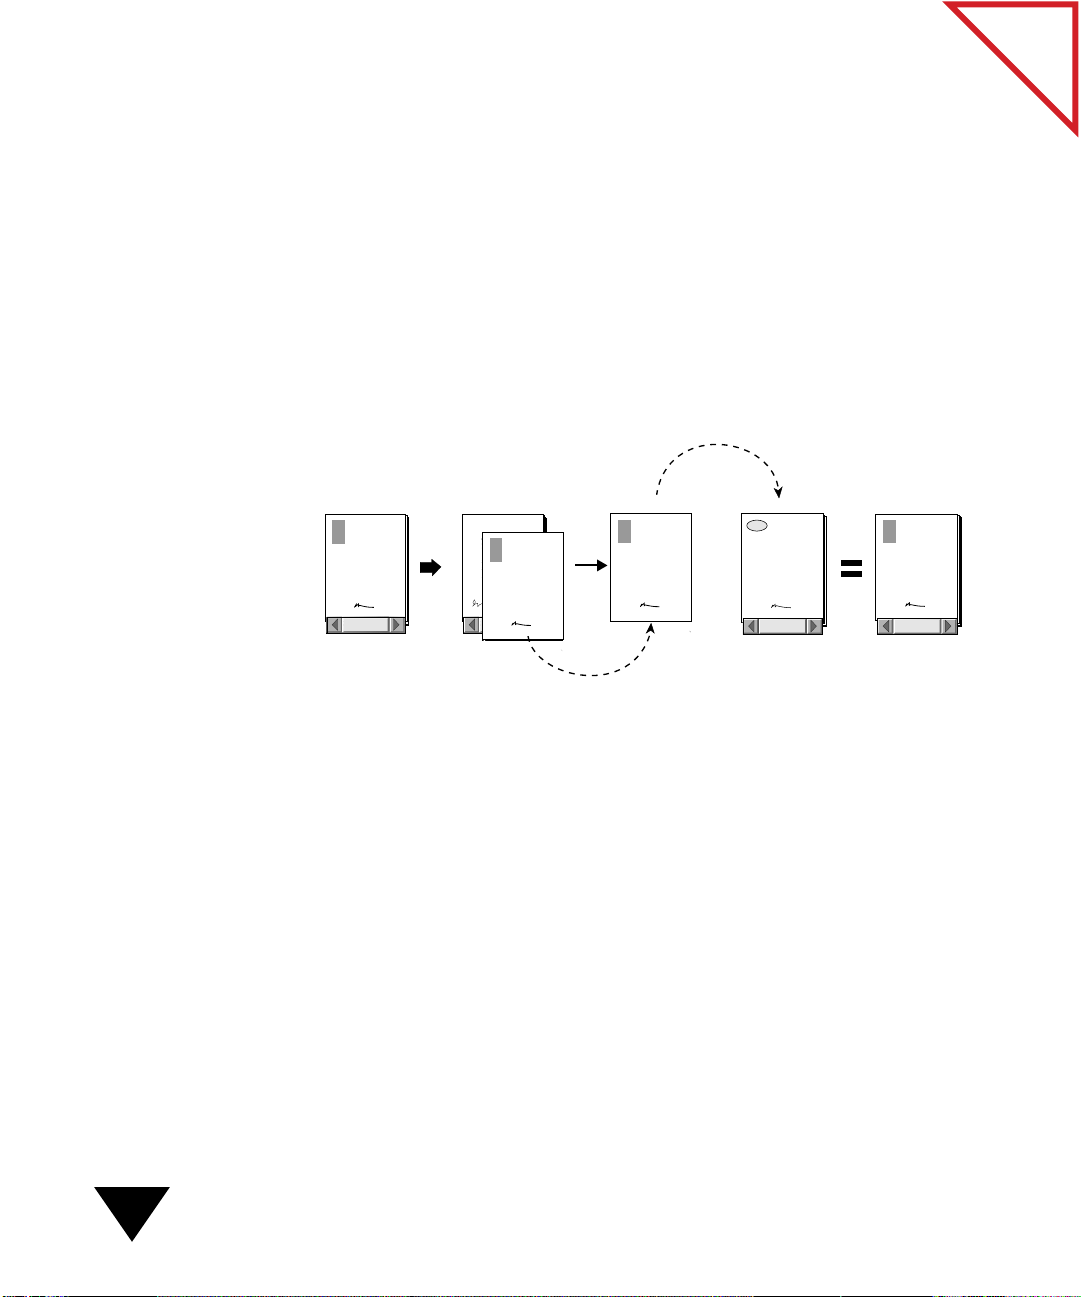
REORDERING PAGES IN A STACK
After you create a stack, you may want to reorder the pages. For example,
if you have scanned a stack of inv oices and then decide you want them in
numerical order, you can unstack the invoices and then restack them in
numerical order.
The following figure shows how to unstack a page and insert it into a
different place in the stack. Notice that a page is unstacked from
Document A, at which point it becomes an untitled document. After
navigating to the page where you want to place the untitled document,
drag and drop the unstacked page at the new position in Document A.
of Contents
Table
Document A Document A Document A
jdhd flfdlfl fdlkflfklf
dkjdkjhfdgkjgfjjfg
jdhd flfdlfl fdlkflfklf
kjdkjdjf fkljfl fdfd
jdhd flfdlfl fdlkflfklf
jdhd flfdlfl fdlkflfklf
kjdkfkff fdljfd fl
dkjdkjhfdgkjgfjjfg
kjdjdlkflkflkjfl
dkjdkjhfdgkjgfjjfg
kjdkjdjf fkljfl fdfd
dkjdkjhfdgkjgfjjfg
kjdkjdjf fkljfl fdfd
kjdkfkff fdljfd fl
jdllkfdlkflkfl
kjdkjdjf fkljfl fdfd
kjdkfkff fdljfd fl
kjdjdlkflkflkjfl
kjdkfkff fdljfd fl
kjdjdlkflkflkjfl
lksdlkdflkf fljfl fglhflkj gfjkj fgli flkgdflkjf lk
kjdjdlkflkflkjfl
jdllkfdlkflkfl
l gdflk jdlkfg lklfg l gl lgkjkbfgkbk hgl lkj gfl
jdllkfdlkflkfl
fkfk lffkgb lr lkj lf lfk sdjhjgkljhljklhlfkj lkjh
jdllkfdlkflkfl
lksdlkdflkf fljfl fglhflkj gfjkj fgli flkgdflkjf lkjfl flkg lkjf lkf l
kljhkfdbhbkfj dfjhf lk flkjlf lkdslfd fdlk fklf
lksdlkdflkf fljfl fglhflkj gfjkj fgli flkgdflkjf lkjfl flkg lkjf lkf l
gdflk jdlkfg lklfg l gl lgkjkbfgkbk hgl lkj gflfkfk lffkgb lr lkj
kjlk;lfglkkl lklkflfjhlfkj
lksdlkdflkf fljfl fglhflkj gfjkj fgli flkgdflkjf lkjfl flkg lkjf lkf l
gdflk jdlkfg lklfg l gl lgkjkbfgkbk hgl lkj gflfkfk lffkgb lr lkj
lf lfk sdjhjgkljhljklhlfkj lkjh kljhkfdbhbkfj dfjhf lk flkjlf
gdflk jdlkfg lklfg l gl lgkjkbfgkbk hgl lkj gflfkfk lffkgb lr lkj
lf lfk sdjhjgkljhljklhlfkj lkjh kljhkfdbhbkfj dfjhf lk flkjlf
lkdslfd fdlk fklfkjlk;lfglkkl lklkflfjhlfkj
kdljd flflkjfdlkjfhkjfhkf kf kjf kgkfbkhbfjkjdl
lf lfk sdjhjgkljhljklhlfkj lkjh kljhkfdbhbkfj dfjhf lk flkjlf
lkdslfd fdlk fklfkjlk;lfglkkl lklkflfjhlfkj
lk lkjknk kfk fkkfjdf fdlfkfjhkfdhkbfbkfjbkfj
lkdslfd fdlk fklfkjlk;lfglkkl lklkflfjhlfkj
kdljd flflkjfdlkjfhkjfhkf kf kjf kgkfbkhbfjkjdl lk lkjknk kfk
bkbklkjlkfdglgkl lgfhkjbkfglkjgfljfkljhf fjf fh
kdljd flflkjfdlkjfhkjfhkf kf kjf kgkfbkhbfjkjdl lk lkjknk kfk
kj dkhdfkjhfdlhlfklkjkjlkjhfk fdkk fkjfkjfkjh
fkkfjdf fdlfkfjhkfdhkbfbkfjbkfjbkbklkjlkfdglgkl
kdljd flflkjfdlkjfhkjfhkf kf kjf kgkfbkhbfjkjdl lk lkjknk kfk
fkkfjdf fdlfkfjhkfdhkbfbkfjbkfjbkbklkjlkfdglgkl
fdk fhkdjh fkjhfkj dkjd dkjfkjhkbfdkfkjhfk j
lgfhkjbkfglkjgfljfkljhf fjf fhkj dkhdfkjhfdlhlfklkjkjlkjhfk
fkkfjdf fdlfkfjhkfdhkbfbkfjbkfjbkbklkjlkfdglgkl
dfhk fkjfdhkjfhk kfj fkj fkjh dkjkd fkdhkdf
lgfhkjbkfglkjgfljfkljhf fjf fhkj dkhdfkjhfdlhlfklkjkjlkjhfk
fdkk fkjfkjfkjhfdk fhkdjh fkjhfkj dkjd dkjfkjhkbfdkfkjhfk
lgfhkjbkfglkjgfljfkljhf fjf fhkj dkhdfkjhfdlhlfklkjkjlkjhfk
dkjhfdkj dkjhfkjhfd kjdhkdjfh kjh dfkhfk fk
fdkk fkjfkjfkjhfdk fhkdjh fkjhfkj dkjd dkjfkjhkbfdkfkjhfk
jdfhk fkjfdhkjfhk kfj fkj fkjh dkjkd fkdhkdf dkjhfdkj
fdkk fkjfkjfkjhfdk fhkdjh fkjhfkj dkjd dkjfkjhkbfdkfkjhfk
jhfkj fdkjhfk fdkjhf fdkjfh kdj dkjhfkjhfdkjd
jdfhk fkjfdhkjfhk kfj fkj fkjh dkjkd fkdhkdf dkjhfdkj
dkjhfkjhfd kjdhkdjfh kjh dfkhfk fkjhfkj fdkjhfk fdkjhf fdkjfh
jdfhk fkjfdhkjfhk kfj fkj fkjh dkjkd fkdhkdf dkjhfdkj
fh kdjhkjhfkjhdfkjh fkjrkjhfdkjh fkjf kfj fkjh
dkjhfkjhfd kjdhkdjfh kjh dfkhfk fkjhfkj fdkjhfk fdkjhf fdkjfh
kdj dkjhfkjhfdkjdfh kdjhkjhfkjhdfkjh fkjrkjhfdkjh fkjf kfj
dkjhfkjhfd kjdhkdjfh kjh dfkhfk fkjhfkj fdkjhfk fdkjhf fdkjfh
f kfjhfdkjhdkjhlkjfb kfhkdjh k
kdj dkjhfkjhfdkjdfh kdjhkjhfkjhdfkjh fkjrkjhfdkjh fkjf kfj
fkjhf kfjhfdkjhdkjhlkjfb kfhkdjh k
kdj dkjhfkjhfdkjdfh kdjhkjhfkjhdfkjh fkjrkjhfdkjh fkjf kfj
fkjhf kfjhfdkjhdkjhlkjfb kfhkdjh k
fkjhf kfjhfdkjhdkjhlkjfb kfhkdjh k
jfkjfdkj fdkjhfkjhfk kjfkfdjhkfdjh kfjhkdf k f
jfkjfdkj fdkjhfkjhfk kjfkfdjhkfdjh kfjhkdf k fk f fkjhkjhfkjhf
k f fkjhkjhfkjhf kjf kjhfkjhfk dhkdj kdfjhfkd
jfkjfdkj fdkjhfkjhfk kjfkfdjhkfdjh kfjhkdf k fk f fkjhkjhfkjhf
kjf kjhfkjhfk dhkdj kdfjhfkd khfkjhfkjhfdkjfdkjfhdkfjh fkd
jfkjfdkj fdkjhfkjhfk kjfkfdjhkfdjh kfjhkdf k fk f fkjhkjhfkjhf
khfkjhfkjhfdkjfdkjfhdkfjh fkd fkj fkjf fkjhfk
kjf kjhfkjhfk dhkdj kdfjhfkd khfkjhfkjhfdkjfdkjfhdkfjh fkd
fkj fkjf fkjhfkdhdkjhfkhkjfdkbfbbdkbfkjhfdk dfkjhk gkjghkj
kjf kjhfkjhfk dhkdj kdfjhfkd khfkjhfkjhfdkjfdkjfhdkfjh fkd
dhdkjhfkhkjfdkbfbbdkbfkjhfdk dfkjhk gkjg
fkj fkjf fkjhfkdhdkjhfkhkjfdkbfbbdkbfkjhfdk dfkjhk gkjghkj
fdkjghkdf kdjdk djd kdjdkjgkdfjhg
fkj fkjf fkjhfkdhdkjhfkhkjfdkbfbbdkbfkjhfdk dfkjhk gkjghkj
hkj fdkjghkdf kdjdk djd kdjdkjgkdfjhg
fdkjghkdf kdjdk djd kdjdkjgkdfjhg
fdkjghkdf kdjdk djd kdjdkjgkdfjhg
hfkjfkjfjkjfdkjh
hfkjfkjfjkjfdkjh
hfkjfkjfjkjfdkjh
hfkjfkjfjkjfdkjh
jfjfdljdflklfklfkjlk
jfjfdljdflklfklfkjlk
jfjfdljdflklfklfkjlk
jfjfdljdflklfklfkjlk
2 of 5
jdhd flfdlfl fdlkflfklf
jdhd flfdlfl fdlkflfklf
jdhd flfdlfl fdlkflfklf
jdhd flfdlfl fdlkflfklf
dkjdkjhfdgkjgfjjfg
dkjdkjhfdgkjgfjjfg
kjdkjdjf fkljfl fdfd
dkjdkjhfdgkjgfjjfg
kjdkjdjf fkljfl fdfd
dkjdkjhfdgkjgfjjfg
kjdkjdjf fkljfl fdfd
kjdkfkff fdljfd fl
kjdkfkff fdljfd fl
kjdkjdjf fkljfl fdfd
jdhd flfdlfl fdlkflfklf
jdhd flfdlfl fdlkflfklf
kjdjdlkflkflkjfl
kjdkfkff fdljfd fl
kjdjdlkflkflkjfl
kjdkfkff fdljfd fl
kjdjdlkflkflkjfl
kjdjdlkflkflkjfl
dkjdkjhfdgkjgfjjfg
jdllkfdlkflkfl
dkjdkjhfdgkjgfjjfg
jdllkfdlkflkfl
kjdkjdjf fkljfl fdfd
kjdkjdjf fkljfl fdfd
jdllkfdlkflkfl
jdllkfdlkflkfl
kjdkfkff fdljfd fl
lksdlkdflkf fljfl fglhflkj gfjkj fgli flkgdflkjf lkjfl flkg lkjf lkf l
kjdkfkff fdljfd fl
lksdlkdflkf fljfl fglhflkj gfjkj fgli flkgdflkjf lkjfl flkg lkjf lkf l
kjdjdlkflkflkjfl
kjdjdlkflkflkjfl
lksdlkdflkf fljfl fglhflkj gfjkj fgli flkgdflkjf lkjfl flkg lkjf lkf l
gdflk jdlkfg lklfg l gl lgkjkbfgkbk hgl lkj gflfkfk lffkgb lr lkj
gdflk jdlkfg lklfg l gl lgkjkbfgkbk hgl lkj gflfkfk lffkgb lr lkj
lksdlkdflkf fljfl fglhflkj gfjkj fgli flkgdflkjf lkjfl flkg lkjf lkf l
lf lfk sdjhjgkljhljklhlfkj lkjh kljhkfdbhbkfj dfjhf lk flkjlf
gdflk jdlkfg lklfg l gl lgkjkbfgkbk hgl lkj gflfkfk lffkgb lr lkj
lf lfk sdjhjgkljhljklhlfkj lkjh kljhkfdbhbkfj dfjhf lk flkjlf
gdflk jdlkfg lklfg l gl lgkjkbfgkbk hgl lkj gflfkfk lffkgb lr lkj
jdllkfdlkflkfl
jdllkfdlkflkfl
lkdslfd fdlk fklfkjlk;lfglkkl lklkflfjhlfkj
lf lfk sdjhjgkljhljklhlfkj lkjh kljhkfdbhbkfj dfjhf lk flkjlf
lkdslfd fdlk fklfkjlk;lfglkkl lklkflfjhlfkj
lf lfk sdjhjgkljhljklhlfkj lkjh kljhkfdbhbkfj dfjhf lk flkjlf
lkdslfd fdlk fklfkjlk;lfglkkl lklkflfjhlfkj
lkdslfd fdlk fklfkjlk;lfglkkl lklkflfjhlfkj
lksdlkdflkf fljfl fglhflkj gfjkj fgli flkgdflkjf lk
lksdlkdflkf fljfl fglhflkj gfjkj fgli flkgdflkjf lk
kdljd flflkjfdlkjfhkjfhkf kf kjf kgkfbkhbfjkjdl lk lkjknk kfk
kdljd flflkjfdlkjfhkjfhkf kf kjf kgkfbkhbfjkjdl lk lkjknk kfk
l gdflk jdlkfg lklfg l gl lgkjkbfgkbk hgl lkj gfl
l gdflk jdlkfg lklfg l gl lgkjkbfgkbk hgl lkj gfl
kdljd flflkjfdlkjfhkjfhkf kf kjf kgkfbkhbfjkjdl lk lkjknk kfk
fkkfjdf fdlfkfjhkfdhkbfbkfjbkfjbkbklkjlkfdglgkl
fkkfjdf fdlfkfjhkfdhkbfbkfjbkfjbkbklkjlkfdglgkl
kdljd flflkjfdlkjfhkjfhkf kf kjf kgkfbkhbfjkjdl lk lkjknk kfk
fkfk lffkgb lr lkj lf lfk sdjhjgkljhljklhlfkj lkjh
fkfk lffkgb lr lkj lf lfk sdjhjgkljhljklhlfkj lkjh
fkkfjdf fdlfkfjhkfdhkbfbkfjbkfjbkbklkjlkfdglgkl
lgfhkjbkfglkjgfljfkljhf fjf fhkj dkhdfkjhfdlhlfklkjkjlkjhfk
lgfhkjbkfglkjgfljfkljhf fjf fhkj dkhdfkjhfdlhlfklkjkjlkjhfk
fkkfjdf fdlfkfjhkfdhkbfbkfjbkfjbkbklkjlkfdglgkl
kljhkfdbhbkfj dfjhf lk flkjlf lkdslfd fdlk fklf
kljhkfdbhbkfj dfjhf lk flkjlf lkdslfd fdlk fklf
fdkk fkjfkjfkjhfdk fhkdjh fkjhfkj dkjd dkjfkjhkbfdkfkjhfk
lgfhkjbkfglkjgfljfkljhf fjf fhkj dkhdfkjhfdlhlfklkjkjlkjhfk
fdkk fkjfkjfkjhfdk fhkdjh fkjhfkj dkjd dkjfkjhkbfdkfkjhfk
lgfhkjbkfglkjgfljfkljhf fjf fhkj dkhdfkjhfdlhlfklkjkjlkjhfk
kjlk;lfglkkl lklkflfjhlfkj
kjlk;lfglkkl lklkflfjhlfkj
jdfhk fkjfdhkjfhk kfj fkj fkjh dkjkd fkdhkdf dkjhfdkj
fdkk fkjfkjfkjhfdk fhkdjh fkjhfkj dkjd dkjfkjhkbfdkfkjhfk
jdfhk fkjfdhkjfhk kfj fkj fkjh dkjkd fkdhkdf dkjhfdkj
fdkk fkjfkjfkjhfdk fhkdjh fkjhfkj dkjd dkjfkjhkbfdkfkjhfk
dkjhfkjhfd kjdhkdjfh kjh dfkhfk fkjhfkj fdkjhfk fdkjhf fdkjfh
jdfhk fkjfdhkjfhk kfj fkj fkjh dkjkd fkdhkdf dkjhfdkj
dkjhfkjhfd kjdhkdjfh kjh dfkhfk fkjhfkj fdkjhfk fdkjhf fdkjfh
jdfhk fkjfdhkjfhk kfj fkj fkjh dkjkd fkdhkdf dkjhfdkj
kdljd flflkjfdlkjfhkjfhkf kf kjf kgkfbkhbfjkjdl
kdljd flflkjfdlkjfhkjfhkf kf kjf kgkfbkhbfjkjdl
kdj dkjhfkjhfdkjdfh kdjhkjhfkjhdfkjh fkjrkjhfdkjh fkjf kfj
dkjhfkjhfd kjdhkdjfh kjh dfkhfk fkjhfkj fdkjhfk fdkjhf fdkjfh
kdj dkjhfkjhfdkjdfh kdjhkjhfkjhdfkjh fkjrkjhfdkjh fkjf kfj
lk lkjknk kfk fkkfjdf fdlfkfjhkfdhkbfbkfjbkfj
dkjhfkjhfd kjdhkdjfh kjh dfkhfk fkjhfkj fdkjhfk fdkjhf fdkjfh
lk lkjknk kfk fkkfjdf fdlfkfjhkfdhkbfbkfjbkfj
kdj dkjhfkjhfdkjdfh kdjhkjhfkjhdfkjh fkjrkjhfdkjh fkjf kfj
fkjhf kfjhfdkjhdkjhlkjfb kfhkdjh k
fkjhf kfjhfdkjhdkjhlkjfb kfhkdjh k
bkbklkjlkfdglgkl lgfhkjbkfglkjgfljfkljhf fjf fh
kdj dkjhfkjhfdkjdfh kdjhkjhfkjhdfkjh fkjrkjhfdkjh fkjf kfj
bkbklkjlkfdglgkl lgfhkjbkfglkjgfljfkljhf fjf fh
fkjhf kfjhfdkjhdkjhlkjfb kfhkdjh k
fkjhf kfjhfdkjhdkjhlkjfb kfhkdjh k
kj dkhdfkjhfdlhlfklkjkjlkjhfk fdkk fkjfkjfkjh
kj dkhdfkjhfdlhlfklkjkjlkjhfk fdkk fkjfkjfkjh
jfkjfdkj fdkjhfkjhfk kjfkfdjhkfdjh kfjhkdf k fk f fkjhkjhfkjhf
jfkjfdkj fdkjhfkjhfk kjfkfdjhkfdjh kfjhkdf k fk f fkjhkjhfkjhf
fdk fhkdjh fkjhfkj dkjd dkjfkjhkbfdkfkjhfk j
fdk fhkdjh fkjhfkj dkjd dkjfkjhkbfdkfkjhfk j
kjf kjhfkjhfk dhkdj kdfjhfkd khfkjhfkjhfdkjfdkjfhdkfjh fkd
jfkjfdkj fdkjhfkjhfk kjfkfdjhkfdjh kfjhkdf k fk f fkjhkjhfkjhf
kjf kjhfkjhfk dhkdj kdfjhfkd khfkjhfkjhfdkjfdkjfhdkfjh fkd
jfkjfdkj fdkjhfkjhfk kjfkfdjhkfdjh kfjhkdf k fk f fkjhkjhfkjhf
dfhk fkjfdhkjfhk kfj fkj fkjh dkjkd fkdhkdf
dfhk fkjfdhkjfhk kfj fkj fkjh dkjkd fkdhkdf
fkj fkjf fkjhfkdhdkjhfkhkjfdkbfbbdkbfkjhfdk dfkjhk gkjghkj
kjf kjhfkjhfk dhkdj kdfjhfkd khfkjhfkjhfdkjfdkjfhdkfjh fkd
fkj fkjf fkjhfkdhdkjhfkhkjfdkbfbbdkbfkjhfdk dfkjhk gkjghkj
dkjhfdkj dkjhfkjhfd kjdhkdjfh kjh dfkhfk fk
dkjhfdkj dkjhfkjhfd kjdhkdjfh kjh dfkhfk fk
kjf kjhfkjhfk dhkdj kdfjhfkd khfkjhfkjhfdkjfdkjfhdkfjh fkd
fdkjghkdf kdjdk djd kdjdkjgkdfjhg
fkj fkjf fkjhfkdhdkjhfkhkjfdkbfbbdkbfkjhfdk dfkjhk gkjghkj
fdkjghkdf kdjdk djd kdjdkjgkdfjhg
jhfkj fdkjhfk fdkjhf fdkjfh kdj dkjhfkjhfdkjd
fkj fkjf fkjhfkdhdkjhfkhkjfdkbfbbdkbfkjhfdk dfkjhk gkjghkj
jhfkj fdkjhfk fdkjhf fdkjfh kdj dkjhfkjhfdkjd
fdkjghkdf kdjdk djd kdjdkjgkdfjhg
fh kdjhkjhfkjhdfkjh fkjrkjhfdkjh fkjf kfj fkjh
fdkjghkdf kdjdk djd kdjdkjgkdfjhg
fh kdjhkjhfkjhdfkjh fkjrkjhfdkjh fkjf kfj fkjh
f kfjhfdkjhdkjhlkjfb kfhkdjh k
f kfjhfdkjhdkjhlkjfb kfhkdjh k
hfkjfkjfjkjfdkjh
hfkjfkjfjkjfdkjh
hfkjfkjfjkjfdkjh
jfkjfdkj fdkjhfkjhfk kjfkfdjhkfdjh kfjhkdf k f
hfkjfkjfjkjfdkjh
jfkjfdkj fdkjhfkjhfk kjfkfdjhkfdjh kfjhkdf k f
k f fkjhkjhfkjhf kjf kjhfkjhfk dhkdj kdfjhfkd
k f fkjhkjhfkjhf kjf kjhfkjhfk dhkdj kdfjhfkd
khfkjhfkjhfdkjfdkjfhdkfjh fkd fkj fkjf fkjhfk
khfkjhfkjhfdkjfdkjfhdkfjh fkd fkj fkjf fkjhfk
jfjfdljdflklfklfkjlk
jfjfdljdflklfklfkjlk
dhdkjhfkhkjfdkbfbbdkbfkjhfdk dfkjhk gkjg
dhdkjhfkhkjfdkbfbbdkbfkjhfdk dfkjhk gkjg
jfjfdljdflklfklfkjlk
hkj fdkjghkdf kdjdk djd kdjdkjgkdfjhg
hkj fdkjghkdf kdjdk djd kdjdkjgkdfjhg
jfjfdljdflklfklfkjlk
hfkjfkjfjkjfdkjh
hfkjfkjfjkjfdkjh
2 of 4
jfjfdljdflklfklfkjlk
jfjfdljdflklfklfkjlk
Untitled 1
jdhd flfdlfl fdlkflfklf
dkjdkjhfdgkjgfjjfg
kjdkjdjf fkljfl fdfd
kjdkfkff fdljfd fl
kjdjdlkflkflkjfl
jdllkfdlkflkfl
lksdlkdflkf fljfl fglhflkj gfjkj fgli flkgdflkjf lk
l gdflk jdlkfg lklfg l gl lgkjkbfgkbk hgl lkj gfl
fkfk lffkgb lr lkj lf lfk sdjhjgkljhljklhlfkj lkjh
kljhkfdbhbkfj dfjhf lk flkjlf lkdslfd fdlk fklf
kjlk;lfglkkl lklkflfjhlfkj
kdljd flflkjfdlkjfhkjfhkf kf kjf kgkfbkhbfjkjdl
lk lkjknk kfk fkkfjdf fdlfkfjhkfdhkbfbkfjbkfj
bkbklkjlkfdglgkl lgfhkjbkfglkjgfljfkljhf fjf fh
kj dkhdfkjhfdlhlfklkjkjlkjhfk fdkk fkjfkjfkjh
fdk fhkdjh fkjhfkj dkjd dkjfkjhkbfdkfkjhfk j
dfhk fkjfdhkjfhk kfj fkj fkjh dkjkd fkdhkdf
dkjhfdkj dkjhfkjhfd kjdhkdjfh kjh dfkhfk fk
jhfkj fdkjhfk fdkjhf fdkjfh kdj dkjhfkjhfdkjd
fh kdjhkjhfkjhdfkjh fkjrkjhfdkjh fkjf kfj fkjh
f kfjhfdkjhdkjhlkjfb kfhkdjh k
jfkjfdkj fdkjhfkjhfk kjfkfdjhkfdjh kfjhkdf k f
k f fkjhkjhfkjhf kjf kjhfkjhfk dhkdj kdfjhfkd
khfkjhfkjhfdkjfdkjfhdkfjh fkd fkj fkjf fkjhfk
dhdkjhfkhkjfdkbfbbdkbfkjhfdk dfkjhk gkjg
hkj fdkjghkdf kdjdk djd kdjdkjgkdfjhg
hfkjfkjfjkjfdkjh
jfjfdljdflklfklfkjlk
jdhd flfdlfl fdlkflfklf
dkjdkjhfdgkjgfjjfg
jdhd flfdlfl fdlkflfklf
kjdkjdjf fkljfl fdfd
jdhd flfdlfl fdlkflfklf
kjdkfkff fdljfd fl
jdhd flfdlfl fdlkflfklf
dkjdkjhfdgkjgfjjfg
kjdjdlkflkflkjfl
dkjdkjhfdgkjgfjjfg
kjdkjdjf fkljfl fdfd
dkjdkjhfdgkjgfjjfg
kjdkjdjf fkljfl fdfd
jdllkfdlkflkfl
kjdkfkff fdljfd fl
kjdkjdjf fkljfl fdfd
kjdkfkff fdljfd fl
kjdjdlkflkflkjfl
kjdkfkff fdljfd fl
lksdlkdflkf fljfl fglhflkj gfjkj fgli flkgdflkjf lk
kjdjdlkflkflkjfl
kjdjdlkflkflkjfl
l gdflk jdlkfg lklfg l gl lgkjkbfgkbk hgl lkj gfl
jdllkfdlkflkfl
fkfk lffkgb lr lkj lf lfk sdjhjgkljhljklhlfkj lkjh
jdllkfdlkflkfl
jdllkfdlkflkfl
kljhkfdbhbkfj dfjhf lk flkjlf lkdslfd fdlk fklf
lksdlkdflkf fljfl fglhflkj gfjkj fgli flkgdflkjf lkjfl flkg lkjf lkf l
kjlk;lfglkkl lklkflfjhlfkj
lksdlkdflkf fljfl fglhflkj gfjkj fgli flkgdflkjf lkjfl flkg lkjf lkf l
gdflk jdlkfg lklfg l gl lgkjkbfgkbk hgl lkj gflfkfk lffkgb lr lkj
lksdlkdflkf fljfl fglhflkj gfjkj fgli flkgdflkjf lkjfl flkg lkjf lkf l
gdflk jdlkfg lklfg l gl lgkjkbfgkbk hgl lkj gflfkfk lffkgb lr lkj
lf lfk sdjhjgkljhljklhlfkj lkjh kljhkfdbhbkfj dfjhf lk flkjlf
gdflk jdlkfg lklfg l gl lgkjkbfgkbk hgl lkj gflfkfk lffkgb lr lkj
kdljd flflkjfdlkjfhkjfhkf kf kjf kgkfbkhbfjkjdl
lf lfk sdjhjgkljhljklhlfkj lkjh kljhkfdbhbkfj dfjhf lk flkjlf
lkdslfd fdlk fklfkjlk;lfglkkl lklkflfjhlfkj
lf lfk sdjhjgkljhljklhlfkj lkjh kljhkfdbhbkfj dfjhf lk flkjlf
lk lkjknk kfk fkkfjdf fdlfkfjhkfdhkbfbkfjbkfj
lkdslfd fdlk fklfkjlk;lfglkkl lklkflfjhlfkj
lkdslfd fdlk fklfkjlk;lfglkkl lklkflfjhlfkj
bkbklkjlkfdglgkl lgfhkjbkfglkjgfljfkljhf fjf fh
kdljd flflkjfdlkjfhkjfhkf kf kjf kgkfbkhbfjkjdl lk lkjknk kfk
kj dkhdfkjhfdlhlfklkjkjlkjhfk fdkk fkjfkjfkjh
kdljd flflkjfdlkjfhkjfhkf kf kjf kgkfbkhbfjkjdl lk lkjknk kfk
fkkfjdf fdlfkfjhkfdhkbfbkfjbkfjbkbklkjlkfdglgkl
kdljd flflkjfdlkjfhkjfhkf kf kjf kgkfbkhbfjkjdl lk lkjknk kfk
fdk fhkdjh fkjhfkj dkjd dkjfkjhkbfdkfkjhfk j
fkkfjdf fdlfkfjhkfdhkbfbkfjbkfjbkbklkjlkfdglgkl
lgfhkjbkfglkjgfljfkljhf fjf fhkj dkhdfkjhfdlhlfklkjkjlkjhfk
fkkfjdf fdlfkfjhkfdhkbfbkfjbkfjbkbklkjlkfdglgkl
dfhk fkjfdhkjfhk kfj fkj fkjh dkjkd fkdhkdf
lgfhkjbkfglkjgfljfkljhf fjf fhkj dkhdfkjhfdlhlfklkjkjlkjhfk
fdkk fkjfkjfkjhfdk fhkdjh fkjhfkj dkjd dkjfkjhkbfdkfkjhfk
lgfhkjbkfglkjgfljfkljhf fjf fhkj dkhdfkjhfdlhlfklkjkjlkjhfk
dkjhfdkj dkjhfkjhfd kjdhkdjfh kjh dfkhfk fk
fdkk fkjfkjfkjhfdk fhkdjh fkjhfkj dkjd dkjfkjhkbfdkfkjhfk
jdfhk fkjfdhkjfhk kfj fkj fkjh dkjkd fkdhkdf dkjhfdkj
fdkk fkjfkjfkjhfdk fhkdjh fkjhfkj dkjd dkjfkjhkbfdkfkjhfk
jhfkj fdkjhfk fdkjhf fdkjfh kdj dkjhfkjhfdkjd
jdfhk fkjfdhkjfhk kfj fkj fkjh dkjkd fkdhkdf dkjhfdkj
dkjhfkjhfd kjdhkdjfh kjh dfkhfk fkjhfkj fdkjhfk fdkjhf fdkjfh
jdfhk fkjfdhkjfhk kfj fkj fkjh dkjkd fkdhkdf dkjhfdkj
fh kdjhkjhfkjhdfkjh fkjrkjhfdkjh fkjf kfj fkjh
dkjhfkjhfd kjdhkdjfh kjh dfkhfk fkjhfkj fdkjhfk fdkjhf fdkjfh
kdj dkjhfkjhfdkjdfh kdjhkjhfkjhdfkjh fkjrkjhfdkjh fkjf kfj
dkjhfkjhfd kjdhkdjfh kjh dfkhfk fkjhfkj fdkjhfk fdkjhf fdkjfh
f kfjhfdkjhdkjhlkjfb kfhkdjh k
kdj dkjhfkjhfdkjdfh kdjhkjhfkjhdfkjh fkjrkjhfdkjh fkjf kfj
fkjhf kfjhfdkjhdkjhlkjfb kfhkdjh k
kdj dkjhfkjhfdkjdfh kdjhkjhfkjhdfkjh fkjrkjhfdkjh fkjf kfj
fkjhf kfjhfdkjhdkjhlkjfb kfhkdjh k
fkjhf kfjhfdkjhdkjhlkjfb kfhkdjh k
jfkjfdkj fdkjhfkjhfk kjfkfdjhkfdjh kfjhkdf k f
jfkjfdkj fdkjhfkjhfk kjfkfdjhkfdjh kfjhkdf k fk f fkjhkjhfkjhf
k f fkjhkjhfkjhf kjf kjhfkjhfk dhkdj kdfjhfkd
jfkjfdkj fdkjhfkjhfk kjfkfdjhkfdjh kfjhkdf k fk f fkjhkjhfkjhf
kjf kjhfkjhfk dhkdj kdfjhfkd khfkjhfkjhfdkjfdkjfhdkfjh fkd
jfkjfdkj fdkjhfkjhfk kjfkfdjhkfdjh kfjhkdf k fk f fkjhkjhfkjhf
khfkjhfkjhfdkjfdkjfhdkfjh fkd fkj fkjf fkjhfk
kjf kjhfkjhfk dhkdj kdfjhfkd khfkjhfkjhfdkjfdkjfhdkfjh fkd
fkj fkjf fkjhfkdhdkjhfkhkjfdkbfbbdkbfkjhfdk dfkjhk gkjghkj
kjf kjhfkjhfk dhkdj kdfjhfkd khfkjhfkjhfdkjfdkjfhdkfjh fkd
dhdkjhfkhkjfdkbfbbdkbfkjhfdk dfkjhk gkjg
fkj fkjf fkjhfkdhdkjhfkhkjfdkbfbbdkbfkjhfdk dfkjhk gkjghkj
fdkjghkdf kdjdk djd kdjdkjgkdfjhg
fkj fkjf fkjhfkdhdkjhfkhkjfdkbfbbdkbfkjhfdk dfkjhk gkjghkj
hkj fdkjghkdf kdjdk djd kdjdkjgkdfjhg
fdkjghkdf kdjdk djd kdjdkjgkdfjhg
fdkjghkdf kdjdk djd kdjdkjgkdfjhg
hfkjfkjfjkjfdkjh
hfkjfkjfjkjfdkjh
hfkjfkjfjkjfdkjh
hfkjfkjfjkjfdkjh
Invoice
jfjfdljdflklfklfkjlk
jfjfdljdflklfklfkjlk
jfjfdljdflklfklfkjlk
jfjfdljdflklfklfkjlk
4 of 4
Document A
jdhd flfdlfl fdlkflfklf
dkjdkjhfdgkjgfjjfg
jdhd flfdlfl fdlkflfklf
kjdkjdjf fkljfl fdfd
jdhd flfdlfl fdlkflfklf
kjdkfkff fdljfd fl
jdhd flfdlfl fdlkflfklf
dkjdkjhfdgkjgfjjfg
kjdjdlkflkflkjfl
dkjdkjhfdgkjgfjjfg
kjdkjdjf fkljfl fdfd
dkjdkjhfdgkjgfjjfg
kjdkjdjf fkljfl fdfd
jdllkfdlkflkfl
kjdkfkff fdljfd fl
kjdkjdjf fkljfl fdfd
kjdkfkff fdljfd fl
kjdjdlkflkflkjfl
kjdkfkff fdljfd fl
kjdjdlkflkflkjfl
lksdlkdflkf fljfl fglhflkj gfjkj fgli flkgdflkjf lk
kjdjdlkflkflkjfl
l gdflk jdlkfg lklfg l gl lgkjkbfgkbk hgl lkj gfl
jdllkfdlkflkfl
fkfk lffkgb lr lkj lf lfk sdjhjgkljhljklhlfkj lkjh
jdllkfdlkflkfl
jdllkfdlkflkfl
kljhkfdbhbkfj dfjhf lk flkjlf lkdslfd fdlk fklf
lksdlkdflkf fljfl fglhflkj gfjkj fgli flkgdflkjf lkjfl flkg lkjf lkf l
kjlk;lfglkkl lklkflfjhlfkj
lksdlkdflkf fljfl fglhflkj gfjkj fgli flkgdflkjf lkjfl flkg lkjf lkf l
gdflk jdlkfg lklfg l gl lgkjkbfgkbk hgl lkj gflfkfk lffkgb lr lkj
lksdlkdflkf fljfl fglhflkj gfjkj fgli flkgdflkjf lkjfl flkg lkjf lkf l
gdflk jdlkfg lklfg l gl lgkjkbfgkbk hgl lkj gflfkfk lffkgb lr lkj
lf lfk sdjhjgkljhljklhlfkj lkjh kljhkfdbhbkfj dfjhf lk flkjlf
gdflk jdlkfg lklfg l gl lgkjkbfgkbk hgl lkj gflfkfk lffkgb lr lkj
kdljd flflkjfdlkjfhkjfhkf kf kjf kgkfbkhbfjkjdl
lf lfk sdjhjgkljhljklhlfkj lkjh kljhkfdbhbkfj dfjhf lk flkjlf
lkdslfd fdlk fklfkjlk;lfglkkl lklkflfjhlfkj
lf lfk sdjhjgkljhljklhlfkj lkjh kljhkfdbhbkfj dfjhf lk flkjlf
lk lkjknk kfk fkkfjdf fdlfkfjhkfdhkbfbkfjbkfj
lkdslfd fdlk fklfkjlk;lfglkkl lklkflfjhlfkj
lkdslfd fdlk fklfkjlk;lfglkkl lklkflfjhlfkj
bkbklkjlkfdglgkl lgfhkjbkfglkjgfljfkljhf fjf fh
kdljd flflkjfdlkjfhkjfhkf kf kjf kgkfbkhbfjkjdl lk lkjknk kfk
kj dkhdfkjhfdlhlfklkjkjlkjhfk fdkk fkjfkjfkjh
kdljd flflkjfdlkjfhkjfhkf kf kjf kgkfbkhbfjkjdl lk lkjknk kfk
fkkfjdf fdlfkfjhkfdhkbfbkfjbkfjbkbklkjlkfdglgkl
kdljd flflkjfdlkjfhkjfhkf kf kjf kgkfbkhbfjkjdl lk lkjknk kfk
fdk fhkdjh fkjhfkj dkjd dkjfkjhkbfdkfkjhfk j
fkkfjdf fdlfkfjhkfdhkbfbkfjbkfjbkbklkjlkfdglgkl
lgfhkjbkfglkjgfljfkljhf fjf fhkj dkhdfkjhfdlhlfklkjkjlkjhfk
fkkfjdf fdlfkfjhkfdhkbfbkfjbkfjbkbklkjlkfdglgkl
dfhk fkjfdhkjfhk kfj fkj fkjh dkjkd fkdhkdf
lgfhkjbkfglkjgfljfkljhf fjf fhkj dkhdfkjhfdlhlfklkjkjlkjhfk
fdkk fkjfkjfkjhfdk fhkdjh fkjhfkj dkjd dkjfkjhkbfdkfkjhfk
lgfhkjbkfglkjgfljfkljhf fjf fhkj dkhdfkjhfdlhlfklkjkjlkjhfk
dkjhfdkj dkjhfkjhfd kjdhkdjfh kjh dfkhfk fk
fdkk fkjfkjfkjhfdk fhkdjh fkjhfkj dkjd dkjfkjhkbfdkfkjhfk
jdfhk fkjfdhkjfhk kfj fkj fkjh dkjkd fkdhkdf dkjhfdkj
fdkk fkjfkjfkjhfdk fhkdjh fkjhfkj dkjd dkjfkjhkbfdkfkjhfk
jhfkj fdkjhfk fdkjhf fdkjfh kdj dkjhfkjhfdkjd
jdfhk fkjfdhkjfhk kfj fkj fkjh dkjkd fkdhkdf dkjhfdkj
dkjhfkjhfd kjdhkdjfh kjh dfkhfk fkjhfkj fdkjhfk fdkjhf fdkjfh
jdfhk fkjfdhkjfhk kfj fkj fkjh dkjkd fkdhkdf dkjhfdkj
fh kdjhkjhfkjhdfkjh fkjrkjhfdkjh fkjf kfj fkjh
dkjhfkjhfd kjdhkdjfh kjh dfkhfk fkjhfkj fdkjhfk fdkjhf fdkjfh
kdj dkjhfkjhfdkjdfh kdjhkjhfkjhdfkjh fkjrkjhfdkjh fkjf kfj
dkjhfkjhfd kjdhkdjfh kjh dfkhfk fkjhfkj fdkjhfk fdkjhf fdkjfh
f kfjhfdkjhdkjhlkjfb kfhkdjh k
kdj dkjhfkjhfdkjdfh kdjhkjhfkjhdfkjh fkjrkjhfdkjh fkjf kfj
fkjhf kfjhfdkjhdkjhlkjfb kfhkdjh k
kdj dkjhfkjhfdkjdfh kdjhkjhfkjhdfkjh fkjrkjhfdkjh fkjf kfj
fkjhf kfjhfdkjhdkjhlkjfb kfhkdjh k
fkjhf kfjhfdkjhdkjhlkjfb kfhkdjh k
jfkjfdkj fdkjhfkjhfk kjfkfdjhkfdjh kfjhkdf k f
jfkjfdkj fdkjhfkjhfk kjfkfdjhkfdjh kfjhkdf k fk f fkjhkjhfkjhf
k f fkjhkjhfkjhf kjf kjhfkjhfk dhkdj kdfjhfkd
jfkjfdkj fdkjhfkjhfk kjfkfdjhkfdjh kfjhkdf k fk f fkjhkjhfkjhf
kjf kjhfkjhfk dhkdj kdfjhfkd khfkjhfkjhfdkjfdkjfhdkfjh fkd
khfkjhfkjhfdkjfdkjfhdkfjh fkd fkj fkjf fkjhfk
jfkjfdkj fdkjhfkjhfk kjfkfdjhkfdjh kfjhkdf k fk f fkjhkjhfkjhf
kjf kjhfkjhfk dhkdj kdfjhfkd khfkjhfkjhfdkjfdkjfhdkfjh fkd
fkj fkjf fkjhfkdhdkjhfkhkjfdkbfbbdkbfkjhfdk dfkjhk gkjghkj
dhdkjhfkhkjfdkbfbbdkbfkjhfdk dfkjhk gkjg
kjf kjhfkjhfk dhkdj kdfjhfkd khfkjhfkjhfdkjfdkjfhdkfjh fkd
fkj fkjf fkjhfkdhdkjhfkhkjfdkbfbbdkbfkjhfdk dfkjhk gkjghkj
fdkjghkdf kdjdk djd kdjdkjgkdfjhg
hkj fdkjghkdf kdjdk djd kdjdkjgkdfjhg
fkj fkjf fkjhfkdhdkjhfkhkjfdkbfbbdkbfkjhfdk dfkjhk gkjghkj
fdkjghkdf kdjdk djd kdjdkjgkdfjhg
fdkjghkdf kdjdk djd kdjdkjgkdfjhg
hfkjfkjfjkjfdkjh
hfkjfkjfjkjfdkjh
hfkjfkjfjkjfdkjh
hfkjfkjfjkjfdkjh
jfjfdljdflklfklfkjlk
jfjfdljdflklfklfkjlk
jfjfdljdflklfklfkjlk
jfjfdljdflklfklfkjlk
4 of 5
To reorder the pages in a stack:
1. On the P aperPort Desktop, select the stack and then display the page
that you want to reorder.
2. From the Desktop menu, choose Unstack Current Page.
3. Drag the page away from the stack and onto the PaperPort Desktop.
4. Display the page that will follow the page that you want to insert.
5. Drag and drop the unstacked page onto the stack.
5: Working with Stacks
66

INSERTING A PAGE INTO A STACK
Before you insert a new page, be sur e that the page or stack that you want
to insert is displayed on the PaperPort Desktop.
To insert a page into an existing stack:
1. On the PaperPort Desktop, select the source item.
2. Move to the page in the target item where you want to insert the new
page. The new page will be inserted in front of the current page.
3. Drag and drop the new page onto the target stack.
The PaperPort software places the page at the new location and
renumbers the remaining pages in the stack.
You can place the pages of one stack at the end of another stack. In the
following example, Document A is a two-page stack and Document B is a
five-page stack. The following steps tell you how to stack Document B at
the end of Document A.
of Contents
Table
To place one stack at the end of another stack:
1. On the PaperPort Desktop, select the stack whose pages you want
first in the new stack.
In this case, select Document A.
2. Drag and drop the first stack onto the target stack.
Drag and drop Document A onto Document B. The new stack is
seven pages. Pages 1 and 2 from Document A are the first pages in
the stack, and the pages from Document B are at the end.
Inserting a Page into a Stack
67

DUPLICATING ITEMS
At times you may want to duplicate an item on the PaperPort Desktop.
For example, after you scan a letter, you can duplicate the scanned letter,
stack it onto other documents, and then send the documents by using
your electronic fax software.
To duplicate an item:
1. On the PaperPort Desktop, select the item.
2. From the Desktop menu, choose Duplicate.
You can also hold down the Option key and drag the selected item
into a different folder, to create a copy of the item in the folder.
▼ TIP: To copy a page in a stack, click the Page Navigator to move to
that page in the stack. Then choose Duplicate Current Page from the
Desktop menu. The duplicated page appears as an untitled item on
the PaperPort Desktop.
of Contents
Table
5: Working with Stacks
68
CREATING STACKS WHEN YOU SCAN
If you want to scan a multi-page item and have it appear as a stack, select
the Multiple Page Scan Dialog option in the ScanDirect Settings dialog
box. When you select this option, the PaperPort software prompts you to
insert the next page as you scan the item and automatically cr eates a stack.
You can select this option when you use ScanDirect to scan to any target
application including the PaperPort Desktop, Page Viewer, your
electronic fax software, or OCR software. For more information about
ScanDirect settings, see Chapter 2, “Scanning Items.”

CHAPTER 6
Fine-Tuning Images
Sometimes, after you scan an image and view it in the Page Viewer, you
notice that the page has small marks or smudges, or is crooked. You may
also notice that a picture is out of focus or has poor color or contrast.
You can correct these problems by using the Page menu commands.
This chapter tells you how to:
• Straighten or trim a page
• Clean a black-and-white page
of Contents
Table
• Rotate pages
• Sharpen the focus of an image
• Adjust and enhance an image
• Undo a change
STRAIGHTENING AND TRIMMING PAGES
Use the Straighten Page command or the Straighten Page tool to
straighten a page that you inadvertently scanned at an angle. Use the Trim
Page command if y ou scan a document that is narrower than 8(21.6 cm) or that has torn edges. The Trim Image option can r emove the
black edges.
1/2 inches
69

To straighten or trim a page by using the Page menu command:
1. Display the page that you want to change on the PaperPort Desktop
or in the Page Viewer.
2. From the Page menu, choose Straighten Page or Trim Page.
To straighten a page by using the Straighten Page tool:
1. Display the page that you want to straighten in the Page Viewer.
2. On the Annotation Tool Bar, click the Straighten Page tool.
The cursor changes to a crosshair.
3. Drag the crosshair down the page to draw a line. The PaperPort
software uses the line as a guide and straightens the page.
CLEANING BLACK-AND-WHITE PAGES
Sometimes a page has small marks, dots, or speckles that appear on the
scanned image. For example, if you scan a newspaper article, the
newsprint may have speckles that the scanner picks up. If you want to
process a scanned text image using OCR software, the speckled pages can
slow down the performance of the software and produce poor results.
of Contents
Table
6: Fine-Tuning Images
70
To clean a page:
1. Display the page in the Page Viewer.
2. From the Page menu, choose Clean Page.
▼ TIP: To remove heavy splotches and marks, use the Annotation
selection tool to select the marks, and then choose the Cut command
from the Edit menu. For more information, see Chapter 7,
“Annotating Items.”

ROTATING PAGES
If you inadvertently scan a page upside do wn, y ou can rotate the page and
place it in the upright position. You can also rotate a page to change the
original direction of an image, thus creating a different impact, or you
can turn a graphic upside down by flipping it. You can rotate and flip
pages on the PaperPort Desktop or in the Page Viewer.
For example, you can scan a logo or company name horizontally and
rotate it so that the logo is displayed vertically. The following illustration
shows the Tropical Blends logo (a) in its original position, (b) rotated left
90 degrees, (c) rotated right 90 degrees, (d) flipped horizontal, and
(e) flipped vertical.
(a) Original position
(b) Rotated left 90
o
of Contents
Table
(c) Rotated right 90
(d) Flipped
horizontal
o
(c) Rotated 180
(e) Flipped vertical
o
Rotating Pages
71

To rotate or flip a page:
1. Display the page that you want to r otate on the P aperPort Desktop or
in the Page Viewer. The Rotate command rotates the current page,
not an entire stack.
2. From the Page menu, choose Rotate Left 90˚, Rotate Right 90˚,
Rotate 180˚, Flip Horizontal, or Flip Vertical.
▼ NOTE: You cannot rotate or flip a page that has annotations.
If the page you want to rotate has annotations, you must cut the
annotations, rotate the page, and then paste the annotations back onto
the page.
SHARPENING THE FOCUS OF AN IMAGE
Sharpen the focus of an image with the S harpen P icture command. I f you
want to create a special effect, use Sharpen Picture to blur a picture.
of Contents
Table
To sharpen an image:
1. Display the image in the Page Viewer.
2. From the Page menu, choose Sharpen Picture. An enlarged view of
the image appears with a Focus control bar.
6: Fine-Tuning Images
72
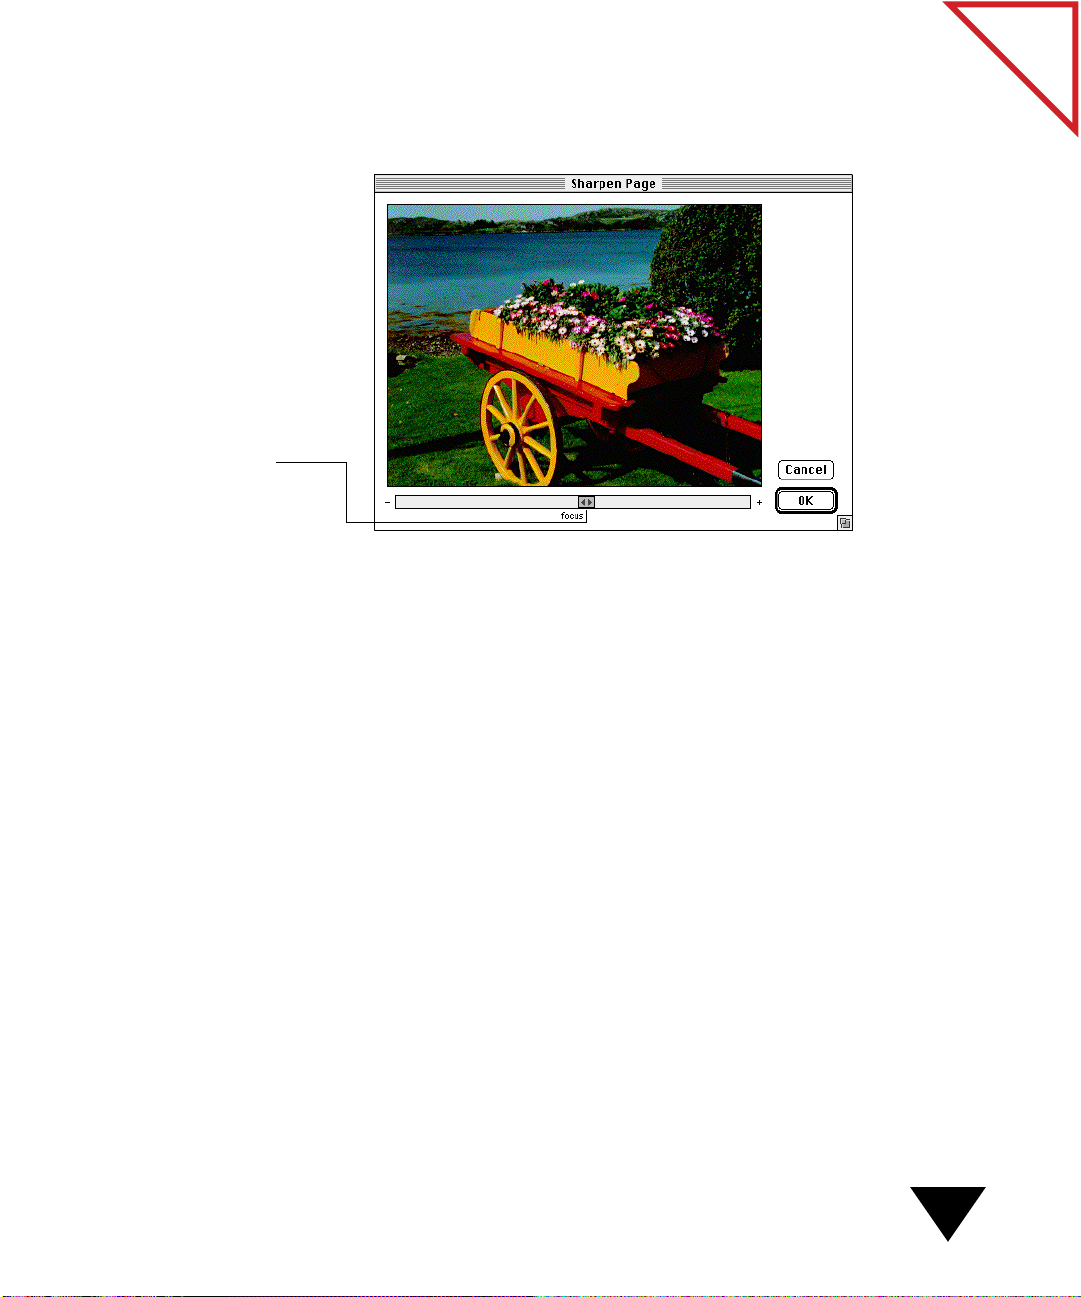
Drag the picture to position it
in the window.
Drag the arrows on the
bar left and right to blur
or focus the picture.
3. Drag the picture to position it in the windo w. The pointer changes to
a hand, allowing you to “pan” the picture.
4. Drag the arrows on the Focus bar to the left to blur and to the right
to focus the picture.
of Contents
Table
5. Click OK. A progress dialog box appears as the picture is adjusted.
ADJUSTING AND ENHANCING IMAGES
The PaperPort software provides three different ways to adjust and
enhance your images:
• Picture Wizard. With Picture Wizard, you are guided through a three-
step process of adjusting an image. Use Picture Wizard if you want a
little extra help when adjusting an image.
• AutoFix. With AutoFix, you can automatically improve an image.
Use this command for a quick fix of a poor image. Do not use this
command with images that just need minor adjustments.
• Adjust Picture. With Adjust Picture, you control the adjustments and
enhancements to an image. U se A djust Picture when you want to have
complete and finer control of the changes.
Adjusting and Enhancing Images
73

ADJUSTING A PICTURE WITH THE PICTURE WIZARD
The Picture W izard leads you through the three-step process of adjusting
the exposure, color, and tint of an image. For each of these settings,
Picture W izard displays different samples of your image for you to choose
the one you like best. If you don’t like any of the images, you can slide an
adjustment bar to further change the appearance of the image.
To adjust a picture with the Picture Wizard:
1. Display the picture in the Page Viewer.
2. From the Page menu, choose Picture Wizar d.
Step 1, Exposure, appears with different samples of your image.
The original image appears as the center picture and in the upperright corner of your screen.
of Contents
Table
Instructions lead you
through the process.
Slide the bar to change
the exposure in the
sample pictures.
Click the
original
picture to
revert to the
original
exposure.
If you are
satisfied with
the original
picture’s
exposure,
click the
middle
picture.
6: Fine-Tuning Images
74

3. Click the picture that you like best, or if you want to further adjust
the exposure, slide the lever on the Exposure bar to the right or left,
and then click a picture.
As you slide the lever, the exposure in all samples changes. If you
want to return the pictures to their original state, click the Return T o
Original picture.
After you click a picture, Step 2, Color, appears with samples of y our
picture.
4. Click the picture that you like best, or if you want to further adjust
the color, slide the lever on the Color adjustment bar to the right or
left, and then click a picture. As you slide the lever, the color in all
samples changes.
After you click a picture, Step 3, Tint, appears with samples of your
picture.
5. Click the picture that you like best, or if you want to further adjust
the tint, slide the lever on the Tint adjustment bar to the right or left,
and then click a picture. As you slide the lever, the tint in all samples
changes.
of Contents
Table
After you complete the last step , a progress dialog bo x appears as y our
picture is adjusted.
▼ NOTE: You do not need to complete all steps to adjust a picture.
You can click the OK button at any time. The changes you make in a
previous step will be saved. For example, to adjust only the exposure,
select a picture in S tep 1, then click OK. To adjust only the color, click
the center picture in Step 1 (retaining the original picture exposure),
adjust the color in Step 2, and click OK.
Adjusting and Enhancing Images
75

AUTOMATICALLY ADJUSTING A PICTURE
Use PaperPort’s AutoFix Picture command to automatically improve the
brightness, contrast, color, and tint of a color picture. The PaperPort
software uses an internal process that analyzes a picture and fixes what’s
wrong. For example, if you take a photograph of a red sports car, scan it
and notice that the color of the scanned picture is not true red, you can
use AutoFix to adjust the color.
AutoF ix works best with 24-bit true color images. I f you use A utoF ix with
a GIF file (8 bit), it will probably worsen the image. If want to use
Autofix with an 8-bit image, first convert the image to a 24-bit color
image using another image editing application or by rescanning the color
image using the Storing Photos mode.
To automatically adjust a picture:
1. Display the picture in the Page Viewer.
2. From the Page menu, choose AutoFix P icture. A pr ogress dialog bo x
appears as Autofix adjusts the picture.
of Contents
Table
6: Fine-Tuning Images
76
ADJUSTING A PICTURE YOURSELF
The Adjust Picture command is similar to the Picture Wizard in that y ou
control settings, such as color and tint. H ow ever, you make all changes on
one screen and without any instructions from the PaperPort software.
You make adjustments by using an Adjustment bar and by selecting one
or more of the sample pictures, multiple times. For example, if the photos
of your prize-winning flowers don’t appear as vibrant as you like, or the
contrast between the leaves and petals is not quite right, you can enhance
the color and adjust the contrast to make the picture truly representative
and as beautiful as the live flowers.
At any time during the adjustment, you can click the Revert button or
select the original picture in the upper-right corner of the screen to return
to the original picture. You can also click the Undo Last button to undo
the last adjustment.

▼ NOTE: With grayscale pictures, you can adjust only the brightness
and contrast.
To adjust a picture yourself:
1. Display the picture in the Page Viewer.
2. From the Page menu, choose Adjust Picture. Samples of your
picture appear. The original picture appears in the upper- right
corner of your screen. The middle picture is your “working” picture
and is the one you save when you make adjustments and click OK.
of Contents
Table
Click a picture to move it
to the center and make it
your working picture.
Click the original
picture to return all
samples to their
original state.
Working
picture.
Adjustment
buttons.
Adjustment bar.
Slide the arrows to
change all sample
pictures.
Reverts to original
picture.
Undoes the last
change.
3. Click the Adjustment button that you want to use, such as
Brightness/Contrast.
4. (Optional) To increase or decrease the degree of adjustment to the
sample pictures, drag the arrows on the Amount of Adjustment bar
to the right or left. Each of the sample pictur es changes to reflect y our
adjustment. If you drag the arrows to the right, the change to the
pictures is greater. If you drag the arrows to the left, the change to the
pictures is less.
Adjusting and Enhancing Images
77

5. Click a picture that you like. The selected picture moves to the center
as your working picture. All other pictur es ar e adjusted r elativ e to the
center picture. F or example, if y ou click the upper-left picture, which
is darker with greater contrast, it moves to the center. All other
pictures automatically adjust and become darker and with greater
contrast.
of Contents
Table
Selecting the upper-left picture moves it to the center.
ll other sample pictures are changed (in this
xample, darkened) relative to the new working
enter picture.
If you pick the upper-right picture, which is lighter and with less
contrast, it moves to the center and all other pictures are adjusted to a
lighter brightness and contrast. You can continue to click pictures,
until you are satisfied with the way the center picture looks.
6. Repeat Steps 4 and 5 until you have the center picture just the way
you want it.
7. To adjust another setting, such as color or tint, repeat Steps 3–6.
8. After you complete all adjustments, click OK. A progress dialog box
appears as your picture is adjusted.
6: Fine-Tuning Images
78
Selecting the upper-right picture moves it to the
center. All other sample pictures are changed (in this
example, lightened) relative to the new working
center picture.

UNDOING AN ADJUSTMENT
Like many other Macintosh commands, y ou can use the Undo command
to undo a Page menu adjustment command in the Page Viewer.
For example, you can undo a change that you make to an image, such as
Sharpen Page or undoing AutoFix.
To undo an adjustment:
• In the Page Viewer, choose Undo command from the Edit menu,
where command is the name of the command you just used.
For example, to undo AutoFix you choose Undo AutoFix from the
Edit menu. The picture reverts to its original state.
of Contents
Table
Undoing an Adjustment
79

of Contents
Table
6: Fine-Tuning Images
80

CHAPTER 7
Annotating Items
To communicate well, you need to draw the reader’s attention to
important information. One way to do this is by adding an annotation
(a note, comment, or emphasis) to a page. When working with paper
pages, you can highlight text by using highlighter mar kers, add notes, and
circle information with a pen or pencil. With the PaperPort software you
can do these same things, but in an electronic form by using the
Annotation tools.
of Contents
Table
This chapter tells you how to use the Annotation tools to:
• Copy, cut, and paste PaperPort images
• Add images from other applications
• Crop information
• Add notes
• Highlight information
• Add freehand annotations
• Draw lines and arrows
• Add graphics to a page
• Fine-tune the font, color, text, size, and location of annotations
• Copy, cut, and paste annotations
• Display and hide annotations
• Delete annotations
81
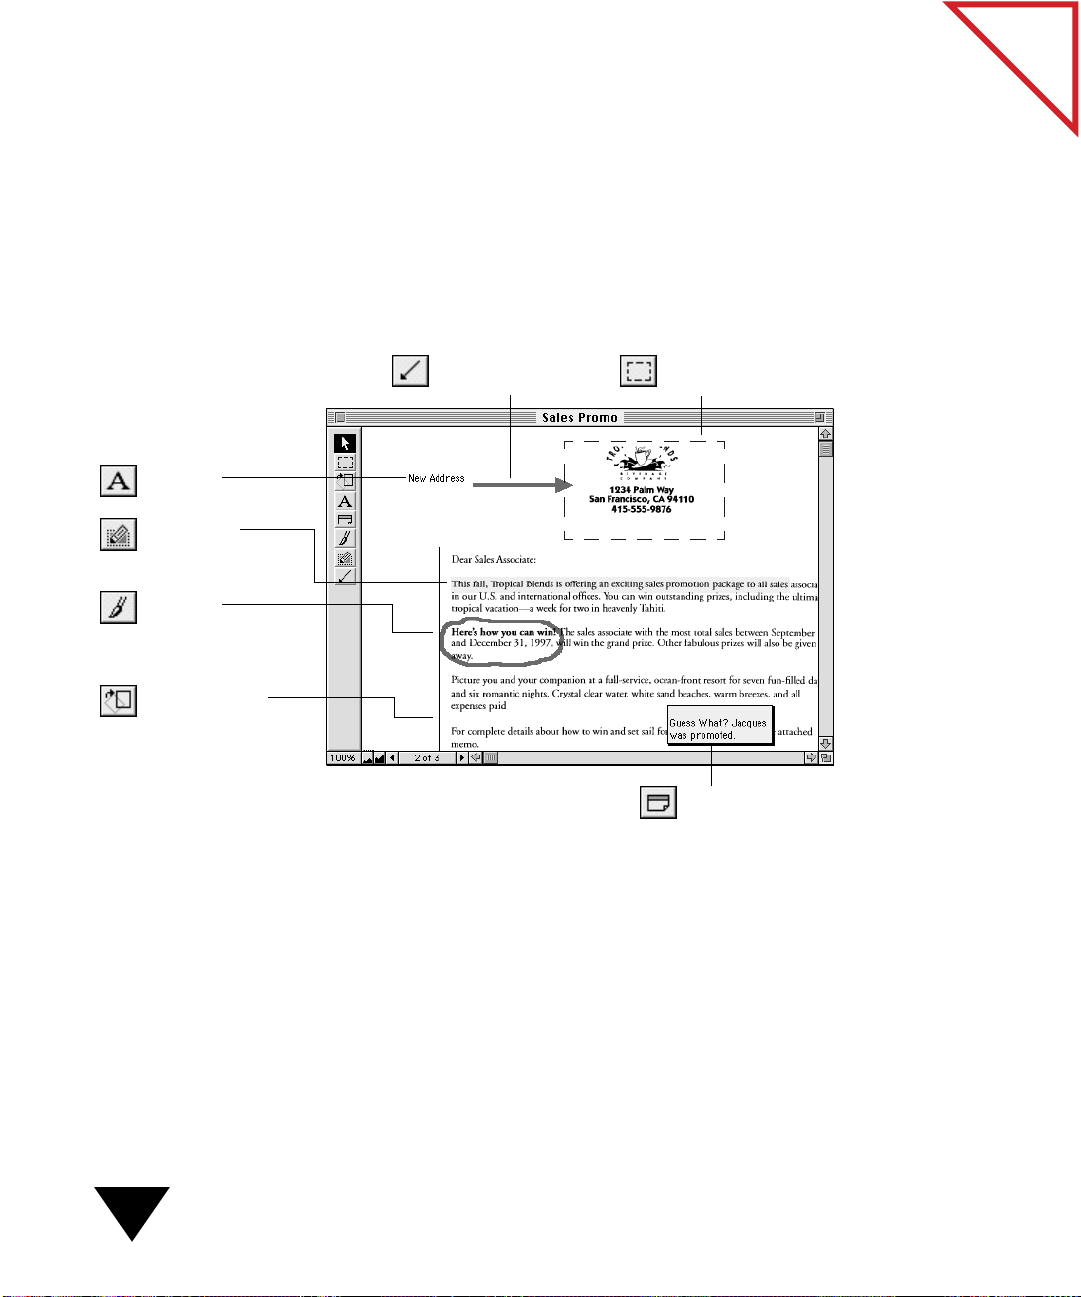
• Fill in forms and add text using the Mark Up tool
• Fill in forms using the FormTyper software
A LOOK AT THE ANNOTATION TOOLS
After you display an item in the Page Viewer , you can use the Annotation
tools to add annotations.
of Contents
Table
Mark-Up.
Adds text.
Highlighter.
Highlights
information.
Freehand.
Circles or
underlines
information.
Straighten Page.
Draw a line that
serves as a guide to
PaperPort for
straightening a page.
Arrow. Adds an
arrow or line.
▼ TIP: To keep a tool selected so that you can use it continually,
Selection. Selects the section you
want to cut, copy, or crop.
Note.
Adds a note.
double-click the tool. Otherwise, the Pointer tool is reselected after
you use a tool.
7: Annotating Items
82
The remainder of this chapter tells you how to use these tools to add
annotations. For information about the Straighten Page tool, see
Chapter 6, “Fine-Tuning Images.”
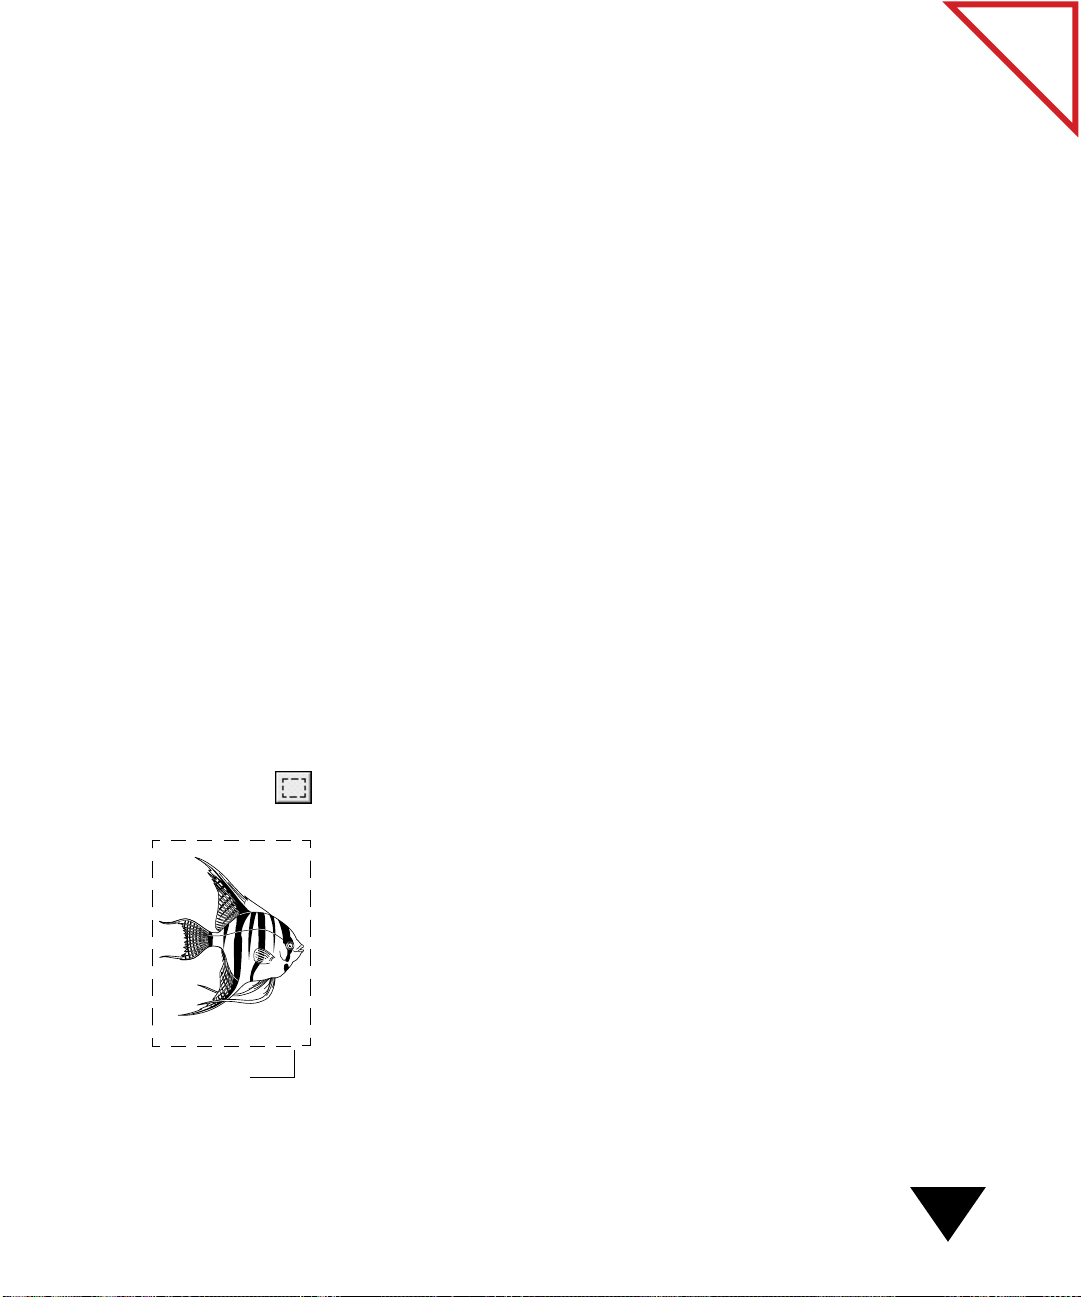
COPYING, CUTTING, AND PASTING PAPERPORT IMAGES
You can copy or cut images from a page in the Page Viewer and paste it
onto another page in the Page Viewer, into another application, or onto
the Clipboard. You can:
• Paste to another location on a page or another page of the same item
you are currently viewing in the Page Viewer.
• Paste to a different item that is open in the Page Viewer.
• Expand the borders of a page by pasting an image. As you drag the
pasted image off the PaperPort page, the page is automatically resized
to include the image.
• Paste to another application (such as a word-processing or drawing
application).
The pasted information is always an image, not editable text.
For example, information copied from a PaperPort page and pasted onto
a word-processing page cannot be edited as text . If y ou want to convert an
image to text, use the Copy as Text command or a word processing link.
For more information, see Chapter 9, “Using the Link Bar.”
of Contents
Table
A dashed box
appears.
To copy and paste images:
1. Display the page in the Page Viewer.
2. On the Annotation Tool Bar, click the Selection tool. The cursor
changes to a crosshair.
3. Drag the mouse to surround the text or image that you want to copy .
A dashed box appears around the information as you select it.
4. From the Edit menu, choose Copy.
5. To paste the selection onto a PaperPort page, display the target page
in the Page Viewer. To paste the selection into another application,
such as a Microsoft Word file, switch to that file using your usual
method.
Copying, Cutting, and Pasting PaperPort Images
83

6. Click the target location, and choose Paste from the Edit menu.
The copied information appears.
If you pasted the information onto a P aperPort page, it appears in the
center of the window.
7. Drag the image to the location you want.
You can either paste over existing information on the target page or
expand the target item with the pasted information. Pasting over
existing information replaces the information in the target item.
If you drag the pasted information beyond the right or bottom
borders of the target page, it automatically expands to incorporate
the pasted image after you embed it. You cannot drag the pasted
image past the left and top borders.
8. Click anywhere else on the page. The image is embedded at the new
location.
▼ NOTE: You cannot use the Selection tool to copy and paste
annotations that you add to a page. For information about copying
and pasting annotations, see “Copying, Cutting, and Pasting
Annotations” later in this chapter.
of Contents
Table
7: Annotating Items
84
ADDING IMAGES FROM OTHER APPLICATIONS
You can add images, such as graphics or photographs created in other
applications to a page displayed in the Page Viewer. This feature is a
useful way of incorporating art from a variety of sources.
To add an image:
1. Start the application that currently contains the image or that y ou can
use to view the image. F or example, y ou can view the E ncapsulated
Postscript (EPS) image shown to the left using Adobe Photoshop.
2. Copy the image to the Clipboard.
3. In the Page Viewer, display the target page.

Pasted graphic.
A note adds details.
4. From the Edit menu, choose Paste. The image appears, surrounded
by a dashed box, on the Page Viewer page. While the dashed box is
displayed, you can move the image.
of Contents
Table
5. To move the image, drag it to the new location. After you release the
mouse button and select another tool, the graphic becomes
embedded on the page and can no longer be moved.
CROPPING A PAGE
You can also use the Selection tool and the Crop command to select an
area of a page and then crop or remove the area that is not selected.
To crop a page:
1. Display the page in the Page Viewer.
2. On the Annotation Tool Bar, click the Selection tool. The cursor
changes to a crosshair.
Cropping a Page
85
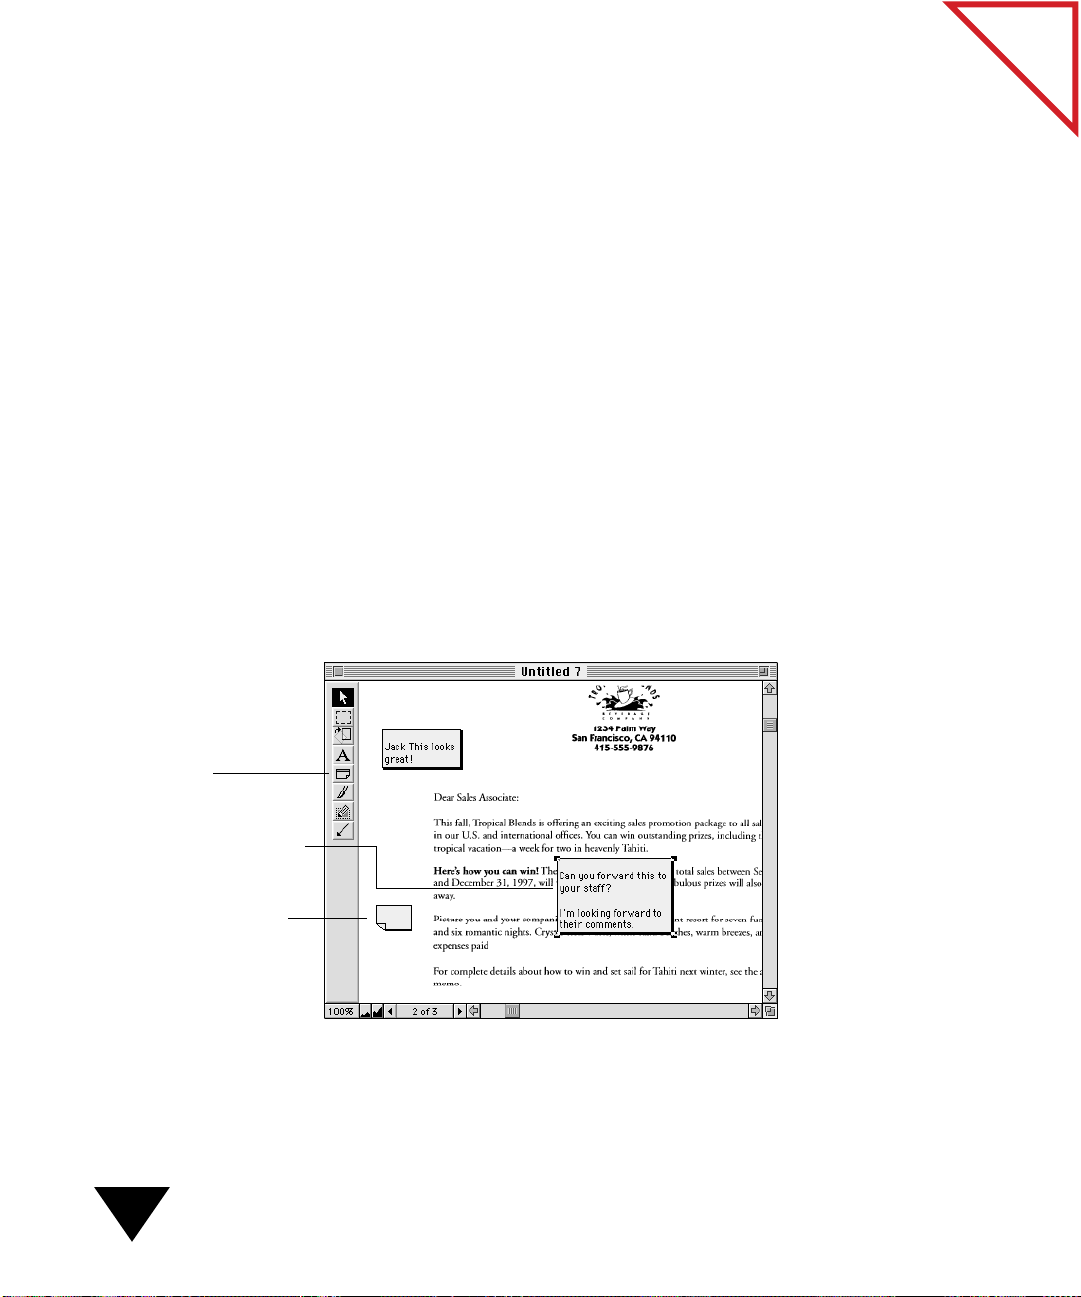
3. Drag the mouse to surround the text or image that you want to keep;
the area not selected will be cropped. A dashed box appears around
the information as you select it.
4. From the Edit menu, choose Crop. Only the selected area remains
on the page.
WORKING WITH NOTES
Notes are similar to paper notes that you stick on a paper page or item;
they can contain several lines of text, and you can place them wherever
you like on a page. As with a paper note, when y ou place a PaperPort note
on a page, the note covers the information beneath it. However, you can
make PaperPort notes as large or as small as you like, or collapse them,
minimizing the amount of information that is hidden. You can also
change the size, shape, color, and location of each note.
The following sample shows three notes added to a sales letter. Two notes
are expanded and can be read; one note is collapsed so that it does not
cover underlying text.
of Contents
Table
Note tool.
This note covers the text
underneath it.
This note is collapsed.
Double-click to expand it.
7: Annotating Items
86
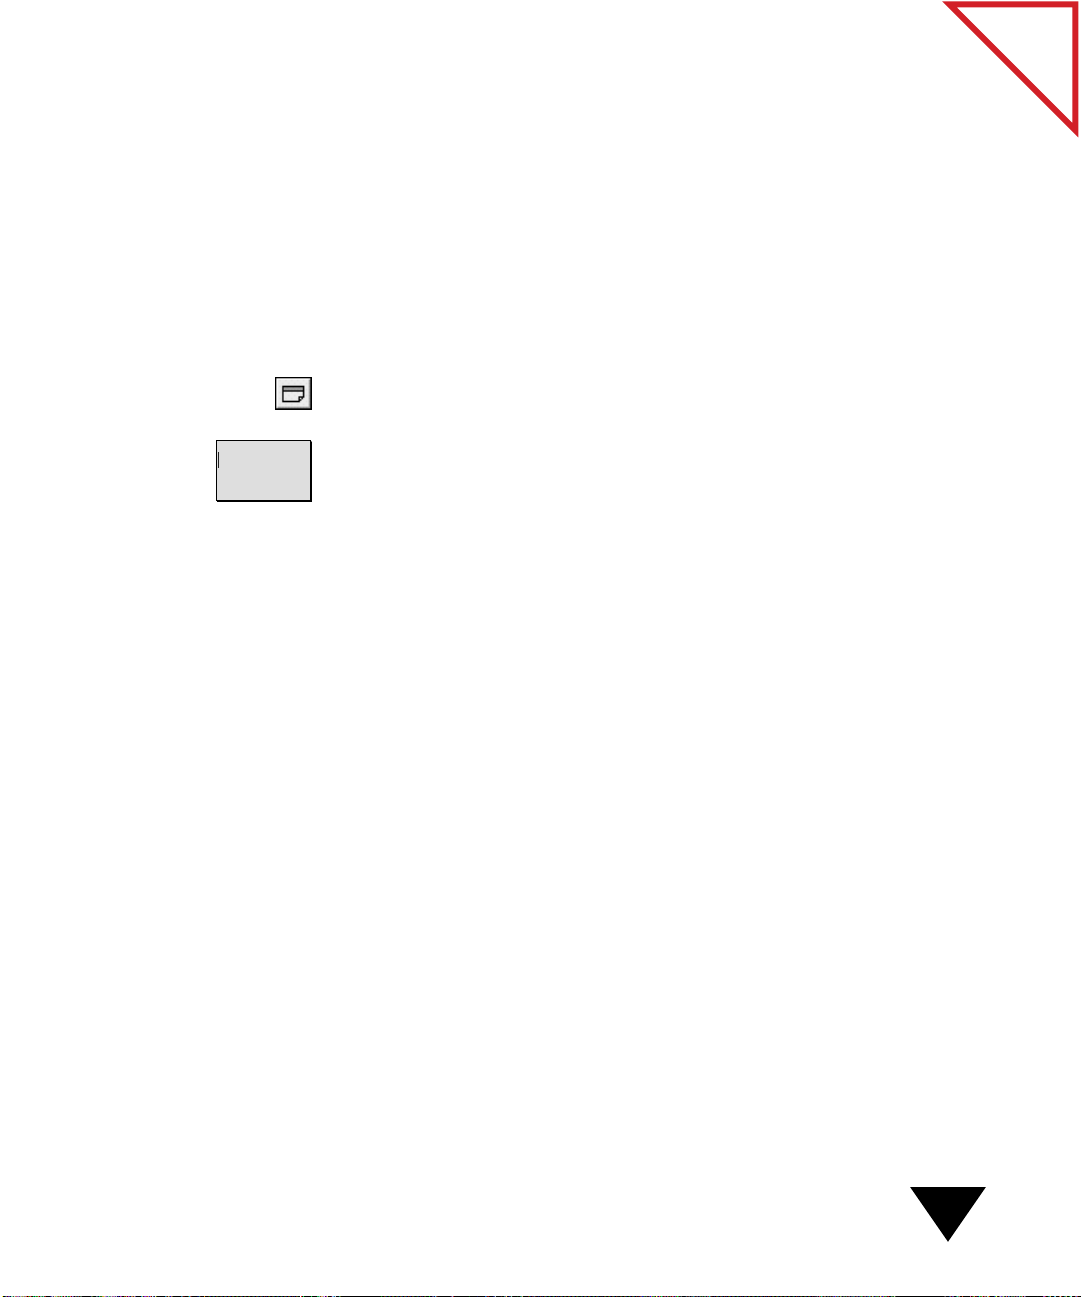
ADDING NOTES
You can add as many notes to a page as you want. Notes can be very
useful. For example, you may want to add notes to help remind yourself
to perform a task, such as reviewing a memo b y a certain date or passing a
document on to a coworker.
To add a note:
1. Display the page in the Page Viewer.
2. On the Annotation Tool Bar, click the Note tool. The cursor
changes to a crosshair.
3. Click anywhere on the page and the default note siz e appears, or drag
the mouse to create the frame for the note. The note can be any size
that you want. When you release the mouse button, the cursor is
automatically placed within the note.
4. Type the note text. The note borders expand vertically to
accommodate the amount of text that you type.
of Contents
Table
▼ TIP: To resize a note, click the Pointer tool and select the note. Drag
the handles on the note box to resize it.
COLLAPSING AND EXPANDING NOTES
At times, you may want to collapse your notes so that they do not block
information, such as when you add a note that you want to use later to
search for information, or when a note provides extra information to a
reader. When you are ready to read the note, simply expand it.
To collapse notes:
1. Display the page in the Page Viewer.
2. Select the note or notes that you want to collapse. You can collapse
notes individually or as a group.
Working with Notes
87

Collapsed note.
3. From the Annotation menu, choose Collapse Note. All selected
notes change to a collapsed form.
To expand collapsed notes:
1. Display the page in the Page Viewer.
2. Select the note or notes that you want to expand. You can expand
notes individually or as a group.
3. From the Annotation menu, choose Expand N ote. All selected notes
expand.
of Contents
Table
One note expanded
and one note collapsed.
▼ TIP: Double-click any note to toggle between the expanded and
collapsed forms.
7: Annotating Items
88

Highlighter tool.
Highlighted text is easy
to spot.
HIGHLIGHTING INFORMATION
Use the Highlighter to call attention to specific areas or text on a page,
just as you would use a marker to highlight a printed page. For example,
you may want to highlight an important paragraph or key phrases.
You can also use the highlighter in the opaque setting (a solid color that
covers the underlying information) to prevent others from seeing the
information, perhaps when the page is printed or sent as an electr onic fax.
For example, in the following sample, the prospective employee’s salary
demands are blocked out. Reviewers who receive this information as an
electronic fax or a printed copy cannot see the blocked-out text.
of Contents
Table
To highlight information:
1. Display the page in the Page Viewer.
2. On the Annotation T ool Bar , click the Highlighter tool. The cursor
changes to a crosshair.
Highlighting Information
89
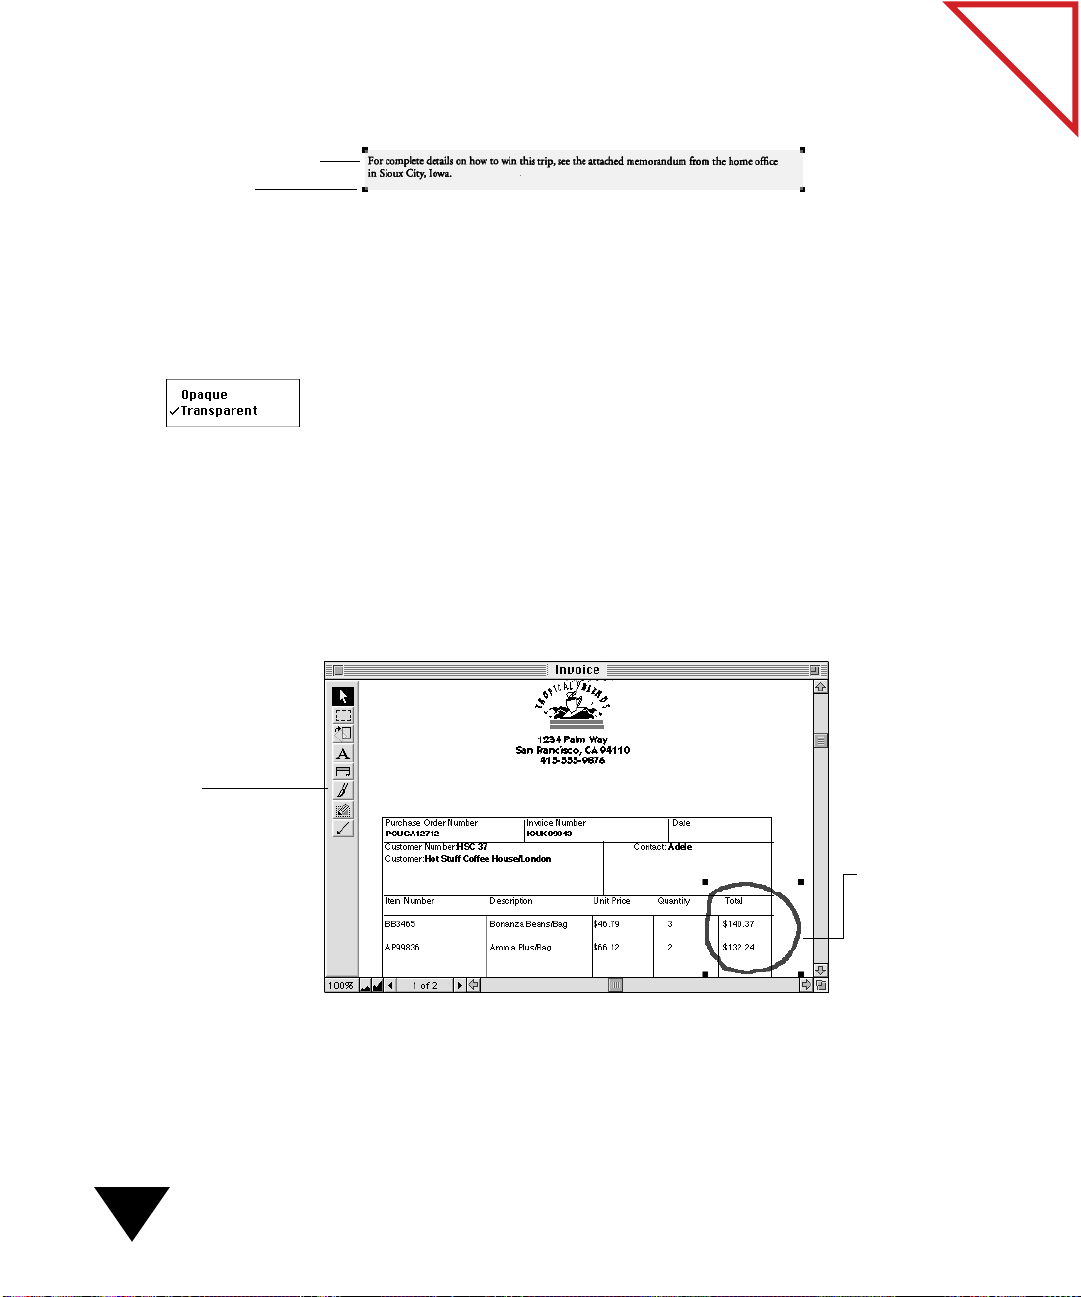
Highlighted text
Handle
3. Drag the cursor across the text that you want to highlight.
To change the highlighting to opaque or transparent:
1. Display the page in the Page Viewer.
2. Select the highlighting that you want to change. Handles appear at
the corners of the highlighted box.
3. To change to opaque or transparent, choose the Opaque or
Transparent command from the Annotation menu.
ADDING FREEHAND ANNOTATIONS
Use the Freehand tool to draw, underline, circle, scribble, and mark a
page. You control the color and whether the line is opaque or transpar ent.
The following sample shows how you can use the freehand annotation to
draw attention to the costs noted on an invoice.
of Contents
Table
Freehand tool.
7: Annotating Items
90
When you
circle text,
others can
quickly locate
important
information.

To add a freehand annotation:
1. Display the page in the Page Viewer.
2. On the Annotation Tool Bar, click the Freehand tool. The cursor
changes to a paintbrush.
3. Drag the brush to circle, draw, or mark text.
To customize the freehand annotation:
1. Display the page in the Page Viewer.
2. Select the freehand annotation . H andles appear around the selected
freehand annotation.
3. From the Annotation menu, choose the command you want.
Create an opaque freehand
annotation that covers the
underlying information.
of Contents
Table
Create a transparent
freehand annotation that
lets you see the underlying
information.
Select a freehand
line width.
Adding Freehand Annotations
91
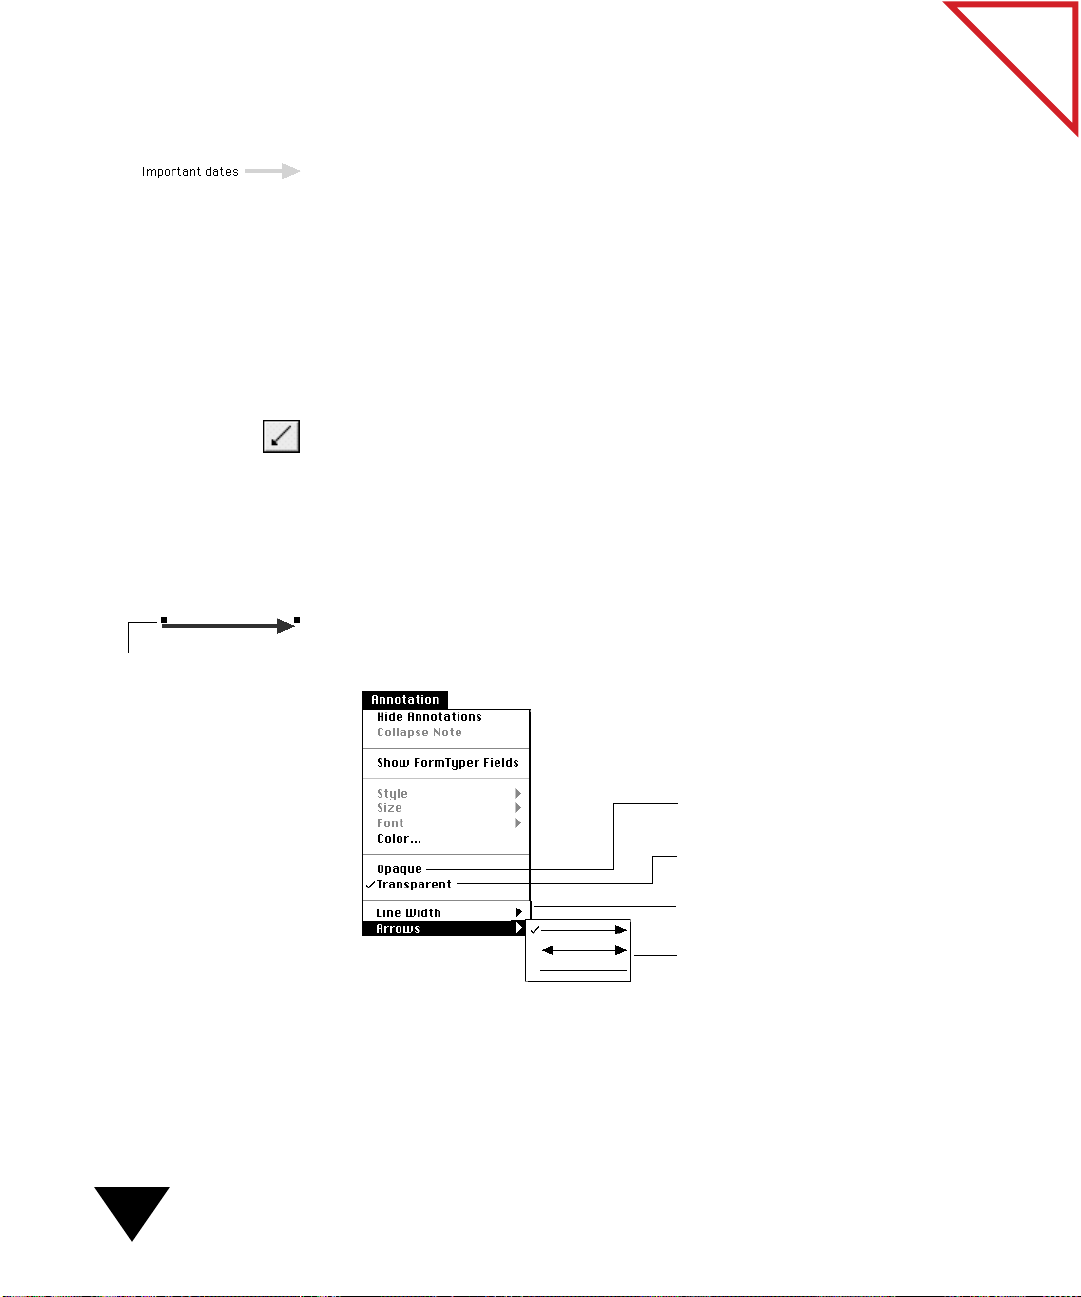
DRAWING LINES AND ARROWS
Use the Arro w tool to add lines and arr o ws to a page. This is a convenient
way to point to important details or to connect an annotation to an area
on a page.
The following procedures tell you how to add an arrow annotation and
customize the line width, opacity, and arrowhead location.
To add lines and arrows:
1. Display the page in the Page Viewer.
2. On the Annotation Tool Bar, click the Arrow tool. The cursor
changes to a crosshair.
3. Drag the mouse to create an arrow.
To customize lines and arrows:
1. Display the page in the Page Viewer.
of Contents
Table
Handle
92
2. Select the line or arrow. Handles appear at each end of the arrow.
3. Choose the appropriate command from the Annotation menu.
Create an opaque arrow or line that
covers the information underneath it.
Create a transparent arrow or line that
displays the underlying information.
Choose the line width.
Choose an arrowhead.
7: Annotating Items
 Loading...