

NorthStar DOC0056 Installation Instructions Manual
OPEN
INSTALLATION INSTRUCTIONS
INSTALLING INDOOR CABINET
DOC0056
SiteTel Sweden AB Haukadalsgatan 8A, SE-164 40 Kista, Sweden
www.northstarbattery.com
Page i

OPEN
COPYRIGHT
© NorthStar SiteTel 2012. All rights reserved. No part of this
document may be reproduced in any form without written permission
of the copyright owner.
DISCLAIMER
The contents of this document are subject to revision without notice
due to continued progress in methodology, design and manufacturing.
NorthStar SiteTel shall have no liability for any error or damage of any
kind resulting from the use of this document.
CONTENTS
1 INTRODUCTION ................................................................................................. 1
1.1 Target Group ................................................................................................................................. 1
1.2 Prerequisites .................................................................................................................................. 1
1.3 Tools and Equipment ..................................................................................................................... 1
2 INSTALLING THE INDOOR CABINET SMALL AND INDOOR CABINET
MEDIUM ............................................................................................................. 2
2.1 Unpacking and preparing .............................................................................................................. 2
2.2 Assembling the Indoor Cabinet Small and Indoor Cabinet Medium .............................................. 3
3 ANCHORING INDOOR CABINET SMALL AND INDOOR CABINET
MEDIUM TO THE FLOOR .................................................................................. 9
4 OPTIONAL 19INCH BRACKETS FOR INDOOR CABINET SMALL AND
INDOOR CABINET MEDIUM .......................................................................... 10
5 INSTALLING THE INDOOR CABINET LARGE .............................................. 12
5.1 Unpacking and preparing ............................................................................................................ 12
5.2 Assembling the Indoor Cabinet Large ......................................................................................... 13
6 ANCHORING INDOOR CABINET LARGE TO THE FLOOR .......................... 19
Document Number:
INS-0038
Revision:
A
Prepared by:
Mikael Lindevall
Date:
2012-04-26
Approved by:
Ulf Krohn
Status:
RELEASED
Page ii

OPEN
1 INTRODUCTION
This document describes how to install the Indoor Cabinets.
1.1 TARGET GROUP
The target group for this document is the personnel involved in
the installation and maintenance of the site.
1.2 PREREQUISITES
All performance statement in this document relies on the following:
Only approved hardware are used
Proper hardware handling
Installation and maintenance instructions as well as
documentation for external equipment are followed
1.3 TOOLS AND EQUIPMENT
The following tools are required for the installation:
Screwdriver Torx T30
U-wrench 13mm
U-wrench 10mm
Torque set, 5-25Nm
Torque set, 20-100Nm
Document Number:
INS-0038
Revision:
A
Prepared by:
Mikael Lindevall
Date:
2012-04-26
Approved by:
Ulf Krohn
Status:
RELEASED
Page 1

OPEN
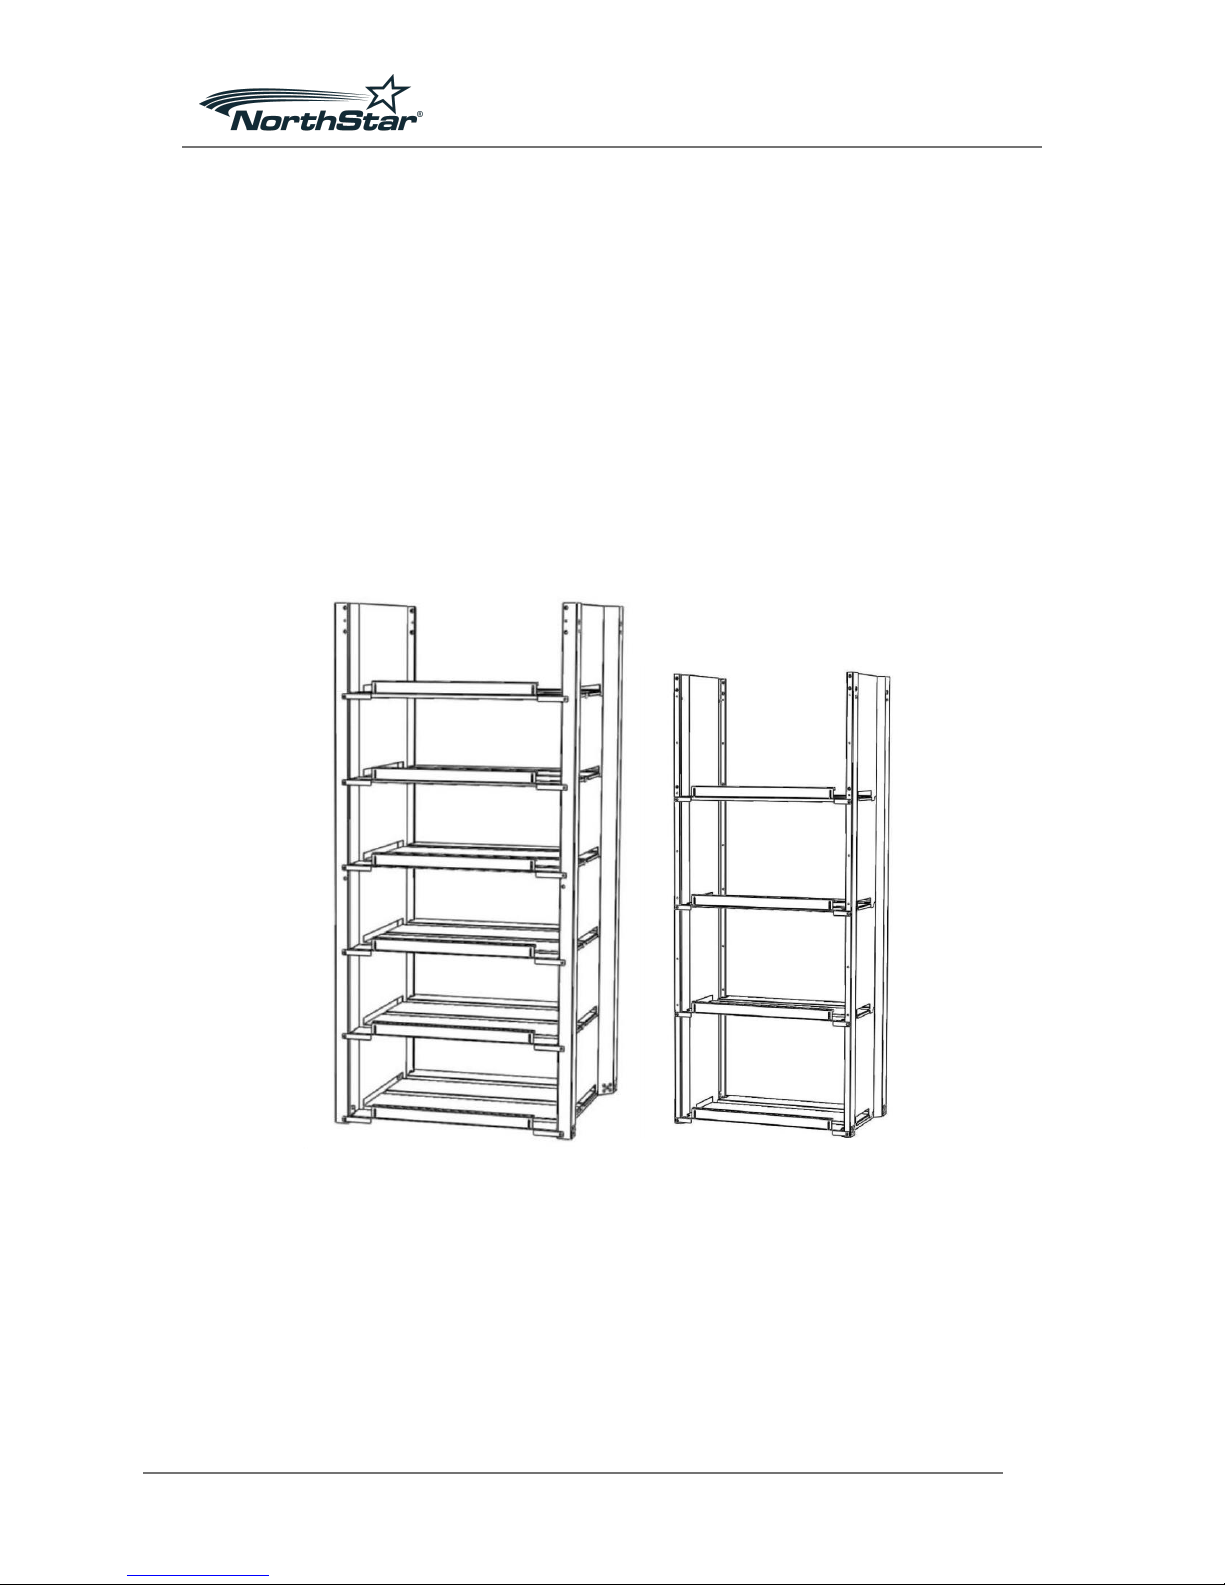
2 INSTALLING THE INDOOR CABINET SMALL
AND INDOOR CABINET MEDIUM
2.1 UNPACKING AND PREPARING
This section describes how to unpack and check the
delivered equipment for damage.
The cabinet is delivered in a flat pack. The following items are included:
Content of the Packaging
Item
Designation
Quantity
No.
1
Sidewall with self-clinching nuts
2
2
Battery Shelf
4
3
Roof
1
4
Cross bar*
4
5
Torx Screw M6x20
24
6
Lock Nut M6
2
7
Nut M8
2
8
Serrated Washer M8
2
9
Installing Indoor Cabinet
1
* The Indoor Cabinet Medium has crossbars of two different lengths, note that
the longer crossbars should be attached at bottom.
1. When the equipment arrives, check that the packaging is undamaged.
2. Make sure that all the items listed above are delivered.
3. Leave the units in the package until needed in the installation procedure.
Document Number:
INS-0038
Revision:
A
Prepared by:
Mikael Lindevall
Date:
2012-04-26
Approved by:
Ulf Krohn
Status:
RELEASED
Page 2
OPEN
2.2 ASSEMBLING THE INDOOR CABINET SMALL AND INDOOR
CABINET MEDIUM
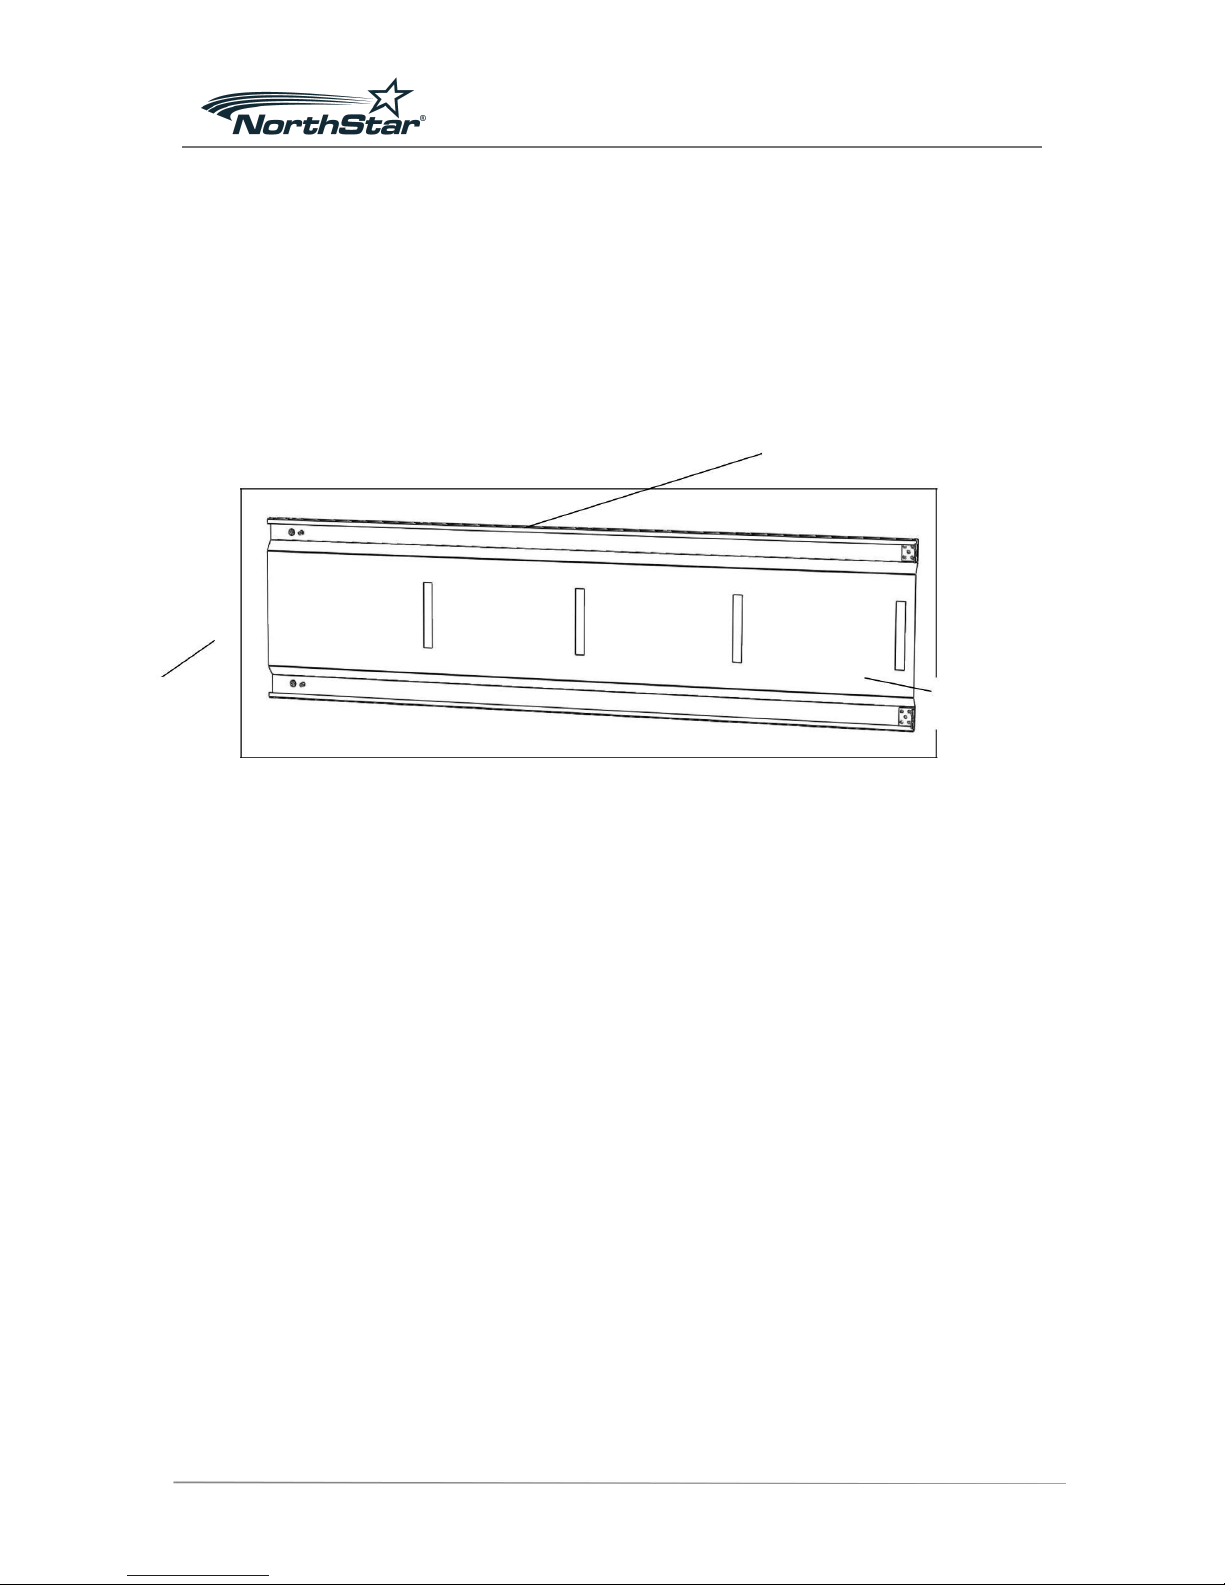
Note: It is important to initially, not tighten the screws.
1. Put one of the two side walls on the floor, see figure 1 below.
Front
Top
Bottom
Figure 1 Put the side wall on the floor
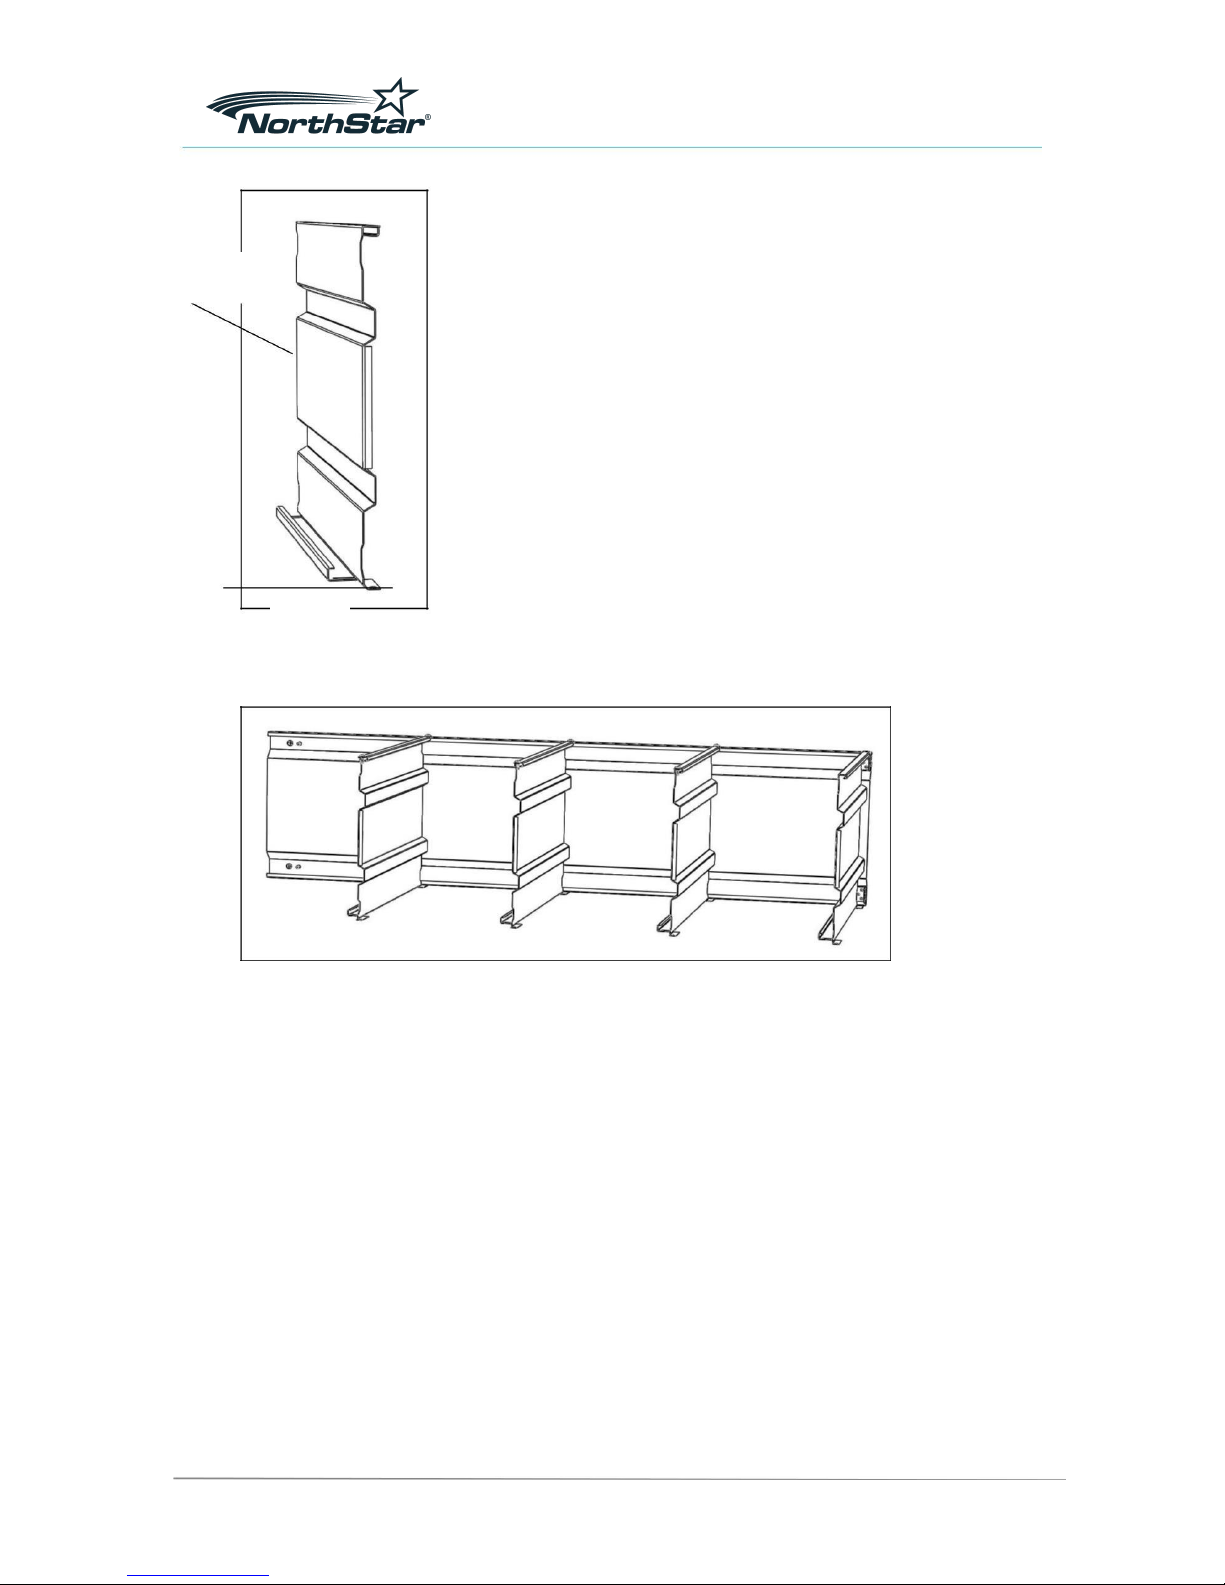
2. Align the edges of the shelves into the holes of the side wall and attach them to
the front side using M6x20 screws, see figure 3 below.
Note: Do not tighten the screws at this moment.
Note: Make sure the shelf’s back side is facing the floor. See figure 2 below.
Document Number:
INS-0038
Revision:
A Prepared by:
Mikael Lindevall
Date:
2012-04-26
Approved by:
Ulf Krohn
Status:
RELEASED
Page 3
OPEN
Upside
Floor
Figure 2 Back side of the shelf facing the floor
Figure 3 Align the shelves to the side wall.
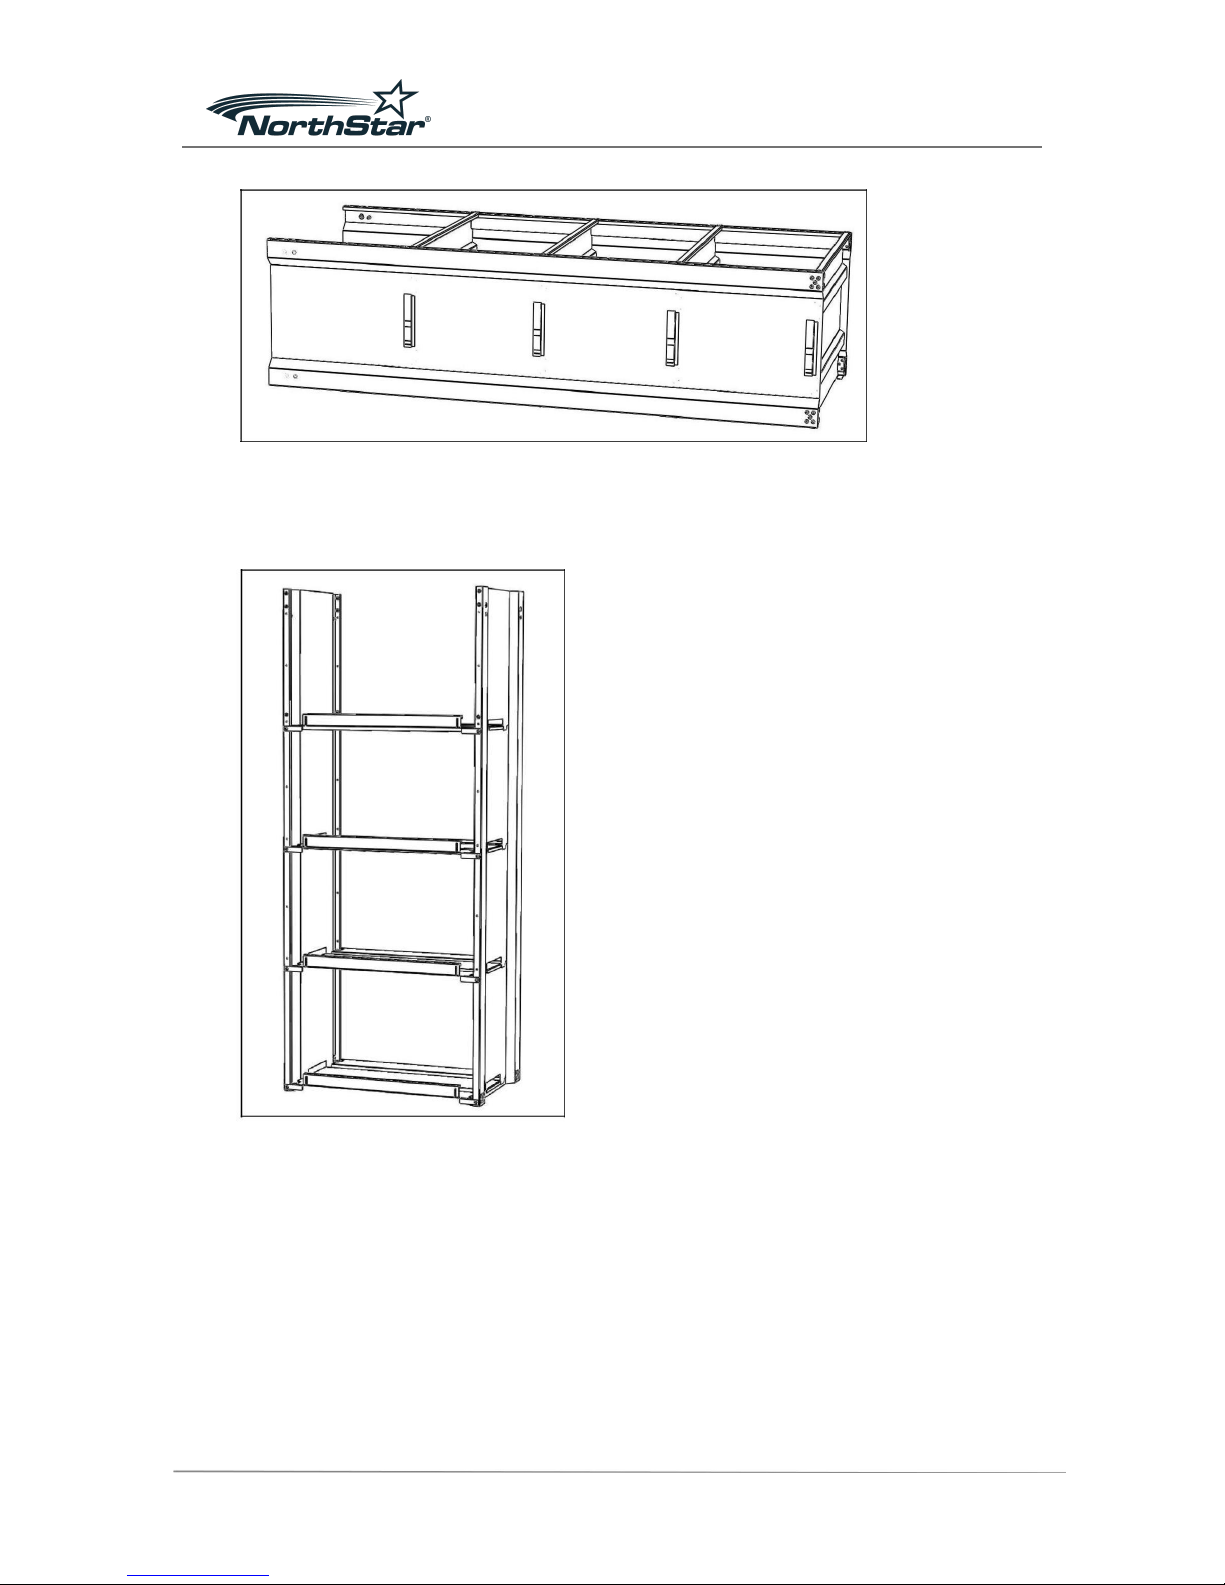
3. Take the other side wall and align the shelves to the wall and attach them to the
front side of the wall using M6x20 screws, see figure 4 below.
Note: Do not tighten the screws at this moment.
Document Number:
INS-0038
Revision:
A
Prepared by:
Mikael Lindevall
Date:
2012-04-26
Approved by:
Ulf Krohn
Status:
RELEASED
Page 4
OPEN
Figure 4 Align the shelves to the other side wall.
4. Raise the cabinet to a standing position, see figure 5 below.
Figure 5 The Cabinet in a standing position seen from behind.
5. Take out the provided cross bars and assemble them loosely together in pairs
using M6x20 screws and M6 lock nuts, see figure 6 below.
Note: The screw should be threaded through the cross bars with the head
pointing backwards.
Document Number:
INS-0038
Revision:
A
Prepared by:
Mikael Lindevall
Date:
2012-04-26
Approved by:
Ulf Krohn
Status:
RELEASED
Page 5
 Loading...