

Nokia NSD-6, 3280, 3285 Service Software

Programmes After Market Services
NSD-6 Series Transceivers
Service Software and Tuning
Instructions
Issue 1 04/01 Nokia Mobile Phones Ltd.

NSD-6
Service Software and Tuning Instructions PAMS Technical Documentation
Page 2 Nokia Mobile Phones Ltd. Issue 1 04/01

NSD-6
PAMS Technical Documentation Service Software and Tuning Instructions
Contents
Page No
WinTesla User’s Guide.................................................................................................. 6
General .........................................................................................................................6
Installation Instructions ...............................................................................................6
System and Dongle Requirements ............................................................................ 6
Hardware................................................................................................................... 6
Dongle Types Supported........................................................................................... 6
Operating System...................................................................................................... 6
WinTesla Installation ...................................................................................................7
WinTesla Updates ........................................................................................................9
Purpose of Updates.................................................................................................... 9
Installing a New WinTesla dll................................................................................... 9
Phone Specific Service Module for NSD–6 ................................................................ 10
Installation .................................................................................................................10
Using WinTesla with NSD-6 phones ........................................................................10
Menu Bar................................................................................................................. 10
WinTesla Screen ..................................................................................................... 11
Getting Started ...........................................................................................................12
Setup for BUS type and COM port:........................................................................ 12
Configure Menu .........................................................................................................12
Options.................................................................................................................... 13
Buses ....................................................................................................................... 14
Directories............................................................................................................... 14
Fault Log Configuration (needed only if fault logger system in use)..................... 15
Fault Log Application ............................................................................................. 16
Completing a FaultLog Record............................................................................... 16
The Product Menu .....................................................................................................20
New (Ctrl+R)........................................................................................................... 20
Open........................................................................................................................ 20
Close........................................................................................................................ 21
Initialize................................................................................................................... 21
FaultLog.................................................................................................................. 22
Exit (Alt+F4)........................................................................................................... 22
The Testing Menu ......................................................................................................23
ADC Readings......................................................................................................... 23
MBUS...................................................................................................................... 23
AMPS / Base Band Tests........................................................................................ 24
CDMA Tests ........................................................................................................... 26
ADC Readings......................................................................................................... 26
The Tuning Menu ......................................................................................................27
Tuning Steps of Radio Unit..................................................................................... 27
Accuracy of the Equipment during Measurement................................................... 27
Battery Tuning......................................................................................................... 28
Battery Voltage Tuning........................................................................................... 28
Charging Voltage and Current Tuning.................................................................... 29
AMPS Tunings.........................................................................................................30
AFC (Automatic Frequency Control) ..................................................................... 30
Tx Power Level....................................................................................................... 31
Issue 1 04/01 Nokia Mobile Phones Ltd. Page 3

NSD-6
Service Software and Tuning Instructions PAMS Technical Documentation
Tx Modulation Index............................................................................................... 32
RSSI (Received Signal Strength Indicator)............................................................. 33
Rx Audio Gain ........................................................................................................ 34
800 CDMA Tunings................................................................................................ 36
TX IF AGC.............................................................................................................. 36
LNA Switch............................................................................................................. 37
RX IF AGC ............................................................................................................. 38
RX IF Compensation............................................................................................... 39
1900 MHz CDMA Tunings..................................................................................... 40
TX IF AGC (1900MHz).......................................................................................... 40
Tuning Max Power, TX_LIM_ADJ tuning: (1900)................................................ 41
LNA Gain Switch (1900MHz)................................................................................ 42
RX IF AGC (1900MHz) ......................................................................................... 43
Rx If Compensation (1900MHz)............................................................................. 44
Factory Values......................................................................................................... 44
The Software Menu ...................................................................................................45
Flash File Programming.......................................................................................... 45
Procedure to Flash a Phone..................................................................................... 46
FAQs:...................................................................................................................... 47
Advanced Options .....................................................................................................48
The Dealer Menu Features........................................................................................... 49
Getting Started — Connecting to the Phone ..............................................................49
Dealer Menu Items ....................................................................................................51
Easy Flash ............................................................................................................... 51
Phone Identity ......................................................................................................... 53
PRL.......................................................................................................................... 54
Subscribe(NAM)..................................................................................................... 55
Phone Book............................................................................................................. 57
A–Key Programming .............................................................................................. 57
Calling Card ............................................................................................................ 58
Warranty Information.............................................................................................. 59
Change SPC............................................................................................................. 59
Download Bitmap ................................................................................................... 60
User Data Transfer .................................................................................................. 61
Refurb...................................................................................................................... 62
WinTesla Dealer Sales Pack ......................................................................................64
The View Menu .........................................................................................................65
RF Parameters (used only for Special Service purposes) ....................................... 65
Phone Identity ......................................................................................................... 66
Customer-Specific Software ........................................................................................ 67
File Name Convention ............................................................................................ 68
The Help Menu ..........................................................................................................68
Mouse Cursors......................................................................................................... 68
Reserved Keys......................................................................................................... 68
Short Cut Function Keys......................................................................................... 69
Alt Hot Keys............................................................................................................ 69
Ctrl Hot Keys .......................................................................................................... 69
Shift Hot Keys......................................................................................................... 69
Page 4 Nokia Mobile Phones Ltd. Issue 1 04/01

NSD-6
PAMS Technical Documentation Service Software and Tuning Instructions
Key Strokes............................................................................................................. 69
Dialog Boxes .............................................................................................................71
Common Dialog Boxes........................................................................................... 72
Custom Dialog boxes.............................................................................................. 73
Service Setups.............................................................................................................. 75
Equipment Setup for POS (Point of Sale) Flashing ...................................................75
Equipment Setup for Tuning a Phone Without Removing Covers ............................76
Flash Concept for NSD-6 (for Central Service use only) ..........................................77
Tuning With Covers Off - Using Test-frame JBS-19 ................................................78
Tuning With Covers Off - Using Light Jig JBT-1 .....................................................79
Warranty Transfer ......................................................................................................80
Service Center......................................................................................................... 80
Point of Sale............................................................................................................ 80
Appendix 1, Vocabulary ............................................................................................81
Appendix 2, License and Updating ...........................................................................84
FLS–X License Update Utilities............................................................................. 84
Update License........................................................................................................ 84
License Update Request Process............................................................................. 85
Generating a License Update Request .................................................................... 85
Processing a License Update Response .................................................................. 87
FLS–X REGISTRATION REQUEST FORM ..........................................................89
Issue 1 04/01 Nokia Mobile Phones Ltd. Page 5

NSD-6
Service Software and Tuning Instructions PAMS Technical Documentation
WinTesla User’s Guide
General
The name TESLA, when used by Nokia, is an acronym for TEst and Service Locals Application. Tesla for Windows (i.e. WinTesla) is a software package designed to operate in the
Microsoft Windows environment. The software package is made of two modules, the
WinTesla core module, with drivers and a service software module DLL, and a service
software module. The WinTesla module is similar to an operating system for various service modules. In this way many Nokia products can be serviced using one common software package.
NOTE: The WinTesla core module MUST be installed for ”any” serv ice module to run.
This document explains how to use WinTesla (Version 2.60 or later) with an FLS–2D. (For
operation with other Nokia dongles, please refer to the appropriate user guide.) WinTesla
is a Microsoft Windows Application designed to run on Windows 95, 98, and Windows
NT. It was developed to support the testing and servicing of CDMA products developed in
San Diego, and it has the capability to be fully multilingual. WinTesla is a fully modular
application; on its own, it has only limited functionality. However, modules are produced
and issued for each supported product type.
Installing these modules for a given product type then gives WinTesla the full capability
to test and service that product type. The more modules that are installed, the more
product types can be supported using WinTesla.
Installation Instructions
System and Dongle Requirements
Hardware
• IBM–compatible PC with Pentium processor and at least 8 MB RAM.
• One standard COM port (COM1), and one standard parallel port (LPT1).
• Minimum 10 MB disk storage space needed, 16 MB recommended.
NOTE: If you are running Windows 95, make sure that the LPT1 is configured to address
0x0378.
Dongle Types Supported
• PKD–1, FLS–2D, CS–1. (This manual addresses features / functions when using the
FLS-2D.)
Operating System
• Windows 95 versions: Standard A and B
• Windows 98
Page 6 Nokia Mobile Phones Ltd. Issue 1 04/01
NSD-6
PAMS Technical Documentation Service Software and Tuning Instructions
• Windows NT
WinTesla Complete Package Installation
The INSTALL program makes installation simple. The files on the distribution disks are all
archived and have to be properly assembled. InstallShield Wizard directs the installation.
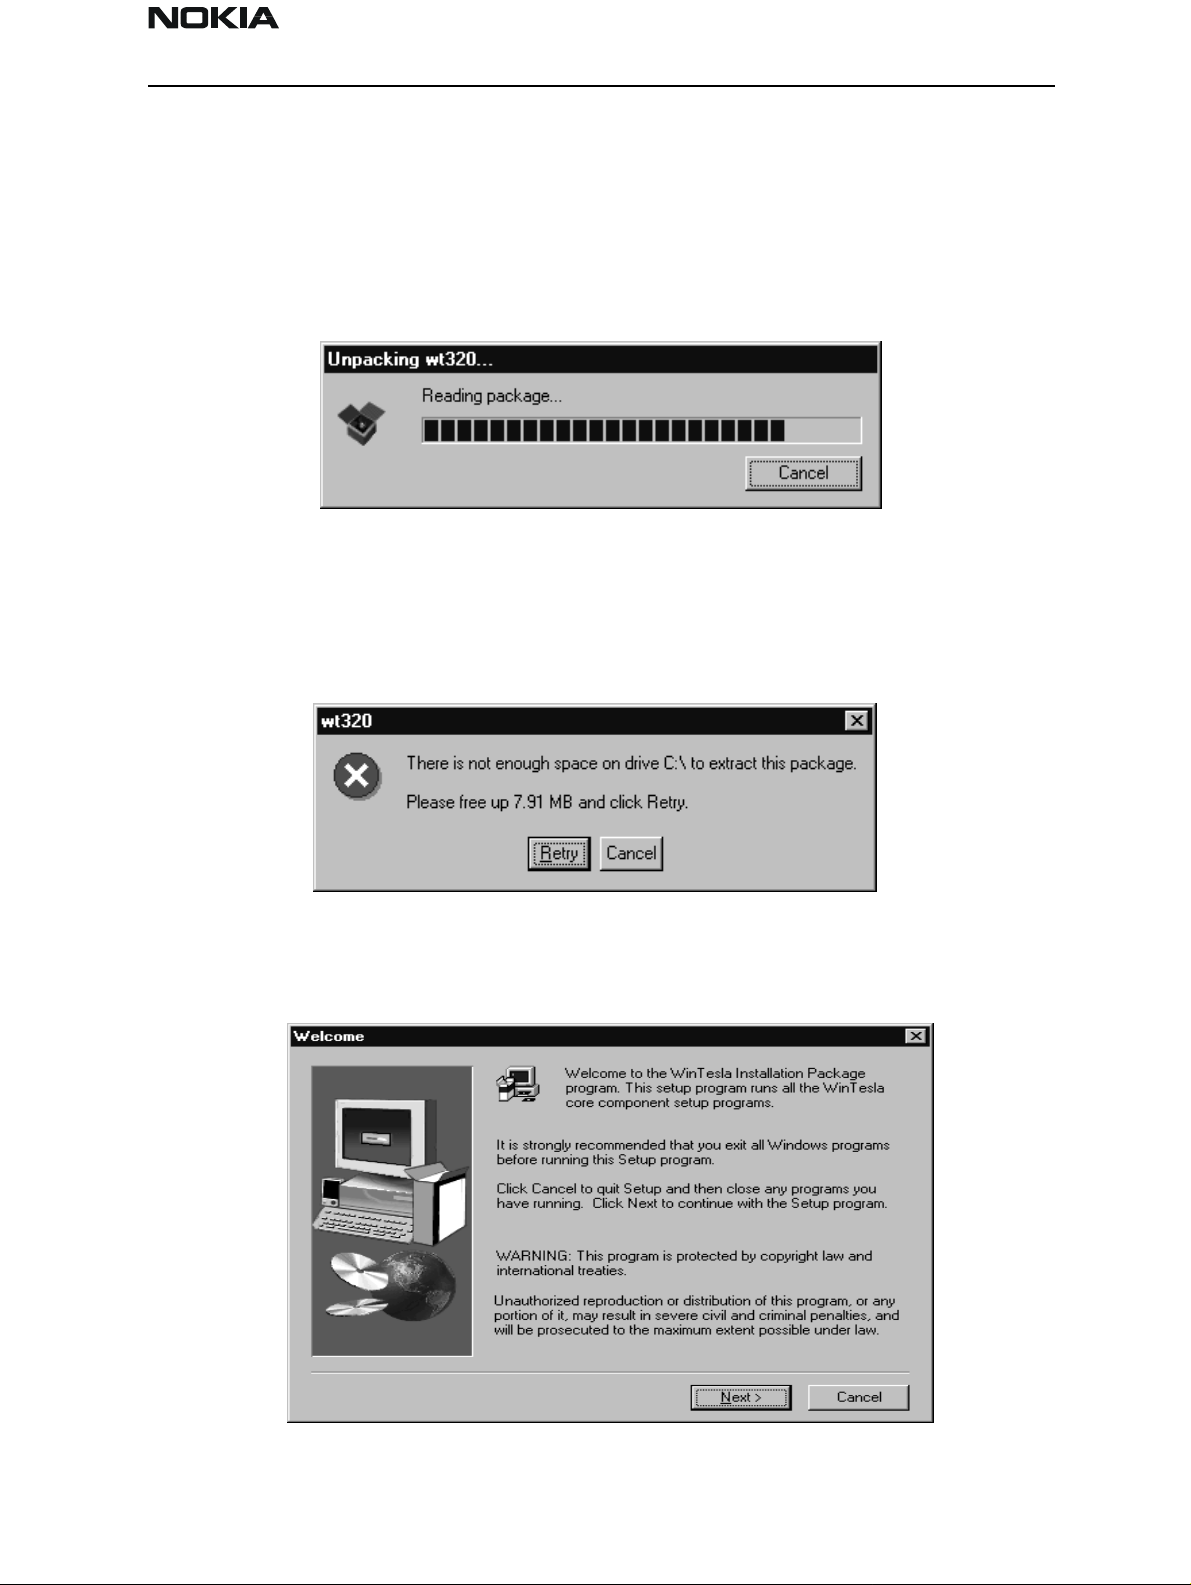
Step 1:.
The installation file will be identified as wtxxx.exe or, as in this example, wt320.
Double click on this file and the unpacking dialog box should appear as follows:
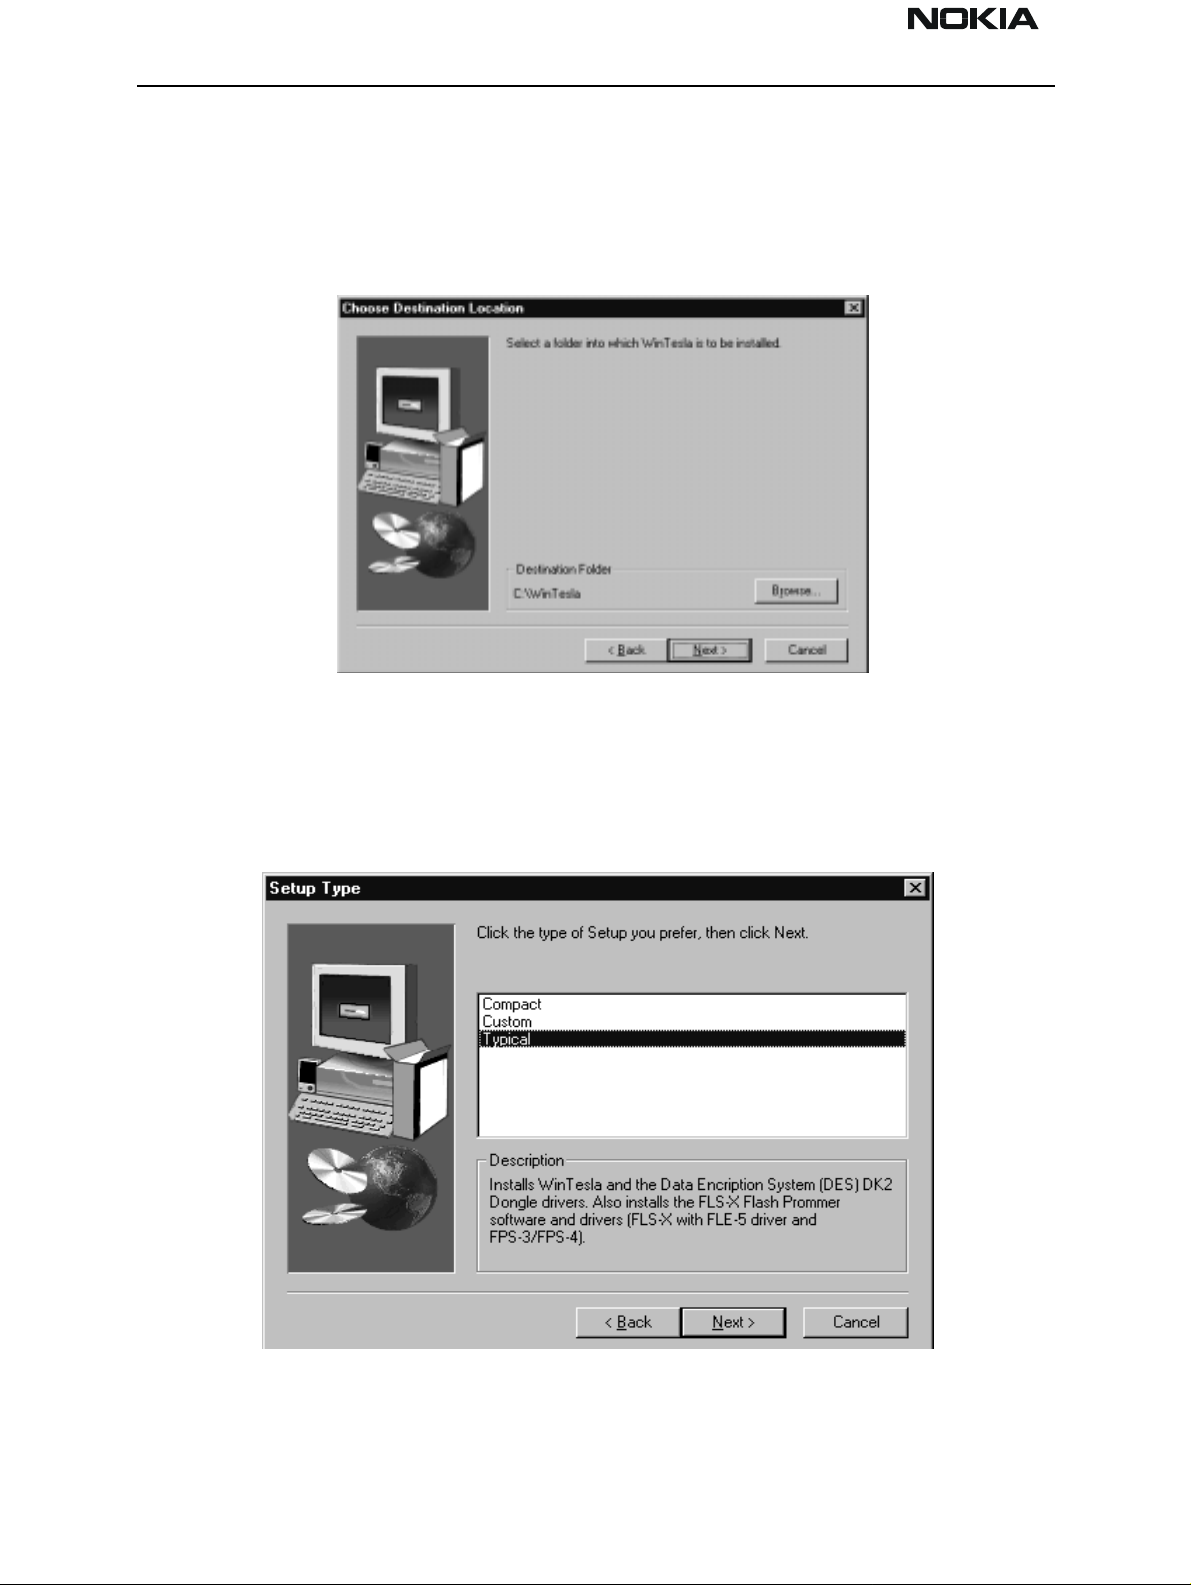
The installation package requires that the system C:\ driv e have a minimum of 10 MB
available disk space; otherwise, an error dialog box, as in the example below, will appear:
Step 2:
Next, the “Welcome” dialog box appears. Click the Next > button to continue:
Issue 1 04/01 Nokia Mobile Phones Ltd. Page 7
NSD-6
Service Software and Tuning Instructions PAMS Technical Documentation
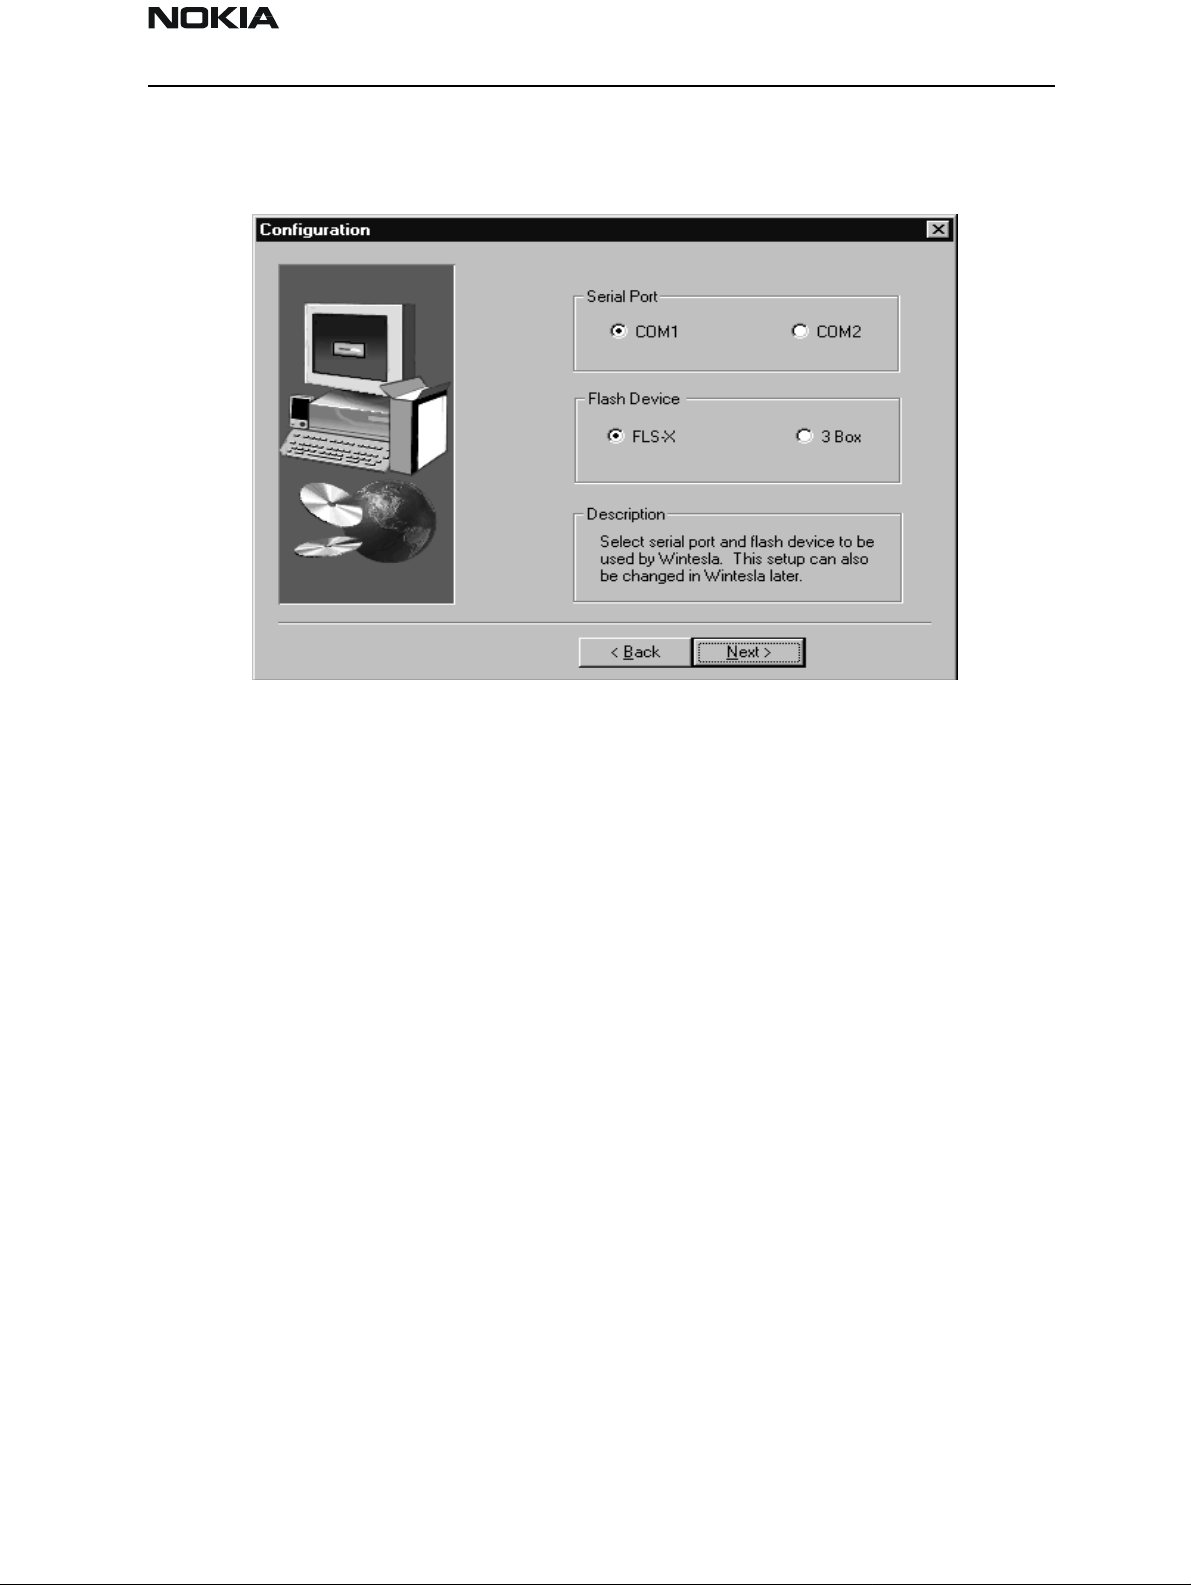
Step 3:
You can either accept the default location for WinTesla software or specify your own
location. Use the Browse button to locate and select the desired destination folder.
Select the Next > button to continue, the < Back button to return to the previous dialog, or the Cancel button to exit.
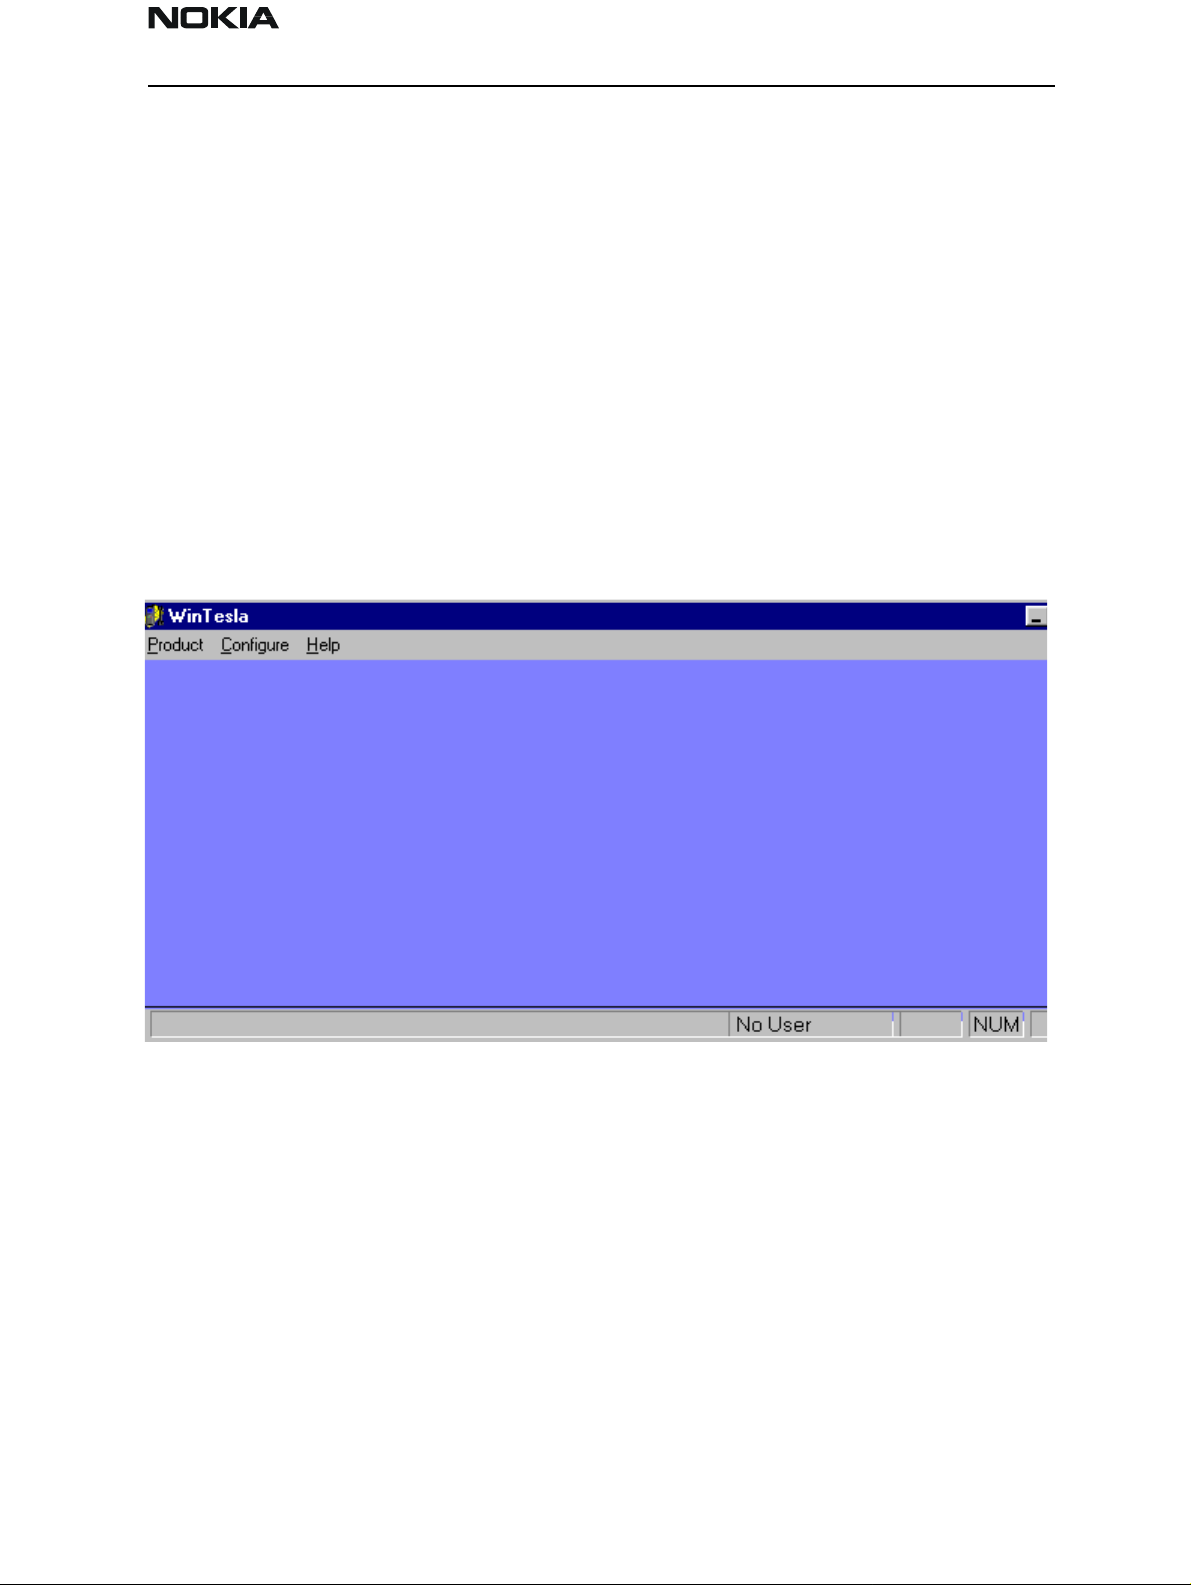
Step 4:
If the Next > button was selected, the “Setup Type” dialog box is displayed. You can
choose “Compact” to install the minimum requirement files to use WinTesla, “Custom” to
install only your favorites, or “Typical” to install WinTesla automatically. “Typical” is
highly recommended.
Select the Next > button to continue, the < Back button to return to the previous dialog, or the Cancel button to exit.
Page 8 Nokia Mobile Phones Ltd. Issue 1 04/01
NSD-6
PAMS Technical Documentation Service Software and Tuning Instructions
:
Step 5
If the Next > button was selected, the “Configuration” dialog box is displayed.
Choose the appropriate serial port and flash device by clicking on the appropriate radio
button. Then, select the Next > button to continue or the < Back button to return to the
previous dialog. Note: These selections can be changed later in the Configuration Menu.
Step 6:
After the installation process is finished, select RESTART to reboot the system.
After doing this complete package installation, the next step will be "Phone Specific Ser-
vice Module for NSD-6.”
WinTesla DLL Module Updates
Purpose of Updates
Occasionally, new versions of WinTesla CDMA dll will be released. These new versions
may be required to service new models of phone s , to incorporate new features, or to
improve the software from a previous version.
It is very important to obtain the new releases as they become available and install them
in your system. Failure to do so may cause problems with WinTesla operation.
Installing a New WinTesla dll
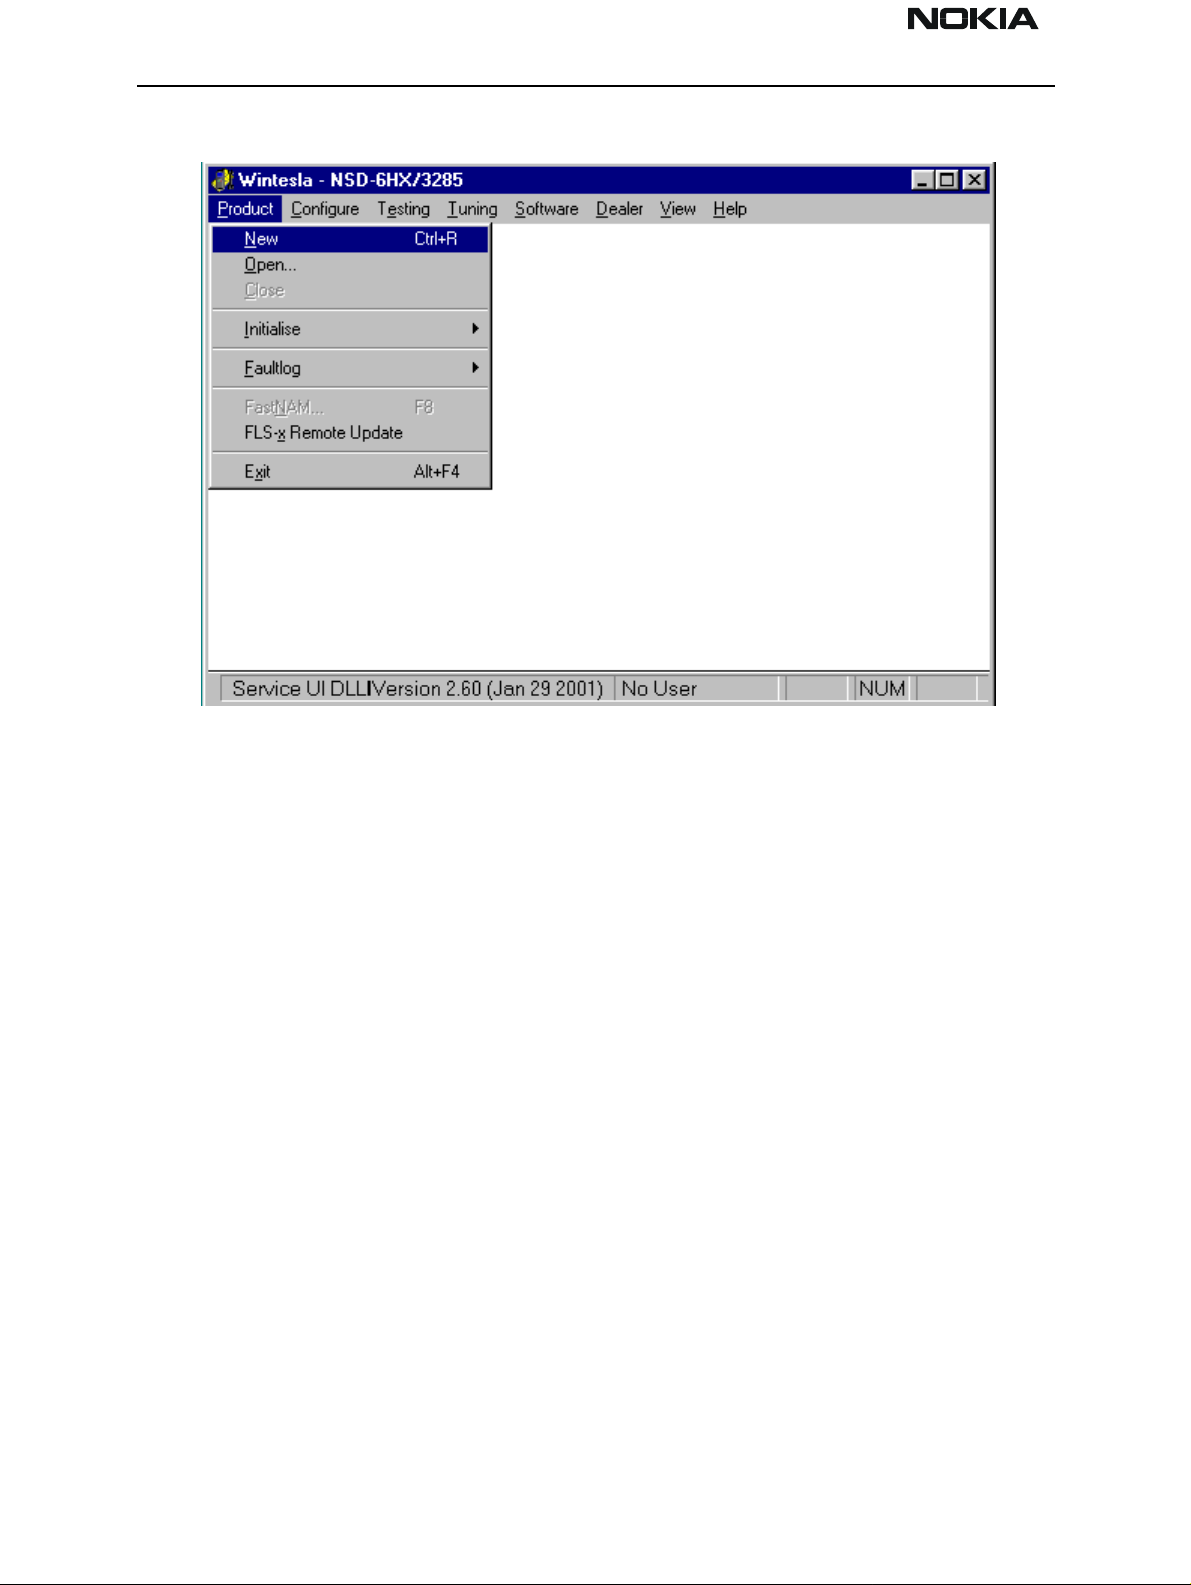
1. Verify which version your setup currently is using by executing WinTesla with a phone
connected. Select the “Product” drop–down menu and click ”New”. Once WinTesla has
communicated with the phone, the current ve rsion of dll will be displayed in the action
bar located in the lower left corner of screen.
Issue 1 04/01 Nokia Mobile Phones Ltd. Page 9

NSD-6
Service Software and Tuning Instructions PAMS Technical Documentation
2. If the version is older than that being released (as indicated in a Field Service Bulletin),
obtain the update file. The file is usually smaller than 2 Meg an d thus can be downloaded from the Partners Web Page, http://americas.partners.nokia.com.
3. Save the file to any folder on the computer.
4. Double click on the saved file. This will automatically install the updated software into
the appropriate WinTesla folders.
Phone Specific Service Module for NSD–6
Using WinTesla with NSD-6 phones
The WinTesla application, “WinTesla.exe”, is phone independent. It relies on separate,
phone specific, “modules” to provide communication, menus, and test algorithms.
For each phone type – or product family – a phone interface module and menu module
are required. The modularity of WinTesla allows support for other languages, so one
phone type may have one phone interface module and several menu modules, all in different languages.
WinTesla allows you to select the language you wish to use (if available), and will automatically load the correct phone interface module for the connected phone. When a different phone type is connected, WinTesla will load the new phone interface and
associated menus.
Menu Bar
The Service Software package will have two menu bar configurations. The first, is an
abbreviated version that contains the minimum number of menus that allows package
configurations when a phone is NOT connected. The second is described below:
The menu bar MUST only contain the following menus for the Service Software package
when a phone is connected:
Product*
Configure*
Tuning (not available with PKD–1D)
Testing (not available with PKD–1D)
Software
Dealer
View
Page 10 Nokia Mobile Phones Ltd. Issue 1 04/01
NSD-6
PAMS Technical Documentation Service Software and Tuning Instructions
Help*
* – always displayed, even if the phone is not connected.
The menu is broken down into sections that are indicated with menu separators. Each
section identifies a logical difference from itself and other sections, i.e. between transmitter and receiver. Any items that are required to be added to a menu lists will be added
to the bottom of the appropriate menu section list. If a new item is to be added which is
common to two or more phone types, then that menu item will become a common menu
item.
The menu lists will use the Microsoft [...] symbol after an item name to indicate that
selecting that item will NOT initiate an operation immediately. A dialog box will be displayed for the user to select options or type in data and press the OK button before the
operation is performed.
WinTesla Screen
The main WinTesla screen (if no phone is attached) is displayed with three menu items at
the top of the screen and a status bar at the bottom.
The information on the left of the status bar will be used to provide information when
WinTesla is performing tasks: such as reading data from the phone. The status bar also
includes the name of the current user.
Getting Started
Setup for BUS type and COM port:
NOTE: This section can be skipped typically. Use it only if there are some changes needed,
such as using a different COM port or using different service accessories (e.g., FLS-2D
instead of FPS-4 (3 box flashing)) setup. When you have installed the WinTesla core software with PKD–1 drivers and the product specific DLL software, the next step is to tell
the software what kind of hardware connection you are using.
Issue 1 04/01 Nokia Mobile Phones Ltd. Page 11

NSD-6
Service Software and Tuning Instructions PAMS Technical Documentation
1. Select the correct COM Port. For example, COM1.
2. Select the Hardware Type. For example, service cable DAU–9P (>>DAU for MBUS).
3. Select the Media, For example, MBUS.
4. Press Add to save configuration.
When you start using the WinTesla program with a new phone you should:
1. Select New, then the program starts to scan the phone that has been connected to the
PC or;
2. Select Open. Then you need to select the right product type, i.e.; NSD–6.
After the product specific DLL has been selected, it will be displayed on the bottom of the
PC screen. The version and date of the Product-specific DLL is also displayed.
Configure Menu
NOTE: This section can be skipped typically. Use it only if there are some changes needed,
such as using a different COM port or using different service accessories (e.g., FLS-2D
instead of FPS-4 (3 box flashing)) setup. The configuration menu allows you to setup
such things as directory paths, user interface language and FaultLog options.
Page 12 Nokia Mobile Phones Ltd. Issue 1 04/01
NSD-6
PAMS Technical Documentation Service Software and Tuning Instructions
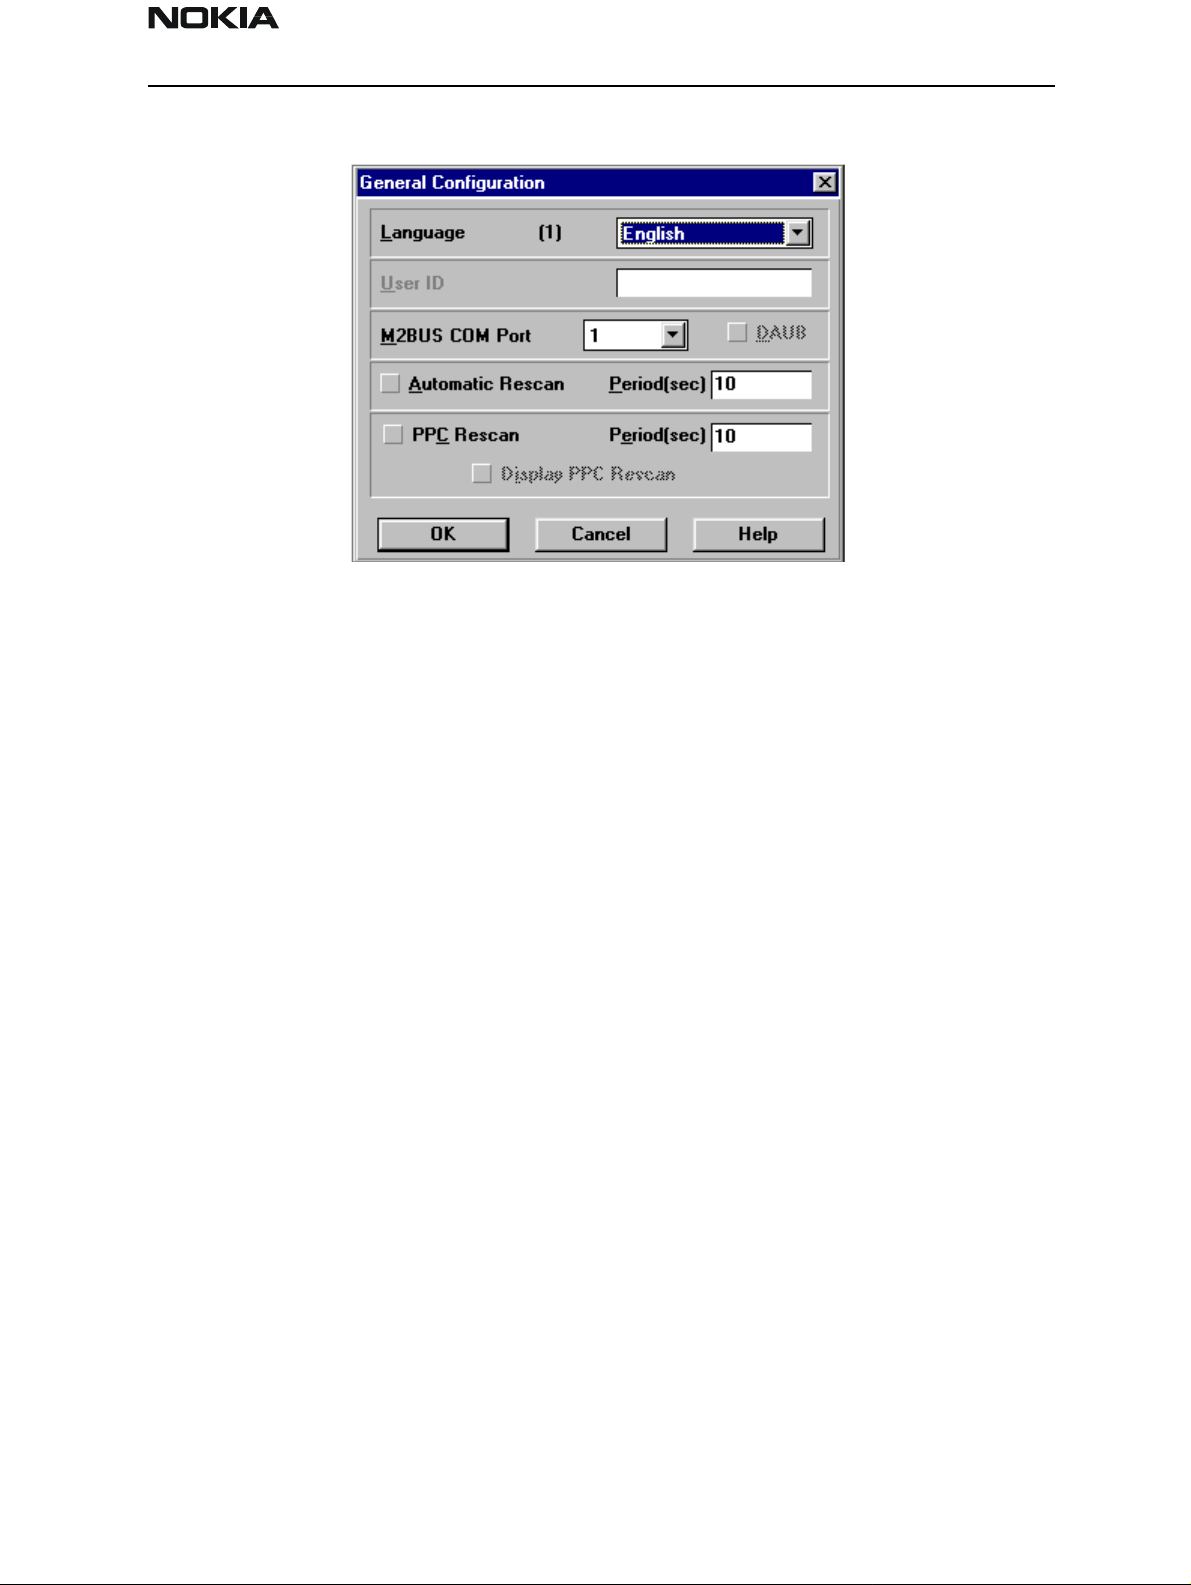
Options
Language
This option allows you to change the language used in the WinTesla application.
User ID
Allows the user ID to be entered if the user’s name is setup in the opt_id.val (validation)
file.
M2BUS COM Port
This option allows you to select which communications port the phone is to be connected. The change will take place immediately after pressing the OK button.
Automatic Rescan
Automatic rescan is a mechanism to automatically check for the new phone; the time
between re–scans is user configurable. When a phone is scanned and recogni ze d, the
corresponding phone interface and menu are loaded, extending the main menu at the
top of the screen and displaying the phone type and description at the bottom of the
screen.
The Product|New (or Ctrl+R ) function can be used to rescan the phone in–between automatic rescans or when automatic rescan has been disabled. The automatic re–scan
mechanism is disabled when the Product|Open function is used to load a phone interface.
Check in the automatic rescan box enables the automatic rescan option. Clicking on the
check–box (making the check–box blank) will disable the automatic re–scan option. The
time between re–scans (in seconds) is entered into the edit box.
Pressing the OK button will save any changes made. Pressing the CANCEL button will
discard any changes you may have made.
Issue 1 04/01 Nokia Mobile Phones Ltd. Page 13
NSD-6
Service Software and Tuning Instructions PAMS Technical Documentation
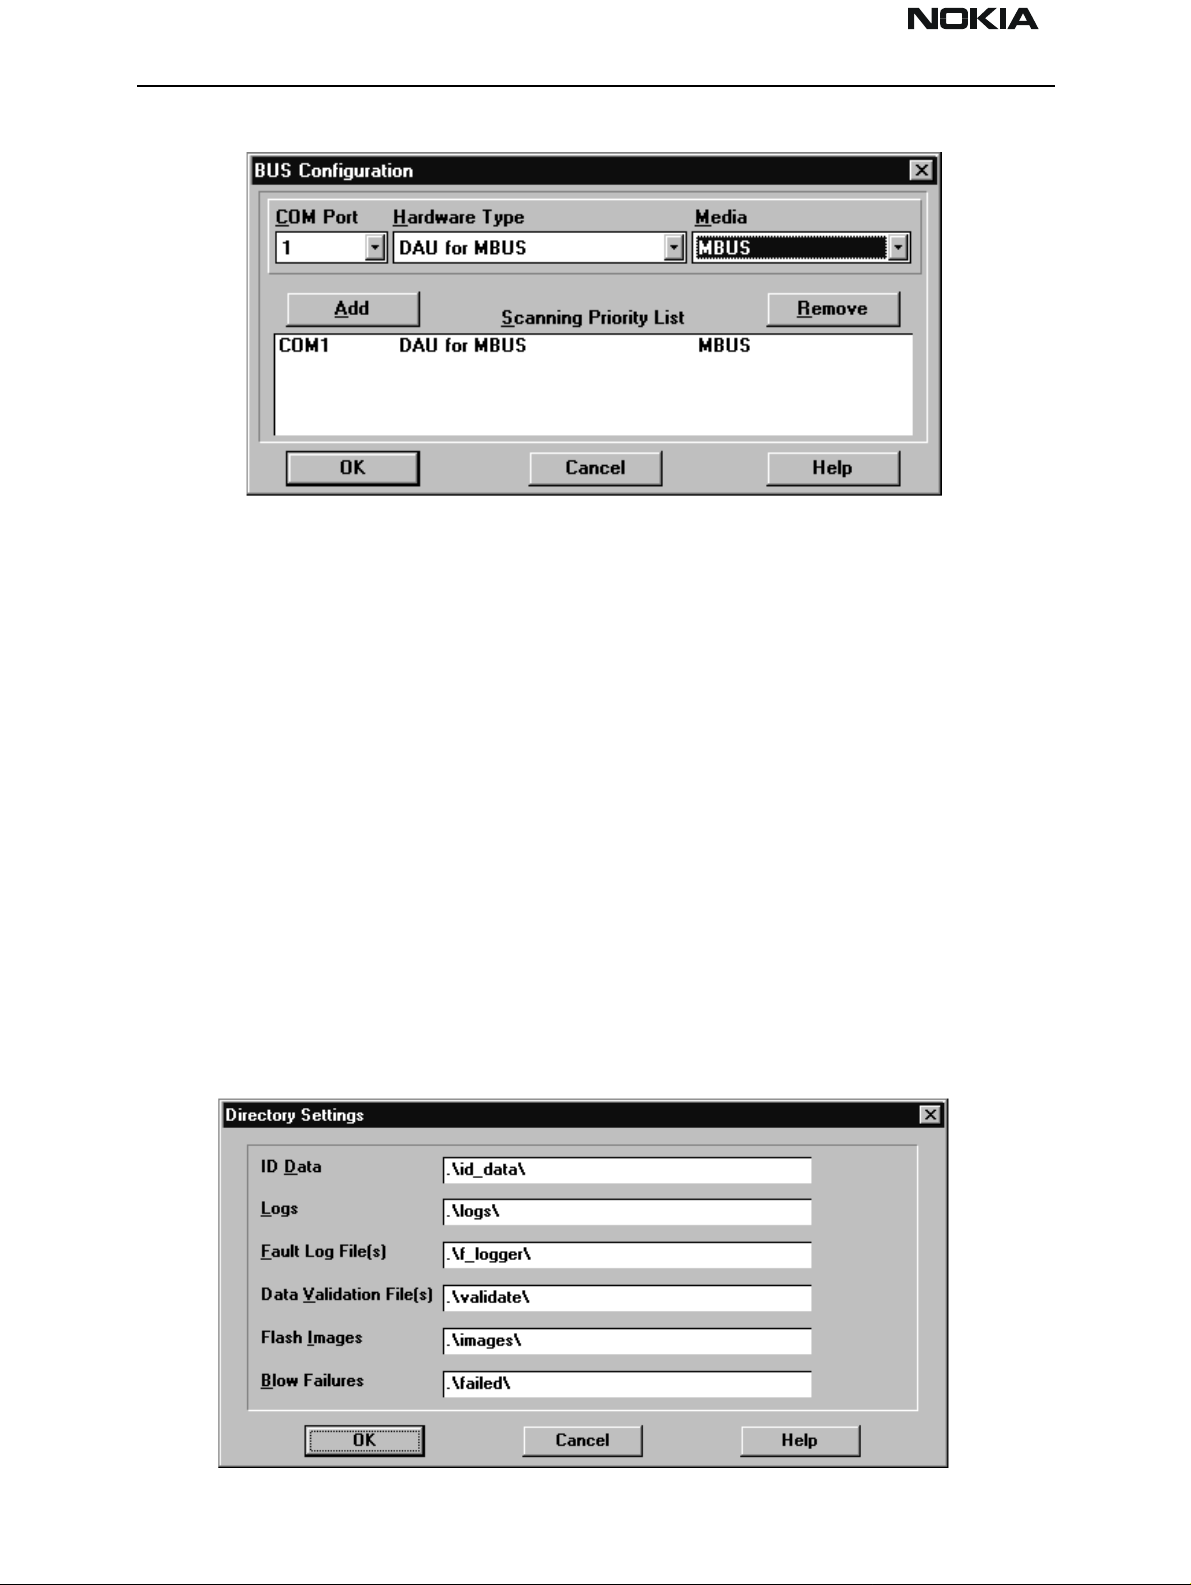
Buses
Setup for BUS type and COM port:
NOTE: This section can be skipped typically. Use it only if there are some changes needed,
such as using a different COM port or using different service accessories (e.g., FLS-2D
instead of FPS-4 (3 box flashing)) setup. When you have installed the WinTesla core software with PKD–1 drivers and the product specific DLL software, the next step is to tell
the software what kind of hardware connection you are using.
1. Select the correct COM Port. For example, COM1.
2. Select the Hardware Type. For example, service cable DAU–9P (>>DAU for MBUS). In
case of FLS–1 select also DAU for MBUS. IN case of 3–box flash concept select Combox
for MBUS.
3. Select the Media, For example, MBUS.
4. Press Add to save configuration.
Directories
This function allows you to organize your data into different directories.
Page 14 Nokia Mobile Phones Ltd. Issue 1 04/01
NSD-6
PAMS Technical Documentation Service Software and Tuning Instructions
The directories already exist when the WinTesla core software is installed. If an invalid
directory is entered, then an error message will be displayed.
The use of a backslash (‘\’) at the end of the directory name is optional. Clicking on the
OK button will save your changes.
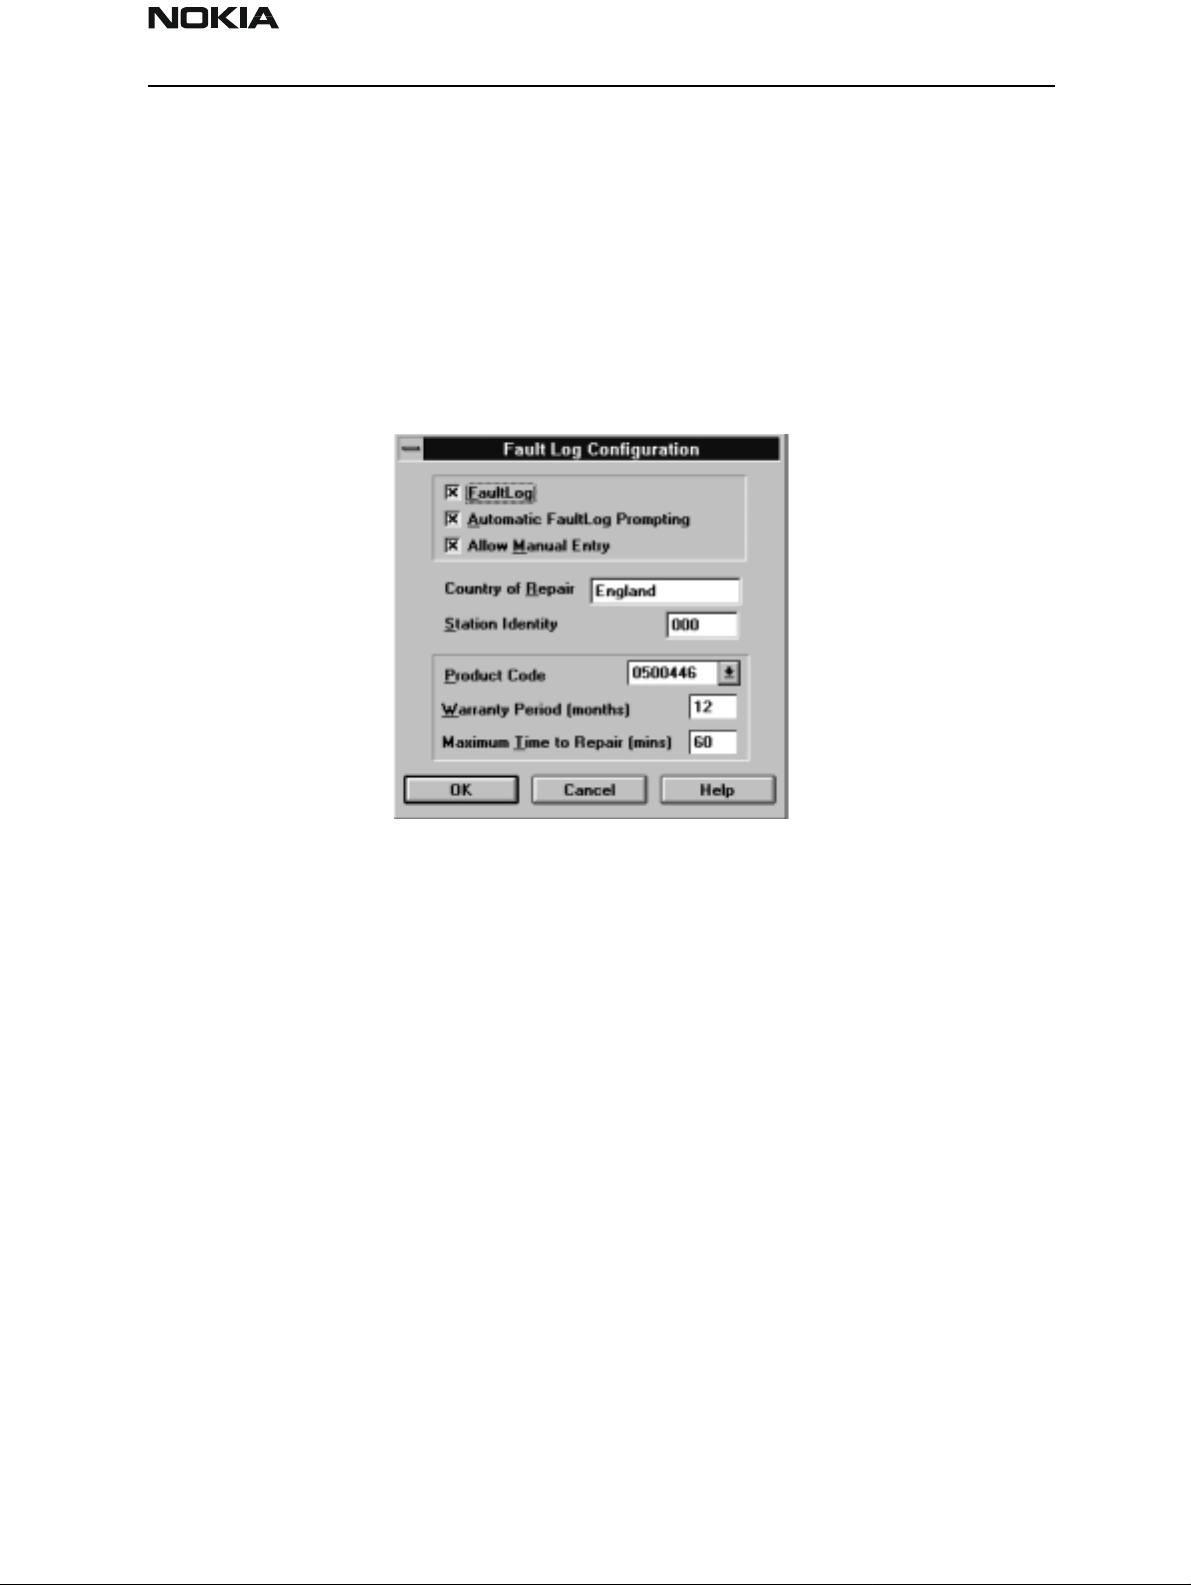
Fault Log Configuration (needed only if fault logger system in use)
If the fault logger is not used, please jump to section "The Product Menu". Fault Log is a
feature that allows the PC to create a record of each phone that is serviced for historical
tracking. This function allows you to configure the Fault Log mechanism. Clicking OK
after making selections, saves all changes made.
Fault Log
This option allows you to enable or disable the Fault Log mechanism. Choosing to disable
the Fault Log mechanism results in the options being ‘greyed’ and the F9 button being
disabled.
Allow Manual Entry
This option allows you to disable manual entry of data that was unavailable from the
phone.
Automatic Fault Log Prompting
Enabling this option results in a prompt being displayed if the phone has changed.
Station Identity
Enter the unique identity of your ‘workstation’; this ID is used to write Fault Log files.
Country Of Repair
Enter the country of repair.
Warranty Period ( months )
Each product code has an associated warranty period. This option allows you to change
those warranty periods. If no phone is connected then all product codes supported will
Issue 1 04/01 Nokia Mobile Phones Ltd. Page 15

NSD-6
Service Software and Tuning Instructions PAMS Technical Documentation
be displayed. However, if a phone is connected then only the product codes associated
with that phone type are displayed.
Note: Changing the Warranty Period in the Fault Log data file has no effect on the product’s warranty terms as stated from the manufacturer.
Maximum Time To Repair ( minutes )
Enter the maximum time allowed to repair a phone.
Fault Log Application
The aim of the Fault Log application is to provide NMP After Market Services companies
worldwide a standard method for the collection of Fault and Repair Data from their service processes. This information can also be used by NMP R&D and Manufacturing organizations as well.
The Fault Log application can be regarded as a data entry subroutine run from the WinTesla Service Software package at the end of a repair. This allows for quick and uniform
recording of the service performed on the product.
Each product repaired will generate one unique record in a Fault Log file consisting of up
to 37 data fields containing information about the product and how it was repaired. This
information is read automatically where possible, from the product’s own internal
EEPROM, and then entered manually by the service technician to form a complete service record.
For more advanced implementations, the repair records are copied and collected by the
electronic mail system installed in the Service Center and are sent electronically to a
Central Service Database located in Finland.
Completing a FaultLog Record
Once WinTesla has been configured correctly, it operates in the following manner:
• WinTesla automatically reads the product details from the product’s EEPROM and
writes them as a record to a pre–determined file.
• Proceed with the repair task, utilizing a combination of software-driven tuning and
hardware modifications.
On completion of the repair task you have a choice:
A. With the product still connected to the PC, manually display the repair data entry
screen by selecting Function Button F9.
B. Alternatively, the product can be disconnected and the next product for repair con-
nected in its pl a ce .
As long as Automatic Prompting is enabled, the previous product’s repair data entry
screen will be displayed.
Page 16 Nokia Mobile Phones Ltd. Issue 1 04/01
NSD-6
PAMS Technical Documentation Service Software and Tuning Instructions
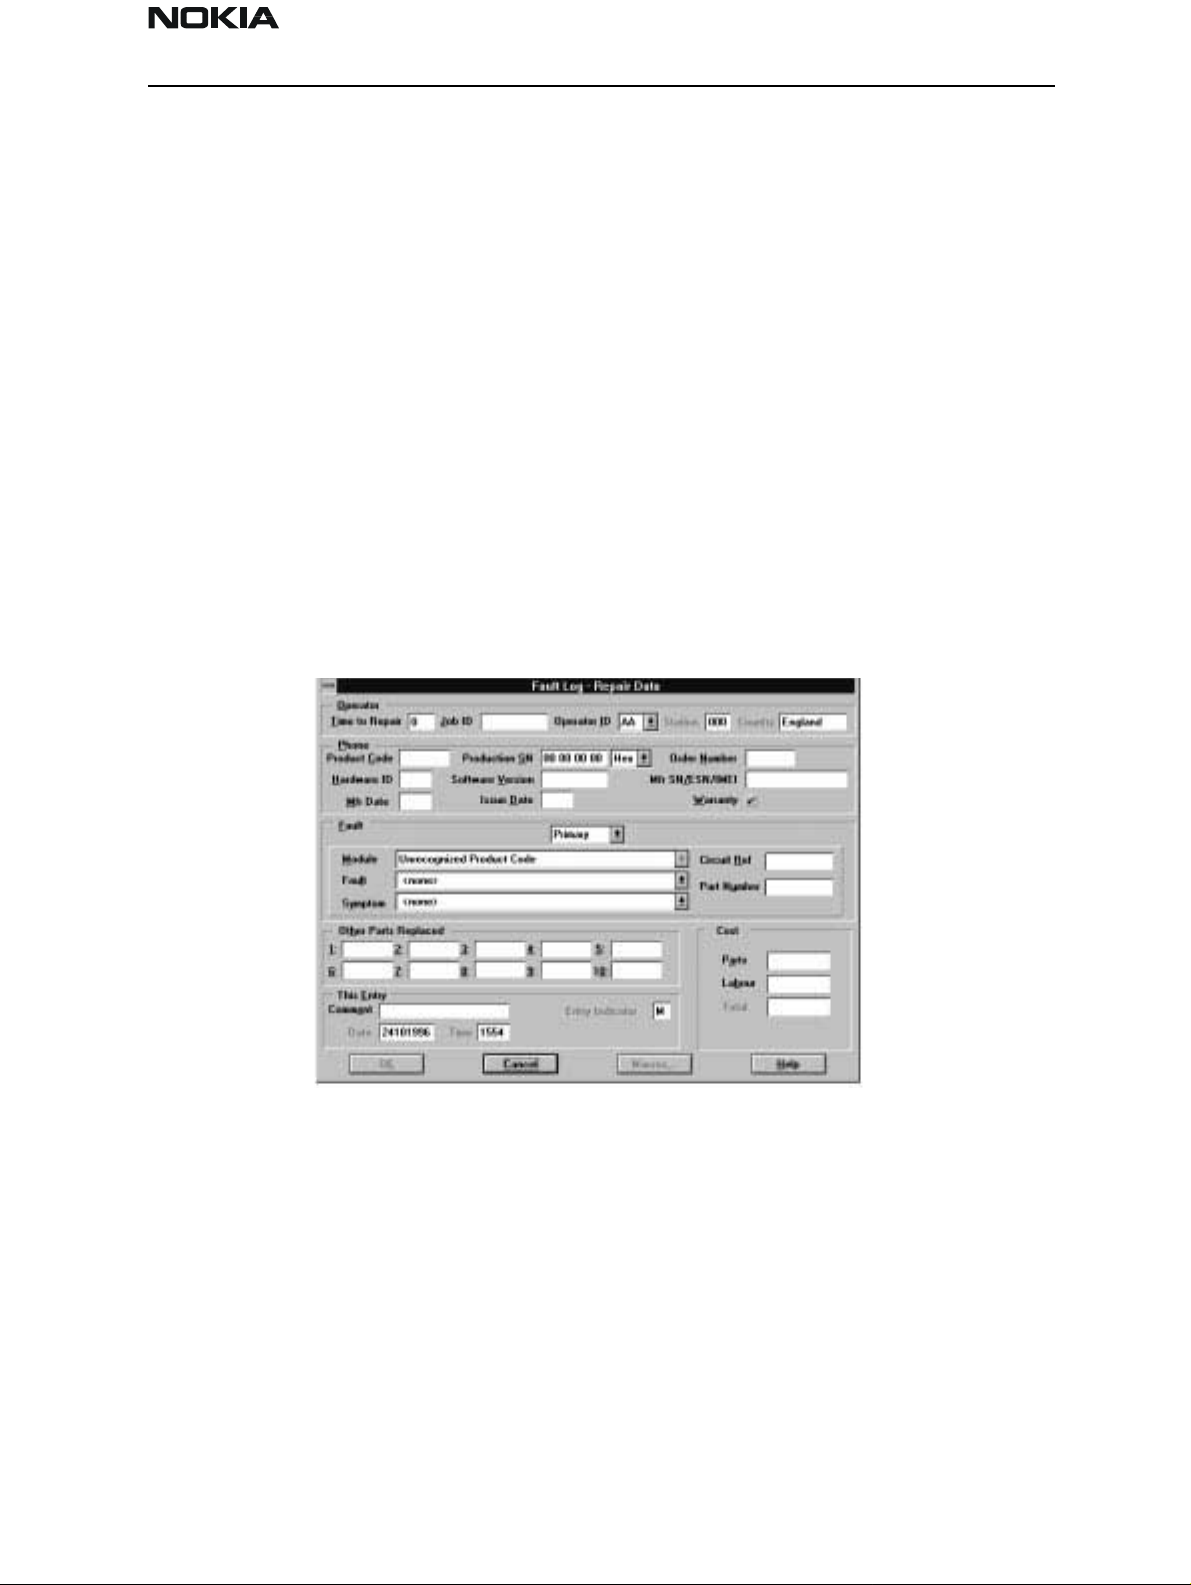
Enter the repair work performed on the product in the repair data screen.
Check the automatic data for this product, read earlier, to ensure its accuracy.
When satisfied with the data, save the entry. This process adds a complete record con-
taining the product details and the repair details to the Fault Log output file.
The output file can then be manipulated by a number of different systems, as required, as
a detailed record of the product fault.
To attempt to record all of this information, 37 data fields are defined for each Fault Log
record. These can be split as follows:
• Product definition information fields
• Repair / fault information fields
Most products have their information stored in EEPROM. WinTesla automatically reads
this information from the EEPROM and writes it to the Fault Log record. This part of the
record is shown below.
Fields that are ‘greyed out’ are data that has been automatically retrieved from the
phone’s EEPROM. All other fields are entered manually; fields are summarized below.
Operator
Automatic: Station, Country
Manual: Time to repair, Job ID, Operator ID
Phone
Automatic: Product code, Production SN, Order No., Hardware ID, Software version,
Mfr. SN/ESN/IMEI, Mfr. Date, Issue date
Issue 1 04/01 Nokia Mobile Phones Ltd. Page 17
NSD-6
Service Software and Tuning Instructions PAMS Technical Documentation
Manual: Warranty
Fault
Automatic: none
Manual: Module, Fault, Symptom, Circuit ref., Part Number
The current Fault Log application allows for the entering of three priority levels of fault /
repair information seen as Primary, Secondary, and Tertiary faults.
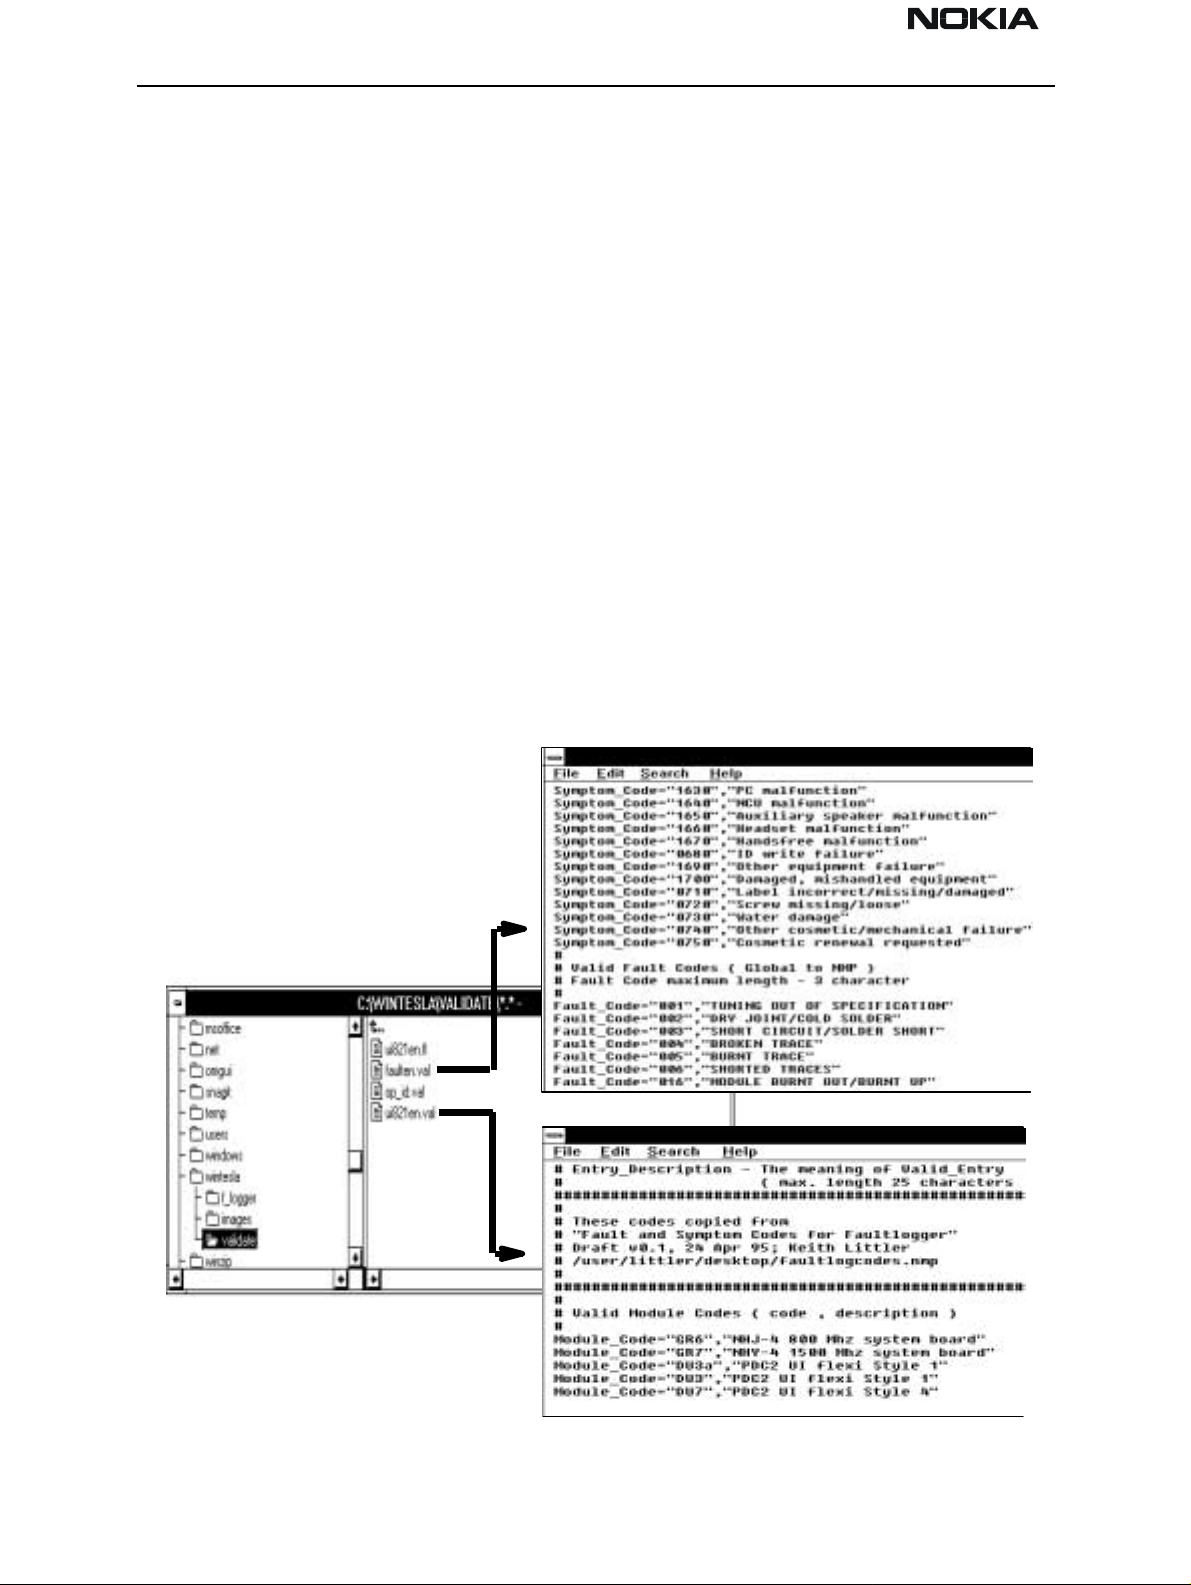
The Module, Fault, and Symptom fields have variables selected by the arrows alongside
each respective field.
A comprehensive list of faults and symptoms as well as all current modules are already
listed within the software. These three fields can be updated by accessing and editing the
following files.
Field DOS File
Modules nhd4en.val
Faults, Symptoms faulten.val
Notepad – FAULTEN.VAL
Notepad – UI821EN.VAL
Page 18 Nokia Mobile Phones Ltd. Issue 1 04/01

NSD-6
PAMS Technical Documentation Service Software and Tuning Instructions
Other Parts Replaced
Automatic none
Manual all fields
Enter other parts that have been replaced i.e. for wear and tear purposes etc.
This Entry
Automatic Entry Indicator, Date, Time
Manual Comment
Cost
Automatic Total
Manual Parts, Labor
Fault Log Macros
The Macro sub–menu can be accessed by selecting the Macros button on the Fault Log
main screen.
Macros in Fault Log are a set of standard repair actions defined and stored in order to
represent frequently repeated repairs. These macros are related to the Product Code of
the product, so whatever product is connected, Fault Log will display the macro list for
that particular product code.
A macro’s standard repair information can also be pasted into the Fault Log record for
that product.
Macros are saved initially under a name you can define yourself from the main Fault Log
screen. All the information contained in the manually entered fields (i.e., Module, Fault,
Symptom, Circuit Ref and Part Number) are recorded and saved under this name.
Flash Device
This function is for selecting the right flash concept. The default setting is POS flash and
is based on FLS–1 device connected to the parallel por t of the PC.
If the FPS–4, FLA–5, and TDF–4 flash device is used, then the setup 3–box is needed to
select.
Issue 1 04/01 Nokia Mobile Phones Ltd. Page 19
NSD-6
Service Software and Tuning Instructions PAMS Technical Documentation
The Product Menu
New (Ctrl+R)
The ‘New’ function (which can also be activated by pressing Ctrl+R) is used to scan for a
phone when either the automatic rescan option is off or the automatic rescan timer has
not expired (see Configure>Options section for automatic rescan).
If the phone type is unrecognized or unsupported by the current WinTesla system, then a
warning message will be displayed.
If the phone is changed (with the same phone type only the serial number is changed),
the phone will be initialized into local mode. If the phone is changed to a different phone
type, the current DLLs are unloaded and new ones are loaded for that phone.
If the Quick/RF Info view is open, the window will be automatically updated.
If the Phone Information view is open, it will be automatically updated.
Open
The ‘Open’ function allows you to ‘force load’ a phone interface, even if there is no phone
connected to the system.
Page 20 Nokia Mobile Phones Ltd. Issue 1 04/01
NSD-6
PAMS Technical Documentation Service Software and Tuning Instructions
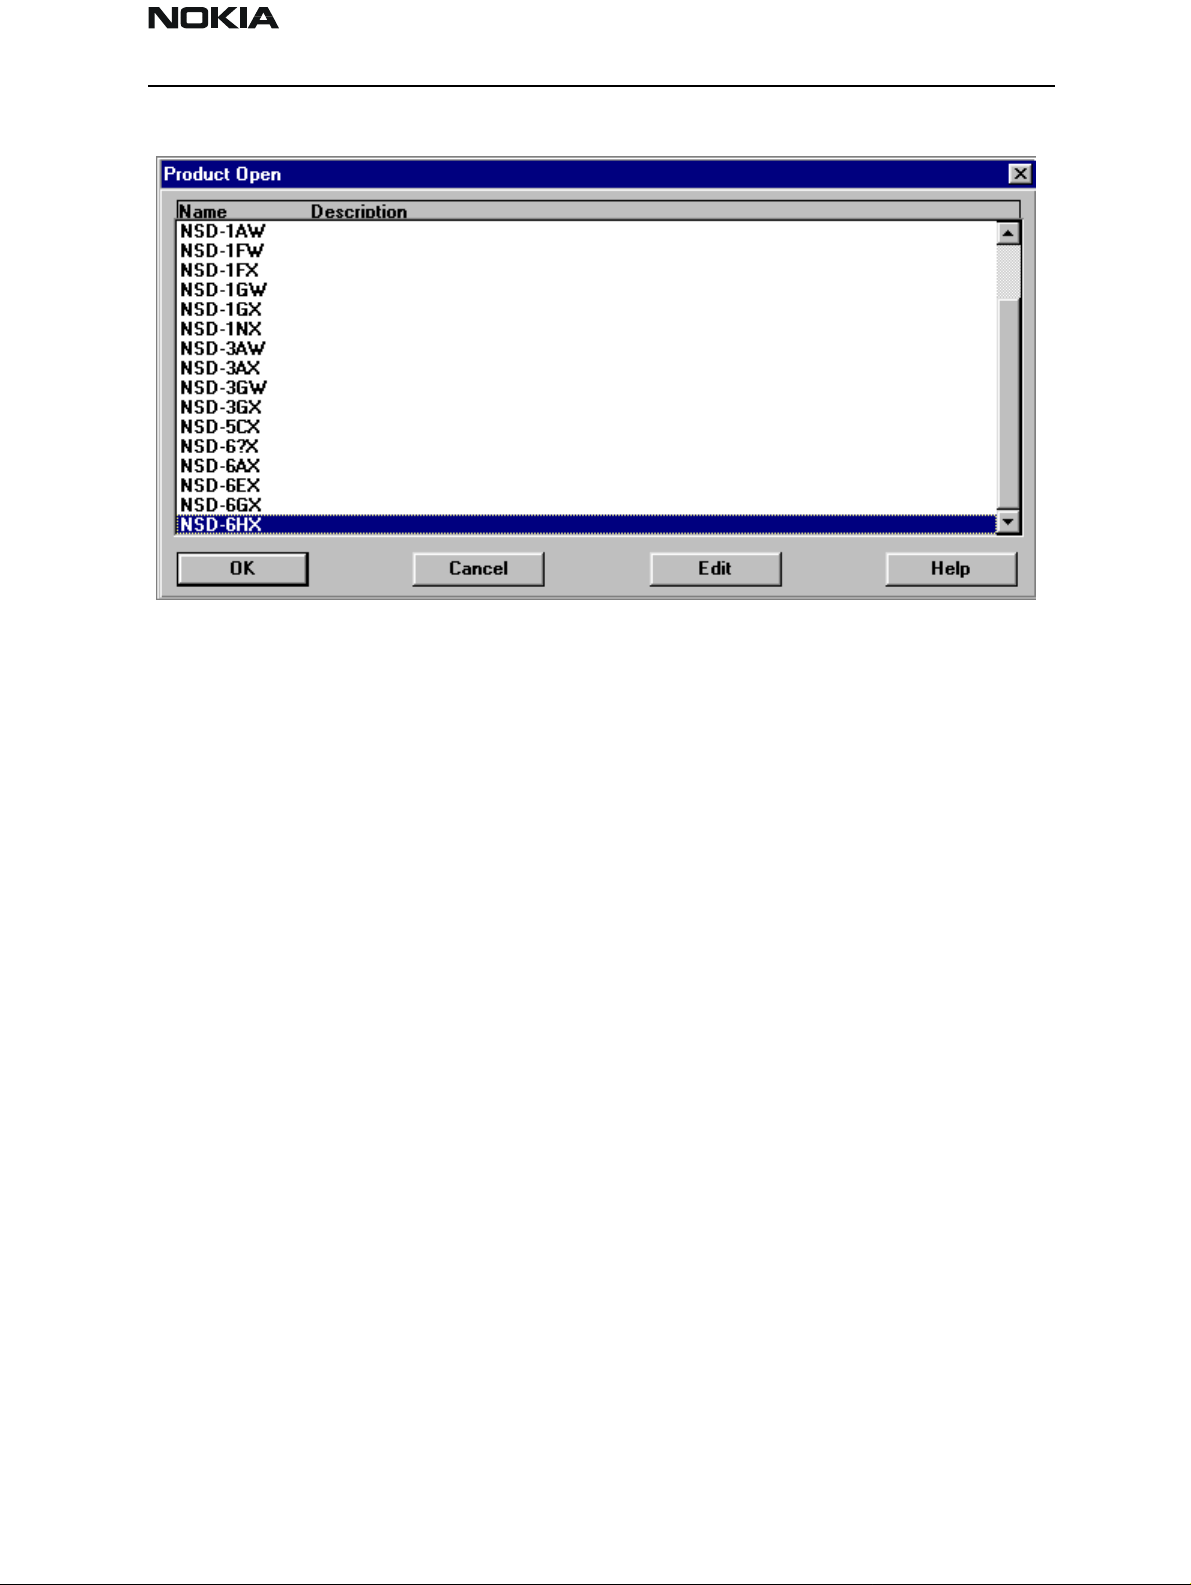
A dialog box will appear and a list of supported phone types. To select a particular phone,
highlight the phone type name and click OK.
Clicking on Cancel will stop the request and no new phone type will be loaded.
Loading a phone interface will disable the automatic rescan function (see Config-
ure>Options section for automatic rescan).
Close
This function will close the currently loaded phone type interface that had been loaded
using the Configure>Options function. You cannot ‘Close’ a loaded phone type interface
if it was loaded by a rescan.
Initialize
Activation Status Bar Text
Alt, P, I Opens a submenu for the Normal Mode and the Local Mode.
Normal Mode
Activation Status Bar Text
Alt, P, N Initializes the phone to normal (cellular) mode F5.
When the normal mode has been activated or the program has been started, self–test
results will be gathered from the MCU. If any fault was found in the tests, an error message is shown. If the normal mode has been set successfully (no self–test error has been
found), and paging listening has been started, the used AFC value is requested from MS.
Initialization routine checks the phone’s cellular type and, if it is unsupported, the phone
Issue 1 04/01 Nokia Mobile Phones Ltd. Page 21

NSD-6
Service Software and Tuning Instructions PAMS Technical Documentation
application unloads the DLLs.
The After Market Services SW automatically sets the MS state to normal mode when
needed.
If the phone identification view is open, the window will be updated automatically. Also,
if the RF Information Window is open, it will be updated t o qu ick info view.
Local Mode
Activation Status Bar Text
Alt, P, L Initializes phone to local mode
Shift + F5
Selection will change the MS state to local. When the user selects item from Testing or
Tuning menus, the After Market Services SW software will automatically change the MS
state to local.
The After Market Services SW automatically sets the MS state to normal mode when
needed.
Also, if quick info view is open, it will be updated to RF Information view.
FaultLog
Activate Fault Log
Edit Fault Log
This function is only needed if fault logger system is in use.
Exit (Alt+F4)
Selecting this option will shut down the WinTesla program.
Page 22 Nokia Mobile Phones Ltd. Issue 1 04/01

NSD-6
PAMS Technical Documentation Service Software and Tuning Instructions
The Testing Menu
ADC Readings
MBUS
This option allows the phone’s ADC readings to be displayed. The readings are updated
every few seconds. There may be some delay before the mouse or keyboard responds
while running this test.
Mbus displays the MCU software version.
Issue 1 04/01 Nokia Mobile Phones Ltd. Page 23
NSD-6
Service Software and Tuning Instructions PAMS Technical Documentation
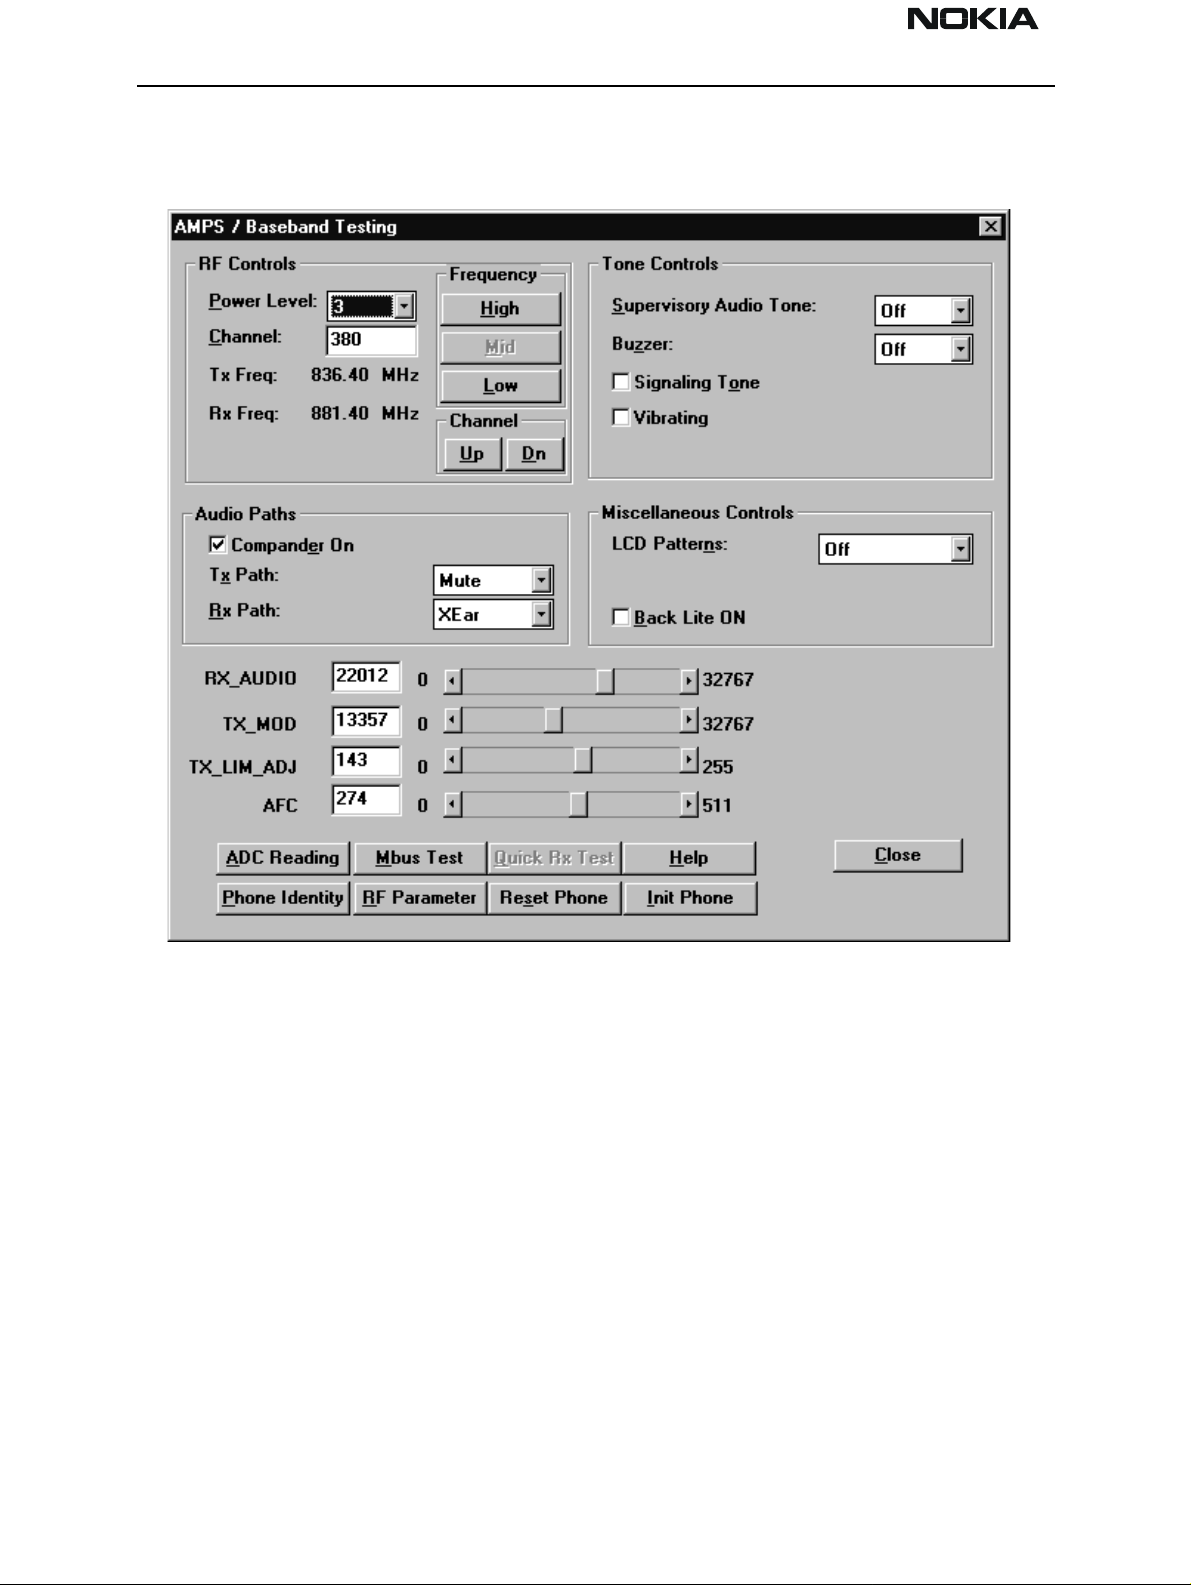
AMPS / Base Band Tests
This screen is used when testing and troubleshooting the phone in AMPS mode. Below is
an example screen.
RF Controls:
Power Level – Turns the transmitter on/off and sets power levels.
Channel – Changes the AMPS channel of the phone.
TX Freq: Displays the current Transmit Frequency.
RX Freq: Displays the current Receiver Frequency.
Frequency:
High – Sets the AMPS channel to the Highest Frequency according to the Frequency
planning set in the “configure” menu.
Mid – Sets the AMPS channel to the Middle Frequency according to the Frequency planning set in the “configure” menu.
Low – Sets the AMPS channel to the Lowest Frequency according to the Frequency plan-
Page 24 Nokia Mobile Phones Ltd. Issue 1 04/01

NSD-6
PAMS Technical Documentation Service Software and Tuning Instructions
ning set in the “configure” menu.
Channel:
Up – Increments the channel selection by one.
Dn – Decrements the channel selection by one.
Tone Controls:
Allows computer control of Supervisory Audio Tone (SAT), buzzer, Signaling Tone (ST),
and vibrating functions.
Audio Paths:
TX Path: – Allows the user to control the TX Audio path (Mute, Ear, External Ear).
RX Path: – Allows the user to control the Rx Audio path (Mute, Ear, External Ear).
Miscellaneous Controls:
Buttons:
Allows control of LCD patterns, call LED and backlight.
ADC Reading
Opens the ADC reading screen.
Mbus Test
Tests the communication between the phone and the computer.
Phone Identity
Opens the Quick Receiver test screen.
RF Parameter
This function allows reading the saved RF parameters (tuning values) from the phone.
Reset Phone
Resets the phone.
Init Phone
Initializes the phone.
Close
Exits the current screen.
Issue 1 04/01 Nokia Mobile Phones Ltd. Page 25
NSD-6
Service Software and Tuning Instructions PAMS Technical Documentation
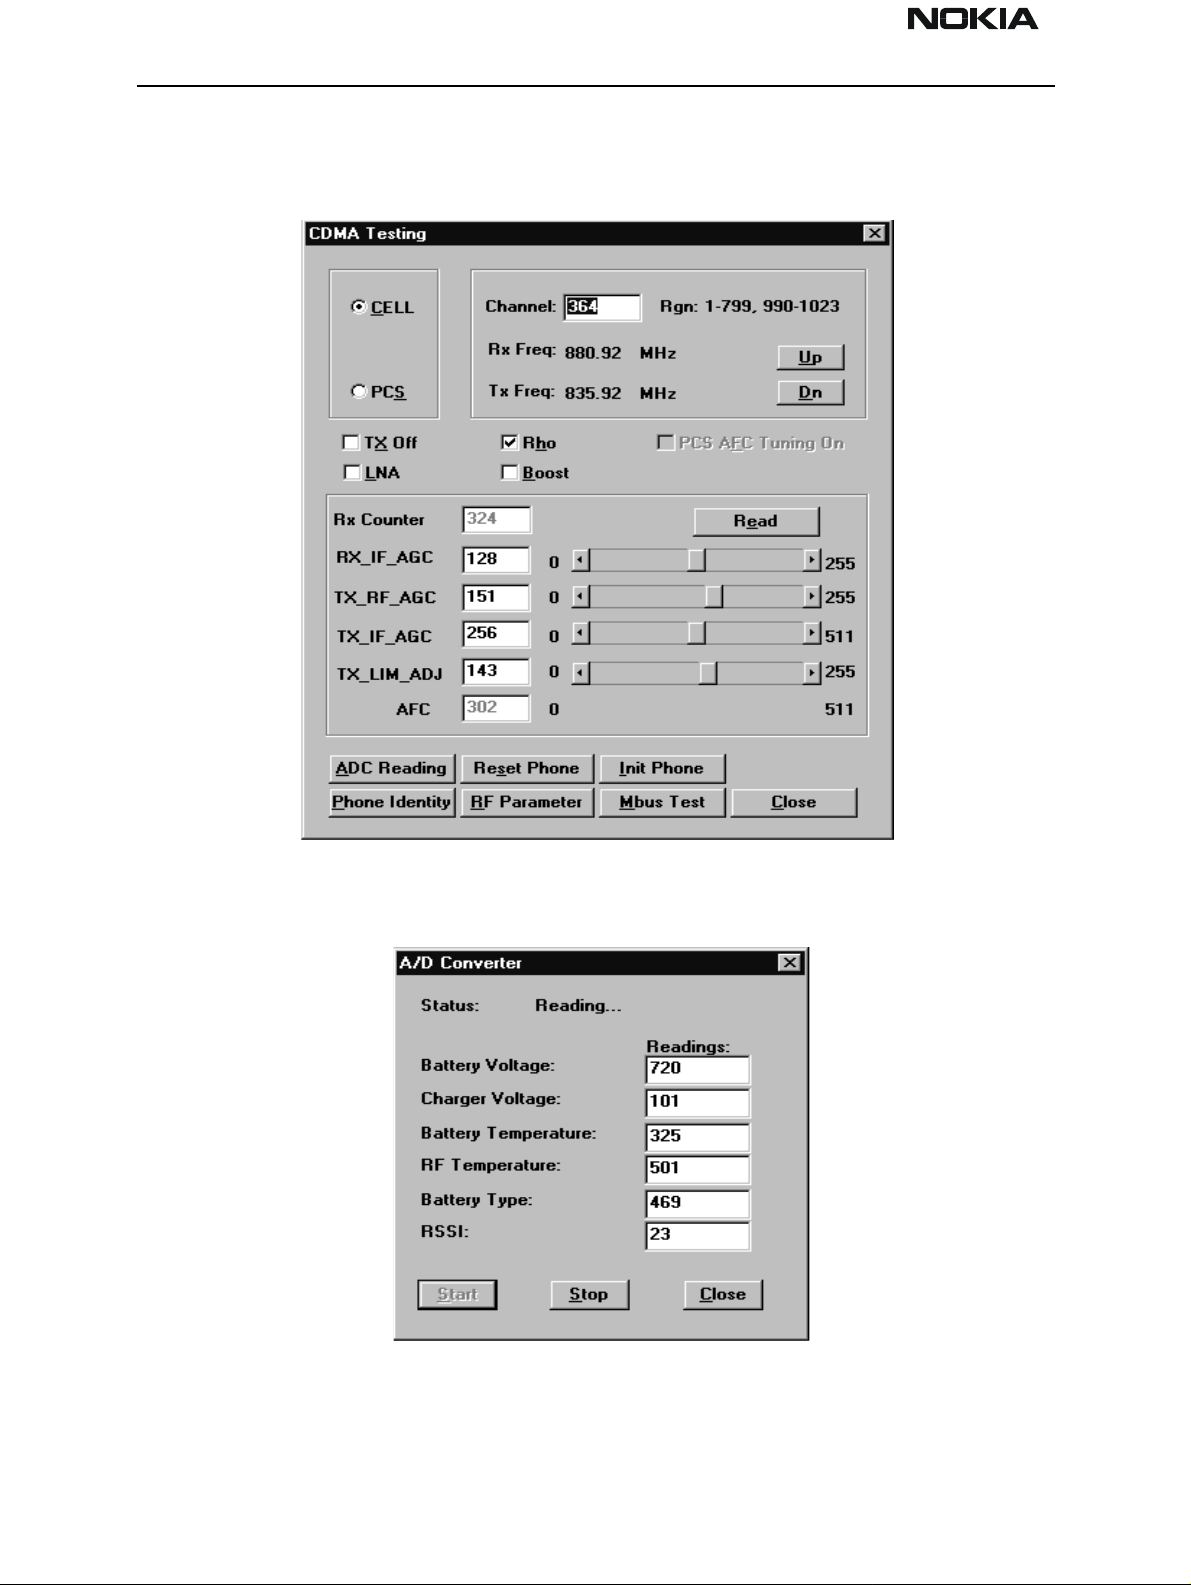
CDMA Tests
This screen is used when testing and troubleshooting the phone in CDMA mode. Below is
an example screen.
ADC Readings
This option allows the phone’s ADC readings to be displayed. The readings are updated
every few seconds. There may be some delay before the mouse or keyboard responds
while running this test.
Page 26 Nokia Mobile Phones Ltd. Issue 1 04/01
NSD-6
PAMS Technical Documentation Service Software and Tuning Instructions
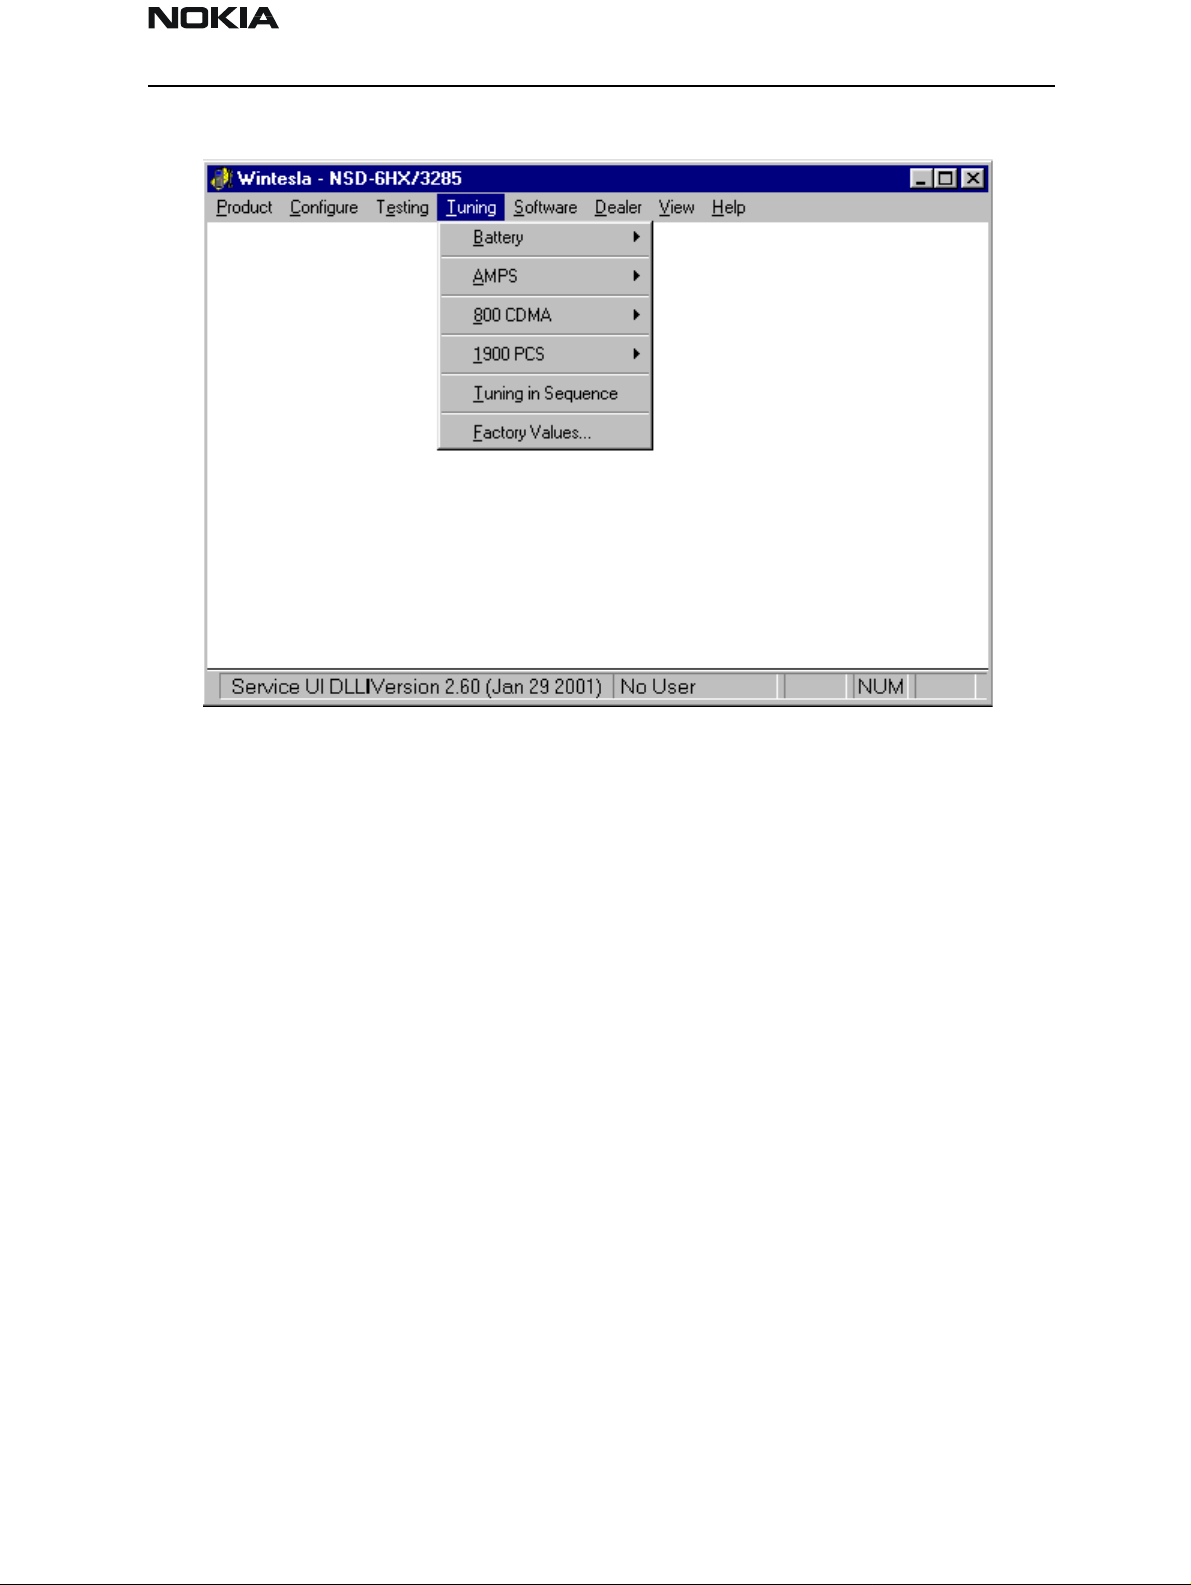
The Tuning Menu
Tuning Steps of Radio Unit
The Service Software program places the phone into the Local mode, in which the phone
can be outwardly controlled via M2BUS interface.
The tuning values of the phone reside on the EEPROM. Before tuning, the Service Software reads these values and the user can change these values with tuning functions.
NOTE: During tuning, keep the following in mind:
• Take care not to damage sensitive measuring instruments with excessive RF power.
• Carry out all tuning steps in the shortest possible time to avoid excessive heating of RF
units.
• Perform all tuning steps in the order presented.
• Never try to mask a fault by tuning it out.
Accuracy of the Equipment during Measurement
• Power supply 1; nominal voltage 8.0V ±0.2V , minimum current capacity 1.5A for ser-
vice battery BBD–3.
• Power Supply 2; nominal voltage 4.1 ±0.1V, minimum current capacity 1.5A for testing
dummy battery BTD–3.
• Modulation analyzer; power level resolution 0.1dB, accuracy ±0.5dB. Frequency
Issue 1 04/01 Nokia Mobile Phones Ltd. Page 27
 Loading...