

Page 1
802.11ac Wireless Access Point Model WAC120
Reference Manual
WiFi On/O
WPS
August 2014
202-11353-01
350 East Plumeria Drive
San Jose, CA 95134
USA
Page 2

802.11ac Wireless Access Point Model WAC120
Support
Thank you for selecting NETGEAR products.
After installing your device, locate the serial number on the label of your
https://my.netgear.com. You must register your product before you can
recommends registering your product through the NETGEAR website. For product updates and web support, visit
h
ttp://support.netgear.com.
Phone (US & Canada only): 1
Phone (Other Countries): Check the list of
888-NETGEAR.
-
phone numbers at http://support.netgear.com/general/contact/default.aspx.
product and use it to register your product at
use NETGEAR telephone support. NETGEAR
Compliance
For regulatory compliance information, visit http://www.netgear.com/about/regulatory.
See the regulatory compliance document befo
re connecting the power supply.
Trademarks
NETGEAR, the NETGEAR logo, and Connect with Innovation are trademarks and/or registered trademarks of NETGEAR, Inc.
and/or its subsidiaries in the United States and/or other countries. Information is subject to change without notice.
© NETGEAR, Inc. All rights reserved.
2
Page 3

Contents
Chapter 1 Hardware Setup
Chapter 2 Initial Setup
System Requirements. . . . . . . . . . . . . . . . . . . . . . . . . . . . . . . . . . . . . . . . . . . . . . . . . .6
Unpack Your Access Point . . . . . . . . . . . . . . . . . . . . . . . . . . . . . . . . . . . . . . . . . . . . . .6
Front and Side View . . . . . . . . . . . . . . . . . . . . . . . . . . . . . . . . . . . . . . . . . . . . . . . . . . .7
LEDs and Buttons . . . . . . . . . . . . . . . . . . . . . . . . . . . . . . . . . . . . . . . . . . . . . . . . . . .7
Rear View . . . . . . . . . . . . . . . . . . . . . . . . . . . . . . . . . . . . . . . . . . . . . . . . . . . . . . . . . . . .8
Label . . . . . . . . . . . . . . . . . . . . . . . . . . . . . . . . . . . . . . . . . . . . . . . . . . . . . . . . . . . . . .9
Install the Access Point. . . . . . . . . . . . . . . . . . . . . . . . . . . . . . . . . . . . . . . . . . . . . . . 11
Connect to the Access Point and Log In . . . . . . . . . . . . . . . . . . . . . . . . . . . . . . . . 13
Specify the Access Point Name and Location. .
Set the Time. . . . . . . . . . . . . . . . . . . . . . . . . . . . . . . . . . . . . . . . . . . . . . . . . . . . . . . . 14
Configure the Basic IP Settings. . . . . . . . . . . . . . . . . . . . . . . . . . . . . . . . . . . . . . . . 15
Set Up and Test Wireless Connectivity . . . . . . . . . . . . . . . . . . . . . . . . . . . . . . . . . 17
Basic Wireless Settings . . . . . . . . . . . . . . . . . . . . . . . . . . . . . . . . . . . . . . . . . . . . 17
Wireless On-Off Schedule. . . . . . . . . . . . . . . . . . . . . . . . . . . . . . . . . . . . . . . . . . 20
Wireless Security Options . . . . . . . . . . . . . . . . . . . . . . . . . . . . . . . . . . . . . . . . . . 21
Wireless Security Profiles
MAC Authentication. . . . . . . . . . . . . . . . . . . . . . . . . . . . . . . . . . . . . . . . . . . . . . . 24
Connect Stations to the Wireless Access Point . . . . . . . . . . . . . . . . . . . . . . . . 26
QoS Settings . . . . . . . . . . . . . . . . . . . . . . . . . . . . . . . . . . . . . . . . . . . . . . . . . . . . . . . 29
Deploy the Access Point. . . . . . . . . . . . . . . . . . . . . . . . . . . . . . . . . . . . . . . . . . . . . . 30
Position Your Access Point . . . . . . . . . . . . . . . . . . . . . . . . . . . . . . . . . . . . . . . . . 31
. . . . . . . . . . . . . . . . . . . . . . . . . . . . . . . . . . . . . . . . . 22
.
. . . . . . . . . . . . . . . . . . . . . . . . . . 13
Chapter 3 Network Settings
Set Up an 802.1Q VLAN . . . . . . . . . . . . . . . . . . . . . . . . . . . . . . . . . . . . . . . . . . . . . 33
Advanced Wireless Settings. . . . . . . . . . . . . . . . . . . . . . . . . . . . . . . . . . . . . . . . . . . 34
Advanced QoS Settings . . . . . . . . . . . . . . . . . . . . . . . . . . . . . . . . . . . . . . . . . . . . . . 37
Wireless Bridging and Repeating. . . . . . . . . . . . . . . . . . . . . . . . . . . . . . . . . . . . . . . 39
Wireless Point-to-Point Bridge Mode. . . . . . . . . .
Wireless Point-to-Multi-Point Bridge Mode . . . . . . .
Client Mode . . . . . . . . . . . . . . . . . . . . . . . . . . . . . . . . . . . . . . . . . . . . . . . . . . . . . . 46
. . . . . . . . . . . . . . . . . . . . . 41
.
. . . . . . . . . . . . . . . . . . . 43
Chapter 4 Manage the Access Point
Change the admin Password . . . . . . . . . . . . . . . . . . . . . . . . . . . . . . . . . . . . . . . . . . 49
Upgrade the Firmware . . . . . . . . . . . . . . . . . . . . . . . . . . . . . . . . . . . . . . . . . . . . . . . 49
Manage the Configuration File . . . . . . . . . . . . . . . . . . . . . . . . . . . . . . . . . . . . . . . . 51
3
Page 4

802.11ac Wireless Access Point Model WAC120
Back Up the Configuration File . . . . . . . . . . . . . . . . . . . . . . . . . . . . . . . . . . . . . . 51
Restore the Configuration File . . . . . . . . . . . . . . . . . . . . . . . . . . . . . . . . . . . . . . 51
Restore the Factory Default Settings . . . . . . . . . . . . . . . . . . . . . . . . . . . . . . . . 52
Enable a Syslog Server . .
. . . . . . . . . . . . . . . . . . . . . . . . . . . . . . . . . . . . . . . . . . . . . 53
Chapter 5 Monitoring
View System Information. . . . . . . . . . . . . . . . . . . . . . . . . . . . . . . . . . . . . . . . . . . . . 56
View Available Wireless Stations. . . . . . . . . . . . . . . . . . . . . . . . . . . . . . . . . . . . . . . 57
Activity Log . . . . . . . . . . . . . . . . . . . . . . . . . . . . . . . . . . . . . . . . . . . . . . . . . . . . . . . . 58
View Network Traffic Statistics . . . . . . . . . . . . . . . . . . . . . . . . . . . . . . . . . . . . . . . 59
Chapter 6 Troubleshooting and Debugging
Troubleshooting with the LEDs . . . . . . . . . . . . . . . . . . . . . . . . . . . . . . . . . . . . . . . . 62
All LEDs Are Off . . . . . . . . . . . . . . . . . . . . . . . . . . . . . . . . . . . . . . . . . . . . . . . . . . 62
LAN LED Is Off. . . . . . . . . . . . . . . . . . . . . . . . . . . . . . . . . . . . . . . . . . . . . . . . . . . . 62
WLAN LED Is Off. . . . . . . . . . . . . . . . . . . . . . . . . . . . . . . . . . . . . . . . . . . . . . . . . . 62
Cannot Connect to the Access Point to Configure It. . . . . . . . . . . . . . . . . . . . . . 63
Wireless Access to the Network . . . . . . . . . . . . . . . . . . . . . . . . . . . . . . . . . . . . . . . 63
Time-Out Error for URL or IP Address. . . . . . . . . . . . . . . . . . . . . . . . . . . . . . . . . . 63
Appendix A Supplemental Information
Factory Settings . . . . . . . . . . . . . . . . . . . . . . . . . . . . . . . . . . . . . . . . . . . . . . . . . . . . 66
Technical Specifications . . . . . . . . . . . . . . . . . . . . . . . . . . . . . . . . . . . . . . . . . . . . . . 70
4
Page 5

1. Hardware Setup
This chapter covers the following topics:
• System Requirements
• Unpack Your Access Point
• Front and Side View
• Rear View
1
For more information about the topics covered in this manual, visit the suppo
http://suppo
Firmware updates with new features and bug fixes are made available from time to time a
http://d
new firmware, or you can check for and do
behavior of your product does not match what is described in this guide, you might need to
update your firmware.
rt.netgear.com.
ownloadcenter.netgear.com. Some products can regularly check the site and download
wnload new firmware manually. If the features or
rt website at
t
5
Page 6
802.11ac Wireless Access Point Model WAC120
WPS
WiFi On/O
Access point
Ethernet cable
Power adapter
System Requirements
Before installing the access point, make sure that your system includes the following:
• A 10/100/1000 Mbp
s local area network device such as a hub or switch
• The Category 5 UTP straight-through Ethernet cable with RJ-45 connector included in the
ckage, or one like it
pa
• A 100–120 V, 50–60 Hz AC power source
• A web browser for configuration
• At lea
st one computer with the TCP/IP protocol installed
• 802.11b/g-compliant or 802.11b/g-compliant devices
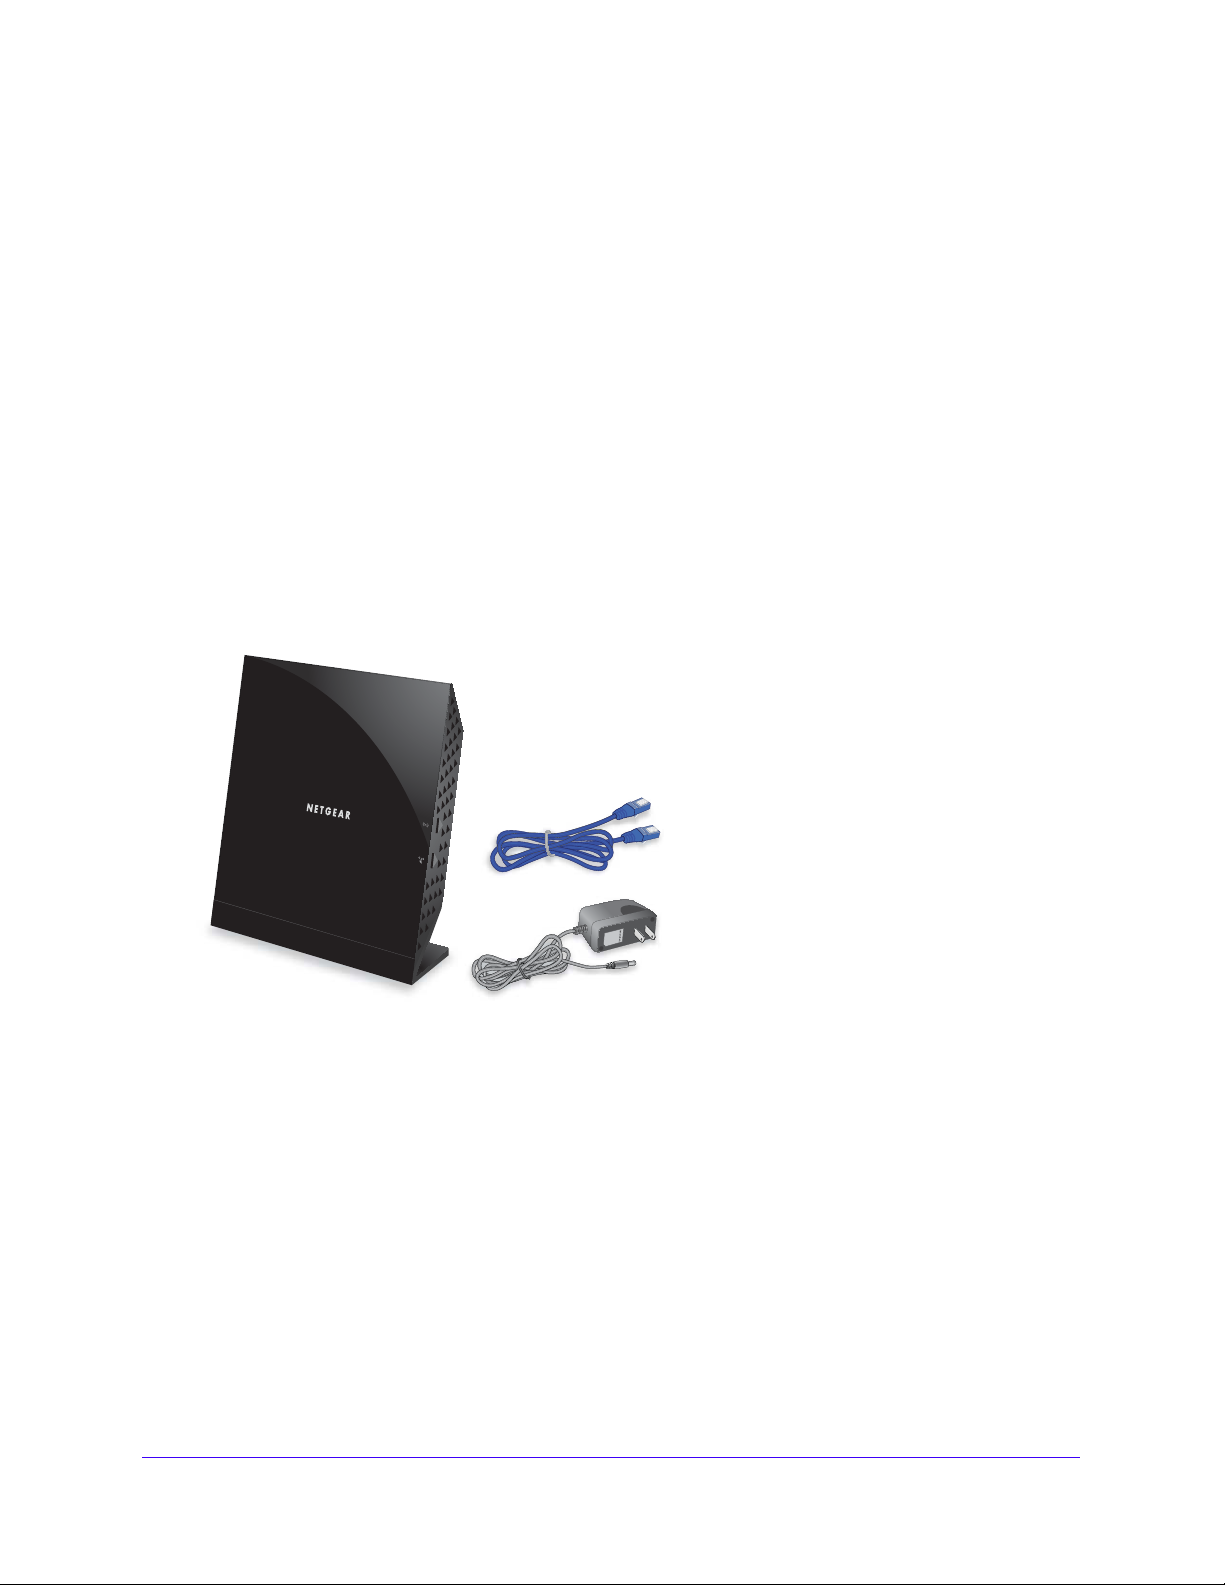
Unpack Your Access Point
Your package contains the following items.
Figure 1. Package contents
Your box contains the following items:
• 802.11ac Wireless Access Point Model WAC120
• AC power adapter (plug varies by region)
• Category 5 (Cat 5) Ethernet cab
• Installation guide with cabling and access point se
le
tup instructions
If any parts are incorrect, missing, or damaged, contact your NETGEAR dealer.
Hardware Setup
6
Page 7
802.11ac Wireless Access Point Model WAC120
WPS
WiFi On/O
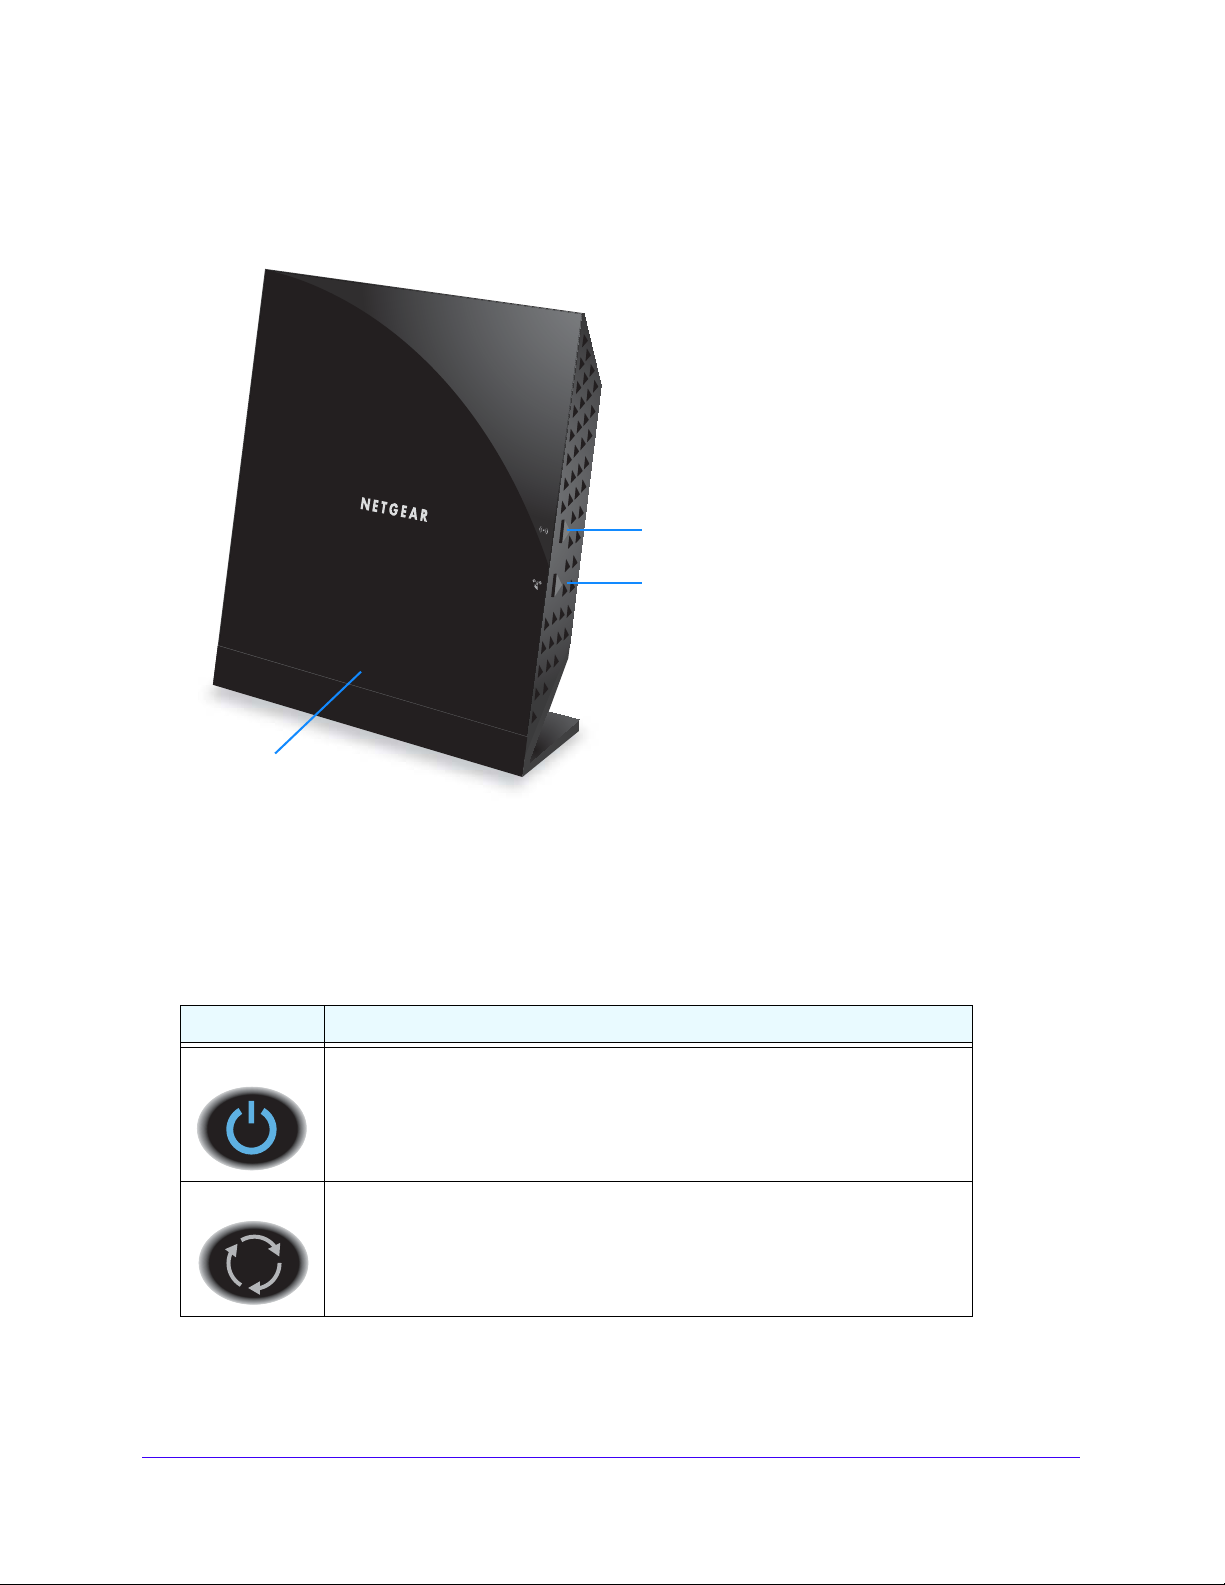
LEDs
WiFi On/Off button
WPS button
Front and Side View
The status LEDs and icons on the front and side panels are shown in the following figure.
Figure 2. Front and side view
LEDs and Buttons
The LEDs on the wireless access point light to indicate wireless access point activity:
Table 1. LEDs
LED Description
Power
Activity
• Off. Power is off.
• Green. Power
• Amber. A self-test is running. During startup the LED is amber, then blinking
green before turning steady green after 45 seconds. If the LED is amber or
continues blinking green after one minute, a system fault exists.
• Off. No Ethernet traffic is detected.
• Green or blinking green. Etherne
in on.
t traffic is detected.
Hardware Setup
7
Page 8
802.11ac Wireless Access Point Model WAC120
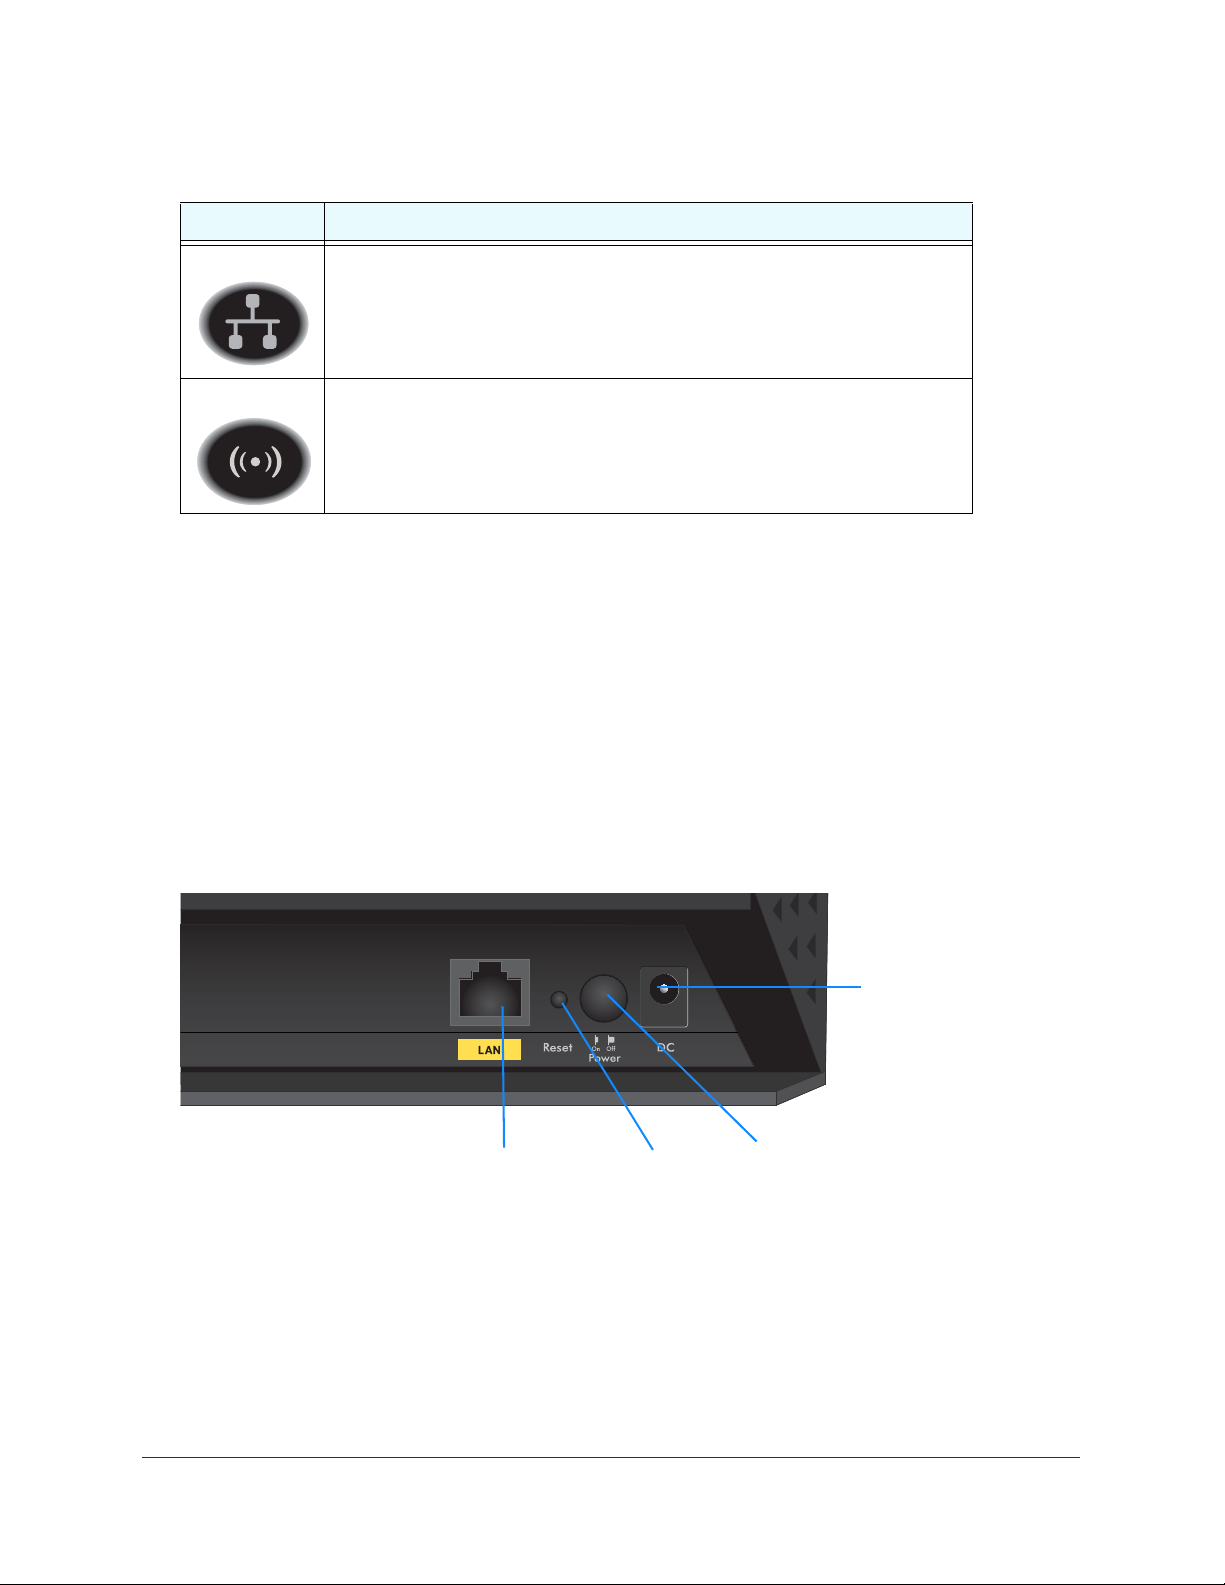
LAN
Power On/Off
Power connector
port
Reset
button
Table 1. LEDs (continued)
LED Description
LAN
• Off. No link is detected.
• Green. A 1000
• Amber. A 100 Mbps or 10 Mbps link is detected.
Mbps link is detected.
WiFi
• Off. Both the 2.4G and 5G radios are off.
• Green. The
• Blinking green. Wireless activity of 2.4G or 5G is detected.
• Slow blinking green. W
2.4G, 5G, or both radios are ready.
PS is enabled.
The WiFi and WPS buttons toggle the WiFi and WPS functions on and off, as follows:
• WiFi On/Off button. Pressing
and holding this button for two seconds turns the 2.4 GHz
and 5 GHz wireless radios on or off. If the WiFi LED is lit, the wireless radios are on. If this
LED is off, the wireless radios are turned off and you cannot connect wirelessly to the
access point.
• WPS button. You can
use this button to use WPS to add a wireless device or computer
to your wireless network. The WiFi LED blinks slowly, green for three seconds, then off for
three seconds, when the access point is trying to add the wireless device or computer.
Rear View
The buttons and connections on the back panel are shown in the following figure.
Figure 3. Rear view
Pressing the Reset button restores the factory settings. See Factory Settings on page 66.
Hardware Setup
8
Page 9

802.11ac Wireless Access Point Model WAC120
Serial number andPreset WiFi
Default access information
password MAC address
Label
The label on the access point shows the login information, MAC address, and serial number.
Figure 4. The label shows unique information about your router
Hardware Setup
9
Page 10

2. Initial Setup
This chapter covers the following topics:
• Install the Access Point
• Connect to the Access Point and Log In
• Specify the Access Point Name and Location
• Set the Time
• Configure the Basic IP Settings
• Set Up and Test Wireless Connectivity
• QoS Settings
• Deploy the Access Point
2
10
Page 11
802.11ac Wireless Access Point Model WAC120
1 2 3 4
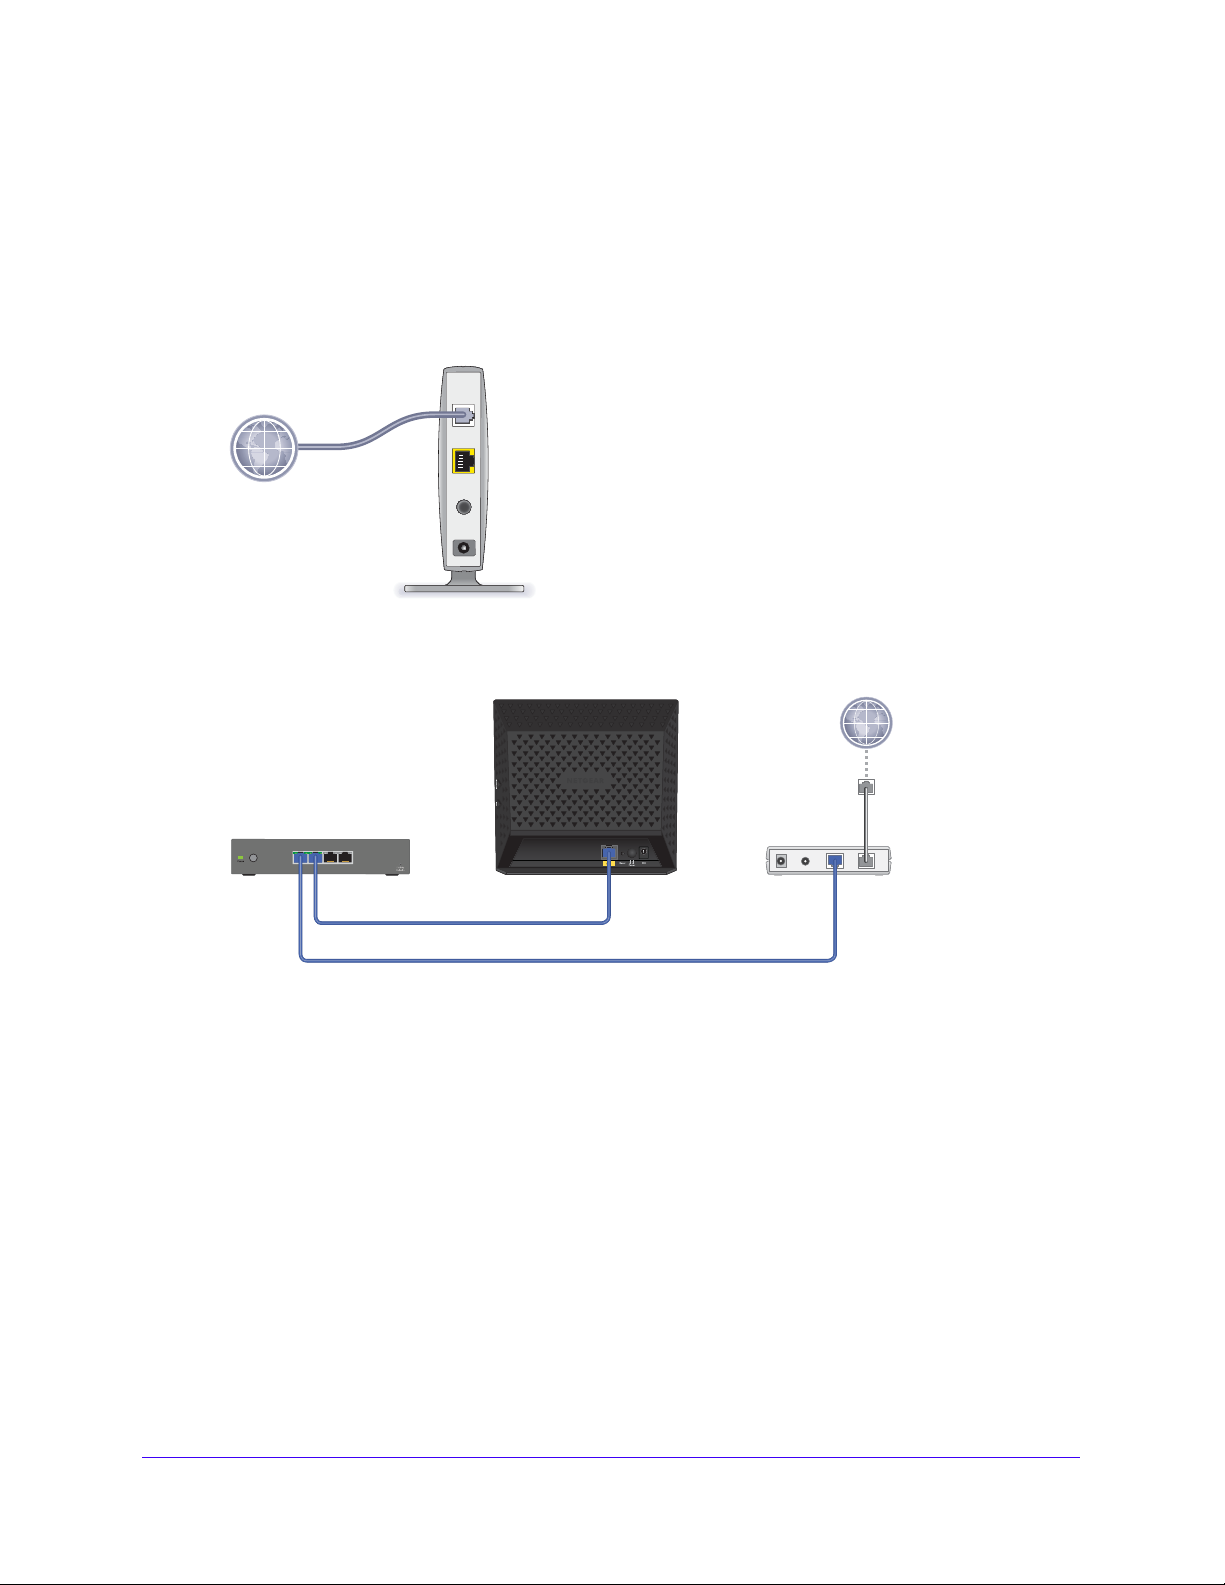
Install the Access Point
Make sure that your Internet service is active before you install your access point.
To install your access point:
1. Prepare your network.
Make sure that your modem is cabled only to the wall jack for your Internet service.
2. Connect your devices.
a. Plug in, then turn on your gateway or modem.
b. With an Ethernet cable, connect your gateway or modem to a network switch.
c. Wi
th the Ethernet cable that came with the access point, connect the
network switch
to the LAN port on your access point.
Initial Setup
11
Page 12
802.11ac Wireless Access Point Model WAC120
1 2 3 4
1 2 3 4
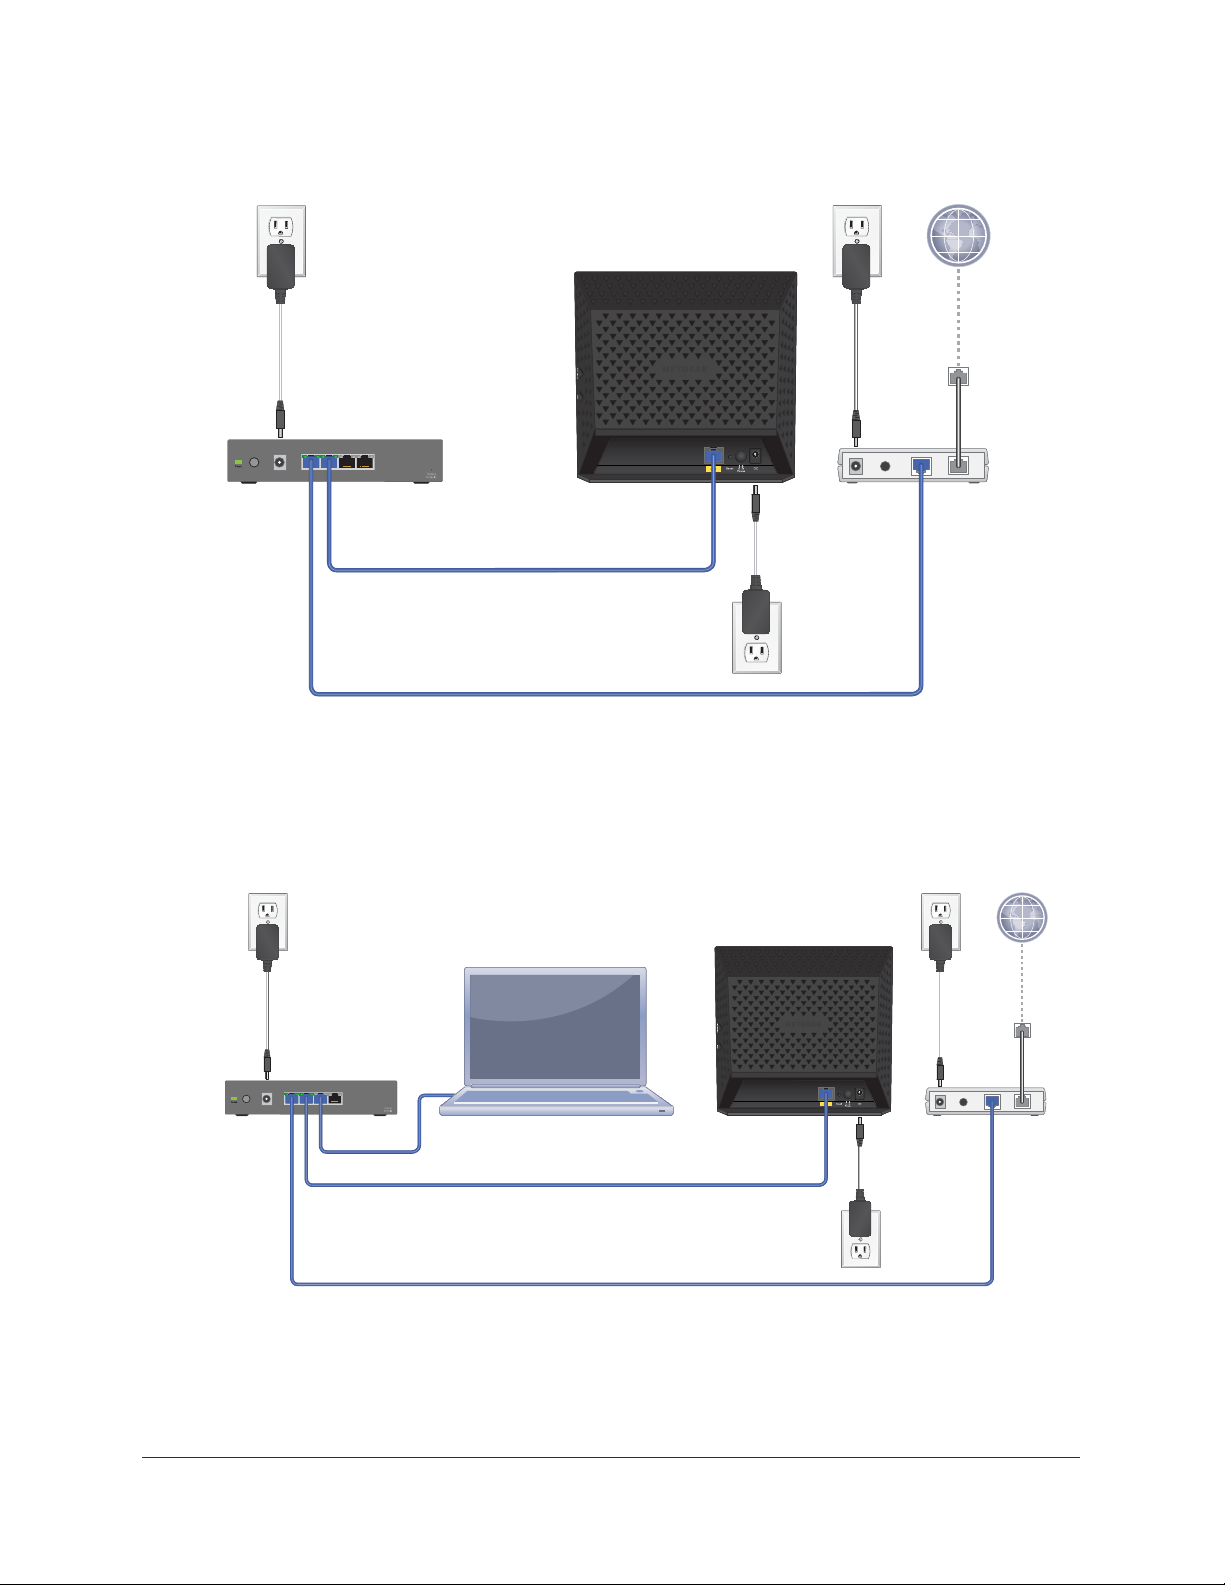
3. Add power to the access point:
a. Connect the power adapter to the access point and plug the power adapter into an
outlet.
b. Wait for the Power LED on the front panel to light amber and turn
If no LEDs are lit, press the Power On/Off button o
4. Connect a compute
r.
n the rear panel of the access point.
green.
Initial Setup
12
Page 13
802.11ac Wireless Access Point Model WAC120
Connect to the Access Point and Log In
You can connect to the access point’s web management interface to view or change its LAN
and wireless access settings.
To connect to the access point:
1. Configure a computer with a static IP address of 192.168.0.210 and a
255.255.255.0.
For help configuring a static IP address on your computer, check the
help that came with that computer.
2. Connect the Ethernet cable to the computer.
3. Connect the other end of the Ethernet cable to the LAN port on the
4. Connect the power adapter to the access point and plug the power ad
outlet.
5. Press the On/Off button
6. On the computer that is connected to the access point, enter http://192.16
address field of a browser.
A login screen displays.
7. Enter admin f
The web management interface of the access point displays.
or the user name and password for the password.
on the access point.
instructions or online
access
apter into a power
subnet mask of
point.
8.0.100 in the
Specify the Access Point Name and Location
You must use a computer that is configured with a static IP address of 192.168.0.210 and a
subnet mask of 255.255.255.0. During initial setup, use a wired Ethernet connection from the
computer to the access point.
To specify the access point name and location:
1. Launch a web browser on the computer that is connected to the access point.
2. Enter http://1
A login prompt displays.
3. Enter the user name and password.
The user name is
92.168.0.100 in the address field of the browser.
admin and t
he default password is password.
Initial Setup
13
Page 14
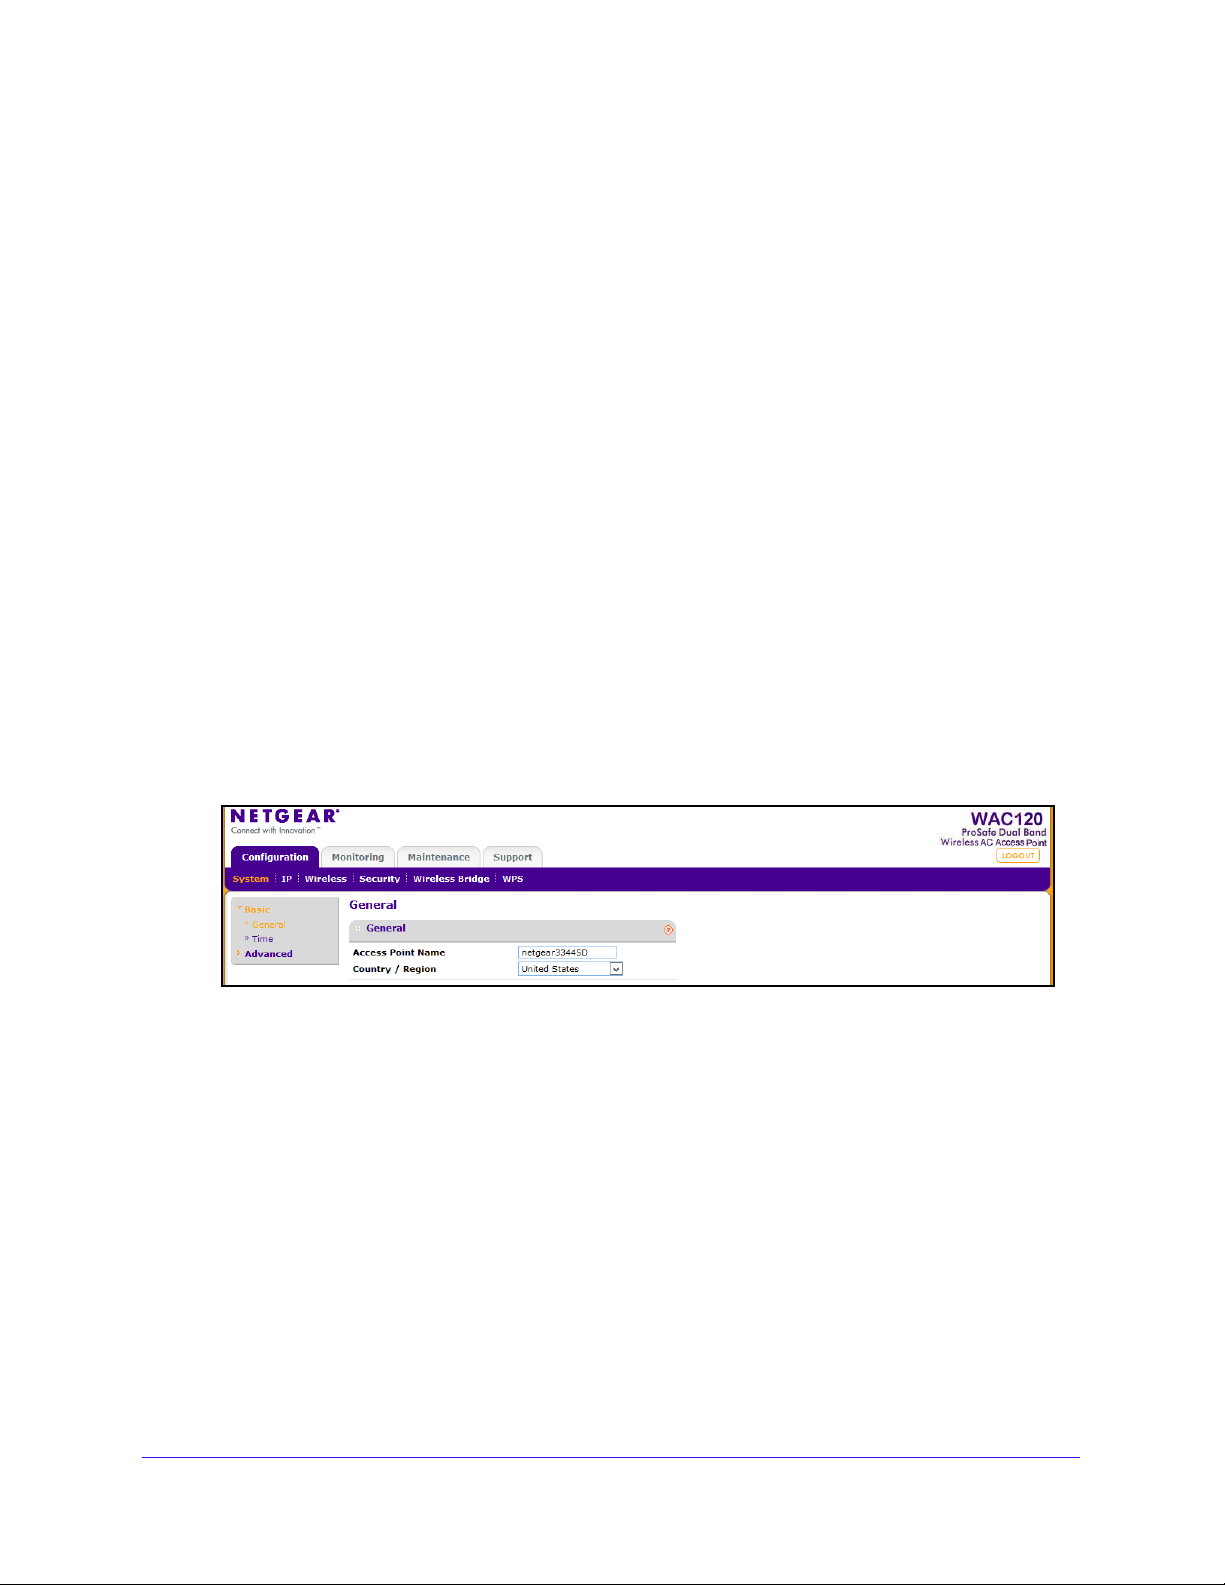
802.11ac Wireless Access Point Model WAC120
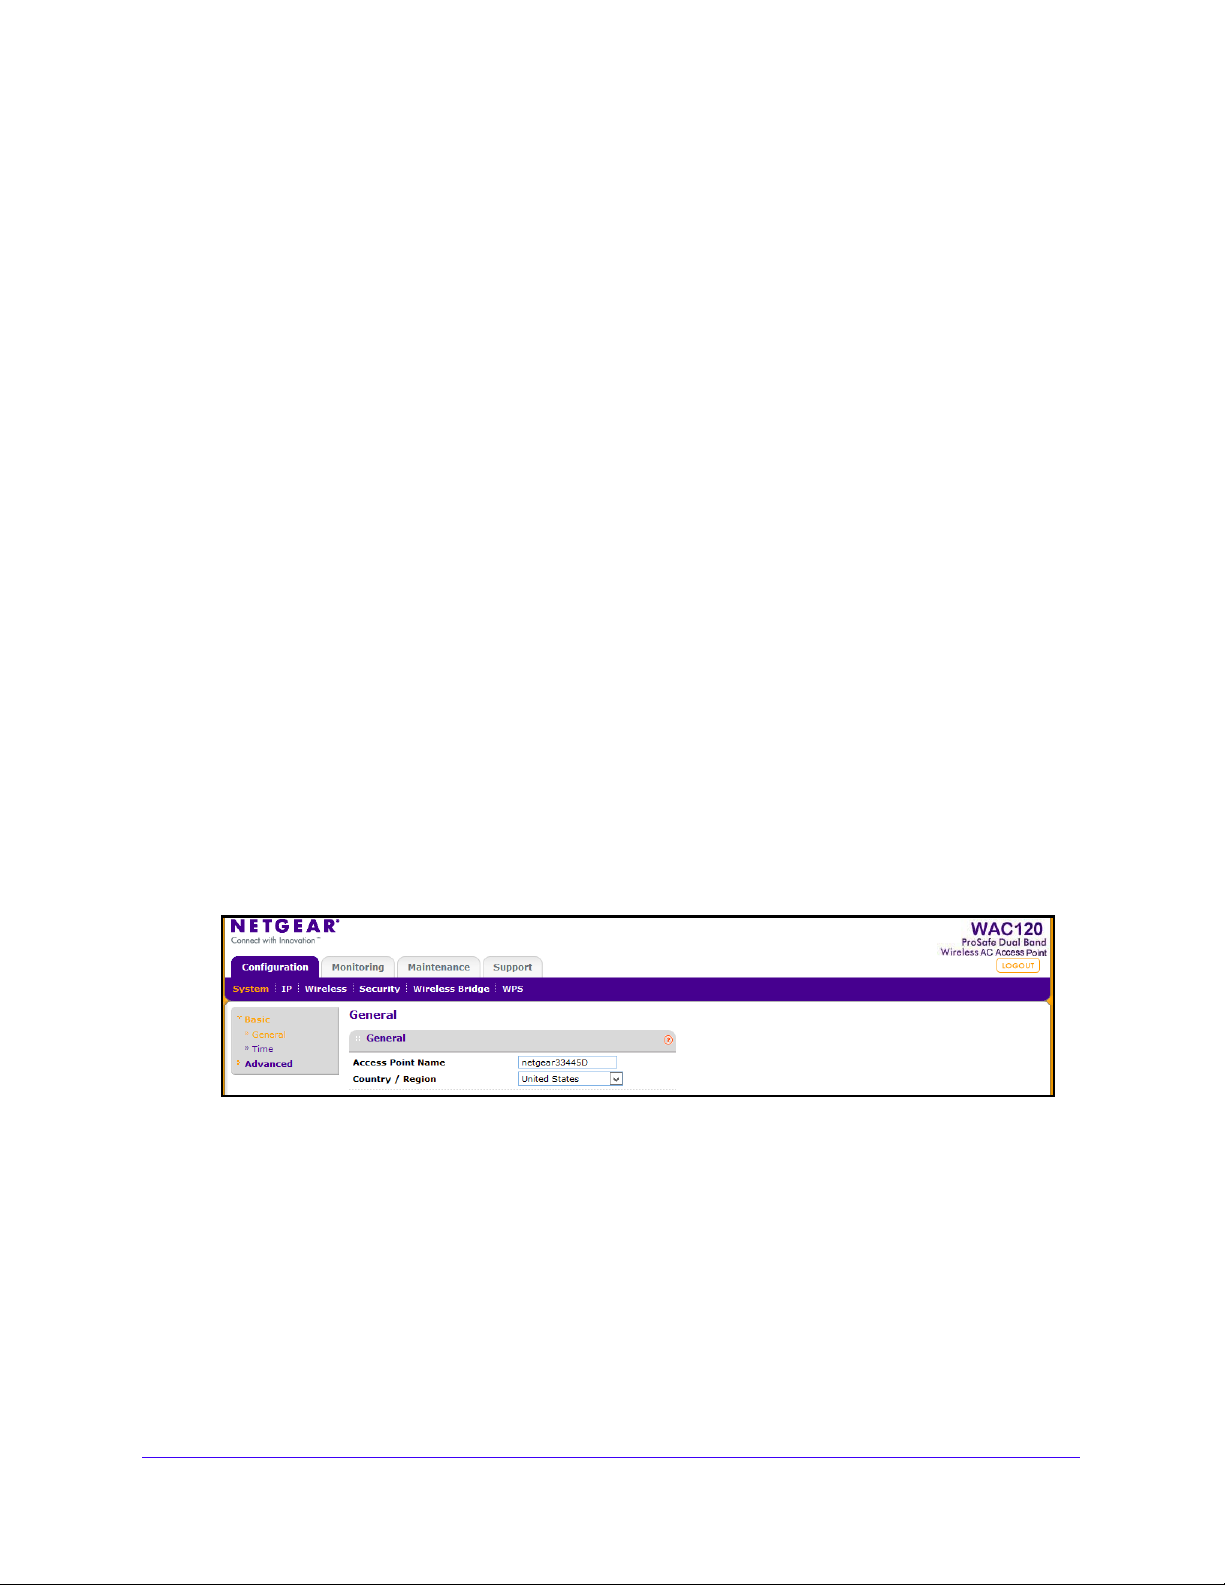
The General screen displays.
4. In the Access Point Name field, type the access point name.
This unique name is the access point NetBIOS name. The access point name is printed
on the product label of the
represents the last 6 digits of the access point MAC address. You can replace the default
name with a unique name up to 15 characters long.
access point. The default is netgearxxxxxx, where xxxxxxx
5. From
6. Click the Apply
the Country/Region
In the United States this setting cannot be changed. If your country or reg
check with NETGEAR support for the correct selection.
button.
Your settings are saved.
list, select the region where the access point is located.
ion is not listed,
Set the Time
You must use a computer that is configured with a static IP address of 192.168.0.210 and a
subnet mask of 255.255.255.0. During initial setup, use a wired Ethernet connection from the
computer to the access point.
To set the time:
1. Launch a web browser on the computer that is connected to the acc
2. Enter http://192.168.0.
A login prompt displays.
3. Enter the user name and password.
The us
er name is admi
100 in the address field of the browser.
n and the default password is password.
ess point.
The General screen displays.
Initial Setup
14
Page 15

802.11ac Wireless Access Point Model WAC120
4. Select Configuration > System > Basic > Time.
5. Adjust the following fields:
• Time Zone. F
is USA-Pacific. The access point gets the current time from the connecting computer.
• NTP Client. En
NTP server. The Enable radio button is selected by default.
rom the list, select the local time zone for your access point. The default
able the NTP client to synchronize the time of the access point with an
Note: You n
• Use Custom NTP Server. Select
check box is cleared by default.
• Hostname / IP Address. Enter the ho
server. The default is time-b.netgear.com.
6. Click the Apply
Your settings are saved.
eed an Internet connection to get the current time using an NTP
client.
this check box if you use a custom NTP server. The
st name or the IP address of the custom NTP
button.
Configure the Basic IP Settings
The default settings work in most cases. However, if your access point is part of a more
complex LAN network, modify these settings to meet the requirements of your network.
You must use a computer that is configured with a static IP addre
subnet mask of 255.255.255.0. During initial setup, use a wired Ethernet connection from the
computer to the access point.
To configure the basic IP settings:
ss of 192
.168.0.210 and a
1. Launch a web browser on the computer that is connected to the access point.
2. Enter http
A login prompt displays.
3. Enter the user name and password.
The user name is
92.168.0.100 in the address field of the browser.
://1
admin and t
he default password is password.
Initial Setup
15
Page 16
802.11ac Wireless Access Point Model WAC120
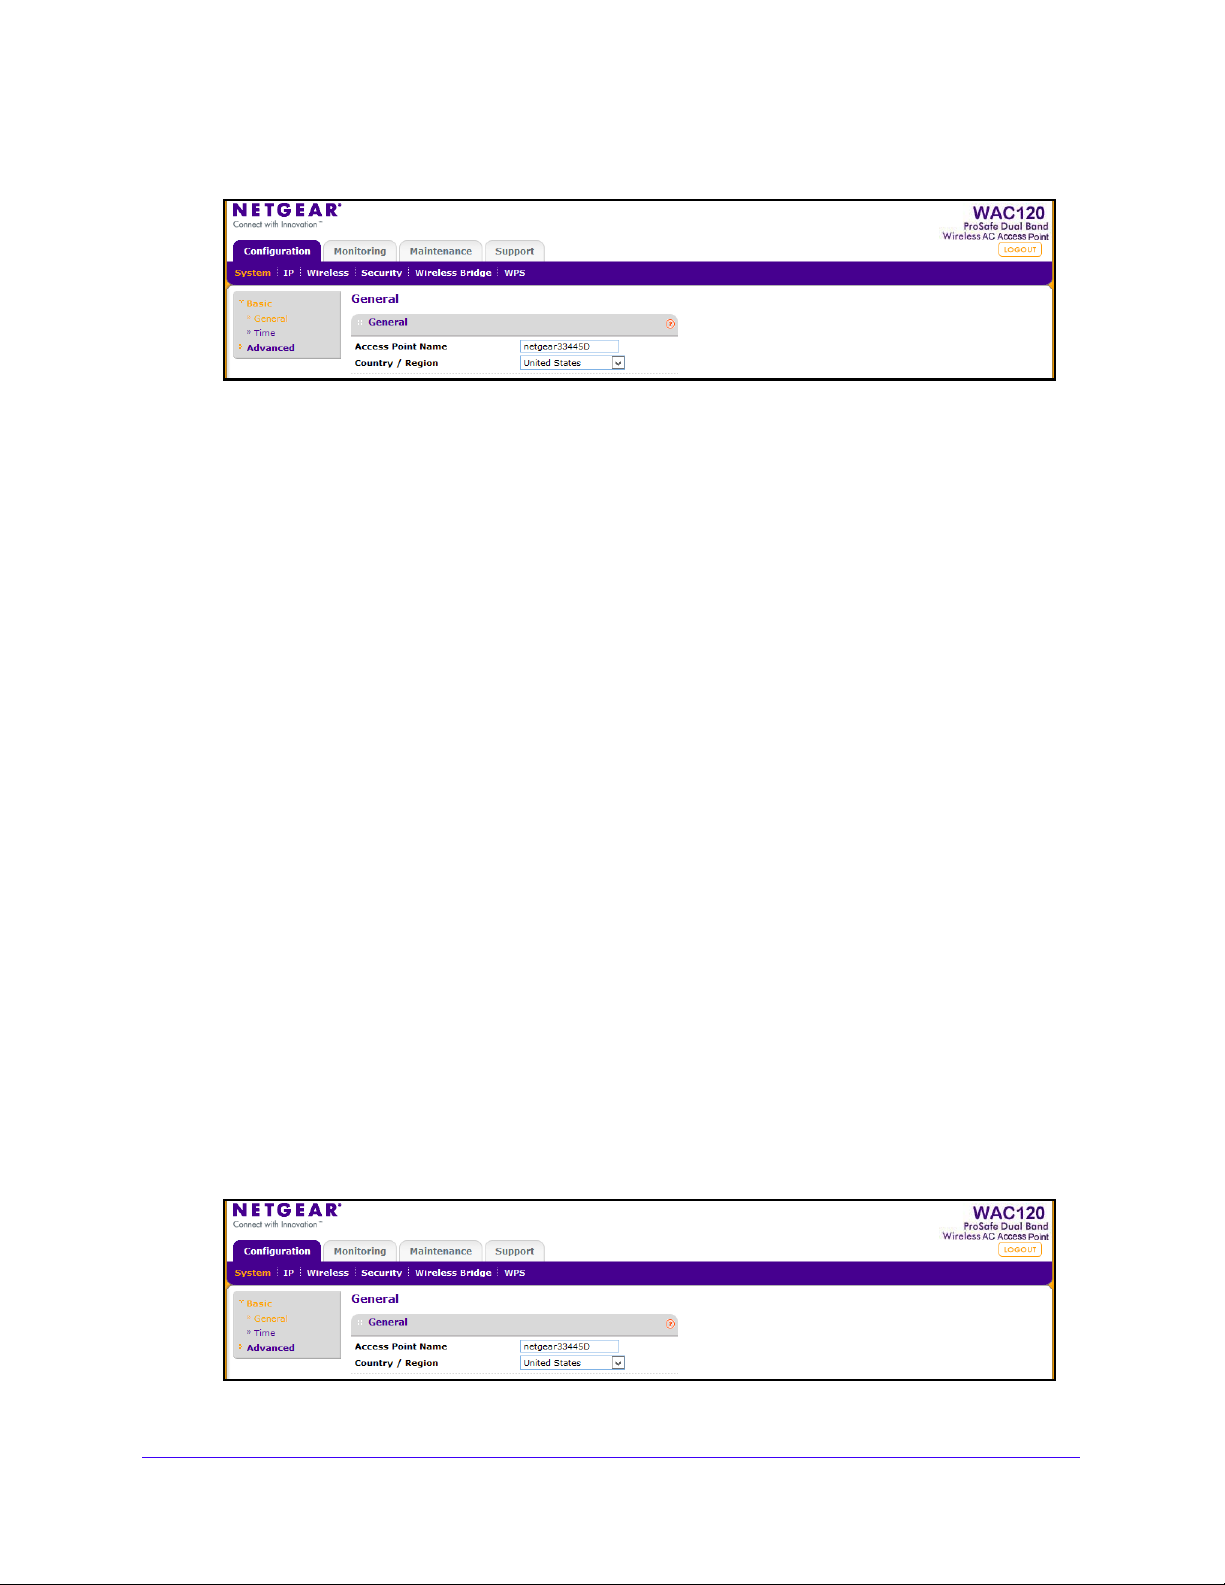
The General screen displays.
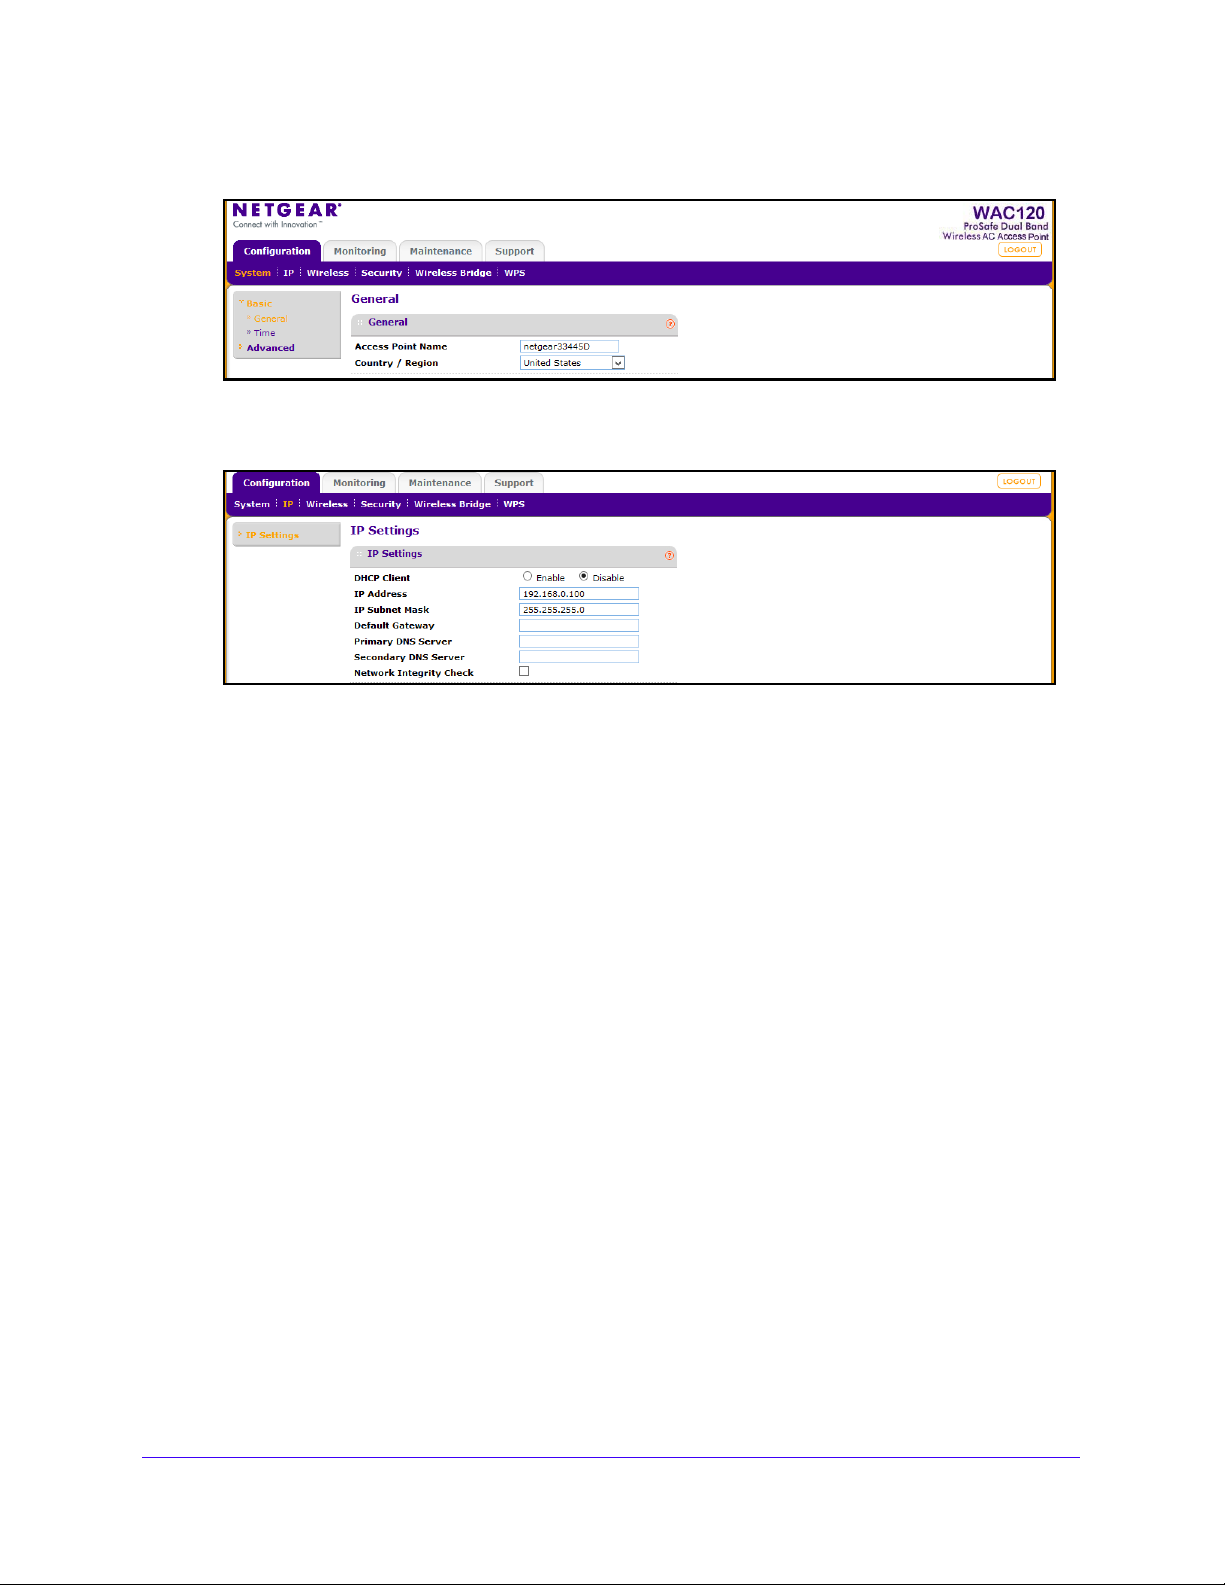
4. Select Configuration > IP.
The IP Settings screen displays.
5. If necessary, specify the following settings:
• DHCP Client. By default, the Dynamic Host Configuration Protocol (DHCP) client is
disabled. If your L
AN includes a DHCP server and you enable DHCP, the access
point gets its IP address, subnet mask, and default gateway settings automatically
from the DHCP server on your network when you connect the access point to your
LAN.
• IP Address. The IP address of your access p
oint. The default IP address is
192.168.0.100. To change it, enter an unused IP address from the address range
used on your LAN, or enable DHCP.
• IP Subnet Mask. The access point
calculates the subnet mask based on the IP
address that you assign. Otherwise, you can use 255.255.255.0 (the default) as the
subnet mask.
• Default Gateway. The IP address o
f the gateway for your LAN. For more complex
networks, enter the address of the router for the network segment to which the access
point is connected. The default is 0.0.0.0.
• Pri
mary DNS Server. The IP address for
the primary Domain Name Server used by
stations on your LAN. The default is 0.0.0.0.
• Secondary DNS Server.Th
e IP address for the secondary Domain Name Server
used by stations on your LAN. The default is 0.0.0.0.
6. Click the Apply
button.
Your settings are saved.
If you changed the subnet of the LAN IP address, you are disconnected from the access
point user interface
. To reconnect, reconfigure your computer with a static IP address within
the new LAN IP subnet.
Initial Setup
16
Page 17
802.11ac Wireless Access Point Model WAC120
Set Up and Test Wireless Connectivity
This section covers the following topics:
• Basic Wireless Settings
• Wireless On-Off Schedule
• Wireless Security Options
• Wireless Security Profiles
• MAC Authentication
• Connect Stations to the Wireless Access Point
You must use a computer that is configured with a static IP addre
subnet mask of 255.255.255.0. During initial setup, use a wired Ethernet connection from the
computer to the access point.
ss of 192
.168.0.210 and a
Basic Wireless Settings
To configure the basic wireless settings:
1. Launch a web browser on the computer that is connected to the access point.
2. Enter http://1
A login prompt displays.
3. Enter the user name and password.
The user name is
The General screen displays.
92.168.0.100 in the address field of the browser.
admin and t
he default password is password.
4. Select Configuration > System.
5. Verify that the correct country or region is selected.
6. If you changed the setting, click the Appl
Your settings are saved.
y button.
Initial Setup
17
Page 18
802.11ac Wireless Access Point Model WAC120
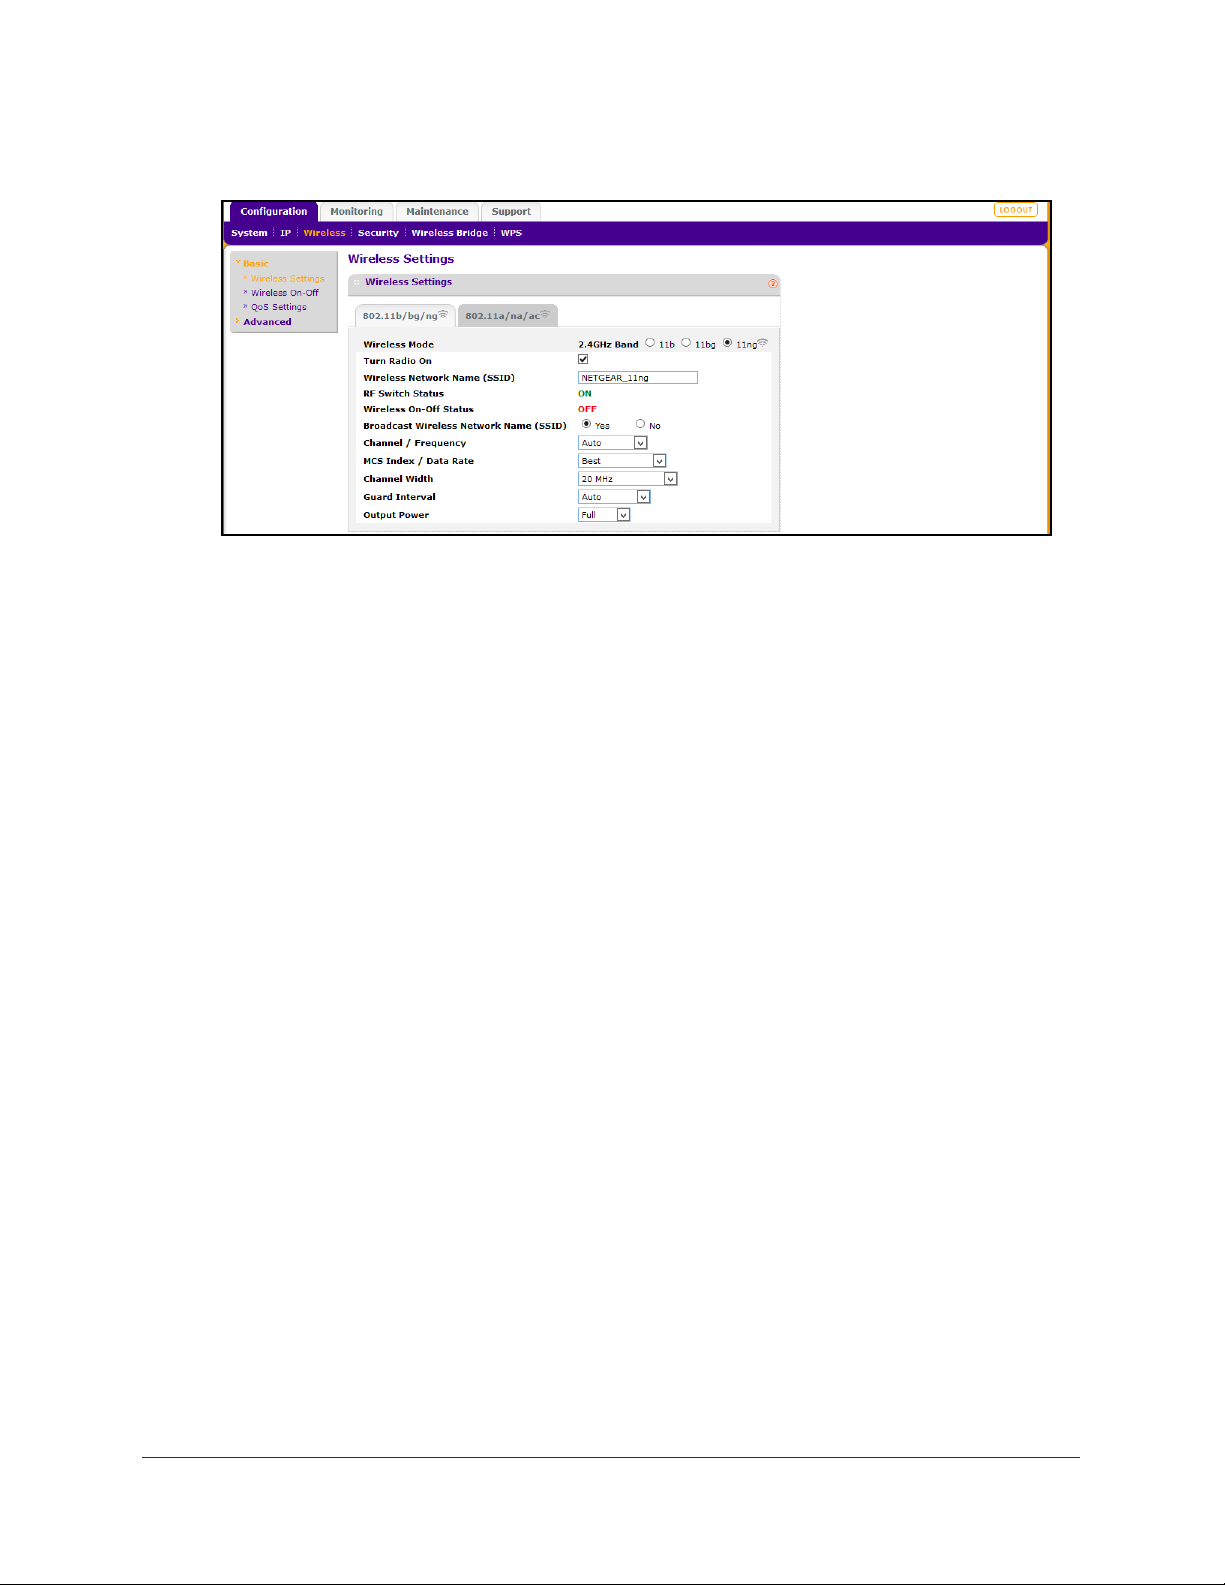
7. Select Configuration > Wireless.
Change any of the default settings that you want to change.
8. Select a Wi
• 11b. All 802.11b wireless stations can
reless Mode radio button:
be used. (The 802.11g wireless stations can
still be used if they can operate in 802.11b mode.)
• 11bg. Both 802.11b and 802.11g wireless stations can be used.
• 11ng. All 11b, 11g, and 11ng wireless stations can be used. This is th
select this option, then two additional lists, Channel Width and Guard Interval,
display.
Note: If you select a wireless mode option and other settings on this s
are disabled, then you must select the Turn Radio On check box to
enable options on this screen.
9. Select the Tu
rn Radio On check box.
This check box is selected by default. You can also turn off the radio to disable
through this device. This can be helpful for configuration, network tuning, or
troubleshooting activities. The following information displays:
h St
• RF Switc
atus. This field displays the status of the hardware RF switch that is
available on the access point. When the RF switch is enabled, this field shows ON in
green. When the RF switch is disabled, it shows OFF in red and users cannot change
any wireless parameter.
• Wireless On-Off Status. T
his field displays the status of the Wireless On-Off feature.
When this feature is enabled, this field shows ON in green and users cannot change
the radio status. When this feature is disabled, it shows OFF in red.
e defau
creen
lt. If you
access
For information about how to turn the wireless radio on and off accor
see Wireless On-Off Schedule on page 20.
Enter a wireless network name in the Wi
10.
reless Network Name (SSID) field.
This is the name of your wireless network. It is set to the default name
for 802.11a/n devices and NETGEAR_11ng for 802.11b/g/n devices.
Initial Setup
18
ding to a sched
ule,
of NETGEAR_11a
Page 19

802.11ac Wireless Access Point Model WAC120
Note: The SSID of any wireless client must match the SSID you configured
in the access point. If they do not match, you cannot get a wireless
connection.
11. Select the Broadcast Wireless Network Name (SSID) Ye
If you disable broadcast of the SSID, only devices that use the c
s radio button.
orrect SSID can connect.
This nullifies the wireless network discovery feature of some products such as Windows
XP, but the data is still fully exposed to a determined snoop using specialized test
equipment like wireless sniffers. By default, the Yes radio button is selected.
12. Ensure that the Auto
is selected in the Channel / Frequency list. This feature selects a
channel that ensures the least interference.
You do not need to change the wireless channel unless you notice interferen
ce or are
near another wireless access point. Select a channel that is not being used by any other
wireless networks within several hundred feet of your access point.
The wireless channel in use can be from 1 to 11 for the United St
ates and Canada, or 1 to
13 for Europe and Australia. The default is Auto.
Do not change the wireless channel unless you experience interferen
ce (shown b
connections or slow data transfers). If this happens, you might need to experiment with
different channels to see which is the best. If you select the Auto channel option, the
access point automatically picks the channel with the least interference. When selecting
or changing channels, bear these points in mind:
oint
• Access p
s use a fixed channel. You can select the channel used. This allows you
to select a channel that provides the least interference and best performance. In the
United States and Canada, 11 channels are available.
• If you are using multiple access points, it is better if adjacent access p
oints use
different channels to reduce interference. NETGEAR recommends channel spacing
between adjacent access points of 5 channels (for example, use Channels 1 and 6, or
6 and 11).
y lost
• Wireless stations usually scan all ch
annels, looking for an access point. If more than
one access point can be used, the one with the strongest signal is used. This can
happen only when the access points use the same SSID.
Note: If you want to use wireless bridging and repeating, you must select a
specific channel for your network. For more information, see Wireless
Bridging and Repeating on page
13. From the list, select the MCS
Index/Data Rate.
You can select the transmit data rate of the wireless network. Depending on
39.
the band
selected, the set of rates varies. (When the auto channel is enabled in the 802.11ng
mode, then the default channel width mode is 20 MHz. In this case, you cannot modify
this parameter unless you change to a static channel.) For the possible supported data
rates, see Technical Specifications on p
14. From the list, select the Channel
Width.
age 70.
Initial Setup
19
Page 20

802.11ac Wireless Access Point Model WAC120
Select the available channel width of the access point. A wider channel improves the
performance, but some legacy devices can operate only on either 20 MHz or 40 MHz.
The following channel width options are available:
• 20 MHz. This is the st
• 40 MHz. This is the st
atic, legacy mode. It gives the least throughput.
atic, high-throughput mode. Legacy clients cannot connect in
this mode.
• 80 MHz. This setting is available f
• 20/40 MHz.
This is the dynamic compatibility mode. Legacy clients can connect to 20
or the 5 GHz band only.
MHz and 11n clients can connect to 40 MHz.
• 20/40/80 MHz. This settin
15. From the list, select the Guard
The guard interval protects from interference from other transmissions. Th
g is available for the 5 GHz band only.
Interval.
e default is
Auto.
16. From
the list, select the Output
This is the transmit power of the access point. The options are Full,
Power.
Half, Quarter, Eighth,
and Minimum. Decrease the transmit power if two or more access points are close
together and use the same channel frequency. The default is Full. The transmit power
might vary depending on the local regulatory regulations.
17. Click the Appl
y button.
Your settings are saved.
18. Configure and test your remaining wireless clients for wireless
connectivity.
Check that they are connected wirelessly and can
obtain an IP address by DHCP from
the access point. Then you can configure the wireless security.
Wireless On-Off Schedule
If you do not want the wireless radio on all the time, you can turn the wireless radio on and off
according to a schedule.
To configure the wireless on-off schedule:
1. Launch a web browser on the computer that is connected to the ac
2. Enter http://192.168.0
.100 in the address field of the browser.
A login prompt displays.
3. Enter the user name and password.
ser name is adm
The u
in and the default password is password.
cess point.
Initial Setup
20
Page 21
802.11ac Wireless Access Point Model WAC120
The General screen displays.
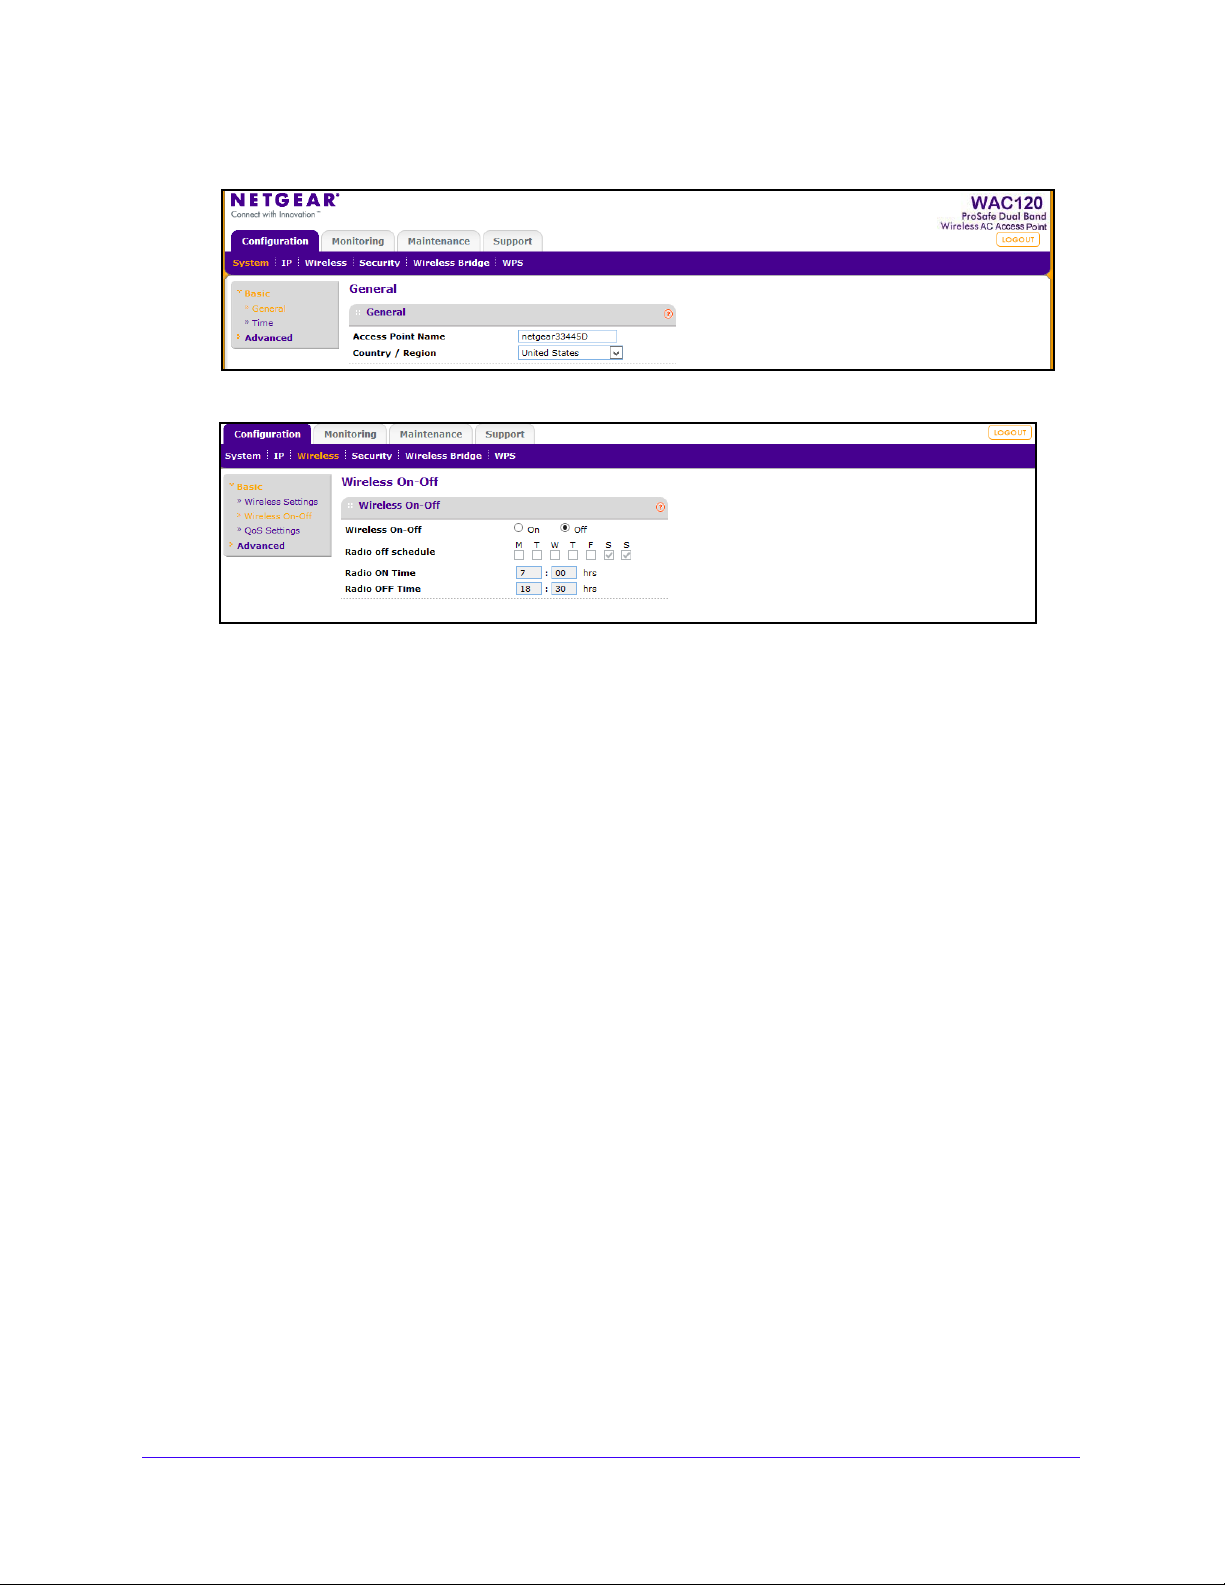
4. Select Configuration > Wireless > Basic > Wireless On-Off.
5. To enable the wireless on-off schedule, select the Wireless On-Off On radio button.
To disable the schedule, select the Off radio button.
6. To
select the days of the week when you want the wireless radio t
off schedule check boxes that correspond to those radio-off days.
7. To select the time of day when the wireless radio is to turn on, in the Radio
enter the hour and minute.
8. To select the time of day when the wireless radio is to turn off,
enter the hour and minute.
9. Click the Apply
Your settings are saved.
button.
o be off, select the Radio
ON Time field,
in the Radio OFF Time field,
Wireless Security Options
Anyone with a compatible wireless adapter can receive your wireless data transmissions well
beyond your walls. For this reason, use the security features of your wireless equipment. The
access point provides highly effective security features, which are covered in detail in this
chapter. Deploy the security features appropriate for your needs.
You can enhance the security of your wireless network in several ways:
• Use
the WPA2 or WPA security option. A security option is the type of
applied to your wireless network. The security protocol encrypts data transmissions and
ensures that only trusted devices receive authorization to connect to your network.
Several types of encryption are available: Wi-Fi Protected Access II (WPA2), WPA, and
Wired Equivalent Privacy (WEP).
security protocol
- WPA2 is the latest and most secure. NETGEAR recommends that you u
if your equipment supports it.
Initial Setup
21
se this option
Page 22

802.11ac Wireless Access Point Model WAC120
- WEP and TKIP provide only legacy (slower) rates of operation. NETGEAR
recommends AES encryption so that you can use the 11n rates and speed.
For more information, see Wireless Security Profiles on p
• Connect st
window of two minutes for a WPS-capable wireless client to join your network. Once the
connection is made, the intruder can learn your wireless security settings and rejoin your
network at a later time. For more information, see Connect Stations to the Wireless
Access Point on page 26.
• Keep watch over your wire
are allowed to connect to your access point and make sure that all of them are legitimate.
For more information, see View Available Wireless Stations on page 57.
• Change the login
intruder can more easily figure out how to log in to the management interface of the
access point and change the settings. For more information, see Change the admin
Password on p
Note: For additional wireless security, you can change the default network
• Turn off the wireless radio. Durin
wireless radio. For more information, see Wireless On-Off Schedule on page 20
• Turn off the broadcast of the wireless network name (SSID). If you disable broadcast
of the
wireless network discovery feature of some products such as Windows XP, but the data is
still fully exposed to a determined snoop using specialized test equipment like wireless
sniffers. For more information, see Wireless Security Profiles on p
• Restrict access b
computers so that unknown computers cannot connect wirelessly to the access point.
MAC address filtering adds an obstacle against unwanted access to your network. For
more information, see MAC Authentication on p
ations manually. When you initiate a WPS connection, you provide a short
less network. Regularly monitor the wireless stations that
password regularly. When you use the default login password, an
age 49.
key regularly. But whenever you change the network key, you must
reconnect all of the wireless devices. For more information, see
Wireless Security Profiles on page 22.
g the hours when your offices are closed, turn off the
SSID, only devices that use the correct SSID can connect. This nullifies the
ased on MAC address. You can restrict access to only trusted
age 24.
age 22
.
.
age 22.
Wireless Security Profiles
Details of each wireless network are contained in a security profile. You can edit up to eight
security profiles for each SSID. Each security profile contains the following information:
• Pro
• SSID. This is the current SSID associated with this profile.
• Security. This is the curre
file name. This is the unique profile name. This value can be up to 32 alphanu
characters.
nt security standard, such as WPA-PSK, associated with the
profile.
Initial Setup
22
meric
Page 23

802.11ac Wireless Access Point Model WAC120
To edit the security profile settings:
1. Launch a web browser on the computer that is connected to the access point.
2. Enter http://1
92.168.0.100 in the address field of the browser.
A login prompt displays.
3. Enter the user name and password.
The user name is
admin and t
he default password is password.
The General screen displays.
4. Select Configuration > Security.
For initial configuration and testing, the Security field for Profile 1 (the default profile) is
set to Open System and the SSID is set to NETGEAR_11ng (for information about how to
configure a profile, see Basic Wireless Settings on page 17
).
Note: The SSID of any wireless client must match the SSID you configured
in the access point. If th
ey do not match, you cannot get a wireless
connection.
5. Select the profile that you want to change and click the Edit
Initial Setup
23
button.
Page 24

802.11ac Wireless Access Point Model WAC120
The fields that display depend on the settings.
6. To change the wireless network name, in the W
Ireless Network Name (SSID) field, enter
the new wireless network name.
7. To broadcast the wireless network name, select the Broadcast Wireless
Network Name
(SSID) Yes radio button.
8. In the Network
Authentication list, select the authentication type:
• Open System. This selection can be used with WEP encryption or no encryption.
• WPA2-PSK. Sele
ct this option only if all clients support WPA2. If you select this
option, you must use AES and TKIP + AES encryption and enter the WPA
passphrase (network key).
• WPA-PSK and WPA2-PSK.
This selection allows clients to use either WPA (with
TKIP) or WPA2 (with AES). If you select this option, you must use TKIP + AES
encryption and enter the WPA passphrase (network key).
9. In the Dat
The options available for data encryption depend on the the option yo
a Encryption list, select the data encryption type.
u select in the
Network Authentication list.
• None. No encryption
• 64 bits WEP.
Standard WEP encryption, 40/64-bit encryption is used.
• 128 bits WEP. S
• 152 bits WEP. Proprie
is used.
tandard WEP encryption, 104/128-bit encryption is used.
tary mode, works only with other wireless devices that support
this mode is used.
• AES.
This is the standard encryption method for WPA2. Some clients support AES
with WPA, but this access point does not.
• TKIP + AES. This set
ting supports both WPA and WPA2. Broadcast packets use
TKIP. For unicast (point-to-point) transmissions, WPA clients use TKIP, and WPA2
clients use AES.
10. In the W
ireless Client Security Separation list, specify if you want the associated wireless
clients to be able to communicate with each other.
If you select Enable, the associat
ed wireless clients cannot communicate with each
other. This feature is intended for hotspots and other public access situations.
11. Click
the Appl
y button.
Your settings are saved.
MAC Authentication
For an additional layer of security, you can allow only trusted stations to interact with the
access point.
To configure MAC authentication:
1. Launch a web browser on the computer that is connected to the ac
Initial Setup
24
cess point.
Page 25

802.11ac Wireless Access Point Model WAC120
2. Enter http://192.168.0.100 in the address field of the browser.
A login prompt displays.
3. Enter the user name and password.
The user name is
admin and t
he default password is password.
The General screen displays.
4. Select Configuration > Security > Advanced > MAC Authentication.
5. To enable MAC authentication, select the Turn Access Control On check box.
6. Select a database from the Select
Access Control Database list.
The access point uses the local MAC address table for access control.
The Trusted Wireless Stations list displays the trusted wireless stations.
7. To add a station to the Trusted Wireless Stations list, enter its
MAC access in the MAC
Address field and click the Add button.
8. To delete a station from the Trusted Wireless Stations list, select the station that you want to
delete and
9. To view the available wireless stations in the area, select check box in the A
click the Delete button.
vailable Wireless
Stations list and click the Refresh button.
The wireless stations in the area display.
10. To add an available wireless station to the Trusted Wireless Stations
list, select the station
that you want to add and click the Move button.
The wireless station displays on the Trusted Wireless Stations list.
11.
Click the Apply
button.
Initial Setup
25
Page 26

802.11ac Wireless Access Point Model WAC120
Your settings are saved.
Connect Stations to the Wireless Access Point
Connect wireless devices such as desktops, laptops, smartphones, and tablets to your
access point. You can connect these WiFi devices either manually or using the WPS (Wi-Fi
Protected Setup) method.
Manual Method
To connect WiFi devices manually to your access point:
1. From your wireless device, view the available wireless networks.
For more information
2. From the list of available wireless networks, select the wireless
access point.
The SSID is printed on the product label.
3. From your wireless device, initiate a wireless connection.
For more information
4. When prompted by your wireless device, enter the wireless network
access point.
The password is printed on the product label.
5. From the screen of your wireless device, click the appropriate butt
connection procedure.
You are connected wirelessly to the access point.
6. Repeat St
access point.
ep 1 through Step 5 for each wireless device that you want to connect to the
, see the manual that c
, see the manual that c
ame with your device.
network name (SSID) of the
ame with your device.
key (password) of the
on to continue the
Wi-Fi Protected Setup Method
Wi-Fi Protected Setup (WPS) is a standard for easily adding computers and other devices to
a wireless network while maintaining security. To use WPS, make sure that all wireless
devices to be connected to the network are Wi-Fi certified and support WPS.
For the access point, WPS is disabled by default. When WPS is enabled
security settings to use when WPS connects wireless clients with the access point.
• Use a wireless client’
wireless security settings of the access point by using the access point’s 8-digit wireless
PIN that is on the label and WPS Settings screen. With this approach, users must make
sure that all wireless clients on the network use the same security settings.
• Use the access
wireless settings of the wireless clients. This approach ensures that each wireless client’s
security settings match the security settings of the access point.
point’s security settings. The access point configures the SSID and
s security settings. A wireless client configures the SSID and
Initial Setup
26
, you decide which
Page 27

802.11ac Wireless Access Point Model WAC120
To enable WPS, MAC authentication must be in its default state of disabled. For more
information, see MAC Authentication on page 24.
To configure WPS:
1. Launch a web browser on the computer that is connected to the access point.
2. Enter http://1
92.168.0.100 in the address field of the browser.
A login prompt displays.
3. Enter the user name and password.
The user name is
admin and t
he default password is password.
The General screen displays.
4. Select Configuration > WPS.
5. To enable WPS, select the WPS Enable radio button.
WPS is enabled.
6. To disable the access point’s PIN, select the Disable
AP’s PIN check box.
The wireless client cannot use the access point’s PIN to connect to the access poi
7. To keep the existing access point’s wireless settings when a wireless
client uses WPS to
connect to the access point, select the Keep Existing Wireiess Settings check box.
Whether you use the access point’s PIN or wireless client’s PIN to
initiate the connection,
the access point’s preconnection wireless settings stay the same. The client’s wireless
settings change to the access point’s wireless settings after the connection.
8. Click the Apply
button.
Your settings are saved.
To connect WiFi devices to your access point with WPS:
1. Launch a web browser on the computer that is connected to the access point.
2. Enter http://1
92.168.0.100 in the address field of the browser.
Initial Setup
27
nt.
Page 28

802.11ac Wireless Access Point Model WAC120
A login prompt displays.
3. Enter the user name and password.
The us
er name is admi
n and the default password is password.
The General screen displays.
4. Select Configuration > WPS > Add WPS Client.
5. Click the Next button.
6. Select one of the following radio buttons:
• Push Button (recommended). Click the
Within two minutes, go to the wireless client and press its WPS button to join the
network without entering a password.
button.
Initial Setup
28
Page 29

802.11ac Wireless Access Point Model WAC120
• PIN Number. Select the PIN Number radio button and enter the wireless client’s
security PIN in the field that displays. Click the Next button.
Within two minutes, go to the wireless device and use its WPS software to join the
network without entering a password. For more information, see the manual that
came with your device.
The access point attempts to add the WPS-capable wireless device. The WiFi LED on
t
he access point blinks slowly, green for three seconds, then off for three seconds. The
WiFi LED on the access point blinks green when the computer or WiFi device connects to
your access point and the access point WPS screen displays a confirmation message.
7. Repeat Ste
p 6 for each wireless device that you want to connect to the access point.
QoS Settings
Wireless Multimedia (WMM) is a subset of the 802.11e standard. WMM allows wireless traffic
to receive a range of priorities, depending on the type of data. Time-dependent information,
such as video or audio, receives a higher priority than normal traffic. For WMM to function
correctly, wireless clients must support WMM. Wi-Fi Multimedia (WMM) is enabled by default
in the access point.
You must use a computer that is configured with a static IP addre
subnet mask of 255.255.255.0. During initial setup, use a wired Ethernet connection from the
computer to the access point.
To change the QoS settings:
1. Launch a web browser on the computer that is connected to the access point.
2. Enter http://1
A login prompt displays.
3. Enter the user name and password.
The user name is
92.168.0.100 in the address field of the browser.
admin and t
he default password is password.
ss of 192
.168.0.210 and a
Initial Setup
29
Page 30

802.11ac Wireless Access Point Model WAC120
The General screen displays.
4. Select Configuration > Wireless > Basic > QoS Settings.
5. Select the Enable Wi-Fi Multimedia (WMM) Enable or Disable radio button.
6. Select the WMM Powersave Enable o
7. Click the Apply
Your settings are saved.
button.
r Disable radio button.
Deploy the Access Point
Before mounting the access point in a high location, first set up and test the access point to
verify wireless network connectivity.
By default, the DHCP client is disabled in the access point. If your ne
addre
sses, you must change this setting. To connect to the access point after the DHCP
server on your network assigns it a new IP address, enter the access point name in your web
browser. The default name is netgearxxxxxx, where xxxxxx represents the last 6 bytes of the
MAC address. The default name is printed on the product label.
To deploy the access point:
1. Disconnect th
access point where it will be deployed.
The best location is elevated, such as on a wall or ceiling or on the
center of your wireless coverage area, and within line of sight of all the mobile devices.
e access point from the computer that you used to configure it, and put the
twork uses dynamic IP
top of a cubicle, at the
2. Connect an Ethern
hub.
3. Connect the
power outlet. The Power and LAN LEDs light, and the WLAN LED blinks.
et cable from your access point to a LAN port on your router, switch, or
power adapter to the wireless access point, and plug the power adapter into a
Initial Setup
30
Page 31

802.11ac Wireless Access Point Model WAC120
Position Your Access Point
The access point lets you access your network anywhere within the operating range of your
wireless network. However, the operating distance or range of your wireless connection can
vary significantly depending on the physical placement of your access point. For example,
the thickness and number of walls the wireless signal passes through can limit the range.
Additionally, other wireless access points in and around your location migh
access point’s signal. Wireless access points are access points, repeaters, WiFi range
extenders, or any other device that emits a wireless signal for network access.
Position your access point according to the following guidelines
• Place your access point near the center of the area where your computers and other
evices operate and within line of sight to your wireless devices.
d
• Make sure that t
cables for wired computers.
• Place the access point in an elevated location, minimizing the number walls and ceilings
b
etween the access point and your other devices.
• Place the access point away from electrical devices such as these:
- Ceiling fans
- Home security systems
- Microwaves
- Computers
- Base of a co
- 2.4 GHz cordless phone
• Place the access point away from large metal surfaces, large glass su
walls, and items such as these:
he access point is within reach of an AC power outlet and near Ethernet
rdless phone
t affect your
rfaces, insulated
- Solid meta
- Aluminum s
- Fish tanks
- Mirrors
- Brick
- Concrete
• (Optional) If yo
reduce interference.
l doors
tuds
u
use adjacent access points, use different radio frequency channels to
Initial Setup
31
Page 32

3. Network Settings
This chapter covers the following topics:
• Set Up an 802.1Q VLAN
• Advanced Wireless Settings
• Advanced QoS Settings
• Wireless Bridging and Repeating
3
32
Page 33

802.11ac Wireless Access Point Model WAC120
Set Up an 802.1Q VLAN
A Spanning Tree Protocol provides network traffic optimization in locations where multiple
access points are present. The 802.1Q VLAN protocol on the access point separates traffic
logically on the same physical network. The following choices are available:
• Unt
• Management VLAN. Use management VLANs to manage Telnet, SNMP, and HTTP
To set up an 802.1Q VLAN:
agged VLAN. You can allow one VLAN to be configured as an untagged VLAN.
When th
Ethernet LAN interface, these frames are untagged. When the access point receives
untagged traffic from the Ethernet LAN interface, these frames are assigned to the
untagged VLAN. Otherwise, the access point tags all outgoing Ethernet LAN frames and
accepts only incoming frames that are tagged with known VLAN IDs.
Note: You lose IP connectivity when the hubs and switches on your network
traffic to and from the access point. Frames belonging to the management VLAN are not
given any 802.1Q header when sent over the trunk. When a port is in a single VLAN, the
port can remain untagged. But when the port must be a member of multiple VLANs, the
port must be tagged.
e access point sends frames associated with the untagged VLAN out from the
are not yet configured with the corresponding VLANs. Use untagged
VLANs only when the hubs and switches on your LAN support the
802.1Q VLAN standard. Change the default untagged VLAN value
only when the hubs and switches on your LAN support the 802.1Q
VLAN standard.
1. Launch a web browser on the computer that is connected to the access point.
2. Enter http://1
A login prompt displays.
3. Enter the user name and password.
The user name is
The General screen displays.
92.168.0.100 in the address field of the browser.
admin and t
he default password is password.
Network Settings
33
Page 34

802.11ac Wireless Access Point Model WAC120
4. Select Configuration > System > Advanced > General.
5. Select the Spanning Tree Protocol Enable or Disable radio button.
6. To require all VLANs to be configured as tagged VLANs, clear the Un
box.
tagged VLAN check
7. To change the untagged VLAN value, enter the new value in the Unt
8. To change the number of management VLANs, enter the new value in the Manageme
VLAN field.
9. Click the Apply
Your settings are saved.
button.
agged VLAN field.
Advanced Wireless Settings
The default wireless LAN parameters usually work well. However, you can use these settings
to fine-tune the overall performance of your access point for your environment.
To configure advanced wireless settings:
1. Launch a web browser on the computer that is connected to the acc
2. Enter http://192.168.0.
A login prompt displays.
3. Enter the user name and password.
The us
The General screen displays.
er name is admi
100 in the address field of the browser.
n and the default password is password.
ess point.
nt
Network Settings
34
Page 35

802.11ac Wireless Access Point Model WAC120
4. To configure the advanced wireless settings for the 2.4 GHz band, select Configuration >
Wireless > Advanced > Wireless Settings > 802.11b/bg/ng.
5. To change the default settings, enter the appropriate information in the following fields:
• RTS Threshold (0–2347). Request
to Send threshold. The packet size that is used to
determine if the station should use the CSMA/CD (Carrier Sense Multiple Access with
Collision Detection) mechanism or the CSMA/CA (Carrier Sense Multiple
Access/Collision Avoidance) mechanism for packet transmission.
- With the CSMA/CD transmission mechanism, the
transmitting station sends out
the actual packet until the silence period ends.
- With the CSMA/CA transmission mechanism, th
e transmitting station sends out
an RTS packet to the receiving station and waits for the receiving station to send
back a CTS (Clear to Send) packet before sending the actual packet data.
The default is 2347.
ragmentation Length (256–2346). This is the maximum packet size. Packets larger
• F
the size specified in this field are fragmented. The Fragmentation Length value
than
must be larger than the RTS Threshold value. The default is 2346.
• Beacon Interval (100–1000). The time interval b
etween 100 ms and 1000 ms for
each beacon transmission, which allows the access point to synchronize the wireless
network. The default is 100.
• Aggregation Length (102
4 – 65535). The aggregation length defines the size of
aggregated packets. Larger aggregation lengths can sometimes lead to better
network performance. The default is 65535.
• AMPD
single large fra
• RIFS Transmission. R
U. Aggregated MAC Protocol data unit. Aggregates several MAC frames into a
me to achieve higher throughput. The default is enabled.
educed interframe space. RIFS transmissions are shorter than
other interframe spaces, and if this feature is enabled, the access point allows
transmission of successive frames at different transmit powers. The default is
disabled.
• DTIM Interval (1-255). The d
elivery traffic indication message. Specifies the data
beacon rate between 1 and 255. The default is 3.
Network Settings
35
Page 36

802.11ac Wireless Access Point Model WAC120
• Preamble Type. A long transmit preamble can provide a more reliable connection or
a slightly longer range. A short transmit preamble gives better performance. The Auto
setting automatically handles both long and short preambles. The default is Auto.
• 802.11d. Select this check box to include support for additional regulatory domains
that are not
in the current standard.
• Max. Wireless Clients. The maximum number of wireless clients that can connect to
the acce
ss point at one time. The default is 128 per radio.
• Band Stee
ring to 5GHz. Band steering identifies the wireless devices that are
capable of operating in both the 2.4 GHz and 5 GHz bands. The access point
responds to these devices only on the 5 GHz band and allows the dual-band-capable
client to connect to the 5 GHz band rather than the 2.4 GHz band, since more
channels and bandwidth are available on the 5 GHz band and using this band causes
less interference for users.
• Rssi Threshold 2.4G
Hz. The minimum RSSI threshold that a client must use to
connect to a 2.4 GHz access point.
• Rssi Threshold 5GHz. The minimum RSSI thre
shold that a client must use to
connect to a 5 GHz access point.
6. To configure the advanced wireless settings for the 5 GHz band, select Configuratio
Wireless > Advanced > Wireless Settings > 802.11a/ag/na.
n >
7. To change the default settings, enter the appropriate information in the following fields:
• RTS Threshold (0–2347). Reque
st to Send threshold. The packet size that is used to
determine if the station should use the CSMA/CD (Carrier Sense Multiple Access with
Collision Detection) mechanism or the CSMA/CA (Carrier Sense Multiple
Access/Collision Avoidance) mechanism for packet transmission.
- With the CSMA/CD transmission mechanism, the tran
smitting station sends out
the actual packet until the silence period ends.
- With the CSMA/CA transmission mechanism, the tra
nsmitting station sends out
an RTS packet to the receiving station and waits for the receiving station to send
back a CTS (Clear to Send) packet before sending the actual packet data.
The default is 2347.
• Fragmentation
Length (256–2346). This is the maximum packet size. Packets larger
than the size specified in this field are fragmented. The Fragmentation Length value
must be larger than the RTS Threshold value. The default is 2346.
Network Settings
36
Page 37

802.11ac Wireless Access Point Model WAC120
• Beacon Interval (100–1000). The time interval between 100 ms and 1000 ms for
each beacon transmission, which allows the access point to synchronize the wireless
network. The default is 100.
• DTIM Interval (1-255
beacon rate between 1 and 255. The default is 3.
• Max. Wireless Clients.
the access point at one time. The default is 128 per radio.
). The delivery traffic indication message. Specifies the data
The maximum number of wireless clients that can connect to
8. Click the Ap
Your settings are saved.
ply button.
Advanced QoS Settings
Wi-Fi Multimedia (WMM) is a subset of the 802.11e standard. WMM allows wireless traffic to
receive a range of priorities, depending on the type of data. Time-dependent information,
such as video or audio, receive a higher priority than normal traffic. For WMM to function
correctly, wireless stations and clients must support WMM.
For most networks, the default QoS (Quality of Service) queue settings work well. You can
specify p
differentiated wireless traffic, like VoIP, and other types of audio, video, and streaming media,
as well as traditional IP data.
The queues defined for types of data transmitted from access point to s
station to access point are as follows:
• Data 3 (Voice). Highest-priority queue, minimum delay. Time-sensitive data such
• Data 2 (Video). High
• Data 1 (Background). Lowest-priority queue, high throughput. Bulk data that requires
arameters on multiple queues for increased throughput and better performance of
tation and from
and streaming media are automatically sent to this queue.
est-priority queue, minimum delay. Time-sensitive video data is
automatically sent to this queue.
maximu
example).
m throughput and is not time-sensitive is sent to this queue (FTP data, for
as VoIP
• Data 0 (best effort). Medium-priority queue, medium throughput and delay. Most
t
raditional IP data is sent to this queue.
To configure advanced QoS settings:
1. Launch a web browser on the computer that is connected to the access point.
2. Enter http
A login prompt displays.
3. Enter the user name and password.
he user name is admin
T
://192.168.0.100 in the address field of the browser.
and the default password is password.
Network Settings
37
Page 38

802.11ac Wireless Access Point Model WAC120
The General screen displays.
4. Select Configuration > Wireless > Advanced > QoS Settings.
The QoS Setting fields are the same for the 2.4 GHz and 5 GHz bands.
5. To change the default settings of the access point EDCA settings, enter the appropriate
information
in the AP EDCA parameters fields.
The following access point Enhanced Distributed Channel Access (EDCA) parameters
af
fect traffic flowing from the access point to the client station:
• AIFS. The Arbitration Inte
r-Frame Spacing (AIFS) interval specifies, in milliseconds,
the wait time between data frames. Higher AIFS values mean higher priority to that
queue. Valid values for AIFS are 1 through 255.
• CwMin. The
minimu
m contention window (CwMin) value specifies the upper limit (in
milliseconds) of a range from which the initial random back-off wait time is
determined. Decreasing this value increases the priority of the queue. The value for
CwMin must be lower than the value for CwMax. Valid values are 1, 3, 7, 15, 31, 63,
127, 255, 511, and 1024.
• CwMax. The maximum contention
window (CwMax) value specifies (in milliseconds)
the upper limit for the doubling of the random back-off value. Decreasing this value
increases the priority of the queue. The value for CwMax must be higher than the
value for CwMin. Valid values are 1, 3, 7, 15, 31, 63, 127, 255, 511, and 1024.
• Max. Burst. (access point only) The maximum burst value specifies (in milliseconds)
the ma
ximum burst length allowed for packet bursts on the wireless network. A packet
burst is a collection of multiple frames transmitted without header information.
Network Settings
38
Page 39

802.11ac Wireless Access Point Model WAC120
Decreasing this value increases the priority of the queue. Valid values for maximum
burst length are 0.0 through 999.9.
6. To change the default settings of the station EDCA settings, enter
information in the Station EDCA parameters fields.
The following station Enhanced Distributed
traffic flowing from the client station to the access point:
• AIFS. The Arbitration
the wait time between data frames. Higher AIFS values means higher priority to that
queue. Valid values for AIFS are 1 through 255.
• CwMin.
milliseconds) of a range from which the initial random back-off wait time is
determined. Decreasing this value increases the priority of the queue. The value for
CwMin must be lower than the value for CwMax. Valid values are 1, 3, 7, 15, 31, 63,
127, 255, 511, and 1024.
• CwMax. The
the upper limit for the doubling of the random back-off value. Decreasing this value
increases the priority of the queue. The value for CwMax must be higher than the
value for CwMin. Valid values are 1, 3, 7, 15, 31, 63, 127, 255, 511, and 1024.
• TXOP Limit.
milliseconds) when a client station can initiate transmissions on the wireless medium
(WM). Decreasing this value increases the priority of the queue. Valid values for
maximum burst length are 0.0 through 999.9.
7. Click the Ap
The minimum con
ply button.
maximum contention window (CwMax) value specifies (in milliseconds)
The transmission opportunity (TXOP) is an interval of time (in
Inter-Frame Spacing (AIFS) interval specifies, in milliseconds,
tention window (CwMin) value specifies the upper limit (in
Channel Access (EDCA) parameters affect
the appropriate
Your settings are saved.
Wireless Bridging and Repeating
You can use the access point as a component to build large bridged wireless networks. The
following modes are available:
Network Settings
39
Page 40

802.11ac Wireless Access Point Model WAC120
WPS
WiFi On/O
WPS
WiFi On/O
LAN Segment 2
LAN Segment 1
Hub or switch
AP 2
AP1 and AP2 in point-to-point bridge mode with each other
AP 1
Router
• Wireless point-to-point bridge mode. The access point communicates with one other
bridge-mode wireless station. You can associate wireless clients with this access point.
Figure 5. Point-to-point bridge mode
For more information, see Wireless Point-to-Point Bridge Mode on page 41.
Network Settings
40
Page 41

802.11ac Wireless Access Point Model WAC120
W
PS
WiFi On/O
WPS
WiFi On/O
WPS
WiFi On/O
LAN Segment 3
LAN Segment 1
Hub or switch
AP 3
AP 1
Router
AP2 (base station) in point-to-multi-point bridge mode
Hub or switch
AP 2
LAN Segment 2
AP1 and AP3 in point-to-point bridge mode with AP2
(base station)
• Wireless point-to-multi-point bridge mode. The access point serves as the base
station for a group of bridge-mode wireless stations. You can associate wireless clients
with this access point.
Figure 6. Point-to-multi-point-bridge mode
For more information, see Wireless Point-to-Multi-Point Bridge Mode on page 43.
The other bridge-mode wireless stations in the network must be set to point-to-point
ridge mode and use the MAC address of the base station access point. They send all
b
traffic to the base station rather than communicating directly with each other. For more
information, see Wireless Point-to-Point Bridge Mode on page 41.
• Client mode. The
remote access point or peer device. Use client mode to extend the local area network to
those clients that are not connected wirelessly. Client mode supports MAC cloning. For
more information, see Client Mode on page 46
Wireless Point-to-Point Bridge Mode
access point operates as a client bridge only and sends all traffic to the
.
Coordinate the following information ahead of time for each access point:
• MAC addresses. You must know the
network. You can use the 2.4 GHz or 5 GHz band for the wireless bridge, but the 2.4 GHz
and 5 GHz bands of each access point use a unique MAC address.
• Authentication settings. Y
ou must specify the same wireless authentication settings for
each access point in the bridge network. Each access point must use the same ESSID,
MAC address of each access point in the bridge
channel, authentication mode, if any, and security settings.
Network Settings
41
Page 42

802.11ac Wireless Access Point Model WAC120
• LAN address range. Each access point must be configured to operate in the same LAN
network address range as the LAN devices.
• DHCP. If you are using DHCP
automatically. See Configure the Basic IP Settings on pa
, all access points must be set to obtain an IP address
ge 15.
When the wireless bridge is completed, a computer on either LAN segment can connect to
the Internet and share files and
printers with any other computers or servers connected to
LAN Segment 1 or LAN Segment 2.
To configure a point-to-point wireless bridge between two access points:
1. Launch a web browser on the computer that is connected to the fir
2. Enter http://192.168.0.
100 in the address field of the browser.
A login prompt displays.
3. Enter the user name and password.
The us
er name is admi
n and the default password is password.
The General screen displays.
4. Select Configuration > Wireless Bridge.
st access point.
5. Select the band that you want to use for the bridge:
• To set up the bridge on the 2.4 GHz band, click the 802.11b/bg/n
• To set up the bridge on the 5 GHz band, click the 802.11a
6. Select the Enable
7. Select the Wi
8. To enable wireless client association, select the Enable
Wireless Bridging check box.
reless Point-to-Point Bridge radio button.
Wireless Client Association check
box.
Network Settings
42
g tab.
/ag/na tab.
Page 43

802.11ac Wireless Access Point Model WAC120
9. Click the Edit button.
10. In the Remote MAC Address field, enter the MAC address of the other access point.
11. Under Authentication Settings, specify the authentication settings for your bridge network.
12. Click the Apply
Your settings are saved.
13. Configure and verify the following parameters for the access point:
• Verify that
address ran
• Verify that both access points use the same ESSID, channel, authentication mode, if
any
, and security settings.
14. Repeat Ste
15. Verify connectivity across LAN 1 and LAN 2.
A computer on eith
printer
Segment 2.
s with any other computers or servers connected to LAN Segment 1 or LAN
button.
both access points are configured to operate in the same LAN network
ge as the LAN devices.
p 1 through Step 13 for the second access point.
er LAN segment can connect to the Internet and share files and
Wireless Point-to-Multi-Point Bridge Mode
In a multi-point wireless bridge, one of the wireless stations is designated as the base station
and configured in wireless point-to-multi-point bridge mode. All of the other access points in
the wireless bridge are configured in wireless point-to-point bridge mode. You can connect up
to four access points to the base station access point.
Coordinate the following information ahead of time for each access point:
• Base station. Sele
points in the wireless bridge network must use the MAC address of the base station.
• MAC addresses. You must know the
network. You can use the 2.4 GHz or 5 GHz band for the wireless bridge, but the 2.4 GHz
and 5 GHz bands of each access point use a unique MAC address.
• Authentication settings. Y
each access point in the bridge network. Each access point must use the same ESSID,
channel, authentication mode, if any, and security settings.
• LAN address range. Each
network address range as the LAN devices.
ct the access point that serves as the base station. The other access
MAC address of each access point in the bridge
ou must specify the same wireless authentication settings for
access point must be configured to operate in the same LAN
Network Settings
43
Page 44

802.11ac Wireless Access Point Model WAC120
• DHCP. If you are using DHCP, all access points must be set to obtain an IP address
automatically. For more information, see Configure the Basic IP Settings on page 15
.
When the wireless bridge is completed, a computer on either LAN segment can connect to
the Internet and share files and
printers with any other computers or servers connected to
LAN Segment 1 or LAN Segment 2.
You can extend this multi-point bridging by addin
g additional access points configured in
point-to-point bridge mode for each additional LAN segment. You can also extend the range
of the wireless network with NETGEAR wireless antenna accessories.
To configure a point-to-multi-point wireless base station:
1. For the first access point (AP 1) on LAN Segment 1, launch a web bro
wser on a
computer that is connected to the access point.
1. On the base station access point, launch a web browser on the computer that is
connect
2. Enter http://192.168.0.
ed to it.
100 in the address field of the browser.
A login prompt displays.
3. Enter the user name and password.
The us
er name is admi
n and the default password is password.
The General screen displays.
4. Select Configuration > Wireless Bridge.
5. Select the band that you want to use for the bridge:
• To set up the bridge on the 2.4 GHz band, click the 802.11b/bg/n
• To set up the bridge on the 5 GHz band, click the 802.11a
6. Select the Enable
Wireless Bridging check box.
Network Settings
44
g tab.
/ag/na tab.
Page 45

802.11ac Wireless Access Point Model WAC120
7. Select the Wireless Point-to-Multi-Point Bridge radio button.
8. To enable wireless client association, select the Enable Wireless Client Association check
box.
9. Select the radio button for the first access point that you want t
o connect to the base station
and click the Edit button.
10. In the Remote MAC Address field, enter the MAC address of the other access point.
11. Under Authentication Settings, specify the authentication settings for your bridge network.
12. Click the Ap
ply
button.
Your settings are saved.
13. Select the radio button for the next access point that you want t
o connect to the base station
and click the Edit button. Repeat Step 10 through Step 12 for this next access point.
14. Repeat Ste
p 13 for each of the remaining access points that you want to connect to the
base station.
You can specify up to four access points that connect to the base stati
15. For each access point that you want to allow to connect to the base
on access point.
station access point,
select its Enable check box.
16. Click the Apply
button.
Your settings are saved.
17. Configure each access point that is to connect to the base station access
point in wireless
point-to-point bridge mode.
For more information, see Wireless Point-to-Point Bridge Mode on page 41
.
18. Verify the following parameters for all access points:
Network Settings
45
Page 46

802.11ac Wireless Access Point Model WAC120
• Only the base station access point is configured in wireless point-to-multi-point bridge
mode and all the other access points are in wireless point-to-point bridge mode.
• For all point-to-point access point, the MAC address of the base station a
ccess point
must be specified in their Remote AP MAC Address fields.
• All access points are con
figured to operate in the same LAN network address range
as the LAN devices.
• All access points use the same SSID, ch
annel, authentication mode, if any, and
encryption.
• If you are using DHCP, all the access point
s must be set to obtain an IP address
automatically. For more information, see Configure the Basic IP Settings on page 15
19. Verify connectivity across the LANs:
• A computer on an
y LAN segment can connect to the Internet and share files and
printers with any other computers or servers connected to any of the other LAN
segments.
• The wireless stations that you enable can connect to the access points. If you require
wireless statio
ns to access any LAN segment, you can add additional access points
configured in wireless bridge mode to any LAN segment.
.
Client Mode
In client mode, the access point operates as a client bridge only and sends traffic to the
selected remote access point or peer device.
To configure the access point for client mode:
1. Launch a web browser on a computer that is connected to the access point.
Enter http://192.168.0.
2.
A login prompt displays.
3. Enter the user name and password.
The us
er name is admi
The General screen displays.
100 in the address field of the browser.
n and the default password is password.
Network Settings
46
Page 47

802.11ac Wireless Access Point Model WAC120
4. Select Configuration > Wireless Bridge.
5. Select the band that you want to use for the bridge:
• To set up the bridge on the 2.4 GHz band, click the 802.1
1b/bg/ng tab.
• To set up the bridge on the 5 GHz band, click the 802.1
6. Select the Enable
7. Select the Client radio
Wireless Bridging check box.
button.
1a/ag/na tab.
8. Enable the MAC clone feature.
The Disable radio button is selected by default. If you enable the MAC clone feature,
enter th
9. Click the Apply butt
e MAC clone address.
on.
Your settings are saved.
Network Settings
47
Page 48

4. Manage the Access Point
This chapter covers the following topics:
• Change the admin Password
• Upgrade the Firmware
• Manage the Configuration File
• Enable a Syslog Server
4
48
Page 49

802.11ac Wireless Access Point Model WAC120
Change the admin Password
The default password for admin is password. NETGEAR recommends that you change this
to a more secure password.
To change the admin password:
1. Launch a web browser on the computer that is connected to the access point.
2. Enter http://1
A login prompt displays.
3. Enter the user name and password.
92.168.0.100 in the address field of the browser.
The user name is
The General screen displays.
4. Select Maintenance > Password > Change Password.
5. Type the password in the Current Password field.
6. Type the new password in the New Pass
7. To restore the default password, select the Restore Default Password Yes
admin and t
he default password is password.
word field and in the Repeat New Password field.
radio button.
8. Click the Apply
Your settings are saved.
button.
Upgrade the Firmware
The firmware is stored in flash memory and can be updated as NETGEAR releases new
firmware. You can download upgrade files from the NETGEAR website. If the upgrade file is
compressed (.zip file), you must first extract the image (.rmt) file before sending it to the
access point. You can send the upgrade file using your browser.
Manage the Access Point
49
Page 50

802.11ac Wireless Access Point Model WAC120
WARNING:
Note: The web browser must support HTTP uploads.
You cannot perform the software upgrade from a computer that is connected to the access
point wirelessly. You must use a computer that is connected with an Ethernet cable.
When uploading firmware to the access point, do not interrupt the
web browser by closing the window, clicking a link, or loading a
new page. If the browser is interrupted, the upload might fail,
corrupt the software, and render the access point inoperable.
To upgrade the firmware:
1. Download the
new software file from the NETGEAR website, save it to your hard disk,
and unzip it.
Visit http://www.netgear.com.
2. Launch a web browser on the computer that is connected to the access point.
3.
Enter http://192.168.0.
100 in the address field of the browser.
A login prompt displays.
4. Enter the user name and password.
The us
er name is admi
n and the default password is password.
The General screen displays.
5. Select Maintenance > Upgrade > Firmware Upgrade.
6. Click the Browse button and browse to the location of the image (.rmgs) upgrade file.
7. Click the Apply
button.
Manage the Access Point
50
Page 51

802.11ac Wireless Access Point Model WAC120
When the upload is completed, your access point automatically restarts. The upgrade
process typically takes at least three minutes.
Manage the Configuration File
The access point settings are stored in the access point in a configuration file. This file can be
saved (backed up) or restored.
Back Up the Configuration File
To back up the access point settings in a configuration file:
1. Launch a web browser on the computer that is connected to the access point.
2. Enter http
A login prompt displays.
3. Enter the user name and password.
92.168.0.100 in the address field of the browser.
://1
The user name is
The General screen displays.
4. Select Maintenance > Upgrade > Backup Settings.
5. Click the Backup button.
Your browser extracts the configuration file from the access point and prompts you for
location on your computer to store the file.
6. Give the file a meaningful name, such as WAC120.cfg
admin and t
he default password is password.
,and click the Save button.
a
Restore the Configuration File
To restore the access point settings from a saved configuration file:
1. Launch a web browser on the computer that is connected to the access point.
2. Enter http://1
92.168.0.100 in the address field of the browser.
Manage the Access Point
51
Page 52

802.11ac Wireless Access Point Model WAC120
A login prompt displays.
3. Enter the user name and password.
The us
er name is admi
n and the default password is password.
The General screen displays.
4. Select Maintenance > Upgrade > Restore Defaults.
5. Click the Browse button.
You are prompted to select a file where you previously saved configuration settings.
6.
Select the file.
7. Click the Restore but
ton.
The file uploads and the access point reboots.
Restore the Factory Default Settings
You can restore the access point to the factory default settings using the Restore Defaults
menu selection, or by using the Reset button.
To restore the factory settings:
1. Launch a web browser on the computer that is connected to the acc
2. Enter http://192.168.0.
100 in the address field of the browser.
A login prompt displays.
3. Enter the user name and password.
The us
er name is admi
n and the default password is password.
ess point.
Manage the Access Point
52
Page 53

802.11ac Wireless Access Point Model WAC120
The General screen displays.
4. Select Maintenance > Reset > Restore Defaults.
5. Select the Yes radio button.
6. Click the Apply
button.
The access point password is password, the access point DHCP client is disa
default LAN IP address is 192.168.0.100, and the access point name is reset to the name
printed on the product label.
bled, the
Enable a Syslog Server
You can enable the syslog option if your LAN includes a syslog server.
To enable a syslog server:
1. Launch a web browser on the computer that is connected to the access point.
2. Enter http
A login prompt displays.
3. Enter the user name and password.
The user name is
The General screen displays.
92.168.0.100 in the address field of the browser.
://1
admin and t
he default password is password.
Manage the Access Point
53
Page 54

802.11ac Wireless Access Point Model WAC120
4. Select Configuration > System > Advanced > SysLog.
5. If your LAN includes a syslog server, select the Enable Syslog check box.
6. In the Syslog
Server IP Address field, type the IP address of your syslog server.
The access point sends all the syslog files to the specified IP address
is enabled. The default is 0.0.0.0.
7. In
the Port N
umber field, type the port number that your syslog server is configured to
use.
The default port number is 514.
8. Click the Apply
button.
Your settings are saved.
if the syslog option
Manage the Access Point
54
Page 55

5. Monitoring
This chapter covers the following topics:
• View System Information
• View Available Wireless Stations
• Activity Log
• View Network Traffic Statistics
5
55
Page 56

802.11ac Wireless Access Point Model WAC120
View System Information
You can view a summary of the current access point configuration settings, including current
IP settings and current wireless settings. This information is read-only, so any changes must
be made on other screens.
To view system information:
1. Launch a web browser on the computer that is connected to the acc
2. Enter http://192.168.0.
A login prompt displays.
3. Enter the user name and password.
The us
The General screen displays.
4. Select Monitoring > System.
er name is admi
100 in the address field of the browser.
n and the default password is password.
ess point.
The following access point information displays:
• Access Point Name.
• Ethernet MAC Address. The MAC address of the a
• Wireless MAC Address for 2.4 GHz. The MAC a
GHz wireless port.
The NetBIOS name. The default name can be changed.
ddress of the access point’s 2.4
Monitoring
56
ccess point’s Ethernet port.
Page 57

802.11ac Wireless Access Point Model WAC120
• Wireless MAC Address for 5 GHz. The MAC address of the access point’s 5 GHz
wireless port.
• Band Steering. Indicates whether band steering is enabled or disabled.
• Country/Region.
It might not be legal to operate this access point in a region other than one of those
identified in this field.
• F
irmware Version. The
• Serial Number. The
• Current Time. T
The following current IPv4 settings information displays:
• IP Address. The
• Subnet Mask. The subnet mask for the access point.
• Default Gateway. The de
• DHCP Client. Enabled
DHCP server on your network. Disabled indicates a static IP configuration.
The following current wireless settings for each wireless band displ
• Operating Mode. Ident
- Access Point
- Point-to-Point Bridge
- Point-to-Point Bridge with Access Point
- Multi-Point Bridge
The domain or region for which the access point is licensed for use.
version of the firmware currently installed.
serial number of the device.
he time setting for the access point.
IP address of the access point.
fault gateway for the access point communication.
indicates that the current IP address was obtained from a
ay:
ifies the 802.11 operating mode of the access point.
• Channel / Frequency. Ide
ntifies the channel that the wireless port is using.
View Available Wireless Stations
You can view all IP devices associated with this access point in the wireless network defined
by the wireless network name (SSID). If your network includes more than one access point
sharing the same SSID, remember that you can view only the wireless stations associated
with this access point.
To view the Available Wireless Stations list:
1. Launch a web browser on the computer that is connected to the access point.
2. Enter http
A login prompt displays.
3. Enter the user name and password.
he user name is admin
T
://192.168.0.100 in the address field of the browser.
and the default password is password.
Monitoring
57
Page 58

802.11ac Wireless Access Point Model WAC120
The General screen displays.
4. Select Monitoring > Wireless Stations.
You can view the MAC address, IP address, BSSID, SSID, channel rate, state, type, AID,
mode, and status (whether the station is allowed to communicate with the access point).
o update the list, click the Refresh
5. T
Note: If the access point reboots,
display until the access point rediscovers the devices. To force the
access point to look for associated devices, click the Refresh button.
button.
the wireless station information does not
Activity Log
You can view a log of the access point system activity.
To display the activity log:
1. Launch a web browser on the computer that is connected to the acc
2. Enter http://192.168.0.
A login prompt displays.
3. Enter the user name and password.
The us
er name is admi
100 in the address field of the browser.
n and the default password is password.
ess point.
Monitoring
58
Page 59

802.11ac Wireless Access Point Model WAC120
The General screen displays.
4. Select Monitoring > Logs.
The Logs screen displays:
5. To update the display, click the Refresh button.
6. To clear the log content, click Clear
To save the log contents in a file on your computer or to save the f
Save As button. The log contents file is saved.
button.
ile to a disk drive, click the
View Network Traffic Statistics
You can view information for both wired (LAN) and wireless (WLAN) interface network traffic.
To view the network traffic statistics:
1. Launch a web browser on the computer that is connected to the access point.
2. Enter http://1
A login prompt displays.
3. Enter the user name and password.
The user name is
92.168.0.100 in the address field of the browser.
admin and t
he default password is password.
Monitoring
59
Page 60

802.11ac Wireless Access Point Model WAC120
The General screen displays.
4. Select Monitoring > Statistics.
The following information is displayed:
• Packets. The numb
er of packets sent and received on the Ethernet port since the
access point was restarted.
• Bytes. The number
of bytes sent and received on the Ethernet port since the access
point was restarted.
• Unicast Pa
ckets. The unicast packets sent and received since the access point was
restarted, shown separately for the 2.4 GHz and 5 GHz bands.
• Broadcast Packets. Th
e broadcast packets sent and received since the access point
was restarted, shown separately for the 2.4 GHz and 5 GHz bands.
• Multicast Packets. The multicast packets sent and received since the access point
was rest
• Total Packets. The wireless packets sent and received since t
arted, shown separately for the 2.4 GHz and 5 GHz bands.
he access point was
restarted, shown separately for the 2.4 GHz and 5 GHz bands.
• Total Bytes. The wireless bytes sent and received since the access point was
restarte
• 802.11ng Radio. The numbe
d, shown separately for the 2.4 GHz and 5 GHz bands.
r of associated clients on the 2.4 GHz band.
• 802.11ac Radio. The number of associated clients on the 5 GHz band.
5. To
update the statistics information for each interface, click the Refresh
button.
Monitoring
60
Page 61

6. Troubleshooting and Debugging
This chapter covers the following topics:
• Troubleshooting with the LEDs
• Cannot Connect to the Access Point to Configure It
• Wireless Access to the Network
• Time-Out Error for URL or IP Address
Note: For up-to-date WAC120 installation details and troubleshooting
guidance, visit http://support.netgear.com.
6
61
Page 62

802.11ac Wireless Access Point Model WAC120
Troubleshooting with the LEDs
Use the LEDs to verify that the access point is working properly.
All LEDs Are Off
It takes a few seconds for the Power LED to light. Wait a minute and check the Power LED on
the access point.
If the access point is not receiving power, do the following:
• Make
• Make sure that the power adapter is connected to a functioning power ou
• Make
sure that the power cord is connected to the access point.
tlet. If it is in a
power strip, make sure that the power strip is turned on. If it is plugged directly into the
wall, verify that it is not a switched outlet.
sure that you are using the correct NETGEAR power adapter sup
access point.
plied with your
LAN LED Is Off
A hardware connection problem occurred. Check these items:
• Make sure that the cable connectors are securely plugged in at the
network device (hub, switch, or router). A switch, hub, or router must be installed between
the access point and the Ethernet LAN or broadband modem.
• Make
• Make sure that the correct cable is used. Use a standard Category 5 Ethe
sure that the connected device is turned on.
cable. If the network device includes Auto Uplink™ (MDI/MDIX) ports, you can use either
a crossover cable or a normal patch cable.
access point and the
rnet patch
WLAN LED Is Off
Either the wireless radio is turned off (see Basic Wireless Settings on page 17) or the access
point antennas are not working.
the WLAN LED stays off when the wire
• If
power source, and then plug it in again.
• Make sure that the antennas are securely connected to the access point.
• Contact NETGEAR technical support if the WLAN LED remains off.
Troubleshooting and Debugging
less radio is on, disconnect the adapter from its
62
Page 63

802.11ac Wireless Access Point Model WAC120
Cannot Connect to the Access Point to Configure It
Check these items:
• The access point is installed correctly, LAN connections are OK,
powered on. Check that the LAN port LED is green to verify that the Ethernet connection
is OK.
• The d
• If you are using the
• If your computer is set
• If your computer uses a
efault configuration of the access point is for a static IP addre
and a subnet mask of 255.255.255.0 with DHCP disabled. Make sure that your network
configuration settings are correct.
NetBIOS name of the access point to connect, ensure that your
computer and the access point are on the same network segment or that there is a WINS
server on your network.
to obtain an IP address automatically (DHCP client), restart it.
fixed (static) IP address, ensure that it is using an IP address in
the range of the access point. The default IP address is 192.168.0.100, and the default
subnet mask is 255.255.255.0.
and the access point is
ss of 192.168.0.100
Wireless Access to the Network
If you cannot connect wirelessly, the wireless radio might be turned off (see Basic Wireless
Settings on pag
check these items:
• If you did not res
took effect, restart the computer.
• The computer with the wireless ad
settings to communicate with the network.
e 17) or a configuration problem might exist. For a configuration problem,
tart the computer with the wireless adapter so that the TCP/IP changes
apter might not be configured with the correct TCP/IP
Restart the computer and check that TCP/IP is set up correctly for th
W
indows, the usual setting for Network Properties is to obtain an IP address
automatically (DHCP client).
• The access point’s default values might not work with your network. Check the access
p
oint default configuration against the configuration of other devices in your network.
at network. In
Time-Out Error for URL or IP Address
A number of things could be causing this. Try the following troubleshooting steps:
• Check whether other
that your computer’s TCP/IP settings are correct. If you are using a fixed (static) IP
address, check the subnet mask, default gateway, DNS, and IP addresses.
• If the computers are configured correctly but still not working, en
point is connected and turned on. Connect to it and check its settings. If you cannot
connect to it, check the LAN and power connections.
computers on the network work without errors. If they do, ensure
sure that the access
Troubleshooting and Debugging
63
Page 64

802.11ac Wireless Access Point Model WAC120
• If the access point is configured correctly, check your Internet connection (DSL or cable
modem, and so on) to make sure that it is working correctly.
• Try again.
Troubleshooting and Debugging
64
Page 65

A. Supplemental Information
This appendix covers the following topics:
• Factory Settings
• Technical Specifications
A
65
Page 66

802.11ac Wireless Access Point Model WAC120
Factory Settings
You can return the access point to its factory settings. Use the end of a paper clip or a similar
object to press and hold the Reset button on the back of the router for at least seven
seconds. The access point resets and returns to the factory configuration settings shown in
the following table.
Table 2. Factory default settings
Feature Description
Login for Management and Configuration
LAN IPv4 management address 192.168.0.100
Subnet mask for IPv4 management
address
Required static IPv4 address for
management computer
User name (case-sensitive) for login admin
Login password (case-sensitive) for login password
LAN and Management Features
DHCPv4 client Disabled
Untagged VLAN Enabled, VLAN ID 1
Management VLAN VLAN ID 1
Syslog Disabled
Spanning Tree Protocol (STP) Disabled
Time zone USA-Pacific
NTP client Enabled
Custom NTP server Disabled
Port speed 10/100/1000
5.255.255.0
25
192.168.0.210 and 255.255.255.0
Ethernet MAC address See product label
Radio and Wireless Settings
Operating mode Access point, infrastructure mode
Wireless access point name netgearxxxxxx, where xxxxxx are the last 6 digit
wireless access point MAC address
Country and region Varies by region
Wireless communication 2.4 GHz radio enabled
5 GHz radio enabled
Supplemental Information
66
s of the
Page 67

802.11ac Wireless Access Point Model WAC120
Table 2. Factory default settings (continued)
Feature Description
Wireless modes 11ng
11ac
Wireless network names (SSIDs) NET
Broadcast network names (SSIDs) Enabled
Radio frequency channels 11ng: Auto
MCS index/data rate (transmission
eed)
sp
Channel width 11ng: 20 MHz
Guard interval Auto
Output power Full
Wireless on/off (radio scheduling) Disabled
RTS threshold 2347
Fragmentation length 2346
GEAR_11ng
NETGEAR_11ac
11ac: Auto
Best
Note: Maximum wireless signal rate derived from IEEE
Standard 802.11 specifications. Actual throughput will vary.
Network conditions and environmental factors, including
volume of network traffic, building materials and construction,
and network overhead, lower actual data throughput rate.
11ac: Dynamic 20/40/80 MHz
Beacon interval 100
Aggregation length 65535
A-MPDU Enabled
RIFS transmission Disabled
DTIM interval 3
Preamble type Auto
802.11d Enabled
Client isolation Disabled
Maximum wireless clients 64
Wi-Fi Multimedia (WMM) Enabled
WMM powersave Enabled
Supplemental Information
67
Page 68

802.11ac Wireless Access Point Model WAC120
Table 2. Factory default settings (continued)
Feature Description
AP EDCA parameters (QoS settings) • AIFS. The Arbitration Inter-Frame Spacing (AIFS) interval
specifies, in milliseconds, the wait time between data
frames. Higher AIFS values mean higher priority to that
queue. Valid values for AIFS are 1 through 255.
• CwMin.
specifies the upper limit (in milliseconds) of a range from
which the initial random back-off wait time is determined.
Decreasing this value increases the priority of the queue.
The value for CwMin must be lower than the value for
CwMax. Valid values are 1, 3, 7, 15, 31, 63, 127, 255,
511, and 1024.
• CwMax.
value specifies (in milliseconds) the upper limit for the
doubling of the random back-off value. Decreasing this
value increases the priority of the queue. The value for
CwMax must be higher than the value for CwMin. Valid
values are 1, 3, 7, 15, 31, 63, 127, 255, 511, and 1024.
• Max.
value specifies (in milliseconds) the maximum burst
length allowed for packet bursts on the wireless network.
A packet burst is a collection of multiple frames
transmitted without header information. Decreasing this
value increases the priority of the queue. Valid values for
maximum burst length are 0.0 through 999.9.
T
he minimum contention window (CwMin) value
T
he maximum contention window (CwMax)
Burst. (access point only) The maximum burst
Station EDCA parameters (QoS settings) • AIFS.
spe
cifies, in milliseconds, the wait time between data
frames. Higher AIFS values means higher priority to that
queue. Valid values for AIFS are 1 through 255.
• CwMin.
specifies the upper limit (in milliseconds) of a range from
which the initial random back-off wait time is determined.
Decreasing this value increases the priority of the queue.
The value for CwMin must be lower than the value for
CwMax. Valid values are 1, 3, 7, 15, 31, 63, 127, 255,
511, and 1024.
• CwMax.
value specifies (in milliseconds) the upper limit for the
doubling of the random back-off value. Decreasing this
value increases the priority of the queue. The value for
CwMax must be higher than the value for CwMin. Valid
values are 1, 3, 7, 15, 31, 63, 127, 255, 511, and 1024.
XOP Limit. The transmission opportunity (TXOP) is an
• T
interval of time (in milliseconds) when a client station can
initiate transmissions on the wireless medium (WM).
Decreasing this value increases the priority of the queue.
Valid values for maximum burst length are 0.0 through
999.9.
Wireless bridging Disabled
The Arbitration Inter-Frame Spacing (AIFS) interval
T
he minimum contention window (CwMin) value
T
he maximum contention window (CwMax)
Supplemental Information
68
Page 69

802.11ac Wireless Access Point Model WAC120
Table 2. Factory default settings (continued)
Feature Description
Default Wireless Profile and Profile Security
Profile name NETGEAR
Wireless network names (SSIDs) NET
Broadcast wireless network names
(SSIDs)
Network authentication Open system (no authentication)
Data encryption None
a
Wireless client security sep
ration Disabled
GEAR_11ng
NETGEAR_11ac
Enabled
Supplemental Information
69
Page 70

802.11ac Wireless Access Point Model WAC120
Technical Specifications
Table 3. WAC120 access point specifications
Feature Description
802.11b/bg/ng Wireless Specifications
802.11b data rates 1, 2, 5.5, and 11 Mbps, and auto-rate capable
802.11bg data rates 1, 2, 5.5, 6, 9, 11, 12, 18, 24, 36, 48, 54 Mbps, and auto-rate capable
802.11ng MCS index and
data rates
802.11b/bg/ng
operating frequencies
Data rates for a 20 MHz channel width and an automatic guard interval:
0 / 7.2 Mbps, 1 / 14.4 Mbps, 2 / 21.7 Mbps, 3 / 28.9 Mbps, 4 / 43.3 Mbps,
5 / 57.8 Mbps, 6 / 65 Mbps, 7 / 72.2 Mbps, 8 / 14.44 Mbps, 9 / 28.88 Mbps,
10 / 43.33 Mbps, 11 / 57.77 Mbps, 12 / 86.66 Mbps, 13 / 115.56 Mbps,
14 / 130 Mbps, 15 / 144.44 Mbps, and auto-rate capable
Data rates for a 20 MHz channel width and a long guard interval (800 ms):
0 / 6.5 Mbps, 1 / 13 Mbps, 2 / 19.5 Mbps, 3 / 26 Mbps, 4 / 39 Mbps, 5 / 52 Mbps,
6 / 58.5 Mbps, 7 / 65 Mbps, 8 / 13 Mbps, 9 / 26 Mbps, 10 / 39 Mbps, 11 / 52 Mbps,
12 / 78 Mbps, 13 / 104 Mbps, 14 / 117 Mbps, 15 / 130 Mbps, and auto-rate capable
Data rates for a 40 MHz channel width and an automatic guard interval:
0 / 15 Mbps, 1 / 30 Mbps, 2 / 45 Mbps, 3 / 60 Mbps, 4 / 90 Mbps, 5 / 120 Mbps,
6 / 135 Mbps, 7 / 150 Mbps, 8 / 30 Mbps, 9 / 60 Mbps, 10 / 90 Mbps, 11 / 120 Mbps,
12 / 180 Mbps, 13 / 240 Mbps, 14 / 270 Mbps, 15 / 300 Mbps, and auto-rate capable
Data rates for a 40 MHz channel width and a long guard interval (800 ms):
0 / 13.5 Mbps, 1 / 27 Mbps, 2 / 40.5 Mbps, 3 / 54 Mbps, 4 / 81 Mbps, 5 / 108 Mbps,
6 / 121.5 Mbps, 7 / 135 Mbps, 8 / 27 Mbps, 9 / 54 Mbps, 10 / 81 Mbps,
11 / 108 Mbps, 12 / 162 Mbps, 13 / 216 Mbps, 14 / 243 Mbps, 15 / 270 Mbps,
and auto-rate capable
• 2.412–2.462 GHz (US)
• 2.457–2.462 GHz (Spain)
• 2.410–2.484 GHz (Japan 11b)
• 2.410–2.472 GHz (Japan 11ng)
• 2.457–2.472 GHz (France)
• 2.412–2.472 GHz (Europe ETSI)
• 2.412–2.472 GHz (China)
802.11 b/bg/ng
encryption
802.11a/na/ac Wireless Specifications
802.11a data rates 6, 9, 12, 18, 24, 36, 48, 54 Mbps, and auto-rate capable
• 64-bit, 128-bit, and 52-bit WEP
• AES
•TKIP
Supplemental Information
70
Page 71

802.11ac Wireless Access Point Model WAC120
Table 3. (continued)WAC120 access point specifications (continued)
Feature Description
802.11na data rates Data rates for a 20 MHz channel width and an automatic guard interval:
0 / 14.4 Mbps, 1 / 28.9 Mbps, 2 / 43.3 Mbps, 3 / 57.8 Mbps, 4 / 86.7 Mbps,
5 / 115.6 Mbps, 7 / 144.4 Mbps, 8 / 173.4 Mbps, and auto-rate capable
Data rates for a 20 MHz channel width and a long guard interval (800 ms):
0 / 13.0 Mbps, 1 / 26.0 Mbps, 2 / 39.0 Mbps, 3 / 52.0 Mbps, 4 / 78.0 Mbps,
5 / 104.0 Mbps, 6 / 117.0 Mbps, 7 / 130.0 Mbps, 8 / 156.0 Mbps,
and auto-rate capable
Data rates for a 40 MHz channel width and an automatic guard interval:
0 / 30.0 Mbps, 1 / 60.0 Mbps, 2 / 90.0 Mbps, 3 / 120.0 Mbps, 4 / 150.0 Mbps,
5 / 180.0 Mbps, 6 / 210.0 Mbps, 7 / 240.0 Mbps, 8 / 270.0 Mbps, 9 / 300.0 Mbps,
10 / 330.0 Mbps, 11 / 370.0 Mbps, 12 / 400.0 Mbps and auto-rate capable
Data rates for a 40 MHz channel width and a long guard interval (800 ms):
0 / 27.0 Mbps, 1 / 54.0 Mbps, 2 / 81.0 Mbps, 3 / 108.0 Mbps, 4 / 162.0 Mbps,
5 / 216.0 Mbps, 6 / 243.0 Mbps, 7 / 270.0 Mbps, 8/ 324.0 Mbps, 9 / 360.0 Mbps,
and auto-rate capable
Data rates for a 80 MHz channel width and an automatic guard interval:
0 / 65.0 Mbps, 1 / 130.0 Mbps, 2 / 195.0 Mbps, 3 / 260.0 Mbps, 4 / 390.0 Mbps,
5 / 520.0 Mbps, 6 / 585.0 Mbps, 7 / 650.0 Mbps, 8 / 780.0 Mbps, 9 / 866.7 Mbps,
and auto-rate capable
Data rates for a 80 MHz channel width and a long guard interval (800 ms):
0 / 58.5 Mbps, 1 / 117.0 Mbps, 2 / 175.5 Mbps, 3 / 234.0 Mbps, 4 / 351.0 Mbps,
5 / 468.0 Mbps, 6 / 526.5 Mbps, 7 / 585.0 Mbps, 8 / 702.0 Mbps, 9 / 780.0 Mbps,
and auto-rate capable
802.11a/na
operating frequencies
802.11 a/na encryption • 64-bit, 128-bit, and 52-bit WEP
Management and Other Specifications
Maximum clients Limited by the amount of wireless network traffic generated by each node; a
Status LEDs • Power LED
• 5.180–5.240 GHz (US, lower frequencies)
• 5.260–5.320 GHz (US, middle frequencies)
• 5.180–5240 GHz (CE [EU], lower frequencies)
• 5.260–5.320 GHz (CE [EU], middle frequencies)
• 5.500–5.680 GHz (CE [EU], upper frequencies)
•AES
•TKIP
maximum of 64 clients is supported.
• Activity LED
• LAN LED
• WiFi LED
Electrical and Physical Specifications
Power adapter 12 VDC, 1A; plug is localized to country of sale
Supplemental Information
71
Page 72

802.11ac Wireless Access Point Model WAC120
Table 3. (continued)WAC120 access point specifications (continued)
Feature Description
Physical specifications • Dimensions (h x w x d): 178.6 x 169.4 x 57 mm (7.0 x 6.7 x 2.24 in.)
• Weight: 322g (0.71 lb)
Environmental
specifications
Electromagnetic
compliance
Operating temperature: 0 to 50°C (32 to 122°F)
Operating humidity: 10–90%
• FCC Part 15 SubPart B
• FCC Part 15 SubPart C
• FCC Part 15 SubPart E
•CE
•C-TICK
Supplemental Information
72
 Loading...