

How to fix the protective glass for X401S
PARTS LIST
Location Part No Q'ty
GLS-1 ― 1
BRK-1 2
BRK-2 2
CUS-1
CUSHION
CUS-2
CUSHION
CUS-3
CUSHION
X401S HOLDER GLASS A
X401S HOLDER GLASS B
―22
DOUBLE SIDE TAPE CUSHION
DOUBLE SIDE TAPE CUSHION
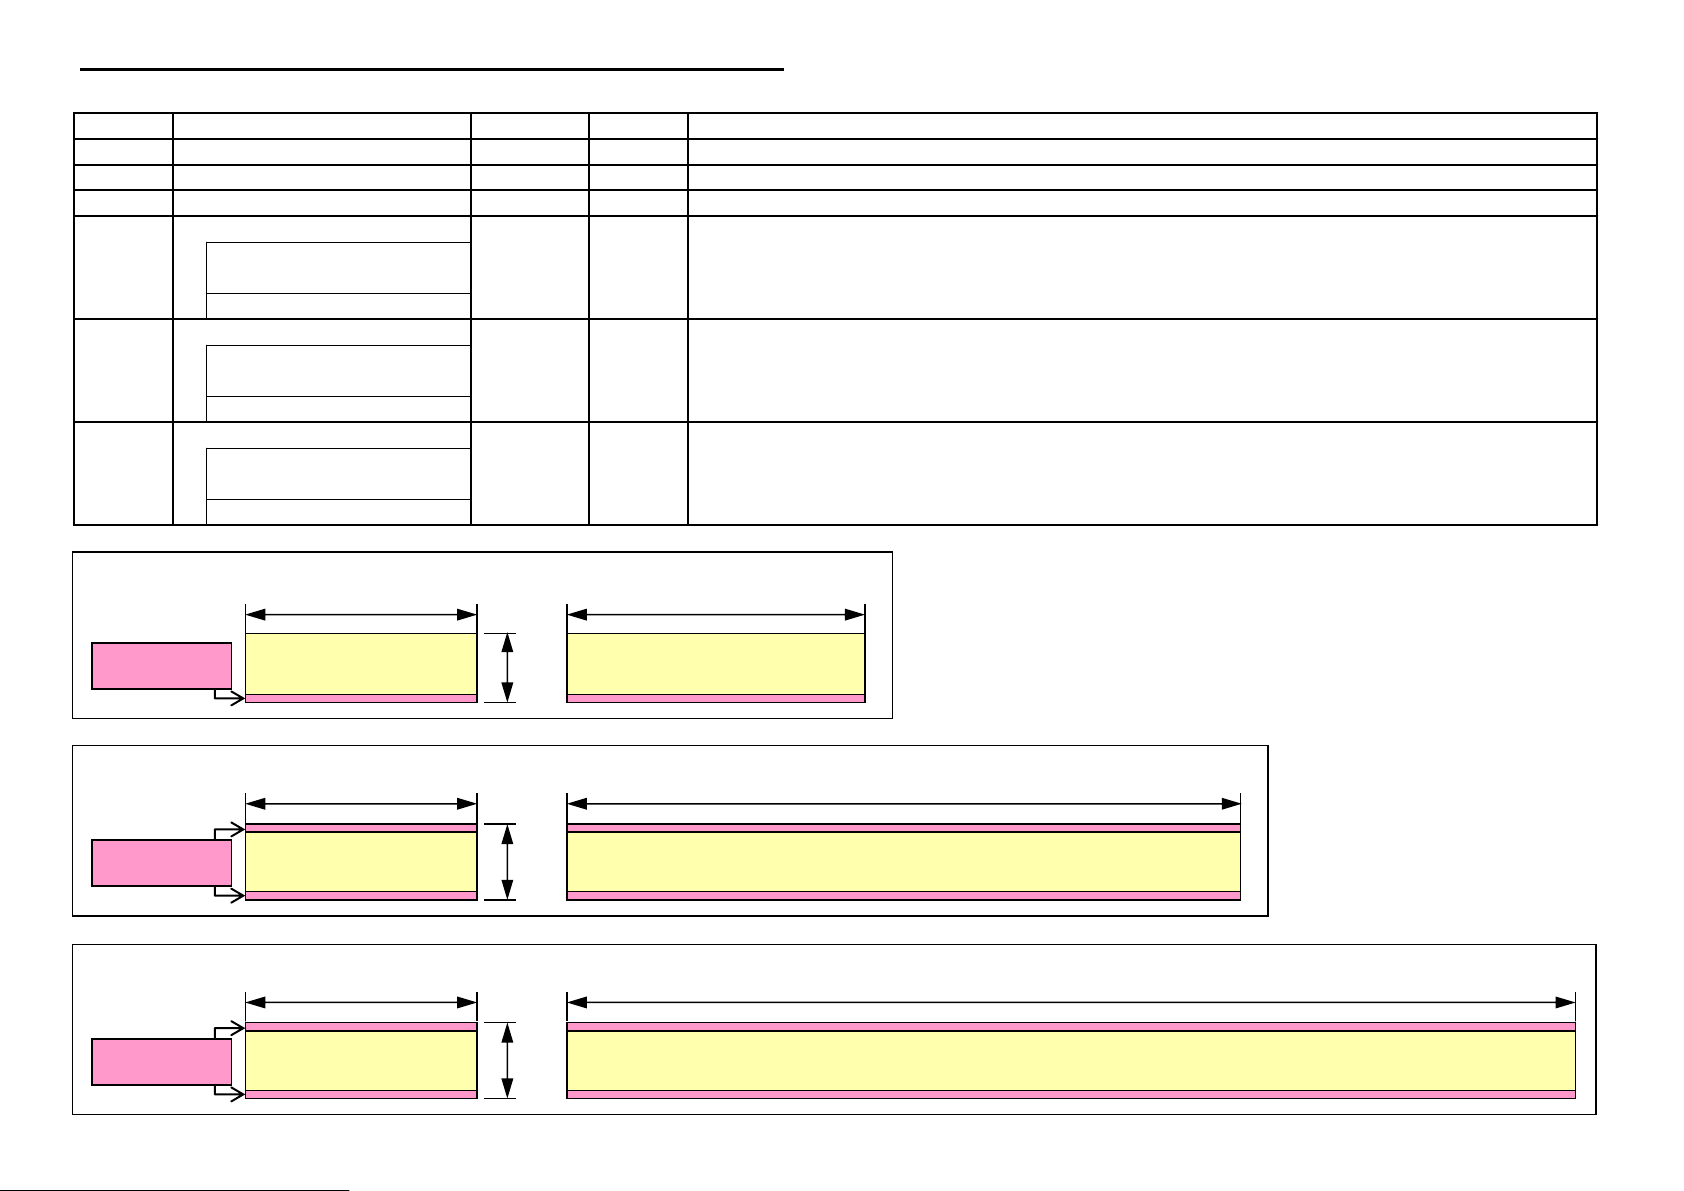
Spec
PROTECTION GLASS X401S
Description
909.4±1.0mm X 521±0.7mm X 4.0±0.3mm
454.2mm X 8mm X 0.8mm
832.6mm X 8mm X 0.8mm
―
BRACKET LED TAPE CUSHION
―
1
DOUBLE SIDE TAPE
98mm X 8mm X 0.65mm
DOUBLE SIDE TAPE
DOUBLE SIDE TAPE
Cushion
8
0.65
DOUBLE SIDE
98
[CUS-1] BRACKET LED TAPE CUSHION:98 X 8 X 0.65
Cushion
Cushion
8
0.8
454.2
[CUS-2] DOUBLE SIDE TAPE CUSHION:454.2 X 8 X 0.8
Cushion
Cushion
8
0.8
832.6
[CUS-3] DOUBLE SIDE TAPE CUSHION:832.6 X 8 X 0.8
Cushion
DOUBLE SIDE
DOUBLE SIDE
Parts_list
How to fix the protective glass for X401S
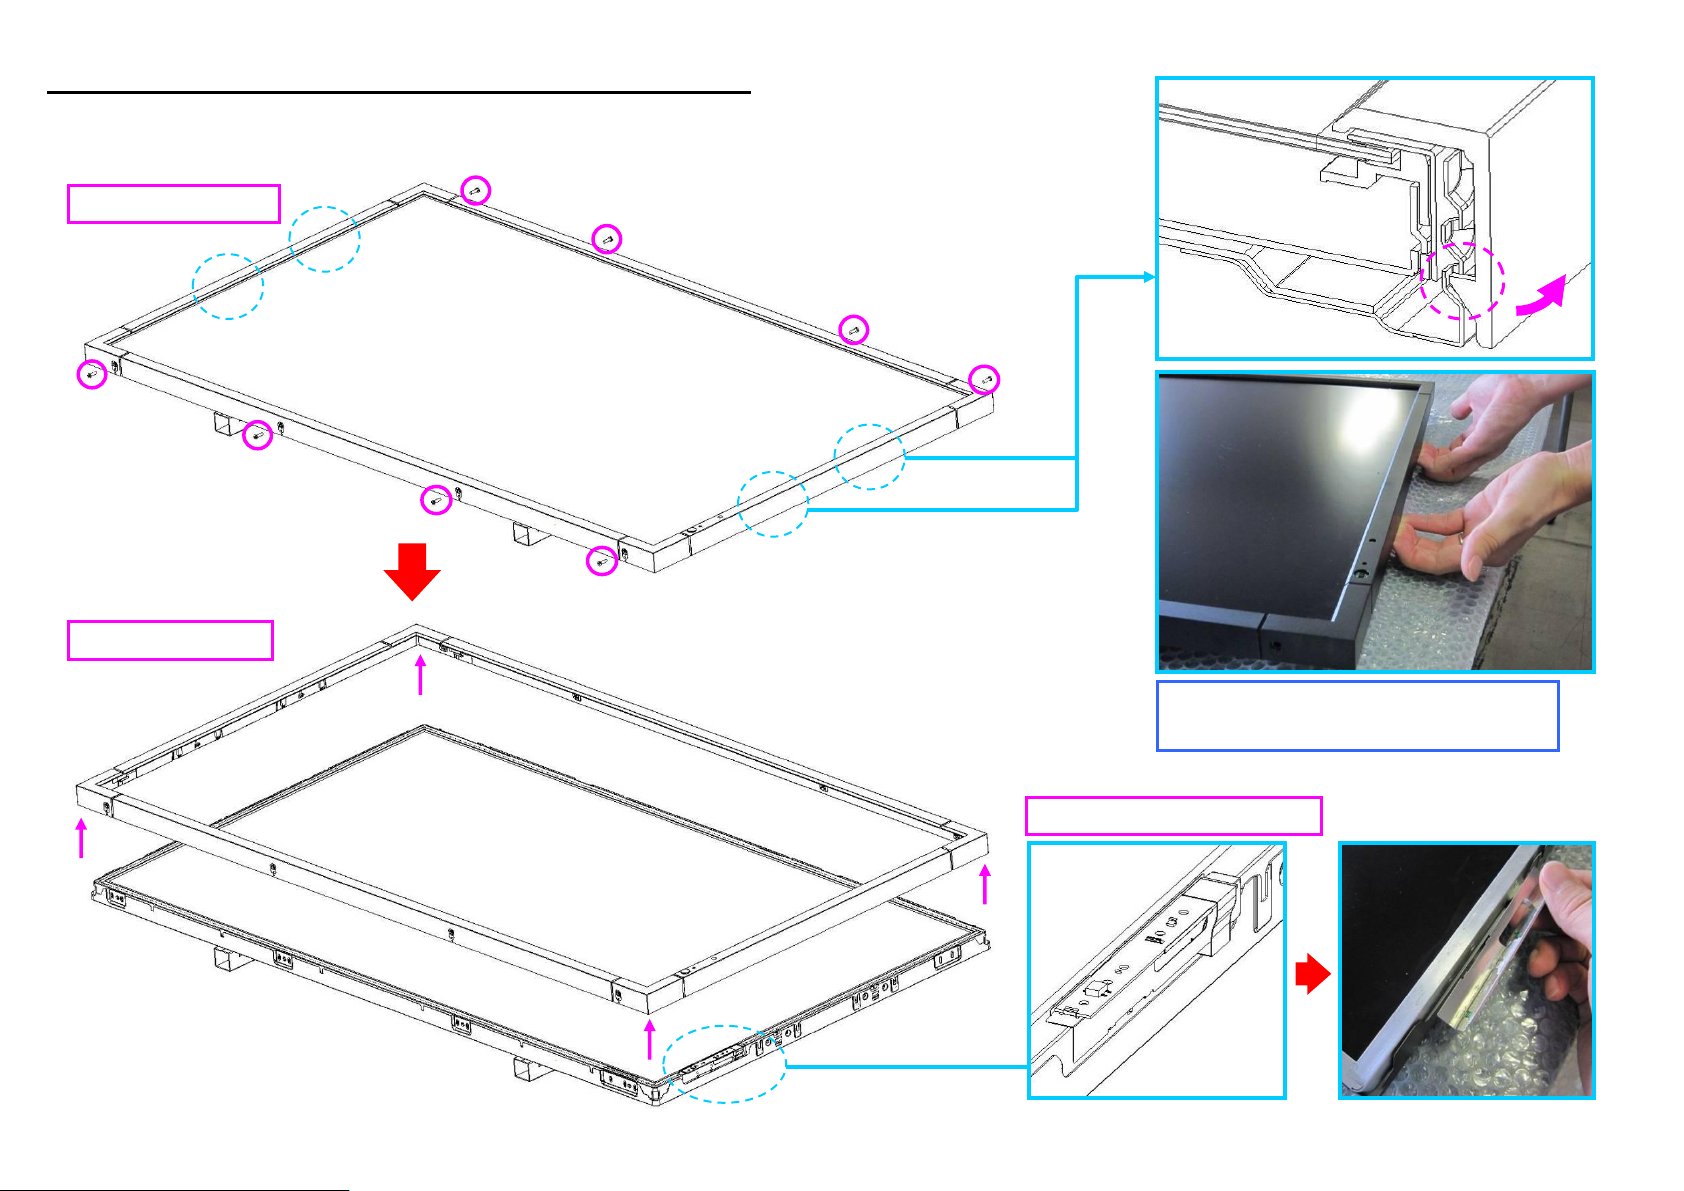
1. Remove BEZEL and BRACKET PWB IR.
(Amount of the screws that fix BEZEL is 8 pieces. )
Remove the BEZEL
REMOVE BRACKET PWB IR
Remove 8 SCREWS.
ATTENTION
Remove catching of a hook. (4 places )
Page-1
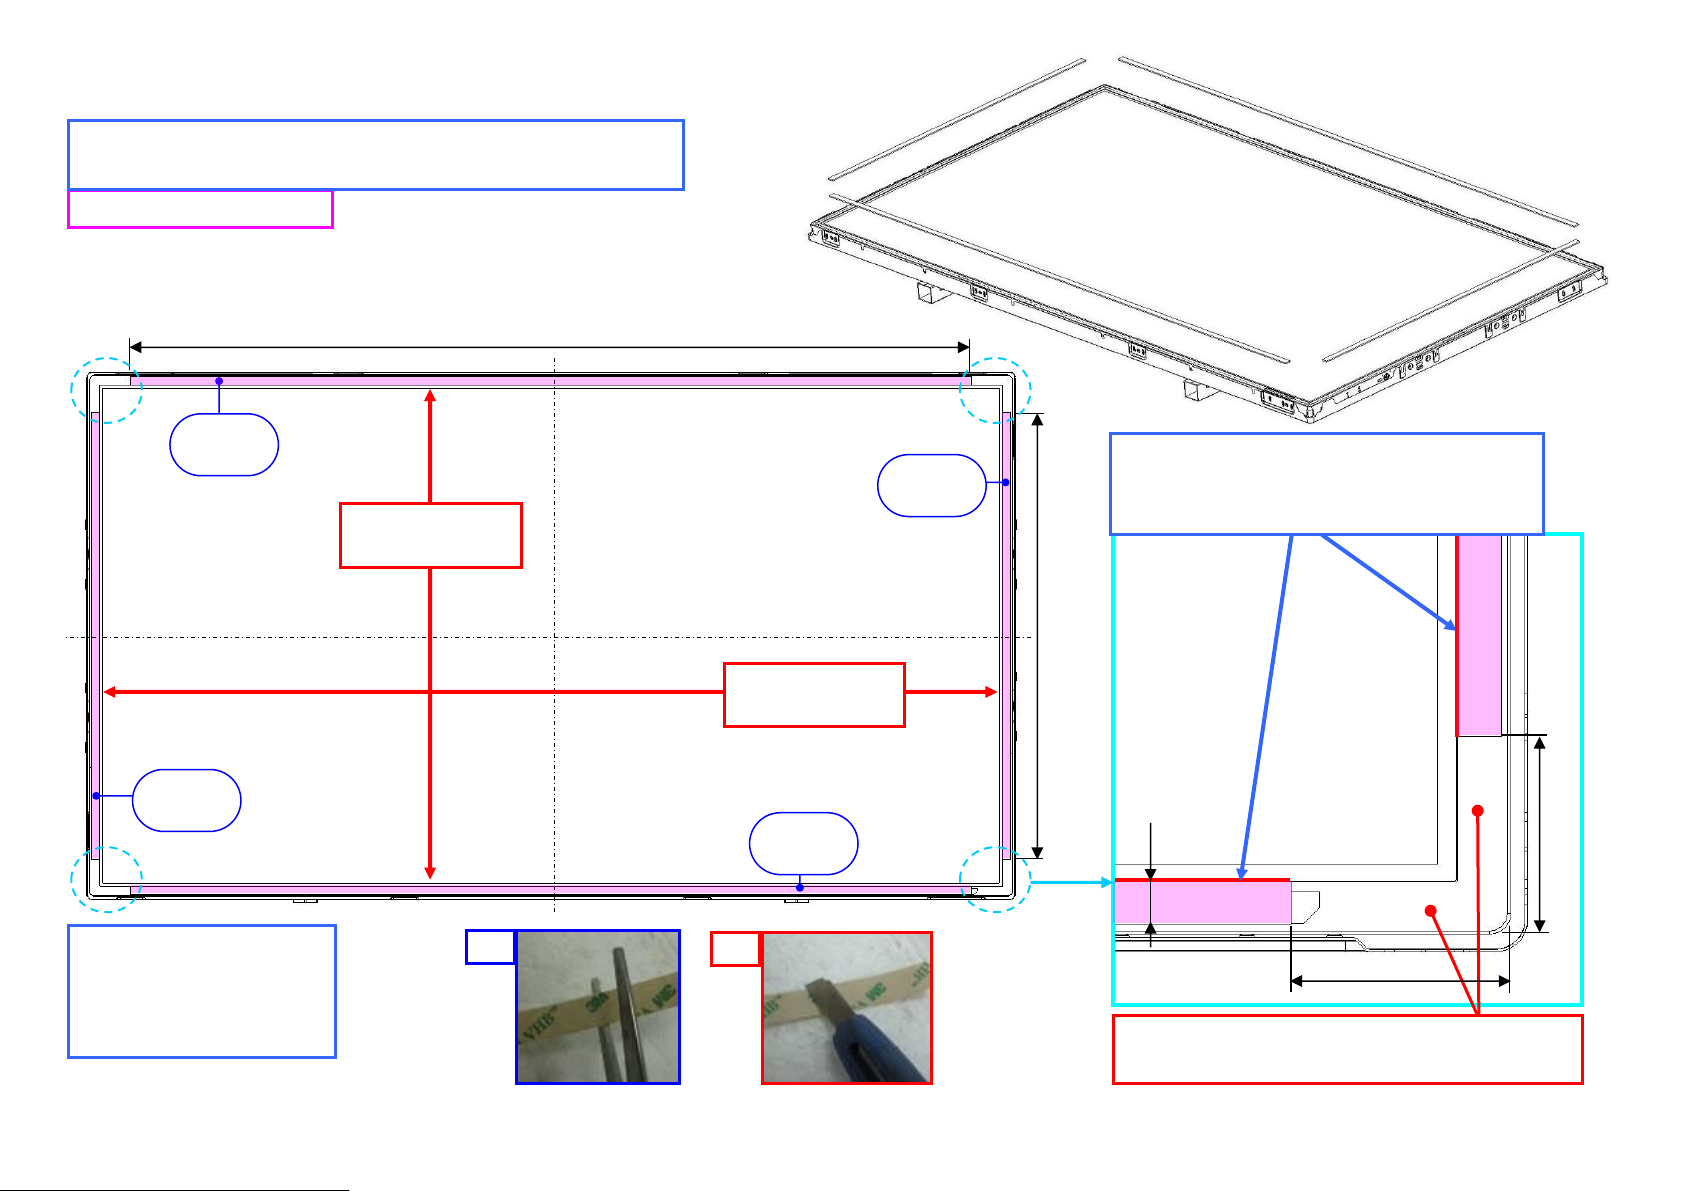
2.
832.6mm
454.2mm
8mm
CUS-3
CUS-2
Don't paste CUS-2
on ACTIVE AREA.
Don't paste CUS-3
on ACTIVE AREA.
CUS-3
CUS-2
Paste CUS-2 and CUS-3
Paste CUS-2 and CUS-3 (DOUBLE SIDE TAPE CUSHION) and peel off separator.
Refer to SPEC of PARTS LIST for the specification of CUS-2 and CUS-3.
ATTENTION
Don't paste CUS-2 and CUS-3 on PANEL'S ACTIVE AREA.
ATTENTION
Criterion which pastes CUS-2 and CUS-3
is the edge of PANEL BEZEL OPENING.
NG
OK
ATTENTION
Don't use the knife to cut
CUS-2 and CUS-3.
Use scissors.
Don't paste CUS-2 and CUS-3 on these area.
This note is applied for all corner.
40mm
35mm
Page-2

3. Assemble GLS-1(PROTECTION GLASS X401S).
ATTENTION
Before assembling PROTECTION GLASS to PANEL,
remove dust from PROTECTION GLASS and PANEL-front surface.
Peel off separator of CUS-2 and CUS-3
GLS-1
Assemble GLS-1
1.6mm
1.6mm
ATTENTION
When assembling PROTECTION GLASS,
clearance is needed from panel edge.
PANEL EDGE
Before assembling, check if there's no dust or fingerprint and so on.
If find it, remove by cleaning cloth.
Page-3

4. Assemble BRK-1 and BRK-2 (X401S HOLDER GLASS A/B).
Assemble BRK-1 and BRK-2
BRK-1
BRK-1
BRK-2
BRK-2
ATTENTION
Insert BRK-1 and BKT-2 between
PANEL and BACK COVER.
Page-4

5. Paste CUS-1 (BRACKET LED TAPE CUSHION).
Refer to SPEC of PARTS LIST for the specification of CUS-1.
Assemble BRACKET PWB IR again.
CUS-1
Paste CUS-1
ATTENTION
Insert the positioning of
BRACKET PWB IR in the
hole of a picture.
Paste the tape of 50mm.
Assemble BRACKET PWB IR again.
Page-5

6. Rotate and install HOLE CAP.
Push
Rotate
Insert
Remove
Remove HOLE CAP
Rotate HOLE CAP
Install HOLE CAP
Page-6

7. Assemble BEZEL again.
1
2
1
2
2
2
2
2
Assemble BEZEL again.
ATTENTION
Fix screw in a specified hole.
ATTENTION
Fix screw by the specified torque.
T=4±1kgf.cm
Install 8 SCREWS.
FIXING SEQUENCE : 1 → 2
ATTENTION
Check that the hook is catching
firmly. (4 places )
Push
Page-7
 Loading...