

Page 1
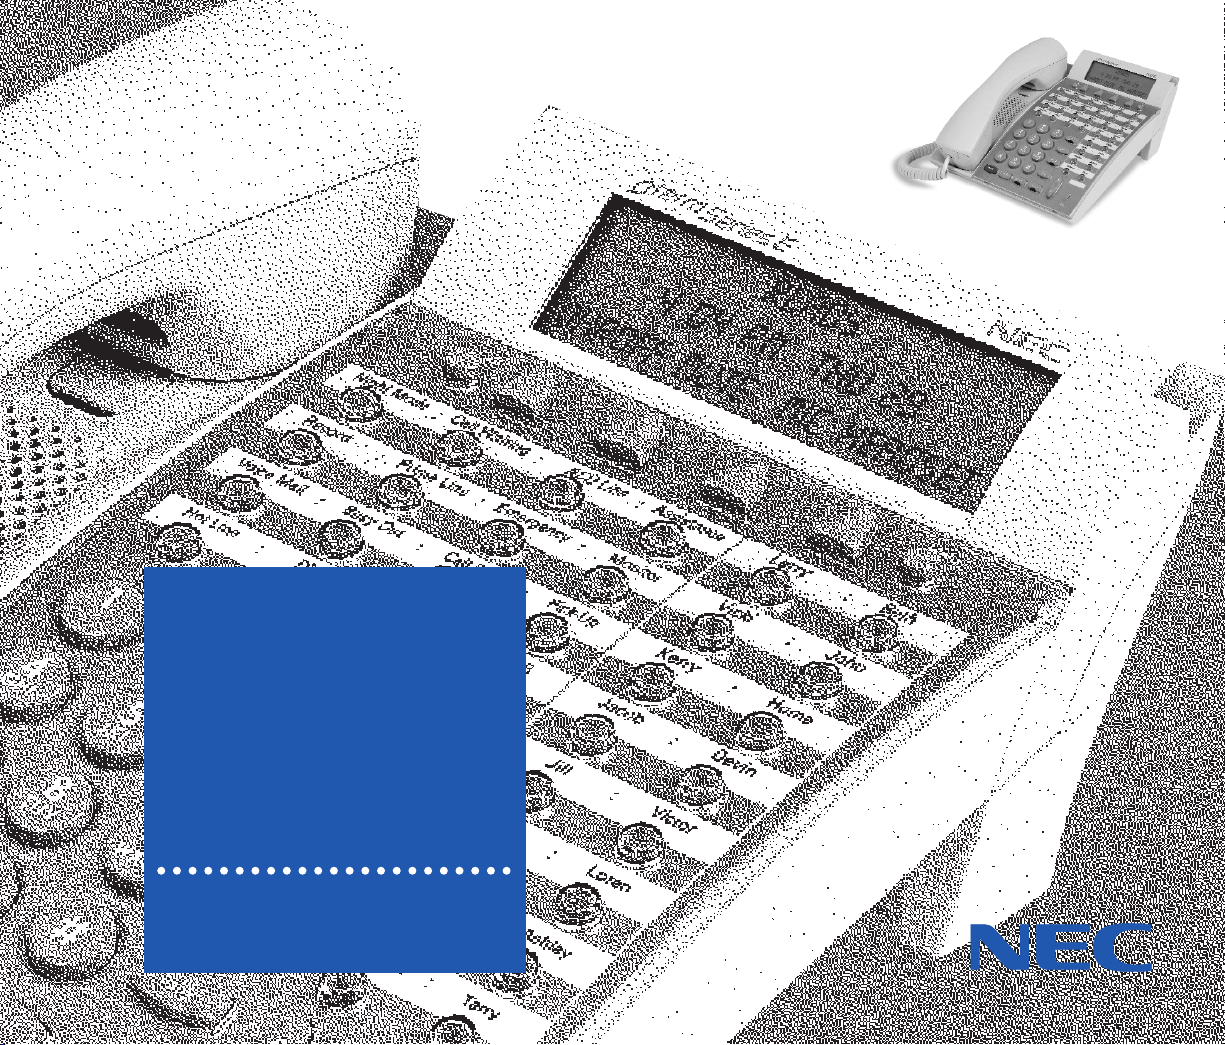
D
TERM
®
SERIES E
Agent Console
USER GUIDE
Page 2

LIABILITY DISCLAIMER
NEC AMERICA, INC. RESERVES THE RIGHT TO CHANGE THE SPECIFICATIONS,
FUNCTIONS, OR FEATURES, AT ANY TIME, WITHOUT NOTICE.
NEC AMERICA, INC. HAS PREPARED THIS DOCUMENT FOR USE BY
ITS EMPLOYEES AND CUSTOMERS
. THE INFORMATION CONTAINED
HEREIN IS THE PROPERTY OF
NEC AMERICA, INC. AND SHALL NOT
BE REPRODUCED WITHOUT PRIOR WRITTEN APPROVAL FROM
NEC AMERICA, INC.
COPYRIGHT 1998
NEC AMERICA, INC.
Page 3
TABLE OF CONTENTS
DEDICATEDFUNCTIONKEYSANDLAMPS 2
T
OLOGONWHENID CODEISREQUIRED 7
TOLOGONWHENID CODEISNOTREQUIRED 8
TOLOGOFFWITHORWITHOUTID CODES 9
TOSETAUTOMATICA
T
OSETMANUALANSWER 11
TOANSWER/RELEASEANINCOMINGACD CALL 11
TOHOLDACALL 13
TOTRANSFERACALLTOSPLITQUEUE 14
ET/RESETBREAKMODE 15
TOS
W
ORKMODEDURINGACALL 17
TALLYCOUNT 18
TOPLACEANASSISTANCECALL 18
MONITORME 19
TOPLACEANEMERGENCYCALL 20
TOREPORTTRUNKTROUBLE 21
TALLY-OHFEATURES 21
TOORIGINATEANOUTSIDECALL 27
TOORIGINATEANINTERNALCALL 27
TOORIGINATEACALLUSINGSPEEDCALLING 28
ACCOUNTCODE 29
FORCEDACCOUNTCODE 30
AUTHORIZATIONCODE 30
NSWER 10
ONFERENCE 31
C
OESTABLISHABROKERCALL 32
T
TOANSWERACAMPED-ONCALL 32
CALLWAITING– ORIGINATING 33
CALLPARK 34
C
ALLPICK-UP(GROUP) 36
ALLPICK-UP(DIRECT) 36
C
OUTGOINGTRUNKQUEUING 37
OFF-HOOKTRUNKQUEUING 38
LASTNUMBERREDIAL 38
C
ALLFORWARDING– ALLCALLS 39
ALLBACK 40
C
TOSAVEANDREPEATANUMBER 41
T
OLEAVEAMESSAGE 42
OANSWERAMESSAGE 42
T
DONOTDISTURB 43
PRIVACY 44
D
ATAFEATURES 44
TOESTABLISHEXTERNALDATATRANSMISSION
VIAMODEMPOOLING 46
This user guide is published to support D
operation with ACD Release II, III, IV (NEAX2400 IMS) and
CallCenterWorX (NEAX2000 IVS).
term
Series E ACD Terminal
Page 4

DEDICATED FUNCTION KEYS AND LAMPS
FUNCTION KEYS
RELEASE
Press this key to release an established ACD or
NON-ACD call.
WORK
Used to set or reset Work mode.
HOLD
Used to hold an ACD call or a NON-ACD call
presently in progress.
DIAL KEY PAD
Provides access to NON-ACD PBX dialed
features and input of Tally Count data to the
MIS system.
LOGON
Press to LOGON or LOGOFF status.
BREAK
When pressed by the ACD Agent, the position
is still Logged On, but it is temporarily unavailable
to receive ACD calls. (This key is used for
lunch time and breaks, etc)
TRANSFER
Allows the console user to transfer established
calls to another station, agent or queue without
attendant assistance.
CONF
Allows simple access to establish a three-way
conference.
TALLY
By pressing this key an Agent enters the tally
count mode. The Agent can register up to 22
digits by pressing the dial pad digit x (x=1-9)
and then #, for each different event.
2
Page 5

ACD PROGRAMMABLE LINE/FEATURE KEYS
AUTO/MAN
When pressed the associated lamp will light
steadily indicating the Agent is in the Automatic
Answer Mode and will automatically receive a
new ACD call upon the release of an established
call if calls are in queue to that Split. Before
being connected to a new call the Agent will
hear “Zip” tone.
When pressed again the Agent’s Answer mode
will change from Automatic to Manual. The
associated lamp is dark. When an ACD call
comes into the ACD Agent position which
is set for manual operation, the console rings
and must be manually answered by pressing the
ACD call key.
MONITOR/BARGE
This feature allows the Agent to select another
Agent position to monitor or barge into calls
on both the ACD line and NON-ACD line at
that Agent position.
EMER
This feature permits an ACD Agent to record a
conversation between an ACD Agent and caller
if recording equipment is provided. Simultaneously,
a call is placed to the Split Supervisors Line key
for silent monitoring.
ACD CALL
All ACD calls directed to an ACD Agent will
terminate to this line key.
LINE
This key is used by the Agent to originate or
answer a NON-ACD call.
TRK TRBL
The Agent presses this key to report low
volume, static, or any problem with trunks
encountered during a call.*
*This feature does not improve upon problem encountered.
3
Page 6

ASSIST
Feature activation provides immediate call
connection to a split supervisor’s line key for
assistance in handling a complaint or problem.
CW
This key is used to indicate calls in queue. The
Agent presses this key to show how many calls in
queue and the time of the longest waiting call.
FEATURE
Used to adjust LCD contrast, speaker/receiver,
volume, and ringer volume.
UP/ DOWN
◆ LCD Contrast:
Press ▲or▼ key while idle.
◆ Speaker / Receiver Volume:
Press ▲or▼ key during conversation.
◆ Ringer Volume:
Press ▲or▼ key during ringing.
NON-ACD PROGRAMMABLE LINE/FEATURE KEYS
NOTE: Each ACD Agent may program PBX features
in any of the unused twenty-four programmable line
keys or available one touch calling keys.
MSG
Message Reminder – D
term
Series E station
users may leave messages on the alphanumeric
displays of other D
term
Series E instruments,
indicating their station number and time of
call attempt.
RECALL
Press to terminate established call and reseize
internal dial tone.
PICK
Call Pick-Up-Group – this feature allows
a station user to intercept calls directed to
another station.
4
Page 7

PICK-DIRECT
Call Pick-Up-Direct – allows a station user to
intercept calls directed to another station.
FWD
Call Forwarding-All Calls – this feature allows
the station user to forward a split incoming call
to an alternate answering position.
DSY/AUTO
While engaged in a voice conversation, the
Agent presses this key to display the status of a
data connection. If this key is pressed while not
engaged in a data connection the agent sets the
data terminal equipment to the Automatic
Answer Mode.
DATA
The Agent presses this key to set up a
connection between the MIS system and the
MIS terminals.
DTX
Press key to transfer a call from a voice line to
a data line.
DND
Do not disturb – the feature allows a station
user to stop calls from ringing at the station
during on hook or off hook condition.
CALL BACK
Enables an originated NON-ACD call upon
encountering a busy condition to have a call
automatically completed when the called ACD
Agent or busy trunk becomes idle.
NOTE: Lower line of LCD constantly indicates
time, day and date.
NOTE: Display indicatations may change depending
on the PBX product. Display in this manual reflect
the indicates behind the NEAX2400 PBX.
5
Page 8

SOFT KEYS
Headset
Press the Soft Key below “Headset” to activate
Headset operation. The primary extension LED
will illuminate when headset is on.
Mic
Press the Soft Key below “Mic” to activate or
deactivate the Microphone. The Mic LED will
illuminate when Mic is on.
Help
Press the Help Key. Press desired Soft Key for
helpful information about that key.
Exit
Press the Exit Key to exit the Help program.
OHROFF (Off Hook Ringing Off)
Go off-hook or press Speaker Key, then press
Soft Key below “OHROFF” to disable ringing
on secondary and trunk line appearances on
this telephone while in use.
OHR-ON (Off Hook Ringing On)
Go off-hook or press Speaker Key, then press
Soft Key below “OHR-ON” to allow ringing
on secondary and trunk line appearances on
this telephone while in use.
MUTE
Go off-hook or press Speaker Key, then press
Soft Key below “MUTE”. MUTE will flash and
Voice Path is eliminated to the handset, headset
or speaker.
6
3:17 PM Fri 28
Mic Headset
Exit
Help
3:17 PM Fri 28
OHROff MUTE MIC HSET
Exit
Help
2000
On Hook State
(Telephone is idle)
Off Hook State
(Telephone is in use)
Page 9
TO LOG ON WHEN ID CODE IS REQUIRED
If the entered Log On ID code is currently in use,
the display indicates ID IN USE and then returns to
LOGON ID?
If an invalid ID code is entered, the display returns
to LOGON ID? and the Agent must enter a current
Log On ID.
From VACANT Status:
♦ LOGON lamp
is dark.
♦ Press LOGON
key, LOGON
key flashes.
LOGON
(Time display)
ID?
VACANT
(Time display)
♦ Dial Agent LOG
ID Code, press the
# key, digits dialed
are displayed. The
LOGON and
WORK lamps light
steadily; display
indicates greeting.
Then reviews the
following modes:
NOTE: Auto Answer
is displayed and active
only if auto answer is
programmed.
NOTE: Work mode
is displayed and active
only if work mode has
been programmed.
WORK MODE
(Time display)
7
(Time display)
CUST.
(Time display)
LARRYHELLO
SYS.SPLIT
Page 10

♦ The WORK key
must be pressed
before Agent can
begin taking calls.
The console is now
in Ready status.
(Time display)
READY
TO LOG ON WHEN ID CODE IS NOT REQUIRED
From VACANT Status:
♦ LOGON lamp
is dark.
♦ Press LOGON
key, LOGON
lamp is lit steadily;
display indicates
the greeting.
Then reviews the
following modes:
SALESSPLIT
(Time display)
LARRYHELLO
(Time display)
(Time display)
VACANT
8
Page 11

NOTE: Auto answer
is displayed and active
only if auto answer is
programmed.
NOTE: Work mode
is displayed and active
only if work mode has
been programmed.
♦ The WORK key
must be pressed
before the Agent
can begin taking
calls. The console is
now in Ready status.
(Time display)
READY
WORK MODE
(Time display)
AUTO ANSWER
(Time display)
TO LOG OFF WITH OR WITHOUT ID CODES
FROM BREAK MODE, WORK MODE OR
READY STATUS
♦ Press LOGON key,
lamp is dark. Several
displays will cycle
on the display for 4
seconds each, ending
with farewell greeting.
NOTE: Name will only be displayed if LOGON ID
codes are used. During LOGOFF, ACD calls cannot
be received.
♦ The time since
LOGON in hours,
minutes and seconds.
SHIFT
(Time display)
6:38:08
LARRYGOODBYE
(Time display)
9
Page 12

♦ The number of
incoming calls
handled.
♦ Of the calls handled,
the average time
spent on each call in
minutes, seconds and
tenths of a second.
♦ The cumulative
amount of time spent
in Work mode during
the shift in hours,
minutes and seconds.
♦ The cumulative
amount of time spent
in Break Mode during
the shift in hours,
minutes and seconds.
♦ Finally, the display
shows VACANT.
(Time display)
VACANT
1:02:41T-BREAK
(Time display)
2:07:41T-WORK
(Time display)
1:30.9AVG TALK
(Time display)
138ACD CALLS
(Time display)
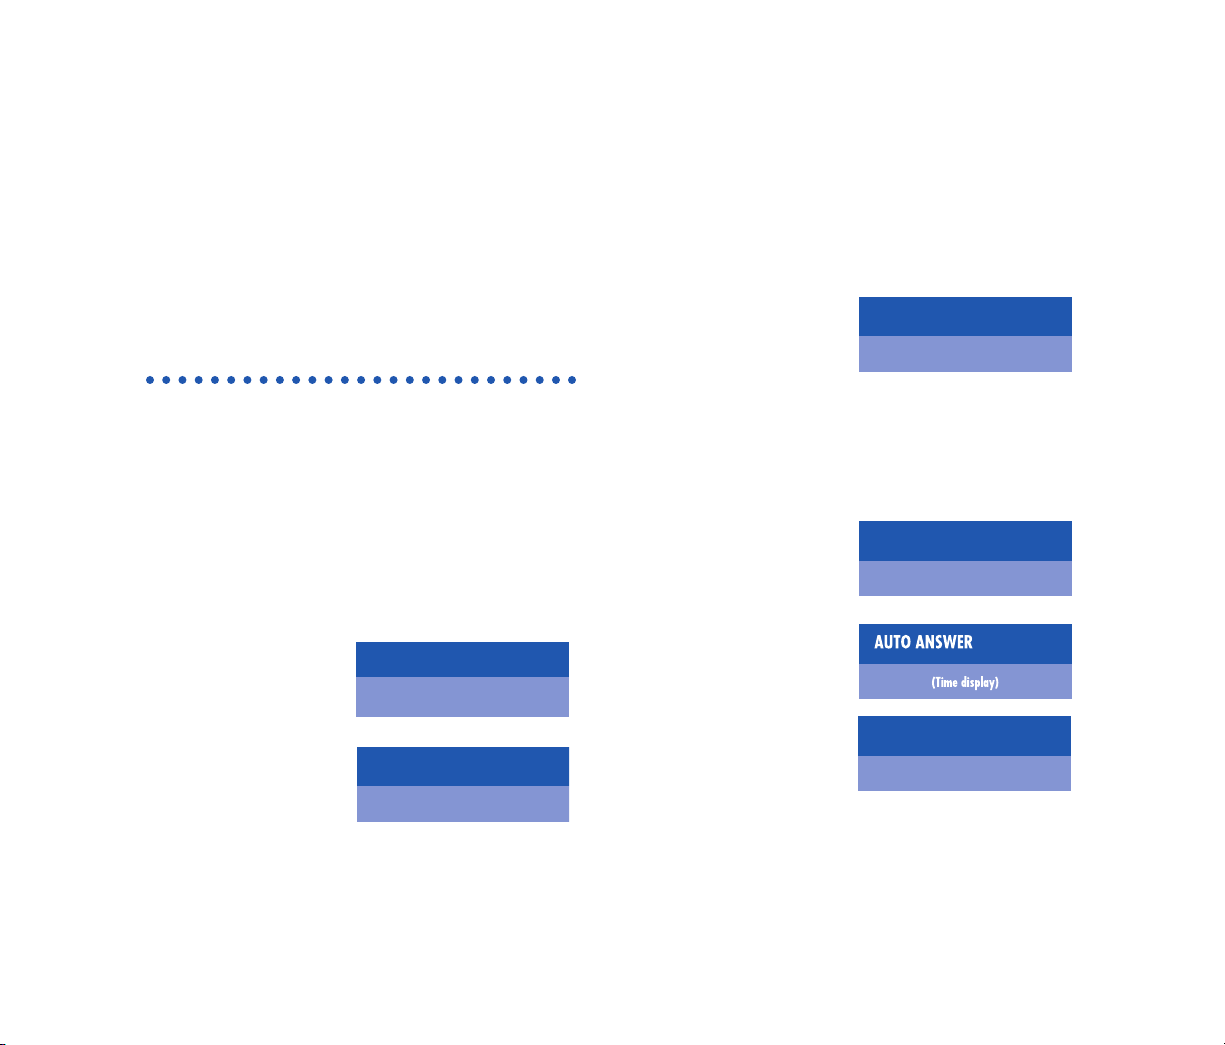
TO SET AUTOMATIC ANSWER
NOTE: This feature applies only to a station that is
off hook on handset or headset.
NOTE: Automatic Answer applies only to ACD calls.
It does not apply to calls terminated on the agent line
key.
FROM MANUAL ANSWER STATUS
♦ Press AUTO key.
♦ Lamp lights steadily.
♦
Incoming, ACD calls are answered automatically.
“Time in Q: X:XX” is displayed temporarily.
♦ Zip tone is heard
before call is
connected to
ACD Agent.
315:39
(Time display)
WATS
No.Elapsed Time
Type
AUTO ANSWER
(Time display)
10
Page 13
TO SET MANUAL ANSWER
FROM AUTOMATIC ANSWER STATUS
♦ Press AUTO key.
♦ Lamp is dark.
♦ Incoming ACD calls.
♦ Press ACD CALL
key or go off hook
on the ACD line to
answer calls.
♦ Upon completion of conversation, press
RELEASE key if using handset, position is
returned to Ready Status.
315:39
(Time display)
WATS
No.Time
Type
MANUAL ANSWER
(Time display)
TO ANSWER/RELEASE AN INCOMING ACD CALL
FROM THE MANUAL ANSWER STATUS
♦ Incoming ACD
call, associated
lamp flashes red.
Display alternates between who is calling name,
ACD Agent number, trunk etc. and time in queue
in minutes and seconds.
♦ Press ACD CALL
key or go off hook
on the ACD line,
lamp is steadily
lit green.
0:02TIME IN
(Time display)
Q
315:39
(Time display)
WATS
(Time display)
READY
11
Page 14

♦ Upon completion
of conversation,
press RELEASE key.
♦ Position is returned
to Ready Status,
agent position is
available for the
next call in queue.
NOTE: Automatic Answer applies only when the
Agent is in the off-hook condition.
FROM AUTOMATIC ANSWER STATUS
♦ Incoming ACD call,
hear zip tone, lamp
lights green, name
displayed.
0:04TIME IN
(Time display)
Q
15:39
(Time display)
SERVICE
(Time display)
READY
15:39
(Time display)
SERVICE
♦ Zip tone is heard before call is connected to
the agent.
♦ Upon completion
of call, press
RELEASE key.
♦ Position is returned to Ready Status, agent
position is available for the next call in queue.
15:39
(Time display)
SERVICE
12
Page 15

TO HOLD A CALL
WHILE ENGAGED IN AN ACD CALL
♦ Press HOLD key;
held line will flash
green.
♦ Displayed name, ACD Agent number, trunk,
etc. flashes.
TO RETRIEVE
♦ Lift Handset.
♦ Press ACD key.
♦ Upon call
completion press
RELEASE key.
(Time display)
READY
31:09
(Time display)
WATS
TRK No.
Route
3HLD
(Time display)
WATS
IF UNANSWERED
♦ After a preprogrammed time; automatic recall
is initiated.
♦ Visual and audible signal (rapid flash and ring
burst) will be sent to ACD Agent which
placed call on hold.
13
Page 16

TO TRANSFER A CALL TO SPLIT QUEUE
FROM A PBX STATION OR AN ACD AGENT
OR
SUPERVISOR POSITION
After pressing the TRANSFER key, the PBX
station or ACD agent or supervisor position
transfers the calling party to the ACD pilot
by dialing the pilot number associated with
the split the call is being transferred to.
♦ Press TRANSFER key,
receive interrupted
dial tone.
NOTE: ACD calls transferred to a NON-ACD
transfer station will recall if the station is busy
upon release.
XFR
(Time display)
♦ Dial the destination
split via a pilot
number.
♦ Press RELEASE key, hang up (announcements
will be heard by the transferred party) or wait
for transfer ACD agent to answer.
3000XFR
(Time display)
FlashesSteady
14
Page 17

TO SET/RESET BREAK MODE
WHILE ENGAGED IN AN ACD CALL
♦ Press BREAK
key, lamp lights
steadily.
Then changes to:
♦ Position in the Break mode upon completion
of the conversation, will be taken out of queue
and no ACD calls will be routed to the position.
3
(Time display)
WATS
(Time display)
BREAK PENDING
FROM READY STATUS USING A NORMAL
BREAK TYPE
♦ Press BREAK key,
lamp lights steadily.
TO RESET
♦ Upon completion
of Break mode,
press BREAK key.
Lamp lights steadily.
Then changes to:
♦ Break mode is canceled
and the LCD display
indicates time spent
on break in minutes
and seconds.
NOTE: Break mode can be set if any call is on hold.
Break Mode may be set/reset when NON-ACD LINE
is actively engaged in a call.
(Time display)
READY
15:00BREAK OVER
(Time display)
ON BREAK
(Time display)
15
Page 18

♦ Status returned to Ready or Work mode.
NOTE: Depending on the type of MIS system used,
the ACD system can be set up for multiple break type.
♦ Multiple break
types is selected
by the system.
Press the BREAK
key, lamp lights
steadily.
♦ The agent then
inputs x via the key
pad, one digit
(x=x1-9), then
presses the # key.
Then changes to:
ON BREAK
(Time display)
BREAK TYPE = X
(Time display)
BREAK TYPE?
(Time display)
BREAK TYPE?
(Time display)
NOTE: The Supervisor defines Break selection types
in the MIS and provides this information to the Agent.
Example:
Break 1 - Lunch
Break 2 - Restroom
Break 3 - Files
Break 4 - Coffee
16
Page 19

WORK MODE DURING A CALL
TO SET WORK MODE DURING A CALL
♦ While engaged in an ACD call, press WORK
key, WORK lamp lights steadily.
♦ Displays Work Pending.
♦ Press RELEASE key
or go on hook to
terminate ACD call.
Then changes to:
♦ Work lamp
light steady red.
(Time display)
(Time display)
WORK MODE
(Time display)
WORK PENDING
♦ No further ACD calls will be received.
♦ Upon completion
of Work, press
WORK key, lamp
extinguishes.
♦ Work mode is canceled, status returns to
Ready, ACD calls will be received.
READY
(Time display)
17
Page 20

TALLY COUNT
WHILE ENGAGED IN AN ACD CALL OR
IN WORK MODE
♦ Press TALLY key;
lamp flashes green.
♦ Press desired digit
1-9 key on dial
keypad up to 22
digits, press # key
to validate entry.
The entered digits
are displayed.
Then changes to:
♦ TALLY lamp extinguishes.
♦ Data is registered in the MIS system.
TALLY ENTERED
(Time display)
22#
(Time display)
TALLY NUMBER?
(Time display)
TO PLACE AN ASSISTANCE CALL
AGENT IS ENGAGED IN AN ACD CALL
♦ Agent presses
ASSIST key; lamp
lights steadily.
♦ The Agent hears ring back tone and the assist
destination is rung (normally a supervisor).
If no supervisor is available, the call waiting
indicator is provided to each supervisor, until
answered. (Depends on ACD programming).
♦ Agent may converse with supervisor, ACD
Call is held in automatic hold mode.
♦ To cancel assistance call, press the TRANSFER
key; the ACD will be recovered.
ASSIST PARTS
(Time display)
18
Page 21

CALL CONFERENCE/TRANSFER
♦ Upon completion of conversation, press
CONF key, all three parties will be connected.
♦ Either the Supervisor or the Agent may drop
out of the call by pressing RELEASE key. When
the agent or supervisor disconnects from the
assisted call, the ASSIST lamp extinguishes
and the display returns to the original status.
♦ The remaining party may converse with the
ACD caller.
♦ If the assist feature
is terminated to
a busy supervisor.
TO CANCEL
♦ Press TRANSFER key to return to the calling
party, the assistance call is canceled.
XXXXASSIST BUSY
(Time display)
MONITOR ME
♦ An agent can request to be monitored by a
specific agent or supervisor. If the ASSIST key
feature is dedicated to the MONITOR ME feature.
♦ Press the ASSIST
key. The ASSIST
lamp lights.
Either the supervisor’s name or the name of the
supervisor’s split is displayed.
♦ When the
supervisor answers.
♦ The ASSIST lamp
flashes red at the ACD Agent.
♦ The monitor lamp flashes red at the supervisor
position.
♦ To barge into the call, the supervisor presses
the MON key, then 1, #.
MONITOR
(Time display)
XXXX
MONITOR JAMES
(Time display)
19
Page 22

20
♦ If the supervisor decides to join the call, the
agent and calling party will hear a warning tone.
TO PLACE AN EMERGENCY CALL
AGENT CONSOLE IS ENGAGED IN
AN
ACD CALL
♦ Agent presses
EMER key, lamp
lights red steadily.
♦ Supervisor is
monitoring call
between Agent
and ACD caller.
♦ ASSOCIATED lamp will flash.
♦ Conversation is simultaneously being
recorded if equipment has been provided.
MONITOR
(Time display)
XXXX
SUPVREMERG
(Time display)
♦ To barge into the call the supervisor presses
the MON key, then 1, #.
♦ Press RELEASE key to transfer the call to
supervisory position after the supervisor
answers. No dialing is necessary.
♦ To cancel emergency request (to ringing
destination), press the EMER key again.
TO BUSY DESTINATION
♦ If the request is routed to an individual
supervisor’s ACD or PBX line, press the
EMER key.
♦ If the request is
routed to a busy
supervisor, the
agent’s LED is
extinguished.
♦ The ACD agent’s conversation is
never interrupted.
EMERG BUSY
(Time display)
Page 23

21
TO REPORT TRUNK TROUBLE
NOTE: The ACD call is not effected by this
procedure. ACD Agent must be engaged in a call
to initiate a trunk trouble report. Pressing TRK TRBL
key does not clear the problem. Trunk trouble can
only be activated while on an ACD call (station or
trunk call).
♦ While engaged
in an ACD call,
press TRK TRBL
key once only.
When changes to: after 4 seconds:
♦ Trouble report is automatically reported
to MIS subsystems and Maintenance
Administration Terminal.
3
(Time display)
WATS5:22
TROUBLE REPORTED
(Time display)
TALLY-OH FEATURES
♦ Tally-Oh codes beginning with a zero are
reserved for special use by agents and are
not reported to the MIS. These codes invoke
various actions, such as statistical displays and
mode changes performed on a tenant basis.
OPERATING PROCEDURES
♦ Press TALLY key.
♦ Enter tally code, then #.
Page 24

22
Special Agent System Tally Code (Leading O)
Code Meaning
000# Displays the agent’s statistics (shift time, number of ACD calls answered, average talk time, total time
in Work mode since logging on, and total time in Break mode since logging on) for the current agent
or the last agent logged on. The statistics are for the shift, they are not given on a per split basis.
To invoke, press 000#.
SAMPLE DISPLAYS: SHIFT 3:12:48 (hours, minutes, seconds)
ACD CALLS 22 (one to three digits)
AVG TALK 3:11 (minutes and seconds)
T-WORK 0:20:16 (hours, minutes, seconds)
T-BREAK 0:10:00 (hours, minutes, seconds)
001# Displays the queue depth of the split(s) served by the logged on agent. If the position is Vacant and
allowed a single split, the queue depth for that split is shown. For an agent, in multi-split mode, the
information for each split will be displayed for a four second interval.
To invoke, press 001#.
SAMPLE DISPLAY: ORDERS 10
002# Displays the time waited by the longest waiting call in the split(s) served by the logged on agent. If the
position is Vacant and allowed a single split, the wait time for that split is shown. For an agent, in
multi-split mode, the information for each split will be displayed for a four second interval.
To invoke, press 002#.
SAMPLE DISPLAY: SERVICE 1:28 (Minutes, Seconds)
Page 25

23
Special Agent System Tally Code (Leading O)
Code Meaning
003# Displays the quantity of working agents (on an ACD call, in Work mode, in Ready mode) in the
split(s) served by the logged-on agent. If the position is Vacant and allowed a single split, the quantity
of working agents in that split is shown. For an agent, in multi-split mode, the information for each
split will be displayed for a four second interval.
To invoke, press 003#.
SAMPLE DISPLAY: SERVICE 26
004# Displays the quantity of agents in Break mode in the split(s) saved by the logged on agent. If the
position is Vacant and allowed a single split, the quantity of agents in Break mode in that split is
shown. For an agent, in multi-split mode, the information for each split will be displayed for a four
second interval.
To invoke, press 004#.
SAMPLE DISPLAY: DELIVERY 6
005# Displays the elapsed time since entering the current mode. The code is valid for the following modes:
on an ACD call, Work mode, Break mode, Ready mode.
To invoke, press 005#.
SAMPLE DISPLAY: BREAK 0:10:00 (hours, minutes, seconds)
Page 26

Special Agent System Tally Code (Leading O)
Code Meaning
006# Sends a request during an ACD call for a supervisor to monitor the conversation. The display shows
the designated supervisor’s name or split.
To invoke, press 006#.
SAMPLE DISPLAY: MONITOR JAMES
007# Sends a request to temporarily disable the Work mode time limit. This request is only valid from Work
mode, and the timer will be disabled only until the agent leaves Work mode.
To invoke, press 007#.
SAMPLE DISPLAY: TIMEOUT DISABLED
008# Displays the time and date for four seconds. This request can be made from any mode.
To invoke, press 008#.
SAMPLE DISPLAY: 1:32 PM MON 22
009# Clear permanent display such as ”READY,” “ON BREAK,” or “VACANT.”
021# Setup Connection Displays, see “CONNECTION DISPLAYS C-199” see ACD F&S.
022# Online Help, see “CONNECTION DISPLAYS C-199” see ACD F&S.
023# Show Connection Displays, see “CONNECTION DISPLAYS C-199” see ACD F&S.
24
Page 27

25
Special Agent System Tally Code (Leading O)
Code Meaning
024 To add a new split to split list.
To invoke, press 024ssspp# to add a new working split (sss) at preference level (pp) to the list of
working splits. An agent may work in up to 16 splits simultaneously.
025 To delete a split from the split list.
To invoke, press 025sss# to delete a split (sss) from the list of splits.
026# To display current split list.
To invoke, press 026# to display a list of the currently assigned splits on the agent’s LCD display. Each
split’s name will be shown for approximately 3 seconds.
027# To save the current working split list to permanent ACD database memory.
To invoke, press 027# to save the current split assignments to permanent ACD database memory.
Ordinarily, when splits are added or deleted (via Tally-Oh 024 and 025) they are in use for the
current logon session only. However, if the split selections are to be permanently assigned (until
modified) to that agent’s logon ID then they must be transferred to permanent ACD database memory.
028# Unlocks the agent’s current position. This request is for emergency use only. There is no display
associated with this request.
To invoke, press 028#. (Emergency use only, notify NECAM of any lockups.)
Page 28

26
Special Agent System Tally Code (Leading O)
Code Meaning
029# Forces the agent to log off at the current position. This request is for emergency use only. There is no
display associated with this request.
To invoke, press 029#. (Emergency use only, notify NECAM of any lockups.)
Page 29

27
In this section, additional Function Keys (e.g.
FEATURE, ANSWER, TRANSFER, etc.) must
first be programmed on the Agent Console by
the System Administrator.
TO ORIGINATE AN OUTSIDE CALL
♦ Lift handset or headset.
♦ Press NON-ACD LINE key.
♦ Receive dial tone, Dial the Central Office
Access Code, e.g. 9.
♦ Dial desired telephone number.
♦ Use handset
to converse.
315:39
WATS
TRK No.Elapsed Time
TRK Type
DateTime
Day
(Time display)
TO ORIGINATE AN INTERNAL CALL
♦ Lift handset or headset.
♦ Press NON-ACD LINE key.
♦ Receive dial tone.
♦ Dial desired station number; display indicates
digits dialed.
♦ Use handset to converse.
Page 30

28
TO ORIGINATE A CALL USING SPEED CALLING (ONE-TOUCH KEYS)
♦ Press NON-ACD LINE key.
♦ Press desired SPEED CALL key, or press SPKR
and SPEED CALL.
TO PROGRAM
(Available only on D
term
stations with speed
calling keys).
♦ Press FEATURE key.
♦ Press desired SPEED CALL key.
♦ Enter desired
telephone number
or feature code on
the keypad. Display
indicates digits dialed.
SPD SET
(Time display)
TO VERIFY
♦ Press FEATURE key.
♦ Press desired SPEED CALL key.
♦ Display indicates digits programmed.
NOTE 1: To program a hookswitch for transfer or
feature activation, press RELEASE key as first digit
(“!” displays on LCD).
NOTE 2: To program a pause, press RELEASE key as
any digit other than the first (“-” displays on LCD).
NOTE 3: To program a Voice Call press TRANSFER
key after dialing station number (“V” displays on LCD).
NOTE 4: Speed calling for feature access: Speed
call keys may be used as feature keys by storing the
NEAX2400 feature access codes. The feature may be
programmed on a system basis by the PBX engineer.
Access codes may be stored in conjunction with
telephone numbers. For example, one button can
be programmed by the user to transfer to a cetain
extension.
Page 31

29
ACCOUNT CODE
TO ENTER
♦ Lift handset.
♦ Press NON-ACD LINE key.
♦ Receive dial tone.
♦ Enter feature Access Code, receive Service
Set tone.*
♦ Enter Account Code (up to 10 digits).
♦ Receive Dial Tone and dial desired number.
TO ENTER ACCOUNT CODE AFTER
AUTHORIZATION CODE
♦ Life handset.
♦ Press NON-ACD LINE key.
♦ Receive dial tone.
♦ Enter feature Access Code for Authorization
Code, receive Service Set tone.
NOTE: Authorization and account codes may be up
to 15 digits combined.
♦ Enter Authorization Code, receive second
Service Set tone.*
♦ Enter Account Code, receive dial tone and
dial desired number.
*Service Set tone is optional depending upon system programming.
Page 32

30
FORCED ACCOUNT CODE
♦ Lift handset.
♦ Press NON-ACD LINE key.
♦ Receive dial tone.
♦ Enter feature Access Code, receive Service
Set tone.*
♦ Enter Forced Account Code (up to 10 digits),
receive dial tone.
♦ Dial desired number.
*Service Set tone is optional depending upon system programming.
AUTHORIZATION CODE
TO ENTER WITHOUT ACCOUNT CODE
♦ Lift handset.
♦ Press NON-ACD LINE key.
♦ Receive dial tone.
♦ Enter feature Access Code, receive Service
Set tone.*
♦ Enter Authorization Code (up to 10 digits),
receive second service set tone.
♦ Receive dial tone, dial desired number.
*Service Set tone is optional depending upon system programming.
Page 33

31
–OR–
♦ Press NON-ACD LINE key.
♦ Receive dial tone.
♦ Dial desired number.
♦ If Authorization Code is required, caller hears
special dial tone.
♦ Enter Authorization Code, or call will be denied.
CONFERENCE
♦ With call in progress, ask party to hold.
♦ Press TRANSFER key, receive interrupted
dial tone.
♦ Dial desired number.
♦ After call is answered, press CONF key;
CONF LED lights.
♦ Three-way
conference is
established.
♦ If one party hangs up, other two remain
connected; CONF LED goes out.
CNF
(Time display)
Page 34

32
TO ESTABLISH A BROKER CALL
♦ While engaged in a call and wishing to consult
a third party, press TRANSFER key; receive
interrupted dial tone, caller is automatically
placed on hold.
♦ Dial desired party to consult.
♦ Press TRANSFER key to return to original
caller. Third party is automatically placed
on hold.
♦ By repeating these steps, it is possible to
alternate between calls.
NOTE: Display will indicate connected station or
trunk at any given time.
TO ANSWER A CAMPED-ON CALL
FROM THE ATTENDANT
♦ While engaged in a call, receive camp-on
indication (one short tone burst); the
ANSWER LED will flash.
♦ Press ANSWER key; call in progress is placed
on hold.
♦ Connection to camped-on call is established.
♦ By repeating these steps, it is possible to
alternate between calls.
NOTE: Display will indicate connected station or
trunk at any given time.
♦ Press ANSWER key
to return to original
call, camp-on call is
placed on Hold.
1CMP
WATS
TRK No.
TRK Type
Page 35

33
CALL WAITING –
ORIGINATING
TO PROGRAM CALL WAITING KEY
(ON ONE-TOUCH SPEED KEY)
♦ Press FEATURE key.
♦ Press desired ONE-TOUCH SPEED key.
♦ Press RECALL key (“!” will appear on LCD).*
♦ Dial call waiting feature access code.
♦ Repress FEATURE key.
*To program a hook switch for transfer or feature activation,
press
RELEASE key as first digit (“!” will be displayed on LCD).
TO ACTIVATE CALL WAITING – ORIGINATING
♦ Dial desired station number, receive busy tone.
♦ Press CALL WAITING key.
♦ Receive special
ring back tone,
Call Waiting
tone will be sent
to busy station.
– OR –
♦ Lift handset.
♦ Dial Call Waiting
access code, receive
dial tone.
♦ Dial busy station.
2000CW SET
(Time display)
CW
(Time display)
0CW
Called Station Number
(Time display)
/
Page 36

34
TO ANSWER A CALL WAITING
♦ Call Waiting tone
is heard.
♦ Press ANSWER key.
NOTE: By pressing the ANSWER key, station can alternate
between the original and camped-on parties,display will
indicate connected station or trunk at any given time.
♦ Call Waiting-Originating call is automatically
connected; original party is placed on hold.
TO DISCONNECT
♦ Press RECALL key, station user will automatically
be connected to original party.
2000CW SET
Calling Station Number
(Time display)
CALL PARK
TO PROGRAM CALL PARK KEY
(ON ONE-TOUCH SPEED KEY)
♦ Press FEATURE key.
♦ Press one touch speed key.
♦ Press RECALL key (“!” will appear on LCD.)
♦ Dial Call Park Access Code.
♦ Press FEATURE again.
PRK SET
(Time display)
Page 37

35
TO PARK A CALL ON A NON-ACD LINE KEY
While connected to a station or trunk:
♦ Press TRANSFER key.
♦ Dial the Call Park
Access Code or
press the CALL
PARK key.
TO RETRIEVE A PARKED CALL FROM AN
ORIGINATING STATION
Or, while connected to a station or trunk on a
NON-ACD LINE key:
♦ Press one touch key or
♦ Dial Call Park local retrieval code.
♦ Station user is
connected to
parked call.
210:01
WATS
Elapsed Time
(Time display)
WATS 2PARK
SET
Parked Station or Trunk
(Time display)
TO RETRIEVE A PARKED CALL FROM A
REMOTE STATION
♦ Dial Call Park
remote retrieval
code* and the
station number
against which the
call was parked.
♦ Station user is connected to parked call.
30:01
WATS
200 is the station the call was parked
from, WATS3 is the parked station
or trunk.
(Time display)
Page 38

36
CALL PICK-UP (GROUP)
STATION WITHIN PICK-UP GROUP RINGS
♦ Lift handset.
♦ Press NON-ACD LINE key.
♦ Press CALL PICK-UP feature button or dial
CALL PICK-Up Access Code. (Also, may
be stored on one touch speed calling key.)
♦ Connection to
calling party is
established.
♦ If engaged on call on NON-ACD LINE key,
press TRANSFER key and dial Call Pick-Up
Access Code. The original party will be
placed on hold.
WATS 3PCK
2000
Calling
Station
Called
Station
(Time display)
CALL PICK-UP (DIRECT)
TO PROGRAM PICK-DIRECT KEY
(ON ONE-TOUCH SPEED KEY)
♦ Press FEATURE key.
♦ Press ONE-TOUCH SPEED key.
♦ Dial Direct Call Pick-Up Access Code.
♦ Re-press FEATURE key again.
A STATION WITHIN THE SYSTEM RINGS
♦ Lift handset, receive dial tone.
♦ Press PICK-DIRECT key and dial the station
number to be picked up.
Page 39

37
– OR –
♦ Dial DIRECT CALL PICK-UP Access Code and
the station number to be picked up.
♦ Connection to
calling party is
established.
– OR –
♦ Press programmed ONE-TOUCH SPEED key.
♦ If busy, original call must be placed on hold
before new call can be picked up.
WATS 3PCK
2000
Calling
Station
Called
Station
(Time display)
OUTGOING TRUNK QUEUING
If trunk “Busy”:
♦ Receive TRUNK
BUSY indication;
press CALL BACK key.
Call is placed in queue for next available trunk.
♦ When trunk is available, setting station is
alerted by ringing and flashing red LED.
♦ Lift handset or headset.
♦ Press NON-ACD LINE key.
♦ Dial tone is heard or number is automatically
dialed if NEAX2400 IMS is programmed with
Least Cost Routing.
OGQ SET
(Time display)
Page 40

38
OFF-HOOK TRUNK QUEUING
♦ Lift handset.
♦ Press NON-ACD LINE key.
♦ Receive dial tone.
♦ Dial OFF-HOOK QUEUING access code.
♦ Dial desired telephone number; encounter
a trunk busy condition.
♦ Station user receives Service Set tone, and
leaves speaker on. The desired number
will automatically be dialed when a trunk
becomes available.
LAST NUMBER REDIAL
TO RECALL THE LAST TELEPHONE
NUMBER DIALED
♦ Lift handset.
♦ Press NON-ACD LINE key.
♦ Receive dial tone.
♦ Press REDIAL key,
outside or internal
station is automatically
redialed,when party
has answered, lift
handset to converse.
To display last number dialed:
♦ While on hook, press REDIAL key.
♦ Display indicates digits stored.
LNR [*]/SD [-]
(Time display)
Page 41

39
CALL FORWARDING –
ALL CALLS
TO SET
♦ Lift handset.
♦ Press NON-ACD LINE key.
♦ Receive dial tone.
♦ Press FWD key or dial Call Forward access
code; receive special dial tone.
♦ Dial destination station or external telephone
number; receive Service Set tone.*
♦ FWD LED lights (at your station or at the
D
term
of the subline station you are setting).
♦ Return to onhook
condition, call
forwarding all
calls is set.
FWD SET
(Time display)
TO CANCEL
♦ Lift handset.
♦ Press NON-ACD LINE key.
♦ Receive dial tone.
♦ Press FWD key or dial Call Forward cancel
code; receive Service Set tone*, FWD lamp
goes out at your station.
♦ Press LINE key;
Call forward all
calls canceled.
*Service Set tone is optional depending upon system programming.
FWD CNCL
Page 42

40
CALL BACK
IF CALLED STATION IS “BUSY”
♦ Press CALL BACK
key if; receive
Service Set tone.*
– OR –
♦ Press FLASH key** and enter CALL BACK
access code.
♦ When both parties
become idle, calling
party’s phone rings.
Calling party would
go off hook and hear
ring back tone. The
called station would
then be ringing.
2000CB
Called Party
(Time display)
CB SET
(Time display)
2000
♦ Lift handset, then
called party’s
phone rings.
♦ Connection is established when called
party answers.
NOTE: Call Back may be programmed by the PBX
Engineer on a Programmable Line/Feature key or by
the user on a Speed Calling One-Touch key.
*Service Set tone is optional depending upon system programming.
**
FLASH key must be programmed on ONE-TOUCH SPEED
call key.
2000CB
Calling Party
Page 43

41
TO SAVE AND REPEAT A NUMBER
TO SAVE
♦ Lift handset.
♦ Press NON-ACD LINE key.
♦ Dial desired telephone number.
♦ Press S & R key; dialed number is now stored.
♦ S & R key LED lights.
– OR –
♦ Receive Internal Call.
♦ Press S & R. Number is stored in memory.
♦ S & R LED lights.
TO VERIFY
♦ While idle, press S & R key, display indicates
digits stored.
TO REPEAT
♦ Lift handset.
♦ Press NON-ACD LINE key.
♦ Press S & R key; D
term
Series E will automatically
redial the programmed number.
♦
S & R key automatically canceled; LED goes out.
NOTE: If Save and Repeat number is busy or no answer is
received, to save it again, press S & R key before going
back on hook.
Page 44

42
TO LEAVE A MESSAGE
♦ Lift handset.
♦ Press NON-ACD LINE key.
♦ Receive dial tone.
♦ Dial desired station number; encounter a
“No-Answer” or Busy condition.
♦ Press MSG key;
message is sent
to called D
term
Series E.
♦ Called station MSG LED lights.
NOTE:
•Up to four messages
can be stored in D
term
Series E memory.
If a fifth message is
attempted, ring back
tone is heard.
MSG BUSY
(Time display)
MSG SET
2000
Recipient Station
(Time display)
•If station is not
equipped to receive
messages, reorder
tone is heard.
TO ANSWER A MESSAGE
TO DISPLAY
♦ MSG LED LIT;
station is idle.
♦ Press MSG key; display indicates time of
message and station number leaving message;
♦ Re-press MSG key again to display additional
messages in order received.
12:28PMMSG
2000
(Time display)
MSG RST
(Time display)
Page 45

43
TO RESPOND
♦ While displaying desired message; lift handset
and Press NON-ACD LINE key.
♦ Press MSG key; station which left message
will be automatically redialed.
TO ERASE
♦ Message is erased.
♦ To erase a message without returning the call,
press MSG key to display desired message.
♦ Dial # while message is displayed, message
is erased.
NOTE: If station which left message is busy,
callback or MSG may be set. If station which left
message does not answer, MSG may be set, thus
notifying originating party that a message return
was attempted.
MSG CNCL
(Time display)
DO NOT DISTURB
WHILE IDLE (ON HOOK)
♦ Press DND key*;
LED lights.
TO CANCEL
♦ Press DND key;
LED goes out.
*DND key must be programmed by the PBX engineer on a
programmable feature key.
DND CNCL
(Time display)
DND SET
(Time display)
Page 46

44
PRIVACY
WHILE OFF-HOOK
♦ Press DND key,
LED flashes;
Display indicates:
♦ Privacy feature prevents interruptions for the
duration of a call.
TO CANCEL
♦ Press DND; LED goes out.
– OR –
♦ Replace handset;
privacy feature
is automatically
canceled.
PRV CNCL
(Time display)
PRV SET
(Time display)
DATA FEATURES
TO ACTIVATE SIMULTANEOUS VOICE/DATA
TRANSMISSION
♦ To send data to
the same station
already involved
in voice conversation,
originating station
presses DTX key.
♦ Receiving station presses DATA key.
♦ Data connection
is established.
♦ Voice conversation can be terminated by either
station without affecting data connection.
XXXXRDY
(Time display)
D DTE
XXXXD
(Time display)
DTE
Page 47

45
♦ To disconnect from
DATA connection,
either station can
press DATA key.
NOTE: If receiving station is programmed for Auto
Answer, disregard this step.
TO SEND DATA TO A STATION WHILE
INVOLVED IN A VOICE CONVERSATION
WITH
ANOTHER STATION
♦ Originating station
presses DATA key
and dials the Data
port number of the
destination station.
♦ Receiving station presses DATA key.
NOTE: If receiving station is programmed for Auto
Answer, disregard this step.
XXXXRLS
(Time display)
D DTE
XXXXRLS
(Time display)
D DTE
♦ DATA connection
is established while
voice conversation
continues. Voice
conversation can
be disconnected
without affecting
DATA connection.
♦ To disconnect from
DATA connection,
either station can
press DATA key at
any time.
TO SEND DATA TO AN INTERNAL STATION
WHEN NO VOICE COMMUNICATION IS
TAKING PLACE
♦ Originating station
presses DATA
key and dials
receiving station’s
data extension.
XXXXD
(Time display)
DTE
XXXXRLS
(Time display)
D DTE
XXXXRDY
(Time display)
D DTE
Page 48

♦ Receiving station
presses DATA key.
♦ Data is established.
♦ To disconnect from DATA call, either
originating or receiving station can press
DATA key.
♦ Released station’s
display indicates:
NOTE: If receiving station is programmed for Auto
Answer, disregard this step.
XXXXRLS
(Time display)
D DTE
XXXXRDY
(Time display)
D DTE
TO ESTABLISH EXTERNAL DATA TRANSMISSION VIA MODEM POOLING
♦ Internal station user initiates a voice
conversation to an external party.
♦ External party switches over from voice
to modem, or modem carrier tone is heard
immediately.
♦ After hearing
modem carrier
tone, originating
(internal) station
presses DTX key.
♦ Originating station‘s DTX lamp lights and
Service Set tone is heard, replace handset.
♦ Called data terminal answers.
♦ DATA connection is established.
NOTE: If internal station is programmed for Auto
Answer, disregard this step.
XXXXRDY
(Time display)
YYY
D
46
Page 49

INTERNAL PARTY RECEIVES A DATA CALL
♦ Station‘s data
port will ring.
Data lamp flashes.
♦ Press DATA
key to answer.
NOTE: If receiving station is programmed for Auto
Answer, disregard this step.
*Service Set tone is optional depending upon system programming.
♦ Data connection is established.
TO RELEASE FROM A MODEM CALL
♦ Press DATA key, LED goes out.
XXXXRDY
(Time display)
YYY
D
XXXXD
(Time display)
47
Page 50

48
NOTES
Page 51

MIC (Microphone) Lamp
RELEASE
LOGON
CONF
(Conference)
TALLY
HOLD
TRANSFER
UP/ DOWN ( )
(Volume/Contrast)
BREAK
(Enter/Exit
Break Mode)
WORK
PROGRAMMABLE KEYS
One-Touch Speed
Dial / Feature Keys
(Programmable by user)
PROGRAMMABLE
KEYS
Flexible Line /
Feature Keys
(Programmable by
telephone system
administrator)
Call Indicator Lamp
LCD
SOFT KEYS (4)
<
>
HELP
EXIT
Page 52

For more information contact:
NEC America, Inc.
CNG
1555 Walnut Hill Lane, Irving Texas 75038-3796
1 800 TEAM NEC
NEAX and D
term
are registered trademarks of
NEC Corporation
590301
*590301*
7/98
 Loading...