


e122 TABLE OF CONTENTS
Table of Contents
General information................................................ 1
Battery care ....................................................1
Disposing of the battery .................................. 2
Access codes .................................................2
Care and Maintenance............................................ 3
Disposing of the product .................................4
Important Safety Information ..........................4
Emergency calls ...................................................10
Your phone ............................................................11
Keys and connectors..........................................11
Standby mode ....................................................12
Getting started ...................................................... 13
Installing the SIM card and the battery............... 13
Charging the battery ...........................................14
Switching the phone on and off..........................14
Call functions ........................................................ 15
Making a call ......................................................15
Answering or rejecting an incoming call.............15
Call waiting .........................................................16
Handling more than one call...............................16
Input method ......................................................... 17
Key ............................................................... 18
Character......................................................18
Menu Structure ..................................................... 19
Phone book ........................................................19
i

TABLE OF CONTENTS
e122
Modify........................................................... 19
Add............................................................... 19
Groups ......................................................... 20
Group edits................................................... 20
Speed dial .................................................... 20
Memory status.............................................. 21
Copy all ........................................................ 21
Delete........................................................... 21
CLI (Calling Line Identification) .................... 22
Message ............................................................ 22
SMS ............................................................. 22
Read messages ...........................................22
To write a message ...................................... 23
To send a message...................................... 24
Unsent and Outbox Messages..................... 24
Message settings .........................................24
MMS (Multimedia message) ........................ 25
To write a MMS ............................................ 25
To send multimedia messages .................... 26
Unsent and Outbox multimedia messages .. 27
MMS memory full ......................................... 27
MMS setting ................................................. 27
Template ...................................................... 27
Voice mail..................................................... 28
Call Record ........................................................ 28
Missed calls/Received calls/Outgoing calls.. 28
Call duration ................................................. 29
Call cost ....................................................... 29
Data counter................................................. 30
Settings .............................................................. 30
Time & Date ................................................. 30
ii

e122 TABLE OF CONTENTS
Melody ..........................................................31
Ring volume..................................................31
Ring or Vibrate..............................................31
Key tone ....................................................... 32
Display settings ............................................32
Call settings ..................................................34
Security.........................................................35
Reset all........................................................38
Camera............................................................... 38
Camera indications ....................................... 38
Photo ............................................................39
Multi-shot ......................................................39
Video ............................................................ 40
Profile ................................................................. 40
Accessories ........................................................41
Calendar .......................................................41
Calculator ..................................................... 42
Stopwatch..................................................... 42
Time count down .......................................... 43
Alarm ............................................................43
Game............................................................43
My data............................................................... 44
Picture gallery ............................................... 44
Video gallery................................................. 45
Melody gallery .............................................. 46
Memory Status ............................................. 47
WAP service .......................................................47
WAP setting.................................................. 47
Key in the service settings manually ............ 48
Activate WAP settings ..................................48
Homepage....................................................48
iii

TABLE OF CONTENTS
e122
Bookmark ..................................................... 48
Go to ............................................................ 48
Edit bookmark .............................................. 48
Push inbox ................................................... 49
Clear cache .................................................. 50
STK .................................................................... 50
SIM toolkit .................................................... 50
GPRS ..................................................................... 51
PC sync ................................................................. 51
iv

e122 GENERAL INFORMATION
General information
Battery care
Your phone is powered by a rechargeable battery.
• The battery can be charged and discharged hundreds of times
but it will eventually wear out. When the operating time (talk-time
and standby time) is noticeably shorter than normal, you should
buy a new battery.
• Unplug the charger when not in use. Do not leave the battery
connected to a charger for longer than a week, since
overcharging may shorten its lifetime.
• If left unused a fully charged battery may discharge itself over
time.
• Temperature extremes can affect the ability of your battery to
charge.
• Do not use a charger or battery that is damaged in any way.
• Use the battery only for its intended purpose.
• Do not leave the battery in hot or cold places, such as in a car in
summer or winter.
• Do not short-circuit the battery. Short-circuiting the terminals may
damage the battery or the connecting object.
• Dispose of batteries according to local regulations. Always
recycle.
• In addition to the rechargable battery your phone is fitted with an
internal battery that can only be replaced by a qualified service
engineer. There is a risk of explosion if the battery is replaced
with an incorrect type of battery. Dispose of the used battery in
accordance with the manufacturer's instructions.
1

GENERAL INFORMATION
Disposing of the battery
Used phone batteries must be disposed of in compliance
with current environment protection regulations. You
should return your batteries to your reseller or dispose of
them in an approved recycling centre.
Access codes
PIN code (4 to 8 digits):
The PIN (Personal Identification Number) code protects your SIM
card against unauthorized access. Your SIM card usually
supplies the PIN code.
PIN2 code (4 to 8 digits)
The PIN2 code may be supplied with the SIM card. Some
functions will require PIN2 support, such as Set tariff.
PUK and PUK2 (8 digits)
The PUK (Personal Unblocking Key) code is required to change
a blocked PIN code. The PUK2 code is required to change a
blocked PIN2 code.
Phone code (4 to 8 digits)
The phone code protects the phone against unauthorized use. It
is not on when you buy the phone. You can change the phone
code (0000) to any four to eight-digit personal code.
2
e122

e122 CARE AND MAINTENANCE
Care and Maintenance
Read this information before using your mobile phone.
Your mobile phone is a highly sophisticated electronic device. When
using your phone, battery, charger or any accessory, please read
this information first.
Product care
• Warning: Please check the volume level of your phone before
listening to your phone. High volume levels will damage your
hearing.
• Keep your mobile phone and all its parts out of young children's
reach.
• Keep your mobile phone dry.
• Avoid exposing your mobile phone to extreme hot or cold
temperatures.
• Avoid placing your mobile phone close to lit cigarettes, naked
flames or any heat source.
Note: Do not use your product in an area where a potentially
explosive atmosphere exists.
• If you set the Vibrator setting to ON, be careful that the phone is
not near a source of heat (e.g. a heater) and that it does not fall
from a desk due to the vibration.
• Do not store or carry flammable or explosive materials in the
same compartment where a mobile phone is placed.
• The operation of some medical electronic devices, such as
hearing aids and pacemakers, may be affected if a mobile phone
is used next to them. Observe any warning signs and
manufacturer's recommendations.
• If you have a weak heart, you should take extra precautions
when setting functions such as the Vibrator and Ringer volume
functions for incoming calls.
3
CARE AND MAINTENANCE
• Do not attempt to disassemble the phone. Non-expert handling of
the device may damage it.
• Do not drop, knock or shake the phone. Rough handling can
break internal circuit boards.
• Do not paint your mobile phone. The paint could obstruct the
earphone, microphone or any moveable parts and prevent
normal use.
• Treat your mobile phone with care, keep it in a clean and dust
free environment.
e122
Disposing of the product
Your Mobile phone should not be placed in municipal
waste. Please check local regulations for disposal of
electronic products.
Important Safety Information
Radio frequency energy and SAR certification information
Your phone meets the government's requirements for exposure
to radio waves.
It is a radio transmitter and receiver. When the phone is turned on, it
receives and transmits radio frequency (RF) energy. Depending on the
type of mobile phone you possess, it operates on different frequency
ranges and employs commonly used modulation techniques.
The exposure standard for mobile phones employs a unit of
measurement known as Specific Absorption Rate (SAR). The
SAR value is determined at the highest certified power level in
laboratory conditions, but the actual SAR level of the mobile
phone while operating can be well below this value. This is
because the mobile phone is designed to use the minimum
power required to reach the network.
This phone is designed and manufactured not to exceed the
emission limits for exposure to radio frequency (RF) energy set
by the Federal Communications Commission (FCC) of the U.S.
4
e122 CARE AND MAINTENANCE
Government and CE certification (CE marking) of European
Union (EU) requirements.
The SAR limit recommended by the EU Council is 2.0W/kg. The
highest SAR value for this model phone was 0.944 W/kg.
DoC
CS
Česky
[Czech]
DA
Dansk
[Danish]
DE
Deutsch
[German]
ET
Eesti
[Estonian]
EN
English Hereby, NEC, declares that this e122 is in compliance
ES
Español
[Spanish]
EL
[Greek]
FR
Français
[French]
IT
Italiano
[Italian]
NEC tímto prohlašuje, že tento e122 je ve shodě se
základními požadavky a dalšími příslušnými
ustanoveními směrnice 1999/5/ES.
Undertegnede NEC erklærer herved, at følgende udstyr
e122 overholder de væsentlige krav og øvrige relevante
krav i direktiv 1999/5/EF.
Hiermit erklärt NEC, dass sich das Gerät e122 in
Übereinstimmung mit den grundl egenden Anforderungen
und den übrigen einschlägigen Bestimmungen der
Richtlinie 1999/5/EG befindet.
Käesolevaga kinnitab NEC seadme e122 vastavust
direktiivi 1999/5/EÜ põhinõuetele ja nimetatud direktiivist
tulenevatele teistele asjakohastele sätetele.
with the essential requirements and other relevant
provisions of Directive 1999/5/EC.
Por medio de la presente NEC declara que el e122
cumple con los requisitos esenciales y cualesquiera
otras disposiciones aplicables o exigibles de la Directiva
1999/5/CE.
Ελληνική
ΜΕ ΤΗΝ ΠΑΡΟΥΣΑ NEC ∆ΗΛΩΝΕΙ ΟΤΙ e122
ΣΥΜΜΟΡΦΩΝΕΤΑΙ ΠΡΟΣ ΤΙΣ ΟΥΣΙΩ∆ΕΙΣ
ΑΠΑΙΤΗΣΕΙΣ ΚΑΙ ΤΙΣ ΛΟΙΠΕΣ ΣΧΕΤΙΚΕΣ
∆ΙΑΤΑΞΕΙΣ ΤΗΣ Ο∆ΗΓΙΑΣ 1999/5/ΕΚ.
Par la présente NEC déclare que l'appareil e122 est
conforme aux exigences essentielles et aux autres
dispositions pertinentes de la directive 1999/5/CE.
Con la presente NEC dichiara che questo e122 è
conforme ai requisiti essenziali ed alle altre disposizioni
pertinenti stabilite dalla direttiva 1999/5/CE.
5
LV
Latviski
[Latvian]
LT
Lietuvių
[Lithuanian]
NL
Nederlands
[Dutch]
MT
Malti
[Maltese]
HU
Magyar
[Hungarian]
PL
Polski
[Polish]
PT
Português
[Portuguese]
SL
Slovensko
[Slovenian]
SK
Slovensky
[Slovak]
FI
Suomi
[Finnish]
SV
Svenska
[Swedish]
CARE AND MAINTENANCE
Ar šo NEC deklarē, ka e122 atbilst Direktīvas
1999/5/EK būtiskajām prasībām un citiem ar to
saistītajiem noteikumiem.
Šiuo NEC deklaruoja, kad šis e122 atitinka
esminius reikalavimus ir kitas 1999/5/EB
Direktyvos nuostatas.
Hierbij verklaart NEC dat het toestel e122 in
overeenstemming is met de essentiële eisen en de
andere relevante bepalingen van richtlijn 1999/5/EG.
Hawnhekk, NEC, jiddikjara li dan [il-mudel
tal-prodott] jikkonforma mal-h–tig·ijiet essenzjali
u ma provvedimenti oh–rajn relevanti li hemm
fid-Dirrettiva 1999/5/EC.
Alulírott, NEC nyilatkozom, hogy a e122 megfelel
a vonatkozó alapvetõ követelményeknek és az
1999/5/EC irányelv egyéb elõírásainak.
Niniejszym NEC oświadcza, że e122 jest zgodny
z zasadniczymi wymogami oraz pozostałymi
stosownymi postanowieniami Dyrektywy
1999/5/EC.
NEC declara que este [tipo de equipamento] está
conforme com os requisitos essenciais e outras
disposições da Directiva 1999/5/CE.
NEC izjavlja, da je ta e122 v skladu z bistvenimi
zahtevami in ostalimi relevantnimi določili direktive
1999/5/ES.
NEC týmto vyhlasuje, že e122 spĺňa základné
požiadavky a všetky príslušné ustanovenia
Smernice 1999/5/ES.
NEC vakuuttaa täten että e122 tyyp pinen laite on
direktiivin 1999/5/EY oleellisten vaatimusten ja sitä
koskevien direktiivin muiden ehtojen mukainen.
Härmed intygar NEC att denna e122 står I
överensstämmelse med de väsentliga egenskapskrav
och övriga relevanta bestämmelser som framgår av
direktiv 1999/5/EG.
6
e122

e122 CARE AND MAINTENANCE
Íslenska
[Icelandic]
NO
Norsk
[Norwegian]
Hér með lýsir NEC yfir því að [type of equipment] er í
samræmi við grunnkröfur og aðrar kröfur, sem gerðar eru
í tilskipun 1999/5/EC.
NEC erklærer herved at utstyret e122 er i samsvar med
de grunnleggende krav og øvrige relevante krav i direktiv
1999/5/EF.
Electronic devices
Most modern electronic equipment is shielded from RF energy.
However, certain electronic equipment may not be shielded
against the RF signals from your mobile phone, therefore:
• Do not use your mobile phone near medical equipment without
requesting permission.
Pacemaker
Mobile phones may affect the operation of some implanted
cardiac pacemakers and other medically implanted equipment.
Pacemaker manufacturers recommend that a minimum
separation of 20 cm (6 inches) be maintained between a
hand-held wireless phone and a pacemaker to avoid potential
interference with the pacemaker. These recommendations are
consistent with the independent research by and
recommendations of Wireless Technology Research.
Persons with pacemakers:
• Should always keep the phone more than 20 cm (6 inches) from
their pacemaker when the phone is switched on;
• Should not carry the phone in a breast pocket;
• Should use the ear opposite the pacemaker to minimize the
potential for interference.
• If you have any reason to suspect that interference is taking
place, switch off your phone immediately.
7

CARE AND MAINTENANCE
e122
Hearing aids
Some hearing aids might be disturbed by mobile phones. In the
event of such disturbance, you may want to consult your service
provider, or call the customer services line to discuss
alternatives.
Aircraft
• Turn off your mobile phone before boarding any aircraft.
• Do not use it on the ground without crew permission.
To prevent interference with communication systems, you must
not use your mobile phone while the plane is in the air.
Potentially explosive atmospheres
Switch off your phone when in any area with a potentially
explosive atmosphere and obey all signs and instructions. It is
rare, but your phone or its accessories could generate sparks.
Sparks in such areas could cause an explosion or fire resulting in
bodily injury or even death. Areas with a potentially explosive
atmosphere are often, but not always, clearly marked. They
include fuelling areas, such as petrol stations, below deck on
boats, fuel or chemical transfer or storage facilities, and areas
where the air contains chemicals or particles, such as grain, dust,
or metal powders.; and any other area where you would normally
be advised to turn off your vehicle engine.
Driving
Check the laws and regulations on the use of mobile phones in
the areas where you drive. If you are going to use your phone
while driving, please:
• Give full attention to driving.
• Use handsfree. Law in many countries requires vehicle
handsfree.
• Pull off the road and park before making or answering a call if
driving conditions so require.
8

e122 CARE AND MAINTENANCE
RF energy may affect some electronic systems in motor vehicles
such as car stereo, safety equipment etc. in addition, some
vehicle manufacturers do not allow use of mobile phones, unless
the installation is supported by a handsfree kit with an external
antenna, in their vehicles. Check with your vehicle
manufacturer's representative to be sure that your mobile phone
will not affect the electronic systems in your vehicle.
9

EMERGENCY CALLS
Emergency calls
Important:
This phone, like any wireless phone, operates using radio
signals, wireless and landline networks as well as user
programmed functions. Because of this, connections in all
conditions cannot be guaranteed. Therefore, you should never
rely solely upon any wireless phone for essential
communications (e.g. medical emergencies)
Emergency calls may not be possible on all wireless phone
networks or when certain network services and/or phone features
are in use. Check with local service provider.
FCC Statement:
T9® Text Input and the T9® logo ar registered trademarks of the
Tegic Communication.
T9® Text Input is licensed under one or more of the following:
U.S. Pat. Nos. 5,187,480, 5,818,437, 5,945,928, 5,953,541, 6,011,554
6,286,064, 6,307,548, 6,307,549, and 6,636,162, 6,646,573; Australian
Pat. Nos. 727539, 746674, and 747901; Canadian Pat. Nos. 1,331,057,
2,302,595, and 2,227,904; Japan Pat. No. 3532780, 3492981; United
Kingdom Pat. No. 2238414B; HongKong Standard Pat. No. HK1010924;
Republic of Singapore Pat. No. 51383, 66959, and 71979; European.
Pat. Nos. 0 842 463 (96927260.8), 1 010 057 (98903671.0), 1 018 069
(98950708.2); Repubilc of Korea Pat. Nos. KR201211B1 and
KR226206B1. People's Republic of China Pat. Application Nos.
98802801.8, 98809472.X and 96196739.0; Mexico Pat. No. 208141;
Russian Federation Pat. No. 2206118; and additional Parents are
pending worldwide.
This device complies with Part 15 of the FCC Rules.
Operation is subject to the following two conditions: (1) this
device may not cause harmful interference, and (2) this
device must accept any interference received, including
interference that may cause undesired operation.
Licenses
10
e122

e122 YOUR PHO NE
Your phone
Keys and connectors
Earpiece
Camera key
Volume/Side
keys
Main display
Left soft key
Talk key /
Yes ke y
* key
Navigation key
Right soft key
Power on /
End call
Numeric keys
# key
Microphone
11
Shortcut Keys
• Adjusts the earpiece
volume during a call.
• Adjusts the ring
volume in standby
mode.
• In standby mode,
press and hold the
key to turn on the
torch light for 8
seconds. Press and
hold the key to
turn off the torch.
• To reject an incoming
call, press the key
twice.
• The current function
• In standby mode, this
Soft key
of each softkey is
displayed on the
screen above each
key.
Navigation Key
key gives quick
access to:
@
Wap
Profile
My data
Message
• In the menu, use the
navigation key to
scroll up and down
sub-menus.
• Press and hold
to activate Silent
mode.
• Press and hold
to lock the Keypad.
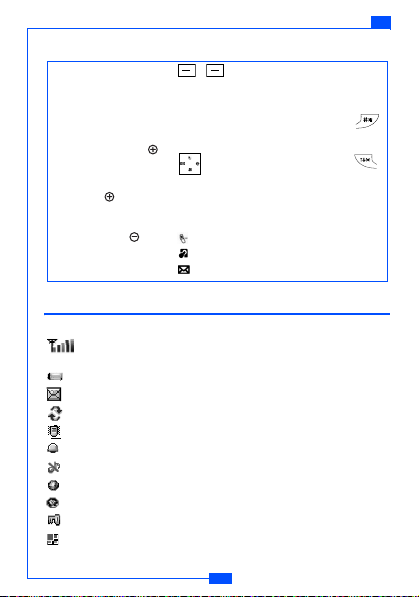
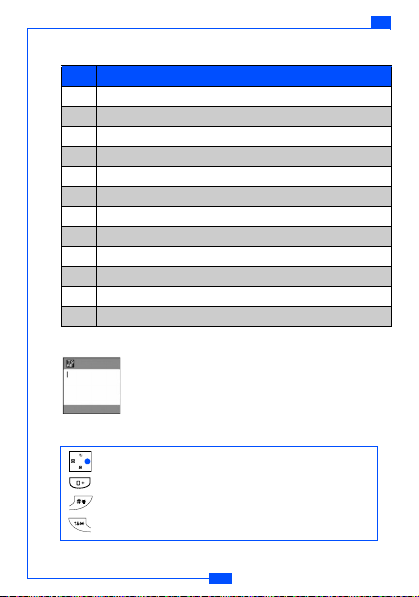
Standby mode
In the main display:
: The signal strength of the cellular network at your current
location.
: The battery charge level.
: One or several messages received.
: All calls are diverted to another number.
: Vibrate is on.
: Alarm clock is on.
: Silent mode activated.
: GPRS dial-up connection is on.
: Reject list is on.
: Keypad locked.
: A profile other than ‘Normal’ is set.
12
YOUR PHO NE
e122
e122 GETTING STARTED
Getting started
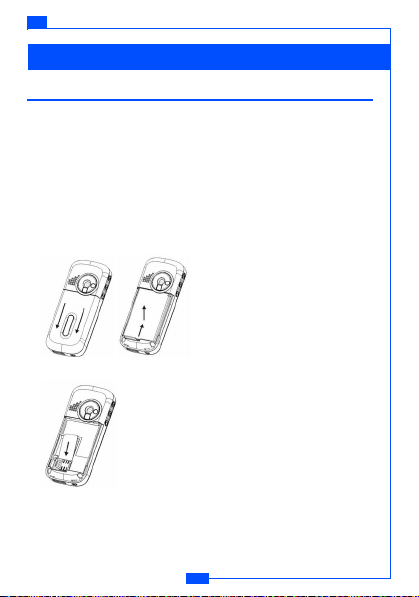
Installing the SIM card and the battery
Note: Insert the SIM card and charge the battery before using the
phone.
• Keep all SIM cards out of the reach of small children.
• Take care when handling the SIM card. Scratches and bending
can damage the card.
• Before installing/removing the SIM card, always make sure that
the phone is switched off.
1. Slide the cover off the phone (1) and lift the battery away (2).
2. Insert the SIM card (3).
13

GETTING STARTED
3. Insert the battery (4) and replace the rear cover of the phone (5).
Push the cover up until you hear a click.
e122
#
$
Charging the battery
You must fully charge the battery before using
your phone for the first time.
1. Connect the charger plug to the socket on
the bottom of your phone (A).
2. Connect the charger to an AC wall outlet.
"
3. It may take 5-15 minutes before a charging
icon is shown in the display.
Note: You can use the phone while the charger is connected but
charging is suspended during that time.
Note: A weak battery is indicated by a warning sound and " " is
shown on the display. When the battery is empty " " is
shown on the display and the phone will switch off.
Switching the phone on and off
Press and hold .
Note: If the phone shows "Insert SIM" when the SIM card is properly
inserted, contact your network operator or service provider.
If the phone asks for the PIN code, key in the PIN code and press
OK
.
Note: Do not switch the phone on when mobile phone use is
prohibited or when it may cause interference or danger.
14
e122 CALL FUNCTIONS
Call functions
Make and receive calls with your phone.
Making a call
• In standby mode, key in the number, including the area code, and
press .
Note: Use the Right Soft key to delete a character.
Making a call from the phone book
1. In Standby mode, press
2. Select the person you wish to call and press .
Alternatively, to search for a name:
1. In Standby mode, select
2. Scroll down to
3. Enter the full or partial name of the person you wish to call. Press
Option
and select
4. Select the person you wish to call and press .
Making an international call
1. For international calls, press and hold for the international
prefix (character +).
2. Key in the country code, area code and the phone number. Press
to call.
Answering or rejecting an incoming call
To answer an incoming call
• Press to answer the call.
To reject an incoming call
• Press the key twice, press or
Search
Search
Names
Names
and press
.
15
.
.
Select
Reject
.
to reject the call.

CALL FUNCTIONS
e122
Call waiting
You can answer another incoming call while you have a call in
progress.
1. Press to answer the incoming call. The first call is put on hold.
2. Press to end the call and return to the call on hold.
Handling more than one call
You can handle up to two lines simultaneously.
Making a second call
1. During a call, press
Option
2. Press
to call and press .
3. Or key in the number then press to make a second call.
Note: You can only put one call on hold. Please refer to "Making a
call from phonebook".
Two calls on line
To swap between the two calls
Swap
• Press
• To end the call and return to the call on hold, press .
Making a Conference call
1. During a call, press to receive the second call.Or press
key in the number and then press .
Join calls
2. Select
Hold
.
, choose
Phonebook
and select the name you want
. The first call is put on hold.
.
16
Hold
,

e122 INPUT METHOD
Input method
You can key in text character by character, or by predictive input.
To select input method
1. When keying in text, press
2. Choose an input method, and press
Change input method
• Press and hold to change the input method (T9Ab, ABC,
abc, 123).
To change case
• In "ABC" or "abc" input mode, press to change between
capital or lower-case letters.
To i n s er t a sp a ce
• Press the key to insert a space.
• In T9Ab, you can also use to insert a space.
Normal Text input
• Use the number keys to select the desired character.
Note: Your phone provides a Multi-tap function. For example, press
twice to display the letter B, and press it three times to
display the letter C.
Option
17
and select
Select
Input Select
.
.
Character table
Key Character
1 ? ! , . : ; = 1
2 2A B C Å Ä Æ à Ç 2
3 D E F è É 3 ∆ Φ
4 G H I ì 4 Γ
5 J K L 5 Λ
6 M N O Ñ Ö Ø Ò 6
7P Q R S ß 7 Π Σ
8 T U V Ü Ù 8
9W X Y Z 9
0 Space + & @ / % $ \ 0
* To change between lower-case and initial case
# To activate Silent mode
Text entry with T9
Keypad information
®
T9® uses a built-in dictionary to recognise the most
commonly used word for every sequence of key
presses.
Shift the cursor.
To switch between alternative words.
Press and hold to change input method.
Press to switch between upper and lower case.
18
INPUT METHOD
e122
e122 MENU STRUCTURE
Menu Structure
Phone book
You can save names and numbers in your phone memory and SIM
card. In addition, this phone allows you to store up to 300 names and
numbers in the phone memory. Records saved in the SIM are
indicated by and those in the Phone memory are indicated by
.
To save a name and phone number
1. In Standby mode, key in a number and press
Save
2. Select
SIM memory and press
3. Enter the name and press
save the number.
. Choose whether to save the record to the Phone or
Select
.
Option
Modify
Edit a number and name saved in the phone book.
To edit a number and a name:
1. In standby mode, select
2. Use to find a name in the phone book, and then press
Select
.
Detail
3. Select
4. Choose the item you wish to modify, press
5. Edit the record and press
.
Names
to access the phone book.
OK
to save.
Add
Add a new name and number to the phone book.
To add a name and phone number to the phone book:
Names
1. In standby mode, select
2. In the
3. Choose
Phone book
Save in SIM
, press
4. Key in the name and press
to access the phone book.
Select
and choose
or
Save in phone
Option
19
Option
.
. Select OK and then
Select
and select
Add
.
and press
Select
.
Save
Edit
.
to
.

MENU STRUCTURE
5. Select OK and select the type of number you want to save.
6. Key in the number and press
Save
7. Select
to save the name and number.
OK
.
e122
Groups
Send a message to all members of a group at the same time.
Before using this function, you need to create a Group list from the
phone book.
To add a name in a Group:
1. In standby mode, select
Phone book
2. In the
3. Choose a group and press
4. Select
Add member
5. Enter a name or press
a member from phone book. Press
, press
.
Names
to access the phone book.
Select
and select
Select
.
Option
and choose
Select
Groups
Phone book
.
.
to select
Note: For input methods, please refer to ‘Input method’ on page 17.
Group edits
Names
1. In standby mode, select
2. In the
Phone book
, press
3. Choose a group, then press
to access the phone book.
Select
and select
Select
Groups
to begin editing.
.
Your phone provides the following options:
• List members: View the members of the group.
• Add member: Add a member to the specified group.
• Rename: Change the group name.
• Ring type: Set a ring type for the group.
• Pictures: Set a picture for the group.
Speed dial
If the number is assigned to a speed dial key ( to ) you can
call the number by pressing and holding the relevant key while in
Standby mode.
20

e122 MENU STRUCTURE
1. In standby mode, select
2. In the
Phone book
3. Choose a speed dial number and press
4. Key in the name and press
Search
5. Select
correct name.
Select
6. Press
to save.
Names
, press
. If necessary, scroll up or down to choose the
to access the phone book.
Select
and select
Speed dial
Option
Select
.
.
.
Memory status
Memory status
SIM (40/200)
Phone
This phone allows you to view the phone book data
stored in the SIM and the Phone.
• In standby mode, select
phone book
Back
• In the
Phone book
Names
menu, select
to access the
Memory status
Copy all
You can copy and transfer your phone data from SIM to phone (or
from phone to SIM).
1. In standby mode, select
2. In the
Phone book
3. Choose
Copy to Phone
, press
Names
to access the phone book.
Select
and select
or
Copy to SIM
and press
Copy all
.
Select
.
Delete
Your phone allows you to delete all names and numbers stored in
the phone book.
1. In standby mode, select
Phone book
2. In the
3. Choose
4. If
5. At the prompt "Are you sure?" press
Delete it
delete all stored names and numbers.
Delete all in Phone
password at the Delete all screen. See ‘Security’ on page 35 for
details on passwords.
Names
, press
to delete one entry or
to access the phone book.
Select
and select
Delete
Delete all in Phone
.
is chosen you will be asked to key in the
Yes
.
21
.
to

MENU STRUCTURE
e122
CLI (Calling Line Identification)
Your phone allows you to recognize incoming calls by specified ring
tones and pictures assigned to numbers in the Phone book.
1. In standby mode, select
2. Select the name from the Phone book .
3. Select
Detail
Melody). Press
4. Select
5. Choose from the default or saved picture/melodies and press
6. Choose a picture/melody from the list. Press
to save.
and scroll to (Personal Picture) or (Personal
Assign
Select
.
Names
to access the phone book.
.
Select
Select
and then
OK
Message
SMS
Send text messages and receive voicemail notification messages
with your phone.
Read messages
When you have received a message, will appear on the display.
: Message in phone that has not been read.
: Message in phone that has been read.
: Message in SIM that has not been read.
: Message in SIM that has been read.
Note: A flashing message icon indicates that the message memory
is full. Before you can send or receive new messages, you
need to delete some of your older messages.
1. In Standby mode, press
SMS
Inbox
to enter the
.
2. Select
3. Select
4. Choose a message and press
Note: To quickly access Messages, press in standby mode.
Note: To scroll through the content of messages, use .
Menu
and select
Message
Read.
22
menu.
Message
.
.

e122 MENU STRUCTURE
When you have read the message, your phone provides the options:
• Reply: Reply by sending a text message.
• Forward: Forward a text message.
• Add number: Save the number in your phone book.
• Call: Call the number shown in the message.
• Delete: Delete the message in progress.
To write a message
1. From the
2. Key in the message and press
3. Choose from the listed options and press
SMS
menu, select
Compose
Option
.
.
Select
.
Your phone provides the following selections for your option:
• Add symbol: Add one or more symbols in the edit screen.
• Insert object: Add pictures or melodies to your message.
• Input select: Change the input method.
• Use templates: Insert templates. See page 27 for further details.
• Clear all: Erase the text composed in the edit screen.
Note: To quickly access Messages, press in standby mode.
Note: For details on keying in content, please refer to ‘Input method’
on page 17.
Note: Network operator or service provider support is necessary to
receive and display picture messages.
Keypad information
Shift the cursor.
Press to insert character *, #, or to start a new line.
Press and hold to change input method.
Press to switch between upper and lower case.
Press and hold to insert symbol.
23

MENU STRUCTURE
e122
To send a message
1. After composing the message, press
single
or
Send group
.
Option
and choose
Send
2. Enter the recipient's number or search for it in the phone book.
3. With the number displayed, press
Send
.
Your phone provides the following options:
• Send single: Send a text message immediately.
• Send group: Send to a group specified in your phone book.
• Save: Save a message and send it later.
Unsent and Outbox Messages
After sending the message, the message is saved in the Outbox folder.
You can also save the message in the
Unsent
folder to send it later.
Message settings
Your phone allows you to set up default settings.
Message
1. In the
2. Select
Setting
menu, select
.
SMS
.
Your phone provides the following setting selections:
• SMS center: Save or change the number of your SMS centre
(required when sending text messages).
• Vali d time : Set the length of time for which your text messages
will be stored at the SMS centre.
• Format: Send different types of messages if supported by your
network provider.
• Delivery report: Get reports informing you if your message has
been delivered or not.
• Reply path: Allow the recipient of your SMS message to send
you a reply through your message centre.
• Broadcast: This is a network service that allows you to receive
text messages on various topics, such as the weather or traffic.
Note: Broadcast must be supported by your network provider.
24

e122 MENU STRUCTURE
MMS (Multimedia message)
MMS allows you to send messages that contain text, sound and
pictures. Depending on the network, you may receive a text
message that includes an internet address where you can view the
multimedia message.
Note: A message with pictures is made up of several text
messages. Therefore, sending a message with pictures may
cost more than sending one text message.
Your phone supports the following MMS formats:
• Picture: JPG (indicate by ), GIF(indicated by ), and BMP
(indicated by ).
• Sound: monophonic ringing tones (indicated by ) and
polyphonic Midi (indicated by ).
• Motion JPG (indicated by icon )
Note: You are not able to receive multimedia messages during a
call, a game, or any active WAP connection over GPRS data.
Do not rely upon multimedia messages for essential
communication since delivery of multimedia messages can
fail for a variety of reasons.
To write a MMS
For MMS availability, contact your network operator or service
provider.
1. In the
Message
menu, select
Compose
2. Select
.
1st MMS size MMS size
3. In edit mode, press
Option
MMS
Option Back
and select
25
.
Add text
.

MENU STRUCTURE
You can insert one picture or a sound a in multimedia message.
To insert a picture, press
of available folders in the Gallery is shown.
Note: To send and receive picture messages, MMS must be
supported by your network provider.
Option
and select
Add Picture
e122
. The list
Your phone provides the following options:
• Add text: Edit the text content.
• Add image: Add a picture or a melody in your message.
• Add video: Add a video in your message.
• Add audio: Add a melody in your message.
• Add page: Add a page in multimedia messages.
• Preview: Preview your message before sending it.
• Page time: Set a page scroll time when you view the content.
• Send: Send your message.
• Save: Save a message and send it later.
To send multimedia messages
Option
and select
Send
1. Press
2. Choose
Phone number
3. Enter the recipient's phone number (or e-mail address) or search
for it in the phone book.
3. Select a phone number and press
Keypad information
Complete the MMS edit.
Sub menu for sending MMS.
or
E-mail
.
and press
OK
Select
.
.
Shift the cursor in text edit mode.
Press and hold to change input method.
Press to switch upper case and lower case.
Press and hold to insert symbol.
26

e122 MENU STRUCTURE
Unsent and Outbox multimedia messages
Your phone saves the multimedia messages that have been
received in the Inbox folder of the MMS menu.
Multimedia messages that have not been sent will be saved in the
Unsent folder, messages that have been sent are saved in the
Outbox folder of the MMS menu.
MMS memory full
If the message memory is full, a dialog is shown on the display. You
will not be allowed to compose or receive any more messages until
old messages have been deleted.
MMS setting
Your phone allows you to set up default settings within MMS.
1. In the
Message
2. Select
Setting
menu, select
.
MMS
.
Your phone provides the following setting options:
• Valid time: Set the length of time for which your text messages
will be stored at the SMS centre.
• Delivery report: Get reports informing you whether your
message has been delivered or not.
• Reply path: Allow the recipient of your SMS message to send
you a reply through your message centre.
• Auto reception: Set whether complete or partial message can
be downloaded.
• WAP profile: Select or create WAP settings specifically for MMS.
See the ‘WAP’ section on page 47 for further details.
• MMS server: Set up the MMS server address (information from
your network provider).
Tem pla te
If you use one or more messages that you send often, you can save
these messages as templates in your phone.
1. In Standby mode, press
Tem pla te
2. Select
Menu
and select
Message
.
.
27

e122
Save
3. Choose a Template and press
4. Enter the content of the template. Press
save the message.
Select
.
Option
MENU STRUCTURE
and select
Voice mail
If supported by your network provider, your phone allows you to
access your voice mailbox quickly.
• In standby mode, press and hold to access your voice mail
server directly.
Note: To use this function, you may need to enter the voice mail
number from your service provider.
Call Record
Your phone can save information on missed, received and dialled
calls, plus the length and cost of your calls.
Note: Once the call list exceeds the memory limit, the oldest record
is deleted.
Missed calls/Received calls/Outgoing calls
Your phone allows you to view the last ten unanswered calls. You
can also edit the number or delete the number from the call list.
1. In Standby mode, press
2. Scroll to
3. In the
3. Select a menu and press
4. Select the number you want and press
5. The call record is displayed. Press
Call record
Call record
the content.
Your phone provides the following options:
• Call: Call the number that is shown on the screen.
• Delete: Erase the number from the list.
• Save: Save the number in the phone book.
Menu
.
and press
Select
.
menu, choose an item and press
Select
.
Select
.
Option
.
28
Select
to view
to

e122 MENU STRUCTURE
Call duration
Your phone allows you to view the timers for calls made and
received.
1. In the
Call record menu
2. Choose an item and press
, select
Select
Call duration
.
.
Your phone provides the following options:
•Total
• Last
• Received
• Dialled
• Clear
Call cost
This function allows you to view the cost of calls.
To view the call cost
1. In the
Call record
2. Choose a selection and press
menu, select
Call cost
Select
.
.
Your phone provides the following options:
• Tota l: Total timers of all calls you have made. If the total cost
exceeds the maximum cost set through Call cost limit, you
will not be able to make any calls. (Does not affect calls to
the emergency services).
• Last: Cost of the last call made.
• Balance: Shows the remaining balance for calls.
• Reset: Reset cost counter. PIN2 code is needed.
• Call Cost Limit and Setting: See below.
To set the Call cost
1. In the
Call record
2. Choose
menu, select
Call cost limit
, and press
29
Call cost
Option
.
to Activate/Cancel.

e122
. Choose a
3. In the
Call cost
selection and press
menu, choose
Select
.
MENU STRUCTURE
Call cost setting
This phone provides the following options:
• Unit: Set the cost of one unit.
• Currency: Set the currency type for the cost of your calls.
Note: To activate, you may need the PIN2 code.
Note: Your network provider must support Call Cost Setting.
Data counter
This function allows you to check the data size whilst browsing the
Internet content through GPRS.
Your phone provides the following options:
• Last data
• All data
• Clear
Settings
Time & Date
This function allows you to view and change the date and time
settings of your phone.
To set the Time
1. In Standby mode, press
2. In the
Setting
3. Choose
Set time
4. Enter the time and press
To set the Time format
Setting
1. In the
2. Choose
Set Time
12 Hours
3. Select
menu, select
and press
menu, select
and press
or
24 Hours
Menu
and select
Time & Date
Select
OK
.
Time & Date
Select
and press OK.
30
. Select
. Select
Setting
.
.
Set time
.
Set time format
.
.

e122 MENU STRUCTURE
To set the Date
1. In
Setting
menu, select
Set Date
2. Choose
3. Enter the date and press
Time & Date
and press
Select
OK
.
. Select
Set Date
.
.
Melody
Melody allows you to select ring tone volume, choose from different
ring tones or compose your own ringtones.
Ring setting
Setting
1. In the
2. Choose
press
Ring setting
Select
.
menu, select
3. Choose a melody and press
Melody
and press
Select
.
Select
. Choose a selection and
.
You can assign different melodies to the following:
• Incoming call
• Message
• Alarm
• Calendar
Ring volume
You can adjust the ring volume to one of six levels.
1. In the
Setting
menu, select
Ring volume
2. Select
3. Use to adjust the ring volume and press
Melody
.
.
OK
.
Ring or Vibrate
You can set the phone to ring or vibrate during an incoming call.
Setting
1. In the
2. Select
3. Choose an item and press
menu, select
Ring or Vibrate
Melody
OK
.
.
31
.

MENU STRUCTURE
e122
Your phone provides the following options:
1. Ring only: The phone rings using the ring tone set in the Melody
Ring setting
2. Vibrate only: The phone vibrates but doesn't ring.
3. Ring & vibrate: The phone rings and vibrates.
4. Vibrate first: The phone vibrates for a few seconds before
ringing.
menu.
Key tone
Select a different keypad tone.
Setting
1. In the
2. Choose
3. Choose a key tone and press
menu, select
Key tone
and press
Melody
Select
Select
.
. Select
.
Key sound
.
Display settings
Your phone allows you to alter the display to suit your preference.
Wallpaper
Set a wallpaper for the LCD display in standby mode.
Setting
1. In the
2. Select
3. Choose a wallpaper from either the
picture
4. Press
menu, select
Wallpaper
lists.
Select
and then OK to confirm.
Display
.
.
Default picture
or
Saved
Greeting
This phone allows you to set a greeting animation or briefly
display a message when the phone is switched on.
the Setting
1. In
2. Select
3. Press
Greeting
OK
to save.
menu, select
, then choose
Display
.
Animation, Text
32
or
Off
.

e122 MENU STRUCTURE
Backlight time
This specifies the screen backlight duration.
1. In the
Setting
2. Select
menu, select
Short, Medium
or
Long
Backlight time
.
.
Note: A longer backlight duration will shorten battery life.
Contrast
This specifies the colour contrast on the main display.
1. In the
Setting
menu, select
Contrast
2. Select
.
3. Use to adjust the contrast rate, then press
Main display
.
OK
.
Brightness
You can adjust the contrast of the LCD screen.
1. In the
Setting
2. Select the desired brightness level and press
menu, select
Brightness
.
OK
to confirm.
Language
Your phone allows you to change the displayed language.
Menu
. Select
Setting
Language
.
.
.
1. In Standby mode, press
Phone setting
2. In the
3. Choose a
Language
menu, select
, and press
Select
Network selection
Network selection allows you to indicate whether the network
used when roaming is selected automatically or manually.
1. In the
Phone setting
2. Choose
3. Choose
Note: You can select a network other than your home network only
if it has a valid roaming agreement with your home network.
menu, press
Network select
Auto
or
Manual
and press
and press
33
Select
Select
Select
.
.
.

MENU STRUCTURE
Call settings
Reject list
This allows you to reject calls from certain numbers. To activate,
you need to save the numbers that you want to reject in the
Reject list. The numbers must first be saved in your phone book.
To activate Reject calls
1. In Standby mode, press
2. In the
Setting
3. Select
Reject list
4. Select
Activate
menu, select
.
and set to ON.
Menu
Call setting
and select
.
Setting
.
To add numbers to the Reject list
Reject list
, select
Edit
1. In the
number, then press
2. Select
Assign single
number and press
and choose an empty slot to add a
Select
.
or
Select
Assign group
to save.
. Enter or search for the
Time alert
This allows you to set a time reminder during a call.
Setting
1. In the
2. Select
menu, select
Time alert
3. Choose an item, and press
Call setting
.
.
Select
.
Your phone provides the following time alert options:
•Off
• Each minute
•User setting
Note: The minimum time for
User setting
is 30 seconds.
Speed dial
You can set the digit keys ( to ) as speed dialling
numbers for fast shortcut access.
34
e122

e122 MENU STRUCTURE
To activate speed dial
1. In the
Setting
menu, select
Speed dial
2. Select
Note: Digit key is already used as a shortcut for your voice
mailbox.
Call setting
, and set to On. press
.
Select
to save.
Call waiting
This network service enables you to be informed when someone
is trying to reach you during another call.
1. In the
Setting
2. Select
3. Choose
menu, select
Call waiting
Activate, Cancel
Call setting
Status
.
. Press
Select
to confirm.
.
or
Call divert
You can set the conditions by which calls are diverted to other
numbers.
To Set call divert
1. In the
Setting
menu, select
Call divert
2. Select
3. Choose when to divert calls and press
4. Enter the number your calls will be diverted to and press
Call setting
.
.
Select
. Select
Activate
OK
.
.
Your phone provides the following divert options:
• Any time: All calls are diverted.
• When busy: Calls are diverted when your phone is engaged.
• No reply: Calls are diverted when the call is not answered.
• Unreachable: Calls are diverted when you have no reception.
• Cancel all: Cancels all call diverts.
Security
The phone and SIM card are protected against misuse by several
security codes.
35

MENU STRUCTURE
PIN (4 to 8 digits)
The PIN (Personal Identification Number) code protects your SIM
card against unauthorized use. The PIN code is usually supplied
with the SIM card.
To activate or cancel the PIN code
1. In the
Setting
2. Select
3. Choose
PIN
On
.
menu, select
or
Off
and press
Security
Select
.
.
Note: The PIN code will be required if you are changing the setting.
Phone code
The phone code protects the phone against unauthorized use.
1. In the
Setting
menu, select
Phone code
2. Select
3. Choose
On
or
Off
Note: The phone code will be required if you are changing the
setting.
.
and press
Security
Select
.
.
Auto keylock
This will activate the key lock automatically in idle mode.
1. In the
Setting
2. Select
3. Choose
menu, select
Auto keylock
On
or
Off
.
and press
Security
Select
.
.
Call barring
This network service allows you to restrict your calls.
To activate call barring:
Setting
1. In the
2. Select
menu, select
Call barring
3. Make your choice and press
Security
.
.
Select
.
36
e122

e122 MENU STRUCTURE
Your phone provides the following call barring options:
• Outgoing: All outgoing calls are barred.
• Int'l calls (international calls): International calls are barred.
• ICEH (Internal Call Except Home): When abroad, calls can be
made within the current country and to your home country, where
your home network provider is located.
• Incoming: All incoming calls are barred.
• Incoming (Roaming): Incoming calls are barred while using the
phone outside your country.
• Code Change: Change call barring code.
Note: Call barring is a network service. A password is needed to
change the settings.
FDN (Fixed Dial Number)
This allows you to restrict your outgoing calls to a limited set of
phone numbers.
To s e t F D N
1. In the
Setting
menu, select
FDN
2. Select
3. Make your choice and press
, enter the PIN2 code and press OK.
Security
Select
.
.
Your phone provides the following options:
•Activate
• Member list
•Add member
• Delete all
Note: To activate, you may need to enter the PIN2 code.
Change codes
This allows you to change your current code to a new one. To
change the code, you need to enter the current code before you
can specify a new one.
37

MENU STRUCTURE
e122
To change the codes
1. In the
Setting
menu, select
Change codes
2. Select
3. Make your choice and press
Security
Select
.
.
.
Your phone provides the following code options:
• Change PIN
• Change PIN2
• Phone code
Security
Note: Please refer to
on page 35 for further details.
Reset all
This allows you to reset your phone to its default configuration. Before
resetting, you may need to enter the phone’s code.
1. In the
Setting
menu, select
Reset all
2. Select
3. Key in the phone code and press
.
Security
OK
.
.
Camera
You can use this phone to take photos with the phone's built-in
camera and adjust the camera settings.
The camera lens is on the back of the phone, and the display of the
phone works as a viewfinder.
If there's not enough memory for new pictures, you need to delete
old photos to free up space for new ones.
Note: Do not use the camera when it violates local laws.
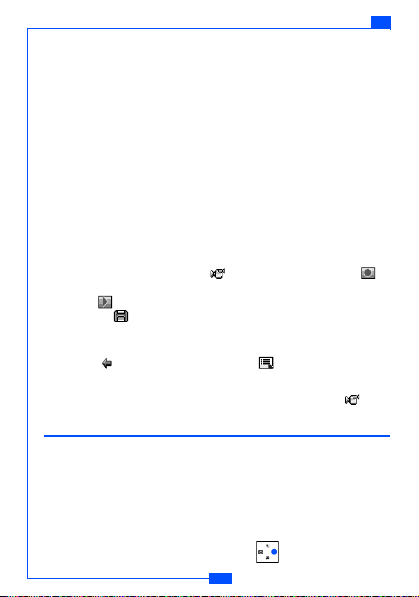
Camera indications
: Save the photo or video
: Shutter the photo and take video
:Back
: Default zoom size
:Zoom in
: Flash light
38

e122 MENU STRUCTURE
: Option menu
: Photo mode
: Multi-shot mode
: In video mode
: Video play
: Video record
: Stop recording video
: Pause
: Self timer
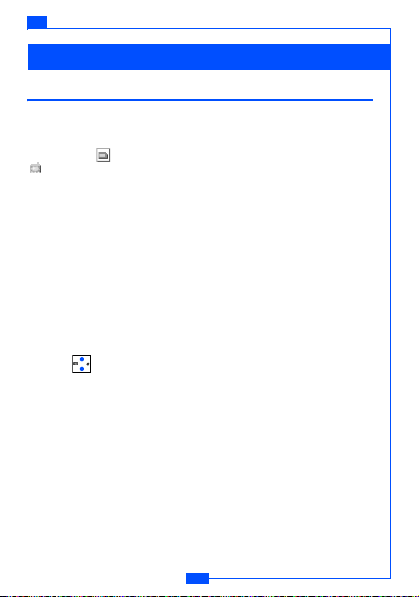
Photo
To take a photo:
1. In standby mode, press and hold the camera key to enter camera
mode. Select
2. To take a photo, press the camera or key.
3. To save the photo, press the
shutter sound is heard. The photo is saved in the
the
4. Select to take another photo or press to enter the
menu.
Note:
Photo
.
key
. When taking a photo, a
My Data
menu.
Picture gallery
When you are in photo mode, the screen will show the icon.
Option
Multi-shot
To take multi-shot:
1. In standby mode, press and hold the camera key to enter
Camera mode. Select
2. Press , and choose Multi-shot.
3. Select
On
or
Note: When you are in multi-shot mode, the screen will show the
icon.
Photo
.
Off
.
Your phone provides the following items for camera settings.
• Self-timer: Set the camera self time. Once the time has elapsed, the
camera takes the photo and saves it in the
menu. While the self-timer is running, a beeping sound is heard.
My data > Picture Gallery
39
in
MENU STRUCTURE
• Date: Show the date in photos.
• Digital Effect: Set your favourite effect in your photos. This
phone provides Monochrome, Negative, Sepia, Solarize and
Binary effects.
• Quality: Set the photo quality. This phone provides Excellent,
Fine and Basic options. Excellent provides the best quality but
takes up more memory.
• Picture size: This phone provides Large (640x480) and Normal
(128x160) for your options. Large takes more memory.
• Flash light: Turn the flash light On or Off.
e122
Video
To take Vide o
1. In standby mode, press the camera key to enter camera mode.
Select
Video
2. To take video, please press to start recording. Press to
stop recording.
3. Press to see the video you have just recorded. To save it,
press the key.
4. When recording video, a shutter sound is heard. The video is
saved in the
5. Select to take another video or to enter the Camera
menu.
Note:
.
Video gallery
in the
My data
menu.
When you are in video mode, the screen will show the icon.
Profile
Your phone has the following profiles:
• Normal: Phone is set to the standard profile, which is the factory
setting.
• Meeting: Ring volume is set to low and the key tone is switched off.
• Outdoor: Ring and key tone volume are set to loud.
• My profile: Set your preferred settings in this profile.
Note: To quickly access Profiles, press in standby mode.
40

e122 MENU STRUCTURE
To activate a Profile
1. In standby mode, press
2. Choose a profile and press
3. Select
Activate
Menu
. Select
Profile
.
Select
.
.
To edit a Profile
You can personalise the profile settings:
1. In the
Profile
menu, select a profile.
Personalize
2. Select
.
Your can personalise the following options:
• Ring or vibrate
• Incoming
• Message
• Ring volume
•Key tone
Note: Press and hold the
mode. Silent mode overrides any profile currently activated.
Press and hold the
key when in standby to activate Silent
key again to turn Silent mode OFF.
Accessories
Calendar
In the calendar you can add notes for things such as meetings,
birthdays and reminders. The phone sounds an alarm tone when the
set date and time arrives.
To add a note and reminder in the Calendar
1. In standby mode, press
Calendar
2. Select
3. Choose a day and press
4. Key in the note and press
date and time.
Reminder
5. Select
displayed.
Menu
. Select
.
Option
. Select
Option
Accessories
and then
Make a note
Save.
.
.
Confirm the
. A dialog confirming the note has been saved is
41
MENU STRUCTURE
e122
Your phone provides the following calender options:
• View today: View the notes for the specified day.
• View all: View all notes made in the calendar.
• Make a note: Add a note for a specified day.
• Delete: Delete a note or all notes made in the calendar.
To delete a note
Calendar
1. In the
Delete today, One by one
2. Select
Yes
3. Select
menu, select
to confirm.
Delete
or
.
All
.
Calculator
The calculator in this phone adds, subtracts, multiplies, divides, and
converts currency values.
To use the calculator
• In the
Accessories
menu, select
Calculator
.
Your phone provides the following options:
Left
• Four way key
• Four way key
• Four way key
• Four way
• Left soft key
• : Make number ‘minus’ (e.g. -5)
• : Decimal point.
: ÷ (Divide)
Right
Up
: + (Add)
Down
: - (Subtract)
(OK)
: = (Equals)
: * (Multiply)
Note: Rounding errors may occur, especially in long divisions.
Stopwa tch
The stopwatch allows you to time an event or record times.
To use the stopwatch
Accessories
1. In the
2. Select
3. Press
Intermediate timers are listed below the display.
menu, select
Start
and then press
Split
when you want to take an intermediate time.
Start
42
Stopwatch
.
.

e122 MENU STRUCTURE
4. Press
Stop
5. Press
to stop stopwatch.
Menu
to
Save
or
Reset
the stopwatch.
Note: Using the stopwatch consumes battery power and the
phone's operating time will be reduced.
Time count down
Set a timer in your phone. The last three seconds are indicated by a
beep, at the end, a special beep sounds.
To use the Time count down
1. In the
Accessories
2. Enter the length of the countdown and press
menu, select
Time count down
Start
.
.
Alarm
Set the alarm to ring at the time specified. The alarm clock works
even when the phone is switched off.
To set the alarm
1. In the
Accessories
2. Enter the time for the alarm and press
Once Alarm
3. Select
Note: If
you wish the alarm to go off. Select each day with the
key.
menu, select
or
Repeat Alarm
Alarm
.
OK
Repeat Alarm
.
.
is selected, you need to enter the days that
When the alarm rings
Press the left soft key to set
the alarm.
Snooze
or the right soft key to turn off
Game
New game options.
• Play: Start a new game.
• Music: Enable or disable music.
• High scores: Show the highest scores.
• Help: Show the rules of the game.
43

MENU STRUCTURE
e122
My data
Picture gallery
This folder saves all videos that have been saved from MMS, WAP
download or the camera. The videos are automatically saved in the
Video gallery. The camera produces video files in Motion JPEG
format.
To edit the images
1. In standby mode, press
2. Select the required
3. Choose a picture and press
4. Choose an item and press
Your phone provides the following edit options:
• View: View the pictures saved in the gallery.
• Send MMS: Select a picture and use the MMS function to send it
to your friends.
• Rename: Rename a picture.
• Save to My picture: Forward the picture to My picture (you will
need to enter the password).
• Delete: Delete the picture.
• Information: View the file type and size.
• Delete All: Delete all pictures.
Note: When sending pictures via MMS, the file size cannot exceed
100KB.
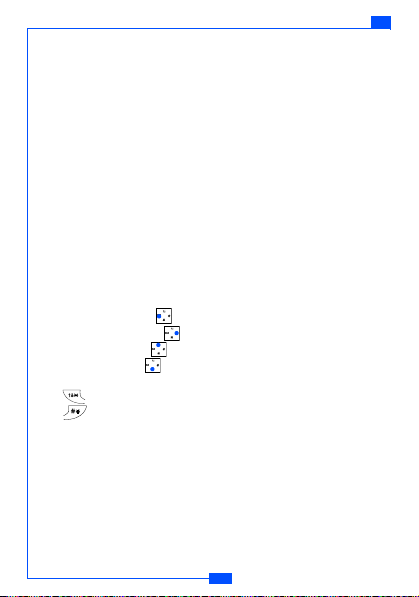
Your phone provides the following picture formats:
:BMP
:EMS
:GIF
:GPG
:WBMP
Menu
, and select
Picture Folder
Select
Select
44
.
.
to edit.
My data
.

e122 MENU STRUCTURE
Note: If you download any document which cannot be forwarded by
MMS or data cable, the Icon will be highlighted by a red
mark.
Video gallery
This folder contains all videos that have been saved. The videos are
automatically saved in the Video Folder. The camera produces
Motion JPEG video.
Note: Only the Motion JPEG format can be played or saved.
45

MENU STRUCTURE
e122
To edit the images
1. In the standby mode, press
2. Select the required
3. Choose a picture and press
4. Choose an item and press
Menu
Video Folder
Select
Select
and select
.
.
to edit.
My data
.
Your phone provides the following edit options:
• View: View the videos saved in the gallery.
• Send MMS: Select a video and use the MMS function to send it
to your friends.
• Rename: Rename a video.
• Save to My video: Forward the video to My video (you will need
to enter the password).
• Delete: Delete video.
• Information: View the file size and type.
• Delete All: Delete all videos.
Your phone provides the following video format:
: Motion JPEG
Melody gallery
This folder contains all melodies that have been saved. The
melodies are automatically saved in the Melody gallery. You can also
send these melodies to your friends in a multimedia message as an
e-mail attachment.
To edit the melody
Menu
and select
My data
1. In standby mode, press
2. Select
Melody gallery
.
.
3. Choose a melody to listen to.
46

e122 MENU STRUCTURE
Your phone provides the following selections edit options:
• Rename: Rename a melody name.
• Send MMS: Select a melody and use the MMS function to send it
to your friends.
• Delete: Delete the melody.
• Information: View the file size and type.
Note: When sending pictures via MMS, the file size cannot exceed
30KB.
Memory Status
This function shows how much memory has been used. The total
user memory is 2713KB.
WAP service
Your phone supports a Web Browser. You can obtain various
services such as up-to date news, weather, sport, and other
information as well as use e-mail and other Internet services. These
services are designed and maintained by WAP service providers.
WAP services use Wireless Markup Language (WML) on their WAP
pages. You may not view the normal Internet pages on your phone.
Note: To activate the WAP service, you may need to contact your
service provider.
Note: Do not switch the phone on when use is prohibited or when it
may cause interference or danger.
WAP setting
• If the settings have already been made by the Service Provider,
you may browse immediately.
• If access profiles have already been assigned by your Service
Provider, select a profile and activate it.
• Otherwise you may key in the setting manually. For the correct
settings, contact your network operator or service provider.
47

MENU STRUCTURE
e122
Key in the service settings manually
1. In the WAP menu, select
2. Choose a profile, press
settings.
You need to enter Homepage, User ID, Password and IP address
information in to your phone. To get the information, you may need
to contact your service provider.
WAP Profile
Select
, and then select
.
Edit
to edit the
Dial type:
You can access WAP via GSM or GPRS.
1. In the WAP menu, select
2. Choose a profile, press
Dial type
3. Select
To get the GPRS access point, you may need to contact your service
provider for the service.
WAP profile
Select
, and then choose either
.
, and then select
GSM
or
Edit
GPRS
.
.
Activate WAP settings
Activate
from the
After you complete all WAP settings, select
profile
menu.
WAP
Homepage
To launch the browser from standby mode, press the key. Once
connected, the homepage is displayed. Content depends on the
service provider.
To exit the browser, press the key.
Bookmark
You can save the addresses of up to five Internet sites for easy
access using the Bookmark feature.
Go to
Open any web page by entering its URL address.
Edit bookmark
Create or edit a local bookmark.
48

e122 MENU STRUCTURE
1. Choose a bookmark and press
2. Select
Edit
3. Enter the URL address and press
.
Select
OK
.
.
Your phone also provides you the following options:
• Delete: Delete the selected bookmark.
• Send address: Open the selected page.
Push inbox
Your phone is able to receive service messages sent by your service
provider. Service messages are notifications of headlines or content,
and they may contain the address of a WAP service.
To access the Push inbox in standby mode, press
receive a service message. The message is moved to the Push
inbox when you exit the message.
Read
when you
To Set the Push inbox
1. In the
WAP
2. Select a profile.
3. Choose
4. Choose
5. Select
menu, select
Edit
Push access
On
.
Note: If you select
and then
WAP profile
.
Push access
and press OK.
Off
, the phone will not receive service messages.
.
To access the Push inbox menu
WAP
• In the
menu, select
Push inbox
.
To access the Push inbox while browsing
Option
1. Press
, and select
2. Choose a message and press
Push inbox
Select
.
.
Your phone provides the following options:
• View: View detailed information on service notification.
• Delete: Delete the selected service notification.
• Load: Download the displayed content.
49

MENU STRUCTURE
e122
Certificates
In the Certificate management list, you can see a list of authority
certificates that have been stored in your phone. Use to see a
list of user certificates, if available.
Clear cache
The services you have accessed are saved in the cache of your
phone. A cache is a buffer memory, which is used to temporarily
save data.
To clear the cache
• While browsing, press
• In the
WAP Me nu
Yes
.
Option
, select
and select
Clear cache
Clear the cache
and confirm by selecting
, or
STK
SIM toolkit
In addition to the functions available in the phone, your service
provider may offer additional applications such as weather or stock
market information via the SIM card.
To set up the STK service
•Select
STK
in the main menu.
Note: For availability, you need to register for the services with your
service provider.
Note: Accessing these services may involve sending an SMS
message for which you may be charged.
50

e122 GPRS
GPRS
GPRS (General Packet Radio Service) is a technology used for
sending and receiving data over mobile networks. The applications
that use GPRS are WAP services, MMS and SMS messaging, Java
application downloading and GPRS dial-up (such as Internet and
e-mail). You can set the phone to automatically register to a GPRS
network when you switch the phone on.
Note: To use GPRS function, you may need to register for the
service with your service provider.
To get the GPRS service
1. In the WAP menu, select
2. Choose a profile, press
Dial type
3. Select
, and then
WAP profile
Select
, and then select
GPRS
.
Edit
.
.
PC sync
Transfer any stored data from the phone to PC or vice versa . The
tools to operate this function are available as accessory and are not
included in the box. Please contact the outlet where you purchased
the product from for availability.
51
 Loading...