

Page 1

Nextel
Digital Multi-Service Data-Capable Phone
®
i1000plus User’s Guide
Final Draft
March 22, 1999
Page 2

CONTENTS
Welcome to Nextel . . . . . . . . . . . . . . . . . . . . . . . . . . . . . . 1
Features of Your i1000
Learning to Use Your i1000
Activating Your i1000
Attaching and Charging the Battery . . . . . . . . . . . . . . . . . . . . . . . .5
Charging the Battery . . . . . . . . . . . . . . . . . . . . . . . . . . . . . . . .5
Disconnecting the Travel Charger . . . . . . . . . . . . . . . . . . . . .5
Battery and Charging Status . . . . . . . . . . . . . . . . . . . . . . . . . .6
Detaching the Battery . . . . . . . . . . . . . . . . . . . . . . . . . . . . . . .6
Turning On Your i1000
Your Nextel Phone Status . . . . . . . . . . . . . . . . . . . . . . . . . . . . . . .6
Turning Off Your i1000
Display Icons . . . . . . . . . . . . . . . . . . . . . . . . . . . . . . . . . . . . . . . . .8
About Modes and Menus . . . . . . . . . . . . . . . . . . . . . . . . . . . . . . . .9
Setting the Time and Date Format . . . . . . . . . . . . . . . . . . . . . . . . .9
Changing the Display Language . . . . . . . . . . . . . . . . . . . . . . . . .11
Phone Calls . . . . . . . . . . . . . . . . . . . . . . . . . . . . . . . . . . . 12
Programming Your Own Phone Number . . . . . . . . . . . . . . . . . . .12
Making Phone Calls . . . . . . . . . . . . . . . . . . . . . . . . . . . . . . . . . . .13
Using Other Dialing Methods . . . . . . . . . . . . . . . . . . . . . . . . . . .14
Last Number Redial . . . . . . . . . . . . . . . . . . . . . . . . . . . . . . .14
Turbo Dial™ . . . . . . . . . . . . . . . . . . . . . . . . . . . . . . . . . . . . .15
Automatic Redial . . . . . . . . . . . . . . . . . . . . . . . . . . . . . . . . .15
Emergency Dial . . . . . . . . . . . . . . . . . . . . . . . . . . . . . . . . . . .15
Non-Emergency Dial . . . . . . . . . . . . . . . . . . . . . . . . . . . . . .15
Hands-Free Speakerphone . . . . . . . . . . . . . . . . . . . . . . . . . . . . . .16
Receiving a Phone Call . . . . . . . . . . . . . . . . . . . . . . . . . . . . . . . .17
Missed Call Indicator . . . . . . . . . . . . . . . . . . . . . . . . . . . . . . . . . .17
Setting the Ringer Volume . . . . . . . . . . . . . . . . . . . . . . . . . . . . . . 18
Selecting a Ring Style . . . . . . . . . . . . . . . . . . . . . . . . . . . . . . . . .18
Selecting a Ring Style for the Alternate Line . . . . . . . . . . . . . . . 18
VibraCall . . . . . . . . . . . . . . . . . . . . . . . . . . . . . . . . . . . . . . . . . . .19
Creating, Editing and Using Stored Lists . . . . . . . . . . . . . . . . . . .21
Combined Phone Number and Private ID List Programming 21
Editing and Erasing Phone List Entries . . . . . . . . . . . . . . . .23
Editing and Erasing Private ID List Entries . . . . . . . . . . . . .23
Last 10 Numbers Received/Sent Call List . . . . . . . . . . . . . . . . . .24
Quickstore of Phone Numbers . . . . . . . . . . . . . . . . . . . . . . . . . . . 25
Quickstore of Private IDs . . . . . . . . . . . . . . . . . . . . . . . . . . . . . . .26
. . . . . . . . . . . . . . . . . . . . . . . . . . . . . .2
plus
. . . . . . . . . . . . . . . . . . . . . . . . . .4
plus
. . . . . . . . . . . . . . . . . . . . . . . . . . . . . . .4
plus
. . . . . . . . . . . . . . . . . . . . . . . . . . . . . .6
plus
. . . . . . . . . . . . . . . . . . . . . . . . . . . . .7
plus
i
Page 3

Contents
Additional Phone Services . . . . . . . . . . . . . . . . . . . . . . . 27
Call Waiting . . . . . . . . . . . . . . . . . . . . . . . . . . . . . . . . . . . . . . . . .27
Call Hold . . . . . . . . . . . . . . . . . . . . . . . . . . . . . . . . . . . . . . . . . . .28
3-Way Calling . . . . . . . . . . . . . . . . . . . . . . . . . . . . . . . . . . . . . . .28
Call Forwarding . . . . . . . . . . . . . . . . . . . . . . . . . . . . . . . . . . . . . . 28
Transferring Calls to Voice Mail . . . . . . . . . . . . . . . . . . . . . . . . .29
Caller ID . . . . . . . . . . . . . . . . . . . . . . . . . . . . . . . . . . . . . . . . . . . .29
Using an Alternate Line . . . . . . . . . . . . . . . . . . . . . . . . . . . . . . . .30
Nextel Voice Mail . . . . . . . . . . . . . . . . . . . . . . . . . . . . . . 32
Setting Up Your Voice Mailbox for the First Time . . . . . . . . . . .32
Sample Greetings . . . . . . . . . . . . . . . . . . . . . . . . . . . . . . . . .33
Accessing the Voice Mail Service After Set Up . . . . . . . . . . . . .33
Receiving New Voice Mail Messages . . . . . . . . . . . . . . . . . . . . . 34
Viewing Voice Mail Message Status in Your Mailbox . . . . . . . . 34
Nextel Voice Mail Features . . . . . . . . . . . . . . . . . . . . . . . . . . . . .36
Playing Messages . . . . . . . . . . . . . . . . . . . . . . . . . . . . . . . . . . . . .36
Sending Messages . . . . . . . . . . . . . . . . . . . . . . . . . . . . . . . . . . . .38
Acceptable Destination Addresses . . . . . . . . . . . . . . . . . . . .38
Recording and Sending Messages . . . . . . . . . . . . . . . . . . . . .39
Special Delivery Options . . . . . . . . . . . . . . . . . . . . . . . . . . .39
Urgent . . . . . . . . . . . . . . . . . . . . . . . . . . . . . . . . . . . . . . . . . .40
Private Delivery . . . . . . . . . . . . . . . . . . . . . . . . . . . . . . . . . .40
Notification of Non-delivery . . . . . . . . . . . . . . . . . . . . . . . . .40
Future Delivery of Messages . . . . . . . . . . . . . . . . . . . . . . . .41
Greetings . . . . . . . . . . . . . . . . . . . . . . . . . . . . . . . . . . . . . . . . . . .41
Group Lists . . . . . . . . . . . . . . . . . . . . . . . . . . . . . . . . . . . . . . . . . .43
Pager Notification . . . . . . . . . . . . . . . . . . . . . . . . . . . . . . . . . . . .45
Personal Password and Name Response Options . . . . . . . . . . . .46
Changing your Password . . . . . . . . . . . . . . . . . . . . . . . . . . .46
Name Response Options . . . . . . . . . . . . . . . . . . . . . . . . . . . .46
Message Forwarding . . . . . . . . . . . . . . . . . . . . . . . . . . . . . . . . . .46
Caller Options . . . . . . . . . . . . . . . . . . . . . . . . . . . . . . . . . . . . . . .47
Voice Mail Time and Dates . . . . . . . . . . . . . . . . . . . . . . . . . . . . .48
Using Text and Numeric Paging . . . . . . . . . . . . . . . . . . 50
The Nextel Paging Advantage . . . . . . . . . . . . . . . . . . . . . . . . . . .50
Page Delivery . . . . . . . . . . . . . . . . . . . . . . . . . . . . . . . . . . . . . . . .50
How to Use Nextel Text and Numeric Paging . . . . . . . . . . . . . . .50
To Send a Page . . . . . . . . . . . . . . . . . . . . . . . . . . . . . . . . . . .50
Notification of New Text and Numeric Pages . . . . . . . . . . .52
Retrieving New Pages . . . . . . . . . . . . . . . . . . . . . . . . . . . . . . 52
Viewing Your Text and Numeric Pages Status . . . . . . . . . . 53
ii
Page 4

Contents
Auto Call Back . . . . . . . . . . . . . . . . . . . . . . . . . . . . . . . . . . . . . . . 53
Nextel Direct Connect . . . . . . . . . . . . . . . . . . . . . . . . . . 55
Programming Your Own Private ID . . . . . . . . . . . . . . . . . . . . . .55
Nextel Direct Connect Private/Group Speaker . . . . . . . . . . . . . . 55
Private Calls . . . . . . . . . . . . . . . . . . . . . . . . . . . . . . . . . . . . . . . . . 56
Making Private Calls . . . . . . . . . . . . . . . . . . . . . . . . . . . . . . . . . .56
Cover Closed . . . . . . . . . . . . . . . . . . . . . . . . . . . . . . . . . . . . .56
Cover Open . . . . . . . . . . . . . . . . . . . . . . . . . . . . . . . . . . . . . .56
Receiving a Private Call . . . . . . . . . . . . . . . . . . . . . . . . . . . . . . . .57
Call Alert™ . . . . . . . . . . . . . . . . . . . . . . . . . . . . . . . . . . . . . . . . .57
Call Alert Queuing . . . . . . . . . . . . . . . . . . . . . . . . . . . . . . . . . . . .58
Group Calls . . . . . . . . . . . . . . . . . . . . . . . . . . . . . . . . . . . . . . . . .59
Making a Group Call . . . . . . . . . . . . . . . . . . . . . . . . . . . . . . . . . .59
Receiving a Group Call . . . . . . . . . . . . . . . . . . . . . . . . . . . . . . . . 60
Adding and Storing a Talkgroup . . . . . . . . . . . . . . . . . . . . . . . . .61
Group-Silent Programming . . . . . . . . . . . . . . . . . . . . . . . . . . . . .61
Using Your Phone as a Modem . . . . . . . . . . . . . . . . . . 62
Programming Menus . . . . . . . . . . . . . . . . . . . . . . . . . . . 63
Accessories . . . . . . . . . . . . . . . . . . . . . . . . . . . . . . . . . . . 69
Batteries . . . . . . . . . . . . . . . . . . . . . . . . . . . . . . . . . . . . . . . . . .69
Travel Charger . . . . . . . . . . . . . . . . . . . . . . . . . . . . . . . . . . . . . . .70
Cigarette Lighter Adapter . . . . . . . . . . . . . . . . . . . . . . . . . . . . . . .71
Desktop Dual-Pocket Charger . . . . . . . . . . . . . . . . . . . . . . . . . . .72
Audio Adapter . . . . . . . . . . . . . . . . . . . . . . . . . . . . . . . . . . . . . . .73
Other Useful Information . . . . . . . . . . . . . . . . . . . . . . . 74
Nextel Customer Care . . . . . . . . . . . . . . . . . . . . . . . . . . . . . . . . .74
Understanding Status Messages . . . . . . . . . . . . . . . . . . . . . . . . . .75
Terms and Conditions of Service . . . . . . . . . . . . . . . . . . . . . . . . .76
Safety and General Information . . . . . . . . . . . . . . . . . . 79
Safety and General . . . . . . . . . . . . . . . . . . . . . . . . . . . . . . . . . . . .81
Accessory Safety Information . . . . . . . . . . . . . . . . . . . . . . . . . . .84
Owner’s Information . . . . . . . . . . . . . . . . . . . . . . . . . . . 86
Private Call Directory . . . . . . . . . . . . . . . . . . . . . . . . . . . . . .87
Talkgroup Directory . . . . . . . . . . . . . . . . . . . . . . . . . . . . . . .87
iii
Page 5

Contents
Patent and Trademark Information
This product is protecte d under one or m ore of the following
patents:
4817157, 4896361, 4857928, 504179 3, 5060294, 5066923,
5134718, 5140156, 5239963, 525741 1, 5287387, 5265219,
5289504, 5316168, 5317247, 533839 6, 5389927, 5406588,
5424921, 5457376, 5460906, 555106 3, 5557079, 5596487,
5615412, 5638403, 5559468, 546946 5, 5170413, 5140615,
5519730, 5241544, 5584059, 557499 2, 5396656, 5487091,
5533004, 5299199, 5343499, 536950 1, 5509031, 5515379,
5528723, 5598417, 5066923, 524165 0, 5278833, 5359696,
5548631, 5410632, 5440582, 545773 5, 5457818, 5471670,
5477550, 5481537, 5566181, 522976 7, 5208804, 5295140,
5381449, 5440590, 5467398, 549023 0, 5620242, 5623523,
5655913, 5715240, 5771440, 585457 8, 5675281
Additional patents are pend ing.
© 1999 Nextel Communications, Inc. A ll rights r eserved. Nextel,
the Nextel logo, Nextel Direct C onnect, NexNote, NexNote Plus,
and Nextel Business Networks are trademarks and/or service marks
of Nextel Communications, Inc. www.nextel.com
, Motorola, iDEN, Call Alert, i1000plus, TurboDial, VibraCall, and
Message Mail are trademarks or registered trademarks of Motorola,
Inc.
®Reg. U.S. Pat. & Tm. Off.
All other trad emarks mentioned in this manual are trademarks of their
respective companies.
Important!
Be sure to read “Safety and General Information” on page 79
before using your Nextel phone.
© Copyright 1999, Motorola, Inc. All r ights reserved.
iv
Page 6

WELCOME TO NEXTEL
hank you for ch oosing Nextel as your wirele ss communications
provider . The i1000
T
cellular phones availabl e toda y, offering you a ran ge of un i qu e, st a teof-the-art features.
This guide contains all the information you need to take full advantage of
your Nextel service, including:
Digital cellular calling
•
security on the all-digital Nextel National Network
Nextel Direct Connect
•
instantly with one or more co-workers at a fraction of the cost of cellular
Voice Mail
•
Text and Numeric Paging
•
don’t have time to talk on the phone
Speakerphone
•
Alternate Lin
•
personal and most important calls
3-W a y Calling
•
Dial-up Services
•
Online Dial-up Services User’s Guide
Net mode
•
• You’ll also find details on other Nextel features:
• The all-digital Nextel National Network
• No roaming fees
• One-second call rounding after the first minute
• Flat-rate long distance pricing anywhere in the continental U.S.
• No landline connection charges
to keep you from missing important calls
feature for hands-free communication
e capability to help you better manage your business,
to easily conference with two other parties
to access Nextel Online Internet Services (future availability)
plus
is one of the most sophisticated digital
for crystal-clear connections and built-in call
SM
, an exclusive feature for communicating
to help you stay connected — even when you
capability without Landline Access (see the
)
Nextel
You can use various features of your i1000
closed. Look for special operating instructions in this guide.
For more information about Nextel or to view this guide on our web site,
visit us at www.nextel.com
TTY access for hearing-impaired users is available with your i1000
Nextel Online Dial-up Services User’s Guide
the
.
plus
with the cover open or
for complete instructions.
plus
. See
Questions?
Call Nextel Customer Care at 1-800-639-6111, or dial 611 from your
i
plus
1000
.
1
Page 7

i1000plus User’s Guide
Features of Your i1000
1. Antenna
3. Status Light
4. Speaker/Home/
Back Button
5. Volume
Control/
List Buttons
6. Nextel Direct
Connect
(Push-To-Talk)
PTT Button
7. Option Keys
8. Cover
(Closed)
2. On/Off Button
1000
plus
9. Menu Key
7. Option Key
10. Mode Key
*11. Punctuation
Key
*12. Back Key
13. Speakerphone
plus
Mode
1000
plus
MENU
1
1
abc
2
4
g
h
i
jkl
5
7
pqrs
tuv
8
nex
t
0
0
*Applies to Nextel Online Internet Services; future availability
3
mno
6
wxyz
9
def
14. Earpiece
8. Cover
(Open)
15. Alphanumeric
Display
7. Option Key
16. Send/End Key
17. Scroll Key
18. Alphanumeric
Keypad
*19. Home Key
20. Microphone
*21. Next Key
22. Accessory and
Data Cable
Connector
NOTES:
2
• Remove the three plastic film lens protectors from
the display and cover before you use yo ur
i
1000
plus
for the first time.
• The displa y ba ck light is acti va ted b y pres sing an y k ey
or button.
Page 8

Welcome to Nextel
1. Antenna Extend for optimal signal.
i
1000
plus
2. On/Off Button Press and hold to tur n your
3. Status Light Check the status of your connection . See
Table 2 on page 7 for more information .
4. Speaker/Home/
Back Button
5. Volume C o n trol/
List Buttons
6. Nextel Direct
Connect
(PTT) Button
7. Option Keys Pres s to se lect a menu op tion o n the d isplay
8. Cover Close the cover to protect the keypad or e nd a
9. Menu Key Press to scroll throug h m enu option s.
10. Mode Key Press to change mod es (Pho ne, Pri vate,
11. Punctuation Key For future functionality.
12. Back Key For future functionality.
13. Speakerphone Listen to calls dur ing speakerphone or Nextel
14. Earpiece Listen to calls when t he spe aker phon e or t he
15. Alphanumeric
Display
16. Send/End Key After entering a phone number, press to make a
17. Scroll Key Press the left side to sc ro ll backward or the
18. Alphanumeric
Keypad
19. Home Key Use to change lettercase when entering text.
20. Microphone Speak into durin g calls.
21. Next Key For future functionality.
22. Accessory and
Data Cable
Connector
Press to listen to Nextel Dir ect Con nect calls
through either the ea r p iece o r the speaker
during Private and Gro up call s.
Press to adjust volume levels in Phone, Private,
and Group modes an d to s croll th rou gh list s.
Press to transmit a Pr ivate or Gr oup Ca ll, or a
Call Alert™. Press and hold to talk; release it to
listen.
that appears directly above the left or ri ght
option key.
phone call.
Group, Net (for future functionality)).
Direct Connect calls.
Nextel Direct Connect spe aker is of f.
View up to four lines (12 characters pe r line) or
six lines (16 charac ters pe r lin e) on the dis play
in Mail Services and Ne t Mod e (futur e
availability).
phone call or redial the numb er. Press to
answer incoming phone calls. Pr ess to end
phone calls.
right side to scro ll forward throug h menu
options and lists. When entering text, press to
erase text or add a space.
Enter telephone numbers, Private Call IDs, and
alphanumeric charac ter s.
Also, for future functionality in Net Mode.
Connect accesso ri es and the da ta ca ble.
on or off.
3
Page 9

i1000plus User’s Guide
i
1000
plus
plus
in your local calling
Learning to Use Your i1000
This User’s Guide is designed to help you learn about the features of your
new i1000plus. By reading it no w, you’ll be able to take full advantage of all
the benefits your Nextel service provides for you and your company.
You will find a handy Quick Reference Guide attached to this manual to
help you get started on your i1000plus right away.
Or, you can view the short vid eo to lea rn th e ba sics of u sing your i1000plus,
then refer to the User’s Guide later for more in-depth information.
Activating Your i1000
Before you can begin using your i1000plus, it needs to be activated.
• If you purchase d your phone through a Nextel Sales Representative,
your phone should be active already.
• If there is a separate activation s heet in this package, simply follo w the
step-by-step instructions included.
If your display reads “No Service” or doesn’t change to the “Phone Ready”
screen when you turn on your phone and you know you are in a Nextel
coverage area, call Nextel Customer Care at 1-800-639-6111.
NOTE:
For first time users:
To properly register for the first time on the network,
you must turn on your
area prior to traveling.
plus
4
Page 10
Welcome to Nextel
h
Accessory Connector
(Connect to i1000plus)
Charger
(Plug into AC outlet)
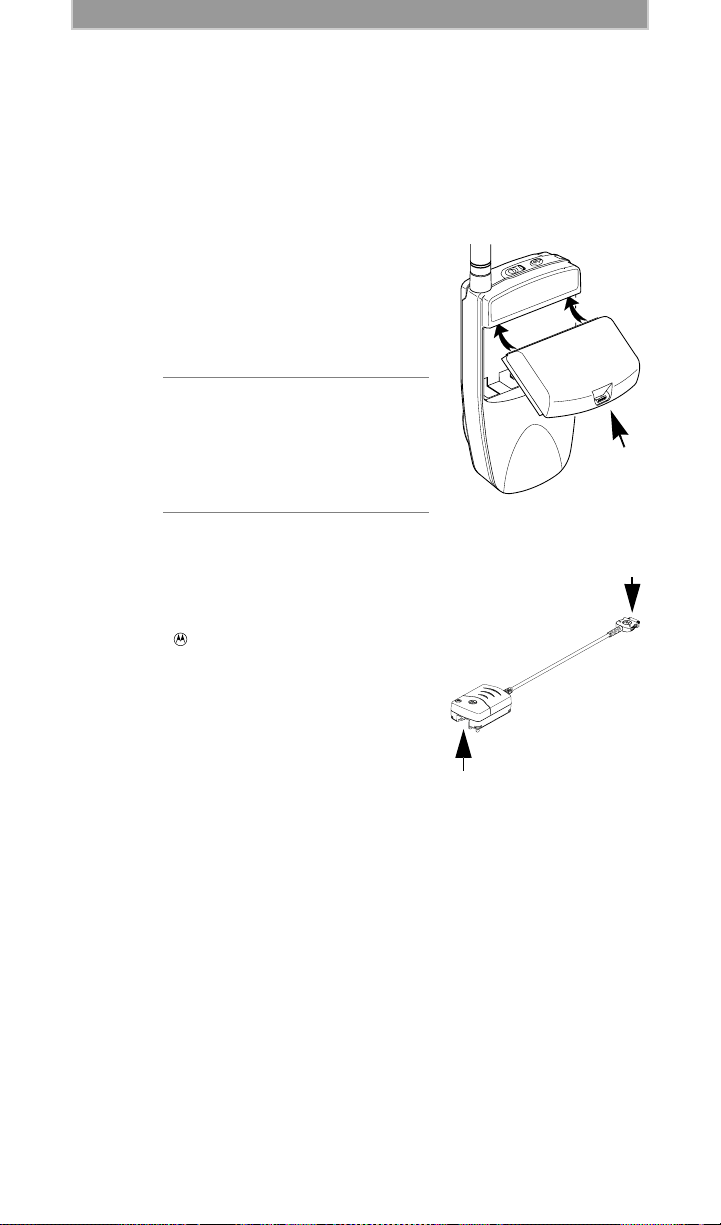
Attaching and Charging the Battery
To get the maximum use from the battery, charge it for at least three hours
before you use it for the first time. After the initial charging, the battery can
be charged more quickly.
Remove the battery from the protective case provided in the original
packaging. When the battery is not attached to the phone or being charged,
store it in this case.
Attaching the Battery
T o attach the battery to your i1000plus, align the
battery as shown. Press down on the battery until
you hear a click.
NOTE:
Charging the Battery
To charge the battery using the Travel Charger:
1. Make sure your i1000plus is facing yo u.
2. With the logo on the accessory
connector facing you, plug the accessory
connector into the bottom of the i1000plus.
3. Flip open the prongs and plug the charger
into an AC outlet.
Disconnecting the Travel Charger
To disconnect the Travel Charger, squeeze the side tabs of the accessory
connector and pull out.
The battery can be charged
i
1000
plus
with the
turned on or off. For best
results, charge it with the
phone turned off.
either
Latc
5
Page 11

i1000plus User’s Guide
Please Wait
Connecting
Battery and Charging Status
A low battery is indicated by a short, chirp-like sound through the speaker.
The battery st re ngth indicator icon shows the remaining charge in your
battery. Three bars indicate full charge. As the charge is reduced through
use, the bars disappear. The indicator flashes when you have less then five
minutes of talk time remaining.
Table 1: Battery Charging Status
Icon
Flashes
Charging Low Battery 0-30% 31-60% 61-90% 91-100%
Discharging Low Battery 0-10% 11-40% 41-70% 71-100%
Detaching the Battery
To detach the battery, press the latch to release the battery and slide the
battery downward.
Turning On Your i1000
After your battery is fully charged, turn on your phone by simply pressing
and holding the On/Off button on top of the phone.
A set of icons appears briefly on your display, followed by a “Welcome to
Nextel” message, and then a “Please Wait Connecting” message.
Within seconds, your phone will sign on to the Nextel National Network and
“Phone Ready” will appear in the display area. Now, you’re ready to use your
i
plus
1000
!
plus
Welcome To
NEXTEL
Your Nextel Phone Status
As you turn ed on yo ur i1000
to the On/Off button on top of the phone. It’s the “Status Light” indicator
that shows you the status of your connection at a glance.
page 7
.
plus
, you may have noticed a light flashing next
See Table 2 on
6
Page 12

Welcome to Nextel
Table 2: Status Light Indicator
Status Light
Indicator
Flashing Red Registering—your
Solid Red No service—your i1000
Flashing
Green
Solid Green In use—-your
Nextel Phone Status
i
1000
Nextel National Network. Please wait.
you are in a Nextel coverage area, keep your
phone on and it will continue trying to connect
every two minutes as long as your phone is
turned on. If this con tinues for 15 minutes or
longer, call Nextel Customer Care at 1-800639-6111.
Note: If you are not in a Nextel coverage area,
you will also see a red light.
i
i
1000
1000
plus
In service—your
You’re on the Nextel National Network!
You can now place and receive calls.
Note: Direct Connect (Private and Group) calls
are not available outside your home market
area.
To make sure that you ended the last call,
press .
plus
is signing on to the
plus
cannot sign on. If
plus
is ready to use.
is currently being used.
Turning Off Your i1000
plus
Press and hold the On/Off button until you see the message “Po wering
Off”.
7
Page 13
i1000plus User’s Guide
Display Icons
After you turn on the phone, icons appear on the display to inf orm you of
existing conditions. See the following list.
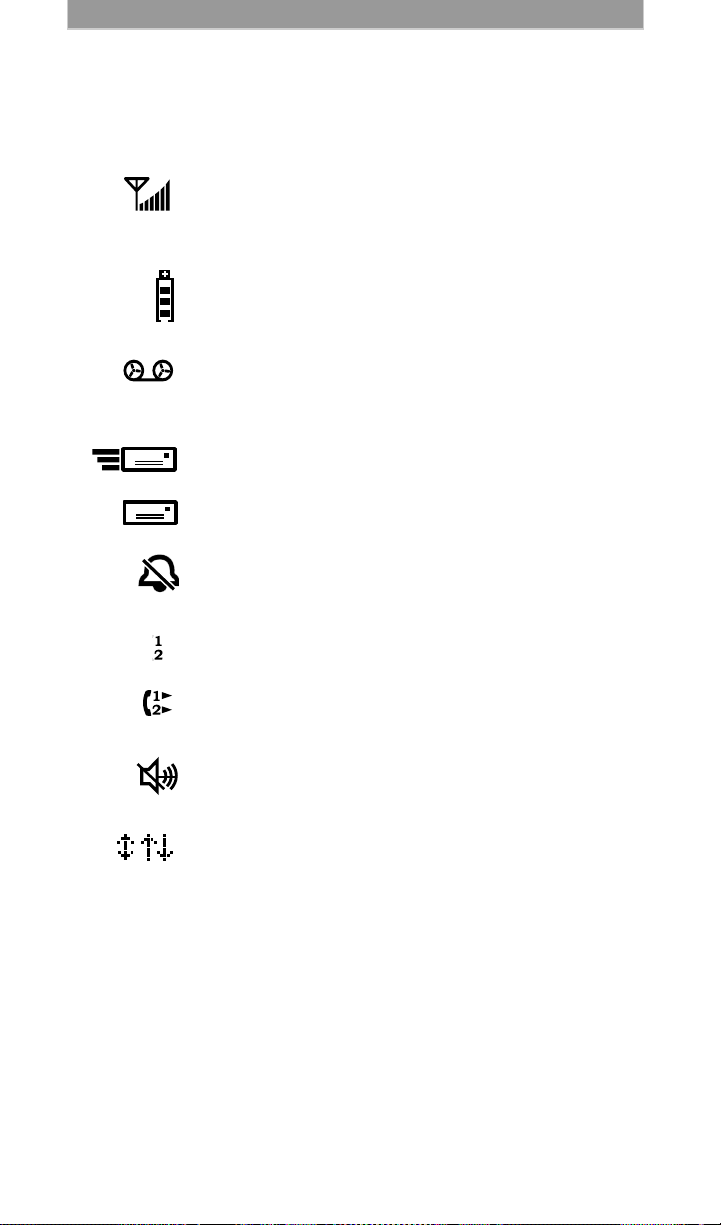
The following icons may appear on the display.
Signal Strength Indicator
Shows the signal strength. Six bars indicate the strongest
signal. Calls and messages may not be sent or received
when there is no signal.
Battery Strength Indicator
Shows the remaining charge in your battery. Three bars
show full charge. The indicator flashes when you have
less than five minutes of talk time remaining.
Voice Mail
Indicates that you listened to but did not save or delete
messages. A flashing voice mail icon indicates that
unplayed messages are waiting in your voice mailbox.
New Text and Numeric Paging
Indicates that you have new incoming pages.
Unread Text and Numeric Paging
Indicates th at you have unread pages.
Vibration (VibraCall
Indicates that the Vibrate All option is turned on. Your
i1000plus will vibrate instead of giving you a ring tone.
Active Line Indication
Indicates the active phone line (1 or 2).
™
)
Call Forward
Indicates that incoming phone calls are being forwarded
and displays the phone lines forwarded (1, 2, or both).
Private/Group Speaker
Indicates that the Private/Group speaker is off. You will
hear Nextel Direct Connect calls through the earpiece.
More Information
Indicates that there is more text to read above, below, or
above and below the current screen.
8
Page 14

Welcome to Nextel
About Modes and Menus
Your i1000plus operates in four different modes: Phone, Private, Group, and
Net (future availability). By switching modes, you can use your i1000plus
for different operations: phone calls, private and group calls, and Nextel
Online Internet Services (future availability).
If the word “Ready” does not appear after the mode name in the display,
your unit is not ready.
To switch between these modes:
• With the cover closed, press the option key under “Mode”.
Mode
• Or, open the cover and press
To use menu options:
• With the cover closed, the menu options change as you press the
option keys under the menu options.
• With the cover open:
1. Press
2. Press to scroll through the available menu options for the
Mode
.
MENU
selected mode.
3. Press under the displayed menu option that you wish to
select.
.
Setting the Time and Date Format
IMPORTANT: The Time and Date may not be available in your area
and may not appear on your display. Once t his fe ature becomes
available, your i1000
date.
You have a choice of a 12- or a 24-hour clock format. See Table 3.
12-Hour Display 24-Hour Display
12:00a 00:00
6:25a 06:25
12:00p 12:00
10:25p 22:25
will automatically display the local time and
plus
Table 3: Time Display Options
9
Page 15
i1000plus User’s Guide
71=Time/
Exit Ok
Date
Time/Date
Display:On
Exit Off
Time Format:
12 Hour
Exit 24hr
Exit DD/MM
MM/DD
Date Format:
After this feature is activated, you have a choice of either a MM/DD
(month/day) or a DD/MM (day/month) date format. See Table 4.
Table 4: Date Display Options
Month/Day Format
Date
January 2nd 01/02 02/01
December 31st 12/31 31/12
(MM/DD)
Day/Month Format
(DD/MM)
After this feature is activated, all modes (Phone Ready, Private Ready,
Group Ready, Net Ready) display the time and date on the third line of the
display.
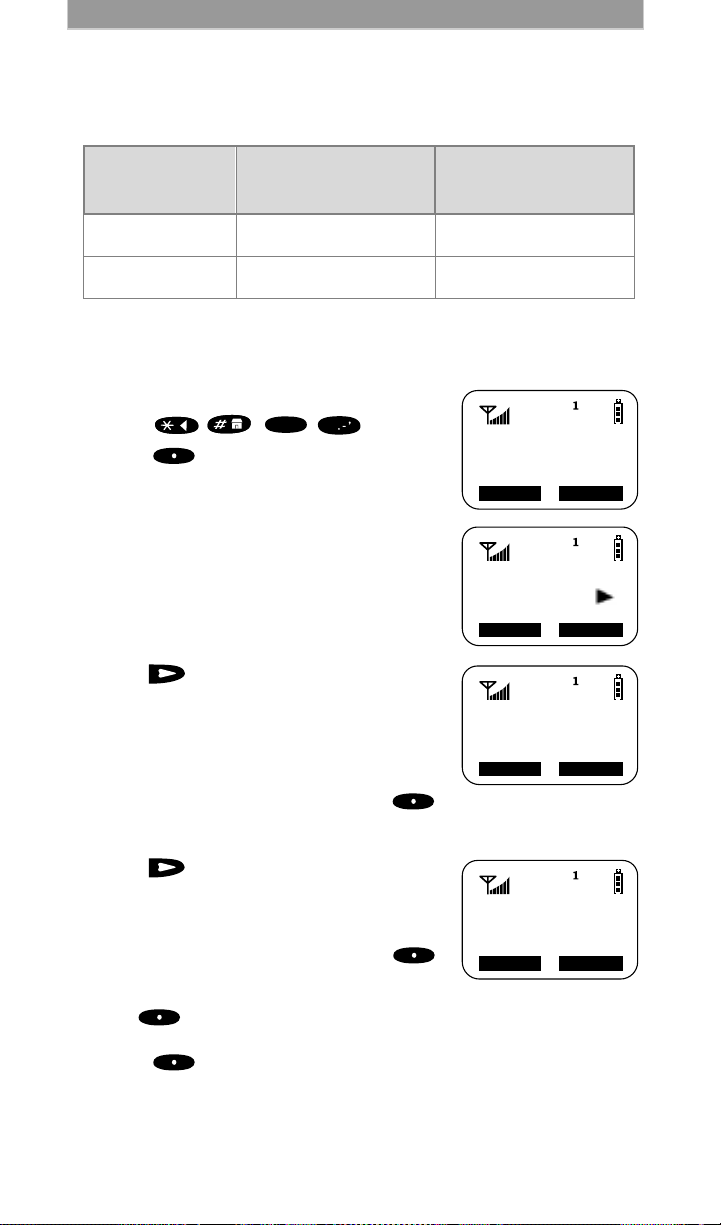
To set the time and date format:
PQRS
7
1. Press , , , .
2. Press
under “Ok”. The Time/Date
1
screen displays.
The default (pres et) time and date forma t is
set to “On”. However, the time and date
does not display until the Nextel National
Network activates this feature.
3. Press until you see the Time Format
screen.
4. Do one of the fo llowing:
• To use the 12-hour format, go to the
next step.
• T o use the 24-hour format, press
under “24hr”.
(See Table 3 on page 9.)
5. Press until you see the Date Format
screen.
6. Do one of the fo llowing:
• T o u se the MM/DD format, p ress
under “Exit”.
• Or to use the DD/MM format, press
under “DD/MM”.
(See Table 4 on page 10.)
7. Press
under “Exit”. The Phone, Private, Group, and Net Ready
screens now display the selected time and date formats.
10
Page 16

Welcome to Nextel
70=Language
Francais
OkCancl
Changing the Display Language
You can customize your i1000plus to display menus in English, Spanish,
French, or Portuguese. The default language is English.
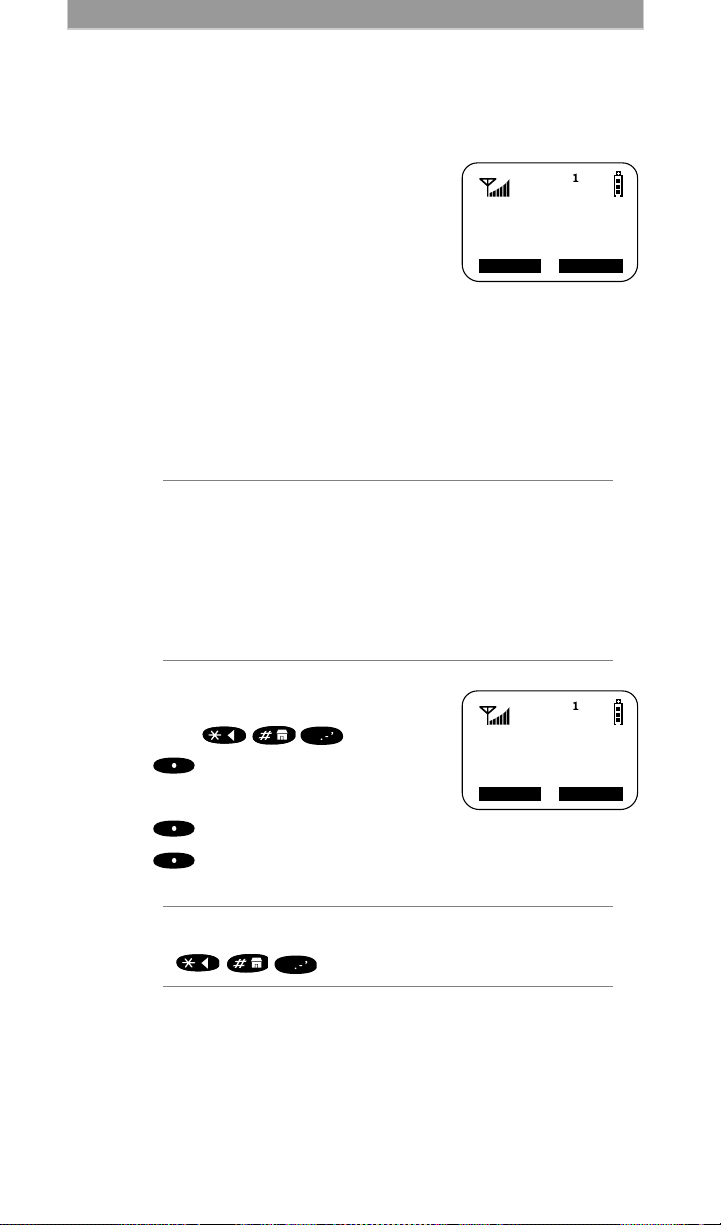
To change the displayed language:
1. Open the cover.
2. Press , , , .
3. Select “Ok”.
4. Press to scroll through the language options.
Selecting “E xit” at any time retains the current language selection.
5. When the desired language appears on your
display, select “Ok”. The displayed text
immediately changes to the selected
language.
6. Select “Exit” (in the language selected) to
exit this menu.
PQRS
nex
7
t
0
11
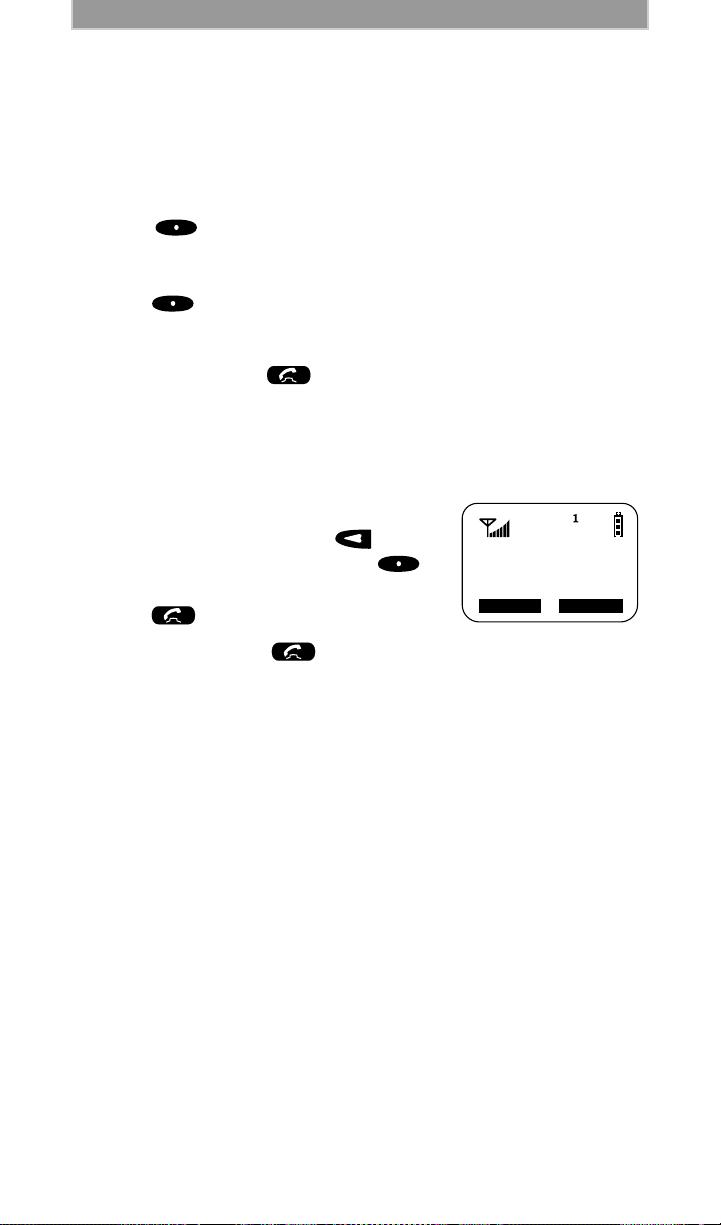
Page 17
i1000plus User’s Guide
Phone Ready
Name Mail
Line1
(cover open)
1_=Own Ph#
Exit Edit
9545553434
PHONE CALLS
In addition to making and receiving phone calls in various ways in Phone
mode, you can make emergency and non-emergency calls, be notified of a
missed call, select ring style notification, set VibraCall, and more.
You can receive incoming phone calls while the
i1000plus is in any mode, and you can make a
phone call with the cover closed or open.
You must be in “Phone Ready” mode to make
and receive phone calls.
Programming Your Own Phone Number
Before you get started using your i1000plus, you may need to enter your
own phone number so you can refer to it later if necessary. This is a onetime activity that can be performed using the following instructions. Or, you
can wait for your first incoming call, when it is automatically entered.
NOTE:
1. T o store your phone number in your Nextel
phone (or the alternate line, if you have two
lines), press , , .
2. Press
3. Enter your phone number.
4. Press
5. Press
NOTE:
If your Nextel phone has two lines, your phone
number for the second line will not be automatically
entered with the first incoming cal l to that line. You
must manually program it in. First select the line for
the phone numb er that y ou w ant to prog r am, and th en
continue. For more information, see “Using an
Alternate Line” on page 30.
1
under “Edit”.
under “Store”.
under “Exit”.
To displ ay your phone number at any time, press
,,.
1
12
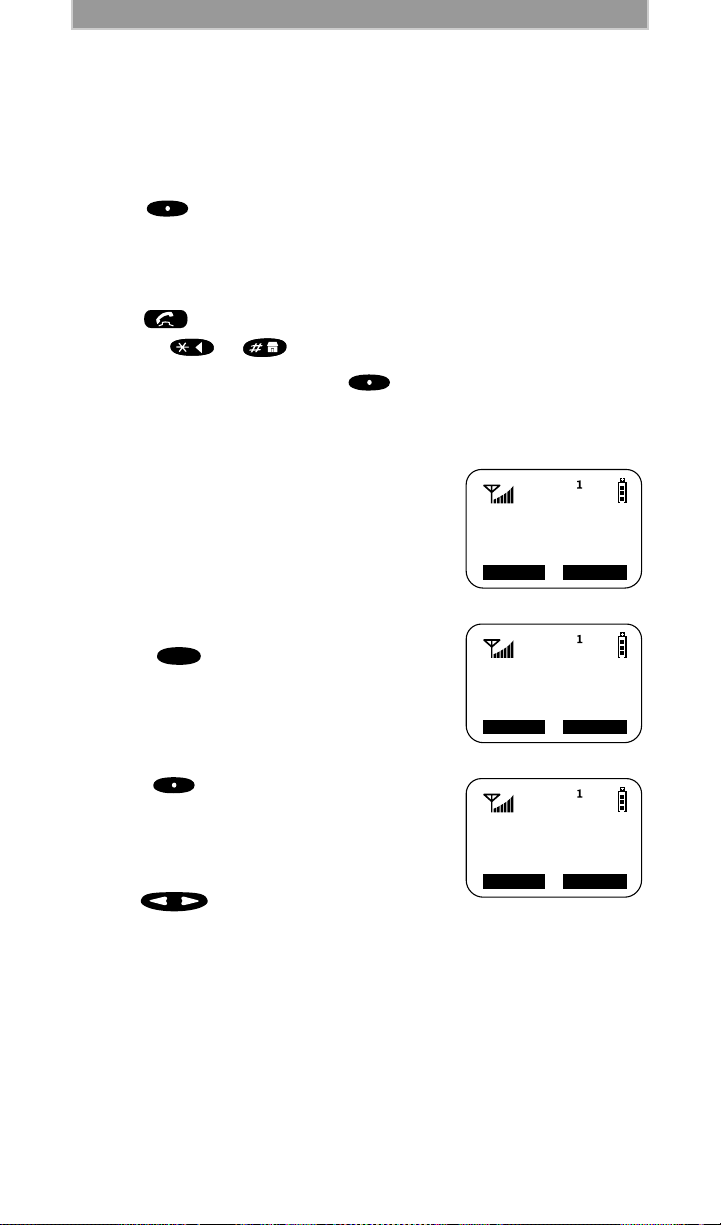
Page 18
Phone Calls
Phone Ready
Name Mail
Line1
Making Phone Calls
Cover Closed
T o place a call with the cover closed, you must hav e a stored phone number.
For more information, see “Creating, Editing and Using Stored Lists” on
page 21.
1. Press
2. Use the Volume Control buttons to scroll through your Phone list until
you see the desi red name or number.
3. Press
activated. For a private conversation, open the cover and use the
earpiece.
4. To end the call, press .
Cover Open
You can place a call by entering the phone number on the keypad (Direct
Dial).
1. Enter t he number you wish to cal l.
under “List”.
under “Dial”. When the call connects, the speakerphone is
If you make a mistake, press to move
back one digit at a time, or press
under “Cancl” to start over.
2. Press to place the call.
3. To end the call, press or close the
cover.
13
Page 19

i1000plus User’s Guide
Using Other Dialing Methods
IMPORTANT: After creating a phone list as described in “Creating,
Editing and Using Stored Lists” on page 21, you have the following
additional options to make a call.
Scroll
1. Press to scroll backward or forward through the stored list of
numbers and names.
2. Press to place the call.
3. To end the call, press or close the cover.
Speed Dial
1. Press until you see the “Spd#” option.
2. Press
3. Enter the assigned speed-dial number (1-100). You will see the
4. Press to place the call.
5. To end the call, press or close the cover.
MENU
under “Spd#”.
name and phone number associated with the speed-dial number.
Name Search
1. Press
2. Using the keypad, enter the first letter of the desired name, for example,
to search for the name Bob:
a. Enter “B” by pressing until you reach the “B” listings.
b. Press to scroll through all the names starting with “B” until
you see “Bob”.
3. Press to place the call.
4. To end the call, press or close the cover.
under “Name”.
ABC
2
Last Number Redial
To redial the last number that you called, simply press .
14
Page 20

Phone Calls
Turbo Dial
™
Turbo Dial allows y ou to call any one of your f irst eight entries in the Phone
List director y by pre ssing and holding the corresponding numeric key (1-8)
on the keypad for two seconds, thus automatically dialing that phone
number.
• Press and hold the numeric key (1-8) associated with the number you
wish to dial.
• The phone begins to dial the number.
For exam ple, pres s fo r spee d dial #1 . Keypad num ber s 0 and 9 are
not available for Turbo Dialing. Pressing and holding will result
1
WXYZ
9
in emergency dialing to 911.
Automatic Redial
If you receive a “System Busy, Try Later” message, press to have
your phone automatically redial the number. You will hear a ring-back tone
when the call is successful.
Emergency Dial
The Emergency Dial feature allows you to call the 911 emergency phone
number by pressing an d ho ldi ng for two sec ond s. You can press the
emergency key e v en if the ke ypad is locked. If you are on an acti v e call, you
must end it before pressing the emergency key.
1. From any mode, press and hold until the unit displays
“EMERGENCY”. The phone then automatically dials the emergency
number.
2. To end the call, press , or close the cover.
WXYZ
9
WXYZ
9
NOTE:
Access to 911 may not be av ailab le in all areas. For
details on the Emergency Dial feature, contact
Customer Care at 1-800-639-6111 or dia l 611 on
your Nextel phone.
Non-Emergency Dial
Now you can call the State Police and Highway Patrol faster, at no charge,
when you’re on a major highway or turnpike in Nextel coverage areas in
localities that offer non-emergency dialing.
Report traffic accidents, motorist problems, careless drivers or any other
non-emergency hig hway incident.
Your Nextel phone is already progra mme d wit h the num ber pr o vide d b y the
State Police and Highway Patrol units operating in the areas where this
service is offered.
15
Page 21

i1000plus User’s Guide
Check the Nextel website at www.nextel.com for an up-to-date list of
current numbers.
NOTE:
Accessibility of non-emergency dialing se rvice
within each state is subject to availability along
major highways.
Hands-Free Speakerphone
The i1000plus provides the convenience of a hands-free speakerphone for
holding impromptu meetings or listening to your voice mail messages.
During speakerphone operation, you may either speak or listen, but you
cannot do both at the same time.
Speakerphone operation varies according to whether the cover is open or
closed.
• If the cover is open during a speakerphone call and you close the
cover, you will end the call.
• If the cover is closed during a speakerphone call and you open the
cover, the call switches to the earpiece. You can return to
speakerphone operation by pressing under “Spkr”.
To use the speakerphone:
1. Press under “Spkr”. The “Spkr” option flashes while the
speakerphone is on.
2. Place the phone 15-30 inches (380-760 millimeters) away from you. In
a noisy en vir onment , you m ay wa nt to mo v e the i1000plus closer to you
for improved audio clarity.
NOTE:
16
If there is background noise in your area, you may
have difficulty hearing a caller’s voice or messages.
To resolve this problem:
1. To listen only, press under “Mute”. The
display changes from “Phone In Use” to “Phone
Mute”, indicating that the microphone is muted.
While the microphone is muted, you can hear
incoming audio, but a caller cannot hear any
speech coming from your
2. To speak, press under “Mute” again. The
display changes from “Phone Mute” to “Phone In
Use”, indicating that the micro pho ne is on.
i
1000
plus
.
Page 22
Phone Calls
Phone Ready
Line1
Mail
Name
2 Rcvd Calls
Phone Ready
Line1
Spd#
Calls
Rcvd Calls
1=5552222
Cancl Store
Receiving a Phone Call
When you receive an incoming call indicated by a ring or vibrate, you can
answer the call with the cover closed or open.
Cover Closed
• Press
under “Spkr” to activate the speakerphone.
• Or, open the cover to answer the call using the earpiece.
Cover Open
• Press , or, press any numeric key (0 through 9).
• Or, press or .
To activate the speakerphone, press under “Spkr”.
Missed Call Indicator
Your i1000plus notifies you of unan swered
phone calls. If you subscribe to Caller ID, your
i1000plus temporarily stores the caller’s phone
number in your Last 10 Received Calls list. Your
screen displays a flashing message with the
number of missed calls.
Press any key to clear the flashing indicator.
To retrieve missed calls:
1. Press until you see the “Calls”
2. Press
3. Use to continue viewing the list.
MENU
option.
under “Calls”. The “Rcvd
Calls” screen opens with the number or
name of the last call that you received.
Note:
Time and date will be displayed when
Time and Date are available in your area.
17
Page 23
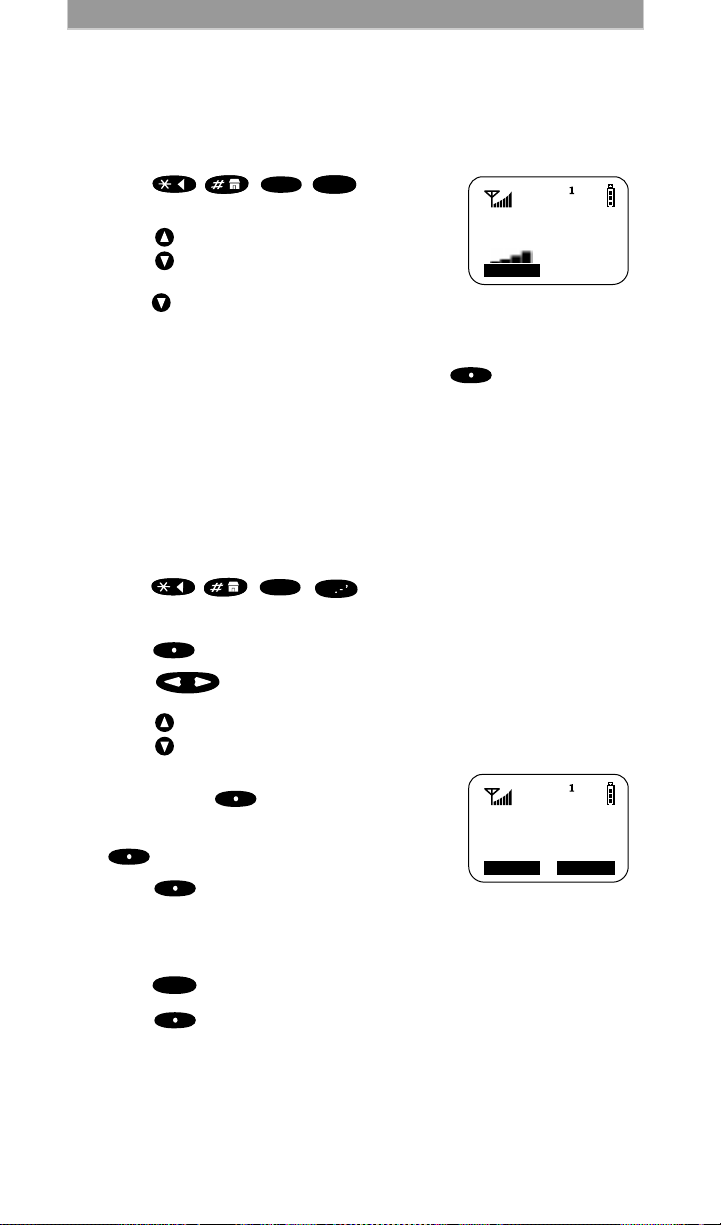
i1000plus User’s Guide
30=Ringer
Volume
Exit
Ring
Style 4
Cancl Ok
Setting the Ringer Volume
You can adjust the ringer volume for incoming calls. For Alternate Line
users, be sure to select the phone line before setting the ringer volume (See
“Using an Alternate Line” on page 30.)
DEF
nex
t
0
1. Press ,,,. The
3
display shows your current ringer volume.
2. Press on the side of the phone to listen
as you raise or lower the volume. If you
press to the lowest setting, the words
“Volume Silent” will appear on the phone
display.
3. When you determine the desired level, press
under “Exit”.
Selecting a Ring Style
With your i1000plus, you even have a choice on how you’d like to be
notified of i ncoming calls. Your Nextel phone has nine selectable ring
styles. Customers with Alternate Line service can use the same ring style or
different ring styles for each phone line, so you can tell which line is
ringing. Make sure you are on the correct line when selecting a ring style.
DEF
1. Press , , , .
The display shows your current ring style.
2. Press
under “Ok”.
3
1
3. Press to scroll through the available Ring Styles.
4. Press on the side of the phone to listen to the selected ring style.
5. To choose the current Ring Style in the
display, press
under “Ok”.
To leave the Ring Style unchanged, press
under “Cancl”.
6. Press
under “Exit”.
Selecting a Ring Style for the Alternate Line
1. Press until you see “Line2”.
2. Press
3. Repeat the procedure for “Selecting a Ring Style” on page 18.
18
MENU
under “Line2”.
Page 24

Phone Calls
Exit All
9=Vibrate
Alert:Off
VibraCall
VibraCall is a vibration alert system that notifies you of incoming Phone,
Private, or Group calls and messages by vibration. You can select this alert
system for all incoming calls/messages, or select individual services for
VibraCall.
NOTE:
When you set vibration alert s, they are set only for
the current line.
If you have a second phone line, you must select
“Line 2” and repeat the procedur e for selecting all
services or selecting individua l services to vibrate.
The vibration choices are:
• Vibrate Alert: All—produces a vibration alert for all incoming calls and
messages.
• Phone Vibrate—produces a vibration alert for incoming phone calls and
Nextel Online data calls (see the Nextel Online Dial-up Services User’s
Guide).
• Phone Vibrate/Ring—produces a vibration alert and a ring tone for
incoming phone calls and Nextel Online data calls (see the Ne xtel O nline
Dial-up Serv ices User’s Guide).
• Mail Vibe—produces a vibration alert for mail messages and net alerts
(future availability).
• Group/Prvt Vibe—produces a vibration alert for incoming group and
private calls.
NOTE:
If VibraCall is set for all incoming calls and
messages, the power-up sequence includes a brief
vibrate cycle.
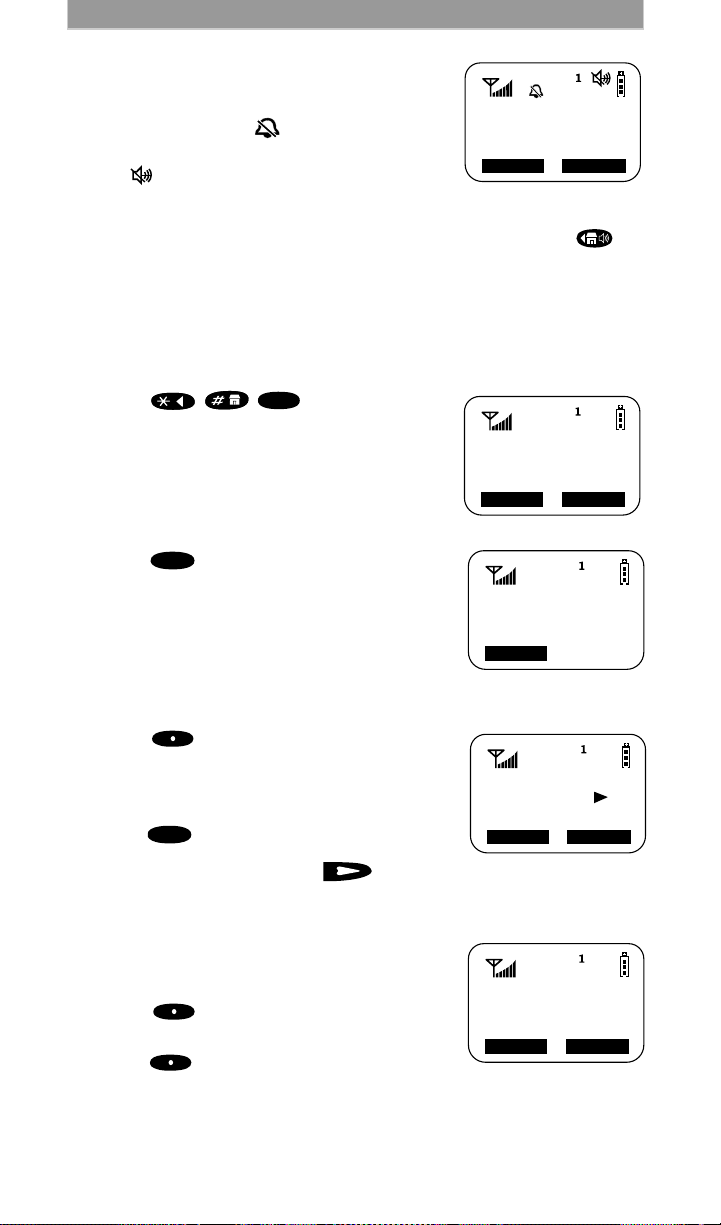
Selecting VibraCall for All Incoming Calls and Messages
WXYZ
1. Press , , .
2. Press
under “All”. The i1000plus will
emit a brief vibration.
9
19
Page 25
i1000plus User’s Guide
Line1 Vibe
Phone Ready
Name Mail
9=Vibrate
Alert:Off
Exit All
9=Vibrate
Alert:Off
Selct
Phone
Vibrate:
Vibrate Off
Exit Vibe
Group/Prvt
Vibe:Off
Exit On
• After you set VibraCall for all incoming calls
and messages, the display returns to the
previous mode, and (the Vibrate All icon)
appears at the top of your display.
• The icon a ppe ar s on your display to r e mind
you that the audio will be heard through the
earpiece instead of the speaker.
• To hear Nextel Direct Connect calls through the speaker, press on
top of the pho ne.
Selecting VibraCall Alert for Specific Phone or Mail
Services
To set a vibration alert for all or specific phone services:
WXYZ
1. Press , , .
9
2. Press until you see the “Selct” menu
MENU
option.
3. Press
under “Selct”. The first selection
is Phone Vibrate.
4. To view the Vibe/Ring alert choice (V/Rng),
MENU
press on the keypad.
5. To view other choices, press .
• To receive vibration alerts only for Mail, select “Mail Vibe”, then
select “On”.
• To receive vibration alerts for Group and
Private calls, select “Group/Prvt”, then
select “On”.
6. Press
under “Exit” to return to the
Vibrate Alert menu.
7. Press
under “Exit” again to return to the
main menu.
20
Page 26

Phone Calls
20=Phone/
Prvt List
Exit Ok
Creating, Editing and Using Stored Lists
A stored list is made up of Phone Numbers and Private IDs and their related
names. Stored lists are convenient because you do not have to remember
names and numbers— you simply scroll through your stored list.
NOTES:
Want to use your computer to create stored lists for
i
1000
plus
your
available for programming names, phone numbers,
and Nextel Direct Connect Private IDs into your
phone.
To order, call Nextel Nextday SM Accessories at
1-800-914-3240 or contact your Nextel Authorized
Representative.
? Nextel’s iDEN Organizer is
Combined Phone Number and Private ID List Programming
This programming function allows you to program the Phone Number,
Private ID with the associated name and speed-dial number in one set of
steps. This eliminates the need to program the name twice, separately with
the number and the ID.
You can store up to 100 phone numbers in your phone list and up to 100
Private IDs in your Private ID List.
The display holds 12 phone-number characters. If the phone number
exceeds 12 characters, you can select “More” to see the remaining
characters. To return to the start of the number, select “Numbr”.
NOTE:
To see the name with Call er ID, enter the caller’s
10-digit regular phone number (703-555-9999) or
their 11-digit Nextel number (1-703-555-9999) i n
your phone list (see “Caller ID” on page 29).
Storing Names and Numbers
1. Press , , , .
under
2. Press
“Ok”.
ABC
nex
2
t
0
21
Page 27
i1000plus User’s Guide
Available
98 Phone #
3 Prvt IDs
Enter Name
Exit Store
_
Skip Store
Enter Phone
Number
_
TIM
Spd#=3
Cancl Store
The next screen displays the remai ning
number of phone numbers and Private IDs
that you can store.
Next, the “Enter Name” screen displays.
3. Enter the name that you want to associate
with this number and select “Store”. See the
example in Table 5.
Table 5: Entering a Name
EXAMPLE
To store the name “TIM”:
1. Enter “T” by pressing once. The cursor
automatically advances to the next space.
2. Enter “I” by pressing three times, until “I”
appears on the display.
3. Enter “M” by pressing once.
TIP: Press to change the case of the letter (lower
to upper or upper to lower case).
upper case.
TUV
8
GHI
4
MNO
6
The default style is
4. Enter the phone number and press
under “Store”.
To skip the Phone Number entry, press
under “Skip”. You will go directly to
the “Enter Prvt ID Number” screen.
The next screen displays the na me that you
entered and a flashing speed-dial number
where the entry will be stored.
5. Do one of the following:
• To accept the speed-dial number
shown, press
• To change the speed-dial number, enter
the desired speed-dial number. The speed-dial number stops
flashing.
• To cancel the entry and return to the “Enter Phone Number”
screen, press
22
under “Store”.
under “Cancl”.
Page 28

6. At the “Enter Prvt ID Number” screen, do
Enter Prvt
ID Number
Skip Store
one of the following:
• Enter the person’s Private ID, then
press
under “Store”.
• Or, if you do not wish to enter a Pri vate
ID, press
under “Skip”.
7. After you enter all the desired numbers,
press
under “Exit”.
Editing and Erasing Phone List Entries
Phone Calls
1. Press , , , .
2. Press
under “Ok”. The “Edit Entry?” screen displays.
3. To edit an entry, press
ABC
2
1
under “Ok”.
a. At the “Edit Entry” screen, press until the desired entry
appears, then select “Ok”.
b. At the “Edit Number” screen, edit th e ph one nu mber, if you wis h;
then select “Store”.
c. At the “Edit Name” screen, edit the name, if you wish; then select
“Store”.
d. At the “Edit Spd#” screen, edit the speed number, if you wish;
then select “Store”.
4. To erase an entry at the “Edit Entry” screen, press either or
once, and then press under “Ok”.
a. Press to scroll to the desired entry, then press under
“Ok”.
b. At the “Erase?” screen, press under “Yes”.
5. Press under “Exit” to close the Phone List Edit screen.
Editing and Erasing Private ID List Entries
ABC
1. Press , , , .
2. Press
under “Ok”. The “Edit Entry?” screen displays.
2
3. To edit an entry, press
ABC
2
under “Ok”.
a. At the “Edit Entry” screen, press until the desired entry
appears, then select “Ok”.
b. At the “Edit ID” screen, edit the number, if you wish; then select
“Store”.
c. At the “Edit Name” screen, edit the name, if you wish; then select
“Store”.
23
Page 29

i1000plus User’s Guide
Phone Ready
Line1
Calls Spd#
Rcvd Calls
1=5554444
Cancl Store
Sent Calls
1=JOHN
Cancl Rcvd
MENU
4. To erase an entry at the “Edit Entry” screen, press either or
once, then press under “Ok”.
a. Press to scroll to the desired entry, then press under
“Ok”.
b. At the “Erase?” screen, press under “Yes”.
5. Press under “Exit” to close the Private ID List Edit screen.
Last 10 Numbers Received/Sent Call List
If you subscribe to Caller ID, you can view, dial, and store the last ten
received and last ten se nt telephone numbers.
The most recent received or sent call appears first in your call list.
From the Phone Ready screen:
1. Press until you see the “Calls” men u
2. Press
3. To view the entries in the Received Calls lis t,
MENU
option.
under “Calls”. The Rcvd Calls
screen opens.
use .
• If the “Store” option appears, the
number currently displayed is not in your
Phone list. To add the number to your
list, press under “Store”.
4. T o vie w th e Sent Calls list, press until
5. To return to the Received Calls list, press until you see the
6. To close the Call list, press
24
you see the “Sent” menu option. Use
MENU
to view each entry.
• If the “Store” option appears, the
number currently displayed is not in your
Phone list. To add the number to your
list, press under “Store”.
“Rcvd” menu option, and then select it.
under “Cancl”.
Page 30

Phone Calls
Phone Ready
0=5554455
Cancl Store
Enter Name
_
Cancl Store
JOHN
5551212
Stored
Quickstore of Phone Numbers
Quickstore allows you to quickly store a received or sent phone number
without having to enter the programming menu.
When scrolling through the Received or Sent Calls lists, if the name for the
received or sent phone number is not already stored in your Phone list, the
“Store” option will be available.
NOTE:
As you scroll through the Last 10 Received or Sent
Calls list, only the name displays. If the name is not
available, the phone number displays.
To use Phone Number Quickstore, do one of the following:
1. Go to the last call you dialed by pressing
.
2. Press
3. Enter the name, then press
under “Store”.
under
“Store”.
To view the Received and Sent Call list:
1. Press until you see “Calls”, then select it.
MENU
2. Scroll to the desired phone number.
3. Press
4. Enter the name, then press
under “Store”.
under
“Store”.
Note:
The name and number entry is stored
in the first available storage space.
The Stored message displays with the name
that you entered.
25
Page 31

i1000plus User’s Guide
Prvt Ready
56781
Alert Store
Enter Name
_
Cancl Store
JOHN
Stored
Prvt Ready
JOHN
Alert Name
Quickstore of Private IDs
Quickstore allows you to quickly store a received or sent Private ID without
having to enter the programming menu.
The ID is added as the last number received or sent in Private mode.
To use Private ID Quickstore, from the Private
Ready screen with the Private ID displayed:
1. Press
2. Enter the name associated
with the Private ID.
3. Press
message displays with the name that you
entered.
If the list is full with the maximum 100
entries, you will get the message, “Prvt List
Full”. You cannot add names until you
remove some names from the list.
4. Next, the Prvt Ready screen displays the
stored name.
under “Store”.
under “Store”. The Stored
26
Page 32

Additional Phone Service s
5551212
No Yes
Accept Call?
Call 1-Hold
5551212
S
Hold Spkr
ADDITIONAL PHONE SERVICES
In addition to making and receiving phone calls in Phone mode, you can use
Call Waiting, Call Hold, 3-way Calling, and Call Forwarding.
Call Waiting
Call W aiting allows you to switch between calls. It is always ON unless you
turn it OFF for a specific call.
NOTE:
If your phone is activated with two lines and you
select the Call Waiting option for one line, the
alternate line is automati cally chan ged.
Answering an Incoming Call Waiting
1. If you’re already on a call, you will hear a tone to alert you of an
incoming call. Your display shows the incomi ng numbe r and ask s
“Accept Call?”.
• To accept the call, press
• To decline the call, press
under “Yes”.
under
“No”. If you’re a Nextel Voice Mail
customer, the call will be forwarded to
your Nextel Voice Mailb ox.
2. To switch between calls, press , then
press
under “Hold”. This allows you
MENU
to move between the two calls.
3. To end the active call, p ress or close
the cover.
Turning Off Call Waiting
You can turn off Call Waiting if you do not want to be interrupted during a
call.
1. Press until you see “Wait”, then select “Wait”.
2. Press
MENU
under “Off”. Call Waiting will be disabled for one call—
but will automatically reset to On after that call.
27
Page 33

i1000plus User’s Guide
MENU
MENU
Call Hold
When you’re already on the phone, you can place a call on hold and make a
second call. The options “3way” and “Spkr” appear only when you are on
an active call.
1. To place the active call on hold, press , then press
“Hold”. You may then answer or place another call.
2. To toggle between the two calls, press , then press
“Hold” again.
under
under
3-Way Calling
Using 3-way calling, you can combine two ongoing phone calls into one
conversation. This option is available only when you initiate the second call.
When you place or receive a phone call, a “3way” option appears in the
bottom left-hand corner of the display screen.
To make a 3-way call:
1. Place or receive a phone call on either line 1 or 2.
2. Press
3. Enter the phone number for your second call and press .
4. When the second call is connected, select “3way” to join the two calls.
Both phone numbers and “3way” appear on your screen.
under “3way”. This places your current call on hold.
5. To end the 3-way call, press or close the cover.
If you are using the speakerphone and want to use 3-way calling:
1. Press .
2. Press
3. Enter the phone number for your second call and press .
4. When the second call is connected, select “3way” to join the two calls.
5. To end the 3-way call, press or close the cover.
MENU
under “3way”. This places your call on hold.
Both phone numbers and “3way” appear on your screen.
Call Forwarding
Call Forwarding lets callers reach you wherever you are—incoming calls
are forwarded to a designated number. To activate or modify Call
Forwarding, you must be in a coverage area (status light is blinking green).
You can select the call forward number from your Phone list using the
scroll, name search, or speed dial method. For more information, see
“Making Phone Calls” on page 13.
28
Page 34

Turning On Call Forward
Phone Ready
Line1
Forwd Memo
Forward:Off
To:5551212
Exit On
Additional Phone Service s
1. Press until you see “Forwd” on the
2. Press
3. To select the number where you want your
4. Press
5. After the “Please Wait” message displays, press
Your calls will now be forwarded to the number that you selected and you
will see the Call Forward icon with the forwarded line number on your
screen. You can forward Line 1 or Line 2 independently.
MENU
last line of the display.
under “Forwd”.
calls forwarded, do one of the following:
• Enter a number.
• Or, press the scroll keys to select a
number from your stored list.
For more information, see “Combined
Phone Number and Privat e ID Li st
Programming” on page 21.
under “On”.
under “Exit”.
Turning Off Call Forwarding
1. Press until you see “Forwd” on the last line of the display.
2. Press
3. Press
4. After the “Please Wait” message displays, press
MENU
under “Forwd”.
under “Off”.
under “Exit”.
Transferring Calls to Voice Mail
If you are a Nextel Voice Mail subscriber, this feature allows you to transfer
incoming calls directly to Voice Mail with just the touch of a button. Simply
press under “End” on your Nextel phone while it is ringing and the
call will be transferred to your Voice Mail.
If you hav e not ye t subsc ribe d to Ne xtel ’s V oic e Mail servi ce, yo u ca n do so
by calling Nextel Customer Care at 1-800-639-6111.
Caller ID
With Caller ID, your i1000plus automatically displays the phone number
and/or name of the person calling unless it was blocked by the caller.
Caller ID allows you to decide whether to take a call right away or let it
forward to Voice Mail. To enable forwarding to Voice Mail, the purchase of
Nextel Voice Mail is required.
Caller ID is not available in all areas.
29
Page 35

i1000plus User’s Guide
Display Caller’s Name
A caller’s name will be displayed on your Nextel phone only if you
previously programmed it in your phone list with the caller’s 10-digit
regular phone number (703-555-9999) or the ca ller’s 11-digit Nextel
number (1-703 -5 55-9999). For more information, see “Combined Phone
Number and Priv ate ID List Programming” on page 21.
Maintaining Your Privacy with Per-Call and Per-Line
Blocking
Nextel provides two no-charge methods to prevent those you call from
seeing your number on their own Caller ID displays.
Your Nextel phone number cannot be blocked from calls made to 911, 800,
877, 888, or 900 phone numbers.
Per-Call Blocking
Per-Call Blocking lets you selectively block delivery of your phone number
to other Caller ID units. Activate free Per-Call Blocking by dialing *67
before dialing the call. Per-Call Blocking is released when the call is ended.
Per-Line Blocking
Per-Line Blocking lets you permanently block delivery of your phone
number on every call you make. You can disable this feature on a per-call
basis by dialing *82 before the call. You must order this feature from
Nextel. To get your company’s line automatically blocked on every call,
contact Nextel Customer Care at 1-800-639-6111.
Using an Alternate Line
The i1000plus also allows you to have an alternate line. You can designate
your alternate line as a “priority line” or you can use it to separate business
and personal calls. If you are an alternate line customer, you will be given a
unique phone number for each line.
1. If your Nextel phone is activated with two lines, you have the
following options:
• Different pricing by line
• Distinct billing records to track usage
• Separate address billing for additional line, for example, home
billing
2. The following settings are independent for each phone line. When you
enable a setting, it applies only to the active line.
• Ringer Volume
• Selectable Ring Styles
• Call Forwarding
• One-minute Beep
• Automatic Display Timer
• Resettable Timer
• Total Call Timer
30
Page 36

Additional Phone Service s
Phone Ready
Line 1
Line2
3055551212
Accept Call
On Line2?
No Yes
3. The alternate line does not have all the features of the first line:
• Line 2 shares the voice mailbox with Line 1; there is only one
monthly charge.
• You cannot forward Line 2 to Line 1 and have the phone ring; the
call defaults to Voice Mail.
• Text and Numeric Paging is not offered on Line 2.
• A call from line 2 will appear on the recipient’s Caller ID as the Line
1 phone number.
Selecting the Alternate Line
At the “Phone Ready” screen:
1. Press until you see “Line2”. (If you
MENU
are on Line 2, you will see “Line1”.)
2. Do one of the fo llowing:
• Press
under “Line2” to activate
Line 2 when Line 1 is the active line.
• Or, press
under “Line1” to activate Line 1 when Line 2 is
the active line.
Receiving a Call
You can receive calls on either line, regardless of the active line setting.
• If the call is on the same line as the currently active line, the active line
icon simply flashes.
• If the call is on the line that is not currently active, the active line icon
remains lit and the additional line icon flashes.
Receiving Calls on Your Alternate Line
If you are on a call on one line:
1. Press
call on the other line. Your o riginal call
will be placed on hold.
2. You can do one of the following to the
active line:
• To end the call, press . You will
automatically revert to the original
call.
• Or, to place the current call on hold, press , then press
• To toggle between the two calls, press , then press
under “Hold” agai n.
When both calls end, the phone remains active in the last line selected.
under “Yes” to answer the
under “Hold”.
MENU
MENU
1
2
31
Page 37

i1000plus User’s Guide
NEXTEL VOICE MAIL
Welcome to Nextel Voice Mail. Your Nextel i1000plus offers a powerful
and easy-to-use Voice Mail service. It can take messages when you’re away
from your phone, your phone is turned off, you’re on another call, or you
are out of the Nextel coverage area.
Setting Up Your Voice Mailbox for the First Time
From a regular phone:
1. Dial your Nextel Personal Telephone Number (PTN).
2. A greeting will play. During the greeting, press the key.
3. The system will prompt you to “Please enter your password”.
• Enter the la st se ven digits of yo ur Ne x tel phon e numbe r. This is your
temporary password.
4. Follow along with the tutorial to:
• Create a 4- to 7-digit password.
• Record your name.
• Record a greeting.
From a Nextel phone:
1. Dial your Nextel Personal Telephone Number (PTN).
2. The system will prompt you to “Please enter your password”.
• Enter the la st se ven digits of yo ur Ne x tel phon e numbe r. This is your
temporary password.
3. Follow along with the tutorial to:
• Create a 4- to 7-digit password.
• Record your name.
• Record a greeting.
Be sure to listen all the way through the tutorial to the point that you
hear the system say, “Enjoy using Nextel Voice Mail”. Your mailbox
set-up is c omp le t e .
32
Page 38

Nextel Voice Mail
2>Mesg Mail
3>Net Mail
Exit Ok
Sample Greetings
• For Voice Messages Only
Hello, you’ve reached ________. I’m sorry I missed your call. If you leave
a message at the tone, I’ll return your call as soon as possible. If you would
like to bypass this greeting in the future, press pound. Thank you for calling.
• For Voice and Numeric Messages
Hello, you’ve reached ________. I’m sorry I missed your call. To leave a
numeric page, press 1. To leave a voice mail message, wait for the tone and
then record your message. I’ll return your call as soon as possible. If you
would like to bypass this greeting in the future, press pound. Thank you for
calling.
• For Voice, Numeric and Operator Assisted Messages
The following message option is available only to subscribers with Operator
Assisted Paging.
Hello, you’ve reached ________. I’m sorry I missed your call. To leave a
numeric page, press 1. To leave a text page, press 2. To leave a voice
message, please wait for the tone and then record your message. I’ll return
your call as soon as possible. If you would like to bypass this greeting in the
future, press pound. Thank you for calling.
For more information about text and numeric paging, see “Using Text and
Numeric Paging” on page 50.
Accessing the Voice Mail Service After Set Up
To access the Voice Mail service from a regular phone, follow the dialing
instructions under “Setting Up Your Voice Mailbox for the First Time” on
page 32.
NOTE:
To access the service from your Nextel Phone:
1. Press
opens.
2. Scroll to the desired mail option, such as
Voice Mail, by using or Volume/List
Control buttons, or press the corresponding
numeric key, for example, 1.
To access your messages f rom your Nextel phone,
you must have received at least one Voice Mail
message.
TIP: You can dial your Nextel number and leave
yourself a message.
under “Mail”. The mailbox
1>VoiceMail
33
Page 39

i1000plus User’s Guide
Exit Dial
Voice Mail
1 New
1 Total
Exit Ok
3=Mail
Display
Exit Off
Voice Mail
Display:On
2>Mesg Mail
3>Net Mail
Exit Ok
3. Press
under “Ok”. The Voice Mail
inbox opens . The number of new and total
messages in your Voice Mailbox is
displayed.
4. Press
under “Dial” to dial your voice
mailbox.
Receiving New Voice Mail Messages
Your Nextel Phone alerts you when you receive a new Voice Mail message.
Voice Mail Notification
When you receive a new Voice Mail message, your Nextel Phone:
• Displays “New Voice Mail Waiting” on the screen (urgent messages
will say “Urgent”).
• Flashes the icon at the top of your screen.
• Issues a mail alert ring, every 30 seconds.
To turn your Voice Mail display on or off:
DEF
1. Press , , .
2. Press
under “Ok”.
3
3. Press to scroll to the desired service for
display.
4. Use the volume control buttons on the left
side of your phone to increase or decrease the
volume or turn it OFF completely.
5. Press
6. Press
under “Exit”.
under “Exit” again.
Viewing Voice Mail Message Status in Your Mailbox
To see the number of messages in your voice mailbox at any time:
1. Press
opens.
2. Scroll to the desired mail option, such as
Voice Mail, by using or Volume/List
Control buttons, or press the corresponding
numeric key, for example, 1.
34
under “Mail”. The mailbox
1>VoiceMail
Page 40

Nextel Voice Mail
Exit Dial
Voice Mail
1 New
1 Total
3. Press
under “Ok”. The Voice Mail
inbox opens .
The screen indicates the total number of
messages in your box, as well as the number
of new messages. An exclamation point (!)
indicates that at least one of the new
messages is urgent.
4. To close your voice mailbox, press
under “Exit”.
Listening to New Messages
When you receive a new message, you can listen to it immediately or wait
until later.
To listen to the message now:
1. Press
under “Dial”.
2. When prompted, enter your password. The service will now guide you
through your messages.
To listen to the message later:
• Press under “Exit”. This clears the display. The icon
stops flashing, but remains on the screen to remind you that you
have a new message.
Note:
The New Message icon can appear while you are on a call. If
this happens, follow the steps outlined in the above section.
Saving and Deleting Messages
Note: You may save or delete a message while the message is still playing.
If you do not save or delete the message, it remains a new mess age in your
mailbox for 30 days and will then be deleted.
After you listen to a message:
• Press to delete the message.
To retrieve a message after you delete it, press , . This will
PQRS
7
DEF
3
recover ALL deleted messages.
Important!
your current Voice Mail session.
You can recover only the messages that you deleted during
After you exit the session, you cannot
recover a deleted message.
• Press to save the message.
WXYZ
9
35
Page 41

i1000plus User’s Guide
Nextel Voice Mail Features
When you log into the Voice Mail service, you will be at the Main Menu.
This is the starting point for any function you want to perform within the
Voice Mail service. You can access additional features through various submenus described in this guide. You can return to the Main Menu at any time
by pressing , .
Playing Messages
When you enter your mailbox, the Voice Mail service tells you how many
messages you have and whether they are new, saved or in preparation.
Your messages will play in the following order:
• Urgent.
• New (unheard and heard).
• Saved.
• Message in preparation (an outgoing message you are preparing to
send to another party or to a group list).
For example, you may hear:
“You have four messages. One is new, two are saved and one is in
preparation.”
Listening to Messages
1. Log into Voice Mail. See “Accessing the Voice Mail Service After Set
Up” on page 33.
2. Press to listen to your messages.
Listening Options Quick List
While liste ning to your messages, you can:
During or after a message is played, you can:
36
1
• Press to re play the previous six seconds.
• Press , to rewind to the beginning of the message.
• Press to pause/continue the current message.
• Press to fast forward six seconds.
• Press , to fast forward to the end of the message.
• Press to copy a message to another subscriber. See
1
1
ABC
2
DEF
3
DEF3DEF
3
MNO
6
1
“Acceptable Destination Addresses” on page 38.
• Press to delete a message.
PQRS
7
Page 42

Nextel Voice Mail
• Press to reply to a message. See “Acceptable Destination
TUV
8
Addresses” on page 38.
• Press to save the message.
WXYZ
9
• Press to skip to the next message.
DEF
• Press , to recover all deleted messages in that session.
NOTE:
3
If you do not save or delete a message, it remains
in your mailbox for 30 days as a “new” message.
Both saved and unsaved messages are
automatically deleted from the system after 30
days.
Helpful Hints
• Press , to play new unheard messages only.
• Press , to play saved messages.
• Press , to play the date and time stamp for a message
1
1
JKL
5
JKL
5
(at any time during the message).
Choosing the Order of Messages Played
You can play your messages:
• From the last one received to the first one received
(Last In/First Out—LIFO).
• Or, from the first one received to the last one received
(First In/First Out—FIFO)
To choose between Last In/First Out and First In/First Out:
1. Log into Voice Mail. See “Accessing the Voice Mail Service After Set
Up” on page 33.
GHI
2. Press to reach the Personal Options Menu.
3. Press to reach Personal Preferences.
4. Press to reach Playback Preferences.
5. Press to toggle between LIFO and FIFO.
4
GHI
4
ABC
2
1
37
Page 43

i1000plus User’s Guide
Normal or Automatic Playback
You can navigat e through the Play Menu:
• Using the default Normal Playback, which means entering every key as
the service prompts you, as described in “Listening to Messages” on
page 36.
• Or, you can use Automatic Playback, which lets you enter your mailbox
and listen to your messages automatically. If you choose Automatic
Playback, messages are automatically saved.
To activate or deactivate Automatic Playback:
1. Log into Voice Mail. See “Accessing the Voice Mail Service After Set
Up” on page 33.
GHI
2. Press to reach the Personal Options Menu.
3. Press to reach Personal Preferences.
4. Press to reach Playback Preferences.
5. Press to toggle between Normal and Automatic Playback.
4
GHI
4
ABC
2
ABC
2
Sending Messages
Acceptable Destination Addresses
This function allows you to record and send a message. You can send the
message to a mailbox number, a name in the Voice Mail service directory or
a Group List number.
When you send, reply to, or copy a message, you must assign a destination
address before the service can deliver the message.
The following options are available when assigning destination addresses to
your message:
• Mailbox Numbers
You may enter the mailbox number (10-digit telephone number) of a
service subscriber. When you enter the mailbox number, the name
response of the recipient plays if it is recorded.
• Group Lists
You may enter a one- or two-digit Group List Number. You must have
previously created the list. See “Group Lists” on page 43.
• Address by Name
You may use th e Address by Name feature to send your message to
nex
another Voice Mail user on your account. Press followed by the
t
0
first few letters of the subscriber’s last name. If more than one subscriber
nex
has the same last name, enter the complete last name followed by
0
and the first few digits of the subscriber’s first name.
38
t
Page 44

Nextel Voice Mail
Recording and Sending Messages
1. Log into Voice Mail. See “Accessing the Voice Mail Service After Set
Up” on page 33.
ABC
2. Press to begin recording your message.
3. Record your message. When you finish, press . The system will
2
ask you to press to address the message or for special delivery
options, pre ss .
WXYZ
9
JKL
5
4. Press to address the message.
WXYZ
9
5. You may enter one or more of the following to assign destination
addresses to your message:
• Mailbox Number
• Group List Number
• 0 + last name; 0 + first name
6. After you have entered all of the addresses, press to send the
message.
Special Delivery Options
Special delivery op tions can be ad ded when sendin g, replyin g to, or copying
a message.
• Press for urgent delivery.
• Press for pri vate deli very.
• Press for notification of non-delivery.
• Press for future delivery.
After making your selection:
• Press to address the message.
• For addressing information, refer to Step 5 under “Recording and
1
ABC
2
DEF
3
GHI
4
WXYZ
9
Sending Messages”.
• When you have entered all of the addresses, press to send the
message.
39
Page 45

i1000plus User’s Guide
Urgent
When you mark messages as urgent, the recipient will hear it before other
messages in the mailbox.
JKL
1. Press for delivery options.
5
2. Press for urgent delivery.
3. Press to address the message.
1
WXYZ
9
• For addressing information, refer to Step 5 under “Recording and
Sending Messages”.
4. When you have entered all of the addresses, press to send the
messages.
Private Delivery
When you mark a message as private, the recipient cannot copy it to another
mailbox or ph one number.
JKL
1. Press for delivery options.
2. Press for private delivery.
3. Press to address the message.
5
ABC
2
WXYZ
9
• For addressing information, refer to Step 5 under “Recording and
Sending Messages”.
4. When you have entered all of the addresses, press to send the
message.
Notification of Non-delivery
This feature allows you to be notified when a recipient has not listened to
your message by a certain date and time.
JKL
1. Press for delivery options.
5
DEF
2. Press . At the prompt, enter the date and the time you want to be
3
notified of non-delivery.
Sample date - October 5 = 1005
Sample time - 1:00pm = 1300
3. Press to address the message.
WXYZ
9
• For addressing information, refer to Step 5 under “Recording and
Sending Messages”.
4. When you have entered all of the addresses, press to send the
message.
40
Page 46

Nextel Voice Mail
Future Delivery of Messages
This feature allows you to deliver a message at a specified future time and
date.
After recording a message:
JKL
1. Press for delivery options.
2. Press . At the prompt, enter the date and the time you want your
5
GHI
4
message sent. You can stamp future dates up to three months in the
future.
Sample date - October 5 = 1005
Sample time - 1:00pm = 1300
3. Press to address the message.
WXYZ
9
• For addressing information, refer to Step 5 under “Recording and
Sending Messages”.
4. When you have entered all of the addresses, press to send the
message.
IMPORTANT: Once a message has been sent for future delivery, it
cannot be retrieved or deleted.
Greetings
Recording a Personal Greeting
Your personal greeting will be played to callers when they reach your Voice
Mailbox.
To record a greeting:
1. Log into Voice Mail. See “Accessing the Voice Mail Service After Set
Up” on page 33.
DEF
2. Press to reach the Greetings Menu.
3. Press to record your greeting.
4. Record your greeting and press .
3
ABC
2
41
Page 47

i1000plus User’s Guide
Playing Back/Deleting Your Greeting
You can listen to your greeting after you are finished recording it. If you do
not want to re cord y our o wn g reet ing, N ex tel V oice Mai l prov ides a ge neri c
greeting. If you have already recorded a personal greeting, you must delete
it before the generic greeting will play.
To play or delete your greeting:
1. Log into Voice Mail. See “Accessing the Voice Mail Service After Set
Up” on page 33.
DEF
2. Press to reach the Greetings Menu.
3
3. Press to play your active greeting.
4. Press to delete your greeting.
1
PQRS
7
Note: Your active greeting is the greeting currently playing to callers.
Greetings Schedule (Optional)
Nextel Voice Mail service lets you record up to 4 separate greetings that are
played based on time of day/day of week. For example, your morn ing
greeting can include “good morning” in your greeting. If you are traveling,
you can set up a special greeting that lets callers know how long you will be
away.
To set up multiple greetings, you must:
1. Turn ON the Greetings Schedule function.
2. Record at least 3 greetings.
When you subscribe to Nextel Voice Mail, the greeting schedule is already
set up with designated time periods for each of the four greeting slots. They
are:
• Greeting 1: Generic Greeting
24 hours a day; seven days a week if you have not activated your
Greeting Schedule
• Greeting 2: Morning Greeting
8:00am - 11:59am; Monday through Friday
• Greeting 3: Afternoon Greeting
12:00pm - 5:00pm; Monday through Friday
• Greeting 5: Travel Greeting
24 hours a day, Seven days a week
Recording Multiple Greetings
To record your four greetings:
1. Log into Voice Mail. See “Accessing the Voice Mail Service After Set
Up” on page 33.
42
Page 48

Nextel Voice Mail
DEF
2. Press to reach the Greetings Menu.
3. Press to record a selected greeting number.
Activating Your Greeting Schedule
This feature lets you activate your greeting schedule so that the Voice Mail
service will automatically play the greetings you have recorded in greeting
slots number 2 and 3.
To turn your greeting schedule ON or OFF:
1. Log into Voice Mail. See “Accessing the Voice Mail Service After Set
2. Press for the Greetings Menu.
3
GHI
4
Enter the greeting number you wish to modify. After you have entered
the greeting number, you can do the following:
• Press to play the greeting currently recorded in this slot. The
1
Voice Mail service will alert you if a greeting has not been recorded.
ABC
• Press to record a greeting.
• Press to delete a greeting that is already recorded in this slot.
2
PQRS
7
• Press to go back to the Greetings Menu so that you can record
another greeting number.
Up” on page 33.
DEF
3
• Press to activate or deactivate your greeting schedule.
WXYZ
9
• Press to listen to your greeting schedule.
TUV
8
Group Lists
A group list is a group of mailboxes assigned a number and a recorded
name. Once you have created one or more lists you can send a message to
everyone on the list by simply entering the group list number. You can have
up to 40 group lists and each list can have up to 50 addresses.
Setting up Group Lists
1. Log into Voice Mail. See “Accessing the Voice Mail Service After Set
Up” on page 33.
GHI
2. Press to reach the Personal Options Menu.
3. Press for group l ist options.
4. Press to create a group list.
5. Enter the one- or two-digit group list number, then press .
4
ABC
2
ABC
2
43
Page 49

i1000plus User’s Guide
6. Record a name for the list, then press .
7. Enter any or all of the following types of destination addresses:
• Mailbox Number
• Group List Number
• 0 + last name; 0 + first name
Press after each entry is made.
8. Press to save all entries added to the list.
Reviewing/Deleting/Adding to a Group List
1. Log into Voice Mail. See “Accessing the Voice Mail Service After Set
Up” on page 33.
GHI
2. Press to reach the Personal Options Menu.
3. Press for group l ist options.
4
ABC
2
4. Press to review your group list directory.
5. Press to delete a group list. Enter the one- or two-digit
1
DEF
3
group list number that you wish to delete.
GHI
6. Press to modify a list. Enter the list number, then press .
7. Press to add an address to the list.
4
1
Reviewing/Changing Group List Names and Numbers
1. Log into Voice Mail. See “Accessing the Voice Mail Service After Set
Up” on page 33.
GHI
2. Press to reach the Personal Options Menu.
3. Press for group l ist options.
4
ABC
2
GHI
• Press to modify a list. Enter the list number, then press
4
.
ABC
• Press to review addresses on the list or
• Press to play the list name or
• Press to re-record a name for your group list.
2
DEF
3
GHI
4
• Record your list name, then press .
44
Page 50

Nextel Voice Mail
Pager Notification
The Voice Mail service has the ability to notify your pager when you have
received a message. If you would like to activate this feature, you must
enable pager notification. Please call Nextel Customer Care at
1-800-639-6111 to a cti vate thi s fea ture , or d ial 611 fr om yo ur N exte l ph one.
Enabling Pager Notification
This feature allows you to enable or disable your pager notification and
confirm the pa ger number to which your me ssages are being sent.
1. Log into Voice Mail. See “Accessing the Voice Mail Service After Set
Up” on page 33.
GHI
2. Press to reach the Personal Options Menu.
3. Press to reach the Pager Notification options.
4
DEF
3
DEF
• Press to enable/disable pager notification.
• Press to enable/disable notification on urgent messages only.
3
GHI
4
• Press to play your pager number.
1
Limiting Notification to Specific Times
You can choose certai n times of t he day to be noti fied of ne w messages . For
example, you could select to be notified between 8:00am and 5:00pm only.
In this example, if someone sends you a message at 5:15pm, you will not be
notified of that new message until the next day at 8:00am. If you do not
specify a time period to be notified of new mail, you will be notified at all
hours.
To specify the times you want to be notified:
1. Log into Voice Mail. See “Accessing the Voice Mail Service After Set
Up” on page 33.
GHI
2. Press to reach the Personal Options Menu.
3. Press to reach the Pager Notification options.
4. Press to modify your notification time window.
You will be asked to enter the starting time and the ending time for your
time window. For acceptable time of day and day of week entries see
“Voice Mail Time and Dates” on page 48.
4
DEF
3
JKL
5
45
Page 51

i1000plus User’s Guide
Personal Password and Name Response Options
Changing your Password
Once you change your password from the initial password to your own
personal password, nobody else can enter your mailbox except you.
Passwords must be 4 to 7 digits long. You should choose a combination of
letters or numbers that you can remember easily and only you will know.
1. Log into Voice Mail. See “Accessing the Voice Mail Service After Set
Up” on page 33.
GHI
2. Press to reach the Personal Options Menu.
3. Press to reach Personal Preferences.
4
GHI
4
4. Press to change your password.
1
5. Enter a 4- to 7-digit password.
6. Press .
Name Response Options
Your name response is a recording of your name only, without a greeting. It
serves as the identification tag for your mailbox. When you send, reply to,
or copy a message, your name response will precede your message. Your
name response will also play as a confirmation when someone else is
sending you a message or adding your mailbox number to their Group List.
Recording/Playing/Deleting Your Name Response:
1. Log into Voice Mail. See “Accessing the Voice Mail Service After Set
Up” on page 33.
GHI
2. Press to reach the Personal Options Menu.
3. Press to reach Personal Preferences.
4. Press to reach Name Options.
4
GHI
4
DEF
3
• Press to play your name response.
• Press to record your name response.
• Press to delete your name response.
1
ABC
2
DEF
3
Message Forwarding
This feature allows you to program your phone to automatically forward
incoming Voice Mail messages to another mailbox. Message Forwarding
insures your messages get attention when you are not available.
46
Page 52

Nextel Voice Mail
To use Message Forwarding you must:
• Program a forwarding addr e ss int o yo ur mailbox.
• Enable the forwarding feature.
• Select a type of message forwarding.
There are two types of message forwarding:
• Immedia te Forwarding -- The caller is notified that the message
being left will be forwarded.
• Silent Forwarding -- The caller hears your personal greeting and is
not notified that the message is being forwarded.
Setting Up Message Forwarding
This feature allows you to set up and listen to your current forwarding
number.
To set up a forwarding number:
1. Log into Voice Mail. See “Accessing the Voice Mail Service After Set
Up” on page 33.
GHI
2. Press to reach the Personal Options Menu.
3. Press to modify forwarding options.
4
JKL
5
• Press to hear your current message forwarding number.
• Press to add an initial forwarding number or to change your
1
ABC
2
number.
DEF
• Press to enable/disable message forwarding.
• Press to choose your forwarding type:
3
GHI
4
• Press to select immediate forwarding.
• Press to select silent forwarding.
1
ABC
2
Caller Options
Your callers have several options when calling you. You can let them know
about these options by recording any of the following on your greeting.
• If you would like to leave a numeric page, press .
• If you would like to send a text message, press . If your
JKL
message is urgent, press . This option is available only to
5
subscribers with Operator Assisted Paging.
• To skip this greeting and record a message immediately, press
.
1
ABC
2
47
Page 53

i1000plus User’s Guide
Voice Mail Time and Dates
The Voice Mail service uses a 24-hour clock (military time), as follows:
Table 6: Military Times
Hour 24-Hour Ti m e
12:00 a.m. 0000
1:00 a.m. 0100
2:00 a.m. 0200
3:00 a.m. 0300
4:00 a.m. 0400
5:00 a.m. 0500
6:00 a.m. 0600
7:00 a.m. 0700
8:00 a.m. 0800
9:00 a.m. 0900
10:00 a.m. 1000
11:00 a.m. 11 00
12:00 p.m. 1200
1:00 p.m. 1300
2:00 p.m. 1400
3:00 p.m. 1500
4:00 p.m. 1600
5:00 p.m. 1700
6:00 p.m. 1800
7:00 p.m. 1900
8:00 p.m. 2000
9:00 p.m. 2100
10:00 p.m. 2200
11:00 p.m. 2300
NOTE:
48
To compute the 24-hour clock, add 1 200 to the a.m. time
to get the p.m. time. For example, adding 1200 to 0200
(2:00 a.m.) gives you 1400 (2:00 p.m.)
Or, subtract 1200 from the p.m. time to get the a.m. time.
For example, subtracting 1200 from 1800 (6:00 p.m.)
gives you 0600 (6:00 a.m.)
Page 54

Nextel Voice Mail
Dates
All dates must have 4 digits in the MM/DD format: 2 digits for the month
and 2 digits for the date.
January is 01, Febr uar y i s 0 2, a nd so f or th. The first day of the mon th i s 01 ,
the second day of the month is 02, and so forth. For example, January 15 is
0115.
Day of the Week
When you program schedules in the Voice Mail service, you must enter the
starting and ending days of the week. Enter Sunday as 1, Monday as 2, and
so forth.
49
Page 55

i1000plus User’s Guide
1
2
ABC
USING TEXT AND NUMERIC PAGING
Your new Nextel Phone offers Text and Numeric Paging allowing callers to
send you a numeric or text page in an instant. The text or numeric pages are
then displayed directly on your phone. You’ll quickly find Nextel Text and
Numeric Paging service convenient and easy to use.
Nextel Text and Numeric Paging helps keep you in touch with co-workers
and customers, regardless of where you travel on the Nextel National
Network. Whether it’s your office calling with a last minute schedule
change, or a customer trying to reach you with an important question, you’ll
be able to retrieve and respond to pages immediately, all from your Nextel
phone.
The Nextel Paging Advantage
Nextel Text and Numeric Paging service gives you all the advantages of a
pager and more. Nextel Paging will accept your pages even if you are
unavailable, your phone is turned off, or if you are busy on another call. If
you receive a page while outside your coverage area (for example, if you are
on an airplane), Nextel will store the page and deliv er it as soon as you come
back into coverage.
Page Delivery
Nextel delivers pages for up to five days. Whether you are sending or
receiving a page, Nextel will continuously attempt to deliver the page until
successful. You can easily retrieve and respond to pages anywhere you
travel on the Nextel National Network.
How to Use Nextel Text and Numeric Paging
Your Ne xtel Phone refers to text and numeric pages as Message Mail. Pag es
are stamped with the time and date the page was left. Your phone can store
up to 16 pages at one time.
To Send a Page
You r callers can send numeric pages up to 20 characters in length and text
pages up to 140 characters in length, right to your Nextel phone. You can
also send a text message from any personal computer that has access to the
Internet via the Nextel home page or e-ma il.
Callers can quickly and easily leave a numeric or text page in one of the
following ways:
• Directly from any phone – by pressing during your voice mail
greeting, callers can leave a numeric page.*
• Through a Ne xtel oper ator – by pressing dur ing yo ur voice mail
greeting. A Nextel operator will forward the numeric or text page to
your Nextel phone.**
50
Page 56

Using Text an d Nu meric P agin g
• Calling 1-800-NEXGRAM (1-800-639-4726)** — A Nextel operator
will forward the numeric or text page to your Nextel phone.
• From a personal computer — by using Nextel NexNote™ software,
simply select a recipient, type the message and click the “
button.
Send
”
• W eb Paging — simply go to the Nextel home page at
and click “
associate's or friend's 10-digit Nextel phone number. For example:
type in 7035551234. Then type your message in the message box and
click “
group page to up to six Nextel users at one time.
• E-mail Paging — Simply address your e-mail message to your
business ass ociate' s or friend' s 10-dig it Ne xtel pho ne numbe r follo wed
by@page.nextel.com
Again, the only limit is 140 characters.
*Be sure to instruct your callers to do this when you record your greeting.
See Voice Mail section on “Greetings” on page 41.
**This option is available only to Nextel customers who have subscribed to
Operator Assisted Paging. For additional information on how you can sign
up for this service, call Nextel Customer Care at 1-800-639-6111.
Send a Pag
Send
”. The only limit is 140 characters. You can also send a
e”. Then address your message to your business
(for example: 7035551234@page.nextel.com).
www . nexte l.com
Checking Message Delivery
Nextel offers three different ways to confirm if your message was deli v ered.
Simply go back to the Nextel Web site at
of the following three options:
• Click on the "
message and report back to you on the delivery status of your page.
• Or, record the claim number when you send your page. Later go back
to the Nextel Web site, click on the “
your claim number and the Nextel phone number of the person you
paged. Once again, Nextel will track your message and report back to
you on the delivery status of your page.
Message Status
www .nex tel.com
" button and the system will track your
Message Status
and choose one
” Web link, enter
• Or, on the Nextel Web site, when you send yo ur message, enter the
e-mail address in the "
will be sent to you letting you know that your message was indeed
delivered.
E-mail Confirmation
" space. A reply message
51
Page 57

i1000plus User’s Guide
New Mail
Read?
Exit Ok
Later Now
Message Mail
2 New
0 Saved
*1>FR:Karen
Exit Read
1>Call
Cathy and
Erase Save
tell her
Notification of New Text and Numeric Pages
Your Ne xtel phone will alert you when you hav e a ne w tex t or numeric page,
even if you are on another call. If you are using Nextel Direct Connect, your
page will be held and delivered upon completion of your call.
Remember, your Nextel phone refers to text and numeric pages as
“Message Mail.” When you receive a new page, your i1000plus will:
1. Display “New Mail Read?” on the screen.
2. Flash the icon at the top of
your screen.
3. Issue a mail alert ring every 30 seconds.
Retrieving New Pages
As soon as you are notified that you have a new page, you can either view
the page immediately or wait until later.
To view the page now:
1. Press
briefly display the number of new and saved
pages. Then your first page will a pp ear o n t h e
screen.
under “Now”. The screen will
2. Press
it fills more than one screen, use the volume
control keys to scroll. You now have the
option to either erase or save the page you
have just viewed.
3. T o erase the page, press
If you have other pages, they will now appear.
If you have no other pages, the screen will
briefly read “No Mail” and return to the
“Phone Ready” screen.
4. T o sa ve th e page, pr ess
you have other pages, they will now appear . At
the conclusion of your pages, you have the option to Exit or Read.
“Exit” will return you to the “Phone Ready” screen, while “Read” will
return you to your pages.
NOTE:
52
under “Read” to view the page. If
under “Erase”.
under “Save”. If
Pages that are not deleted will remain in your
mailbox until you choose to delete them. Your
Nextel phone can store up to 16 pages.
Page 58

Using Text an d Nu meric P agin g
To view the page la ter:
Press under “Later”. This will clear the display, the message will
disappear and the icon will stop flashing, but it will remain on the
screen to remind you that you have a new message.
Viewing Your Text and Numeric Pages Status
Your Nextel Phone lets you v i ew the status of your Text and Nume ri c Pages
in your mailbox at any time by letting you see how many new and saved
pages you have.
To view your page status:
1. Open the cover and from the Phone Ready screen, select “Mail”. The
inbox opens.
2. Scroll to “Mesg Mail” or press the corresponding number.
3. Press
new and saved pages.
4. To view individual messages, see “Retrieving New Pages” on page 52.
under “Ok”. The screen will briefly display the number of
Auto Call B ack
By simply pressing while viewing a page, your Nextel Phone
automatically dials the number that appears on your screen, even if the
number is included in the middle of a text page. This allows you to respond
immediately to important pages without having to remember the caller’s
number or fumble around for a pen and paper to write it down.
Note: If the page you received contains two numbers, Auto Call Back will
dial the last number.
Mail Memory Full
If all 16 message registers are full, your phone displays the message “Mail
Waiting, Memory Full”. You cannot receive new Message Mail until you
empty the register space by erasing saved or unread messages.
NexNote
Nextel NexNote software lets you compose and send a page to a Nextel
customer right from your personal computer.
Nextel NexNote Plus
several Nextel customers. Simply type your message and it will be delivered
to a group of subscribers you select.
NexNote and NexNote Plus software are available in Windows
Macintosh
—
A Powerful Personal Computer Connection
™
™
software lets you compose and send a page to
™
, and DOS™ (Basic only) formats.
™
,
53
Page 59

i1000plus User’s Guide
NexNote tracks your text and numeric pages and lets you know if the page
was received by the customer’s Nextel phone. If the Nextel customer’s
phone was not available, NexNote will notify you that the page is being
stored for future delivery. Whether you’re trying to confirm a meeting time
change, reroute a driver’s delivery schedule or send new pricing
information to an important client, you’ll have peace of mind knowing the
page was received.
Ordering Nextel Paging Features
call Nextel Customer Care at 1-800-639-6111,
Nextel Nextday
To order Paging Features,
or dial 611 on your Nextel phone.
To order NexNote paging software, call
or contact your Nextel Authorized
SM
Accessories at 1-800-914-3240
Representative.
54
Page 60

Nextel Direct Connect
NEXTEL DIRECT CONNECT
Nextel Direct ConnectSM is a revolutionary way to communicate with your
co-workers and clients...for a fraction of the cost of traditional cellular calls.
You may want to talk to a co-worker right away, but you don’t want to page
that person or leave a lengthy message. With Nextel Direct Connect’s
Private Call feature, you can find them wherever they are.
Or maybe you need to communicate a last-minute schedule change to your
sales people...all 100 of them. It’s easy with Ne xtel Direct Connect’s Group
Call. This 2-way feature lets you contact all of them at once!
In addition, Nextel has created Nextel Business Networks, which allows you
to communicate with individuals outside as well as inside your company.
These Networks link Nextel customers in similar industries or geographies.
So, if you often need to reach a client, vendor, or contractor instantly, work
smarter by joining the Nextel Business Network. For more information, call
1-888-NEXTEL2 (1-888-639-8352).
Programming Your Own Private ID
Before you get started using Direct Connect, you will want to store your
Private ID for future reference.
To store your i1000plus Private ID:
1. Press , , .
2. Press
3. Enter your own Private ID, which is given to you at time of activation.
4. Press
under “Ok”.
under “Store”.
ABC
2
5. Press
NOTE:
under “Exit”.
If you forget your Private ID after it is programmed,
you can recall it by pressing
,,.
ABC
2
Nextel Direct Connect Private/Group Speaker
Your i1000plus acts like a phone or speakerphone with Nextel Direct
Connect. If the Private/Group speaker is set ON, all incoming audio will be
heard through the speaker. This is helpful in monitoring group activity.
If the Private/Group speaker is OFF, a brief alert tone will notify you of
Private or Group call activity. Incoming audio will be heard through the
earpiece, allowing you to have private conversations.
Press on top of the i1000plus to turn the Private/Group Speaker on or
off. The Private/Group icon on your display indicates that the Private/
Group speaker is OFF and audio will be heard through the earpiece.
55
Page 61

i1000plus User’s Guide
Prvt Ready
12345
Cancl
Private Calls
A Private Call is a one-to-one conversation between you and someone else
on another Nextel phone. You’ll want to make a Private Call if you need to
talk to someone in your local calling area and don’t want to page or call that
person or leave a message that might not be retrieved for hours.
You can make a Private Call with the cover closed or open.
Making Private Calls
Cover Closed
To contact the last Private ID that you called:
1. Press until you see “Prvt Ready” on your display.
2. Press the PTT button.
To select a number from your Private ID list:
1. Press
2. Use the Volume Control buttons to scroll to the desired name.
3. Press the PTT button.
Cover Open
Mode
under “List”.
With the cover open, you can use one of the following methods: Direct
Entry, Scroll, or Name Method. The Scroll and Name methods require that
you have established a Private Call Calling List in your phone.
Direct Entry
From the “Prvt Ready” mode:
1. Use the keypad to enter the Private ID of
the person that you want to reach.
2. To speak, press and hold the PTT button,
wait for the chirp, then speak into the
microphone.
3. To listen, release the PTT button.
Scroll
From the “Prvt Ready” mode:
1. Press to select the person you want to private call.
2. Press and hold the PTT button, wait for the chirp, then
speak into the microphone.
3. To listen, release the PTT button.
56
Page 62

Nextel Direct Connect
Prvt Ready
List Mode
JOHN
Prvt Ready
Cancl Alert
JOHN
12345
Name Method
From the “Prvt Ready” mode:
1. Press
2. Press the key with the first letter of the name associated with the Priv ate
ID.
3. Press to find the desired name in the list.
4. Press and hold the PTT button, wait for the chirp, then
speak into the microphone.
5. To listen, release the PTT button.
under “Name”.
Receiving a Private Call
When you receive an incoming Priv ate Call, you hear a brief chirp-like tone.
Your i1000plus automatically switches to Private mode, and the Private ID
or the name of the caller displays.
Wait for the caller to finish speaking, then press and hold the PTT button.
Begin speaking after you hear the chirp.
Call Alert
Call Alert lets you privately page an individual by sending an audible alert.
You ’ll want to send a Call Alert when you do not need an immediate
response. The alert plays intermittently until the individual clears it. Call
Alert allows you to contact another Nextel Direct Connect subscriber at no
cost and avoid airtime charges.
™
Sending a Call Alert
Once you have programmed Private IDs into your list, you can send a Call
Alert with the cover closed or open.
Cover Closed
From the “Prvt Ready” mode:
1. Press
Control buttons to scroll to the desired name
or ID.
2. Press
button.
under “List”. Use the Volume
under “ Alert”, then press the PTT
57
Page 63

i1000plus User’s Guide
Prvt Ready
Alert Name
JOHN
Alert
JOHN
Exit Queue
Alert
JOHN SMITH
3 Queued
Clear Queue
Cover Open
From the “Prvt Ready” mode:
1. Press
under “Alert”.
2. Press to scroll to the desired name.
You may also select the name by pressing
and using the Name Method.
MENU
3. Press the PTT button to send the Call Alert.
Receiving a Call Alert
When you receive a Call Alert, you hear a brief chirp-like tone, and see a
message on your display with the name or number of the cal ler.
• To answer the Call Alert, press the PTT button, wait for the chirp, then
speak; release to listen.
• Or, to clear the Call Alert, press
other than the PTT button.
under “Clear”, or press any key
NOTE:
Until the Call Alert is cleared or returned, you will
not receive any additional Phone, Private, Group, or
Net calls (future availability).
Call Alert Queuing
Call Alert Queuing is a feature that allows you to save up to eight Call
Alerts in a list.
Receiving a Call Alert Queuing
When you receive a Call Alert Queuing, you can
either clear the Call Alert or save it to the list for
later recall.
• To clear a Call Alert, press
“Clear”.
• Or, to place the Call Alert into the queue,
press
Mode
under “Queue”. Pressing
also queues the Call Alert.
If you receive multiple Call Alerts, the last received Call Alert displays and
the remaining Call Alerts are stacked at the beginning of the queue.
under
58
Page 64

Nextel Direct Connect
Responding to a Call Alert within the Queue
You can respond to the Call Alerts in any order. To select a Call Alert for
response:
1. Press
2. Press to scroll to the desired Call Alert.
3. Press the PTT button to respond to the Call Alert. After you respond to
the Alert, it is removed from the queue.
under “Queue”.
Group Calls
Much simpler than setting up a conference call, a Group call allows you to
instantly communicate with members of a selected group—a pre-defined set
of individuals who share a common communication need. This group is
called a Talkgroup.
Talkgroups appea r on yo ur display as numbers or pr og ra m me d na me s, suc h
as, SALES TEAM or Talkgrp5. You’ll want to make a Group call if you
want to talk to more than one person at a time.
Either your sal e s re p re se n ta t ive or Nex t e l Customer Care (1-8 00- 6 39- 6 111)
can help you s et up your Talkgroups . After they give you your Talkgrou p
number, you can name the talkgrooup by entering , ,
ABC
2
Talkgroup” on page 61.
DEF
3
, . Then, follow the instructions in “Adding and Storing a
Making a Group Call
Cover Closed
To contact t he last group that you call ed:
1. From the “Group Ready” mode, press and hold the Push-to-Talk
(PTT) button.
2. Wait for the chirp, then speak into the microphone.
3. To listen, release the PTT button.
To select a talkgroup from your talkgroup list:
1. From the “Group Ready” mode, press
2. Use the Volume Control buttons to scroll to the desired talkgroup name.
3. Press and hold the PTT button to talk now, or press “Ok”.
under “List”.
59
Page 65

i1000plus User’s Guide
Group Ready
Talkgrp 10
Alert Mail
Cover Open
To contact t he last group that you call ed:
1. From the “Group Ready” mode, your most
recently used talkgroup displays, for
example, “Talkgrp 10”.
2. To place a call to this talkgroup, press and
hold the Push-to-Talk (PTT) button.
3. Wait for the chirp, then speak into the
microphone.
4. To listen, release the PTT button.
To select a talkgroup from your talkgroup list:
t
1. Press
2. Press and hold the PTT button to talk now, or press “Ok” to select the
talkgroup.
o scroll to the desired talkgrou p na me.
Receiving a Group Call
When you receive an incoming Group call, you will hear a brief chirp-like
tone. Your i1000plus automatically switches to Group mode, and the
talkgroup name displays.
Your phone mus t be idle, that is, n ot busy in an active call or on the browser
in Net Mode (future availability).
To join a Group call:
1. Wait for the caller to finish speaking.
2. Press and hold the PTT button. Begin speaking after you hear the chirp.
3. To listen, release the PTT button.
You can receive group calls only in the talkgroups that you have predefined.
Any communication activity within the talkgroup that you select
automatically switches your phone into Group mode.
60
Page 66

Nextel Direct Connect
Adding and Storing a Talkgroup
Your i1000plus can store up to 30 predefined talkgroups.
To add and store a talkgroup name to your i1000plus:
1. Press , , , .
2. Press
under “Ok”.
3. At “Add New Entry?”, press
2
under “Ok”.
DEF
ABC
3
4. At “Enter ID” , enter the desired talkgroup number.
5. Press
under “Store”.
6. At “Enter Name”, enter the desired talkgroup name.
7. Press the option key under “Store”.
Group-Silent Programming
If you set the Group-Silent programming menu to silence incoming alerts
and voices, the "Group Ready" screen displays as "Group-Silent".
To reset it:
DEF
1. Press , , , .
3
2. Select "Off", then "Exit".
TUV
8
61
Page 67

i1000plus User’s Guide
USING YOUR PHONE AS A MODEM
With Nextel Online Dial-up Services, you can use your i1000plus as a
modem for you r IB M
Windows). This is particularly useful when there is no wired phone line
(wall jack) available.
With this service, simply connect the data cable to your computer and to the
i1000plus phone. This will allow you to send or receive time-critical
information such as e-mail, a field service report, or files.
Note:
To take advantage of this feature, you must subscribe to Nextel
Online Dial-up Services. For more information, contact your Nextel
Authorized Representative.
You can use your phone and computer in TTY mode. Your
computer screen and keyboard replace the standard TTY
device. For more information, please see the
Dial-up Services User’s Guide
cable accessories. Contact your Nextel Authorized
Representative for more information.
PC-compatible laptop computer (using Microsoft®
™
TTY USERS
that is included with data
Nextel Online
62
Page 68

Programming Menus
PROGRAMMING MENUS
You can customize the settings on your phone using the programming
menus. Many of them have been discussed throughout this guide.
You may access this menu from the Phone, Private, or Group modes.
1. Press until you see “Prgm” on the display.
2. Press under “Prgm”.
3. Press under “Ok”.
4. Press to scroll to the desired programming menu option or
MENU
enter the option keypad number.
SHORTCUT:
PressKeypad
Number Menu Option To
1 Own Ph # Automatically store the
2 Own Pvt ID Display the private number of
3 Mail Display:On/Off Turn on and off the New Mail
Press , press , then press the keypad
number. See Table 7.
Table 7: Programming Menu Options
telephone number of your
Nextel phone after you
receive the first incoming call.
Or, you can enter the number.
Also, view your number. See
“Programming Your Own
Phone Number” on page 12.
your phone. You must first
store this number. See
“Programming Your Own
Phone Number” on page 12
and “Call Alert™” on page 57.
message that is displayed
with incoming Voice,
Message, or Net Mail (future
availability).
63
Page 69

i1000plus User’s Guide
9
WXYZ
Table 7: Progr amming Menu Options (Continued)
PressKeypad
Number Menu Option To
4 Manual Lock:On/Off Lock your phone to prevent
unauthorized use. You must
enter a password to unlock it.
Even with the manual lock on,
you can reach emergency
help by pressing and holding
the key.
5 A uto Lock:On/Off Automatically lock your phone
each time it is powered off to
prevent unauthorized use.
6 Auto Answer:On/Off Turn on or off auto matic
answering of incoming phone
calls after 1-4 rings.
9 Vibrate Alert:On/Off Provide non-audible
notification of incoming phone
and Nextel Online Data calls
and messages. See
“VibraCall” on page 19.
10 Last Call Timer Display the duration of the
most recent phone call.
11 Display Timer:On/Off Tur n on or off auto matic
display of the Last Call Timer
at the end of each phone call.
12 Reset Timer Display cumulative airtime of
all phone calls since the last
time the timer was reset.
13 To tal Timer Display cumulative airtime of
all phone calls.
14 1 Minute Beep:On/
Off
Automatically signal each
minute of elapsed phone
airtime with an aud ible beep.
64
Page 70

Programming Menus
Table 7: Progr amming Menu Options (Continued)
PressKeypad
Number Menu Option To
20 Phone/Prvt List Add phone and private
numbers in one procedure.
See “Combined Phone
Number and Private ID List
Programming” on page 21.
21 Phone List Edit Edit o r e rase up to 100
frequently called phone
numbers and associated
names. See “Editing and
Erasing Phone List Entries”
on page 23.
22 Prvt ID List Edi t Edit or erase up to 100
Private numbers and
associated names. See
“Editing and Erasing Private
ID List Entries” on p age 23.
23 Ta lkgr p L ist P rogram Add, edit, or erase numbers
and associated names for up
to 10 pre-programmed
talkgroups. See “Adding and
Storing a Talkgroup” on
page 61.
24 Area List Program A dd, edit, or erase numbers
and associated names for up
to 50 targeted areas.
30 Ringer Volume Set the ringer volume using
the volume control keys, or
lower the volume to silence
the ringer.
31 Set Ring Style Select a distinct ring style for
incoming phone calls.
65
Page 71

i1000plus User’s Guide
Table 7: Progr amming Menu Options (Continued)
PressKeypad
Number Menu Option To
32 Mail Volume S et the volume of incoming
pages, Voice Mail, and Net
alert tones (future availability)
using the volume control keys.
Or lower the volume to silence
the mail alert tones.
33 Earpiece Volume Set the default earpiece
volume using the volume
control keys.
34 Keypad Volume Set the volume of the keypad
tones using the volume
control keys, or to silence the
keypad tones.
35 Speaker Volume Temporarily adjust the
Private/Group speaker
volume for noisy
environments.
36 Spkr Vol Set Tone Turn the speaker volume set
tones on or off.
38 Silent Group Silence all incoming Group
Call alerts an d voice activity.
When set, your screen
displays the message,
“Group-Silent”. See “GroupSilent Programming” on
page 61.
40 Change Passcode Change your secret four-digit
password from the initial
setting 0000.
66
Page 72

Programming Menus
Table 7: Progr amming Menu Options (Continued)
PressKeypad
Number Menu Option To
60 Set Baud Rate Set the modem baud rate
between the phone and the
PC. See
Dial-up Services U ser’s
Guide.
61 Data Ring Volume Set the default data ringer
volume using the volume
control buttons. See
Online Dial-up Ser vices
User’s Guide.
62 Program Data # View your circuit data number.
See
Services User’s Guide.
63 IP Address View the Internet Protocol (IP)
Address-1 for your browser,
as programmed in your
phone.
If your phone is cabled to a
computer, view IP Address-2,
the stored IP address of your
computer.
Use the scroll keys to view
either one.
(Future availability)
Nextel Online
Nextel
Nextel Online Dial-up
64 Reset kBytes Tx/Rx View the number of Kilobytes
sent and received for packet
data.
(Future availability)
65 Lines per Screen For message mail, select 4
lines, 12 characters or 6 lines,
16 characters.
67
Page 73

i1000plus User’s Guide
Table 7: Progr amming Menu Options (Continued)
PressKeypad
Number Menu Option To
70 Language Select one of four languages
for your display text.
default is English.
“Changing the Display
Language” on page 11.
71 Time/Date Select the standard or military
time and MM/DD or DD/MM
date format.
The
See
NOTE:
Option
Number
41 Feature Reset Returns all feature settings to
42 Master Clear Performs Feature Reset and
43 Master Reset Resets the phone’s
44 Change Service
50 NAM Selects alternate N umeri c
51 Net ID Edits the pre-programmed
Do not try to program menus 41 through 51 as you
could permanently damage your phone. They are for
Nextel Customer Care use only and should never be
programmed by customers.
Table 8: Other Programming Menu Options
Menu Option Function
their original defaults.
erases all stored lists.
identification number.
Changes or resets the fraud
Key
prevention service key.
Assignment Module (NAM).
Network number list and
select roaming options.
68
Page 74

ACCESSORIES
Batteries
Accessories
NOTE:
• For best results, charge the batteries within the
temperature range of 10
• Prolonged charging is not recommended. For battery
charging guidelines, see Table 9.
o
C to 40oC (50oF to 104o).
Charging Lithium Ion Batteries
Table 9 provides the approximate time to fully charge a battery using a
Motorola iDEN Approved Lithium Ion battery charger.
Table 9: Battery Charging Times
MOTOROLA BATTERIES
Kit Number Description/Chemistry Charging Time*
NTN1645 Slim Lithium I on 2.5 Hours
NTN1644 Standard L ithium Ion 3 Hours
* Charging times are based on a fully discharged battery.
For optimal battery life, use a Motorola iDEN Approved Lithium Ion
battery charger with your Motorola iDEN Lithium Ion battery. Other
chargers may not fu lly charge your Lithium Ion battery or may yield a
reduced number of cycles.
Battery Operating Instructions
• Extreme temperatures will degrade battery performance. Do not store
your battery where temperatures exceed 60°C (140°F) or fall below 20°C (4°F).
• This Lithium Ion battery has a self discharge rate and without use, will
lose about 1% of its charge per day.
• The battery capacity will be degraded if stored for long periods while
fully charged. If long term storage is required, store at half capacity.
• The Motorola iDEN Approved Lithium Ion chargers will provide
optimum performance. Other chargers may not fully charge your iDEN
Lithium Ion battery or may yield reduced number of charge cycles.
• If the battery appears inoperative, the internal protection circuitry may
have been activated. Remove the battery from the phone and put it into
the charger for several minutes to reset the circuitry.
• When batteries are not in use, always store them in the plastic safety tray.
69
Page 75

i1000plus User’s Guide
Travel Charger
Using the NPN6197 Travel Charger, you can charge a battery from an AC
outlet. On one end of the Trav el Char ger, an accessory connector attaches to
the bottom of the phone unit. At the other (AC outlet) end of the device,
there is a compact housing that contains the plug-in power supply. A
lightweight cable connects the two ends (accessory connector and supply).
A power light (green LED) on the accessory power supply indicates that the
Travel Charger is plugged in.
Using the Travel Charger
Accessory Connector
Transformer
Figure 1. Using the Travel Charger
1. While holding the i1000plus with it s fro n t toward you , insert the
accessory connector (with the Motorola logo facing you) into the slot
on the bottom of the i1000plus until you hear a click.
2. Flip open th e prongs, and plug the Travel Charger transf ormer into an
AC wall outlet. The power light (green LED) on the accessory power
supply will come on.
Travel Charger Operating Specifications
Input voltage range: 90-264 VAC @ 50/60 Hz.
Operating temperature range: 0°C to +50°C
70
Page 76

Accessories
Cigarette Lighter Adapter
The NTN1628 Cigarette Lighter Adapter provides power to the phone and
charges the phone’s Lithium Ion battery.
The power light (green LED) will light when the adapter is receiving power.
Using the Cigarette Lighter Adapter
Cigarette Lighter
Adapter
Accessory
Connector
Accessory
Figure 2. Using the Cigarette Lighter Adapter
1. Attach the Cigarette Lighter Adapter’s accessory connector to the
bottom of the i1000plus. While holding the i1000plus with its front
toward you, insert the accessory connector (with the Motorola logo
facing you) into the slot on the bott om o f the i1000plus until you hear
a click.
2. Remove the vehicle’s cigarette lighter plug from the cigarette lighter
receptacle.
3. Plug the cigarette lighter adapter into the cigarette lighter receptacle.
The power light (green LED) will come on.
4. The i1000plus may be turned off, turned on, or in use.
Removing the Cigarette Lighter Adapter
1. Unplug the adapter’s cigarette lighter adapter from the vehicle’s
cigarette lighter receptacle.
2. Press the latches on the accessory connector.
3. Pull the accessory connector from the bottom of the i1000plus.
71
Page 77

i1000plus User’s Guide
Cigarette Lighter Adapter Operating Specifications
Operating voltage range: 10.8 - 33.0 Vdc.
Operating temperature range: -30°C to +60°C
Desktop Dual-Pocket Charger
The NTN1627 Desktop Dual-Pocket Charger charges Motorola authorized
batteries, as listed on page 69, for the i1000plus. To charge a battery, see
Figure 3.
Charging a Battery
Rear PocketFront Pocket
LED
Indicators
Pin Connector Power supply cord receptacle
Figure 3. Desktop Dual-Pocket Charger
1. Plug the flat end of the power-supply cord, with the logo facing
down, into the receptacle labeled “Charging” on the back of the
charger.
2. Plug the transformer end of the power-supply cord into any standard AC
wall outlet.
3. Insert an i1000plus with an attached battery, into the charger's front
pocket. This is done by inserting the bottom of the i1000plus into the
pin connector in the bottom of the charger's front pocket.
4. If the i1000plus is properly seated in the front pocket, the charger’s
front pocket LED indicator will light green to indicate that the battery is
being charged. If a battery is in the rear pocket and the i1000plus with a
battery is inserted into the front pocket, the battery in the front pocket
will charge to full capacity before the battery in the rear pocket is
charged. The LED for the rear pocket will flash yellow, indicating that
its battery is waiting to be charged.
5. The charger has the capability of displaying the battery’s charge status.
The indicator will show the following: solid red=1-30%; solid
yellow=31-60%; flashing green=61-90%; solid green=91-100%.
72
Page 78

Accessories
Audio Adapter
The Audio Adapter connects an earpiece microphone to your i1000plus for
privacy and hands-free operation.
The Audio Adapter fits onto the bottom of the i1000plus and provides a
standard 2.5mm jack connection for an earpiece microphone or headset.
(The Audio Adapter will be packaged with an audio accessory, such as an
earpiece microphone or a headset.)
Using the Audio Adapter
Audio Adapter
Connector
Button
2.5mm jack
Figure 4. Using the Audio Adapter
1. Hold the phone and the Audio Adapter fac ing you so that you see the
Motorola logo on the adapter.
2. Insert the Audio Adapter’s connector into the i1000plus receptacle. You
will hear the connector snap into place.
Attaching/Detaching the Earpiece Microphone
1. Insert the 2.5mm plug of the earpiece microphone cord into the jack
of the Audio Adapter.
2. Pull on the plug, not the cord, to remove the earpiece microphone.
Removing the Audio Adapter
1. Press the button on the front of the Audio Adapter. The button
displays the Motorola logo.
2. Pull the Audio Adapter from the i1000plus.
73
Page 79

i1000plus User’s Guide
OTHER USEFUL INFORMATION
Freque ntly Asked Que stions
Q. Which services or calling features follow me when I travel?
A.
All digital cellular calling services, including Voice Mail, Paging and
related features follow you no matter where you use your phone on the
Nextel National Network. Nextel Direct Connect can be used only in your
local market.
Q. What number is dialed to reach me when I’m traveling on the Nextel
National Network?
A.
Every Nextel subscriber gets a regular 10-digit Personal Telephone
Number — a 3-digit area code, plus a 7-digit local number. This number is
used just like any phone number. And it doesn’t matter where you’re
traveling on the Nextel National Network...you’ll get the call. However, if
you are traveling long distance and someone calls you from your home
market using only your 7-digit number, you will be charged long distance
for the call.
Q. How are calls on the Nextel National Network priced?
A.
Local calls are priced according to your home market rates, no matter
where you are on the Nextel National Network. For long distance calls, you
are charged a flat rate per minute, no matter where you call in the U.S.
There are no roaming charges associated with any digital calls made while
traveling, and there are no incremental access fees to pay for use of the
network.
Q. If I live in Chicago, travel to Denver and make a local call there, how
will that call be priced?
A.
Local is always local with Nextel! You will be charged local rates,
because a local call placed in Denver is a local call, regardless of where
your home market is located.
Q. What do I do if I have additional questions or my phone breaks?
A.
Call Nextel Cu stomer Ca re at 1 -800- 639-611 1 or d ial 611 on yo ur Next el
phone. However , if you are hav ing prob lems with your i1000plus, whenever
possible, call Cu stom er Ca re f rom a not her ph one as yo u may be a sked to go
through steps to correct the problem on your phone.
Nextel Customer Care
Relax! Nextel Customer Care is here to help. There are lots of features
packed into your Nextel service...and into your i1000plus phone. But don’t
worry. If, after reading this guide, you still have questions about coverage,
billing, Nextel Direct Connect or any other service or feature, call us.
We’ll be happy t o give you hel p, expla nations and an ything else you n eed to
enjoy your Nextel service as soon as possible!
Before you call Nextel Customer Care for service or to resolve an issue, be
sure to have your IMEI number and your model number ready. These
numbers are located behind the battery on the back of your Nextel phone.
You’ll want to record these numbers, and keep them handy, so that you can
replace the battery prior to making your call.
74
Page 80

Other Useful Information
Understanding Status Messages
You may receive status messages under certain conditions. Before
contacting your carrier, note the message, numeric code, and the conditions
under which it appeared. The following table lists and describes the status
messages.
Status Messages Message Description
Number Not in Serv ice The number that you entere d is not valid.
User Not Available Th e phone that you ca lled is either busy, out-
User Not Authorized The par ty that you ca lled has not p urcha sed
Please Try Later This ser v ice is te mporar ily not available.
User Busy in Private The phone that you called is busy in a Private
User Busy in Data The ph one t hat you called is busy in a d ial-up
Service Restricted This service was restricted by your service
Service Not Available This feature is not available on the current
System Busy Try Later The system is experiencing he avy traffic.
Service Co nflict T his s er v ice ca nn ot be enabled be ca use a n
Please Try Agai n An error occ urr ed. Not e the error co de a nd tr y
Self Check Error A fault was detected wi th your Nextel phon e. If
Self Check Fail An operational fault was detecte d with your
of-range, or turned o ff. Please tr y again la ter.
this service.
Please try again later.
call.
call.
provider or it was not purch as ed.
network.
Please try again later.
incompatible ser vic e ha s alre ady be en tur ne d
on.
again.
this error recurs, not e the err or co de and
contact Customer Car e.
phone. Note the numeric code, turn your Nextel
phone off, and contact Cust omer Ca re.
75
Page 81

i1000plus User’s Guide
TERMS AND CONDITIONS OF SERVICE
TERMS AND CONDITIONS OF SERVICE: Before calling the Nextel Customer Service
Activation N umbe r co nt ai ned in t he se m ater ia ls, yo u ( “Cust o mer”) m ust r ea d an d ag re e to
the following terms and condi tions of N e xtel wireless telephone service (“Service”). By
calling to activate service, Customer applies and subscribes for Services provided by
Nextel (the “Company”) and confirms that Customer has read, understands, agrees to and
accepts the terms and conditi ons state d he rein. Customer understands that Company will
rely upon the information provided by Customer including credit information, in making a
decision to provide Services. Customer understands that Company may request and verify
Customer’s bank references and perform a credit history check utilizing standard
commercial credit reference services in connection with Company’s review of the
Customer’s credit worth ine s s . C us tomer understands that a security deposit or air time
usage limit may be required.
1. USE OF SERVICE — Customer must comply with all FCC rules and regula tions.
Customer w ill not use the Service f or any unlawful purpo s e. Customer will not use the
Service in aircraft.
2. CREDIT APPLICATION — This Agreement shall be contingent upon Company’s
approval of Customer’s credit. Comp any may require Customer to update credit
information from time to time. Customer warrants and represents that all credit
information furnishe d is complete, accurate and true. If Company subse que ntly
determines that any statements regarding Customer’s credit are false, incomplete or
inaccurate, Company may declare Customer to be in default and may exercise any
remedies it has under these Terms and Conditions of Service and at law or in equity.
3. CUSTOMER RADIO EQUIPMENT — Company is not responsible fo r the
installation, operation, quality of transmission or maintenance of the equipment. Company
reserves the right to change or rem ove assigned codes and/or telephone numbers when
such change is reasonabl y ne ce ssary in the conduct of its business. Customer does not
have any proprietary interest in such codes or telephone numbers. Federal and state laws
make it illegal for t hir d part ies to list en i n on se rvi ce, h owever comp lete pri vacy ca nnot be
guaranteed.
4. SECURITY DEPOSITS — C om pany has the right, in its sole discretion, to require
Customer to make a deposit to guarantee payment of Service charges. Customer grants
Company a security interest in suc h de posi ts, to se cure the payment of all sums due
thereunder as well as the performance of all other obligations Customer may ha ve to the
Company whether now existing or hereafter arising. Upon termination of Service,
Company may apply the deposit against any outstanding Service charges of Customer or
any other amount owed to Company. Company reserves the rig ht t o int er rupt services if
service appears to have excessive charges or any unusual calling patterns are observed on
Customer’s account. Such interr uption may be done to protect Customer or Company as
the Company determines in its sole discretion.
5. RATES, CHARGES AND PAYMENTS — Company shall issue invoices for Service
on a monthly basis which are due and payable upon receipt. Monthly Access Charges shall
be invoiced in advance. Airti m e an d long-distance charges shall be invoiced in arrears.
Customer is responsible to pay Compa ny on a timely basis, for charges for Service
payments as set forth on the Company ’s then-current rate plans, and any modifications
thereto. Customer acknowledges that chargeable time for telephone calls originated by a
unit begins when a connection is established with Company facilities. Customer accepts
responsibility for Airtime charges fro m invoicing telephone calls to its mobile unit from
the time that Customer responds to the call. If Customer disputes any Service charges,
Customer must pay entire amount set forth in the invoice by the due date and submit a
written explanation wi thin forty-five (45) days from the date on the invoice. If Com pany
76
Page 82

Other Useful Information
determines that an error was made on Customer’s invoice, Company shall credit
Customer’s account in the amoun t of th e e rror. If Customer does not pay the amount in
dispute, Company may e xe rcise any remedies it may have for non-payment of Service
charges. Co mpany res erve s the ri ght to mod ify an y and all elemen ts of th e Servic e char ges
at any time. Payments wh ic h are not received within thirty (30) days from the day of the
invoice shall be subject to late paym ent charges. If Customer does not make payments,
such failure shall be a default and Company shall be entitled to exercise any remedies it
may have under these Terms and Conditions of Servic e or a t law or in equity.
6. NONP AYMENT/BREACH — A late payment charge of 1.5% (or the maximum
interest rate permitted by law) per mo nth, may be applied to Customer’s account if
monthly invoices are not pai d by the due date. The later payment charge is applied to the
total unpa id balance due and outs tanding. The late payment charge is for cost s r elated to
the non-timely payment and shall be deemed an interest payment. A charge of $25.00 will
be made by Company for any check or negotiable instrument tendered by Customer and
returned unpaid by a financia l insti tu ti on for any reason. Company may demand payment
by money order, cashier’s check or similarly secure form of payment, at Company’s
discretion. If Company obtains the service of a collection or repossession agency or an
attorney to assist the Comp any in remedying Customer’s breach of any payment
obligations, Customer shall be liable for this expense. Customer understands that in the
event of nonpayment of charges or any other breach of these Terms and Conditions of
Service in addition to any oth er re m edies the Company may have, Company may
temporarily or pe rmanently terminate Service to Customer. If Compan y dis c onnects the
Service, Customer shall be liable to pay a re-connect charge of $25.00 per unit, in addition
to the outstanding Service charges before the Company will re activate Service. Company
reserves the right to modify the ter m s of servi ce as a precondition to reactivating service.
7. TAXES — Customer is responsible for all federal, state and lo ca l taxes for fees which
are computed in accordance with the appropriate tax laws for Services.
8. LIMITATION AND CONDITION OF LIABILITY/INDEMNITY — The Company’s
sole liability for Service disruption, whether caused by the negligence of the Company or
otherwise, is li mited to a credit allowance not exceeding an amount equal to the
proportionate charge to the Cust om er for the period of Service disruption. In no event is
the company or lessor liable for act u al co nsequential or special damages caused by it s
negligence or otherwise nor for e co nomic loss, personal injuries or property damages
sustained by customer or any third parties. Customer agrees to indemnify, defend and hold
Company harmless from any Cust om er violations of FCC rules and regulations or
Customer violation of any statutes, ordinances or laws of any local, state or federal public
authority.
9. NOTICE REGARDING USE OF SERVICE FOR 911 OR OTHER EMERGENCY
CALLS — The Service pro vider hereunder does not interact with 911 and other
emergency services in the same manner as land line telephone service. Depend in g on t he
circumstances of a particu la r ca ll , the Service provided hereunder may not be able to
identify your location to emergency services and may not always be connected to the
appropriate emergency services provider. Customer agrees to hold company harmless
against any and all claims, demands, actions or causes of action (including all actions by
third parties) arising out of the use or attempted use of the company’ s service to access 911
or other emergency services.
10. NO WARRANTY (SER VICE) — Company makes no warranties, express or implied,
including without limitation, any implied warranty of merchantability or fitness for a
particular purpo se to customer in connection with it s us e of the service. In no event shall
company be liable fo r inc ident al or cons eque ntia l dama ges to the f ull exten t th e same may
be disclaimed by law. Customer acknowledges that service inter ruptions will occur from
77
Page 83

i1000plus User’s Guide
time to time and agrees to hold company harmless for all such interruptions.
11. NO WARRANTY (EQUIPMENT) — Co mp any makes no warranties or
representations of any kind , statutory, expressed or implied, to customer or any other
purchaser of equipment activated on the service. Without limiting the foregoing, company
specifically makes no express or implied warranties of merchantability or fitness for a
particular purpose. Customer hereby waives all other warranties, guarantees, conditions or
liabilities, express or implied, arising by law or otherwise. In no event shall company be
liable for consequential, special or in ci dental damages, whether or not occasioned by
company negligence and including, without limitation, liability for any loss or damage
resulting from the interruption or failure in the operation of any equipment activated on
the service. There ar e no warranties which exte nd beyond the description contained
herein. Customer assumes the entire risk as to the quality and performance of the
equipment. If the equi pm ent proves defective, the costs of all necessary servic ing and
repair will be borne by the cu stom er.
12. NEXTEL BUSINESS NE TWORKS -- There is no group call available on the N e xte l
Business Networks. There is no pool i ng of N e xte l Direct Connect minutes between
companies on the Nextel business networks. It is possible that participants on the Nextel
Business Network could determin e th e private identification numbers of customer’s units
and be able to private call those units. It is also possible that users of customer units could
determine the private identification numbers of other Nextel Business Network
participants an d pri vate call them.
©1999 Nextel Communi cati ons, Inc . Al l ri ght s rese rve d. Next el, the Nextel logo, Nextel
Direct Connect, Nex N ot e, and Nextel Business Networks are trademarks an d/o r service
marks of Nextel Communications, Inc.
, Motorola, i1000plus, VibraCall, and Call Alert
Dial are registered trademarks of Motorola, Inc.
®Reg. U.S. Pat. & Tm. Off.
are trademarks; an d iD EN an d T ur bo
,
78
Page 84

Safety and G enera l Info rma tion
SAFETY AND GENERAL
INFORMATION
IMPORTANT INFORMATION ON SAFE AND
EFFICIENT OPERATION.
READ THIS INFORMATION BEFORE USING YOUR
INTEGRATED MULTI-SERVICE PORTABLE RADIO.
For the Safe and Efficient Operation of Your Radio,
Observe these Guidel ines :
Your radio product contains a transmitter and a receiver . When it is ON,
it receives and transmits radio frequency (RF) energy. The radio
operates in the frequency range of 806 MHz to 870 MHz and employs
digital modulation techniques. When you use your radio, the system
handling your call controls the power level at which your radio
transmits. The power level typically may vary over a range from
.0024 Watts to 0.6 Watts.
Exposure To Radio Frequency Energy
Your Motoro la Radio Product is designed to comply with the following
national and international standards and guidelines regarding exposure
of human beings to radio frequency electromagnetic energy:
• United States Federal Communications Commission, Code of
Federal Regulations; 42 CFR part 2 sub-part j
• American National Standards Institute (ANSI) IEEE. C95. 1-1992
• National Council on Radiation Protection and Measurements
(NCRP). Report 86
• International Commission on Non-Ionizing Radiation Protection
(ICNIRP) 1998
• National Radiological Protection Board of the United Kingdom, GS
11, 1988
• Verband Deutscher Elektrotechniker (VDE) DIN-0848
• Department of Health and Welfare Canada. Safety Code 6
To assure optimal radio performance and make sure human exposure to
radio frequency electromagnetic energy is within the guidelines set forth
in the above standards, always adhere to the following procedures:
When placing or receiving a phone call, or using the group or private
call functions with the Group/Priv ate Speak er OFF (muted speak er icon
visible in the display), hold the radio as you would a telephone. Speak
directly into the mouthpiece and position the antenna up and over your
shoulder.
79
Page 85

i1000plus User’s Guide
When using the radio as a traditional two-way
radio while making group or private calls with the
Group/Private Speaker ON (no speaker icon
visible in the display), hold the radio in a vertical
position with the microphone one to two inches
away from the lips.
For body-worn operation, the antenna should be
kept at least one inch from the body when
transmitting.
DO NOT hold the antenna when the radio is “IN USE”. Holding the
antenna affects call quality and may cause the radio to operate at a
higher power level than needed.
Interference to Med ical and Personal E lectronic D evices
Most electronic equipment is shielded from RF energy. However , certain
equipment may not be shielded against the RF signals from your
wireless phone.
Pacemakers
The Health Industry Manufacturers Association recommends that a
minimum separation of six inches (6") be maintained between a
handheld wireless phone and a pacemaker to avoid potential
interference with the pacemaker. These recommendations are consistent
with the independent research by and recommendations of Wireless
Technology Research.
Persons with pacemakers should:
• ALWA YS keep the phone more than six inches from their pacemak er
when the phone is turned ON.
• not carry the phone in a breast pocket.
• use the ear opposite the pacemaker to minimize the potential for
interference.
• turn the phone OFF immediately if you have any reason to suspect
that interference is taking place.
Hearing Aids
Some digital wireless phones may interfere with some hearing aids. In
the event of such i nterferen ce, you may want to cons ult y our hear ing aid
manufacturer to discuss alternatives.
Other Medical Devices
If you use any other personal medical device, consult the manufacturer
of your device to determine if it is adequately shielded from external RF
energy. Your physician may be able to assist you in obtaining this
information.
Turn your phone OFF in health care facilities when any regulations
posted in these areas instruct you to do so. Hospitals or health care
facilities may be using equipment that could be sensitive to external RF
energy.
80
Page 86

Safety and G enera l Info rma tion
Interference to Other Electronic Devices
RF energy may affect improperly installed or inadequately shielded
electronic operating and entertainment systems in motor vehicles.
Check with the manufacturer or representative to determine if these
systems are adequately shielded from external RF energy. Also check
with the manufacturer of any equipment that has been added to the
vehicle.
Turn your radio off before boarding any aircraft to prevent possible
interference to aircraft systems. Regulations of the United States Federal
Aviation Administration prohibit use when the plane is in the air and
require you have permission from a crew member to use your radio
while the plane is on the ground.
Safety and General
Use While Driving
Check the laws and regulations on the use of telephones in the area
where you drive. Always obey them.
When using the phone while driving, please:
• Give full attention to driving and to the road
• Use hands-free operation, if available
• Pull off the road and park before making or answering a call if
driving conditions so require.
81
Page 87

i1000plus User’s Guide
!
OPERATIONAL WARNINGS
!
W A R N I N G
Turn off your two-way radio when you are in any area with a
potentially explosive atmosphere, unless it is a radio type especially
qualified for use in such areas (for example, Factory Mutual
Approved). Sparks in a poten tially explosi ve atmosphere can caus e an
explosion of fire resulting in bodily injury of even death.
Note
: The areas with potentially explosive atmospheres referred to
above include fueling areas such as: below decks on boats; fuel or
chemical transfer or storage facilities; areas where the air contains
chemicals or part icles s uch as grain, dust or m et al po wders; and any
other area where you would normally be advised to turn off your
vehicle engine. Areas with potentially explosive atmospheres are
often, but not always, posted.
Batteries
Do not replace or charge batteries in a potentially explosive
atmosphere. Contact sparking may occur while installing or removing
batteries and cause an explosion.
BLASTING CAPS AND AREAS
To avoid possible interference with blasting operations, turn off your
radio when you are near electrical blasting caps, in a blasting area, o r
in areas posted: “Turn off two-way radio”. Obey all signs and
instructions.
POTENTIALLY EXPLOSIVE
ATMOSPHERES
FOR VEHICLES EQUIPPED WITH AN AIR BAG
Do NOT place objects, including both in stalled an d po rtable wireless
equipment, in the area over the air bag or in the air bag deployment
area. An air bag inflates with great force. If in-vehicle wireless
equipment is improperly installed and the air bag inflates, serious
injury could result.
82
Page 88

Safety and G enera l Info rma tion
!
C a u t i o n
Damaged Antennas
Do not use any portable two-way radio that has a damaged antenna. If
a damaged antenna comes into contact with your skin, a minor burn
can result.
Batteries
All batteries can cause property damage and/or bodily injury such as
burns if a conducti ve material such as jewelry , k eys, o r beaded cha ins
touch exposed terminals. The conductive material may complete an
electrical circuit (short circuit) and become quite hot. Exercise care in
handling any charged battery, particularly when placing it inside a
pocket, purse, or other container with metal objects.
Cleaning Instructions
Clean the external surfaces of the unit with a damp cloth, using a mild
solution of dishwashing detergent and water. Some household cleaners
may contain chemicals that could seriously damage the unit. Avoid the
use of any petroleum-based solvent cleaners. Also, avoid applying
liquids directly on the unit.
Antenna Considerations
Use only the supplied or an approved antenna. Unauthorized antennas,
modifications, or attachments could impair call quality, damage the
radio, or result in violation of local agency regulations.
OPERATIONAL
CAUTIONS
83
Page 89

i1000plus User’s Guide
Accessory Safety Information
IMPORTANT
SAVE THESE ACCESSORY SAFETY INSTRUCTIONS
• Before using the battery, read all the instructions and cautionary
markings on (1) the battery, (2) the battery charger, and (3) the phone
using the battery.
• For your protection, store the battery in its safety tray when you are not
using it.
• Before using the Travel Charger, read all the instructions and cautionary
markings on (1) the Travel Charger, (2) the battery, and (3) the phone
using the battery.
• Before using the Cigarette Lighter Adapter (CLA), read all the
instructions and cautionary markings on (1) the CLA, (2) the battery , and
(3) the phone using the battery.
• Before using the Desktop Charger, read all the instructions and
cautionary markings on (1) the battery charger, (2) the battery, and (3)
the phone using battery.
• Do not expose the Travel Charger, Desktop Charger, or CLA to water.
To reduce the risk of injury, charge only the
rechargeable batteries listed. Other types of
!
!
batteries may burst, causing personal injury and
damage.
W A R N I N G
:
• To reduce the risk of damage to the cord or plug, pull by the plug rather
than the cord when you disconnect the Travel Charger or Desktop
Charger from the AC receptacle or when you disconnect the CLA from
the cigarette lighter.
• Do not operate the Travel Charger or CLA with a damaged cord or plug.
• Do not attempt to disassemble the Travel Charger or CLA.
• The T ra v el Cha r ger o r CLA m ay b ecom e w arm duri ng o pera tion, b ut not
hot. If the Travel Charger becomes hot to the touch, unplug it from the
AC outlet immediately and discontinue its use. If the CLA becomes hot
to the touch, unplug it from the cigarette lighter immediately and
discontinue its use.
• Use of a non-recommended attachment to the Desktop Charger may
result in a risk of fire, electric shock, or injury to persons.
• Make sure the Desktop Charger cord is located so that it will not be
stepped on , t r ipped over, or subjected to damage or stress.
• An extension cord should not be used with the Desktop Charger unless
absolutely necessary. Use of an improper extension cord could result in a
risk of fire and electric shock. If an extension cord must be used, make
sure that:
ˆ The pins on the plug of the extension cord are the same num ber,
size, and shape as those on the plug of the charger.
ˆ The extension cord is properly wired and in good e lectri cal
condition.
84
Page 90

Safety and G enera l Info rma tion
ˆ The cord size is 18AWG for lengths up to 100 feet and 16AWG
for lengths up to 150 feet.
• Do not operate the Desktop Charger with a damaged cord or plug replace them immediately.
• Do not operate the Desktop Charger if it has received a sharp blow, has
been dropped, or has been damaged in a ny way; take it to a qualified
service technician.
• Do not disassemble the Desktop Charger; take it to a qualified service
technician when service or repair is required. Incorrect reassembly may
result in a risk of electric shock or fire.
• Maximum a m bi ent t e mp er at ur e a r ou nd t h e power supply of t h e D esktop
Charger must not exceed 40°C (104°F).
• The output power from the power supply must not exceed the rating
given on the Desktop Charger.
• The disconnection from the line voltage is made by unplugging the
power supply’s transformer from the AC receptacle.
• To reduce risk of electric shock, unplug the Desktop Charger from the
outlet before attempting any maintenance or cleaning.
• For optimum performance, turn off the i1000plus while charging it in the
Desktop Charger .
• The Desktop Charger is for indoor use only.
85
Page 91

i1000plus User’s Guide
OWNER’S INFORMATION
Mobile Equipment Identifier (IMEI)
_____________________________
Own Phone Number
_____________________________
BBBBBBBBBBBBBBBBBBBBBBBBBBBBB
Own Private ID
86
Date Purchased
BBBBBBBBBBBBBB
Sales Representative Telephone Number
_______________________
Customer Care Number
1-800-639-6111
Page 92

Directories
Private Call Directory
Private ID Name
1
2
3
4
5
6
7
8
9
Talkgroup Directory
Owner’s Information
Talkgroup ID Name
1
2
3
4
5
6
7
8
9
87
Page 93

i1000plus User’s Guide
88
 Loading...