How it Works
Log In / Sign Up
Buy Points
How it Works
FAQ
Contact Us
Questions and Suggestions
Users
Miele
Loading...
H
H4641BKAT
H4680B-OVEN
H4682B
2
H4742BP
2
H4780B
3
H4780B-OVEN
H4780BP
2
H4780BP-OVEN
H4782BP
3
H4842BP
2
H4880
H4880B-OVEN
H4880BP
2
H4880BP-OVEN
H4881B
2
H4881BP
2
H4886BPBRWS
H4890B2
3
H4890B2-OVEN
H4890BP2-OVEN
H4892BP2
H4894BP2
3
H5040 BM ClSt
H5040 B ST CS
H5080 BM Ice
H5140BPIN
H5140 BP ST CS
H5145BPL
H5145BPR
H5240 BP BK
H5241 B ST СS
H52456BP
H52456BPL
H52456BPR
H5461 BP ST CS
H5681BP
18
H5681BP CS
H5681P
H6
4
H6000-1BM
2
H6100B
9
H6100B EDST-CLST
H6100BM EDST-CLST
H6160B EDST-CLST
H6160BP
22
H6160E
4
H6165BP
5
H6166E
3
H6167BP
8
H6167E
2
H6180BP
7
H6200B C
H6200B EDST-CLST
H6200BMBRWS
2
H6200BM EDST-CLST
H6200BMHVBR
H6200BMOBSW
2
H6200BP EDST-CLST
H6260B
30
H6260B EDST-CLST
H6260BP
26
H6260BP EDST-CLST
H6260E
5
H6265BP
H6267B
19
H6267B EDST/CLST
H6280BP
6
H6280BPBRWS
3
H6280BPOBSW
H6280BPTB
2
H6281BP
4
H6300B
H6301BP
H6360BP
23
H6360BP EDST-CLST
H6361B
2
H6361BP
6
H6400-60B
3
H6400BMB
2
H6400 BM BLANC
H6400BMM
2
H6400BMW
2
H6401B BRWS
H6401B EDST-CLST
H6401B HVBR
H6401BM BRWS
H6401BM CLST
H6401BM HVBR
H6401BM OBSW
H6401BMXB
H6401BMX C
H6401BMXG
H6450-55B
3
H6460-60B
3
H6460-60BP
3
H6460B
9
H6460B EDST-CLST
H6460BP
16
H6461B CLST
H6461B EDST
Loading...
Loading...
Nothing found
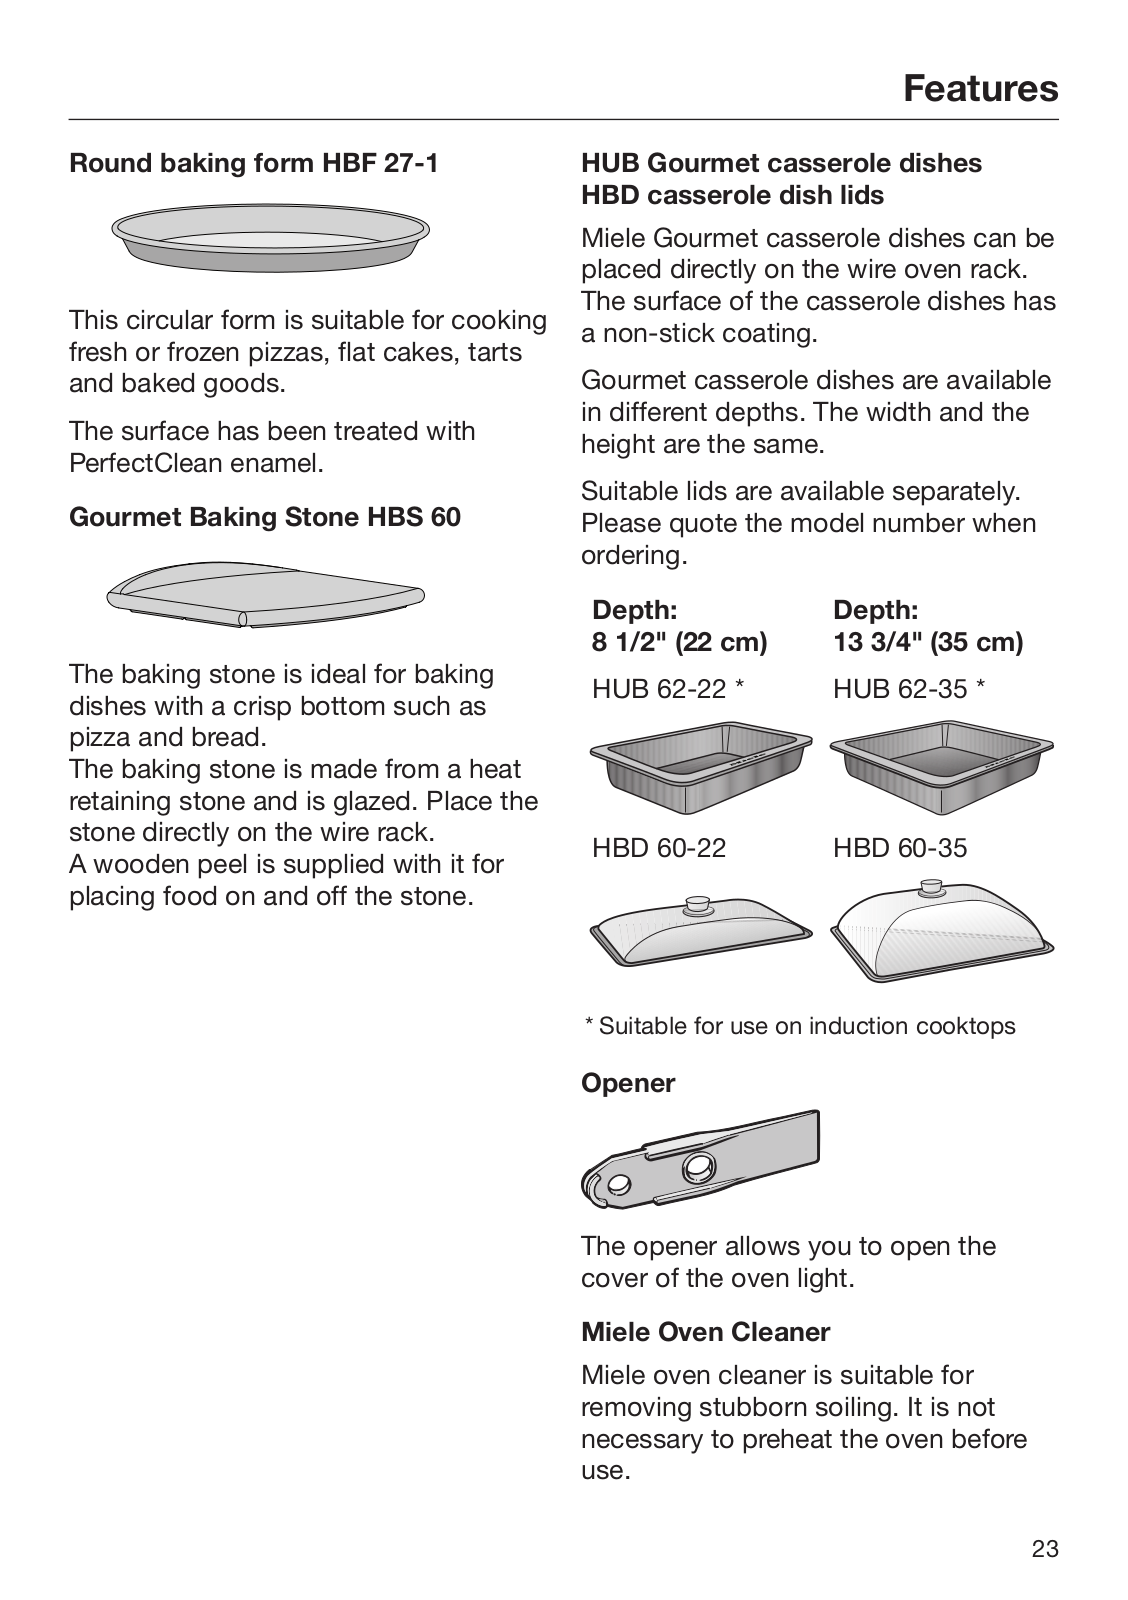
H6180BP
User Manual
9 pgs
2.15 Mb
0
Installation Manual
80 pgs
2.21 Mb
0
User Manual
88 pgs
2.71 Mb
0
Specification
8 pgs
1.19 Mb
0
Operating instructions [es]
84 pgs
2.52 Mb
0
User Manual
20 pgs
240.72 Kb
0
Specifications
8 pgs
747.11 Kb
0
Table of contents
Loading...
Miele H6180BP, H6280BP Installation Manual
...
Miele Installation Manual
Download
Specifications and Main Features
Frequently Asked Questions
User Manual
Download
Loading...
+
56
hidden pages
Unhide
You need points to download manuals.
1 point = 1 manual.
You can buy points or you can get point for every manual you upload.
Buy points
Upload your manuals