

Operating and installation instructions
Steam oven
To avoid the risk of accidents or damage to the appliance it is essential
to read these instructions before it is installed and used for the first time.
en-GB M.-Nr. 09 580 070

Contents
Warning and Safety instructions.......................................................................... 5
Caring for the environment ................................................................................13
Guide to the appliance........................................................................................ 14
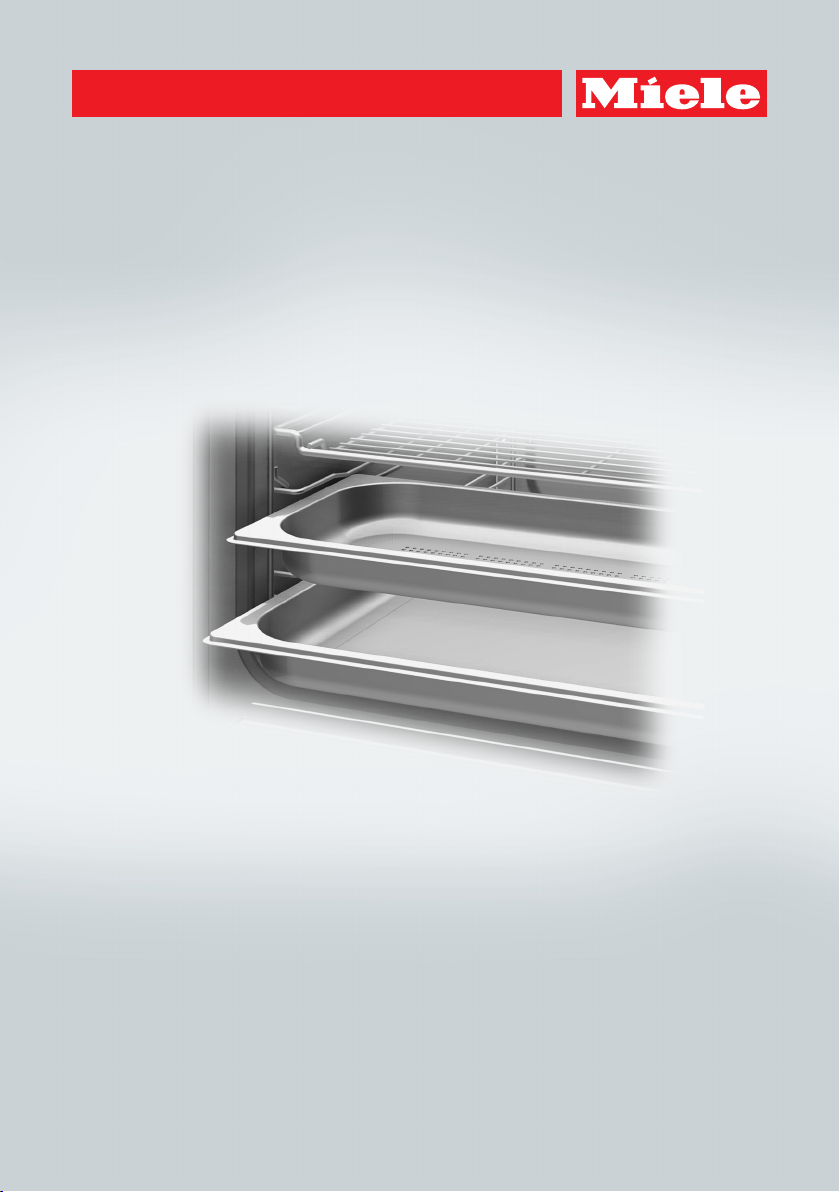
Steam oven front view........................................................................................... 14
Accessories supplied ............................................................................................ 15
Controls................................................................................................................ 16
Sensor controls ..................................................................................................... 17
Display................................................................................................................... 17
Description of functions .....................................................................................18
Water container ..................................................................................................... 18
Condensate tray.................................................................................................... 18
Temperature .......................................................................................................... 18
Duration................................................................................................................. 19
Noises.................................................................................................................... 19
Heating-up phase.................................................................................................. 19
Cooking phase ...................................................................................................... 19
Using for the first time ........................................................................................ 20
Cleaning for the first time ...................................................................................... 20
Set the water hardness level ................................................................................. 21
Set the correct boiling point for water................................................................... 21
Operation.............................................................................................................. 22
Using the appliance............................................................................................... 22
Interrupting operation............................................................................................ 24
Pre-heat................................................................................................................. 25
General notes....................................................................................................... 26
The advantages of cooking with steam ................................................................ 26
Suitable containers................................................................................................ 26
Cooking containers .......................................................................................... 26
Your own containers......................................................................................... 26
Condensate tray.................................................................................................... 26
Shelf level .............................................................................................................. 27
Frozen food............................................................................................................ 27
Temperature .......................................................................................................... 27
Duration................................................................................................................. 27
Cooking with liquid................................................................................................ 27
Your own recipes................................................................................................... 27
2

Contents
Steam cooking..................................................................................................... 28
Vegetables............................................................................................................. 28
Meat ...................................................................................................................... 31
Sausages............................................................................................................... 33
Fish........................................................................................................................ 33
Shellfish ................................................................................................................. 36
Mussels ................................................................................................................. 37
Rice ....................................................................................................................... 38
Pasta .................................................................................................................... 39
Dumplings ............................................................................................................. 40
Grain...................................................................................................................... 41
Dried pulses .......................................................................................................... 42
Hen's eggs ........................................................................................................... 44
Fruit ....................................................................................................................... 45
Menu cooking (cooking whole meals)................................................................... 46
Special applications ............................................................................................ 48
Reheat ................................................................................................................... 48
Defrost................................................................................................................... 49
Bottling .................................................................................................................. 52
Extracting juice with steam ................................................................................... 55
Make yoghurt ........................................................................................................ 56
Prove dough.......................................................................................................... 57
Dissolve gelatine ................................................................................................... 58
Melt chocolate....................................................................................................... 58
Skinning vegetables and fruit................................................................................ 59
Apple storage ....................................................................................................... 59
Blanching............................................................................................................... 60
Sweat onions......................................................................................................... 60
Cook bacon........................................................................................................... 61
Disinfect items ...................................................................................................... 61
Heating damp flannels .......................................................................................... 62
Decrystallise honey ............................................................................................... 62
Making eierstich .................................................................................................... 62
Settings ................................................................................................................63
Note for test institutes ........................................................................................ 65
Cleaning and care ...............................................................................................66
Important information on cleaning and care ......................................................... 66
Appliance front ...................................................................................................... 67
Oven interior.......................................................................................................... 68
Accessories .......................................................................................................... 68
3

Contents
Side runners .......................................................................................................... 69
Water container ..................................................................................................... 69
Descaling............................................................................................................... 71
What to do if....................................................................................................... 73
Optional accessories ..........................................................................................76
Cooking containers ............................................................................................... 76
Cleaning and care products.................................................................................. 78
Miscellaneous........................................................................................................ 78
Safety instructions for installation..................................................................... 79
Building-in dimensions DG 6020........................................................................ 80
Building-in dimensions DG 6030........................................................................ 85
Installation............................................................................................................ 89
Fitting the feet ....................................................................................................... 89
Installing the steam oven....................................................................................... 90
Electrical connection ..........................................................................................91
After sales service, data plate, guarantee ........................................................93
4

Warning and Safety instructions
This appliance complies with statutory safety requirements.
Inappropriate use can, however, lead to personal injury and
damage to property.
To avoid the risk of accidents and damage to the appliance,
please read these instructions carefully before using it for the first
time. They contain important notes on installation, safety, use and
maintenance.
Miele cannot be held liable for damage caused by non-compliance
with these instructions.
Keep these instructions in a safe place and ensure that new users
are familiar with the contents. Pass them on to any future owner.
5

Warning and Safety instructions
Correct application
This steam oven is intended for use in domestic households and
similar working and residential environments.
This steam oven is not intended for outdoor use.
This steam oven is intended for domestic use only as described in
these operating instructions.
Any other usage is not supported by the manufacturer and could be
dangerous.
The steam oven can only be used by people with reduced
physical, sensory or mental capabilities, or lack of experience and
knowledge, if they are supervised whilst using it, or have been
shown how to use it in a safe way and recognise and understand the
consequences of incorrect operation.
6

Warning and Safety instructions
Safety with children
Children under 8 years of age must be kept away from the
appliance unless they are constantly supervised.
Children 8 years and older may only use the steam oven
unsupervised if they have been shown how to use it safely and
recognise and understand the consequences of incorrect operation.
Children must not be allowed to clean the steam oven
unsupervised.
Please supervise children in the vicinity of the steam oven and do
not let them play with it.
Danger of suffocation. Packaging, e.g. plastic wrappings, must be
kept out of the reach of babies and children. Whilst playing, children
could become entangled in packaging or pull it over their head and
suffocate.
Danger of burning. Children's skin is far more sensitive to high
temperatures than that of adults. Make sure that children do not
attempt to open the door when the appliance is in operation. Keep
children well away from the appliance until it has cooled down and
there is no danger of burning.
Danger of injury. The oven door can support a maximum weight of
8kg. Children could injure themselves on an open door. Do not let
children swing on the door when it is open.
7

Warning and Safety instructions
Technical safety
Unauthorised installation, maintenance and repairs can cause
considerable danger for the user. Installation, maintenance and
repairs must only be carried out by a Miele authorised technician.
Never use a damaged steam oven. It could be dangerous. Check
it for visible signs of damage before using it.
Reliable and safe operation of this steam oven can only be
assured if it has been connected to the mains electricity supply.
The electrical safety of this appliance can only be guaranteed
when correctly earthed. It is essential that this standard safety
requirement is met. If in any doubt please have the electrical
installation tested by a qualified electrician.
Before connecting the appliance to the mains supply, ensure that
the connection data on the data plate (voltage and frequency) match
the mains electricity supply.
This data must correspond in order to avoid the risk of damage to
the appliance. Consult a qualified electrician if in any doubt.
Do not connect the steam oven to the mains electricity supply by
a multi-socket adapter or an extension lead. These do not guarantee
the required safety of the appliance (fire hazard).
For safety reasons, this steam oven may only be used when it has
been built in. This is necessary to ensure that all electrical
components are shielded.
This steam oven must not be used in a non-stationary location
(e.g. on a ship).
Never open the casing of the appliance. Tampering with electrical
connections or components and mechanical parts is highly
dangerous to the user and can cause operational faults.
8

Warning and Safety instructions
While the appliance is under guarantee, repairs should only be
undertaken by a Miele authorised service technician. Otherwise the
guarantee is invalidated.
Miele can only guarantee the safety of the appliance when
genuine original Miele replacement parts are used. Faulty
components must only be replaced by Miele spare parts.
If the plug is removed from the connection cable or if the cable is
supplied without a plug, the appliance must be connected to the
electrical supply by a suitably qualified electrician.
If the connection cable is damaged, it must be replaced with a
special connection cable typeH05VV-F (PVC insulated), available
from Miele.
During installation, maintenance and repair work, the appliance
must be disconnected from the mains electricity supply.
If the steam oven is installed behind a furniture panel (e.g. a door),
ensure that the door is never closed whilst the steam oven is in use.
Heat and moisture can build up behind a closed furniture panel and
cause subsequent damage to the steam oven, the housing unit and
the floor. Do not close the door until the steam oven has cooled
down completely.
9

Warning and Safety instructions
Correct use
Danger of burning. The steam oven becomes hot when in use.
You could burn yourself on the heating elements, oven interior,
cooked food, oven accessories or hot steam. Wear oven gloves
when placing food in the oven or removing it and when adjusting
oven shelves etc. in a hot oven.
Take care when putting cooking containers into the oven or removing
them not to spill the contents.
Do not use the steam oven to heat up or bottle food in sealed jars
and tins.
Pressure will build up inside them and they can explode causing
damage to the appliance, as well as the risk of injury and scalding.
Plastic dishes which are not heat- and steam resistant melt at high
temperatures and can damage the appliance.
Use temperature- (to 100°C) and steam-resistant plastic dishes.
Follow the manufacturer's instructions.
Food which is left in the oven to be kept hot can dry out and the
moisture released can lead to corrosion damage in the appliance. Do
not use the steam oven for keeping food warm and do not use
utensils in the appliance which could corrode.
You could injure yourself on the open oven door.
Avoid leaving the door open unnecessarily.
When using a small electrical appliance, e.g. a hand-held blender,
near the steam oven, care should be taken that the cable of the
appliance cannot get trapped by the steam oven door. The insulation
on the cable could become damaged, giving rise to an electric shock
hazard.
The steam oven is designed in such a way that there will always
be a little residual water left in the water container after use. If there
is no residual water, there is something wrong. Call the Service
Department.
10

Warning and Safety instructions
Do not immerse the water container in water, or clean it in a
dishwasher. Connecting the water container into the appliance when
wet could cause an electric shock.
For reasons of hygiene and to prevent the build-up of moisture in
the appliance, the water container should be emptied after each use.
Danger of burning. There may be some residual hot water in the
water container at the end of a cooking process. Take care not to
spill the contents when taking the water container out of the
appliance.
11

Warning and Safety instructions
Cleaning and care
Do not use a steam cleaning appliance to clean this appliance.
The steam could reach electrical components and cause a short
circuit.
Scratches on the door glass can result in the glass breaking. Do
not use abrasive cleaners, hard sponges, brushes or sharp metal
tools to clean the door glass.
The side runners can be removed for cleaning purposes (see
"Cleaning and care").
Ensure that they are replaced correctly and do not use the oven
without them fitted.
Try to avoid the interior walls being splashed with food or liquids
containing salt. If it does happen, wipe these away thoroughly to
avoid corrosion to stainless steel surfaces inside the cabinet.
Accessories
Only use genuine original Miele accessories and spare parts with
this appliance. Using accessories or spare parts from other
manufacturers will invalidate the guarantee, and Miele cannot accept
liability.
12

Caring for the environment
Disposal of the packing material
The packaging is designed to protect
the appliance from damage during
transportation. The packaging materials
used are selected from materials which
are environmentally friendly for disposal
and should be recycled.
Recycling the packaging reduces the
use of raw materials in the
manufacturing process and also
reduces the amount of waste in landfill
sites.
Disposing of your old appliance
Electrical and electronic appliances
often contain valuable materials. They
also contain specific materials,
compounds and components, which
were essential for their correct function
and safety. These could be hazardous
to human health and to the environment
if disposed of with your domestic waste
or if handled incorrectly. Please do not,
therefore, dispose of your old appliance
with your household waste.
Please dispose of it at your local
community waste collection / recycling
centre for electrical and electronic
appliances, or contact your dealer or
Miele for advice. You are also
responsible (by law, depending on
country) for deleting any personal data
that may be stored on the appliance
being disposed of. Please ensure that
your old appliance poses no risk to
children while being stored prior to
disposal.
13
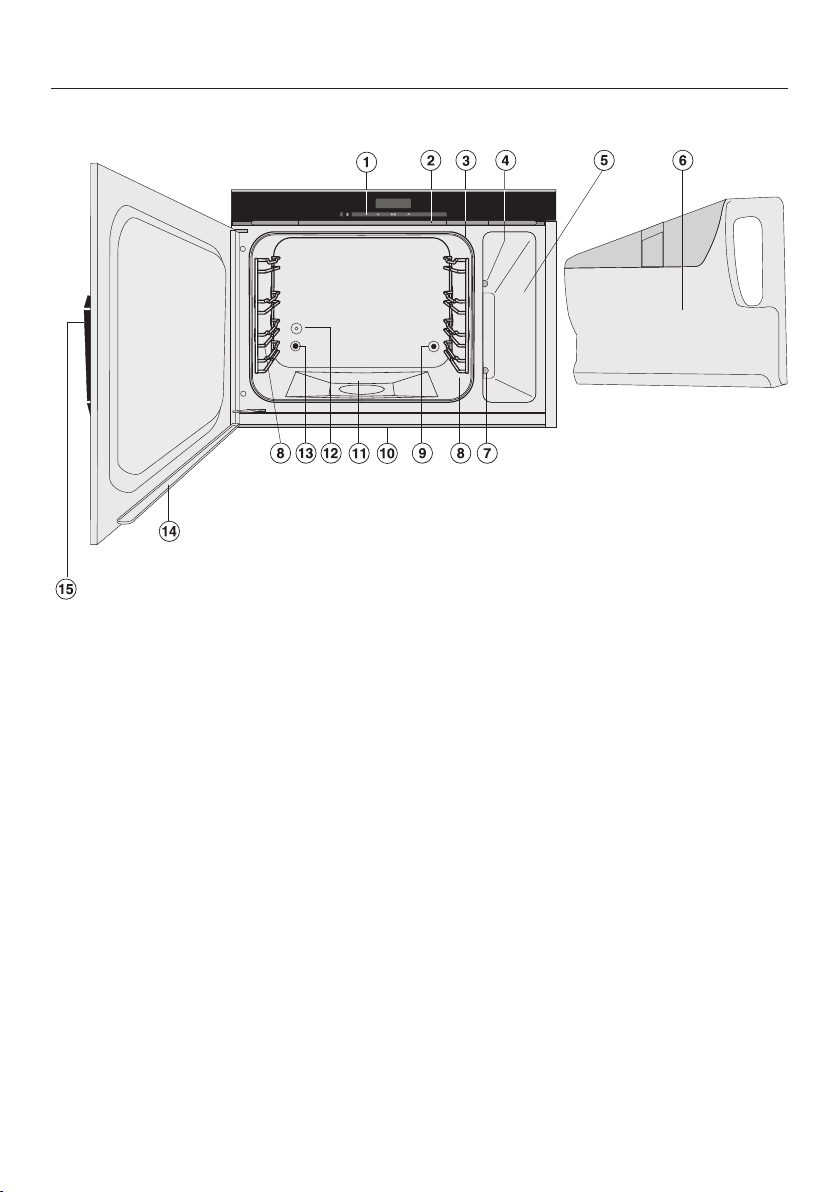
Guide to the appliance
Steam oven front view
a
Controls
b
Ventilation outlet
c
Door seal
d
Steam channel
e
Compartment for water container
f
Water container with insert
g
Water container connection point
h
Side runners with 4 shelf levels
14
i
Steam inlet
j
Drip channel
k
Floor heater
l
Temperature sensor
m
Steam outlet
n
Drip channel in the door
o
Door release
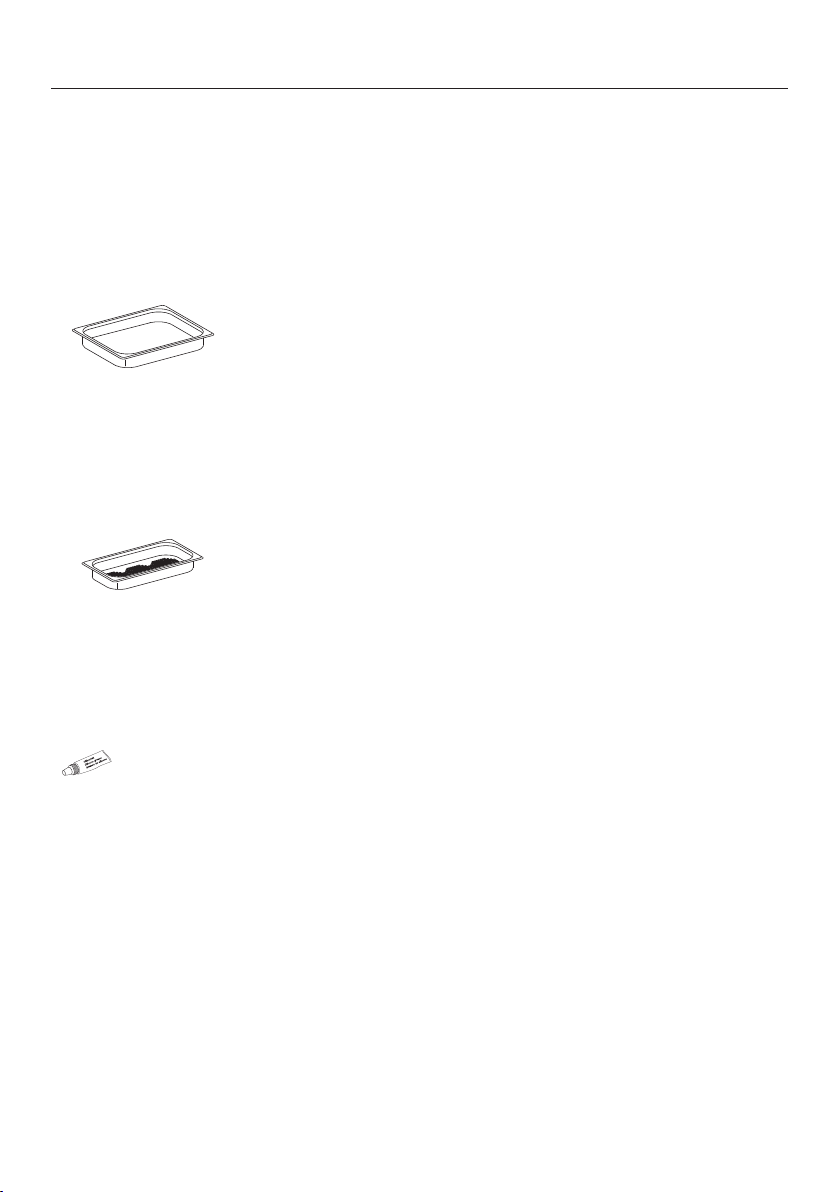
Accessories supplied
The accessories supplied with your
appliance as well as a range of optional
ones are available to order from Miele
(see "Optional accessories").
DGG 15
1 condensate tray for collecting excess
moisture, can also be used as a
cooking container.
325 x 265 x 40 mm (W x D x H)
DGGL 1
2 perforated cooking containers
Gross capacity 1.5 litres / Usable
capacity 0.9 litres
325 x 175 x 40 mm (W x D x H)
Guide to the appliance
Silicone grease
1 tube for lubricating the coupling seal
on the water container
Descaling tablets
For descaling the appliance
15

Controls
a
Recessed On/Off button
For switching the appliance on and off and accessing the descaling process
b
sensors
For setting the temperature and cooking duration and for "scrolling" through
options.
Settings are accessed using: + (see "Settings")
c
OK sensor
For confirming input
d
Display
e
Optical interface
(for Miele service technician use only)
16

Controls
Sensor controls
The sensors react to touch. Each touch is confirmed with a keypad tone. This
keypad tone can be switched off (see "Settings").
Display
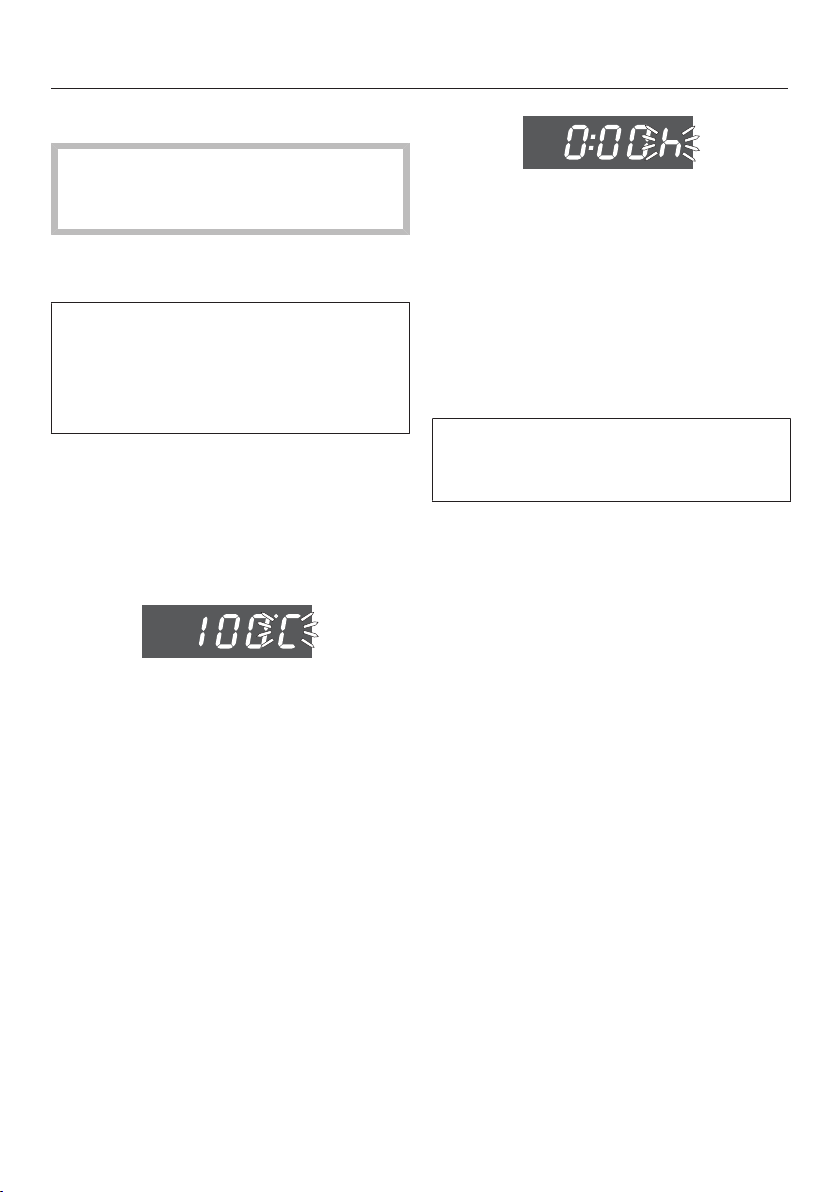
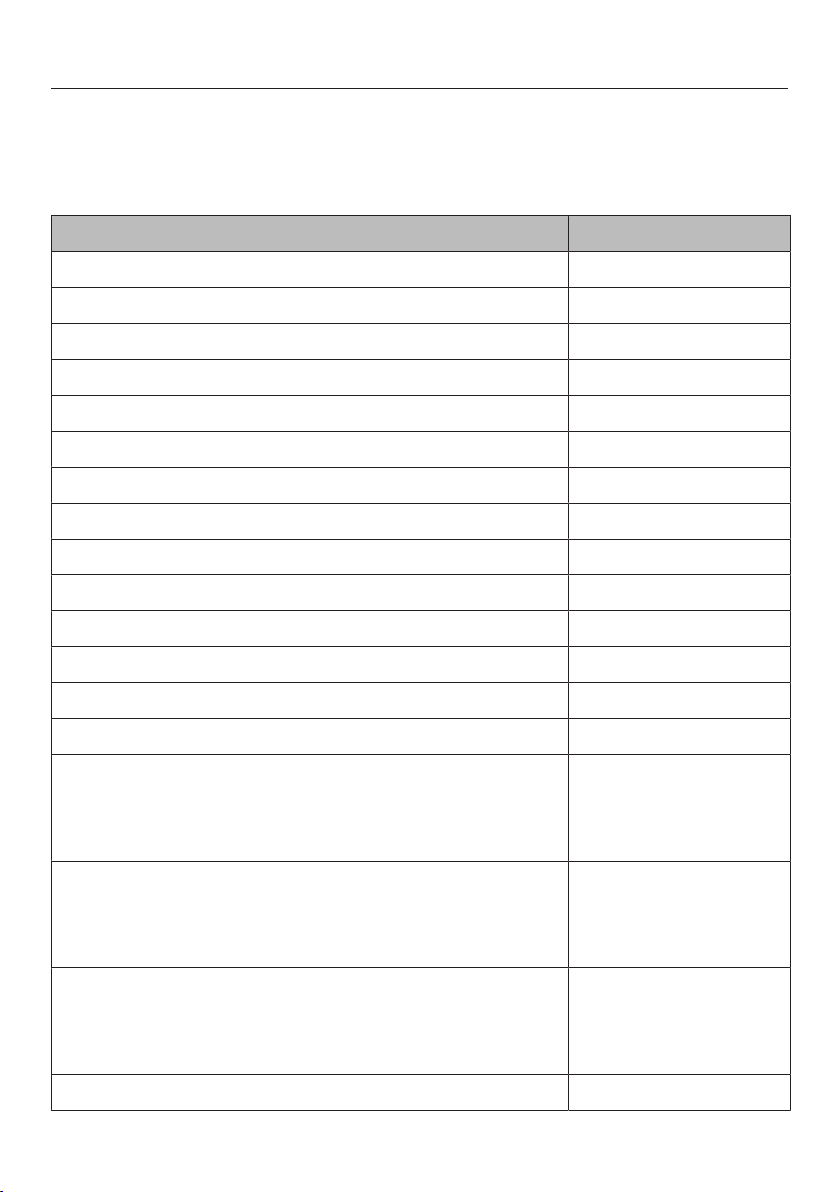
Display Meaning
(flashing) Insufficient water or water container not present
Numbers + °C Temperature
Numbers + h Duration
+ number(s) The appliance needs to be descaled.
17

Description of functions
Water container
The maximum water level is 1.2litres,
the minimum 0.75litres. These levels
are indicated both inside and outside
the container. Do not exceed the
maximum level.
The amount of water used will depend
on the type of food and the duration of
cooking. Water will sometimes need to
be replenished during the cooking
process. Water consumption is
increased if the door is opened during
cooking.
If the symbol is flashing, either the
water container is not pushed in
correctly or there is not enough water in
it.
Condensate tray
When using perforated containers,
place the condensate tray on the lowest
shelf level to collect any drops of liquid
and allow them to be removed easily.
You can also use the condensate tray
as a cooking container if necessary.
Temperature
The steam oven has a temperature
range of 40 °C to 100°C. The appliance
is set at 100 °C when the oven is
switched on. You can alter the
temperature in 5 °C steps.
Recommended temperature
Temperature When to use
100 °C – Cooking all types of
food
– Reheating
– Menu cooking
(cooking whole
meals)
– Bottling
– Extracting juice
85 °C – Cooking fish gently
60 °C – Defrosting
40 °C – Proving dough
– Making yoghurt
18

Duration
You can set a duration between 1
minute (:) and 9 hours 59 minutes
(:). If the duration exceeds 59
minutes you have to enter it in hours
and minutes. Example: Duration 80
minutes = 1:20.
Noises
You can hear the noise of the fan when
the appliance is operating. Noises
similar to those of a kettle can be heard
when steam is being generated.
Heating-up phase
During the heating-up phase the oven
compartment is heated to the set
temperature. The display will show the
temperature in the cooking
compartment as it rises.
The duration of the heating-up phase
will depend on the quantity and the
temperature of the food. In general the
heating-up phase will last for approx. 7
minutes. The duration will be longer if
you are cooking refrigerated or frozen
food.
Description of functions
Filling the water container with hot
water will shorten the heating-up time.
Cooking phase
The cooking phase begins when the set
temperature is reached. During the
cooking phase, the duration remaining
will be shown in the display.
19
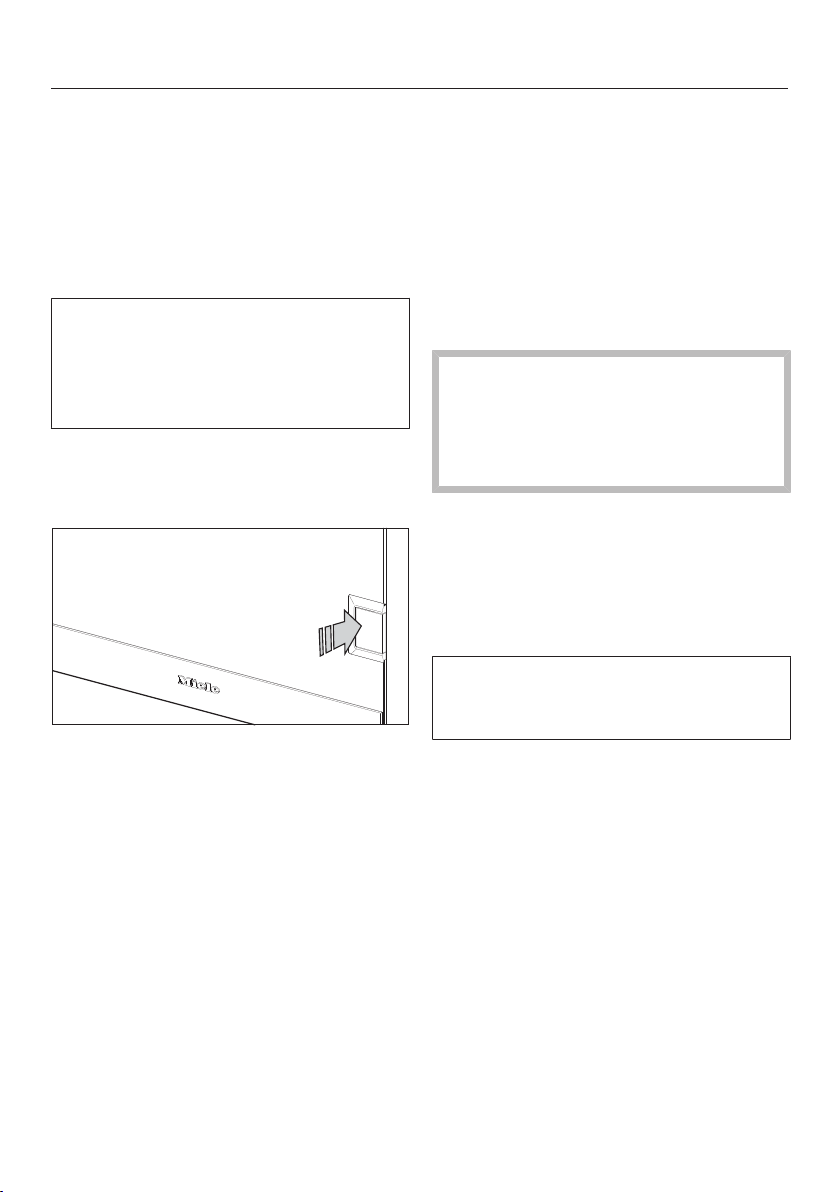
Using for the first time
Please stick the extra data plate for
the appliance supplied with this
documentation in the space provided
in the "After sales service, data plate,
guarantee" section of this booklet.
Remove any protective wrapping and
stickers.
The appliance has undergone a
function test in the factory. Residual
water from this testing may have
trickled back into the cabinet during
transportation.
Cleaning for the first time
Opening the door
Open the door by pressing on the left
hand side of the door release.
The door will open slightly.
Water container
Take the water container out of the
steam oven and remove the insert
(see "Cleaning and care - Water
container").
Rinse the water container and the
insert thoroughly by hand using hot
water. Do not use any washing-up
liquid or detergent.
Risk of damage to the water
container!
Do not clean the water container or
the insert in the dishwasher and do
not immerse them in water.
Accessories / Oven interior
Take all accessories out of the oven.
Wash the accessories in a mild
solution of washing-up liquid and hot
water or in the dishwasher.
The interior of the steam oven has
been treated at the factory with a
conditioning agent.
To remove this, clean the oven
interior with a mild solution of
washing-up liquid and hot water.
20

Using for the first time
Set the water hardness level
The steam oven is set ex-works for
hard water. It must be adjusted to local
water hardness to ensure trouble-free
operation and to ensure that descaling
is carried out at the correct interval. The
harder the water, the more often it will
need to be descaled.
Check the hardness of your local
water supply and adjust the setting if
necessary (see "Settings").
Set the correct boiling point for water
Before cooking food for the first time,
you must set the boiling point for water,
as this varies depending on the altitude
the appliance is located at. This
procedure also flushes out the
waterways.
This process must be carried out to
ensure efficient functioning of your
appliance.
Run the steam oven at 100°C for
15minutes. Proceed as described in
"Operation".
Set the correct boiling point for water following a house move
If you move house, the appliance will
need to be re-set for the new altitude if
this differs from the old one by 300m or
more. To do this, descale the appliance
(see "Cleaning and care - Descaling").
21
Operation
Using the appliance
Only use tap water. Never use
distilled or mineral water or other
liquids.
will appear in the display and will
start flashing.
Fill the water container and push it
into the appliance until it connects.
If the water container is not inserted
correctly the steam oven will not heat
up and after a short time will
appear in the display (see "What to do
if...").
Place the condensate tray on the
lowest shelf level.
Place the food in the oven.
Switch the steam oven on using the
On/Off button.
will appear in the display and ° will
start flashing.
If you want to cook with 100 °C,
confirm the setting with OK.
If you wish you can set a lower
temperature by touching the
sensor. Confirm with OK.
Set the cooking duration you want by
touching (from upwards) or
(from downwards).
Confirm with OK.
The cooking process begins. The steam
generator and fan switch on.
If you do not complete these steps
within 15 minutes, the appliance will
switch itself off.
22

Operation
At the end of the cooking duration
– appears in the display,
– the fan remains switched on,
– an audible tone sounds.
Danger of burning.
Steam can escape when the door is
opened.
Step back and wait until the steam
has dissipated.
Danger of burning.
You could burn yourself on the oven
interior walls, spilled food and hot
steam.
Use oven gloves when removing hot
food from the oven.
Open the door and remove the food.
Switch the steam oven on using the
On/Off button.
If you want to reduce the run-on time,
you can do so by removing the water
container as soon as you have
switched the appliance off.
After use
Remove the condensate tray and
empty it.
Remove the water container by
pushing upwards slightly as you take
it out of the appliance and empty it.
The appliance is designed in such a
way that there will always be a little
residual water left in the water
container after use. If there is no
residual water, there is something
wrong. Call the Service Department.
After each use, clean and dry the
whole appliance as described in
"Cleaning and care".
Leave the appliance door open until
the oven interior is completely dry.
Insufficient water
Insufficient water is indicated by the
flashing symbol and an audible tone.
Remove the water container and fill it
with fresh tap water.
Push the water container into the
appliance until it connects.
Operation will continue.
23

Operation
Changing settings during a cooking process
You can alter the temperature and
cooking duration at any time during
operation.
Changing the temperature
Briefly touch OK once.
The display will change to the
temperature setting and ° will flash.
Set the temperature as described
earlier.
Changing the cooking duration
Briefly touch OK twice.
The display will change to the cooking
duration setting display and will flash.
Set the cooking duration as
described earlier.
Interrupting operation
Operation is interrupted as soon as the
door is opened. The heating will be
switched off and the cooking duration
remaining stored in memory.
Danger of burning.
Steam can escape when the door is
opened.
Step back and wait until the steam
has dissipated.
Danger of burning.
You could burn yourself on the oven
interior walls, spilled food and hot
steam.
Use oven gloves when placing food
in the oven or removing it and when
working in a hot oven
Operation will resume when the door is
closed.
When the door is closed, the pressure
has to equalise, which can cause a
whistling sound.
24
The oven will heat up again and the
display will show the temperature of the
cooking compartment as it rises.
Once the set temperature has been
reached, the display will change to
show the cooking duration remaining as
it counts down.
The cooking programme will finish
early if the door is opened in the last
minute of cooking.

Operation
Pre-heat
Your appliance has a pre-heating
function. This heats the oven interior to
approx. 40 °C. The heating-up time is
then shorter as the oven interior is preheated and therefore the cooking
process takes less time.
The appliance is delivered with this
function deactivated. If you wish to use
it you will need to alter the setting (see
"Settings").
When the pre-heating function has
been activated you can still choose
whether you want to use it for each
programme.
The water container must be filled with
water for pre-heating and present in
the appliance.
The pre-heating process will be
cancelled if the door is opened. You
can start the process again by
switching the appliance off and then
back on again.
Using pre-heat
Switch the steam oven on.
will appear in the display and ° will
start flashing. Do not confirm.
After a few seconds the pre-heating
process will begin and the display will
show the temperature as it rises.
When pre-heating is finished, will
appear in the display and ° will flash.
Place the food in the oven.
Set the temperature and duration as
normal.
Not using pre-heat
Place the food in the oven.
Switch the steam oven on.
will appear in the display and ° will
start flashing.
Confirm this with OK or set the
required temperature as normal.
Set the cooking duration as
described earlier.
25

General notes
This section contains general
information. You will find more detailed
information about particular foods and
how to cook them in the other sections.
The advantages of cooking with steam
Almost all vitamins and minerals are
retained as the food is not immersed in
water.
Cooking with steam also retains the
true taste of the food better than
conventional cooking. We therefore
recommend seasoning the food after it
has been cooked. Food also retains its
fresh, original colour.
Suitable containers
Cooking containers
This steam oven is supplied with
stainless steel cooking containers.
Other containers, in a variety of sizes,
both perforated and solid, are available
as optional extras (see "Optional
accessories"). This enables you to
choose the most suitable container for
the food you are cooking.
It is best to use perforated containers
for steam cooking. The steam can
reach the food from all sides and the
food is cooked evenly.
Your own containers
You can also use your own containers.
However, please note the following:
– Containers must be heat-resistant to
100 °C and able to withstand hot
steam. With plastic containers please
check with the manufacturer that
they are suitable for use in a steam
oven.
– Thick-sided containers made from
porcelain, china or stoneware, for
example, are not so suitable for
steam cooking. They do not conduct
heat well and as a result cooking
durations will be considerably longer
than those given in the charts.
– Place the cooking container in a
sufficiently large perforated container,
not on the oven floor.
– Ensure that there is a gap between
the upper rim of the container and
the top of the cooking compartment
to allow sufficient steam into the
container.
Condensate tray
When using perforated containers,
place the condensate tray on the lowest
shelf level to collect any drops of liquid
and allow them to be removed easily.
You can also use the condensate tray
as a cooking container if necessary.
26

General notes
Shelf level
You can select any shelf level. You can
also cook on several levels at the same
time. This will not alter the cooking
duration.
Always insert cooking containers and
the rack between the rails of the side
runners so that they cannot tip.
Frozen food
The heating up phase for frozen food is
longer than for fresh food. The greater
the quantity of frozen food, the longer
the heating up phase.
Temperature
A maximum temperature of 100°C is
reached when steam cooking is taking
place. Most types of food will cook at
this temperature. Some more delicate
types of food, such as soft fruit, must
be cooked at lower temperatures as
otherwise they will burst. More
information is given in the relevant
section.
Combination with a food warming
drawer
When the warming drawer is in use the
oven cavity in the steam oven can get
up to 40°C. If, in this case, you set a
temperature of 40°C, no steam will be
produced because the oven cavity is
too warm.
Duration
In general, the cooking durations for
cooking with steam are the same as for
cooking food in a saucepan. More
information about any factors which
may affect the cooking duration is given
in the relevant sections.
The quantity of food does not affect the
cooking duration. 1 kg of potatoes will
take the same time to cook as 500 g.
The durations given in the charts are
guidelines only. We recommend
selecting the shorter cooking duration
quoted to start with. If food is not
cooked sufficiently after the shorter
time it can be put back in the oven and
cooked for longer.
Cooking with liquid
When cooking with liquid only fill the
cooking container ²/₃full to prevent the
liquid spilling when the cooking
container is removed from the oven.
Your own recipes
Food which is cooked in a pot or a pan
can also be cooked in the steam oven.
The cooking times in the steam oven
will be the same. Please note that food
will not be brown or crisp when cooking
with steam.
27

Steam cooking
Vegetables
Fresh
Prepare fresh vegetables in the usual
way, i.e. wash, clean and cut them up.
Frozen
Frozen vegetables do not need to be
defrosted beforehand, unless they have
been frozen together in a block.
Frozen and fresh vegetables which take
the same length of time to cook can be
cooked together.
Break up vegetables that have frozen
together in a lump and follow
instructions on the packaging regarding
cooking duration.
Cooking containers
Food such as peas or asparagus
spears, which have little or no space
between them, will take longer to cook
because the steam has less space to
work in. For an even result, it is best to
use a shallow container for these types
of food, and only fill it about 3-5cm
deep. When cooking large quantities
divide the food between 2 or 3 shallow
containers rather than using one deep
one.
Shelf level
To avoid any colour transfer when
cooking vegetables with a distinctive
colour (e.g. beetroot) in a perforated
container, do not place other food
underneath the perforated container.
Duration
As with conventional methods, the
cooking duration when cooking
vegetables with steam will depend on
the size and how well done you want
them. Example:
firm potatoes, cut into quarters
= approx. 17minutes
firm potatoes, cut in half
= approx. 21minutes
Settings
Temperature: 100°C
Duration: see chart
Different types of vegetables which take
the same length of time to cook can be
cooked together.
Use solid containers for vegetables
which are cooked in liquid.
28
Steam cooking
The durations given in the chart are guidelines for fresh vegetables. We
recommend selecting the shorter cooking duration quoted. If food is not cooked
sufficiently after the shorter duration it can be put back in the oven and cooked for
longer.
Vegetables [min]
Artichokes 32–38
Cauliflower, whole 27–28
Cauliflower, florets 8
Beans, green 10–12
Broccoli, florets 3–4
Chantenay carrots, whole 7–8
Chantenay carrots, halved 6–7
Chantenay carrots, chopped 4
Chicory, halved 4–5
Chinese cabbage, chopped 3
Peas 3
Fennel, halved 10–12
Fennel, cut into strips 4–5
Curly kale, chopped 23–26
Firm potatoes, peeled
whole
halved
quartered
Fairly firm potatoes, peeled
whole
halved
quartered
Floury potatoes, peeled
whole
halved
quartered
Kohlrabi, cut into batons 6–7
27–29
21–22
16–18
25–27
19–21
17–18
26–28
19–20
15–16
29

Steam cooking
Vegetables [min]
Pumpkin, diced 2–4
Corn on the cob 30–35
Chard, chopped 2–3
Peppers, diced / cut into strips 2
New potatoes, firm 30–32
Mushrooms 2
Leeks, sliced 4–5
Leeks, halved lengthwise 6
Romanesco, whole 22–25
Romanesco, florets 5–7
Brussels sprouts 10–12
Beetroot, whole 53–57
Red cabbage, chopped 23–26
Black salsify, whole 9–10
Celeriac, cut into batons 6–7
Green asparagus 7
White asparagus 9–10
Main crop carrots, chopped 6
Spinach 1–2
Spring cabbage, chopped 10–11
Celery, chopped 4–5
Swede, chopped 6–7
White cabbage, chopped 12
Savoy cabbage, chopped 10–11
Courgettes, sliced 2–3
Sugar snap peas 5–7
Duration
30

Steam cooking
Meat
Fresh
Prepare the meat in the usual way.
Frozen
Meat should be thoroughly defrosted
before cooking in the steam oven (see
"Defrosting").
Preparation
For meat which needs to be seared
before being cooked, e.g. for a stew,
sear the meat in a pan on the hob first.
Duration
The cooking duration depends on the
thickness and the texture of the meat,
and not on the weight. The thicker the
piece of meat, the longer the cooking
duration. A piece of meat weighing
500g which is 10 cm thick will take
longer to cook than a piece of meat
weighing 500g which is 5 cm thick.
Tips
– Use a perforated container to retain
the juices when cooking meat. Place
a solid container underneath to catch
the juices. You can use these to make
a gravy or freeze them for later use.
– Boiling fowl, back or top rib and meat
bones can be used to make stock.
Place the meat together with some
mixed vegetables in a solid cooking
container and add cold water and
cook. The longer the cooking
duration, the stronger the stock.
Settings
Temperature: 100°C
Duration: see chart
31

Steam cooking
The durations given in the charts are guidelines only. We recommend selecting the
shorter cooking duration quoted to start with. If food is not cooked sufficiently
after the shorter time it can be put back in the oven and cooked for longer.
Meat [min]
Leg steak, covered with water 110–120
Knuckle 135–140
Chicken breast 8–10
Shank 105–115
Top rib, covered with water 110–120
Veal cutlets 3–4
Gammon slices 6–8
Lamb stew 12–16
Poularde 60–70
Turkey roulade 12–15
Turkey escalope 4–6
Brisket, covered with water 130–140
Beef stew 105–115
Boiling fowl, covered with water 80–90
Boiled topside 110–120
Duration
32

Steam cooking
Sausages
Settings
Temperature: 90°C
Duration: see chart
Sausages [min]
Frankfurters 6–8
Bologna sausages 6–8
Veal sausages 6–8
Duration
Fish
Fresh
Prepare fresh fish in the usual way, i.e.
clean, gut and fillet.
Frozen food
Fish does not need to be fully defrosted
before cooking. Defrost so that the
surface is sufficiently thawed to take
herbs and seasoning. Depending on the
thickness of the fish, 2 - 5 minutes
should be enough.
Preparation
Add some lemon or lime juice to fish
before cooking. The citric acid helps the
flesh stay firm.
It is not necessary to season fish with
salt when cooking with steam as this
method retains the minerals which give
the fish its unique flavour.
Cooking containers
If using a perforated container, grease it
first.
Shelf level
When cooking fish in a perforated
container at the same time as cooking
other types of food in other containers,
place the container with the fish directly
above the condensate tray/universal
tray (depending on model) to catch any
liquid and so avoid any transfer of
tastes to other food.
33

Steam cooking
Temperature
85 °C – 90 °C
For gently cooking delicate types of
fish, such as sole.
100 °C
For cooking firmer types of fish, e.g.
cod and salmon.
Also for cooking fish in sauce or stock.
Duration
The cooking duration depends on the
thickness and the texture of the fish,
and not on the weight. The thicker the
fish, the longer the cooking duration. A
3 cm thick piece of fish weighing 500 g
will take longer to cook than a 2 cm
thick piece of fish weighing 500 g.
The longer fish cooks, the firmer its
flesh will become. Use the cooking
durations given in the chart. If you find
that the fish is not cooked sufficiently
only cook it for a few minutes more.
When cooking fish in sauce or stock,
we recommend that you increase the
cooking duration quoted by a few
minutes.
– You can use any fish scraps, e.g. fish
heads, bones, tails etc to make a fish
stock. Place the fish scraps together
with some mixed vegetables in a
solid cooking container and add cold
water. Cook at 100 °C for 60 to 90
minutes. The longer the cooking
duration, the stronger the stock.
– Blue fish is fish which is cooked in
water and vinegar. It is important not
to damage the skin of the fish. This
method is suitable for cooking carp,
trout, tench, eel and salmon. (Follow
recipe instructions for the ratio of
water to vinegar).
Settings
Temperature: see chart
Duration: see chart
Tips
– Adding herbs and spices, such as
dill, will help bring out the full flavour
of the fish.
– Cook large fish in the swimming
position. To help maintain the shape
of the fish, place a small cup or
similar upside down in the cooking
container, and arrange the fish
bellyside down over the cup.
34

Steam cooking
The cooking durations given in the chart are guidelines for fresh fish. We
recommend selecting the shorter cooking duration quoted. If food is not cooked
sufficiently after the shorter duration it can be put back in the oven and cooked for
longer.
Fish [°C] [min]
Eel 100 5–7
Perch fillet 100 8–10
Seabream fillet 85 3
Trout, 250 g 90 10–13
Halibut fillet 85 4–6
Atlantic cod fillet 100 6
Carp, 1.5 kg 100 18–25
Salmon fillet 100 6–8
Salmon steak 100 8–10
Salmon trout 90 14–17
Coley fillet 85 3
Rose fish fillet 100 6–8
Haddock fillet 100 4–6
Plaice fillet 85 4–5
Monk fish fillet 85 8–10
Sole fillet 85 3
Turbot fillet 85 5–8
Tuna fillet 85 5–10
Pikeperch fillet 85 4
Temperature / Duration
35

Steam cooking
Shellfish
Preparation
Defrost frozen shellfish before cooking with steam.
Peel, remove and discard the intestines, and then wash the shellfish.
Cooking containers
If using a perforated container, grease it first.
Duration
The longer shellfish are cooked, the tougher they become. Use the cooking
durations given in the chart.
When cooking shellfish in sauce or stock, we recommend that you increase the
cooking duration quoted by a few minutes.
Settings
Temperature: see chart
Duration: see chart
[°C] [min]
Crevettes 90 3
Prawns 90 3
King prawns 90 4
Small shrimps 90 3
Lobster 95 10–15
Large shrimps 90 3
Temperature / Duration
36

Steam cooking
Mussels
Fresh
Warning - danger of food poisoning
Only cook mussels which are closed. Do not eat mussels which have not
opened after being cooked.
Steep fresh mussels in water for a few hours before cooking to rinse out any sand.
Then scrub the mussels thoroughly to clean them.
Frozen food
Defrost frozen mussels before cooking.
Duration
The longer mussels are cooked, the tougher they become. Use the cooking
durations given in the chart.
Settings
Temperature: see chart
Duration: see chart
[°C] [min]
Barnacles 100 2
Cockles 100 2
Bearded mussels 90 12
Scallops 90 5
Razor clams 100 2–4
Venus mussels 90 4
Temperature / Duration
37

Steam cooking
Rice
Rice swells when cooked and needs to be cooked in liquid. The proportion of rice
to liquid will vary depending on the type of rice.
The rice absorbs all the liquid and so none of the nutrients are lost.
Settings
Temperature: 100°C
Duration: see chart
Ratio
Rice : Liquid
Basmati rice 1:1.5 15
Parboiled rice 1:1.5 23–25
Round grain rice
Pudding rice
Risotto rice
Brown rice 1:1.5 26–29
Wild rice 1:1.5 26–29
Duration
1:2.5
1:2.5
[min]
30
18–19
38

Steam cooking
Pasta
Dry pasta
Dry pasta swells when it is cooked and needs to be cooked in liquid. The liquid
must cover the pasta. Using hot liquid gives better results.
Increase the cooking time stated by the manufacturer by approx.¹/₃.
Fresh
Fresh pasta, such as you can buy from the supermarket chilled counter, does not
need to absorb water. Cook fresh pasta in a greased perforated container.
Separate any pieces of pasta which have stuck together and spread them out in
the cooking container.
Settings
Temperature: 100°C
Duration: see chart
Fresh [min]
Gnocchi 2
Knöpfli 1
Ravioli 2
Spätzle 1
Tortellini 2
Dry pasta,
covered with water
Tagliatelli 14
Vermicelli 8
Duration
39

Steam cooking
Dumplings
Ready made boil-in-the-bag dumplings need to be well covered with water as
otherwise they can fall apart. This is because even though they have been soaked
in water beforehand they will not absorb enough moisture.
Cook fresh dumplings in a greased, perforated container.
Settings
Temperature: 100°C
Duration: see chart
[min]
Sweet dumplings 30
Yeast dumplings 20
Boil-in-the-bag potato dumplings 20
Boil-in-the-bag bread dumplings 18–20
Duration
40

Steam cooking
Grain
Grain swells during cooking and needs to be cooked in liquid. The proportion of
grain to liquid depends on the type of grain.
Grain can be cooked whole or cracked.
Settings
Temperature: 100°C
Duration: see chart
Ratio
Grain : Liquid
Amaranth 1:1.5 15–17
Bulgur 1:1.5 9
Green spelt, whole 1:1 18–20
Green spelt, cracked 1:1 7
Oats, whole 1:1 18
Oats, cracked 1:1 7
Millet 1:1.5 10
Polenta 1:3 10
Quinoa 1:1.5 15
Rye, whole 1:1 35
Rye, cracked 1:1 10
Wheat, whole 1:1 30
Wheat, cracked 1:1 8
Duration
[min]
41

Steam cooking
Dried pulses
Soak pulses for at least 10 hours in cold water before cooking. Soaking makes the
pulses more digestible and shortens the cooking duration required. Soaked pulses
must be covered with liquid during cooking.
Lentils do not need to be soaked before cooking.
With unsoaked pulses a certain ratio of pulses to liquid is required depending on
variety.
Settings
Temperature: 100°C
Duration: see chart
Soaked
[min]
Beans
Kidney beans 55–65
Adzuki beans 20–25
Black beans 55–60
Pinto beans 55–65
Haricot beans 34–36
Peas
Yellow split peas 40–50
Green split peas 27
Duration
42

Unsoaked
Steam cooking
Ratio
Pulses : Liquid
Beans
Kidney beans 1:3 130–140
Adzuki beans 1:3 95–105
Black beans 1:3 100–120
Pinto beans 1:3 115–135
Haricot beans 1:3 80–90
Lentils
Brown lentils 1:2 13–14
Red lentils 1:2 7
Peas
Yellow split peas 1:3 110–130
Green split peas 1:3 60–70
Duration
[min]
43

Steam cooking
Hen's eggs
Use a perforated container to boil eggs in the steam oven.
The eggs do not need to be pierced before cooking as they are gradually warmed
during the heating up phase and so do not burst when they are cooked with
steam.
When using a solid container for making egg dishes such as scrambled eggs,
remember to grease it first.
Settings
Temperature: 100°C
Duration: see chart
[min]
Small
soft
medium
hard
Medium
soft
medium
hard
3
5
9
4
6
10
Large
soft
medium
hard
Extra large
soft
medium
hard
Duration
44
5
6–7
12
6
8
13

Steam cooking
Fruit
Cook fruit in a solid container so that none of the juice is lost. If you wish to cook
fruit in a perforated container, place a solid container directly underneath it to
collect the juice.
Tip: You can use the juice which has collected in the solid container to make a
glaze for a fruit flan.
Settings
Temperature: 100°C
Duration: see chart
[min]
Apple pieces 1–3
Pear chunks 1–3
Cherries 2–4
Mirabelle plums 1–2
Nectarine / Peach pieces 1–2
Plums 1–3
Quince, diced 6–8
Rhubarb pieces 1–2
Gooseberries 2–3
Duration
45

Steam cooking
Menu cooking (cooking whole meals)
You can use the steam oven to cook a
whole meal containing types of food
which have different cooking durations,
e.g. fish fillet with rice and broccoli.
Each dish is placed in the oven at
different times so that they are all ready
at the same time.
Shelf level
When cooking fish or food with a
distinctive colour (e.g. beetroot) in a
perforated container, place the
perforated container directly above the
condensate tray / universal tray
(depending on model) to avoid any
transfer of flavour or colour to other
food and to prevent liquid dripping onto
food below it.
Temperature
Whole meals should be cooked at a
temperature of 100 °C as this is the
temperature required to cook the
majority of foods.
Do not cook a whole meal at the lowest
temperature when different
temperatures are required for different
types of food, e.g. 85°C for seabream
and 100°C for potatoes.
Duration
If you are increasing the recommended
temperature, shorten the cooking
duration by approx. ¹/₃.
Example
Rice 20minutes
Rose fish fillet 6minutes
Broccoli 4 minutes
20minutes minus 6minutes =
14minutes (1st duration: rice)
6minutes minus 4minutes=2minutes
(2nd duration: rose fish fillet)
Remaining time=4minutes
(3rdduration: broccoli)
Durations 20 min. - rice
6 min. - fish fillet
4 min. -
broccoli
Setting 14min.2min. 4 min.
If the recommended cooking
temperature for the food is 85 °C for
example, try cooking it at 100 °C and
testing the result. Some delicate types
of fish with a soft structure, e.g. sole
and plaice will become very firm when
cooked at 100°C.
46

Procedure
Place the rice in the oven first.
Set the first cooking duration: 14
minutes.
After 14 minutes, place the fish in the
steam oven.
Set the second cooking duration: 2
minutes.
After 2 minutes, place the broccoli in
the steam oven.
Set the third cooking duration: 4
minutes.
Steam cooking
47

Special applications
Reheat
The steam oven is very effective at
reheating food gently, without drying it
out or cooking it further. The food will
reheat evenly and does not need to be
stirred during the reheating process.
You can reheat individual dishes or
plated meals which have been prepared
previously (e.g. meat, vegetables and
potatoes).
Suitable containers
Small quantities can be reheated on a
plate, larger quantities should be placed
in a cooking container.
Duration
The number of plates or containers has
no bearing on the duration.
The cooking durations listed in the chart
relate to an average portion per plate/
container. Increase the cooking duration
for larger quantities.
Tips
– Do not reheat large items, such as a
joint of roast meat, whole. Divide it
into portions and reheat these as
plated meals.
Procedure
Cover the food with a deep plate, a
lid, or with foil that is resistant to
temperatures up to 100 °C and to
steam.
Place the plate or dish in a sufficiently
large perforated container.
Settings
Temperature: 100°C
Duration: see chart
[min]
Side dishes (pasta, rice,
etc.)
Casserole 8–10
Fish fillet 6–8
Meat 8–10
Poultry 8–10
Vegetables 8–10
Soup 8–10
Plated meals 8–10
Duration
8–10
– Compact items, such as stuffed
peppers or roulades, should be cut in
half.
– Please note that breaded items, such
as schnitzel, will not retain their
crispness when they are reheated.
– Reheat sauces separately, except for
dishes such as stew and casseroles
where the sauce is part of the dish.
48

Special applications
Defrost
It is much quicker to defrost food in the
steam oven than at room temperature.
Temperature
60 °C is the best temperature for
defrosting.
Exception: 50 °C for minced meat and
game
Before and after defrosting
Remove all packaging before
defrosting.
Exceptions: Leave bread, biscuits and
cakes in their packaging as otherwise
they will absorb moisture and become
soft.
Allow defrosted food to stand at room
temperature after removing it from the
oven. The standing time is necessary to
allow the even distribution of heat.
Cooking containers
Tips
– Fish does not need to be fully
defrosted before cooking. Defrost so
that the surface is sufficiently thawed
to take herbs and seasoning.
Depending on the thickness of the
fish, 2 - 5 minutes should be enough.
– When defrosting food which has
frozen together, e.g. berries, chops,
fish fillets etc. separate it about halfway through the defrosting time.
– Do not refreeze food once it has
thawed.
– Defrost frozen pre-cooked meals
according to the manufacturer's
instructions.
Settings
Temperature: see chart
Defrosting duration: see chart
Danger of salmonella poisoning.
Do not use the liquid from defrosted
meat or poultry. Pour it away and
wash the container, the sink and your
hands.
Use a perforated container with a solid
container underneath it when defrosting
food which will drip, such as poultry.
This way food will not be lying in
defrosted liquid.
Food which does not drip can be
defrosted in a solid container.
49

Special applications
Food to be defrosted Quantity [°C] [min] [min]
Dairy products
Cheese slices 125g 60 15 10
Quark 250g 60 20–25 10–15
Cream 250g 60 20–25 10–15
Soft cheese 100g 60 15 10–15
Fruit
Apple sauce 250g 60 20–25 10–15
Apple pieces 250g 60 20–25 10–15
Apricots 500g 60 25–28 15–20
Strawberries 300g 60 8–10 10–12
Raspberries / Blackcurrants 300g 60 8 10–12
Cherries 150g 60 15 10–15
Peaches 500g 60 25–28 15–20
Plums 250g 60 20–25 10–15
Gooseberries 250g 60 20–22 10–15
Vegetables
Frozen in a block 300g 60 20–25 10–15
Fish
Fish fillets 400g 60 15 10–15
Trout 500g 60 15–18 10–15
Lobster 300g 60 25–30 10–15
Small shrimps 300g 60 4–6 5
Ready meals
Meat, vegetables, side
dishes / Stew / Soup
Meat
Roast meat, sliced 125–150g each 60 8–10 15–20
Minced meat 250g 50 15–20 10–15
Minced meat 500g 50 20–30 10–15
Goulash 500g 60 30–40 10–15
50
480g 60 20–25 10–15

Special applications
Food to be defrosted Quantity [°C] [min] [min]
Goulash 1000g 60 50–60 10–15
Liver 250g 60 20–25 10–15
Saddle of hare 500g 50 30–40 10–15
Saddle of roebuck 1000g 50 40–50 10–15
Cutlets / chops / sausages 800g 60 25–35 15–20
Poultry
Chicken 1000g 60 40 15–20
Chicken drumsticks 150g 60 20–25 10–15
Chicken escalopes 500g 60 25–30 10–15
Turkey drumsticks 500g 60 40–45 10–15
Baked goods
Puff pastries /Yeast buns – 60 10–12 10–15
Creamed mixture cakes /
biscuits
Bread / rolls
Bread rolls – 60 30 2
Rye bread, sliced 250g 60 40 15
Whole grain bread, sliced 250g 60 65 15
White bread, sliced 150g 60 30 20
400g 60 15 10–15
Temperature / Duration / Standing time
51

Special applications
Bottling
Only use unblemished, fresh produce
which is in good condition for bottling.
Glass jars
Use clean glass jars and accessories
and check them for any defects. Glass
jars with twist off lids or glass lids with a
rubber seal are suitable.
Make sure that all the jars are the same
size so that bottling is carried out
evenly.
After you have filled the jars with the
bottled produce, clean the glass rims
with a clean cloth and hot water and
then seal the jars.
Fruit
Sort fruit carefully, rinse it briefly but
thoroughly and allow it to drain. Take
great care when cleaning soft fruit as it
is very delicate and squashes easily.
Remove any peel, stalks, cores or
stones. Cut up large fruit. For example,
cut apples into slices.
Fill volume
Fill the glass jars with produce up to a
maximum of 3cm below the rim. Do
not pack it down as this will damage
the cell walls of the produce. Tap the jar
gently onto a cloth to help distribute the
contents evenly. Fill the jars with liquid.
The produce must be completely
covered.
Use a sugar solution for fruit and a salt
or vinegar solution for vegetables.
Tips
– Make use of residual heat by leaving
the jars in the oven for 30 minutes
after it has switched off.
– Then cover the jars with a cloth and
allow to cool for approx. 24 hours.
If you are bottling fruit with stones (e.g.
plums, apricots) without removing the
stones, pierce the fruit several times
with a fork or wooden skewer as
otherwise it will burst.
Vegetables
Rinse, clean and cut up vegetables.
Vegetables should be blanched before
bottling to help them retain their colour
(see "Blanching").
52

Special applications
Procedure
Push the condensate tray in on the lowest level with a perforated container
above it.
Place the jars on the rack (all the same size). Ensure that they do not touch one
another.
Settings
Temperature: see chart
Bottling duration: see chart
Produce [°C] * [min]
Berries
Red / blackcurrants 80 50
Gooseberries 80 55
Cranberries 80 55
Fruit with stones
Cherries 85 55
Mirabelle plums 85 55
Plums 85 55
Peaches 85 55
Greengages 85 55
Fruit with pips
Apples 90 50
Apple sauce 90 65
Quinces 90 65
Vegetables
Beans 100 120
Broad beans 100 120
Gherkins 90 55
53

Special applications
Produce [°C] * [min]
Beetroot 100 60
Temperature / Duration
* The durations quoted are for 1.0 litre jars. If using 0.5 litre jars, reduce the duration by
about 15 minutes. If using 0.25 litre jars, reduce the duration by about 20 minutes.
54

Special applications
Extracting juice with steam
This appliance is ideal for extracting
juice from soft and medium firm fruit.
It is best to use overripe fruit, as the
riper the fruit the greater the quantity of
juice produced. Very ripe fruit will also
produce a more intense flavour.
Preparation
Sort and clean the fruit. Cut out any
blemishes.
Remove the stalks from grapes and
morello cherries as these are bitter. The
stalks do not need to be removed from
raspberries etc.
Cut larger fruit into chunks approx. 2
cm in size. The harder the fruit the
smaller the pieces should be.
Tips
– Try experimenting with mild and tart
fruit.
– Adding sugar will increase the
quantity of juice produced and
improve the flavour. Sprinkle the fruit
with sugar and leave to absorb for a
few hours before juicing. For 1kg of
sweet fruit add 50–100g of sugar,
and for 1kg of tart fruit add 100–
150g of sugar.
Procedure
Put the prepared fruit (cleaned,
washed, chopped etc.) into a
perforated cooking container.
Place a solid container or the
condensate tray underneath to catch
the juice.
Settings
Temperature: 100°C
Duration: 40 - 70minutes
– If you wish to bottle the juice rather
than consume it straight away, pour it
whilst hot into hot, sterilised bottles,
and then seal immediately with
sterilised tops.
55

Special applications
Make yoghurt
To make yoghurt, you will need either
fresh live yoghurt or yoghurt culture,
obtainable from health food shops.
Use natural yoghurt with live culture and
without additives. Heat-treated yoghurt
is not suitable.
The yoghurt must be fresh (short
storage time).
You can use either unchilled long-life or
fresh milk.
Long-life milk can be used without any
further treatment. Fresh milk must first
be heated to 90 °C and then cooled
down to 35 °C. Do not boil it. Fresh milk
will give a better set than long-life milk.
The yoghurt and milk should have the
same percentage fat.
Do not move or shake the jars whilst
the yoghurt is thickening.
Immediately after preparation leave the
yoghurt to cool in the fridge.
Possible reasons for unsatisfactory results
Yoghurt has not set:
Incorrect storage of starter yoghurt, too
much time out of the refrigerator, e.g. in
transportation, damaged packaging,
milk not sufficiently heated.
Liquid has separated:
The jars were moved, yoghurt was not
cooled down quickly enough.
Yoghurt is gritty:
Milk was overheated or in poor
condition, milk and starter yoghurt not
evenly stirred.
Tip: When using yoghurt enzyme,
yoghurt can be made from a milk /
cream mixture. Mix³/₄litre milk
with¹/₄litre cream.
How well home prepared yoghurt sets
will depend on the consistency, fat
content and the cultures used in the
starter yogurt. Not all yoghurts are
suitable for use as starter yoghurt.
56

Special applications
Procedure
Mix 100 g yoghurt with 1litre of milk
or make up the mixture with yoghurt
enzyme, following the instructions on
the packaging.
Pour the mixture into jars and seal the
jars.
Place the sealed jars in a perforated
container making sure they do not
touch one another.
Immediately after the yoghurt has
been made, place the jars in the
refrigerator, taking care not to shake
them unnecessarily.
Settings
Temperature: 40°C
Duration: 5:00 hours
Prove dough
Procedure
Prepare the dough according to the
recipe.
Cover the bowl and place in a
perforated container.
Settings
Temperature: 40°C
Duration: as per recipe instructions
57

Special applications
Dissolve gelatine
Procedure
Gelatine leaves: Completely cover
the gelatine leaves with cold water
and leave to soak for 5 minutes.
Remove the gelatine leaves from the
bowl and squeeze them out. Empty
the bowl. Place the squeezed gelatine
leaves back in the bowl.
Gelatine powder: Place in a bowl
and add water according to the
instructions on the packaging.
Cover the bowl and place in a
perforated container.
Settings
Temperature: 90°C
Duration: 1 minute
Melt chocolate
You can use the steam oven for melting
any type of chocolate.
Procedure
Break the chocolate into small
pieces. Leave chocolate cake
covering in its packaging, and place
in a perforated cooking container.
Place large quantities in a solid
cooking container and small
quantities in a cup or a bowl.
Cover the container or the dish with a
lid or with foil that is resistant to
temperatures up to 100 °C and to hot
steam.
Stir large quantities once halfway
through cooking.
Settings
Temperature: 65°C
Duration: 20minutes
58

Special applications
Skinning vegetables and fruit
Procedure
Cut a cross in the top of tomatoes,
nectarines etc. This will allow the skin
to be removed more easily.
Place the fruit/vegetables in a
perforated cooking container.
To blanch almonds, it is important to
plunge them into cold water as soon
as they are taken out of the oven,
otherwise the skin cannot be
removed.
Settings
Temperature: 100°C
Duration: see chart
Food [min]
Apricots 1
Almonds 1
Nectarines 1
Apple storage
You can treat homegrown apples in the
steam oven to increase the length of
time for which you can store them.
Once treated, the apples will keep for 5
to 6months when stored in a dry, cool
and well-ventilated place. This method
is only suitable for apples and not for
other types of fruit.
Settings
Temperature: 50 °C
Duration: 5 minutes
Peppers 4
Peaches 1
Tomatoes 1
Duration
59

Special applications
Blanching
Blanch vegetables before freezing
them. Blanching helps maintain the
quality of the produce when it is frozen.
Blanching vegetables also helps them
retain their original colour.
Procedure
Put the prepared vegetables into a
perforated cooking container.
Once blanched, plunge the
vegetables into ice cold water to cool
them down quickly. Drain them well.
Settings
Temperature: 100°C
Duration: 1 minute
Sweat onions
Sweating means cooking the onions in
their own juices, with the addition of a
little fat if necessary.
Procedure
Cut the onions up into small pieces
and place them in a solid cooking
container with a little butter.
Cover the container or the dish with a
lid or with foil that is resistant to
temperatures up to 100 °C and to hot
steam.
Settings
Temperature: 100°C
Duration: 4minutes
60

Special applications
Cook bacon
The bacon does not brown.
Procedure
Place the bacon (diced or rashers) in
a solid cooking container.
Cover the container with a lid or with
foil that is temperature resistant up to
100 °C and to steam.
Settings
Temperature: 100°C
Duration: 4 minutes
Disinfect items
The steam oven can be used to
disinfect baby bottles and other
containers so that at the end of the
programme they are as germ free as
they would have been had they been
boiled. Check beforehand that all parts,
teats etc. are declared by the
manufacturer to be heat resistant to 100
°C and also that they can withstand hot
steam.
Dismantle, clean and thoroughly rinse
baby bottles. All parts of the bottles
must be completely dry before they are
reassembled to keep them germ free.
Procedure
Place the individual parts in a
perforated container (on their sides or
with the opening facing downwards)
ensuring that they do not touch one
another to allow hot steam to reach
them from all sides.
Place the container on the lowest
shelf level.
Settings
Temperature: 100°C
Duration: 15minutes
61

Special applications
Heating damp flannels
Procedure
Moisten the flannels and then roll
them up.
Place them beside one another in a
perforated cooking container.
Settings
Temperature: 70°C
Duration: 2minutes
Decrystallise honey
Procedure
Loosen the lid and place the jar of
honey in a perforated container.
Stir the honey once during the
cooking duration.
Settings
Temperature: 60°C
Duration: 90 minutes (irrespective of the
size of jar or the amount of honey in the
jar)
Making eierstich
Procedure
Mix 6 eggs with 375 ml milk (do not
beat until foamy).
Season the egg and milk mixture and
pour into a greased solid cooking
container with a little butter.
Settings
Temperature: 100°C
Duration: 4 minutes
62

Your steam oven is supplied with a
number of standard default settings.
The standard settings listed in the chart
can be altered.
To change and save settings
With the appliance switched off:
Press and hold the On/Off button.
Whilst pressing the On/Off button,
touch the sensor once briefly when
the display lights up.
P1 will appear in the display.
Touch the or sensor repeatedly
until the programme you want
appears highlighted in the display.
Confirm with OK.
Touch the or sensor repeatedly
until the status you want appears
highlighted in the display.
Settings
Confirm with OK.
The selected status will be saved.
After you have altered the setting(s)
required, switch the appliance off.
63

Settings
The factory setting is shown in bold.
Programme Status Available settings
P1 S0
S1
P2 Demo mode S0S1Off, the steam oven heats up
Factory default settings reinstated
On, the steam oven does not heat up
P3 Buzzer volume S1
S2
S3
S4
P4 Water hardness S1
S2
S3
S4
P5 Temperature S1S2°C
P6 Pre-heat S0S1Pre-heating not activated
P7 Keypad tone S0S1Off
Very quiet
Quiet
Medium
Loud
Soft (< 1.5 mmol/l, < 8.4 °dH)
Medium (1.5 - 2.5 mmol/l, 8.4–14 °dH)
–
Hard (> 2.5 mmol/l, > 14 °dH)
°F
Pre-heating activated
On
64

Note for test institutes
Test food in accordance with EN 60350-1 (Steam cooking function)
Test food Cooking
container
Quantity [g]
1
2[°C]
[min]
Steam replenishment
Broccoli (8.1) 1x DGGL1 max. Any 100 3
Steam distribution
Broccoli (8.2) 1x DGGL1 300 Any 100 3
Performance at maximum capacity
Peas (8.3) 3x DGGL1 2.5 kg frozen
peas spread
2, 3, 4
3
100
4
evenly across
the container
Shelf level(s) / Temperature / Duration
1)
Always insert the condensate tray on the lowest shelf level.
2)
Place the test food in a cold oven (before the heating up phase begins).
3)
Place cooking container at the back of shelf levels 2 and 4 and at the front of shelf level 3.
4
The test is finished when the temperature measures 85 °C in the coolest place.
65

Cleaning and care
Important information on cleaning and care
Danger of injury.
The steam from a steam cleaning
appliance could reach electrical
components and cause a short
circuit.
Do not use a steam cleaner to clean
the steam oven.
Unsuitable cleaning agents can
discolour and damage the surfaces
of the appliance. Only use a solution
of domestic washing-up liquid and
warm water applied with a soft
sponge or cloth.
All surfaces are susceptible to
scratching. Scratches on glass
surfaces could cause a breakage in
certain circumstances.
Remove any residual cleaning agent
immediately.
Allow the appliance to cool down to
a safe temperature before cleaning.
The appliance and accessories
should be cleaned and dried
thoroughly after each use.
Leave the appliance door open until
the oven interior is completely dry.
If the appliance is not going to be
used for a longer period of time, e.g.
whilst on holiday, it should be
thoroughly cleaned and dried
beforehand to prevent the build-up of
odours etc. Leave the door open
afterwards.
Do not use cleaning agents or
washing-up liquids containing
aliphatic hydrocarbons (e.g.
methane, propane, hexane etc.) as
these could cause the seals to swell.
66

Cleaning and care
Unsuitable cleaning agents
To avoid damaging the surfaces, do not
use:
– cleaning agents containing soda,
ammonia, acids or chlorides
– cleaning agents containing descaling
agents
– abrasive cleaning agents, e.g.
powder cleaners and cream cleaners
– solvent-based cleaning agents
– stainless steel cleaning agents
– dishwasher cleaner
– glass cleaning agents
– cleaning agents for ceramic hobs
– hard, abrasive brushes or sponges,
e.g. pot scourers, brushes or
sponges which have been previously
used with abrasive cleaning agents
– melamine eraser blocks
Appliance front
Soiling that is left too long might
become impossible to remove and
could cause external surfaces to alter
or discolour.
Remove any soiling immediately.
Clean the front with a solution of
warm water and a little washing-up
liquid applied with a clean sponge or
cloth. A clean, damp microfibre cloth
without cleaning agent can also be
used.
After cleaning dry the front of the
appliance with a soft cloth.
– sharp metal scrapers or tools
– wire wool
– stainless steel spiral pads
– spot cleaning
– oven sprays.
67

Cleaning and care
Oven interior
When cleaning the back of the oven
cavity, make sure that nothing gets
caught behind the seals around the
steam inlet and outlet. Otherwise the
seals could get pushed into the back
panel by mistake.
After prolonged use, the floor heater
can become discoloured by drops of
liquid.
Remove:
– condensate using a sponge or
absorbent cloth,
– light, greasy soiling with a sponge
and a solution of washing-up liquid
and hot water.
After cleaning, wipe the surface with
a damp cloth to remove any cleaning
agent residues.
Then dry the oven interior and the
inside of the door with a cloth.
Accessories
All accessories are dishwasher safe.
Condensate tray and cooking containers
Wash and dry the condensate tray
and cooking containers after each
use.
Any bluish discolouration on the
cooking containers can be removed
with vinegar. Then rinse with clean
water.
Replace the door seal with a new one
if it becomes porous or brittle. Door
seals can be ordered from the Miele
Spare Parts Department (see the end
of this booklet for contact details).
68

Cleaning and care
Side runners
The side runners are suitable for
cleaning in a dishwasher.
Pull the runners off as shown.
The side runners can be cleaned in
the dishwasher or by hand with a
solution of warm water and a little
washing-up liquid applied with a
clean sponge.
Push the side runners firmly back in
after cleaning.
When putting them back in, make
sure they are correctly inserted (see
illustration).
If the side runners are not correctly
inserted there is no anti-tip
protection. The temperature sensor
could also be damaged when
cooking containers are placed in the
steam oven.
Water container
Do not immerse the water container
in water or clean it in a dishwasher.
For reasons of hygiene and to
prevent the build-up of moisture in
the appliance, the water container
should be emptied after each use.
Do not use scouring pads or hard
brushes.
Remove, empty and dry the water
container after each use.
Release the insert by pushing the
catches on the sides in towards each
other and then pull it out of the
container.
After cleaning, dry both parts of the
insert thoroughly before replacing it in
the water container. When replacing
the insert, guide it in at an angle
and then push it downwards as
illustrated.
69

Cleaning and care
Coupling seal
If, after prolonged use, the water
container becomes difficult to remove
and replace or the fault message
appears, rub a small amount of the
silicone grease supplied into the
inside of the coupling seal.
Do not take the seal out to lubricate it.
Misuse of silicone grease!
Remove any silicone grease from
your skin either by wiping it off or by
washing it off.
If the grease gets into the eyes, it
must be rinsed out with plenty of
clean water.
If it is swallowed, seek medical
advice.
Only use the silicone grease
supplied. On no account must
margarine or oil or any other
domestic grease or fat be used, as
these can cause the seal to swell.
The coupling seal should be replaced
with a new one if it becomes brittle or
porous or if an unusually large
amount of water collects on the floor
of the water container compartment.
Coupling seals can be ordered from the
Miele Spare Parts Department (see the
end of this booklet for contact details).
70

Cleaning and care
k
Descaling
We recommend using Miele descaling
tablets (see "optional accessories").
These have been specially developed
for use with Miele appliances to
optimise the descaling process.
Alternatively you can use a proprietary
citric acid based descaling agent.
Descaling solution is acidic.
Do not spill descaling agent onto
metal surfaces.
However, should any descaling
agent get onto these surfaces, wipe
it away immediately.
The steam oven needs to be descaled
after a certain number of operating
hours. When it needs descaling, the
symbol and a number will appear in
the display when the appliance is
switched on. The number indicates the
number of times that the steam oven
can be used before it has to be
descaled.
The appliance will lock after the last
remaining cooking process.
We recommend that you descale the
appliance before it locks out.
During the descaling process the water
container must be emptied, rinsed out
and refilled with fresh water and the
condensate container must be emptied.
Touch the On/Off button until a
tone sounds and the flashing
symbol and the duration
appear in the display.
Fill the water container with 1 litre of
fresh tap water and add the correct
amount of descaler.
Push the water container into the
appliance until it connects.
Confirm with OK.
The colon will flash and the symbol
will now light up constantly in the
display. Descaling will now begin.
It is only possible to cancel the
descaling process during the first
minute. Do not switch the appliance
off during the descaling process. If it is
switched off before the end of the
process, the whole process will have
to be started from the beginning
again.
An audible tone will sound and the
symbol will flash in the display approx.
10 minutes before the end of the
descaling process.
71

Cleaning and care
Remove the water container and take
the insert out.
Empty the water container.
Rinse the water container and the
insert thoroughly.
Fill the water container with 1 litre of
fresh tap water and refit the insert.
Push the water container into the
appliance until it connects.
The flashing symbol will go out and
the symbol will start flashing.
Confirm with OK.
The colon will flash and the symbol
will now light up constantly in the
display. Descaling will now continue.
An audible tone will sound when the
descaling process has been completed.
After descaling
Switch the steam oven off.
Remove, empty and dry the water
container.
Allow the oven compartment to cool
down.
Then dry the oven compartment.
Leave the appliance door open until
the oven interior is completely dry.
72

What to do if...
With the aid of the following guide, minor problems can be easily corrected
without contacting Miele.
If having followed the suggestions below, you still cannot resolve the problem,
please contact Miele (see back cover for contact details).
Danger of injury. Installation, maintenance and repairs to electrical
appliances must only be carried out by a suitably qualified and competent
person in strict accordance with current local and national safety regulations.
Do not open the casing of the appliance.
Repairs and other work by unqualified persons could be dangerous and Miele
cannot be held liable for unauthorised work.
Problem Cause and remedy
You cannot switch the
appliance on.
The oven does not heat
up.
The symbol and a
number between and
appear in the display.
and are
flashing.
The fuse is defective or has tripped.
Reset the trip switch in the mains fuse box or
replace the fuse (minimum fuse rating - see data
plate).
There may be a technical fault.
Disconnect the appliance from the mains
connection for approx. 1minute:
– switch off at the isolator, or
– disconnect the mains fuse.
If, after resetting the trip switch in the mains fuse
box and switching the appliance back on, the
appliance will still not heat up, contact a qualified
electrician or Miele.
Demo mode has been activated. appears in the
display.
The steam oven can be operated but does not heat
up.
Deactivate demo mode (see "Settings").
The oven cavity has been warmed up by a warming
drawer in operation underneath it.
Open the door and let the oven cool down.
The appliance needs to be descaled.
Proceed as described in "Cleaning and care -
Descaling".
73

What to do if...
Problem Cause and remedy
The fan can still be
heard after the
appliance has been
switched off.
The water container has
become harder to put
into the appliance and
take out again.
After moving house the
appliance no longer
switches from the
heating-up phase to the
cooking phase.
During operation an
unusually large amount
of steam escapes, or
steam escapes from
parts of the oven where
it does not usually.
After a period of time,
the door makes a noise
when it is opened and
closed.
The symbol appears
in the display and an
audible tone may
sound.
The fan is still running.
The appliance is fitted with a fan which removes
steam from the oven. The fan will continue to run for
a while after the appliance has been switched off. It
will switch itself off automatically after a while.
The coupling seal in the water container has become
stiff.
Lightly lubricate the coupling seal on the water
container with silicone grease, as described in
"Cleaning and care - Water container".
The boiling temperature of the water has changed as
the altitude of the new location for the appliance
differs from the old one by at least 300m.
To adjust the boiling temperature, you need to
descale the appliance (see "Cleaning and care Descaling").
The door is not properly closed.
Close the door.
The door seal is not correctly fitted.
Press it in all the way round the door to make sure
it is fitted evenly.
The door seal is damaged, e.g. cracks can be seen.
Replace the door seal. This can be ordered from
Miele.
The door has become stiff.
Lubricate the hinges with the silicone grease
supplied.
The water container has not been pushed into the
appliance properly.
Remove the water container and push it back in so
that it connects.
There is not enough water in the water container. The
water level must be between the two marks.
Fill the water container
74

Problem Cause and remedy
The heating-up phase
lasts an unusually long
time.
The water container has a lot of limescale built-up in it
because the appliance was not set correctly for the
hardness of the local water supply.
Set the correct water hardness level for your water
supply (see "Settings).
Proceed as described in "Cleaning and care -
Descaling".
If the water hardness level was in fact set correctly
or the problem occurs again, contact the Service
Department.
Technical fault.
Switch the appliance off and contact Miele.
What to do if...
The water container has not been pushed into the
appliance properly.
Remove the water container and push it back in so
that it connects.
Switch the steam oven off and then back on again.
The water container has become harder to put into
the appliance and take out again.
Lightly lubricate the coupling seal on the water
container with silicone grease, as described in
"Cleaning and care - Water container".
75

Optional accessories
Miele offer a comprehensive range of
useful accessories as well as cleaning
and conditioning products for your
Miele appliances.
These products can be ordered through
the Miele Webshop.
These can also be ordered from Miele
(see end of this booklet for contact
details) or from your Miele dealer.
Cooking containers
There is a wide range of perforated and
solid cooking containers available in
different sizes:
DGGL 1
Perforated cooking container
Gross capacity 1.5 litres / Usable
capacity 0.9 litres
325 x 175 x 40 mm (W x D x H)
DGG 2
Solid cooking container
Gross capacity 2.5 litres / Usable
capacity 2.0 litres
325 x 175 x 65 mm (W x D x H)
DGG 3
76
Solid cooking container
Gross capacity 4.0 litres / Usable
capacity 3.1 litres
325 x 265 x 65 mm (W x D x H)

Optional accessories
DGGL 4
Perforated cooking container
Gross capacity 4.0 litres / Usable
capacity 3.1 litres
325 x 265 x 65 mm (W x D x H)
DGGL 5
Perforated cooking container
Gross capacity 2.5 litres / Usable
capacity 2.0 litres
325 x 175 x 65 mm (W x D x H)
DGGL 6
DGGL 8
Perforated cooking container
Gross capacity 2.0 litres / Usable
capacity 1.7 litres
325 x 265 x 40 mm (W x D x H)
Lid for cooking containers
DGD 1/3
Lid for 325 x 175 mm cooking
containers
DGD 1/2
Perforated cooking container
Gross capacity 4.0 litres / Usable
capacity 2.8 litres
325 x 175 x 100 mm (W x D x H)
DGG 7
Solid cooking container
Gross capacity 4.0 litres / Usable
capacity 2.8 litres
325 x 175 x 100 mm (W x D x H)
Lid for 325 x 265 mm cooking
containers
77

Optional accessories
Cleaning and care products
Descaling tablets (Qty 6)
For descaling the appliance
Microfibre cloth
Removes finger marks and light soiling
Silicone grease
For lubricating the coupling seal on the
water container
Miscellaneous
DGG 15
Condensate tray for catching excess
moisture, can also be used as a
cooking container.
325x265x40mm (W x D x H)
Multi-purpose casserole dish
Die-cast aluminium casserole dish with
non-stick surface and stainless steel lid.
Also suitable for use on an extended
zone of induction hobs and in all Miele
ovens.
Not suitable for use on gas hobs.
KMB 5000-S
78
Maximum capacity approx. 2.5 kg.
325 x 260 x 60 mm (W x D x H)
Building-under casing DGUG
only for DG 6020
Casing for freestanding installation DGSG
only for DG 6020

Safety instructions for installation
Incorrect installation can result in personal injury and damage
to property.
Before connecting the appliance to the mains supply, ensure that
the connection data on the data plate (voltage and frequency) match
the mains electricity supply.
This data must correspond in order to avoid the risk of damage to
the appliance. Consult a qualified electrician if in any doubt.
Do not connect the steam oven to the mains electricity supply by
a multi-socket adapter or an extension lead. These do not guarantee
the required safety of the appliance (fire hazard).
The socket and on-off switch should be easily accessible after the
appliance has been installed.
The appliance must be positioned so that you can see the
contents of a cooking container placed on the top runner. Otherwise
you may risk scalding or burning yourself with hot water and food
when taking containers out of the oven.
All dimensions are given in mm.
79

Building-in dimensions DG 6020
Installation in a tall unit
a
Steam oven
b
Niche
c
Inlet for mains connection cable to the appliance
d
Recommended position for electrical socket. Important: do not position behind
the appliance.
Important: Do not position behind the appliance.
e
Mains connection cable
*Glass front / **metal front
80

Installation in a dresser unit
Building-in dimensions DG 6020
a
Steam oven
b
Niche
c
Inlet for mains connection cable to the appliance
d
Recommended position for electrical socket. Important: do not position behind
the appliance.
Important: Do not position behind the appliance.
e
Mains connection cable
*Glass front / **metal front
81

Building-in dimensions DG 6020
Installation in wall unit
a
Steam oven
b
Niche
c
Inlet for mains connection cable to the appliance
d
Recommended position for electrical socket. Important: do not position behind
the appliance.
e
Mains connection cable
*Glass front / **metal front
82

Building-in dimensions DG 6020
Installation in a base unit
When building the appliance into a base unit underneath a hob please also
observe the installation instructions for the hob as well as the building-in depth
required for the hob (see installation instruction manual for the hob).
a
Steam oven
b
Niche
c
Inlet for mains connection cable to the appliance
d
Recommended position for electrical socket. Important: do not position behind
the appliance.
e
Mains connection cable
*Glass front / **metal front
83

Building-in dimensions DG 6020
Installation underneath a wall unit
a
Steam oven
b
Building-under casing (available as an optional accessory)
c
Inlet for mains connection cable to the appliance
d
Recommended position for electrical socket. Important: do not position behind
the appliance.
e
Mains connection cable
f
Dimension including mains connection cable and plug
*Glass front / **metal front
84

Installation in a tall unit
Building-in dimensions DG 6030
a
Steam oven
b
Niche
c
Inlet for mains connection cable to the appliance
d
Recommended position for electrical socket. Important: do not position behind
the appliance.
Important: Do not position behind the appliance.
e
Mains connection cable
*Glass front / **metal front
85

Building-in dimensions DG 6030
Installation in a dresser unit
a
Steam oven
b
Niche
c
Inlet for mains connection cable to the appliance
d
Recommended position for electrical socket. Important: do not position behind
the appliance.
Important: Do not position behind the appliance.
e
Mains connection cable
*Glass front / **metal front
86

Installation in wall unit
a
Steam oven
Building-in dimensions DG 6030
b
Niche
c
Inlet for mains connection cable to the appliance
d
Recommended position for electrical socket. Important: do not position behind
the appliance.
e
Mains connection cable
*Glass front / **metal front
87

Building-in dimensions DG 6030
Installation in a base unit
When building the appliance into a base unit underneath a hob please also
observe the installation instructions for the hob as well as the building-in depth
required for the hob (see installation instruction manual for the hob).
a
Steam oven
b
Niche
c
Inlet for mains connection cable to the appliance
d
Recommended position for electrical socket. Important: do not position behind
the appliance.
e
Mains connection cable
*Glass front / **metal front
88

Installation
Fitting the feet
The steam oven is supplied with four feet.
When installing
– in a 360 mm high niche the appliance is installed with the feet fitted.
– in a 350 mm high niche the appliance is installed without the feet fitted.
– in a counter top casing (DGSG) or in a building-under casing (DGUG) the
appliance is installed without the feet fitted.
Carefully place the appliance on its back.
Screw the four feet into the holes provided (see illustration).
89

Installation
X
b
107
a
a
c
d
Installing the steam oven
Secure wood panels with the 3 x 20 mm screws supplied to the left hand
side of the niche.
Dimension x for niche height:
350 mm = 30 ± 5 mm
360 mm = 40 ± 5 mm
Drill 2.0 mm Ø fixing holes in the wood trim.
Push the appliance into position in the niche and align it.
Make sure that the mains connection cable does not get trapped or damaged
when doing so.
Secure the appliance left and right using the wood screws supplied (3.5mm
x 25mm) on the right and (3 x 20mm) on the left.
Do not overtighten the screws as this will prevent the door from closing.
90

Electrical connection
All electrical work should be carried out
by a suitably qualified and competent
person in strict accordance with current
local and national safety regulations
(e.g. BS 7671 in the UK). Connection
should be made via a switched socket.
This will make it easier for service
technicians should the appliance need
to be repaired. The electrical socket
must be easily accessible after
installation.
Danger of injury.
Miele cannot be held liable for
unauthorised installation,
maintenance and repair work as this
can be dangerous to users.
Miele cannot be held liable for
damage or injury caused by incorrect
installation, maintenance or repair
work, or by an inadequate or faulty
earthing system (e.g. electric shock).
If the plug is removed from the
connection cable or if the cable is
supplied without a plug, the
appliance must be connected to the
electrical supply by a suitably
qualified electrician.
If the switched socket is not
accessible after installation, or if the
appliance is to be hard-wired, an
additional means of disconnection
must be provided for all poles. When
switched off, there must be an allpole contact gap of at least 3mm in
the switch (including switch, fuses
and relays). Connection data is
shown on the data plate. It must
match the mains electrical supply.
After installation ensure that all
electrical components are shielded
and cannot be accessed by users.
Total power rating
See data plate
Connection
AC 230 V, 50 Hz
The connection data is quoted on the
data plate. It must match the household
supply.
Residual current device
For extra safety, it is advisable to
protect the appliance with a suitable
residual current device (RCD) with a trip
range of 30 mA.
91

Electrical connection
Disconnecting from the mains
Danger of electrical shock.
After disconnection, ensure the
appliance cannot be switched back
on by mistake.
To disconnect the appliance from the
mains power supply, do one of the
following depending on installation:
Safety fuses
Completely remove fuses
Automatic circuit breakers
Press the (red) button until the middle
(black) button springs out.
Built-in circuit breakers
Circuit breakers typeB orC:
Switch the on/off switch from 1 (on)
to 0 (off).
Residual current device (RCD)
Switch the main switch from 1(on) to
0(off) or press the test button.
Replacing the mains connection cable
If the mains cable needs to be replaced
it must be replaced with a special
connection cable, type H05VV-F (PVCinsulated), available from Miele.
92

After sales service, data plate, guarantee
After sales service
In the event of any faults which you cannot easily remedy, please contact
– your Miele Dealer, or
– Miele Service.
See end of this booklet for contact details.
Please note that telephone calls may be monitored and recorded for training
purposes.
N.B. A call-out charge will be applied to service visits where the problem could
have been resolved as described in these instructions.
When contacting your Dealer or Miele, please quote the model and serial number
of your appliance.
Data plate
Space in which to stick the extra data plate supplied with the appliance. Ensure
that the model number is the same as the one on the back page of these
instructions.
Guarantee: UK
The appliance is guaranteed for 2 years from the date of purchase.
In the UK, you must activate your cover by calling 0330 160 6640 or registering
online at www.miele.co.uk.
Guarantee: Other countries
For information on the appliance guarantee specific to your country please contact
Miele. See end of this booklet for contact details.
93


United Kingdom
Miele Co. Ltd., Fairacres, Marcham Road, Abingdon, Oxon, OX14 1TW
Tel: 0330 160 6600, Internet: www.miele.co.uk/service, E-mail: info@miele.co.uk
Australia
Miele Australia Pty. Ltd.
ACN 005 635 398
ABN 96 005 635 398
1 Gilbert Park Drive
Knoxfield, VIC 3180
Tel: 1300 464 353
Internet: www.miele.com.au
Miele Electrical Appliances Co., Ltd.
1-3 Floor, No. 82 Shi Men Yi Road
Jing' an District
200040 Shanghai, PRC
Tel: +86 21 6157 3500
Fax: +86 21 6157 3511
E-mail: info@miele.cn,
Internet: www.miele.cn
China Mainland
Miele (Hong Kong) Ltd.
41/F - 4101, Manhattan Place
23 Wang Tai Road
Kowloon Bay, Hong Kong
Tel: (852) 2610 1025
Fax: (852) 3579 1404
Email:
customerservices@miele.com.hk
Website: www.miele.hk
Hong Kong, China
Miele India Pvt. Ltd.
Ground Floor, Copia Corporate Suites
Plot No. 9, Jasola
New Delhi - 110025
Tel: 011-46 900 000
Fax: 011-46 900 001
E-mail: customercare@miele.in
Internet: www.miele.in
India
Miele Ireland Ltd.
2024 Bianconi Avenue
Citywest Business Campus
Dublin 24
Tel: (01) 461 07 10
Fax: (01) 461 07 97
E-Mail: info@miele.ie
Internet: www.miele.ie
Ireland
Malaysia
Miele Sdn Bhd
Suite 12-2, Level 12
Menara Sapura Kencana
Petroleum
Solaris Dutamas No. 1
Jalan Dutamas 1
50480 Kuala Lumpur, Malaysia
Phone: +603-6209-0288
Fax: +603-6205-3768
Miele New Zealand Limited
IRD 98 463 631
8 College Hill
Freemans Bay, Auckland 1011
New Zealand
Tel: 0800 464 353
Internet: www.miele.co.nz
New Zealand
Miele Pte. Ltd.
29 Media Circle
#11-04 ALICE@Mediapolis
Singapore 138565
sTel: +65 6735 1191
Fax: +65 6735 1161
E-Mail: info@miele.com.sg
Internet: www.miele.sg
Singapore
Miele (Pty) Ltd.
63 Peter Place
Bryanston 2194
P.O. Box 69434
Bryanston 2021
Tel: (011) 875 9000
Fax: (011) 875 9035
E-mail: info@miele.co.za
Internet: www.miele.co.za
South Africa
Miele Appliances Ltd.
Showroom 1
Eiffel 1 Building
P.O. Box 114782 - Dubai
Tel. +971 4 3044 999
Fax. +971 4 3418 852
800-MIELE (64353)
E-Mail: info@miele.ae
Website: www.miele.ae
United Arab Emirates
Manufacturer:
Miele & Cie. KG, Carl-Miele-Straße 29, 33332 Gütersloh, Germany
Thailand
Miele Appliances Ltd.
BHIRAJ TOWER at EmQuartier
43rd Floor Unit 4301-4303
689 Sukhumvit Road
North Klongton Sub-District
Vadhana District
Bangkok 10110, Thailand
Sheikh Zayed Road, Umm Al Sheif

DG 6020 / DG 6030
en-GB
M.-Nr. 09 580 070 / 04
 Loading...