


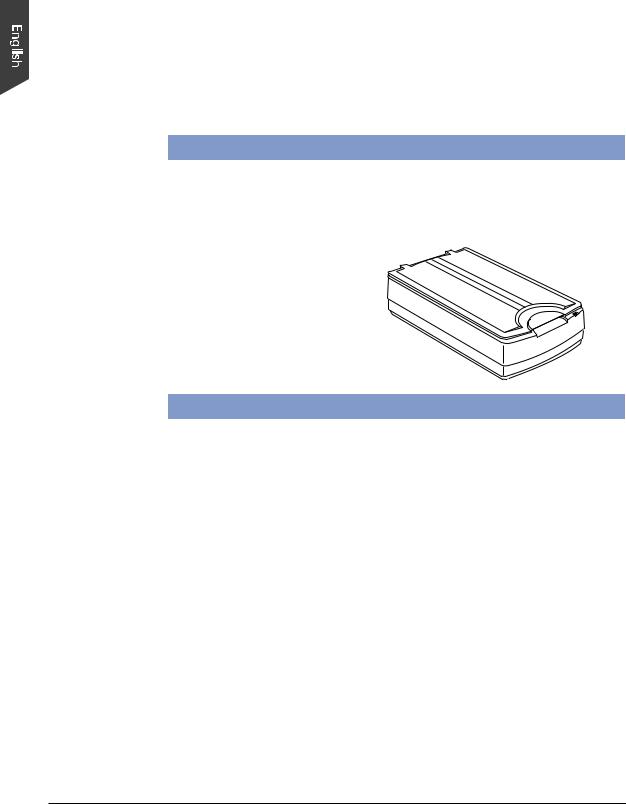
ScanMaker 9800XL
Installing and Getting Started
Trademarks
Microtek®, ScanMaker®, and ScanWizardTM Pro are trademarks or registered trademarks of Microtek International, Inc. Macintosh® and Apple® are registered trademarks of Apple Computer, Inc. Windows® is a registered trademark of Microsoft Corporation. All other products or name brands are trademarks of their respective holders.
Important
Documents you scan may be protected under copyright law. The unauthorized use of such documents could be a violation of the rights of the copyright holder. Microtek bears no responsibility for the unauthorized use of copyrighted materials.
Contents |
|
Introduction ............................................................................................................... |
2 |
System Requirements............................................................................................... |
2 |
Unpacking the Scanner ............................................................................................. |
3 |
Taking a Closer Look ................................................................................................. |
3 |
Unlocking the Scanner .............................................................................................. |
4 |
Shipping scanner ............................................................................................... |
4 |
Installing the Scanner Software ............................................................................... |
5 |
Connecting the Scanner toYour Computer ............................................................. |
6 |
Using the FireWire cable ................................................................................... |
6 |
Using the SCSI cable ......................................................................................... |
8 |
Using the USB cable ......................................................................................... |
11 |
Positioning Reflective Originals ............................................................................. |
13 |
Your First Scan ........................................................................................................ |
14 |
Performing Color Calibration ................................................................................. |
16 |
The color calibration target ............................................................................. |
16 |
Before you calibrate ......................................................................................... |
16 |
Calibrating your target .................................................................................... |
17 |
Loading a profile .............................................................................................. |
18 |
Specifications .......................................................................................................... |
20 |
Additional Documentation in the CD-ROM ........................................................... |
20 |
Copyright © 2001 Microtek International, Inc. http://www.microtek.com
I49-003275 A, December 2001
This document provides information on how to install the ScanMaker 9800XL flatbed color scanner and perform basic image scanning procedures.
Introduction
The ScanMaker 9800XL is a 48-bit color flatbed scanner that supports tabloid-sized (A3 or B-size) scanning for corporate users or designers. This scanner scans images up to 12" x 17" at an optical resolution of 1600 x 3200 dpi (12800 x 12800 dpi interpolated).
The ScanMaker 9800XL provides three built-in interfaces (FireWire, USB, and SCSI), and allows you to choose any of the three interfaces to digitize image originals.
System Requirements
•128MB RAM or more recommended
•CD-ROM drive (for installing software)
•Color display with 24-bit color output capability
FireWire |
|
|
• |
PC |
- Pentium II or later with built-in FireWire port |
|
|
- Windows 98 SE, 2000, Me, or XP |
• |
Mac |
- iMac DV or new G3/G4 with built-in FireWire support |
|
|
- Mac OS 9.x |
USB |
|
|
• |
PC |
- Pentium PC or later with USB port |
|
|
- Windows 98, 2000, Me, or XP |
• |
Mac |
- iMac or G3/G4 with built-in USB port |
|
|
- Mac OS 8.6 through 9.x |
SCSI |
|
|
• |
PC |
- Pentium PC or later |
|
|
- Windows 95, 98, 2000, Me, XP, or NT 4.0 |
• |
Mac |
- Power PC class or later with ASPI compliant SCSI port |
|
|
- Mac OS 8.5 through 9.x |
2ScanMaker 9800XL Installing and Getting Started

Unpacking the Scanner
Open your scanner package and check the components as stated in your packing list. If any component is missing, call Microtek Customer Service.
•ScanMaker 9800XL unit
•FireWire card
•FireWire cable
•USB cable
•Kodak Q-60R1 color target (Reflective)
•Documentationincludes ScanMaker 9800XL Installing and Getting Started, ScanWizard Pro User's Guide, ScanWizard Pro Quick Reference, Unlock card, and other inserts.
Taking a Closer Look
Scanner lid
Vertical ruler
Horizontal ruler
READY indicator (Green)
POWER indicator (Orange)
Power switch |
SCSI ID switch |
|
Power port |
Accessory port |
|
|
||
Terminator switch |
FireWire ports (2) |
|
SCSI port (1) |
||
|
||
USB port (1) |
|
ScanMaker 9800XL Installing and Getting Started 3
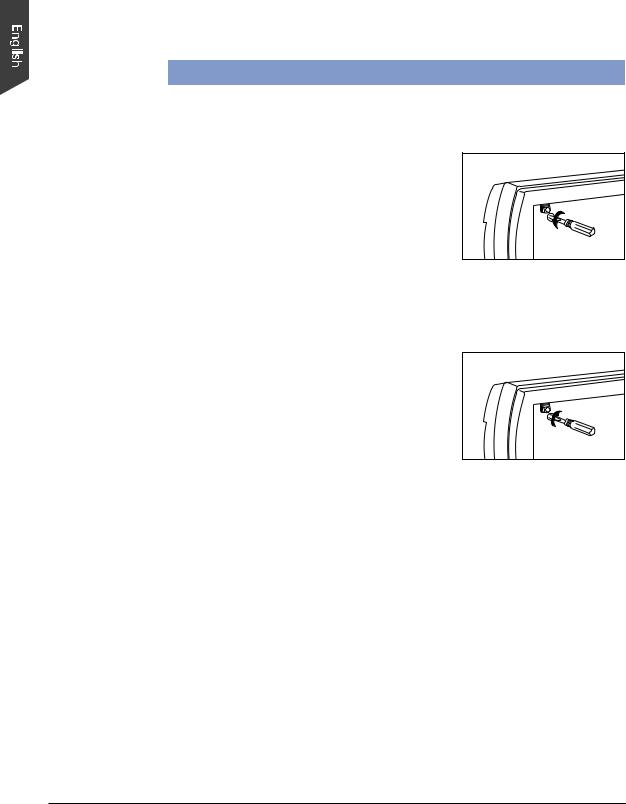
Unlocking the Scanner
Your scanner has a locking screw to protect the scanner carriage mechanism during shipping. Before you operate the scanner, you need to disengage the locking screw.
1. Turn the scanner on its side and locate the |
Unlock |
|
locking screw at the bottom of the scanner. |
||
|
2.Using a flathead screwdriver, turn the locking screw counterclockwise until the screw pushes out and is flush with the bottom of the scanner base.
Shipping scanner
If you have to transport the scanner, the scanner must be locked. To lock the scanner, follow the steps below:
1. Turn off the scanner if your scanner is on.
Lock
2.Set the SCSI ID number to “9”.
3.Turn on your scanner. The scanner's carriage
will move to standby position in 5 minutes.
4. When the indicators on the front of your scanner stop blinking, turn the locking screw clockwise one-fourth turn while pushing it in simultaneously. The screw should stay in and not pop back out.
5. Turn off your scanner. The scanner is now ready for transport.
Note: To use the scanner again at a future time, be sure to reset the SCSI ID to its original number prior to step #2. Otherwise, the scanner ID will be left at SCSI ID 9 and will not work.
4ScanMaker 9800XL Installing and Getting Started

Installing the Scanner Software
Before connecting the scanner to your computer, follow the steps below to install the scanner software:
1.Turn on your computer.
2.Insert the Microtek CD-ROM into your CD-ROM drive.
For Macintosh users:*
When the Microtek CD-ROM icon appears on your Macintosh desktop, doubleclick on this icon to open it. The software installer screen should appear, and click each software program on the screen to install all the software components. Double-click the “Install” icon on each folder to install the respective programs one at a time.
For PC users:
The Microtek Scanner Software installer screen should automatically come up. When the software installer screen appears, click each software program in the order that it appears on the screen to install all the software components.
When you install ScanWizard Pro, the installer program will install the Color Matching driver program and ask you to perform Color Matching for your monitor and printer. The Color Matching feature ensures color consistency from the initial input phase when an image is captured by the scanner, to the final output process when the image is output to your monitor or printer.
Note: If the software installer screen does not come up automatically, doubleclick the following in succession: “My Computer” on your Windows desktop; the CD-ROM icon; and then cdsetup.exe to start the installer program.
3.Restart your computer when the software installation is complete.
*Caution:
For Macintosh users,
1.Make sure the additional software you have is already installed in your computer before installing the scanner software.
2.Make sure that all virus protection software is turned off before installing the scanner software. Once the scanner software installation is finished, remember to re-enable the virus protection software.
3.For iMac users, please visit Apple's website at http://www.apple.com/imac/ to download and install any iMac updates you may require.
ScanMaker 9800XL Installing and Getting Started 5
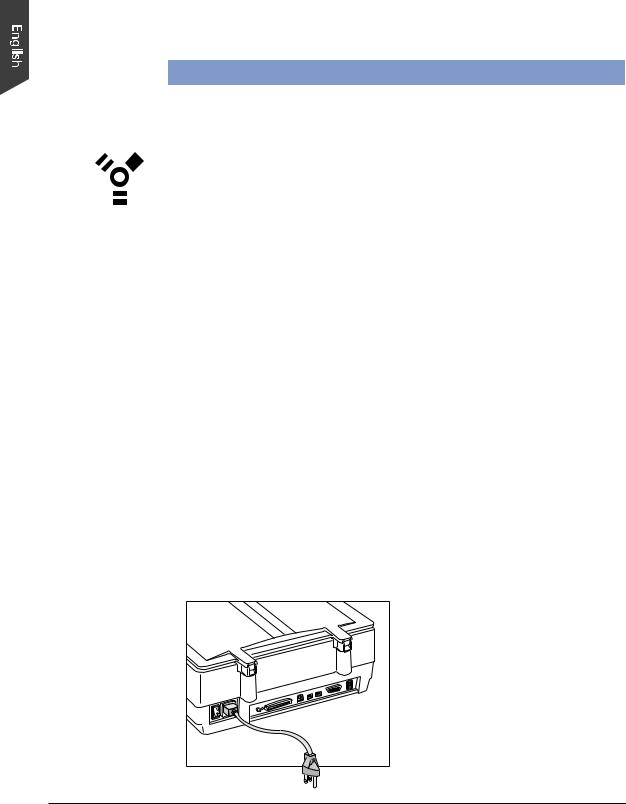
Connecting the Scanner toYour Computer
The ScanMaker 9800XL comes with three built-in interfaces: FireWire, USB, and SCSI. You may choose any of the three interfaces to make the connection between the scanner and computer. (You should use only one interface at a time.)
Using the FireWire cable
Before connecting the scanner, check to see if your computer system is FireWireready. FireWire-ready means you can connect the scanner to your computer using a provided FireWire cable.
System is FireWire-ready
•For Macintosh users, your computer should have been equipped with a built-in FireWire port. This port should be designated with the FireWire symbol shown to the left.
•For PC users, the FireWire card should be installed and work properly in your computer.
System is Not FireWire-ready
If your system is not FireWire-ready, you will need to install a FireWire card. For more details on how to install the FireWire card, please refer to the “FireWire Installation Guide” on a separate documentation included with your scanner package. Alternatively, you can use the USB or SCSI interface to connect your scanner.
For FireWire-ready systems:
Follow the steps below to make the FireWire connection.
1.Connect the power cord to your scanner.
Plug the power cord into the back of the scanner, and plug the other end into a power source (power surge protector highly recommended). Make sure no other cable is connected to the scanner except the power cord at this point.
6ScanMaker 9800XL Installing and Getting Started
 Loading...