

Page 1

TABLE OF CONTENTS
Safety instructions . . . . . . . . . . . . . . . . . . . . . . . . . . . . . . . . . . . . . 5
Before first use . . . . . . . . . . . . . . . . . . . . . . . . . . . . . . . . . . . . . . . . 9
Heating appliance empty . . . . . . . . . . . . . . . . . . . . . . . . . . . . . . . . 10
Preparation for use . . . . . . . . . . . . . . . . . . . . . . . . . . . . . . . . . . . 11
Fitting glass turntable . . . . . . . . . . . . . . . . . . . . . . . . . . . . . . . . . . . 11
Fitting grill rack . . . . . . . . . . . . . . . . . . . . . . . . . . . . . . . . . . . . . . . 12
Using the baking tray . . . . . . . . . . . . . . . . . . . . . . . . . . . . . . . . . . . 12
Controls . . . . . . . . . . . . . . . . . . . . . . . . . . . . . . . . . . . . . . . . . . . 13
Setting clock time . . . . . . . . . . . . . . . . . . . . . . . . . . . . . . . . . . . . . . 13
Microwave mode . . . . . . . . . . . . . . . . . . . . . . . . . . . . . . . . . . . . . 13
Microwave / Grill mode . . . . . . . . . . . . . . . . . . . . . . . . . . . . . . . . . 14
Microwave / hot air oven mode . . . . . . . . . . . . . . . . . . . . . . . . . . . 15
Control of microwave, hot air and grill . . . . . . . . . . . . . . . . . . . . . 16
Using the microwave . . . . . . . . . . . . . . . . . . . . . . . . . . . . . . . . . . . 16
Using the grill . . . . . . . . . . . . . . . . . . . . . . . . . . . . . . . . . . . . . . . . 16
Using the hot air oven . . . . . . . . . . . . . . . . . . . . . . . . . . . . . . . . . . . 16
Using the microwave/grill combination . . . . . . . . . . . . . . . . . . . . . . . 17
Using the microwave / hot air combination . . . . . . . . . . . . . . . . . . . . 18
Using the defrost function . . . . . . . . . . . . . . . . . . . . . . . . . . . . . . . . . 18
Cooking in two steps . . . . . . . . . . . . . . . . . . . . . . . . . . . . . . . . . . . 18
Quick start function . . . . . . . . . . . . . . . . . . . . . . . . . . . . . . . . . . . . . 19
Cleaning the appliance . . . . . . . . . . . . . . . . . . . . . . . . . . . . . . . . 21
Additional functions . . . . . . . . . . . . . . . . . . . . . . . . . . . . . . . . . . . 22
Child security . . . . . . . . . . . . . . . . . . . . . . . . . . . . . . . . . . . . . . . . 22
Checking settings during cooking . . . . . . . . . . . . . . . . . . . . . . . . . . . 22
Notes on special features . . . . . . . . . . . . . . . . . . . . . . . . . . . . . . . . 23
Troubleshooting . . . . . . . . . . . . . . . . . . . . . . . . . . . . . . . . . . . . . . 24
3
Page 2

THANK YOU VERY MUCH FOR YOUR PURCHASE!
We congratulate on your new microwave oven and are convinced that you
will be delighted with this modern appliance.
In order to guarantee the ideal function and performance of your microwave
oven at all times and in order to protect your personal safety, we would make
the following request:
• Please read these operating instructions thoroughly and follow them and the
safety notes in particular before using the appliance for the first time!
• All actions on and with this appliance may only be undertaken as described
in the operating instructions.
• If you pass on the appliance it is essential that you also provide the operating instructions!
DISPOSAL
Packaging
Your microwave oven is wrapped in packaging to protect it against transportation damage. Packaging is raw material and can be reused or added to the
recycling system.
Appliance
At the end of its life, the microwave oven must not be disposed of in household
rubbish. Seek the advice of your local authority on correct, environmentallyfriendly disposal.
4
Page 3
SAFETY INSTRUCTIONS
AREA OF USE
• This appliance is intended exclusively for domestic use. It may only be used
for heating suitable foods in containers suitable for use in microwave ovens.
• When heating food in plastic or paper containers, the cooking appliance
must be checked frequency because of the possibility of fire.
• The microwave oven is not suitable for preparing deep fried food. The appliance is also not suitable for drying objects. Caution - fire risk!
• Note that children may not use the appliance, since children are not yet able
to recognise the hazards that may arise when dealing with electrical appliances.
SETTING UP AND ELECTRICAL CONNECTION
• Only connect the microwave oven to a regulation-compliant 230 V, 50 Hz
socket with a protection/fuse current of at least 16 A. Do not use an extension cable.
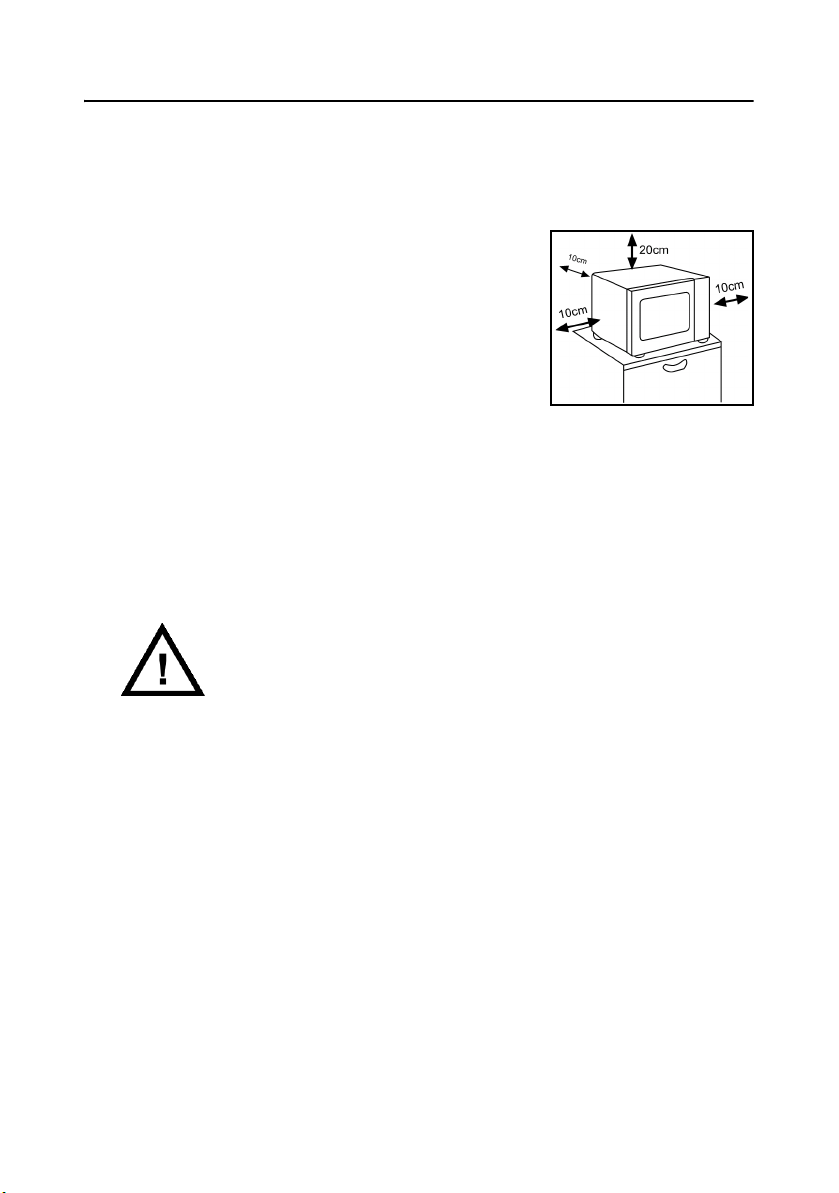
• Place the appliance on a sturdy, level surface in a protected, dry area.
• Respect the minimum clearances and never cover the ventilation slots. Place
nothing on top of the microwave oven as it becomes hot when in operation.
• Protect the appliance from drips and splashes. If the appliance, nevertheless, comes into contact with water, pull the plug from the socket immediately.
CAUTION:
During operation, the accessible surfaces can become very hot!
PRECAUTIONS FOR USE
• Only use the microwave oven with the roller ring
and turntable supplied.
• Never operate the appliance without food in the oven.
• Only use the accessories supplied or approved by us.
• Only use crockery that is suitable for use in microwave ovens.
5
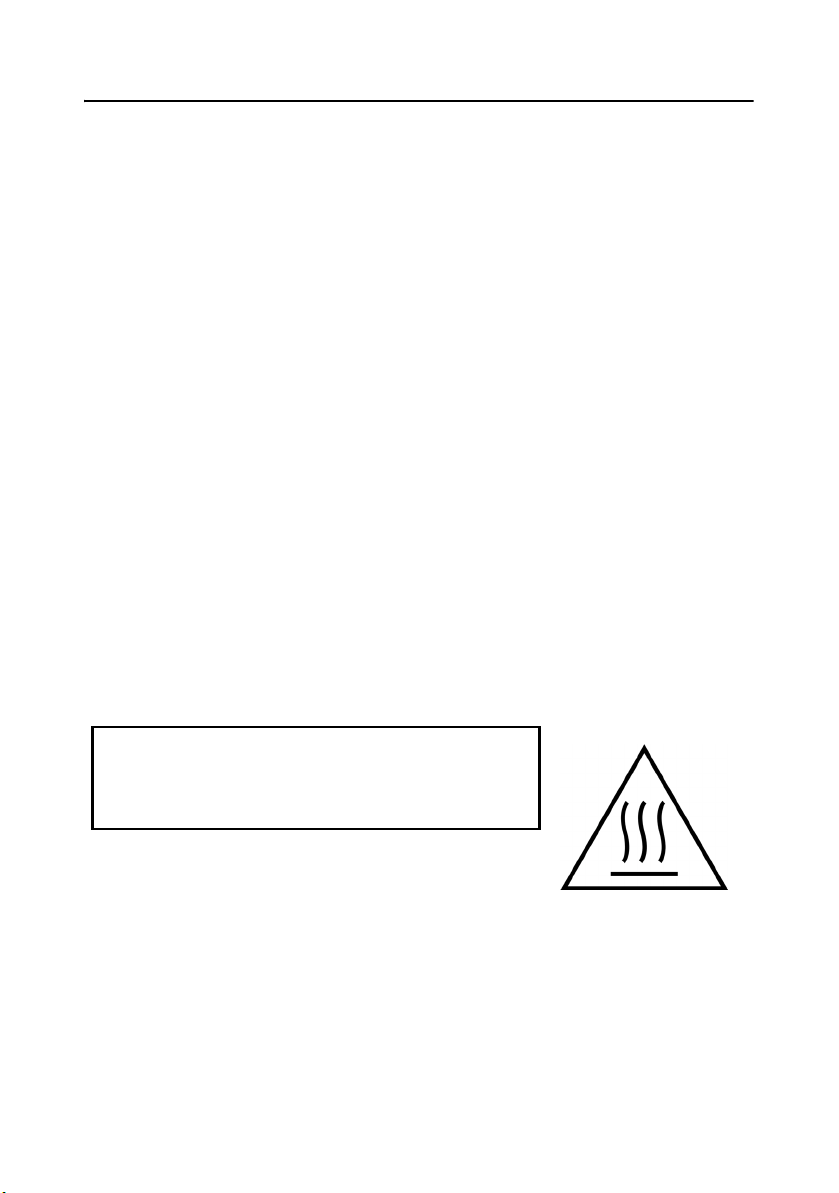
Caution! Hot surface!
Page 4
SAFETY INSTRUCTIONS
• In microwave mode, never use crockery with metallic decoration, metallic
containers or grill stands, as damage to the appliance may result.
• Do not remove any covers from the microwave oven or the inner foil from
the viewing window, as microwave radiation can then be emitted.
• Never leave the appliance unattended during operation.
• Inadequate cleanliness of the appliance can lead to destruction of the surface, reducing the useful life and possibly leading to dangerous situations.
CAUTION:
When heating liquids in the microwave oven, superheating can occur, i.e. the
liquid can reach boiling point without steam being released. When agitated,
as may occur when removing the vessel from the oven, the steam may be explosively released.
There is a risk of scalding.
To avoid this problem, remember, when heating liquids, to place a glass or
ceramic rod in the container. This will inhibit delayed boiling.
• Never heat food in closed containers. Always remove the lid from jars and
bottles, such as baby bottles.
• Before heating food with skins, such as sausages or tomatoes, prick the skin
at various points to avoid bursting.
• Only cook eggs in microwave crockery designed for the purpose.
• Do not warm up hard-boiled eggs in the microwave oven.
Eggs that have already been cooked can explode even after
being removed from the oven!
6
Page 5

SAFETY INSTRUCTIONS
• Where possible, stir food after heating to distribute the heat evenly or leave
it to stand for a while.
• Before eating, check the temperature of food heated in the microwave oven.
Take special care with babyfood and always stir or shake children's food
before checking the temperature.
FAULTS
• Protect the appliance and the mains cable from damage.
• Before each use, check the appliance and the mains cable for damage.
• If found to be damaged, the appliance should under no circumstances be
used. Pull the mains plug from the socket immediately.
• A defective appliance or damaged mains cable should be repaired without
delay in an approved workshop or you should contact the Medion Service
department to avoid taking risks.
WARNING!
It is dangerous for anyone other than properly trained persons to carry out any
maintenance or repair work, which involves the removal of any covers that
prevent exposure to microwave radiation.
• If smoke is observed, it is essential to keep the door closed to avoid the formation of flames or to smother any that have already formed and turn the
appliance off immediately by pressing the STOP/CLEAR button.
• The mains plug must then be pulled from the socket without delay.
• The appliance may never be switched on if there is damage to the casing,
the door or the door latch. Have the appliance repaired in an approved
workshop or contact the Medion Service department.
• Place the microwave oven on a sturdy, level, heat-proof surface. Respect the
minimum clearances.
• Ensure that the microwave oven is not too close to a source of heat or in an
area in which it may come into contact with water.
7
Page 6

SAFETY INSTRUCTIONS
ABOUT MICROWAVES
Microwaves are high-frequency electromagnetic waves that heat food placed
in the oven cavity. Microwaves heat all non-metallic objects. You should, therefore, use no metallic objects in the microwave oven. These heating effect depends on the water content of the food. To achieve optimum heat distribution,
allow food to stand for one or two minute after removing it from the oven.
8
Page 7
BEFORE FIRST USE
• Unpack the appliance and all its accessories.
• Place the microwave oven on a sturdy, level, heat-proof surface. Respect the
minimum clearances.
• Ensure that the microwave oven is not too close to
a source of heat or in an area in which it may
come into contact with water.
• Do not place anything (vases, covers etc.) on the
appliance.
• Check that you have all the accessories before
throwing away the pakkaging.
• Before you operate your appliance for the first time using the grill or hot air
oven (fan) functions, clean the appliance and all accessories to remove any
production residues.
• Remove the protective foil from the appliance and its control panel.
• Clean all accessories in hot water with a mild detergent and dry them.
• Clean the appliance carefully with a damp cloth, inside and out and rub it
dry.
Do not use the microwave oven outdoors!
9
Page 8

BEFORE FIRST USE
HEATING THE APPLIANCE WHEN EMPTY
• Without food or accessories in the oven, switch on the appliance in hot air
oven mode by pressing the hot air oven button and rotate the control clockwise until a temperature setting of 230 °C is shown on the display.
• Press the START/OK button. Now turn the rotary control clockwise until a
cooking time of 20:00 minutes is shown on the display.
• Press the START/OK button. A slight odour may be produced by this initial
heating. The vapours are harmless and quickly disappear.
• Ensure the ventilation is adequate.
• After 20 minutes, the appliance turns off automatically. Wait until it has cooled down completely.
• Pull the mains plug from the socket and then clean the appliance once again
with a damp cloth and dry.
10
Page 9

PREPARATION FOR USE
CAUTION:
Do not remove the protective foil on the inner side of the door
or the card on the right side of the cavity, otherwise, microwave radiation can leak out.
Check the mains cable and the appliance, especially the door and the door
latch, for damage.
CAUTION:
If damaged in any way, the appliance may not be connected
to the supply. Have the appliance repaired in an approved
workshop or contact the Medion Service department hotline.
• Plug the mains plug into a regulation compliant, earthed mains socket (230
V, 50 Hz).
• Ensure that the mains cable cannot come into contact with sources of heat
or sharp edges.
FITTING THE GLASS TURNTABLE
• Position the roller ring in the middle of the oven cavity.
• Place the glass turntable on the roller ring and position it to engage in the
drive.
11
Page 10

PREPARATION FOR USE
FITTING THE GRILL RACK
• For grilling or in hot air oven mode, place the grill rack centrally on the glass
turntable, rack upwards.
CAUTION:
Do not use the grill rack in microwave only mode!
USING THE BAKING TRAY
• Use the baking tray supplied for pizzas and similar pastry basses. The
baking tray is specially shaped so that the pastry is browned at the bottom
when baked in a hot air oven.
12
Page 11

CONTROLS
SETTING CLOCK TIME
Once the microwave oven is connected to the supply, the display will show
"0:00". To set the clock, proceed as follows:
• Press the CLOCK button. The hour digits in the display will blink.
• Turn the rotary control to set the hours.
• Press the CLOCK button to enter the hour setting. The minute digits in the
display will blink.
• Turn the rotary control to set the minutes.
• Press the CLOCK button to enter the setting.
NOTE:
If, while setting the clock, you press the STOP/CLEAR button or do
nothing for one minute, the display will return to the previous setting.
MICROWAVE MODE
• Press the MICROWAVE button repeatedly to step through the 5 power levels of the appliance. The power levels are as follows:
"M-W" presses
Power level Maxi-
Display
1x 2x 3x 4x 5x
mum
P 100 P 80 P 50 P 30 P 10
High Medium Low Mini-
mum
13
Page 12

CONTROLS
MICROWAVE / GRILL MODE
In this mode the grill is set to full power. In addition, the microwave function
can be added in combinations 1 and 2.
• Press the GRILL button or the MICROWAVE/GRILL button to select the
desired program as shown in the table.
Button Function Display
Press
GRILL once
Press MICROWAVE/GRILL once
Press MICROWAVE/GRILL twice
NOTE:
To check whether you have selected the grill mode: during grilling,
only the heating elements and the fan are in operation.
Grill
Combination 1
36% microwave,
64% grill
Combination 2
55% microwave, 45% grill
G-1
G-2
G-3
14
Page 13
CONTROLS
MICROWAVE / HOT AIR OVEN MODE
• Press the HOT AIR/MICROWAVE button to select one of the two combination settings.
• Press the HOT AIR/MICROWAVE button once to select hot air mode at
180 °C. The display will show "C1".
With this setting, 52% of the power comes from the microwave and 48% from
the air heater.
• Press the HOT AIR/MICROWAVE button twice to select hot air mode at
200°C. The display will show "C2".
• With this setting, 27% of the power comes from the microwave and 73%
from the air heater.
Summary of the functions:
Button Function Display
Press MICROWAVE /
HOT AIR
once
Press MICROWAVE /
HOT AIR
twice
15
52% microwave,
48% hot air
27% microwave,
73% hot air
C-1
C-2
Page 14

CONTROL OF MICROWAVE, HOT AIR AND GRILL
USING THE MICROWAVE
Press the Microwave button repeatedly to select one of the 5 power levels.
The display will show the symbol " ".
• Turn the rotary control clockwise to set a cooking time of up to 95 minutes.
• Press the START/OK button to start cooking. The "" symbol in the display
will blink.
USING THE GRILL
• Press the GRILL button to select grill mode. The display will show the symbol, " " and "G-1".
• Turn the rotary control clockwise to set a cooking time of up to 95 minutes.
• Press the START/OK button to start cooking.
USING THE HOT AIR OVEN
1. with pre-heating
• Press the HOT AIR button to select hot air mode. The display will show the
symbols, " ", " " and " " and the blinking number 140. This indicates
that a temperature of 140 °C has been set for pre-heating (temperature blinking).
• Turn the rotary control to set a pre-heat temperature of up to 230 °C (if no
change is made in the setting, the oven is pre-heated to 140 °C).
• Press the START/OK button to enter the setting (the temperature continues
to blink).
• Press the START/OK button again to start pre-heating. As soon as the selected temperature is reached, the oven will switch off and beep five times.
In the display, the temperature setting blinks.
• Open the door, place the food in the oven and close the door again.
• Turn the rotary control to set the cooking time.
• Press the Start/Stop button to start cooking. The " " and " " symbols
in the display will blink.
16
Page 15

CONTROL OF MICROWAVE, HOT AIR AND GRILL
2. without pre-heating
• Press the HOT AIR button to select hot air mode. The display will show
the symbols, " ", " " and " " and the blinking number 140. This indicates that a temperature of 140 °C has been set for pre-heating (temperature blinking).
• Turn the rotary control to set a pre-heat temperature of up to 230 °C (if no
change is made in the setting, the oven is pre-heated to 140 °C).
• Press the START/OK button to enter the setting (the temperature continues
to blink).
• Turn the rotary control to set a cooking time.
• Press the START/OK button to start cooking. The " " and " " symbols
in the display will blink.
USING THE MICROWAVE/GRILL COMBINATION
• Press the MICROWAVE/GRILL button once or twice to select combination
1 or 2. The display will show "G2" or "G3". " " and " ".
• Turn the rotary control to set a cooking time.
• Press the START/OK button to start cooking. The " " and " " symbols
in the display will blink.
NOTE:
When cooking in microwave/grill mode starts, the temperature display goes blank.
17
Page 16

CONTROL OF MICROWAVE, HOT AIR AND GRILL
USING THE MICROWAVE / HOT AIR COMBINATION
There are two settings for the microwave / hot air combination.
• Press the MICROWAVE/HOTAIR button once or twice to select a combination setting. The display will show the symbols, " ", " " and " " blinking.
• Turn the rotary control to set a cooking time.
• Press the START/OK button to start cooking. The display will show the symbols, " ", " " and " " blinking.
USING THE DEFROST FUNCTION
• Press the DEFROST key. The display will show
"dEF 1".
• Turn the rotary control to set the weight of the food to be defrosted. The display will show the symbols, " ", " ", " " and " ".
• Press the START/OK button to start defrosting. The " " symbol in the display will blink, indicating that defrosting has started.
COOKING IN TWO STEPS
For convenience, you can also use two functions/modes, one after the other.
• To do this, select one function (e.g. microwave) and enter your settings as
described above.
• Now select another function (e.g. hot air oven) and enter your settings.
• Press the START/OKbutton to start cooking. The two steps will run one after
the other.
NOTE:
The defrost function can only be set as the first step.
The automatic function cannot be set as one of the steps.
18
Page 17

CONTROL OF MICROWAVE, HOT AIR AND GRILL
QUICK START FUNCTION
• Press the QUICK START button to start quick cooking with full microwave
power for one minute.
• Each time the QUICK START button is pressed, the cooking time is
increased by a further minute. The display will show the symbol, " " blinking.
19
Page 18

CONTROL OF MICROWAVE, HOT AIR AND GRILL
Using the automatic function
• Press the AUTOMATIC button.
• Turn the rotary control to select an automatic program from A1 to A8.
• Press the START/OKbutton to enter the program selection.
• Turn the the rotary control to select the weight of the food to be cooked using
programs A2 to A6 or the number of portions for programs A1, A7 and A8.
• Press the START/OK button to start the automatic program.
Table of automatic programs:
Auto.
Prog.
Weight potatoes rice veg. chicken meat reheat convenience
A1 A2 A3 A4 A5 A6 A7 A8
beverages
food
1 1 port’n 50 g 100 g 400 g 100 g 50 g 1 port’n 1 port’n
2 2 port’n 100 g 200 g 600 g 200 g 100 g 2 port’n 2 port’n
3 3 port’n 150 g 300 g 800 g 300 g 150 g 3 port’n
4 200 g 400 g 1,000 g 400 g 200 g
5 250 g 500 g 1,200 g 500 g
6 600 g 1,500 g 750 g
20
Page 19

CLEANING THE APPLIANCE
The microwave oven should be cleaned regularly, removing food residues. Inadequate cleanliness of the appliance can lead to destruction of the surface,
reducing the useful life and possibly leading to dangerous situations.
• Before cleaning, always pull the mains plug from the socket.
• Never allow the appliance itself to come into contact with liquids and never
immerse the appliance in water.
CAUTION:
Risk of electric shock.
• Allow the appliance to cool down completely.
• Wash the grill rack and turntable in a mild soapy solution or in the dishwasher.
• Wipe out the oven cavity with a damp cloth.
• Clean parts of the door and viewing window, especially the seal and the
door latch, carefully with a mild soapy solution. Pay special attention to damage to these parts.
• If required, you can also wipe over the casing with a damp cloth.
• Leave the microwave oven to dry properly with the door open. It is essential
to wait until the microwave oven is completely dry. Only then may the appliance be plugged back into the mains.
21
Page 20

ADDITIONAL FUNCTIONS
CHILD SECURITY
Locking buttons
• Hold down the STOP/CLEAR button for approx. 3 seconds. You will hear
a beep and the symbol, , will appear in the display. The control buttons
are now locked.
Unlocking buttons
• Hold down the STOP/CLEAR button for approx. 3 seconds. You will hear
a beep and the symbol, , will disappear from the display. The control
buttons are now active again.
CHECKING SETTINGS DURING COOKING
During cooking, you can check the settings you have made. To do this, press
the appropriate mode button. The display will show the current temperature or
power setting. After approx. 3 seconds, the display will switch back to the previous indication.
Microwave mode
Press the MICROWAVE button.
Hot air mode
Press the HOT AIR button.
Microwave / Grill combination
Press the MICROWAVE/GRILL button.
Microwave / Hot air oven
Press the MICROWAVE/HOT AIR button.
Automatic function
Press the AUTOMATIC button.
22
Page 21

ADDITIONAL FUNCTIONS
NOTES ON SPECIAL FEATURES
The maximum cooking time for microwave, grill, hot air oven, microwave/grill
and microwave / hot air modes is 95 minutes.
In grill mode, the oven will beep twice to remind you to turn the food. If there
is no input for one minute, the appliance will start up at once.
23
Page 22

TROUBLESHOOTING
Problem Possible cause Solution
The appliance will
not start
The appliance
does not heat.
The turntable
makes loud noises
when turning.
The appliance display shows an
error indication,
E1, E2 or E3.
The mains plug is not
correctly inserted
The fuse is blown or
the safety cut-out has
tripped.
The mains socket is
defective.
The door is not closed.
The roller ring or
oven floor is dirty.
The safety times and
temperatures were
not respected.
Pull out the plug, wait 10
seconds and reinsert it.
Replace the fuse or reset
the cut-out (contact our Service Department).
Check the socket by plugging in another appliance.
Close the door.
Clean the appliance.
See "Cleaning the
appliance".
Unplug the appliance for 5
minutes. Turn it on again.
24
Page 23

25
 Loading...