How it Works
Log In / Sign Up
Buy Points
How it Works
FAQ
Contact Us
Questions and Suggestions
Users
Logitech
Loading...
#
МК 710
С525
Z
Z-10
4
Z110
Z110 2.0
Z120
5
Z130
6
Z150 WS
Z200
8
Z205
Z207
2
Z213
25
Z-2300
Z240
2
Z-3
Z305
Z313
3
Z320
5
Z-3 2.1
Z323
6
Z-333
13
Z337
Z-340
Z4
2
Z407
2
Z443
3
Z-5
Z506
4
Z506 5.1
Z515
6
Z520
6
Z523
5
z-5300
2
Z533
6
Z533 SW
3
Z537
Z-540
2
Z-5400
2
Z-5450
Z-5500
3
Z5500D
2
Z5500 DIGITAL
Z553
3
z600
4
Z606
Z607
Z623
5
Z-623 2.1 THX 980-000403
Z625
4
Z-640
3
Z-680
2
Z906
4
Z Cinema
3
ZMAP9701KB
ZONE
2
Zone Vibe 100 Trådløs Headset m/Mikrofon (20 timer) Grafit
Zone Wired
ZONE WIRELESS
ZONE WIRELESS HEADSETS
ZONE WIRELESS PLUS
2
Loading...
Loading...
Nothing found
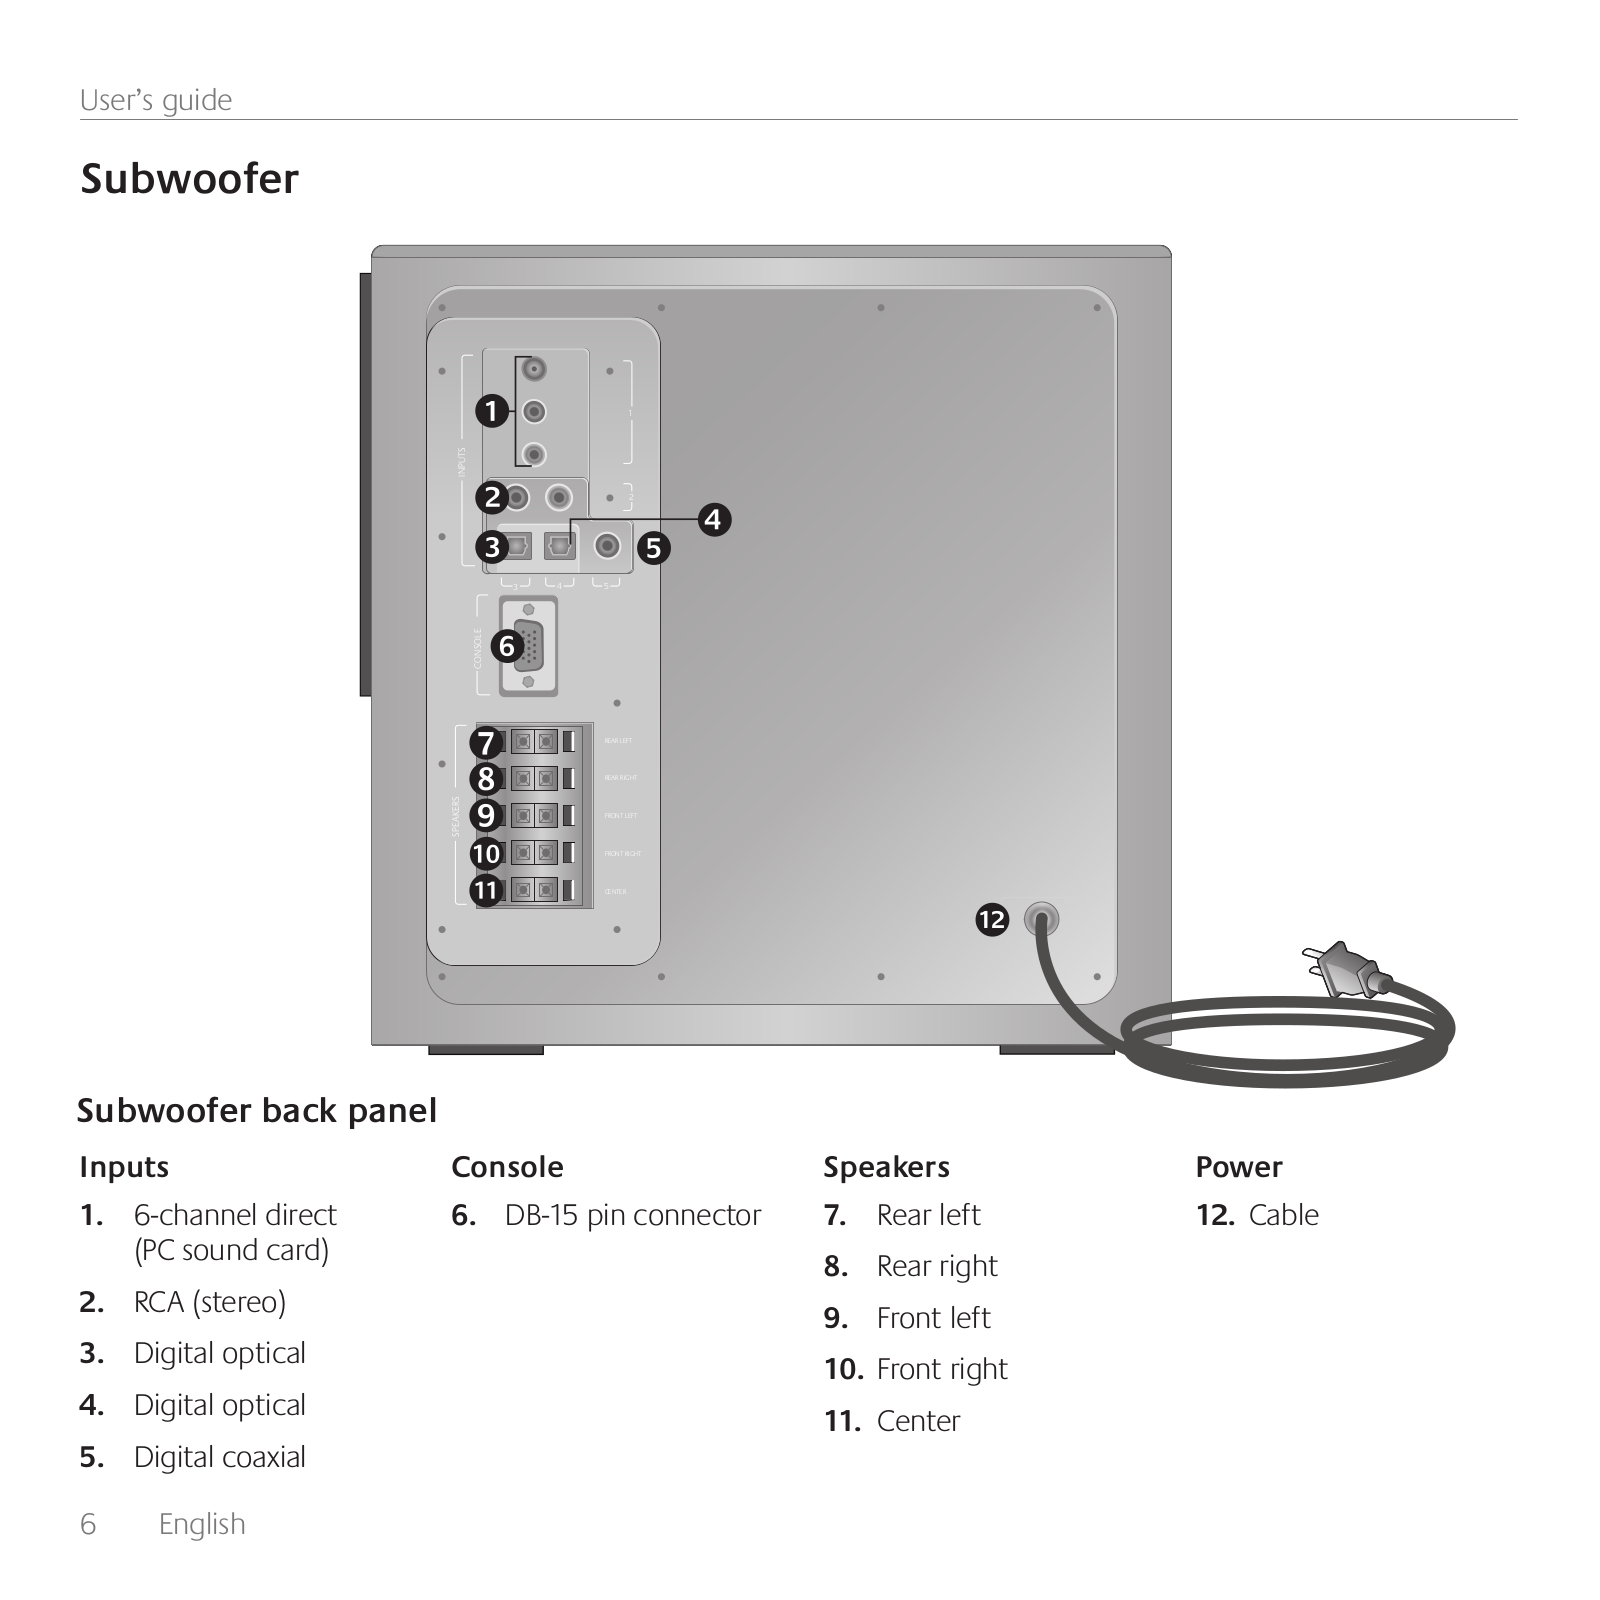
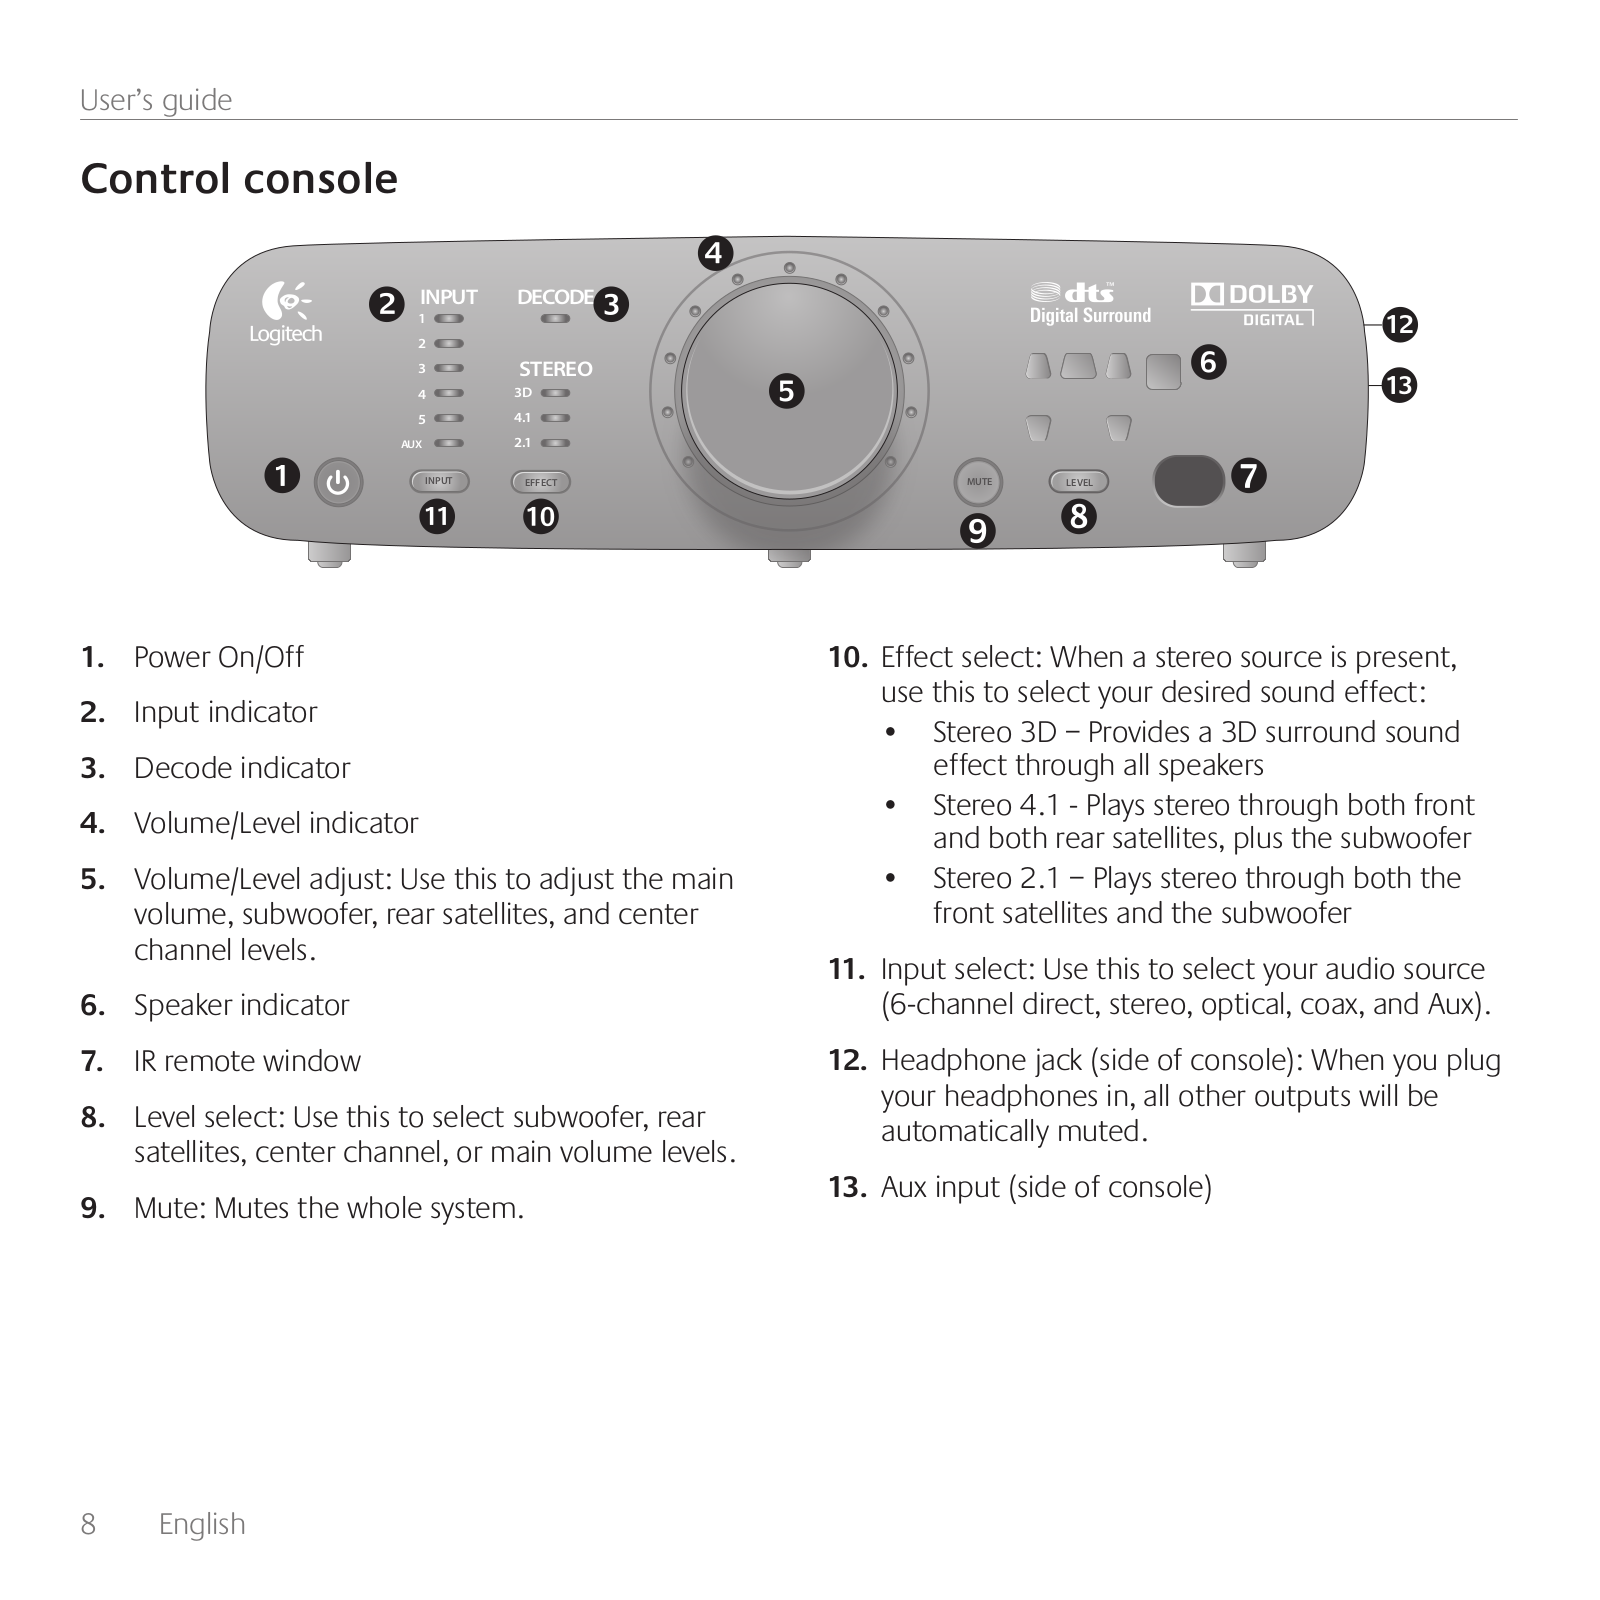
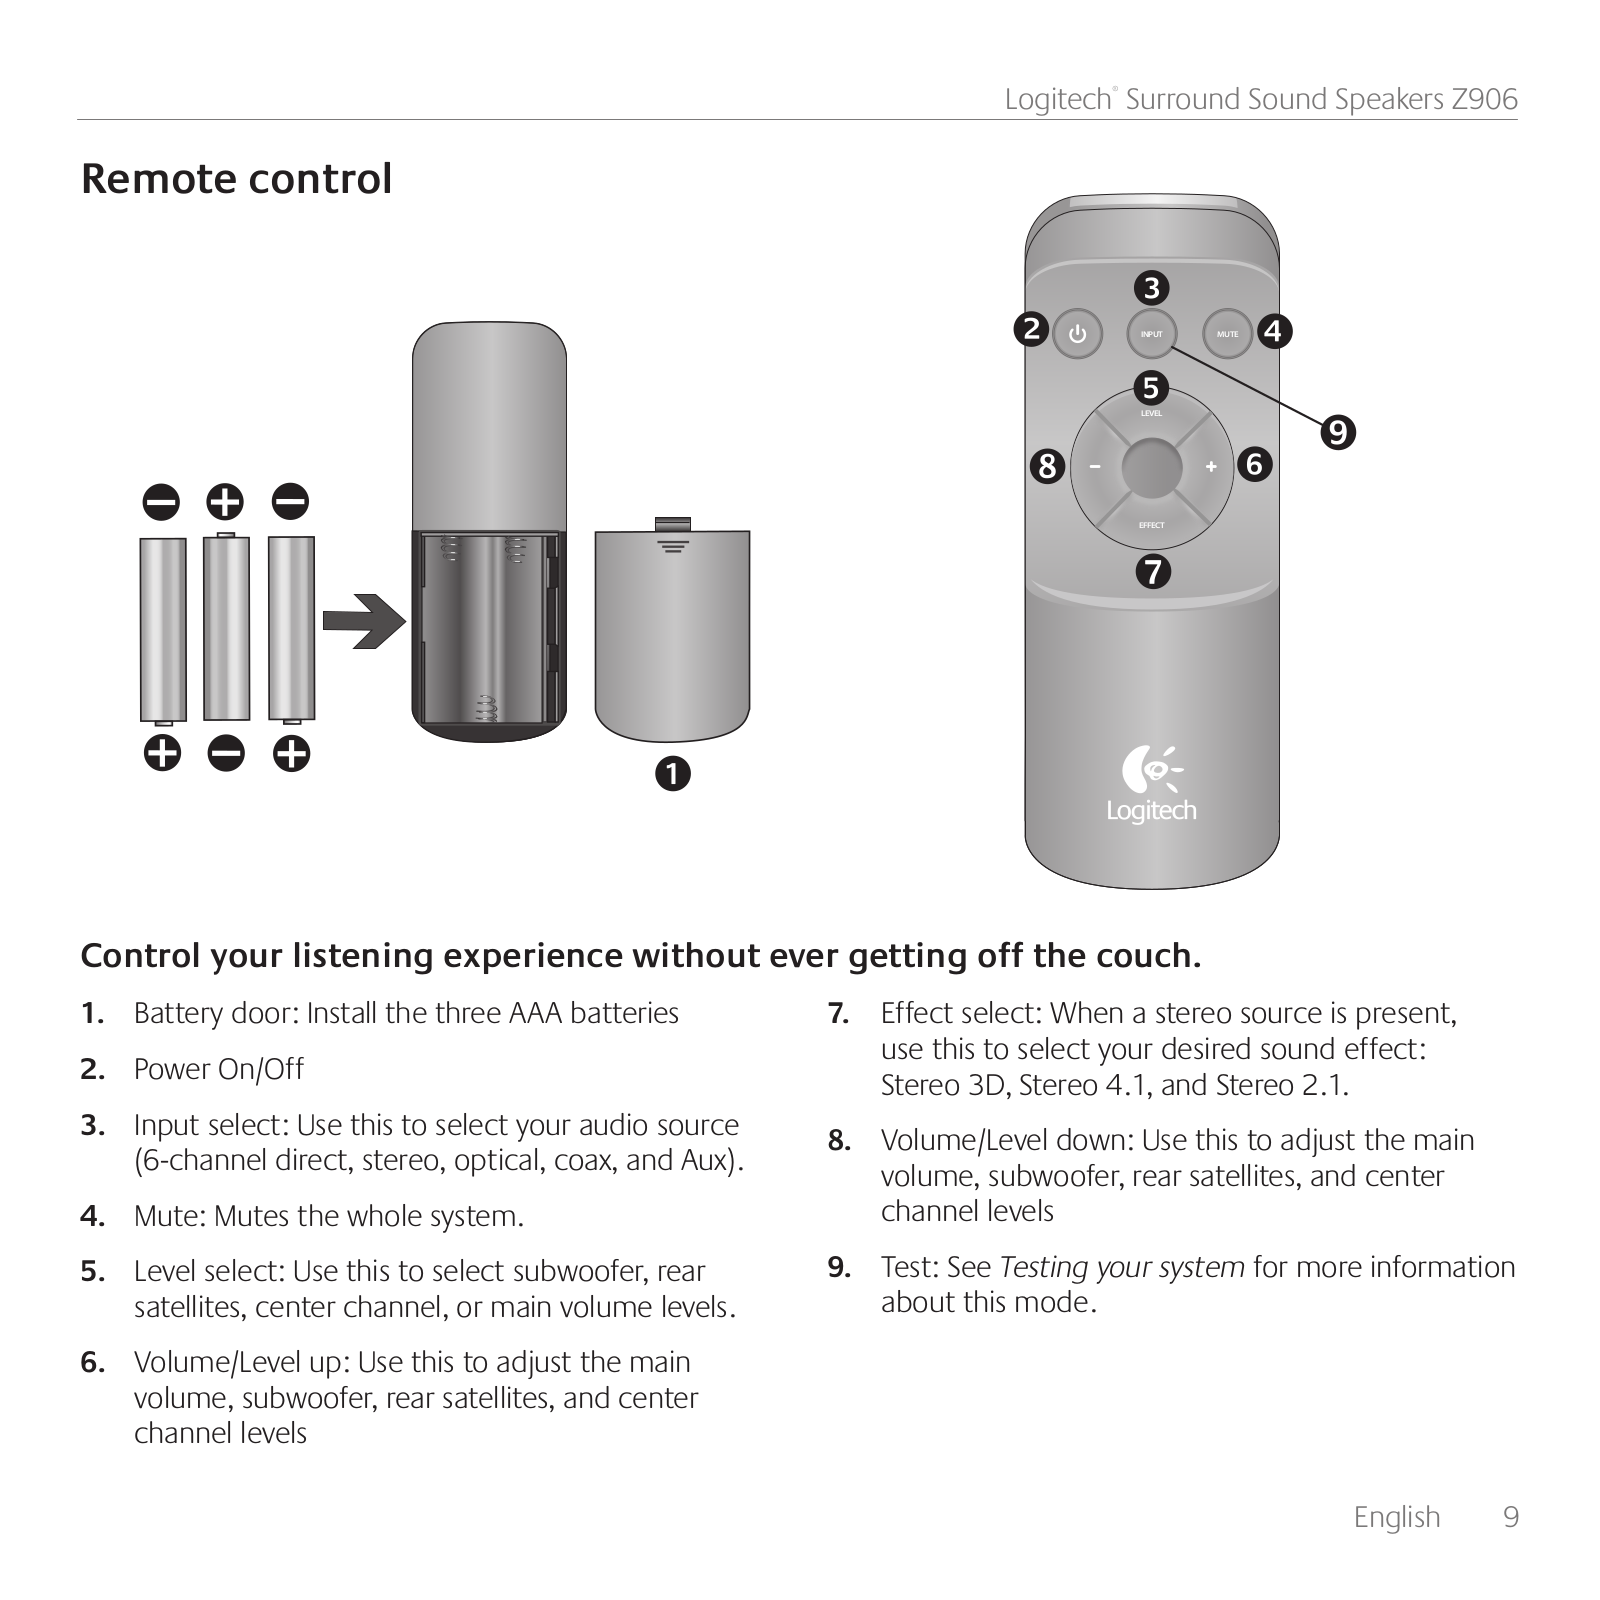
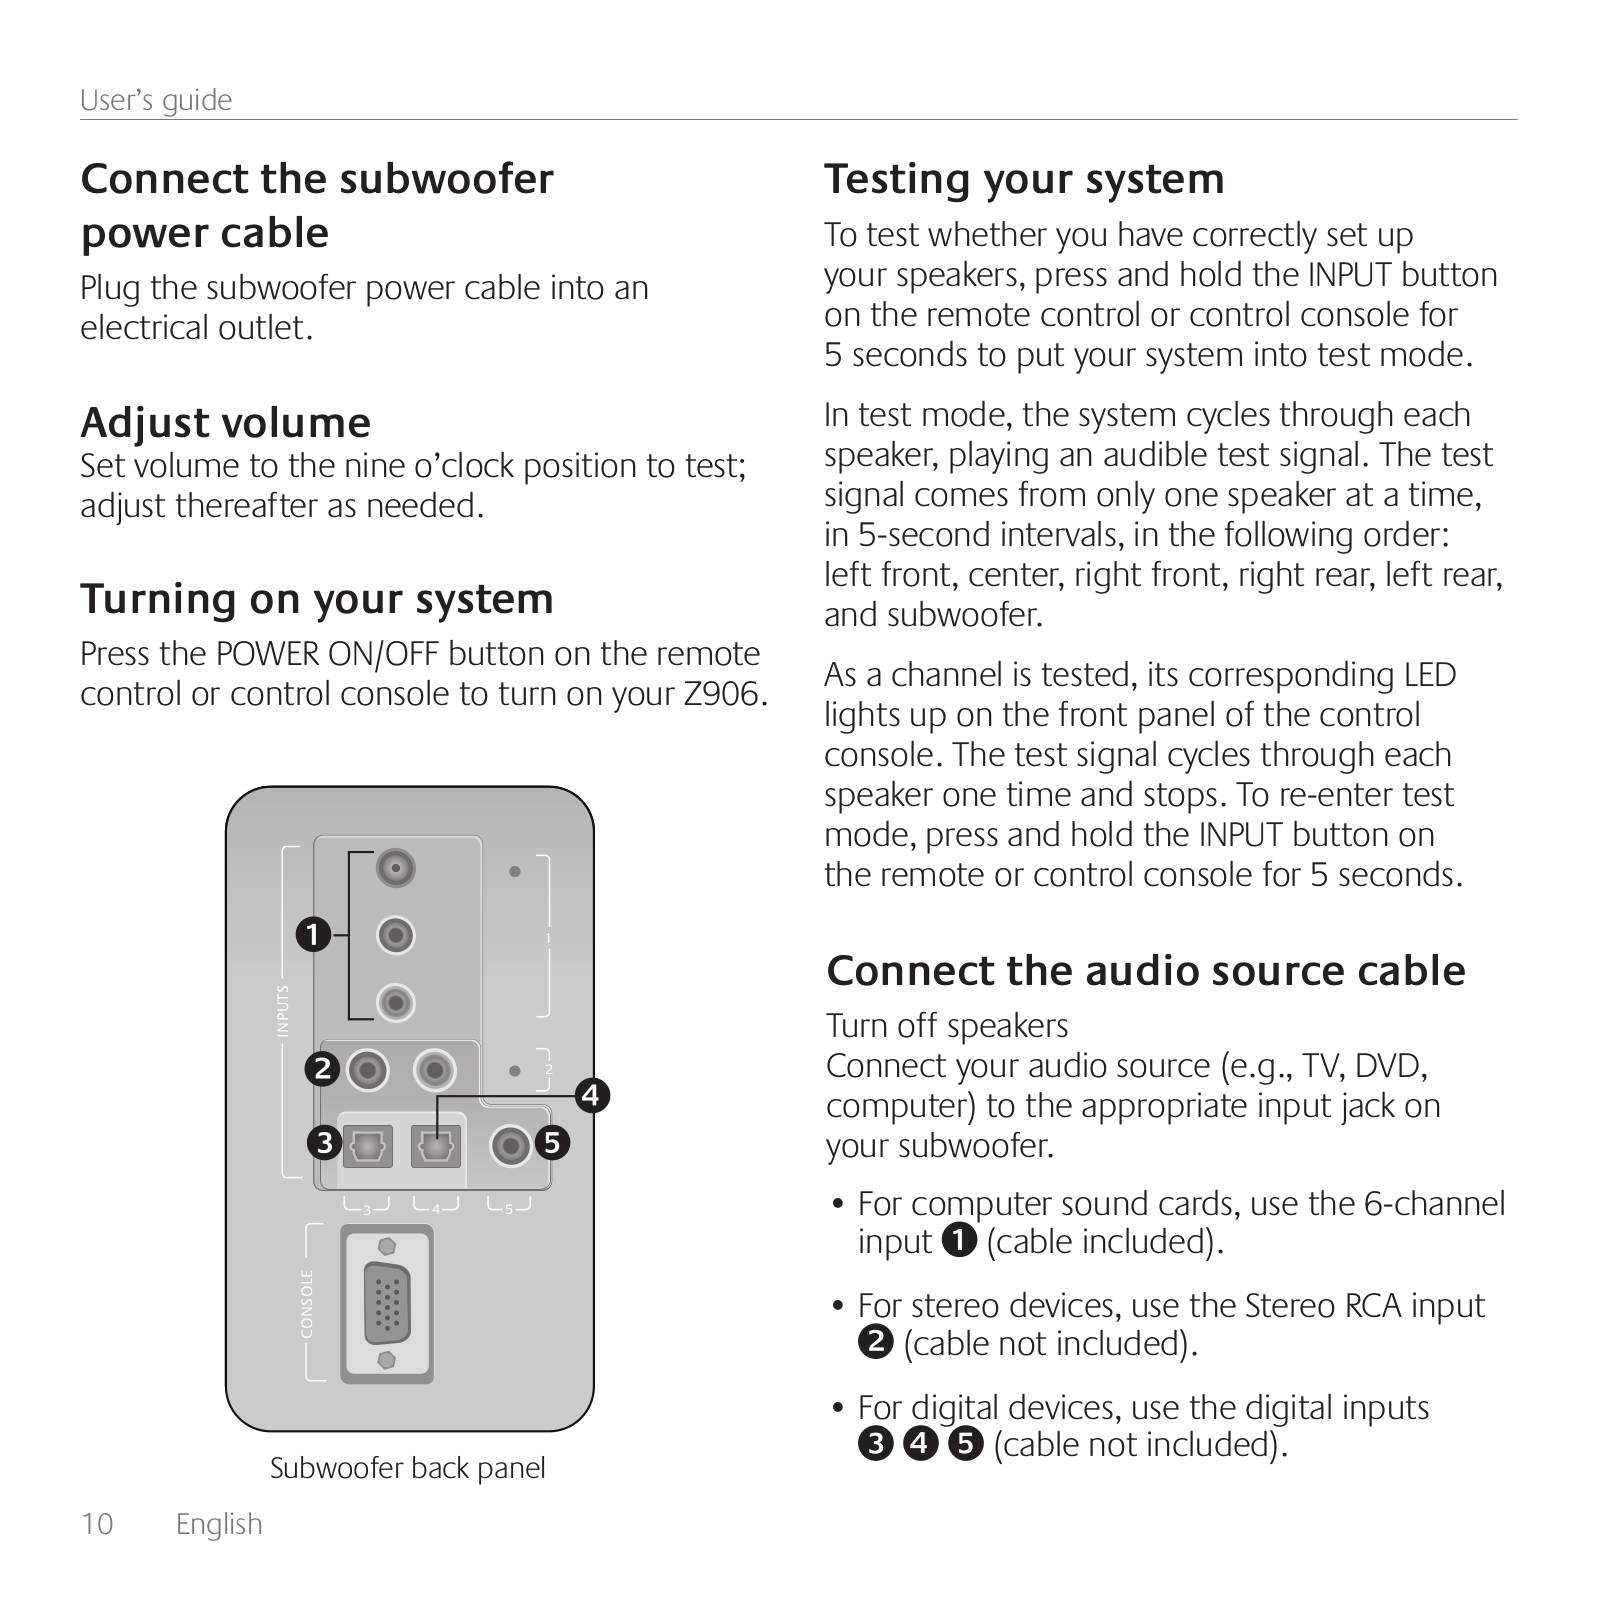
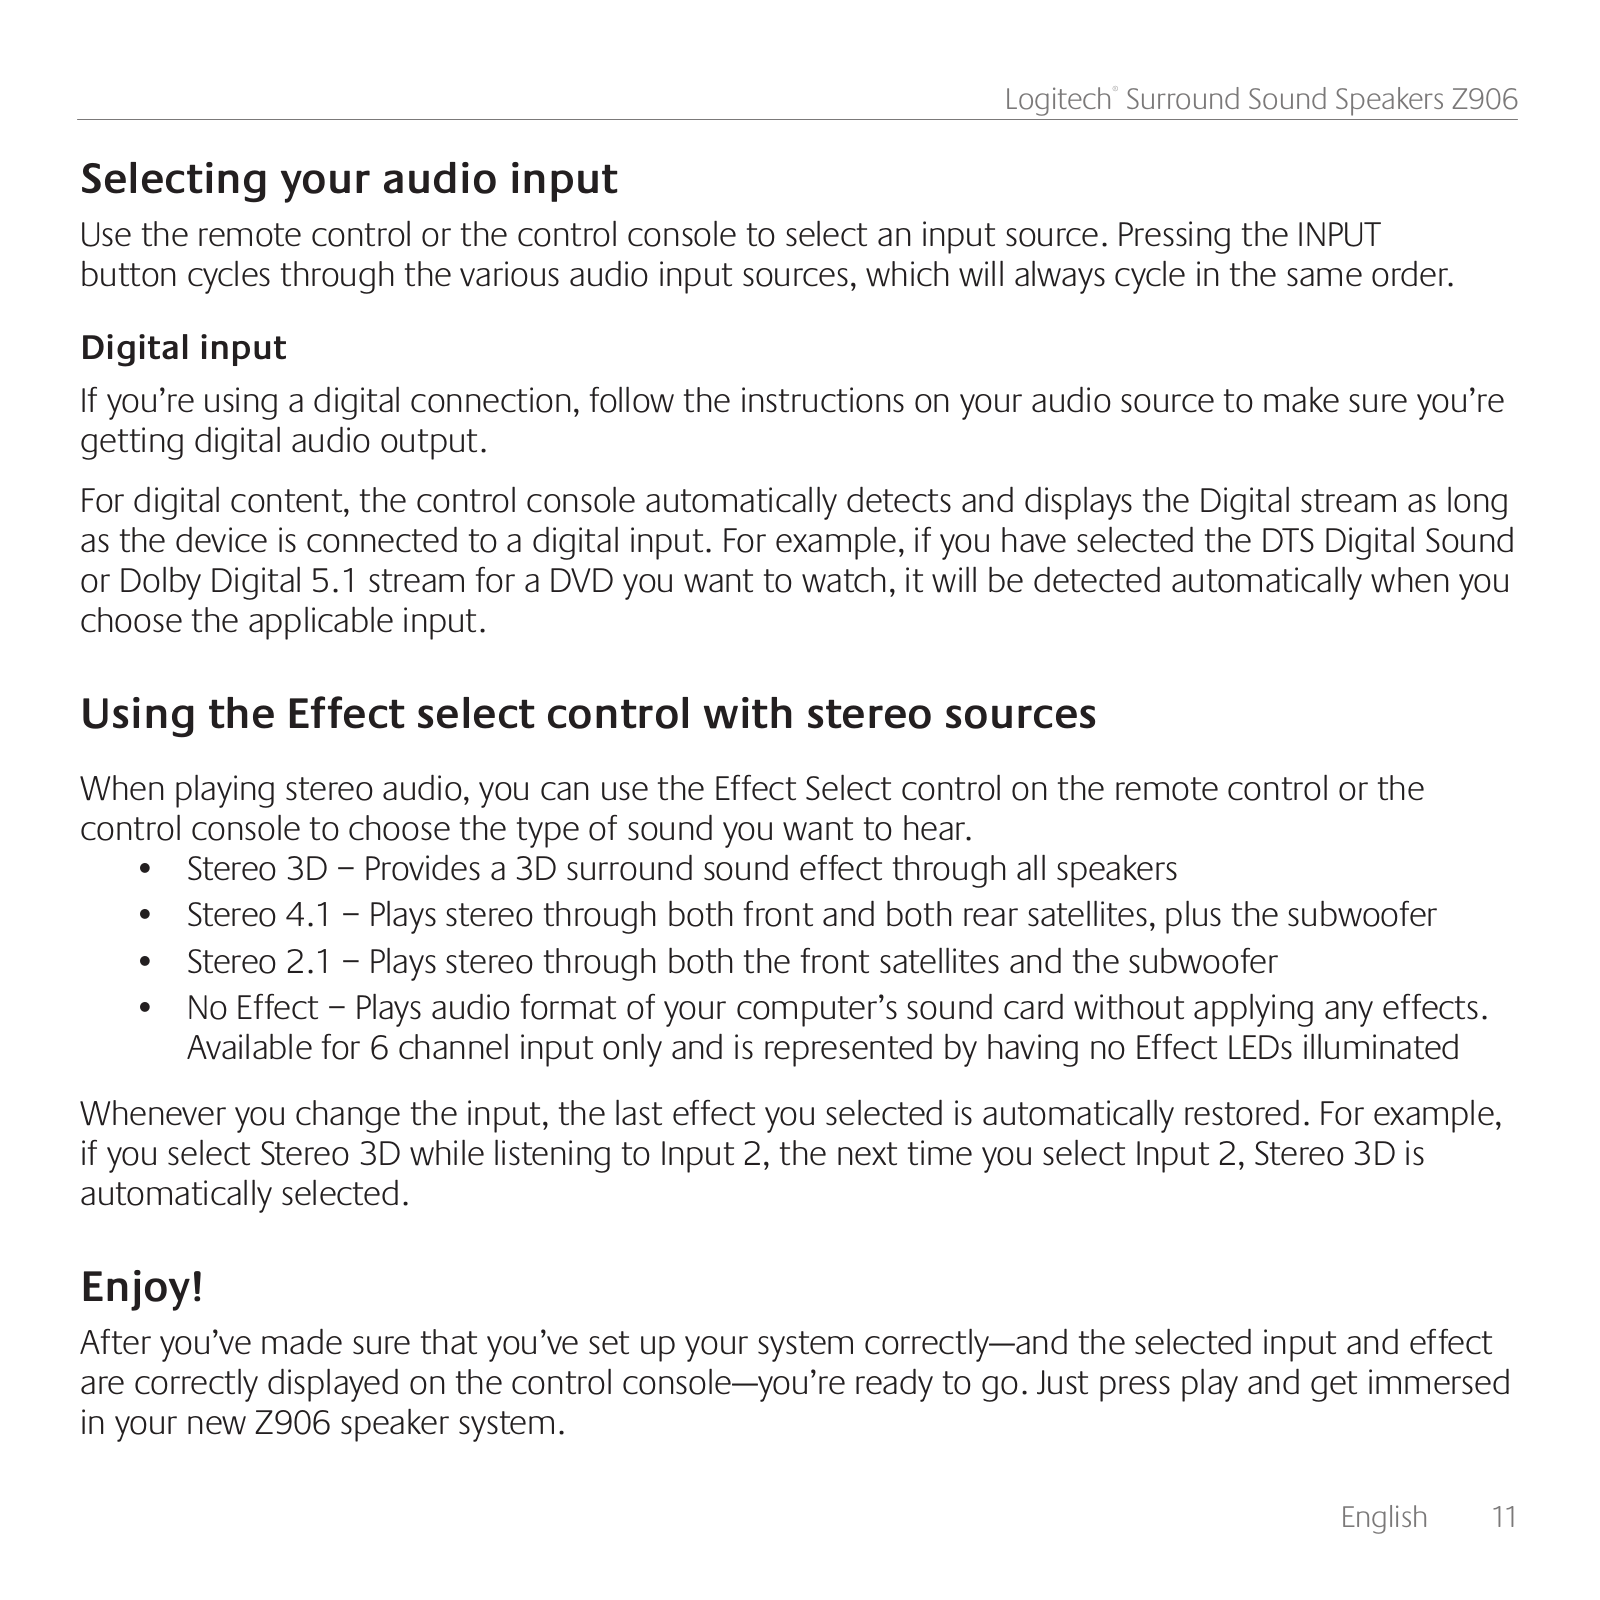
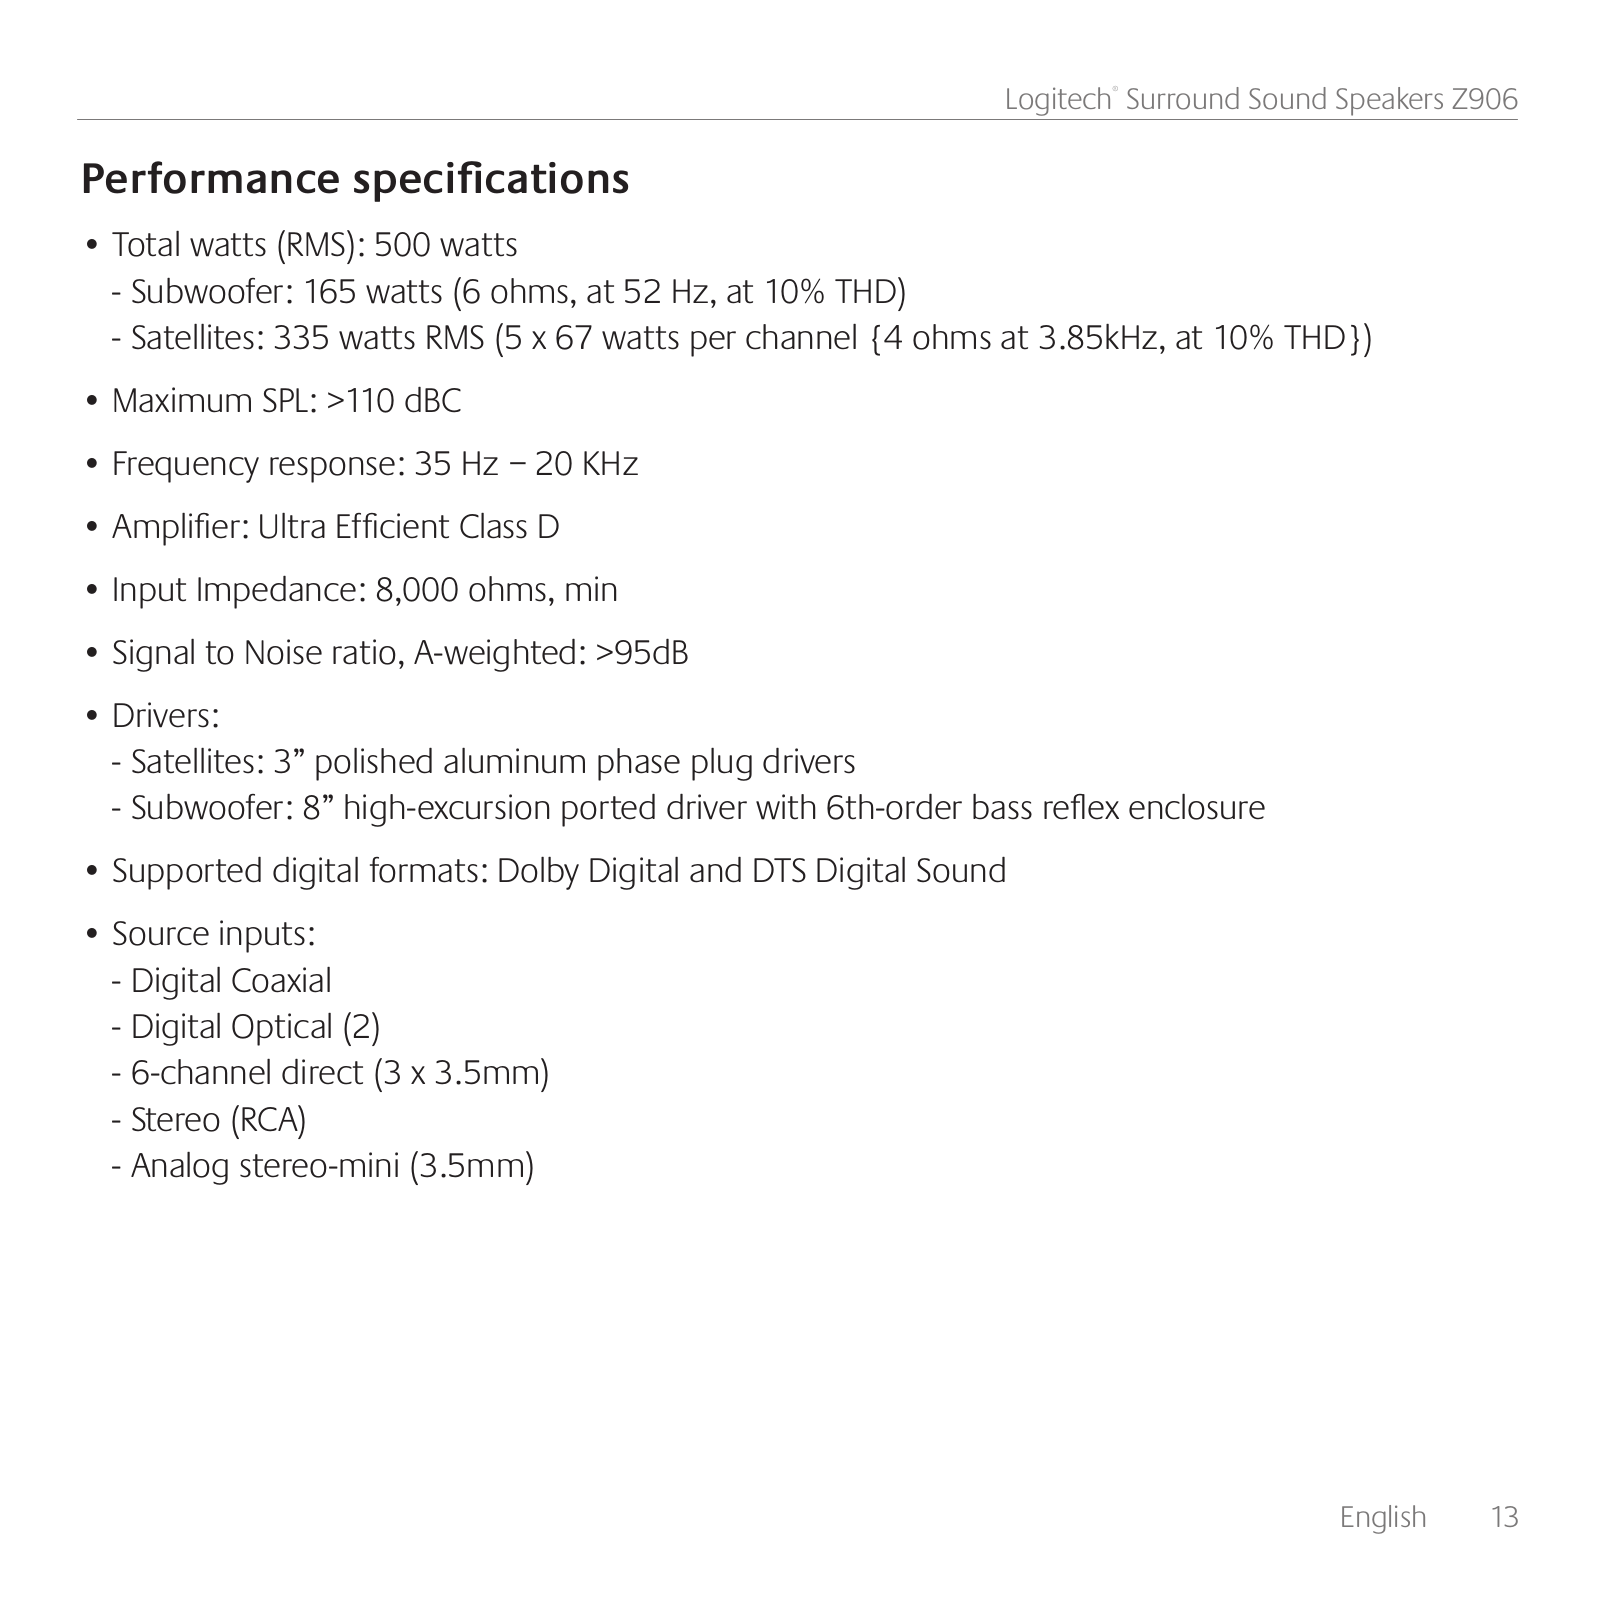
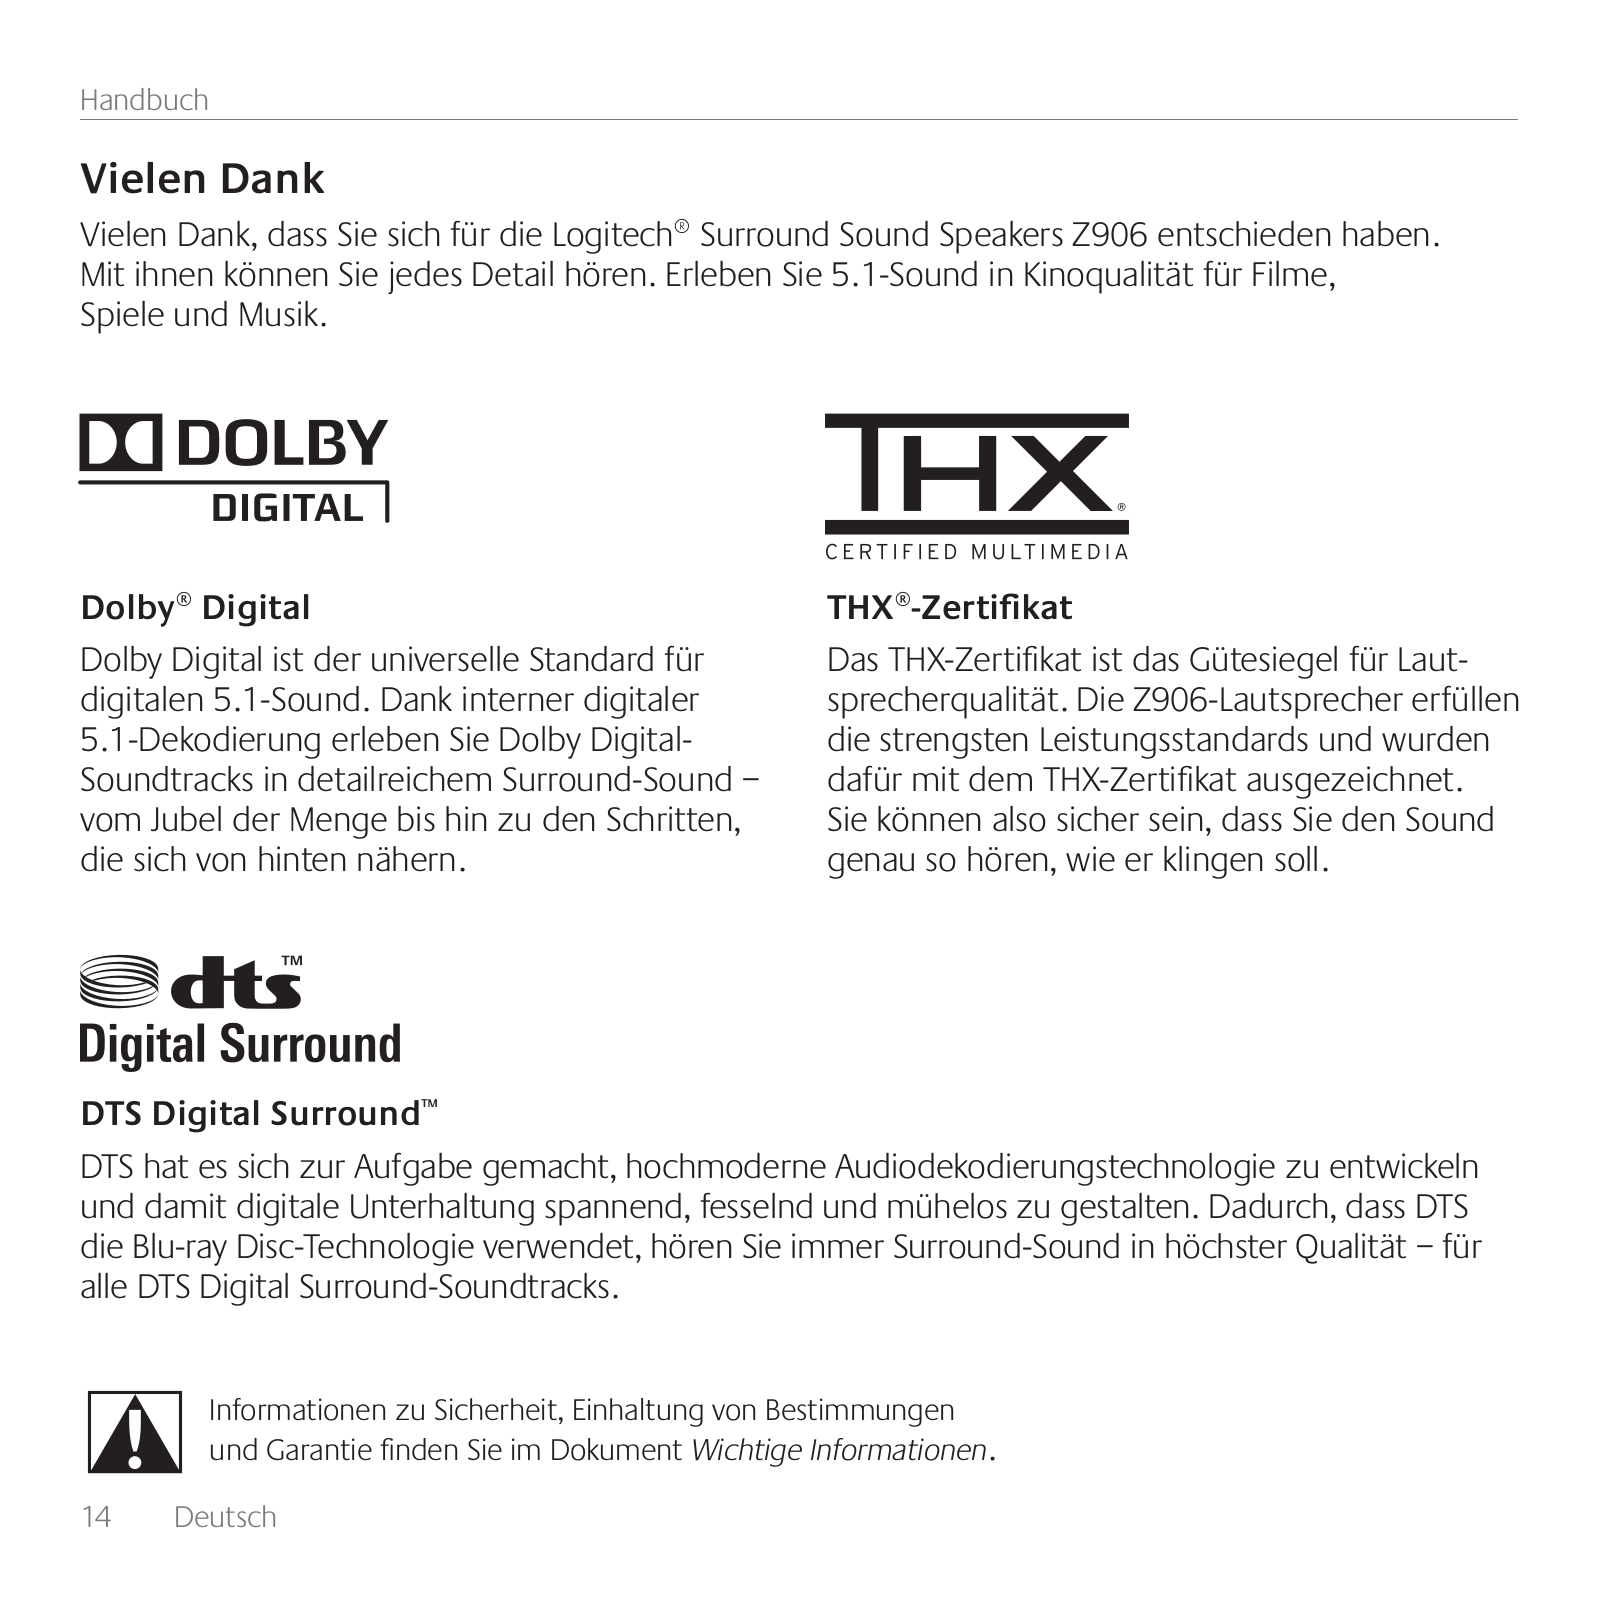
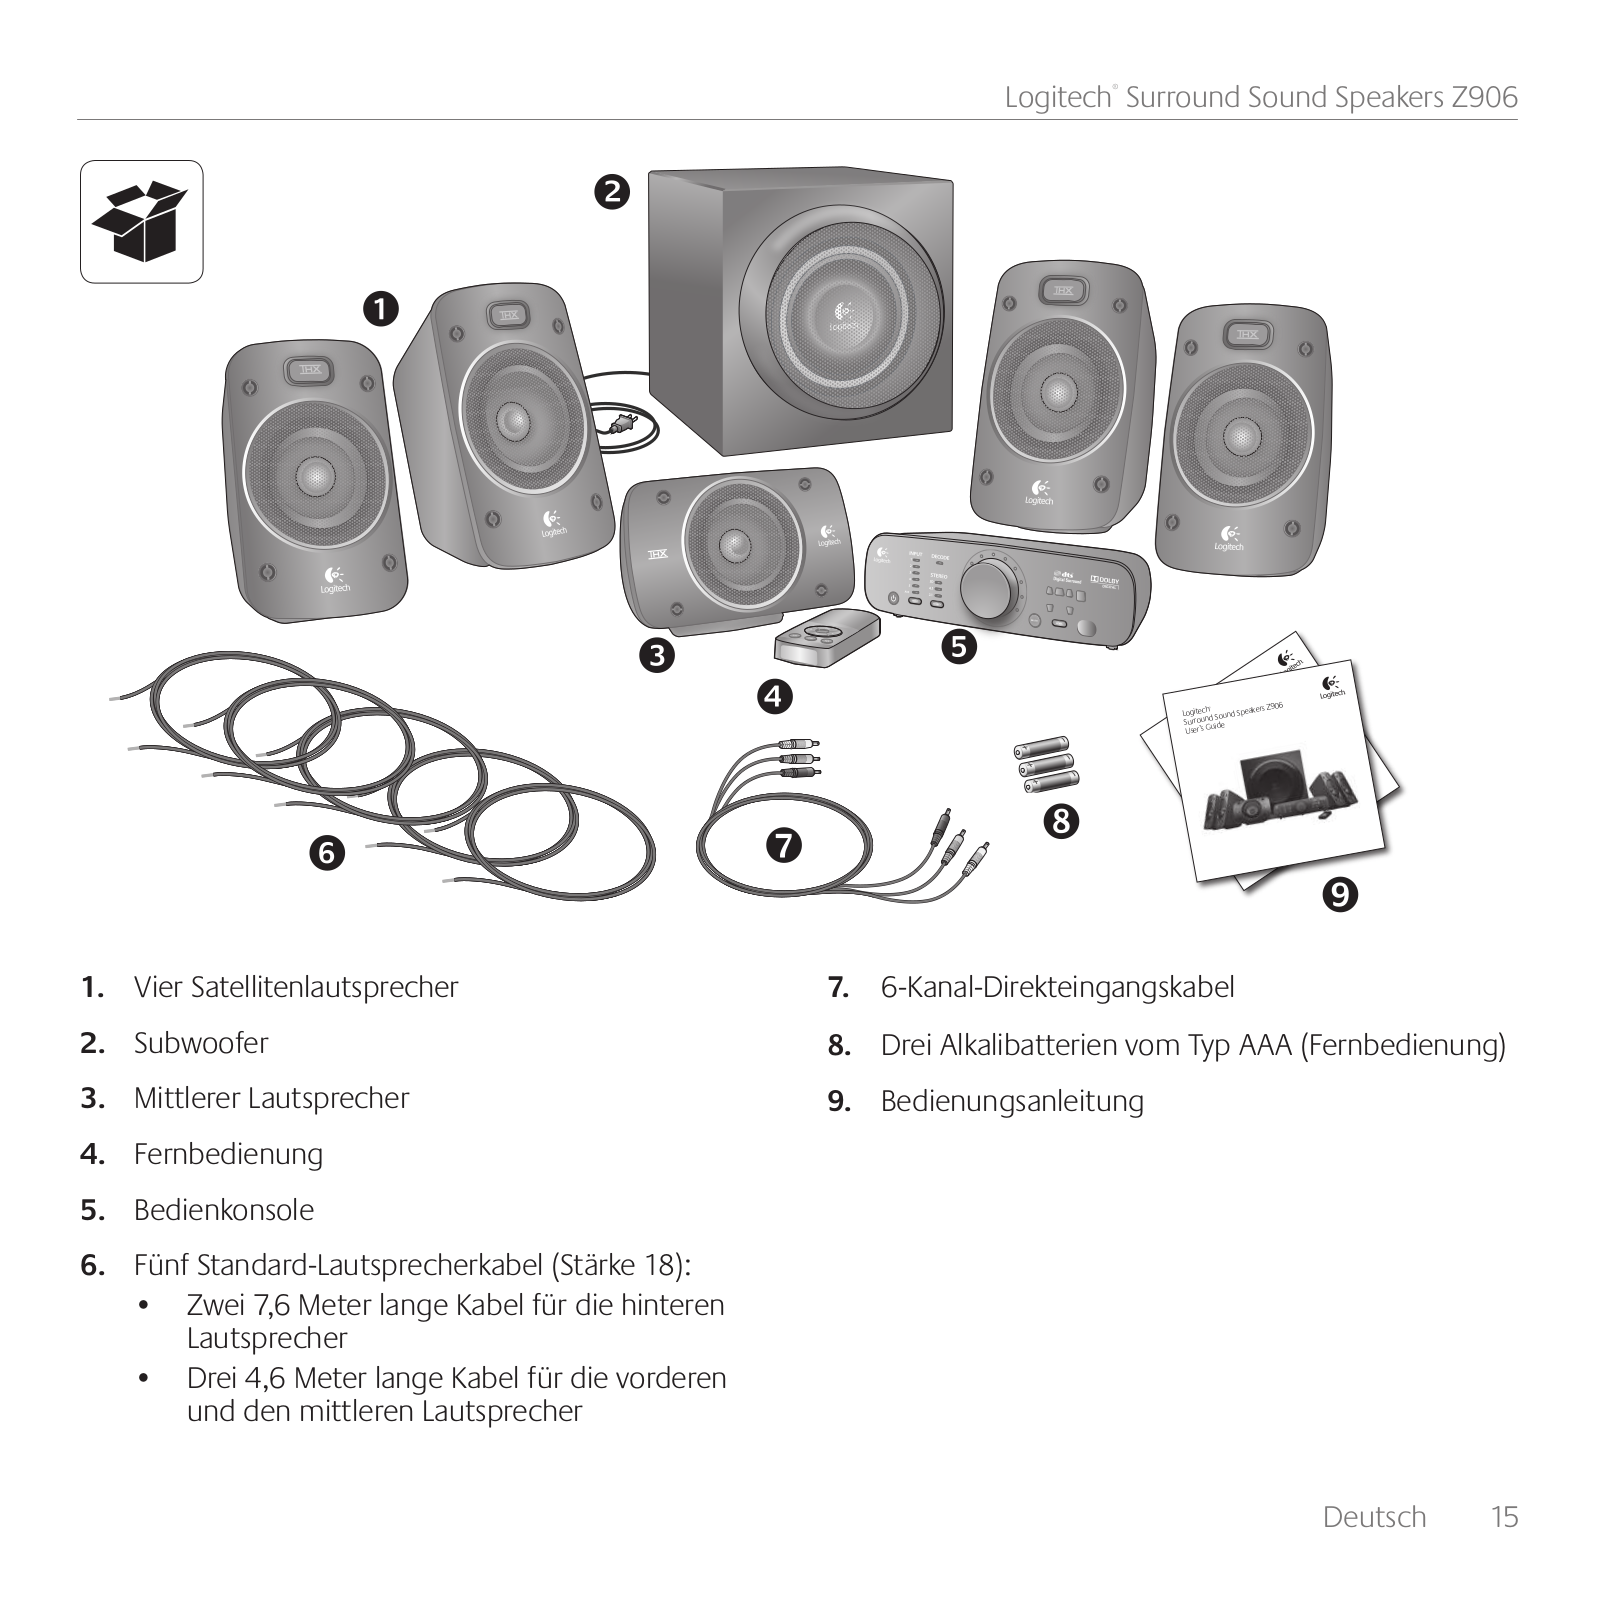
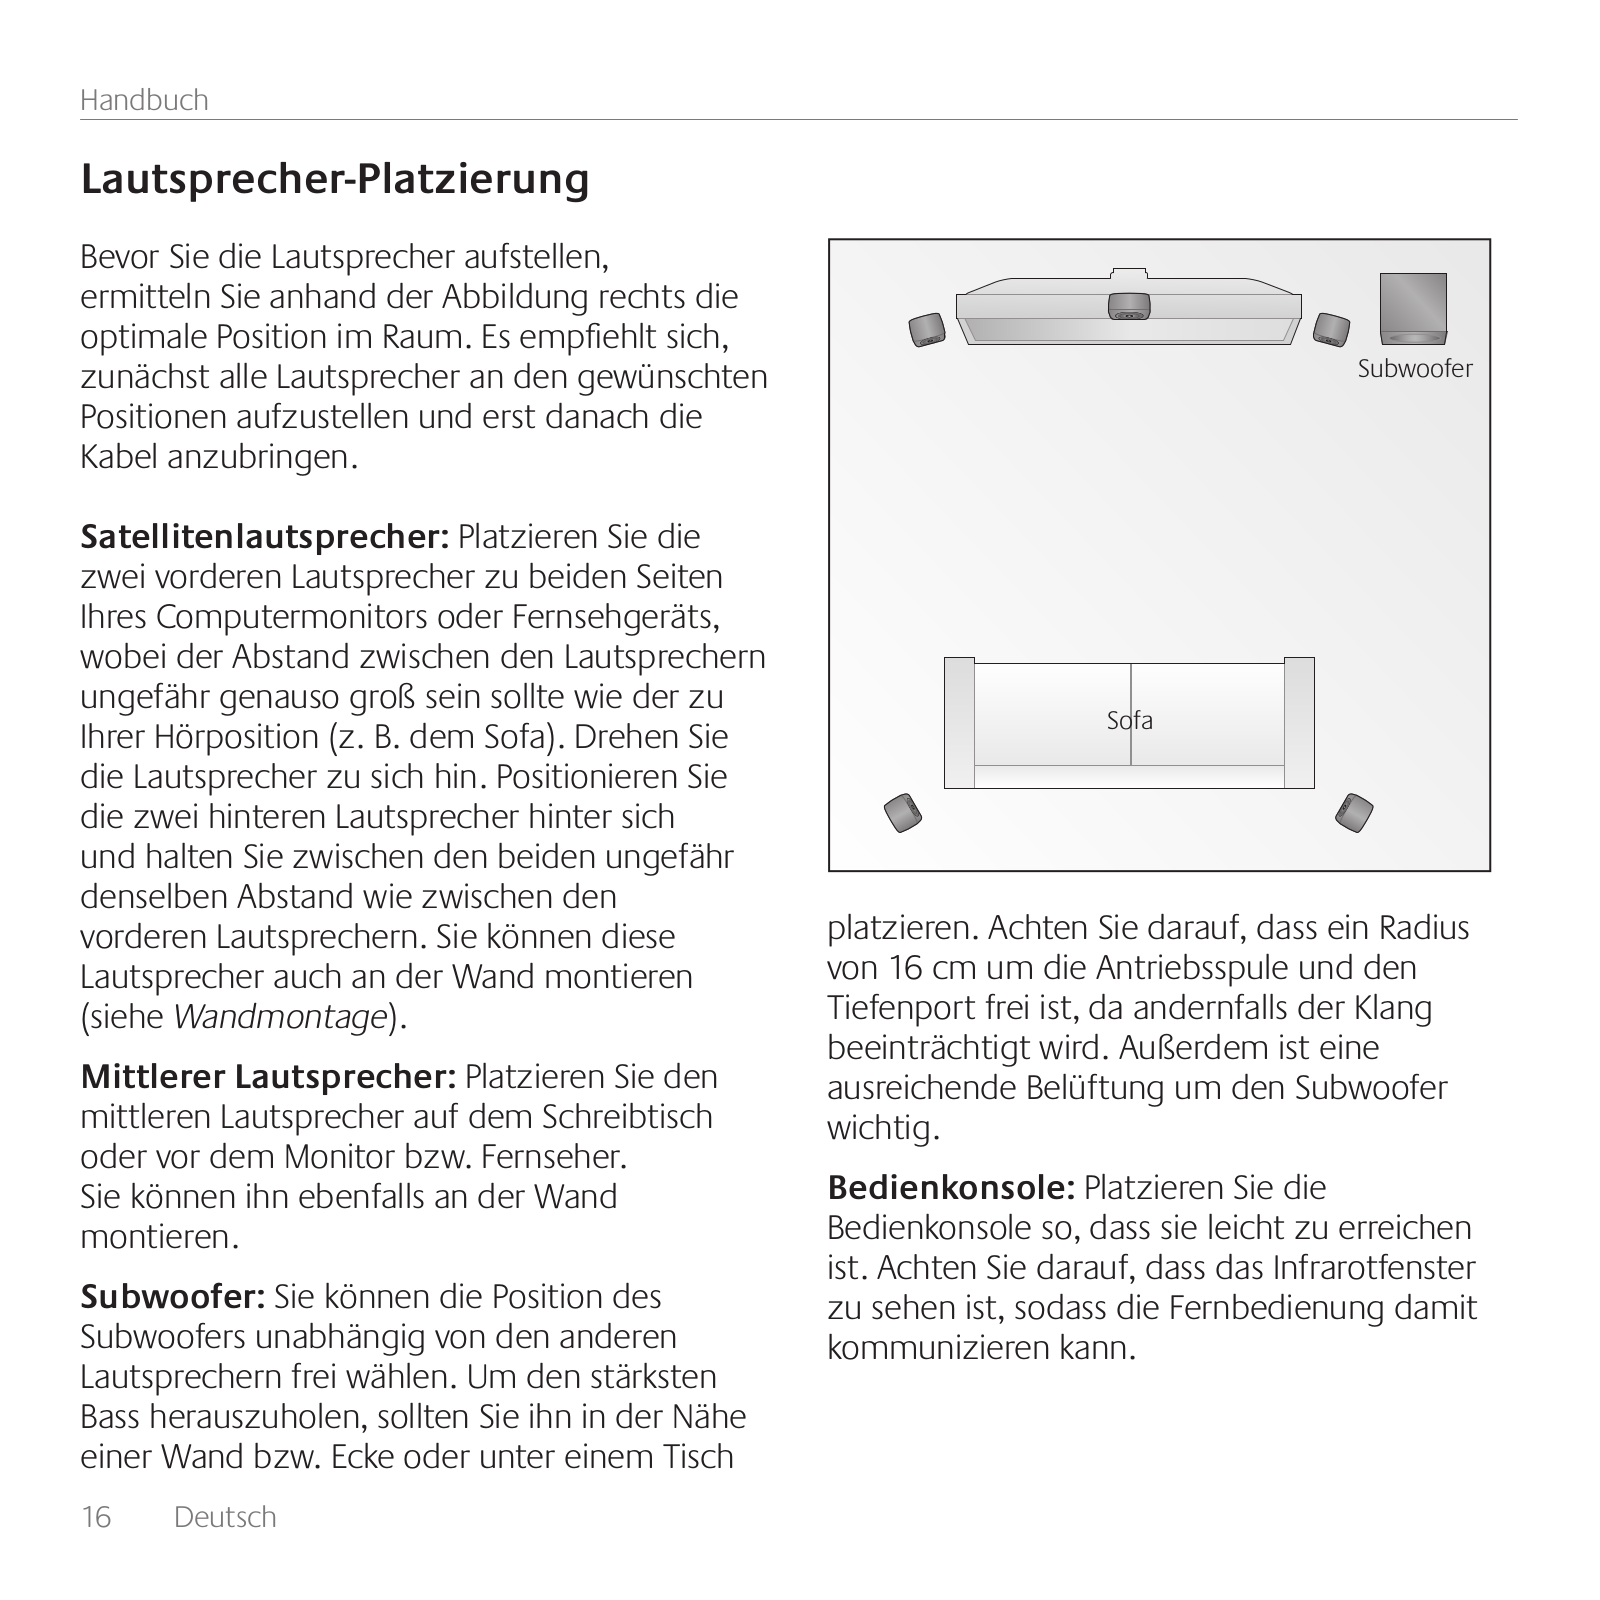
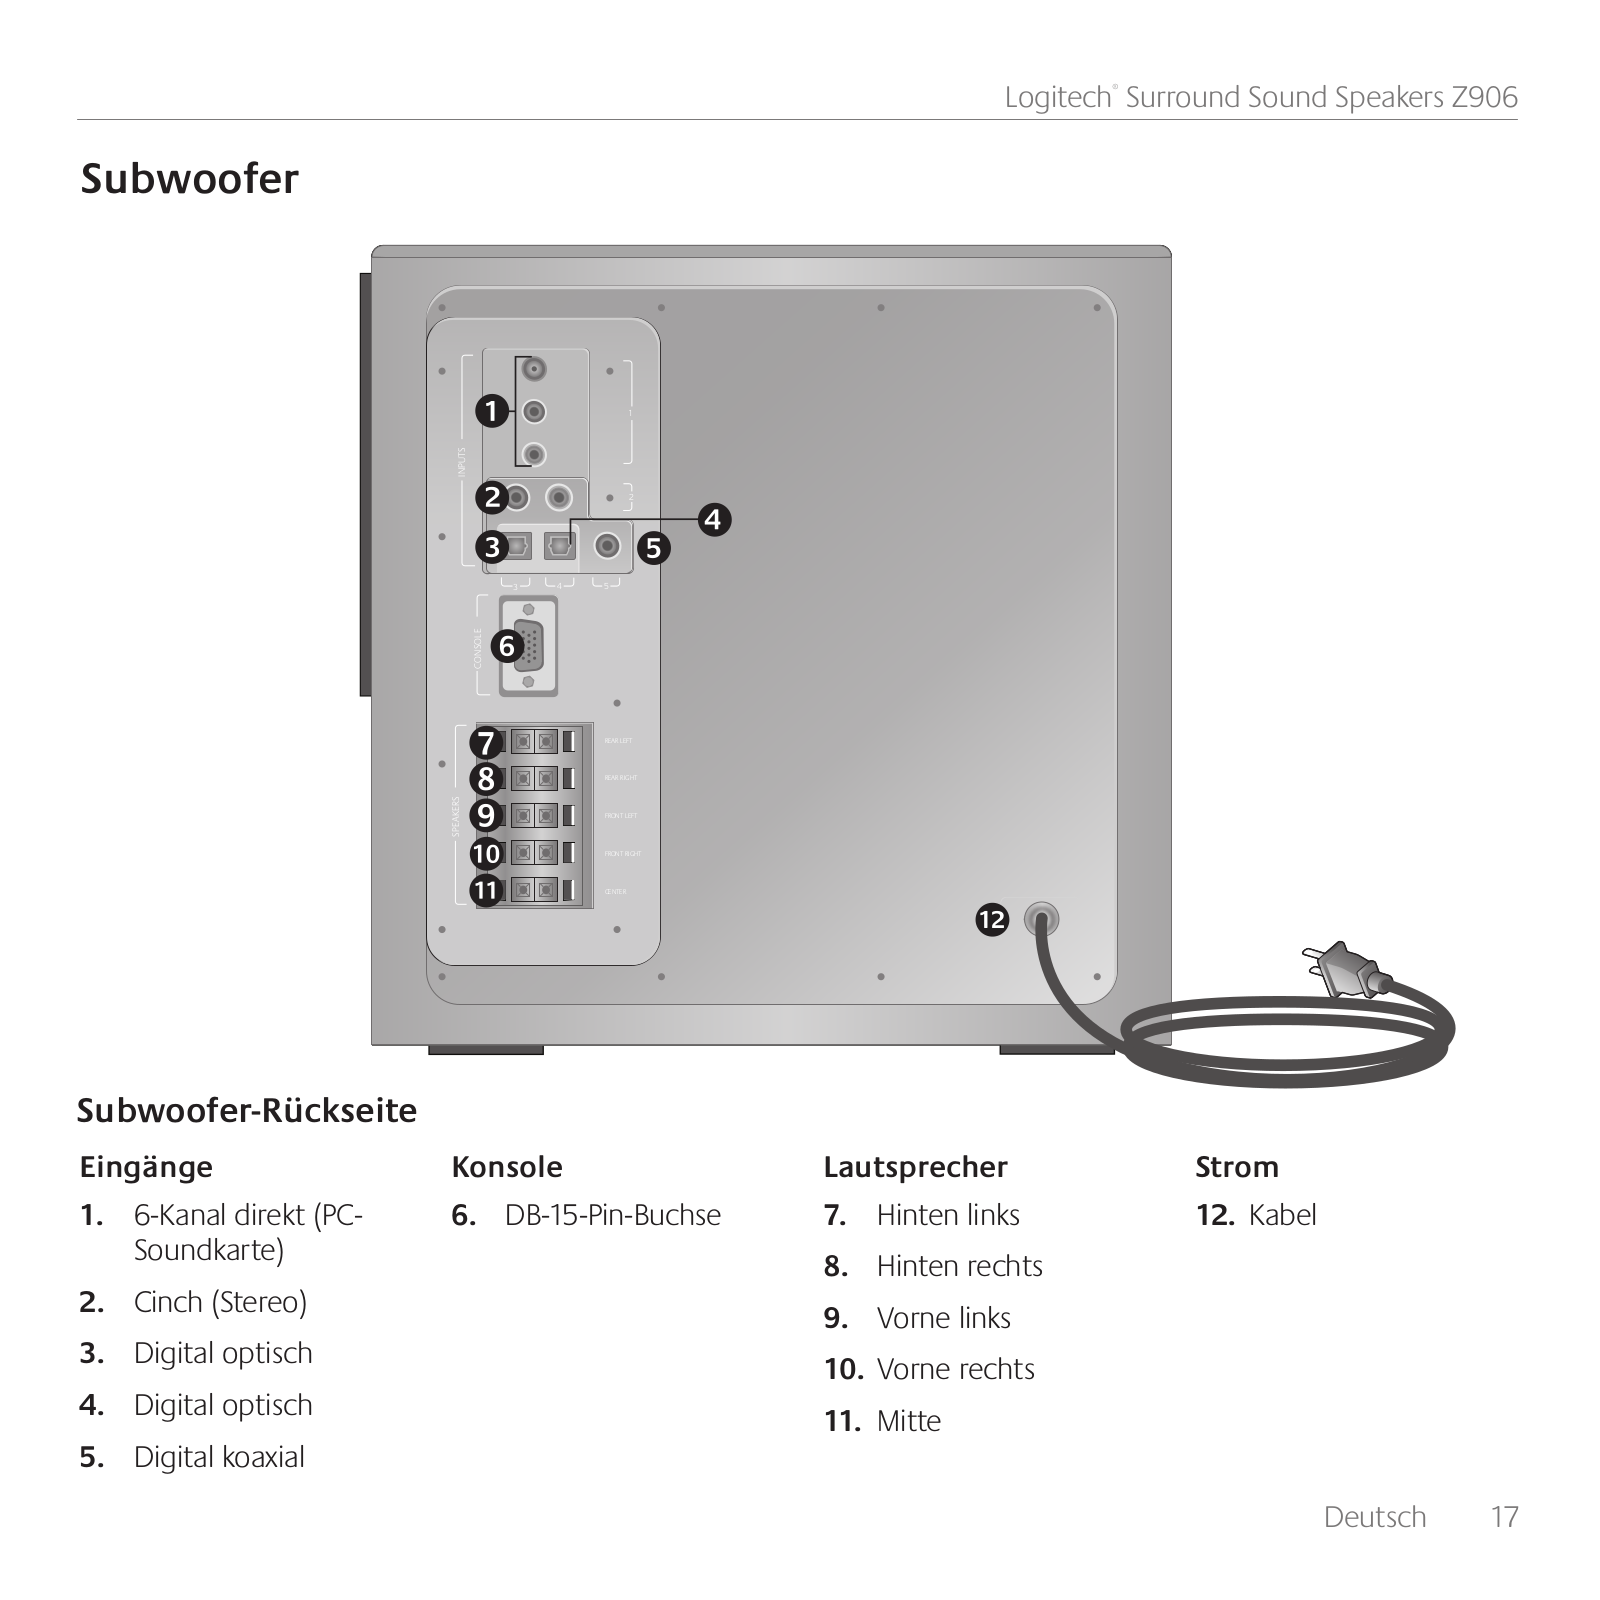
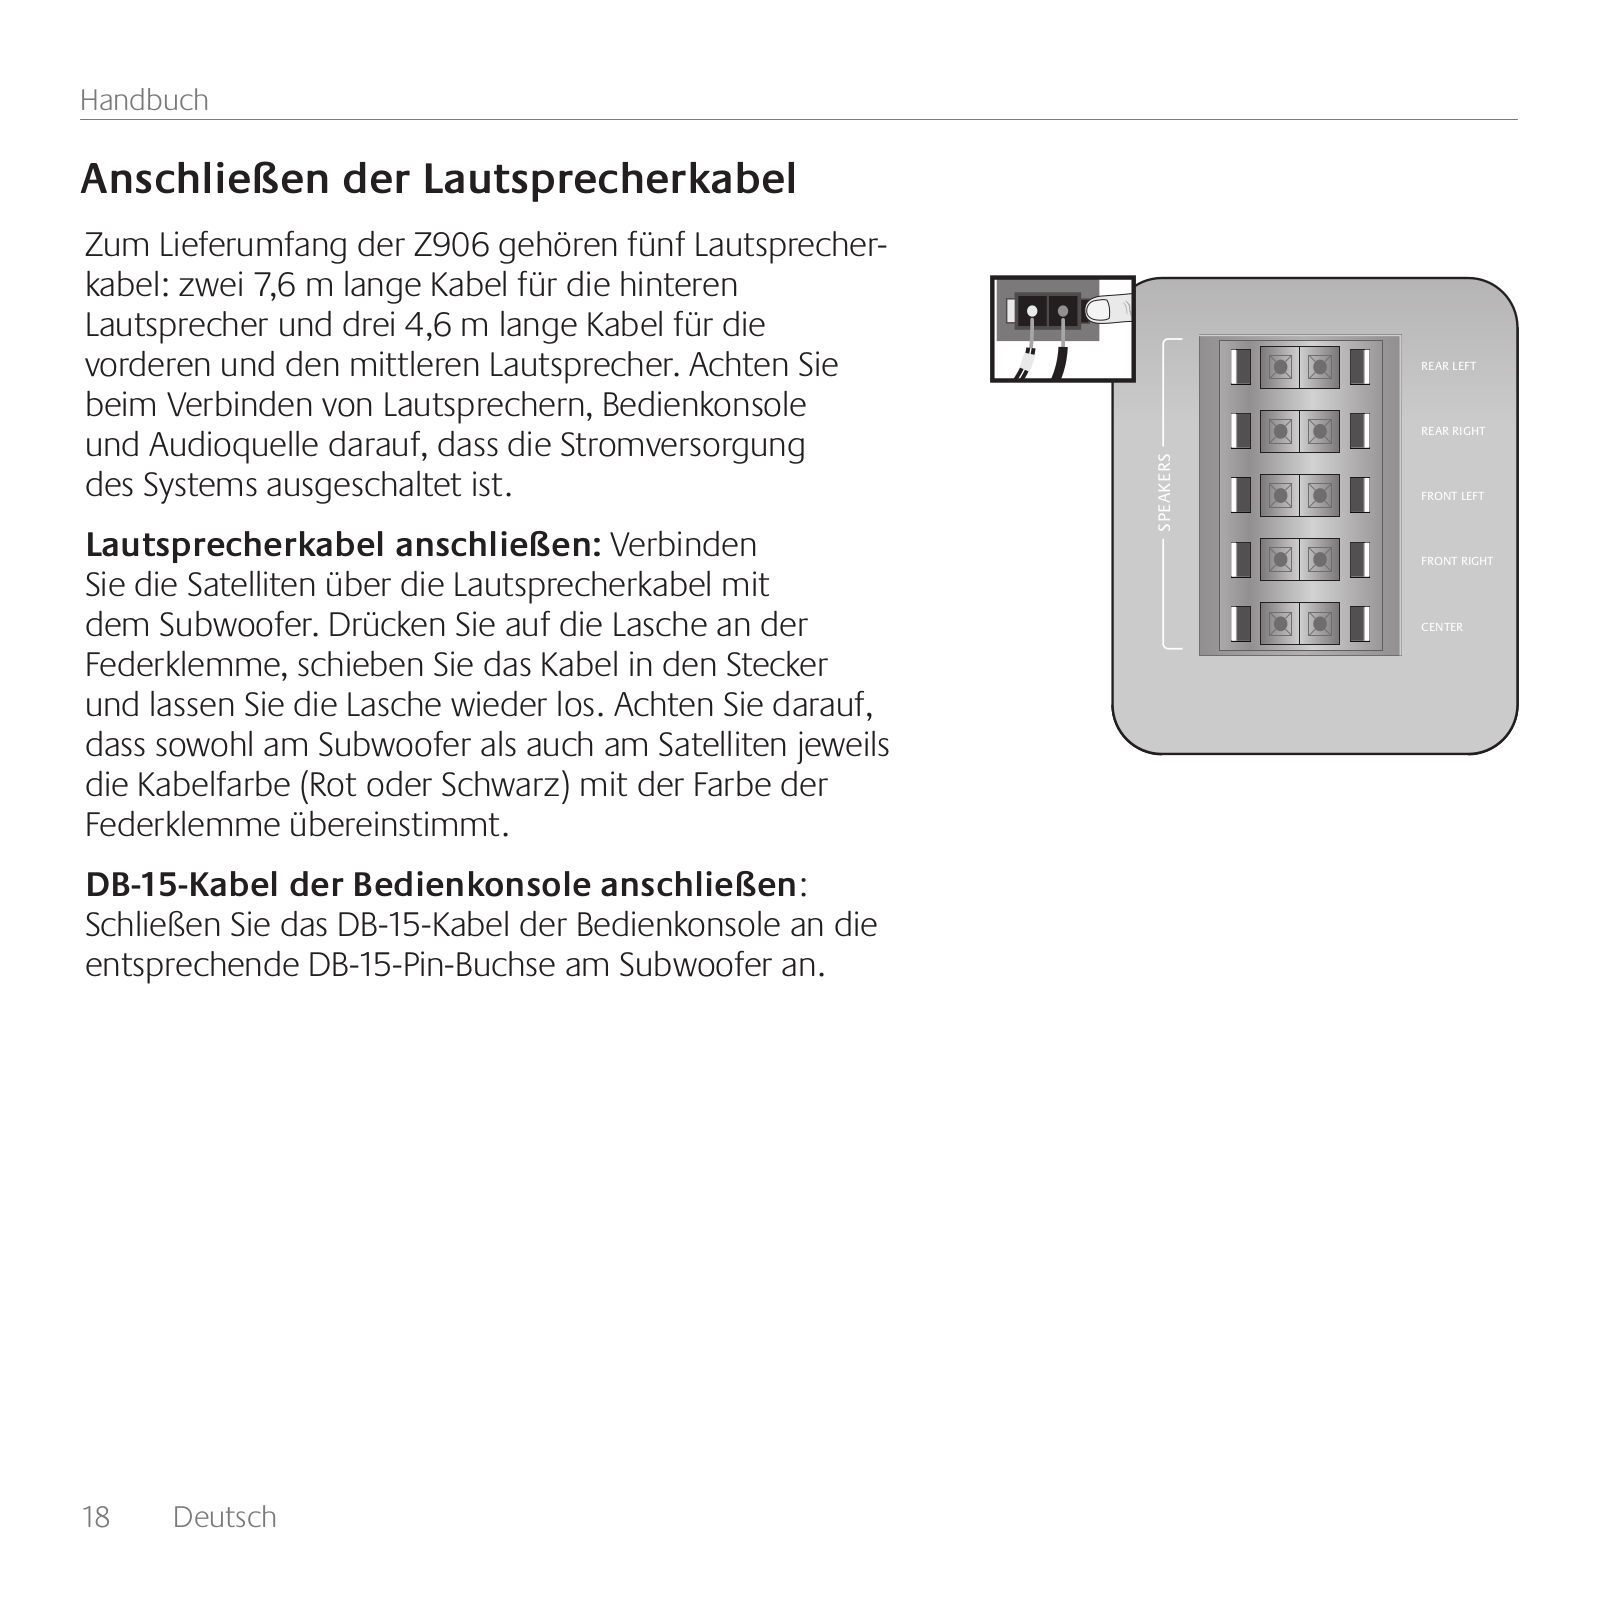
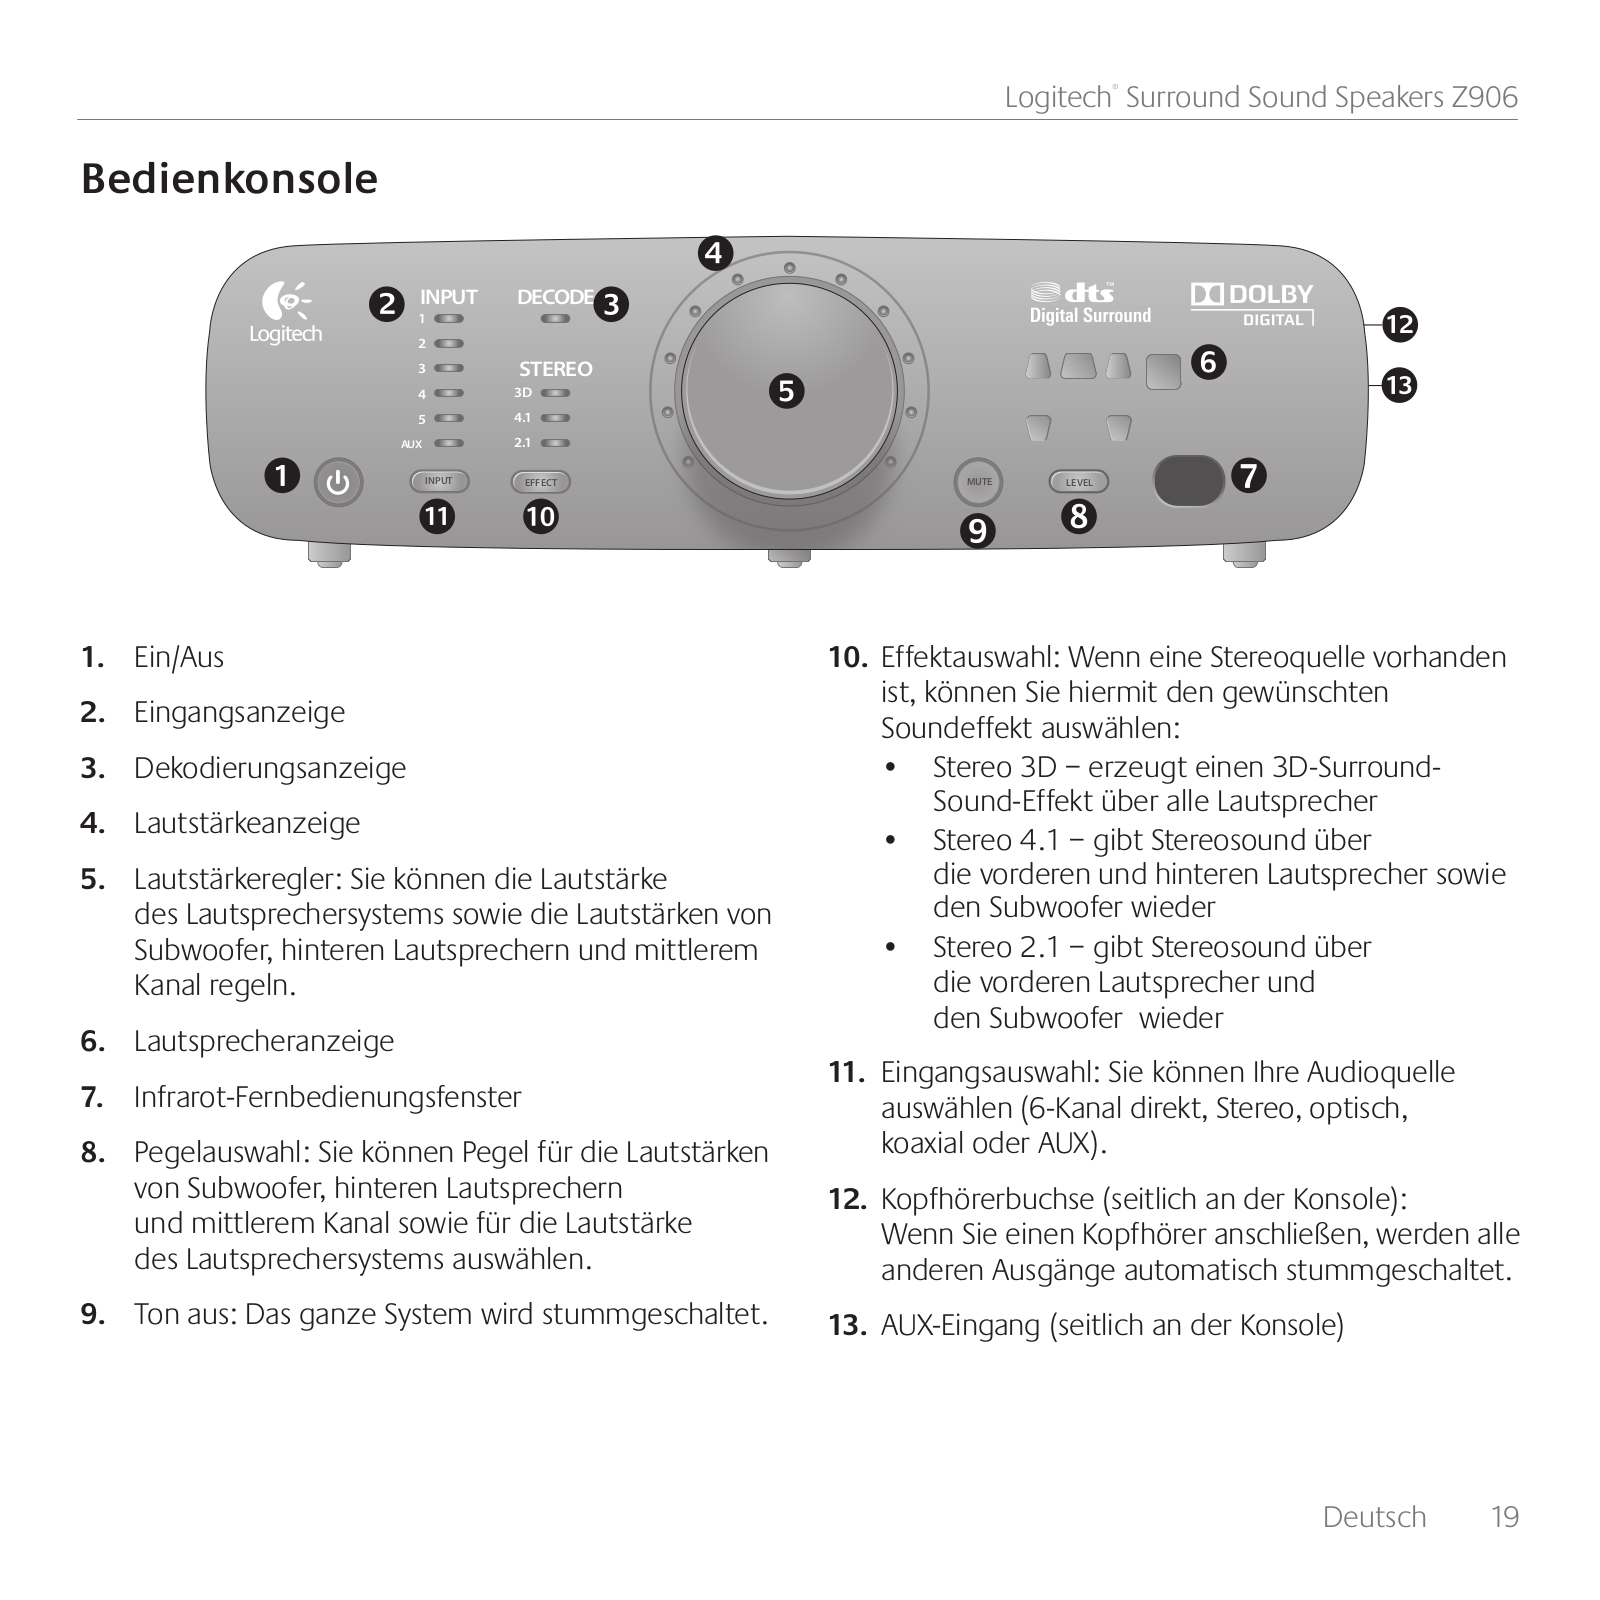
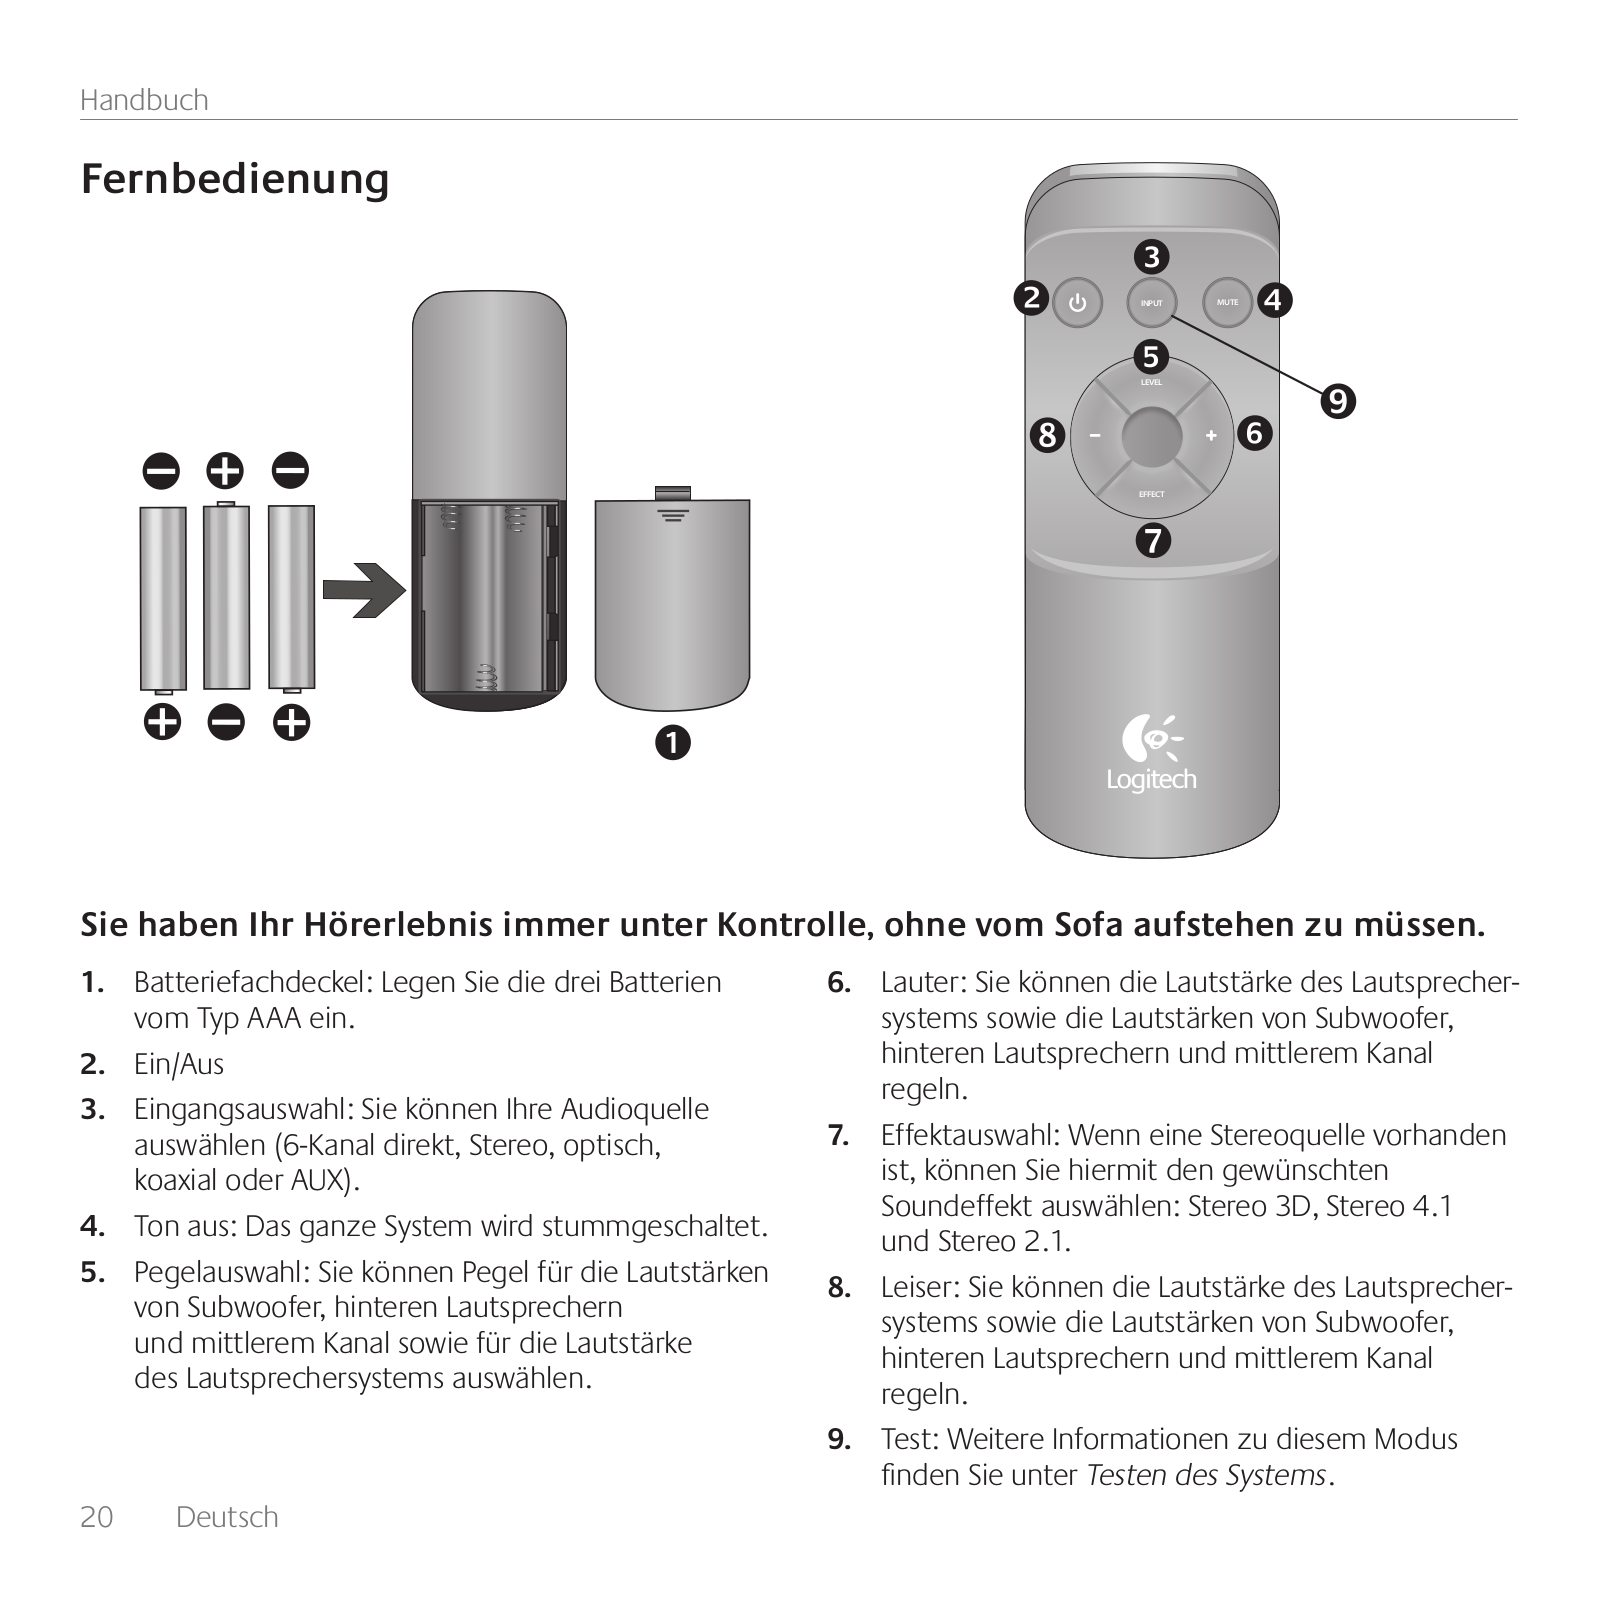
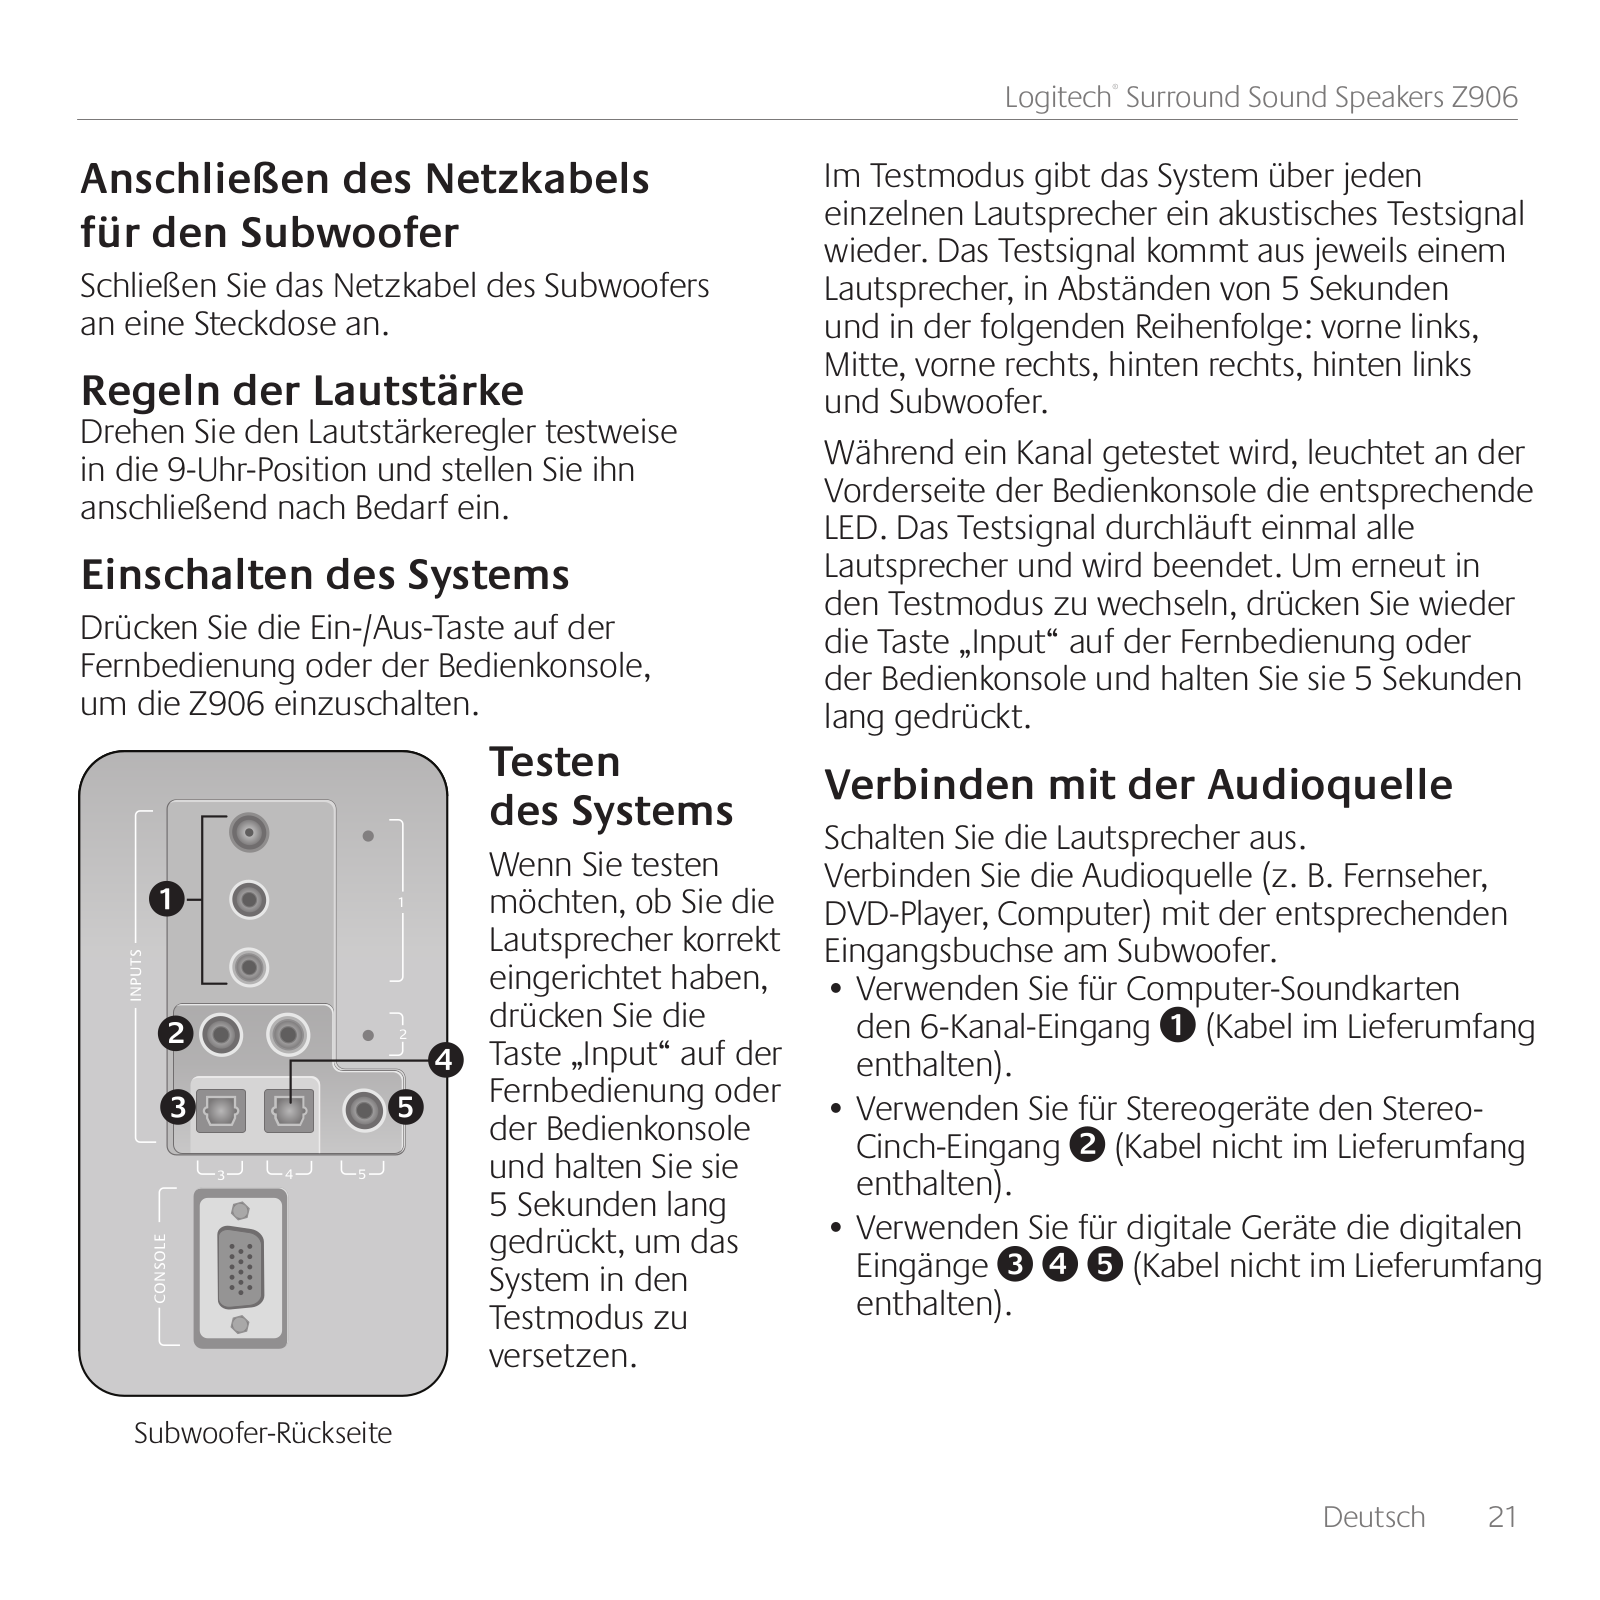
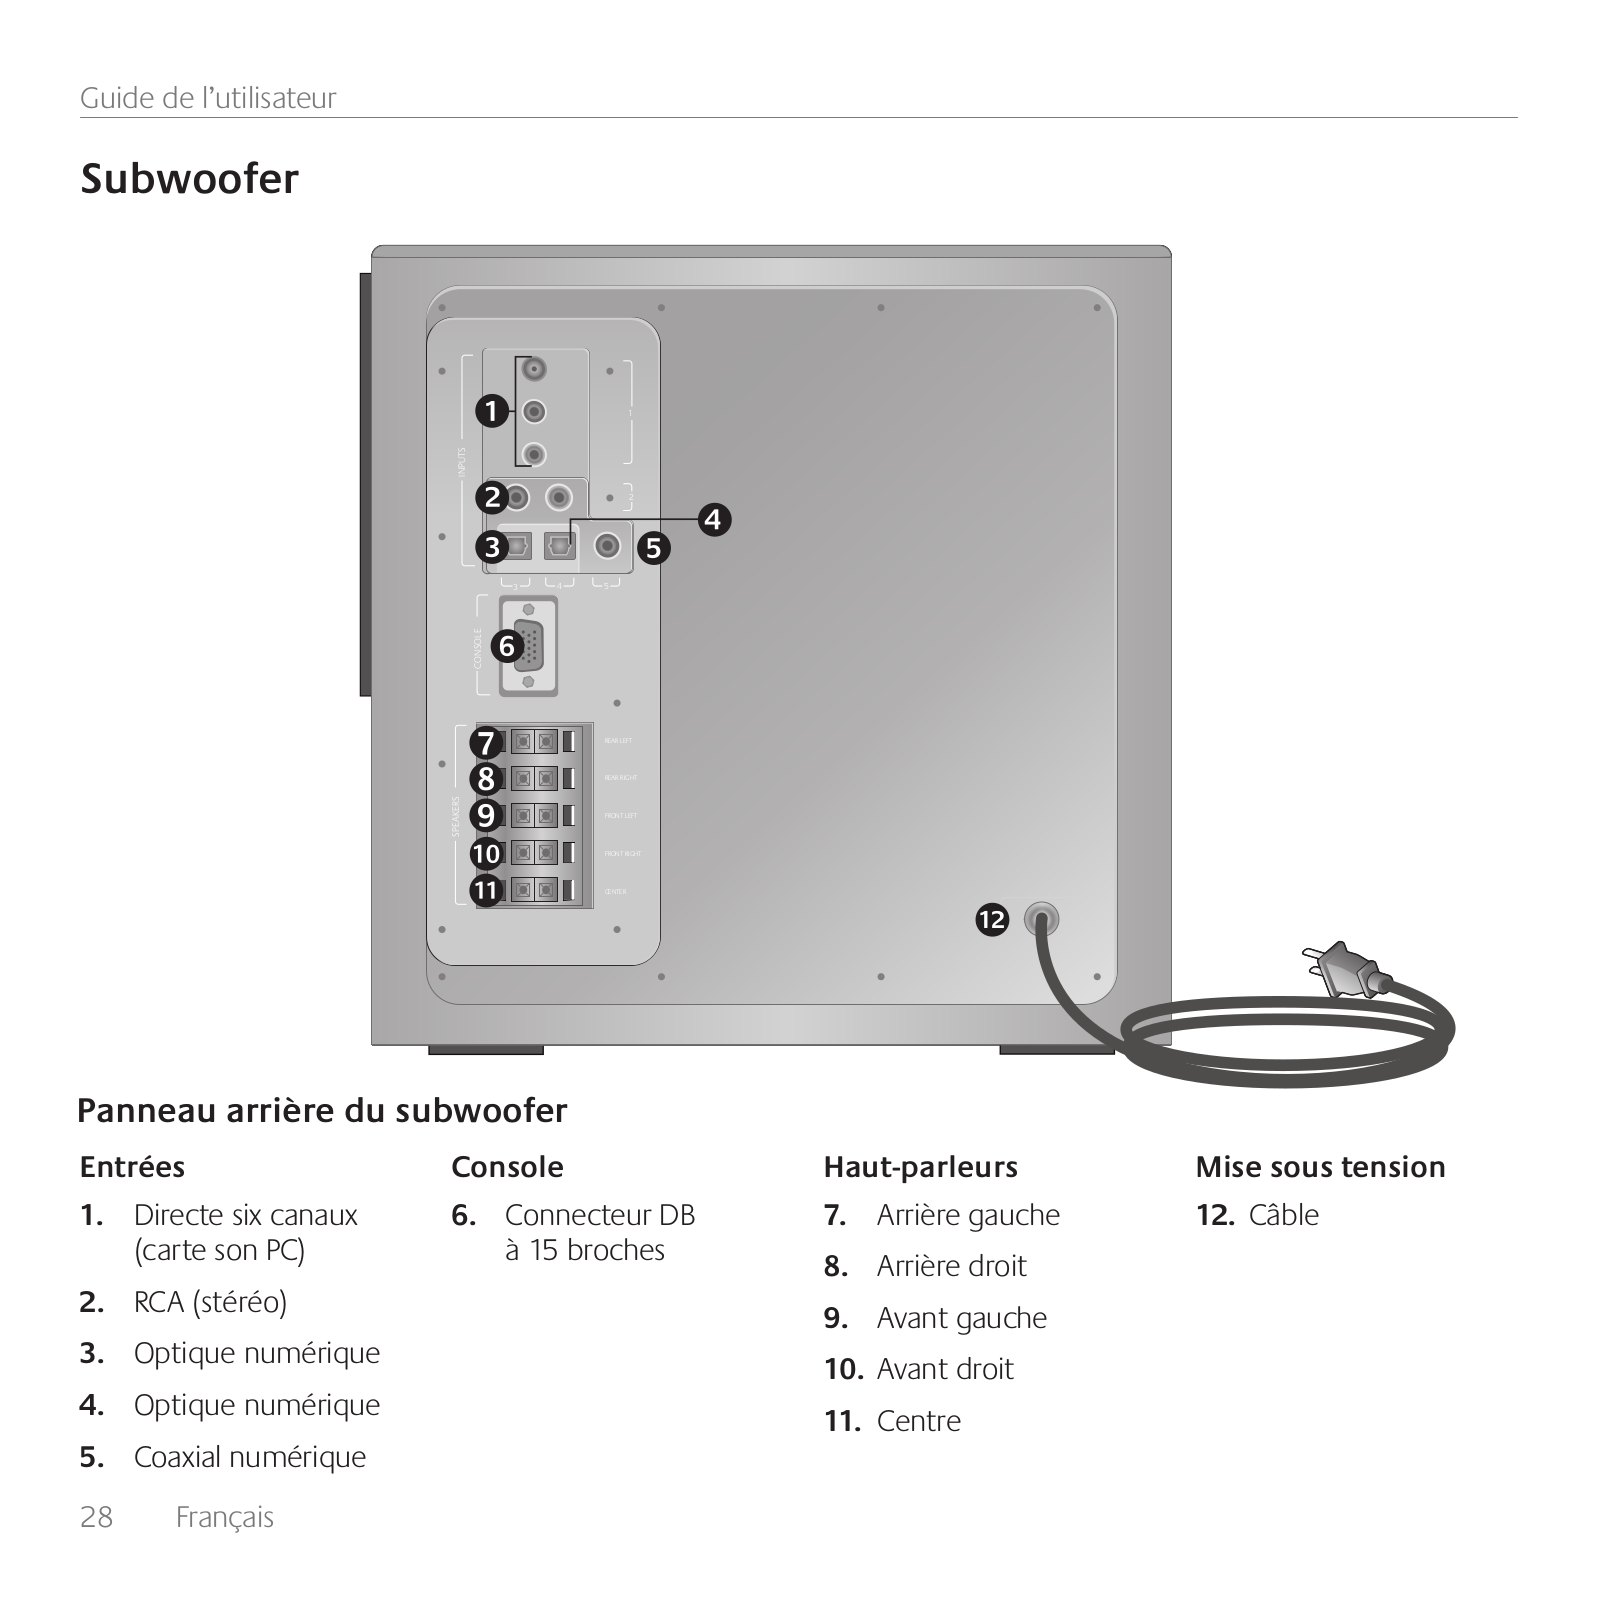
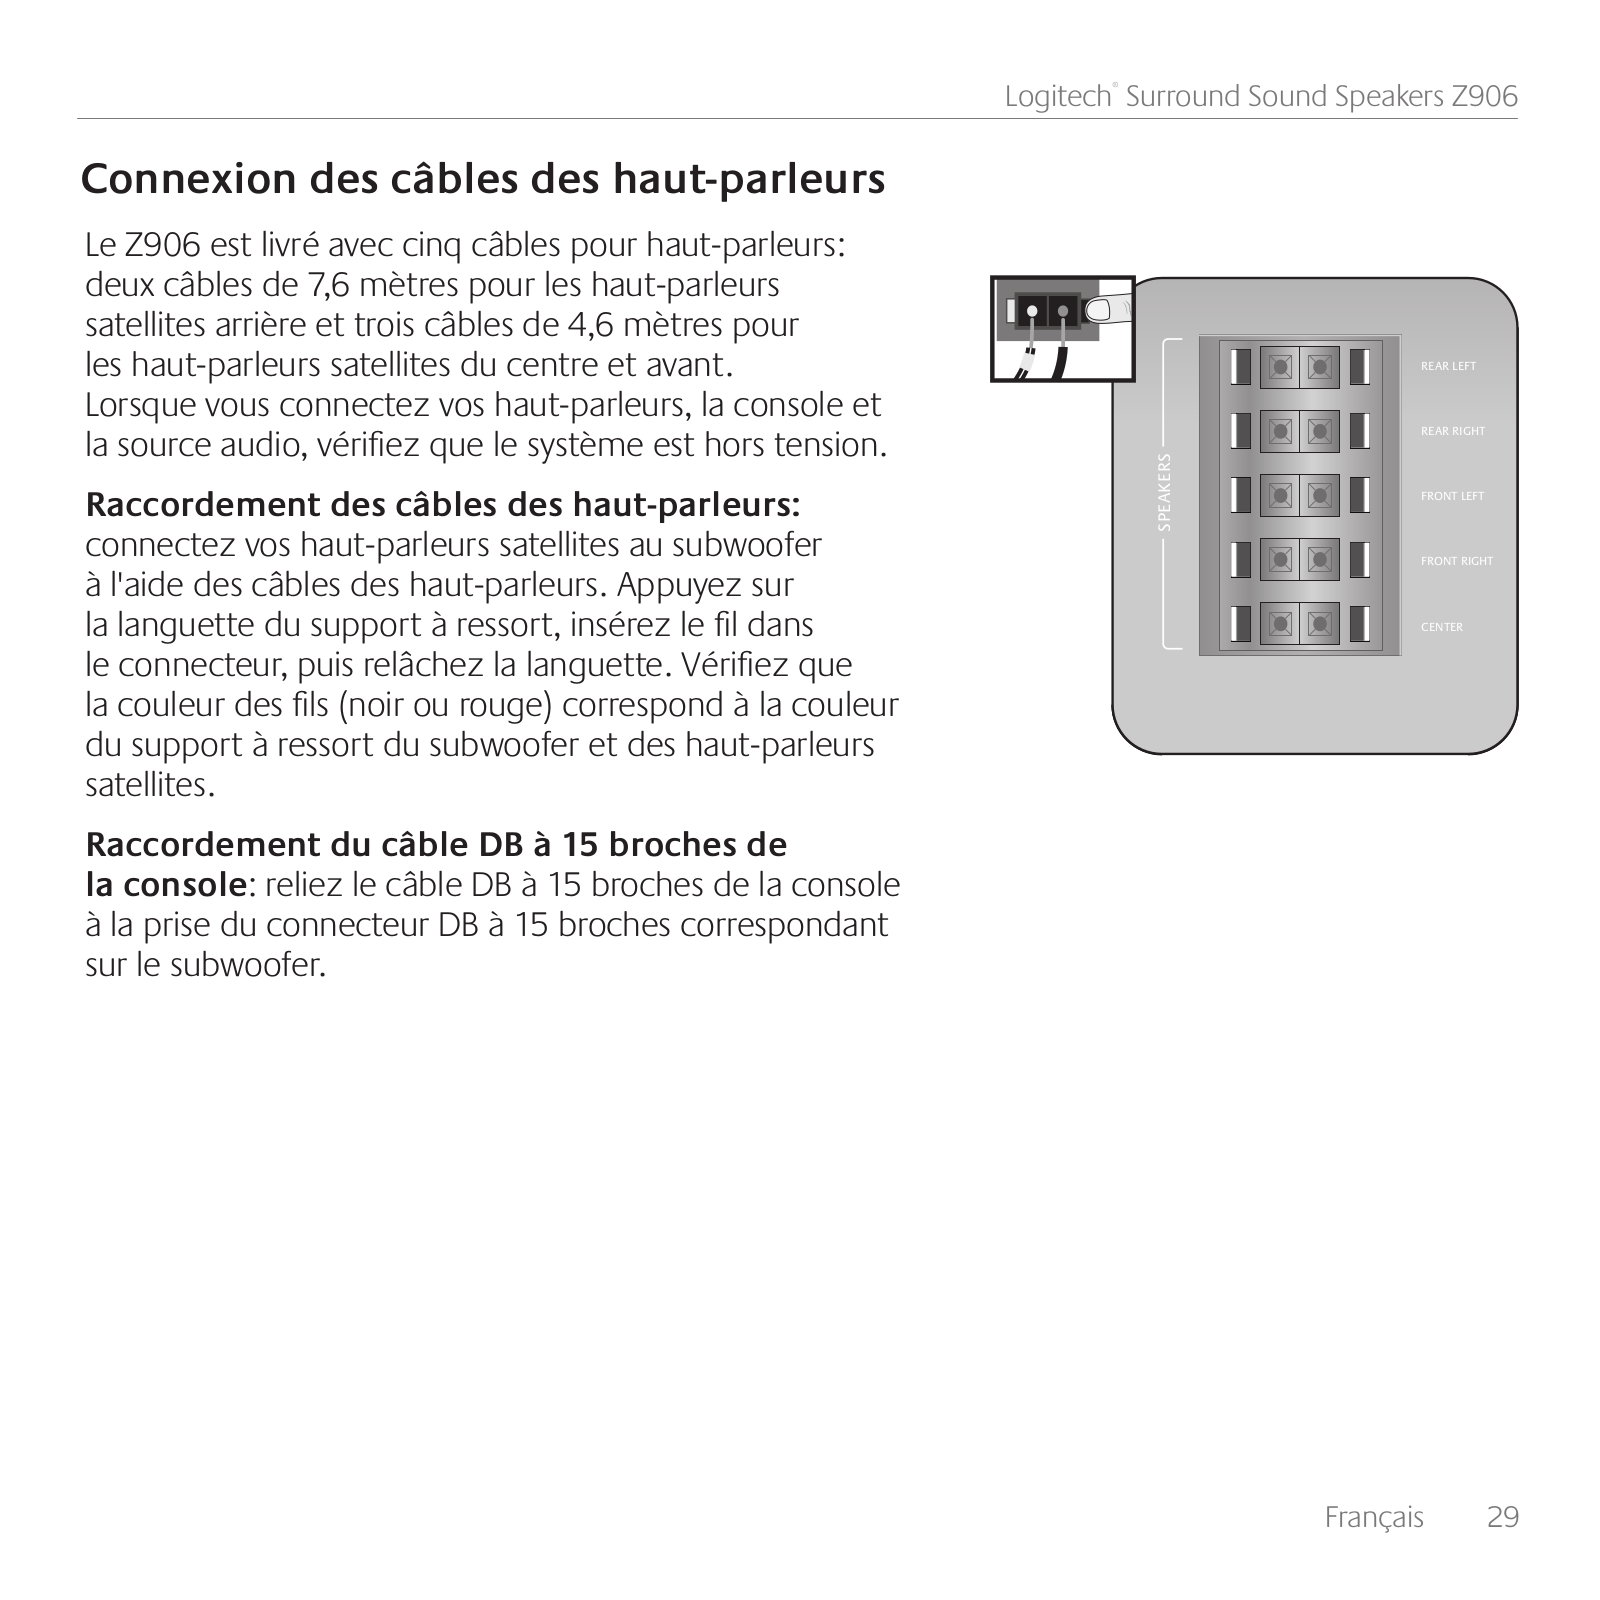
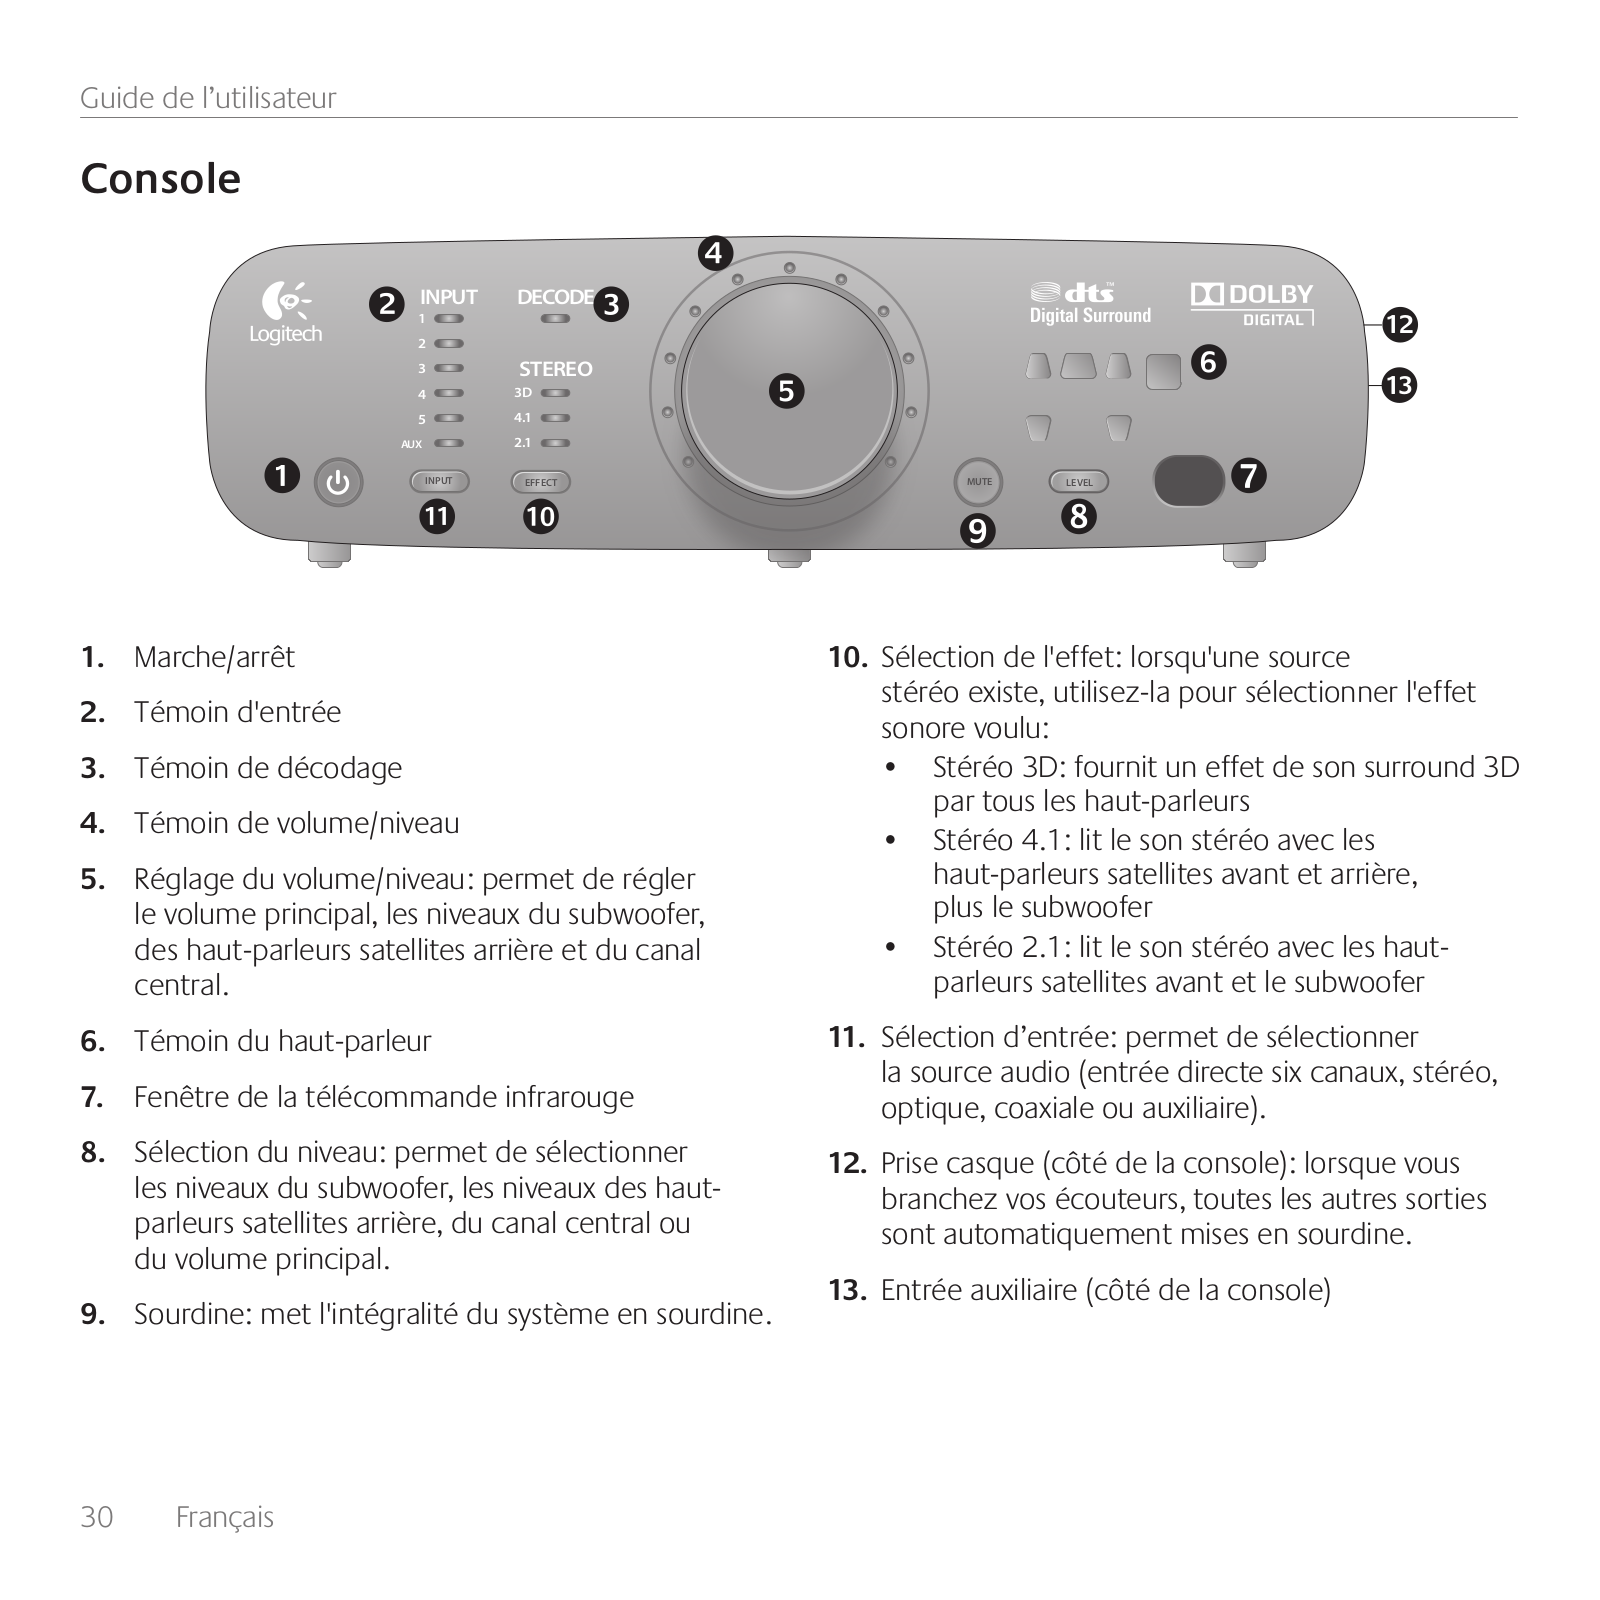
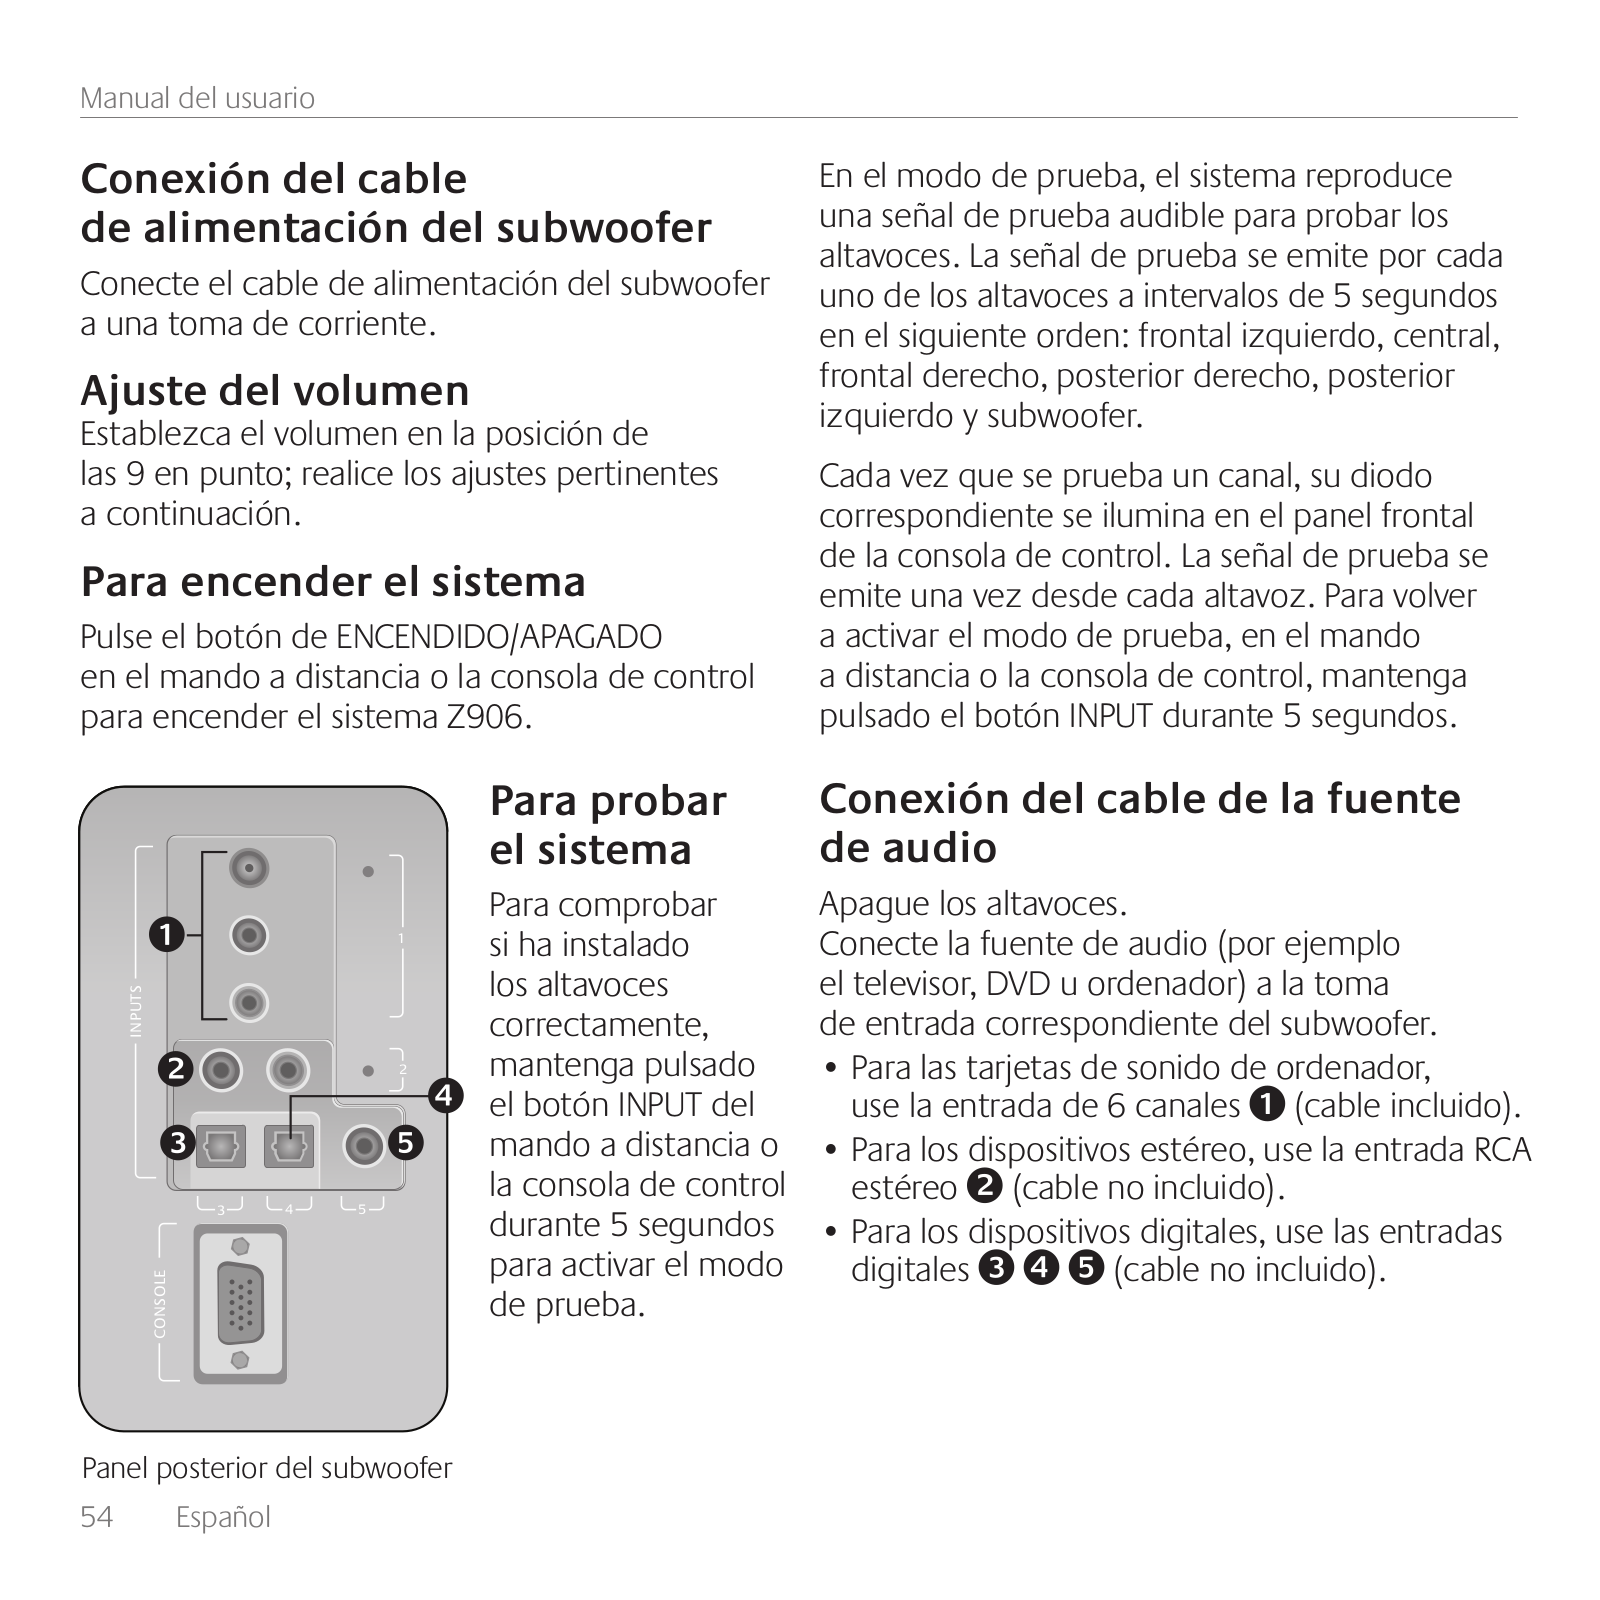
Z906
User Manual
52 pgs
10.08 Mb
0
User Manual
14 pgs
2.14 Mb
0
User Manual
312 pgs
33.74 Mb
0
User Manual
36 pgs
7.64 Mb
0
Table of contents
Loading...
Logitech Z906 User Manual
...
Logitech User Manual
Download
Specifications and Main Features
Frequently Asked Questions
User Manual
Download
Loading...
+
hidden pages
Unhide
You need points to download manuals.
1 point = 1 manual.
You can buy points or you can get point for every manual you upload.
Buy points
Upload your manuals
 Loading...