

Page 1

Logictech LTG-2100T Gyro setup guide
(most sections apply to other gyros as well)
Recommended servos for LTG-2100T
Mini helis - Futaba S3154 digital micro servo
Standard size helis - LTG-6100G Digital high speed servo(0.05s)
Install the gyro on a suitable flat platform on the helicopter's frame as indicated in the
instruction sheet.
Take note to use a suitable mounting tape, the tape that comes with the gyro works best
on most surfaces. You can experiment with different tapes if deem necessary. When
securing down the gyro leads, do leave a bit of slack in the leads. The leads MUST NOT
be strained as this will transmit any frame vibrations to the gyro, reducing it's
effectiveness in yaw sensing accuracy.
All connections to be hooked up as indicated in the instruction sheet as well. Most flyers
don't have misunderstanding in this area.
As different radio manufacturers uses different channels for the rudder and gain, I will
term them as follows:
Rudder/tail - TAIL channel
Gain/Gyro - GAIN Channel
Please go thru your radio's instruction manuals to ensure it's clear before we proceed.
***Disregard the broken tail part, I just crashed it....***
Switch on the radio and neutral the TAIL channel.
Adjust the GAIN value on your radio's appropriate channel until the green LED on the
gyro is OFF and the RED LED is at the 1st or 2nd position from the left.
Make sure the Revo-mix is OFF or INH.
We must go thru the mechanical setup first.
General heli's tail rotation is upwards, sweeping into the main rotor's downwash.
Page 2
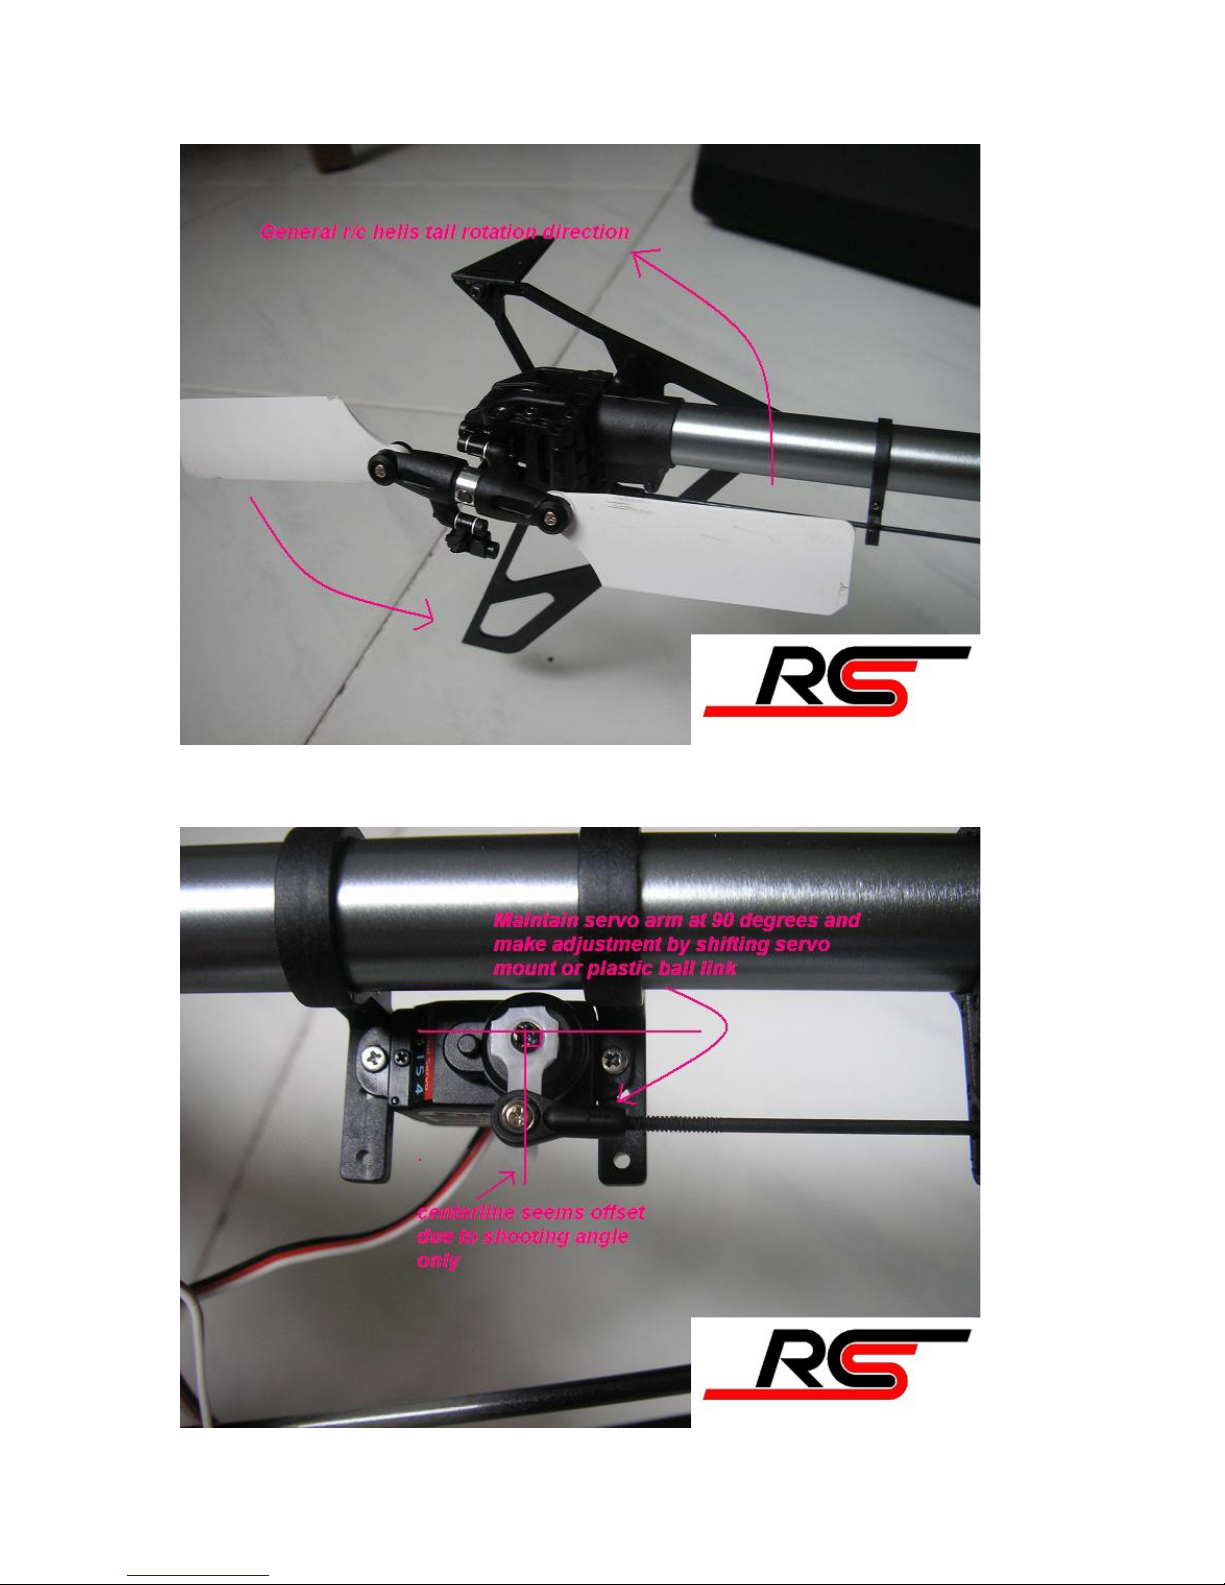
At this point, your servo should be in it's neutral position.
Mount your servo horn perpendicular to the tail pushrod.
Page 3
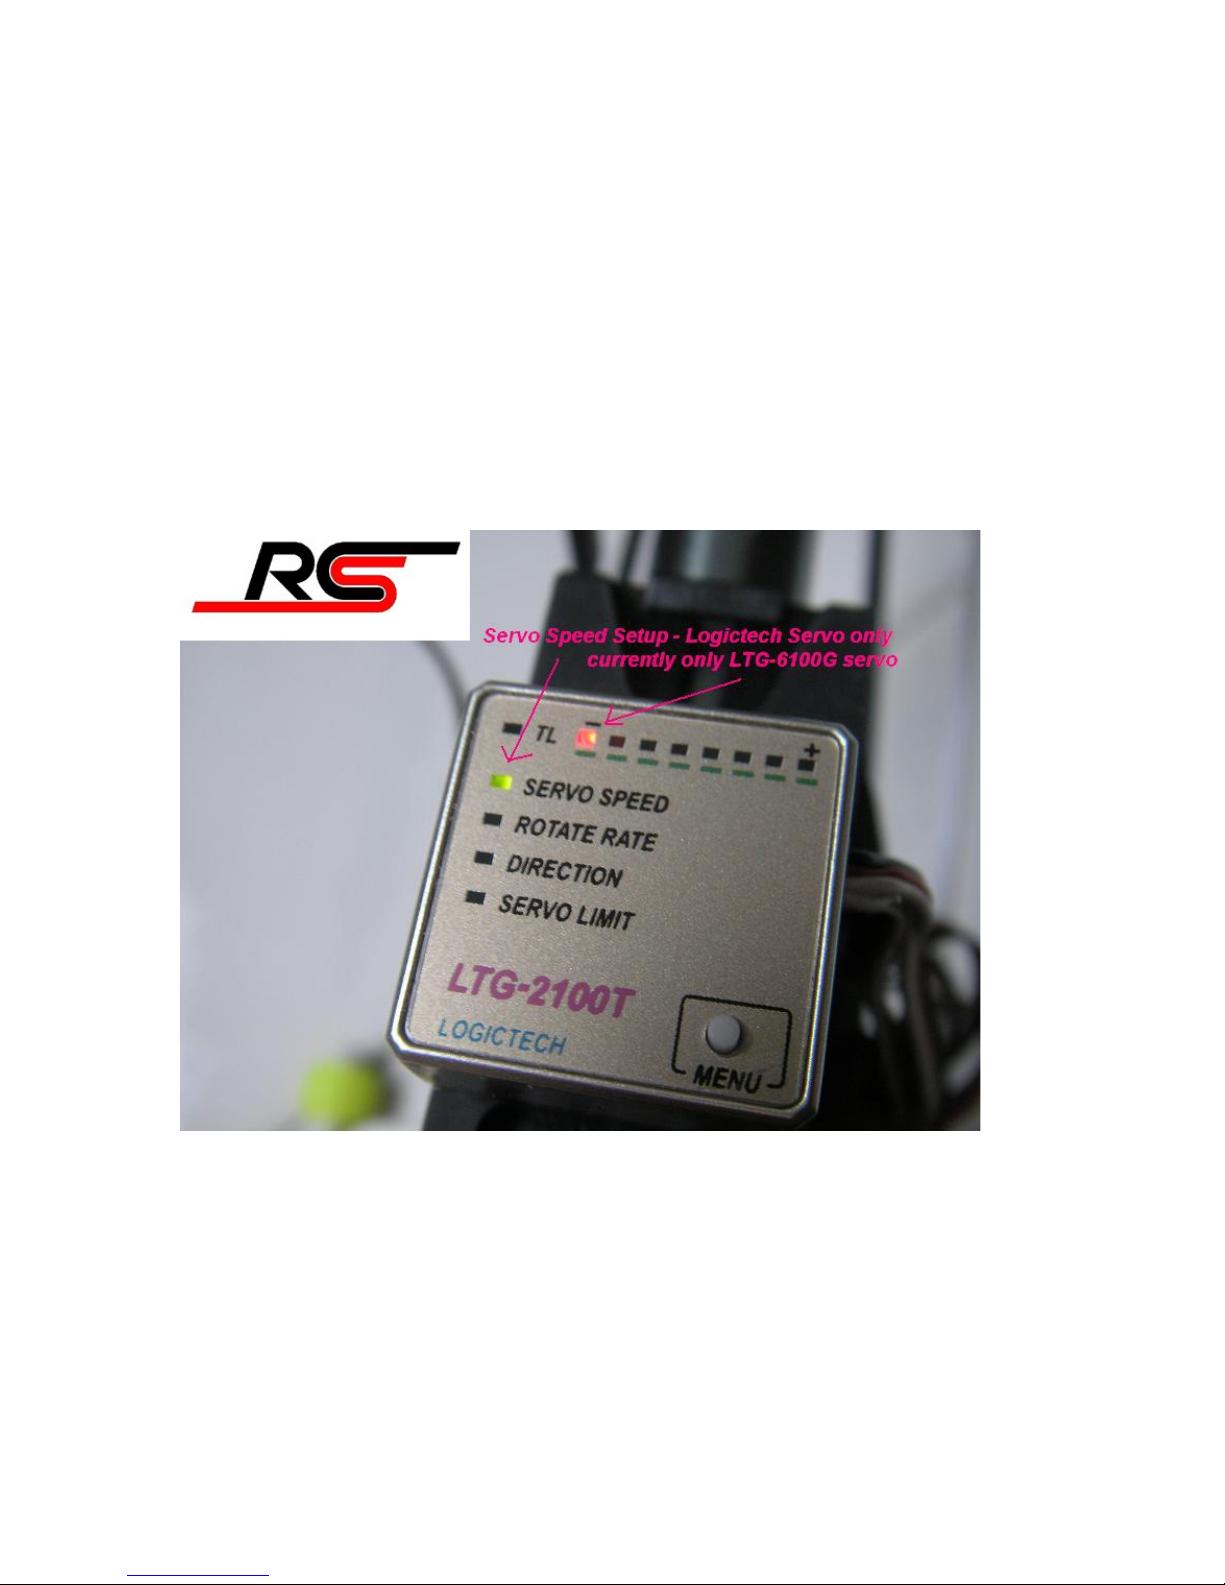
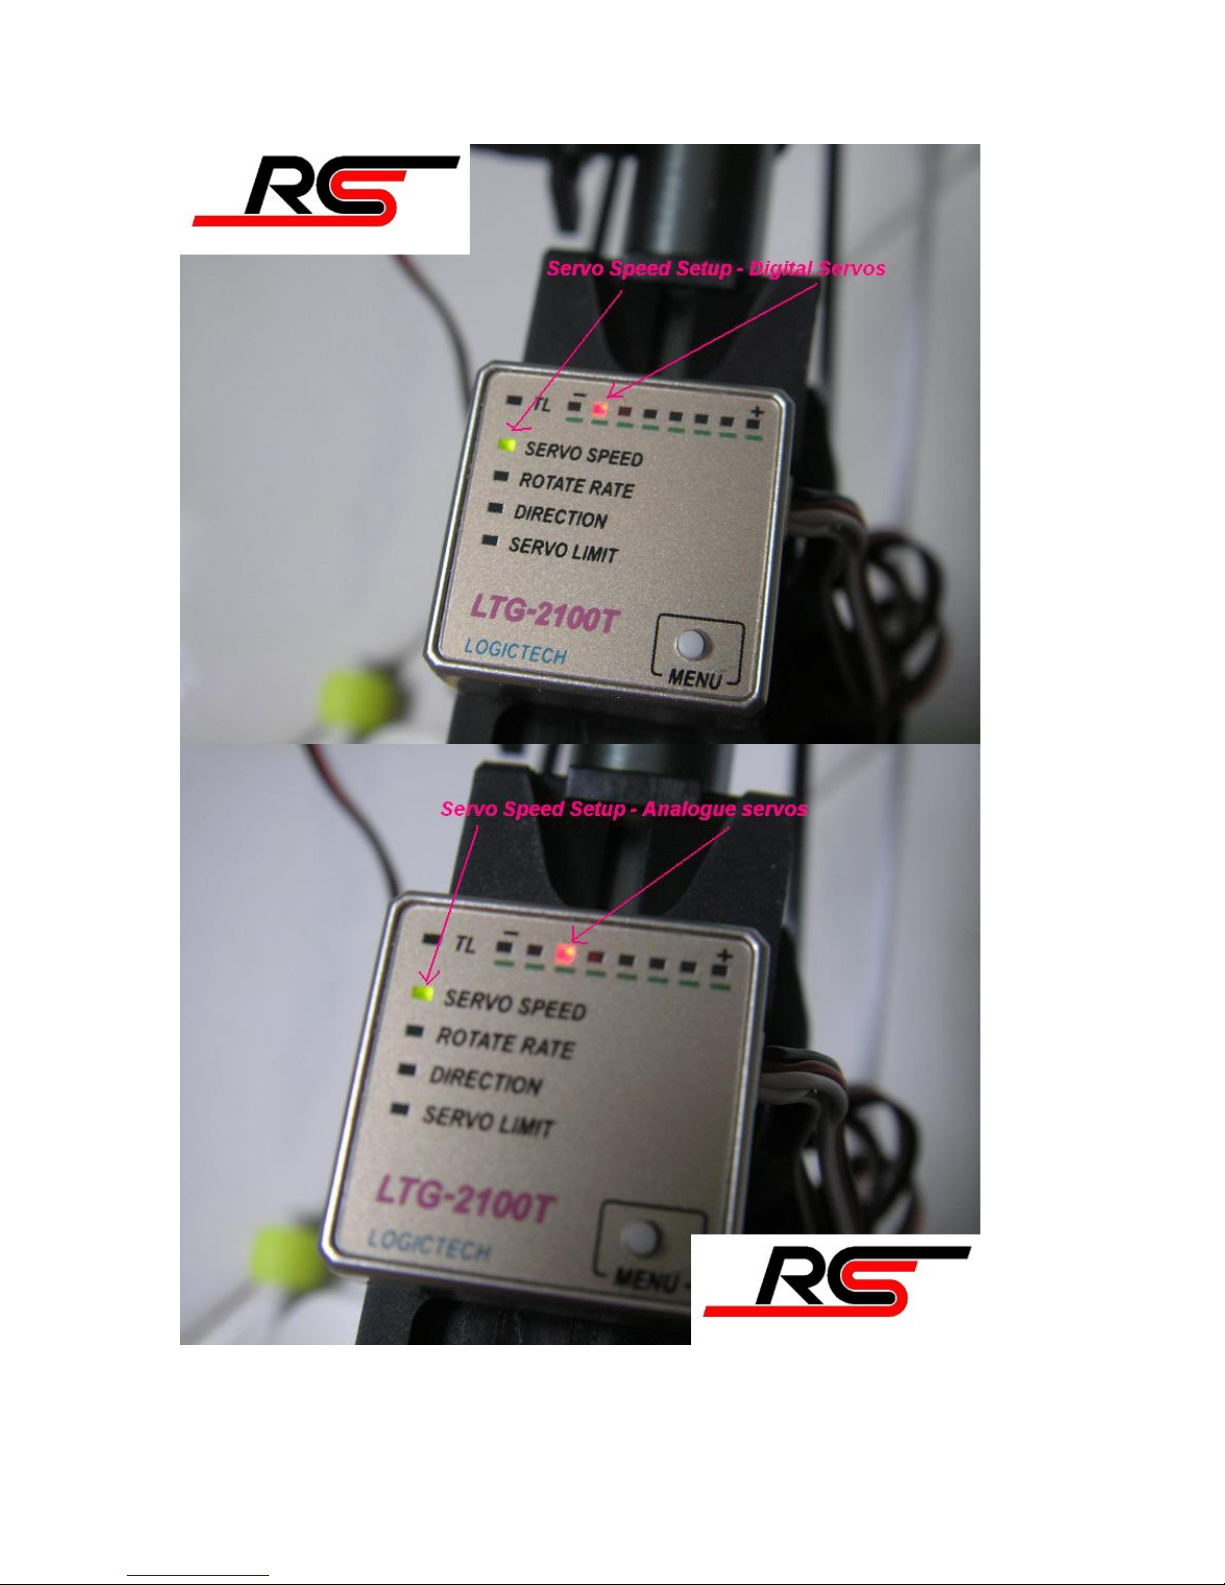
Before we proceed further, let's go thru the servo selection feature for LTG-2100T.
Get into gyro setup by pressing the MENU button and holding on to it until the LED goes
to the first setting. Let go. You will see the green LED at SERVO SPEED and a red LED
above.
The rudder stick is used to shift the red LED left and right to desired positions for setup.
Experiment with it and you will understand immediately.
To change move the red LED to the suitable position, hold the rudder stick one direction
or the other and press the MENU button once. You will notice the red LED shift a
position.(if not, hold the other direction and press the button). Choose the suitable servo
type selection
Page 4
Once the suitable servo type is selected, neutral your rudder stick and press the MENU
button. You will notice the green LED will shift down to ROTATE RATE. Same thing
Page 5
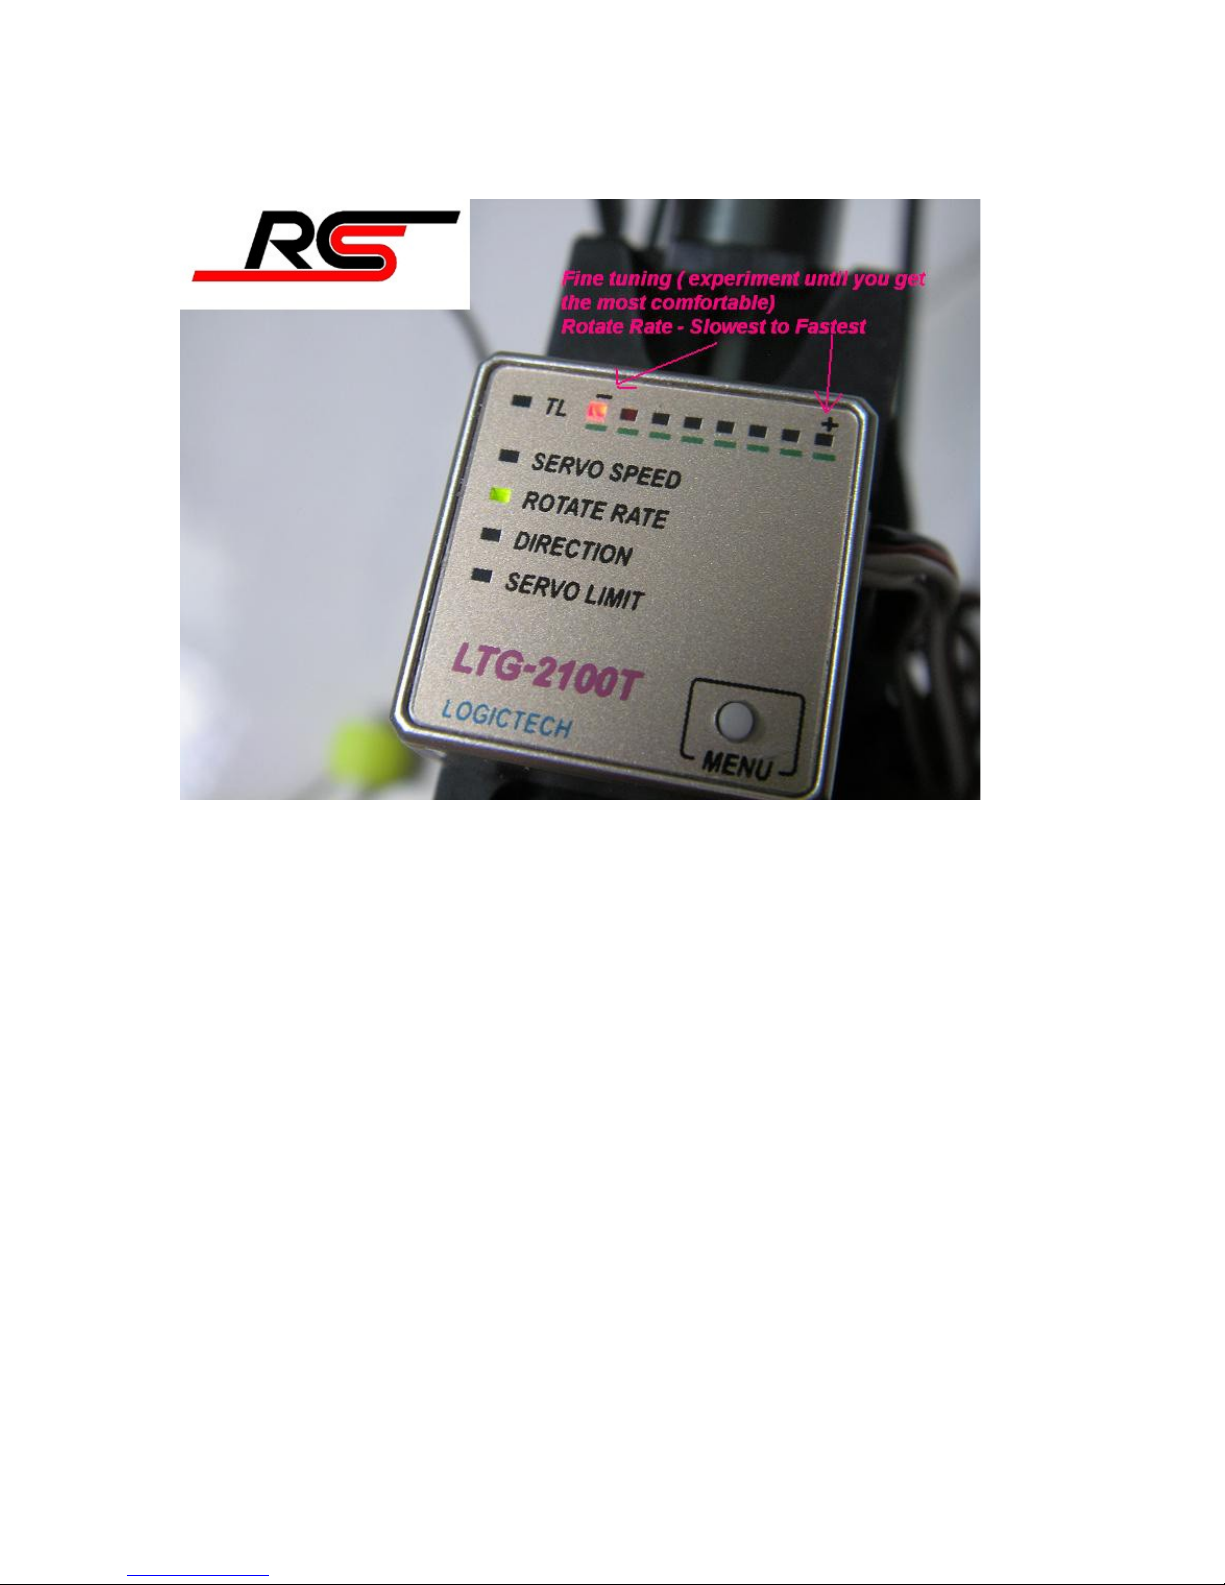
goes, but set it to the slowest for inital tests first.
You can use it to fine tune to desired likings after everything is done.
Now exit gyro setup by simply neutral rudder stick and don't touch the gyro. It will exit
in a couple of seconds. You will notice it will go back to the gain indication screen as
when you just initialise it.
Now let's take a look at the tail rotor's action.
With everything hooked up, push the rudder stick to the Left
Page 6
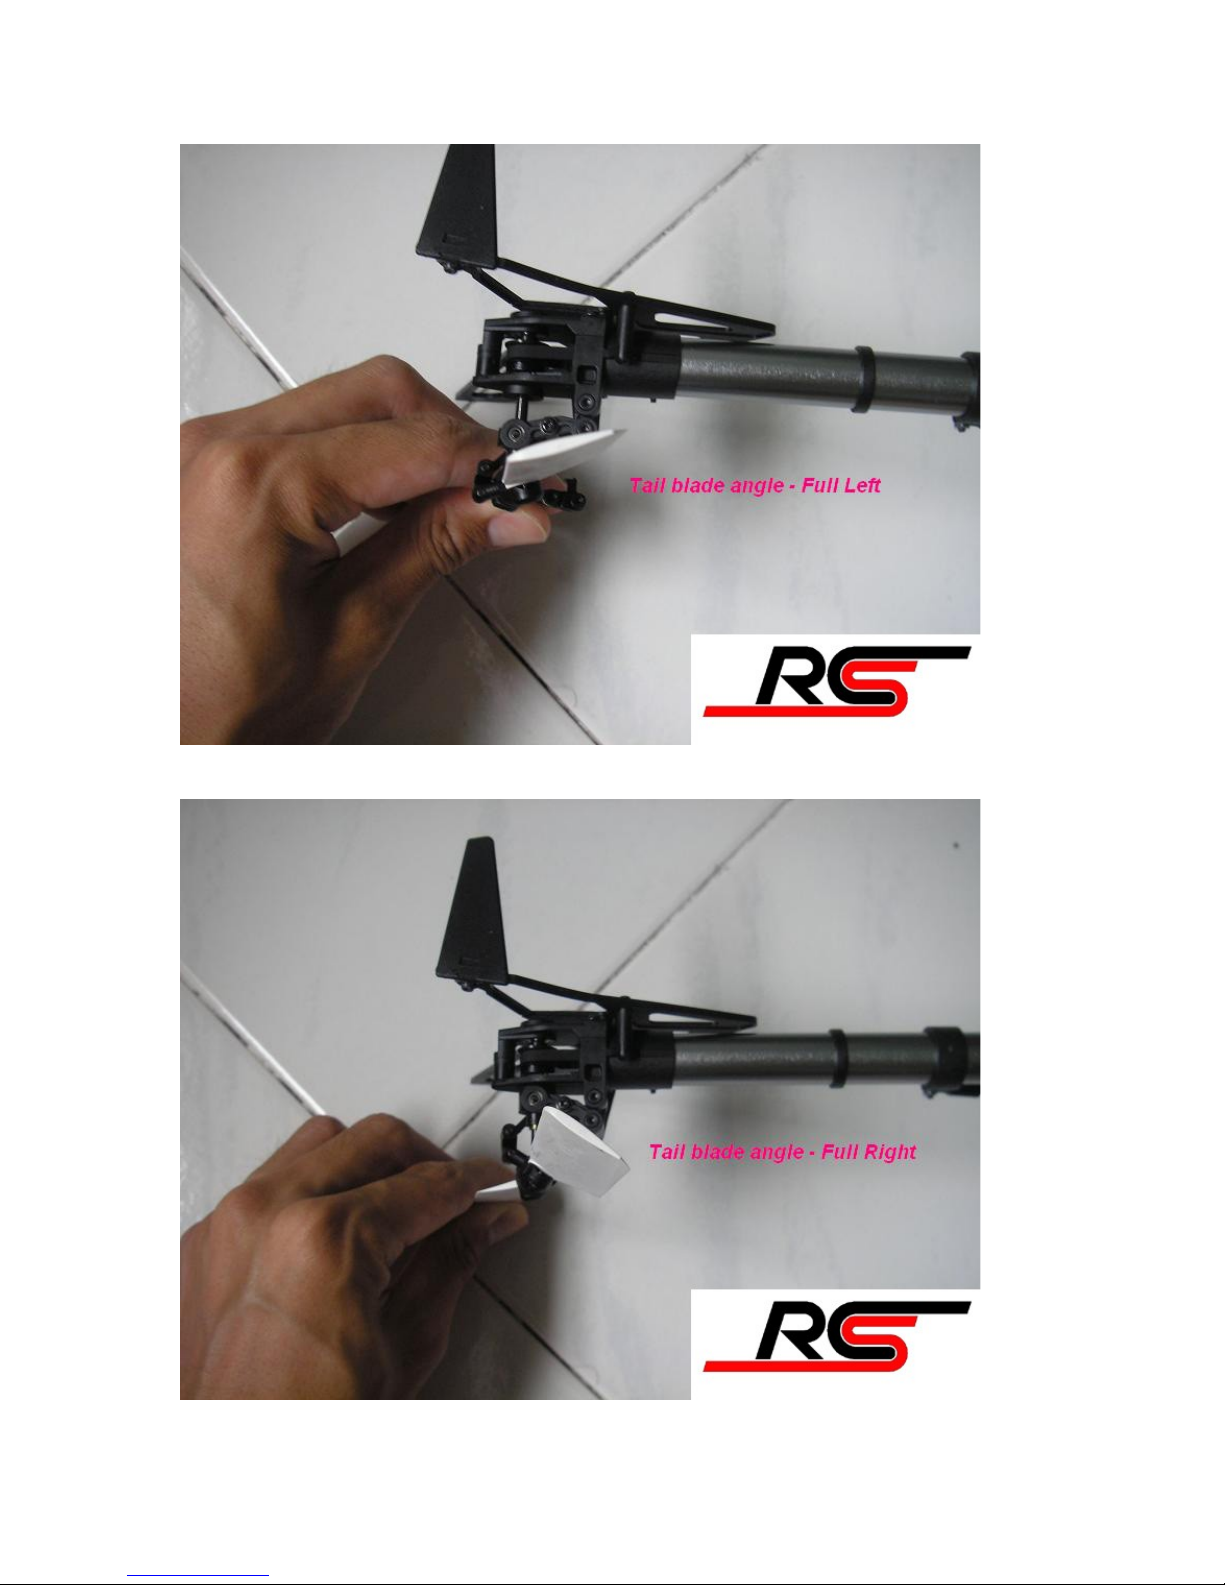
Push the rudder stick to the right
Page 7
This pictures are taken on the mini titan, please note that the tail blade is the thing to look
at, the pitch slider's position may be different for other helis.
If the tail blades actions you see on your heli is opposite, REVERSE the TAIL channel.
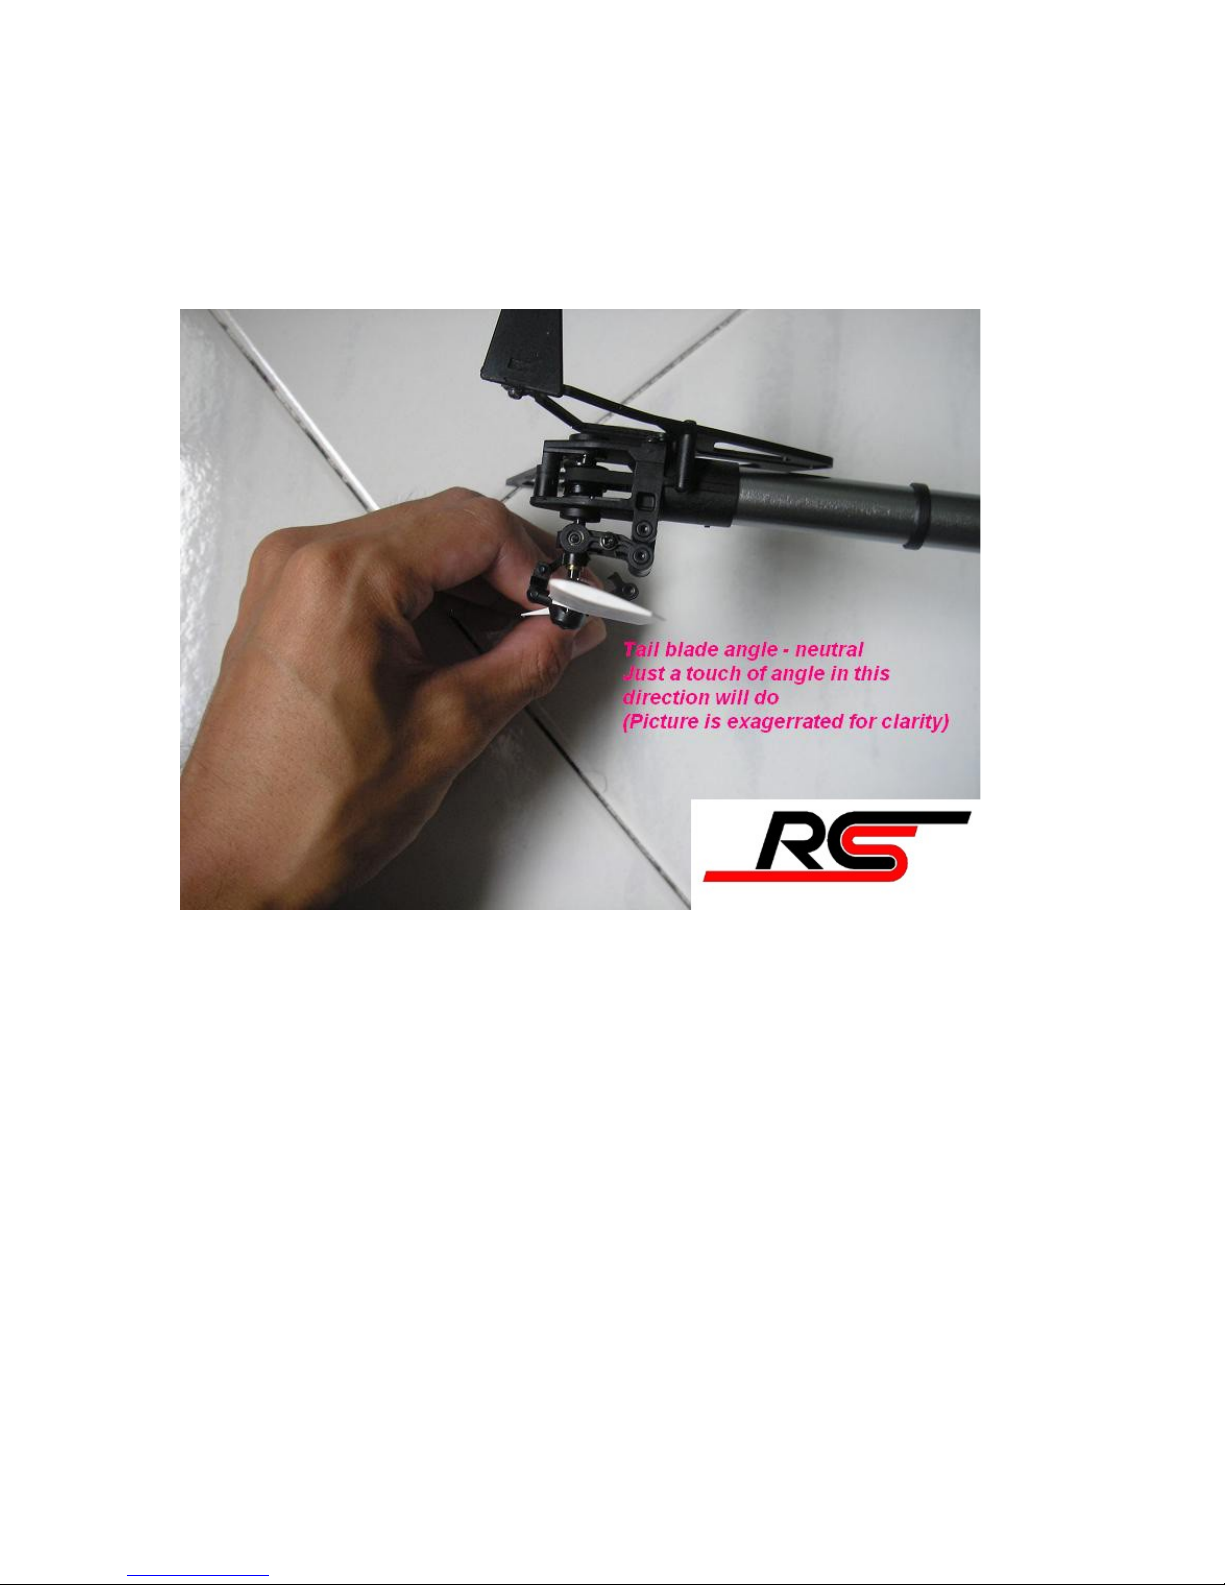
In neutral state, the tail blades will have a bit of an angle, eg 10 degrees
In order to get the neutral state tail blades angle more or less in the ballpark, adjust by
sliding the tail boom servo mount forward or aft. Alternatively, you can also adjust the
pushrod ball links.(for frame mounted tail servo, this is the only option)
Page 8

Now check that your gyro sensing is in the correct direction.
Page 9

Leave the transmitter alone now.
Hold the tail and move it to it's left, you should notice the tail blades will tend to angle
towards Full LEFT.
Hold the tail and move it to it's right, you should notice the tail blades will tend to angle
towards Full RIGHT.
If it's behaving the correct way, leave it alone.
If it is opposite, we will need to reverse the gyro sensing.
Enter gyro setup just like before, press and hold MENU button for a few seconds, until it
enters setup mode. Let go and press repeatedly until the green LED gets to DIRECTION.
Use rudder stick to move the red LED to the 'other' position. Gyro sensing direction is
changed.
Exit gyro setup mode.
Your throttle curve is expected to be capable of maintaining reasonable headspeed for
good hovering.
Do a test hover and watch out for the tail, it is very likely to drift to either direction. Land
and adjust the servo mount/ball links and test hover again.
Repeat this process as many times as required to get a close to perfect mechanical neutral
so you can hover without the tail drifting. The better you can achieve this at this stage,
the better your tail will work.
Now that the mechanical setup is done, let's proceed to utilise the feature function of the
Page 10

LogicTech gyros - Servo Limit
The left and right servo limits for LogicTech gyros are INDEPENDENTLY adjustable,
unlike most other gyros. This allows you to maximise performance out of your available
tail travel. Doesn't have to leave an 'empty' travel which other gyros can't use.
Ensure your TAIL channel's Endpoint/EPA/ATV/Travel/etc are max out for this step.
Enter gyro setup mode. (I think we have done it enough times to get familiar by now)
Go to SERVO LIMIT (Green LED should be at SERVO LIMIT)
You will notice there will be no red LED at this stage.
Now move the rudder stick gradually to the left, Watch the tail slider.
Once the tail slider touches the end, the rudder stick may not be at it's end yet. This is
OK, stop moving the rudder stick and hold it at that position. Now press the MENU
button once. You will notice one red LED will light up on one end. This means that the
gyro has already registered that position as it's operating limit. You may see the LED is
on the other end for your gyro but it's ok. We're not done yet!
Page 11

Now, move the rudder stick to the right, same thing, watch the tail slider.
Once the tail slider touches the end, the rudder stick may not be at it's end yet. This is
Page 12

OK, stop moving the rudder stick and hold it at that position. Now press the MENU
button once. You will notice the red LED will light up on the opposite end. This means
that the gyro has already registered that position as it's 'other' operating limit.
Page 13

Exit gyro setup mode.
Now, try moving the rudder sticks all the way to it's ends, you will see the servo will stop
at the registered spot and not push further.
Again I will just mention again. The gyro has now 'memorised' the two ends' independent
travel limits.
It will be a good idea to reduce the TAIL channel's Endpoint/EPA/ATV/Travel/etc now,
this gyro doesn't just give you a solid hold, but will give you a very powerful piro speed
at full!
No no no... not now yet!
Ok, up to this stage the gyro is more or less set. We need to turn our attention to the
radio's setup.
For most gyros, you may be changing the value of the gyro GAIN in your radio and trial
and error till you get to what you want. Most commonly, all you have is a LED on or off
(or change of colours)to tell you if it's in heading hold mode or not.
How would you know of the ACTUAL GYRO's GAIN?
True enough, leading brands calibrates their own radios and gyros to get a very close
match so you will more or less 'accurate' input. or rather what u think is accurate. What
happens when you mix them? eg brand-X radio with brand-Z gyro, brand-Z radio with
brand-Y gyro, etc....
To reduce the guesswork involved, LogicTech LTG-2100T incoporates a row of LEDs to
indicate what is the gain that the gyro is actually 'seeing'
TL LED off - normal mode
TL LED on - TAIL LOCK mode
1st LED - 1 to 30 %
2nd LED - 31 to 40 %
3rd LED - 41 to 50 %
4th LED - 51 to 60 %
5th LED - 61 to 70 %
6th LED - 71 to 80 %
7th LED - 81 to 90 %
8th LED - 91 to 100%
Page 14

Page 15

Page 16

Page 17

Page 18

Page 19

Page 20

Page 21

Adjust the GAIN value in your radio and see the actual LED indication until you get the
Page 22

desired holding power you want for the tail.
Don't forget you still have the ROTATE RATE settings to finetune the heli's tail
behaviour to your liking!
Experiment around and awake the potential of LTG-2100T :up
*the GAIN channel endpoints can actually be adjusted so that the radio values and the
actual gyro values are close to perfectly matched*
 Loading...