How it Works
Log In / Sign Up
0
My Files
0
My Downloads
329074
History
Account Settings
Log Out
Buy Points
How it Works
FAQ
Contact Us
Questions and Suggestions
Users
Logitech
Loading...
G
G230
G233
G25
3
G27 Racing Wheel
G29
5
G300
G302
G303
G305
G333
G400
G400S
G402
3
G403
G403 Hero
G410
G413
5
G430
G502
G502 Hero High Performance
G502 Lightspeed
G502 Proteus Core
G51
G510
G513
3
G560
G600
3
G600 MMO
G602 Wireless
G603
G610
G613
G633
G635
G640
G710+
G810
G815
G840 XL
G900
G903
G903 Lightspeed
G910
3
G910 Orion Spectrum
G913
G915
G920
G923
2
G930
2
G933
2
G935
G940
G9X
Gaming G302 Daedalus Prime
Gaming Software
H
H110
H111
H130
H151
H330
H540
H570e
H800
H 950
Handleiding
Harmony 1000
Harmony 1100
Harmony 200
Harmony 300
HARMONY 300 REMOTE
HARMONY 350 CONTROL
HARMONY 525
3
HARMONY 555
3
Harmony 600
HARMONY 628
HARMONY 665
HARMONY 670
Harmony 688
Harmony 880
HARMONY 885
3
HARMONY 885 VERSION 1.1
HARMONY 895
HARMONY ELITE
HARMONY HUB
HARMONY REMOTE 600
HARMONY SMART CONTROL PLUS
Harmony Smart Keyboard
HARMONY ULTIMATE
Harmony Ultimate One
HD C525
HEAVY EQUIPMENT SIDE PANEL
HS200
I
ILLUMINATED KEYBOARD
INTERNET 1500 LASER CORDLESS DESKTOP
INTERNET 350 KEYBOARD
Internet Navigator Keyboard
K
K100
K120
K200
2
K230
Loading...
Loading...
Nothing found
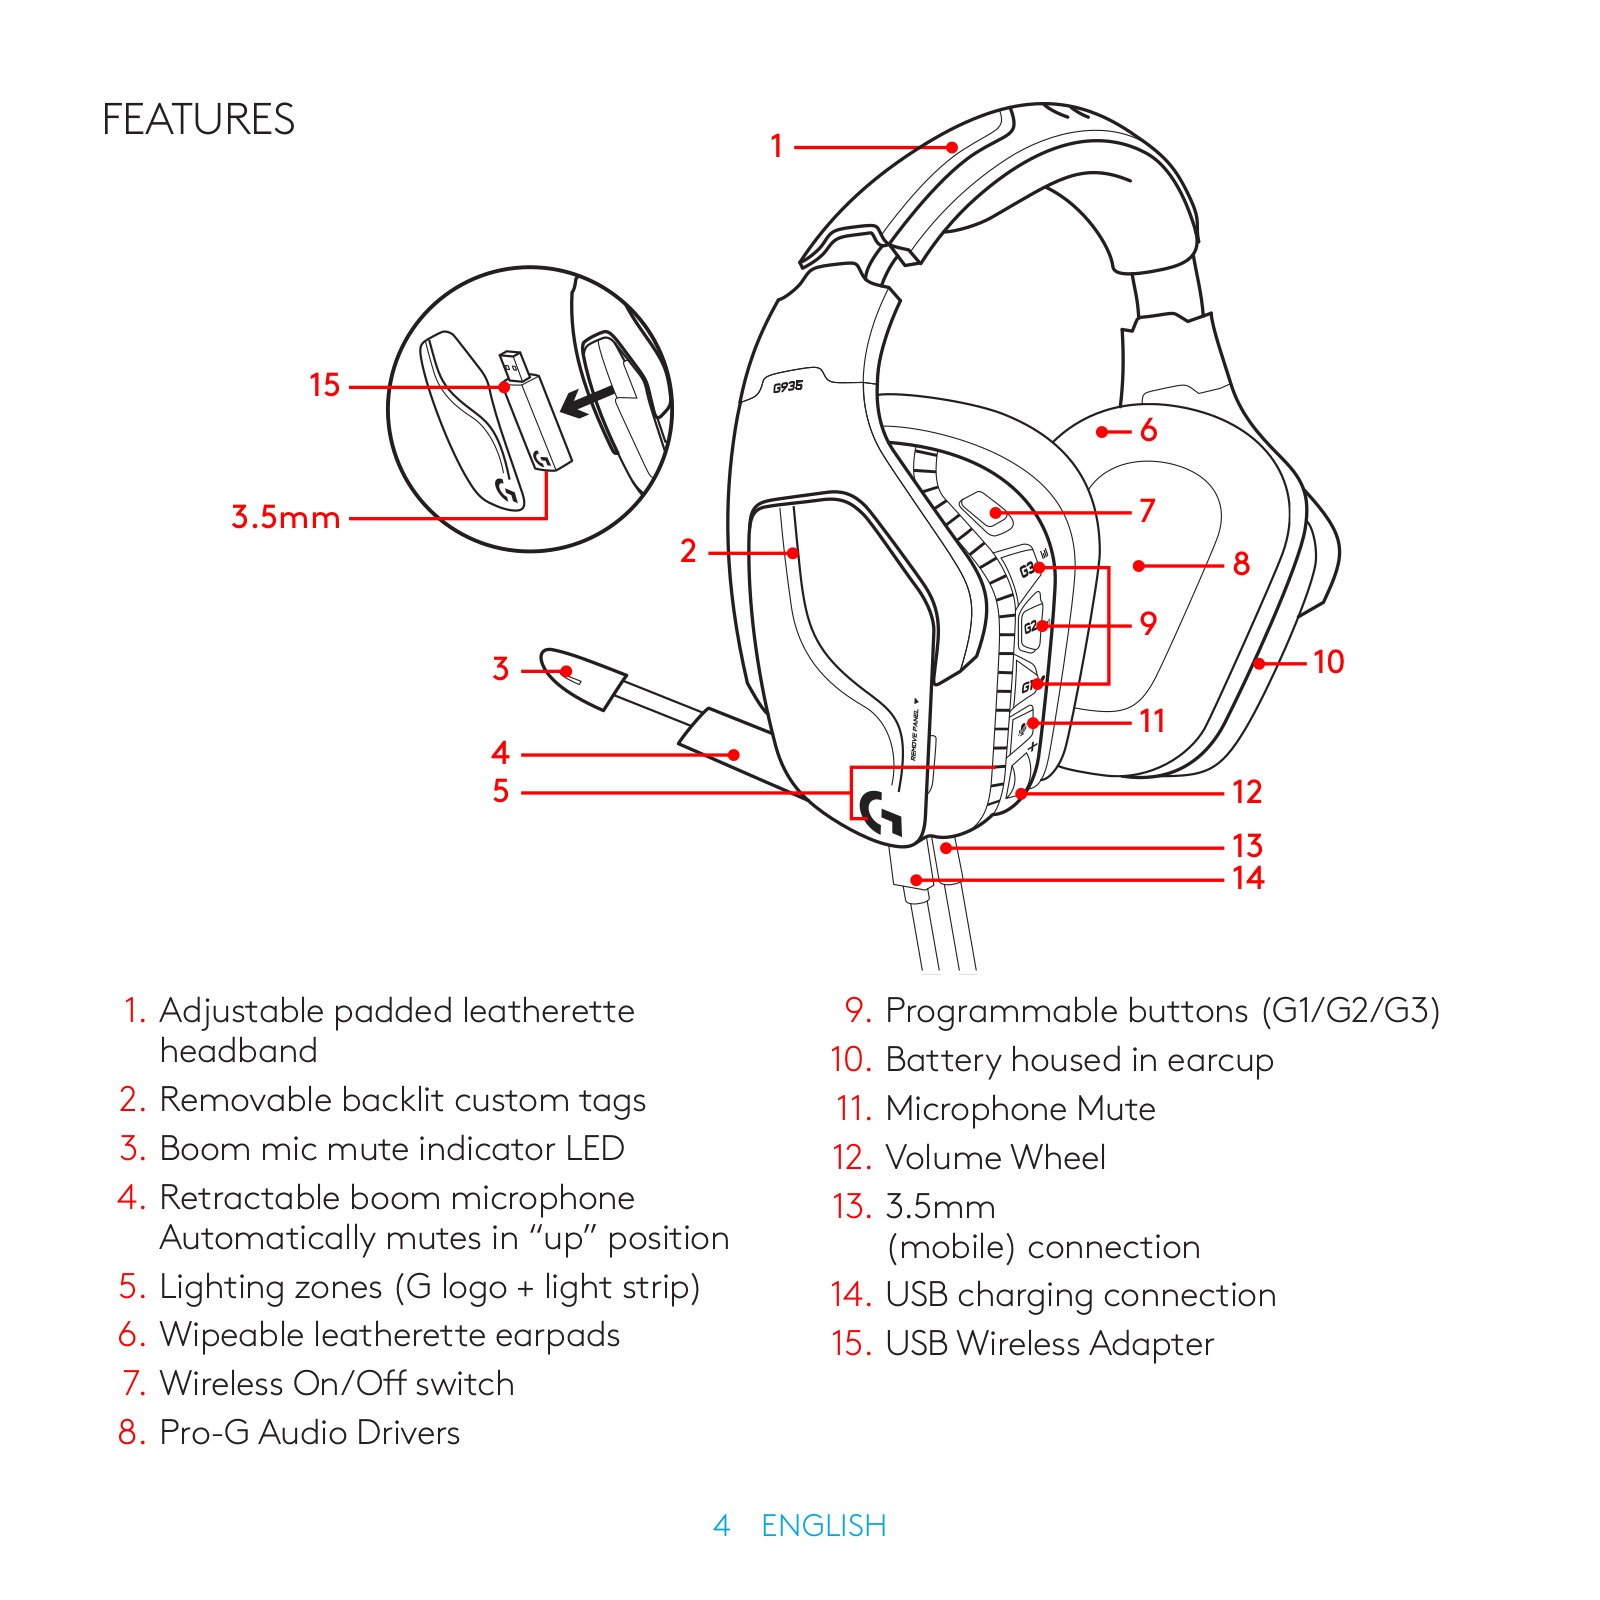
G935
User Manual
451 pgs
3.86 Mb
1
User Manual
67 pgs
3.27 Mb
0
Technical data
2 pgs
339.56 Kb
0
Table of contents
Loading...
Logitech G935 User Manual
...
Logitech User Manual
Download
Loading...
+
421
hidden pages
Unhide
You need points to download manuals.
1 point = 1 manual.
You can buy points or you can get point for every manual you upload.
Buy points
Upload your manuals
 Loading...