


User
Manual
User
Manual
Version 1.0
Version 1.0

Contents
Introduction............................................................................................................................. 4
Getting to know your remote .................................................................................................. 4
How your Harmony 525 works ........................................................................................ 4
Activities, devices, and inputs ......................................................................................... 4
The buttons on your Harmony 525 ................................................................................. 5
What’s on the Harmony 525 screen ...................................................................................... 6
Using your Harmony 525 ......................................................................................................... 7
Selecting an Activity ........................................................................................................... 7
Turning off your devices ...................................................................................................... 7
Switching between Activities ................................................................................................ 7
Using the Help button ........................................................................................................ 8
Controlling your devices individually ...................................................................................... 9
Setting the backlight timing ................................................................................................. 9
Using the Coloured Buttons (Teletext).................................................................................... 9
Using the Glow Button ........................................................................................................ 9
Setting up your Harmony 525 for the first time ......................................................................10
Overview of the setup process ............................................................................................10
1. Creating your user account .............................................................................................11
2. Connecting your Harmony 525 to your computer ..............................................................11
3. Setting up the devices you want to control .......................................................................12
4. Setting up Activities for your Harmony 525........................................................................12
5. Updating the remote .....................................................................................................13
Testing your setup ..................................................................................................................14
Adding an extra device (passthrough) to an Activity ...............................................................15
Changing how buttons work in an Activity ............................................................................16
Customizing the on-remote help .........................................................................................16
Changing your setup ..............................................................................................................17
Adding and changing your Activities ....................................................................................17
Renaming an Activity .........................................................................................................17
Adding and changing your devices ......................................................................................17
Controlling the Remote Assistant .........................................................................................18
Personalizing your Harmony 525 ............................................................................................18
Adding custom-labeled buttons to an Activity .......................................................................18
Changing the order of Activities on your Harmony 525 screen .................................................18
Adding additional features to your Harmony 525 ...................................................................19
Teaching your Harmony 525 new commands using your old remote ........................................19
Naming a new command your remote learned ..................................................................... 20
Types of delays or speed settings .........................................................................................21
Adjusting the delay between IR commands (speed settings) ................................................... 22
2

Maintaining your Harmony 525 ............................................................................................. 23
Upgrading your Harmony 525 firmware ............................................................................... 23
Testing your remote settings after a software upgrade .......................................................... 23
Upgrading to a new Harmony remote ................................................................................. 23
Troubleshooting problems with your Harmony 525 .............................................................. 24
Figuring out which inputs your system uses .......................................................................... 26
Figuring out which type of input control you have ................................................................ 26
Step 1— Turn on all your devices ......................................................................................... 27
Step 2 — Watch the TV ..................................................................................................... 28
Step 3 — Listen to the sound .............................................................................................. 28
Getting help with your Harmony 525 .................................................................................... 29
Contacting Customer Support ............................................................................................ 29
Getting help with your online setup .................................................................................... 29
Finding answers to questions ............................................................................................. 29
Using the On-Remote Help ................................................................................................ 30
Logitech’s Harmony Remote user forums ............................................................................. 30
Appendix A - Device Information ............................................................................................31
Appendix B - Glossary ............................................................................................................ 32
Appendix C - Product Specification ........................................................................................ 35
3

Introduction
The Logitech® Harmony® 525 advanced universal remote simplifies your home entertainment,
replacing up to ten remotes with one. One-touch, Activity-based control turns on the right devices
in the right order.
Whether you’re new to Harmony products or you consider yourself an expert, this User Manual
provides you with useful information to get you going.
Getting to know your remote
How your Harmony 525 works
The Harmony 525 is an Activity-based infrared (IR) universal remote control.
Using the Harmony Remote Software, you can configure the Harmony 525 to control
up to 10 devices.
The Harmony 525 delivers powerful Activity-based control through the use of Smart State
Technology®. This technology allows the Harmony 525 to keep track of the devices it controls,
so it always knows which of your devices are on. Using Smart State Technology®, the Harmony 525
switches effortlessly from watching a DVD to listening to music on the stereo with the touch
of a button.
Activities, devices, and inputs
Activities are the basis for how the Harmony 525 works. Things like watching a DVD, listening
to radio, playing a game are all examples of Activities you can set up for your remote using the
Harmony Remote Software.
When you select an Activity, your Harmony 525 sends a series of commands to your entertainment
system to turn on the necessary devices and configure them for the selected Activity. After you
select an Activity, your Harmony 525 assigns the buttons on your remote so they control the
proper devices and the LCD screen will also display other commands for that Activity.
For information on how to select an Activity, or how to switch between Activities,
see Selecting an Activity.
Devices are the components of your entertainment system. They’re things like your TV, cable box,
DVD player, or game system.
Inputs are how your devices are connected. For example, if your DVD player is connected to your
TV using the Component 1 input, then the TV needs to be set to Component 1 to display the DVD
picture properly.
4

The buttons on your Harmony 525
OK
Glow
Stop Replay SkipPlay
Rec Rew FwdPause
abc
def
ghijkl mno
pqrs tuvwxyz
clear
enter
*
#
123
456
789
0
Off
Menu Info
Ch
-
+
Vol
Devices Help
Activities
u
t
e
Off
Stop Replay SkipPlay
Rec
Vol
Ch
RewFwd Pause
Activities
Devices
Menu Info
Help
ExitGuide
OK
abc
Glow
def
ghijkl mno
pqrs tuvwxyz
clear
enter
*
#
123
456
789
0
-
+
Menu Info
ExitGuide
ExitGuide
The Harmony 525
buttons may have
different functions
or control different
devices depending on
which Activity you’re in.
For more information, see
Changing how buttons
work in an Activity.
The system off button turns off all the devices in the current Activity.
The arrow keys help you page through items on the touch screen.
The Activities button returns you to the Activities starting point.
The Help button starts the on-remote help.
The Menu button opens the on-screen menu for the device selected.
For information on selecting devices, see
The glow button lights up the buttons and your on-screen guide or
menu.
The Info button opens the information section of your on-screen guide.
The Exit button closes your on-screen menu or guide.
The Guide button opens your on-screen guide.
The volume button changes the volume.
The navigation pad arrows allow you to move through menus or onscreen guides.
The channel button changes the channels.
The mute button mutes the sound.
The previous channel buttons returns you to the last channel you were
on.
The play area puts your play, pause, skip and other buttons in one area
for quick access.
The number pad has the digits 0-9.
5
What’s on the Harmony 525 screen
Commands common to your Activity
When you select an Activity, your Harmony 525 screen displays all the commands related
to that Activity, not just the ones related to the primary device of that Activity. For
example, if you’re watching a DVD, your screen displays functions and commands for
your DVD and other devices you use in the Watch a DVD Activity.
Activities
The Activities screen is your starting point on the Harmony 525. From this screen,
you can select your Activities. You get to the Activities screen by pressing the Activities
button.
The status light is the green ring shaped LED that
surrounds the Activities button. The status light will
illuminate when the Harmony is sending commands
to your devices.
Devices
When you press the Devices button, the Harmony 525 screen displays a list of
your devices. From this screen, you can control individual devices by selecting the
device you’d like to control.
6
Using your Harmony 525
Off
StopReplay Skip Play
Rec
Vol
Ch
RewFwd Pause
Activities
Devices
Menu Info
Help
Exit Guide
OK
Glow
-
+
M
u
t
e
P
r
e
v
Selecting an Activity
The Activities screen displays the Activities you have
created for the remote. You can start an Activity by
pressing the Activities button and then selecting the
Activity you want to start by pressing the side LCD
button corresponding to that Activity.
Switching between Activities
To switch to a new Activity, press the Activities button, and select the Activity you want by pressing
the side LCD button corresponding to that Activity.
The Harmony 525 will take care of powering on the needed devices, and powering off the ones not
needed.
Turning off your devices
Press the off button to power off all the devices used in the Activity.
You don’t need to press the system off button when
switching between Activities. The Harmony 525 ensures
the proper devices for the Activity are On or Off.
7
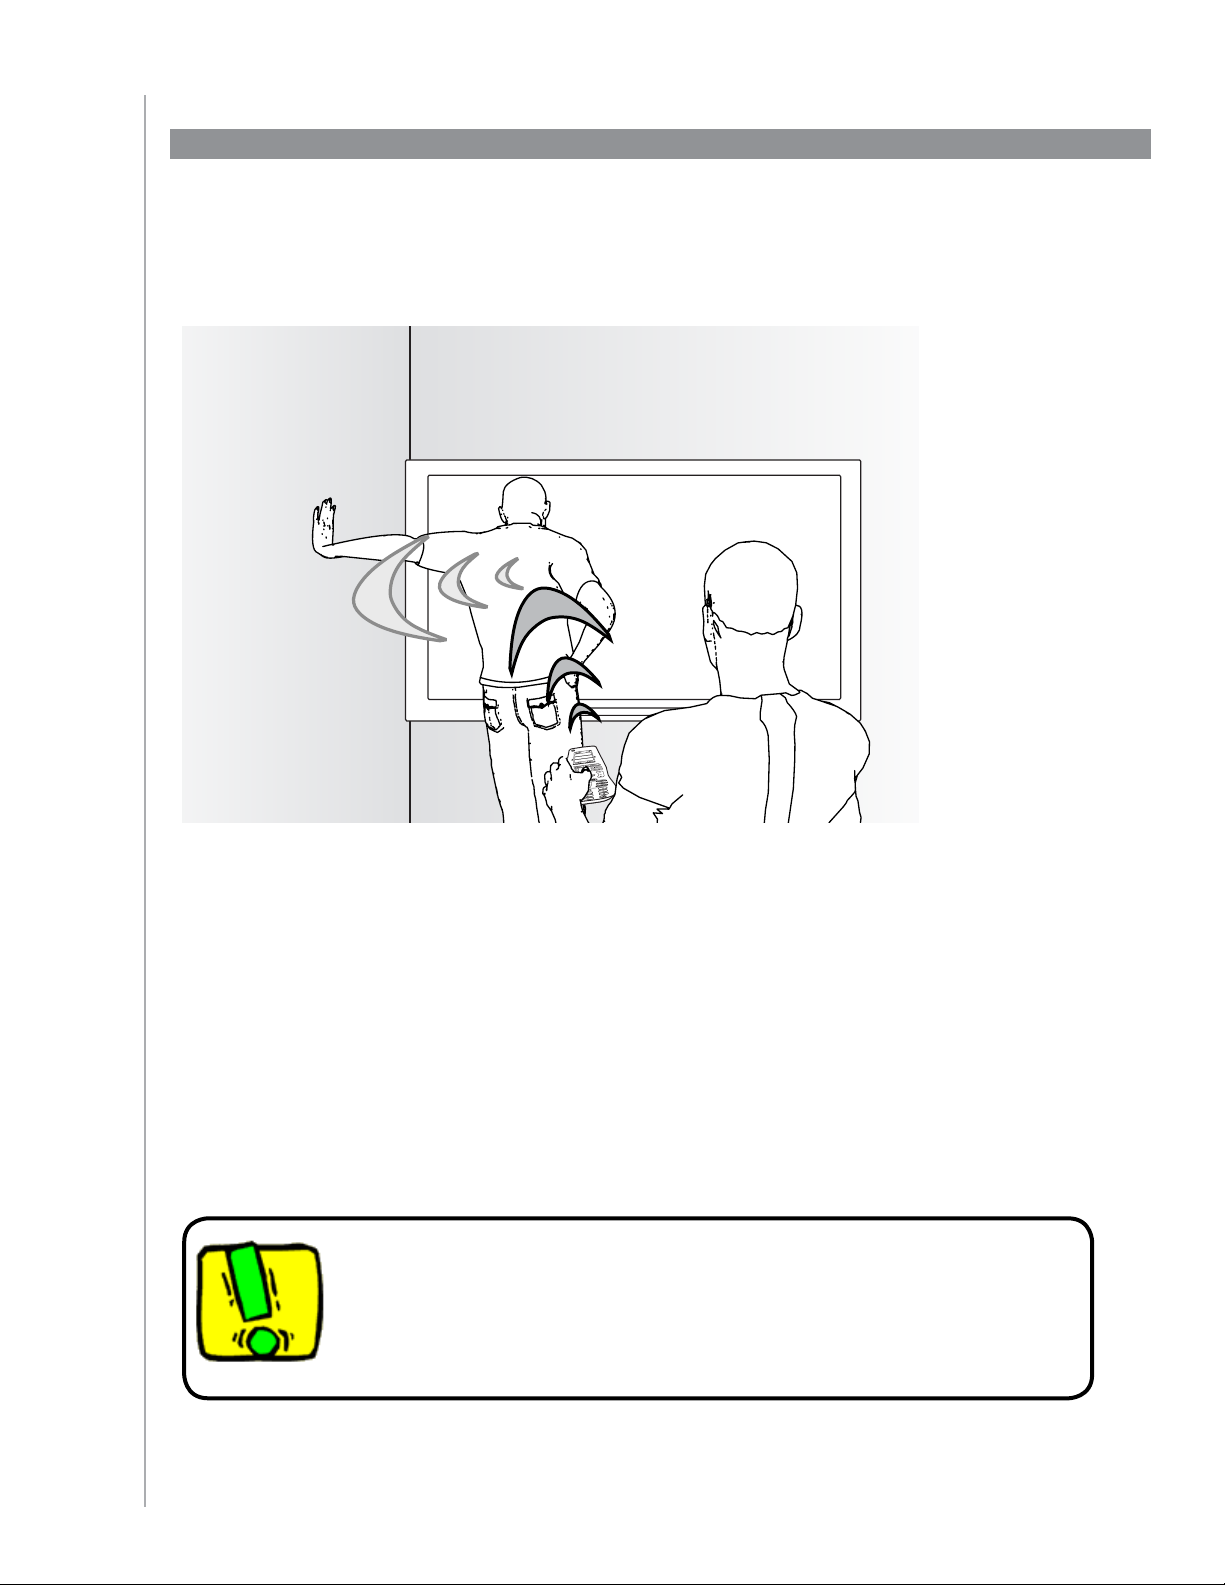
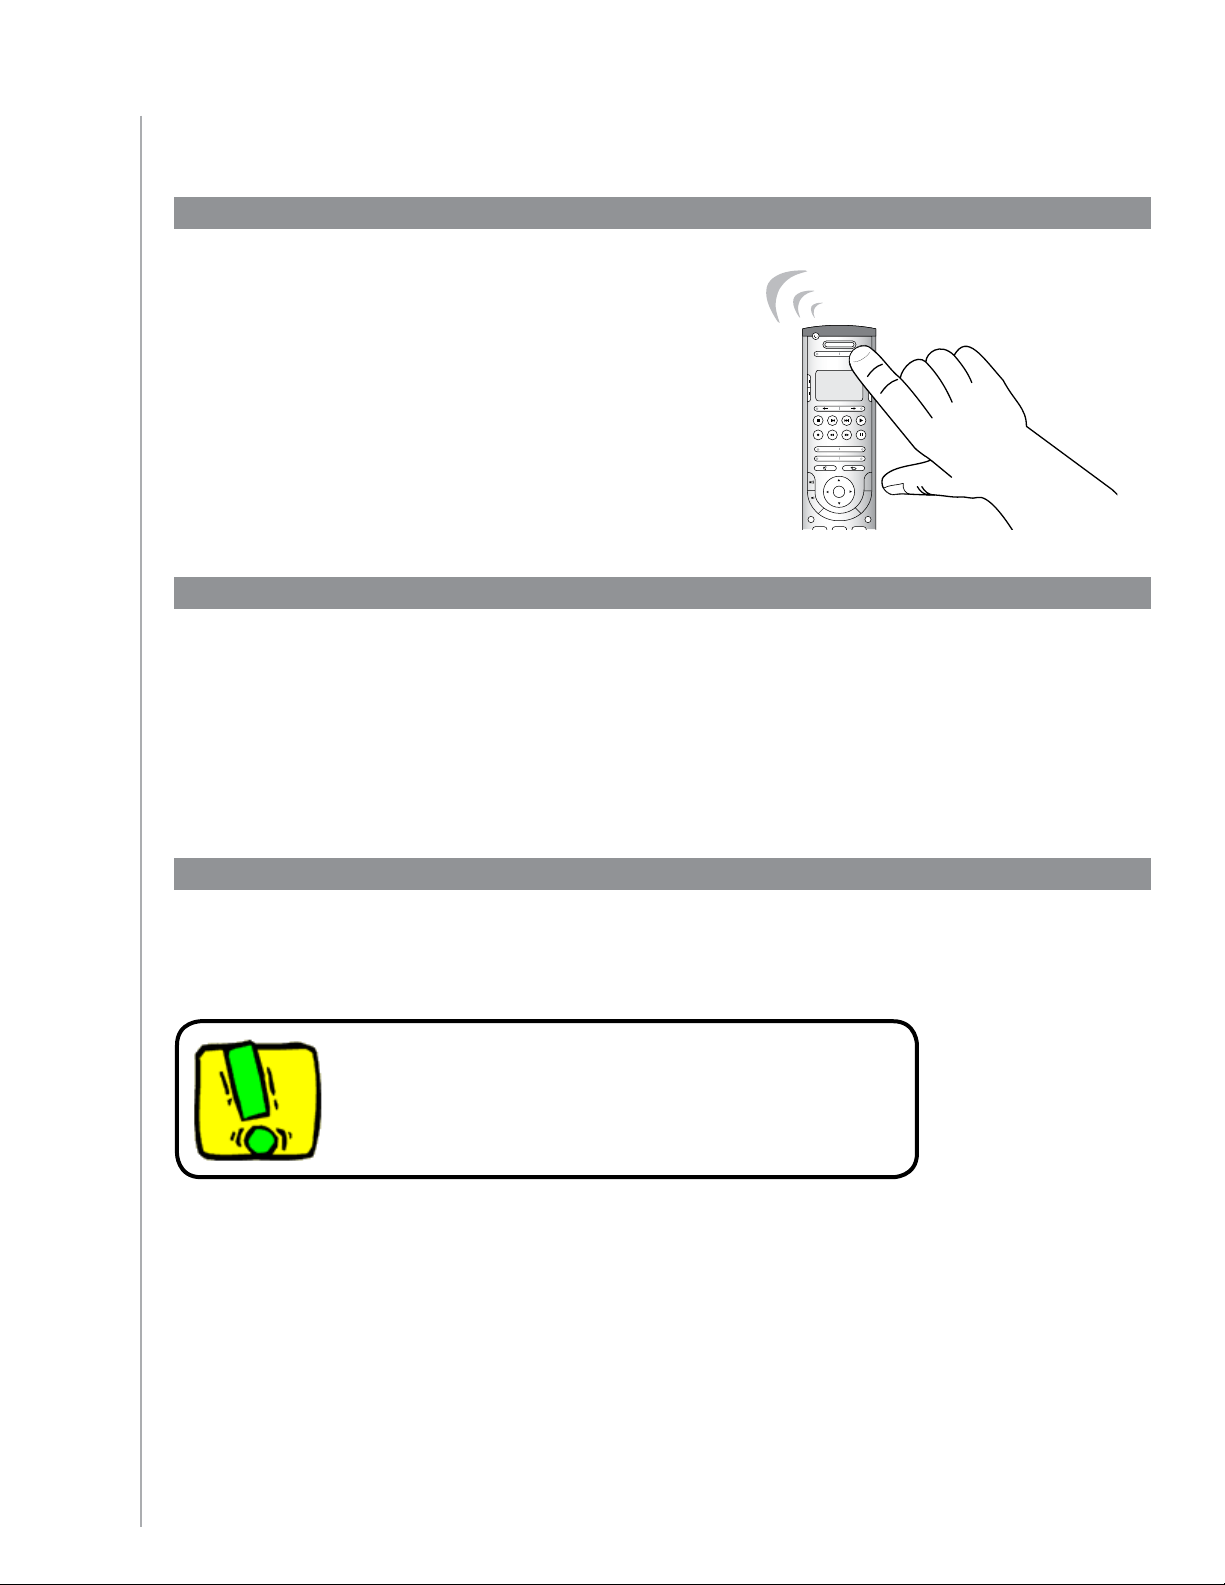
Using the Help button
Because obstacles or distance can interfere with the signals the Harmony 525 sends when it starts
an Activity (for example, someone walks between your Harmony 525 and the TV when you press
Watch TV, or you’re very far away from the system when you start an Activity), your Harmony 525
can become “out of sync” with your devices.
To fix the problem, use the help feature on your Harmony 525.
On the remote, press the 1. Help button.
Answer the questions on the Harmony 525 screen by selecting 2. Yes or No by pressing
the side LCD button closest to your selection.
Based on your answers, the Harmony 525 re-sends the necessary commands to synchronize with
your devices.
When you’re done with this process, the Harmony 525 will be “in sync” with your devices.
Before using the Help button, be sure you’ve addressed the cause
of the problem (for example, remove any obstacles from the line of sight).
8
Controlling your devices individually
In some cases, you may want to control a device individually. You can use the device feature of the
Harmony 525 to control devices one-by-one.
When you press the Device button, the Harmony 525 screen displays a list of your devices. Select
the device you wish to control by pressing the side LCD button closest to your selection. After you
select a device, the Harmony 525 controls only that device. You have access to all the commands
for the device included in your Harmony 525 configuration.
Once you’ve finished, return to Activities for the optimal control of your entertainment system.
Setting the backlight timing
To set the length of time the backlight stays on, follow these steps:
From your Harmony Remote Software:
Select 1. Remote Settings.
Select 2. Display Settings.
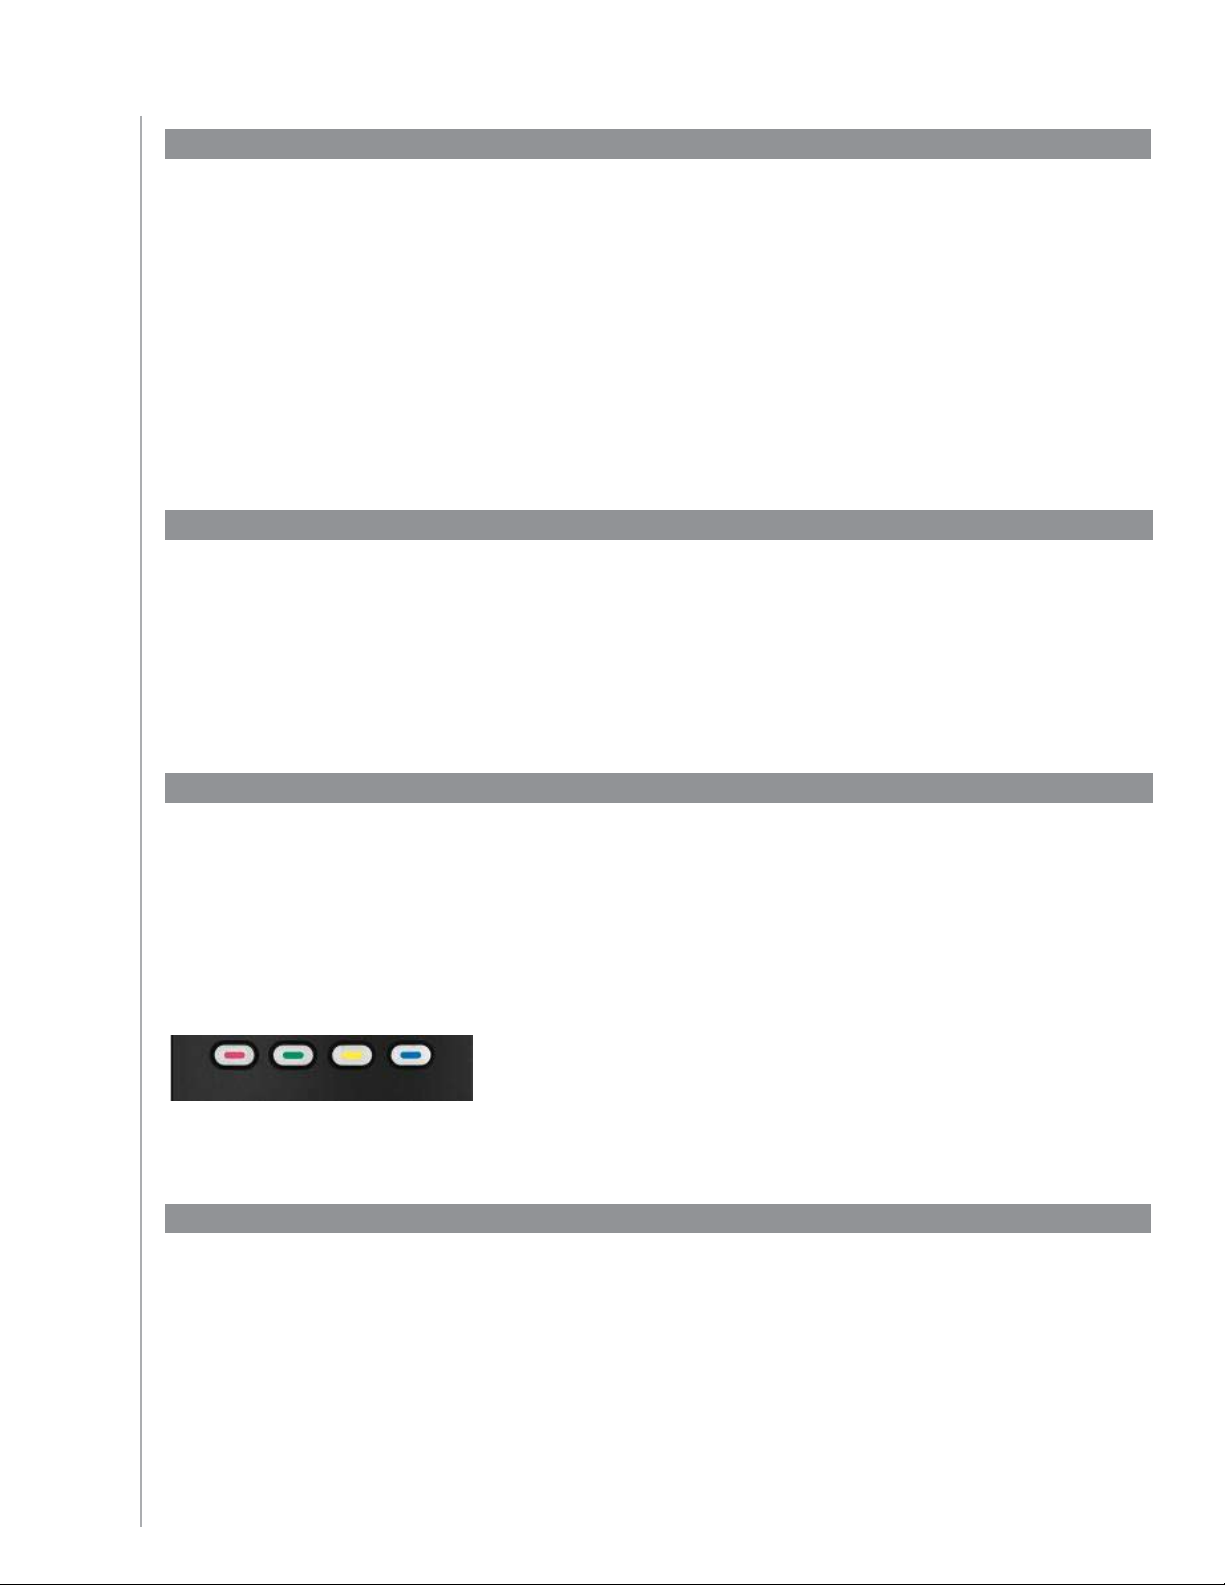
Using the Coloured Buttons (Teletext)
If your TV is programmed to send and receive Teletext content, when you press any of the
Coloured buttons (Teletext), the home page for Coloured buttons will appear on the television
(it may take a few seconds for the page to appear). The Teletext page will completely replace
the television picture, but sound will still be available. Each Teletext page has a unique 3-digit
page number; all pages can be accessed by entering the 3-digit page number using the
numbered channel buttons on your Harmony remote.
While Teletext is the default setting for these coloured buttons
in the Watch TV Activity, you can customize these buttons
to send different commands in other Activities. See Adding
custom-labeled buttons to an Activity.
Using the Glow Button
Press the Glow button to light up or turn off the display backlight. To determine the length of
time the backlight stays on.
Note: Shaking or tilting the Harmony remote will not light up the display backlight. Users must
press the Glow button to light up the display backlight. The remote will go into Deep Sleep
mode when the remote detects no motion for two hours. The remote will begin motion
sensing in Deep Sleep mode, and can be sensitive to movement.
9
Setting up your Harmony 525 for the first time
Overview of the setup process
When you insert the Harmony remote CD, the Installer launches. Follow the easy setup instructions
to install the Harmony Remote Software. For more information on installing the Harmony Remote
Software, refer to the Getting Started Guide.
After the software installs, start the Harmony Remote Software. When you start the Harmony
Remote Software, you will be prompted to update your remote.
After you install the Harmony Remote Software and gather your device information using
the Device Worksheet, the setup process guides you through five steps in which you answer a series
of questions about how your entertainment system is set up.
Create Account: the setup walks you through creating a user account on the Harmony 1.
Remote Software.
Check connection: the software ensures your computer and Harmony 525 are 2.
communicating with each other.
Set up Devices: the software walks you through entering the manufacturer and model 3.
numbers of your entertainment system that you collected using the Device Worksheet.
Set up Activities: the software asks you questions about how your entertainment system 4.
is set up, and then saves the settings.
Update Remote: the software transfers the information from your PC to the remote.5.
10
Gathering your device information
To simplify the setup process, we recommend you fill out the Device Worksheet,
so that all the device information is at hand when you need it.
Locating manufacturer and model number on your devices
Manufacturer names and model numbers are typically found at the front of a
device, on a label on the back of the device, or in the User Manual for that device.
1. Creating your user account
Off
StopReplay Skip Play
Rec
Vol
Ch
RewFwd Pause
Activities
Devices
Menu Info
Help
ExitGuide
OK
abc
Glow
def
ghi jkl mno
pqrs tuv wxyz
clear
enter
*
#
1 23
4 56
789
0
-
+
M
u
t
e
P
r
e
v
When you start the Harmony Remote Software for the first time, you must create
your user account.
From the Harmony Remote Software:
Click 1. Create New Account.
Complete the required account information.2.
Follow the instructions in the setup wizard.3.
After you create your user account, the Harmony Remote Software opens your home 4.
page each time you log in.
Your home page is where you can manage your Activities and Devices, as well as change the settings
on your remote.
Whether you want to add a new Activity or device, troubleshoot a problem with an Activity,
or customize remote buttons, the Harmony Remote Software home page is the place to start.
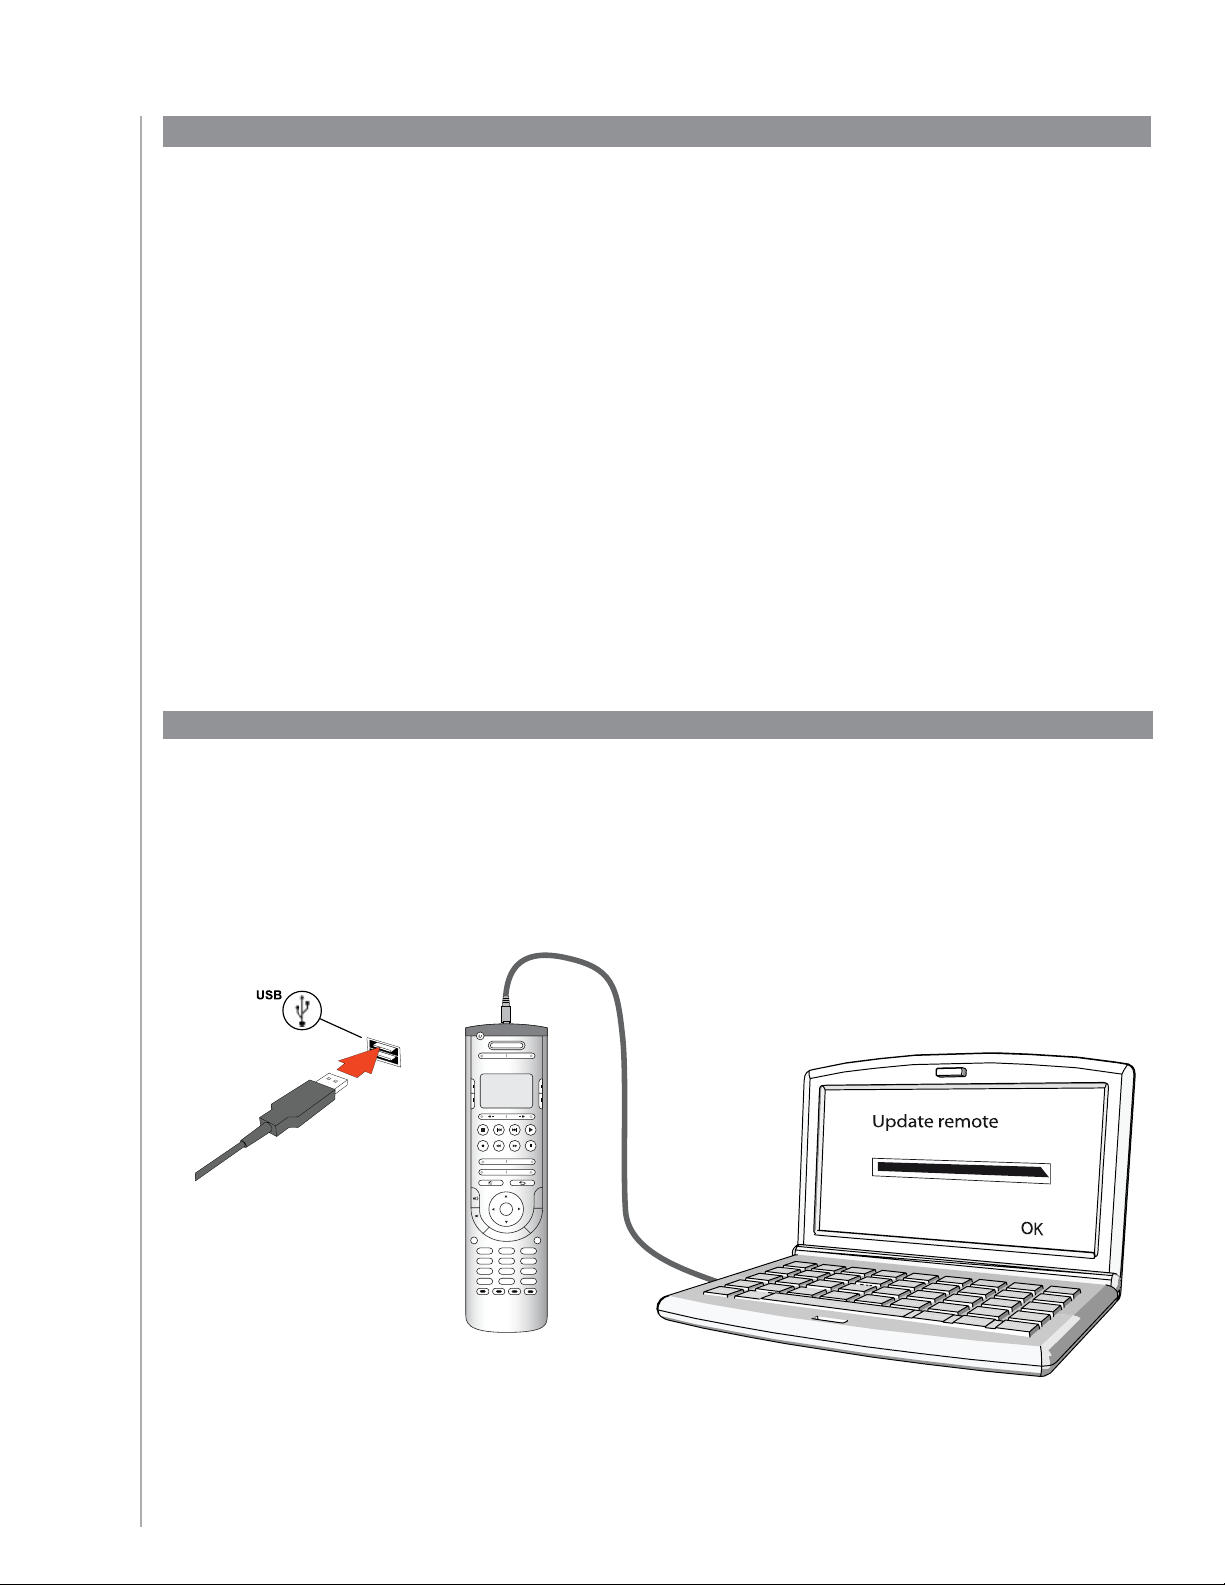
2. Connecting your Harmony 525 to your computer
To connect your Harmony 525 to your PC, use the USB cable provided.
Connect the smaller end of the cable to the USB port on your remote.1.
Connect the wider end of the USB cable to a USB port on your computer.2.
11

3. Setting up the devices you want to control
The guided online setup asks you to enter your device information. Enter the information for all the
entertainment components you want to control with your Harmony 525. You should use the Device
Worksheet
to gather all your device information before starting the setup process.
Select the Device Type for each of your devices.1.
Select the Manufacturer for each device.2.
Enter the Model numbers for each device.3.
Adding new devices at a later time
If you want to add newly acquired devices
after the initial setup, see Adding and
changing your devices.
Guided online setup
4. Setting up Activities for your Harmony 525
To set up Activities, you need to enter the information related to the Activities you will be using
on your Harmony 525. The Harmony Remote Software shows you a selection of recommended
Activities based on the device information you provided.
When you set up Activities, the software asks questions about the function of each device. For
example, if you set up the Watch TV Activity, you’re asked which device changes the channels
(TV or satellite/cable box). If you only have one device that is capable of doing something, then
the software skips the question. For example, if you only have one TV, the software doesn’t ask
you which device displays video.
If the device has more than one input, the software asks you which input the device needs to be
set. If you’re not sure which input a device uses, see Determining your inputs for more information.
Activities are the basis for how the Harmony 525 works.
With Activities, the Harmony 525 eliminates the need
to use multiple remotes for simple tasks. Just select the
Activity and the Harmony 525 does the rest. For more
information on Activities, see Adding and changing
Activities.
12

5. Updating the remote
After you enter your device and Activity information, the software saves your information. It also
transfers the information to your Harmony 525. After the software updates your remote, you’re
ready to test your setup. For specific details about testing your setup, see the chapter on Testing
your Setup.
13

Testing your setup
Every time you update your Harmony 525, you should test your remote to ensure it’s working the
way you expect. This chapter gives you the information you need to test your remote. It also has
some suggestions on what to check while you’re testing your setup.
If you run into specific issues while testing your remote, refer to the Troubleshooting section of this
manual for suggestions and possible fixes for your problems.
The process of testing your Harmony 525 is straightforward. It involves simply trying the Activities
you use most often and then using the on-remote help to correct any issues.
In some cases, you may need to return to the Harmony Remote Software to make changes to your
remote’s setup to ensure the remote is working the way you want.
To begin testing your remote:
Ensure all the devices in your entertainment system are turned off.1.
Disconnect the USB cable from your remote.2.
Follow the instructions displayed on the remote’s screen.3.
Go to your entertainment system and try each of your Activities. 4.
For tips on what to look for when starting an Activity, or switching between Activities,
see the tips in this chapter.
If an Activity doesn’t start correctly, press the Help button on the remote
and the on-remote help will get you back “in sync”. After you finish
testing your Activities, be sure to re-test any for which you had to use the
Help.
Testing your setup – Starting an Activity
Look for these things in particular:
Did all of your devices for that Activity turn on?•
Do you hear the correct sound?•
If the Activity includes your TV, do you see the correct picture?•
Testing your setup – Switching between Activities
Look for these things in particular:
Are all devices needed for this new Activity on?•
Did devices not needed for this Activity turn off?•
Do you hear the correct Sound?•
If the Activity includes your TV, do you see the correct • picture?
14

Adding an extra device (passthrough) to an Activity
A passthrough device is a device that you add to your system that a signal passes through
unaltered.
For example, if you use your DVD recorder (or VCR) to record shows from your satellite or set top
box, you may need to add your DVD recorder as a passthrough device.
In these examples, the DVD Recorder and the A/V Switch are used as passthrough devices.
Digital Set Top Box DVD Recorder
TV
VCR
Digital Set Top Box
A/V Switch
DVD Player
To add an extra Device (Passthrough) to an Activity, go to your home page:
Select the 1. Activities tab.
Click 2. Settings next to the appropriate Activity.
Select 3. Review the settings for this Activity.
Select 4. Yes, but I want to add more control of options and devices for
this Activity.
Click 5. Next.
Follow the online instructions to complete the setup.6.
TV
15

Changing how buttons work in an Activity
Activities
Devices
Menu Info
Help
Exit Guide
OK
abc
Glow
def
ghi jklmno
pqrstuv wxyz
clear
enter
*
#
123
456
78
9
0
-
+
M
u
t
e
P
r
e
v
When you select an Activity, your Harmony 525 turns on all the required entertainment devices,
sets up the device inputs correctly, and sets up the remote’s buttons to control the devices in
the Activity. For example, when you select the Watch a DVD Activity, the volume buttons on the
Harmony 525 changes the volume.
However, there may be some commands you want to add to buttons or display on the remote’s
screen. Using the Harmony Remote Software you can add or customize how buttons work in any
Activity quickly and easily.
From the Harmony Remote Software:
Select the 1. Activities tab.
In the Activity in which you want to change a button, click 2. Customize Buttons.
Follow the online instructions.3.
Customizing the on-remote help
Using the Harmony Remote Software, you can customize the Harmony 525 on-remote help
by selecting between two types of help:
Smart Help
• Asks questions about the devices that are on during a specific Activity.
Full Help
• Asks questions about all the devices in your account.
From the Harmony Remote Software:
Select the 1. Remote Settings tab.
Click 2. Display Settings.
Follow the online instructions.3.
16

Changing your setup
Whether you get a new device or want to change the behavior of some buttons, you may need to
make changes to your Harmony 525 setup. The following sections provide you with the information
to help you with these tasks.
Adding and changing your Activities
In the Harmony Remote Software, select the Activities tab.
To add an Activity, click • Add Activity.
To remove an Activity, click the • icon for the Activity you want to remove.
To modify the settings for an Activity, press the • Settings button for the Activity you
want to modify.
Renaming an Activity
In some cases, you may want to rename an Activity. You can rename any Activity
using the Harmony Remote Software.
To rename an Activity, go to the Harmony Remote Software:
Select the 1. Activities tab.
In the Activity you want to rename, click 2. Settings.
Select 3. Rename <current Activity name>.
Adding and changing your devices
To add or change a device in your Harmony 525 set up, use the Harmony Remote
Software and select the Devices tab.
To add a device, click • Add Device.
To remove a device, click the • icon for the device you want to remove.
To modify the settings for a device, press the • Settings button for the device you
want to modify.
If you delete a device, be sure to update your Activities!
17

Controlling the Remote Assistant
The Harmony 525 Remote Assistant guides you through starting Activities. It also gives you more
information about the status of your remote and the Activity you selected.
For example, when you select the Watch TV Activity, the Remote Assistant prompts you to press help
if any devices are not configured properly.
You can turn this feature on or off from the Harmony Remote Software or from the remote.
The Remote Assistant can be turned off permanently only by using the Harmony Remote Software.
To permanently turn the Remote Assistant off from the Harmony Remote Software:
Select the 1. Remote Settings tab.
Click 2. Display Settings.
Follow the instructions online.3.
Personalizing your Harmony 525
You can personalize your Harmony 525 to make the screen look and act the way you want.
Changing the order of Activities on your Harmony 525 screen
You can easily change the order in which your Activities appear on your remote’s screen.
Rearranging the order of the Activities allows you to have the Activities you use most often appear
at the top of the list.
From the Harmony Remote Software:
Click the 1. Activities tab.
Click 2. Re-order Activities.
Follow the online instructions.3.
Adding custom-labeled buttons to an Activity
If you want a button to do something specific, or there’s a function on your device’s original
remote that’s not on the Harmony 525, you can create your own buttons that appear on the
Harmony 525 screen.
You can also change the name of buttons on your remote’s screen to help make them easier
to find.
Naming buttons that appear on the remote’s screen
When you create a custom name for a button, remember to think
about how the name will look on the remote’s screen! We recommend
keeping button names to 10 characters or less.
18

When you use your Harmony 525 to control devices one-by-one, you can customize
Off
Stop Replay Skip Play
Rec
Vol
Ch
Rew Fwd Pause
Activities
Devices
Menu Info
Help
Exit Guide
OK
abc
Glow
def
ghi jkl mno
pqrs tuv wxyz
clear
enter
*
#
1 2 3
4 5 6
7 8 9
0
+
M
u
t
e
P
r
e
v
the commands that appear on the Harmony 525 screen to make the functions you use easiest
to find.
You can even add the commands you’re missing to your Activities so they’ll always be easily
accessible.
If there’s a button that you don’t use, you can remove buttons that appear on the remote’s screen
using the Harmony Remote Software.
To customize the buttons that appear on the Harmony 525 screen, from the Harmony Remote
Software:
In the Activity for which you want to customize a button, 1.
click Customize Buttons.
Follow the online instructions.2.
Adding additional features to your Harmony 525
It’s possible that a device’s commands are not recognized. Maybe you have a very rare device?
Or a new one? Although we update our device list regularly, there are always new devices in the
market. To remedy this, you can teach your Harmony how to control this device by using the
device’s original remote.
Teaching your Harmony 525 new commands using your old remote
With the Learn IR feature of the Harmony 525 and the Harmony Remote Software, you can use your
device’s original remote to “teach” your Harmony 525. You should only need to use this feature
when Logitech’s device list doesn’t have your device listed, or there’s a button you want to use
that’s missing from the device configuration.
To use the Harmony 525 learning feature, go to the Harmony Remote Software.
Select the 1. Devices tab.
Click 2. Learn IR located next to the device you want to control.
Follow the online instructions.3.
5-10 cm (2” - 5”)
19

Naming a new command your remote learned
When you teach your Harmony a new command, you need to give the command a name. This way,
you can refer to the command by name in various locations in the Harmony Remote Software.
Logitech recommends you use the default names listed on the Learn IR page. By using the default
names, you minimize the chance of a button being assigned incorrectly on the Harmony 525.
Naming conventions
When naming a command for which there is no default name on the Learn IR page,
use the following naming conventions to make button assignment easier:
Don’t use spaces or special characters such as /, & or * in the name.•
Capitalize the start of words (for example,• NextDisc, ModeDigital).
Start the command name with its main function (for example, • VolumeRearUp,
VolumeRearDown, VolumeFrontUp). This helps group related commands in lists.
Start infrared commands that select inputs (for example, on a stereo receiver) with the prefix •
“Input” (for example, InputAux, InputVideo1, InputTape, InputDVD).
Don’t name the input based on what you’ve connected to your device, rather name it based •
on what it’s called on the front of the device, or on the remote control
(for example, InputAux, InputVideo1, InputTape, InputDVD).
20

Types of delays or speed settings
If your device doesn’t react to a command from the Harmony 525, it may be because the delay
setting needs to be adjusted. By default, different devices take different amounts of time to react
to a command from a remote control. To accommodate these differences in your devices,
the Harmony 525 uses several types of delays, or speed settings, to control your devices.
Power On Delay
The Power On Delay is the amount of time that a device needs to “warm up” before receiving
another command. For instance, when you turn on a device, you may notice that the device needs
a certain amount of time before it can receive another command from the remote.
Example: Every time I turn on my system with an Activity, my TV powers on but doesn’t go to the
correct input. However, it does go to the correct input when switching between Activities when the
TV is already on. The Help button fixes it each time, but I don’t want to use the Help button every
time.
Inter-Key Delay
The Inter-Key Delay is the amount of time allotted for commands to be sent between button presses.
Example: Any time I press volume up multiple times in a row, for my AV Receiver it takes a long time
to increase the volume. I would like my devices to respond quicker to these presses.
Input Delay
The Input Delay is the amount of time that the remote takes when switching between inputs.
Many devices need a certain amount of time before changing to the next input in the input list.
Example: My TV doesn’t always go to the correct input when switching between Activities and
I have already verified that the input list is correct.
21

Adjusting the delay between IR commands (speed settings)
If you find the delay between IR commands is too long, especially when changing channels on your
TV, you can change the delay time for a device that is reacting too slowly.
The Harmony 525 uses several different delays to control your devices. For more information on
which delay you need to adjust, see Types of delays or speed settings.
To adjust the delay between IR commands, go to the Harmony Remote Software:
Click the 1. Devices tab.
Select the device for which you want to apply the change and click 2. Settings.
Select 3. Adjust the delays (speed settings).
Click4. Next.
Follow the online instructions.5.
22
One touch to you favorite channels

Maintaining your Harmony 525
Upgrading your Harmony 525 firmware
Your Harmony 525 contains internal software, called firmware. The remote’s firmware is similar
to your computer’s operating system.
Logitech updates the firmware for your remote to ensure you’re always getting the most from your
Harmony 525. Generally, when you connect your remote to your computer the Harmony Remote
Software updates your remote automatically if new firmware is available.
However, sometimes you may need to update the firmware manually.
To upgrade your Harmony 525 firmware:
Connect your Harmony to your computer using the USB cable.1.
Start the Harmony Remote Software.2.
Click 3. Downloads.
Click 4. Firmware.
Follow the online instructions.5.
Testing your remote settings after a software upgrade
After you finish making any changes to your Harmony 525 configuration, you should test the new
set up to ensure everything is working the way you expect. This testing process is the same as the
one you did when you set up your Harmony 525 for the first time. For more detailed information,
see Testing your setup.
Upgrading to a new Harmony remote
When you upgrade to a newer model Harmony, you can transfer the configuration from your
old remote to your new remote.
To upgrade to a new model Harmony remote:
From the Harmony Remote Software:
Click 1. Remote Settings.
Click 2. Manage Remotes.
Click 3. Replace.
Follow the online instructions.4.
23

Troubleshooting problems with your Harmony 525
In this section, you’ll find some commonly reported issues and the suggested solutions.
These solutions may help you fix problems you’re experiencing. If you still cannot fix the problem,
refer to Getting help with your Harmony 525.
The TV doesn’t turn on when starting an Activity, but using the Help
button on the remote fixes the issue.
Try increasing the • Inter-Device Delay for your television. Sometimes
commands are sent too close together for different devices and need
to be spaced out more.
The TV doesn’t go to the right input when starting Activities.
Using the Harmony Remote Software, check your Activity to ensure •
the Activity is set up to use the correct input your TV needs to be set
on to get a picture. Next, check that the inputs are in the correct order
for the Harmony 525 to know how to cycle through each input. If you’re
still experiencing trouble, try raising the Inter-Device and Input Delays
for your TV.
When pressing buttons in an Activity, the remote sends
the command twice.
Try lowering the repeats for the device that is receiving the command. •
You can do this by using the troubleshoot option in the Harmony Remote
Software.
When you try to add a new TV to your account, you get a message
informing you that you haven’t entered the correct model number.
The model number for most devices can be found on the front of the •
device. If it isn’t there, it can be found on a label on the back or bottom
of the device. The model number shouldn’t be confused with the serial
number or the model number of the device’s remote control, as many
different devices by a manufacturer can share the same remote.
24

The On Demand command isn’t on the Harmony 525 for the Watch TV
Activity.
You can map the command to any unused button on the Harmony 525 or on •
the remote’s screen. The command is likely in our database, but wasn’t mapped
to the Activity. If we’re missing the command, the Harmony 525 can learn it
from your original remote. For more information, see Teaching your Harmony
525 new commands using your old remote.
The Harmony Remote software in unable to communicate with
the Harmony 525.
Try disabling any Internet security software you might have including firewalls •
and anti-virus software.
25

Figuring out which inputs your system uses
One of the most important parts to creating your Activities for your Harmony 525 is determining
which inputs your system uses for each device. This chapter gives you some suggestions on how
to figure out which inputs your entertainment system uses if you’re not sure.
Inputs are how the devices in your entertainment system are connected. For example, your DVD or
cable box is connected to your TV through an input. If you use an AV Receiver to control the sound
on your devices, for example if you have a home theater system, this chapter will also help you figure
out the inputs for your audio connections.
After you know how your devices are connected, you can use the information to create your
Activities using the Harmony Remote Software.
Figuring out which type of input control you have
The first step in determining which inputs you have is to figure out how you use your device’s original
remote to change inputs. In general, there are four possibilities and each one is described in this
section. To figure out which option your TV or AV Receiver uses, look at your device’s original remote
and see which option fits.
Option 1 — One source button
In this case, your remote has only one source or input
select button.
When you press the source button, your device switches
to the next input and the label appears on your TV
screen.
Each time you press the source button, the device
switches to a new source until you get back to where
you started.
Option 2 — Several source buttons
In this case, your device’s original remote has several
source buttons — one for each input. For example, you
may have buttons labeled TV, DVD, VIDEO 1, or S-VIDEO.
When you press one of the source buttons, the device
switches to the source you selected and the label appears
on your TV screen.
26

Option 3 — Select the input from an on-screen
menu
In this case, your device uses an on-screen menu from
which you can select the input you want.
When you press the source button, the menu appears
on your TV screen. Then, you use another button on
the remote to choose the input you want, and then a
third button to select the input.
For example, you press the source button to display
the on-screen menu, the arrow keys to select an input,
and then the OK button enter your selection.
Option 4 — Select the source from a list
In this case, your device has a list of inputs and you can
use the buttons on the remote to select the input you
want from the list.
After you press the source button, you have to press
another button on the remote that selects the input
you want.
In this option, there’s no menu from which to choose
(Option 3) and you don’t have to cycle through all
inputs to get to the one you want (Option 1).
Step 1— Turn on all your devices
To determine which devices are using which inputs, Logitech recommends you start by turning
on all the devices in your entertainment system.
If possible, you should even start something playing in your DVD player, CD player, VCR, etc.
By having all your devices on, it’s easier to see how they’re connected.
It’s also handy to have some paper and a pen so you can note which devices are connected to
which inputs.
27

Step 2 — Watch the TV
In this step, you must use your TV’s original remote control to switch between inputs.
Using your TV’s original remote, select each input one-at-a-time.1.
For each input, note which device appears to be connected to that input. 2.
For example, if you switch to VIDEO 1 and see your DVD playing, you know your DVD
player is connected to VIDEO 1.
Repeat step 2 for each input.3.
Step 3 — Listen to the sound
You need to complete this step only if you have a separate device (called an AV Receiver) that
manages the sound for your entertainment system. For example, you have a home theater system
or connect your TV to your stereo so the sound comes out of your stereo speakers.
You must use your AV Receiver’s original remote control to switch between inputs.
Using your AV Receiver’s original remote, select each input one-at-a-time.1.
For each input, note which device appears to be connected to that input. 2.
For example, if you switch to OPTICAL 1 and hear the sound from your DVD playing, you
know your DVD player is connected to OPTICAL 1.
Repeat step 2 for each input.3.
28

Getting help with your Harmony 525
Contacting Customer Support
If you’re experiencing problems and can’t find the solution, our courteous and expert professionals
can assist!
Log on to the Harmony Remote Software, click the More Help button located in the Tip Center
and then select the Contact Us tab.
Finding answers to questions
You can access our online help to search for topics or Frequently Asked Questions (FAQs).
Log on to the Harmony Remote Software, click the More Help button located in the Tip Center.
Getting help with your online setup
You have access to several online features that help guide you through the online setup and
customization of your Harmony 525:
Harmony Remote
Software
FAQs (Frequently
Asked Questions)
More Help button Provides specific online help for the page you’re on.
Provides instructional help to guide you through a series of question-andanswer steps to accomplish a task.
A searchable list of customer questions with answers provided by the
Logitech Harmony support center.
29

Using the On-Remote Help
When one or more of your devices don’t power on or off, or when they don’t switch inputs correctly,
you can use the Help button on the remote for simple troubleshooting.
Answer the questions on your Harmony 525 to re-synchronize it with your entertainment system.
See Using the Help button.
Logitech’s Harmony Remote user forums
You can also access the user forums to see what other users like you are discussing. Simply go
to http://forums.logitech.com/.
30

Appendix A - Device Information
In the Add Devices step of the setup software, you will need to enter information about
the components in your entertainment system. Fill out this worksheet to use as your guide.
List the entertainment components below that you would like your new remote to control.
Device Type Manufacturer Model Number
example: DVD Player example: Pioneer example: DV-414
Tips for identifying Device Type:
•ageneralcategorydescription
•examples:Television,VCR,CDPlayer,DVDPlayer,Stereo
Receiver, Amplifier, Game Console, etc.
Tips for identifying Manufacturer:
•alsoreferredtoas“make”or“brandname”
•typicallyonthefrontofthecomponent
•sometimesonthelabelwiththeModelNumber
•examples:Sony®, Philips®, Denon®, DirecTV®, TiVo®, etc.
Tip Center
How to Find Model Numbers
On most entertainment components,
the model number is usually found on
a label located on the front, back or
bottom.
Tips for identifying Model Number:
•also“Model”or“M/N”
•usuallyonalabelonthefront,backorbottomofthecomponent
(see the Tip Center )
•modelnumbermaybedifferentthanmodelname
•alsofoundinthecomponent’susermanual
•NOTmodelnumberontheoldremotecontrol
•NOTserialnumber(SN)whichisusuallymuchlonger
•examples:RC-QN3BK,CT-36XF36C,Explorer3100,L32
HDTV 10A, etc.
If you cannot find the model number on
the component itself, the user manual
that came with your component should
list the manufacturer and model number.
Once you have gathered all of your information, take this worksheet to your computer
and continue with the Setup software.
© Copyright 2006 Logitech or its licensors. All rights reserved.
31

Appendix B - Glossary
Amplifier A stereo component that outputs to speakers, and increases the gain or
level of an audio signal. An amplifier doesn’t typically include a radio.
Anamorphic
views
Also referred to as Enhanced for Widescreen, or Enhanced for 16:9. The process
that horizontally shrinks a 16:9 image into a 4:3 space to convert images between
widescreen and typical television image aspect ratio.
Used on many DVDs.
Aspect ratio The ratio of image width to image height. Common motion-picture ratios
are 1.85:1 and 2.35:1. Television screens are usually 1.33:1 (also known
as 4:3). HDTV is 1.78:1, or 16:9.
A/V switch A device with several audio and video source inputs that sends a selected audio/
video source input signal to an output device like speakers or a TV.
®
(Digital
DLP
Light
Processing)
Projector screen technology that relies on using individually controlled tinoy
mirrors (micro mirrors) to produce an image. Developed
originally by Texas Instruments.
DVD recorder
(DVR)
A standalone unit that resembles and functions very much like a VCR.
Like a VCR, DVD recorders all have AV source inputs, as well it can record
TV shows.
HDTV (High
Definition
Television)
The high-resolution form of television. HDTV has 1125 lines of resolution, or more
than five times the video information than that of a TV set, creating a much
crisper, more detailed picture.
Light controller A device that is connected to a set of lights and allows the lights to be
powered or dimmed remotely.
Mini-system A single unit that is some combination of the functionality of a DVD, VCR,
radio, and amplifier.
32

NTSC (National
The standard video broadcast format used in North America.
Television
System(s)
Committee)
Output Device A device that produces the sound or picture, for example, a TV or speakers.
PAL
A video format that is used in the UK, and parts of Europe and Asia.
(Phase
Alternating
Line)
Passthrough A device that routes video or audio from one device to another device.
Personal Video
Recorder (PVR)
Contains an internal recorder and player that records and plays video without the
use of a removable tape or disc. Typically PVRs can pause, rewind, instantly replay,
and play slow-motion for live or recorded TV. Examples of PVR service providers
are TiVo, ReplayTV, UltimateTV, and Keen PM. Many satellite and cable providers
also provide PVR services and have PVRs included in some of their set-top boxes.
Pre-amplifier A control and switching component that may include equalization functions.
Pre-amp Sound
Processing
Takes a small signal and amplifies it sufficiently to be fed into the power amplifier
for further amplification. A pre-amp includes all of the controls for regulating tone,
volume, and channel balance. This task is known as sound processing.
Receiver Also referred to as a tuner or a stereo receiver. A receiver can be any component
that receives or tunes broadcast signals, or AM/FM radio. Typically refers to the
single component that includes a preamplifier, surround processor, multi-channel
amplifier, and AM/FM tuner.
RF (Radio
Frequency)
Used by some remote controls, to control devices that are out of sight
(e.g. behind cabinet doors) because it doesn’t have the same line-of-sight
restrictions as IR (infrared) signals.
SACD (Super
Audio CD)
A read-only optical audio disc aimed at providing much higher quality of digital
audio reproduction than the compact disc.
33

Satellite Radio A service in the United States that provides digital programming directly
fromsatellites.Currentlythe2mainprovidersforserviceareXMandSirrus.
SDTV Standard
Definition
Television
One mode of operation of digital television where the broadcaster transmits
pictures with detail similar to, or slightly better than, today’s analog
television. Since the picture contains less information, there is “room” in the digital
signal multicast broadcasting.
Stereo receiver Also referred to as a tuner or a receiver. A stereo receiver is any component that
receives or tunes, broadcast signals, or AM/FM radio. Typically refers to
the single component that includes a preamplifier, surround processor,
multi-channel amplifier, and AM/FM tuner.
Tuner Also referred to as a receiver or a stereo receiver. A tuner is any component that
receives or tunes, broadcast signals, or AM/FM radio.
Typically refers to the single component that includes a preamplifier,
surround processor, multi-channel amplifier, and AM/FM tuner.
Power strip A common device that acts like an extension cord, providing additional cord
length, as well as a mechanism that offers several electrical outlets.
34

Appendix C - Product Specification
LCD Size 1.5" Diagonal
LCD Resolution 96 x 64
LCD Screen Monochrome
Power Source 4 x AAA batteries
Power Type Alkaline
Brands Supported 5,000+
Devices Supported 225,000+
Maximum number of devices per account 10
Backlit keypad Yes
Backlight Color Blue
IR Learning Yes (Up to 250 Khz)
IR Transmit 15.625 kHz to 500 kHz
Learning Capabilities Any IR Device
IR Transmitters 2
IR Transmission Range Up to 30ft
Memory Type Flash
Memory Amount 512 KB
Weight 5.4 oz (with battery installed)
Dimensions 1.9” x 8.0”
Warranty 2 Years
Supported Platforms Windows2000/XP/Vista
MACOSX10.3+
35

36
© 2008 Logitech Inc. All rights reserved. Logitech's trademarks are either registered trademarks or
trademarks of Logitech in the US and other countries. All other trademarks are the property of their
respective owners.
 Loading...