

ConferenceCam Connect
QuickStart Guide

English. . . . . . . . . . . . . . . . . . . . . . . . . 3
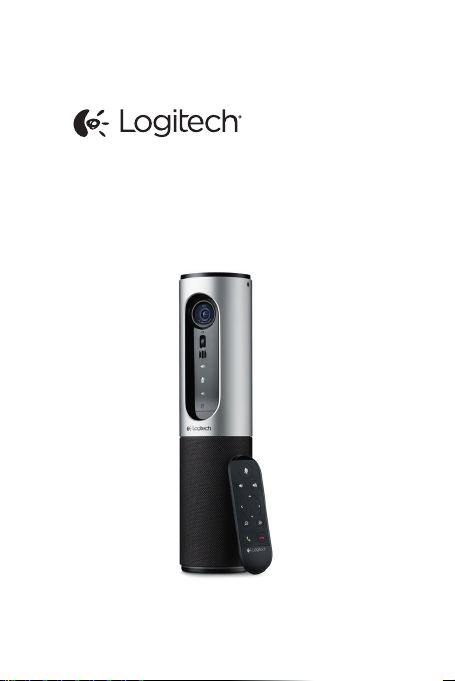
Logitech ConferenceCam Connect
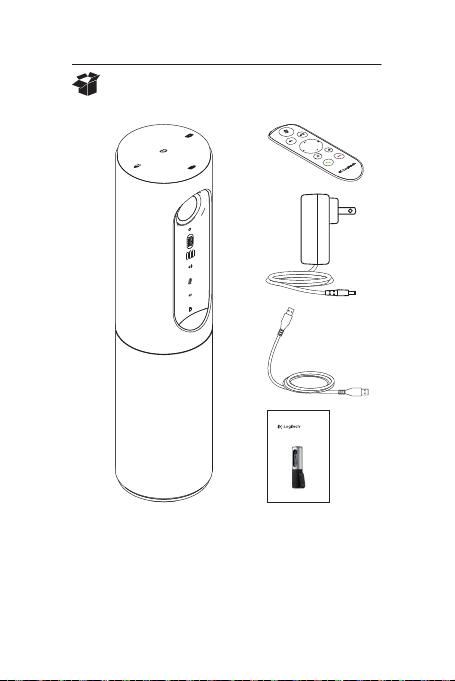
What’s in the box
1 2
3
4
5
ConferenceCam Connect
QuickStart Guide | Guide de démarrage rapide
1. Main unit with camera
and speakerphone
2. Remote control
3. Power cable
and regional plugs
4. USB Cable
5. User documentation
English 3
Logitech ConferenceCam Connect
2
3
1
5
6
4
7
9
11
5
12
14
7
6
8
13
15
10
Z
E
I
S
S
H
D
1
0
8
0
p
,
4
x
Z
o
o
m
Know your product
1. Camera, 1080p and
90-degree FOV
2. Camera LED
3. Tilt wheel for tilting
camera lens
4. Microphones
5. Volume Up
6. Mute
7. Volume down
8. Battery indicator
9. Speakerphone
10. Speakerphone/
Battery LED
4 English
11. Pan and Tilt
12. Zoom In
13. Zoom Out
14. End Call
15. Make/Answer Call
Logitech ConferenceCam Connect
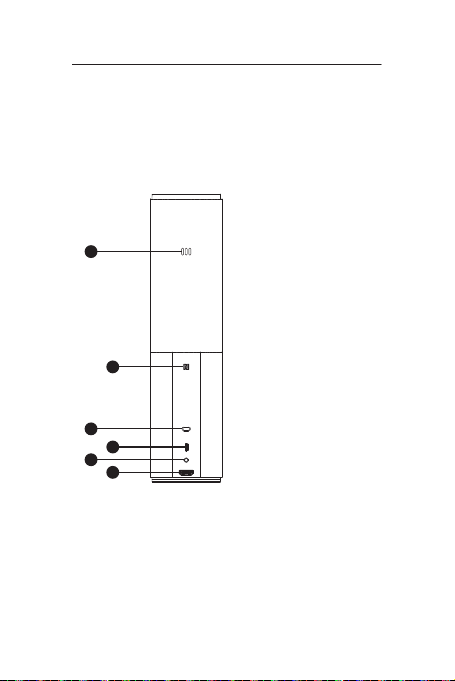
1. Microphone
1
2
3
4
5
6
2. NFC
3. Kensington Lock
4. USB connector
5. Power
6. HDMI connector
(wireless screen
mirror mode)
English 5

Logitech ConferenceCam Connect
1
2
3
4
1. Wireless screen mirror mode
2. Power On/O button
3. Bluetooth® mode
4. Video conferencing mode
6 English

Logitech ConferenceCam Connect
1
Setup your product
1. Connect ConferenceCam
Connect to external power.
Although ConferenceCam Connect
comes with rechargeable battery,
it must first be plugged into external
2
On / O
power and charged till the green
battery light displays.
Note: The device can also be charged
through USB on your PC or Mac
(charging times may vary.)
2. Press and hold power On/O
button to turn on the device.
A sound will play and the device
LEDs will light for 2-3 seconds,
with the last used mode LED
staying lit when on.
3
Bluetooth mode
3. Select the following modes
Wireless Screen
and follow the instructions
Mirror Mode
to get started.
Video
Conferencing
Mode
English 7

Logitech ConferenceCam Connect
1. Video Conferencing Mode:
1. Connect the USB cable to the device and to your USB port.
2. To start a call from your PC or Mac application,
select Video Conferencing Mode on ConferenceCam
Connect. The camera and speakerphone LEDs will flash
to show that connection is taking place, and when
completed, the camera LED will light steady for a few
seconds and the speakerphone will play a sound.
If these activities do not take place, try again and then
consult Troubleshooting or call technical support.
3. Ensure that ConferenceCam Connect is selected as
the default video and audio device in your OS settings
and in your conferencing application. Start your video
or audio call from your application. The LEDs on the
camera and speakerphone will alight when streaming.
2. Bluetooth Mode
To connect ConferenceCam Connect speakerphone
to your mobile device:
1. Select Bluetooth mode on the ConferenceCam Connect.
2. If your device is NFC enabled, touch the mobile device
to the NFC icon on the speakerphone, which should
enable Bluetooth acceptance on the mobile device,
or hold down the Bluetooth button until the LED on
the speakerphone starts blinking blue rapidly.
3. On your mobile device, go to settings and turn on
Bluetooth to connect. The ConferenceCam Connect
will also play a sound to acknowledge connection.
8 English

Logitech ConferenceCam Connect
3. Wireless Screen Mirror Mode (Screen share content
from your mobile device):
1. Connect the HDMI cable from your display to the back
of the ConferenceCam Connect device.
2. Select Wireless Screen Mirror Mode on
the ConferenceCam Connect.
3. On your mobile device, go to Settings, and then select
your mobile device’s option for screen mirroring.
The listed option name will dier from device
to device. For help with your mobile device setting,
please consult www.logitech.com/support/connect
for list of tested devices.
Note: Only Bluetooth mode and Wireless Screen
Mirror Mode may operate at the same time.
Wireless performance may vary.
English 9

Logitech ConferenceCam Connect
Use your product
• Video
• Starting the video: The video is controlled by
the application and will start once the camera
is selected and the video is started in the application.
Camera LED will light when the video is streaming.
• Pan, tilt and zoom the camera using the controls on
the remote control. Press once for incremental or press
and hold for continuous pan or tilt. You can also pan
and tilt the camera image – first zoom in, and then pan
the image or tilt the image. You may also tilt the actual
camera with the tilt wheel on the unit. Do not manually
try to tilt camera itself. Doing so may damage unit.
• Saving pan, tilt and zoom settings: An optional
application is available which includes a software
interface to control camera settings. These can be
saved so your camera settings remain next time
you turn on the unit. You may download the software
from www.logitech.com/support/connect
• Far end control: You may control the pan, tilt and zoom
of a remote ConferenceCam CC3000e, ConferenceCam
Connect or a ConferenceCam BCC950, in supported
applications. Please visit the download page listed for
more information.
• Audio
• Volume: Volume Up and Down adjusts volume.
• Mute: Mute audio with Mute button.
• Calling: Run video conferencing software. Answer picks
up call. Hang up ends call. For call waiting, select hang
up to reject second call or answer button to toggle
between calls
Note: Answer and Hang up buttons may not work
in some applications. Use video conferencing
software to answer and end call. To enable answer
and hangup buttons for Skype or Cisco Jabber,
please download the plugin available from
www.logitech.com/support/connect
• SpeakerPhone Activity light indications
10 English

Logitech ConferenceCam Connect
Blue: ConferenceCam is in active call. Blinking Blue:
Call is being received or Bluetooth is in pairing mode.
Bluetooth to connect ConferenceCam Connect
speakerphone to your mobile device for speakerphone
broadcast of call:
• If your device is NFC enabled, touch the mobile device
to the NFC icon on the speakerphone, which should
enable Bluetooth acceptance on the mobile device
OR
• Press the Bluetooth button on the speakerphone until
connection is made to the mobile device
• Battery Light Indicator
• When the battery is fully charged, the battery light turns
green. The green turns o when the power dips below 75%.
• When the battery has 25% power left, a red battery
light will alight continuously steady, indicating that
the device needs to be plugged into external power
very soon.
• When the battery has 10% power left, the red battery
light will blink, indicating that the device will no
longer operate unless plugged into external power
immediately, and a sound will also play once.
• The ConferenceCam Connect battery indicator will
blink green when the unit is being charged.
• When the device is completely charged, the LED will
turn o until the device is unplugged from external
power and running on battery.
• When the remote is docked the speakerphone indicator
will represent the same sequence.
English 11

Logitech ConferenceCam Connect
Visit Product Central
Discover your product’s full potential. Get valuable information
and usage tips by browsing easy-to-use FAQs. Find answers
to product questions and get help setting up your product.
See if there’s software available for download that can
enhance your product experience. To enjoy all the benefits
of your Logitech product, visit www.logitech.com/support/
connect and take advantage of Logitech’s wide range of useful
support services:
• Product information
• Tutorials
• Troubleshooting
• Diagnostics
• Firmware upgrades
• Support community
• Software downloads
• In-box documentation
• Warranty information
• Spare parts
Troubleshooting tips
• Please visit www.logitech.com/support/connect
for troubleshooting tips, information on software tools
and for a diagnostic tool to help troubleshoot any issues
you may have with your ConferenceCam Connect.
12 English


www.logitech.com/support/connect
© 2015 Logitech. All rights reserved. Logitech, the Logitech logo,
andother Logitech marks are owned by Logitech andmay be registered.
Bluetooth®isaregistered trademark of Bluetooth SIG, Inc. All other
trademarks are theproperty of theirrespective owners. Logitech
assumes no responsibility for any errors that may appear in this manual.
Informationcontained herein is subject to change without notice.
620-006338.005
 Loading...