


La Crosse Technology WT-5432 User Manual
WT-5432
433 MHz
Radio Controlled Projection Alarm
Instruction Manual

TABLE OF CONTENTS
Topic Page
Inventory of Contents/ Additional Equipment 3
About WWVB 3
Quick Set-Up Guide 4
Detailed Set-Up Guide
Battery Installation 5-6
Program Mode
Programming Sequence 6
Function Buttons 6
Time Zone Setting 6-7
DST (Daylight Saving Time) Setting 7
Adjustable Snooze 7
Time Setting 8
Date Setting 8
12/24-Hour Setting/Selecting °F or °C
8
Features & Operations
Features 9
Radio-Controlled Time 9
Projection of time and/ or remote temperature 10
Forecast Icon 11
EL Backlight 11
Indoor Temperature 12
Remote Temperature 12
Time Ala rm 13
Changing Display Mode (viewing seconds ) 14
Mounting 15
Maintenance & Care 16
Troubleshooting 17
Specifications 18
Warranty and Contact Information 19-20
2

INVENTORY OF CONTENTS
1) WT-5432 projection alarm
2) TX6U remote temperature sensor
3) AC adapter/transformer (6V)
4) Instruction manual and warranty card.
ADDITIONAL EQUIPMENT (not included)
1) Three fresh 1.5V AA batteries (optional for alarm clock)
2) Two fresh 1.5V AA batteries (for remote transmitter)
ABOUT WWVB (Radio Controlled Time)
The NIST (National Institute of Standards and Technology—Time and Frequency
Division) WWVB radio station is located in Ft. Collins, Colorado, and transmits the exact
time signal continuously throughout the United States at 60 kHz. The signal can be
received up to 2, 000 miles away through the internal antenna in the projection alarm.
However, due to the nature of the Earth’s Ionosphere, recept i on is very limited during
daylight hours. The projection alarm will search for a signal every night when reception
is best. The WWVB radio station derives its signal from the NIST Atomic clock in
Boulder, Colorado. A team of atomic physicists is continually measuring every second,
of every day, to an accuracy of ten billionths of a second per day. These physicists have
created an international standard, measuring a second as 9,192,631,770 vibrations of a
Cesium-133 atom in a vacuum. For more information about WWVB please see the NIST
website at http://www.boulder.nist.gov/timefreq/stations/wwvb.htm
QUICK SET-UP GUIDE
Hint: Use good quality Alkaline Batteries and avoid rechargeable batteries.
1. Have the indoor station and outdoor remote 3 to 5 apart.
2. Batteries should be out of both units for 10 m i nut es.
3. Place the batteries into the outdoor remote first then into the indoor station.
(All outdoor remotes must be started before the indoor station)
4. DO NOT PRESS ANY BUTTONS FOR 10 MINUTES.
In this time the display and sensor will start to talk to each other and the display will
show both the indoor temperature and an outdoor temperature. If the station does not
display both temperatures after the 10 minutes please retry the set up as stated above.
After both indoor and outdoor temperatures are displayed for 10 minutes you can place
your sensor outdoors and set your time.
The remote sensor should be placed in a dry, shade d area. The rem ote sensor has a range
of 80 feet. Any walls that the signal will have to pass through will reduce distance. An
outdoor wall or window will have 20 to 30 feet of resistance and an interior wall will
have 10 to 20 feet of resistance. Your distance plus resistance should not exceed 80 ft. in
a straight line.
3
B
NOTE: Fog and mist will not harm your remote sensor but direct rain must be avoided.
To complete the set up of your temperature station after the 10 minutes have passed
please follow the steps starting on page 6.
DETAILED SET-UP GUIDE
Important: Insert batteries into the transmitter first, then into the alarm clock. Do
not press any buttons until remote temperature is displayed.
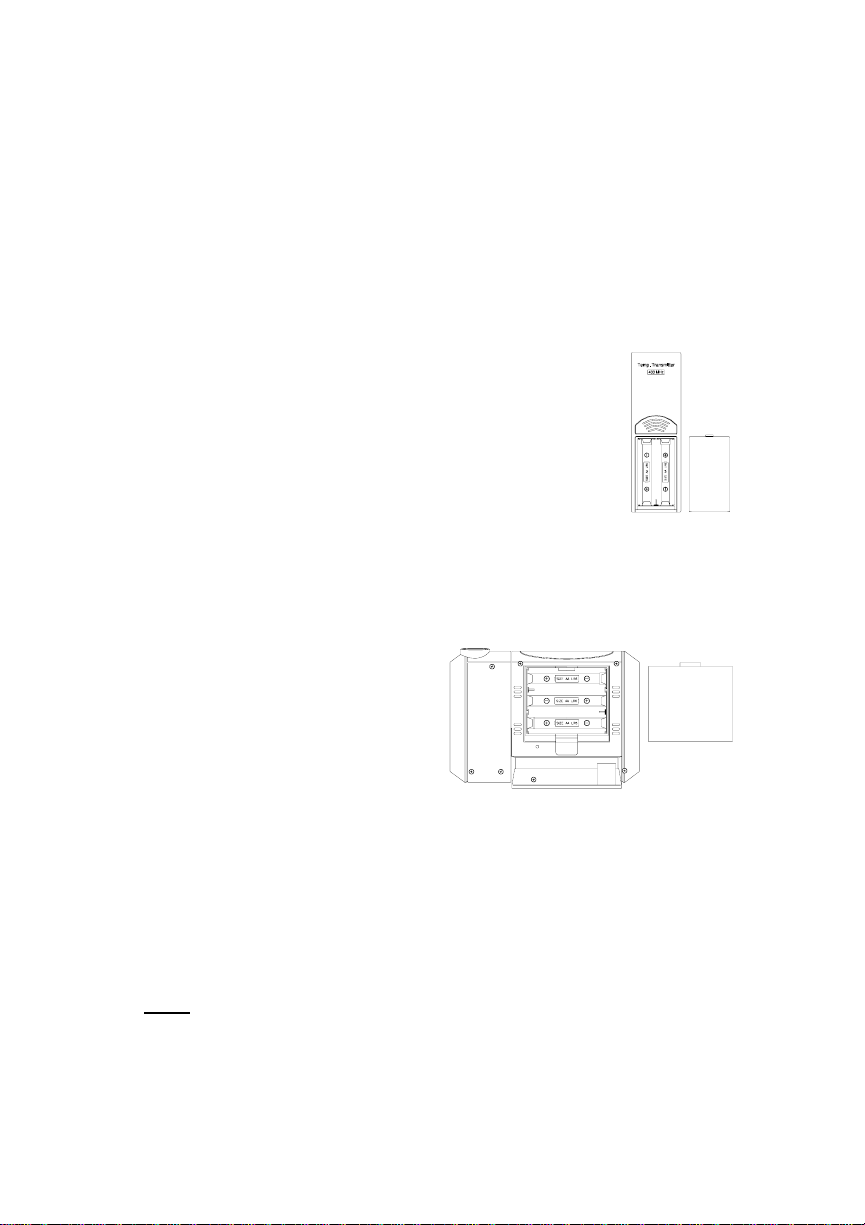
I. BATTERY INSTALLATION
A. Remote Temperature Sensor
1. Remove the battery cover.
2. Observing the correct polarity, install 2 AA
batteries.
attery
Cover
3. The batteries will fit tightly to avoid start-up
problems make sure that they do not spring free
during installation.
4. Replace the battery cover.
B. Projection Alarm
1. Remove the battery cover.
2. Observe the correct polarity,
and install 3 AA batteries.
3. In addition to, or instead of
inserting batteries, the AC
adapter can be used. Simply
insert the adapter into the
receptacle on the underneath
of the alarm clock and then plug the adapter into the wall socket.
4. Replace the battery cover.
The projector will activate and remain on if the alarm clock is plugged in. If
only batteries are used, the projector will only be activated when a button is
pressed. The projection is a red light, not harmful under normal usage, although
care should be taken to not look directly into the light.
Note:
After the batteries have been installed a tone will sound, and the LCD
(Liquid Crystal Display) will activate. The indoor temperature and the remote
temperature will be displayed (within three minutes). Also, the time will appear
as “-:--”. The WWVB search is automatically initiated, and a tower icon
appears and flashes with the time colon (no tower icon will appear if the WWVB
is too weak to be detected, and the time display will remain on “-:--”). While
4

the WWVB search is being conducted various numbers will appear in the time
display. After 10 minutes, the projection alarm will either display the WWVB
time or discontinue the search if the time is not found. If the search is cancelled
“-:--” will remain in the time LCD. The projection alarm will conduct a WWVB
search every hour until the first signal is found. Once the WWVB time is found,
a search is automatically conducted nightly at midnight. If the signal is found at
midnight the tower icon will remain. If the signal is not found another search
will take place every hour, until 6:00 am, until the signal is found successfully.
If no signal is found during this period the tower icon will not appear and the
clock will search again at 12:00 am the next night.
II. Program Mode
To enter the program mode, hold down the “SET” button for 1 second until the time
zone, “-5” which is the default setting, flashes in the lower left. Press and release
the “SNOOZE” button at any time to exit the program mode or wait approximately
15 seconds for the projection alarm to automatically return to normal operation.
A. Programming Sequence
1. Time Zone Setting
2. Daylight Saving Time ON/OFF
3. Adjustable Snooze
4. Hour Setting
5. Minute Setting
6. Year Setting
7. Month Setting
8. Date Setting
9. Day Setting
10. 12/24-hour Mode
B. Function Buttons
There are 7 function buttons located on the front of the projection alarm and one
on the top. The function buttons are labeled: “ALM1/HOUR”, “ALM2/MIN”,
light intensity icon, “DISPL”, light direction icon, “SET”, “MODE/+”, and
“SNOOZE” (the top bar).
C. Time Zone Setting
1. Hold down the “SET” button for 1 second.
2. The time zone (“-5” default) will flash in the Date LCD.
3. Press and release the “+” button to select the appropriate time zone.
There are 13 time zones to choose from (based relative to the international time
standard of GMT (“Greenwich Mean Time).
5
 Loading...