

Page 1
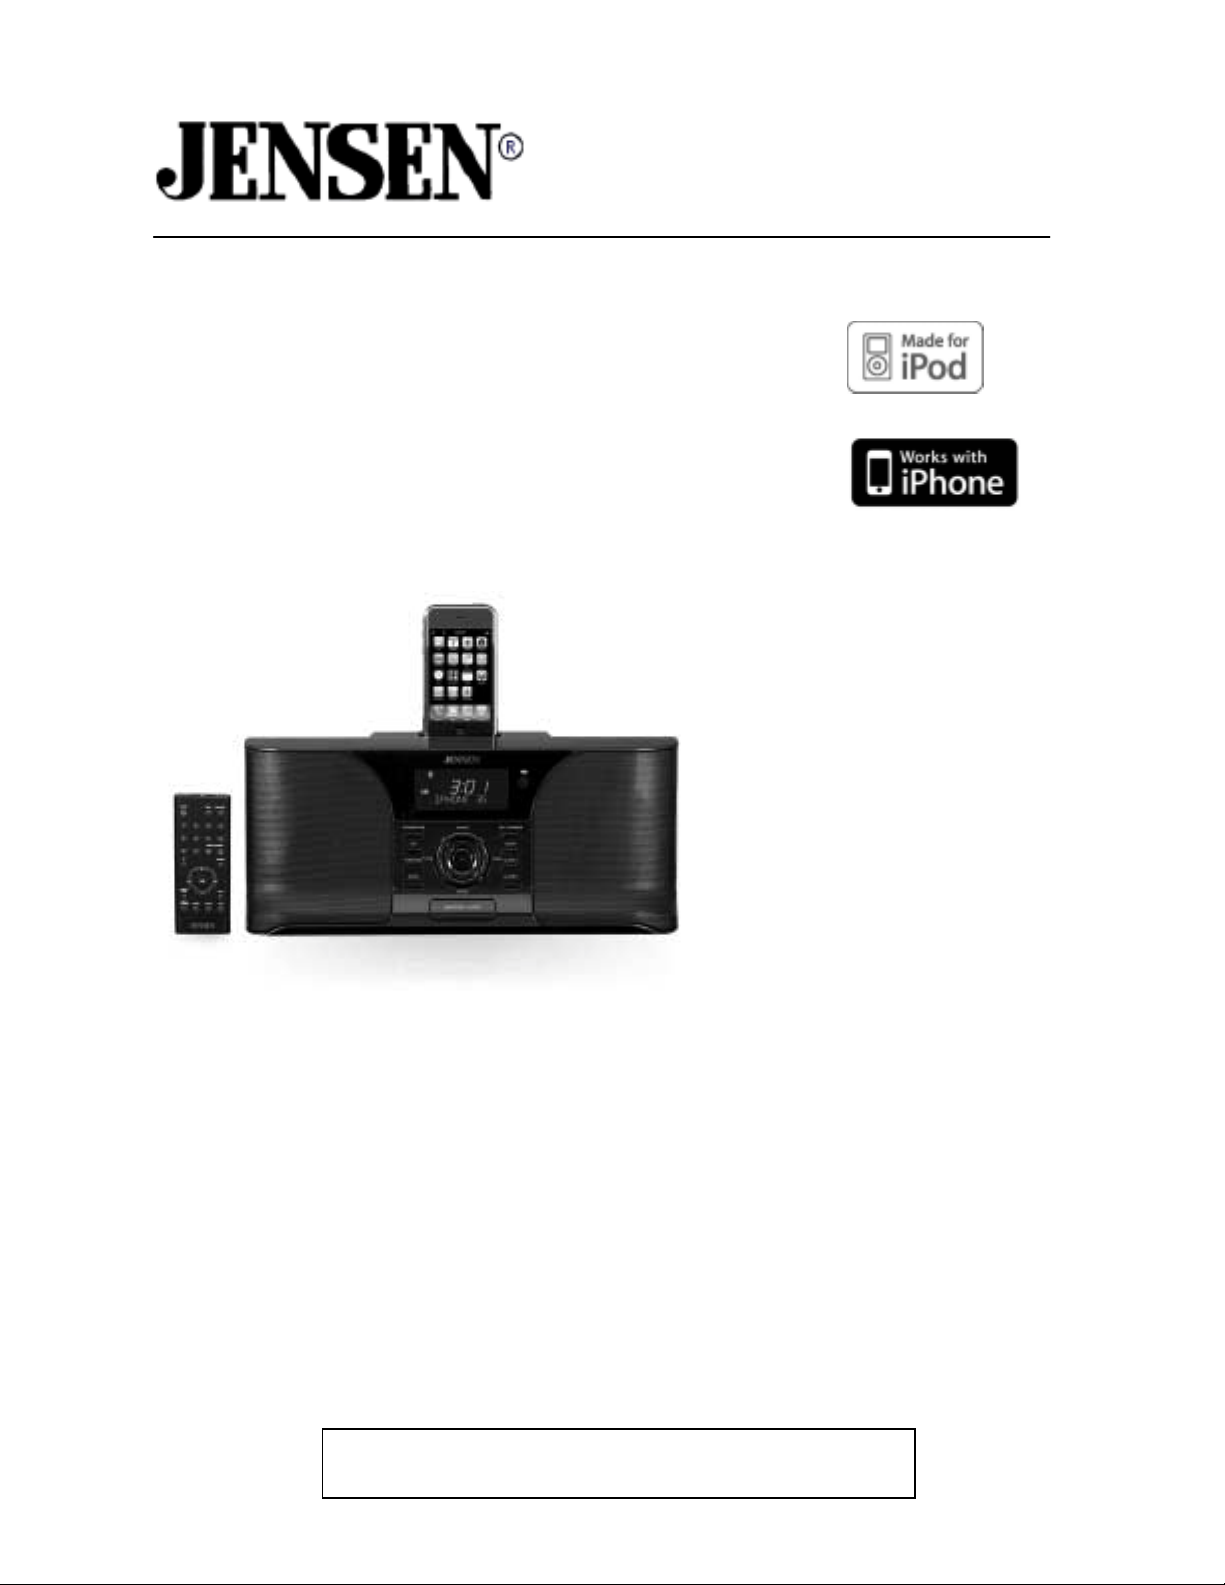
Docking System for iPod® and iPhone™
Owner’s Manual
JiMS-520i
(iPod and iPhone Not Included)
Please read this Instruction Manual carefully before
using the unit and retain it for fut ure reference
Page 2

1
IMPORTANT SAFETY I N STRUCTIONS
WARNING:
TO REDUCE THE RISK OF FIRE OR ELECTRIC SHOCK, DO NOT EXPOSE THIS
APPLIANCE TO RAIN OR MOISTURE. DANGEROUS HIGH VOLTAGES ARE PRESENT
INSIDE THE ENCLOSURE. DO NOT OPEN THE CABINET REFER SERVICING TO
QUALIFI ED PERSO NN EL ONLY .
The Caution marking is located at the bottom of the unit
The ra ti ng plate is loc ated at the bottom of t he unit
CAUTION:
PLEASE READ AND OBSERVE ALL WARNINGS AND INSTRUCTIONS GIVEN IN THIS
OWNER’S MANUAL AND THOSE MARKED ON THE UNIT, KEEP THESE INSTRUCTIONS.
RETAIN THIS BOOKLET FOR FUTURE REFERENCE.
This set has been designed and manufactured to assure personal safety. Improper use can
result in electric shock or fire hazard. The safeguards incorporated in this unit will protect you if
you observe the following procedures for installation, use and servicing. This unit does not
contain any parts that can be repaired by the user.
The symbol for class II (Double insulation)
DO NOT REMOVE THE CABINET COVER, OR YOU MAY BE EXPOSED TO DANGEROUS
VOLTAGE. REFER SERVICING TO QUALIFIED SERVICE PERSONNEL ONLY.
1. Read these Instructions.
2. Keep these Instructions.
3. Heed all Warnings.
4. Follow all instructions.
5. Do not use this apparatus near water.
6. Clean only with a dry cloth.
Page 3

2
7. Do not block any of the ventilation openings. Install in accordance with the manufacturer’s
instructions.
IMPORTANT SAFETY INSTRUCTIONS
(Continued)
8. Do not install near any heat sources such as radiators, heat registers, stoves, or other
apparatus (including amplifiers) that produce heat.
9. Do not defeat the safety purpose of the polarized or grounding – type plug. A polarized plug
has two blades with one wider than the other. A grounding type plug has two blades and a
third grounding prong. The wide blade or the third prong is provided for your safety. If the
provided plug does not fit into your outlet, consult an electrician for replacement of the
obsolete outlet.
10. Protect the power cord from being walked on or pinched particularly at plugs, convenience
receptacles and the point where they exit from the apparatus.
11. Only use attachments/accessories specified by the manufacturer.
12. Use only with a cart, stand, tripod, bracket, or table specified by the
manufacturer, or sold with the apparatus. When a cart is used, use
caution when moving the cart/apparatus combination to avoid injury
from tip-over.
13. Unplug this apparatus during lightning storms or when unused for long periods of time.
14. Refer all servicing to qualified service personnel. Servicing is required when the apparatus
has been damaged in anyway, such as power-supply cord or plug is damaged, liquid has
been spilled or objects have fallen into the apparatus, the apparatus has been exposed to
rain or moisture, does not operate normally, or has been dropped.
15. The apparatus shall not be exposed to dripping or splashing and that no objects filled with
liquids, such as vases, shall be placed on apparatus.
16. Main plug is used as disconnect device and it should remain readily operable during
intended use. In order to disconnect the apparatus from the mains completely, the mains
plug should be disconnected form the mains socket outlet completely.
17. Battery shall not be exposed to excessive heat such as sunshine, fire or the like.
Page 4

3
This Class B digital apparatus complies with Canadian ICES-003.
FCC NOTICE:
This equipment has been tested and found to comply with the limits for a Class B digital device,
pursuant to Part 15 of the FCC Rules. These limits are designed to provide reasonable
protection against harmful interference in a residential installation. This equipment generates,
uses and can radiate radio frequency energy and, if not installed and used in accordance with
the instructions, may cause harmful interference to radio communications.
However, there is no guarantee that interference will not occur in a particular installation. If this
equipment does cause harmful interference to radio or television reception, which can be
determined by turning the equipment off and on, the user is encouraged to try to correct the
interference by one or more of the following measures:
– Reorient or relocate the receiving antenna.
– Increase the separation between the equipment and receiver.
– Connect the equipment into an outlet on a circuit different from that to which the receiver is
needed.
– Consult the dealer or an experienced radio/TV technician for help.
WARNING:
Changes or modifications to this unit not expressly approved by the party responsible for
compliance could void the user's authority to operate the equipment.
Page 5

4
TABLE OF CONTENTS
WELCOME!...........................................................................................................................................5
PROTECT YOUR FURNITURE........ ..... .... .............. ..... .... ..... .... ..... .... ..... .... ..... ..... .... ..... .... ..... .... ..... .....5
ABOUT THIS MANUAL......................................................................................................................... 5
LOCATION OF CONTROLS.... ..... .... ..... ..... .... ..... .... ..... .... ..... .... .............. .... ..... .... ..... .... ..... ..... .... .......... 5
FRONT VIEW............................................................................................................................... 5
REAR VIEW................................................................................................................................. 6
DISPLAY UNIT.............................................................................................................................6
REMOTE CONTROL UNIT...........................................................................................................7
GETTING STARTED...... ..... .... ..... .... ..... .... ..... ..... .... ..... .... ..... .... ..... .... .............. .... ..... ..... .... ..... .............. 8
UNPACKING THE DOCKING SYSTEM....................................................................................... 8
USING THE FM & AM ANTENNA................................................................................................ 8
AUX IN CONNECTIONS..............................................................................................................8
POWER SOURCE.................................................................................................................................8
CONNECTING TO POWER SUPPLY.......................................................................................... 8
ACTIVATING THE REMOTE CONTRL........................................................................................ 8
REPLACING THE REMOTE CONTROL BATTERY..................................................................... 9
BATTERY PRECAUTIONS.......................................................................................................... 9
RADIO OPERATION.............................................................................................................................9
LISTENING TO RADIO ................................................................................................................ 9
TO PRESET STATIONS............................................................................................................10
TO RECEIVE PRESET STATIONS............................................................................................ 10
AUX OPERATION............................................................................................................................... 11
IPOD ADAPTORS............................................................................................................................... 12
DOCKING YOUR IPOD....................................................................................................................... 13
DOCKING YOUR IPHONE.................................................................................................................. 14
CONNECTING AND VIEWING THE S-VIDEO OUT (IPOD)................................................................ 15
CONNECTING AND VIEWING THE S-VIDEO OUT (IPHONE)........................ .... ..... ..... .... ..... ............ 15
USING HEADPHONES....................................................................................................................... 16
CLOCK SETTING................................................................................................................................ 16
SETTING THE TIME........... .... ..... ..... .... .... ..... ..... .... ..... .... ..... .... ..... ..... .... ..... .... ..... .... ..... .... ..... ... 16
SETTING THE ALARM (S).. .... ..... .... ..... ..... .... .... ..... ..... .... ..... .... ..... .... ..... ..... .... ..... .... ..... .... ..... ... 16
CLOCK LIGHT OPERATION......................................................................................................17
ALARM OPERATION.......................................................................................................................... 17
WAKE TO ALARM, IPOD OR RADIO......................................................................................... 17
SNOOZE OPERATION.............................................................................................................. 18
SLEEP OPERATION........................................................................................................................... 18
ACTIVATING THE SLEEP TIMER.............................................................................................. 18
ADJUSTING THE SLEEP PERIOD............................................................................................ 18
DEACTIVATING THE SLEEP TIMER......................................................................................... 18
SLEEP AND WAKE TO ALARM, IPOD OR RADIO............................................................................. 19
CARE AND MAINTENANCE............................................................................................................... 19
CLEANING THE UNIT................................................................................................................ 19
TROUBLESHOOTING GUIDE............................................................................................................. 20
SERVICE............................................................................................................................................. 20
SPECIFICATION................................................................................................................................. 21
Page 6

5
WELCOME
Thank you for purchasing the JENSEN JiMS-520i Docking System.
Before operating the unit, please read this manual thoroughly and retain it for future reference.
PROTECT YOUR FURNITURE!!
This system is equipped with non-skid rubber ‘feet’ to prevent the product from moving when you
operate the controls. These ‘feet’ are made from non-migrating rubber material specially formulated to
avoid leaving any marks or stains on your furniture. However certain types of oil based furniture
polishes, wood preservatives, or cleaning sprays may cause the rubber ‘feet’ to soften, and leave marks
or a rubber residue on the furniture.
To prevent any damage to your furniture we strongly recommend that you purchase small self-adhesive
felt pads, available at hardware stores and home improvement centers everywhere, and apply these
pads to the bottom of the rubber ‘feet’ before you place the product on fine wooden furniture.
ABOUT THIS MANUAL
Instructions in this manual describe using the controls on the remote. You can also use the controls on
the main unit if they have the same or similar names as those on the remote.
LOCATION OF CONTROLS
Front View
1. Volume + Button 10. ALARM 2 Button
2. STANDBY/ON Button 11. ALARM 1 Button
3. EQ Button 12. Skip Forward/Tuning Up Button !
4. Skip
Backward/Tuning Down Button # 13. SLEEP Button
5. FUNCTION Button 14. SET/FM Mode Button
6. BAND Button 15. Remote Sensor
7. Volume - Button 16. iPod Connector and Docking Bay
Page 7

6
8. SNOOZE/LIGHT Button 17. Display
9. Play/Pause Button
Rear View
1. AC INPUT SOCKET 5. HEADPHONE Jack
2. FM Antenna Wire 6. RESET Button
3. S-VIDEO OUT (iPod/iPhone) 7. AM LOOP Antenna Connector
4. AUX IN Jack
Display Unit
1. SLEEP Indicator 7. iPod Mode Indicator
2. ALARM 1 Wakeup Mode Indicator 8. PM Indicator
3. ALARM 2 Wakeup Mode Indicator 9. FREQUENCY Unit
4. AM-FM Band Indicator 10. TIME/FREQUENCY Reading
5. FM STEREO Indicator 11. FUNCTION/VOLUME/EQ Indicator
6. MEMORY Indicator
Page 8

7
Remote Control Unit
POWER
BAND Selects AM or FM Band
FUNCTION
0 – 9
PRESET STATIONS ▲ Set & Access Stored Stations Up
PRESET STATIONS
EQ
MEMORY Programs Preset Stations
+, –
Turns the System On/Off
Selects Radio, iPod or Aux Mode
Numeric Buttons
▼ Set & Access Stored Stations Down
Equalizer Options
Adjusts Volume Up and Down
Activates Play/Pause Function
! Skips Forward/Tuning Up/Sleep
Time Up Adjustment
# Skips Backward/Tuning Down /Sleep
Time Down Adjust men t
SNOOZE/LIGHT Silences the Alarm Temporarily/
MUTE Turns System Sound On or Off
SET/FM MODE
ALARM 1 Sets Alarm 1 Time/Wakeup Mode
ALARM 2
SLEEP Turns SLEEP Timer On
Sets Time /Selects FM ST or MONO
Sets Alarm 2 Time/Wakeup Mode
Switches Backlight On/Off
Page 9

8
GETTI NG ST ARTED
Unpacking the JiMS-520i Docking System
Please save all the original packaging. It provides the safest way to transport your unit.
NOTE:
Using the FM and AM Antenna
Before using your docking system please make sure both the FM and AM antenna are positioned
properly.
The JiMS-520i is not magnetically shielded and may cause color distortion on the screen of
some TVs or video monitors. To avoid this, you may need to move JiMS-520i further away from
the TV or monitor if unnatural color shifts or image distortion occurs.
•
Uncoil the FM Antenna Wire at the back of the unit, making sure i t is fully extended (You can
even tape it onto the wall if required, the higher the better).
•
Plug the AM antenna loop to the AM LOOP Pin Socket at back
of the unit. Rotate the AM loop antenna for best reception.
AUX IN Connection
Plug one end of the included cord into the AUX IN jack on the back of JiMS-520i. Plug the other end of
the cord into your external audio player, such as an iPod shuffle, CD, MP3 Player etc.
POWER SOURCE
!
This JiMS-520i Docking System operates from AC120V~ 60Hz line power supply.
! The Remote Control operates on 1 Lithium battery, CR2025 (Included).
Connecti ng to Power Su pply
Insert the AC Cord Inlet into the AC cord socket on back of JiMS-520i and the other end into a standard
120V~ AC outlet as shown in the diagram below . JiMS-520i will automatically go into standby mode.
Remark:
In the event of a malfunction due to electrostatic discharge (ESD), reset the unit by pressing the
RESET button on the back of the main unit with a ballpoint pen or similar object.
After resetting, re-adjustment of the current and alarm time (s) are required.
Activating the Remote Contr o l
Page 10

9
i. To activate the Remote Control, remove the protective film.
n radio mode if required.
ii. Point the remote control toward the front of the main unit. The effective range of the r emote is
about 15~19 ft from the remote sensor and within an angle of about 45° from the front of the unit.
Remote Control Battery Replacement
Please replace your battery if the operating distance of the Remote Control drops drastically.
1. Remove the battery cover.
2. Install one new CR2025 Lithium battery into the battery compartment as
shown in the figure on the right.
3. Replace the battery cover.
CAUTION:
Battery Precautions
Follow these precautions when replacing the battery in this device.
1. Use only the size and type of battery specified.
2. Be sure to follow the correct polarity when installing the batteries as indicated next to the battery
com pa rtmen t . R eversed batte ry ma y cause da m age to the de vice .
3. If the device is not to be used for a long period of time, remove the battery to prevent damage or
injury from possible battery leakage.
4. Do not dispose of battery in fire, battery may explode or leak.
The following procedures can be accomplished by using either the Remote or the controls on JiMS-520i.
The battery may leak or explode if incorrectly installed.
RADIO OPERATION
Listening To The Radio
1. Press the Button to turn on the unit.
2. Press the FUNCTION Button to operate the unit i
Note: The Display will change from displaying the radio frequency to the current time 1 minute after the
system enters the radio function mode.
TO: PRESS:
Switch between AM/FM band BAND Button repeatedly
Select FM MONO or ST mode SET/FM MODE Button repeatedly
Scan radio station automatically !
Stop auto-tuning
Scan radio station manua lly
Adju st th e volume level (0 0~35) Volume + or - But ton s
Select the EQ EQ Button re pe at edly unti l th e des ir ed EQ sh ow n in the Display
Stop output from the speakers MUTE Button once
Resume output from the speakers MUTE Button again.
3. To check the current function mode, press the Volume +/- Buttons once. The Display will first show
! or # Buttons again
! or # Buttons repeatedly
or # Butt on s and ho ld for 1 s econd
Page 11

10
the Volume Level and then the frequency reading for about 1 minute and then revert to current time.
Note:
1. When listening to an FM station, fully extend the antenna wire to insure maximum reception.
2. Automatic tuning operation may vary depending on the broadcast signal strength and also your
distance from the broadcast tower, so weaker stations may be skipped. Tune manually to find the
weaker stations. With stronger stations, the tuner may stop before it reaches the optimum setting for
that station. Adjust tuning manually for the best reception if necessary.
3. For FM reception, the Radio provides FM MONO/STEREO option. In FM STEREO mode, the un it
will automatically switch to stereo when a strong FM stereo broadcast is received and will indic at e
“
” in the Display.
4. To receive a weaker (noisy) FM station, briefly press the SET/FM MODE Button to switch to MONO
mode. The reception may improve, but the sound heard is monaural (MONO).
5. The sound equalization can be adjusted for optimum sound reproduction depending on the style of
music you are playing. By pressing the EQ Button, you can switch between ROCK, POP, CLASSIC,
JAZZ, BASS or NORMAL equalization to suit your taste.
To Preset Channels
The JiMS-520i is equipped with 20 preset memories each for the AM and FM band. Once they are
preset, they can be instantly accessed by keying in the preset channel using the Numeric Buttons or
pressing the
1. Press the
▲ or ▼ Buttons on the Remote Control.
Button to turn on the unit.
2. Press the FUNCTION Button to switch the unit to the Radio mode if required.
3. Press the BAND Button to select AM or FM band as desired.
4. Tune to a desired station.
5. Press the MEMORY Button once. The Memory Indicator “MEMO” and the Channel Indicator “01”
will appear and flash in the Display.
6. While the Memory Indicator “MEMO” and the Channel Indicator “01” are flashing in the Display,
press the
▲ or ▼ buttons to select the desired preset channel.
7. Press the MEMORY Button again to confirm when the desired preset channel appears in the
Display.
Note:
The MEMORY and Preset Channel Indicators, “MEMO” and “01”, will dis appear in the LC D
Display if no Button is pressed in 5 seconds and the receiver will exit the Preset Channel mode.
8. Tune to another station and repeat steps 5 to 7 to store the new station in another preset channel.
To Receive Preset St ations
1. Press the
Button to turn on the unit.
2. Press the FUNCTION Button to operate the unit in the radio mode.
3. Press the BAND Button to select AM or FM band as desired.
Page 12

11
4. To listen to your desired station, press the ▲ or ▼ Buttons or directly key in the preset channel
using the NUMERIC Buttons. For example to receive preset station 5, first press the “0” Button and
then the “5” Button.
AUX OPERATION
You can play other music sources (iPod shuffle, MP3, CD or other digital audio player) through the
speakers of JiMS-520i by connecting its AUX IN Jack to your external player’s LINE OUT jack or
headphone jack.
1. Plug one end of the included cord into the AUX IN jack on the back of JiMS-520i. Plug the other end
of the cord into your external audio player, such as an iPod shuffle, CD, MP3 Player etc.
2. Power on JiMS-520i and the external player.
3. Press the FUNCTION Button to select the AUX mode.
4. Start playing your iPod shuffle, MP3, CD or other digital audio
player.
5. Slowly adjust both the volume on JiMS-520i and the external device
.
6. Press the EQ Button repeatedly to choose the des ired equalizer effect.
7. Turn off the attached player when finish listening.
8. Press the Button to turn J iMS-520i off and unplug the cord from the AUX IN jack.
Note:
i. The Display will change from showing “AUX” to the current time 1 minute after the system
enters the AUX function mode.
ii. To check the current function mode, press the Volume +/- Buttons once. The Display will firs t
show the Volume Level and then “AUX“ for about 1 minute and revert to current time.
Page 13

12
iTouch & iPhone
iPod ADAPTORS
Below are the iPod Adaptors included in the package.
It is always recommended you use the adaptor that comes with your iPod first. This will help maximize
a custom fit for your iPod when docked.
TABLE 1
Page 14

13
1. Press the
DOCKING YOUR iPod
Bu t ton to tu r n on the un i t .
2. Press the
3. According to TABLE 1, select a suitable adaptor for your iPod and insert it into the docking bay.
Your iPod can now be inserted onto the docking connector by aligning the connector on the
bottom of the iPod onto the connector in the docking bay.
Note :
4. Verif i ca t ion w il l be gin on c e the iPod is d ocke d. T he mes sag e
“READING” will be shown on the Display for a few seconds and then
“IPOD” will be shown on the Display after the verification has completed.
5. The iPod will start playing and charging automatically.
6. Adjust the sound level by pressing the
Note :
docke d.
FUNCTION
Please be careful when seating your iPod onto the dock to
avoid damaging the 30-pin connector in the iPod or the docking
system.
i. The volume level cannot be adjuste d using the volume control on your iPod after being
ii. The Display will change from showing “IPOD” to the current time 1 minute after the
system has entered the iPod function mode.
iii. When the Volume +/- Buttons is pressed, the Display will first show the Volume Level,
Button to select the iPod mode.
VO LUME +/-
buttons on the JiMS-520i.
then “IPOD“ for about 1 minute and then revert to current time again.
7. Repeatedly press the EQ Button on JiMS-520i to choose the desired equalizer effect.
Note :
8. To remove the iPod from JiMS-520i, press and hold the
the iPod and then gently remove it from the docking connector.
9. To turn JiMS-520i off, press the STANDBY/ON Button again.
Set the EQ of your iPod to OFF so that it will not affect the correct operation of the EQ on
this unit.
Button for few seconds to switch off
Page 15

14
1. Press the
DOCKING YOUR iPhone
Button to turn on the unit.
2. Press the
3. According to TABLE 1, select the 30G adaptor and insert it into the docking area. Your iPhone can
now be inserted into the docking port by aligning the connector on the bottom of the iPhone onto
the connector in the docking.
Note: Please be careful when seating the iPhone onto the dock to avoid
4. Verification will begin once the iPhone is docked. The message
“READING” will be shown in the Display for a few seconds and then
“IPOD” will be shown in the Display after the verification has completed.
5. The iPhone will start playing and charging automatically.
6. Adju st th e sound level by pressin g th e
Note:
FUNCTION
damaging the 30-pin connector in the iPhone or the docking
system.
i. The volume level cannot be adjusted using the volume control on your iPhone after
being docked.
ii. The Display will change from showing “IPOD” to current time 1 minute after the system
has entered the iPod function mode.
iii. When the Volum e+ or Vo lum e- Bu tto ns is pre ss es , the Dis pl ay will f irst sho w the Volume
Button to select the iPod mode.
VOLUME +/-
buttons on the JiMS-520i.
Level, then “IPOD“ for about 1 minute and then revert to current time again.
7. Press the EQ Button on the JiMS-520i to choose the desired equalizer effect.
Note: Set the EQ of your iPhone to OFF so that it will not affect the correct operation of the EQ
JiMS-520i.
8. Playback will be suspended if there is an incoming call and the iPhone will ring.
9. Touch th e A n swer icon on the iP hone once t o a nswer the call.
10. Touch the Speaker icon on the iPhone once to answer the call in handsfree mode.
11. Press the End Call icon on the iPhone when you have finished your call. Music will resume.
Note:
To enhance the sound quality in handsfree mode, use the 30G adaptor for docking the iPhone.
12. To remove your iPhone from JiMS-520i, press and hold the Button for few seconds to switch
off the iPhone and then gently remove it from the docking connector.
13. To turn JiMS-520i off, press the STANDBY/ON Button again.
Page 16

15
CONNECTING THE S-VIDEO ( for iPod with video output)
You are able to view videos and photos stored in your 5th generation iPod, iPod classic, 3rd and 4th
generation iPod nano and iPod touch on a standard TV screen or video display using the S-VIDEO
OUT feature of the JiMS-520i.
General Set Up
1. Plug one end of the included S-VIDEO cable into the S-VIDEO OUT Jack located on the back panel
and the other end into the VIDEO IN of your TV or video display.
2. Switch on your TV or video display.
3. Press the
4. Securely dock your iPod. Verification of the iPod will begin and “IPOD” will be shown on the
Display after verification completes.
5. To play your favorite video movies or video clips following the iPod operation instructions to operate
your iPod.
6. Adjust the
Note:
7. To remove the iPod from JiMS-520i, press and hold the Button for few seconds to switch off
the device and then gently remove it from the docking connector.
8. To turn JiMS-520i off, press the STANDBY/ON Button again.
FUNCTION
VOLUME
When playing slideshows or videos on your TV, the audio will only playback through the
JiMS-520i speakers.
Button to select the iPod mode.
+/- Buttons for the desired sound level.
CONNECTING THE S-VIDEO (for iPhone Video Output)
You are able to view videos and photos stored in your iPhone on a standard TV or video display using
the S-Video OUT feature of this unit.
For Video View (For iPhone with video ONLY)
You can connect your JiMS-520i to a TV or other video display that has S-Video input.
1. Plug one end of the included S-VIDEO cable into the S-VIDEO OUT Jack located on the back panel
and the other end into the VIDEO IN of your TV or video display.
2. Switch on your TV or video display.
3. Press the
4. Securely dock the iPhone and place it in Video mode. Touch the Video Icon on the iPhone to enter
Video mode if necessary. Verification will begin and “IPOD” will be shown in the Display after
verification completes.
5. Select a movie, video clip from the menu and touch the title of the movie to start playback.
6. Adjust the
Note:
FUNCTION
VOLUME
When playing slideshows or videos on your TV, the audio will only playback through the
JiMS-520i speakers.
Button to select iPod mode.
+/- Buttons for the desired sound level.
Page 17

16
7. To remove the iPhone from JiMS-520i, press and hold the Butto n for few seconds to swit ch o ff
the device and then gently remove it from the docking connector.
8. To turn JiMS-520i off, press the STANDBY/ON Button again.
USING HEADPHONES (NOT INCLUDED)
Inserting the plug of your headphones (not included) into the Headphone jack will enable you to listen in
private. When using headphones, the speakers will be disconnected automatically.
Note:
READ THIS IMPORT ANT INFORMATION BEFORE USING YOUR HEADPHONES
1. Avoid extended pl ay a t v er y high volu m e a s it m ay im pair your hear in g.
2. If you ex p er ien c e ri ng ing in your ea rs , redu c e th e vo lum e or s hu t o ff y o ur unit .
3. Keep the volume at a reasonable level even if your headset is an open-air type designed to allow
you to hear outside sounds. Please note that excessively high volume may still block outside
sounds.
CLOCK SETTING
The following procedures can be accomplished by using either the remote or the controls on the main
unit.
Setting the Time
The Clock can only be set in STANDBY mode.
1. Press and hold the SET Button until the Hour digits flash.
2. While the Hour digits are flashing, press and hold the
appear in the LCD Display.
Note:
Make sure the hour is correctly set to AM or PM. If the PM Indicator is “On”, the time displayed is
PM. If the PM Indicator is “Off” the time displayed is AM.
It is important that the “AM” or “PM” setting is correct for proper operation of the Alarm function.
3. Pr ess the SET Button to confirm. The Minute digits will flash in the LCD.
4. While the Minute digits are flashing, press and hold the
digits appear in the LCD Display.
5. Press the SET button to exit and activate the new clock time to operate.
Setting the Alarm (s)
i. JiMS-520i allows you to set two different wake-up times which can be used independently or
simultaneously ALARM1 or ALARM2 or ALARM1 and ALARM2.
ii. The procedure for setting the alarm time for ALARM 1 and ALARM 2 are the same.
iii. The fol lowing pr ocedure des cr i be s how to se t AL ARM 1 alarm t ime :
1. In STANDBY mode, briefly press the ALARM 1 Button. The Alarm1 Indicator will appear
! or # Buttons until the correct Hour digits
! or # Buttons until the correct Minute
steadily in the LCD Display.
2. Press and hold the ALARM 1 Button until the Alarm1 Indicator flashes ( ) in the display. The
Docking System is now set to Alarm Wakeup mode.
Page 18

17
3. To switch to iPod Wakeup mode, when the Alarm Wakeup Mode Indicator is flashing ( ), press
the
! Button once, the iPod Wakeup Mode Indicator, , will appear and flash in the
Display.
4. To switch to Radio Wakeup Mode, press the
Indicator is flashing ( ), in the Display. The Radio Wakeup Mode Indicator, , will appear
and flash in the Display.
5. Press the ALARM1 Button to confirm when the desired Wakeup Mode appears in the Display. The
Wakeup Mode Indicator will flash together with the Hour digits prompting for input .
6. While the Wakeup Mode Indicator and Hour digits are flashing, press the
select the desired wakeup Hour.
Note:
7. Press the ALARM 1 Button again to confirm the wakeup Hour. The Minute digits will flash in the
8. Press the
9. Press the ALARM 1 Button again to confirm the Minutes. The Alarm sound level Indicator “VOL”
10. Press the
11. Press the ALARM 1 button to confirm and the Alarm setting process is then completed.
Make sure the hour is correctly set to AM or PM. If the PM Indicator is “On”, the time
displayed is PM. If the PM Indicator is “Off” the time displayed is AM.
It is important that the “AM” or “PM” setting is correct for proper operation of the Alarm function.
LCD Display to prompt for input.
!
or # Buttons to select the desired Minutes.
will then be displayed and flash to prompt for input.
Volume
+
or - Buttons to set the desired wakeup sound level (00 ~35)
!
Button again when the iPod Wakeup Mode
!
or # Buttons to
CLOCK LIGHT OPERATION
1. For a bright LCD Display under normal room illumination, press the SNOOZE/LIGHT Button once.
The LCD backlight will turn on.
2. For a dim LCD Display in the dark press the SNOOZE/LIGHT Button again to turn the LCD
backlight off.
ALARM OPERATION
This Docking System provides wake to Alarm, iPod or Radio functions.
Wake to Alarm, iPod or Radio
1. Refer to “Setting the Alarm (s)” in the above to set the desired Wakeup time (s), Wakeup mode, i.e.
Alarm, iPod or Radio, and the volume level.
2. When the preset wakeup time is reached the selected Wakeup mode turns “On”. The respective
Indicator of the Wakeup mode flashes. The alarm will continue to sound and last for 6 0 minutes
and then turn off automatically. The alarm remains set and will turn JiMS-520i on again at the same
time on the following day.
3. To stop the alarm sound before it automatically turns off briefly press the STANDBY/ON Button
once. The alarm sound stops but the alarm remained set and will turn JiMS-520i on again at the
same time on the following day.
4. To cancel the alarm function briefly press the
respective ALARM indicator(s) will go off.
Notes:
ALARM1
and/or
ALARM 2
Button(s) again. The
Page 19

18
i. If you have chosen “Wake to RADIO” alarm mode, make sure that you have tuned to a station and
SLEEP
FM
adjusted the volume to a comfortable level.
ii. If “Wake to iPod” alarm mode is selected, make sure that there is an iPod docked in the System
and the volume is set to a comfortable level.
iii. In “Wake to iPod” alarm mode, the alarm will sound if no iPod is inserted in the System.
SNOOZE OPERATION
1. When the alarm sounds (alarm, radio or iPod), you can press the SNOOZE Button to extend the
alarm time b y 9 minutes. The alar m, radio or iPod will then turn on again . The relevant Snooze
Indic at or “ S N1” or “ SN2 ” w ill ap pe ar an d fla s h in the Disp l ay.
2. The SNOOZE operation can be repeated several times within the 60 minutes alarm duration.
SLEEP OPERATION
You can use the SLEEP Timer to fall asleep to Radio or iPod for a maximum duration of 90 minutes.
Activating the SLEEP Timer
Note: The default SLEEP duration is 90 minutes.
1. In POWER On mode, operate the Radio, iPod or your external audio player (AUX mode) as usual
and adjust the volume to the desired level.
2. Press the SLEEP button. The Sleep Indicator “SLEEP” appears in the upper left corner of the LCD
Display. The Display will show 90 minutes of playing time and then return to the current mode in a
few seconds. The Sleep Indicator “SLEEP” keeps flashing in the upper left corner of the Display.
MHz
The Radio or iPod will automatically turn off after the 90 minutes sleep time has elapsed. The SLEEP
Indicator “SLEEP” will disappear in the Display.
Adjusting the SLEEP Period
1. With the unit In POWER ON mode, press the SLEEP Button. The display will show 90 minutes of
playing time.
2. To adjust the sleep time for less than 90 minutes, press the
# Button repeatedly. The sleep time
will decrease in 5 minutes decrement every time the SLEEP Button is pressed. Stop pressing the
# Button when your desired sleep time is displayed.
!
3. To adjust the sleep time for more than 5 minutes, press the
will increase in 5 minutes increment every time the SLEEP Button is pressed. Stop pressing the
Button repeatedly. The sleep time
!
Button when the desired sleep time is displayed.
4. The unit will automatically turn off after the preset sleep time has elapsed. However, if you want to
turn the radio off before the preset sleep time has elapsed, press the
Button once to switch the
power off. The LCD Backlight will turn off and the SLEEP Indicator “SLEEP” will disappear in the
Page 20

19
Display.
Deactivating the SLEEP Timer
If you want to exit the SLEEP mode simply press either the ALARM 1 or ALARM 2 button once.
SLEEP AND WAKE TO ALARM, iPod OR RADIO
1. Refer “SETTING THE ALARMS” in above to set the desired wakeup time (s), wakeup mode, i.e.
ALARM, iPod or RADIO and volume level.
2. Fo llow step 1-3 (shown abov e) under the “ADJUSTING THE SLEEP PERI OD” section to set the
desired SLEEP time.
The Radio is now programmed to turn off automatically at the Sleep Time you selected and then to turn on
again at th e p reset “ A lar m Ti me”.
CARE AND MAINTENANCE
1. Avoid operating your unit under direct sunlight or in hot, humid or dusty places.
2. Keep your unit away from heating appliances and sources of electrical noise such as fluorescent
lamps or motors.
3. For better Clock Display clarity, avoid operating the unit under direct sunlight or in strong room
illumination.
4. Unplug the unit from the electrical power outlet immediately in case of malfunction.
Cleaning the Unit
! To prevent fire or shock hazard, disconnect your unit from the AC power source when cleaning.
! The finish on the unit may be cleaned with a dust cloth and cared for as other furniture. Use
caution when cleaning and wiping the plastic parts.
! If the cabinet becomes dusty wipe it with a soft dry dust cloth. Do not use any wax or polish sprays
on th e ca bin et .
! If the front panel becomes dirty or smudged with fingerprints it may be cleaned with a soft cloth
slightly dampened with a mild soap and water solution. Never use abrasive cloths or polishes as
these will damage the finish of your unit.
CAUTION:
Never allow any water or other liquids to get inside the unit while cleaning.
Page 21

20
If you experience difficulties in the use of this Docking System, please check the following or call
905-845-6200 for Customer Service.
Symptom Possible Cause Solution
The unit does not
respond (no power)
iPod/iPhone does not
install properly.
iPod/iPhone does not
respond
to the system
iPod/iPhone does not
charge up
AM band is too noisy.
FM band is too noisy.
AC cord is not plugged properly into a
wall outlet or the connector is not
plugged into the AC IN jack on the
back of the uni t .
Wall out let is not functioning.
Using no/wrong iPod Adaptor.
iPod/iPhone does not dock properly
iPod/iPhone is not installed properly.
Your iPod/iPhone is locked up.
iPod/iPhone is not installed properly.
iPod/iPhone is locked up/ frozen.
iPod/iPhone battery has problem.
The re ce ptio n at the set locat ion is
poor
The re ce ptio n at the set locat ion is
poor
TROUB LE S H OOT IN G GUI DE
Plug the AC cord into a wall outlet and plug
the connector into the AC IN jack on the
unit.
Plug another device into the same out
outlet to confirm the outlet is working.
Make sure the dock insert is properly fit for
your iPod/iPhone.
Make sure the dock insert is properly fit for
your iPod/iPhone
Remove your iPod/iPhone from the dock
and check for obstruction on the
connectors in the dock and on your
iPod/iPhone. Then reseat it in t h e dock.
Remove your iPod/iPhone from the dock
and check for obstruction on the
connectors in the dock and on your
iPod/iPhone. Then reseat it on the dock.
Please make sure that your iPod/iPhone is
working properly before docking into the
unit. Please refer to your iPod/iPhone
manual for info on resetting the
iPod/iPhone.
Remove your iPod/iPhone from the dock
and check for obstruction on the
connectors in the dock and on your
iPod/iPhone. Then reseat it in t h e dock.
Plea se mak e sur e your i Po d / i P ho ne is
working properly before docking into the
unit. Please refer to your iPod/iPhone
manual for details on resetting.
Slightly rotate the AM loop antenna position
for the best reception.
Move the AM loop antenna away from the
unit to avoid interference.
Make sure the FM Antenna is fully
extended and tape it onto the wall if
required, the higher the better
SERVICE
Please ref er to the in structi ons on the en closed wa rrant y card for retu rning your uni t for s ervice . When
returning the unit, please remove any batteries to prevent damage to the unit in transit and/or from
possible battery leakage. We are not responsible for batteries returned with the product or for the cost
of replacement.
Distri bu te d by:
Target Marketing Corp.
47 Forsythe Street.
Page 22

21
Oakville, ON. L6K3R7
China
Email: www.targetmarketingcorp.com
Please have m odel number ready, for Customer Service, call 905-845-6200
SPECIFICATIONS
General
Power FUNCTION: AC 120V~ 60Hz 20W
Dimensions: 13.5 (L) x 6.6 (D) x 5.9 (H) Inch
Weight: 4.9 lb
Radio Frequency Coverage
AM: 520-1710 kHz
FM: 87.5 – 108 MHz
Speakers: 2 x 8 ohms
Output Power: 2 x 2.5W
iPod is a trademark of Apple Inc., registered in the U.S. and other countries.
iPhone is a trademark of Apple Inc.
"Made for iPod" means that an electronic accessory has been designed to connect specifically to iPod
and has been certified by the developer to meet Apple per formance standards.
"Works With iPhone" means that an electronic accessory has been designed to connect specifically to
iPhone and has been certified by the developer to meet Apple performance standards.
Apple is not responsible for the operation o f this devise or its compliance with safety and regulatory
standards.
Printed in
 Loading...