

Page 1

Telio CS
Telio CAD
Instructions for Use
Page 2

Table of Contents
elio – A comprehensive system with a future 4
T
Product information 5
Material
Uses
Composition
CAD/CAM partners
Clinical working steps, fabrication process 9
Shade determination
Minimum material thicknesses
Telio CS Desensitizer 11
Application
Telio CS C&B – Fabricating
temporary crowns and bridges 12
Fabrication of an alginate or silicone matrix
Preparing the double cartridge and application
Shaping temporaries
Curing and finishing
Repairing temporaries
Filling of air bubbles or chippings
Individualizing temporaries
Telio CS
Telio
2
Telio CS Link 24
Cementation
Final result
Relining of Telio CAD restorations
or lab-fabricated temporary crowns and bridges 27
Telio CAD – Fully anatomical fabrication and
final polishing 29
Finishing
Polishing
Telio CAD – Cut-back technique 32
CAD
General information 34
Seating/cementation of temporaries
Subsequent adjustments
Page 3
Telio –
The 3-in-1 solution for temporary restorations
Telio is a comprehensive, fully integrated product system for
temporary restorations designed for dentists, CAD/CAM users and
dental technicians.
• Telio CS
For dentists: Self-curing temporary C&B materials, including a
desensitizer and cement.
• Telio CAD
For CAD/CAM users: Acrylate polymer blocks for the CAD/CAM
manufacture of temporary crowns and bridges.
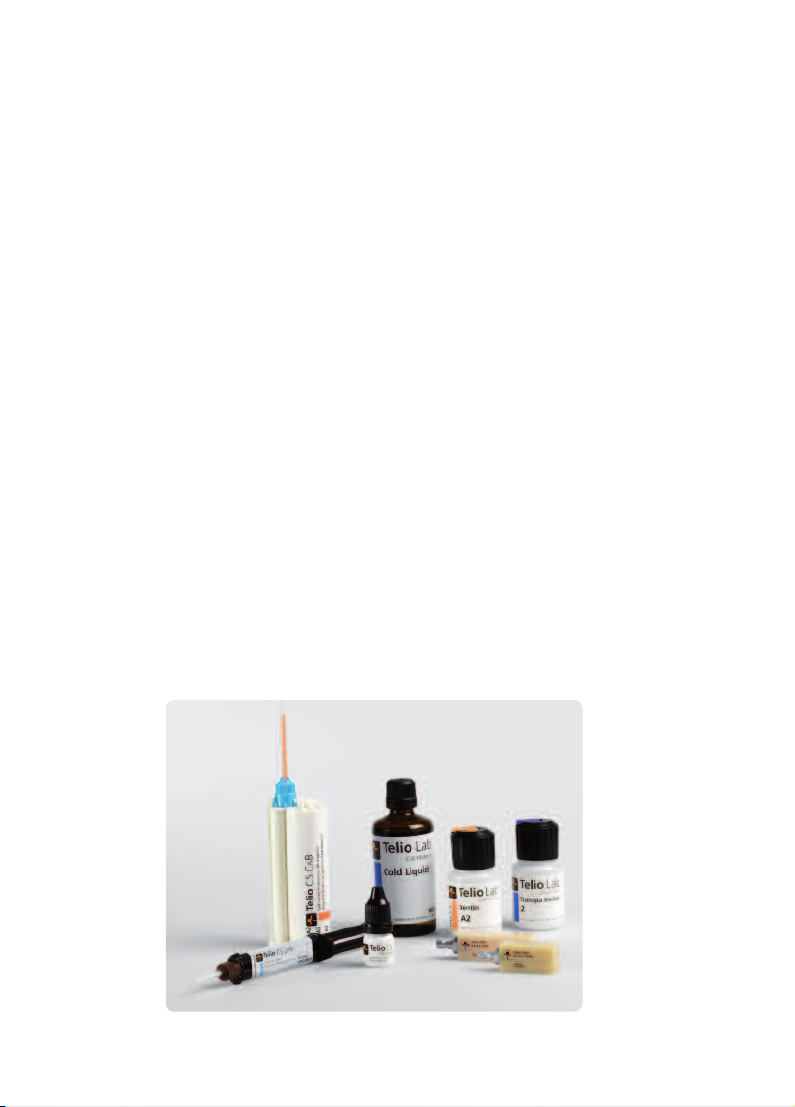
• Telio Lab
For dental technicians: Resin for temporary crowns and
bridges, including a light-curing composite for additional
individualizations.
The materials are compatible with each other and their shades are
optimally coordinated.
All materials are out of one hand:
Telio is a system of compatible materials for temporary restorations.
3
Page 4

Product information
Material
The Telio products are compatible with each other and their shades are optimally coordinated.
Telio CS C&B
is a self-curing composite material for high-quality
temporary crown and bridge restorations and is
supplied in five shades (BL3, A1, A2, A3, A3.5).
Telio CS C&B provides a high accuracy of fit and
allows stress-free restorations to be fabricated even
in multi-unit constructions, as, in addition to the
high stability, the material features low polymerization shrinkage and absorbs little water.
Telio CS Desensitizer
is a solution to prevent and/or reduce dentinal
hypersensitivity and postoperative sensitivity. In
general, Telio CS Desensitizer is suitable to condition and desensitize exposed or ground dentin surfaces (dressing for prepared cavities and teeth).
Dentin wounds may be treated before the incorporation of the Telio temporary restorations in order
to prevent and minimize hypersensitivity. The
desensitizer can be applied with temporary restorations, cementation of prosthetic work, during
direct restorative therapy as well as for sensitive
cervicals.
Telio CS Link
is a dual-curing (light- and self-curing) temporary
composite cement used to seat temporary restorations (wear period of less than 6 weeks). Due to
the two translucent shades (A3 & Transparent), an
esthetic integration of the restoration is achieved.
Telio CS Link is free of eugenol and therefore also
suitable if all-ceramic restorations or lab-fabricated
composite restorations are adhesively placed later.
Telio CAD
Telio CAD are cross-linked PMMA blocks for the
fabrication of long-term temporaries by means of
the CAD/CAM technique. As a result of the industrial polymerization process, the blocks feature a
high material homogeneity. There is neither polymerization shrinkage nor an inhibited layer. Given
the CAD/CAM fabrication, the temporary can be
easily reproduced at any time. Stains and/or
layering materials can be used to apply final
esthetic optimizations.
Flexural strength [MPa] 130 ± 10
Modulus of elasticity [MPa] 3200 ± 300
Water absorption [µg/cm2] < 28
Water solubility [µg/cm2] < 0.6
Ball indentation hardness [MPa] 180 ± 5
Source: Ivoclar Vivadent R&D, Schaan/Liechtenstein, 2009
In accordance with ISO 10477
4
Page 5

Uses
Telio CS C&B
Indications
• Temporary crowns, bridges, inlays, onlays, post
temporaries and veneers
• Relining of lab-fabricated resin temporaries
(e.g. Telio CAD, Telio Lab)
• Relining of prefabricated polycarbonate crowns
Contraindication
• Do not use if a patient is known to be allergic
or intolerant to any of the ingredients of Telio
CS C&B.
Telio CS Desensitizer
Indications
Prevention and reduction of dentinal hypersensitivity and postoperative sensitivity in
conjunction with:
• temporary restorations
• cementation of indirect restorations
• direct restorative therapy
• sensitive tooth necks
Contraindication
• Do not use if the pain is caused by pulpitis or
inflammation.
• Do not use if a patient is known to be allergic
or intolerant to any of the ingredients of Telio
CS Desensitizer.
Telio CS Link
Indications
• Temporary incorporation of temporary restora-
tions (max. 6 weeks)
Contraindication
• The material should not be used if a patient is
known to be allergic to any of the ingredients
of Telio CS Link.
Telio CAD
Indications
• Anterior and posterior crowns with a maximum
wear period of 12 months
• Anterior and posterior bridges with up to
2 pontics with a maximum wear period of
12 months
• Implant temporaries with a maximum wear
period of 12 months
• Therapeutic restorations to correct TMJ
problems and occlusal adjustments
Contraindication
• Use for permanent restorations
• Bridge reconstructions with more than two
pontics
• Patients with parafunctions, e.g. bruxism
Product information
5
Page 6

mportant processing restrictions
I
If the following restrictions are not observed,
successful working with the Telio materials cannot
be ensured:
• Telio CS C&B and Telio CAD must not be used
to fabricate final restorations.
• Telio CS Link must not be used for the
permanent cementation of restorations.
• The Telio material should not be used if a
patient is known to be allergic to any of its
ingredients.
• The required minimum thicknesses must be
observed.
• Staining/layering of Telio CAD using materials
that are not approved and/or recommended.
• Milling the Telio CAD blocks in a non-
compatible/non-authorized CAD/CAM system.
• Do not inhale grinding dust during finishing.
Use exhaust air discharge and dust mask.
Prevention of premature loss of retention:
Apart from a retentive preparation design, the
reliable cementation of Telio CAD restorations
using a temporary luting material (e.g. Telio CS
Link) depends on the accuracy of fit, which is
determined by the CAD/CAM system used.
Composition
• Telio CS C&B
Components: Polyfunctional methacrylates
(48 wt.%), inorganic fillers (47 wt.%),
additives, initiators, stabilizers and pigments
(5 wt.%).
• Telio CS Desensitizer
Components: Polyethylene glycol dimethacrylate and glutaraldehyde in an aqueous
solution.
• Telio CS Link
Components: Bismethacrylates (56 wt.%),
fillers (43 wt.%), initiators, stabilizers,
pigments.
• Telio CAD Blocks
Components: Polymethyl methacrylate
(PMMA), pigments.
• Telio Stains
Components: Bis-GMA, urethane dimethacrylate and triethylene glycol dimethacrylate
(86 wt.%), fillers and pigments (13 wt.%),
catalysts, stabilizers.
• Telio Add-On Flow
Bis-GMA, urethane dimethacrylate and
decandiol dimethacrylate (40.5 wt.%), fillers
(59 wt.%), catalysts, stabilizers and pigments
(0.5 wt.%).
• Telio Activator
Components: Methyl methacrylate (86-87%),
dimethacrylate (13%) and catalyst (<1%).
6
Page 7

ote
N
Do not use in case of known hypersensitivity to
methyl methacrylate. Do not use products containing methyl methacrylate intraorally.
Storage instructions
– Protect the materials from direct sunlight.
– Observe the storage instructions and the expiry
date on the secondary packaging.
– Do not use the products after the indicated
expiry date.
– Keep out of the reach of children!
– Telio CS C&B
Use only at room temperature (cooled material
is more viscous and takes longer to cure). Leave
the used mixing tip on the syringe as a cap
until the next application.
– Telio CS Desensitizer
Close bottle immediately after use.
– Telio Stains and Telio Add-On Flow
Syringes should be closed immediately after
use. Exposure to light causes premature poly-
merization.
– Telio CS Link
Storage at 2-8°C / 36-46°F. Use only at room
temperature (cooled material is more viscous
and takes longer to cure). After use, leave the
mixing tip on the syringe as a closure.
Warning
– Prevent contact of uncured Telio CS C&B and
Telio CS Link with the skin and eyes.
Minimize contact of uncured Telio CS C&B
with the mucous membrane.
– Uncured Telio CS C&B and Telio CS Link may
cause slight irritation and in rare cases may
lead to a sensitization to methacrylates after
repeated skin contact.
– Commercially available medical gloves do
not provide protection against the sensitizing
effect of methacrylates.
– Telio CS Desensitizer contains glutaraldehyde
and is harmful if inhaled or swallowed.
Prevent contact with skin, mucous
membranes and eyes. If the material should
accidentally come in contact with the eyes,
immediately rinse with copious amounts of
water and consult a physician. Repeated
skin contact and inhalation may cause
sensitization.
– Telio Activator contains methyl methacrylate
(MMA). Skin contact may cause
sensitization.
– Telio Activator is only for extra-oral
application.
– MMA is highly flammable and irritating
(flash point: +10 °C/50 °F).
– Irritating to eyes, respiratory organs and skin.
– Do not inhale vapours.
– Keep away from sources of ignition. Do not
smoke.
– Prevent contamination of the sewage
system.
– Take measures against electrostatic charge.
– Do not inhale resin dust during finishing of
Telio CAD – use exhaust air discharge and
mouth protection.
Product information
7
Page 8
CAD/CAM partners
Telio CAD is processed by means of CAD/CAM systems from authorized partners.
Please read the respective handbooks on the hard- and software of your CAD/CAM device carefully
before fabricating the restorations.
The CAD-Waxx Starter Kit (Sirona) with a modified tank and reinforced filter system is required for the
processing in the Sirona systems.
For questions regarding the different systems, please contact the respective cooperation partners.
For further information, please
contact
Sirona Dental Systems
GmbH
Fabrikstrasse 31
64625 Bensheim
Germany
E-mail: contact@sirona.de
www.sirona.com
CEREC®is a registered trademark of
Sirona Dental Systems GmbH
8
Page 9
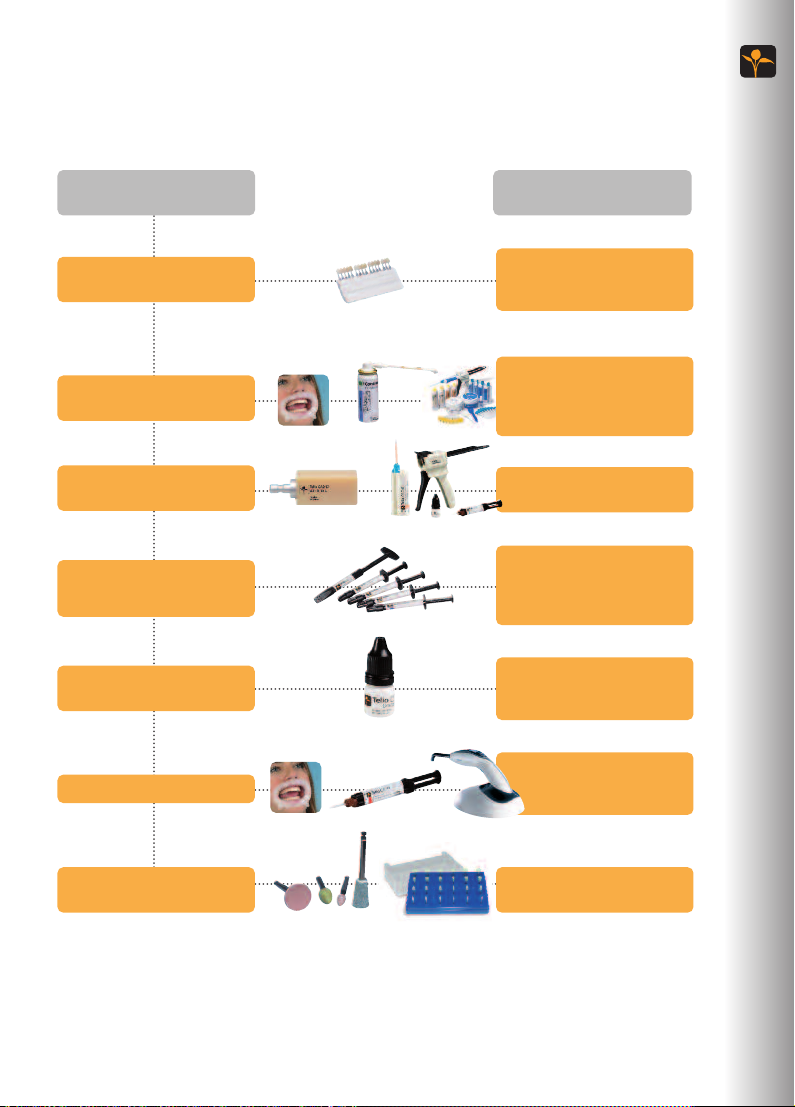
Clinical working steps, fabrication process
Working step
Preparation,
shade determination
Intraoral imaging /
impression-taking
Temporary restoration
Characterization, cut-back
technique, corrections,
addition of material
Preparing
for cementation
Ivoclar Vivadent
Products
A-D shade guide
OptraGate
Contrast Spray Chairside
Virtual
Vival NF
Telio CS C&B
Telio CAD
Telio Stains
Telio Lab LC Veneer
Telio Add-On Flow
Telio Activator
Telio CS Desensitizer
(optional)
OptraGate
Clinical working steps, fabrication process
Cementation
Polishing
OptraGate
Telio CS Link
bluephase
Astropol
OptraPol
9
Page 10
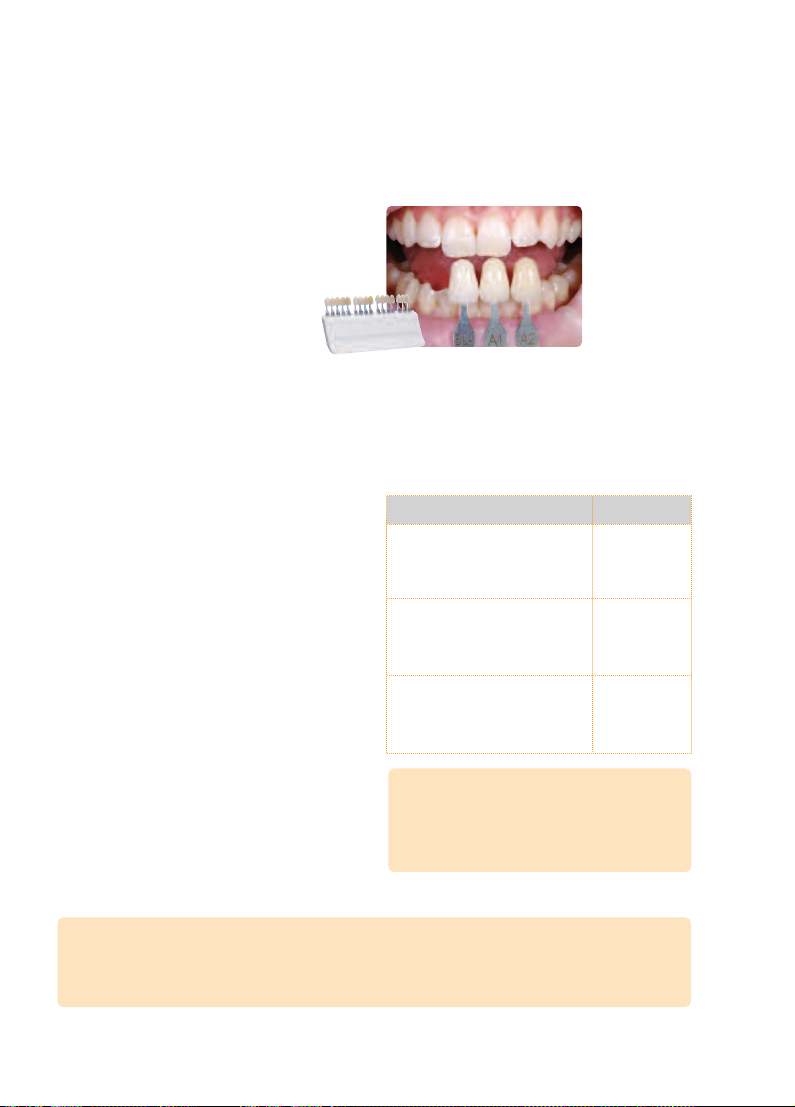
Shade determination
Shade determination of the natural tooth
After tooth cleaning, the tooth shade of the nonprepared tooth and/or the adjacent teeth is determined with the help of a shade guide. Individual
characteristics have to be considered when
determining the tooth shade (e.g. cervical shade).
In order to achieve the best possible true-tonature results, shade determination should
be carried out at daylight. Furthermore, the
patient should not wear clothes of intensive
colours and/or lipstick.
Minimum material thicknesses /
layer thicknesses
The design of the restoration is the prerequisite for
successful temporary restorations and also paves
the way for the incorporation of the permanent
restoration.
The following basic guidelines have to be observed:
• In large preparations and for partially veneered
restorations, the excess available space must be
compensated by the correspond-ing dimensions
of the stable Telio CAD component and not by
the layering material.
• The transition to the layering material must not
be located in the area of the functional contact
points.
• With Telio CAD the design of the restoration
generated by the software has to be individually
adjusted in accordance with the clinical situation using the design tools. The build-up of
missing areas to support and reinforce the
shape and cusps of the restoration is constructed
with the integrated design tools of the different
types of software used.
Material thicknesses
Telio CAD
Minimum wall thicknesses
occlusal
circular
1,5 mm
0,8 mm
Connector dimensions anterior
bridges
with 1 pontic
with 2 pontics
min. 12 mm
min. 12 mm
Connector dimensions posterior
bridges
with 1 pontic
with 2 pontics
min. 12 mm
min. 16 mm
Failure to observe the stipulated framework design criteria, minimum thicknesses
and minimum connector dimensions may
result in clinical failures, such as fracture of
the restoration.
2
2
2
2
Prevention of premature loss of retention:
Apart from a retentive preparation design, the reliable cementation of Telio CAD restorations using a
temporary luting material (e.g. Telio CS Link) depends on the accuracy of fit, which is determined by
the CAD/CAM system used.
10
Page 11

Telio CS Desensitizer
Application
Telio CS Desensitizer makes the temporary restoration phase more
comfortable for patients, since it reduces the sensitivity of prepared,
and in some cases exposed, dentin surfaces.
– Prepare cavity / abutment
– You may take the impression at this stage or wait until you have
applied the desensitizer (see notes).
– The dentin surfaces should be dry and clean. Keep working field
dry (e.g. cotton rolls).
– Apply Telio CS Desensitizer:
Brush it into the dentin for 10 seconds using a suitable instrument
(brush, applicator brush).
– Carefully disperse excess to a thin layer / dry with an air syringe.
Do not overdry the dentin.
– Fabricate the temporary restoration / provisionally cement restora-
tion (see notes).
Notes
– The application of Telio CS Desensitizer somewhat increases the
adhesion of the light-curing temporary inlay and onlay materials
from Ivoclar Vivadent to the cavity walls. Nevertheless, they can
be removed at the second appointment without difficulty.
– If light-curing temporary C&B materials are used, Telio CS
Desensitizer should be applied after the fabrication of the
temporary. If you apply Telio CS Desensitizer prior to fabricating
the temporary, the material may stick to the tooth structure when
the impression is repositioned into the oral cavity during the
setting/light-curing procedure and may be difficult to remove.
– The application of Telio CS Desensitizer during temporary fabrica-
tion does not affect or limit the choice of the cementation system
or the success of the cementation procedure in the second
appointment. Both conventional and adhesive cementation
systems can be used for cementation purposes.
– The application of Telio CS Desensitizer to enamel does not create
any problems and does not affect the subsequent steps of the
treatment or the materials being used (thoroughly remove excess
desensitizer / dry).
– Telio CS Desensitizer can be applied before or after impression-
taking. The layer thickness is very thin, so that the accuracy of fit
is maintained even if the desensitizer is applied after the
impression-taking. Interaction of the desensitizer with impression
materials are not known (if applied before impression-taking).
Telio CS Desensitizer
11
Page 12

Telio CS C&B
Fabrication of temporary crowns and bridges
Fabrication of an alginate or silicone matrix
If the unprepared teeth exhibit a suitable occlusal morphology that may be transferred to the provisional
restoration or even the planned permanent restoration, and if abutment teeth in suitable position are
available, a preliminary impression can be made to serve as a matrix for the fabrication of the temporaries.
Prior to the preparation or extraction of the teeth, an impression of the preoperative situation is made
using addition-cured silicone impression material (e.g. Virtual; dimensionally stable impressions) or alginate (e.g. Vival NF, impressions that are dimensionally stable for a limited period of time).
Adjusting the impression and creating an additional recess for the lip frenulum ensure that the impression
can be repositioned in the patient’s oral cavity without difficulties.
To do so, trim the interdental gingival areas and remove undercuts in the impression (e.g. using a scalpel),
if necessary. If the occlusion is defective, the fabrication of a wax-up in the laboratory may additionally be
required prior to taking the impression.
Impression of the preoprative situation prior to tooth preparation Dimensionally stable preoperative impression made with Virtual
Finishing of the impression Finished impression that can be easily repositioned
Note regarding plastic templates
When using a vacuum-formed plastic matrix, care should be taken that the plastic material
does not bond to Telio CS C&B. Suitable plastic sheets (e.g. polyethylene sheets) should be
selected, so that the vacuum-formed matrix can be reused. If a bond between the plastic and
Telio CS C&B is desired, plastic sheets should be chosen that are especially designed for this
purpose. Condition the inner aspect of the sheet with AdheSE
12
®
Bond.
in the patient’s oral cavity
Page 13

Preparing the double cartridge
1. Press the black release lever located below the
plunger on the back of the dispenser and pull
the plunger as far back as possible.
2. Lift the cartridge lock and insert the cartridge.
Lower the cartridge lock. Push the plunger
forward until it touches the cartridge.
3. Remove the sealing cap or used mixing tip by
turning it in a 1/4 turn counter clockwise and
discard it; do not reuse it.
4. Insert a new mixing tip. Push the tip down until
the notch on the mixing tip touches the notch
on the cartridge.
While gripping the coloured base, and not the
mixing tip, turn the mixing tip base 1/4 turn
clockwise.
Telio CS C&B – Fabricating temporary crowns and bridges
13
Page 14

. The material is mixed and dispensed through
5
the mixing tip by pulling the trigger and can be
applied directly into the matrix.
Removal of the cartridge
Lift the release lever below the plunger on the back and pull the plunger as far back as possible.
Lift the cartridge lock on the front side on top of the dispenser and remove the cartridge.
Leave the used mixing tip on the syringe as a cap until the next application.
Application
Telio CS C&B is automatically mixed when it is dispensed directly into the impression or vacuum-formed
matrix with slight pressure. Prior to each application, extrude and discard an approximately pea-sized
amount of material.
Telio CS C&B is automatically mixed when it is dispensed directly into the impression or vacuum-formed
matrix with slight pressure.
To prevent voids, apply the material to the occlusal surfaces first, then proceed by filling the gingival areas.
Keep the mixing tip immersed in the material to prevent bubbles. If required, the material may also be
syringed around the prepared teeth to avoid bubble formation along the preparation margin. The
processing time is approx. one minute at room temperature (23 °C / 73 °F).
Discard a pea-sized amount of Telio CS C&B.
14
Page 15

Application directly into the impression or the plastic template under exerting slight pressure.
Apply the material to the occlusal surfaces and proceed by filling the gingival areas.
To prevent voids, keep the tip immersed in the material.
Telio CS C&B – Fabricating temporary crowns and bridges
15
Page 16

Shaping of temporaries
a) Fabrication in the mouth
The prepared teeth should be slightly moist. This can be achieved by painting them with water-soluble
glycerine gel (e.g. Liquid Strip). Undercut areas of the tooth preparation or adjacent teeth may have to be
blocked out with appropriate materials (e.g. with kneadable rope wax).
Carefully reposition the impression filled with Telio CS C&B on the prepared teeth. The setting time is
approx. 1 to 2 minutes at a temperature of 37 °C / 98 °F. At room temperature (23 °C / 73 °F), e.g. when
the restoration is fabricated on a model, the material takes longer to cure (approx. 3 minutes).
When the material is nearly cured (hard-elastic, partially cured state) the impression can be removed from
the patient’s oral cavity. Remove the unfinished Telio CS C&B temporary from the impression using a spatula (e.g. OptraSculpt).
Reposition the filled impression on the prepared teeth. The setting time in the mouth is approx. 1-2 minutes.
Removing the impression Removed impression with non-finished Telio CS C&B restoration
Remove the unfinished Telio CS C&B temporary from the impression using a spatula.
16
Page 17

) Fabrication on the model
b
Isolate the preparation area of the model (e.g. using Vaseline). Carefully reposition the impression filled
with Telio CS C&B on the model. After approx. 3 minutes (at 23 °C / 73 °F), Telio CS C&B attains a hardelastic, partially set consistency and can be removed from the model together with the impression.
Telio CS C&B – Fabricating temporary crowns and bridges
17
Page 18

Curing and finishing
After removing the temporary restoration from the impression (or from the tooth preparation), remove
excess material using rotary instruments once the material is cured completely (after approx. 4 to
5 minutes). Cross-cut tungsten carbide burs are suitable for finishing. Remove the inhibition layer with
alcohol or by polishing. Silicon carbide rubber polishers (e.g. OptraPol) should be used for polishing.
Finish the temporary restoration with rotary instruments (cross-cut tungsten carbide burs).
Use diamond disks to finish the interdental areas.
Polishing with silicon carbide rubber polishers (e.g. OptraPol).
18
Polishing with a cotton buffing wheel
Page 19

Repairing of temporaries
If Telio CS C&B temporaries are relined, repaired or adjusted, the following procedure is
recommended:
Telio CS C&B temporaries can be repaired with freshly mixed Telio CS C&B after having
conditioned them with AdheSE Bond or Heliobond.
1. Grind the areas of the Telio CS C&B temporary which need to be relined, repaired or
adjusted with a coarse diamond.
2. Apply AdheSE Bond / Heliobond.
3. Disperse AdheSE Bond / Heliobond with a very weak stream of air. Avoid pooling!
Care should be taken not to blow away the bonding agent. All the prepared
surfaces must be adequately coated with AdheSE Bond / Heliobond.
Note: AdheSE Bond / Heliobond does not contain a solvent that has to be
evaporated!
4. Polymerize AdheSE Bond / Heliobond for 10 s using an LED or halogen curing light
with a light intensity of more than 500 mW/cm
other curing lights are used, the recommendations of the respective manufacturer
must be followed to obtain fully polymerized results. The curing time depends on
the light intensity and the wavelength range of the light emitted by the different
curing units. Curing times of less than 5 s are not recommended.
5. Apply Telio CS C&B.
6. If necessary, finish the relined, repaired or adjusted areas of the Telio CS C&B
temporary with e.g. cross-cut tungsten carbide burs and subsequently polish them
with silicon carbide rubber polishers (e.g. OptraPol®).
Alternatively, Telio CS C&B temporaries can be repaired or adjusted directly with a lightcuring Ivoclar Vivadent composite (e.g. Telio Add-On Flow, Tetric EvoFlow). In this case,
the respective Instructions for Use must be observed.
Telio Add-On Flow is cured with a high-power curing light (>1000 mW/cm
bluephase) in 15 s per segment or with a standard curing light (>500 mW/cm
per segment. Tetric EvoFlow
®
is cured with a high-power curing light (1000 mW/cm2;
e.g. bluephase) in 10 s per segment or with a standard curing light (500 mW/cm
20 s per segment.
2
(e.g. bluephase in the LOP mode). If
2
; e.g.
2
) in 30 s
2
) in
Telio CS C&B – Fabricating temporary crowns and bridges
If the retention is insufficient or in the case of older temporary restorations, the bond
to composites can be increased by carrying out the following pre-treatment:
Grind the area to be repaired or adjusted and subsequently apply Telio Activator
extraorally. Agitate the Telio Activator for at least 30 s over the entire surface using
an application brush in order to achieve even distribution and quick penetration.
Subsequently, allow the Activator to react for another 30-60 seconds (total reaction
time 1-2 minutes). Now apply the Heliobond bonding agent, thinly disperse it with
blown air, and polymerize for 10 seconds (650 mW/cm
2
, e.g. bluephase using the
LOP mode).
Apply Telio Add-On Flow or another light-curing Ivoclar Vivadent composite (e.g.
Tetric EvoCeram or Tetric EvoFlow) and cure according to the Instructions for Use.
19
Page 20

Filling of air bubbles or chippings
A light-curing Ivoclar Vivadent composite (e.g. Telio Add-On Flow/Tetric EvoFlow) is used to directly fill or
cover the areas that need to be modified.
The Telio Add-On Flow material is applied with a spatula (e.g. OptraSculpt) and shaped. Telio Add-On
Flow is cured with a high-power curing light (>1000 mW/cm
a standard curing light (>500 mW/cm
2
) in 30 s per segment.
Finally, polish using silicon carbide rubber polishers (e.g. Astropol).
Apply Telio Add-On Flow and sculpt with a spatula (e.g. OptraSculpt) …
2
; e.g. bluephase) in 15 s per segment or with
... to the desired shape.
Polishing with silicon carbide rubber polishers (e.g. OptraPol)
20
Light-cure
Page 21

Characterizing temporaries
Telio Stains are light-curing stains for individual characterization of Telio restorations. The Stains are
applied in very thin layers of max. 0.5 mm with a brush or other suitable instrument (e.g. thin probe). The
shade intensity may be reduced and the consistency thinned by mixing the stains with Heliobond. Telio
Stains are cured with a high-power curing light (2000 mW/cm
with a high-power curing light with an intensity of >1000 mW/cm
If a standard curing light is used (intensity: 800 mW/cm
Important
The material should have room temperature so that a smooth consistency is ensured. Do not
expose Telio Stains to intensive light during application, since this clearly shortens the
processing time.
Telio Stains must not be left at the surface of restorations, they have to be covered
(application of a methyl methacrylate-based varnish or application of light-curing Telio Lab
LC Veneer materials).
2
; e.g. bluephase 20i) in 5 s per segment or
2
2
; e.g. bluephase C8), the curing time is 15 s.
(e.g. bluephase) in 10 s per segment.
Telio CS C&B – Fabricating temporary crowns and bridges
Application of Telio Stains (orange) and …
Light-curing of Telio Stains Application of Telio Stains (white) and …
... dispersing with a brush to characterize the cervical area.
21
Page 22

… dispersing them to imitate enamel cracks and white spots.
Apply a light-curing varnish… … and cure according to the instructions of the manufacturer.
Light-curing of Telio Stains
22
Page 23

Optional
Application of a desensitizer
Telio CS Desensitizer makes the temporary restoration phase more comfortable for patients, since it
reduces the sensitivity of prepared, and in some cases exposed, dentin surfaces. The dentin surfaces
should be clean and dry for the application of Telio CS Desensitizer.
Rinse the preparation with water. Subsequently, dry with an air syringe and oil-free air.
Apply Telio CS Desensitizer and brush it into the dentin for 10 s
using a suitable instrument (e.g. brush, applicator brush).
Carefully disperse excess to a thin layer and dry with an air syringe.
(Do not overdry the dentin.)
(Do not overdry the dentin.)
After the desensitizer has been applied on the prepared teeth, the temporary restoration is fabricated.
Telio CS C&B – Fabricating temporary crowns and bridges
23
Page 24

Telio CS Link
Seating/cementation of temporaries
elio CS Link is a dual-curing (light- and self-curing) temporary composite cement to be used for the
T
sthetic temporary cementation of provisional restorations.
e
1
1. Remove the cap of Telio CS Link (double-push syringe) by turning it
the cap, do not re-use it!) and replace it with a mixing tip. If the double-push syringe has been used
before, mount a new mixing tip directly before the application of Telio CS Link.
2. When attaching the mixing tip to the syringe, make sure that the guidance of the double-push syringe
is aligned with that of the mixing tip. Push the tip completely down until the notch on the mixing tip
is aligned with that of the double-push syringe. Secure the mixing tip in place by gripping the
coloured base and turning
1
/4turn clockwise. The double-push syringe contains pre-dosed amounts of
Telio CS Link base and catalyst, which are automatically mixed and dispensed when the two
components are extruded. Thus, Telio CS Link can be applied directly into the temporary restoration.
3. Apply Telio CS Link on the dry inner surfaces of the temporary restoration and/or the prepared,
cleaned and dried tooth surface. The processing time is approx. 2
(23 °C / 73 °F). Incorporation of Telio CAD temporary restorations: Abrade the inside surfaces of the
restoration with Al
bur.
, 100 µm grit at 1-2 bar /15-29 psi pressure or roughen with a rough diamond
2O3
4. Seating of the temporary restoration and removal of excess cement. Seat the temporary restoration on
the prepared teeth with light pressure. Excess cement can be removed using different methods:
a. Removal of excess with additional light-activation (quarter technique)
Light-cure excess material with the polymerization light (>650 mW/cm
mode) for 2-4 seconds per quarter surface (mesio-oral, disto-oral, mesio-buccal, disto-buccal) at a
distance of approx. 0-10 mm. Following this, the excess material can be easily removed with a
scaler, as it features a visco-plastic consistency. Subsequently, light-cure all margins again for
10 seconds (>1000 mW/cm
2
; e.g. bluephase in the HIP mode).
b. Removal of excess in the unpolymerized state
Remove uncured excess material immediately after seating using a microbrush / brush / foam
pellet / dental floss or scaler. Subsequently, wait until the self-curing process is finished (approx.
3 min) or accelerate the polymerization process by light-curing the cement layer with a curing light
(>1000 mW/cm
2
; e.g. bluephase in the HIP mode) for 10 s per aspect.
c. Removal of excess in the polymerized state
Approx. 3 minutes after having seated the restoration, remove excess material carefully with a
scaler or other instruments.
5. Long-term temporaries (wear periods of >4 weeks) have to be checked and re-examined at regular
intervals so that the restoration can be recemented, if necessary.
/4turn counter clockwise (discard
1
/2to 3 minutes at room temperature
2
, e.g. bluephase in the LOP
Leave the used mixing tip on the syringe as a cap until the next application.
Prevention of premature loss of retention:
Apart from a retentive preparation design, the reliable cementation of Telio CAD restorations using a
temporary luting material (e.g. Telio CS Link) depends on the accuracy of fit, which is determined by
the CAD/CAM system used.
24
Page 25

Direct application of Telio CS Link into the temporary restoration
Seating on the prepared teeth
Accelerated curing of the cement using the curing light
Telio CS C&B – Fabricating temporary crowns and bridges
Removal of excess material with a scaler and dental floss
25
Page 26

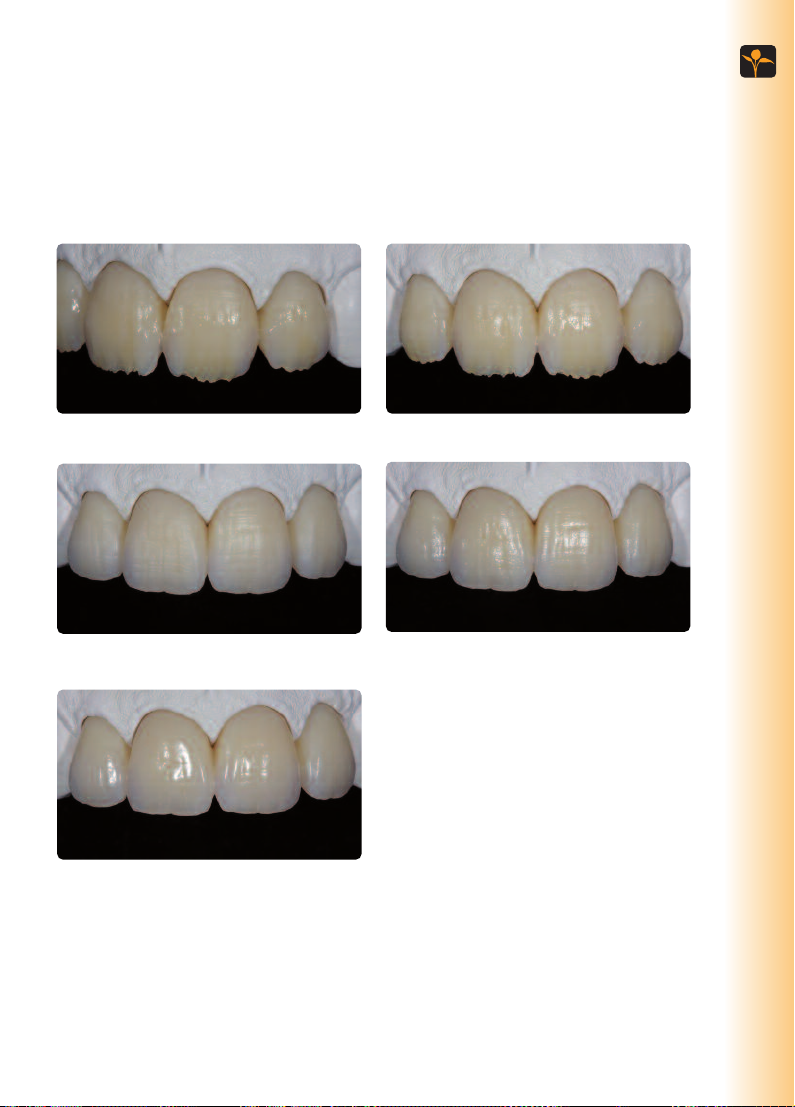
Final result
The image shows a completed Telio CS C&B temporary restoration.
The air bubble and chipping that occurred during fabrication were repaired/adjusted
with Tetric EvoFlow. The incisal area of the temporary restoration was individualized
with Telio Stains, and a glaze varnish based on methyl methacrylate was subsequently
applied.
The temporary restoration was cemented using Telio CS Link (Transparent). Telio CS
Desensitizer was applied to the prepared teeth prior to seating of the restoration.
26
Page 27

Relining of Telio CAD restorations or
lab-fabricated temporary crowns or bridges
Relining of Telio CAD restorations
Carefully remove the restorations from the
prepared teeth. Remove excess cement from the
prepared teeth and the inner aspects of the
restorations. Abrade the inner surfaces with Al
100 µm grit at 1–2 bar /15–29 psi pressure or
roughen with a rough diamond bur.
Thoroughly rinse with water and dry with oil-free
compressed air. Then wet the bonding areas extraorally with Telio Activator. Agitate the Telio
Activator for at least 30 s over the entire surface
using an application brush in order to achieve even
distribution and quick penetration. Subsequently,
allow the Activator to react for another
30-60 seconds (total reaction time 1-2 minutes).
2O3
(e.g. Telio Lab)
,
Roughen the inner aspects
Agitate the Telio Activator and allow to react.
Now apply the light-curing bonding agent Heliobond with a brush, a spherical instrument or by means
of the snap-on cannula. Thinly disperse the material and polymerize for ≥ 10 s (> 650 mW/cm
phase in the LOP mode).
Apply Heliobond… … and disperse with air. Light-cure the Heliobond bonding agent.
2
; e.g. blue-
Telio CS C&B – Relining of Telio CAD restorations or lab-fabricated temporary crowns and bridges
27
Page 28

or the relining, apply the mixed Telio CS C&B to the inner aspect of the crowns. Keep the mixing tip
F
immersed in the material to prevent bubbles. If required, the material may also be syringed around the
prepared teeth to avoid bubble formation along the preparation margin.
Application of Telio CS C&B Seated Telio CAD bridge with excess Telio CS C&B material
The curing time is approx. 3 min at room temperature (23 °C / 73 °F). After that, Telio CS C&B is in a hardelastic, partially cured state and can be removed from the oral cavity together with the Telio CAD restoration. After complete curing (4-5 min), finishing is carried out extraorally. Cross-cut tungsten carbide burs
are suitable for finishing; for polishing, use silicon carbide rubber polishers (e.g. Astropol, OptraPol).
Extraoral removal of excess material… ... with burs and polishers. Completed Telio CAD restoration
If necessary, apply Telio CS Desensitizer prior to cementation. Then cement the relined temporary
restoration with Telio CS Link (see page 34).
Completed and cemented Telio CAD restoration
Lab-fabricated Telio Lab restorations may of course also be relined with Telio CS C&B material. The
procedure is the same as for Telio CAD.
28
Page 29

Telio CAD – Fully anatomical fabrication
and final polishing
n this processing technique, the restoration is polished and incorporated immediately after milling in the
I
CAD/CAM system. In the process, the surface lustre is achieved by manual polishing. This processing
technique is very efficient and leads to an esthetic result quickly and easily.
Depending on the CAD/CAM system used, spray the preparation with IPS Contrast Spray Chairside in
order to ensure optimum scanning results. Subsequently, scan the preparation. Then clean the preparation
with the water jet, air syringe – additionally use rotary brushes and water spray if necessary.
Starting situation Preparation
Select Telio CAD in the material selection of the software and construct the long-term temporary using
the software. In doing so, observe the minimum thickness for the intended application.
Note on the fabrication in Sirona units
Use the “Reduced design bridge technique” to be able to check the connector surface.
Clamp the Telio CAD block in the CAD/CAM unit and mill with the appropriate grinding tools.
After milling the restoration is separated from its holder with a fine tungsten carbide bur or a diamond
separating disk and fitted on the model.
Telio CAD restoration after milling in the CAD/CAM unit and being detached from the holder
Remove any possible white spots on the restoration that developed during milling in the CAD/CAM
machine using a tungsten carbide bur.
Telio CAD – Fully anatomical fabrication and final polishing
29
Page 30

Finishing
Use (fine) cross-cut tungsten carbide burs to finish Telio CAD blocks.
Observe the following procedure for finishing Telio CAD restorations:
– Use cross-cut tungsten carbide burs to smooth out the attachment point.
– Carry out shape adjustments with cross-cut tungsten carbide burs or customary diamonds.
– Overheating of the material must be avoided.
– Surface-grind the entire occlusal surface with a fine diamond to smooth out the surface texture
created by the CAD/CAM procedure.
– Make sure that the minimum thicknesses are maintained even after the minor adjustments.
– Make sure to thoroughly clean the restoration before further processing and to remove any residue of
the milling additive of the CAD/CAM milling unit. Residue of the milling additive remaining on the
surface may result in bonding problems.
– Try in the restoration and adjust the occlusion/articulation, if necessary.
Finishing with tungsten carbide burs… ... and disks
30
Page 31

Polishing
Careful polishing is the prerequisite for an optimum esthetic result. Polishing reduces plaque accumulation
and the resulting shade disturbances. Pay special attention to crown margins, interdental areas, occlusal
surfaces and the basal rest area of pontics.
In order to achieve a lifelike surface gloss, please observe the following procedure:
– Use the appropriate speed (7500-10,000 rpm) and water spray for the polishing.
– Avoid an excessive heat build-up.
Polishing is carried out with the 3-step polishing system Astropol F, P and HP:
st
1
step: Finishing with Astropol F (grey)
With the Astropol F finisher, excess is removed and a smooth surface can be achieved.
d
n
2
step: Polishing with Astropol P (green)
Polishing with Astoropol P results in a very delicate surface finish.
rd
3
step: High-gloss polishing with Astropol HP (pink)
With the microfine Astropol HP diamond finisher, a high gloss can be achieved quickly. Do not apply
pressure.
Alternatively, the single-step polishing system OptraPol can be used.
Telio CAD – Fully anatomical fabrication and final polishing
Polishing with Astropol
Seated Telio CAD restoration
Completed Telio CAD restoration
31
Page 32

Telio CAD
T
elio
L
a
b
T
elio
C
A
D
Ver
ar
bei
t
ungs
anl
ei
t
ung
Cut-back technique
o fabricate highly esthetic temporary restorations, especially in the anterior region, the
T
incisal/occlusal third may be veneered using the light-curing Telio Lab LC Veneer materials. The individual working steps are briefly described below. For a detailed description of the materials used and the individual working steps, please refer to the
Instructions for Use of Telio Lab.
Partially reduced Telio CAD restorations fitted on
the model.
The cut-back may be carried out by using a
suitable CAD/CAM milling procedure or by manual
reduction.
32
Page 33
elio Stains are applied in very thin layers and light-cured. Then the incisal edge is built up and the
T
anatomical shape is completed using the Telio Lab LC Veneer materials. The materials are cured in a lightpolymerization device (e.g. Spectramat). Finally, the restorations are finished and manually polished.
Application of Telio Stains… … and Telio Lab LC Veneer materials
Individualized Telio CAD restorations before and after polymerization
Telio CAD – Cut-back technique
Completed Telio CAD restoration characterized with TelioVeneer on
the working model
33
Page 34

Seating/cementation of temporaries
Seating/cementation of temporaries
Telio CS Link is a dual-curing (light- and self-curing) temporary composite cement to be used for the
esthetic temporary cementation of provisional restorations.
1. Remove the cap of Telio CS Link (double-push syringe) by turning it
the cap, do not re-use it!) and replace it with a mixing tip. If the double-push syringe has been used
before, mount a new mixing tip directly before the application of Telio CS Link.
2. When attaching the mixing tip to the syringe, make sure that the guidance of the double-push syringe
is aligned with that of the mixing tip. Push the tip completely down until the notch on the mixing tip
is aligned with that of the double-push syringe. Secure the mixing tip in place by gripping the
coloured base and turning
1
/4turn clockwise. The double-push syringe contains pre-dosed amounts of
Telio CS Link base and catalyst, which are automatically mixed and dispensed when the two
components are extruded. Thus, Telio CS Link can be applied directly into the temporary restoration.
3. Apply Telio CS Link on the dry inner surfaces of the temporary restoration and/or the prepared,
cleaned and dried tooth surface. The processing time is approx. 2
temperature (23 °C / 73 °F). Incorporation of Telio CAD temporary restorations: Abrade the inside
surfaces of the restoration with Al
coarse diamond bur.
, 100 µm grit at 1-2 bar / 15-29 psi pressure or roughen with a
2O3
4. Seating of the temporary restoration and removal of excess cement
Seat the temporary restoration on the prepared teeth with light pressure. Excess cement can be
removed using different methods:
a. Removal of excess with additional light-activation (quarter technique)
Activate the cement excess with a polymerization light (>650 mW/cm
mode) at a distance of approximately 0–10 mm for 2-4 s per quarter surface (mesio-oral, distooral, mesio-buccal, disto-buccal). Excess may be easily removed with the help of a scaler once
the material is in its highly viscous state. After that, polymerize all the margins again for 10 s.
(>1000 mW/cm
2
; e.g. bluephase in the HIP mode).
b. Removal of uncured excess
Remove uncured excess cement immediately after incorporation with a micro-brush/brush/foam
pellet/dental floss or scaler. After that, wait until the material has set due to the self-curing action
(approximately 3 minutes) or, as an option, accelerate the setting process by means of light
polymerization for 10 s per surface (>1000 mW/cm
2
; e.g. bluephase in the HIP mode).
c. Removal of cured excess
Carefully remove cement excess after approximately 3 minutes with a scaler or other instruments.
5. Long-term temporaries (wear periods of >4 weeks) have to be checked and re-examined at regular
intervals so that the restoration can be recemented, if necessary.
1
/4turn counter clockwise (discard
1
/2to 3 minutes at room
2
, e.g. bluephase in the LOP-
Leave the used mixing tip on the syringe as a cap until the next application.
Prevention of premature loss of retention:
Apart from a retentive preparation design, the reliable cementation of Telio CAD restorations using a
temporary luting material (e.g. Telio CS Link) depends on the accuracy of fit, which is determined by
the CAD/CAM system used.
34
Page 35

Subsequent adjustments
Supplementing Telio CAD restorations
Roughen the area to be supplemented or repaired by grinding and then wet extraorally with Telio
Activator. Agitate Telio Activator for at least 30 seconds over the entire surface using an application brush
in order to achieve even distribution and quicker penetration. Subsequently, allow the Activator to react
for another 30-60 seconds (total reaction time 1-2 minutes). Now apply the Heliobond bonding agent,
thinly disperse it with blown air, and polymerize for 10 seconds (650 mW/cm
Apply Telio Add-On Flow or another light-curing Ivoclar Vivadent composite (e.g. Tetric EvoFlow, Tetric
EvoCeram) and cure according to the Instructions for Use.
Add-ons and relines with Telio Add-On Flow
Relines and supplements of Telio Lab and Telio CAD restorations can be carried out using Telio Add-On
Flow.
– Roughen the desired area of the Telio Lab / Telio CAD restoration with rotary instruments / diamonds.
– Then wet the roughened area (extraorally!) with Telio Activator.
Agitate Telio Activator for at least 30 seconds over the entire surface using an application brush in
order to achieve even distribution and quicker penetration. Subsequently, allow the Activator to react
for another 30-60 seconds (total reaction time 1-2 minutes). Now apply a thin layer of Heliobond
bonding agent with a brush, ball-shaped instrument, or using the snap-on plastic cannula, thinly
disperse it with blown air, and polymerize for ≥10 seconds
(>650 mW/cm
– Then apply Telio Add-On Flow and subsequently polymerize using a high-performance curing light
(>1000 mW/cm
(>500 mW/cm
– As an alternative, other light-curing Ivoclar Vivadent composites (e.g. Tetric EvoCeram) can be used.
2
e.g. bluephase using the LOP mode).
2
; e.g. bluephase) for 15 seconds per segment, or a standard curing light
2
) for 30 seconds per segment.
2
e.g. bluephase using LOP).
General Information
35
Page 36

Ivoclar Vivadent – worldwide
Ivoclar Vivadent AG
Bendererstrasse 2
L-9494 Schaan
F
Liechtenstein
Tel. +423,235 35 35
ax +423,235 33 60
F
www.ivoclarvivadent.com
Ivoclar Vivadent Pty. Ltd.
1 – 5 Overseas Drive
.O. Box 367
P
Noble Park, Vic. 3174
Australia
el. +61 3 979 595 99
T
Fax +61 3 979 596 45
www.ivoclarvivadent.com.au
Ivoclar Vivadent GmbH
Bremschlstr. 16
Postfach 223
6706 Bürs
Austria
Tel. +43 5552 624 49
Fax +43 5552 675 15
www.ivoclarvivadent.com
Ivoclar Vivadent Ltda.
Rua Geraldo Flausino Gomes,
78 – 6.º andar Cjs. 61/62
Bairro: Brooklin Novo
CEP: 04575-060 São Paulo – SP
Brazil
Tel. +55 11 3466 0800
Fax +55 11 3466 0840
www.ivoclarvivadent.com.br
Ivoclar Vivadent Inc.
2785 Skymark Avenue, Unit 1
Mississauga
Ontario L4W 4Y3
Canada
Tel. +1,905,238 5700
Fax +1,905,238 5711
www.ivoclarvivadent.us
Ivoclar Vivadent
Marketing Ltd.
Rm 603 Kuen Yang
International Business Plaza
No. 798 Zhao Jia Bang Road
Shanghai 200030
China
Tel. +86 21 5456 0776
Fax +86 21 6445 1561
www.ivoclarvivadent.com
Ivoclar Vivadent
Marketing Ltd.
alle 134 No. 7-B-83, Of. 520
C
Bogotá
Colombia
el. +57 1,627 33 99
T
Fax +57 1,633 16 63
ww.ivoclarvivadent.com
w
Ivoclar Vivadent SAS
.P. 118
B
F-74410 Saint-Jorioz
France
el. +33 450 88 64 00
T
Fax +33,450 68 91 52
www.ivoclarvivadent.fr
Ivoclar Vivadent GmbH
Dr.Adolf-Schneider-Str. 2
73479 Ellwangen, Jagst
Germany
Tel.
Fax +49 (0) 79 61 / 63 26
www.ivoclarvivadent.de
Ivoclar Vivadent Marketing
Ltd. (Liaison Office)
503/504 Raheja Plaza
15 B Shah Industrial Estate
Veera Desai Road,
Andheri (West)
Mumbai, 400 053
India
Tel. +91 (22) 2673 0302
Fax +91 (22) 2673 0301
www.ivoclarvivadent.com
Ivoclar Vivadent s.r.l. & C.
s.a.s
Via Gustav Flora, 32
39025 Naturno (BZ)
Italy
Tel. +39 0473 67 01 11
Fax +39 0473 66 77 80
www.ivoclarvivadent.it
Ivoclar Vivadent K.K.
1-28-24-4F Hongo
Bunkyo-ku
Tokyo 113-0033
Japan
Tel. +81 3 6903 3535
Fax +81 3 5844 3657
www.ivoclarvivadent.jp
Ivoclar Vivadent S.A. de C.V.
Av. Mazatlán No. 61, Piso 2
ol. Condesa
C
06170 México, D.F.
Mexico
el. +52 (55) 5062-1000
T
Fax +52 (55) 5062-1029
ww.ivoclarvivadent.com.mx
w
Ivoclar Vivadent Ltd.
2 Omega St, Albany
1
PO Box 5243 Wellesley St
Auckland, New Zealand
el. +64 9,914 9999
T
Fax +64 9,814 9990
www.ivoclarvivadent.co.nz
Ivoclar Vivadent
Polska Sp. z.o.o.
ul. Jana Pawla II 78
PL-00175 Warszawa
Poland
Tel. +48 22,635 54 96
Fax +48 22,635 54 69
www.ivoclarvivadent.pl
Ivoclar Vivadent
Marketing Ltd.
Derbenevskaja Nabereshnaya
11, Geb. W
115114 Moscow
Russia
Tel. +7,495,913 66 19
Fax +7,495,913 66 15
www.ivoclarvivadent.ru
Ivoclar Vivadent
Marketing Ltd.
171 Chin Swee Road
#02-01 San Centre
Singapore 169877
Tel. +65 6535 6775
Fax +65 6535 4991
www.ivoclarvivadent.com
Ivoclar Vivadent S.L.U.
c/ Emilio Muñoz Nº 15
Entrada c/ Albarracin
E-28037 Madrid
Spain
Tel. + 34 91 375 78 20
Fax + 34 91 375 78 38
www.ivoclarvivadent.es
Ivoclar Vivadent AB
Dalvägen 14
-169 56 Solna
S
Sweden
Tel. +46 (0) 8,51493,930
ax +46 (0) 8,51493,940
F
www.ivoclarvivadent.se
Ivoclar Vivadent Liaison
Office
hi Evran Caddesi No 1
A
Polaris Is Merkezi Kat: 7
80670 Maslak
stanbul
I
Turkey
Tel. +90 212 346 04 04
ax +90 212 346 04 24
F
www.ivoclarvivadent.com
Ivoclar Vivadent Limited
Ground Floor Compass Building
Feldspar Close
Warrens Business Park
Enderby
Leicester LE19 4SE
United Kingdom
Tel. +44,116,284 78 80
Fax +44,116,284 78 81
www.ivoclarvivadent.com
Ivoclar Vivadent, Inc.
175 Pineview Drive
Amherst, N.Y. 14228
USA
Tel.
Fax +1 716 691 2285
www.ivoclarvivadent.us
Date information prepared: 03/2010
Rev. 1
These materials have been developed solely for use in dentistry. Processing should
be carried out strictly according to the Instructions for Use. Liability cannot be
accepted for damages resulting from failure to observe the Instructions or the
stipulated area of application. The user is responsible for testing the products for
their suitability and use for any purpose not explicitly stated in the Instructions.
These regulations also apply if the materials are mixed orused in conjunction with
products of other manufacturers.
Printed in Liechtenstein
© Ivoclar Vivadent AG, Schaan / Liechtenstein
633294/0310/e/BVD
 Loading...