

Page 1
®
Telio
CAD A16
Instructions for Use
Page 2

Table of Contents
3 Telio System
4 Product Information
Description
Material
Uses
CAD/CAM partners
9 Fabricating a Telio CAD Hybrid Abutment Crown
Treatment / fabrication process
Shade – tooth shade and abutment shade
Preparation for the CAD/CAM process
Layer thicknesses
Block selection
Finishing
12 Completing the Telio CAD Structure
Polishing technique chairside
Polishing technique labside
13 Cementation of Ti Base / Telio CAD Structure
19 Seating and Aftercare
Intraoral preparation
Seating the hybrid abutment crown
Care notes – Implant Care
21 Designing the Emergence Profile
Chairside
Labside
25 General Information
Frequently Asked Questions
2
Page 3
®
Telio
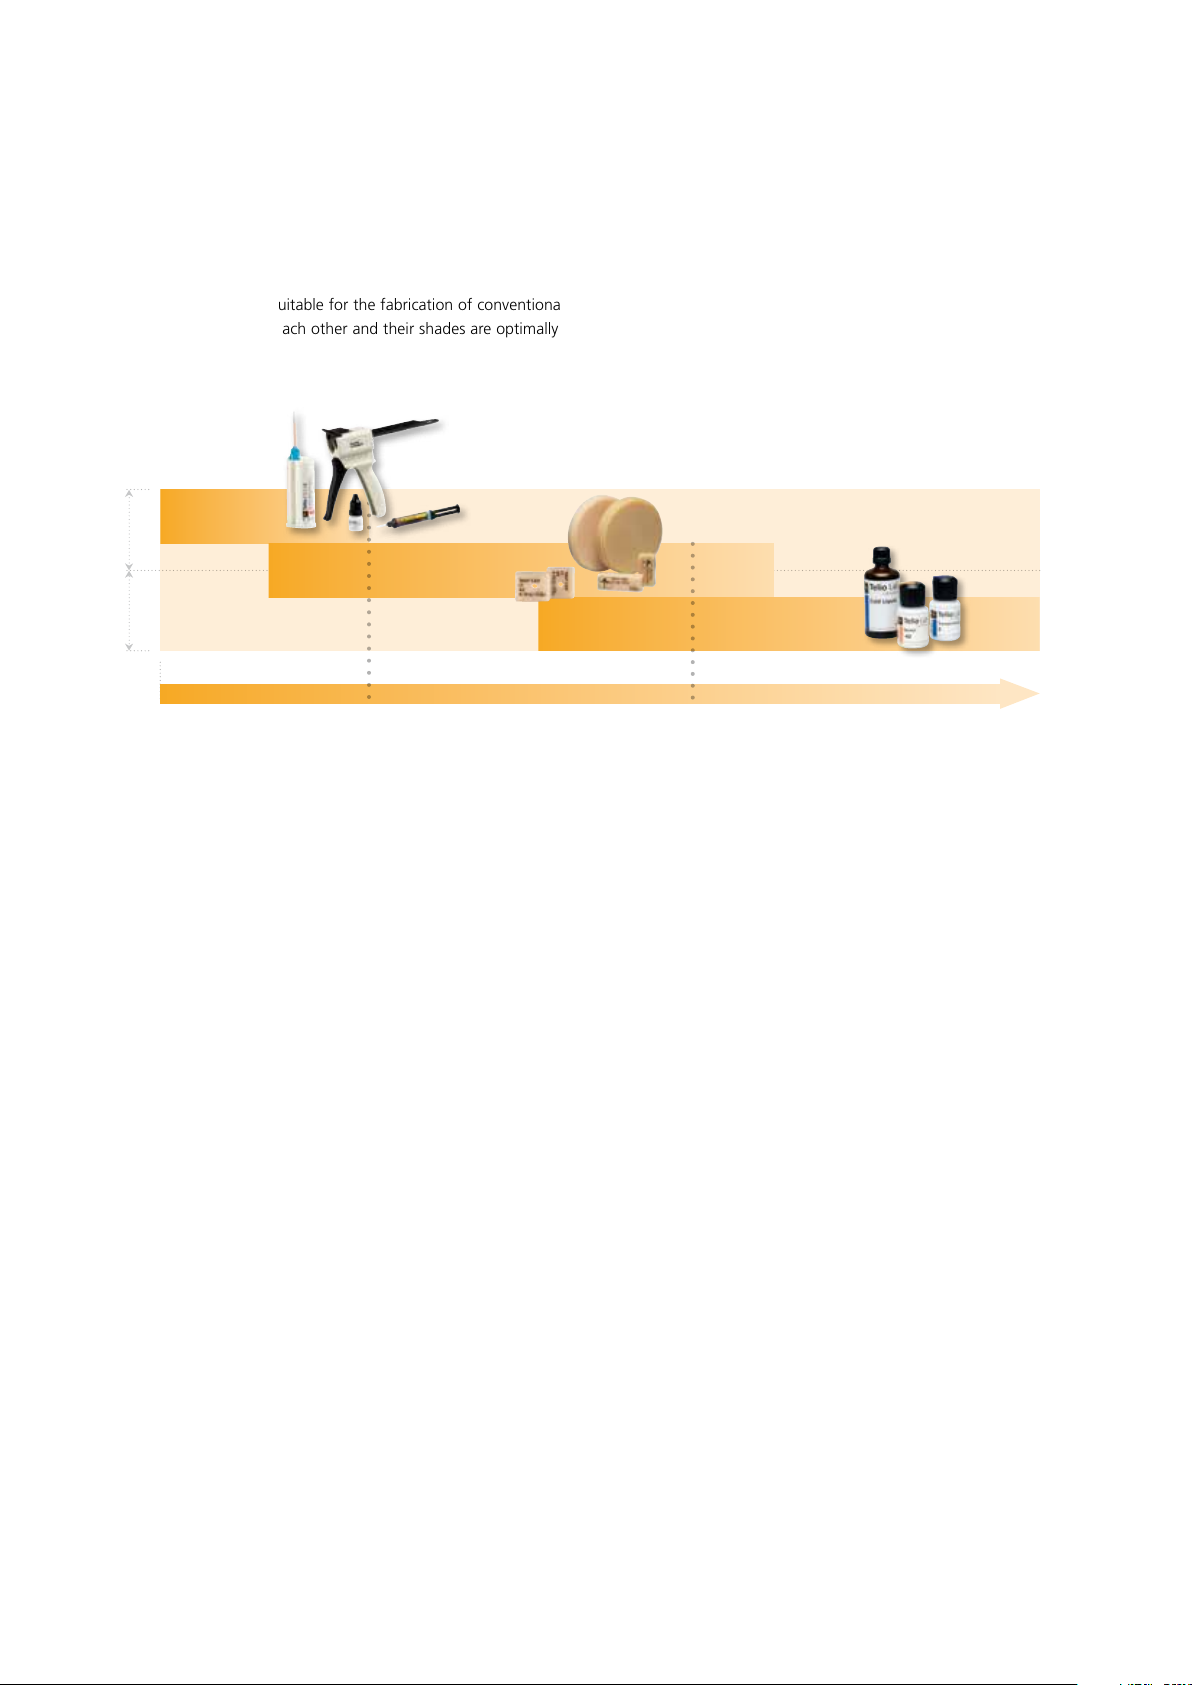
Telio is a comprehensive system solution for temporary restorations which addresses dental technicians, CAD/CAM users
and dentists alike.
All products are suitable for the fabrication of conventional and implant-supported temporaries. Their materials are
compatible with each other and their shades are optimally coordinated.
System
Telio CS
Telio CAD
Laboratory Practice
Short treatment time Medium treatment time Long treatment time
Telio Lab
Telio CS
For dentists: Self-curing temporary crown and bridge material, supplemented by a desensitizer and cement
Telio CAD
For CAD/CAM users: Resin blocks and discs for the efficient fabrication of temporary crowns, hybrid abutment crowns and
bridges using the CAD/CAM technique
Telio Lab
For dental technicians: Temporary crown and bridge resin for the cold technique
3
Page 4

®
Telio
CAD Abutment Solutions
Product Information
Description
Telio® CAD A16 are CAD/CAM-fabricated implant-supported hybrid restorations for individual, temporary singletooth reconstructions. The material consists of a cross-linked polymer block (PMMA), enabling the fabrication of
individual, monolithic hybrid abutment crowns which are directly cemented to a Ti base. Shape, esthetics and
emergence profile can be easily designed and adjusted any time. Telio CAD A16 thus represents the basis for
the subsequent permanent restorations with IPS e.max® CAD Abutment Solutions and IPS e.max Press
Abutment Solutions.
Hybrid abutment crown
Hybrid abutment crowns are characterized by combining abutment
and monolithic crown in one piece. This is an efficient two-in-one
solution made of PMMA, which is directly cemented to a Ti base.
Shape, esthetics and emergence profile can be easily designed and
adjusted any time. For cases with immediate stress-bearing, a CAD/
CAM-milled instant temporary can be fabricated. For this purpose,
Telio CAD convinces users with its usual esthetic properties and
sufficient strength, durability and efficiency.
The monolithically milled hybrid abutment crown is extraorally
cemented to the Ti base by means of Multilink Hybrid Abutment HO 0.
Then, the restoration is screwed onto the implant – in one piece.
Finally, the screw channel is sealed with a composite (e.g. Tetric
EvoCeram
®
) or a light-curing temporary restorative material (e.g. Telio CS Inlay / Onlay).
Telio CAD
(PMMA)
Ti base
Telio CAD
Hybrid abutment
crown
Ideally coordinated – Multilink® Hybrid Abutment HO 0
The auto-curing Multilink Hybrid Abutment composite cement together with SR Connect and Monobond
the cementation of Telio CAD on adhesive bases made of titanium / titanium alloys.
This allows
– reliable adhesion due to high adhesion values;
– easy handling due to the convenient Automix syringe.
®
Plus are used for
4
Page 5
Material
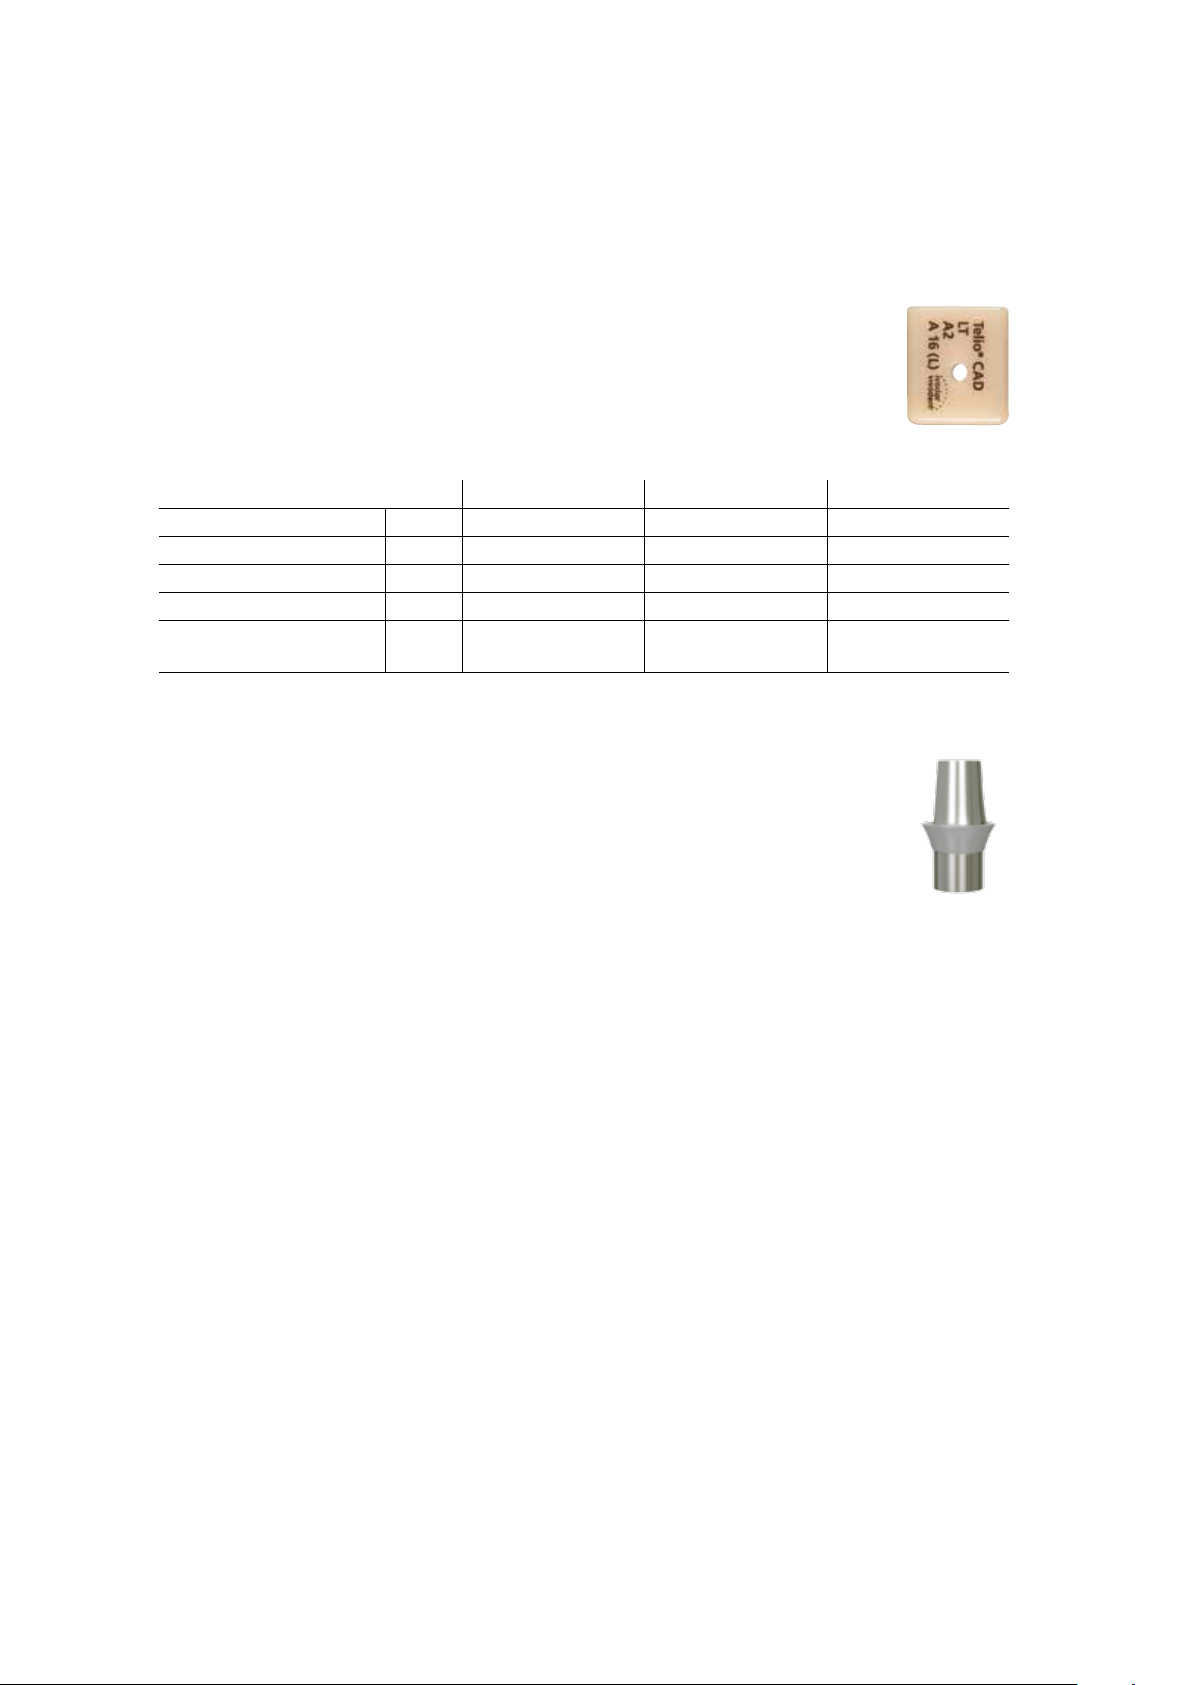
Telio CAD
Telio CAD are cross-linked PMMA blocks for the fabrication of long-term temporaries by means of the
CAD/CAM technique. As a result of the industrial polymerization process, the blocks feature a high material
homogeneity. Polymerization shrinkage or inhibition layers no longer have to be taken into consideration.
Given the CAD/CAM fabrication, the temporary can be easily reproduced at any time. Stains and/or layering
materials can be used to apply final esthetic optimizations.
Physical properties
Test method Specifications Example values
Flexural strength MPa EN ISO 10477 ≥ 100 128
Flexural modulus MPa EN ISO 10477 ≥ 2800 3041
Water absorption µg/mm3EN ISO 10477 ≤ 40 22
Solubility µg/mm3EN ISO 10477 ≤ 7.5 0
Ball indentation hardness MPa Internal method
(358N, 30s)
Ti base
Ti bases are used for the fabrication of Telio CAD Abutment Solutions. The suitable Ti bases are selected in
accordance with the CAD/CAM system used. Please observe the instructions for use and processing of the
respective manufacturer.
– 176
Further information about the authorized CAD/CAM systems is available on the Internet from
www.ivoclarvivadent.com.
5
Page 6

Uses
Indications
Fabrication of temporary restorations by means of CAD/CAM technology
Contraindications
– Use for permanent restorations
– Bruxism
– Failure to observe the requirements stipulated by the implant manufacturer for using the selected
implant type (diameter and length of the implant must be approved for the respective position in the
jaw by the implant manufacturer)
– Failure to observe the permissible maximum and minimum Telio CAD layer thicknesses
– Use of a luting composite other than Multilink Hybrid Abutment HO 0 for the cementation of Telio
CAD to the Ti base
– Intraoral cementation of the Telio CAD structure to the Ti base
– All uses not stated as indications are contraindicated.
Important processing restrictions
– Processing of the blocks with non-authorized CAD/CAM systems
– Failure to observe the manufacturer's instructions regarding the processing of the Ti base
Side effects
If the patient is known to be allergic to any of the components, Telio CAD and the other materials
necessary for the fabrication should not be used.
Composition
– Telio CAD
Components: Poly(methyl methacrylate) (PMMA), pigments
– Multilink Hybrid Abutment HO 0
Components: Dimethacrylate, HEMA as well as fillers (barium glass, ytterbium trifluoride, spheroid
mixed oxide and titanium dioxide)
– SR Connect
Components: Methyl methacrylate, polymethyl methacrylate, dimethacrylates and initiators
Warnings
– Do not inhale grinding dust.
– SR Connect contains methyl methacrylate (MMA). MMA is highly flammable. Therefore, keep away
from sources of ignition and do not smoke. MMA is an irritant and is irritating to eyes, respiratory
organs and skin. Do not inhale vapours.
– The safety notes on the individual primary packaging and labels have to be observed.
CAD/CAM partners
Telio CAD has to be processed with an authorized CAD/CAM system. For questions regarding the
different CAD/CAM systems, please contact the respective cooperation partners.
Further information is available on the Internet from www.ivoclarvivadent.com.
6
Page 7
®
Telio
CAD Abutment Solutions
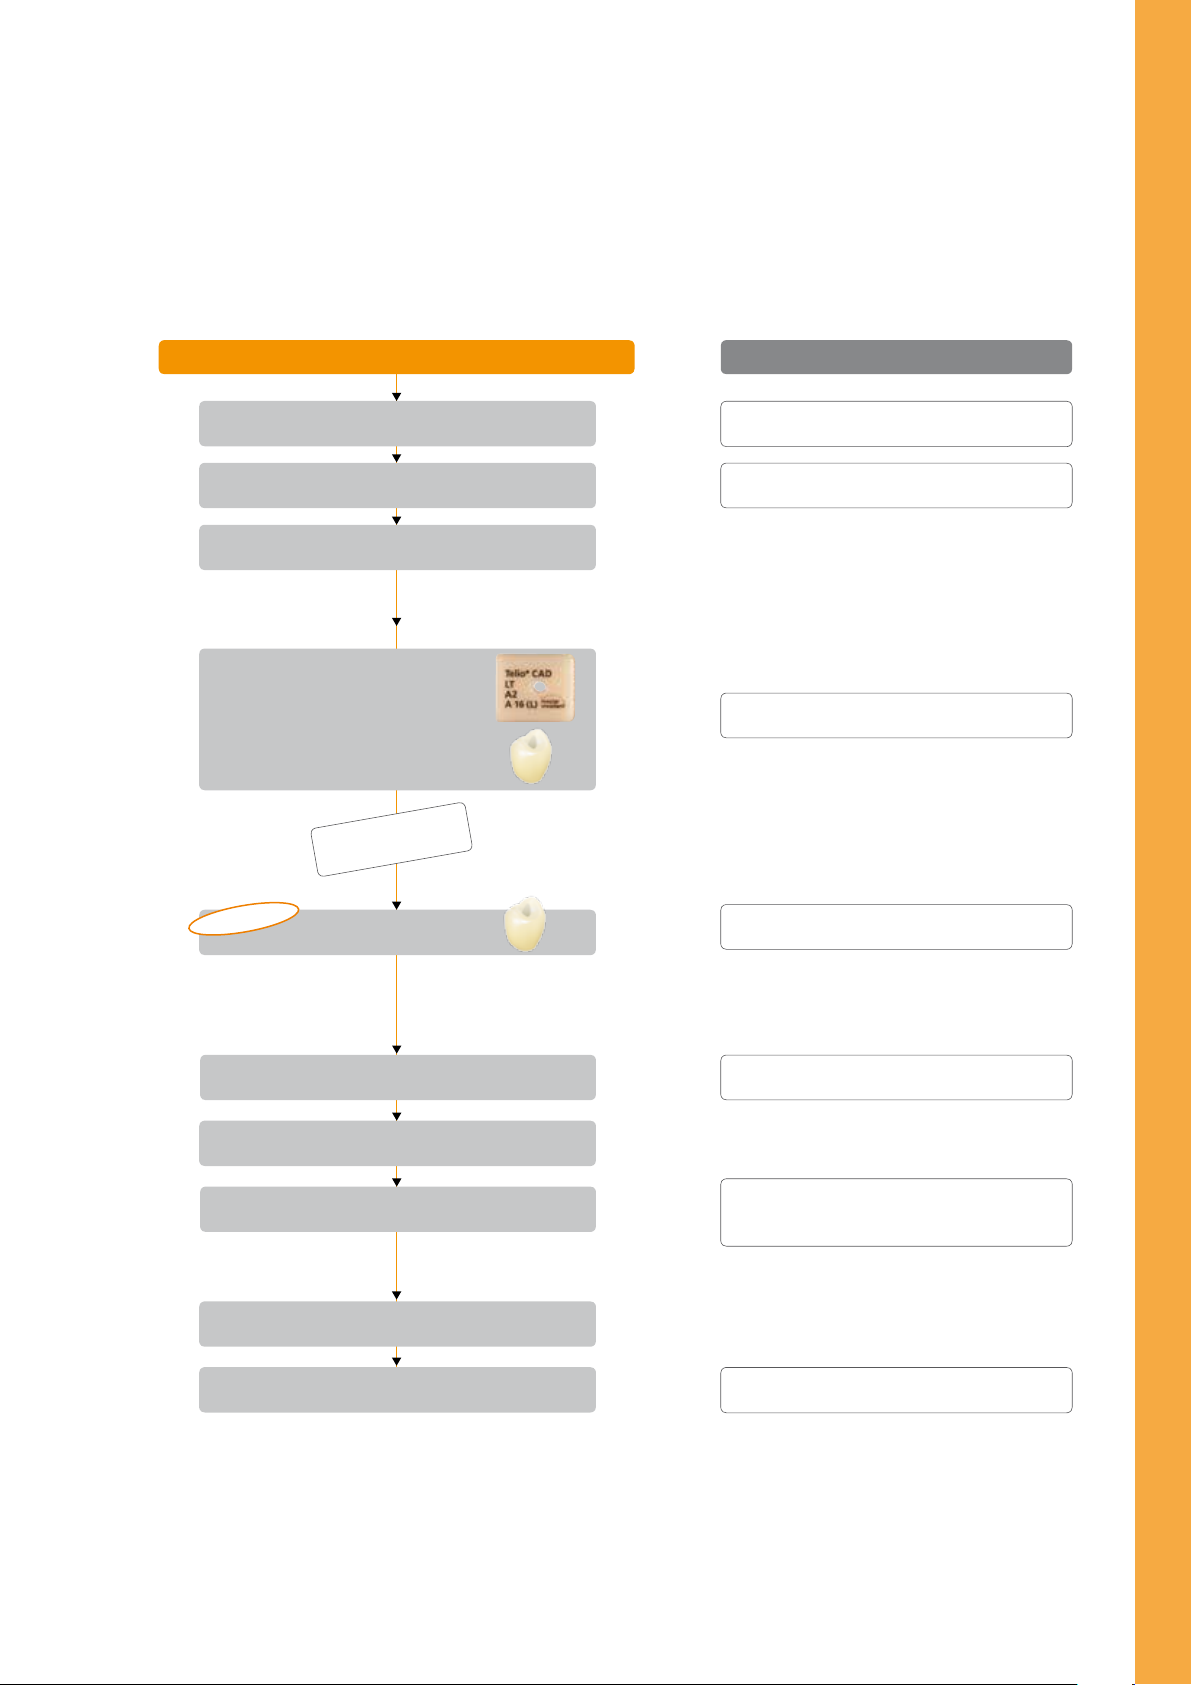
Fabricating a Telio CAD Hybrid Abutment Crown
Optional
Working Steps
Implantation,
healing phase
Shade determination,
impression-taking
CAD design
CAM
Hybrid abutment crown
Optional
Clinical try-in
Characterization,
adjustment
Ivoclar Vivadent Products
Cervitec® Plus, Cervitec® Liquid
®
OptraGate
Telio
SR Nexco
, Virtual®
®
CAD A16
®
, Telio® Lab LC
CAD Abutment Solutions – Fabricating a Telio CAD Hybrid Abutment Crown
®
Telio
Cementation of
Ti base / Telio CAD A16
Screwing in the
hybrid abutment crown
Sealing
the screw channel
Final check
Aftercare
Monobond
Multilink® Hybrid Abutment HO 0
Tetric EvoCeram®, Tetric EvoFlow®,
Telio® CS Inlay, Heliomolar®,
7
®
Plus, SR Connect,
Telio Add-On Flow
Implant Care
Page 8

Shade – tooth shade and abutment shade
For the Telio CAD hybrid abutment crown, the desired tooth shade results from the
– shade of the Telio CAD A16 block;
– the shade of Multilink Hybrid Abutment HO 0.
Preparation for the CAD/CAM process
Scanning
For the fabrication of Telio CAD Abutment Solutions, the clinical situation is digitalized either by a direct intraoral scan or
an indirect model scan, depending on the CAD/CAM system used. For notes regarding the scan, please observe the
manufacturer's instructions of the CAD/CAM system.
Selecting a Ti base
The required Ti base is selected depending on the inserted implant and the CAD/CAM system used.
8
Page 9
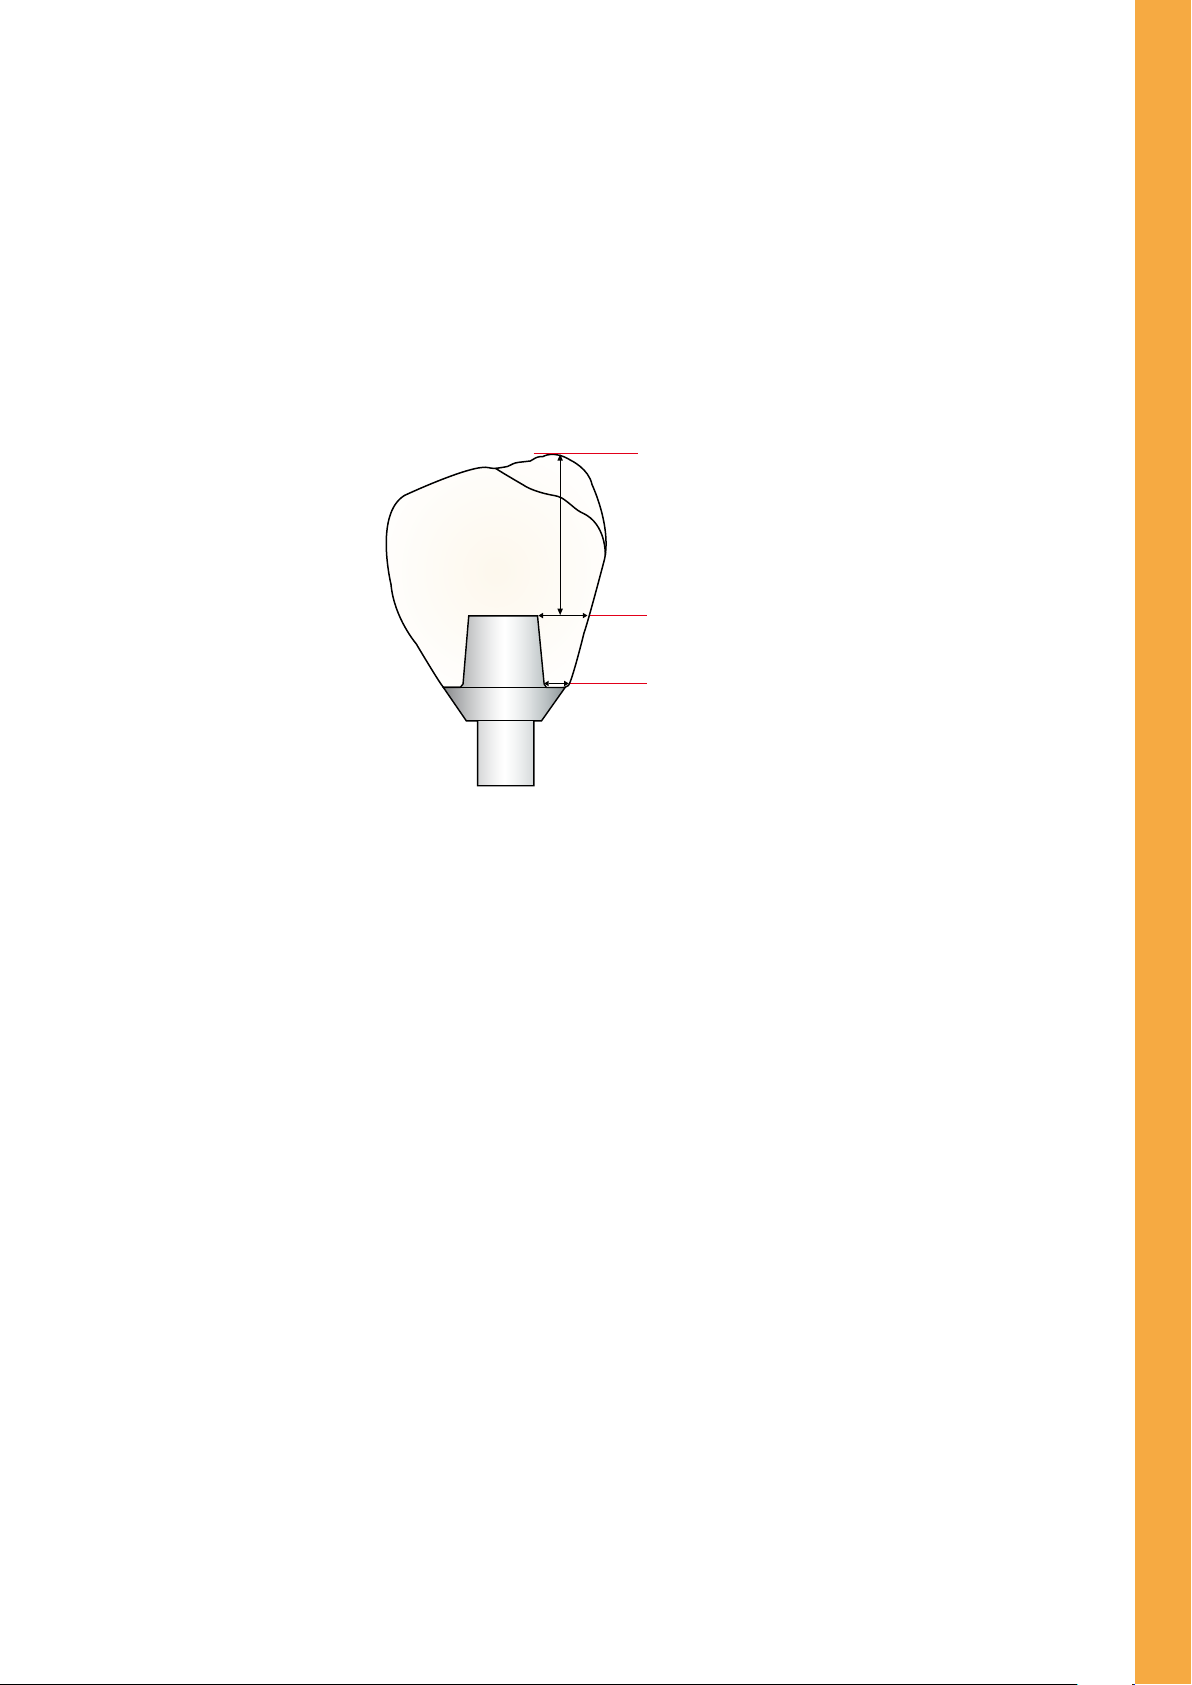
Layer thicknesses
Observing the geometry requirements of the Telio CAD structure is the key to success for a durable restoration. The more
attention is given to the design, the better the final results and the clinical success will turn out to be.
The following basic guidelines have to be observed:
Hybrid abutment crown
> 1.5 mm
> 0.8 mm
CAD Abutment Solutions – Fabricating a Telio CAD Hybrid Abutment Crown
®
> 0.5 mm
Minimum thicknesses
– occlusal: min. 1.5 mm
– circular: min. 0.8 mm
– Telio CAD A16 in the transition area to the Ti base rim: min. 0.5 mm
– The notes of the implant manufacturer regarding the maximum height of the hybrid abutment crown must be observed.
– In the transition area to the Ti base rim, the minimum thickness is 0.5 mm, which has to be continuously increased to
0.8 mm.
Block selection
When using a Ti base from Sirona, the dimensions of the interface to the Ti Base (S or L) have to be observed.
Available tooth shades Telio CAD A16 block with S or L interface:
LT A1, LT A2, LT A3, LT A3.5, LT B1, LT BL3
Telio
9
Page 10

Finishing
Conventional cross-cut tungsten carbide burs are suitable for finishing and adjusting the Telio CAD structure.
During finishing, make sure that the minimum layer thicknesses are observed. The milled Telio CAD structure is separated
from the block by means of a fine cross-cut bur or a diamond separating disc.
Checking the fit of the Telio CAD structures on the Ti base
Carefully place the CAD structures on the Ti base and check the fit. Observe the position of the rotation lock.
Separate the attachment point from the incisal using a fine, cross-cut bur or a
diamond separating disc.
Carefully place the Telio CAD structure on the Ti base and check the fit. Optimum fit of the Telio CAD structure on the Ti base
Finishing
Important!
– Do not finish the shoulder of the Telio CAD structure to prevent negatively affecting the Ti base.
– Finish the emergence profile if required taking the fit to the gingiva and the minimum thickness into account.
Finishing the outer surface of the Telio CAD structure (hybrid abutment crown)
– Smooth out the attachment point to the block with fine tungsten carbide burs taking the shape of the emergence profile
and the proximal contacts into account.
– Check the proximal, occlusal and basal contacts.
– Design surface textures.
Clean the Telio CAD structure in an ultrasounic bath or blast with the steam jet before further processing.
10
Page 11

Do not finish the shoulder to the Ti base. Be careful when finishing the emergence profile to prevent affecting the fit
to the gingiva.
CAD Abutment Solutions – Fabricating a Telio CAD Hybrid Abutment Crown
®
Telio
Smooth out the attachment point to the block taking the shape of the emergence
profile and the crown margin into account.
Adjust the surface texture where desired.
11
Page 12

®
Telio
CAD Abutment Solutions
Completing the Telio CAD Structure
Polishing technique chairside
Astropol
Step 1: Finishing with Astropol F (grey): With the Astropol F finisher, excess is removed and a smooth surface is achieved.
Step 2: Polishing with Astropol P (green): Polishing with Astropol P results in a smooth restoration surface.
Step 3: High-gloss polishing with Astropol HP (dusky pink): Do not apply pressure. The restoration surfaces are finished
Note:
Finishing and polishing is carried out using water spray for cooling and to remove the resulting polishing residue. If excess
has already been removed with a fine-grain diamond grinding instrument or if the surfaces of the restoration are rather
smooth, the first step (Astropol F) can be forgone.
Recommended speed: 7,500 – 10,000 rpm
OptraPol® NG
As an alternative, the OptraPol NG one-step polishing system can be used. The following instructions should be observed:
– Speed: 5,000 – 8,000 rpm
– Only use in conjunction with copious water spray.
The restoration is polished to a high gloss in only one polishing step and medium contact pressure.
®
and polished using medium contact pressure.
Polishing technique labside
Prepolishing is performed with rubber polishers and silicone wheels with various abrasive levels from rough to fine. A high
gloss is achieved with goat hair brush, cotton or leather buffing wheel as well as SR® Universal polishing paste.
12
Page 13

®
Telio
CAD Abutment Solutions
Cementation of Ti Base / Telio CAD Structure
Careful preparation of the bonding surfaces is a prerequisite for optimum adhesive cementation of the
Telio CAD structure to the Ti base. The following paragraphs outline the required procedures.
Required materials
– SR Connect
– Monobond® Plus
– Multilink® Hybrid Abutment HO 0
– Liquid Strip
Telio CAD A16 Ti base
Blasting – Observe manufacturer's instructions.
Apply SR Connect on the adhesive
surface to the Ti base, allow to react
Cementation preparation Telio CAD
Preparation for cementation –
for 30 s and polymerize for 40 s with
a polymerization device
(Bluephase
®
Style).
Wet adhesive surface with
Monobond Plus for 60 s.
–
®
Cementation Multilink
Covering the cementation joint Liquid Strip
Curing Auto-polymerization: 7 min
Polishing the cementation joint Customary polishers for resin materials and polishing paste
Preparation of the Ti base
The following procedure should be observed when preparing the Ti base for the cementation with the Telio CAD structure:
– Prepare the Ti base according to the instructions of the manufacturer.
– Clean the Ti base in an ultrasonic bath or with the steam jet and then dry with blown air.
– Screw the Ti base onto a model analog.
– Place the Telio CAD structure on the Ti base and mark the relative position of the components with a waterproof pen.
This facilitates locating the correct position when the parts are assembled at a later stage.
– Do not blast or modify the emergence profile of the Ti base any way.
– If the manufacturer recommends that the bonding surface of the base be blasted, the following procedure
should be observed:
– Protect the emergence profile and the screw channel, e.g. by means of a silicone (Virtual® Extra Light Body Fast Set).
– Carefully blast the bonding area according to the instructions of the manufacturer.
– Remove silicone.
– Clean the Ti Base in an ultrasounic bath or with the steam jet.
– After the bonding surface has been cleaned, it must not be contaminated under any circumstances as this would
impair the bond.
– Note: Aggressive blasting negatively affects the anti-rotation lock. Blasting with max. 50 µm at 1–2 bar (15–29 psi) pres-
sure is recommended.
– Apply Monobond Plus on the cleaned bonding surface and allow to react for 60 s. After the reaction time, dry the
remaining residue with water- and oil-free air.
– Seal the screw channel with a foam pellet or wax. The bonding surface must not be contaminated in the process.
Hybrid Abutment HO 0
CAD Abutment Solutions – Completing the Telio CAD Structure | Cementation of Ti Base / Telio CAD Structure
®
Telio
13
Page 14

Screw the Ti base onto a model analog. Mark the relative position to the structure with
a waterproof pen.
Protect the emergence profile and the screw channel, e.g. by means of silicone
The instructions of the implant manufacturer must be observed.
(Virtual Extra Light Body Fast Set).
The instructions of the implant manufacturer must be observed. Carefully blast the
bonding surface with max. 50 µm and 1-2 bar (15-29 psi) pressure.
Apply Monobond Plus on the cleaned bonding surface and allow to react for 60 s.
After the reaction time, dry the remaining residue with water- and oil-free air.
Remove silicone and subsequently clean in an ultrasonic bath or with the steam jet.
Seal the screw channel with a foam pellet or wax.
14
Page 15

Preparing the Telio CAD structure
The following procedure must be observed when preparing the Telio CAD structure for cementation on the Ti base:
– Do not blast the Telio CAD structure in preparation for the cementation.
– Clean the Telio CAD structure in an ultrasonic bath or with the steam jet and subsequently blow dry.
– After cleaning, any contamination of the bonding surface must be prevented, since contaminations negatively influence
the bond.
– Thinly coat the bonding surface with SR Connect using a disposable brush and allow to react for 30 s. Subsequently,
polymerize with a polymerization light (e.g. Bluephase Style) for 40 s.
Device Bluephase® Style
(Polywave®, 1100 ± 10% mW/cm2)
Manufacturer Ivoclar Vivadent AG
SR Connect 40 s
Lumamat 100 Spectramat Labolight LV-III Solidilite V Visio Beta Vario HiLite Power
Ivoclar Vivadent Ivoclar Vivadent GC Shofu 3M Heraeus
P2: 11 min 2 min 3 min 3 min 4 x 20 s 90 s
Status 2014
Note:
The SR Connect reaction time of 30 s must be observed: If SR Connect is applied as a conditioner for Telio
CAD A16 for longer than that, the accuracy of fit may be compromised.
CAD Abutment Solutions – Cementation of Ti Base / Telio CAD Structure
®
Telio
Do not blast the Telio CAD structure. Thinly apply SR Connect with a disposable brush.
Do not disperse.
15
Light-cure for 40 s.
Page 16

Cementation with Multilink® Hybrid Abutment
The following instructions must be observed in the cementation procedure:
– Lay out the cleaned and conditioned components (Telio CAD structure, Ti base) for cementation.
– Carry out the subsequent cementation procedure quickly and without interruption. The working time of
Multilink Hybrid Abutment HO 0 is approximately 2 min at 23°C (± 1°C) or 73°F (± 1.8°F).
– As a general rule, attach a new mixing tip to the Multilink Hybrid Abutment HO 0 syringe prior to each use.
– Apply a thin layer of Multilink Hybrid Abutment HO 0 directly from the mixing tip to the bonding surface of the Ti base
and to the bonding surface of the Telio CAD structure.
– Leave the mixing tip on the Multilink Hybrid Abutment syringe until the next use. The remaining cement polymerizes in
the tip and functions as a seal.
– Place the Telio CAD structure on the Ti base in such a way that the position markings are aligned.
– Press the parts lightly and evenly together and check the correct relative position of the components (transition Ti base /
Telio CAD structure).
– Subsequently, tightly press the components together for 5 s.
– Carefully remove excess in the screw channel, e.g. with a microbrush or brush, using rotary movements.
Important:
– Do not remove circular excess cement before curing has started, i.e. 2-3 min after mixing. Use a suitable
dental lab instrument (e.g. Le Cron) for this purpose. Hold the components in place using light pressure.
– Apply glycerine gel (e.g. Liquid Strip) to the cementation joint to prevent the formation of an inhibition layer. Leave the
gel on the cementation joint until polymerization is complete.
– Next, the composite cement auto-polymerizes completely within 7 min.
– Important: Do not move the components until Multilink Hybrid Abutment HO 0 has completely cured. Hold
them in place using e.g. diamond-coated tweezers.
– After completed auto-polymerization, rinse off the glycerine gel with water.
– Cautiously polish the cementation joint with rubber polishers at a low speed (< 5,000 rpm) to avoid overheating.
Finally, polish the surface of the PMMA structure to a high gloss using polishing paste.
– If there is any cement residue in the screw channel, remove it using suitable rotary instruments.
– Clean the restoration in an ultrasonic bath or with the steam jet.
Keep the cleaned and conditioned components that are to be cemented at hand. Attach a new mixing tip to the Multilink Hybrid Abutment syringe prior to each use.
16
Page 17

Apply a thin layer of Multilink Hybrid Abutment HO 0 directly from the mixing tip to
the bonding surface of the Ti base.
Apply a thin layer of Multilink Hybrid Abutment HO 0 directly from the mixing tip to
the bonding surface of the Telio CAD structure.
5 s
CAD Abutment Solutions – Cementation of Ti Base / Telio CAD Structure
®
Telio
Place the Telio CAD A16 structure on the Ti base in such a way that the position markings are aligned. Press the parts lightly and evenly together and check the correct relative position of the components (transition Ti base / Telio CAD structure).
Carefully remove excess in the screw channel, e.g. with a microbrush or brush, using
rotary movements.
Subsequently, tightly press the components together for 5 s.
2-3 min
Important: Do not remove circular excess cement before curing has started,
i.e. 2–3 minutes after mixing. Hold the components in place using light pressure.
7 min
Apply glycerine gel (e.g. Liquid Strip) to the cementation joint to prevent the
formation of an inhibition layer.
Important: Do not move the components until auto-polymerization is completed.
The composite cement auto-polymerizes within 7 min.
Hold them in place during this time.
17
Page 18

After completed auto-polymerization, rinse off the glycerine gel with water.
Cautiously polish the cementation joint with rubber polishers at low speed
(< 5,000 rpm) to avoid overheating. Finally, polish the surface of the PMMA structure
to a high gloss using polishing paste.
Remove any remaining cement residue in the screw channel with suitable rotating
instruments. Do not damage the Ti base.
Telio CAD hybrid abutment crown after polishing and cementation
18
Page 19

®
Telio
CAD Abutment Solutions
Seating and Aftercare
Hybrid abutment crowns must be disinfected before being incorporated in the oral cavity. The local statutory provisions and
hygiene standards that apply to dental practices have to be observed. For disinfection, the hybrid abutment crown can be
immersed in a disinfectant suitable for PMMA materials. Dürr MD 520 with a reaction time of 5 min is a suitable impression
disinfectant.
Intraoral preparation
Please observe the following procedure to prepare for the permanent cementation of the implant-supported restoration:
– Remove the gingiva former or healing cap.
– Clean the implant lumen.
– Check the periimplant tissue (emergence profile).
Seating the hybrid abutment crown
Seating the hybrid abutment crown
– Insert the hybrid abutment crown intraorally into the implant.
– Manually screw in the matching implant screw.
– Tighten the implant screw with a torque wrench (observe the instructions of the manufacturer).
– Check the screw channel for contamination / moisture and clean or dry with an air syringe, if necessary.
– Insert a sterile cotton or foam pellet or teflon tape into the screw channel.
– Seal the screw channel with a composite or a light-curing temporary restorative (e.g. Telio CS Inlay / Onlay) if the wear
period is intended to be shorter than 6 weeks. For a longer wear period, a composite (e.g. Telio Add-On Flow, Tetric
EvoCeram, Tetric EvoFlow, Heliomolar) has to be used, at best after conditioning of the surface with Monobond Plus and
Heliobond.
– Polymerize with a curing light (e.g. Bluephase Style).
– Check the occlusion / articulation after polymerization and correct possible interfering spots with suitable fine-grain
grinding instruments.
– Polish to a high gloss with silicone polishers (e.g. OptraPol / Astropol).
CAD Abutment Solutions – Seating and Aftercare
®
Telio
19
Page 20

Insert the hybrid abutment crown intraorally into the implant.
Manually screw in the matching implant screw.
Tighten the implant screw with a torque wrench (observe the instructions of the
manufacturer).
Polymerize with a curing light (e.g.Bluephase Style).
After insertion of e.g. a teflon tape, seal the screw channel with a composite
After polymerization, check the occlusion / articulation and correct possible rough spots
(e.g. Tetric EvoCeram) in the matching shade.
with suitable finishers or fine diamonds.
Polish to a high gloss using silicone polishers (e.g. Astropol P, Astropol HP or
Astrobrush).
Completed Telio CAD hybrid abutment crown
20
Page 21

®
Telio
CAD Abutment Solutions
Designing the emergence profile
Chairside
Blast the area to be supplemented (Al2O3, 100 µm grit, 1–2 bar / 15–29 psi) or roughen with a rough diamond bur and
then wet extraorally using Telio® Activator or SR Connect.
a) Use of Telio Activator
Wet the area to be supplemented extraorally with Telio Activator. To achieve even distribution, agitate the Activator over
the entire surface for 30 s using a brush. After that, allow to react for another 30 to 60 s (total reaction time: 1 to 2 min).
Now apply the Heliobond bonding agent, thinly disperse it with blown air and polymerize for ≥10 s (see Heliobond
Instructions for Use).
CAD Abutment Solutions – Designing the emergence profile
®
Telio
Roughen the area of the abutment crown which is to
be supplemented.
b) Use of SR Connect
Thinly apply SR Connect extraorally on the conditioned surface of the area to be supplemented using a disposable brush,
allow to react for 2–3 min and subsequently polymerize with light (see table on page 15).
Roughen the area of the abutment crown which is to be
supplemented.
Subsequently, apply Tetric EvoCeram in increments of max. 2 mm and adapt the material with a suitable instrument.
Polymerize each layer with light (e.g. Bluephase Style) according to the instructions for use of the respective material. As an
alternative, other light-curing Ivoclar Vivadent composites can be used.
Note: Do not apply any material on the Ti base as this may result in inaccuracies of fit.
Apply Telio Activator.
Apply SR Connect.
Polymerize with light after the application of Heliobond.
Light-cure with Bluephase Style.
Do not apply any material on the Ti base.
Apply Tetric EvoCeram with OptraSculpt Pad.
21
Polish with OptraPol.
Page 22

Labside
Labside adjustment of a temporary, chairside-modi-
Labside design of the emergence profile
fied emergence profile
– Screw the emergence profile modified by the operator
on a model analog.
Erase the area to be redesigned on the model with stone
or on the gingival mask.
– Take a silicone impression of the area of the emergence
profile to be adjusted.
– Remove the material applied by the operator.
With SR Nexco / Telio Lab LC (light-curing):
Blast the area to be supplemented (Al
, 100 µm, 1-2 bar / 15-29 psi). Then clean with steam and dry with oil-free
2O3
compressed air.
a) Use of Telio Activator or Telio Lab Cold Liquid
Condition with Telio Activator or Telio Lab Cold Liquid. For this purpose, distribute Telio Activator / Telio Lab Cold Liquid
evenly but generously on the conditioned surface and allow it to react for at least 2 min to a maximum of 4 min. Then,
apply SR Composiv according to the Instructions for Use, cure and subsequently layer the Telio Lab LC or SR Nexco
materials (see Telio CAD/Lab or SR Nexco Instructions for Use).
Roughening, Telio Activator and SR Composiv Apply SR Nexco.
22
Page 23

b) Use of SR Connect
Apply a thin layer of SR Connect on the conditioned surface of the area to be supplemented using a disposable brush,
allow to react for 2–3 min and subsequently polymerize. Then, layer Telio Lab LC or SR Nexco materials (see Telio CAD/Lab
or SR Nexco Instructions for Use).
CAD Abutment Solutions – Designing the emergence profile
®
Telio
Roughening, SR Connect
Apply SR Nexco.
With Telio Lab (cold-curing):
Blast the area to be supplemented (Al
, 100 µm, 1-2 bar / 15-29 psi). Then clean with steam and dry with oil-free com-
2O3
pressed air. Subsequently, condition with Telio Activator or Telio Lab Cold Liquid. For this purpose, distribute Telio Activator
evenly but generously on the conditioned surface and allow it to react for at least 2 min to a maximum of 4 min. Then
directly begin with the application of the Telio Lab material (see Telio CAD/Lab Instructions for Use).
After polymerization finish with cross-cut tungsten carbide burs and prepolish with rubber polishers and silicone wheels. A
high gloss is achieved with goat hair brush, cotton or leather buffing wheel as well as SR Universal polishing paste.
Condition the surface using e.g. Telio Activator.
Apply Telio Lab.
23
Page 24

Care notes – Implant Care
Implant Care comprises a coordinated product program for the professional care of patients during the different phases of
an implant treatment and the aftercare throughout the rest of their lives. Products for professional cleaning and bacteria
control contribute to ensure the long-term quality of the implant-supported restorations. Structural elements, periimplant
tissue, natural teeth, dentures, gingiva and mucous membrane obtain optimum treatment and care with regard to their
function and esthetic appearance.
24
Page 25

®
Telio
CAD Abutment Solutions
General Information
Frequently Asked Questions
Is it possible to fabricate an abutment crown
only with Telio CAD without the use of a
Ti base?
No! For this indication, Telio CAD needs the
support provided by the Ti base. In addition, the
Ti base allows an optimum (industrially fabricated)
fit to the implant.
Which Ti bases can be used for the fabrication
of Telio CAD Abutment Solutions?
Only Ti bases of authorized CAD/CAM systems
may be used. Further information about the
CAD/CAM cooperation systems is available on the
Internet from www.ivoclarvivadent.com.
Is it permissible to re-use the selected Ti base?
No. When using Telio CAD Abutment Solutions
and, when indicated, IPS e.max CAD Abutment
Solutions, the Ti base must not be re-used. The
instructions of the manufacturer regarding the
preparations for permanent cementation must be
observed.
Is it permissible to modify the selected
Ti base?
The Ti base must not be adjusted by grinding as
this would compromise the fit of the Telio CAD
structure. As far as the preparations for permanent
cementation are concerned, the instructions of the
manufacturer have to be observed.
Is a hybrid abutment crown indicated in the
anterior region?
This indication depends on the position and
inclination of the implant. If the screw channel
extends through the oral surface, a hybrid
abutment crown may also be fabricated in the
anterior region.
Can a clinical try-in be conducted with the
Telio CAD Abutment Solutions?
Yes. A clinical try-in may be performed. The
Ti base and Telio CAD structure are temporarily
joined in the laboratory by means of a silicone
material, e.g. Virtual Extra Light Body Fast Set. This
facilitates the intraoral handling during clinical tryin with the patient.
What material may be used for the cementation to the Ti base?
Exclusively Multilink Hybrid Abutment HO 0 may
be used for cementation. This ensures a highquality bond. Given the high opacity of the
composite cement, complete optical masking of
the Ti base is achieved and thus an excellent
esthetic appearance ensured.
How is the Ti base prepared for the cementation with Multilink Hybrid Abutment?
If approved by the manufacturer of the Ti base,
the adhesive surface is carefully blasted with Al
with low pressure until an even mat surface is
achieved. After cleaning, the area is conditioned
with Monobond Plus.
How is the screw channel of a hybrid abutment crown sealed after seating?
After the restoration has been intraorally screwed
down on the implant, the screw channel is
sealed with a temporary or permanent restorative
composite.
2O3
25
Page 26

26
Page 27

27
Page 28

Ivoclar Vivadent – worldwide
Ivoclar Vivadent AG
Bendererstrasse 2
9494 Schaan
Liechtenstein
Tel. +423 235 35 35
Fax +423 (235) 33 60
www.ivoclarvivadent.com
Ivoclar Vivadent Pty. Ltd.
1 – 5 Overseas Drive
P.O. Box 367
Noble Park, Vic. 3174
Australia
Tel. +61 3 9795 9599
Fax +61 (3) 9795 9645
www.ivoclarvivadent.com.au
Ivoclar Vivadent Ltda.
Alameda Caiapós, 723
Centro Empresarial Tamboré
CEP 06460-110 Barueri – SP
Brazil
Tel. +55 11 2424 7400
Fax +55 (11) 3466 0840
www.ivoclarvivadent.com.br
Ivoclar Vivadent Inc.
1-6600 Dixie Road
Mississauga, Ontario
L5T 2Y2
Canada
Tel. +1 905 670 8499
Fax +1 (905) 670 3102
www.ivoclarvivadent.us
Ivoclar Vivadent Shanghai
Trading Co., Ltd.
2/F Building 1, 881 Wuding Road,
Jing An District
200040 Shanghai
China
Tel. +86 21 6032 1657
Fax +86 (21) 6176 0968
www.ivoclarvivadent.com
Ivoclar Vivadent Marketing Ltd.
Calle 134 No. 7-B-83, Of. 520
Bogotá
Colombia
Tel. +57 1 627 3399
Fax +57 (1) 633 1663
www.ivoclarvivadent.co
Ivoclar Vivadent SAS
B.P. 118
F-74410 Saint-Jorioz
France
Tel. +33 4 50 88 64 00
Fax +33 (4) 50 68 91 52
www.ivoclarvivadent.fr
Ivoclar Vivadent GmbH
Dr. Adolf-Schneider-Str. 2
73479 Ellwangen, Jagst
Germany
Tel. +49 7961 889 0
Fax +49 7961 6326
www.ivoclarvivadent.de
Wieland Dental + Technik
GmbH & Co. KG
Schwenninger Strasse 13
D-75179 Pforzheim
Germany
Tel. +49 7231 3705 0
Fax +49 (7231) 3579 59
www.wieland-dental.com
Ivoclar Vivadent Marketing (India)
Pvt. Ltd.
503/504 Raheja Plaza
15 B Shah Industrial Estate
Veera Desai Road, Andheri (West)
Mumbai, 400 053
India
Tel. +91 22 2673 0302
Fax +91 (22) 2673 0301
www.ivoclarvivadent.in
Ivoclar Vivadent s.r.l.
Via Isonzo 67/69
40033 Casalecchio di Reno (BO)
Italy
Tel. +39 051 6113555
Fax +39 051 6113565
www.ivoclarvivadent.it
Ivoclar Vivadent K.K.
1-28-24-4F Hongo
Bunkyo-ku
Tokyo 113-0033
Japan
Tel. +81 3 6903 3535
Fax +81 (3) 5844 3657
www.ivoclarvivadent.jp
Ivoclar Vivadent Ltd.
12F W-Tower, 1303-37
Seocho-dong, Seocho-gu,
Seoul 137-855
Republic of Korea
Tel. +82 2 536 0714
Fax +82 (2) 596 0155
www.ivoclarvivadent.co.kr
Ivoclar Vivadent S.A. de C.V.
Av. Insurgentes Sur No. 863.
Piso 14, Col. Napoles
03810 México, D.F.
México
Tel. +52 55 5062 1000
Fax +52 (55) 5062 1029
www.ivoclarvivadent.com.mx
Ivoclar Vivadent BV
De Fruittuinen 32
2132 NZ Hoofddorp
Netherlands
Tel. +31 23 529 3791
Fax +31 (23) 555 4504
www.ivoclarvivadent.com
Ivoclar Vivadent Ltd.
12 Omega St, Rosedale
PO Box 303011 North Harbour
Auckland 0751
New Zealand
Tel. +64 9 914 9999
Fax +64 (9) 914 9990
www.ivoclarvivadent.co.nz
Ivoclar Vivadent Polska Sp. z o.o.
Al. Jana Pawla II 78
00-175 Warszawa
Poland
Tel. +48 22 635 5496
Fax +48 (22) 635 5469
www.ivoclarvivadent.pl
Ivoclar Vivadent Marketing Ltd.
Prospekt Andropova 18 korp. 6/
office 10-06
115432 Moscow
Russia
Tel. +7 499 418 0300
Fax +7 (499) 418 0310
www.ivoclarvivadent.ru
Ivoclar Vivadent Marketing Ltd.
Qlaya Main St.
Siricon Building No.14, 2
Office No. 204
nd
Floor
P.O. Box 300146
Riyadh 11372
Saudi Arabia
Tel. +966 11 293 8345
Fax +966 (11) 293 8344
www.ivoclarvivadent.com
Ivoclar Vivadent S.L.U.
C/ Ribera del Loira nº 46, 5ª planta
28042 Madrid
Spain
Tel. + 34 913 757 820
Fax + 34 913 757 838
www.ivoclarvivadent.es
Ivoclar Vivadent AB
Dalvägen 14
S-169 56 Solna
Sweden
Tel. +46 8 514 939 30
Fax +46 8 514 939 40
www.ivoclarvivadent.se
Ivoclar Vivadent Liaison Office
: Tesvikiye Mahallesi
Sakayik Sokak
Nisantas’ Plaza No:38/2
Kat:5 Daire:24
34021 Sisli – Istanbul
Turkey
Tel. +90 212 343 0802
Fax +90 (212) 343 0842
www.ivoclarvivadent.com
Ivoclar Vivadent Limited
Ground Floor Compass Building
Feldspar Close
Warrens Business Park
Enderby
Leicester LE19 4SE
United Kingdom
Tel. +44 116 284 7880
Fax +44 (116) 284 7881
www.ivoclarvivadent.co.uk
Ivoclar Vivadent, Inc.
175 Pineview Drive
Amherst, N.Y. 14228
USA, if necessary.
Tel. +1 800 533 6825
Fax +1 (716) 691 2285
www.ivoclarvivadent.us
Manufacturer:
Ivoclar Vivadent AG, 9494 Schaan, Liechtenstein
www.ivoclarvivadent.com
Date information prepared: 2014-06-24/Rev. 1
Some products and/or indications may not be regulatory cleared/released in all markets. Please contact the local
Ivoclar Vivadent sales office for the current national status.
These materials have been developed solely for use in dentistry. Processing should be carried out strictly
according to the Instructions for Use. Liability cannot be accepted for damages resulting from failure to
observe the Instructions or the stipulated area of application. The user is responsible for testing the products
for their suitability and use for any purpose not explicitly stated in the Instructions. Descriptions and data constitute no warranty of attributes and are not binding. These regulations also apply if the materials are used in
conjunction with products of other manufacturers.
Printed in Liechtenstein
© Ivoclar Vivadent AG, Schaan / Liechtenstein
666040/en
 Loading...