

Ironman Fitness M3EL User Manual

OWNER’S MANUAL
Official product of the Ironman Triathlon
M3EL
IRONMAN M3 ELLIPTICAL TRAINER
315-00034
07/05 Rev B
QUESTIONS?
Call our toll free Ironman Fitness Helpline at
1.800.750.IRON
1.800.750.4766
Prior to your call, please be sure you have located and
noted the model number and sales receipt for proof
of purchase date confirmation.
ironmanfitness.com
Congratulations on choosing an Ironman Fitness product.
The Ironman M3 Elliptical Trainer is a tremendously effective tool for achieving your personal fitness goals.
Named after the Ironman Triathlon, you will be able to rely
on the quality craftsmanship and durability of the Ironman
M3 Elliptical Trainer for years to come.
This owner’s manual contains all the information you need
to operate and enjoy your Ironman M3 Elliptical Trainer.
Please read the manual in its entirety before attempting to
exercise on the M3 Elliptical Trainer.

FITNESS SAFEGUARDS
Failure to follow any of these safeguards may result in
injury or serious health problems.
• Before starting any exercise program, consult with your
physician or health professional. He or she can help
establish the exercise frequency, intensity and time
appropriate for your particular age and condition.
• If you have any pain or tightness in your chest, an
irregular heartbeat, shortness of breath, feel faint or have
any discomfort while you exercise, STOP! Consult your
physician before continuing.
• Do not place fingers or any other objects into moving
parts of the exercise equipment.
• Keep children and pets away from the M3 Elliptical
Trainer . A child’s curiosity may result in injury.
• Do not allow children to use the M3 Elliptical Trainer. The
machine is designed and intended for adults, not children.
• Never turn pedal crank arms by hand. To avoid
entanglement and possible injury, do not expose hands or
arms to the drive mechanism.
• Do not dismount the M3 Elliptical Trainer until the pedals
are at a complete STOP.
• Warn bystandars to keep a safe distance. Do not allow
anyone to touch the bike while it is in operation.
1
ASSEMBLY INSTRUCTIONS
2
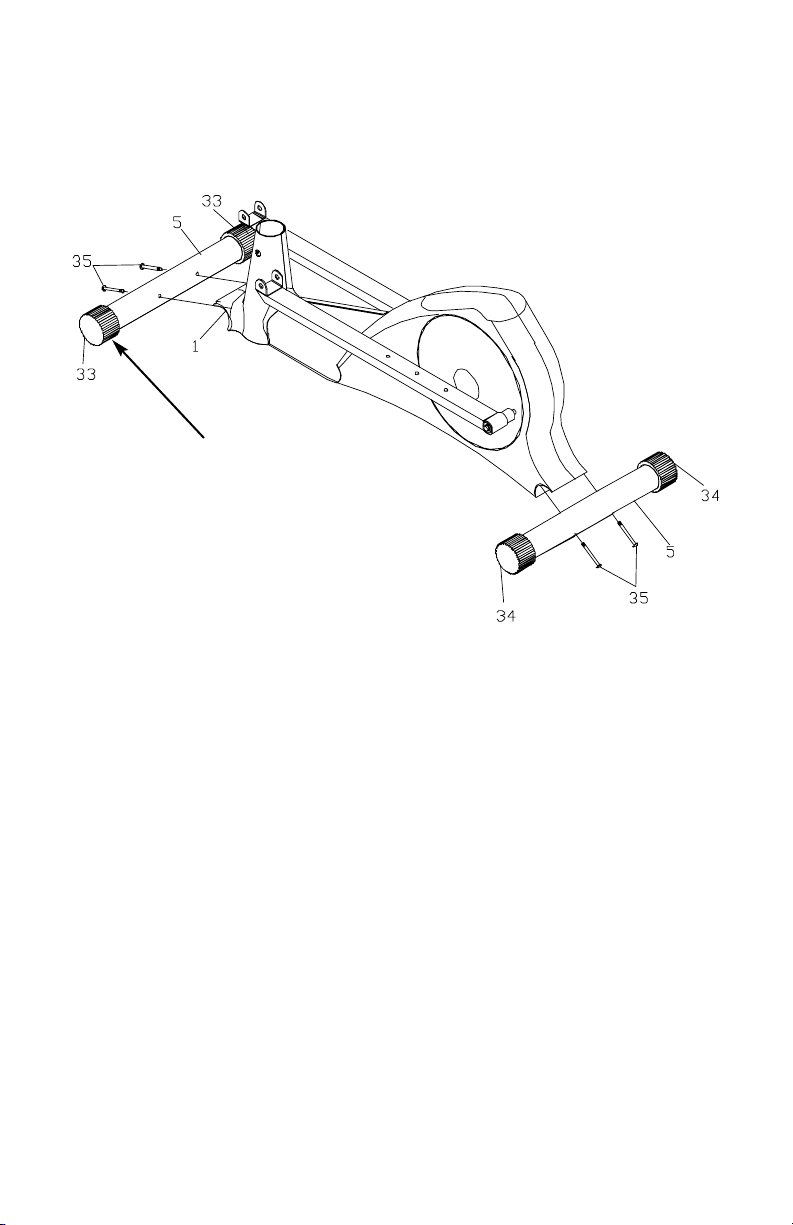
STEP 1
Connect foot tubes (5) to main frame (1) using:
Qty 4 - (35) Hex Head Screw
Make sure that the foot tube (5) with transport wheels (33)
is assembled to the front of the main frame (1).
Transport Wheels
ASSEMBLY INSTRUCTIONS
3
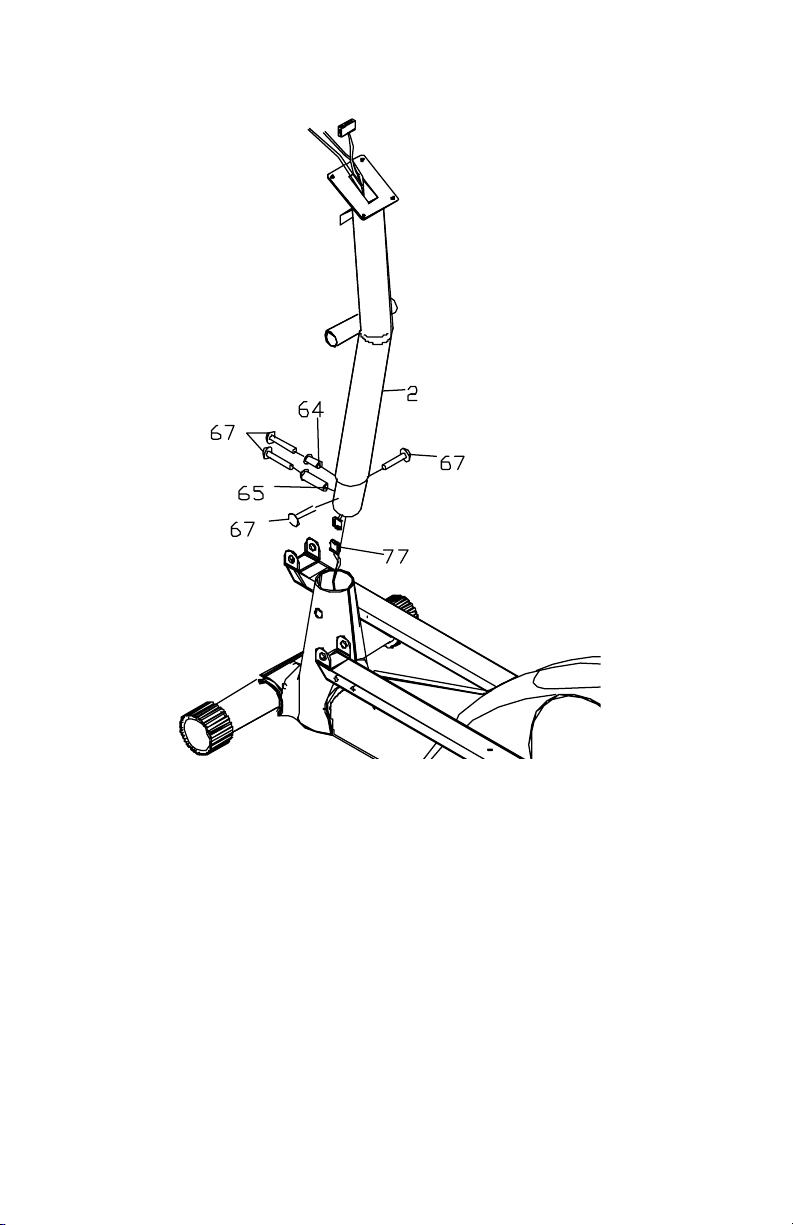
STEP 2
Connect the extension wire in the console tube to the reed
switch wire (77) in the main frame.
Secure the console tube (2) to the main frame using:
Qty 2 - (67) Hex Head Screw
Qty 2 - (67) Hex Head Screw
Qty 1 - (64) Plastic Washer (Short)
Qty 1 - (65) Plastic Washer (Long)
4
ASSEMBLY INSTRUCTIONS
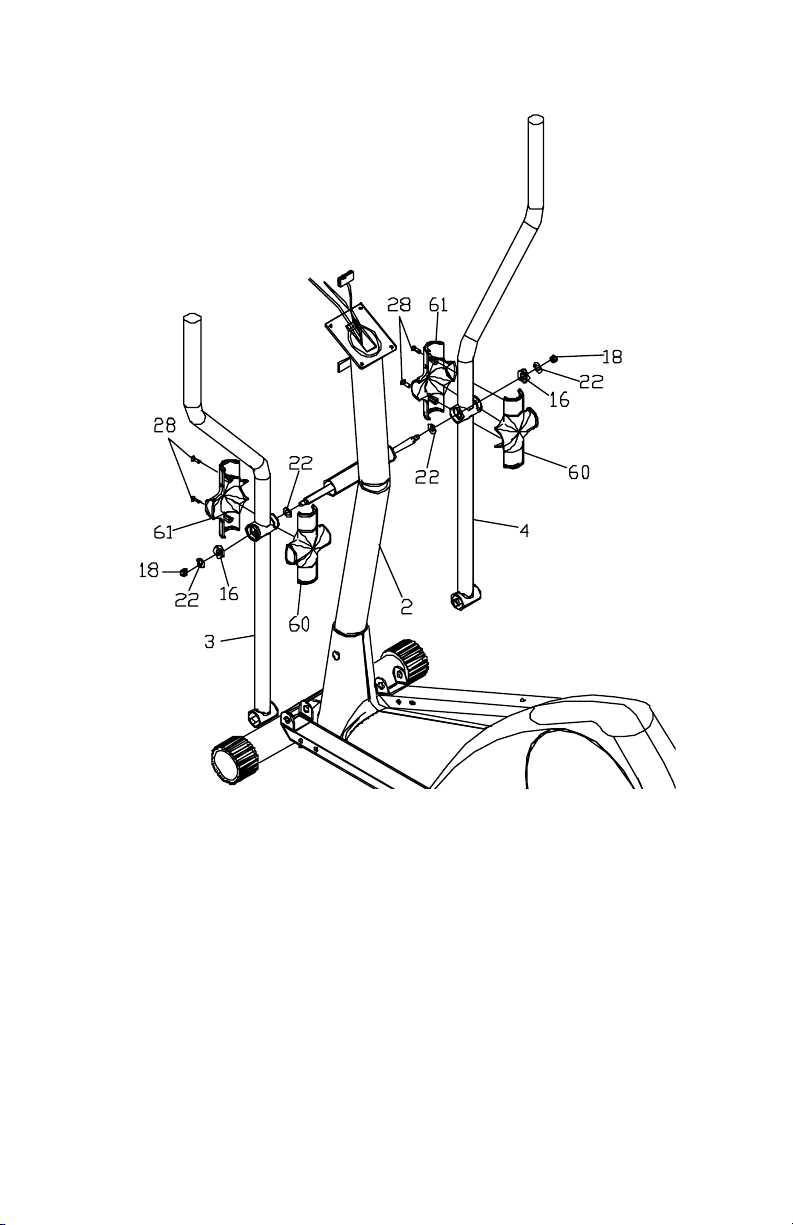
STEP 3
Attach left and right handles (3,4) to console tube (2) using:
Qty 4 - (22) Washer
Qty 2 - (16) Precise Bearing
Qty 2 - (18) Locknut
Attach rear and front shaft caps (60,61) to left and right handles (3,4) using:
Qty 4 - (28) Screw
5
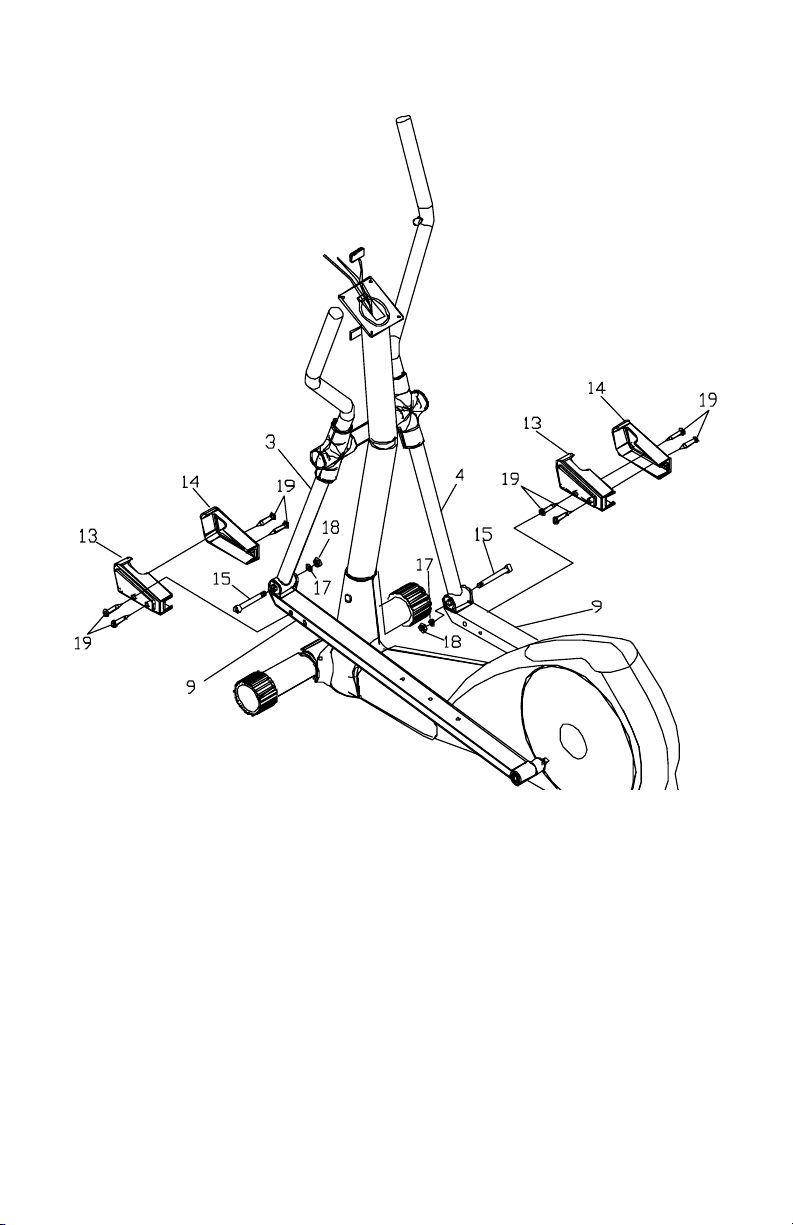
ASSEMBLY INSTRUCTIONS
STEP 4
Connect foot frames (9) to left and right handles (3,4) using:
Qty 2 - (15) Hex Head Screw
Qty 2 - (17) Washer
Qty 2 - (18) Locknut
Attach left and right frame sid covers (13,14) using:
Qty 8 - (19) Screw
6
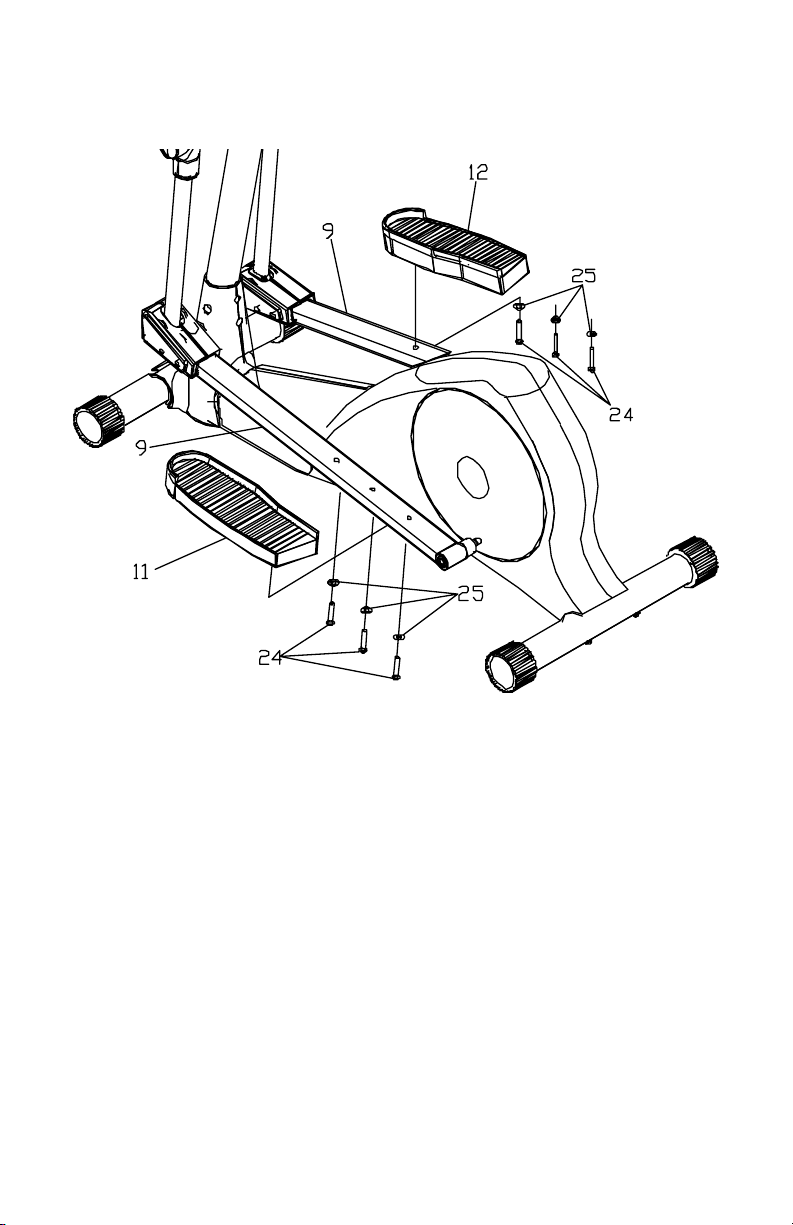
STEP 5
Attach the left and right foot pedals (11,12) to the foot
frames using:
Qty 6 - (24) Hex Head Screw
Qty 6 - (25) Washer
ASSEMBLY INSTRUCTIONS
 Loading...