

User's Manual
CN30
Mobile
Computer

Intermec Technologies Corporation
Worldwide Headquarters Cedar Rapids Technical Communications
6001 36th Ave.W. 550 Second Street SE
Everett, WA 98203 Cedar Rapids, IA 52401
U.S.A. U.S.A.
www.intermec.com
The information contained herein is proprietary and is provided solely for the purpose of allowing customers to
operate and service Intermec-manufactured equipment and is not to be released, reproduced, or used for any
other purpose without written permission of Intermec.
Information and specifications contained in this document are subject to change without prior noticed and do
not represent a commitment on the part of Intermec Technologies Corporation.
© 2005-2006 by Intermec Technologies Corporation. All rights reserved.
The word Intermec, the Intermec logo, Norand, ArciTech, Beverage Routebook, CrossBar, dcBrowser, Duratherm, EasyADC, EasyCoder, EasySet, Fingerprint, i-gistics, INCA (under license), Intellitag, Intellitag Gen2,
JANUS, LabelShop, MobileLAN, Picolink, Ready-to-Work, RoutePower, Sabre, ScanPlus, ScanShop, Smart
Mobile Computing, SmartSystems, TE 2000, Trakker Antares, and Vista Powered are either trademarks or reg
istered trademarks of Intermec Technologies Corporation.
Throughout this manual, trademarked names may be used. Rather than put a trademark (™ or ®) symbol in
every occurrence of a trademarked name, we state that we are using the names only in an editorial fashion, and
to the benefit of the trademark owner, with no intention of infringement.
There are U.S. and foreign patents pending.
-
Wi-Fi is a registered certification mark of the Wi-Fi Alliance.
Microsoft, Windows, and the Windows logo are registered trademarks of Microsoft Corporation in the United
States and/or other countries.
Bluetooth is a trademark of Bluetooth SIG, Inc., U.S.A.
ii CN30 Mobile Computer User’s Manual

Contents
Before You Begin . . . . . . . . . . . . . . . . . . . . . . . . . . . . . . . . . . . . . . . . . . . . . . . . . . . . . . . . ix
Global Services and Support . . . . . . . . . . . . . . . . . . . . . . . . . . . . . . . . . . . . . . . . . x
Warranty Information . . . . . . . . . . . . . . . . . . . . . . . . . . . . . . . . . . . . . . . . . . . . . . xi
Web Support . . . . . . . . . . . . . . . . . . . . . . . . . . . . . . . . . . . . . . . . . . . . . . . . . . . . . xi
Telephone Support . . . . . . . . . . . . . . . . . . . . . . . . . . . . . . . . . . . . . . . . . . . . . . . . xi
Who Should Read This Manual . . . . . . . . . . . . . . . . . . . . . . . . . . . . . . . . . . . . . . xi
Related Documents . . . . . . . . . . . . . . . . . . . . . . . . . . . . . . . . . . . . . . . . . . . . . . . xi
Patent Information . . . . . . . . . . . . . . . . . . . . . . . . . . . . . . . . . . . . . . . . . . . . . . . . xi
Using the CN30 Mobile Computer. . . . . . . . . . . . . . . . . . . . . . . . . . . . . . . . . . . . . . . . . . 1
1
Introducing the CN30 Mobile Computer . . . . . . . . . . . . . . . . . . . . . . . . . . . . . . . . . . . . . . 2
Audio . . . . . . . . . . . . . . . . . . . . . . . . . . . . . . . . . . . . . . . . . . . . . . . . . . . . . . . . . . . . . . . . . 3
Speaker . . . . . . . . . . . . . . . . . . . . . . . . . . . . . . . . . . . . . . . . . . . . . . . . . . . . . . . . . 3
Using the Battery. . . . . . . . . . . . . . . . . . . . . . . . . . . . . . . . . . . . . . . . . . . . . . . . . . . . . . . . . 4
Charging and Installing the Battery . . . . . . . . . . . . . . . . . . . . . . . . . . . . . . . . . . . 5
To charge the battery . . . . . . . . . . . . . . . . . . . . . . . . . . . . . . . . . . . . . . . . 5
Maximizing Battery Life . . . . . . . . . . . . . . . . . . . . . . . . . . . . . . . . . . . . . . . . . . . . 5
Checking the Battery Status . . . . . . . . . . . . . . . . . . . . . . . . . . . . . . . . . . . . . . . . . . 5
Contents
Adjusting the Beeper . . . . . . . . . . . . . . . . . . . . . . . . . . . . . . . . . . . . . . . . . . . . . . . . . . . . . . 7
Enabling the Beeper. . . . . . . . . . . . . . . . . . . . . . . . . . . . . . . . . . . . . . . . . . . . . . . . . . . . . . . 7
Disabling the Beeper. . . . . . . . . . . . . . . . . . . . . . . . . . . . . . . . . . . . . . . . . . . . . . . . 8
Using the Keypad . . . . . . . . . . . . . . . . . . . . . . . . . . . . . . . . . . . . . . . . . . . . . . . . . . . . . . . . 9
TE 2000 Overlay. . . . . . . . . . . . . . . . . . . . . . . . . . . . . . . . . . . . . . . . . . . . . . . . . . . . . . . . . 9
The 56-Key Keypad. . . . . . . . . . . . . . . . . . . . . . . . . . . . . . . . . . . . . . . . . . . . . . . . . . . . . . 10
Using the Color-Coded Keys . . . . . . . . . . . . . . . . . . . . . . . . . . . . . . . . . . . . . . . . 10
Capitalizing All Characters . . . . . . . . . . . . . . . . . . . . . . . . . . . . . . . . . . . . . . . . . 10
Using the 14-Key Keypad Module . . . . . . . . . . . . . . . . . . . . . . . . . . . . . . . . . . . . . . . . . 11
Using the 10-Key Keypad Module . . . . . . . . . . . . . . . . . . . . . . . . . . . . . . . . . . . . . . . . . 12
Magnifier Application . . . . . . . . . . . . . . . . . . . . . . . . . . . . . . . . . . . . . . . . . . . . . 13
Using the Power (I) Key . . . . . . . . . . . . . . . . . . . . . . . . . . . . . . . . . . . . . . . . . . . . . . . . . 14
Using the Screen . . . . . . . . . . . . . . . . . . . . . . . . . . . . . . . . . . . . . . . . . . . . . . . . . . . . . . . . 15
Resetting Your CN30 Mobile Computer . . . . . . . . . . . . . . . . . . . . . . . . . . . . . . . . . . . . . 16
Performing a Warm-Boot on the CN30 Computer . . . . . . . . . . . . . . . . . . . . . . . . . . . . . 16
Performing a Cold-Boot on the CN30 Computer . . . . . . . . . . . . . . . . . . . . . . . . 16
Using the Speakers . . . . . . . . . . . . . . . . . . . . . . . . . . . . . . . . . . . . . . . . . . . . . . . . 18
CN30 Mobile Computer User’s Manual iii

Contents
Using the Status Lights . . . . . . . . . . . . . . . . . . . . . . . . . . . . . . . . . . . . . . . . . . . . . . . . . . . 19
Scanning with the 2D Area Imager . . . . . . . . . . . . . . . . . . . . . . . . . . . . . . . . . . . . . . . . . . 21
StorageMedia . . . . . . . . . . . . . . . . . . . . . . . . . . . . . . . . . . . . . . . . . . . . . . . . . . . . . . . . . . 22
Using the SD Card . . . . . . . . . . . . . . . . . . . . . . . . . . . . . . . . . . . . . . . . . . . . . . . . . . . . . 23
Physical and Environmental Specifications . . . . . . . . . . . . . . . . . . . . . . . . . . . . . . . . . . . . 24
Accessories for the CN30 Computer . . . . . . . . . . . . . . . . . . . . . . . . . . . . . . . . . . . . . . . . . 27
Windows Mobile. . . . . . . . . . . . . . . . . . . . . . . . . . . . . . . . . . . . . . . . . . . . . . . . . . . . . . . . . . . . 29
2
Software Builds . . . . . . . . . . . . . . . . . . . . . . . . . . . . . . . . . . . . . . . . . . . . . . . . . . . . . . . . . 30
Where to Find Information . . . . . . . . . . . . . . . . . . . . . . . . . . . . . . . . . . . . . . . . . . . . . . . . 30
Basic Skills. . . . . . . . . . . . . . . . . . . . . . . . . . . . . . . . . . . . . . . . . . . . . . . . . . . . . . . . . . . . . 31
Today Screen . . . . . . . . . . . . . . . . . . . . . . . . . . . . . . . . . . . . . . . . . . . . . . . . . . . . 31
Programs . . . . . . . . . . . . . . . . . . . . . . . . . . . . . . . . . . . . . . . . . . . . . . . . . . . . . . . 32
Navigation Bar and Command Bar. . . . . . . . . . . . . . . . . . . . . . . . . . . . . . . . . . . . 33
Pop-up Menus . . . . . . . . . . . . . . . . . . . . . . . . . . . . . . . . . . . . . . . . . . . . . . . . . . . 33
Notifications. . . . . . . . . . . . . . . . . . . . . . . . . . . . . . . . . . . . . . . . . . . . . . . . . . . . . 33
Entering Information . . . . . . . . . . . . . . . . . . . . . . . . . . . . . . . . . . . . . . . . . . . . . . 34
Typing With the Onscreen Keyboard . . . . . . . . . . . . . . . . . . . . . . . . . . . 36
Using Block Recognizer. . . . . . . . . . . . . . . . . . . . . . . . . . . . . . . . . . . . . . 36
Using Letter Recognizer . . . . . . . . . . . . . . . . . . . . . . . . . . . . . . . . . . . . . 37
Using Transcriber . . . . . . . . . . . . . . . . . . . . . . . . . . . . . . . . . . . . . . . . . . 37
Selecting Typed Text. . . . . . . . . . . . . . . . . . . . . . . . . . . . . . . . . . . . . . . . 37
Writing on the Screen. . . . . . . . . . . . . . . . . . . . . . . . . . . . . . . . . . . . . . . . . . . . . . 38
Selecting the Writing. . . . . . . . . . . . . . . . . . . . . . . . . . . . . . . . . . . . . . . . 38
Converting Writing to Text. . . . . . . . . . . . . . . . . . . . . . . . . . . . . . . . . . . 38
Drawing on the Screen . . . . . . . . . . . . . . . . . . . . . . . . . . . . . . . . . . . . . . . . . . . . . 40
Creating a Drawing . . . . . . . . . . . . . . . . . . . . . . . . . . . . . . . . . . . . . . . . . 40
Selecting a Drawing. . . . . . . . . . . . . . . . . . . . . . . . . . . . . . . . . . . . . . . . . 40
Recording a Message. . . . . . . . . . . . . . . . . . . . . . . . . . . . . . . . . . . . . . . . . . . . . . . 40
Using My Text . . . . . . . . . . . . . . . . . . . . . . . . . . . . . . . . . . . . . . . . . . . . . . . . . . . 42
Finding and Organizing Information . . . . . . . . . . . . . . . . . . . . . . . . . . . . . . . . . . 42
Customizing Your CN30 Computer . . . . . . . . . . . . . . . . . . . . . . . . . . . . . . . . . . 43
Adjusting Settings . . . . . . . . . . . . . . . . . . . . . . . . . . . . . . . . . . . . . . . . . . 43
Adding or Removing Programs . . . . . . . . . . . . . . . . . . . . . . . . . . . . . . . . 43
Microsoft ActiveSync. . . . . . . . . . . . . . . . . . . . . . . . . . . . . . . . . . . . . . . . . . . . . . . . . . . . . 47
Microsoft Pocket Outlook . . . . . . . . . . . . . . . . . . . . . . . . . . . . . . . . . . . . . . . . . . . . . . . . . 48
Calendar: Scheduling Appointments and Meetings. . . . . . . . . . . . . . . . . . . . . . . . 49
Synchronizing Calendar. . . . . . . . . . . . . . . . . . . . . . . . . . . . . . . . . . . . . . 49
Why Use Categories in the Calendar? . . . . . . . . . . . . . . . . . . . . . . . . . . . 49
What’s an All Day Event? . . . . . . . . . . . . . . . . . . . . . . . . . . . . . . . . . . . . 50
What’s a Recurrence Pattern? . . . . . . . . . . . . . . . . . . . . . . . . . . . . . . . . . 50
Viewing Appointments . . . . . . . . . . . . . . . . . . . . . . . . . . . . . . . . . . . . . . 50
Creating or Changing an Appointment . . . . . . . . . . . . . . . . . . . . . . . . . . 54
iv CN30 Mobile Computer User’s Manual

Contents
Creating an All-Day Event . . . . . . . . . . . . . . . . . . . . . . . . . . . . . . . . . . . 55
Setting a Reminder for an Appointment . . . . . . . . . . . . . . . . . . . . . . . . . 56
Adding a Note to an Appointment . . . . . . . . . . . . . . . . . . . . . . . . . . . . . 57
Making an Appointment Recurring. . . . . . . . . . . . . . . . . . . . . . . . . . . . . 57
Assigning an Appointment to a Category. . . . . . . . . . . . . . . . . . . . . . . . . 58
Sending a Meeting Request . . . . . . . . . . . . . . . . . . . . . . . . . . . . . . . . . . . 56
Finding an Appointment. . . . . . . . . . . . . . . . . . . . . . . . . . . . . . . . . . . . . 57
Deleting an Appointment . . . . . . . . . . . . . . . . . . . . . . . . . . . . . . . . . . . . 58
Changing Calendar Options . . . . . . . . . . . . . . . . . . . . . . . . . . . . . . . . . . 58
Contacts: Tracking Friends and Colleagues . . . . . . . . . . . . . . . . . . . . . . . . . . . . . 59
Creating a Contact . . . . . . . . . . . . . . . . . . . . . . . . . . . . . . . . . . . . . . . . . 59
Synchronizing Contacts. . . . . . . . . . . . . . . . . . . . . . . . . . . . . . . . . . . . . . 60
Viewing Contacts . . . . . . . . . . . . . . . . . . . . . . . . . . . . . . . . . . . . . . . . . . 60
Creating or Changing a Contact . . . . . . . . . . . . . . . . . . . . . . . . . . . . . . . 60
Adding a Note to a Contact. . . . . . . . . . . . . . . . . . . . . . . . . . . . . . . . . . . 60
Assigning a Contact to a Category . . . . . . . . . . . . . . . . . . . . . . . . . . . . . . 62
Copying a Contact . . . . . . . . . . . . . . . . . . . . . . . . . . . . . . . . . . . . . . . . . 62
Sending a Message to a Contact. . . . . . . . . . . . . . . . . . . . . . . . . . . . . . . . 62
Finding a Contact . . . . . . . . . . . . . . . . . . . . . . . . . . . . . . . . . . . . . . . . . . 62
Deleting a Contact . . . . . . . . . . . . . . . . . . . . . . . . . . . . . . . . . . . . . . . . . 63
Changing Contacts Options . . . . . . . . . . . . . . . . . . . . . . . . . . . . . . . . . . 63
Tasks: Keeping a To Do List . . . . . . . . . . . . . . . . . . . . . . . . . . . . . . . . . . . . . . . . 64
Creating a Task . . . . . . . . . . . . . . . . . . . . . . . . . . . . . . . . . . . . . . . . . . . . 64
Synchronizing Tasks . . . . . . . . . . . . . . . . . . . . . . . . . . . . . . . . . . . . . . . . 65
Notes: Capturing Thoughts and Ideas . . . . . . . . . . . . . . . . . . . . . . . . . . . . . . . . . 66
Creating a Note. . . . . . . . . . . . . . . . . . . . . . . . . . . . . . . . . . . . . . . . . . . . 66
Synchronizing Notes . . . . . . . . . . . . . . . . . . . . . . . . . . . . . . . . . . . . . . . . 66
Messaging: Sending and Receiving E-mail Messages . . . . . . . . . . . . . . . . . . . . . . . 67
Synchronizing E-mail Messages . . . . . . . . . . . . . . . . . . . . . . . . . . . . . . . . 67
Managing E-mail Messages and Folders. . . . . . . . . . . . . . . . . . . . . . . . . . 67
Connecting to a Mail Server . . . . . . . . . . . . . . . . . . . . . . . . . . . . . . . . . . 69
Composing and Sending Messages . . . . . . . . . . . . . . . . . . . . . . . . . . . . . 70
Companion Programs . . . . . . . . . . . . . . . . . . . . . . . . . . . . . . . . . . . . . . . . . . . . . . . . . . . . 70
Word Mobile . . . . . . . . . . . . . . . . . . . . . . . . . . . . . . . . . . . . . . . . . . . . . . . . . . . . 70
Unsupported Features in Word Mobile. . . . . . . . . . . . . . . . . . . . . . . . . . 70
Creating a Document . . . . . . . . . . . . . . . . . . . . . . . . . . . . . . . . . . . . . . . 73
Typing Mode . . . . . . . . . . . . . . . . . . . . . . . . . . . . . . . . . . . . . . . . . . . . . 74
Writing Mode . . . . . . . . . . . . . . . . . . . . . . . . . . . . . . . . . . . . . . . . . . . . . 74
Synchronizing Word Mobile Documents . . . . . . . . . . . . . . . . . . . . . . . . 75
Excel Mobile. . . . . . . . . . . . . . . . . . . . . . . . . . . . . . . . . . . . . . . . . . . . . . . . . . . . . 75
Unsupported Features in Excel Mobile . . . . . . . . . . . . . . . . . . . . . . . . . . 76
Creating a Workbook . . . . . . . . . . . . . . . . . . . . . . . . . . . . . . . . . . . . . . . 77
Tips for Working in Excel Mobile. . . . . . . . . . . . . . . . . . . . . . . . . . . . . . 77
PowerPoint Mobile. . . . . . . . . . . . . . . . . . . . . . . . . . . . . . . . . . . . . . . . . . . . . . . . 77
Unsupported Features in PowerPoint Mobile . . . . . . . . . . . . . . . . . . . . . 77
Starting a Slide Show Presentation. . . . . . . . . . . . . . . . . . . . . . . . . . . . . . 79
Windows Media Player for Windows Mobile . . . . . . . . . . . . . . . . . . . . . . . . . . . . 80
Internet Explorer Mobile . . . . . . . . . . . . . . . . . . . . . . . . . . . . . . . . . . . . . . . . . . . . . . . . . . 81
Mobile Favorites. . . . . . . . . . . . . . . . . . . . . . . . . . . . . . . . . . . . . . . . . . . . . . . . . . 81
Favorite Links. . . . . . . . . . . . . . . . . . . . . . . . . . . . . . . . . . . . . . . . . . . . . . . . . . . . 81
Mobile Favorites. . . . . . . . . . . . . . . . . . . . . . . . . . . . . . . . . . . . . . . . . . . . . . . . . . 82
CN30 Mobile Computer User’s Manual v

Contents
Using Internet Explorer Mobile . . . . . . . . . . . . . . . . . . . . . . . . . . . . . . . . . . . . . . 81
Viewing Mobile Favorites and Channels . . . . . . . . . . . . . . . . . . . . . . . . . 81
Browsing the Internet . . . . . . . . . . . . . . . . . . . . . . . . . . . . . . . . . . . . . . . 84
Getting Connected . . . . . . . . . . . . . . . . . . . . . . . . . . . . . . . . . . . . . . . . . 84
Connecting to an Internet Service Provider . . . . . . . . . . . . . . . . . . . . . . . . . . . . . 85
Connecting to Work. . . . . . . . . . . . . . . . . . . . . . . . . . . . . . . . . . . . . . . . . . . . . . . 87
Creating a Modem Connection to Work. . . . . . . . . . . . . . . . . . . . . . . . . 88
Creating a VPN Server Connection to Work. . . . . . . . . . . . . . . . . . . . . . 90
Ending a Connection . . . . . . . . . . . . . . . . . . . . . . . . . . . . . . . . . . . . . . . . . . . . . . 91
Connecting Directly to an E-mail Server . . . . . . . . . . . . . . . . . . . . . . . . . . . . . . . 92
Setting Up an E-mail Account . . . . . . . . . . . . . . . . . . . . . . . . . . . . . . . . . . . . . . . 92
Configuring the CN30 Computer . . . . . . . . . . . . . . . . . . . . . . . . . . . . . . . . . . . . . . . . . . 95
3
Developing Applications for the CN30 Computer . . . . . . . . . . . . . . . . . . . . . . . . . . . . . . 96
Converting Older Computer Applications to CN30 Applications . . . . . . . . . . . . . . . . . . . 96
Packaging Applications for the CN30 Computer. . . . . . . . . . . . . . . . . . . . . . . . . . . . . . . . 97
Installing Applications on the CN30 Computer . . . . . . . . . . . . . . . . . . . . . . . . . . . . . . . . 98
Installing Applications Using Microsoft ActiveSync . . . . . . . . . . . . . . . . . . . . . . . 98
Installing Applications Using a Secure Digital Card . . . . . . . . . . . . . . . . . . . . . . . 99
Launching Your Application Automatically . . . . . . . . . . . . . . . . . . . . . . . . . . . . . . . . . . . 100
PreShell . . . . . . . . . . . . . . . . . . . . . . . . . . . . . . . . . . . . . . . . . . . . . . . . . . . . . . . 100
PostShell. . . . . . . . . . . . . . . . . . . . . . . . . . . . . . . . . . . . . . . . . . . . . . . . . . . . . . . 100
RunAutoRun . . . . . . . . . . . . . . . . . . . . . . . . . . . . . . . . . . . . . . . . . . . . . . . . . . . 101
AutoExec . . . . . . . . . . . . . . . . . . . . . . . . . . . . . . . . . . . . . . . . . . . . . . . . . . . . . . 102
AutoRun. . . . . . . . . . . . . . . . . . . . . . . . . . . . . . . . . . . . . . . . . . . . . . . . . . . . . . . 104
AutoCopy. . . . . . . . . . . . . . . . . . . . . . . . . . . . . . . . . . . . . . . . . . . . . . . . . . . . . . 104
AutoReg . . . . . . . . . . . . . . . . . . . . . . . . . . . . . . . . . . . . . . . . . . . . . . . . . . . . . . . 105
AutoCab. . . . . . . . . . . . . . . . . . . . . . . . . . . . . . . . . . . . . . . . . . . . . . . . . . . . . . . 105
Customizing How Applications Load on the CN30 Computer . . . . . . . . . . . . . . . . . . . . 106
Configuring CN30 Parameters . . . . . . . . . . . . . . . . . . . . . . . . . . . . . . . . . . . . . . . . . . . . 107
Configuring with the Setup Assistant . . . . . . . . . . . . . . . . . . . . . . . . . . . . . . . . . 108
Configuring the CN30 Computer With Intermec Settings. . . . . . . . . . . . . . . . . 108
Synchronizing the CN30 Computer System Time with a Time Server . . . . . . . . 108
Configuring the CN30 Computer through the Network . . . . . . . . . . . . . . . . . . 109
Configuring the CN30 Computer in a TCP/IP Direct Connect Network . . . . . 109
Configuring the CN30 Computer in a UDP Plus Network . . . . . . . . . . . . . . . . 110
Configuring the CN30 Computer for Your Network . . . . . . . . . . . . . . . . . . . . . . . . . . . 111
Configuring Serial Communications . . . . . . . . . . . . . . . . . . . . . . . . . . . . . . . . . 111
Configuring 802.11b/g Radio Communications. . . . . . . . . . . . . . . . . . . . . . . . . 112
Configuring the Network Parameters for a TCP/IP Network. . . . . . . . . . . . . . . 112
Configuring the Network Parameters for a UDP Plus Network . . . . . . . . . . . . . 112
Configuring Ethernet Communications . . . . . . . . . . . . . . . . . . . . . . . . . . . . . . . 112
Configuring Bluetooth Radio Communications . . . . . . . . . . . . . . . . . . . . . . . . . 113
Documentation . . . . . . . . . . . . . . . . . . . . . . . . . . . . . . . . . . . . . . . . . . . 113
vi CN30 Mobile Computer User’s Manual

Contents
About the Application . . . . . . . . . . . . . . . . . . . . . . . . . . . . . . . . . . . . . . 113
Wireless Printing . . . . . . . . . . . . . . . . . . . . . . . . . . . . . . . . . . . . . . . . . . 118
Bluetooth Audio . . . . . . . . . . . . . . . . . . . . . . . . . . . . . . . . . . . . . . . . . . 122
Configuring Bluetooth Using Intermec Settings . . . . . . . . . . . . . . . . . . 123
Reprogramming the CN30 Keypad . . . . . . . . . . . . . . . . . . . . . . . . . . . . . . . . . . . . . . . . . 123
Implementation . . . . . . . . . . . . . . . . . . . . . . . . . . . . . . . . . . . . . . . . . . . . . . . . . 123
Registry Entries . . . . . . . . . . . . . . . . . . . . . . . . . . . . . . . . . . . . . . . . . . . . . . . . . 124
Programming the Keypad. . . . . . . . . . . . . . . . . . . . . . . . . . . . . . . . . . . . . . . . . . 124
Alphanumeric Scan Codes . . . . . . . . . . . . . . . . . . . . . . . . . . . . . . . . . . . . . . . . . 125
Numeric Scan Codes . . . . . . . . . . . . . . . . . . . . . . . . . . . . . . . . . . . . . . . . . . . . . 125
Configuring the SF51 Scanner. . . . . . . . . . . . . . . . . . . . . . . . . . . . . . . . . . . . . . . . . . . . . 126
Imager Settings. . . . . . . . . . . . . . . . . . . . . . . . . . . . . . . . . . . . . . . . . . . . . . . . . . 126
Enabling Bluetooth. . . . . . . . . . . . . . . . . . . . . . . . . . . . . . . . . . . . . . . . . . . . . . . 126
Creating an SF51 Connection Label. . . . . . . . . . . . . . . . . . . . . . . . . . . . . . . . . . 127
Viewing SF51 Scanner Information from Your CN30 Computer. . . . . . . . . . . . 128
Configuring Security . . . . . . . . . . . . . . . . . . . . . . . . . . . . . . . . . . . . . . . . . . . . . . . . . . . . 129
Loading Certificates . . . . . . . . . . . . . . . . . . . . . . . . . . . . . . . . . . . . . . . . . . . . . . 129
Wireless Network . . . . . . . . . . . . . . . . . . . . . . . . . . . . . . . . . . . . . . . . . . . . . . . . 130
Terminology. . . . . . . . . . . . . . . . . . . . . . . . . . . . . . . . . . . . . . . . . . . . . . . . . . . . 130
Choosing Between Microsoft and Funk Security . . . . . . . . . . . . . . . . . . . . . . . . 131
Configuring Funk Security . . . . . . . . . . . . . . . . . . . . . . . . . . . . . . . . . . 131
Configuring Microsoft Security . . . . . . . . . . . . . . . . . . . . . . . . . . . . . . . 154
Maintaining the CN30 Computer. . . . . . . . . . . . . . . . . . . . . . . . . . . . . . . . . . . . . . . . . 161
4
Upgrading the Operating System on your CN30 Computer . . . . . . . . . . . . . . . . . . . . . . 162
Troubleshooting Your CN30 Computer . . . . . . . . . . . . . . . . . . . . . . . . . . . . . . . . . . . . . 162
Problems While Configuring 802.1x Security . . . . . . . . . . . . . . . . . . . . . . . . . . . . . . . . . 164
Problems Transmitting Data through the Serial Port . . . . . . . . . . . . . . . . . . . . . 166
Cleaning the Scanner Window and CN30 Screen . . . . . . . . . . . . . . . . . . . . . . . . . . . . . . 168
Network Support . . . . . . . . . . . . . . . . . . . . . . . . . . . . . . . . . . . . . . . . . . . . . . . . . . . . . . . . . . 169
5
Configuring IP Address and Name Servers . . . . . . . . . . . . . . . . . . . . . . . . . . . . . . . . . . . 170
Via Intermec Settings . . . . . . . . . . . . . . . . . . . . . . . . . . . . . . . . . . . . . . . . . . . . 170
Ethernet Communications . . . . . . . . . . . . . . . . . . . . . . . . . . . . . . . . . . . . . . . . . 170
Wireless 802.11 Communications . . . . . . . . . . . . . . . . . . . . . . . . . . . . . . . . . . . 171
Configuring Wireless 802.11 Communications . . . . . . . . . . . . . . . . . . . . . . . . . . . . . . . 172
AutoIP/DHCP . . . . . . . . . . . . . . . . . . . . . . . . . . . . . . . . . . . . . . . . . . . . . . . . . . . . . . . . 172
Index . . . . . . . . . . . . . . . . . . . . . . . . . . . . . . . . . . . . . . . . . . . . . . . . . . . . . . . . . . . . . . . . . . . . . . . . 175
I
CN30 Mobile Computer User’s Manual vii

Contents
viii CN30 Mobile Computer User’s Manual
Before You Begin
Safety Information
Before You Begin
This section provides you with safety information, technical support information, and sources for additional product information.
Your safety is extremely important. Read and follow all warnings and cautions in this document before handling and operating Intermec equipment.
You can be seriously injured, and equipment and data can be damaged if
you do not follow the safety warnings and cautions.
This section explains how to identify and understand dangers, warnings,
cautions, and notes that are in this document. You may also see icons that
tell you when to follow ESD procedures and when to take special precautions for handling optical parts.
A danger warns you of possible eye damage caused by use of a Class IIIa
laser product. Use of this symbol is mandated by CFR21 1040.
A warning alerts you of an operating procedure, practice, condition, or
statement that must be strictly observed to avoid death or serious injury
to the persons working on the equipment.
A caution alerts you to an operating procedure, practice, condition, or
statement that must be strictly observed to prevent equipment damage
or destruction, or corruption or loss of data.
Note: Notes either provide extra information about a topic or contain special instructions for handling a particular condition or set of circumstances.
CN30 Mobile Computer User’s Manual ix

Before You Begin
Global Services and Support
Warranty Information
To understand the warranty for your Intermec product, visit the Intermec
web site at www.intermec.com and click Service & Support. The Intermec
Global Sales & Service page appears. From the Service & Support menu,
move your pointer over Support, and then click War ra nt y.
Disclaimer of warranties: The sample code included in this document is
presented for reference only. The code does not necessarily represent complete, tested programs. The code is provided “as is with all faults.” All warranties are expressly disclaimed, including the implied warranties of
merchantability and fitness for a particular purpose.
Web Support
Visit the Intermec web site at www.intermec.com to download our current
manuals (in PDF). To order printed versions of the Intermec manuals, contact your local Intermec representative or distributor.
Visit the Intermec technical knowledge base (Knowledge Central) at
intermec.custhelp.com to review technical information or to request
technical support for your Intermec product.
Telephone Support
These services are available from Intermec Technologies Corporation.
In the U.S.A. and Canada
call 1-800-755-5505 and
Service Description
Order Intermec
products
Order Intermec media Order printer labels and ribbons. 1 and then choose 1
Order spare parts Order spare parts. 1 or 2 and then choose 4
Technical Support Talk to technical support about
Service • Get a return authorization
Service contracts • Ask about an existing con-
• Place an order.
• Ask about an existing order.
your Intermec product.
number for authorized service
center repair.
• Request an on-site repair technician.
tract.
•Renew a contract.
• Inquire about repair billing or
other service invoicing questions.
choose this option
1 and then choose 2
2 and then choose 2
2 and then choose 1
1 or 2 and then choose 3
Outside the U.S.A. and Canada, contact your local Intermec representative.
To search for your local representative, from the Intermec web site, click
Contact.
x CN30 Mobile Computer User’s Manual

Who Should Read This Manual
This manual provides you with information about the features of the CN30
Mobile Computer, and how to install, configure, operate, maintain
and troubleshoot it. Before you install and configure the CN30, you
should be familiar with Pocket PC or Windows CE, your network and
general networking terms, such as IP address and network naming conventions.
Related Documents
This table contains a list of related Intermec documents and part numbers.
Document Title Part Number
CN30 Mobile Computer Quick Start Guide 962-054-125
CN30 Model AD9 Charge Dock Quick Start Guide 962-000-060
CN30 Model AC9 Quad Charger Quick Start Guide 962-000-061
CN30 Model AK1 14-Key Module Quick Start Guide 943-035-001
Before You Begin
Patent Information
The Intermec web site at www.intermec.com contains our documents (as
PDF files) that you can download for free.
To download documents
1 Visit the Intermec web site at www.intermec.com.
2 Click Service & Support > Manuals.
3 In the Select a Product field, choose the product whose documentation
you want to download.
To order printed versions of the Intermec manuals, contact your local Intermec representative or distributor.
This product is protected by one or more of the following patents:
4,882,476; 4,894,523; 4,953,113; 4,961,043; 4,970,379; 4,988,852;
5,019,699; 5,021,642; 5,038,024; 5,081,343; 5,095,197; 5,144,119;
5,144,121; 5,182,441; 5,187,355; 5,187,356; 5,195,183; 5,195,183;
5,195,183; 5,216,233; 5,216,550; 5,218,191; 5,227,614; 5,233,172;
5,241,488; 5,243,602; 5,258,606; 5,278,487; 5,288,985; 5,308,966;
5,322,991; 5,331,136; 5,331,580; 5,342,210; 5,349,678; 5,359,185;
There may be other U.S. and foreign patents pending.
Microsoft, Windows, and the Windows logo are registered trademarks of
Microsoft Corporation in the United States and/or other countries.
CN30 Mobile Computer User’s Manual xi

Before You Begin
xii CN30 Mobile Computer User’s Manual

Using the CN30 Mobile
1
Use this chapter to familiarize yourself with the CN30 Mobile Computer.
In this chapter you will find these sections:
• Introducing the CN30 Mobile Computer
• Audio
•Battery
Computer
• Beeper
• Using the Keypad
• Resetting your CN30 Mobile Computer
• Using the SD Card
CN30 Mobile Computer User’s Manual 1
Chapter 1 — Using the CN30 Mobile Computer
7
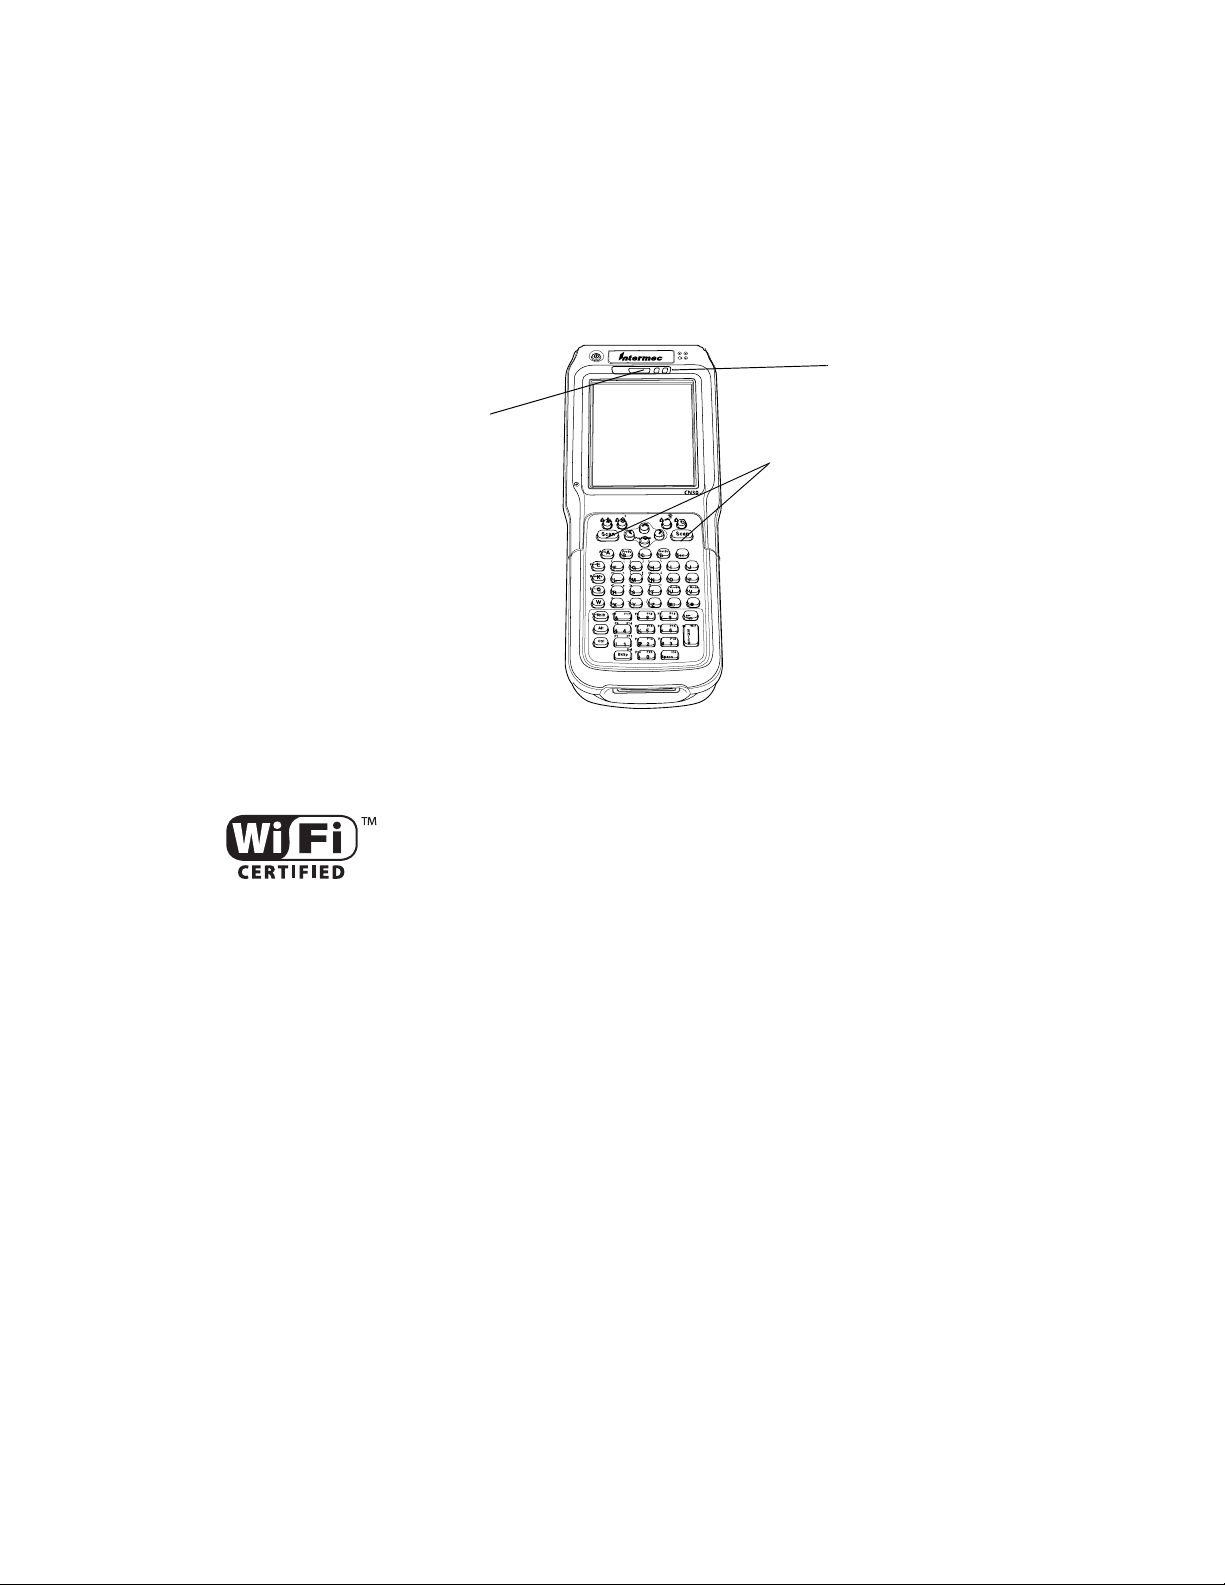
Introducing the CN30 Mobile Computer
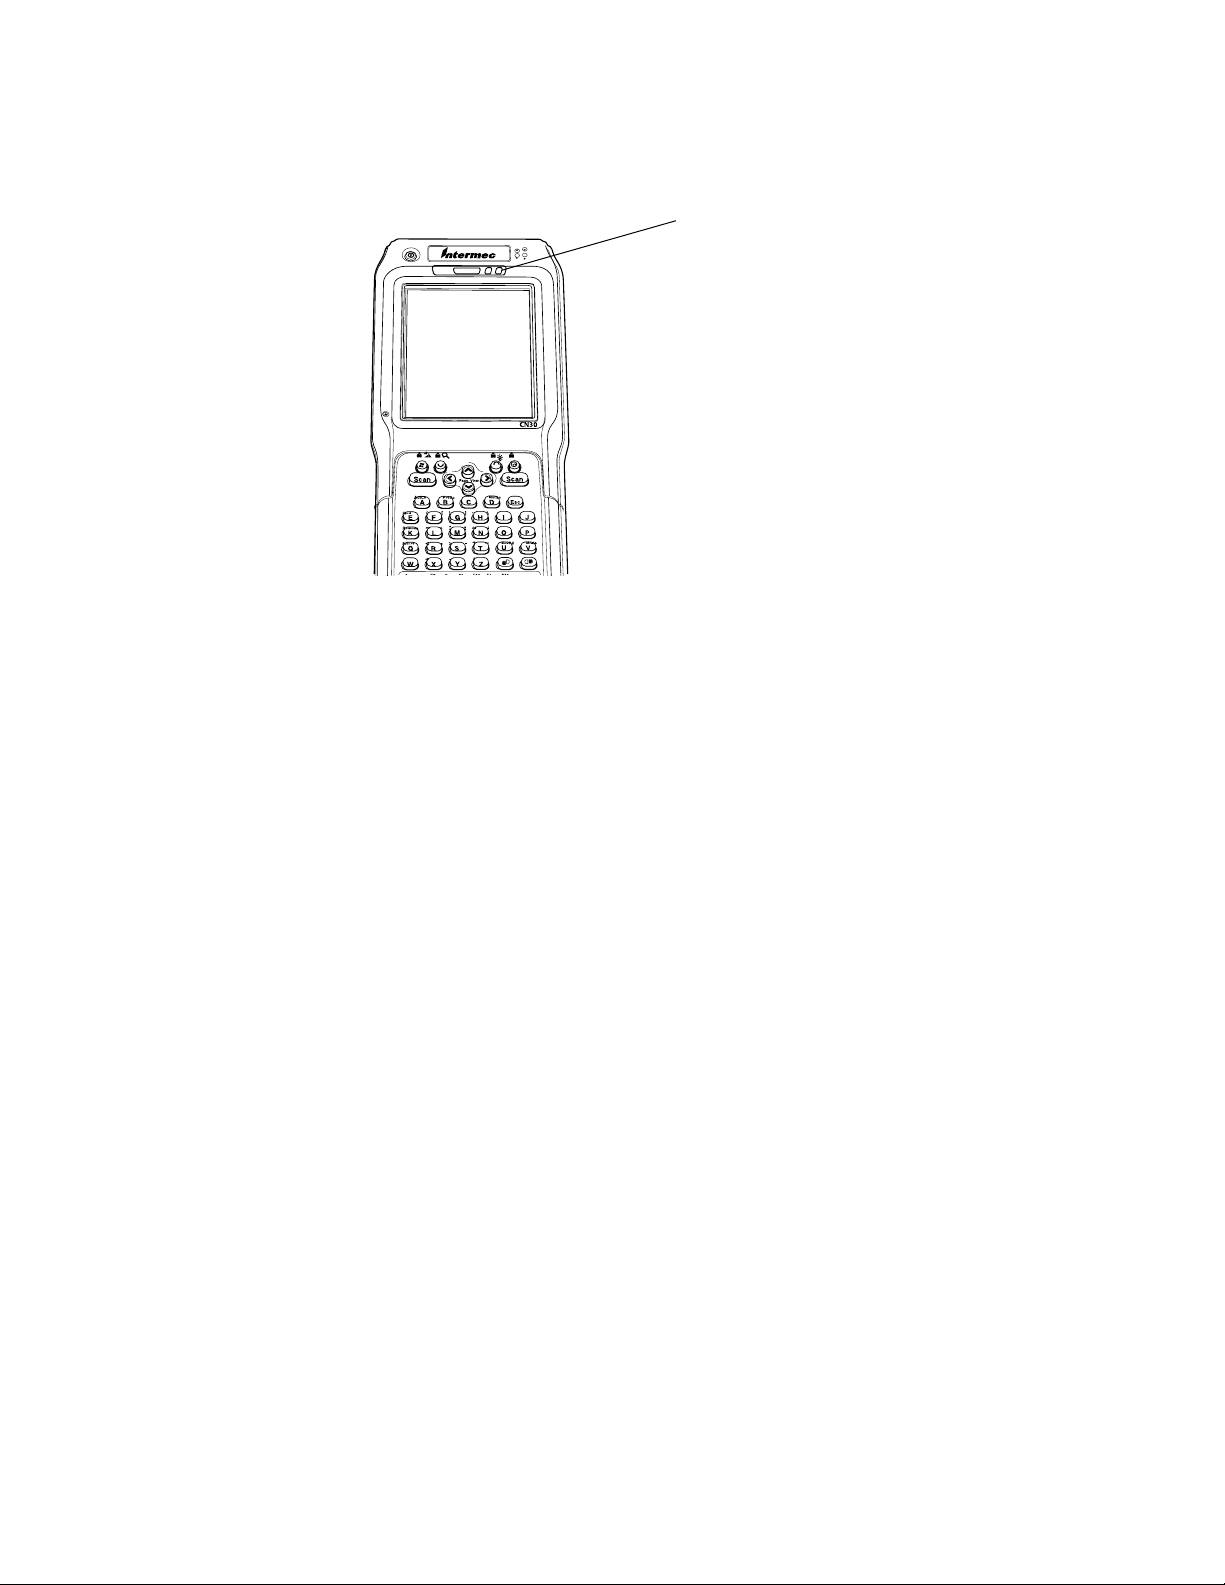
The Intermec CN30 is an ergonomically designed Mobile computer built
on the Microsoft® Windows® Mobile Version 5.0 operating system. It is a
lightweight, easy-to-use, reliable computer that runs client/server applications, terminal emulation applications, as well as browser-based applications.
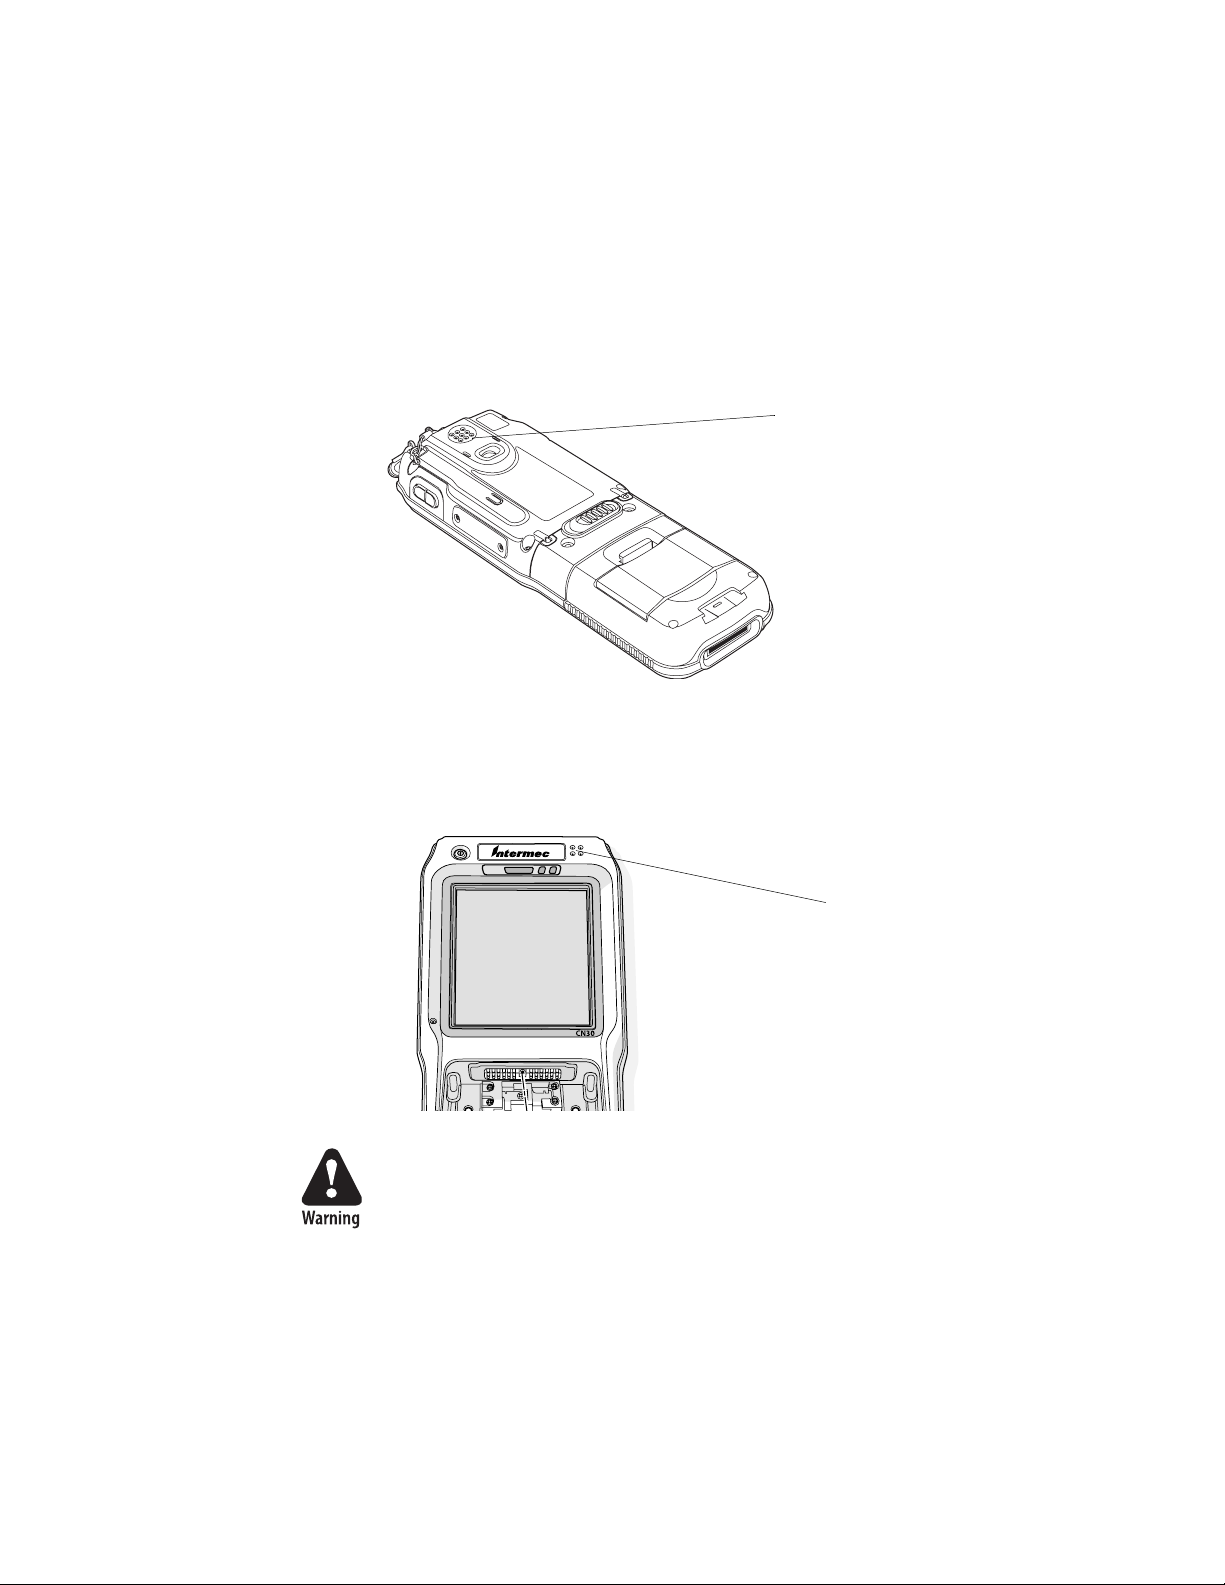
Intermec
Ready-to-work
Indicator
Battery Light
Scan Buttons
CN30 Computers with an IEEE 802.11b/g radio installed are Wi-Fir certified for interoperability with other 802.11b/g wireless LAN devices.
2 CN30 Mobile Computer User’s Manual
Audio
Speaker
Chapter 1 — Using the CN30 Mobile Computer
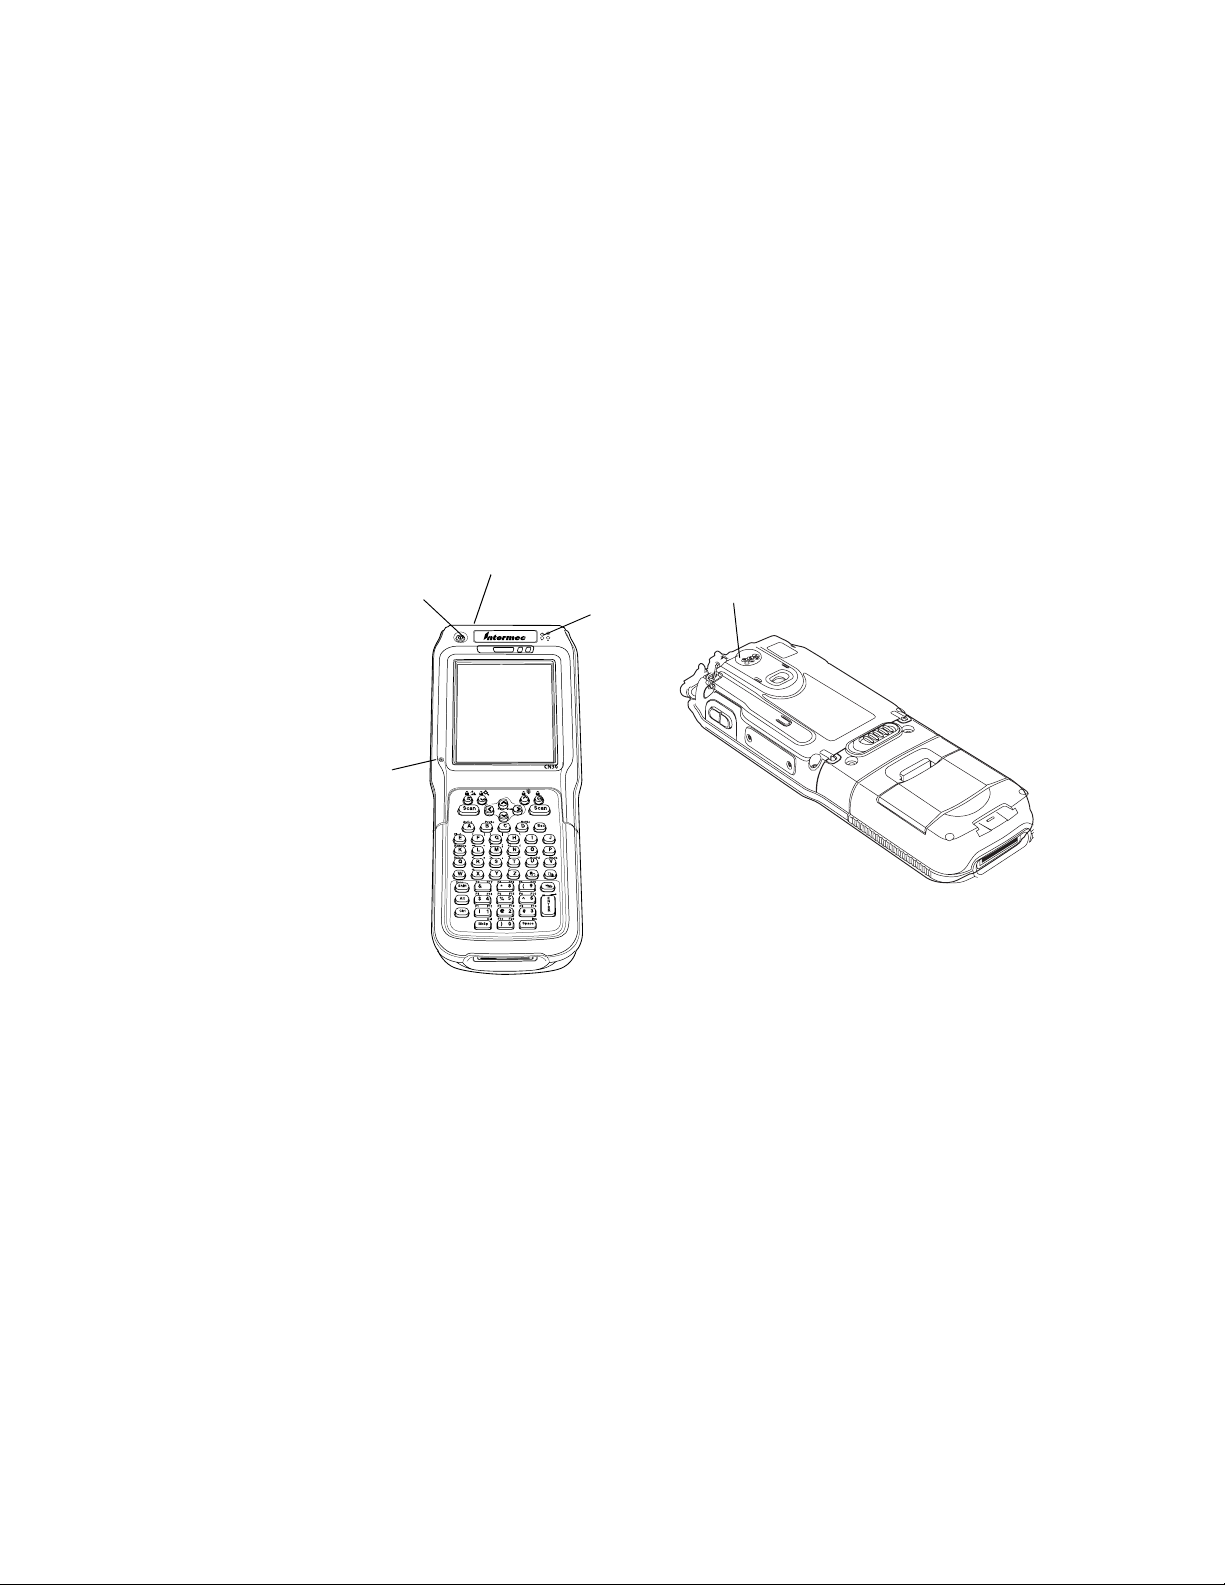
The audio system consists of two speakers, internal microphone and an
external headset jack.
The main speaker (on back) is capable of variable volume levels and is
located on the back of the computer. The external headset jack connects a
mobile phone style headset to your mobile computer for use in noisy environments. The jack is a 2.5 mm, three-conductor jack, with autosensing of
the headset jack insertion which disables the internal speaker and microphone. The external headset jack is located on the top of the mobile computer in front of the scan window.
Headset Jack
[I] Key
Front Speaker
Main Speaker
Microphone
7
The internal microphone provides support for voice communication and
speech recognition applications. The microphone is positioned on the computer for operation as a mobile phone when held close to the head.
CN30 Mobile Computer User’s Manual 3
Chapter 1 — Using the CN30 Mobile Computer
Using the Battery
The CN30 uses a lithium-ion battery as its main power source. You must
fully charge the main battery before you can use the CN30. When you
change the battery, a backup battery (super capacitor) maintains your
memory, data and real-time clock for at least 10 minutes.
The 14-key keypad module has a 3.7V 2400 MAh battery that is internal to
the module and is not user replaceable.
The 56-keypad module has a removable 3.7V 4800 MAh replaceable Lithium-Ion (LiIon) battery.
Removing the main battery when the backup battery low or critically low
icon displays in the status bar may cause your CN30 to cold boot and you
may lose data.
Attention: L’enlèvement de la batterie principale quand le bas de secours
de batterie ou les affichages en critique bas d’icône dans la barre de statut
peut causer votre CN30 à la botte froide et de vous peut perdre des données.
The lithium-ion battery pack that is used in this device may present a fire or
chemical burn hazard if it is mistreated. Do not disassemble it, heat it above
100°C (212°F) or incinerate it.
Avertissement: Le paquet de piles d’ions de lithium qui est utilisé dans cet
appareil peut presenter un risque feu ou un risque chimique de brûlure
s’il est maltraité. Il ne faut pas le désassembler, le réchauffer à une
température plus élevée que 100°C (212°F) ou l’incinérer.
Attention: Si la batterie n’est pas remplacée immédiatement, des données ou
applications importantes risquent d’être perdues
Dispose of used battery packs promptly. Keep away from children. Contact
your local Intermec sales representative for replacement batteries.
Several factors determine the life of your battery such as extreme temperatures, input devices, and your usage.
4 CN30 Mobile Computer User’s Manual

Charging and Installing the Battery
To charge the battery
Either insert the battery into the CN30 AC9 Quad charger or place the
CN30 with battery installed in the AD9 charge dock. For more information
on these accessories, see page 27 ‘Accessories for the CN30’.
The batteries fully charge in approximately 4 hours.
Note: If you do not plan to use the computer for several months, remove
the keypad module from the console and store it in the shipping box.
To install the battery
Insert the tabs on the bottom of the charged battery into the CN30 56Keyboard module and snap the battery into place.
Chapter 1 — Using the CN30 Mobile Computer
Maximizing Battery Life
There are several things that you can do to prolong the life of your fully
charged battery.
1 Verify that the backlight timeout is set to 15 seconds.
2 Verify that Power Management has an automatic shutoff time of 3
minutes.
Checking the Battery Status
The easiest way to tell the status of your battery is to look at the battery
icon in the status bar of your CN30.
CN30 Mobile Computer User’s Manual 5
Chapter 1 — Using the CN30 Mobile Computer
You can also check the battery status by looking at the Battery light on the
front of the CN30 or by using the battery diagnostics screen.
To view the status of this battery, tap Start > Settings > the System tab >
the Power icon > the Power tab to view the current status of both the main
battery and the backup battery. Tap ok to exit this information.
Battery Light
Flashes red on low
battery condition
Your computer contains an internal super capacitor, a temporary power
storage device, that protects data for up to ten minutes. This is to give you
time to replace the main battery pack before that data is lost. Be sure to put-
the computer in suspend mode before doing so.
The configuration and time are lost if:
• The battery discharges beyond this level.
• The battery is removed when the computer is not in suspend mode.
• A cold reset is performed on the computer.
6 CN30 Mobile Computer User’s Manual

Adjusting the Beeper
For information about setting volume levels for screen taps, ActiveSync
alert noises, etc., tap Start > Help.
Enabling the Beeper
1 Ta p Start > Settings > the Personal tab > the Sounds & Notifica-
2 Check for which features the CN30 Computer should enable
Chapter 1 — Using the CN30 Mobile Computer
tions icon, then tap the Sounds tab.
sounds, then tap ok to close.
3 Tap the Vol um e icon at the top of the screen, tap On, then move the
slider bar to your desired level.
CN30 Mobile Computer User’s Manual 7
Chapter 1 — Using the CN30 Mobile Computer
Select a Beeper Volume
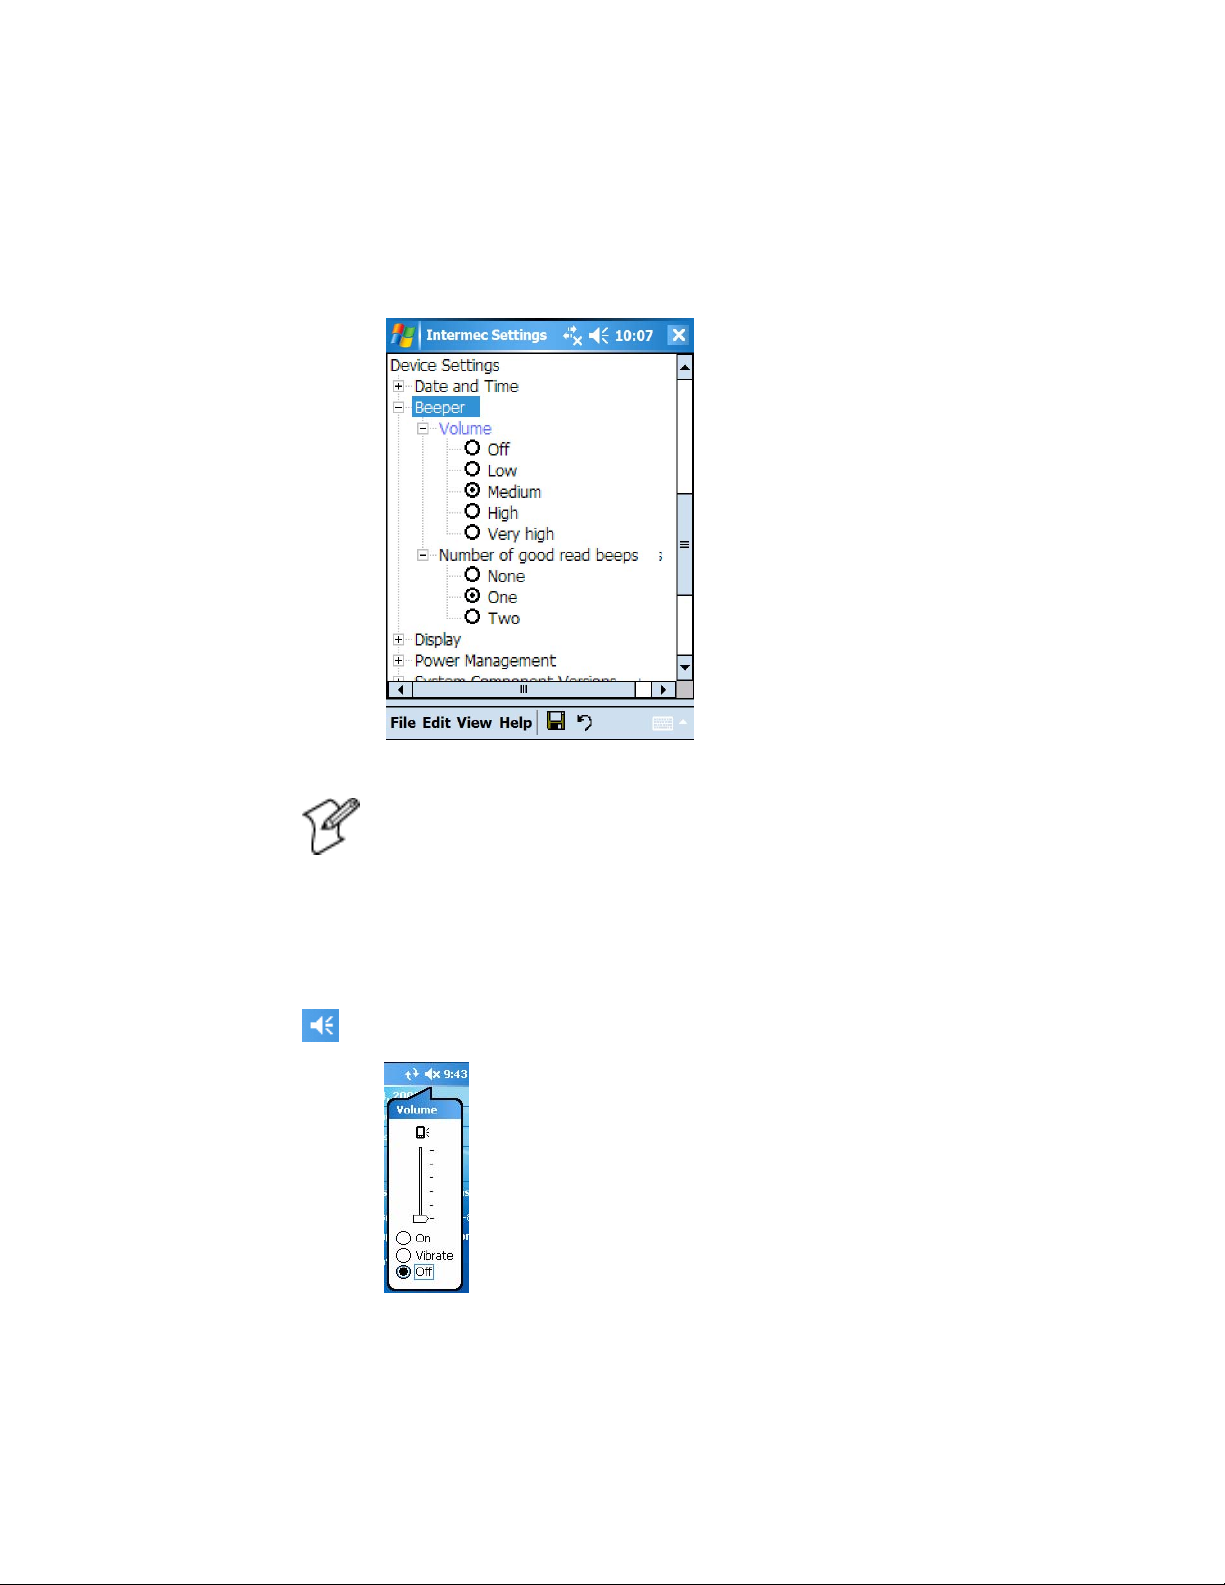
To select a beeper volume for the CN30 Mobile Computer, tap Start > Set-
tings > the System tab > the Intermec Settings icon. Tap the Device Set-
tings option, tap (+) to expand Beeper, then tap (+) to expand Vol u me .
Select an item, then close this option.
Disabling the Beeper
Note: Information about the settings you can configure with the Intermec
Settings control panel applet is described in the Intermec Computer Com-
mand Reference Manual (P/N: 073529). The online manual is available
from the Intermec web site at www.intermec.com.
To disable the beeper, tap the Vo lu m e icon at the top of the screen, either
drag the slider to the bottom, or tap Off.
8 CN30 Mobile Computer User’s Manual

Using the Keypad
Your CN30 has one of the following keypads:
TE 2000 Overlay
The CN30 supports TE 2000 VT100/220/320/340 and ANSI, TE 2000
5250, and TE 2000 3270. When you order the CN30 with a TE 2000
application, you must order the corresponding keypad overlay. Use the TE
2000 keypad overlays to enter the same keys that you can enter on a VT/
ANSI keyboard, an IBM 5250 keyboard, or an IBM 3270 keyboard.
Chapter 1 — Using the CN30 Mobile Computer
• 56-key full alphanumeric
• 14-key function
• 10-key numeric
You can order all versions of the CN30 56-keypad with an international
overlay. The international overlay supports English and many Western
European languages, such as French, German, Italian, Portuguese, and
Spanish. You enter all of the characters and functions printed above the
keys just like you would on a standard keypad.
Like the standard CN30 keypad overlays, the TE 2000 keypad overlays let
you enter all the characters printed on or above the keys. The terminal
emulation keypads also come with the same color-coded keys that are on
the standard overlay.
For more help using TE 2000 terminal emulation, see the appropriate TE
2000 programmer’s guide.
CN30 Mobile Computer User’s Manual 9
Chapter 1 — Using the CN30 Mobile Computer
The 56-Key Keypad
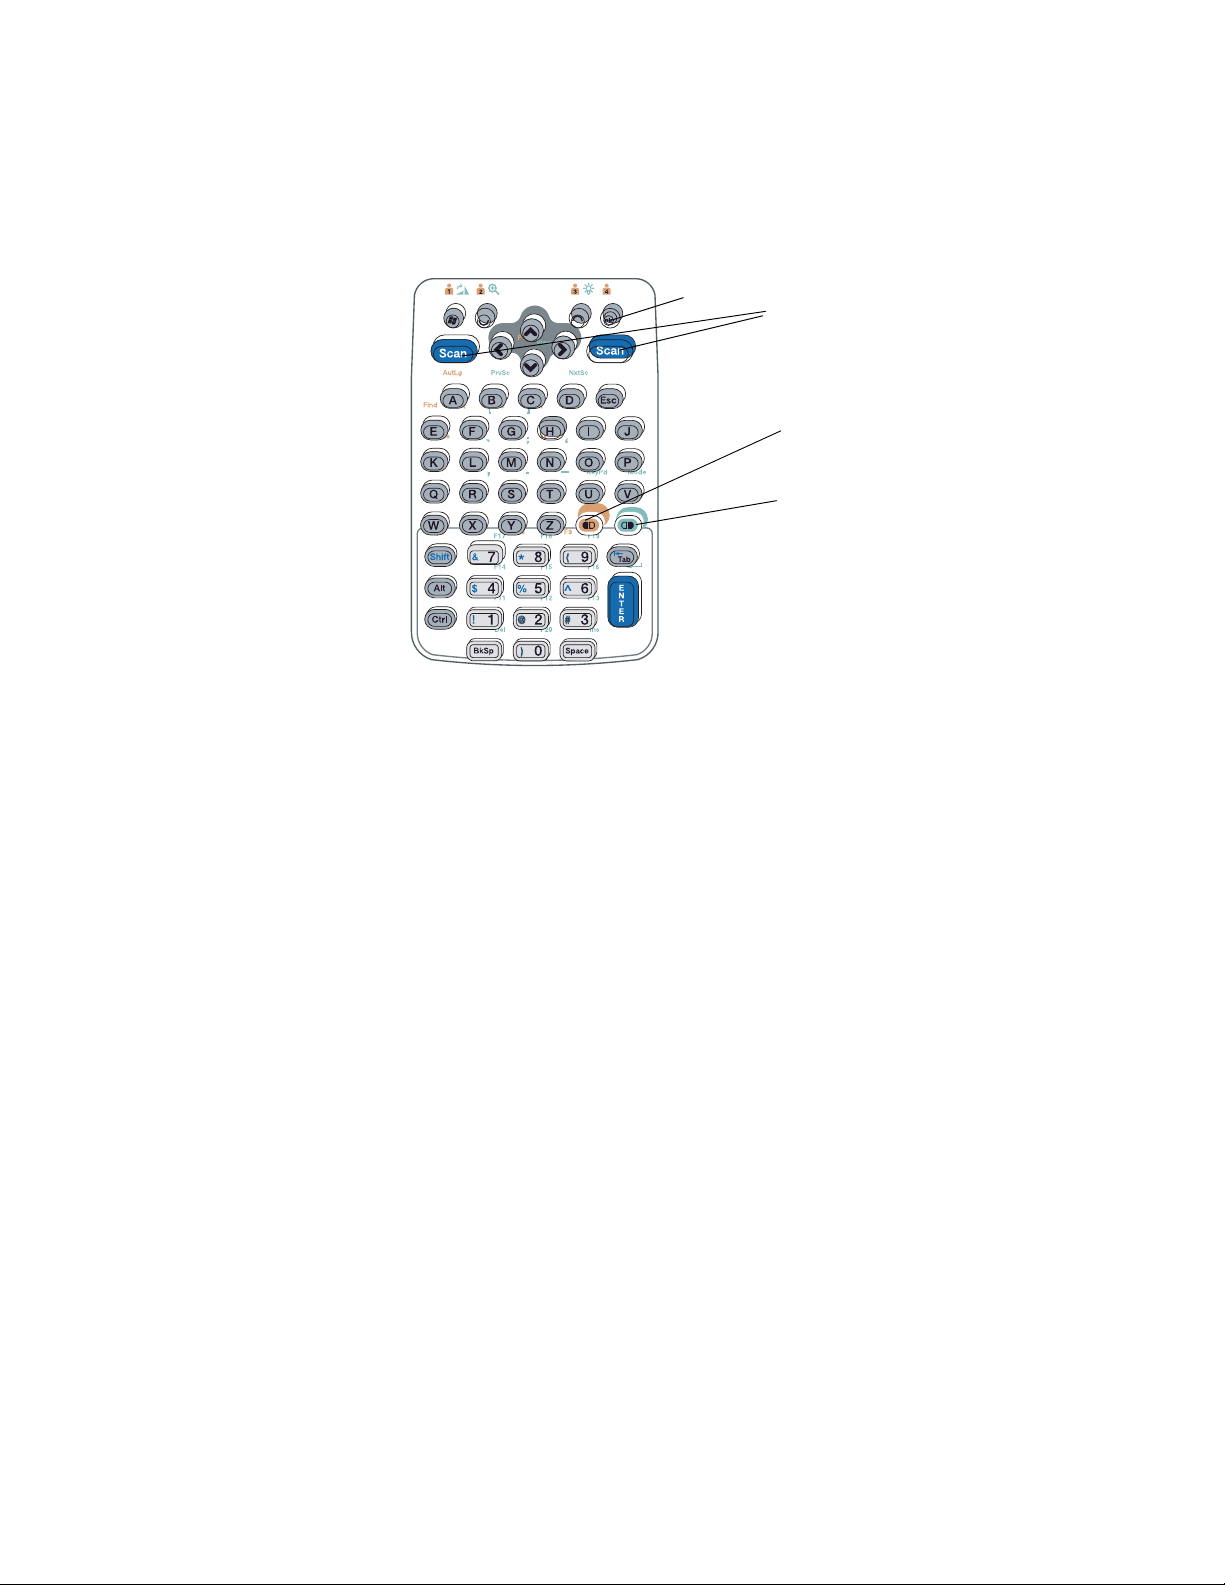
Using the Color-Coded Keys
Each keypad available for the CN30 provides color-coded keys to let you
access additional characters, symbols, and functions printed on the keypad
overlay. Once you understand how to use the color-coded keys and key
sequences, you will know how to access all of the additional features printed
on the keypad overlay. There are two color-coded modifier keys on the
CN30: the orange key and the green key. You press and release the first key,
then press and release the second key to access the color-coded character or
function printed above a key.
Backlight Key
Scan Buttons
Orange Key
Green Key
Capitalizing All Characters
To type all alphabetic characters as uppercase letters, you can enable the
Caps Lock feature on the CN30 keypad. To enable Caps Lock on the 56key keypad, press the orange key. Press the same key sequence to disable the
Caps Lock.
10 CN30 Mobile Computer User’s Manual

Using the 14-Key Keypad Module
Chapter 1 — Using the CN30 Mobile Computer
Backlight key
Scan buttons
Orange key
Green key
The 14-key keypad module provides basic navigation through the Windows Mobile Version 5.0 screens.
To rotate the display
On the 14-key or 56-key keypad, press the Green key. Press the Windows
Logo key. Press the key again to return to portrait (default) mode.
To enable the Backlight
On the 14-key or 56-key keypad, press the Green key. Press the backlight
key.
Assigning Functions to Keys
Go to Settings >the Personal tab > Buttons to assign a program to a “soft
key”.
CN30 Mobile Computer User’s Manual 11

Chapter 1 — Using the CN30 Mobile Computer
Using the 10-Key Keypad Module
Backlight key
Scan buttons
Orange key
Green key
The 10-key keypad module provides basic navigation through the Windows Mobile Version 5.0 screens.
To rotate the display
On the 10-key keypad, press the Green key. Press the Windows Logo key.
Press the key again to return to portrait (default) mode.
To enable the Backlight
On the 10-key keypad, press the Green key. Press the backlight key.
Assigning Functions to Keys
Go to Settings >the Personal tab > Buttons to assign a program to a “soft
key”.
12 CN30 Mobile Computer User’s Manual
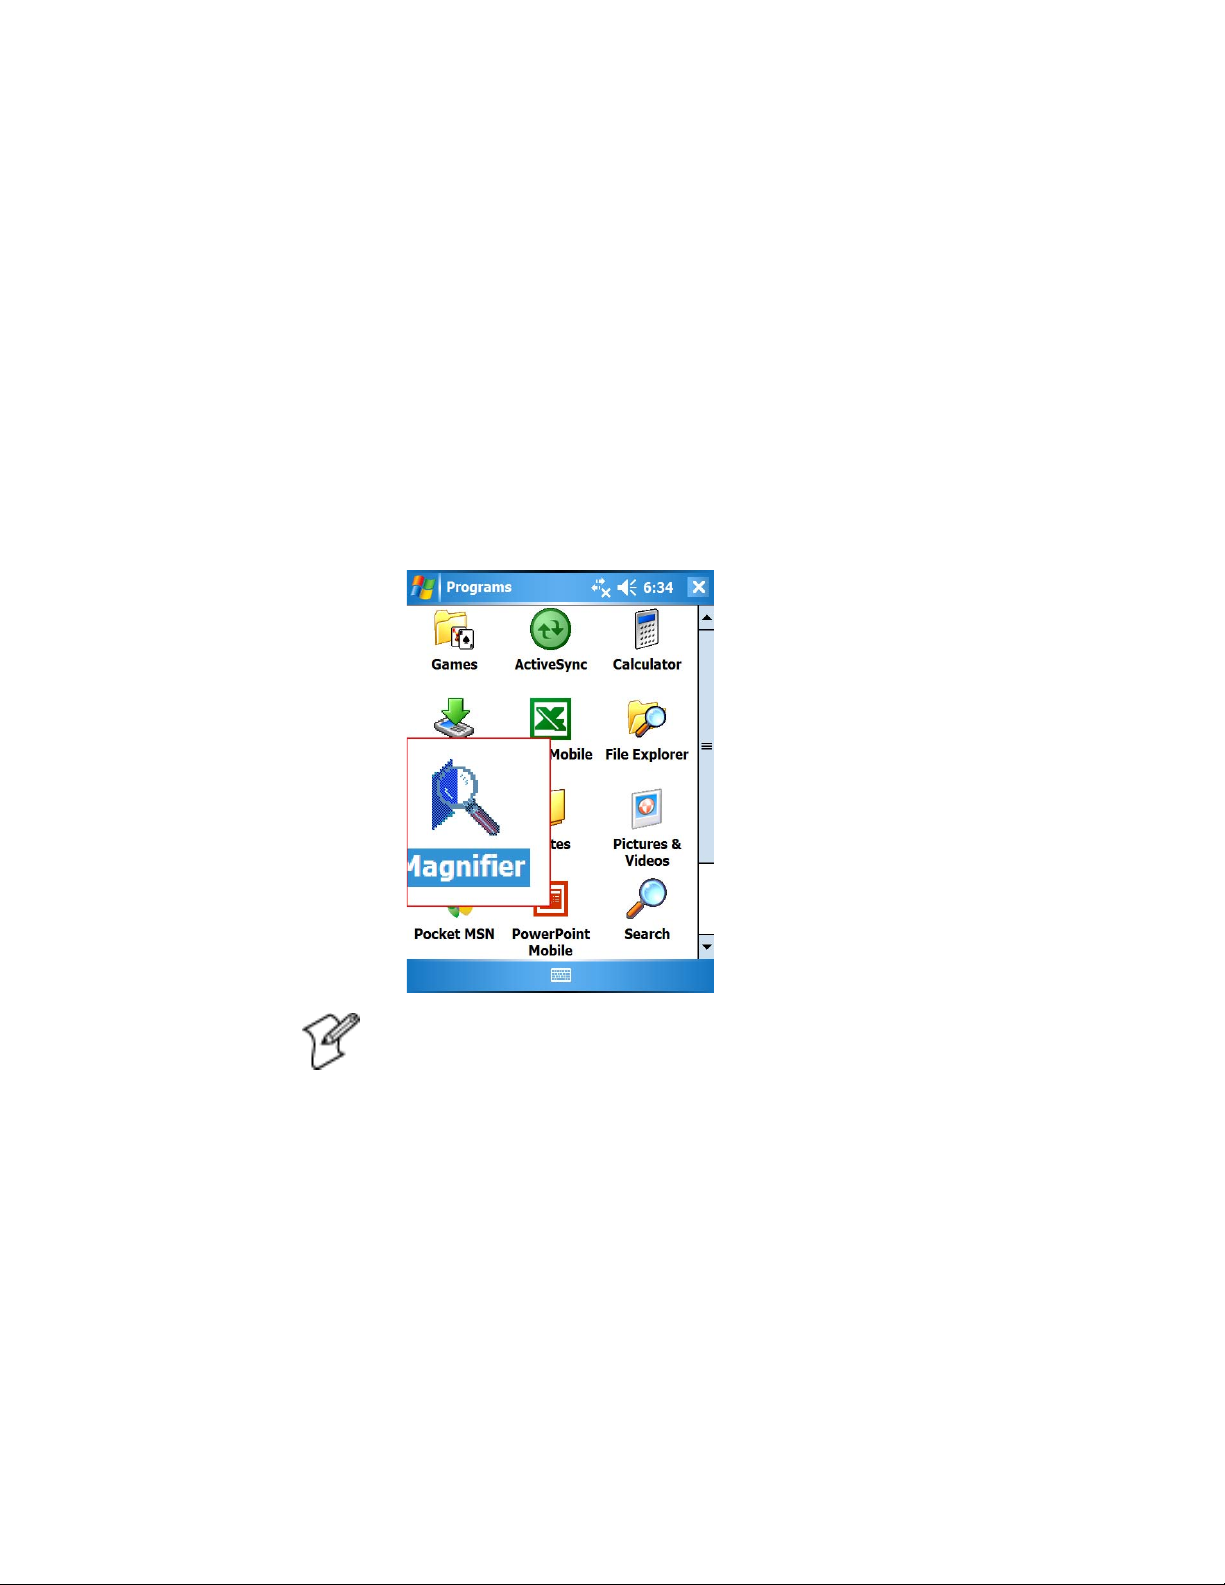
Magnifier Application
Chapter 1 — Using the CN30 Mobile Computer
The Magnifier application allows you to view an enlarged portion of the
CN30 Computer screen by tapping and holding the stylus. The enlarged
window can be moved to any location on the screen.
To Start Magnifier with the Keypad
• On the 14-key or 56-key keypad, press the Orange key. Press the Magnifier key.
• Tap and hold the stylus to move the displayed area of the screen. For
more help, see the Magnifier help under Windows help.window can be
moved to any location on the screen.
To Start Magnifier with the Stylus
• From the Start menu, go to Programs and tap Magnifier.
Note: The Magnifier window is not an active window.
CN30 Mobile Computer User’s Manual 13

Chapter 1 — Using the CN30 Mobile Computer
Using the Power (I) Key
When you press the (I) key to turn off the CN30, you actually put the
CN30 in Suspend mode. In Suspend mode, the CN30 continues to supply
power to all memory, but turns off power to most hardware. This powersaving feature is designed to prolong battery life.
When you press the (I) key to turn the CN30 back on, your computer
resumes where it was when you turned it off.
If you are using WPA or 802.1x security, the computer may need to reauthenticate before it starts your application.
If the Battery light flashes and your CN30 does not resume after pressing
(I), your battery may be too low to supply power. Replace the battery. If
replacing the battery does not solve the problem, see “Resetting your CN30
Mobile Computer” on page 16.
14 CN30 Mobile Computer User’s Manual
Using the Screen
Chapter 1 — Using the CN30 Mobile Computer
The CN30 Computer has a 3.7” diagonal 640x480 pixel (VGA) transflective TFT-LCD 64K color display. The screen supports Unicode characters,
user programmable fonts and bitmap graphics. The Start screen has two
distinct areas; the desktop and the taskbar. The desktop displays shortcuts
to some of the applications installed on the CN30 Computer. The taskbar
displays the Start menu, the time, the onscreen keyboard icon and the desktop icon.
Desktop
Tas kb ar
Your CN30 Computer has a stylus for selecting items and entering information. Use the stylus in place of a mouse.
Tap Touch the screen once with the stylus to select options, close
Double Tap Touch the screen twice with the stylus to launch applications.
Drag Hold the stylus on the screen and drag across the screen to
Tap an d h ol d Tap and hold the stylus on an icon to see a list of actions avail-
applications, or launch menus from the taskbar
select text and images.
able for the item. On the pop-up menu that appears, tap the
action you want to perform.
CN30 Mobile Computer User’s Manual 15
Chapter 1 — Using the CN30 Mobile Computer
Resetting Your CN30 Mobile Computer
In some cases where the CN30 Mobile Computer completely stops
responding, it may be necessary to perform a cold reset. Because cold resetting may result in data loss, it is not recommended unless all other recovery
methods have failed.
Performing a Warm-Boot on the CN30 Computer
If your charged CN30 Computer does not resume after pressing (I), or if
the computer or an application is locked up, you may need to do a warmboot.
• Press and hold (I) for five to ten seconds, until the screen goes dark.
The CN30 Computer tells you it is performing a warm-boot, then comes
back up to the start screen.
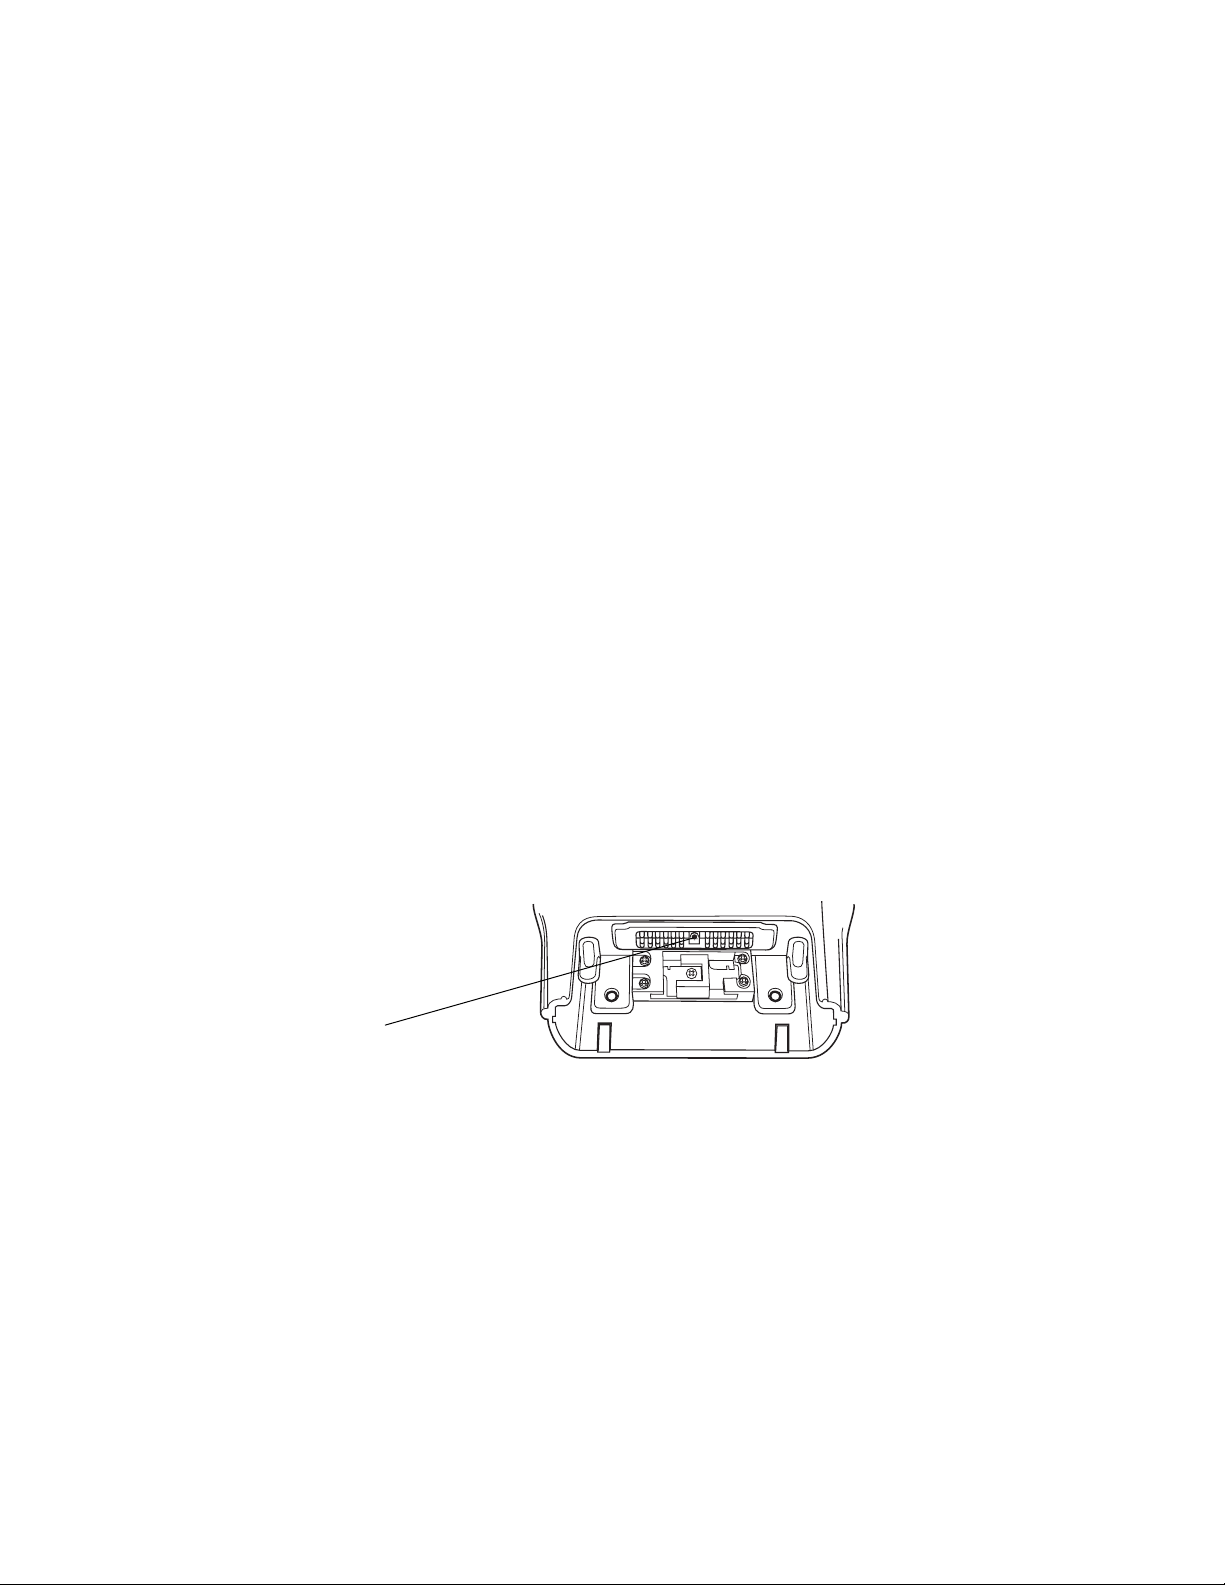
Performing a Cold-Boot on the CN30 Computer
If the CN30 Computer or an application is locked up and does not respond
to a warm-boot, do the following.
1 Release the lower clip of the hand strap and slide the latch to the left.
2 Remove the keypad module.
3 Press the Reset button located inside the console module.
4 Reinstall the keypad module.
Reset Button
CN30 Console
16 CN30 Mobile Computer User’s Manual
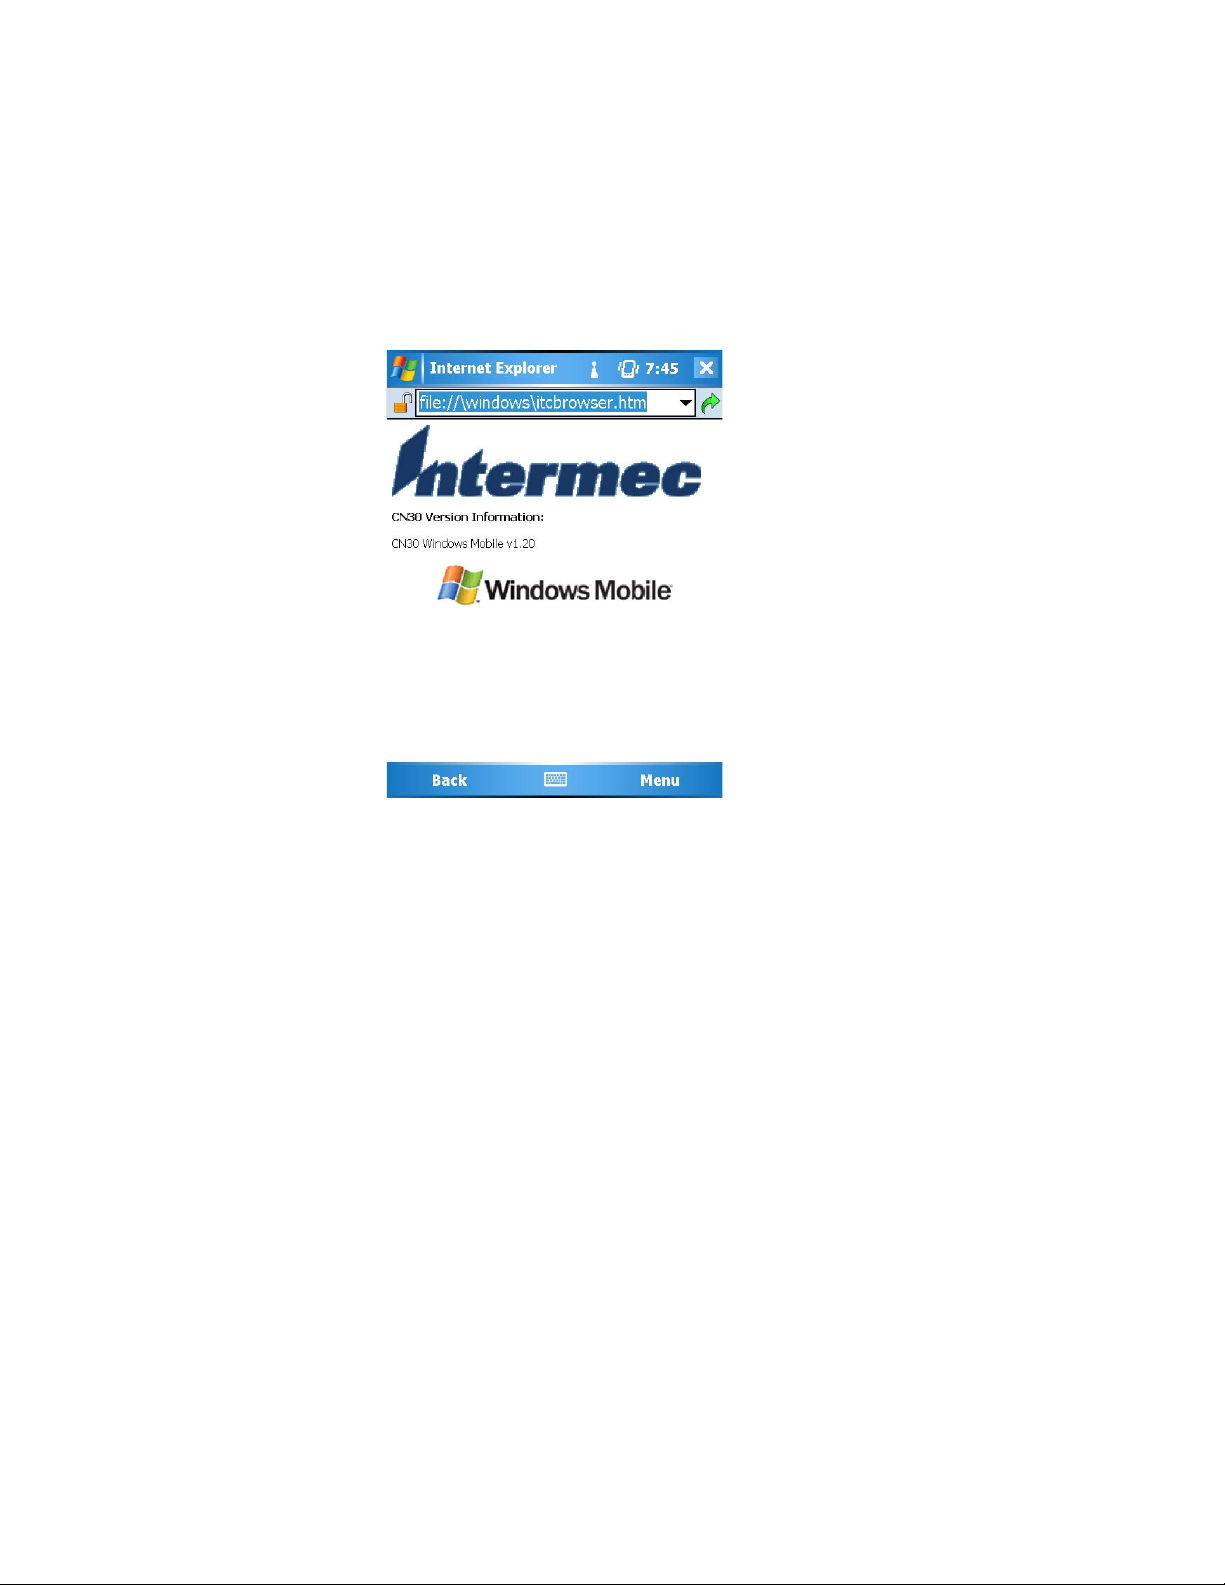
Software Build Version
To check to see if your CN30 Mobile Computer has the latest software
build, select Start > Internet Explorer > the Intermec logo. The latest software build version is displayed beneath the Version Information title. This
information is useful should you need product support assistance.
Chapter 1 — Using the CN30 Mobile Computer
CN30 Mobile Computer User’s Manual 17
Chapter 1 — Using the CN30 Mobile Computer
Using the Speakers
The high-volume speaker on the back of the CN30 Computer, is capable of
variable volume levels. This speaker is capable of reproducing voice and
WAV files, and is used primarily to convey status tones. There is a separate
volume control in the toolbar at the top of the display. You can also control
the volume using the Intermec Settings applet. Information on this control
and applet are on the next page.
High-volume speaker on center, back
of CN30 Computer
The front speaker is a full-voice range speaker of cell-phone quality with a
separate volume control. See the next page for information about this volume control.
Front Speaker
Warning: Do not place the speaker next to your ear when the speaker
volume is set to “Loud” (maximum), or you may damage your hearing.
18 CN30 Mobile Computer User’s Manual

Chapter 1 — Using the CN30 Mobile Computer
Enabling the Speaker and Adjusting the Volume
To enable the speaker and adjust the volume:
1 Tap the Vol um e icon at the top of the screen.
2 Ta p On, then move the system volume slider to the desired volume level.
Up is louder, down is quieter.
3 To mute system sounds, tap Off or move the slider to the bottom.
You can also enable the speaker and adjust the volume with the Intermec
Settings applet. Tap Start > Settings > the System tab > the Intermec Set-
tings icon, then tap (+) to expand Device Settings > Beeper > Vol ume . Tap
any of the options other than “Off” to enable and adjust. To disable the
speaker, tap the Off option.
Using the Status Lights
The status lights on the CN30 Computer turn on to indicate the status of
the battery or a successful decode of a bar code.
The battery lights and the battery screen icon work with each other to alert
you to the status of your battery. If the battery light (to the right of the
Scan button) comes on, check the status bar to see which battery icon
appears on it. The battery may be critically low and need replacing.
The Good Read light (green) above the display indicates when the CN30
Computer successfully decodes a bar code.
CN30 Mobile Computer User’s Manual 19

Chapter 1 — Using the CN30 Mobile Computer
Scanning Bar Codes
Use the scanner to scan and enter bar code data. The type of scanner you
are using and the type of bar code you are decoding determines the way you
scan the bar code. The CN30 Computer supports the scanning of 2D
images. Plus, if you are using an integrated handle or a tethered scanner, the
way you scan bar codes is different.When you unpack the CN30, these bar
code symbologies are enabled:
• Code 39
•UPC/EAN
Good Scan Light
Battery Light
Flashes red on low
battery condition
• PDF417 (if supported)
If you are using bar code labels that are encoded in a different symbology,
you need to enable the symbology on the computer.
Use the Intermec Settings to enable and disable symbologies for your scanner.
20 CN30 Mobile Computer User’s Manual

Scanning with the 2D Area Imager
The CN30 Computer has the 2D area imager, which provides the ability to
scan 2D bar code symbologies and supports omni-directional (360°) scanning where you can position the CN30 Computer in any orientation to
scan a bar code label. Using the 2D area imager is very similar to taking a
picture with a digital camera.
1 Press (I) to turn on the CN30 Computer.
2 Point the scanner window at the bar code label and hold the CN30 Computer steady a few inches from the label.
3 Press the Scan button on the keypad or pull the trigger on a handle and
center the red aiming beam over the bar code label. The aiming beam is
smaller when the imager is closer to the bar code and larger when it is further away.
When the CN30 Computer successfully reads a bar code label, you hear a
high beep and the green Good Read light turns on briefly.
4 Release the Scan button.
Chapter 1 — Using the CN30 Mobile Computer
If you have problems scanning a bar code with the 2D imager, try following
some of these tips to improve the performance of your imager:
• Set Lighting mode to Illum LED Priority.
• Keep your hand as steady as possible while scanning a label.
• Make sure that Aimer LED Duration is set to zero.
• Position the imager as close to the bar code as possible while still being
able to capture the entire bar code.
• Enable only the bar codes that you need to use every day.
Use Intermec Settings to configure these imager commands. For help using
Intermec Settings, see “ Configuring the CN30 Computer With Intermec
Settings” on page 102. For more information on the commands and their
parameters, see the Intermec Computer Command Reference Manual (P/N
073529) via the Intermec web site. See “Before You Begin” for information
how to download this .CHM file.
CN30 Mobile Computer User’s Manual 21

Chapter 1 — Using the CN30 Mobile Computer
StorageMedia
Note: MultiMediaCards (MMCs) are not supported in CN30 Mobile
Computers.
The CN30 Mobile Computer supports Secure Digital storage cards. To
access the card slot, locate the access door at the side of the CN30 Mobile
Computer, remove its two screws, then remove the door. See the CN30
Mobile Computer Quick Start Guide (P/N: 962-054-125) for more information.
CompactFlash Cards
On CN30 Mobile Computers, the CompactFlash card slot accepts only
the 802.11b or 802.11b/g radio, which is factory-installed and cannot be
removed.
Secure Digital Cards
The SD (Secure Digital) card slot accepts storage cards only.
SD Card Slot
Access Door
22 CN30 Mobile Computer User’s Manual

Using the SD Card
You can use a Secure Digital (SD) card to increase file storage and install
software. The CN30 currently supports SanDisk SD cards only. The SD
card slot is located on the side of the CN30.
To insert an SD card
Chapter 1 — Using the CN30 Mobile Computer
1 Press (I) to turn off the CN30.
2 Remove the two screws on the SD card slot door and remove the door.
3 Gently insert the SD card into the CN30 with the printed side facing
the keypad and screen side of the CN30.
4 Push the card into the slot until it latches in place and the steel card
retainer covers the end of the SD card.
5 Replace the door, making sure to insert the door catch into the slot
above the steel card retainer.
6 Replace the two screws.
7 Press (I) to turn on the CN30.
To remove the SD card
1 Press (I) to turn off the CN30.
2 Remove the two screws on the SD card slot door and remove the door.
3 Push in on the SD card until you hear it unlatch. The card should eject
far enough that you can easily remove it from the CN30. If the card does
not eject easily, you can use the door catch to remove it by turning the
door upside down and using the catch to pull out the SD card.
4 Remove the SD card from the CN30.
CN30 Mobile Computer User’s Manual 23

Chapter 1 — Using the CN30 Mobile Computer
Physical and Environmental Specifications
Use this section to locate technical information about the CN30 and its
available features and options.
Hardware
Microprocessor: Intel X Scale PXA272
Application Processor: 520 MHz RAM
Memory: 64 or 128 MB
Flash ROM: 64 MB
Persistent Storage: 128 MB, provides onboard non-volatile storage of applications and data
Removable Storage: SDIO Card Slot, user-accessible
Keypad: 14-key with large numeric keys or 56-key with full alphanumeric
keys; both with LED backlighting
Operating System
Microsoft Windows Mobile Version 5.0
Software
Development Environments:
Visual Studio 2003
Embedded Visual C++ 4.0,
.NET Compact Framework (VB. NET, C#)
Intermec Developer’s Library:Integrates with leading development environments; supports device-specific features and bar code scanning
Browser support: Internet Explorer 6-compatible
Bar Code Scanning
Options of Integrated 2D Area Imager or 1D & PDF417 Linear Imager
Supports all popular 1D and 2D symbologies including Australian Post,
British Post, Codabar, Codablock A, Codablock F, Code 11, Code 2 of 5,
Code 39, Code 93, Code 93i, Code 128, Datamatrix, Dutch Post, ISBT
128, Interleaved 2 of 5, Macro 2 of 5, Matrix 2 of 5, Maxicode, Micro
PDF417, MSI, PDF417, Planet, Plessey, Postnet, QR Code, RSS 14, RSS
Expanded, RSS Limited, Telepen, TLC39, UCC-EAN Composite Code,
UPC/EAN
Standard Communications
USB Host and Client, Bluetooth Class 1, V2.0 + EDR, RS232 Serial,
24 CN30 Mobile Computer User’s Manual

Physical Dimensions
Chapter 1 — Using the CN30 Mobile Computer
Wireless LAN
Standards Compliant: IEEE 802.11g (2.4 GHz - OFDM) IEEE 802.11b
(2.4 GHz - DSSS)
Data Rates: Up to 54 Mbps for 802.11g
Up to 11 Mbps for 802.11b
Radio Power Output: 50 m W
Security: WEP, WPA, 802.11i, 802.1x (EAP-TLS, TTLS, LEAP, PEAP)
Certifications: Wi-Fi, WPA2, Cisco Compatible Extensions V1
Device Management
SmartSystems™ Support: Centralized remote support capability;
configures, updates, and maintains single devices or entire populations;
real-time or batch, wired or wireless.
Based on Wavelink Avalanche™ with Intermec value add utilities.
Length: 24.1 cm (9.5 in) with 56-Key Module
Length:16.5 cm (6.5 in) with 14-Key Module
Width: 8.9 cm (3.5 in)
Depth: 3.3 cm (1.3 in)
Weight: 538-595g (19-21oz) with 56-Key Module
Weight: 340.1-396.9g (12-14oz) with 14-Key Module
CN30 Mobile Computer User’s Manual 25

Chapter 1 — Using the CN30 Mobile Computer
Power Specifications
Note: Specifications will vary based on system configuration
Operating: Rechargeable 2400 or 4800 mAh lithium-ion battery
Backup: System supplies 10 minutes bridge time while replacing the battery
or keyboard module
Electrical Specifications
Model: CN30
Electrical rating: 3.7-5VDC, 2A
Temperature and Humidity Specifications
Operating temperature:-10°C to 50°C (-14°F to 122°F)
Operating humidity:10 to 95% non–condensing
Storage temperature:–20°C to 70°C (–4°F to 158°F)
Storage humidity:0 to 95% humidity, non–condensing
Screen Specifications
Transflective TFT; VGA Color with touch panel; 640x480 pixels; 9.7 cm
(3.7 in) diagonal active area; 5-level LED backlight control with high and
low settings
Regulatory Approvals
UL and cUL Listed, UL 60950 and UL 1604 and CSA 22.2 No. 157, FCC
Part 15, TUV, CE mark
26 CN30 Mobile Computer User’s Manual

Accessories for the CN30 Computer
You can use these accessories (sold and ordered separately) with the CN30
Computer. To order accessories, contact your local Intermec representative.
CN30 Quad Charger
Use the Quad Battery Charger to charge up to four batteries or modules at
the same time, in any combination.
CN30 Charge Dock
Use the CN30 Charge Dock to hold a CN30 Computer with its battery
installed. The charge dock charges a battery, or keypad module, provides
power to the CN30 Computer, provides a USB and serial port for the
docked CN30 Computer.
CN30 Belt Clip
Use belt clip to carry your CN30 Computer while not using it.
CN30 Handstrap
The removable and adjustable handstrap make it easy for you to grip and
use the CN30 Computer without hand fatigue.
Chapter 1 — Using the CN30 Mobile Computer
CN30 Scan Handle
Use the scan handle to comfortably balance the CN30 while scanning bar
codes.
CN30 Mobile Computer User’s Manual 27

Chapter 1 — Using the CN30 Mobile Computer
28 CN30 Mobile Computer User’s Manual

Windows Mobile
2
This chapter introduces Microsoft Windows Mobile 5.0 for Pocket PC.
While using your CN30 Computer, keep these key points in mind:
•Tap Start on the navigation bar, located at the top of the screen, to
quickly move to programs, files, and settings. Use the command bar at
the bottom of the screen to perform tasks in programs. The command
bar includes menus, icons, and the onscreen keyboard.
• Tap and hold an item to see a pop-up menu containing a list of actions
you can perform. Pop-up menus give you quick and easy access to the
most common actions.
Below is a list of Windows Mobile components described in this chapter.
Ta p Start > Help, then select a topic on your CN30 Computer to find
additional information on Windows Mobile components.
Windows Mobile 5.0 Components
Microsoft ActiveSync (page 47)
Microsoft Pocket Outlook (page 48)
Word Mobile (page 71)
Excel Mobile (page 75)
PowerPoint Mobile (page 78)
Windows Media Player for Windows Mobile (page 80)
Using Internet Explorer Mobile (page 83)
CN30 Mobile Computer User’s Manual 29

Chapter 2 — Windows Mobile Version 5.0
Software Builds
Do the following to determine which Intermec build of Windows Mobile
5.0 is on your unit.
1 Select Start > Internet Explorer > the following Intermec logo.
2 Note the information beneath the CN30 Version Information title.
3 Tap the Close icon in the top right corner to exit the Internet Explorer.
Where to Find Information
This chapter describes your CN30 Computer hardware, provides an overview of the programs on your CN30 Computer, and explains how to connect your CN30 Computer to a desktop, a network, or the Internet. For
instructions on setting up your CN30 Computer and installing ActiveSync,
see the Quick Start Guide. The following is a guide to more information to
assist you use your CN30 Computer.
For information on: See this source:
Programs on your mobile computer. This chapter and mobile computer Help. To view Help, tap
Start > Help, then select a topic.
Additional programs that can be installed on the
mobile computer.
Connecting to and synchronizing with a desktop. The Quick Start Guide or ActiveSync Help on your desktop.
Last-minute updates and detailed technical information.
The Windows Mobile Companion CD.
To view Help, click Help > Microsoft ActiveSync Help.
The Read Me files, located in the Microsoft ActiveSync folder
on the desktop and on the Windows Mobile Companion CD.
Up-to-date information on your Windows Mobile. www.microsoft.com/windowsmobile/resources/communities/
default.mspx
30 CN30 Computer Mobile User’s Manual

Basic Skills
Chapter 2 — Windows Mobile Version 5.0
Windows Mobile and many of the technologies supported by the CN30
Computer are not from Intermec Technologies. Many of the utilities and
features on a Windows Mobile device come directly from Microsoft without any modification from Intermec Technologies. There may be certain
Microsoft-specific issues that Intermec Technologies would not be able to
support, so contact our front-line support personnel to determine the best
source of assistance.
Use these URLs for additional information about Microsoft Windows
Mobile (Pocket PC):
• msdn.microsoft.com/support/
• support.microsoft.com/
• news.microsoft.com (a free support option)
Learning to use your CN30 Computer is easy. This section describes the
basic concepts of using and customizing your CN30 Computer.
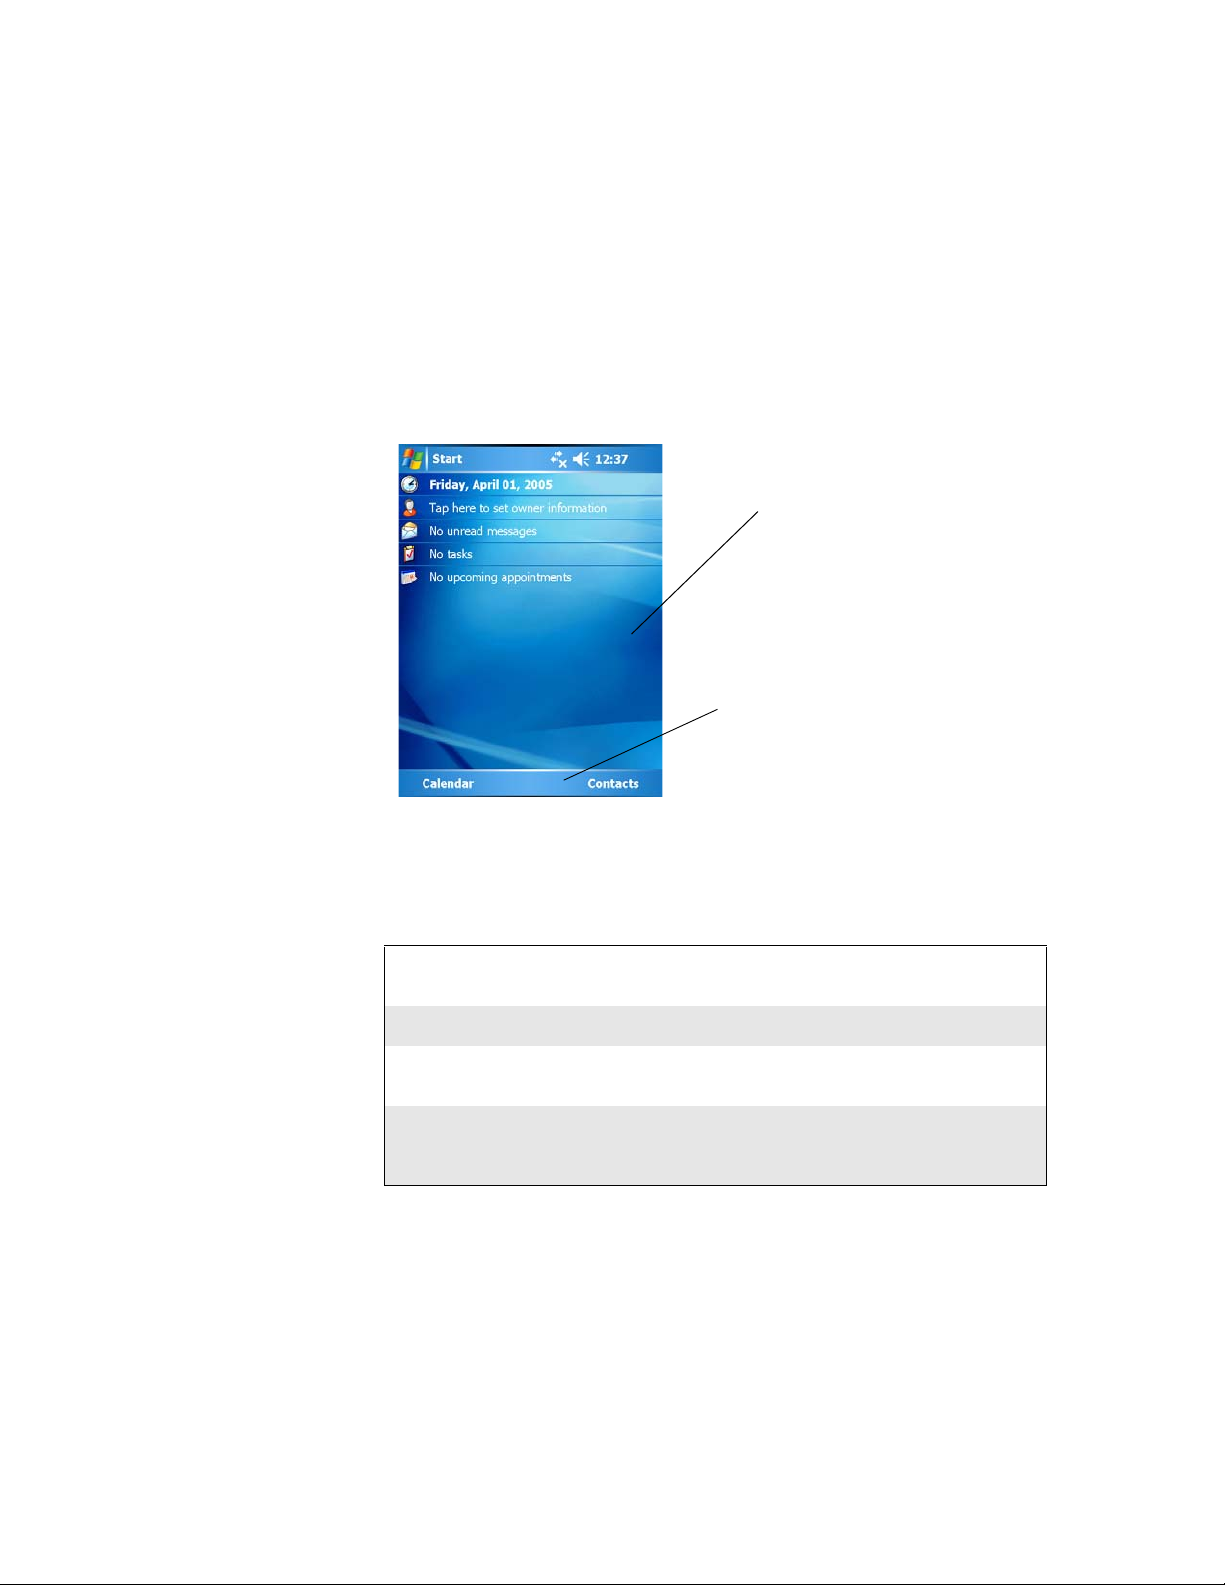
Today Screen
When you turn on your CN30 Computer for the first time each day (or
after four hours of inactivity), you see the To d a y screen. You can also display
it by tapping the Start flag at the top left of your display and then Tod a y.
On the Today screen, you can see important information for the day.
Tap to start a program Tap and hold to change time format
Tap to change date and time
Tap to change owner information
Tap to review your email
Your day at a glance. Tap to open an associated
program
To customize what is displayed on the Today screen, including the background image, tap Start > Settings > the Personal tab > the To d a y icon.
Status icons display information such as low batteries or when the CN30
Computer is connected to a desktop or to the Internet. You can tap an icon
to open the associated setting or program.
CN30 Mobile Computer User’s Manual 31

Chapter 2 — Windows Mobile Version 5.0
Programs
You can switch from one program to another by selecting it from the Start
menu. (You can customize which programs you see on this menu. For
information, see “Adjusting Settings” on page 43.) To access some programs, tap Start > Programs, and then the program name.
You can also switch to some programs by pressing a program icon. Your
CN30 Computer has one or more program icons located on the front or
side of the computer. The icons on the icons identify the programs to
which they switch.
Note: Some programs have abbreviated labels for check boxes and dropdown menus. To see the full spelling of an abbreviated label, tap and hold
the stylus on the label. Drag the stylus off the label so that the command is
not carried out.
The following is a partial list of programs that are on your CN30 Computer, in the order they appear in the Start menu. Look on the Windows
Mobile Companion CD for additional programs that you can install onto
your CN30 Computer.
Keep track of your appointments and create meeting requests.
Keep track of your friends and colleagues.
Browse Web and WAP (Wireless Application Protocol) sites, and download new programs and files from the Internet.
Send and receive e-mail messages.
Play digital audio and video files that are stored on your CN30 Computer
or on a network.
32 CN30 Computer Mobile User’s Manual

Navigation Bar and Command Bar
The navigation bar is located at the top of the screen. It displays the active
program and current time, and allows you to switch to programs and close
screens.
Use the command bar at the bottom of the screen to perform tasks in programs. The command bar includes menu names, functions, and the Input
Panel icon, when needed. To create a new item in the current program, tap
New. To see the name of a icon, tap and hold the stylus on the icon. Drag
the stylus off the icon so that the command is not carried out.
Chapter 2 — Windows Mobile Version 5.0
Tap to switch to a program
Select from up to six recent accessed programs
Tap to see more programs
Tap to change device settings
Tap to see a Help topic for the current screen
Pop-up Menus
Notifications
Use pop-up menus to quickly perform an action on an item. For example,
you can use a pop-up menu to delete or make a copy of an item. To access
a pop-up menu, tap and hold the item on which you want to perform the
action. When the menu appears, tap the action you want to perform, or tap
anywhere outside the menu to close the menu without performing the
action.
Tap and hold to display the pop-up menu
Lift the stylus and tap the action you want
Tap outside to close without performing an action
When you have something to do, your CN30 Computer notifies you in a
variety of ways. For example, if you have set up an appointment in Calendar, an e-mail message arrives, or a friend sends you an instant message, you
are notified in any of the following ways: a message box appears on the
screen, a sound (which you can specify) is played, a light flashes on your
CN30 Computer, or the CN30 Computer vibrates. You can choose the
notification types.
CN30 Mobile Computer User’s Manual 33

Chapter 2 — Windows Mobile Version 5.0
Entering Information
You can enter information on your CN30 Computer in several ways,
depending on the type you have and the program you are using:
Synchronizing Using Microsoft ActiveSync, synchronize or copy information
Ty pi ng Using the input panel, enter typed text into the CN30 Computer.
Writing Using the stylus, write directly on the screen.
Drawing Using the stylus, draw directly on the screen.
Recording Create a stand-alone recording or embed a recording into a docu-
between your desktop and CN30 Computer. For more information
on ActiveSync, see ActiveSync Help on your desktop.
Do this by tapping keys on the onscreen keyboard or by using handwriting recognition software.
ment or note.
Use the input panel to enter information in any program on your CN30
Computer. You can either type using the onscreen keyboard or write using
Block Recognizer, Letter Recognizer, or Transcriber. In either case, the
characters appear as typed text on the screen.
To show or hide the input panel, tap the Input Panel icon. Tap the arrow
next to the Input Panel icon to see your choices.
Select an input method
Input Panel icon
Tap to see your choices
34 CN30 Computer Mobile User’s Manual

Chapter 2 — Windows Mobile Version 5.0
When you use the input panel, your CN30 Computer anticipates the word
you are typing or writing and displays it above the input panel. When you
tap the displayed word, it is inserted into your text at the insertion point.
The more you use your CN30 Computer, the more it learns to anticipate.
Tap a text box to display the input panel
Tap to insert anticipated word
Tap characters on the onscreen keyboard to enter them
To change word suggestion options, such as the number of words suggested
at one time, tap Start > Settings > the Personal tab > Input > the Wo rd
Completion tab.
CN30 Mobile Computer User’s Manual 35

Chapter 2 — Windows Mobile Version 5.0
Typing With the Onscreen Keyboard
Tap the input panel arrow, then tap Keyboard. On the soft keyboard that is
displayed, tap the keys with your stylus.
• To type lowercase letters, tap the keys with the stylus.
• To type a single uppercase letter or symbol, tap the Shift key. To tap
multiple uppercase letters or symbols, tap the CAP key.
• To convert a letter to uppercase, tap and hold the stylus on the letter and
drag up.
• To add a space, drag the stylus to the right across at least two keys.
• To backspace one character, drag the stylus to the left across at least two
keys.
• To insert a carriage return, tap and hold the stylus anywhere on the keyboard and drag down.
If you want to use larger keys, tap the input panel arrow, tap Options,
select “Keyboard” from the Input method drop-down list, then select Large
keys.
Using Block Recognizer
Character recognition software gives you a fast and easy method for entering information in any program on your CN30 Computer. Letters, numbers, and punctuation you write are translated into typed text.
Tap the input panel arrow, then tap Block Recognizer. Write a letter in the
box. When you write a letter, it is converted to typed text that appears on
the screen.
36 CN30 Computer Mobile User’s Manual

Chapter 2 — Windows Mobile Version 5.0
For specific instructions on using Block Recognizer, with Block Recognizer
open, tap the question mark next to the writing area.
Tap for as s istan ce
Using Letter Recognizer
With Letter Recognizer, you can write letters using the stylus just as you
would on paper.
Tap the input panel arrow, then tap Letter Recognizer. Write a letter in the
box. When you write a letter, it is converted to typed text that appears on
the screen. For specific instructions on using Letter Recognizer, with Letter
Recognizer open, tap the question mark next to the writing area.
Tap for assistance
Using Transcriber
With Transcriber, you can write anywhere on the screen using the stylus
just as you would on paper. Unlike Letter Recognizer and Block Recognizer, you can write a sentence or more of information. Then, pause and let
Transcriber change the written characters to typed characters.
Tap the input panel arrow, then tap Transcriber. Tap ok, then write any-
where on the screen.
For specific instructions on using Transcriber, with Transcriber open, tap
the question mark in the lower, right-hand corner of the screen.
Tap for as s istan ce
Selecting Typed Text
If you want to edit or format typed text, you must select it first. Drag the
stylus across the text you want to select.
You can cut, copy, and paste text by tapping and holding the selected words
and then tapping an editing command on the pop-up menu, or by tapping
the command under Menu.
CN30 Mobile Computer User’s Manual 37

Chapter 2 — Windows Mobile Version 5.0
Writing on the Screen
In any program that accepts writing, such as the Notes program, and in the
Notes tab in Calendar, Contacts, and Tasks, you can use your stylus to
write directly on the screen. Write the way you do on paper. You can edit
and format what you have written and convert the information to text at a
later time. Tap the Pen icon to switch to writing mode. This action displays
lines on the screen to help you write
Tap to use your stylus like a pen
Note: Some programs that accept writing may not have the Pen icon. See
the documentation for that program to find out how to switch to writing
mode.
Selecting the Writing
If you want to edit or format writing, you must select it first.
1 Tap and hold the stylus next to the text you want to select until the
insertion point appears.
2 Without lifting, drag the stylus across the text you want to select.
If you accidentally write on the screen, tap Menu > Undo and try again.
You can also select text by tapping the Pen icon to deselect it and then
dragging the stylus across the screen.
You can cut, copy, and paste written text in the same way you work with
typed text: tap and hold the selected words and then tap an editing command on the pop-up menu, or tap the command under Menu.
Converting Writing to Text
You can convert words you write in print or cursive to text by tapping
Menu > Tools > Recognize. If a word is not recognized, it stays in its original form.
If you want to convert only certain words, tap Pen to disable the writing
function, tap twice over the word or phrase to highlight, then tap Menu >
To o l s > Recognize.
38 CN30 Computer Mobile User’s Manual

Chapter 2 — Windows Mobile Version 5.0
Before Recognition
After Recognition
If the conversion is incorrect, you can choose different words from a list of
alternates or return to the original writing. To do so, tap and hold the
incorrect word (tap one word at a time). On the pop-up menu, tap Alter-
nates. Tap the word use from the menu with a list of alternate words, or tap
the writing at the top of the menu to return to the original writing.
Tap to return to the original writing
Or tap the word you want to use
Tips for getting good recognition:
• Write neatly.
• Write on the lines and draw descenders below the line. Write the cross of
the “t” and apostrophes below the top line so they are not confused with
the word above. Write periods and commas above the baseline.
• For better recognition, try increasing the zoom level to 300% by selecting Menu > Zoom. Recognition is not good under a 150% zoom.
• Write the letters of a word closely and leave big gaps between words so
that the CN30 Computer can easily tell where words begin and end.
• Hyphenated words, foreign words that use special characters such as
accents, and some punctuation cannot be converted.
• If you add writing to a word to change it (such as changing a “3” to an
“8”) after you attempt to recognize the word, the writing you add is not
included if you attempt to recognize the writing again.
CN30 Mobile Computer User’s Manual 39

Chapter 2 — Windows Mobile Version 5.0
Drawing on the Screen
You can draw on the screen in the same way that you write on the screen.
The difference between writing and drawing on the screen is how you select
items and how they are edited. For example, you can resize selected drawings, while you cannot resize writing.
Creating a Drawing
Select Menu > Draw, then draw a line to initiate a drawing box. Subsequent strokes in or touching the drawing box become part of the drawing.
The drawing box indicates the boundaries of the drawing
Recording a Message
Note: You may want to change the zoom level so that you can more easily
work on or view your drawing. Tap Menu > Zoom, then select a zoom
level.
Selecting a Drawing
If you want to edit or format a drawing, you must select it first. Tap and
hold the stylus on the drawing until the selection handle appears. To select
multiple drawings, deselect the Pen icon and then drag to select the drawings you want.
You can cut, copy, and paste selected drawings by tapping and holding the
selected drawing and then tapping an editing command on the pop-up
menu, or by tapping the command under Menu. To resize a drawing, make
sure the Pen icon is not selected, and drag a selection handle.
In any program where you can write or draw on the screen, you can also
quickly capture thoughts, reminders, and phone numbers by recording a
message.
In the Messaging program, you can add a recording to an e-mail message.
In Calendar, Tasks, and Contacts, you can include a recording in the Notes
tab. In the Notes program, you can create a stand-alone recording or add a
recording to an open note.
40 CN30 Computer Mobile User’s Manual

Chapter 2 — Windows Mobile Version 5.0
Ta p Menu > View Recording Toolbar to add the recording toolbar to the
bottom of the screen.
1 Hold the CN30 Computer’s microphone near your mouth or source of
sound.
2 Tap the red circle to start your recording.
3 Tap the black box when finished. If you are recording in an open note,
an icon appears in the note, like in the following sample. If you are creating a stand-alone recording, it appears in the note list.
4 To play a recording, tap the recording icon in the open note or tap the
recording in the note list.
Note: To quickly create a recording, hold down the Record hardware button. When you hear the beep, begin your recording. Release the button
when you are finished. The new recording is stored in the open note or as a
stand-alone recording if no note is open.
To play a recording, tap it in the list or tap its icon in the note.
Indicates an embedded recording
Tap to begin recording
CN30 Mobile Computer User’s Manual 41

Chapter 2 — Windows Mobile Version 5.0
Using My Text
When using Messaging, use My Text to quickly insert preset or frequently
used messages into the text entry area. To insert a message, tap Menu > My
Text, then select a message.
• To quickly add common messages, tap Menu > My Text and tap a
desired message.
• To edit a My Text message, tap Menu > My Text > Edit My Text Mes-
sages. Tap the message you want to edit and enter new text at the bottom of the screen.
Finding and Organizing Information
You can use the File Explorer to find files on your CN30Computer and
to organize these files into folders. Tap Start > Programs > the File
Explorer icon.
For future use, this is added to your Start menu in the Recent Programs
area, via Start > File Explorer.
Note: You can move files in File Explorer by tapping and holding the item
you want moved, then tapping Cut or Copy and Paste on the pop-up
menu.
Tap a folder to open it
Tap New Folder to create a new folder
42 CN30 Computer Mobile User’s Manual

Customizing Your CN30 Computer
You can customize your CN30 Computer by adjusting settings and installing additional software.
Adjusting Settings
You can adjust settings to suit the way you work. To see available options,
tap Start > Settings > either the Personal tab or the System tab located at
the bottom of the screen. You might want to adjust the following:
Chapter 2 — Windows Mobile Version 5.0
Personal tab
Menus To customize what appears on the Start menu.
Owner Information To enter your contact information.
Password To limit access to your CN30 Computer.
To d a y To customize the look and information displayed on the
Today screen.
Clock & Alarms To change the time or to set alarms.
Power To maximize battery life.
Systems tab
Adding or Removing Programs
Programs added to your CN30 Computer at the factory are stored in ROM
(Read Only Memory). You cannot remove this software, and you cannot
accidentally lose ROM contents. ROM programs can be updated using
special installation programs with a *.XIP extension. All other programs
and data files added to your CN30 Computer after factory installation are
stored in RAM (Random Access Memory).
You can install any program created for your CN30 Computer, as long as
your CN30 Computer has enough memory. The most popular place to
find software for your CN30 Computer is on the Windows Mobile Web
site (www.microsoft.com/windowsmobile/resources/communities/
default.mspx).
CN30 Mobile Computer User’s Manual 43

Chapter 2 — Windows Mobile Version 5.0
Adding Programs Using ActiveSync
Install the appropriate software for your CN30 Computer on your desktop
before installing it on your CN30 Computer.
1 Determine your CN30 Computer and processor type so that you know
which version of the software to install. Tap Start > Settings > the Sys-
tem tab > the About icon > the Ve rs io n tab, then make a note of the
information in Processor.
Note this information
2 Download the program to your desktop (or insert the CD or disk that
contains the program into your desktop). You may see a single *.XIP,
*.EXE, or *.ZIP file, a SETUP.EXE file, or several versions of files for
different CN30 Computer types and processors. Be sure to select the
program designed for the Windows Mobile and your CN30 Computer
processor type.
3 Read any installation instructions, Read Me files, or documentation that
comes with the program. Many programs provide special installation
instructions.
4 Connect your CN30 Computer and desktop.
5 Double-click the *.EXE file.
• If the file is an installer, the installation wizard begins. Follow the
directions on the screen. Once the software is installed, the installer
automatically transfers the software to your CN30 Computer.
• If the file is not an installer, an error message stating that the program
is valid but it is designed for a different type of computer is displayed.
Move this file to your CN30 Computer. If you cannot find any installation instructions for the program in the Read Me file or documentation, use ActiveSync Explore to copy the program file to the Program
Files folder on your CN30 Computer. For more information on copying files using ActiveSync, see ActiveSync Help.
Once installation is complete, tap Start > Programs, and then the program
icon to switch to it. For future use, this is added to your Start menu in the
Recent Programs area, via Start > File Explorer.
44 CN30 Computer Mobile User’s Manual

Chapter 2 — Windows Mobile Version 5.0
Adding a Program Directly from the Internet
1 Determine your CN30 Computer and processor type so that you know
which version of the software to install. Tap Start > Settings > the System tab > the About icon > the Ve rs io n tab, then make a note of the
information in Processor.
Note this information
2 Download the program to your CN30 Computer straight from the
Internet using Pocket Internet Explorer. You may see a single *.XIP,
*.EXE, or *.ZIP file, a SETUP.EXE file, or several versions of files for
different CN30 Computer types and processors. Be sure to select the
program designed for the Windows Mobile and your CN30 Computer
processor type.
3 Read program installation instructions, Read Me files, or other docu-
mentation. Many programs provide installation instructions.
4 Tap the file, such as a *.XIP or *.EXE file to start the installation wizard.
Follow the directions on the screen.
CN30 Mobile Computer User’s Manual 45

Chapter 2 — Windows Mobile Version 5.0
Adding a Program to the Start Menu
Ta p Start > Settings > the Personal tab > the Menus icon, then the check
box for the program. If you do not see the program listed, you can either
use File Explorer on the CN30 Computer to move the program to the Start
Menu folder, or use ActiveSync on the desktop to create a shortcut to the
program and place the shortcut in the Start Menu folder.
Using File Explorer on the CN30 Computer
Ta p Start >
Programs > the File Explorer icon, locate the program (tap the
folder list, labeled My Documents by default, then My Device to see a list
of all folders on the CN30 Computer). Tap and hold the program and tap
Cut on the pop-up menu. Open the Start Menu folder located in the
Windows folder, tap and hold a blank area of the window, and tap Paste
on the pop-up menu. The program now appears on the Start menu. For
more information on using File Explorer, see “Finding and Organizing
Information” on page 42.
For future use, this is added to your Start menu in the Recent Programs
area, via Start > File Explorer.
Using ActiveSync on the desktop
Use the Explorer in ActiveSync to explore your CN30 Computer files and
locate the program. Right-click the program, and then click Create Short-
cut. Move the shortcut to the Start Menu folder in the Windows folder.
The shortcut now appears on the Start menu. For more information, see
ActiveSync Help.
Removing Programs
Ta p Start > Settings > the System tab > the Remove Programs icon.
If the program does not appear in the list of installed programs, use File
Explorer on your CN30 Computer to locate the program, tap and hold
the program, and then tap Delete on the pop-up menu.
46 CN30 Computer Mobile User’s Manual

Microsoft ActiveSync
Visit the following Microsoft Web site for the latest in updates, technical
information, and samples:
www.microsoft.com/windowsmobile/resources/communities/default.mspx
Using Microsoft ActiveSync, you can synchronize the information on your
desktop with the information on your CN30 Computer. Synchronization
compares the data on your CN30 Computer with your desktop and
updates both computers with the most recent information. For example:
• Keep Pocket Outlook data up-to-date by synchronizing your CN30
Computer with Microsoft Outlook data on your desktop.
• Synchronize Microsoft Word and Microsoft Excel files between your
CN30 Computer and desktop. Your files are automatically converted to
the correct format.
Note: By default, ActiveSync does not automatically synchronize all types
of information. Use ActiveSync options to turn synchronization on or off
for specific information types.
Chapter 2 — Windows Mobile Version 5.0
With ActiveSync, you can also:
• Back up and restore your CN30 Computer data.
• Copy (rather than synchronize) files between your CN30 Computer and
desktop.
• Control when synchronization occurs by selecting a synchronization
mode. For example, you can synchronize continually while connected to
your desktop or only when you choose the synchronize command.
• Select which information types are synchronized and control how much
data is synchronized. For example, you can choose how many weeks of
past appointments you want synchronized.
Before you begin synchronization, install ActiveSync on your desktop from
the Windows Mobile Companion CD. For more information on installing
ActiveSync, see your Quick Start card. ActiveSync is already installed on
your CN30 Computer.
After installation is complete, the ActiveSync Setup Wizard helps you connect your CN30 Computer to your desktop, set up a partnership so you
can synchronize information between your CN30 Computer and your
desktop, and customize your synchronization settings. Your first synchronization process automatically begins when finished using the wizard.
After your first synchronization, look at Calendar, Contacts, and Tasks on
your CN30 Computer. Notice that information you have stored in
Microsoft Outlook on your desktop was copied to your CN30 Computer,
and you did not have to type a word. Disconnect the CN30 Computer
from your computer and you are ready to go!
CN30 Mobile Computer User’s Manual 47

Chapter 2 — Windows Mobile Version 5.0
Once you have set up ActiveSync and completed the first synchronization process, you can initiate synchronization from your CN30 Computer. To switch to ActiveSync on your CN30 Computer, tap Start >
Programs > the ActiveSync icon. Note that if you have a wireless
LAN card, you can synchronize remotely from your CN30 Computer.
For future use, this is added to your Start menu in the Recent Programs area, via Start > ActiveSync.
For information about using ActiveSync on your desktop, start ActiveSync
on your desktop, and then see ActiveSync Help.
Tap to connect and synchronize
For more information about ActiveSync on your CN30 Computer, switch
to ActiveSync, tap Start > Help, then select a topic.
Microsoft Pocket Outlook
Microsoft Pocket Outlook includes Calendar, Contacts, Tasks, Messaging,
and Notes. You can use these programs individually or together. For example, you can use e-mail addresses stored in Contacts to address e-mail messages in Messaging.
Using ActiveSync, you can synchronize information in Microsoft Outlook
or Microsoft Exchange on your desktop with your CN30 Computer. You
can also synchronize this information directly with a Microsoft Exchange
server. Each time you synchronize, ActiveSync compares the changes you
made on your CN30 Computer and desktop or server and updates both
computers with the latest information. For information on using ActiveSync, see ActiveSync Help on the desktop.
View the connection status
Tap to synchronize via IR or to change synchronization
You can switch to any program by tapping it on the Start menu.
48 CN30 Computer Mobile User’s Manual

Calendar: Scheduling Appointments and Meetings
To switch to Calendar on the CN30 Computer, tap Start > Calendar.
Use Calendar to schedule appointments, including meetings and other
events. You can check your appointments in one of several views (Day,
Week, Month, Year, and Agenda) and set Calendar to remind you of
appointments with a sound or other method.
Appointments for the day can display on the Today screen.
If you use Outlook on your desktop, you can synchronize appointments
between your CN30 Computer and desktop.
Tap to go to Today
Tap to display and edit appointment details
Chapter 2 — Windows Mobile Version 5.0
Synchronizing Calendar
Calendar items stored on your CN30 Computer can be synchronized with
calendar items on your desktop or Microsoft Exchange Server. (Note that
you can only synchronize information directly with an Exchange Server if
your company is running Microsoft Mobile Information Server 2002 or
later.) Calendar synchronization is automatically selected in ActiveSync.
Calendar items entered on one computer are copied to the other during
synchronization. Handwritten notes and drawings are saved as metafiles
(pictures).
For information on synchronization, see ActiveSync Help on the desktop.
Why Use Categories in the Calendar?
Use categories to group related tasks, contacts, and appointments. Then,
use these groupings to quickly display only the information you want. For
example, you can easily share your CN30 Computer with another by
assigning your appointments to a category with a special project’s name.
You can then use this category to filter Calendar and only display appointments for that project.
CN30 Mobile Computer User’s Manual 49

Chapter 2 — Windows Mobile Version 5.0
Note: In Month View, the day of an appointment assigned to the Holiday
category appears in red.
Tap to access the Year view
What’s an All Day Event?
An appointment can either be a normal appointment or an all day event,
which lasts the full day or spans many days. Examples include a trade show,
a vacation, or a seminar. You can also use all day events to schedule an
annual event, such as a birthday or anniversary. In this case, change the Status box to Free (you may need to scroll to see it) so that it does not show
time as busy in your calendar. All day events do not occupy blocks of time
in Calendar; they appear in banners at the top of the calendar.
This day was assigned the Holiday category.
Note: You cannot modify or create all-day events with attendees on the
CN30 Computer. If you create all day events with attendees on your desktop, use ActiveSync to copy such events to the CN30 Computer, then view
them in Calendar. For more information on copying files, see ActiveSync
Help. To use the CN30 Computer to schedule an appointment with
attendees lasting all day, set type to “Normal,” then adjust the date and
time appropriately.
This describes the all-day event
Tap to access the Week view
50 CN30 Computer Mobile User’s Manual

Chapter 2 — Windows Mobile Version 5.0
What’s a Recurrence Pattern?
If you have an appointment or task that you do on a regular basis, such as a
weekly team meeting or a monthly status report, enter the item once and
set a recurrence pattern for it. If the default patterns in the list are not what
you need, you can create your own pattern using the wizard.
Select your recurrence pattern from this list
Select <edit pattern> to access the wizard with which
to customize your recurrence.
Viewing Appointments
You can view appointments in one of several views (Agenda, Day, Week,
Month, and Year). In Agenda view, upcoming appointments are displayed
in bold. To see detailed appointment information in any view, tap the
appointment. To see a list of available actions for an appointment, tap and
hold the appointment. Tap Start > To d ay to see appointments for the day.
Month view displays symbols to indicate the types of appointments you
have on a given day. An upward triangle indicates a morning appointment;
a downward triangle indicates an afternoon appointment. If you have
appointments in the morning and afternoon, a solid square is displayed. If
you have an all day event not marked Free, a hollow square is displayed.
This displays a morning appointment
This displays appointments in morning and afternoon
This displays an all-day event not marked “Free”
This displays an afternoon appointment
Tap this to access the Year view
CN30 Mobile Computer User’s Manual 51

Chapter 2 — Windows Mobile Version 5.0
Creating or Changing an Appointment
To create an appointment, tap Menu > New Appointment. To select a
new date from a pop-up calendar, tap the display date. To enter or select a
new time, tap the display time. Enter the appointment details, and when
finished, tap ok to return to the calendar.
If you are working in Day view, tap and hold the time slot for the new
appointment, then select New Appointment to have the time automatically entered for you.
To change an appointment, tap it in the calendar, and then tap Edit.
Change any appointment detail by tapping it and entering the new information. Tap the arrows to the right of the description and location boxes to
choose from previous entries.
When entering a time, you can type military and abbreviated time forms,
such as 2300 (becomes 11:00 PM), 913pm (becomes 9:13 PM), 911
(becomes 9:11 AM), and 9p (becomes 9:00 PM).
Tap to return to calendar, saved automatically
Tap to choose from predefined text
Tap to choose from previous defined locations
Tap to select a time
Tap to select a date
Notes is a good place for maps and directions
52 CN30 Computer Mobile User’s Manual

Chapter 2 — Windows Mobile Version 5.0
Creating an All-Day Event
To create an all-day event, do the following. To change an all-day event,
switch to Day or Agenda, tap the event listed at the top of the calendar,
then tap Edit. Change any appointment detail by tapping it and entering
the new information.
1 Ta p Menu > New Appointment.
2 Ta p All Day, then select Yes .
Tap to select “Yes” or “No” for the all-day event
You cannot modify or create all day events with attendees on the CN30
Computer. If you create all-day events with attendees on your desktop, use
ActiveSync to copy such events to the CN30 Computer. Then, view them
in Calendar. For more information on copying files, see ActiveSync Help.
To use the CN30 Computer to schedule an appointment with attendees
lasting all day, set type to Normal, then adjust date and time accordingly.
CN30 Mobile Computer User’s Manual 53

Chapter 2 — Windows Mobile Version 5.0
Setting a Reminder for an Appointment
Do the following to set a reminder for an appointment in the calendar:
1 Tap the appointment, then tap Edit to change the appointment.
2 Ta p Reminder and select Remind me.
3 To change how many minutes before the appointment you are
reminded, tap the minutes displayed, then select the new minutes from a
drop-down or enter the new minutes. Tap minutes to change hours,
days, or weeks.
Tap this to enable the reminder feature
Note: To automatically set a reminder for all new appointments, in the calendar, tap Menu > Options > the Appointments tab, check Set reminders
for new items, then tap the number and timeframe options to change the
information given.
Tap this to set reminders for new appointments
To choose how you are reminded, for example by a sound, tap Start > Set-
tings > the Personal tab > the Sounds & Notifications icon.
54 CN30 Computer Mobile User’s Manual

Chapter 2 — Windows Mobile Version 5.0
Adding a Note to an Appointment
You can add written or typed notes and even recordings (if your CN30
Computer supports recordings) to an appointment. This is a good place for
maps, drawings, and other detailed information. To edit an existing note, tap
the appointment in the calendar, tap Edit, then tap the Notes tab.
1 In the calendar, tap the appointment, then tap Edit.
2 Tap the Notes tab to enter notes. For specific instructions, tap Start >
Help, then select a topic.
Use your stylus to write or draw information here
Making an Appointment Recurring
Do the following to make a recurring appointment:
1 In the calendar, tap the appointment, then tap Edit.
2 Ta p Occurs and select a pattern from the list. Or, to create a new pat-
tern, tap <Edit pattern...>, and follow the steps in the wizard.
Select your recurrence from the drop-down list
Select <edit pattern> to customize your recurrence
CN30 Mobile Computer User’s Manual 55

Chapter 2 — Windows Mobile Version 5.0
Assigning an Appointment to a Category
To find an appointment assigned to a category, tap Menu > Filter, then
select the type of appointment that you want displayed. To show all
appointments again, tap Menu > Filter > All Appointments to clear all categories.
1 In the calendar, tap the appointment, tap Edit, then tap Categories.
2 Check the categories to which you want to assign the appointment.
3 To create a new category, tap New, enter the category name, then tap
Done. The new category is automatically checked in the list.
4 Ta p ok to return to the appointment.
A check mark indicates a selected category
Sending a Meeting Request
Use Calendar to schedule meetings with people who use Outlook or Pocket
Outlook. When attendees receive a meeting request, they can accept or
decline the meeting. If they accept the request, the meeting is automatically
added to their schedule, their response is sent back to you, and your calendar is updated.
Before you can send a meeting request, you must enter e-mail addresses in
Contacts Help and set up Messaging to send and receive messages. For
more information on sending and receiving meeting requests, open either
the Calendar application or the Messaging application, tap Start > Help,
then select a topic.
If you are sending the meeting request through a connection to an ISP or
the network, rather than through synchronization with your desktop, tap
Menu > Options > the Appointments tab. From the Send meeting request
via drop-down list, tap the service to use to send the request.
1 Tap to hold a timeslot in the calendar, then tap New Appointment.
2 Enter the meeting information, hide the onscreen keyboard, if needed,
then tap Attendees. Only those contacts with e-mail addresses are displayed. Select the contacts you want to invite, then tap Add to return to
the list.
56 CN30 Computer Mobile User’s Manual

Chapter 2 — Windows Mobile Version 5.0
3 Repeat this procedure until you have everyone you want to invite to the
meeting, then tap ok.
4 Messaging automatically creates a meeting request and sends it to the
attendees the next time you synchronize with your desktop. Textual
notes entered in the Notes tab (excluding writing) are also sent.
To remove a person, highlight that person,
then tap Delete
Finding an Appointment
•Tap Start > Programs > the Search icon, enter the appointment name,
tap the Ty pe arrow and select “Calendar” from the drop-down list, and
then tap Search. You can tap the Search for drop-down arrow to select
from a list of previously searched items or phrases.
Note for future access, this is added to your Start menu in the Recent
Programs area, via Start > Search.
• To find an appointment assigned to a category, tap Menu > Filter, then
select the type of appointment that you want displayed. To show all
appointments again, tap Menu > Filter > All Appointments to clear all
categories.
Tap to select or enter a phrase
Tap to select where to search for this phrase
Tap to see details
CN30 Mobile Computer User’s Manual 57

Chapter 2 — Windows Mobile Version 5.0
Deleting an Appointment
1 In the calendar, tap and hold the appointment.
2 On the pop-up menu, tap Delete Appointment. The next time you syn-
chronize, the appointment is also deleted from the desktop.
Changing Calendar Options
In the calendar, tap Menu > Options, tap either tap, make your changes,
then tap ok to return to the calendar.
•Tap the General tab to change the calendar view.
•Tap the Appointments tab to select what Show icons appointment indicators should appear when you view appointment contents. Tap and
hold an icon to see its name. Selected icons are in black.
58 CN30 Computer Mobile User’s Manual

Contacts: Tracking Friends and Colleagues
To switch to Contacts on the CN30 Computer, tap Start > Contacts.
Contacts maintains a list of your friends and colleagues so that you can easily find the information you are looking for, whether you are at home or on
the road. You can enter both personal and business information.
If you use Microsoft Outlook on your desktop, you can synchronize contacts between your CN30 Computer and your desktop.
Chapter 2 — Windows Mobile Version 5.0
Tap and enter part of a name to find it in the list
Tap to see additional phone numbers, e-mail addresses
Tap to display and edit contact details
Tap to create a new contact
Creating a Contact
1 Ta p New, then use the input panel to enter a name and other contact
information. Scroll down to see all available fields.
2 To assign the contact to a category, scroll to and tap Categories, then
select a category from the list. In the contact list, you can display contacts
by category.
3 To add notes, tap the Notes tab. You can enter text or draw. For infor-
mation on creating notes, see “Notes: Capturing Thoughts and Ideas” on
page 66.
4 When finished, tap ok to return to the contact list.
Tap to return to the list, entry saved automatically
Scroll to see more fields
Use Notes to include maps and directions
CN30 Mobile Computer User’s Manual 59

Chapter 2 — Windows Mobile Version 5.0
Synchronizing Contacts
Contacts stored on your CN30 Computer can be synchronized with Outlook contacts stored on your desktop or with Mobile Information Server
2002 or later.
New items entered in one location are copied to the other during synchronization. Handwritten notes and drawings are saved as pictures when synchronizing with your desktop, but are removed when synchronizing with a
server.
For information on synchronization, see ActiveSync Help on the desktop.
Viewing Contacts
The contact list displays the contact name and the first primary phone
number or e-mail address specified for that contact. Contacts are ordered
by name of contact or company. You can change the appearance of the Con-
tacts list by tapping Menu > Options.
• Tap the default letter (home, w ork, mobile, or e-mail) to the right of the
contact to see additional phone numbers and e-mail addresses.
• Use the up/down controls on your keypad to highlight a contact, then
press the left/right controls on your keypad to change the default number, displayed as a letter to the right of the contact name. The default
number is highlighted in the contact’s summary, like the sample below.
• To see more contact information, tap the contact.
• To see a list of available actions for a contact via a pop-up menu, tap and
hold the contact.
• To see a list of contacts employed by a specific company, tap Menu >
View By > Company. Then, tap the desired company name.
Indicates the default number
Tap to edit the default number
60 CN30 Computer Mobile User’s Manual

Chapter 2 — Windows Mobile Version 5.0
Creating or Changing a Contact
• To create a contact, tap New. To enter notes, tap the Notes tab. When
finished, tap ok to return to the contact list. New contacts are added to the
displayed category.
• To change a contact, tap it in the contact list, and then tap Menu > Edit.
To cancel edits, tap Menu > Undo. When finished making changes, tap
ok to return to the contact list.
Note: If you enter a name with more than two words, the middle word is
recorded as a middle name. If your contact has a double first or last name,
tap the Name arrow and enter the names in the proper box.
Tap to access the Name fields
Tap outside the box to close and return to details
Adding a Note to a Contact
You can add written or typed notes and even recordings (if your CN30
Computer supports recordings) to a contact. Notes are handy for maps and
drawings. To edit an existing note, tap the contact, tap Menu > Edit, then tap
the Notes tab.
1 In the contact list, tap the contact.
2 Tap the Notes tab. For instructions, tap Start > Help, then select a topic.
Use your stylus to write or draw your information
Tap to activate the input panel
CN30 Mobile Computer User’s Manual 61

Chapter 2 — Windows Mobile Version 5.0
Assigning a Contact to a Category
1 In the contact list, tap the contact, and then tap Menu > Edit.
2 Scroll to, tap Categories, then check categories to assign to the contact.
3 To create a new category, tap New, enter the category name, then tap
Done. The new category is automatically checked in the list.
4 Ta p ok to return to the contacts.
A check mark indicates a selected category
Copying a Contact
Press and hold a contact for a pop-up menu, then select Copy Contact; or
if a contact is already highlighted, tap Menu > Copy Contact.
Sending a Message to a Contact
Press and hold a contact for a pop-up menu, then select Send E-mail or
Send SMS depending on the type of message being sent. To send an e-mail
message, you must have an e-mail address configured for the contact. To
send an SMS (Short Messaging Service) message, you must have an SMS
number for the contact, which is usually the mobile phone number.
Finding a Contact
Use any of the following methods to find a contact. To quickly move
through a long list of contacts, tap one of the sets of letters displayed at the
top to view contact names beginning with those letters.
•Tap Start > Programs > the Search icon, enter the contact name, tap the
Ty pe arrow and select “Contacts” from the drop-down list, and then tap
Search. You can tap the Search for drop-down arrow to select from a list of
previously searched items or phrases.
Note for future access, this is added to your Start menu in the Recent
Programs area, via Start > Search.
• From Contacts, start typing a contact name until you see it displayed on
the screen. To show all contacts again, tap the text box at the top of the
screen and clear the text, or tap the arrow to the right of the text box.
62 CN30 Computer Mobile User’s Manual

Chapter 2 — Windows Mobile Version 5.0
• To find a contact assigned to a category, tap Menu > Filter, then select
the type of contact to display. To show all contacts again, tap Menu >
Filter > All Contacts to clear all categories.
• To view the names of companies for which your contacts work, in the
contact list, tap Menu > View By > Company. The number of contacts
that work for that company is displayed to the right of the company.
Deleting a Contact
Press and hold a contact for a pop-up menu, select Delete Contact, then
select Yes ; or if a contact is already highlighted, tap Menu > Delete Con-
tact, then select Yes .
Changing Contacts Options
In the contact list, tap Menu > Options, make your changes, then click ok
to return to the Contacts list.
CN30 Mobile Computer User’s Manual 63

Chapter 2 — Windows Mobile Version 5.0
Tasks: Keeping a To Do List
To switch to Tasks on your CN30 Computer, either tap Start > Programs
> the Ta sk s icon. Note for future access, this is added to your Start menu in
the Recent Programs area, via Start > Ta s ks .
Use Tasks to keep track of what you have to do. A variety of task information can display on the Today screen. If you use Microsoft Outlook on
your desktop, you can synchronize tasks between your CN30 Computer
and desktop. To change the way information is displayed, tap Menu >
Options.
Use this to assign a task quickly
Indicates a high priority
Tap to display or edit details
Tap and hold to display a pop-up menu
Creating a Task
To quickly create a task with only a subject, tap Tap here to add a new task
and enter your task information.
• To quickly create a task, enter text in the Tap here to add a new task box
at the top of the screen. If you do not see this box, tap Menu > Options,
then check Show Tasks entry bar.
• To create a task with detailed information, such as start and due dates,
tap New. To enter notes, tap the Notes tab. You can enter a start date
and due date or enter other information by first tapping the field. If the
input panel is open, you need to hide it to see all available fields. You can
enter text or draw. For information on creating notes, see “Notes: Capturing Thoughts and Ideas” on page 66
64 CN30 Computer Mobile User’s Manual

Chapter 2 — Windows Mobile Version 5.0
• To change a task, tap it in the task list, and then tap Edit. Using the
onscreen keyboard, enter a description. To assign the task to a category,
tap Categories and check categories from the list. In the task list, you can
filter tasks by category. When finished, tap ok to return to the task list.
Synchronizing Tasks
Tasks stored on the CN30 Computer can synchronize with Microsoft Outlook on your desktop. Task synchronization is automatic in ActiveSync.
New items entered on one computer are copied to the other during synchronization. Handwritten notes and drawings are saved as metafiles (pictures). For information, see ActiveSync Help on the desktop.
CN30 Mobile Computer User’s Manual 65

Chapter 2 — Windows Mobile Version 5.0
Notes: Capturing Thoughts and Ideas
To switch to Notes on your CN30 Computer, tap Start > Programs > the
Notes icon. For the future, this is added to the Start menu in the Recent
Programs area, via Start > Notes.
Notes helps you quickly capture your ideas, notes, and thoughts. You can
create a note using written and typed text, drawings, and recordings. You
can also share your notes with others through e-mail, infrared, and synchronization with your desktop.
To create documents with advanced formatting or templates, such as bulleted lists and tabs, use word processing software developed for your CN30
Computer, such as Word Mobile.
Tap to change the sort order of the list
Tap to open a note or play a recording
Tap and hold to display a pop-up menu
Tap to record
Tap to create a new note
Creating a Note
To create your note, tap New, then write, draw, type, or record your information. For information about using the input panel, writing and drawing,
and creating recordings, see “Basic Skills” on page 31.
• Wr it i ng
Using the stylus, write directly on the screen.
• Drawing
Using the stylus, draw directly on the screen.
• Ty pi n g
Using the input panel, enter typed text into the CN30 Computer. Do
this by tapping keys on the onscreen keyboard or by using handwriting
recognition software.
• Recording
Create a stand-alone recording or embed a recording into a note.
Synchronizing Notes
Notes can synchronize between your desktop and CN30 Computer either
through notes synchronization or file synchronization. Notes synchronization synchronizes the notes on your CN30 Computer with Outlook Notes
on your desktop. File synchronization synchronizes all notes on the CN30
66 CN30 Computer Mobile User’s Manual

Chapter 2 — Windows Mobile Version 5.0
Computer with the My Documents folder for the CN30 Computer on
your desktop.
To synchronize your notes through notes synchronization, first select the
Notes information type for synchronization in ActiveSync. The next time
you synchronize, all notes in My Documents and its subfolder on your
CN30 Computer appear in Outlook Notes on your desktop. Notes that
contain only text appear as regular notes in Outlook on your desktop, while
notes containing written text or drawings appear in the device format. In
addition, all notes in the Notes group in Outlook on the desktop appear in
Notes on the CN30 Computer.
To synchronize your notes as files, in ActiveSync, select the Files information type for synchronization and clear the Notes information type. When
you select Files, the My Documents folder for the CN30 Computer is created on your desktop. All .PWI files placed in the My Documents folder on
your CN30 Computer and all .DOC files placed in the My Documents
folder for the CN30 Computer on your desktop are synchronized. Password-protected files cannot be synchronized.
ActiveSync converts documents during synchronization. For information
on synchronization or file conversion, see ActiveSync Help on the desktop.
Note: When you delete or change an item on either your desktop or the
CN30 Computer, the item is changed or deleted in the other location the
next time you synchronize.
Note: If you synchronize your notes using file synchronization and then
later decide to use notes synchronization, all of your notes are synchronized
with Outlook on your desktop and no longer store in the My Documents
folder for the CN30 Computer.
Messaging: Sending and Receiving E-mail Messages
To switch to Messaging on your CN30 Computer, tap Start > Messaging.
You can receive Internet e-mail messages and SMS messages in Messaging.
Internet e-mail messages are sent by using an address you receive from your
Internet service provider (ISP) or your employer. SMS messages are sent
and received through your wireless phone service provider by using a phone
number as the message address.
You can send and receive e-mail by synchronizing with your desktop, or by
connecting to a Post Office Protocol 3 (POP3) or Internet Message Access
Protocol 4 (IMAP4) mail server. You need to set up an e-mail account for
each method that you use except for Microsoft ActiveSync, which is set up
by default. The ActiveSync folder on your CN30 Computer stores messages that you send and receive through synchronization with a desktop.
Account names appear as folders in the folder list (located on the left, under
the navigation bar) in the Messaging message list.
CN30 Mobile Computer User’s Manual 67

Chapter 2 — Windows Mobile Version 5.0
With synchronization, messages are synchronized between the CN30
Computer Inbox and the PC Inbox by using ActiveSync and Microsoft
Exchange or Microsoft Outlook. For more information, see “Synchronizing
E-mail Messages” below.
When connecting to a POP3 or IMAP4 server, you use a modem to connect to your Internet service provider (ISP), or a modem or Ethernet card
to connect to the local area network to which your e-mail server is connected. You can also use your phone to connect by using a cellular line connection. For more information, see “Connecting to a Mail Server” on
page 69.
Synchronizing E-mail Messages
After selecting Messaging for synchronization in ActiveSync, e-mail messages are synchronized as part of the general synchronization process. During synchronization:
• Messages are copied from the Inbox folder on your desktop or the
Microsoft Exchange server to the Inbox folder on your CN30 Computer. (Note that you can only synchronize information directly with an
Exchange Server if your company is running Microsoft Mobile Information Server 2002 or later.) By default, you receive messages from the last
three days only, the first 100 lines of each new message, and file attachments of less than 100 KB in size.
• Messages in the Outbox folder on your CN30 Computer are transferred
to Exchange or Outlook and then sent from those programs.
• The messages on the two computers are linked. When you delete a message on your CN30 Computer, it is deleted from your desktop the next
time you synchronize.
• Messages in subfolders in other e-mail folders in Outlook are synchronized only if they were selected for synchronization in ActiveSync.
For information on initiating Messaging synchronization or changing synchronization settings, see ActiveSync Help on your desktop or tap Start >
Help, then select a topic.
Managing E-mail Messages and Folders
Each e-mail account and SMS account has its own folder hierarchy with
five default folders: Inbox, Outbox, Deleted Items, Drafts, and Sent Items.
The messages you receive and send through the mail account are stored in
these folders. You can also create additional folders within each hierarchy.
The Deleted Items folder contains messages that were deleted on the CN30
Computer. The behavior of the Deleted Items and Sent Items folders
depends on the Inbox options you have chosen.
The behavior of the folders you create depends on whether you are using
ActiveSync, SMS, POP3, or IMAP4.
• If you use ActiveSync, e-mail messages in the Inbox folder in Outlook
automatically synchronize with your CN30 Computer. You can select to
68 CN30 Computer Mobile User’s Manual

Chapter 2 — Windows Mobile Version 5.0
synchronize additional folders by designating them for ActiveSync. The
folders you create and the messages you move are then mirrored on the
server. For example, if you move two messages from the Inbox folder to a
folder named Family, and you have designated Family for synchronization, the server creates a copy of the Family folder and copies the messages into that folder. You can then read messages while away from your
desktop.
• If you use SMS, messages are stored in the Inbox folder.
• If you use POP3 and you move e-mail messages to a folder you created,
the link is broken between the messages on the CN30 Computer and
their copies on the mail server. The next time you connect, the mail
server sees that the messages are missing from the CN30 Computer
Inbox and deletes them from the server. This prevents you from having
duplicate copies of a message, but it also means that you no longer have
access to messages that you move to folders created from anywhere
except the CN30 Computer.
• If you use IMAP4, the folders you create and the e-mail messages you
move are mirrored on the server. Therefore, messages are available to you
anytime you connect to your mail server, whether it is from your CN30
Computer or desktop. This synchronization of folders occurs whenever
you connect to your mail server, create new folders, or rename/delete
folders when connected.
For all accounts except ActiveSync, you can access folder options by tapping Menu > To o l s > Manage Folders.
Connecting to a Mail Server
In addition to synchronizing e-mail messages with your desktop, you can
send and receive e-mail messages by connecting to an e-mail server using a
modem or network card connected to your CN30 Computer. You need to
set up a remote connection to a network or an ISP, and a connection to
your e-mail server. For more information, see “Getting Connected” on
page 84.
When you connect to the e-mail server, new messages are downloaded to
the CN30 Computer Inbox folder, messages in the CN30 Computer Outbox folder are sent, and messages that were deleted on the e-mail server are
removed from the CN30 Computer Inbox folder.
Messages that you receive directly from an e-mail server are linked to your
e-mail server rather than your desktop. When you delete a message on your
CN30 Computer, it is also deleted from the e-mail server the next time you
connect based on the settings selected in ActiveSync.
You can work online or offline. When working online, you read and
respond to messages while connected to the e-mail server. Messages are sent
as soon as you tap Send, which saves space on your CN30 Computer.
When working offline, once you have downloaded new message headers or
partial messages, you can disconnect from the e-mail server and then decide
CN30 Mobile Computer User’s Manual 69

Chapter 2 — Windows Mobile Version 5.0
which messages to download completely. The next time you connect,
Inbox downloads the complete messages you have marked for retrieval and
sends the messages you have composed.
Setting Up or Changing an Account
To set up a a POP3 or IMAP4 e-mail account, tap Menu > Tools >
Options > New Account. Follow the instructions in the New Account
Wizard.
To set up an SMS account, tap Menu > Switch Accounts, and then tap
SMS. Follow the instructions on the screen.
To change options for an account, tap Menu > Tools > Options > the
name of the account, and follow the instructions on the screen.
To delete an account, tap Menu > To o l s > Options, tap and hold the name
of the account, and then tap Delete.
Note: You can set up several e-mail accounts including your ActiveSync
account, but you can set up only one SMS account, which you cannot
delete once it is set up.
Downloading Messages from the Server
Note that receiving entire messages consumes storage memory. The size
column in the message list displays the local size and server size of a message. Even when a message has downloaded fully, these numbers may differ
because the size of a message can vary between the server and the CN30
Computer.
1 Ta p Menu > Switch Accounts and ensure that the account you want to
use is selected (marked by a bullet.)
2 The messages on your CN30 Computer and e-mail server are synchro-
nized: new messages are downloaded to the CN30 Inbox folder, messages in the CN30 Outbox folder are sent, and messages that were
deleted from the server are removed from the CN30 Inbox. Tap a message in the message list to open it.
3 If you read a message and decide that you need the full copy, tap Menu >
Download Message while in the message window. If you are in the mes-
sage list, tap and hold the message, and then tap Download Message.
This also downloads message attachments if you selected those options
when you set up the e-mail account. You can also choose to download
full copies of messages by default.
4 When finished, close Messaging.
Composing and Sending Messages
To compose a message, do the following.
If you are sending an SMS message and want to know if it was received,
before sending the message, tap Menu > Message Options > Request SMS
text message delivery notification.
70 CN30 Computer Mobile User’s Manual

Chapter 2 — Windows Mobile Version 5.0
Depending on the e-mail address options that you select, you can use a
directory service in addition to your contact list to verify names.
1 In the message list, tap New.
2 To select an account, tap the From list and select “ActiveSync,” “SMS,”
or the desired e-mail account.
3 Enter the e-mail address or SMS address of one or more recipients, sepa-
rating them with semicolons. To access addresses and phone numbers
from Contacts, tap To .
4 Enter your message. To quickly add common messages, tap Menu > My
Text, select a desired message.
5 To check spelling, tap Edit > Spell Check.
6 Ta p Send. If you are working offline, the message is moved to the Out-
box folder and is sent the next time you connect.
Companion Programs
The companion programs consist of Word Mobile, Excel Mobile, and
PowerPoint Mobile, and Windows Media Player. To switch to a companion program on your CN30 Computer, tap Start > Programs, then tap the
program name.
Word Mobile
Word Mobile works with Microsoft Word on your desktop to give you
access to copies of your documents. You can create new documents on your
CN30 Computer, or you can copy documents from your desktop to your
CN30 Computer. Synchronize documents between your desktop and your
CN30 Computer to have up-to-date content in both locations.
Unsupported Features in Word Mobile
Word documents created on your PC can be opened and edited on your
CN30 Computer. However, Word Mobile does not fully support some features such as revision marks and password protection. Some data and for-
CN30 Mobile Computer User’s Manual 71

Chapter 2 — Windows Mobile Version 5.0
matting may be lost when you save the document on your CN30
Computer. The following features are not supported in Word Mobile:
Backgrounds These are not displayed or saved by Word Mobile.
Bi-directional text While Word Mobile will open documents containing bi-directional text, the indentations
and alignment may be displayed and saved incorrectly.
Document protection Word documents can be protected from unauthorized changes by using Protect Docu-
ment on the PC. Word Mobile does not support displaying files that have been protected
in this manner.
Metafiles These are not retained by Word Mobile; instead, a graphical representation of the object is
displayed.
Page borders Lined page borders are supported; however, artistic page borders are not. The graphics are
converted to lined borders.
Password-protected files Word Mobile does not support opening password-protected documents. You must first
remove the password protection in Word on the PC if you want to view the document on
the CN30 Computer.
Shapes and text boxes These are not displayed or saved by Word Mobile.
Smart tags These are not displayed or saved by Word Mobile.
The following features are partially supported in Word Mobile:
Picture bullets While regular bullets are supported, picture bullets are not. The picture bullets are not
displayed or saved by Word Mobile.
Revision marks These are not retained. When a document with revision marks is opened in Word
Mobile, the document will appear as though all revision marks have been accepted. When
the document is saved, revision marks will be lost.
Table styles Some or all of the formatting defined in the style will be lost when a document is saved by
Word Mobile.
Underline styles Underline styles not supported by Word Mobile are mapped to one of the four supported
styles: regular, dotted, wavy, or thick/bold/wide.
Legacy Pocket Word files You can open *.PSW files in Word Mobile; however, if you edit a file, you will need to
save it in *.DOC, *.RTF, *.TXT, or *.DOT formats.
72 CN30 Computer Mobile User’s Manual

Chapter 2 — Windows Mobile Version 5.0
The following features are not supported on the CN30 Computer; however, they are retained in the file so that when a file is opened on the PC
again, they appear as expected:
Fonts and font sizes Fonts not supported by the CN30 Computer are mapped to the closest font available,
although the original font will be listed on the CN30 Computer. When a document that
has been edited in Word Mobile is opened on the PC, text is displayed in the original font.
Footnotes, endnotes,
headers, footers
Lists Indented lists are not displayed on the CN30 Computer in the same way they are dis-
Page breaks Word Mobile does not display breaks between pages. However, all page breaks except a
These features are not displayed by Word Mobile, but they are retained when a document
is edited and saved on the CN30 Computer.
played on the PC. They are mapped to the closest indentation level supported by Word
Mobile. However, the list information is retained in the document, so when it is opened
on a PC again, lists are displayed in their original form.
break placed at the end of a document are retained in the document.
Creating a Document
Use Word Mobile to create documents, such as letters or meeting minutes.
To create a new file, tap Start > Programs > the Word Mobile icon > New.
You get either a blank document or a template, depending on what you
have selected under Menu > Tools > Options.
For future use, this is added to your Start menu in the Recent Programs
area, via Start > Word Mobile.
You can open only one document at a time; when you open a second document, you have to save the first. You can save a document you create or edit
in formats such as Word (.DOC), Pocket Word (.PSW), Rich Text Format
(.RTF), and Plain Text (.TXT).
Word Mobile contains a list of files stored on your CN30 Computer. Tap a
file in the list to open it. To delete, make copies of, and send files, tap and
hold a file in the list, then, select the action on the pop-up menu.
Tap to change the sort order of the list
Tap to open a document
Tap and hold an item to see a pop-up menu
Tap to create a new document
CN30 Mobile Computer User’s Manual 73

Chapter 2 — Windows Mobile Version 5.0
You can enter information in Word Mobile in by typing or writing. Each
mode has its own toolbar, which you can show and hide by tapping the
Input Panel icon in the center of the command bar.
You can change the zoom magnification by tapping View > Zoom, then
select the percentage you want. Select a higher percentage to enter text and
a lower one to see more of your document.
If you are opening a Word document created on a desktop, you may select
View > Wrap to Window so that you can see the entire document.
To check spelling, select text, then tap Menu > To o l s > Spelling. To use
new documents as templates, move the documents to the Templates folder.
You can insert the data in a document. Tap and hold anywhere on the document, then tap Insert Date from the pop-up menu.
Typing Mode
Using the input panel, enter typed text into the document. For more information on entering typed text, see “Basic Skills” on page 31.
To format existing text and to edit text, first select the text. You can select
text as you do in a Word document, using your stylus instead of the mouse
to drag through the text you want to select. You can search a document to
find text by tapping Menu > Edit > Find/Replace.
Tap to return to the document list
Tap and hold to see a pop-up menu
Tap to fo r mat te x t
Writing Mode
In writing mode, use your stylus to write directly on the screen. Ruled lines
are displayed as a guide, and the zoom magnification is greater than in typing mode to allow you to write more easily. For more information on writing and selecting writing, see “Basic Skills” on page 31.
74 CN30 Computer Mobile User’s Manual

Chapter 2 — Windows Mobile Version 5.0
Written words are converted to graphics (metafiles) when a Pocket Word
document is converted to a Word document on your desktop.
Synchronizing Word Mobile Documents
Word Mobile documents can be synchronized with Word documents on
your desktop. To synchronize files, first select the Files information type for
synchronization in ActiveSync. When you select Files, the My Documents
folder for the CN30 Computer is created on your desktop. Place all files
you want to synchronize with the CN30 Computer in this folder. Password-protected files cannot be synchronized.
Excel Mobile
All Word Mobile files stored in My Documents and its subfolders are synchronized with the desktop. ActiveSync converts documents during synchronization.
For more information on synchronization or file conversion, see ActiveSync
Help on the desktop.
When you delete a file on either your desktop or your CN30 Computer,
the file is deleted in the other location the next time you synchronize.
You can create and edit workbooks and templates in Excel Mobile as you
do in Microsoft Excel on your desktop. Excel Mobile workbooks are usually saved as .PXL files, but you can also save them in .XLS format.
When you close a workbook, it is automatically named and placed in the
Excel Mobile workbook list.
CN30 Mobile Computer User’s Manual 75

Chapter 2 — Windows Mobile Version 5.0
Unsupported Features in Excel Mobile
Excel workbooks created on your PC can be opened and edited on your
CN30 Computer. However, Excel Mobile does not fully support some features such as formulas and cell comments. Some data and formatting may
be lost when you save the workbook on your CN30 Computer. Note the
following regarding these Excel Mobile formatting considerations:
Alignment Horizontal, vertical and wrap text attributes remain the same, but vertical text appears hor-
izontal.
Borders Appear as a single line.
Cell patterns Patterns applied to cells are removed.
Fonts and font sizes Fonts not supported by your device are mapped to the closest font available. The original
font is listed on your CN30 Computer. When the workbook is opened in Excel on your
PC again, the data is displayed in the original font.
Number formats Numbers formatted using the Microsoft Excel 97 conditional formatting feature are dis-
Formulas and functions If an Excel file contains a function that is not supported by Excel Mobile, the function is
Protection settings Most worksheet and workbook protection features are disabled but not removed. How-
Zoom settings Are not retained. Excel supports a per worksheet zoom setting, while the Excel Mobile
Worksheet names Names that reference worksheets within the same workbook are displayed accurately, but
AutoFilter settings Are removed. However, you can use the AutoFilter command in Excel Mobile to perform
played in Number format.
removed, and only the returned value of the function appears. The following formulas are
also converted to values: formulas entered as an array or containing an array argument, for
example, =SUM({1;2;3;4}); formulas containing external link references or an intersection
range reference; and formulas containing references past row 16384 are replaced with
#REF!
ever, support for password protection has been removed. Workbooks that are passwordprotected or workbooks in which one or more worksheets are password-protected cannot
be opened. You must remove the password protection in Excel on the PC and then synchronize to open the file on the CN30 Computer.
zoom setting is applied to the entire workbook.
names that refer to other workbooks, arrays, for example, \{1;2;3;4}, array formulas, or
intersection ranges are removed from the name list. If a name is removed from the list, it is
left in formulas and functions, causing those formulas to be resolved as “#NAME?” All
hidden names are not hidden.
similar functions. If you have an AutoFilter applied to a worksheet that causes rows to be
hidden, the rows remain hidden when the file is opened in Excel Mobile. Use the Unhide
command to display the hidden rows.
Chart formatting All charts will be saved the way they are shown in Excel Mobile. Unsupported chart types
are changed to one of these supported types: Column, Bar, Line, Pie, Scatter, and Area.
Background colors, gridlines, data babels, trend lines, shadows, 3D effects, secondary axes,
and logarithmic scales are turned off.
Worksheet features The following features are not supported in Excel Mobile and are removed or modified
when a workbook is opened on the CN30 Computer: VBA modules, macro sheets, and
dialog sheets are removed and replaced with a place holder sheet; text boxes, drawing
objects, pictures, lists, conditional formats, and controls are removed; pivot table data is
converted to values.
76 CN30 Computer Mobile User’s Manual

Chapter 2 — Windows Mobile Version 5.0
Creating a Workbook
Use Excel Mobile to create workbooks, such as expense reports and mileage
logs. To create a new file, tap Start > Programs > the Excel Mobile icon >
New to access a blank workbook. Or, if you have selected a template for
new workbooks under the Menu > To o l s > Options, that template appears
with appropriate text and formatting already provided.
For future use, this is added to your Start menu in the Recent Programs
area, via Start > Excel Mobile.
You can open only one workbook at a time; when you open a second workbook, save the first. You can save a workbook you create or edit in a variety
of formats, including Pocket Excel (.PXL) and Excel (.XLS). You can also
save a workbook as a template by moving the workbook to the Templates
folder.
Excel Mobile contains a list of the files stored on your CN30 Computer.
Tap a file in the list to open it. To delete, make copies of, and send files, tap
and hold a file in the list. Then select the appropriate action from the popup menu.
Excel Mobile provides fundamental spreadsheet tools, such as formulas,
functions, sorting, and filtering. To display the toolbar, tap View > To o l -
bar.
Cell contents appear here as you enter them
Autosum icon
Tips for Working in Excel Mobile
Note the following when working in large worksheets in Excel Mobile:
• View in full-screen mode to see as much of your worksheet as possible.
Ta p View > Full Screen. To exit full-screen mode, tap View > Full
Screen.
•Tap View > Zoom and select a percentage so that you can easily read the
worksheet.
• Show and hide window elements. Tap View > Show, then tap the elements you want to show or hide.
CN30 Mobile Computer User’s Manual 77

Chapter 2 — Windows Mobile Version 5.0
• Freeze panes on a worksheet. First select the cell where you want to
freeze panes. Tap View > Freeze Panes. You might want to freeze the top
and leftmost panes in a worksheet to keep row and column labels visible
as you scroll through a sheet. Tap View > Unfreeze Panes to undo this
process.
• Split panes to view different areas of a large worksheet. Tap View > Split.
Then drag the split bar to where you want it. To remove the split, tap
View > Remove Split.
For more information on using Excel Mobile, tap Start > Help, then select
a topic.
PowerPoint Mobile
With PowerPoint Mobile on your CN30 Computer, you can open and
view slide show presentations created on your PC. Whether the presentation is opened from an e-mail message, downloaded from a file share or the
Internet, copied to the CN30 Computer via a storage card, or obtained by
synchronizing with your PC, slide shows created in *.PPT and *.PPS format with PowerPoint 97 and later can be viewed on your CN30 Computer.
Many presentation elements built into the slide shows such as slide transitions and animations will play back on the device. If the presentation is set
up as a timed slide show, one slide will advance to the next automatically.
Links to URLs are also supported.
Unsupported Features in PowerPoint Mobile
PowerPoint features not supported on the CN30 Computer include:
Notes Notes written for slides will not be visible.
Rearranging or editing
slides
File formats Files created in *.PPT format earlier than PowerPoint 97
For more information on PowerPoint Mobile while you are in this application, tap Start > Help, then select a topic.
PowerPoint Mobile is a viewer only.
and HTML files in *.HTM and *.MHT formats are not
supported.
78 CN30 Computer Mobile User’s Manual

Chapter 2 — Windows Mobile Version 5.0
Starting a Slide Show Presentation
1 To start a slide show presentation, tap Start > Programs > the Power-
Point Mobile icon. For future use, this is added to your Start menu in
the Recent Programs area, via Start > PowerPoint Mobile.
2 In the presentation list, tap the slide show you want to view.
3 Tap the current slide to advance to the next slide. If the presentation is
set up as a timed slide show, slides will advance automatically.
4 To view a PowerPoint Mobile presentation in portrait, or right-handed
or left-handed landscape orientations, tap the slide icon (in the bottom,
left corner of the following illustration) for a pop-up menu.
5 Ta p Show Options > the Orientation tab, then select an orientation.
CN30 Mobile Computer User’s Manual 79

Chapter 2 — Windows Mobile Version 5.0
6 Ta p Default to view the presentation in the orientation that best fits the
size and shape of the screen.
Windows Media Player for Windows Mobile
Use Microsoft Windows Media for Windows Mobile to play digital audio
and video files that are stored on your CN30 Computer or on a network.
To switch to Windows Media on your CN30 Computer, tap Start > Win-
dows Media.
Use Microsoft Windows Media Player on your desktop to copy digital
audio and video files to your CN30 Computer. You can play Windows
Media and MP3 files on your Windows Mobile.
Indicates the progress of the current track
Tap to adjust the volume
Tap to skip to the next song
Tap to play or pause
Tap to play the previous song
Tap to download from the Internet
For more information about using Windows Media, tap Start > Help, then
select a topic.
80 CN30 Computer Mobile User’s Manual

Internet Explorer Mobile
Use Internet Explorer Mobile to view Web or WAP pages in either of these
ways:
• During synchronization with your desktop, download your favorite links
and mobile favorites that are stored in the Mobile Favorites subfolder in
Internet Explorer on the desktop.
• Connect to an ISP or network and browse the Web. To do this, create
the connection first, as described in “Getting Connected” on page 84.
When connected to an ISP or network, you can also download files and
programs from the Internet or intranet.
To switch to Internet Explorer Mobile on your CN30 Computer, tap Start
> Internet Explorer.
Mobile Favorites
Only items stored in the Mobile Favorites subfolder in the Favorites folder
in Internet Explorer on your desktop are synchronized with your CN30
Computer. This folder was created automatically when you installed
ActiveSync.
Chapter 2 — Windows Mobile Version 5.0
Favorite Links
During synchronization, the list of favorite links in the Mobile Favorites
folder on your desktop is synchronized with Internet Explorer Mobile on
your CN30 Computer. Both computers are updated with changes made to
either list each time you synchronize. Unless you mark the favorite link as a
mobile favorite, only the link is downloaded to your CN30 Computer.
Connect to your ISP or network to view the content.
1 In ActiveSync on your desktop, click To o ls > Options, and select
“Favorites” from the Windows PC list. For more information on using
ActiveSync, see ActiveSync Help on the desktop.
2 In Internet Explorer on your desktop, save or move favorite links to the
Mobile Favorites subfolder in the Favorites list via Favorites > Organize
Favorites. For more information on using Internet Explorer, see Internet
Explorer Help on the desktop.
3 Connect your CN30 Computer to your desktop. If synchronization does
not start automatically, in ActiveSync on your desktop, click Sync.
CN30 Mobile Computer User’s Manual 81

Chapter 2 — Windows Mobile Version 5.0
Mobile Favorites
If you are using Microsoft Internet Explorer 5.0 or later on your desktop,
you can download mobile favorites to your CN30 Computer. Synchronizing mobile favorites downloads Web content to your CN30 Computer so
that you can view pages while you are disconnected from your ISP and
desktop.
Use the Internet Explorer plug-in installed with ActiveSync to create
mobile favorites quickly. To create a mobile favorite:
1 In ActiveSync on your desktop, click To o ls > Options, and select
“Favorites” from the Windows PC list. For more information on using
ActiveSync, see ActiveSync Help on the desktop.
2 In Internet Explorer 5.0 or greater on your desktop, browse to the page
you want to view offline, then click To o ls > Create Mobile Favorite.
3 To change the link name, enter a new name in the Name box.
4 In the Update box, select a desired update schedule to keep the page in
the Mobile Favorites folder up to date. You can also update content by
clicking Tools > Synchronize in Internet Explorer.
5 To save the link in a subfolder of Mobile Favorites, click Create In and
select the desired subfolder.
6 Click OK. Internet Explorer downloads the latest version of the page to
your desktop.
7 To download the pages that are linked to the mobile favorite you just
created, in Internet Explorer on the desktop, right-click the mobile
favorite, then click Properties. On the Download tab, specify the num-
ber of links deep you want to download. To conserve CN30 Computer
memory, go only one level deep.
8 Connect your CN30 Computer to your desktop. If synchronization
between your CN30 Computer and desktop does not start, in ActiveSync on your desktop, click Sync.
Mobile favorites take up storage memory on your CN30 Computer. To
minimize the amount of memory used:
• In the settings for the Favorites information, type in ActiveSync options,
turn off pictures and sounds, or stop some mobile favorites from being
downloaded to the CN30 Computer. For more information, see Active-
Sync Help.
• Limit the number of downloaded linked pages. In Internet Explorer on
the desktop, right-click the mobile favorite you want to change and then
Properties. In the Download tab, specify “0” or “1” for the number of
linked pages you want to download.
82 CN30 Computer Mobile User’s Manual

Using Internet Explorer Mobile
You can use Internet Explorer Mobile to browse mobile favorites and channels that were downloaded to your CN30 Computer without connecting to
the Internet. You can also connect to the Internet through an ISP or a network connection and browse the Web.
Chapter 2 — Windows Mobile Version 5.0
Viewing Mobile Favorites and Channels
1 Ta p Favorites, or Menu > Favorites to display your list of favorites.
2 Tap the page you want to view.
Tap the favorite you want to view
Tap to add or remove a folder or link
3 The page that was downloaded the last time you synchronized with your
desktop opens. If the page is not on your CN30 Computer, the favorite
is dimmed. Synchronize with your desktop again to download the page
to your CN30 Computer, or connect to the Internet to view the page.
CN30 Mobile Computer User’s Manual 83

Chapter 2 — Windows Mobile Version 5.0
Browsing the Internet
1 Set up a connection to your ISP or corporate network using Connec-
tions, as described in “Getting Connected” on page 84.
2 To connect and start browsing, do one of the following:
•Tap Favorites, or Menu > Favorites, and then tap the favorite you
want to view.
• In the address bar that appears at the top of the screen, enter the Web
address you want to visit and then tap Enter. Tap the arrow to choose
from previously entered addresses.
• To add a favorite link while using the CN30 Computer, go to the
page you want to add, tap and hold on the page, and tap Add to
Favorites.
Getting Connected
You can set up connections to the Internet and corporate network at work
to do such activities as browsing the Internet or intranet, sending and
receiving e-mail, and synchronizing information using ActiveSync.
Connections can be made using a modem, wireless network, or Ethernet.
You can use a modem connection to set up connections with an external
modem.
Your CN30 Computer has two groups of connection settings: My ISP and
My Work Network. Use My ISP settings to connect to the Internet. Use
My Work Network settings to connect to any private network, such as a
corporate network used at work.
• My ISP: Once connected, you can send and receive e-mail messages by
using Messaging and view Web or WAP pages by using Internet
Explorer Mobile. The communication software for creating an ISP connection is already installed on your CN30 Computer. Your service provider provides the software needed to install other services, such as
paging and fax services. If this is the method you want to use, see “Connecting to an Internet Service Provider” on page 85.
• My Work Network: Connect to the network at your company or organization where you work. Once connected, you can send and receive email messages by using Messaging, view Web or WAP pages by using
Internet Explorer Mobile, and synchronize with your desktop. If this is
the method you want to use, see “Connecting to Work” on page 87.
84 CN30 Computer Mobile User’s Manual

Connecting to an Internet Service Provider
You can connect to your ISP, and use the connection to send and receive e–
mail messages and view Web or WAP pages. You can connect to your ISP
via a modem connection.
Get an ISP dial-up access telephone number, a user name, and a password
from your ISP.
If you do not have a modem dock, use a NULL modem cable and appropriate adapters to connect an external modem to your CN30 Computer
through the serial port.
To view additional information for any screen in the wizard or while
changing settings, tap the Help icon.
1 Ta p Start > Settings > the Connections icon. In My ISP, tap Add a new
modem connection.
Chapter 2 — Windows Mobile Version 5.0
2 Enter a name for the connection, such as “ISP Connection.” In the
Select a modem list, select your modem type. If your modem type does
not appear, try reinserting the CN30 Computer into your modem dock.
If you are using an external modem that is connected to your CN30
Computer with a cable, select “Hayes Compatible on COM1.” Tap
Next to continue.
CN30 Mobile Computer User’s Manual 85

Chapter 2 — Windows Mobile Version 5.0
3 Enter the access phone number, then tap Next. For more information,
tap use dialing rules.
4 Enter the user name, password, and domain (if provided by an ISP or
your network administrator), then tap Finish.
5 Tap the Advanced tab from the Connections screen, then tap Dialing
Rules to specify your current location. These settings apply to all con-
nections. Tap Use dialing rules, tap OK, then tap Edit to continue.
86 CN30 Computer Mobile User’s Manual

Chapter 2 — Windows Mobile Version 5.0
6 Specify your current phone type. If your phone type is pulse dialing,
check Pulse dialing. If your type is tone dialing (as most phone lines
are), then clear Pulse dialing. Continue to tap ok to close each page and
return to the Settings page.
To start the connection, start using one of the following programs. Once
connected, you can:
Connecting to Work
• Send and receive e-mail messages by using Messaging. Before you can
use Messaging, you need to provide the information it needs to communicate with the e-mail server. For specific instructions, see “Connecting
Directly to an E-mail Server” on page 92.
• Visit Web and WAP pages by using Internet Explorer Mobile. For more
information, see “Internet Explorer Mobile” on page 81.
Note: To change modem connection settings in My ISP, tap Manage exist-
ing connections. Select the desired modem connection, tap Settings, then
follow the instructions on the screen.
If you have access to a network at work, you can send e-mail messages, view
intranet pages, synchronize your CN30 Computer, and possibly access the
Internet. You can connect to work in one of two ways:
• Create a modem connection by using a RAS (Remote Access Server)
account. Before you can create this modem connection, your network
administrator needs to set up a RAS account for you. Your network
administrator may also give you Virtual Private Network (VPN) settings.
• Get a dial-up access telephone number, a user name, and a password
from your network administrator. If your CN30 Computer does not
have access to a mobile phone network, insert your CN30 Computer
into a modem dock.
Note: To change modem connection settings in My Work Network, tap
Manage existing connections. Select the desired modem connection, tap
Settings, then follow the instructions on the screen.
CN30 Mobile Computer User’s Manual 87

Chapter 2 — Windows Mobile Version 5.0
To view additional information for any screen in the wizard or while
changing settings, tap the Help icon.
Creating a Modem Connection to Work
1 Ta p Start > Settings > the Connections icon. In My Work Network,
tap Add a new modem connection.
2 Enter a name for the connection, such as “Company Connection.” In
the Select a modem list, select your modem type, then tap Next to continue. If your modem type does not appear, try reinserting your CN30
Computer into your modem dock.
• If using an external modem connected to your CN30 Computer with
a cable, select “Hayes Compatible on COM1.”
• If using any type of external modem, select the modem by name. If a
listing does not exist for your external modem, select “Hayes Compatible on COM1.”
3 Enter the access phone number, using some of the following guidelines.
If you know part of the phone number changes frequently as you travel,
create dialing rules to avoid creating numerous modem connections for
the same phone number. For more information, tap use dialing rules.
88 CN30 Computer Mobile User’s Manual
 Loading...