

Page 1
HP LaserJet M1319 MFP Series – Fax
Manage the phone book
How do I? Steps to perform
Manage the phone book
You can store frequently dialed fax numbers or groups of
fax numbers as speed dials or group-dial entries.
In the product phone book, a total of 120 entries are
available for speed dials and group-dial entries.
For example, if you program 100 of the entries as speeddials, the remaining 20 can be used for group dials.
1 Open HP Toolbox.
Use phone-book data from other programs
NOTE: Before a phone book from another program can
be imported, you must use the export feature in that other
program.
3 Browse to the program phone book, and then click
2 Click Fax, and then click Fax Phone Book.
Import.
© 2008 Copyright Hewlett-Packard
Development Company, L.P.
1
www.hp.com
Page 2
HP LaserJet M1319 MFP Series – Fax
A
Fax logs and reports
How do I? Steps to perform
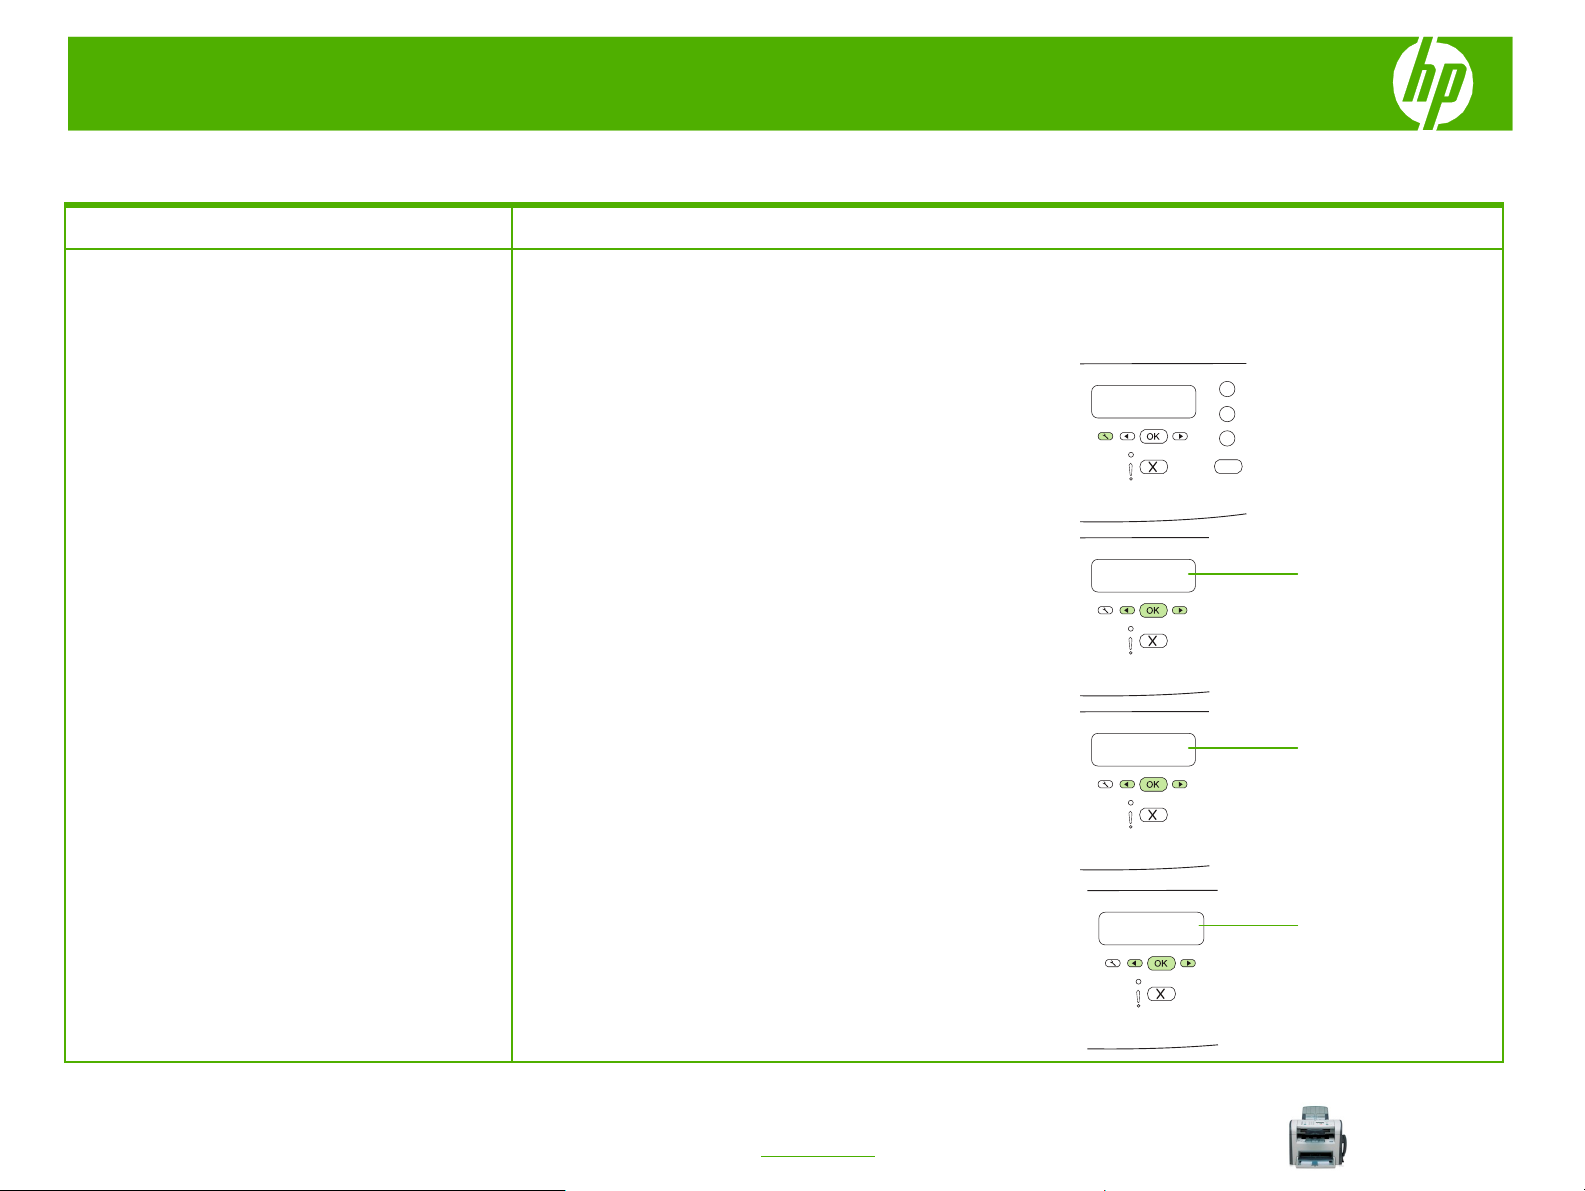
Use the following instructions to print fax logs and reports:
Print all fax reports
● Fax activity log
● Phone book report
1 On the control panel, press Setup.
2 Use the arrow buttons to select Reports, and then press OK.
● Configuration report
● Block-fax list
Reports
3 Use the arrow buttons to select Fax Reports, and then press
OK.
4 Use the arrow buttons to select All fax reports, and then press
OK. The product exits the menu settings and prints the reports.
Fax Reports
ll fax reports
1
© 2008 Copyright Hewlett-Packard
Development Company, L.P.
www.hp.com
Page 3

HP LaserJet M1319 MFP Series – Fax
How do I? Steps to perform
1 On the control panel, press Setup.
Print individual fax reports
2 Use the arrow buttons to select Reports, and then press OK.
Reports
4 Use the arrow buttons to select the report to be printed, and then
3 Use the arrow buttons to select Fax Reports, and then press
OK.
press OK. The product exits the menu settings and prints the
report.
2
© 2008 Copyright Hewlett-Packard
Development Company, L.P.
www.hp.com
Fax Reports
Page 4

HP LaserJet M1319 MFP Series – Fax
Fax my scan
How do I? Steps to perform
1 Insert the top-end of the stack of originals into the ADF
Fax from the automatic document feeder
(ADF)
CAUTION: To prevent damage to the product, do not
use an original that contains correction tape,
correction fluid, paper clips, or staples. Also, do not
load photographs, small originals, or fragile originals
into the ADF. Use the flatbed glass to scan these
items.
input tray, with the media stack face-down and the first
page to be copied on bottom of the stack.
2 Make sure that the ADF media lever is set correctly for
single-page or multiple-page documents.
3 Slide the stack into the ADF until it does not move any
farther.
Document loaded appears on the control-panel display.
1
© 2008 Copyright Hewlett-Packard
Development Company, L.P.
www.hp.com
Document loaded
Page 5

HP LaserJet M1319 MFP Series – Fax
How do I? Steps to perform
4 Adjust the media guides until they are snug against the
Fax from the automatic document feeder
(ADF) (continued)
media.
5 Use the alphanumeric buttons on the control panel to dial
the number.
-or-
If the fax number you are calling has been assigned to a
one-touch key, press that key.
-or-
If the fax number you are calling has a speed dial or groupdial entry, press Phone Book, use the alphanumeric
buttons to specify the speed dial or group-dial entry, and
then press OK.
© 2008 Copyright Hewlett-Packard
Development Company, L.P.
6 On the control panel, press Start Fax. The product starts
the fax job.
2
www.hp.com
Page 6

HP LaserJet M1319 MFP Series – Fax
Schedule a fax
How do I? Steps to perform
1 Load the document into the automatic document feeder
Send a delayed fax
NOTE: If the product cannot transmit the fax at the
scheduled time, that information is indicated on the
fax error report (if that option is turned on) or recorded
in the fax activity log. The transmittal might not be
initiated because the fax-sending call is not answered,
or because a busy signal stops the redial attempts.
(ADF) input tray.
2 On the control panel, press Setup.
3 Use the arrow buttons until Fax functions appears, and
then press OK.
Fax functions
© 2008 Copyright Hewlett-Packard
Development Company, L.P.
4 Use the arrow buttons until Send fax later appears, and
then press OK.
1
www.hp.com
Send fax later
Page 7

HP LaserJet M1319 MFP Series – Fax
How do I? Steps to perform
5 Use the alphanumeric buttons to enter the time.
Send a delayed fax (continued)
6 If the product is set to the 12-hour time mode, use the
arrow buttons to move the cursor past the fourth character
to set A.M. or P.M. Select 1 for A.M. or select 2 for P.M.,
and then press OK.
-or-
If the product is set to the 24-hour time mode, press OK.
7 Use the alphanumeric buttons to enter the date, and then
press OK.
-or-
Accept the default date by pressing OK.
8 Enter the fax number, enter the speed dial, or press the
one-touch key.
07:00
MM/DD/YYYY
© 2008 Copyright Hewlett-Packard
Development Company, L.P.
9 Press OK or Start Fax. The product scans the document
into memory and sends it at the designated time.
2
www.hp.com
Page 8

HP LaserJet M1319 MFP Series – Fax
Fax speed dial
How do I? Steps to perform
NOTE: To gain access to all of the speed dials, you must use the
Create and edit speed dials
Shift button. Speed dials 6 through 10 are all available by pressing
Shift and the associated one-touch key on the control panel.
1 On the control panel, press Setup.
2 Use the arrow buttons to select Fax setup, and then press OK.
3 Press OK to select Phone Book.
4 Press OK to select Individual Setup.
Fax setup
Phone Book
Individual Setup
© 2008 Copyright Hewlett-Packard
Development Company, L.P.
1
www.hp.com
Page 9

HP LaserJet M1319 MFP Series – Fax
How do I? Steps to perform
5 Press OK to select Add.
Create and edit speed dials
(continued)
Add
NOTE: When entering a fax number, press Pause
until a comma (,) appears if you want to insert a
pause in the dialing sequence, or press * until W
appears if you want the product to wait for a dial
tone.
6 Use the alphanumeric buttons to specify the speed-dial entry
number that you want to associate with this fax number, and then
press OK. Selecting a number from 1 to 10 also associates the fax
number with the corresponding one-touch key.
7 Use the alphanumeric buttons to enter the fax number. Include any
pauses or other needed numbers, such as an area code, an
access code for numbers outside a PBX system (usually a 9 or 0),
or a long distance prefix.
8 Press OK.
© 2008 Copyright Hewlett-Packard
Development Company, L.P.
2
www.hp.com
Page 10

HP LaserJet M1319 MFP Series – Fax
How do I? Steps to perform
9 Use the alphanumeric buttons to enter a name for the fax number.
Create and edit speed dials
(continued)
NOTE: To insert punctuation, press the asterisk (*)
button repeatedly until the character that you want
appears, and then press the > button to go to the
next space.
To do so, repeatedly press the alphanumeric button for the letter
that you need until the letter appears.
11 If you have more speed dials to program, repeat steps 1 through
10 Press OK to save the information.
10.
© 2008 Copyright Hewlett-Packard
Development Company, L.P.
3
www.hp.com
 Loading...