

Page 1

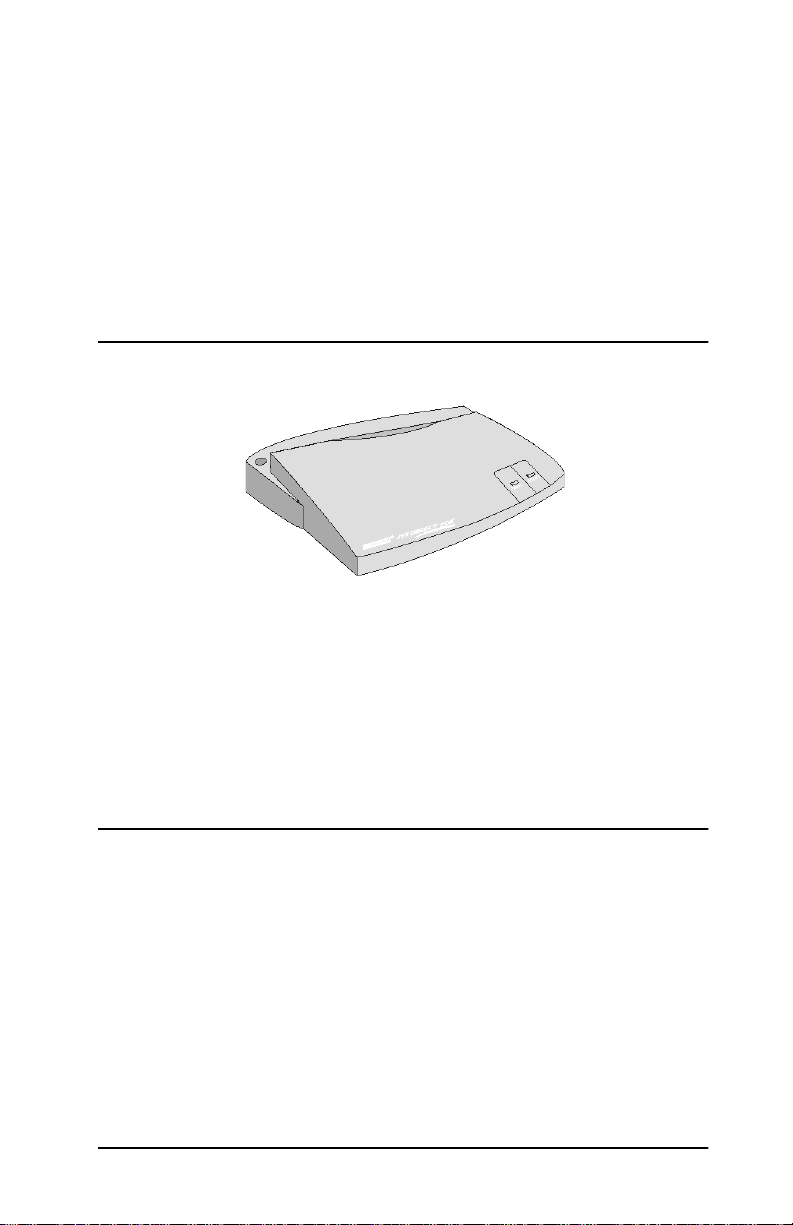
HP JetDirect 70X
Home Print Server
(J4155A)
Page 2

User’s Guide
HP JetDirect 70X Home Print Server
Page 3

© Hewlett-Packard Company 2000
All rights reserved
Reproduction, adaptation or translation
without prior written permission is
prohibited, except as allowed under the
copyright laws.
Publication number
5967-9977
First Edition, March 2000
Applicable Products
J4155A
Trademark Credits
Microsoft
Windows NT
®
,MS-DOS®,Windows®,
®
are U.S. registered
trademarks of Microsoft Corporation.
Netscape Navigator is a U.S. trademark
of Netscape Communications
Corporation.
Other product names are U.S.
trademarks or registered trademarks of
their respective owners.
War ran ty
The information contained in this
document is subject to change without
notice.
HEWLETT-PACKARD COMPANY
MAKES NO WARRANTYOFANYKIND
WITH REGARD TO THIS MATERIAL,
INCLUDING, BUT NOT LIMITED TO,
THE IMPLIED WARRANTIES OF
MERCHANTABILITY AND FITNESS
FOR A PARTICULAR PURPOSE.
Hewlett-Packard shall not be liable for
errors contained herein or for incidental
or consequential damages inconnection
with the furnishing, performanceor use
of this material.
For warranty service information, see
the Warranty section in this guide.
Safety Considerations
Prior to the installation and use of this
product, review allsafety markings and
instructions.
Instruction Manual Symbol.
!
If theproduct is marked with
this symbol, refer to the
product manuals to protect
the product from damage.
WARNING: Denotes a hazard that can
cause injury.
CAUTION: Denotes a hazard that can
damage equipment or data.
Do not proceed beyond a WARNING
or CAUTION notice until you have
understood the hazard and have taken
appropriate steps.
Hewlett-Packard Company
8000 Foothills Boulevard
Roseville, California USA 95747-6588
Page 4

Table of Contents
1 Introduction..................................... 1
What’saHomePrintServer? .......................1
TheNeedforHomeNetworking.....................1
DifferentSetupsarePossible .......................2
Terms ..........................................3
2 Setup........................................... 5
3 Operations ..................................... 11
Printing........................................11
SendingFaxes ..................................11
NetworkScanning...............................11
4 Frequently-AskedQuestions ..................... 15
5 Troubleshooting................................ 17
HardwareInstallationProblems....................17
HPJetDirect70XSetupWizardProblems............18
PrintingProblems...............................21
WebScanProblems...............................22
IndicatorLights.................................23
GettingHelp....................................24
6 SpecificationsandService....................... 25
PhysicalSpecifications ...........................25
SupportedPrinters ..............................25
Accessories.....................................26
WarrantyService................................27
HPCustomerCareOnline.........................28
HPCustomerCareForum.........................28
HPCustomerCarebyPhone.......................28
RegulatoryStatements ...........................29
iii
Page 5

iv
Page 6
1Introduction
Thank you forpurchasing the HP JetDirect 70X Home Print Server!
You will find it to be an easy and flexible way to share a printer
among all the PCs in your home.
This guide provides information about installing and operating the
HP JetDirect 70X.
While using this manual, if you encounter some new or unfamiliar
terms, see the Terms section at the end of this chapter.
What’s a Home Print Server?
A home print server is an accessory that allows every PC in your
home to sharethe same printer,using your existinghome phoneline
network.
A home phoneline network allows telephone and network activity
to take place at the same time. With one phone line, you can make
telephone calls or connect to the Internet, even while you are
printing.
The Need for Home Networking
Networks in businesses allow PCs to share printers and other
devices. However, for the home, a network has usually been too
costly and inconvenient to install.
In a non-networked home with multiple PCs, each PC usually has
a printer connected directly to it.
Sometimes there is only one quality laser or color inkjet printer.
Sometimes there is both a laser printer and a color inkjet printer.
In either case, there is no easy way for family members to use all
the printers.
Introduction 1
Page 7
Printer Sharing with an HP JetDirect 70X
When you use an HP JetDirect 70X Home Print Server, there are
several advantages:
• You can connect the HP JetDirect 70X to any phone jack,
regardless of its location in your home. The phone jack must be
on the same phone line as the PCs in the network.
• Only the PC that has the file to be printed, the home print server,
and the printer, need to be turned on.
• Scanning and faxing functions of HP All-in-One products are
available to networked PCs.
The following illustrates how you might use a home print server to
share a printer in your home.
Bedroom 1
Home Office
JetDirect 70X
Bedroom 2
Family
Room
All of the PCs connected to the phone line in this home can now
share the printer in the home office.
Different Setups are Possible
If your home has only one telephone line, the same line is used for
voice phone calls, connecting to the Internet, and networking PCs
over the home phoneline network.
If your home has two telephone lines, you must connect the HP
JetDirect 70X to the same telephone line used by the home
phoneline network.
2Introduction
Page 8

It is also possible to connect your PCs and HP JetDirect 70X
together independent of your home telephone wiring, using
standard telephone cables. This is useful in small offices, where
each desk might have multiple independent telephone lines and
might not have a suitable arrangement for connection over one
telephone line.
Term s
Daisy chaining: a method of connecting multiple devices.
Driver: software that enables your PC to communicate with a
particular piece of hardware, such as a printer, modem, or network
card.
Home phoneline network: connects the PCs and printers in a
home, using existing phone lines.
HomePNA (Home Phoneline Networking Alliance): an
association of companies working together to promote widespread
deployment of compatible, low-cost solutions for in-home,
phoneline-based networking.
LED (Light-emitting diode): a light on the top and back of the
HP JetDirect 70X.
PCI (Peripheral Component Interconnect): astandardPC
interface used to connect devices to PCs.
Phoneline splitter: a small telephone accessory that allows two
or more telephone devices (answering machines, faxes, phones) to
share one phone jack. You can buy a phoneline splitter at your local
electronics shop. Some splitters can divide a line into two, three, or
more jacks. Make sure you buy a splitter that divides a wall jack for
asinglephonenumberintotwoormorejacksforthesamenumber.
POTS (Plain old telephone services): the regular phone
services, such as voice calls and fax transmissions.
RJ-11: the most common telephone jack used in household or office
phones.
Introduction 3
Page 9

4Introduction
Page 10
2Setup
Setting up your HP JetDirect 70X Home Print Server is also
described on the large Quick Start guide included in the shipping
container.
To set up the JetDirect 70X Home Print Server, complete the
following tasks:
1. Before You Begin
• You must have a working home phoneline network installed. It
includes:
• PCs equipped with internal or external home phoneline PC
network interface (PNA) devices (these are not modems).
• PCs connected to the same phone line.
• Verify the home phoneline network is functioning by using the
procedures described in the documentation that came with your
home phoneline network interface devices.
®
• You should have your printer and Windows
CDs available. They may be required during setup.
operating system
Setup 5
Page 11
2. Unpack Your HP JetDirect 70X
HP JetDirect 70X
Quick Start Guide
HP JetDirect 70X
Setup CD
Power Supply Telephone Cable
User’s Guide
3. Connect Your HP JetDirect 70X
“Line” Jack
• Makesuretheprinteristurnedoff.
• Attach your printer cable to the HP JetDirect 70X’s parallel
printer port.
• Attach the phone cable (included) to the HP JetDirect 70X’s
“Line” jack.
Home Phoneline
Networking Device
Modem
Parallel Printer Port
• Option A: Locate your printer near your PC. Attach the other
end of the phone cable to a wall jack. Connect the phone cable
6Setup
Page 12

from your PC’s home phoneline networking device to the HP
JetDirect 70X.
• Option B: Locate your printer anywhere – even in a room
without a PC. Attach the other end of the phone cable directly to
a telephone wall outlet.
Note: If your home has two telephone lines, you must
connect the HPJetDirect 70X to the same telephone
line used by the home phoneline network.
4. Plug in the HP JetDirect 70X
Power cable
Test button
• Connect the power supply (included) to the HP JetDirect 70X.
Connect the other end to a wall outlet.
• Turn on your printer.
• The green Status light on the top of the HP JetDirect 70X will
blink for about five seconds and then stay on solid.
• Press the Testbutton on the HP JetDirect70X. A test page should
print on your printer. This verifies the connection to the printer
and may be required in Step 5.
Setup 7
Page 13

• If a test page does not print, refer to the Troubleshooting
chapter of this User’s Guide.
• If the IP address on the test page is 0.0.0.0, the HP JetDirect
70X has not initialized. Wait one minute and press the Test
button again.
5. Set Up Your PC to Print to Your HP JetDirect
70X-Connected Printer
Note: If you are using Internet sharing, performthe setup
first on the PC which provides Internet sharing.
The installation method varies with the printer you are installing.
Determine which option is appropriate for your printer and
environment; then follow the instructions below.
Option A: For HP DeskJet 970, 950, 930, 895C, 880C, 810, 2000
Professional Series, LaserJet 5L, 6P, 2100, or 4000 Series
printers.
Option B: For HP OfficeJet G, HP LaserJet 3150, or LaserJet
1100A All-in-Ones.
Option C: For printers not listed above that were previously
installed and working on your PC.
Option D: For printers not listed above that have not been
installed on your PC.
Note: It is necessary to repeat the installation option for
each PC in your network from which you want to
print.
Option A: For HP DeskJet 970, 950, 930, 895C, 880C, 810, 2000
Professional Series, LaserJet 5L, 6P, 2100, or 4000 Series
printers.
• If you are running Windows 95 or 98, insert the HP JetDirect
70X Setup CD and run the Setup Wizard.
• If you are running Windows NT
®
4.0 and your printer was
previously installed, insert the HP JetDirect 70X Setup CD
and run the Setup Wizard. If your printer was not previously
installed, you must first install the printer (use Option D
below).
8Setup
Page 14

Option B: For HP OfficeJet G, HP LaserJet 3150, or HP
LaserJet 1100A All-in-Ones.
• Youmust use the Setup CD thatshipped with your All-in-One.
During the installation, choose the network installation
option. This option will guide you through the setup.
Option C: For printers not listed above that were previously
installed and working on your PC.
• Insert the HP JetDirect 70X Setup CD and run the Setup
Wizard.
Option D: For printers not listed above that have not been
installed on your PC.
•Part1. Install the printer. Use the printer Setup CD that
came with your printer. During the setup you may be
prompted to choose a port. If this happens, choose LPT1. If
you get a message saying that no printer is attached to LPT1,
simply continue with the printer installation (you may have
to click Skip).
•Part2. Insert the HP JetDirect 70X Setup CD and run the
Setup Wizard.
Note: For supported All-in-Ones not listed above, in order
to use the HP JetDirect WebScan feature, you must
choose the TCIP/IP printing protocol. (You will be
prompted for this selection during the Setup
Wizard.) See the Network Scanning section in
Chapter3formoreinformation.
Setup 9
Page 15

10 Setup
Page 16

3Operations
Printing
Once your HP JetDirect 70X Home Print Server and PCs are
configured, you can print from any PC connected to your home
phoneline network.
You can select the printer attached to the HP JetDirect 70X from
any application, just as you do now with directly-attached printers.
If another PC in your home is using the printer connected to the HP
JetDirect 70X, your print job will print after the first print job
finishes.
Sending Faxes
You can send faxes from any PC on your home phoneline network
if you have one of the following HP All-in-Ones installed:
•HPOfficeJetG
• HP LaserJet 3150
Refer to the documentation that came with your All-in-One device.
Network Scanning
There are two methods of scanning over a home phoneline network.
All-in-One Software CD
The HP OfficeJet G and HP LaserJet 3150 All-in-Ones have
networking software included on the setup CD that came with them.
To enable full scanning support over the network, run the All-inOne setup CD and select the network installation option.
Refer to the documentation that came with your All-in-One device.
WebScan
If you have a supported All-in-One (see the Supported Printers list
in Chapter 6 of this User’s Guide), you can use the HP JetDirect
WebScan feature. WebScan allows you to scan and save scanned
images over the network. If you have a flatbed All-in-One, you have
Operations 11
Page 17

the ability to preview scanned images. In order to use the WebScan
feature,youmustsetuptheHPJetDirect70XtousetheTCP/IP
communication protocol. You will be promptedto select this protocol
when you run the HP JetDirect 70X Setup CD.
Note: Since WebScan is included in your HP JetDirect
70X, the All-in-One software does not need to be
installed.
To use the WebScan feature, you will need to have one of the
following supported web browsers installed:
TM
• Netscape Navigator
version 4.01-4.7, excluding 4.04.
• Microsoft Internet Explorer version 4.01-5.0.
Using WebScan
Starting WebScan
1. Open your web browser.
2. Netscape users: enter the IP address of the HP JetDirect 70X in
the “Go To:” or “Location” field.
Internet Explorer users: enter the IPaddress of the HP JetDirect
70X in the “Address:” field.
For example: http://123.123.123.123 (The IP address of the HP
JetDirect 70X represents its URL).
The IP address of the HP JetDirect 70X can be found on its Test
page. Press the button on the back of your HP JetDirect 70X and
the Test page will print on the printer.
The web interface for the HP JetDirect WebScan will display.
Click the Scan buttonontheleftsideofthewindow.
If there is no Scan button, but the Home and Administration
buttons appear, make sure your All-in-One is a supported device
(See the Supported Printer list in Chapter 6of this User’s Guide).
Make sure the All-in-One is correctly connected to the HP
JetDirect 70X.
If the page does not load on your web browser, check the
WebScan section of the Troubleshooting chapter in this User’s
Guide.
12 Operations
Page 18

Preview Image
If you have a flatbed All-in-One, you may preview an image by
clicking the Scan Preview button.Useyourmousetoselectthe
desired portion of the preview image by clicking and dragging a
rectangle on the preview window.
Scan Image
Followthesestepstoscananimage:
1. Select your paper size using the “Document Size” list box. If you
have selected a region of your preview image, this box will
display “Selected Region.”
2. Select an image format. Available formats are PDF and TIFF.
JPEG is also supported on the OfficeJet G.
3. Selectthetypeofdocumentyouarescanningusingthe
“Document Settings” buttons. You may select a custom scan
resolution and color depth using the “Custom Settings” button.
4. Click the Download Scanned Image button to scan the
document and download it to your PC. You may save the scanned
image to your disk drive or run an application to view the
scanned image from your browser.
Operations 13
Page 19

Scanner Status
The following table shows the status messages for the scanner and
what they mean.
Status Message Meaning
Ready The scanner is ready for use
Scanning You are currently scanning
Resetting The scanner is resetting. If this persists, turn your
HP JetDirect 70X off and back on.
In use by... or Busy Someone else is using the scanner
Offline The scanner is not available (the device may be
turned off)
Unable to contact device A network error occurred while contacting the
device
Document Settings
The document settings are dependent on the particular All-in-One
attached. Document settings can include:
• Color Picture: 150 DPI, 24-bit color
• Color Drawing: 300 DPI, 24-bit color
• B/W Picture: 150 DPI, gray-scale
• Text: 300 DPI, black and white
• Custom (manual) Settings:
• Resolution (100, 150, 200, or 300 DPI)
• Color depth (24-bit color, gray-scale, or black and white)
Document Size
The document size is dependent on the particular All-in-One
attached. Document sizes can include:
• Letter (8.5” x 11”)
•Legal(8.5”x14”)
• A4 (8.3” x 11.7”)
• Executive (7.25” x 10.5”)
•4”x6”
•5”x7”
•3”x5”
•3”x3”
14 Operations
Page 20

4 Frequently-Asked Questions
1 What if another computer is printing a job?
Your print job will print as soon as the first job finishes.
2 Can I make phone calls while printing?
Yes.
3 Can I connect to my Internet Service Provider while
printing?
Yes.
4 I have an HP All-in-One. Can I still scan with it?
Yes. See the Network Scanning section in Chapter 3 of this
User’s Guide.
5 I have an HP All-in-One. Can I still send faxes?
Yes. The HP JetDirect 70X supports faxing on the HP OfficeJet
G and the LaserJet 3150 All-in-Ones. All-in-Ones can continue
to fax independent of the HP JetDirect 70X and your network.
6 I have a printer that isn’t listed as supported on the HP
JetDirect 70X carton. Can I still use it?
The HP JetDirect 70X should work with most HP or non-HP
printers with a parallel port (refer to Option D in Chapter 2 of
this User’s Guide for installation steps).
7 Can I use the home print server with Macintosh
computers?
No. The HP JetDirect 70X works with PCs running Windows 95,
Windows 98, or Windows NT 4.0.
8 Can I print from DOS?
No. The HP JetDirect 70X does not support DOS printing.
9 What happens if there’s a power outage or I unplug the
HP JetDirect 70X while I’m printing?
The result is the same as when printing from a directlyconnected printer. There may be a loss of print data, and you will
have to print again.
Frequently-Asked Questions 15
Page 21

10 My HP JetDirect 70X is connected to the network
interface device in my home office PC. What happens if I
turn off the home office PC?
You will still be able to print. The HP Jet Direct 70X works
whether or not the PC it is attached to is turned on.
11 How far from the PCs can the HP JetDirect 70X be?
The HP JetDirect 70X can be located up to 100 feet from the PC.
This means you can locate the HP JetDirect 70X and the printer
wherever you need them, even in a room with no PC.
12 Can I use two home print servers to share two printers?
Yes. You can install as many HP JetDirect 70X Home Print
Serversasyouwant.
16 Frequently-Asked Questions
Page 22

5 Troubleshooting
If you encounter any problems while installing or operating the HP
JetDirect 70X, here are some suggestions for solving them.
Hardware Installation Problems
Condition Possible Cause/Solution
When I press the Test
button on the back of the
home print server, no test
page or an unreadable test
page prints.
I can’t connect the home
print server to my
computer’s home
phoneline network. All of
the jacks are being used.
The Status LED (light) is off. See the Indicator Lights section of this chapter.
The light on the back of my
HP JetDirect 70X is off.
Try the following. After each item retry the test.
• Be sure theHP JetDirect 70X is powered up.
The green Status light on the top of the HP
JetDirect 70X should be ON. The power
supply must be firmly connected to the HP
JetDirect 70X. The other end of the power
supply should befirmly inserted into a power
source. Make sure the wall outlet or power
strip is receiving power.
• Be sure your printer is turned on, is online,
has paper, and ink or toner.
• Be sure the parallel printer cable connecting
the HP JetDirect 70X to the printer is an
IEEE-1284 compliant cable. Be sure it is
firmly seated and working properly
(substitute a known working cable if
available).
• Turn off printer and HP JetDirect 70X; then
turn on the devices in this order: HP
JetDirect 70X, then the printer.
• Provide additional connections using a
phoneline splitter (see the Terms section in
Chapter 1).
CAUTION: some home phoneline network
devices wil not pass network traffic through
the device’s “phone” jack.
This is the Link Valid LED. See the Indicator
Lights section of this chapter.
Troubleshooting 17
Page 23

HP JetDirect 70X Setup Wizard Problems
Condition Possible Cause/Solution
I put the setup CD in my
CD-ROM drive, but nothing
happens.
After I start the setup CD,
I’mgettingadialoguebox,
saying that the system does
not have the appropriate
networking configuration.
During setup, the computer
begins dialing up my
Internet Service Provider.
When I ran the setup CD, I
got the following error
message: “Hard Disk Full”.
When I ran the setup CD, I
got the following error
message: “Insufficient
Memory”.
• Try to manually run the setup CD. Click
Start. Click Run.TypeinD:\setup.exe,
whereDisthedriveletterofyourCD-ROM
drive. Click OK. The setup program should
run.
• If the setup CD doesn’t run, verify your CDROM drive is working properly by trying to
run another CD.
• If another CD works, the HP JetDirect 70X
setup CD could be defective. Contact HP.
The setup CD could not find your home
phoneline network interface device. Verify that
the network is working, as described in the
documentation for your home phoneline
network interface device.
Then try to run the HP JetDirect 70X setup CD
again.
Click Cancel when you see the “Dialing...”
dialogue box. The Setup Wizard will continue.
Youwillneedtodeletesomefilestocreatemore
space on your hard disk.Then try to run the HP
JetDirect 70X setup CD again.
Close any open programs. Then try to run the
HP JetDirect 70X setup CD again.
18 Troubleshooting
Page 24

Condition Possible Cause/Solution
When I run thesetupwizard
and choose from the list of
available printers, I get a
message saying, “No
printers found on network.”
When I click OK, I don’t see
my printer on the Identify
Printer screen.
OR
When I try to specify my
printer by address, I get the
same message, ”No
printers found on network.”
Try the following:
• Be sure theprinter and theHP JetDirect 70X
have been powered on for at least one
minute, and the phone cable is properly
seated (in either the wall jack of your home
or the “wall” jack of your home phoneline
network interface device).
Verify that the Link Valid light on the back of
the HP JetDirect 70X is ON. If the HP
JetDirect 70X is notconnected directly to the
computer’s home phoneline networking
device’s “wall” jack,try connecting it directly.
If the Link Valid light goes on, there could be
a problem withyour phone wiring or a device
on your network.
The Status light on the top of the HP
JetDirect 70X should be ON (see the
Indicator Lights section of this chapter).
Click Refresh on the Identify Printer screen.
The printer should show up.
• If your printer still does not show up on the
Identify Printer screen, print a test page by
pressing the Test button on the back of the
HP JetDirect 70X. Use either the IP or
hardware address found on the test page of
theHPJetDirect70Xtodoa“specific
device” discovery. To perform a specific
device discovery, click Back to go to the
Welcome screen. Select “Specify printer by
address” and follow the instructions in the
setup wizard.
• If your printer still does not show up, exit the
setup CD. If the HP JetDirect 70X is not
connected directly to the computer’s home
phoneline networking device “wall” jack, try
connecting it directly. Rerun the setup CD.
Use the “Select from a list of discovered
printers (recommended)” option.
• If your printer still does not show up, verify
that the network is working, as described in
the documentation for your home phoneline
network interface device. Then, run the HP
JetDirect 70X setup CD again.
• If the above procedures are not successful,
contact HP.
Troubleshooting 19
Page 25

Condition Possible Cause/Solution
The Setup Wizard found my
printer, but it identifies the
printer as “Unknown.”
Be sure the printer is powered on.
Be sure youare using an IEEE-1284compatible
parallel printer cable. See the Specifications
section of Chapter 6 for a list of the HP IEEE1284 compatible cables.
Click Refresh on the Identify Printer screen. In
some cases, printers do not supply printer
identification information to the setup wizard.
This does not affect printer operation.
OntheNetworkingMode
screen, I don’t know which
printing protocol (TCP/IP or
IPX) to select.
Take the “Recommended” mode, OR
IfyouareusinganHPAll-in-Oneandwantto
scan across the network,select TCP/IP. See the
Network Scanning section in Chapter 3 of this
User’s Guide.
Youmayalsowanttoreviewtheonlinehelpfor
more information about the different network
printing protocols.
I have two printers of the
same type on my home
network. Each one is
connectedtoanHPJet
Direct 70X. At the Identify
Printer screen, how do I
know which one is
connected to which HP
Use the Test button on the back of the HP
JetDirect 70X to print a test page. The third line
of the test page contains the hardware address.
On the Identify Printer screen, scroll to the right.
Match the hardware address on your screen to
the one on the test page. Highlight the
appropriate printer and click Next.
JetDirect 70X?
On the Printer Driver
screen, I can’t find my
printer.
OR
When the Setup Wizard
was copying files, I got a
message saying run the
printer setup.exe.
Cancel the home print server Setup Wizard.
Youwillneedtoinstalltheprinterandrerunthe
setup CD.
To install your printer, use the printer setup CD
that came with your printer. During the setup,
you may be prompted to choose a port. If this
happens, choose LPT1. If you get a message
saying that no printer isattachedtoLPT1, simply
continue with the printer installation (You may
have to click Skip.).
In many cases, a driver for your printer can be
downloaded from the Internet. When you are
downloading your driver, if you see a network or
corporate driver for your printer, download that
one.
Insert the HP JetDirect 70X setup CD and run
the Setup Wizard.
20 Troubleshooting
Page 26

Condition Possible Cause/Solution
My printer shows up in both
of the lists.
When I ran the Setup
Wizard,itdidn’tcomplete.I
saw one of the following
messages: “Corrupt file,”
“Printer installation error,”
or “Driver installation
interrupted.”
On the Finish screen, I
selected “Print a test page,”
but no test page printed.
Select your printer from the “Show available
drivers” list.
If the Setup Wizard cannot successfully copy a
driver from the CD supplied with the HP
JetDirect 70X or the operating system, the
Setup Wizard will halt.
Be sure the CD is free of grease, fingerprints, or
scratches. Try running the setup CD again.
If the driver still fails to copy, you may have to
contact the printer manufacturer for a new
driver.
In many cases, a driver for your printer can be
downloaded from the Internet. When you are
downloading the driver, if you see a network or
corporate driver for your printer, download that
one.
Be sure everything is powered up and that all
connections are in place.
Be sure the printer has paper and a working
inkjet/toner cartridge.
Verity that the printer is working by printing a
printer self-test page (consult your printer
manual).
Check the printer setup window.
Printing Problems
Condition Possible Cause/Solution
I connected the HP
JetDirect 70X to the home
phoneline network
interface device. I can print
fromit,butIcan’tprintfrom
other PCs in the house.
The printer does not report
its status about paper,
toner, or ink remaining.
Printing comes out looking
different than what I
expected.
Each of the other PCs in the house must be
connected to the same phone line. Verify the
network as described in the documentation that
came with your home phoneline network
interface devices.
You must run the HP JetDirect 70X setup CD on
thePCsinthehouseyouwanttoprintfrom.
Some printer drivers do not support this feature
over the network.
This is a printer problem. Refer to the User’s
Guide that came with your printer.
Troubleshooting 21
Page 27

WebScan Problems
Condition Possible Cause/Solution
When I see the WebScan
screen, I see other nonscan options. What should
Idowiththese?
After I click the Download
Scanned Image button,
Adobe Acrobat Reader is
launched. I am unable to
select the “Save” or “Save
As” option.
After I click the Download
Scanned Image button, I
amnotpromptedto“Save
File As” or “Open File.”
Instead, an application or
plug-in is loaded and the
scanned image is
displayed.
After I click the “Download
Scanned Image” button, a
plug-in is launched and
triestoopenmyTIFFor
PDF image. Instead of the
image displaying on the
screen, I get an icon.
Examples of icons include:
apagewiththeleftcorner
folded, a smallimage with a
question mark in the center,
or a message stating that
the browser could not load
the image.
Iwanttopreviewanimage
before saving it, but the
Scan Preview button is
grayed out.
Nothing. These are the settings of your HP
JetDirect 70X. If you change them, you may be
unable to print.
This is a known issue with various versions of
Microsoft Internet Explorer andWindows95, 98,
and NT 4.0. A recommended workaround is to
download the latest version of Adobe Acrobat
Reader (4.0 or higher).
There are many different plug-ins available for
both TIFF and PDF image formats. If you do not
want the plug-in to automatically load your
scanned image, you should uninstall the plug-in
associated with the image format you are using.
If you are unable to uninstall the plug-in
application, use the “Save” or “Save As”
command located within the plug-in.
Since a variety of plug-ins exist, each plug-in
exhibits a different behavior. If an uninstall
option is availablefor the plug-in,try uninstalling
the plug-in. Another workaround is to change
the association of the TIFF or PDF file types to
a different application.
Sheet-feed multi-function peripherals do not
support scan previews. To preview the image
before saving it,use the “Openit” option orallow
the plug-in to open the scanned image. Once
the scanned image is displayed, use the “Save”
or “Save As” command in the application.
22 Troubleshooting
Page 28

Condition Possible Cause/Solution
IamusingPDFasmy
image type. I clicked the
Scan Preview button and
the image appeared in the
Scan Preview window. I
selected a small region and
then clicked the Download
Scanned Image button.
When I opened the file, the
image was blank.
When I start WebScan, the
page does not completely
load.
Use TIFF as the image format instead of PDF
or select a larger area.
You may need to add the IP address of the HP
JetDirect 70X to the proxy exceptions list in your
browser.
In most browsers, you will find an advanced
option in the proxy settings area. The IP address
should be added in the exceptions area.
Indicator Lights
There are two indicator lights (LEDs) on the top of the JetDirect 70X
Home Print Server. They are the Status and Activity LEDs.
If the
Status
LED is...
Off Off Not receiving power. The power supply must be
onstant
C
blinking
On Off On; no network activity detected (normal).
On Blinking On; network activity detected (normal).
On On On; heavy print activity detected (normal).
Off On (Solid) A problem occurred during self-test or operation.
And the
Activity
LED is...
Off The HP JetDirect 70X is unable to attach to the
Then the HP JetDirect 70X is...
firmly connected to the HP JetDirect 70X. The
other end of the power supply should be firmly
inserted into a power source. Make sure the wall
outlet or power strip is receiving power.
network. Verify that the phone cable connection is
seated properly; try a new phone cable. Next, turn
off printer and HP JetDirect 70X; then turn on the
devices in this order: HP JetDirect 70X, then the
printer. If this fails to solvethe problem, contact HP.
Turn off printer and HP JetDirect 70X; then turn
on the devices in this order: HP JetDirect 70X,
then the printer. If this fails to solve the problem,
contact HP.
Troubleshooting 23
Page 29

There is one indicator light (LED) on the back of the JetDirect 70X
Home Print Server. It is the Link Valid LED.
If the Link Valid LED
is...
On The HP JetDirect 70X has detected the presence
Off The HP JetDirect 70X is not connected to the
Then the HP JetDirect 70X is...
of at least one home phoneline network device.
network. Try the following:
• Turn off printerand HP JetDirect 70X;then turn
on the devices in this order: HP JetDirect 70X,
then the printer.
• Verify that the HP JetDirect 70X is plugged into
the same phoneline as the other home
phoneline products.
• Verify that the networkis working, as described
in the documentation for the home phoneline
networking device.
• Verify that your home phone wiring is working
properly. To do this, connect your HP JetDirect
70X directly to a powered-up home phoneline
network interface device. If the Link Valid LED
illuminates, the HP JetDirect 70X is working
properly and there could be a problem with the
home wiring.
• If you have verified your network is working
properly and is on the same phoneline as the
HP JetDirect 70X and the Link Valid LED is still
off, contact HP.
Getting Help
If the solutions described in this chapter don’t work, contact HP:
• On the World Wide Web, point your browser to
http://www.hp.com/support/net_printing.
• Via phone, call HP Customer Care at (208) 323-2551, M-F 6:00
am–6:00pmMST.
24 Troubleshooting
Page 30

6 Specifications and Service
Physical Specifications
Dimensions 180 mm (7.09 in) W
115 mm (4.53 in) D
33 mm (1.3 in) H
Weight 224 g (0.49 lbs)
LEDs Front: Status, Activity
Rear: Link Valid
Test button Initiate test page print
Power 13 VDC, 0.4 W
Power Supply Input: 110-127VAC 60Hz, Output: 13 VDC @300 ma
HP part number 0950-3169
Telephone Connection Two RJ-11 telephone jacks
Printer Connection DB-25 parallel port
Supported Printers
To find the latest information on supported printers, visit the HP
Customer Care Online website at:
http://www.hp.com/support/net_printing
The HP JetDirect 70X Home Print Server works best with the
following devices:
Hewlett-Packard DeskJet and Professional Series
Printers
DeskJet 1120 DeskJet 880
DeskJet 970 DeskJet 840
DeskJet 950 DeskJet 810
DeskJet 930 2000 Professional
DeskJet 895
Specifications and Service 25
Page 31

Hewlett-Packard LaserJet Printers
LaserJet 1100A LaserJet 4000 series
LaserJet 1100 LaserJet 2100 series
LaserJet 6L LaserJet 5L
LaserJet 6P
Hewlett-Packard All-in-One Devices
OfficeJet G OfficeJet 1175
OfficeJet R OfficeJet 1170
LaserJet 3150 OfficeJet 1150
Accessories
HP parallel cables
(IEEE 1284
compatible)
2.0 meter parallel cable (36-pin
Centronics male to DB25 male)
3.0 meter parallel cable (36-pin
Centronics male to DB25 male)
C2950A
C2951A
26 Specifications and Service
Page 32

Warranty Service
Warranty Period
The Hewlett-Packard JetDirect 70X Home Print Server is
warranted against defects in materials and workmanship from the
date of receipt by the end user for a period of one year.
During the warranty period, HP will replace the unit at no charge
provided the defective unit is returned. You may return the unit to
yourHPAuthorized Dealer or your local HP Sales and Service Office
representative. Be sure to include a copy of your purchase receipt.
This warranty does not apply if the JetDirect 70X Home Print
Server has been damaged by accident or misuse, or as a result of
service or modification by other than an authorized HewlettPackard Service Facility. No other express warranty is given by
Hewlett-Packard. Hewlett-Packard shall not be responsible for
consequential damages.
For warranty service in the USA, call HP at (208) 323-2551
(M-F 6:00 am – 6:00 pm MST) with the following information:
• HP product number (J4155A)
• HP model number (JetDirect 70X Home Print Server)
• Serial number
• Description of the problem
Ask for information and instructions on returning the defective
product.
Service Outside the USA
Customers outside the USA should contact their HP Authorized
Dealer or HP Sales and Service Office to obtain information about
prices, exchange unit availability and instructions.
Specifications and Service 27
Page 33

HP Customer Care Online
Click your way to a quick solution! The HP website
http://www.hp.com/support/net_printing
is a great place to start for answers to questions about your HP
JetDirect 70x home print server – 24 hours a day, 7 days a week.
HP Customer Care Forum
Go online, anytime,and you’ll alsofind helpful user forums – a great
source of ideas and suggestions for using your HP Home Print
Server. You can access the user forum directly from
http://www.hp.com/go/forums
Select the Network Printing Support forum. Then select HP
JetDirect Home Print Servers.
HP Customer Care by Phone
Call (208) 323-2551 (M-F 6am-6pm MST) when you want to talk to
HP directly. Highly trained technicians at our HP Customer Care
Center are ready to take your call. In an industry that’s known to
keep customers waiting, we’re proud of our quick response time.
Most calls are connected in three minutes.
28 Specifications and Service
Page 34

Regulatory Statements
FCC PART 68 STATEMENT (USA)
This equipment complies with Part 68 of the FCC Rules. On the bottom of this
equipment is a label that contains, among other information, the FCC registration
Number and Ringer Equivalence (REN) for this equipment. You must, upon request,
provide this information to your telephone company. (NOTE: REN is not required
for some types of analog or digital facilities.)
This equipment uses an RJ 11 jack.
An FCC compliant telephone cord and modular plug are provided with this
equipment This equipment is designed to be connected to the network or premises
wiring using a compatible modular connector which is part 68 compliant. See
installation instructions for details.
The REN is useful to determine the quantity of devices you may connect to your
telephone line and still have all of those devices ring when your telephone number
is called. In most, but not all areas, the sum of the REN’s of all devices connected to
one line shall not exceed five (5.0). To be certain of the number of devices you may
connect to your line, as determined by the REN, you should contact your local
telephone company to determine the maximum REN for your calling area. (NOTE:
REN are associated with loop-start and ground-start ports. Do not use for E&M or
digital ports).
If your telephone equipment causes harm to the telephone network, the telephone
Company may discontinue your service temporarily. If possible, they will notify you
in advance. But if advance notice is not practical, you will be notified as soon as
possible.
You will be informed of your right to file a complaint with the FCC.
Your telephone company may make changes in its facilities, equipment, operations
or procedures that could affect the proper functioning of your equipment. If they do,
you will be notified in advance to give you an opportunity to maintain uninterrupted
telephone service.
If you experience trouble with this telephone equipment, please contact your local
Hewlett-Packard Service Center for information on obtaining service or repairs. The
telephone company may ask that you disconnect this equipment from the network
until the problem has been corrected or until you are sure that the equipment is not
malfunctioning.
FCC PART 15 STATEMENT (USA)
General Information. This device complies with Part 15 of the FCC Rules.
Operation is subject to the following two conditions: (1) This device may not cause
interference, and (2) this device must accept any interference received, including
interference that may cause undesired operation.
Pursuant to Part 15.21 of the FCC Rules, any changes or modifications to this
equipment not expressly approved by the Hewlett-Packard Company may cause
interference and void the FCC authorization to operate this equipment.
The Federal Communications Commission has prepared a booklet titled Interference
Handbook (1986), which may be helpful to you. This booklet (stock number 004-000004505-7) may be purchased from the Superintendent of Documents, U.S. Government
Printing Office, Washington, D.C. 20402.
Specifications and Service 29
Page 35

FCC Class B for HP J4155A. This equipment has been tested and found to comply
with the limits for a Class B digital device, pursuant to part 15 of the FCC Rules.
These limits are designed to provide reasonable protection against interference in a
residential installation. This equipment generates, uses and can radiate radio
frequency energy and, if not installed and used in accordance with the instructions,
may cause interference to radio communications. However, there is no guarantee
that interference will not occur in a particular installation. If this equipment does
cause interference to radio or television reception, which can be determined by
turning the equipment off and on, the user is encouraged to try to correct the
interference by one or more of the following measures:
1. Reorient or relocate the receiving antenna.
2. Increase the separation between the equipment and receiver.
3. Connect the equipment into an outlet on a circuit different from that to which the
receiver is connected.
4. Consult the dealer or an experienced radio/TV technician for help.
INDUSTRY CANADA (IC) NOTICE
NOTICE: The Industry Canada (IC) label identifies certified equipment. This
certification means that the equipment meets telecommunications network
protective, operational and safety requirements as prescribed in the appropriate
Terminal EquipmentTechnical Requirementsdocument(s). Thedepartmentdoes not
guarantee the equipment will operate to the user’s satisfaction.
Before installing this equipment, users should ensure that it is permissible to be
connected to the facilities of the local telecommunications company. The equipment
must also be installed using an acceptable method of connection. The customer
should be aware that compliance with the above conditions may not prevent
degradation of service in some situations.
Repairs to certified equipment should be coordinated by a representativedesignated
by the supplier. Any repairs or alterations made by a user to this equipment, or
equipment malfunctions, may give the telephone communications company cause to
request the user to disconnect the equipment.
Users should ensure for their own protection, that the electrical ground connections
of the power utility, telephone lines and internal metallic water pipe system, if
present, are connected together. This precaution may be particularly important in
rural areas.
CAUTION: Users should not attempt to make such connections themselves, but
should contact the appropriate electric inspection authority, or electrician as
appropriate.
“NOTICE: TheRinger Equivalence Number (REN) assigned to eachterminal device
provides anindication of the maximum number of terminals allowed to be connected
to a telephone interface. The termination on an interface may consist of any
combination of devices subject only to the requirement that the sum of the Ringer
Equivalence Numbers of all the devices does not exceed 5.”
REN: 0.0
SAFETY STATEMENTS
Product complies with:
UL 1950
CSA 950
CANADA
Product complies with Canadian EMC Class B requirements.
30 Specifications and Service
Page 36

Page 37

 Loading...