

Page 1
Page 2

IMPORTANT
The mains lead on this equipment may be supplied with a moulded plug incorporating a fuse, the
value of which is indicated on the pin face of the plug. Should the fuse need to be replaced, an ASTA
or BSI approved BS 1362 fuse must be used of the same rating. If the fuse cover is detachable
never use the plug with the cover omitted. If a replacement fuse cover is required, ensure it is of the
same colour as that visible on the pin face of the plug. Fuse covers are available from your dealer.
DO NOT cut off the mains plug from this equipment. If the plug fitted is not suitable for the power
points in your home or the cable is too short to reach a power point, then obtain an appropriate
safety approved extension lead or consult your dealer.
Should it be necessary to change the mains plug, this must be carried out by a competent person,
preferably a qualified electrician.
If there is no alternative to cutting off the mains plug, ensure that you dispose of it immediately,
having first removed the fuse, to avoid a possible shock hazard by inadvertent connection to the
mains supply.
IMPORTANT
The wires in this mains lead are coloured in accordance with the following code:
Blue : NEUTRAL
Brown : LIVE
As these colours may not correspond to the coloured markings identifying the terminals in your plug,
proceed as follows:
The wire coloured BLUE must be connected to the terminal marked with the letter N or coloured
BLUE or BLACK. The wire coloured BROWN must be connected to the terminal marked with the
letter L or coloured BROWN or RED.
On no account connect either of these wires to the terminal marked E or by the earth symbol E or
coloured green or green and yellow.
Alternatively, this equipment may be supplied with a rewireable plug already fitted, which may be
removed if not suitable and an alternative fitted in accordance with the preceding instructions.
- 1 -
Page 3
Important Cautions
Thank you for purchasing this system. Please read these operating instructions before operating
the unit. The operating instructions should be retained for future reference.
For your safety
CAUTION
RISK OF ELECTRIC SHOCK
DO NOT OPEN
CAUTION: TO REDUCE THE RISK OF
ELECTRIC SHOCK, DO NOT REMOVE
COVER. NO USER SERVICEABLE
PARTS INSIDE REFER SERVICING TO
QUALIFIED SERVICE PERSONNEL.
This symbol indicates that dangerous
voltage constituting a risk of electric
shock is present within this unit.
This symbol indicates that there are
important operating and maintenance instructions in the literature
accompanying this unit.
Laser Product
This product is equipped with low power laser equipment. For your own safety do not
remove any covers or take the product apart.
Repair work must be carried out by qualified
personnel.
CLASS 1
LASER PRODUCT
Caution:
This product is equipped with low power
laser equipment inside, for your safety, don’t
open the laser radiation protective
equipment. Don’t look at the laser radiation
district when the equipment is operating.
The rating label is located on the base of the
amplifier unit.
Precautions
This equipment has been designed and manufactured to meet international safety standards but,
like any electrical equipment, care must be taken if you are to obtain the best results and safety is
to be assured.
……………………………
DO read the operating instructions before you attempt to use the equipment.
DO ensure that all electrical connections (including the mains plug, extension leads and
interconnections between the pieces of equipment) are properly made and in accordance with
themanufacturer’s instructions. Switch off and withdraw the mains plug before making or
changing connections.
DO consult your dealer if you are ever in doubt about the installation, operation or safety of your
equipment.
DO be careful with glass panels or doors on equipment
……………………………
DON’T remove any fixed cover as this may expose dangerous voltages.
DON’T obstruct the ventilation openings of the equipment with items such as newspapers,
tablecloths, curtains, etc. Overheating will cause damage and shorten the life of the equipment.
DON’T allow electrical equipment to be exposed to dripping or splashing, or objects filled with
liquids, such as vases, to be placed on the equipment and don’t handle the power cord with
wet hands.
- 2 -
Page 4

DON’T place hot objects or naked flame sources such as lighted candles or nightlights on, or close
to equipment. High temperatures can melt plastic and lead to fires.
DON’T use makeshift stands and NEVER fix legs with wood screws - to ensure complete safety
always fit the manufacturer’s approved stand or legs with the fixings provided according
to the instructions.
DON’T leave equipment switched on when it is unattended unless it is specifically stated
that it is designed for unattended operation or has a standby mode. Switch off using the
switch on the equipment and make sure that your family knows how to do this. Special
arrangements may need to be made for infirm or handicapped people.
DON’T continue to operate the equipment if you are in any doubt about it working normally, or if it
is damaged in any way - switch off, withdraw the mains plug and consult your dealer.
……………………………
ABOVE ALL,
NEVER let anyone especially children push anything into holes, slots or any other opening in the
case - this could result in a fatal electrical shock.
NEVER guess or take chances with electrical equipment of any kind…it is better to be safe than
sorry!
……………………………
* The apparatus shall not be exposed to dripping or splashing and that no objects filled with
liguids, such as vases, shall be placed on the apparatus.
* Plug is the disconnect device, and the disconnect device shall remain readily operable.
* Batteries shall not be exposed to excessive heat such as sunshine, fire or the like.
Correct Handling of Batteries
Improper or incorrect use of batteries may cause corrosion or battery leakage, which could cause
fire, personal injury or damage to property.
Use only the types of the batteries which are indicated in this manual.
Do not install new batteries with used ones.
Install the batteries correctly by following the polarity (+ and -) indications in the battery compartment.
Do not dispose of the used batteries as domestic waste. Dispose of them in accordance with the
local regulations.
Small button cell batteries such ad used in the remote handset for this unit are easily swallowed by
young children and this can be dangerous. Keep loose button cells away from young children and
make sure that the battery holder tray is secure in the remote control. Seek medical advice if you
believe a cell has been swallowed.
- 3 -
Page 5

Table of Contents
IMPORT ANT.........................................................................................................................................1
Important Cautions..............................................................................................................................2
For your safety ...................................................................................................................................................... 2
Precautions .............................................................................................................................................................. 2
Correct Handling of Batteries .............................................................................................................................. 3
Package Contents .............................................................................................................................. 5
Control Locations ............................................................................................................................... 6
The CD Player ........................................................................................................................................................ 6
The Amplifier ........................................................................................................................................................... 6
The Remote Control ............................................................................................................................................... 7
Replacing battery (lithium CR2025) into the remote control ............................................................................. 7
Connections.................................................................................................................... ....................8
Connecting the Speakers ....................................................................................................................................... 8
Connecting Auxiliary Equipment ........................................................................................................................... 8
Connecting Control Cable ...................................................................................................................................... 8
Connecting the AC Power Plug ............................................................................................................................. 9
Turning the Power On and Off .......................................................................................................... 9
Sound Quality .....................................................................................................................................9
Adjusting the Volume .............................................................................................................................................. 9
Adjusting the super bass ....................................................................................................................................... 9
Control the Loudness ............................................................................................................................................. 9
Preset Equalizer ...................................................................................................................................................... 9
Changing the VFD Darkness ................................................................................................................................9
Listening to Radio Broadcasts .........................................................................................................10
Tuning in a Station ................................................................................................................................................ 10
Presetting Stations ............................................................................................................................................... 10
To change the FM Reception Mode .................................................................................................................... 10
RDS (Radio Data System) Reception...............................................................................................11
CD Operation .................................................................................................................................... 11
CD Playing ............................................................................................................................................................ 11
To Skip Search or Search and Play .................................................................................................................... 11
Program Play ......................................................................................................................................................... 12
Random Play (CD and MP3 discs) .................................................................................................................... 12
Playing the Beginning (Intro) of each Track ...................................................................................................... 12
Playing Repeatedly .............................................................................................................................................. 12
MP3 Disc Playing .............................................................................................................................. 12
Playing Repeatedly .............................................................................................................................................. 13
Use the USB .....................................................................................................................................13
Setting the Clock Automatically ........................................................................................................ 13
Setting the Clock Manually ............................................................................................................... 14
Setting the Sleep Timer..................................................................................................................... 14
Setting the Daily on Timer .................................................................................................................15
Disc Handling ....................................................................................................................................15
Troubleshooting................................................................................................................................16
Specifications...................................................................................................................................16
- 4 -
Page 6
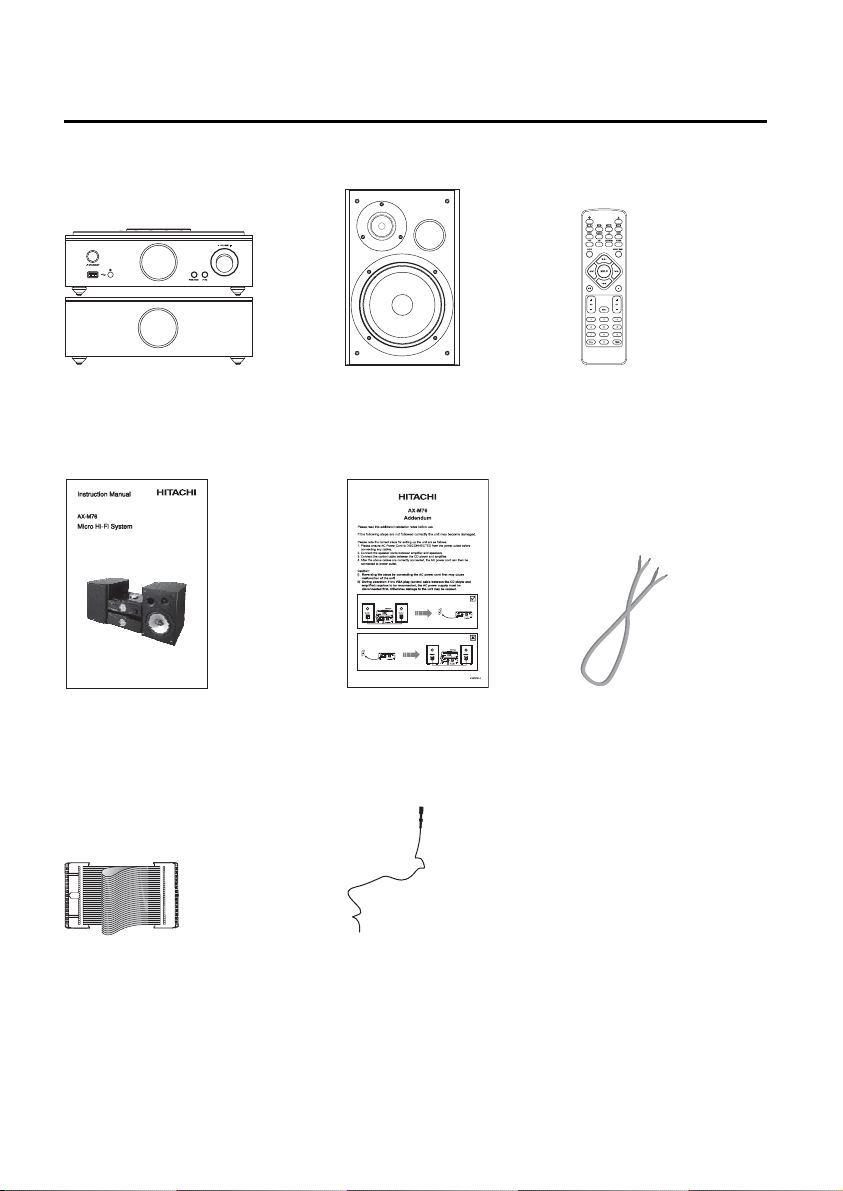
Package Contents
Make sure all of the following contents are included.
The unit
Instruction Manual
(P .N.: AXM76P0002)
Ribbon cable
(P .N.: AXM76P0005)
Speakers x 2
Addendum
(P .N.: AXM76P0003)
FM Antenna
(P .N.: AXM76P0006)
Remote control
(P .N.: AXM76P0001)
Speaker leads x2
(P .N.: AXM76P0004)
- 5 -
Page 7

Control Locations
The CD Player
1. Standby
2. USB Port
3. Remote Sensor
4. VFD(Vacuum Fluorescent Display) Display Lens
5. Function
6. Preset Equalizer
7. Volume Control Knob
8. Disc Door
9. Previous/Search Backward H
Channel Select Backward - PRESET
10. Next/Search Forward G
Channel Select Forward PRESET +
11. Play/Pause BF
Tuning Backward - TUNING
12. Stop L
Tuning Forward TUNING +
13. Mode
Stereo/MONO Select
14. Open/Close K
The Amplifier
15. Control Cable Connector
16. Line Output Terminals (L&R)
17. AUX Input Terminals (L&R)
18. FM Antenna
1.
2. AC Power Cord
3. Control Cable Connector
4. Left & Right Speaker Output Terminals
- 6 -
Page 8

The Remote Control
1. Standby
2. CD Function
3. Tuner Function
4. Random
5. Intro
6. Dimmer DIM
7. Preset Equalizer P-EQ
8. Clock
9. Next
10. Search Backward D
11. Previous H
12. Play/Pause BF
13. Album Up ALB +
14. Album Down ALB -
15. Mute
16. Number
17. Open/Close K
18. USB Function
19. AUX Function
20. Repeat A-B
21. Mode
22. Loudness
23. Super Bass S-BASS
24. Sleep/Timer
25. CD Display DISPLAY
26. Search Forward C
27. Stop L
28. Volume Up VOL+
29. Volume Down VOL-
30. Program PROG
G
Channel Select Forward
Tuning Backward
Channel Select Backward
RDS Display
Tuning Forward
Memory
Replacing battery (lithium CR2025) into the remote control
1. Press the slot on the battery compartment.
2. Pull out the battery compartment.
3. Replace a new battery and fully insert the battery compartment
back to the original position.
- 7 -
Page 9

Connections
Caution: Make all connections before plugging the system into an AC power outlet.
Connecting the Speakers
Connect the speaker cords between the terminals as shown below.
Connect the cords with black sleeves at the ends and tracer marks to the (-) (G) terminals and cords
with red sleeves at the ends and tracer marks to the (+) (L) (R) terminals.
Right Speaker Box
Back View
Left Speaker Box
Back View
Connecting Auxiliary Equipment
Connect the AUX INPUT sockets on this unit to the line output sockets on the auxiliary equipment as
illustrated below.
The amplifier
Auxiliary equipment
Connect the LINE OUT sockets on this unit to the auxiliary input sockets on the auxiliary equipment
as illustrated below.
The amplifier
Auxiliary equipment
Connecting Control Cable
Connect the control cable between the CD player and the amplifier.
The CD player The amplifier
- 8 -
Page 10

Connecting the AC Power Plug
Insert the AC power plug into a wall outlet, and your system is ready to use.
Caution: Be sure to unplug the power plug from the outlet when going out or when the system is
not in use for an extended period of time.
Turning the Power On and Off
When the unit is first connected to the mains, the unit will be in ECO POWER standby mode and the
VFD will not be illuminated.
T o bring the unit out of ECO POWER standby mode; press the standby button ( ) on the unit for three
seconds.
To put the unit back into ECO POWER standby mode from normal standby; press the standby button
( ) for three seconds when the clock is displayed. The clock display will disappear and the blue led
will be illuminated. (see “Setting the clock” on page 14").
Caution: Be sure to unplug the system from the wall output when the system is not in use for an
extended period of time.
Sound Quality
Adjusting the Volume
To increase or decrease the volume, rotate the volume control knob (- VOLUME +) on the CD player
or press the volume up/down buttons (VOL +/-) on the remote control.
Adjusting the super bass
You can reinforce the bass sound to maintain rich, full bass at low volume.
Press the super bass button (S-BASS) on the remote control to get the effect, the “BASS” will display
on the VFD. Press the super bass button (S-BASS) again to cancel the effect.
Control the Loudness
This unit has a loudness function, it can automatically increase bass sound effect at low volume
(the higher volume, the smaller bass increase). You only need to press the loudness button
(LOUDNESS) on the remote control to obtain the loudness function, the “LOUD” will display on the
VFD.
Preset Equalizer
You can adjust the sound reproduced by pressing the preset equalizer button (P-EQ) repeatedly.
Select from one of the 5 preset equalizer:
POPS JAZZ CLASSIC ROCK No Display
Changing the VFD Darkness
To dim or brighten the VFD display, repeatedly press the dimmer button (DIM) on the remote control
to the desired brightness.
- 9 -
Page 11

Listening to Radio Broadcasts
You can listen to FM stations. Stations can be tuned in manually, automatically, or from preset
memory storage.
Caution: Before listening to the radio, please check that the FM antenna is correctly connected and
adjusted for length and direction or that the unit is connected to an external FM antenna.
Tuning in a Station
1. Repeatedly press the function button (FUNCTION) on the front of the product or press the tuner
function button ( ) on the remote control to select tuner function.
2. Select a station using one of the following methods.
Manual Tuning
Repeatedly press the tuning backward/forward button (- TUNING +) on the front of the product
DD
or press the search backward/forward button (
frequency until you find the station you want.
Auto Tuning
If you press and hold the tuning backward/forward button (- TUNING +) on the front of the
product or press the search backward/forward button (
second or more, the frequency changes down, or up, automatically until a station is found.
Preset Tuning (Possible only after presetting stations)
Repeatedly press the channel select backward/forward button (- PRESET +) on the front of the
product or press the channel select backward/forward button (
to select the desired preset number. Its band and frequency are displayed on the VFD.
Presetting Stations
You can preset up to 16 FM stations.
Tune in the desired station:
1. Press the memory button (PROG) on the remote control, the “MEM” will flash on the display and
the preset number will be displayed.
2. Press the channel select backward/forward button ( - PRESET +) on the front of the product or
press the channel select backward/forward button (
preset number.
- PRESET/
PRESET +/
HH
H Decreases the preset number by 1
HH
GG
G Increases the preset number by 1
GG
Note: If you select more than 16, the preset number will be changed to “1” automatically.
3. Press the memory button (PROG) on the remote control to store the station. After 1 second, the
display returns to the broadcast frequency display.
4. Repeat above steps 1 to 3 for each station you want to store in memory with a preset number.
Note: If the system is unplugged or if a power failure occurs, the preset stations will not be erased.
To change the FM Reception Mode
When you are tuned into a FM stereo broadcast, “FM ST.” will be displayed and you can hear stereo
effects.
If a FM stereo broadcast is hard to receive or noisy, you can select MONO by pressing the mode
button (MODE) and the “FM ST” will not displayed. Reception will be improved, but you will lose any
stereo effect.
To restore the stereo effect, press the mode button (MODE) and the “FM ST” will be displayed.
CC
D/
C) on the remote control to change the
DD
CC
DD
CC
D/
C) on the remote control for one
DD
CC
HH
GG
H/
G) on the remote control
HH
GG
HH
GG
H/
G) on the remote control to select the
HH
GG
- 10 -
Page 12

RDS (Radio Data System) Reception
Many FM stations are broadcasting added data compatible with RDS. This radio set offers
convenient functions using such data.
PS (Program Service Name)
When an RDS station is received, the “RDS” and the name of that station will be displayed. When
RDS display button (DISPLAY) on the remote control is pressed during PS display, the CT is
displayed for 3 seconds, then PS display returns.
PTY (Program Type)
Program type identification signal. (Example: News, Rock, Classical music.)
CT (Clock Time System)
The CT system may not properly operate in areas where RDS CT service is not available. Once
CT service is received, the CT system keeps operating. “RDS CLOCK” is displayed in areas
where no CT services are available.
Changing Display
During PS display, press the RDS display button (DISPLAY) on the remote control repeatedly to
select the CT, PTY or Frequency. They will be displayed for 3 seconds, then the PS display
returns.
CD Operation
CD Playing
1. Repeatedly press the function button (FUNCTION) on the front of the product until “DISC” is
displayed or press the CD function button ( ) on the remote control to select tuner function.
2. Press the open/close button (K) to open the disc door and place the disc on the disc tray (with
the printed side up).
3. Press the open/close button (K) to close the disc door, the unit will read the disc and play it
automatically.
Note: If in stop mode, please press the play/pause button (BF) to start playing the disc.
4. Press the play/pause button (BF) to pause the playing, press the button again and it will be
continue to play.
5. Press the stop button (L) to stop the disc playing.
To Skip Search or Search and Play
Press the previous/search backward button (H/D) on the front of the unit or previous button
(H) on the remote control once or more to skip previous one or more tracks of the disc.
Press and hold the previous/search backward button (H/D) on the front of the unit or search
backward button (D) on the remote control to search for the position that you intend to start
playing.
Press the next/search forward button (G/C) on the front of the unit or next button (G ) on
the remote control once or more to skip forward one or more tracks of the disc.
Press and hold the next/search forward button (G/C ) on the front of the unit or search
forward button (C) on the remote control to search for the position that you intend to start
playing.
- 11 -
Page 13

Program Play
1. Insert a disc and press L button when it starts playing.
2. Press the program button (PROG) on the remote control.
3. Press the H/D, G/C buttons on the front of the product or 0-9, 10+, G, H buttons on
the remote control to select the desired track number and press the program button (PROG) to
confirm your programme.
4. Repeat above step 3 to finish your programming.
5. Press the BF button to start programme play.
6. Press the L button to stop the programme play.
NOTE: Random play will not shuffle the programmed music list.
Random Play (CD and MP3 discs)
The CD can be played randomly.
Random play begins by pressing the random button (RANDOM) on the remote control in stop mode.
Playing the Beginning (Intro) of each Track
In stop mode, press the intro button (INTRO) on the remote control to play the beginning of each track
consecutively. The playing time of each track is 10 seconds.
When you hear the desired track, press the play/pause button twice.
Playing Repeatedly
* For CD disc, ONE and ALL repeat play can be set by pressing the mode button (MODE) repeatedly.
First press : To repeat the same track over and over again, (“REP” will flash).
Second press : To repeat all tracks on a disc and then play them again and again, (“REP” will
stay lit).
Third press : To cancel the repeat playing, (“REP” off).
* You can use this function to enjoy the certain part of a disc which you like repeating.
When it is playing, press the repeat A-B button (A-B) on the remote control at the beginning of the
content that needs repeat playing. Press the repeat A-B button (A-B) again at the end of the
content that needs repeat playing. Then the player will repeatedly play between A and B until you
press the repeat A-B button (A-B) again to cancel the repeat paragraph the setting and turn to
normal playing mode.
NOTE: A-B repeat function can only be used within the same track.
MP3 Disc Playing
When selecting tracks the player will automatically display the album and track number. For example:
track number 21 may be from album 3, track 7.
1. Press the K button to open the disc door and place the MP3 disc on the disc tray.
2. Press the CD display button (DISPLAY) on the remote control, ID3 information (song title and artist)
will be displayed or “NO ID3” if there is no ID3 information. Press this button again, album, track
and playing time will be displayed.
3. When playing MP3 discs, the current album and track will be displayed.
4. Press the H/D, G/C button on the front of the product or H, G button on the remote
control to select the previous/next track. When pressing the H/D, G/C button on the front
of the product or D, C button on the remote control for a few seconds, it will search
backward or search forward.
- 12 -
Page 14

5. Press the album up button (ALB+) or album down button (ALB-) on the remote control to select
the next/previous album, and play the first track of this album.
If playing has ended, press the album up button (ALB+) or album down button (ALB-) on the
remote control to select the next/previous album.
Then choose the track with the H/D, G/C button on the front of the product or H, G
button on the remote control.
6. Press the BF button to start playing the disc.
7. Press the L button to stop playback.
Note: Play will continue to the final track when the selected tracks have been played.
The first 2 digits of the display is the album number, the next 3 digits is the track number
and the remaining digits display the minutes and seconds.
Playing Repeatedly
For MP3 disc, ONE, ALB and ALL repeat play can be set by pressing the mode button (MODE)
repeatedly.
- First press : To repeat the same track.
- Second press : To repeat ALB (Album).
- Third press : To repeat ALL (All albums and tracks).
- Fourth press : To cancel the repeat playing.
Note:
The word ALB will appear on the display to indicate the albums stored on your MP3 disc.
Use the USB
By connecting an USB mass storage device (including USB flash
memory, USB flash players or memory cards) to this unit, you can
enjoy the device's stored music through the powerful speakers of
Hi-Fi system.
1. Insert the USB device's USB plug into the socket on the front
of unit.
2. Press the USB button on remote control or press the function
select button on the CD player to select the USB function.
3. The device's stored music will be played automatically.
For the devices with USB cables:
1. Insert one plug of the USB cable (not supplied) to the socket on the set.
2. Insert the other plug of the USB cable to the USB output terminal of the USB device.
For the memory card:
1. Insert the memory card into a card reader (not supplied).
2. Use a USB cable (not supplied) to connect the card reader into the socket on the set.
Setting the Clock Automatically
Tune into a RDS station and wait for a few minutes. To confirm, press the clock button.
- 13 -
Page 15

Setting the Clock Manually
The built-in clock shows the time on the display.
1. In standby mode, press the clock button (CLOCK) twice, the VFD will display SET CLOCK and the
hour indicator will blink.
2. Set the hour with the VOL- or VOL+ button.
3. Press the clock button (
4. Set the minute with the
5. Press the clock button (CLOCK), the built-in clock starts operating.
Caution:
* The operating time of every step shouldn’t be longer than 10 seconds or it will return to the time
display.
* If there is a power failure or the systems power is turned off, the clock will lose its setting.
CLOCK), minute indicator will blink.
VOL- or VOL+ button.
Setting the Sleep Timer
Use the sleep timer to turn the system off after a certain number of minutes when in play mode. By
setting the sleep timer, you can fall asleep to music and know that your system will turn off by itself
rather than play all night.
1. Play a CD or tune in to the desired station.
2. T o set the sleep timer press the sleep/timer button (SLEEP/TIMER) on the remote control repeatedly,
it changes the number of minutes shown on the display in this sequence:
- -
10 20
After setting the number of minutes for the sleep timer, the display will return to the display as
before setting the sleep timer.
The system is now set to turn off after the number of minutes you set. The display will show
“zzz”.
To confirm the sleep time
When the sleep/timer button (SLEEP/TIMER) on the remote control is pressed once, the remaining
sleep time is displayed. Wait for a second until the display returns to the original display.
To cancel the sleep timer setting
Repeatedly press the sleep/timer button (SLEEP/TIMER) on the remote control until the “00” is displayed.
Turning off the system also cancels the sleep timer.
...
80 90 00
- 14 -
Page 16

Setting the Daily on Timer
You can use the setting timer to make the unit automatically turn on at a certain time everyday from
standby. When the setting timer is on, the timer indicator “ ” will be displayed. But the clock must be
correctly set for the timer to operate correctly.
1. In standby mode, press the sleep/timer button (SLEEP/TIMER) on the remote control, SET TIMER is
displayed on the VFD and the hour indicator will blink.
2. Set the hour with the VOL- or VOL+ button.
3. Press the sleep/timer button (SLEEP/TIMER) on the remote control, minute indicator will blink.
4. Set the minute with the VOL- or VOL+ button.
5. Press the sleep/timer button (SLEEP/TIMER) on the remote control, the selected time is set. Then
set the daily timer to “ON” (daily timer set is in effect) or “OFF” (daily timer set is to cancel) by
pressing the VOL- or VOL+ button.
Caution:
* You can set the daily timer only in standby mode.
* The operating time of every step shouldn’t be longer than 10 seconds or it will return to the time
display.
* Please select the sound source before turning into standby mode. e.g. CD, Radio.
To confirm the daily time
When you press the sleep/timer button (SLEEP/TIMER) on the remote control in standby mode, the
daily time is displayed. Wait for a few seconds until the display returns to the time display.
To cancel the daily timer setting
In standby mode, repeatedly press the sleep/timer button (SLEEP/TIMER) until the “ON” is flashing.
Press the VOL- button or VOL+ button to set the daily timer to “OFF”. Press the Sleep/Timer button
again to finish.
Disconnecting the mains from the unit also cancels the daily timer.
Disc Handling
1. To keep the disc clean, please don’t touch the disc’s surface when you are holding it. You should
hold the edge. (See fig. 1)
2. If the disc is dirty, it will affect the sound quality. Please use a clean and soft cloth to wipe the
disc from inside to outside. Don’t wipe the disc in a circular direction. (See fig. 2)
Fig.1
3. Don’t stick paper on the disc.
4. Don’t put the disc in a place with direct sunshine or hot sources.
5. Do not play any damaged discs in this player.
6. When you have finished playing a CD, remove it from the CD player and store in its protector
cover.
Fig.2
- 15 -
Page 17

Troubleshooting
If you are having a problem with your system, check this list for a possible solution before calling for
service.
If you cannot solve the problem from the hints given here, or the system has been physically
damaged, call a qualified person, such as your dealer, for service.
Symptom
No sound is heard
Poor radio reception
The CD skips
The CD does not play
Unable to operate
the remote control
Operations are disabled
Connections are incorrect, or loose
The antenna is disconnected
The FM wire antenna is not properly
extended and positioned
The CD is dirty or scratched
The CD is upside down
The path between the remote control
and the sensor on the CD player is
blocked
The batteries have lost their charge
The built-in microprocessor has malfunctioned due to external electrical
interference
Possible Cause
Check all connections and make
corrections
Reconnect the antenna securely
Extend FM wire antenna to the best
reception position
Clean or replace the CD
Put the CD in with the label side up
Remove the obstruction
Replace the batteries
Unplug the system then plug it back
in
Specifications
System Specification
Power Requirements : AC 230V/50Hz
FM Tuning Range : 87.5~108 MHz
Power Consumption : 60W (ECO standby 0.7W)
Output Power : 50W x 2
THD : ≤ 0.7%
Dimensions : (CD) 218(W) x 85(H) x 235(D) mm
(Amplifier) 218(W) x 85(H) x 235(D) mm
Speaker Specifications
Impedance : 4Ω
Input Power : 50W
Dimensions : 161(W) x 250(H) x 220(D) mm
Action
- 16 -
Page 18

The mark is in compliance with the Waste Electrical and Electronic Equipment
Directive 2002/96/EC (WEEE). The mark indicates the requirement NOT to dispose
the equipment including any spent or discarded batteries as unsorted municipal waste,
but use the return and collection systems available.
If the batteries or accumulators included with this equipment, display the chemical
symbol Hg, Cd, or Pb, then it means that the battery has a heavy metal content of more than
0.0005% Mercury, or more than 0.002% Cadmium or more than, 0.004% Lead.
Visit Partmaster.co.uk today for the easiest way to buy electrical spares and accessories.
With over 1 million spares and accessories available we can deliver direct to your door
the very next day.
Visit www.partmaster.co.uk
or call
0870 6001 338
(UK customers only)
Calls charged at National Rate.
If you require a replacement for any of the items listed below, please quote their corresponding
part numbers:
Replacement Part Part Number
Remote control AXM76P0001
Instruction Manual AXM76P0002
Addendum AXM76P0003
Speaker leads x 2 AXM76P0004
Ribbon cable AXM76P0005
FM Antenna AXM76P0006
- 17 -
41006868
 Loading...