

Hellwig 7232 User Manual
559-734-7451 800-367-5480 FAX 559-734-7460
INSTALLATION INSTRUCTIONS
FRONT STABILIZER BAR
MONACO RR8R CHASSIS
Thank you for purchasing a quality Hellwig Product.
1 2
NOTE U-BOLT
MOUNTING ON
DRIVERS SIDE
BACKING
PLATE
3 4
7232 ( R-7232 ) 12/14/04

559-734-7451 800-367-5480 FAX 559-734-7460
TORQUE TABLE
BOLT SIZE: 3/8” = 20-30 ft. lbs. – 7/16” = 35-45 ft. lbs. – ½” = 50-70 ft. lbs. – 9/16” = 70-90 ft. lbs.
SAFETY: BEFORE STARTING YOUR INSTALLATION, BE SURE TO SET PARKING BRAKE AND
CHOCK TIRES.
NOTE: TO EASE INSTALLATION AND TO PROPERLY ADJUST BAR, THE WEIGHT OF THE
VEHICLE MUST BE ON THE SUSPENSION, AS IF DRIVING DOWN THE ROAD.
DO NOT RAISE VEHICLE BY FRAME.
NOTE: THIS FRONT SWAY BAR IS DESIGNED TO MOUNT ON THE FRONT CROSSMEMBER
WITH THE ARMS FACING THE FRONT OF THE VEHICLE.
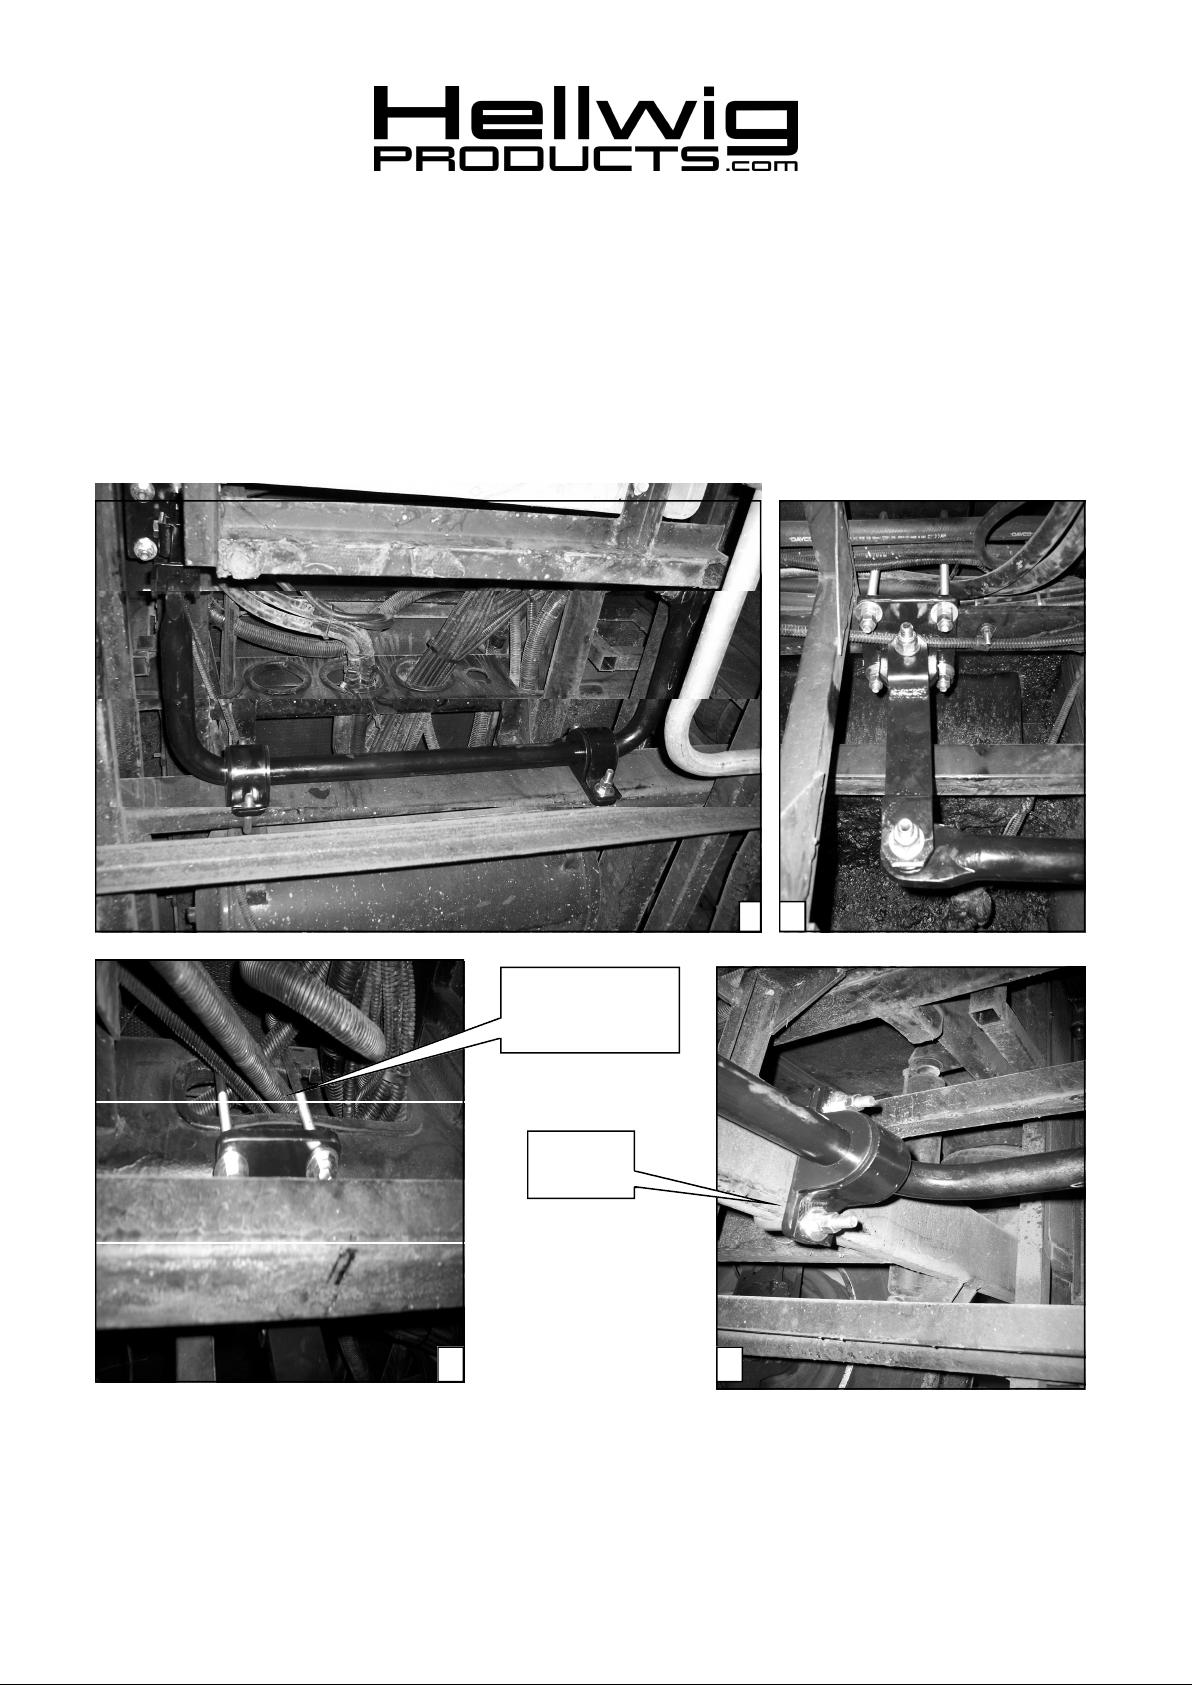
1. Install the D-shaped poly bushings on the sway bar in as close a mounting position as
in photo one ( 1 ).
2. Install the 10” square U-bolts over the vehicles frame with the legs pointing down.
Install the frame mounting brackets with mounting hardware provided. Leave loose
at this time to allow for adjustment later. Take note on the mounting of the U-bolts
on the drivers side. See photo ( 3 ). Take care as to not damage any electrical wires
or hoses that run through the frame.
3. Install the shorter square U-bolts on the vehicles crossmember in as close a position
to match the D-bushings installed on the sway bar. Install the backing plates on the
U-bolts. Raise the sway bar, align the U-bolts to match the D-bushings. Install the Uplates over the D-bushing and tighten with the mounting hardware provided. Leave
loose at this time to allow for adjustment later. See photo ( 4 ).
4. Install the hanger brackets on the arms of the sway bar. Raise the arms of the sway
bar and attach to the mounted frame brackets. Align the hanger brackets to be straight
up and down as in photo ( 2 ).
5. With the sway bar properly fitted on the crossmember and on the vehicles frame.
Torque all mounting components to the specified rates. Double check and make sure
that no wires or hoses will be damaged during the installation.
ATTENTION INSTALLER: PLEASE MAKE SURE CUSTOMER RECEIVES THIS
INSTRUCTION SHEET, ALL IMPORTANT NOTE CARDS,
WARNING CARDS AND THE WARRANTY FORM.
7232 ( R-7232 ) 12/14/04
 Loading...