


 Loading...
Software Reference
FlexColor 4.0 for Camera Backs
by Hasselblad Imacon

2
© 2004 Hasselblad A/S. All rights reserved.
Software Reference - FlexColor 4.0 for Camera Backs, Part No 70030035 revision 1.0.
The information in this manual is furnished for informational use only, is subject to change without notice, and should not be construed as a commitment by Hasselblad A/S. Hasselblad A/S assumes no responsibility or liability for any errors or inaccuracies that may appear in this manual.
Hasselblad A/S assumes no responsibility or liability for loss or damage incurred during or as a result of using Hasselblad software or products.
Hasselblad, Imacon, FlexColor, Flextight, FlexFrame and Ixpress are trademarks of Hasselblad A/S.
Adobe and Adobe Photoshop are trademarks of Adobe Systems, Inc. Macintosh, Mac OS, ColorSync, and FireWire are registered trademarks of Apple Computer, Inc.
Printed in Denmark.
Software Reference - FlexColor 4.0 for Camera Backs

Table of Contents
3
Table of Contents
Introduction |
7 |
What's in this Manual |
7 |
Software compatibility |
7 |
FlexColor under Mac OS and Windows |
7 |
System Requirements |
8 |
The 3f File Format |
10 |
FlexColor Menus |
13 |
The FlexColor Menu |
13 |
The File Menu |
14 |
The Edit Menu |
16 |
The Modify Menu |
17 |
The View Menu |
18 |
The Maintenance Menu |
18 |
The Window Menu |
19 |
The Main FlexColor Window |
21 |
Introduction |
21 |
Capture and Save Tools |
21 |
Color and Exposure Analysis Tools |
23 |
Corrections Controls |
24 |
Size Controls |
24 |
Zoom Controls |
26 |
Orientation Controls |
26 |
Other Controls |
27 |
Overlay |
28 |
The Preview |
28 |
The Setup Window |
29 |
Introduction |
29 |
The FlexColor Setup Philosophy |
30 |
Managing Setups |
30 |
Advanced Setup Management |
31 |
continues... |
|
Software Reference - FlexColor 4.0 for Camera Backs

4 |
Table of Contents |
|
...continued |
|
|
|
|
|
|
General Tab |
32 |
|
Contrast Tab |
35 |
|
Texture Tab |
36 |
|
CC (Color Correction) Tab |
37 |
|
Auto Tab |
39 |
|
Dot Tab |
40 |
|
ColorSync or ICM Tab |
41 |
|
The Preferences Window |
47 |
|
Introduction |
47 |
|
Scanner Tab |
47 |
|
Camera Tab |
47 |
|
3f Tab |
50 |
|
Output Profiles Tab |
51 |
|
General FlexColor Settings |
52 |
|
FlexColor ICC Profiles |
55 |
|
Generic ICC Output Profiles |
55 |
|
Editing ColorSync Color Profiles |
56 |
|
The Thumbnails Window |
61 |
|
Introduction |
61 |
|
Opening the Thumbnails Window |
61 |
|
Selecting a Thumbnails Folder |
62 |
|
Files and Formats |
62 |
|
Saving Crop and Imaging Settings |
62 |
|
Using the Thumbnails Window |
63 |
|
Printing the Thumbnails |
69 |
|
Ixpress Contents Window |
71 |
|
Introduction |
71 |
|
Using the Ixpress Contents Window |
71 |
|
Transferring Images |
74 |
|
The Info Window |
75 |
|
Introduction |
75 |
|
Using the Info Window |
75 |
Software Reference - FlexColor 4.0 for Camera Backs

|
Table of Contents |
5 |
|
The Exposure Window |
79 |
||
|
|||
Introduction |
79 |
|
|
Using the Exposure window |
79 |
|
|
Setting the Exposure |
80 |
|
|
Custom White Calibration |
81 |
|
|
The Color Info Window |
83 |
|
|
Introduction |
83 |
|
|
Reading Values in the Color Info Window |
83 |
|
|
Setting Fixed Sample Points |
84 |
|
|
Active and Reload Buttons |
85 |
|
|
Introduction |
85 |
|
|
The Gradations Window |
87 |
|
|
Introduction |
87 |
|
|
Using the Sliders |
88 |
|
|
Using the Gradations Color Picker |
89 |
|
|
Using the Curve |
89 |
|
|
Setting the Threshold for Lineart Captures |
91 |
|
|
The Histogram Window |
93 |
|
|
Introduction |
93 |
|
|
The Histogram Display |
94 |
|
|
The Histogram Color Pickers |
96 |
|
|
Neutralizing Colors |
98 |
|
|
Selective Color Correction |
99 |
|
|
Introduction |
99 |
|
|
Opening the Color Correction Window |
99 |
|
|
Using the Color Correction Window |
99 |
|
|
The Texture Window |
101 |
|
|
Introduction |
101 |
|
|
Using the Texture Window |
102 |
|
|
The Detail Window |
105 |
|
|
Introduction |
105 |
|
|
Using the Detail Window |
106 |
|
Software Reference - FlexColor 4.0 for Camera Backs

Table of Contents
6
The Live Video Window |
107 |
Introduction |
107 |
Live Video Window Tools |
108 |
The Tasks Window |
111 |
Background save from 3f |
111 |
Appendix |
113 |
Keyboard Shortcuts |
113 |
Software Reference - FlexColor 4.0 for Camera Backs

Introduction |
7 |
|
What's in this Manual |
||
|
Introduction
What's in this Manual
This manual provides a menu-by-menu, screen-by-screen listing of controls and settings available with FlexColor.
Topics include:
•Summaries of all menu commands
•Description of the 3f file format
•Information about rotating and mirroring images
•Image management from the Thumbnails Window
•Full details of all tab sheets in the Setup window
•Full details of the Preferences window
•Instructions for editing ColorSyncTM profiles
•Brightness and contrast control with the Gradations window
•Advanced highlight and shadow settings with the Histogram window, including color neutralization and control
•Advanced color control with the Color Correction window
•Sharpening images with the Texture window
Software compatibility
The FlexColor software works with the entire range of Ixpress and FlexFrame digital camera backs and all Flextight scanners except for the Flextight 4800.
FlexColor under Mac OS and Windows
The CD that came with your digital camera system includes versions of FlexColor for both Macintosh and Windows-based systems.
The interface is nearly identical on both platforms, with mostly superficial differences to conform with the interface guidelines of the two systems.
Software Reference - FlexColor 4.0 for Camera Backs

8 |
Introduction |
|
System Requirements |
||
|
Nearly all of the screen captures shown in this manual were taken from Mac OS X. Windows users will notice the following differences:
•In the Setup window, the color management tab is called ICM instead of ColorSyncTM.
•The menus are located at the top of the main FlexColor window instead of at the top of the screen.
System Requirements
IBM PC-Compatibles
•Minimum 233 MHz processor.
•Windows 2000 or XP.
•System RAM
512 MB or more recommended - when performing micro step captures we recommend at least 1.5 GB. Ixpress 528C will not function with less than 2 GB.
•Screen resolution of 800 x 600 pixels with true colors (24 bits).
•Mouse or other pointing device.
•FireWire interface or
SCSI Interface.
•Minimum available hard disk space of 10 GB
Macintosh
•Minimum Power PC processor.
•Mac OS X ver. 10.2.1 or later.
•System RAM
512 MB or more recommended - when performing micro step captures we recommend at least 1 GB.
•Screen resolution of 800 x 600 pixels with true colors (24 bits).
•FireWire interface or
SCSI interface.
•Minimum available hard disk space of 10 GB.
Software Reference - FlexColor 4.0 for Camera Backs

Introduction |
9 |
|
System Requirements |
||
|
OS X Requirements
OS X V 10.2.1 or later is required. We recommend updating to the latest release available.
Devices can be connected by either SCSI or FireWire. Please note that if you are connecting a SCSI device through a SCSI to FireWire device it will be represented as a FireWire device - that is the bus number in the device window will be 9.
To be recognized by OS X, devices connected to a standard SCSI adapter must be present when booting the Mac.
A SCSI device connected via a SCSI to FireWire adapter will be recognized when the adapter is plugged in.
The SCSI device itself must be turned on before connecting the adapter to FireWire or rebooting.
Software Reference - FlexColor 4.0 for Camera Backs

10 |
Introduction |
|
The 3f File Format |
||
|
The 3f File Format
When using the Scan 3f function (for scanners) or capturing an image with a digital camera back, FlexColor stores the image in the unique 3f (flexible file format).
The 3f file is an extended TIFF-file containing
•Raw 16-bit image data
•A complete history of applied settings
•High quality preview image
•Custom icons and previews visible in the Finder.
•Meta-data (including IPTC tags) to support an image database.
In short this means that when you have scanned or captured your image, you can crop, resize and color correct an unlimited number of times afterwards.
You can easily integrate to databases, have fast previews in a number of applications and always be able to re-create the quality you need - all this from the same 3f file.
Image Archiving & Availability
Because a 3f file preserves all of the details captured by your scanner or camera, it is perfect for archiving. Then, for each new job, you will work with the 3f image in FlexColor and export it to create a new TIFF file in which your settings are applied - the only change made to the 3f file will be the addition of a new history record of the settings you used.
By making the 3f files available over your network, you will enable operators at any workstation to open an image in FlexColor and apply cropping, correction and conversion just as though they were working directly on the scanner or camera.
Software Reference - FlexColor 4.0 for Camera Backs
Introduction |
11 |
|
The 3f File Format |
||
|
Editing 3f Files
FlexColor holds all tools required for making standard image correction of the 3f files.
If you need to apply pixel-editing to your image, FlexColor has a special plug-in for Photoshop. When installing FlexColor, this plug-in will be installed in the appropriate plug-in folder if Photoshop is already installed.
Please note that you will permanently alter your original scanning or capture data when you save using the plug-in.
To use your images in other image-editing and DTP applications, you must apply the required settings and then save them as TIFF files. TIFF is a standard format that is supported by the vast majority of imaging and DTP programs.
IPTC Tags
The International Press Telecommunications Council (IPTC) defines a standard used in the press industry for exchanging meta-information in news content, including images. The standard associates an object with its description within the same file. You can embed all kinds of information in your images, such as a caption, the place you took it, the date and even keywords and categories etc.
In FlexColor you are able to apply a number of IPTC-tags to your 3f files. See “The Info Window” on page 65 for details.
An extra copy of the IPTC data is stored in the Adobe Image Resource tag to enable Extensis Portfolio and other applications extracting metadata with QuickTime to read the keywords stored in the standard IPTC tag.
Many aspects of managing your images are made easier using the IPTC standard. Many software programs already exist for doing this, including Adobe Photoshop. It’s the standard used by professional news agencies worldwide, and it’s just as useful for others.
Software Reference - FlexColor 4.0 for Camera Backs

Introduction
12
Software Reference - FlexColor 4.0 for Camera Backs
FlexColor Menus |
13 |
|
The FlexColor Menu |
||
|
FlexColor Menus
FlexColor commands are available via a standard menu bar. Each of them is described briefly below. Note that most menu entries also list a keyboard shortcut to the right of the entry. Try to remember and use these shortcuts to speed up your work.
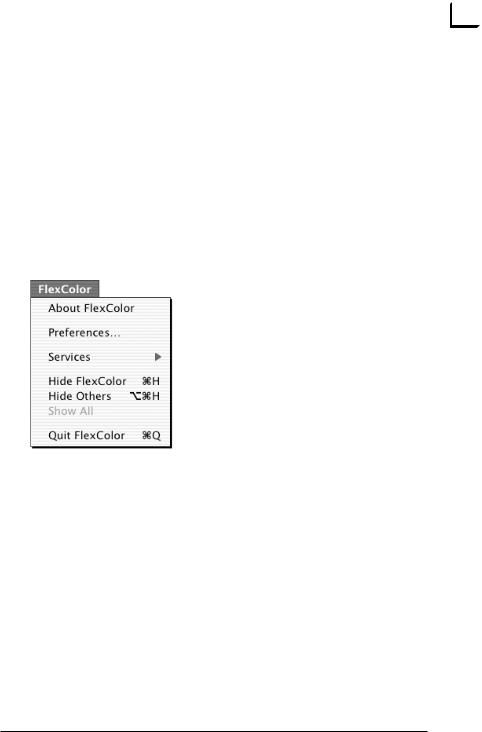
The FlexColor Menu
Except for the Preferences entry the FlexColor menu functions are standard for all applications.
•Preferences: Opens the Preferences window, which enables you to make general flash and shutter settings for your current camera model, select an application for viewing final images, and typing some default information for the 3f files.
See "The Preferences Window" on page 47 for more information.
Software Reference - FlexColor 4.0 for Camera Backs
14 |
FlexColor Menus |
|
The File Menu |
||
|
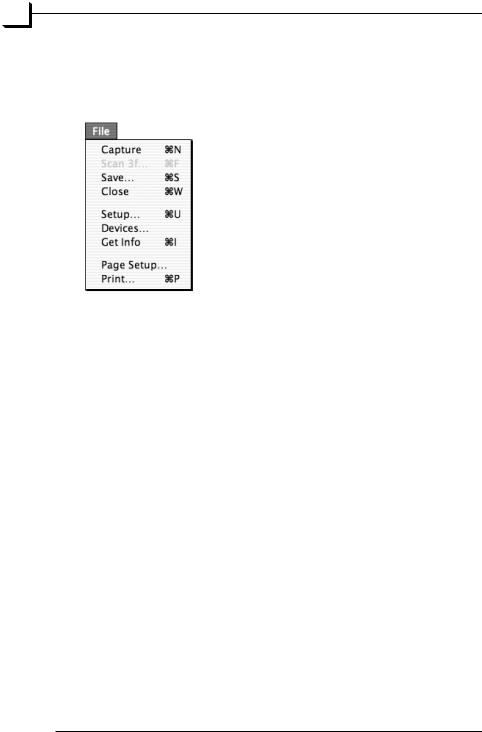
The File Menu
The File menu includes entries that initiate image captures and make settings for FlexColor.
•Capture: Captures an image using your current settings and saves it as a 3f file (see page 10 for details). A preview of the image will be displayed in main FlexColor window right away, though rendering of the image will continue in the background for several seconds afterwards. You will not be able to view the image in full resolution until the rendering is finished, though you can make other types of settings. All setting are previewed using the full 16-bit color depth to display results.
•Save: Saves the image currently shown in the FlexColor window as a standard TIFF file. All current crop, mode, color and imageenhancement settings will be applied to the saved image.
•Close: Closes the currently selected window if possible.
•Setup: Opens the Setup window, in which most of the basic settings for an image capture can be made, saved and loaded.
See "The Setup Window" on page 29 for more information.
Software Reference - FlexColor 4.0 for Camera Backs
FlexColor Menus |
15 |
|
The File Menu |
||
|
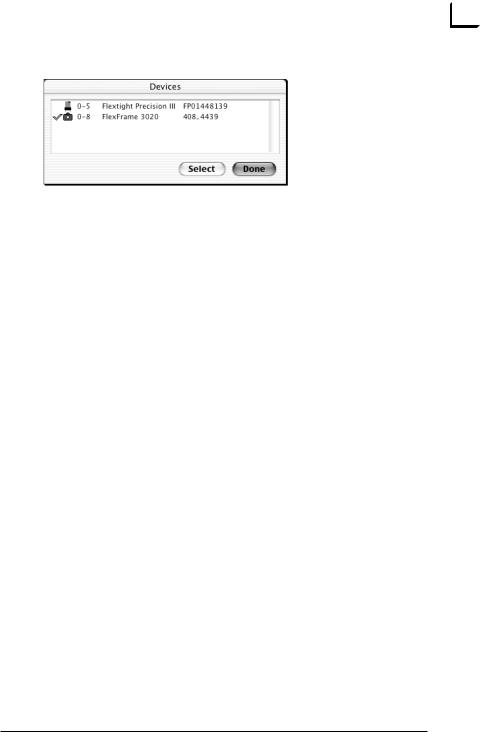
• Devices: Opens the Devices window.
The window lists all connected devices allowing you to select which camera or scanner device you want to work with. Click on the one you prefer and click the Select button. If you have only a single scanner or camera connected this device is automatically chosen.
The numbers just to the right of the scanner or camera icon in the list (ex. 0-5) refers to the Bus no. (0) and the SCSI address (5).
•Get Info: Opens an Info window, which contains various information about the currently selected image.
See "The Info Window" on page 65 for a detailed description.
•Page Setup.../Print… : Enables you to print the contents of the Thumbnails window. Make sure you have selected the view by clicking on an image in the window, then select Print.
Software Reference - FlexColor 4.0 for Camera Backs
16 |
FlexColor Menus |
|
The Edit Menu |
||
|
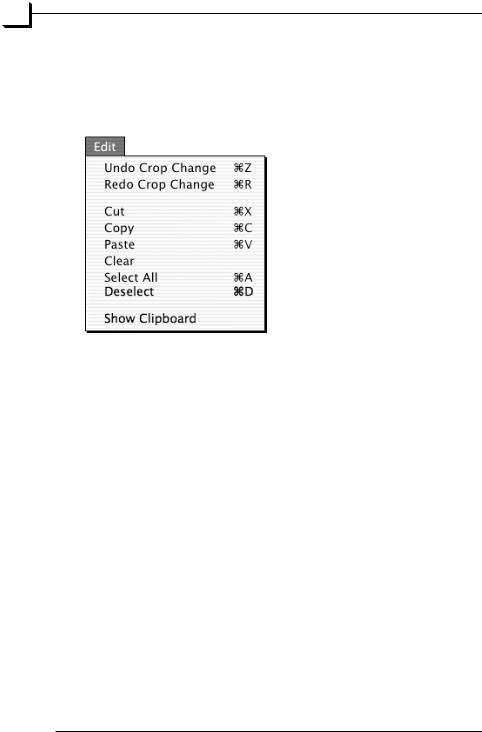
The Edit Menu
The Edit menu contains entries that enable you to undo multiple actions that you have made while making settings in FlexColor. It also enables you to cut, copy and paste text in various windows.
•Undo: Reverses your most-recent actions - for example, a crop area modification or a change in the Setup window. You are able to step back through a long series of actions.
•Redo: Reapplies the last action that you cancelled using the Undo command.
•Cut: If you have selected some text in a text field, then this command removes the text and saves it on a system-wide virtual clipboard.
•Copy: Saves the selected text on the clipboard without removing it.
•Paste: Places a copy of the text on the clipboard at the insertion point.
•Clear: Removes all text from the clipboard.
•Select All: Selects all of the text contained in the field in which the insertion point is standing. In the Thumbnails window, this selects all of the icons in the window (see "The Thumbnails Window" on page 61).
•Deselect: Removes the cropping of the currently shown image.
•Show Clipboard: displays the current contents of the clipboard.
Software Reference - FlexColor 4.0 for Camera Backs
FlexColor Menus |
17 |
|
The Modify Menu |
||
|
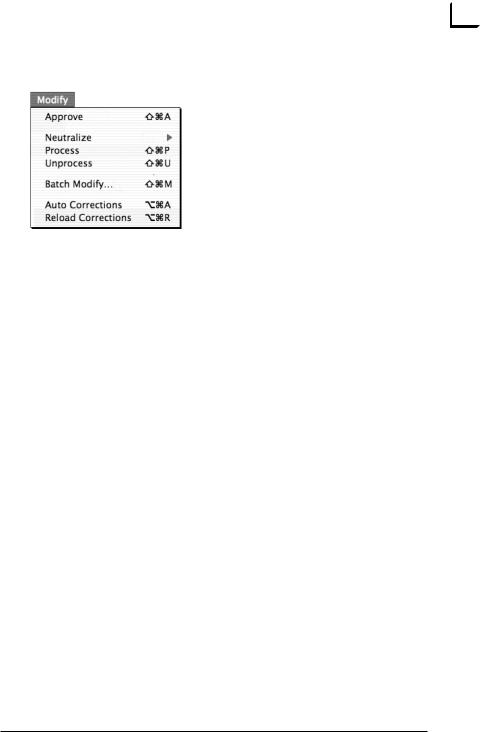
The Modify Menu
The Modify menu gives you quick short cuts to functions that are also available from within the modify dialog in the Thumbnails window (see page 61 for details).
You have the possibility to select a number of files and choose Process from the Modify menu. This will add a corresponding number of processing tasks to the list in the Task window and processing of those files will take place in the background. Processing tasks will not be interrupted by new image captures.
Batch Modify
When using the Batch Modify... function to add settings from current settings the cropping will be maintained in the added settings.
If the images in question have different sizes the cropping will be scaled accordingly.
Neutralization presets
You have the ability to save and reuse named neutralization presets. This feature is also accessible from the Modify dialog in the Thumbnails window (see page 67 for details).
Software Reference - FlexColor 4.0 for Camera Backs
18 |
FlexColor Menus |
|
The View Menu |
||
|
||
|
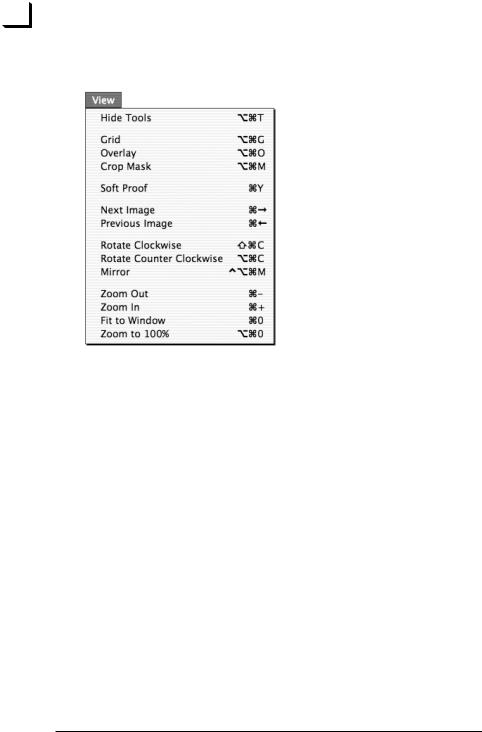
The View Menu |
The View menu exposes some of the “secret” short cuts that relate to the control of grid, overlay and crop mask and to zooming and selection of images.
The Soft Proof feature combines the ICC color profile of your monitor with the profiles of your camera back and output device to provide a simulation of the output colors on your screen. Enable this only when you are sure about the specific output device you are using. If you are making a general-purpose RGB capture, then keep this feature unselected.
A small s to the right of the Color Info area in the main FlexColor window indicates that Soft Proof is enabled.
The Hide Tools item lets you hide all tool windows.
The Maintenance Menu
The Maintenance menu is not available when you use FlexColor with a digital camera back.
Software Reference - FlexColor 4.0 for Camera Backs
FlexColor Menus |
19 |
|
The Window Menu |
||
|
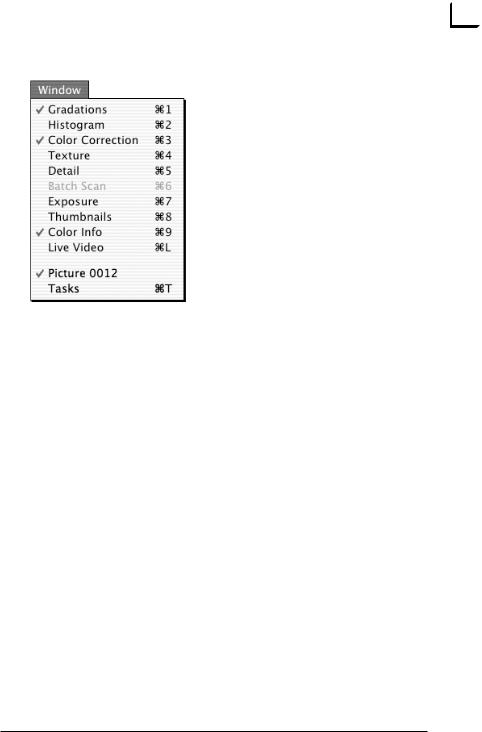
The Window Menu
The Window menu opens and closes each of the image settings windows available with FlexColor. Each window that is currently open shows a check mark to the left of its name. For more information about each of these windows, see the appropriate section later in this manual:
Gradations window . . . . . . . . .
Histogram window . . . . . . . . . .
Color Correction window . . . .
Texture window . . . . . . . . . . .
Detail window . . . . . . . . . . . . .
Exposure window . . . . . . . . . . .
Thumbnails window . . . . . . . .
Color Info window . . . . . . . . . .
Live Video window . . . . . . . .
Tasks window . . . . . . . . . . . . .
see page 87. see page 93. see page 99. see page 101. see page 105. see page 79. see page 61. see page 83. see page 107. see page 111.
NOTE! The Batch Scan entry is not available when you use FlexColor with a digital camera back.
Software Reference - FlexColor 4.0 for Camera Backs

FlexColor Menus
20
Software Reference - FlexColor 4.0 for Camera Backs

The Main FlexColor Window
Introduction 21
The Main FlexColor Window
Introduction
The main FlexColor window displays your preview images and provides access to most of the image capturing and editing functions available with
FlexColor.
Capture and Save Tools
Capture Captures an image using your current settings.
A preview of the image will be displayed in the main FlexColor window right away.
All settings are previewed using the full 16-bit color depth to display results.
Software Reference - FlexColor 4.0 for Camera Backs
22 |
The Main FlexColor Window |
||
Capture and Save Tools |
|||
|
|||
|
Save |
Saves the image currently shown in the FlexColor window |
|
|
|
as a standard TIFF file. All current crop, mode, color and |
|
|
|
image-enhancement settings will be applied to the saved |
|
|
|
image. The save task is added to the list in the Tasks |
|
|
|
window (see page 111 for details) and the actual save task |
|
|
|
will take place in the background |
|
|
|
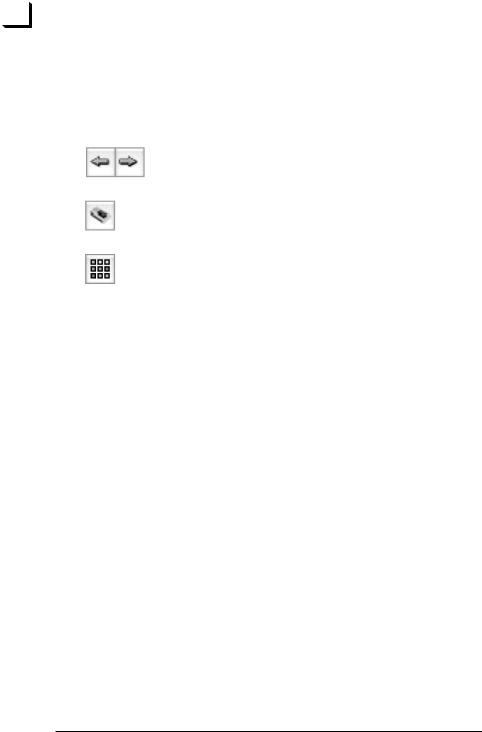
Previous/Next Image Buttons: Use these buttons to select |
|
|
|
previous or next image from the thumbnails folder. |
|
|
|
Ixpress Contents Button: Opens the Ixpress Contents |
|
|
|
window displaying thumbnails of all images currently |
|
|
|
stored on the Image Bank's hard disk. |
|
|
|
Thumbnails Button: Opens the Thumbnails window, which |
|
|
|
displays thumbnail images of all of the images saved in the |
|
|
|
current folder. See "The Thumbnails Window" on page 61 for |
|
|
|
more information. |
|
|
Setup |
Use this pop-up menu to choose between any of the |
|
|
|
currently available setups. A small + will appear to the right |
|
|
|
of the menu to indicate when you have made custom |
|
|
|
changes that affect the setup but have not been saved. |
|
|
Type |
Use this pop-up menu to choose the type of capture you |
|
|
|
want to make (preview, single-shot, multi-shot or |
|
|
|
micro-step). This setting mirrors the Type setting on the |
|
|
|
General tab of the Setup window. |
|
|
|
See "General Tab" on page 32 for more information. |
|
|
Mode |
Use this pop-up menu to set the capture mode (RGB, RGB |
|
|
|
16 bit, Grayscale, Grayscale 16 bit, Lineart, or CMYK). This |
|
|
|
setting mirrors the Mode setting on the General tab of the |
|
|
|
Setup window. |
|
|
|
See "General Tab" on page 32 for more information. |
|
Keyboard shortcuts
See "Appendix" on page 113 for related keyboard shortcuts.
Software Reference - FlexColor 4.0 for Camera Backs
The Main FlexColor Window |
23 |
|
Color and Exposure Analysis Tools |
||
|
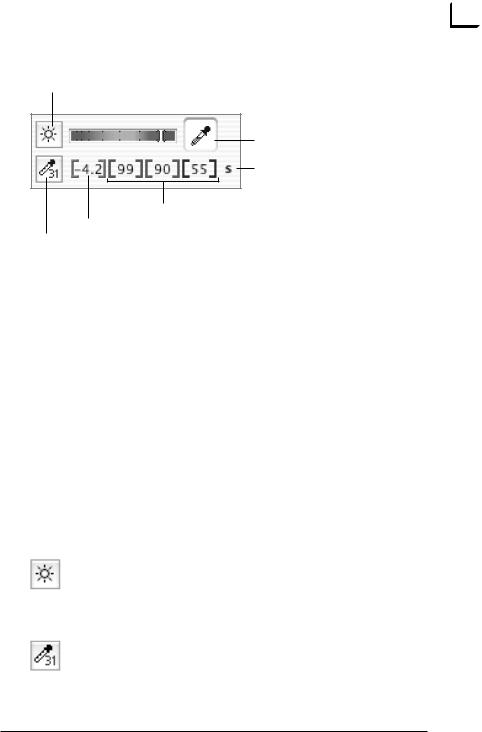
Color and Exposure Analysis Tools
Exposure button |
Exposure-level indicator |
|
|
Neutralize color picker
Soft Proof enabled
Red, green and blue pixel values f-stop pixel value
Color Info button
Use the exposure-level indicator to get a rough idea of how bright your picture is. Ideally, it should be near the top of the green area, but without entering into the red area, which indicates an overexposure. The indicator turns yellow to indicate a probably bad exposure and turns white to indicate a good exposure. Only the part of the image that is inside of your crop area is measured by this tool, which means that the measurement will change when you modify the crop area.
The various pixel value displays give you the f-stop and/or color values for the pixel currently under the mouse pointer in the preview. Use this tool to evaluate the exposure in particular areas of the captured image.
When you are shooting in RGB mode, then you can read values for each of the three colors and the f-stop brightness, as shown above. However, if you are shooting to CMYK, then CMYK pixel values are shown, and no f-stop value appears. Use the Color Info window to read CMYK and f-stop values simultaneously (see below).
The Neutralize color picker helps you to obtain a neutral color balance in your image (see “Neutralizing Colors" on page 98 for details).
Next to the information displays are two buttons, which will open windows that give you even more information and control. These are:
Exposure Button: Click this button to open the Exposure window, which enables you to assess your exposure, set camera aperture, exposure time and ISO sensitivity, and make a black calibration. See "The Exposure Window" on page 79 for more information.
Color Info Button: Click this button to read pixel values from several points in the preview image. See "The Color Info Window" on page 65 for more information.
Software Reference - FlexColor 4.0 for Camera Backs
24 |
The Main FlexColor Window |
|
Corrections Controls |
||
|
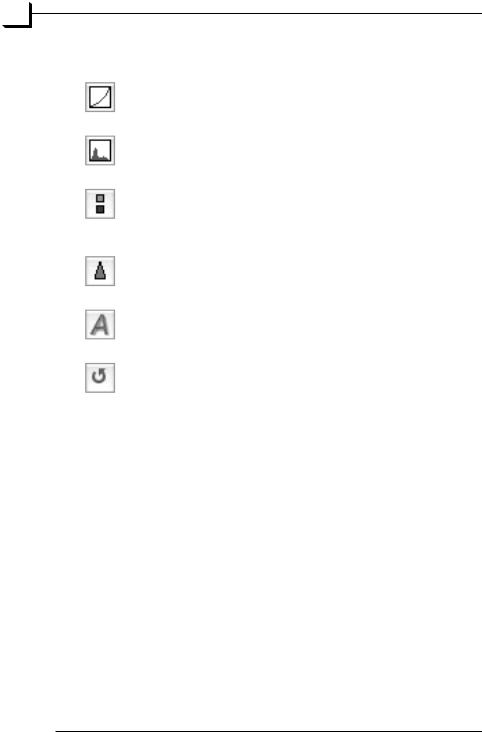
Corrections Controls
Gradation Button: Opens/closes the Gradations window. See "The Gradations Window" on page 87 for more information.
Histogram Button: Opens/closes the Histogram window. See "The Histogram Window" on page 93 for more information.
Color Correction Button: Opens/closes the Color Correction window.
See "Selective Color Correction" on page 99 for more information.
Texture Button: Opens/closes the Texture window. See "The Texture Window" on page 101 for more information.
Auto Button: Click this button to apply automatic settings for highlight and shadow points based on the histogram of your image.
Reload Button: Click on this button to return all correction windows (Gradations, Histogram, Color Correction, and
Texture) to the settings saved with the current setup.
Size Controls
Width |
The measured width of the output image. The units used are |
|
set on the General tab of the Setup window. See "General |
|
Tab" on page 32 for more information. |
Height |
The measured height of the output image. The units used are |
|
set on the General tab of the Setup window. See "General |
|
Tab" on page 32 for more information. |
Zoom |
The level of magnification applied when the image is saved. |
|
The Width and Height settings will update to reflect the |
|
setting you make here. Note that if you choose a setting |
|
other than 100%, then FlexColor will interpolate the image to |
|
fit the size you specify. |
Size |
The file size of the final image file. This is affected by the |
|
Width, Height, Zoom, and PPI settings. |
|
It is possible to type a desired output file size. This will |
|
adjust the zoom percentage correspondingly (max. 200%). |
Software Reference - FlexColor 4.0 for Camera Backs

|
The Main FlexColor Window |
25 |
|
Size Controls |
|
|
|
|
PPI |
The output resolution of the final image. The Width and |
|
|
Height settings will update to reflect the setting you make |
|
|
here. |
|
Lock Button: The lock button enables you to lock the output width and height settings. When the lock is closed, then the output width and height will not change when you modify the crop area by dragging one of its corners, and the proportion of height to width will be maintained. Click on the lock to toggle its setting.
Crop Button: Usually this button is gray, which indicates that the crop tool is active. When the crop tool is active, you are able to click and drag on the preview image to create and manipulate the crop area. However, some tools, such as the color pickers, change the cursor so that it selects colors instead of defining a crop area. When one of these tools is active, the crop button is white. To return to the crop tool, click on the crop button.
Note the following points about working with the crop and size tools:
•When you work with the digital camera, you will typically know the target output dimensions and resolution. If so, first enter the dimensions in the Height and Width fields and choose the output resolution from the PPI pop-up menu. Then click on the lock icon so that it is closed (this will lock your height and width settings).
You are now able to click and drag the crop area to define the composition of your image - the Zoom value automatically tracks your changes without changing the height, width, or PPI of your output image.
•To set the crop area, place the mouse cursor over the preview image. Click and hold over one corner of the area you wish to capture and drag the cursor away to outline the area. Release the mouse button to select the area.
•To move the crop area, place the mouse cursor inside the outline, then click and drag the area. Release the button to drop the area again.
•To resize the crop area, place the mouse cursor over one of the sides or corners. The cursor will change into a double sided arrow. Click and drag the side or corner to stretch or shrink the area.
Software Reference - FlexColor 4.0 for Camera Backs
26 |
The Main FlexColor Window |
|
Zoom Controls |
||
|
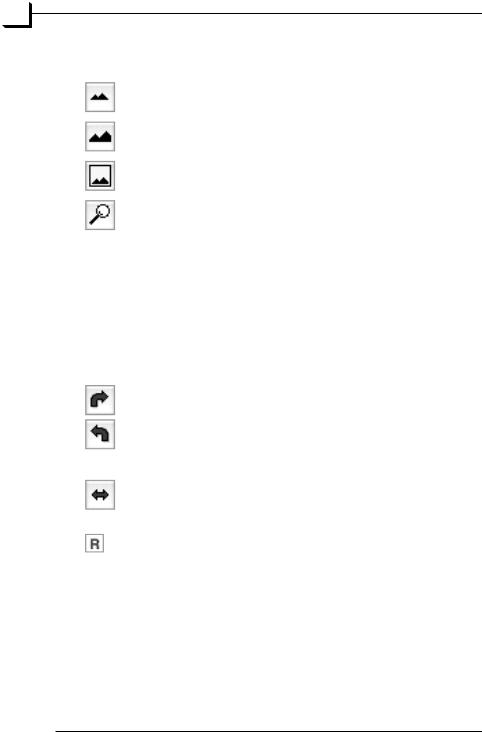
Zoom Controls
Zoom Out: Click this button to make the preview image smaller.
Zoom In: Click this button to make the preview image larger.
Fit to Window: Click this button to resize the preview to fit the window.
Detail: Click this button to open the Detail window. Use this window to show details of the image and/or a strongly magnified view of the preview image for reading color values of a specific pixel in your image. See "The Detail Window" on page 105 for more information.
Keyboard shortcuts
See "Appendix" on page 113 for related keyboard shortcuts.
Orientation Controls
Rotate Buttons: If you choose to shoot with the camera back in portrait mode, then your subjects will be rotated so that they appears sideways in relation to the FlexColor preview window. If this annoys you, the use the rotate buttons to rotate the image in 90° steps in either direction. Both the preview and the final image will be rotated.
Mirror Button: Mirrors the preview and final image.
Orientation Icon: Shows the current rotation/mirroring in relation to the captured image.
Keyboard shortcuts
See "Appendix" on page 113 for related keyboard shortcuts.
Software Reference - FlexColor 4.0 for Camera Backs
The Main FlexColor Window |
27 |
|
Other Controls |
||
|
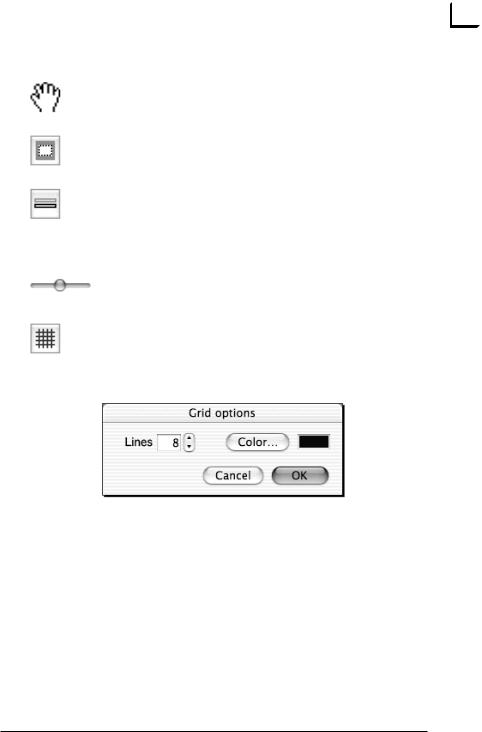
Other Controls
Grab tool: Holding down space activates the grab tool allowing you to drag the contents of the preview window around.
Crop mask button: Masks off the area outside the current cropping.
Overlay Button: Switches on and off the display of an overlay over the image in the preview window. Activating this button without actually having added an overlay image will display a message describing this.
See page 28 for details about adding an overlay to the image.
Opacity slider: This slider occurs below the overlay button while the overlay is active. The slider gives you full control of the overlay image transparency.
Grid Button: Adds a grid over the preview and live video window. The grid can be useful for aligning objects in your setup.
Holding down the option key while clicking the button opens the Grid options window:
Here you are able to define the number and color of the lines in the grid.
The number of lines is per the smallest image dimension (width or height).
Scrolling
The scroll wheel on your mouse can be used in the preview window - hold down option key to scroll sideways.
Software Reference - FlexColor 4.0 for Camera Backs

The Main FlexColor Window
28 Overlay
Overlay
It is possible to add an overlay to the preview and live video windows to help with aligning your setup. All the standard image file types such as TIFF, JPEG, GIF, and PNG can be used.
The Mac version supports PNG-files with alpha channels giving you full control of the image transparency.
To add the overlay simply drag the image file into the preview window, or alternatively if you option-click the Overlay button you are given the possibility of browsing for the overlay image instead of dragging it into place.
Once in place you can click and drag the overlay image around to align it correctly and you can resize it by clicking the borders and dragging.
Clicking the Overlay button (see page 27) will turn the overlay on/off.
The Preview
FlexColor has been designed with the philosophy that when creating digital images, it is best to judge image quality with your eyes, not based on point measurements and color lookup tables. This is why we have drawn so much attention to the screen calibration procedure in the tutorial, and why we have integrated ICC color profiles to maintain the color accuracy you see on your screen all the way to print.
To make it easy for you to see and use the preview, FlexColor provides a large 16-bit image with a zoom function and magnifier window. Because your monitor can only show 8-bit colors, FlexColor calculates a new 8-bit image from the 16-bit information each time you apply a highlight, shadow, gradation, or color setting. This creates a very accurate preview image.
Software Reference - FlexColor 4.0 for Camera Backs
The Setup Window
Introduction 29
The Setup Window
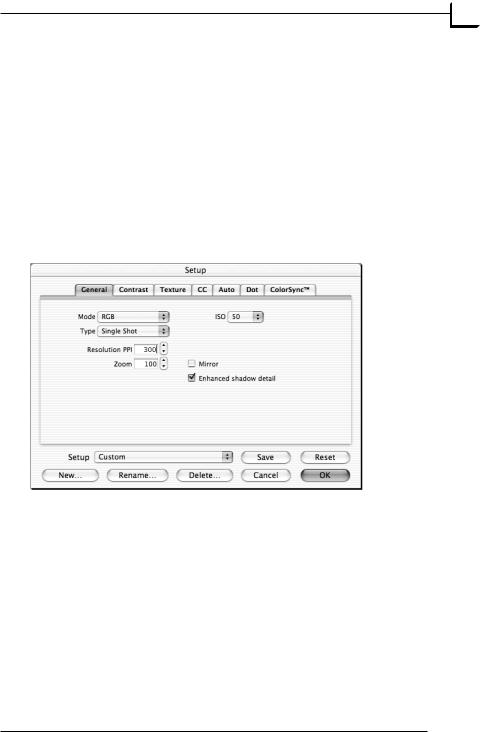
Introduction
The Setup window shows many settings that affect the image and the way in which the other tools in the FlexColor application work. All of the settings displayed in the window can be saved and loaded from your hard disk.
To open the Setup window, type cmd-U or select Setup from the File menu.
Many of the settings, such as sharpness, gradation, and color correction, are available individually through tool buttons in the main FlexColor window. All settings you make using the individual tools are also applied to the Setup window, and vice versa.
The Setup window is divided into several tab sheets to help you find the setting you want to make.
Software Reference - FlexColor 4.0 for Camera Backs
30 |
The Setup Window |
|
The FlexColor Setup Philosophy |
||
|
The FlexColor Setup Philosophy
In the traditional prepress environment, where photographs are captured on film and then scanned, the professional scanner operator requires extensive education and experience to make all of the settings required to obtain good results. The operator examines each original and, applying his or her experience, enters a "best guess" of what all the settings should be for that particular type of original. Then the operator checks the preview and makes fine tuning adjustments. However, when shooting directly to digital, the photographer needs to be able to make these same decisions.
FlexColor simplifies this process by enabling you to save a library of setups that you use most frequently. Nearly all FlexColor settings, including all settings in the Setup, Gradations, Histogram, and Texture windows, are saved in each setup file.
Each time you make a capture, select the closest setup from the Setup menu, define the crop, click on the Auto button, and you are 98 to 100% of the way to a perfect image capture (provided that you have neutralized the colors of your image - see "Neutralizing Colors" on page 98 for details).
FlexColor is delivered with several generic setups to get you started quickly. Use the Setup pop-up menu to choose a setup that is appropriate for your original. The name of each setup indicates its intended use.
Start by using the generic setups. If you want to develop your own setup library, begin with the closest of the available generic setups, modify it, and save it with a new name.
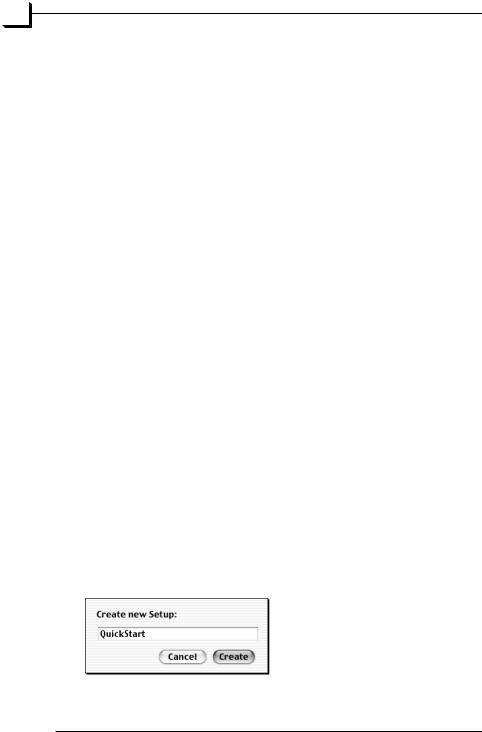
Managing Setups
To create a new setup, click on the New button. A window will appear in which you can name the new setup. All of the settings currently applied in the Setup, Gradations, Histogram, and Texture windows will be saved in the new file.
Software Reference - FlexColor 4.0 for Camera Backs
Loading...