

Page 1
02345/12
PK 600
OPERATOR'S MANUAL
MANUALE DELL'OPERATORE
MANUEL D'UTILISATION
WARTUNGSANLEITUNG
MANUAL DE INSTRUCCIONES
Page 2
SAFETY RULES
This symbol alongside messages and instructions in this manual and on the machine indicates a potential
danger; care must be taken so ensure your own safety and that of anyone within the machine’s range of operation.
BEWARE! This machine has been manufactured to european standards and carries the mark.
NORME ANTINFORTUNISTICHE
Sulla macchina ed all’interno di questo manuale sono presenti scritte ed indicazioni accompagnate da
questo segnale, stanno ad indicare la presenza di un potenziale pericolo per cui è opportuno utilizzare una
particolare prudenza per la propria sicurezza e di quanti si possono trovare nel raggio di azione della macchina.
ATTENZIONE! Questa macchina è costruita secondo le normative europee ed è certificata col marchio .
RÈGLES DE SÉCURITÉ GÉNERALE
Sur la machine et sur les pages de ce manuel se trouvent des mises en garde et des indications
accompagnées de ce signal; elles indiquent la présence d’un danger potentiel qui explique la nécessité d’être
particulièrement prudent pour sauvegarder sa propre sécurité et la sécurité de tous ceux qui peuvent se trouver
dans le rayon d’action de la machine.
ATTENTION! Cette machine est fabriquée selon les directives européennes et est certifiée par le label
SICHERHEITSVORSCHRIFTEN
Auf der Maschine und in diesem Handbuch finden Sie Beschriftungen und Hinweise mit dem hier
abgebildeten Symbol. Sie weisen auf eine potentielle Gefahr hin, und Sie sollten besonders gefahrenbewusst
vorgehen, um unnötige Risiken für sich selbst und andere Personen, die sich im Aktionsbereich der Maschine
befinden, auszuschließen.
ACHTUNG! Diese Maschine entspricht den europäischen Richtlinien und ist mit dem Zeichen zertifiziert.
NORMAS DE SEGURIDAD
En la máquina y dentro de este manual hay leyendas e indicaciones acompañadas por esta señal que
indican la presencia de un peligro potencial o la necesidad de adoptar una prudencia mayor para la seguridad
propria y de los que se encuentran en el radio de acción de la máquina.
¡ATENCIÓN! Esta máquina es fabricada según las normas europeas y es certificada con la marca .
NORMAS DE PRECAUÇAÕ CONTRA ACIDENTES
Na máquina e neste manual, estão presentes escritas e indicações acompanhadas por este sinal. Estas
chamam a atenção do Operador para a presença de um risco petencial. Portanto, recomenda-se a máxima
atenção para garantir a própria segurança e a de terceiros, que possam estar no raio de acção da máquina.
ATENÇÃO! Esta máquina foi construída em conformidade com as normas europeas e está certificada com a marca .
GENERAL SECURITY RULES
NORME DI CARATTERE GENERALE SULLA SICUREZZA
SICHERHEITSHINWEISE
RÈGLES GÉNÉRALES DE SÉCURITÉ
NORMAS DE CARÁCTER GENERAL SOBRE LA SEGURIDAD
NORMAS DE CARÁCTER GENERAL ACERCA DA SEGURANÇA
Pay attention to symbol DANGER! It points out all m
ost dangerous operations according to the situation. All safety rules are important and therefore must be strictly observed. Always keep this handbook within the reach,
read it carefully and learn how to use the equipment in a safe way. Let nobody, unprovided with necessary information, work with the equipment.
Fare attenzione al simbolo PERICOLO! Esso indica la presenza delle principali situazioni di pericolo. Tutte le norme antinfortunistiche contente sono importanti e vanno
rispettate. Tenere sempre questo manuale a portata di mano, leggerlo attentamente ed imparar ad usare l’attrezzatura in modo sicuro. Non permettere che qualcuno
operi con questa attrezzatura senza aver ricevuto istruzioni esaurienti.
Attention au symbole DANGER! Il indique la présence des principales situations de danger. Toutes les normes contenues pour la prévention des accidents sont
importantes et doivent être respectées scrupuleusement. Garder toujours ce manuel à la portée de la main, le lire attentivement et apprendre à utiliser ce matériel en
toute sécurité. Ne pas permettre que d’autres personnes utilisent ce matériel sans avoir reçus des instructions exhaustives.
Achtung - die mit dem Symbol GEFAHR! gekennzeichneten Hinweise weisen auf potentielle Gefahrensituationen hin. Alle sicherheitsrelevanten Hinweise in diesem
Handbuch sind sehr wichtig und müssen unbedingt befolgt werden. Bewahren Sie dieses Handbuch stets griffbereit auf, lesen Sie es aufmerksam durch, und lernen
Sie, die Maschine und die gesamte Ausrüstung sicher zu benutzen. Die Maschine darf nur von Personen benutzt werden, die vorher entsprechend unterwiesen
wurden.
Preste atención al símbolo ¡PELIGRO! Indica la presencia de situaciones importantes de peligro. Todas las normas de prevención de accidentes detalladas son
importantes y deben respetarse strictamente. Conserve este manual al alcance de la mano, léalo atentamente y aprenda a utilizar el equipamiento de modo seguro. No
permita que otras personas operen con este equipamiento sin haber recibido instrucciones exhaustivas.
1
Page 3

Take special care not to touch hot parts of the engine.
Prestate particolare attenzione a non entrare in contatto con parti surriscaldate del motore.
Veiller tout particulièrement à ne pas toucher des éléments surchauffés du moteur.
Achtung – keine heißen Motorteile berühren!
No tocar partes recalentadas del motor.
Tome muito cuidado para não entrar em contacto com as partes aquecidas do motor.
Engine exhaust fumes can cause sickness or death. If it is necessary to run an engine in an enclosed area,
use an exhaust pipe extension to remove the fumes. Always try to work in a well ventilated area.
I gas di scarico possono causare malanni o morte. Se è necessario mettere in moto un motore in uno spazio
chiuso, usare una prolunga tubo di scarico per far uscire il fumo. Lavorare in una zona ben ventilata.
L’exhalation des gaz d’échappement peut être cause d’intoxication ou de mort. S’il est vraiment nécessaire
d’allumer le moteur à l’interieur, appliquer au tuyau d’échappement un autre tuyau extensible pour permettre
la sortie des gaz. Il est toujours mieux de travailler en plein air.
Auspuffgase können Übelkeit oder Tod verursachen. Wenn es notwendig ist, einen Motor in einem
geschlossenen Raum laufen zu lassen, benützen Sie eine Verlängerung, um das Auspuffgas abzuleiten.
Versuchen Sie immer in einem gut belüfteten Raum zu arbeiten.
Los gases de escape pueden provocar enfermedades o muerte. De tener que poner en marcha un motor en
un espacio cerrado, usar una prolongación del tubo de escape para que salga el humo. Trabajar en una zona
bien ventilada.
Os gases de escape podem causar danos ou morte. Caso seja ncessário fazer com que o motor funcione
num espaço fechado, utilize uma extensão para o tubo de escape que os fumos sejam espulso para o
exterior. Trabalhe numa área bem ventilada.
Caution! Never touch moving pulleys or belts. They can be very dangerous. Never do maintenance with
engine running.
Attenzione! Non toccare mai pulegge o cinghie in movimento, creano gravi danni alla persona. Non fare
manutenzione col motore in moto.
Attention! Ne jamais toucher ni poulies ni courroies en mouvement, elles peuvent provoquer des accidents
aux personnes. Ne pas faire l’entretien quand le moteur est en marche.
Vorsicht! Nie laufende Riemenscheiben oder Treibriemen anfassen, da es gefährlich ist. Nie bei laufendem
Motor Instandhaltung machen.
¡Atención! No tocar jamás poleas o correas en movimiento, porque pueden crear graves daños a la persona.
No efectuar el mantenimiento con el motor en marcha.
Atenção! Nunca toque nas polias ou correias em movimento devido ao alto risco de ferimentos. Nunca faça a
manutenção da máquina com o motor ligado.
A burst which separates the tyre from the rim parts can cause serious injury or death.
La separazione fra pneumatico e cerchione, causata dall’esplosione del pneumatico, può provocare serie
ferite o addirittura la morte.
La séparation entre le pneu et la jante, provoquée par l’explosion d’une roue peut causer des dommages,
blessures ou la mort.
Die Trennung der Räder von den Felgen durch Explosion kann schwere Verletzungen oder den Tod
verursachen.
La separación entre el neumático y la llanta producida por la explosión del neumático puede provocar graves
herida e incluso la muerte.
A separação entre o pneumático e o aro, provocada pela explosão do pneumático, pode causar graves
ferimentos ou até mesmo a morte.
Prevent battery explosions: keep sparks, lighted matches and open flames away from the top of the battery.
Battery gas can explode.
Per prevenire l’esplosione della batteria, tenete scintille, fiammiferi accesi e fiamme lontani dalla stessa. Il gas
della batteria può esplodere.
Prevenir l’explosion de la batterie: tenir les éticelles, les alumettes et le feu loin de la batterie. Le gaz de la
batterie peut exploser.
Vorbeugung der Batterie-Explosion. Entfernen Sie Funken, Zündhölzer und Flammen von der Batterie. Das
Batteriegas kann explodieren.
Para prevenir la explosión de la batería, mantener chispas, cerillas encendidas y llamas lejos de la misma. El
gas de la batería puede explotar.
Para prevenir explosao da bateria ter centelhas, fosforos acendido e chamas longe da mesma.O gas da
bateria poderia expludir.
Handle fuel with care, it is highly flammable: Do not refuel machine while smoking, when machine is near an
open flame or sparks, or when the engine is running. Stop the engine.
Maneggiare il carburante con cura, è altamente infiammabile; non fate rifornimento mentre fumate, o vicino a
fiamme o scintille, o quando il motore è acceso.
Manier avec soin le carburant car c’est très inflammable. Ne pas remplir le réservoir si vous êtes en train de
fumer ou pendant que la machine est près du feu ou d’étincelles ou encore pendant que la machine travaille.
Arrêter le moteur.
Treibstoff vorsichtig handhaben, da er sehr entzündbar ist: beim Tanken nicht rauchen. Nicht tanken, wenn
die Maschine in der Nähe von Flammen oder Funken ist oder wenn der Motor läuft. Immer den Motor
abschalten.
Manejar el combustible con cuidado porque es sumamente inflamable; no repostar mientras se fuma o cerca
de llamas o chispas, o cuando el motor está encendido.
Manuseie o carburante com cuidado, pois este è altamente inflamável; não fume durante o abastecimento da
máquina ou enquanto o motor estiver ligado, não o aproximado de chiama ou de faíscas.
.
2
Page 4
Sulfuric acid in battery electrolyte is poisonous. It is strong enough to burn skin, eat holes in clothing and
cause blindness if it gets in contact with the eyes.
L’acido solforico della batteria è velenoso. È in grado di causare bruciature alla pelle, bucare vestiti e
causare cecità se arriva negli occhi.
L’acide sulfurique de la batterie est toxique. Il peut causer des brûlures à la peau, endommager les
vêtements et peut aussi causer cécité.
Säure der Batterie ist giftig. Sie kann die Haut verbrennen, Löcher in die Kleidung machen und Blindheit
verursachen.
El ácido sulfúreo de la batería es venenoso, puede provocar quemaduras en la piel, agujear la ropa y
provocar ceguez si llega a los ojos.
O acido sulfurico e toxico. Pode ser causa de queimadura da pele, furar roupa e provocar cegueira, no caso
chegarem em contacto com os olhos.
Avoid tipping. Do not drive where machine could slip or tip. Stay alert for holes and other hidden objects.
Evitate le scivolate. Non guidate dove la macchina potrebbe scivolare o inclinarsi. Attenzione a buche o ad
oggetti nascosti.
Eviter les pentes. Ne pas conduire la machine où elle peurrait glisser ou se renverser. Faire attention aux
trous ou à tout autre obstacle caché.
Nicht dort fahren, wo die Maschine rutschen könnte. Vorsicht bei Löchern oder versteckten Gegenständen.
Evitar patinazos. No conducir donde la máquina pueda patinar o inclinarse. Cuidado con los baches o con
objetos escondidos.
Evitar deslizamentos.Nao diriga em lugares onde a maquina poderia deslizar. Ter cuidado a buracos e
objetos escondidos.
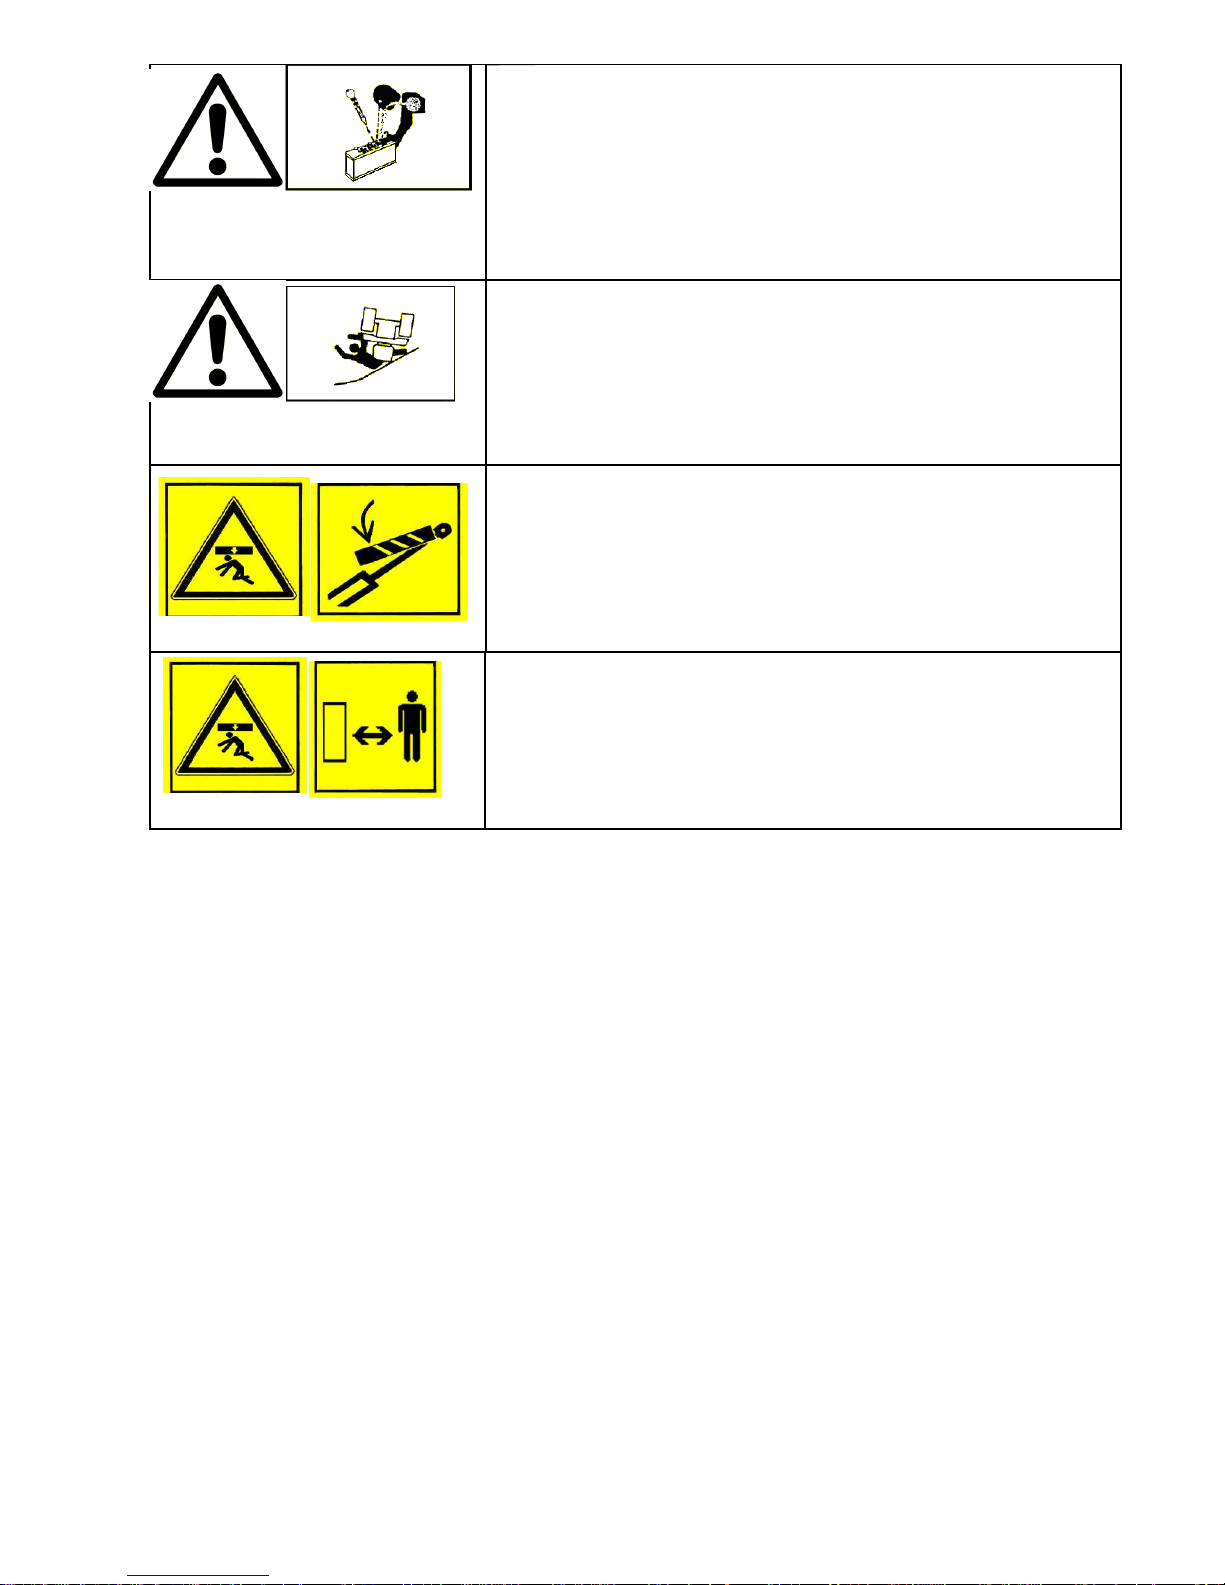
Attention! Do not perform any maintenance on the machine with the body raised without having put the
safety strut on the hydraulic cylinder.
Attenzione! Non operare sotto il cassone sollevato senza aver inserito in puntone di sicurezza sul cilindro
idraulico.
Attention! Ne jamais faire des opérations avec la benne soulevée sans avoir inséré la sécurité du vérin sur
le cylindre hydraulique.
Führen Sie keine Wartungsoperation durch, wenn die Ladepritsche angehoben ist und wenn
Sie nicht den Sicherheitssporn auf den Hydraulikzylinder gesteckt haben.
No realizar mantenimiento a la máquina con el cajón alzado sin haber insertado el puntal de seguridad en
el cilindro hidráulico.
Always put the safety strut on the body raising hydraulic cylinder before any maintenance operation.
Inserire sempre il puntone di sicurezza sul cilindro sollevamento cassone prima di procedere alla
manutenzione della macchina.
Insérer toujours la sécurité du vérin sur le cylindre du relevage de la benne, avant de faire des opérations
de maintenance sur la machine
Während der Wartungsarbeiten stellen Sie immer den Sicherheitssporn unter der Pritsche, so dass die
Pritsche nicht herunterkommen kann.
Insertar siempre el puntal de seguridad en el cilindro hidráulico del cajón alzado antes de realizar
mantenimiento a la máquina.
3
Page 5

GRILLO PK 600
TRANSPORTER
Dear customer,
we thank you for placing your trust in our PK 600 and for having a preference for it. We are confident that this
machine will fully satisfy all your requirements.
To use and maintain the machine at its best we ask you to read and observe carefully the directions given in
this handbook. This will ensure the best possible results and will also safeguard your investment. Please keep
this handbook in a safe place. It should accompany the machine throughout its working life.
GENERAL DESCRIPTION AND INTENDED USE
The Grillo machine PK 600 is a vehicle with four-wheel-drive and loading body.
It has been designed for the transport of material or things on road and in particular off the road.
GRILLO PK 600 is a vehicle moved by a four-stroke air-cooled petrol engine. The right distribution of loads allows
to obtain the greatest stability. The vehicle is equipped with shock absorbers and assures a great comfort when it
moves. The machine servicing is reduced to a few and simple operations.
It has two seats, one for the driver and one for the passenger; the seats are sprung and have safety belts.
The loading body can be hydraulically tilted on three sides. The machine consists of one carrier frame, the engine,
the gearbox and the variator are in the rear part under the body.
ATTENTION! Read carefully before turning the engine on. The following warnings are
important for the operator's safety!
WARNINGS
Caution is the main safeguard in preventing accidents!
We urge you to read carefully the following warnings when using the transporter, even before starting any
work.
Improper use of the machine and its equipment can be dangerous; in order to reduce the risks to the minimum,
observe the necessary precautions set out below:
1) Read the whole handbook before starting up and using the machine.
2) Pay particular attention to the warnings and safety labels.
3) Before starting work, always change into suitable working clothes.
4) Do not load weights over the type-approved load limit - (maximum autorithed machine weight with full
load: 2100 Kg).
5) Before allowing other persons to work with the machine, make sure they are aware of the safety rules and how
to use the machine.
6) Before starting the machine, make sure that no people are around it, especially children.
7) Before driving the machine in reverse, make sure there are no people or obstacles in the way.
8) Secure the load properly with the provided hooks.
9) Before getting off the machine, turn off the engine, remove the ignition key and engage the handbrake.
10) Never allow the machine to be used by anyone under the 18 years of age.
11) Load the body in a tidy and even way.
12) Never keep the engine running indoors; you may inhale poisonous gases.
13) Always switch off the engine before filling the fuel tank, keep away from sparks or flames, do not smoke!
14) Avoid any fuel spillage and after filling the tank swipe away any spilled fuel before starting the engine.
15) If you have children hide the keys after using the machine.
16) Never do any adjustment or cleaning with the engine running.
17) Never allow anyone to check the machine while you are seated at the controls with the engine
running.
18) The user is always responsible for damages caused to third parties.
19) Always use original Grillo spare parts.
IMPROPER USE TO BE AVOIDED
Never load heavy weights in the rear part of the body or on one side, since a great deal of stability and safety is
lost.
Do not drive in reverse at high speed.
Do not use the machine when tired or after drinking alcohol.
Never carry passengers on the machine apart from the one allowed next to the driver.
4
Page 6

Do not use the vehicle near to ditches or verges which could collapse under the weight of the machine, especially
when the surface is loose or wet.
Never tamper with or deactivate the safety devices.
Any misuse causes the warranty to become null and void and the constructor will decline any liability.
FURTHER SAFETY ADVICE
The above-mentioned warnings could not be enough to avoid all risks, if the operator does not use the transporter
correctly.
Therefore, for your safety we give you the following advice:
When downhill always swerve slowly.
Always drive slowly along uneven paths.
Do not perform any maintenance on the machine with the body raised without having put the safety strut on the
hydraulic cylinder.
Place well the evenly distributed load and fix it with suitable ropes or bands.
Do not transport loads projecting from the body, especially on roads.
Bulky loads make the machine lose stability. Pay special attention.
TECHNICAL SPECIFICATIONS
MODEL: wheeled transporter.
ENGINE: LOMBARDINI FOCS 1003 1028cc 25,5 HP (@ 3600 r.p.m.) diesel with 3 cylinders liquid-cooled engine
STARTING: electric 12V.
FUEL TANK: 23 litres.
GEARBOX: Continuously variable CVT with double speed range and reverse gear.
MAX SPEED (with 23x10.50-12 wheels): 35 km/h.
WHEELS: Tractor tyres 23x10.50-12 (8 PR).
DRIVE: four driving wheels.
DIFFERENTIAL: on the two axles with lock device on the rear axle.
FRONT AXLE: steering
REAR AXLE: steering and disconnectable
STEERING: hydraulic.
TURNING RADIUS: 180 cm
STEERING SYSTEM: hydraulic
SEATS: sprung and adjustable.
SERVICE BRAKE: 4 hydraulic disc brakes, acting on the four wheels.
EMERGENCY AND PARKING BRAKE: mechanic band brake acting on the transmission.
LOAD BED: three-way hydraulic tipper 1770 x 1470 x 300 mm
HEIGHT OF THE BODY LOADING PLATFORM FROM THE GROUND: 850 mm.
DRIVER'S PROTECTING GRILL: fitted on the front side of the load bed.
LOADING CAPACITY: max. 900 kg (with 2 people on board).
DIMENSIONS OF THE MACHINE:
Length 3460 mm;
Width 1600 mm;
Height 2030 mm;
Distance between axles 1705 mm;
Wheel track 1350 mm.
Weight: 1150 kg.
Implements: heater-kit, vehicle doors, TURF wheels 23x10.50-12
5
Page 7

IDENTIFICATION OF THE MACHINE
SERVICING
This handbook provides the instructions for the machine's use. For a correct maintenance contact your Local
Dealer.
WARRANTY
The warranty is subject to the terms and conditions given by the law in force.
You have to keep the warranty registration card handed over the day of the delivery.
SPARE PARTS
Original spares should always be used as these are the only ones which offer safety and interchangeability. Each
order should include the machine serial number and the code of the spare part needed.
For engine spares, refer to the information in the specific manual.
HOW TO ORDER SPARE PARTS
Always state the machine serial number and the code of the spare part needed. Contact our service centers.
PUTTING THE MACHINE INTO SERVICE
1) Make sure the machine is complete and that it has not suffered any damage during transit.
2) Check the levels of the engine oil, the gearbox oil and the radiator liquid.
3) Check the tyre pressure: 23 x 10,50 / 12 8 PR: 2 bar
4) Check the battery voltage, it must not be lass than 12 Volts; recharge if necessary.
If the battery has been supplied dry with separate acid, to put the machine into service proceed as follows:
4.1) Pour in the acid and wait 2 hours; before handling the battery it is compulsory to wear protective
devices such as working gloves and tight-fitting protective goggles.
4.2) Charge the battery with a charger set to 12 Volts on slow charge for 2 hours.
Caution, if this procedure is not observed this could lead to the battery deteriorating and the acid leak during use.
IMPORTANT! Do not invert the battery poles during assembly.
BATTERY – CAUTION!
The gases released by the battery are explosive, so keep it away from naked flames or sparks. Check the level of
the liquid at regular intervals and keep the terminals greased with vaseline or similar.
Useful advice for a longer battery life
In order to avoid to discharge the battery quickly and also to keep it working for a long time, follow these
instructions meticulously:
When the engine is off, do not leave any devices on for a long time (for instance lights, emergency lights, and so
on).
Before carryng out any work on the electrical system unplug the cable of the battery's negative pole.
Tighten the battery terminals well.
Caution. If the battery is kept with a charge lower than 50% for a long time, it is damaged by sulphation, also
reducing the starting ability and performance.
RUNNING-IN
During the running-in period (the first 50 operating hours) do not work wirh the engine at high speed, taking care
not to use more than 80% of the available power.
After the first 20 operating hours and at the end of the running-in period:
Check the thightness of all the fasteners and the connecting units (screws, nuts, fittings).
Check the units, the engine, the gearbox and the pipelines for oil leaks.
Adjust the parking brake.
The vehicle's serial number is marked on the nameplate on
the chassis.
6
2100
Page 8

Refer to the engine handbook for the specific running-in instructions.
INSTRUCTIONS FOR USE
DESCRIPTION OF THE CONTROLS Fig. 1 - 2
1. Starting: Start the engine (Fig.1 n°1) only after applying the brakes, otherwise the machine will not start for a
safety catch.
2. Brake control pedal (Fig. 1 n° 1): it applies the wheel brakes. It activates the starting safety catch. It activates
the gear box safety (if you are not completely still with the brake pulled you cannot change gear). It activates the
steering security (if you are not completely still with the brake pulled, you cannot change steering thanks to the
security: from 2 to 4 steering wheels and vice versa).
3. Throttle pedal (Fig. 1 n° 2).
4. Parking brake control lever (Fig. 1 n° 4): it acts on the transmission, simultaneously on both axles. The brake
is engaged by pulling the lever up and the corresponding red warning light comes on (Fig. 3 n° 7). To release the
lever, press the button on its end and put it in the lowest position.
5. Gear control lever (Fig. 1 n° 3): it provides two forward (low and high) and one reverse speeds.
6. Differential locking engagement selector (Fig. 1 n° 5): when you press the differential locking selector, the
differential on the rear axle is locked,
7. Dumper activating button (Fig. 2n° 6): You can lift and lower the body by pressing the button for the dumper
actuation.
8. Lights commutor and horn (fig. 2 n° 9)
9. Emergency light switch (fig. 2 no.7)
10. Dumper activating button (fig. 2 no. 6)
11. Flashing lights beacon (fig. 2 no. 8)
12. Button for 4-wheel drive (fig. 3 no. 1)
13. Brake liquid reservoir (fig. 2 no. 10)
14. Starter key (fig. 2 no. 11)
BEFORE STERTING, CHECK:
Check that the gear box oil level is in line, in the centre of the gearbox casing (fig. 17).
Check the engine oil level fig. 13 (follow the instructions in the engie handbook).
Check the brake oil level (fig. 2 n°10).
Fill up the fuel tank, using a funnel with a fine filter (fig. 5).
Make sure that all the levers are in neutral position, than proceed as follows:
1) Starting with cold engine.
2) Press the brake pedal.
3) Move the ignition lever (fig 2 n°11); as soon as the engine starts return the lever into the starting position.
Carry out this operation only with cold engine.
Fit the key into the ignition switch; turn it clockwise (fig. 2 n°11) and release as soon as the engine starts.
To stop the engine, return the key to the central position. If the engine fails to start, do not keep trying and run
down the battery; wait a few minutes before repeating the starting procedure.
Besides check the liquid level in the battery often and add distilled water if necessary.
4) Position the low and high or reverse gear lever fig. 1 no. 3 in the desired position, if still engaged disengage
the parking brake, accelerate the engine slowly, the machine gets moving.
5) To stop step off the accelerator and activate the brake pedal. Caution, do not accelerate while pressing
the brake pedal as the speed variator gets damaged.
SAFETY BELTS
The safety belt (fig. 6) has to be put on sitting upright leaning on the seat back. To fasten the seat belts, take the
flap A and put it into the belt-fastener B, until there is a snap. If the belt should block while pulling it out, let it roll up
again a little bit and then pull it out slowly. To undo the seat belts, press button C. Accompany the belt while it is
rolling up in order to avoid getting into a tangle. Thanks to the rolling device the belt automatically adjusts to the
passenger's body so that the person is free to move.
MANUAL GEARBOX USE
To engage the low and high gears, press the brake pedal only when the vehicle has come to a complete stop and
put the gear lever in the required position (the scheme for the gear engagement is shown behind the lever fig. 1
n°3).
Page 9

WARNING The reverse gear can be engaged only when the vehicle has come to a complete stop. With the engine
running, wait at least 2 seconds with the brake pedal completely depressed before engaging the reverse gear, in
order to avoid damaging the gears and clashing. In fig. 11 the brake adjuster is displayed which blocks the speed
change adjuster in combination with a sensor. A micro switch connected to the throttle pedal and notices the
minimal engine revolutions.
CAUTION!, The space under the pedals has to be free of obstacles: make sure that the mats are always well
spread out and do not impede the pedal's movement.
TIPPING BODY INSTRUCTIONS
Body tipping operations:
Lock the two body frame crosspieces that are located on the desired tipping side with the latches and
make sure that the hinge pins are properly fitted in place.
To lift the body, press the button (fig. 2 n° 6) towards the "lifting side".
The body moves upward only if the button is continually pressed. You can immediately stop tipping by releasing
the button.
CAUTION!
The tipping body must never be locked in diagonally opposing points; to avoid the wrong location the
latches are of different shape.
Only use original latches.
Before any lateral tipping make sure that the sides are open, act on lever fig.8.
Before beginning the tipping operations, make sure that the vehicle is located on horizontal and not soft
ground and that the load is uniformly distributed.
WARNINGS FOR THE TIPPING BODY USE
The three-sided tipping body is built and fitted with some devices in order to guarantee maximum safety, also for
an inexperienced driver; however, it is necessary to follow these fundamental safety rules:
Before beginning the tipping operations always make sure that the vehicle is located on a horizontal and
not soft ground and that the load is uniformly distributed.
Before beginning the tipping operations make sure that there are no people, animals or obstacles near the
vehicle.
Before beginning the tipping operations make sure that the latches are seated in order to allow tipping in
the desired direction.
While the tipping equipment is lifted or is being lifted, it is forbidden to get on the body for load levelling.
When the body is loaded, above all with loose material, pay maximum attention when opening the sides,
because the material's pressure makes the side open violently and the falling material could hit the
operator.
Make sure that during travel the sides are properly closed and locked (fig. 8).
Pay much attention, in case of tipping inside enclosed spaces, to the possible interference with beams,
ceilings, scaffoldings, installations, or other.
Never lift the body in the presence of electric cables or similar.
It is forbidden to leave the driving seat when the tipping equipment is lifted.
To activate the safety strut, the tipping equipment has to be empty.
During maintenance operations position safely the strut suited to support the body (fig.10). It is forbidden
to place any part of your body under the lifted body if the above-mentioned strut is not properly positioned.
When you unload laterally, check that the cable that prevents the ram from doing its full travel is in place
(fig. 10).
CAUTION!
1) Improper use of the tipping equipment is absolutely forbidden.
2) The working pressure of the hydraulic system is regulated by the constructor taking into consideration the
vehicle's capacity.
3) It is absolutely forbidden to change the calibration of the pressure control valve.
4) Never stay under the tipping body if it is lifted and if the strut is not properly fixed.
5) It is absolutely forbidden to travel with the body even slightly lifted.
6) Never lift the body laterally over the limit.
MATERIAL LOADING OPERATION
The load must be uniformly distributed, in order to avoid the danger of material falling off.
Never exceed the allowed load.
7
Page 10

The material must be loaded into the body from the minimum possible height.
Check that the sides are closed, in particular that the rear side is locked by the ratchets.
Big stone blocks or demolition material rubbles must be placed cautiously on the body and must not be
thrown from a height.
CAUTION!
Irregularities along the road and abrupt braking can provoke sudden movement of the load, which is dangerous for
the driver and the passengers: before leaving fix also the load properly using the relative hooks on the body. To
secure the material use metal cables, ropes or belts with a strength suitable for the material's weight.
Avoid driving on laterally sloping surfaces.
Moving load or possible jolts could cause the machine to tip over.
CAUTION!
Avoid overloading the vehicle (never exceed 2100 kg of the fully loaded machine).
Before starting make sure that the body is completely down and avoid travelling when the body is lifted.
ENGINE STOP
After moving all control levers to the NEUTRAL position, to stop the engine move the ignition key into the stop
position (fig. 2 ref. 12). Engage the parking brake (fig.1 ref. 4).
STOP
Proceed as follows:
Switch off the engine and engage the parking brake.
Leave the wheels turned.
If the vehicle is parked on a strong slope we advise you to also block the wheels with a wedge or a stone.
PARKING BRAKE
The parking brake lever (fig.1 n°4) is on the left side of the driving seat. To apply the parking brake, pull the lever
upward until the vehicle is blocked. On level ground, four or five clicks are normally enough, while nine or ten
might be necessary on strong slopes when the vehicle is loaded.
WARNING! If the brake is not working properly, please contact the Grillo Assistance Network to make an
adjustment.
MAINTENANCE AND LUBRIFICATION
ENGINE OIL
During the running-in period, make the first oil change after the first 20 hours ok work and then change it every
130 operating hours. Use 15 W 40 engine oil, quantity 2,4 kg. It is essential to check the oil level every 8 hours of
work. (Follow the instructions in the engine handbook).
Fig. 15 ref. B cap to pour in engine oil.
Fig. 12 ref. A engine oil filter.
Fig. 14 ref. B engine oil drain lid.
Fig. 13 ref. B engine oil level.
Fig. 16 Radiator liquid reservoir
HYDRAULIC TIPPING BODY - POWER STEERING
Check the level every 130 hours about of work through the tank dipstick (Fig. 5 ref. B). If necessary, add OSO 46
gearbox oil. Change the oil once a year. To drain the old oil from the tank unscrew the cap that is under the oil
tank. Quantity: 7,5 litres. The filler cap is on the tank.
The hydraulic oil filter is under the oil tank (Fig. 5 ref. B). Change it once a year.
GEARBOX OIL
Change the oil every 1000 hours using BLASIA 220 (ISO L-CKD, DIN 51502 PGLP) gearbox oil. Quantity: 2,5
kilos.
The cap is under the front gearbox casing (Fig. 14 ref. C).
The cap to pour in the oil is on the central gearbox casing (fig. 4, ref. 2).
Gearbox oil level control lamp (Fig. 4, ref. 1)
8
9
Page 11

FRONT AND REAR AXLE OIL
Change the oil every 1000 hours using SAE 85 W140 gearbox oil. Quantity: 1,6 kilos.
The cap is under the central casing (Fig. 14 ref. B).
The cap to pour in the oil is on the central casing (fig. 14, ref. A).
BRAKE FLUID
Check the brake fluid level in the reservoir on the dashboard every 8 hours (fig. 3 ref. 9). If necessary add PLUS
DOT.4 (SAE J 1703) brake fluid. Check the braking system periodically for leaks.
If it is necessary to bleed, proceed as follows: if you have the special tool, connect it in the place of the tank cap;
bleed the rear trailer circuit first, then the front circuit.
Users without the tool can try to bleed the circuits using the machine's pump, but this operation is not always
successful. The bleed screw is on the brake tongs (fig. 19 ref. A).
NOTE Clean the tank cap (fig. 2 ref. 11) and the surrounding surface thoroughly. Pay attention when opening the
cap in order to avoid possible impurities entering the tank. For filling up always use a funnel with an integrated
filter with a 0,12 mm or smaller mesh.
WARNING The brake fluid absorbs humidity, therefore, if the vehicle is mainly used in areas with a high
percentage of humidity, the liquid has to be changed once a year.
CAUTION! The brake fluid is poisonous and highly corrosive. In case of accidental contact, immediately wash the
affected parts with water and neutral soap, then rinse well.
BRAKE ADJUSTMENT
The disk brakes of the service brake are self-adjusting.
The parking brake can be adjusted operating on the register located on the cable (Fig. 4 ref. A)
IMPORTANT!
Grease the universal joint, the transmission joint periodically fig. 21
AIR FILTER
The air filter is placed under the body (fig. 22). In dusty areas, daily cleaning is recommended.
RUBBER TUBINGS
For the maintenance of the rubber flexible tubings of the brake and feed system, follow the instructions in this
chapter accurately. Ozone, high temperatures and long lack of liquid in the system can cause the tubings to
harden and break, leading to possible liquid leaks. Attention is therefore necessary.
ELECTRICAL SYSTEM (FUSE BOX)
The electrical system is protected by fuses, which once interrupted, cause the total inefficiency of the whole
electrical system. They are placed in front of the passenger's seat (fig. 23).
Once the failure has been sorted out you need to replace the fuse with one having the same capacity. Never
replace with a fuse having another capacity. If the inconveniences should continue after having done the above
mentioned actions, contact an authorised Grillo Dealer.
LOAD BED LIFTING ELECTROVALVE
In fig. 25 you can see the electrovalve that manages the load bed's tipping.
PRIORITY VALVE
In fig. 26 you can see the priority valve that divides the oil flux between the power steering to the piston engine
exhaust electrovalve.
ADJUSTMENT GREASER FIG. 29
TOW BAR FIG. 27
FRONT TOW FIG. 28
ALLDRIVE ELECTROVALVE FIG. 24
HEATER-KIT (OPTIONAL) FIG. 30
WINDSCREEN WIPER SWITCH FIG. 31
END OF SEASON MAINTENANCE
When the vehicle has to be inactive for a long time, the following procedure is recommended:
Clean the machine in general.
Store it in a place without dust or humidity.
Remove the battery and place it in a dry place without frost risk; recharge it once a month.
Place planks of wood under the wheels to keep it off the ground and cover it with a protective sheet.
10
Page 12

ROUTINE MAINTENANCE GUIDE
This table is intended to help you to keep your machine in good, safe working order. It lists the main maintenance and
lubrication procedures with the frequencies at which they are required. Alongside each one, you will find a series of
boxes where you can note the date or the number of operating hours when the procedure was carried out. CAUTION!
Perform the first general inspection after the running-in period, after the first 50 working hours. Change the
engine oil and filter.
Then follow the table below:
ROUTINE MAINTENANCE GUIDE
PROCEDURE
EACH 8
HOURS
AFTER
THE 50
HOURS
EACH
100
HOURS
EACH
200 ORE
EACH
250
HOURS
OR
EACH
YEAR
Check the wheel bolts tightness
• •
Check the rubber hoses (brakes, feed system and hydraulic
system)
•
Check the tyre pressure
•
Check the brakes wear
•
Check the battery voltage
•
Check the engine, gearbox and pipe
•
Check and clean the engine air filter
•
Check the brake fluid level
•
Check the radiator liquid level
•
Check the gearbox oil level
•
Check the engine oil level
•
Change the radiator fluid
•
Change the engine oil
• •
Change the brakes fluid
•
Change the air filter
*
Change the fuel filter
•
Refer to the engine handbook for the complete list and relative procedures.
General lubrication is strongly recommended whenever the machine is to be out of use for a long period.
recommended procedure
* procedure to be made if necessary
11
Page 13

GRILLO PK 600
TRANSPORTER A RUOTE
Gentile cliente,
Nel ringraziarla per la fiducia e la preferenza accordata al nostro PK 600, confidiamo che l’uso di questa sua
nuova macchina risponda pienamente alle sue esigenze.
Per l’impiego ottimale e per la sua manutenzione nel tempo, la preghiamo di leggere attentamente e
eseguire scrupolosamente le indicazioni di questo libretto. Ciò le consentirà di ottenere i massimi
risultati e salvaguardare la sua spesa. La preghiamo di conservare questo libretto, che dovrà sempre
accompagnare la macchina.
DESCRIZIONE GENERALE ED USO PREVISTO
La macchina Grillo PK 600 è un transporter a 4 ruote motrici con cassone di carico.
Progettato per il trasporto di materiali o cose in strada e in particolare fuori strada.
GRILLO PK 600 è un veicolo azionato da un motore Benzina a 4 tempi raffreddato ad aria. L’esatta
distribuzione dei pesi consente di ottenere la massima stabilità. Il veicolo è ammortizzato e garantisce
grande comfort di marcia. La manutenzione della macchina è ridotta a poche e semplici operazioni.
Dispone di due posti, uno per il conducente e uno per il passeggero con sedili ammortizzati e cinture di
sicurezza.
Il cassone di carico è ribaltabile trilaterale idraulico. La macchina è costituita da un telaio portante, il motore e
il cambio e il variatore sono posizionati posteriormente sotto al cassone.
ATTENZIONE! Leggere attentamente prima di avviare il motore. Le seguenti avvertenze
sono importanti per l’incolumità dell’operatore!
AVVERTENZE
La prudenza è l’arma principale nella prevenzione degli incidenti!
La preghiamo vivamente di leggere con attenzione le seguenti avvertenze nell’uso della macchina,
prima ancora di iniziare il lavoro.
L’uso improprio della macchina e il suo equipaggiamento può risultare dannoso; per impedire che ciò
avvenga osservare le precauzioni necessarie di seguito riportate:
1) Leggere questo manuale interamente prima di accendere e mettere in movimento la macchina.
2) Dare particolare attenzione alle ammonizioni e alle etichette di sicurezza.
3) Prima di iniziare il lavoro, indossare indumenti appropriati da lavoro.
4) Non caricare pesi superiori alla portata omologata – (Massa complessiva della macchina a pieno
carico Kg 2100)
5) Prima di fare lavorare altre persone bisogna metterle al corrente delle norme di sicurezza e di come si
usa la macchina.
6) Prima di accendere il motore verificare che non ci siano persone intorno; specialmente bambini.
7) Prima di partire con la macchina in marcia indietro controllare che non ci siano persone od ostacoli.
8) Fissare bene il carico negli appositi ganci.
9) Prima di scendere dalla macchina, spegnere il motore, rimuovere la chiave di avviamento, inserire il freno
di stazionamento.
10) Non fare lavorare ragazzi troppo giovani: è vietato l’uso ai minori di 18 anni.
11) Caricare il cassone in maniera ordinata e uniforme.
12) Per evitare il pericolo di esalazioni velenose, non adoperare il motore acceso in un locale chiuso.
13) Spegnere sempre il motore prima di fare rifornimento di combustibile, stare lontano da scintille o fiamme,
non fumare!
14) Evitare fuoriuscite di combustibile e dopo aver riempito il serbatoio pulire ogni fuoriuscita prima di avviare
il motore.
15) Se avete dei bambini, quando non usate la macchina nascondete le chiavi di avviamento.
16) Non fare nessun tipo di regolazione o pulizia col motore in moto.
17) Non fare controllare la macchina da nessuno mentre siete seduti alla guida col motore in moto.
18) L’utilizzatore è sempre responsabile dei danni arrecati a terzi.
19) Usare sempre ricambi originali Grillo.
11
Page 14

USI IMPROPRI DA EVITARE
Non caricare molto peso nella parte posteriore del cassone oppure su un lato: si perde molto in stabilità e
sicurezza nella guida.
Non fare retromarcia col motore accelerato
Non usare la macchina quando si è affaticati e non bere alcolici.
Non trasportare passeggeri sulla macchina oltre a quello consentito a fianco del guidatore.
Non operare con la macchina vicino a fossati o banchine che si possono rompere sotto il peso della
macchina, specialmente quando la superficie è staccata o bagnata.
Non manomettere o disattivare i dispositivi di sicurezza.
Ogni utilizzo improprio comporta il decadimento della garanzia ed il declino di ogni responsabilità del
costruttore.
ULTERIORI ACCORGIMENTI PER LA SICUREZZA
Le avvertenze sopra riportate potrebbero non essere sufficienti ad evitare ogni rischio, nel caso in cui
l’operatore non si attenesse all’uso appropriato della macchina.
Pertanto, per maggior prudenza specifichiamo quanto segue:
In discesa curvare sempre lentamente.
Sui viali sconnessi viaggiare a bassa velocità.
Non fare manutenzione alla macchina col cassone alzato senza aver inserito il puntone di sicurezza sul
cilindro oleodinamico.
Posizionare bene il carico uniformemente distribuito e fissarlo con funi o fasce adibite a questo scopo.
Non trasportare carichi sporgenti dal cassone in particolare su strada
I carichi voluminosi fanno perde stabilità alla macchina prestare particolare attenzione.
CARATTERISTICHE TECNICHE
MODELLO: Transporter a ruote.
MOTORE: Briggs & Stratton 18hp Benzina, raffreddato aria, 2 cilindri.
AVVIAMENTO: elettrico 12V.
CAMBIO: 3 marce, 2 avanti + 1RM Variazione continua di velocità CVT.
VELOCITÀ MAX (con ruote 23x8.50-12): 40 km/h.
RUOTE: pneumatiche semi tractor 23x8.50-15 (6 PR).
DIFFERENZIALE: sui due assi con bloccaggio sull’asse posteriore.
ASSALE ANTERIORE: sterzante.
ASSALE POSTERIORE: sterzante disinseribile.
STERZO: idraulico.
SEDILI: molleggiati e registrabili.
TRAZIONE: a 2 ruote motrici anteriori, 4 ruote motrici.
FRENO DI SERVIZIO: 4 freni a disco idraulici agenti sulle 4 ruote.
FRENO DI SOCCORSO E STAZIONAMENTO: freno a disco meccanico agente
sulla trasmissione.
CASSONE: ribaltabile idraulico, scarico trilaterale
ALTEZZA PIANALE CASSONE DA TERRA: 900 mm.
GRIGLIA PROTEZIONE CONDUCENTE: sulla sponda anteriore del cassone.
PORTATA: 1000 kg max. (2 persona in cabina).
DIMENSIONI MACCHINA:
Lunghezza 4000 mm;
Larghezza 1510 mm;
Altezza 2320 mm;
Passo 1800 mm;
Carreggiata 1220 mm.
Peso: 1100 kg.
ACCESSORI: cabina
12
Page 15

IDENTIFICAZIONE DELLA MACCHINA
SERVIZIO ASSISTENZA
Questo manuale fornisce le indicazioni per l’uso della macchina. Per una corretta manutenzione interpellare
il Rivenditore di Zona.
RICAMBI
Si raccomanda di impiegare esclusivamente ricambi originali, gli unici che offrono caratteristiche di sicurezza
e intercambiabilità.
Ogni richiesta deve essere corredata dal numero di matricola della macchina e dal codice del pezzo da
sostituire.
Per i ricambi del motore, attenersi a quanto indicato nel libretto specifico.
GARANZIA
La garanzia è fornita nei modi e nei limiti indicati dalla legge vigente.
Occorre conservare il certificato fornito il giorno della consegna.
COME ORDINARE I RICAMBI
Indicare sempre il numero di matricola della macchina e il codice del pezzo da sostituire. Rivolgersi ai nostri
centri presenti in ogni provincia.
MESSA IN OPERA DELLA MACCHINA
1) Controllare l’integrità della macchina e accertare che non abbia subito danni durante il trasporto.
2) Verificare i livelli olio motore, olio cambio e liquido radiatore.
3) Verificare la pressione dei pneumatici:23 x 8.50 / 12 6 PR: 2 bar , 23x10,5 / 12 10 PR: 2 bar.
4) Controllare il voltaggio della batteria, non deve risultare inferiore al valore di 12 Volt, eventualmente
provvedere alla ricarica.
Se la batteria è stata fornita a secco con acido a parte, per la messa in opera procedere come segue:
4.1) Inserire l’acido e attendere 2 ore;
4.2) Caricare la batteria con un carica batteria regolato a 12 Volt su carica lenta per 2 ore.
Attenzione, non rispettando questa regola si può avere il deterioramento della batteria e la fuoriuscita
dell’acido durante il lavoro.
IMPORTANTE! Durante il montaggio evitare di invertire le polarità della batteria.
BATTERIA – ATTENZIONE!
I gas sprigionati dalla batteria sono esplosivi, tenetela lontano da fiamme o scintille. Controllate
periodicamente il livello del liquido e mantenete i morsetti lubrificati con grasso di vaselina.
Consigli utili per prolungare la durata della batteria
Per evitare di scaricare rapidamente la batteria e per preservarne la funzionalità nel tempo, seguire
scrupolosamente le seguenti indicazioni:
A motore spento non tenere dispositivi accesi per lungo tempo,(ad es. luci , luci di emergenza ecc.)
Prima di qualsiasi intervento sull’impianto elettrico staccare il cavo del polo negativo della batteria.
Serrare a fondo i morsetti batteria.
Avvertenza. La batteria mantenuta per lungo tempo in stato di carica inferiore al 50% si danneggia per
solfatazione, riducendo la capacità e l’attitudine all’avviamento.
RODAGGIO
Durante il periodo di rodaggio (prime 50 ore di funzionamento) evitare di operare con il motore a regimi
elevati, limitando lo sfruttamento della potenza a circa il 80% di quella disponibile.
Dopo le prime 20 ore di funzionamento ed al termine del periodo di rodaggio:
Controllare il serraggio di tutti gli organi di fissaggio e di collegamento (viti, dadi, raccordi).
13
Il numero di matricola della macchina è riportato sulla
targhetta e punzonato sul longherone destro del telaio vicino
alla targhetta
Page 16

Controllare tutti i gruppi, motore, scatola cambio e le tubazioni, accertandosi che non si presentino
perdite d’olio.
Registrare il freno di parcheggio.
Per quanto riguarda le prescrizioni di rodaggio del motore consultare il rispettivo libretto di istruzioni.
ISTRUZIONI D’USO
DESCRIZIONE DEI COMANDI
Fig. 1/2
1. Messa in moto: L'avviamento del motore (Fig.1 n°1) va fatto esclusivamente con il pedale del freno
azionato, se questo non avviene, la macchina non si metterà in moto per via di una sicurezza.
2. Pedale comando freni (Fig. 1 n° 1): aziona i freni delle ruote. Aziona sicurezza messa in moto. Aziona
sicurezza cambio(se non si è completamente fermi con il freno tirato non si può cambiare marcia).
Aziona sicurezza passaggio sterzata.(se non si è completamente fermi, con il freno tirato, la sicurezza
impedisce cambiare sterzata: da 2 a 4 ruote sterzanti e viceversa)
3. Acceleratore pedale (Fig. 1 n° 2).
4. Leva comando freno di stazionamento (Fig. 1 n° 6): agisce sulla trasmissione, contemporaneamente
sull'asse posteriore e anteriore. Il freno viene inserito tirando la leva verso l’alto e la spia rossa relativa si
accende (Fig. 3 n° 7). Per sbloccare la leva stessa, premere il pulsante sulla sua estremità e portarla
nella posizione più bassa.
5. Leva comando marce (Fig. 1 n° 3): consente di ottenere, due velocità in avanti (ridotte e veloci) e una
in retromarcia.
6. Leva inserimento bloccaggio differenziale (Fig. 1 n° 4): tirando la leva del bloccaggio differenziale, il
differenziale sull'asse posteriore viene bloccato, e la spia rossa relativa si accende(Fig. 3 n° 14).
7. Questo dovrà essere utilizzato esclusivamente con le 2 ruote sterzanti. Fare molta attenzione a non
dimenticare il bloccaggio diferenziale inserito.
8. Pulsante azionamento ribaltabile (Fig. 1 n° 10): Premendo il pulsante azionamento ribaltabile è
possibile alzare e abbassare il cassone. La relativa spia Verde sul cruscotto si accede quando il cassone
è sollevato (Fig. 3 n° 3).
Fig. 3
1. Spia luci anabbaglianti Spia luci di posizione -(verde).
2. Contaore
3. Spia cassone sollevato
4. Spia luci abbaglianti.
5. Riserva carburante.
6. Spia generatore (rosso).
7. Spia freno di stazionamento.
8. Spia funzionamento indicatori di direzione (verde).
9. Vaschetta liquido freni
10. Strumento livello carburante
11. Selettore 2/4 ruote sterzanti
12. Spia 4 ruote sterzanti inserite
13. Tappi serbatoi liquido freni
14. Spia inserimento bloccaggio differenziale
CONTROLLI DA ESEGUIRE PRIMA DELL’AVVIAMENTO:
Verificare che l’olio del cambio sia a livello, posto al centro del carter cambio (fig. 4 n°1).
Controllare il livello olio nel motore (attenersi alle istruzioni del libretto motore).
Controllare il livello olio freni (fig. 3 n°9).
Riempire il serbatoio di carburante, servendosi di un imbuto munito di filtro molto fine (fig. 6 n°1).
Accertarsi che tutte le leve siano in posizione folle, indi operare nel seguente modo:
1) Avviamento con motore freddo.
2) Premere il pedale del freno.
3) Azionare la levetta dello starter (fig 1 n°5) appena il motore si avvia riportarla nella posizione di partenza.
Questa operazione va effettuata solo con il motore freddo.
14
Page 17

4) Inserire la chiave nel commutatore avviamento; ruotarla in senso orario (fig. 2 n°8) appena il motore si
sarà avviato abbandonarla.
5) Posizionare la leva ridotte e veloci o retromarcia nella posizione desiderata, disinnestare se inserito il
freno di parcheggio, accelerare lentamente il motore la macchina si mette in movimento.
6) Per fermarsi togliere il piede dall’acceleratore e azionare il pedale del freno Nota non accelerare col
pedale del freno premuto si deteriora il variatore di velocità.
Per spegnere il motore ruotare la chiave in posizione centrale.
In caso di mancato avviamento, non insistere in tentativi inutili, che scaricherebbero la batteria, ma attendere
qualche minuto prima di ripetere l’operazione di avviamento.
Inoltre verificare frequentemente il livello del liquido nella batteria e se occorre aggiungere acqua distillata.
CINTURE DI SICUREZZA
La cintura (fig.7) va indossata tenendo il busto eretto e appoggiato contro lo schienale. Per allacciare le
cinture, impugnare la linguetta di aggancio A ed inserirla nella sede della fibbia B, fino a percepire lo scatto di
blocco. Se durante l’estrazione della cintura questa dovesse bloccarsi, lasciarla riavvolgere per un breve
tratto ed estrarla nuovamente evitando manovre brusche. Per slacciare le cinture, premere il pulsante C.
Accompagnare la cintura durante il riavvolgimento, per evitare che si attorcigli. La cintura, per mezzo
dell’arrotolatore, si adatta automaticamente al corpo del passeggero che la indossa consentendogli libertà di
movimento.
USO DEL CAMBIO MANUALE
Per inserire le marce, ridotte e veloci premere il pedale del freno solo a veicolo completamente fermo e
mettere la leva del cambio nella posizione desiderata (lo schema per l’inserimento è riportato dietro alla leva
fig.1 n°3).
AVVERTENZA La retromarcia può essere inserita solo a veicolo completamente fermo. A motore in moto,
prima di innestare la retromarcia, attendere almeno 2 secondi con pedale del freno premuto a fondo, per
evitare di danneggiare gli ingranaggi e grattare.
ATTENZIONE!, Il pavimento sotto la pedaliera non deve presentare ostacoli: accertarsi che eventuali
sovratappeti siano sempre ben distesi e non interferiscano con i pedali.
ISTRUZIONI PER L’USO DEL RIBALTABILE
Operazioni per il ribaltamento del cassone:
Bloccare con i chiavistelli le due traverse del telaio del cassone che si trovano sul lato del
ribaltamento desiderato ed accertarsi che gli spinotti di cerniera siano inseriti correttamente
nell’alloggio.
Per la salita del cassone agire premendo il pulsante (fig. 2 n° 10) verso il “lato salita”.
La salita si ottiene solo con il pulsante continuamente premuto. L’interruzione del ribaltamento si ha
immediatamente rilasciando il pulsante.
ATTENZIONE!
Il cassone ribaltabile non va mai bloccato in punti diagonalmente opposti; per impedire l’errato
posizionamento i chiavistelli sono di forma diversa.
Usare solo chiavistelli originali.
Prima di ogni ribaltamento laterale accertarsi che le sponde siano aperte, agire sulla leva fig.8
Prima di iniziare le operazioni di ribaltamento assicurarsi che il veicolo sia posizionato su terreno
orizzontale, non cedevole e con il carico uniformemente distribuito.
AVVERTENZE PER L’IMPIEGO DEL RIBALTABILE
Il ribaltabile trilaterale è costruito e dotato di dispositivi per garantire la massima sicurezza anche per un
operatore inesperto, tuttavia è necessario osservare alcune norme fondamentali di seguito elencate:
Prima di iniziare le operazioni di ribaltamento assicurarsi che il veicolo sia posizionato su terreno
orizzontale, non cedevole e con il carico uniformemente distribuito.
Prima di iniziare il ribaltamento accertarsi che non vi siano persone, animali o cose nelle immediate
vicinanze del veicolo.
Prima di iniziare le operazioni di ribaltamento assicurarsi che i chiavistelli siano alloggiati in modo tale
da permettere il ribaltamento nella direzione voluta.
È vietata la salita di persone ad attrezzatura ribaltabile sollevata o in corso di sollevamento per
operazioni di livellamento del carico.
15
Page 18

A cassone carico, soprattutto con materiali sfusi, prestare la massima attenzione nell’apertura delle
sponde, la pressione dei materiali fa aprire la sponda in modo violento ed il materiale cadendo può
colpire l’operatore.
Assicurarsi che durante la marcia le sponde siano chiuse e bloccate regolarmente (fig. 9).
Prestare molta attenzione, nel caso di ribaltamenti all’interno di locali, all’eventuale interferenza con
travi, soffitti, impalcature, impianti o altro.
Non sollevare mai il cassone in presenza di linee aeree elettriche o similari.
È vietato abbandonare il posto di manovra con l’attrezzatura ribaltabile alzata.
Per azionare il puntone di sicurezza, l’attrezzatura ribaltabile deve essere vuota.
Durante le operazioni di manutenzione collocare in modo sicuro il puntone atto a sostenere il cassone
(fig.10). E’ vietato esporsi con alcuna parte del corpo sotto il cassone sollevato senza che il predetto
puntone sia stato accuratamente posizionato.
Quando si scarica lateralmente, controllare sia presente il cavetto che impedisce al martinetto di fare
tutta la corsa (fig. 11).
ATTENZIONE!
1) E’ tassativamente vietato l’uso improprio dell’attrezzatura ribaltabile.
2) La pressione di esercizio dell’impianto idraulico è regolata dal costruttore in funzione della portata del
veicolo
3) E’ tassativamente vietato modificare la taratura della valvola limitatrice di pressione.
4) Non sostare per nessun motivo sotto il cassone ribaltabile sollevato e non puntellato.
5) E’ tassativamente vietato viaggiare con il cassone, anche minimamente sollevato.
6) Non sollevare mai il cassone lateralmente oltre il limite
OPERAZIONE DI CARICAMENTO MATERIALE
Caricare il veicolo in modo uniforme e tale da non presentare pericolo di caduta materiale sul piano
stradale.
Mai superare il carico consentito.
Il materiale va versato nel cassone dalla minima altezza possibile.
Controllare che le sponde siano chiuse, in particolare modo che la sponda posteriore sia bloccata
dagli arpioni.
Grossi blocchi di pietra, di detriti di materiale di demolizione vanno disposti cautamente sul cassone e
non lasciati cadere da grande altezza.
ATTENZIONE!
Irregolarità del percorso e frenate energiche possono essere causa di spostamenti improvvisi del carico con
conseguente situazione di pericolo per il guidatore e i passeggeri: prima di partire provvedere quindi a
vincolare saldamente il carico, utilizzando gli appositi ganci disposti sul cassone. Per il bloccaggio utilizzare
cavi metallici, funi o cinghie di robustezza adeguata al peso del materiale da fissare.
Evitate di viaggiare su pendii inclinati lateralmente.
Lo spostamento del carico o eventuali sobbalzi potrebbero causare il ribaltamento della macchina.
ATTENZIONE!
Evitare di sovraccaricare il mezzo (non superare mai i kg 2.000 totali della macchina a pieno
carico)
Prima della marcia accertarsi che il cassone sia completamente abbassato ed evitare di viaggiare con
il cassone sollevato.
ARRESTO DEL MOTORE
Dopo aver portato tutte le leve di comando nella posizione di FOLLE, per spegnere il motore portare la
chiave del commutatore nella posizione stop (fig. 2 rif. 8). Inserire il freno di stazionamento (fig.1 rif.6).
IN SOSTA
Procedere come segue:
Spegnere il motore e azionare il freno di stazionamento;
lasciare le ruote sterzate.
Se il veicolo è posteggiato in forte pendenza si consiglia anche di bloccare le ruote con un cuneo od un
sasso.
16
Page 19

FRENO DI STAZIONAMENTO
La leva del freno di stazionamento (fig.1 n°6) è posta sul lato sinistro del sedile di guida. Per azionare il freno
a mano, tirare la leva verso l’alto, fino a garantire il bloccaggio del veicolo. Sono normalmente sufficienti
quattro o cinque scatti su terreno piano, mentre ne possono essere necessari nove o dieci su forte pendenza
e con veicolo carico.
AVVERTENZA Se così non fosse, rivolgersi alla Rete Assistenza Grillo per eseguire la regolazione.
MANUTENZIONE E LUBRIFICAZIONE
OLIO MOTORE
Durante il rodaggio si consiglia di effettuare il primo cambio dopo le prime 20 ore di lavoro e
successivamente, ogni 130 ore di funzionamento. Utilizzare olio motore SAE 30. E’ indispensabile controllare
il livello ogni 8 ore di lavoro. (Attenersi al libretto motore).
Fig.12 rif. A tappo inserimento olio motore
Fig. 13 rif.A filtro olio motore
Fig. 13 rif.B tappo scarico olio motore
Fig. 12 rif. B livello olio motore
RIBALTABILE IDRAULICO – IDROGUIDA
Controllare il livello ogni 130 ore circa di lavoro dall’asta del serbatoio (Fig. 12 rif C) . Se occorre, aggiungere
olio per cambio AGIP ROTRA JD. Sostituire l’olio una volta all’anno. Per togliere l’olio vecchio dal serbatoio
svitare il tappo posto sotto al serbatoio dell'olio (fig. 12 rif. D). Quantità 7,5 L. Il tappo di alimentazione si
trova sopra al serbatoio (Fig. 12 rif. C).
Il filtro dell’olio idraulico si trova sotto al serbatoio dell'olio (Fig. 12 rif. D). Sostituirlo una volta all’anno.
OLIO CAMBIO
Sostituire l’olio ogni 1000 ore usando olio per cambio SAE 85 W 140, quantità 2,5Kg.
Il tappo si trova sotto al carter anteriore(Fig. 14 rif.C).
Il tappo inserimento olio si trova sopra al carter centrale (fig. 4 rif. 2).
Spia livello olio cambio (Fig. 4, rif. 1)
OLIO PONTE ANTERIORE E POSTERIORE
Sostituire l’olio ogni 1000 ore usando olio per cambio SAE 85 W140, quantità 1,6Kg.
Il tappo si trova sotto al carter centrale (Fig. 14 rif. B).
Il tappo inserimento olio si trova sopra al carter centrale (fig. 14, rif. A).
LIQUIDO FRENI
Verificare ogni 8 ore il livello del liquido dei freni nella vaschetta posta sul cruscotto (fig. 3 rif. 9). Se occorre
aggiungere liquido per freni DOT.4 (SAE J 1703). Controllare periodicamente l’impianto frenante per
verificare che non vi siano perdite.
Come eseguire lo spurgo qualora se ne verificasse la necessità: se si è in possesso dell’attrezzo collegarsi al
posto del tappo della vaschetta; spurgare prima il circuito posteriore del rimorchio, poi lo spurgo anteriore.
Dovendo eseguire lo spurgo senza attrezzo agire sulla pompa della macchina, ma non sempre l’operazione
riesce. La vite di spurgo si trova sulla pinza freno (fig. 15 rif.A).
NOTA Pulire accuratamente il tappo del serbatoio (fig.3 rif13) e la superficie circostante. All’apertura del
tappo prestare la massima attenzione affinché eventuali impurità non entrino nel serbatoio. Per il rabbocco
utilizzare, sempre, un imbuto con filtro integrato a maglia minore o uguale a 0,12 mm.
AVVERTENZA Il liquido freni assorbe l’umidità pertanto, se il veicolo viene usato prevalentemente in zone ad
alta percentuale di umidità atmosferica, il liquido deve essere sostituito una volta all’anno.
ATTENZIONE! Il liquido freni è velenoso e altamente corrosivo. In caso di contatto accidentale lavare
immediatamente le parti interessate con acqua e sapone neutro, quindi effettuare abbondanti risciacqui.
REGISTRAZIONE FRENI
I freni a disco del freno di servizio sono autoregistranti.
E' possibile registrare il freno di stazionamento agendo sul registro posto sul cavo (Fig. 5 rif. B)
17
Page 20

IMPORTANTE!
Ingrassare periodicamente il giunto cardanico, di trasmissione, lo snodo oscillante della macchina e le testine
sterzo.
FILTRO ARIA
Il filtro aria si trova sotto al cassone (fig. 12 rif. E) .
E’ consigliata in caso di ambienti polverosi la pulizia giornaliera.
TUBAZIONI IN GOMMA
Per la manutenzione delle tubazioni flessibili in gomma dell’impianto freni e di alimentazione, seguire
scrupolosamente quanto riportato sul “Piano di Manutenzione Programmata” in questo capitolo. L’ozono, le
alte temperature e la prolungata mancanza di liquido nell’impianto possono causare l’indurimento e la rottura
delle tubazioni, con possibili perdite di liquido. È quindi necessario un attento controllo.
MANUTENZIONE DI FINE STAGIONE
Quando la macchina deve rimanere inattiva per un lungo periodo si consigliano le seguenti operazioni:
Eseguire una pulizia generale della macchina.
Collocarla in un ambiente che non sia né polveroso, né umido.
Togliere la batteria, collocarla in un locale asciutto in cui non vi sia pericolo di gelo e ricaricarla
almeno una volta al mese.
Mettere delle assicelle di legno sotto le ruote per isolarla dal suolo, ricoprire la macchina con un telo
protettivo.
18
Page 21

TRANSPORTEUR A ROUES
PK600
Cher client,
nous vous remercions pour la confiance et la préférence que vous avez bien voulu
accorder à notre GRILLO PK 600 et nous sommes certaines que son usage répondra
entièrement à vos exigences. Pour une utilisation optimale et sa maintenance à long
terme nous vous demandons de lire attentivement et suivre scrupuleusement les
indications contenues dans cette brochure, ce qui vous permettra d'obtenir des excellents
résultats et de sauvegarder votre investissement.
Nous vous demandons de conserver ce manuel qui doit toujours accompagner le
véhicule.
DESCRIPTION GENERALE ET USAGE PREVU
La machine Grillo PK 600 est un véhicule à 4 roues motrices avec plateau de
chargement, conçu pour le transport de matériaux ou objets sur route et en particulier
hors route.
GRILLO PK 600 est actionné par un moteur à 4 temps refroidi par air. La répartition
exacte du poids permet d’obtenir une stabilité maximale.
Le véhicule est amorti et garantit un grand confort de conduite. L’entretien du véhicule ne
comporte que quelques simples et rapides opérations.
La machine dispose de deux places, l’ un pour le chauffeur et l’autre pour un passager,
avec sièges amortis et ceinture de sécurité.
Le plateau de chargement à basculement est trilatéral et hydraulique. La machine se
compose d’un châssis portant, le moteur, la boite de vitesse et le variateur sont disposés
dans la partie postérieure de la machine, sous le plateau de chargement.
ATTENTION!
Avant d’ allumer le moteur lisez attentivement. Les précautions
suivantes sont importantes pour votre sécurité!
NORMES POUR LA PRÉVENTION DES ACCIDENTS
La prudence est le moyen principal pour éviter les accidents!
Nous vous demandons de lire attentivement les précautions suivantes pour l’usage de la
machine avant de commencer le travail.
Une utilisation impropre de la machine et de ses équipements peut être dangereuse;
pour éviter tout risque d’accident suivez les indications suivantes:
1) Lire entièrement ce manuel avant l'allumage et la mise en mouvement du véhicule.
2) Suivre avec attention particulière les mises en garde et les étiquettes de sécurité.
3) Avant de commencer le travail, mettre des vêtements de travail appropriés, des gants
et des bottes.
4) Ne pas charger de poids supérieurs à la portée maximale homologuée – (totale à
pleine charge 2100kg)
5) Avant de confier votre véhicule à d'autres personnes, il faut leur illustrer aussi bien les
normes de sécurité que le mode d'emploi.
6) Avant de mettre en marche le moteur, vérifier qu'il n'y ait personne aux alentours et, en
particulier, qu'il n'y ait pas d'enfants.
7) Avant de faire marche arrière, vérifier qu'il n'y ait personne et qu'il n'y ait aucun obstacle.
8) Fixer parfaitement le charge avec les crochets spécialement prévus à cet effet.
Page 22

9) Avant de quitter le véhicule, désactiver le moteur, enlever la clé de démarrage et insérer le
frein de stationnement.
10) Ne pas faire travailler de personnes trop jeunes: l'usage est interdit aux mineurs de 18 ans.
11) Charger la benne de manière ordonnée et uniforme.
12) Pour éviter le danger d' exhalations toxiques, ne pas faire tourner le moteur dans un endroit
fermé.
13) Arrêter toujours le moteur avant de faire le plein de combustible; rester loin des étincelles
ou des flammes et ne pas fumer!
14) Éviter les fuites de combustible; après avoir rempli le réservoir, nettoyer soigneusement les
fuites avant d'activer le moteur.
15) Si vous avez des enfants, il faut cacher la clé de démarrage quand vous n'utilisez pas le
véhicule.
16) N'effectuer aucun réglage ou nettoyage avec le moteur en marche.
17) Ne pas faire contrôler le véhicule lorsque le conducteur est au volant avec le moteur
en marche.
18) L'utilisateur est toujours responsable des dommages occasionnés aux tiers.
19) Utiliser toujours des pièces de rechange d'origine Grillo.
USAGES IMPROPRES À ÉVITER
Ne pas charger du poids excessif sur le derrière ou sur le coté du plateau car cela peut affecter la
stabilité et la sécurité de la machine.
Ne pas faire marche arrière si le moteur est accéléré.
Ne pas utiliser la machine quand l'on est fatigués et quand l' on a bu de l’ alcool.
Ne transporter plus de passagers que la capacité indiquée.
Ne pas utiliser la machine près des fossés ou sur les accotements qui peuvent s'écrouler sous
son poids, en particulier lorsque la surface est fragile ou mouillée.
Ne pas modifier ou désactiver les dispositifs de sécurité.
L'utilisation impropre de la machine implique la déchéance de la garantie et par conséquent le
constructeur décline toute responsabilité.
PRÉCAUTIONS DE SÉCURITÉ SUPPLEMENTAIRES
Les mises en garde décrites ci-dessus pourraient ne pas être suffisantes afin d'éviter tous les
risques, au cas où l'opérateur ne se tenait pas à l'usage approprié de la machine. Pour cette
raison et pour plus de prudence nous ajoutons les précautions suivantes:
Dans les descentes tourner très lentement.
Rouler lentement sur les routes accidentées.
Ne pas effectuer des opérations d'entretien de la machine quand la benne est soulevée et sans
mettre la barre de sécurité sur le cylindre hydraulique.
Charger le plateau de chargement de manière ordonnée et uniforme et fixer la charge
parfaitement avec les crochets spécialement prévus à cet effet.
Ne pas transporter des poids penchants de la benne.
Faire attention en cas de poids excessif dans la benne, il peut affecter la stabilité et la sécurité de
la machine.
CARACTÈRISTIQUES TECHNIQUES
MODELE: Transporteur à roues.
MOTEUR: Briggs & Stratton 18hp essence, refroidissement à air, 2 cylindres.
DEMARRAGE: électrique, 12V.
BOITE DE VITESSES:3 marches, 2 avant+ 1 arrière à variation continue CVT.
VITESSE MAXIMALE (avec roues 23x8.50-12): 40 km/h.
ROUES: pneumatiques semi tractor 23x8.50-15 (6PR).
DIFFERENTIEL: sur les deux axes avec blocage sur l'axe AR.
ESSIEU AV: directionnel.
Page 23

ESSIEU AR: directionnel, désactivable.
BRAQUAGE: hydraulique.
SIEGES: suspendus et réglables.
TRACTION: 2 roues motrices antérieures, 4 roues motrices.
FREIN DE SERVICE: 4 freins à disque hydraulique qui agissent sur les 4 roues.
FREIN DE SECOURS ET STATIONNEMENT: frein à disque mécanique qui agit sur la
transmission.
BENNE: basculeur hydraulique trilatéral.
HAUTEUR DU PLATEAU DE CHARGEMENT DU NIVEAU DU SOL: 900 mm.
GRILLE DE PROTECTION DU CONDUCTEUR: sur le bord antérieur du plateau de chargement.
PORTEE: 1000kg max. (2 personnes dans la cabine).
DIMENSIONS DE LA MACHINE
Longueur 4000mm:
Largeur 1510mm;
Hauteur 2320mm;
Pas 1800mm;
Chaussée 1220mm;
Poids: 1100kg.
ACCESSOIRES: Cabine
IDENTIFICATION DE LA MACHINE
Le numéro de série du véhicule est indiqué sur la plaquette et marqué sur le longeron
droit du châssis près de la plaquette.
SERVICE ASSISTANCE
Ce manuel fournit les indications pour l’utilisation de la machine. Pour un entretien
correct consultez le revendeur le plus proche.
PIÈCES DETACHÉES
N’ utilisez que des pièces détachées d’origine Grillo, les seules qui offrent des
caractéristiques de sécurité et d’ interchangeabilité.
Tout demande doit être accompagnée du numéro de série et de la référence de la pièce
à remplacer.
Pour les pièces détachées du moteur observez les indications contenues dans le livret
spécifique.
GARANTIE
La garantie est assurée selon les modalités et les limites indiqués par la loi en vigueur.
Il faut garder le certificat de garantie reçu le jour de la consigne.
MODALITÈS DE COMMANDE DES PIÈCES DETACHÉES
Indiquez toujours le numéro de série de la machine et la référence de la pièce à
remplacer. Adressez-vous au centre d’assistance le plus proche.
MISE EN SERVICE DE LA MACHINE
1) Contrôlez que la machine est intacte et qu’elle n’a pas été endommagée pendant
le transport.
2) Vérifiez les niveaux de huile moteur, huile boite de vitesse et liquide de
refroidissement.
Page 24

3) Vérifiez la pression des pneus: 23 x 8.50 / 12 6 PR: 2 bar, 23 x 10,5 / 12 10 PR: 2
bar.
4) Contrôlez le voltage de la batterie, qui ne doit pas être en dessous de 12volt; si
nécessaire, rechargez-la.
Si la batterie a été livrée sèche avec l’acide à part, suivez les indications suivantes pour
la mise en service:
4.1) Insérez l’acide et attendez 2 heures.
4.2) Chargez la batterie avec un chargeur réglé à 12 volt sur charge lente pour 2
heures.
ATTENTION Si vous ne respectez pas cette règle la batterie peut se détériorer et il peut
y avoir des fuites d’acide pendant le travail.
IMPORTANT! Pendant le montage évitez de inverser les polarités de la batterie.
BATTERIE – ATTENTION!
Les gaz dégagés par la batterie sont explosifs, gardez-la éloignée des flammes et des
étincelles. Contrôlez périodiquement le niveau du liquide et gardez les bornes lubrifiés
avec de la graisse de vaseline.
Conseils utiles pour prolonger la durée de vie de la batterie
Afin d'éviter une décharge rapide de la batterie et pour en prolonger la durée de vie, suivez scrupuleusement les indications suivantes:
A moteur éteint ne gardez pas les dispositifs (lumières, lumière d’urgence etc.) long temps allumés;
Avant toute intervention sur l’installation électrique débranchez le câble du pôle négatif
de la batterie.
Serrez les bornes de la batterie à fond.
Attention! Si la batterie est chargée longtemps à une charge inférieure à 50% elle
s‘abîme par sulfatation, en réduisant ainsi la capacité et l’aptitude au démarrage.
RODAGE
Pendant le rodage (premières 50 heures de travail) évitez de travailler avec le moteur à
régime élevé: limitez l’exploitation de la puissance disponible à environ 80%.
Après les premières 20 heures de travail et à la fin de la période de rodage:
- Contrôlez le serrage de tout élément de fixation et liaison (vis, écrous, raccords).
- Contrôlez tous les groupes, moteur, boite de vitesse e tuyauteries, et assurez-vous qu’il
n’y a pas de fuite d’huile.
- Réglez le frein de stationnement.
En ce qui concerne le rodage du moteur consultez le manuel d’utilisation spécifique.
MODE D’EMPLOI
DESCRIPTION DES ELEMENTS DE COMMANDE
Fig.1/2
1. Démarrage: le moteur peut démarrer (Fig.1 n.1) seulement avec la pédale du
frein actionnée; si l’on ne appuie pas sur la pédale, la voiture ne démarre pas à
cause d’une sécurité.
2. Pédale freins (Fig.1 n.1): actionne les freins des roues. Actionne sécurité
démarrage. Actionne sécurité boite de vitesse (si l’on n’est pas totalement
arrêtés avec le frein tiré on ne peut pas changer de vitesse). Actionne sécurité
passage virage (si l’on n’est pas totalement arrêtés, avec le frein tiré, la
Page 25

sécurité empêche de changer de braquage: de 2 à 4 roues directrices et vice
versa)
3. Pédale accélérateur (Fig. 1 n.2).
4. Levier frein de stationnement (Fig.1 n.6): il agit sur la transmission, en
même temps sur l’essieu antérieur et l’essieu postérieur. Le frein s’insère en
tirant le levier vers le haut et le voyant rouge correspondant s’allume (Fig. 3
n.7). Pour débloquer le levier, pressez le bouton placé à l’extrémité et portez-le
dans la position la plus basse.
5. Levier vitesses (Fig.1 n.3): permet d’ obtenir deux vitesses en avant (réduites
et vites) e une en arrière.
6. Levier blocage différentiel (Fig.1 n.4): en tirant le levier du blocage
différentiel, le différentiel sur l’essieu postérieur se bloque, et le voyant rouge
correspondant s’allume (Fig.3 n.14). Le blocage ne doit être utilisé qu’avec les
deux roues directrices. N’oubliez pas le blocage différentiel inséré.
7. Bouton actionnement benne basculante (Fig.1 n.10): ce bouton permet de
hausser et baisser la benne. Le voyant vert correspondant s’allume quand la
benne est soulevée (Fig.3 n.3).
Fig.3
1. Voyant feux de croisement Voyant feux de position (vert).
2. Compteur d’heures.
3. Voyant benne soulevée.
4. Voyant feux de route.
5. Réserve carburant.
6. Voyant générateur (rouge).
7. Voyant frein de stationnement.
8. Voyant indicateur de direction (vert).
9. Récipient liquide de freins.
10. Indicateur niveau carburant.
11.Sélecteur 2/4 roues directrices.
12.Voyant 4 roues directrices activées.
13.Bouchon réservoir liquide de freins.
14. Voyant blocage différentiel activé.
CONTROLS à EFFECTUER AVANT LE DEMARRAGE
- Vérifiez le niveau de l’huile boite de vitesse , placé au centre du carter boite de
vitesse (Fig.4 n.1).
- Contrôlez le niveau huile moteur (suivez les instructions dans le livret).
- Contrôlez le niveau huile freins (Fig. 3 n.9).
Remplissez le réservoir avec le carburant, en utilisant un entonnoir muni d’un filtre très fin
(Fig.6 n.1).
Vérifiez que tous les leviers sont au point mort et continuez de la façon suivante:
1) Démarrage à moteur froid.
2) Appuyez sur la pédale du frein.
3) Actionnez le levier du démarreur (Fig.1 n.5); quand le moteur démarre, remettez-la
dans la position de départ. Cette opération ne doit être effectuée qu’à moteur froid.
4) Insérez la clé dans le commutateur de démarrage; tournez-la en sens horaire
(Fig.2 n.8); quand le moteur démarre, laissez-la.
5) Positionnez le levier réduites et vites ou marche arrière dans la position souhaitée,
débrayez le frein de stationnement s’il est inséré, accélérez lentement le moteur,
la machine se met en mouvement.
Page 26

6) Pour vous arrêter enlevez le pied de l’accélérateur et actionnez la pédale du frein.
ATTENTION Ne pas accélérer avec la pédale du frein pressée, car le variateur de
vitesse s’abîme.
Pour éteindre le moteur tourner la clé vers la position centrale.
Si le moteur ne démarre pas n’insistez pas sur des tentatives inutiles qui déchargent
la batterie, mais attendez quelques minutes avant de répéter l’opération de
démarrage.
Vérifiez fréquemment le niveau de liquide dans la batterie et s’il est nécessaire
ajoutez de l’eau distillée.
CEINTURES DE SECURITE
La ceinture (Fig.7) doit être mise en tenant le buste droit et appuyé contre le dossier.
Pur boucler la ceinture, insérez la languette A dans la boucle B, jusqu’à ce que vous
entendez le déclic de blocage. Si la ceinture se bloque pendant l’extraction, faites-la
enrouler pour un petit trait, après tirez-la de nouveau sans mouvements brusques.
Pur enlever la ceinture, appuyez sur le bouton C.
Accompagnez la ceinture pendant qu’elle s’enroule afin d’éviter qu’elle s’entortille. La
ceinture s’adapte automatiquement au corps du passager, et lui laisse ainsi toute sa
liberté de mouvement.
UTILISATION DE LA BOITE DE VITESSES MANUELLE
Pour passer les vitesses, réduites et vites, pressez la pédale du frein seulement si la
machine est complètement arrêtée et portez le levier de la boite de vitesses dans la
position souhaitée (le schéma pour le changement de vitesse se trouve derrière le
levier Fig.1 n.3).
ATTENTION La marche arrière peut être passée seulement si le véhicule est
complètement arrêté. Avec le moteur en marche, avant de passer la marche arrière,
attendez au moins 2 secondes avec la pédale pressée à fond, pour éviter de
endommager les engrenages et faire craquer la boite de vitesses.
ATTENTION! La surface sous la pédale doit être sans obstacles: vérifiez que les
éventuels tapis n’ interfèrent pas avec les pédales.
MODE D’ EMPLOI DE LA BENNE BASCULANTE
Pour basculer la benne:
- Avec des verrous bloquez les entretoises du châssis de la benne qui se trouvent
sur le côté de basculement souhaité et vérifiez que les goupilles de fermeture sont
correctement insérées.
- Pour hausser la benne appuyez sur le bouton (Fig.2 nr.10) vers «coté montée».
La montée de la benne s’obtient seulement avec le bouton pressé sans interruption.
En relâchant le bouton le basculement s’ arrête immédiatement.
ATTENTION!
- La benne basculante ne doit jamais être bloquée par deux points diagonalement
opposés; pour éviter le positionnement erroné les verrous ont des formes
différentes.
- Utilisez exclusivement des verrous d’origine.
- Avant tout basculement vérifiez que les bords de la benne sont bien ouvertes,
(agissez sur le levier fig.8).
Page 27

- Avant de commencer les opérations de basculement vérifiez que le véhicule se
trouve sur un terrain plat, solide et avec la charge repartie de façon uniforme.
PRÉCAUTIONS D’ EMPLOI POUR LA BENNE BASCULANTE
La benne basculante trilatérale est construite et équipée avec des dispositifs de façon
à garantir une sécurité maximale même pour les opérateurs inexperts; toutefois, il faut
respecter quelques règles fondamentales:
- Avant de commencer les opérations de basculement vérifiez que le véhicule est
positionné sur un terrain plat, solide et avec la charge repartie de façon uniforme.
- Avant de commencer le basculement vérifiez qu’il n’y a pas de gens, animaux ou
objets autour du véhicule.
- Avant de commencer les opérations de basculement vérifiez que les verrous sont
placés de façon à permettre le basculement dans la direction souhaitée.
- Il est interdit de monter sur la benne quand celle-ci est soulevée ou en train de
soulèvement.
- Quand la benne est chargée, surtout avec les matériaux en vrac, faites attention à
l’ouverture des bords de la benne, car la pression des matériaux peut ouvrir la
porte de façon forte et les matériaux pourraient, en tombant, toucher et blesser
l’opérateur.
- Vérifiez que pendant la marche les portes sont bien fermées et bloquées (Fig.9)
- Faites beaucoup d’attention, en cas de basculement à l’intérieur, à la présence
éventuelle de poutres, plafonds, charpentes, installations etc.
- Ne soulevez jamais la benne s’ il y a des lignes électriques aériennes ou d’ autres
installations de ce genre.
- Pour actionner le support de sécurité, il faut que la benne soit vide.
- Pendant les opérations d’ entretien placez le support de sécurité de façon fiable
au-dessous de la benne (Fig.10). Il est interdit de s'arrêter sous la benne avant
que le support n’ ait pas été soigneusement placé.
- Quand vous déchargez latéralement, vérifiez que le câble qui bloque le vérin est
présent (Fig.11).
ATTENTION!
1) Il est strictement interdit d'utiliser la benne basculante de manière impropre.
2) La pression d’activité de l’installation hydraulique est réglée par le constructeur en
fonction de la charge utile du véhicule.
3) Il est strictement interdit de modifier le calibrage de la soupape de décharge.
4) Ne pas s’arrêter pour aucune raison sous la benne basculante soulevée et non
soutenue.
5) Il est strictement interdit de rouler avec la benne soulevée.
6) Ne soulevez jamais la benne au-delà de la limite.
OPÉRATION DE CHARGEMENT MATÉRIAUX
- Chargez le véhicule de façon uniforme et telle qu’elle ne présente pas de risque
de chute de matériaux sur la route.
- Ne dépassez jamais le poids total autorisé en charge.
- Les matériaux doivent être versés de la hauteur minimale possible.
- Vérifiez que les bords sont bien fermées, spécialement que le bord postérieur est
bloqué par les crochets.
- Les gros blocs de pierre et de déchets de démolition doivent être disposés avec
prudence sur le plateau de chargement et non pas laissés tomber de haut.
Page 28

ATTENTION!
Un parcours irrégulier et des coups de frein brusques peuvent causer le déplacement
soudain du chargement, ce qui crée une situation de danger pour le conducteur et les
passagers: avant de partir fixez donc la charge avec les crochets prévus à cet effet,
disposés sur la benne. Utilisez toujours des câbles métalliques et des cordes appropriés
selon le poids des matériaux à fixer.
Évitez de voyager sur des pentes inclinées latéralement.
Le déplacement de la charge et des éventuels cahots peuvent causer le retournement de
la voiture.
ATTENTION!
- Évitez de surcharger le véhicule (ne dépassez jamais les 2000 kg totales de la
machine complètement chargée)
- Avant de partir vérifiez que la benne est complètement baissée et évitez de rouler
avec la benne soulevée.
ARRET DU MOTEUR
Après avoir mis tous les leviers de commande au point mort, pour arrêter le moteur
portez la clé du commutateur dans la position de stop (Fig.2, 8). Tirez le frein de
stationnement (Fig.1, 6).
VOITURE ARRÊTÉE
Procédez comme suit:
- Arrêtez le moteur et actionnez le frein de stationnement;
- Laissez les roues braquées.
Si le véhicule est garé en forte pente il peut être utile de bloquer les roues avec un coin
ou une pierre.
FREIN DE STATIONNEMENT
Le levier du frein de stationnement (Fig.1 n.6) est placé sur le côté gauche du siège
conducteur. Pour actionner le frein à main, tirez le levier vers le haut, jusqu’à assurer le
blocage du véhicule. Normalement, quatre ou cinq déclics sont suffisants sur terrain plat,
alors qu’ en pente et avec le véhicule chargé ils peuvent monter jusqu’à neuf ou dix.
ATTENTION Si ce n’est pas le cas, adressez-vous au réseau assistance Grillo pour le
réglage.
ENTRETIEN ET LUBRIFICATION
HUILE MOTEUR
Pendant le rodage effectuez le premier changement d’huile après les 20 premières
heures de travail, ensuite après toutes les 130 heures de fonctionnement. Utilisez l’huile
moteur SAE 30. Il est indispensable de contrôler le niveau toutes les 8 heures de travail
(suivez les indications dans le livret du moteur).
Fig.12, A Bouchon remplissage huile moteur
Fig.13, A Filtre huile moteur
Fig.13, B Bouchon vidange huile moteur
Fig.12, B Niveau huile moteur
BASCULEUR HYDRAULIQUE – SERVO-DIRECTION HYDRAULIQUE
Contrôlez le niveau environ toutes les 130 heures de travail avec la jauge de réservoir
(Fig.12, C). S’il est nécessaire ajoutez de l’huile de boite de vitesses AGIP ROTRA JD.
Page 29

Vidanger l’huile une fois par an. Pour enlever l’huile usée du réservoir dévissez le
bouchon sous le réservoir de l’huile (Fig.12, D). Quantité 7,5l. Le bouchon de
remplissage se trouve sur le réservoir (Fig.12, C).
Le filtre de l’huile hydraulique se trouve sous le réservoir de l’huile (Fig. 12,D).
Remplacez-le une fois par an.
HUILE BOITE DE VITESSE
Vidangez l’huile toutes les 1000 heures en utilisant de l’huile de boite de vitesses SAE 85
W 140, quantité 2,5kg.
Le bouchon se trouve sous le carter central (Fig.18,B).
Le bouchon de remplissage se trouve sur le carter central (Fig. 19).
HUILE ESSIEU ANTÉRIEUR ET POSTÉRIEUR
Remplacez l’huile toutes les 1000 heures en utilisant de l’huile de boite de vitesse SAE
85 W 140, quantité 1,6kg.
Le bouchon se trouve sous le carter central (Fig.18, B).
Le bouchon de remplissage se trouve sur le carter central (Fig.19)
LIQUIDE DE FREINS
Vérifiez toutes les 8 heures le niveau du liquide des freins dans la cuvette sur le tableau
de bord (Fig.3, 9). S’il est nécessaire ajoutez du liquide de freins DOT.4 (SAE J 1703).
Contrôlez périodiquement l’installation de freinage pour vérifier qu’il n’y a pas de pertes.
Comment purger les freins en cas de nécessité: si vous possédez l’ outil branchez-le au
bouchon de la cuvette. Purger d’abord le circuit postérieur du remorque, ensuite l’
antérieur. Pour faire la purge sans outil agissez sur la pompe de la voiture, mais cette
opération ne marche pas toujours. La vis de purge se trouve sur la pince de frein (Fig.15,
A).
ATTENTION Nettoyez soigneusement le bouchon du réservoir (Fig.3, 13) e la surface
environnante. Quand vous dévissez le bouchon faites attention aux impuretés qui
pourraient tomber dans le réservoir. Pour remplir le réservoir utilisez toujours un
entonnoir avec filtre intégré avec maille de 0,12mm maximum.
ATTENTION Le liquide de freins absorbe l’ humidité, donc, si vous utilisez le véhicule
principalement dans des zones à haut pourcentage d’ humidité atmosphérique, il faut
remplacer le liquide une fois par an.
ATTENTION! Le liquide de freins est toxique et extrêmement corrosif. En cas de contact
accidentel avec la peau lavez immédiatement et plusieurs fois avec de l’eau et du savon
neutre.
RÉGLAGE DES FREINS
Les freins à disque du frein de service sont autorégulateurs.
Il est possible de régler le frein de stationnement en agissant sur le câble (Fig.5, B).
IMPORTANT!
Graisser périodiquement le joint de Cardan, le joint de transmission, l’articulation
oscillante de la machine et les tés de fourche.
FILTRE A AIR
Le filtre à air se trouve sous la benne (fig.12, E).
Si vous travaillez dans un milieu poussiéreux nous recommandons un nettoyage
quotidien.
Page 30

TUYAUX EN CAOUTCHOUC
Pour l’entretien des tuyaux flexibles en caoutchouc du circuit de freinage et
d’alimentation suivez scrupuleusement les indications fournies dans «Plan d’ entretien
programmé» dans ce chapitre. L’ozone, les températures élevés et le manque prolongé
de liquide dans le circuit peuvent provoquer le durcissement et la rupture des tuyaux,
avec des possibles pertes de liquide. Il faut donc les contrôler attentivement.
ENTRETIEN DE FIN DE SAISON
Si la machine ne sera pas utilisée pour longtemps nous recommandons les opérations
suivantes:
- Faites un nettoyage général de la machine.
- Placez-la à un endroit ni humide, ni poussiéreux.
- Enlevez la batterie, gardez-la à un endroit sec sans risque de gel et rechargez-la
au moins une fois par mois.
Placez des lattes en bois sous les roues pour isoler la machine du sol et couvrez-la avec
une toile de protection.
Page 31

GRILLO PK 600
Sehr geehrter Kunde,
wir danken Ihnen für Ihr Vertrauen und wir sind sicher, dass Sie mit Ihrem neuen "Grillo PK 600" voll und
ganz zufrieden sein werden.
Lesen Sie dieses Handbuch aufmerksam durch und halten Sie sich genau an die Anleitungen, damit
Sie auch wirklich immer optimale Resultate erzielen und lange Freude an Ihrer Maschine haben werden.
Bewahren Sie dieses Handbuch immer zusammen mit der Maschine auf.
ALLGEMEINE BESCHREIBUNG UND VORGESEHENER GEBRAUCH
Die Grillo-Machine PK 600 ist ein Transporter mit Allradantrieb und Ladepritsche, für den Transport von
Materialien auf Straße und abseits befestigter Wege entworfen und wird durch einen Dieselmotor
angetrieben. Die richtige Verteilung der Gewichte erlaubt die höchste Stabilität.
Das Fahrzeug ist auf Stoßdämpfer gebaut und es garantiert den höchsten Komfort. Die Wartung besteht aus
wenigen und einfachen Handgriffen.
Die Maschine ist mit zwei Sitzen ausgestattet, einem für den Fahrer und einem für den Passagier. Die Sitze
sind auf Stoßdämpfer gebaut und mit Sicherheitsgurten ausgestattet.
Die Ladepritsche ist dreiseitig hydraulisch kippbar. Die Maschine besteht aus einem Hauptrahmen, der
Motor, das Getriebe und der Regler befinden sich im hinteren Teil der Maschine unter der Ladepritsche.
ACHTUNG!
Lesen Sie die folgenden Hinweise vor dem Anlassen des Motors zum Schutz Ihrer
persönlichen Sicherheit genau durch!
SICHERHEITSRELEVANTE HINWEISE
Vorsicht ist immer die beste Maßnahme, um Unfälle zu vermeiden!
Lesen Sie die folgenden Hinweise genau durch, bevor Sie mit der Arbeit beginnen.
Ein unsachgemäßer Gebrauch der Maschine und Ihrer Ausrüstung kann Personen- oder Sachschäden zur
Folge haben; um alle eventuellen Risiken zu vermeiden, sind die folgenden Hinweise zu beachten:
1) Lesen Sie das gesamte Handbuch durch, bevor Sie die Maschine in Gang setzen.
2) Beachten Sie die auf der Maschine angebrachten Hinweise bzw. Plaketten.
3) Bevor Sie zu arbeiten beginnen, müssen Sie immer geeignete Arbeitskleidung anziehen.
4) Niemals bei Beladung das zulässige Gesamtgewicht überschreiten (max. zulässige
Gesamtgewicht in vollbeladenem Zustand beträgt 2100 kg).
5) Soll eine andere Person die Maschine benutzen, muss diese über die Sicherheitshinweise und die
Betriebsanleitung der Maschine informiert werden.
6) Vergewissern Sie sich vor dem Einschalten der Maschine, dass sich keine andere Person und vor allem
keine Kinder in der nähe befinden.
7) Vergewissern Sie sich vor dem Rückwärtsfahren, dass sich keine Personen oder Hindernisse hinter der
Maschine befinden.
8) Die Last immer gut mit den dafür vorgesehenen Haken befestigen.
9) Vor dem Absteigen von der Maschine, den Motor abstellen, den Zündschlüssel abziehen und die
Feststellbremse anziehen.
10)Das vorgeschriebene Mindesalter für die Benutzung der Maschine beträgt 18 (achtzehn) Jahre.
(jeweiligen Landesbestimmungen zur Fahrberechtigung überprüfen).
11)Die Ladefläche ordentlich und gleichmäßig beladen.
12)Den Motor nicht in geschlossenen Räumen laufen lassen, um die Vergiftungsgefahr durch gefährliche
Abgase zu vermeiden.
13)Beim Nachtanken den Motor immer abschalten, nicht rauchen und offene Flammen bzw. Funken im
Gefahrenbereich vermeiden.
14)Keinen Treibstoff verschüttern und vor dem Staren des Motors Überreste entfernen.
15)Wenn Sie Kinder haben, bewahren Sie immer den Zündschlüssel an einem für Kinder unerreichbaren Ort
auf.
16)Niemals bei laufendem Motor Reinigungsarbeiten bzw. Einstellungen durchführen.
17)Die Maschine niemals von einer anderen Person kontrollieren lassen, während Sie selbst auf
dieser sitzen und der Motor läuft.
18)Der Benutzer ist immer für anderen Personen zugefügte Schäden verantwortlich.
19)Ausschließlich Original-Grillo-Ersatzteile verwenden.
1
Page 32

FOLGENDES IST ZU VERMEIDEN
20) Die Ladefläche einseitig oder nur hinten mit großen Gewichten belasten, da dadurch die Stabilität der
Maschine und die Sicherheit beim Lenken beeinträchtigt werden.
21) Im Rückwärtsgang zu schnell fahren.
22) Das Gerät bei Müdigkeit oder unter Alkoholeinfluß benutzen.
23) Mehr als einen Passagier transportieren. Als Passagiere ist nur der auf dem Beifahrersitz erlaubt.
24) In der Nähe von Gräben oder Banketten arbeiten, die unter dem Gewicht der Maschine nachgeben
könnten, vor allem dann, wenn das Erdreich nass oder brüchig ist.
25) Die Sicherheitsvorrichtungen der Maschine außer Funktion setzen bzw. entfernen.
26) Jeder unsachgemäße Gebrauch hat den Verfall des Garantieanspruches und der Haftung des
Herstellers zur Folge.
WEITERE SICHERHEITSRELEVANTE HINWEISE
Die oben aufgeführten Sicherheitshinweise könnten nicht ausreichen, um jedes Risiko zu vermeiden, falls
sich der Benutzer nicht an den vorgesehenen Gebrauch dieser Maschine hält.
Vorsicht und weisen auf Folgendes hin:
27) Beim Abwärtsfahren immer langsam abbiegen.
28) Auf holprigen und unwegsamen Straßen/Wegen mit niedriger Geschwindigkeit fahren.
29) Keine Wartungsoperation durchführen, wenn die Ladepritsche angehoben ist und nicht den
Sicherheitssporn auf den Hydraulikzylinder gesteckt worden ist.
30) Die Last immer ordentlich und gleichmäßig auf die Ladepritsche stellen und die mit den dafür
vorgesehenen Haken und Seilen befestigen.
31) Ladung darf nicht aus der Pritsche vorstehen, vor allem wenn Sie auf der Straße fahren.
32) Vorsicht! Schwere oder sperrige Ladung kann die Stabilität der Maschine stark beeinträchtigen.
TECHNISCHE DATEN
MODELL: Transporter.
MOTOR: LOMBARDINI FOCS 1003, 1028cc, 25,5PS mit 3600 UpM, Diesel 3-Zylinder
Dieselmotor mit Flüssigkeitskühlung
ANLASSER: elektrisch mit 12V Batterie.
KRAFTSTOFFBEHÄLTER: 23 Liter
GETRIEBE: mit 3 Gänge, davon 2 Vorwärtsgänge und 1 Rückwärtsgang; stufenlos
einstellbares Getriebe CVT.
ANTRIEB: Allradantrieb.
HÖCHSTGESCHWINDIGKEIT (mit Bereifung 23x10.5-12): 35 km/h.
BEREIFUNG: Pneumatische Tractor-Reifen 23x10.50-12 (6 PR).
DIFFERENZIAL: Auf beiden Achsen mit Sperrung auf Hinterachse.
VORDERACHSE: gelenkt.
HINTERACHSE: gelenkt und abschaltbar.
LENKUNG: hydraulisch.
WENDERADIUS: 180 cm
SITZE: einstellbar und gefedert
BETRIEBSBREMSE: 4 hydraulische Scheibenbremse, auf alle 4 Räder wirkend.
FESTSTELL-UND NOTBREMSE: mechanisch, auf die Hinterräder wirkend.
RAHMEN: auf vier unabhängigen Stoßdämpfern aufgebaut mit Doppel-Schwingarm
PRITSCHE: dreiseitig kippbar und hydraulisch 1770 x 1470 x 300 mm.
PRITSCHENHÖHE VOM BODEN: 850 mm.
FAHRER-SCHUTZGITTER: auf dem Vorderrand der Pritsche.
LADEFÄHIGKEIT: 900 kg max. (2 Passagiere in der Kabine).
ZUBEHÖR AUF ANFRAGE: Heizungs-Kit, Kabinentür-Kit, GARTEN-RÄDER 23X10.5-12
MASCHINEN-ABMESSUNGEN:
Länge: 3460 mm.
Breite: 1600 mm.
Höhe: 2030 mm.
Radstand: 1705 mm;
Spurweite: 1350 mm.
Gewicht: 1150 kg.
1
Page 33

IDENTIFIKATION DER MASCHINE
KUNDENDIENST
In diesem Handbuch finden Sie die Anleitungen für den Gebrauch Ihrer Maschine. Für korrekte
Wartungsarbeiten wenden Sie sich bitte an Ihren Grillo-Händler.
ERSATZTEILE
Verwenden Sie ausschließlich Original-Ersatzteile, die unter sicherheitsrelevantem und montagetechnischem
Standpunkt keine Probleme bereiten können.
Bei der Ersatzteilebestellung immer die Seriennummer der Maschine und die Ersatzteil-Nummer angeben.
Für die Ersatzteile des Motors beachten Sie die Hinweise im Handbuch des Motors.
ERSATZTEILEBESTELLUNG
Immer die Seriennummer der Maschine und die Ersatzteil-Nummer des auszuwechselnden Teils angeben.
Wenden Sie sich an Ihren nächsten Grillo-Händler.
GARANTIE
Die mit den Vorschriften übereinstimmenden Garantiebedingungen finden Sie auf dem Garantieschein.
Bitte bewahren Sie immer den Garantieschein auf.
INBETRIEBNAHME DER MASCHINE
1) Vollständigkeit und Unversehrtheit der Maschine sofort überprüfen und kontrollieren, ob die erhaltene
Maschine Transportschäden aufweist.
2) Das Niveau des Motoröles, des Getriebeöles und der Kühlflüssigkeit überprüfen.
3) Reifendruck prüfen: 23 x 8.50 / 12 6 PR: 2 bar, 23x10,5 / 12 10 PR: 2 bar.
4) Die Batteriespannung überprüfen; sie darf nicht unter 12 Volt liegen. Bei Bedarf die Batterie ans
Ladegerät hängen.
Wenn die Batterie trocken, mit dem Batterie-Säure getrennt verpackt, geliefert wurde, bitte folgende Punkte
befolgen:
4.1) Säure einfüllen und 2 Sunden warten; vor Handhabung mit der Batterie muss unbedingt
Schutzkleidung wie Schutztbrille und Arbeitshandschuhe angezogen werden.
4.2) Die Batterie, mit einem auf 12 Volt eingestellten Batterieladegerät, 2 Stunden langsam laden.
Achtung, bei Nicht-Befolgung dieser Regel, kann die Batterie beschädigt werden, und die Säure kann
während der Arbeit austreten.
WICHTIG! Bei der Montage die Polung der Batterie nicht verwechseln.
BATTERIE – ACHTUNG!
Die aus der Batterie ausströmenden Gase sind explosiv, halten Sie die Batterie von Feuer oder Funken fern.
Kontrollieren Sie regelmäßig den Flüssigkeitsstand und halten Sie die Klemmen mit Vaseline-Fett eingefettet.
Nützliche Hinweise um die Batterielebensdauer verlängern
Um ein schnelles Entladen der Batterie zu vermeiden und um die Lebensdauer der Batterie so lang wie
möglich zu bewahren, bitte die folgende Hinweise beachten:
- Wenn der Motor abgeschaltet ist, andere Vorrichtungen nicht längere Zeit eingeschaltet lassen (z. B. Lichte,
Notfalllicht).
- Vor dem Arbeiten an der elektrischen Anlage, ziehen Sie das Negativ-Kabel der Batterie ab.
- Die Batterieklemmen sehr gut befestigen.
Achtung! Wenn der Batterieladestand für lange Zeit weniger als 50% beträgt, kann die Batterie sulfatieren
und Probleme beim Starten des Motors verursachen.
1
Der PK 600 ist mit einer Identifikationsplakette ausgestattet,
auf der die Serien-Nr. angebracht wurde. Sie befindet sich
seitlich am Rahmen
2100
Page 34

EINFAHREN
In der Einfahrzeit (die ersten 50 Arbeitsstunden) vermeiden Sie, den Motor mit hohen Drehzahlen zu fahren
und benutzen Sie hingegen die Maschine nur mit 80% der zur Verfügung stehenden Leistung.
Nach den ersten 20 Arbeitsstunden und nach der Einfahrzeit:
Überprüfen Sie, dass alle Befestigungs- und Verbindungsstücke gut befestigt sind (Schrauben,
Muttern, Verbindungsteilen).
Überprüfen Sie alle Aggregate, den Motor, das Getriebegehäuse, Leitungsrohre, um sich zu
versichern, dass nirgends Öl austritt.
Stellen Sie die Handbremse ein.
Was die Einfahrzeit des Motors betrifft, lesen Sie das Motoren-Handbuch durch.
BETRIEBSANLEITUNG
BESCHREIBUNG DER BEDIENUNGSELEMENTE
Abb. 1/2
1. Anlassen: lassen Sie den Motor (Abb.1 Nr. 1) an und dadurch setzen Sie das Bremspedal in Gang,
sonst durch eine Sicherheitsvorrichtung läuft nicht der Motor an.
2. Bremspedal (Abb. 1 Nr. 1): durch das Treten auf das Bremspedal, werden die Radbremsen in Gang
gesetzt; auch die Anlassensicherheit wird in Gang gesetzt; auch die Getriebegehäusesicherheit (nur mit
stehender Maschine und angezogener Bremse ist es möglich zu schalten); endlich wird auch die
Lenkung-Sicherheitsschalter in Gang gesetzt (wenn die Maschine nicht völlig stehend ist und die Bremse
nicht angezogen ist, verhindert diese den Übergang des 2-Rad Antriebs in den Allradantrieb und zurück).
3. Gaspedal (Abb. 1 Nr. 2).
4. Hebel der Feststellbremse (Abb. 1 Nr. 4): wirkt auf die Übersetzung, gleichzeitig auf beide Achsen. Die
Bremse wird betätigt, indem der Hebel nach oben gezogen wird und das entsprechende rote Licht
schaltet sich ein. Um den Hebel wieder zu lösen, drücken Sie den Knopf am Ende des Hebels und stellen
Sie den hebel auf die niedrigste Position.
5. Gangschalthebel (Abb. 1 Nr. 3): stellt er zwei Vorwärtsgänge (reduzierte und schnelle Gänge) und
einen Rückwärtsgang zur Verfügung.
6. Hebel für die Differenzialsperreeinschaltung (Abb. 1 Nr. 5): wenn man das Hebel für die
Differenzialsperre zieht, wird das Differenzial auf der Hinterachse blockiert,
7. Schalter für Pritschenkippung (Abb. 2 Nr. 6): wenn man diesen Schalter drückt, wird die Ladepritsche
hochgehoben oder herunter gefahren.
8. Schalter für Licht und Hupe (Abb. 2 Nr. 9)
9. Druckknopf für Warnblinklicht (Abb. 2 Nr. 7)
10. Schalter für Pritschenkippung (Abb. 2 Nr. 6)
11. Blinklichtschalter (Abb. 2 Nr. 8)
12. Druckknopf für Allradantrieb (Abb. 3 Nr. 1)
13. Bremsflüssigkeitsbehälter (Abb. 2 Nr. 10)
14. Zündschloss (Abb. 2 Nr. 11)
VOR DEM ANLASSEN DES MOTORS, FÜHREN SIE DIE FOLGENDEN KONTROLLEN DURCH:
Überprüfen Sie das Getriebeöl-Niveau, das sich in der Mitte des Getriebegehäuses befindet (Abb. 17)
Überprüfen Sie das Motoröl-Niveau Abb. 13 (folgen Sie den Anweisungen im Motor-Handbuch).
Überprüfen Sie das Bremsöl-Niveau (Abb. 2 Nr. 10).
Füllen Sie den Kraftstoffbehälter durch einen Trichter mit einem sehr feinen Filter (Abb. 5).
Vergewissern Sie sich, dass sich alle Hebel im Leerlauf befinden und dann befolgen Sie die
folgenden Schritte:
1) Anlassen beim kalten Motor.
2) Das Bremsepedal treten.
3) Den Zündschlüssel ins Zündschloss stecken; den Schlüssel im Uhrzeigersinn drehen (Abb. 2 Nr. 11);
wenn der Motor anspringt, den Schlüssel sofort anlassen. Zum Ausschalten des Motors, den Schlüssel
in die zentrale Position zurückdrehen.
Wenn der Motor nicht anspringt, versuchen Sie nicht kontinuierlich den Motor zu starten, weil auf diese
Weise die Batterie sich entleert. Warten Sie hingegen einige Minuten und dann versuchen Sie nochmals
den Motor anzulassen.
1
Page 35

Außerdem überprüfen Sie häufig das Niveau der Batterieflussigkeit und wenn es notwendig ist, füllen
destilliertes Wasser zu.
4) Den Hebel für reduzierte und schnelle Gänge oder den Rückwärtsgang auf die gewünschte Position
stellen, die Parkbremse lösen, wenn sie eingeschaltet wäre, langsam den Motor beschleunigen: die
Maschine sprint an.
5) Wenn Sie anhalten wollen, kuppeln Sie den Gaspedal aus und betätigen Sie das Bremspedal.
Anmerkung: nicht mit dem getretenen Bremspedal beschleunigen, weil das stufenlose Getriebe
verschleißen wird. Zum Ausschalten des Motors, den Schlüssel in die zentrale Position zurückdrehen.
(Abb. 2 Nr. 11)
SICHERHEITSGURTE
Die Sicherheitsgurte (Abb. 6), mit dem Rücken auf Sitz anliegend und aufrecht sitzend, anlegen. Um die
Sicherheitsgurte zu schließen, führen Sie das Endstück des Gurtes A in das Gurtschloss B. Sie müssen
einen "Click" hören. Wenn der Gurt sich blockieren sollte, führen Sie den Gurt zurück und ziehen Sie ihn
ohne schroffe Bewegungen wieder heraus. Um die Sicherheitsgurte zu lösen, drücken SIe den Kopf C.
Während des Aufrollen, begleiten Sie den Gurt mit den Händen, um zu vermeiden, dass der Gurt sich
verdreht. Dank des Gurtstraffers, passen sich die Gurte automatisch dem Körper der Passagiere an und
ermöglichen ihnen sich frei zu bewegen.
GEBRAUCH DES MANUELLEN GETRIEBES
Um die reduzierten und schnellen Gänge einzulegen, treten das Bremspedal durch, nur wenn die Maschine
seht und stellen den Getriebehebel auf die gewünschte Position. Das Schema der Gänge finden Sie hinter
dem Hebel (Abb. 1 Nr. 3).
VORSICHT! Man darf den Rückwärtsgang nur einlegen, wenn die Maschine steht. Bevor Sie den
Rückwärtsgang einlegen, warten Sie zumindest 2 Sekunden, nachdem Sie das Bremspedal durchgetreten
haben. Auf diese Weise werden Sie die Getriebezähne nicht beschädigen, In Abb. 11 ist der Regler für die
der Bremseneinstellung abgebildet, der zusammen mit einem Sensor für das stufenlose Getriebe blockiert.
Ein Mikroschalter ist ans Gaspedal verbunden und erhebt die Minimalumdrehungen des Motors.
VORSICHT! Der Boden unter dem Pedal muss frei von Hindernissen sein. Vergewissern Sie sich, dass der
Fußteppich das Pedal nicht behindern und achten Sie immer darauf, die Fußfreiheit zum Bedienen der
Pedale nicht zu behindern.
GEBRAUCHSANWEISUNGEN FÜR DEN EINSATZ DER KIPP-PRITSCHE
Um die Pritsche umzukippen, führen Sie bitte die folgenden Punkte durch:
Die zwei gewünschten Querträger des Rahmens der Pritsche mit den Riegeln blockieren und
vergewissern Sie sich, dass die Scharnierbolzen gut befestigt sind.
Um die Pritsche anzuheben, drucken Sie den Kopf (Abb. 2 Nr. 6) nach oben.
Um die Pritsche anzuheben, müssen Sie den Kopf gedrückt halten. Wenn Sie den Kopf loslassen,
unterbricht sich das Anheben der Pritsche.
VORSICHT!
Niemals die Pritsche an zwei diagonal gegenüberliegenden Punkten blockieren; um eine
Fehlpositionierung zu verhindern sind die Riegel verschiedenartig geformt.
Nur Original-Riegel verwenden.
Vor jedem seitlichen Kippvorgang überprüfen Sie, ob die Seitenwände geöffnet sind und dazu den
Hebel benutzen
Vor dem Kippvorgang vergewissern Sie sich, dass das Fahrzeug auf einem ebenen und festen
Boden steht und, dass die Ladung gleichmäßig verteilt ist.
SICHERHEITSHINWEISE FÜR DEN EINSATZ DER KIPP-PRITSCHE
Die dreiseitige kippbare Pritsche ist so gebaut und mit solchen Vorrichtungen ausgestattet, dass die
maximale Sicherheit auch für Nicht-Experten gawährleistet wird. Trotzdem ist es notwendig, die folgenden
fundamentale Richtlinien zu befolgen:
Vor dem Kippvorgang vergewissern Sie sich, dass das Fahrzeug auf einem ebenen und festen
Boden steht und die Ladung gleichmäßig verteilt ist.
Vor dem Kippvorgang vergewissern Sie sich, dass sich keine Personen, Tiere oder Gegenstände in
der Nähe des Fahrzeugs befinden.
1
Page 36

Vor dem Kippvorgang vergewissern Sie sich, dass die Riegel richtig positioniert und befestigt sind,
damit die Pritsche in die gewünschte Richtung umkippt.
Während des Kippvorganges oder wenn die Pritsche schon angehoben ist, ist es verboten, auf die
Pritsche aufzusteigen, um die Ladung in Ordnung zu stellen.
Bei beladener Pritsche, vor allem bei losen Materialien, die Seitenwände vorsichtig öffnen, da der
Druck der Materialien die Seitenwände gewaltsam öffnen kann und herabfallende Materialien den
Bediener treffen und verletzen können.
Vergewissern Sie sich, dass während der Fahrt die Seitenwände der Pritsche geschlossen und
ordnungsgemäß verriegelt sind (Abb. 8).
Achten Sie darauf, dass die Maschine beim Kippen der Pritsche im Inneren von Räumlichkeiten nicht
mit Trägern, Decken, Baugerüsten, Anlagen oder anderen Elementen in Kontakt kommt.
Niemals die Pritsche anheben, wenn sich elektrische Leitungen oder ähnliches in der Nähe befiden.
Es ist verboten, die Kontrolle der Maschine zu verlassen, wenn dei Pritsche angehoben ist.
Um den Sicherheitssporn zu aktivieren, muss die Ladepritsche leer sein.
Während der Wartungsarbeiten stellen Sie immer den Sicherheitssporn unter der Pritsche (Abb. 9),
so dass die Pritsche nicht herunterkommen kann. Es ist verboten, sich unter die angehobenen
Pritsche zu begeben, ohne dass der obengenannte Sicherheitssporn sorgfältig positioniert wurde.
Wenn man die Pritsche seitlich auflädt, vergewissern Sie sich, dass das Kabel welches den
Hubzylinder am Ende seines Weges blockiert, vorhanden ist (Abb. 10).
ACHTUNG!
1) Es ist absolut verboten, die Kippvorrichtung unsachgemäß zu verwenden.
2) Der Arbeitsdruck der hydraulischen Anlage wurde vom Hersteller unter Berücksichtigung der
Ladefähigkeit des Fahrzeugs eingestellt.
3) Es ist absolut verboten, die Eichung des Drosselventils zu verändern.
4) Es ist äußerst gefährlich, sich in der Nähe der angehobenen Ladepritsche zu befinden, wenn der
Sicherheitssporn nicht eingelegt ist.
5) Es ist absolut verboten mit dem Fahrzeugs zu fahren, wenn die Pritsche auch nur teilweise
angehoben ist.
6) Achten SIe immer darauf, dass beim seitlichen Kippen der Pritsche nie über das Limit angehoben
wird.
BELADUNG VON MATERIALIEN
Das Fahrzeug gleichmäßig beladen, so dass keine Gefahr besteht, dass das beladene Material auf
die Fahrbahn herunterfällt.
Nie das zulässige Gesamtgewicht und die Nutzlast der Ladepritsche überschreiten.
Das Material muss von oben aus der niedrigst möglichen Höhe aud die Pritsche geladen werden.
Überprüfen Sie bitte, dass die Seitenwände geschlossen sind und vor allem das die Heckwände mit
den Krampen blockiert wurden.
Große Steinblöcke und Bauschutt müssen vorsichtig auf die Pritsche geladen und nicht von oben
fallen gelassen werden.
ACHTUNG!
Ungleichmäßiger Boden und abruptes Bremsen können plötzliche Bewegungen der Ladung verursachen und
deshalb können Gefahren für den Fahrer und die Passagiere entstehen. Vor dem Fahrt befestigen Sie die
Ladung mit den auf der Ladepritsche vorgesehenen Hacken. Benutzen Sie immer für die Ladung geeignete
und robuste Metallkabel, Seile und Gurte.
Vermeiden Sie, an seitlichen Hängen zu fahren.
Wegen der Bewegung der Ladung oder plötzlichen Stößen, könnte die Maschine sich überschlagen.
ACHTUNG!
Die maximale Ladefähigkeit der Maschine nicht überschreiten (überschreiten Sie nie das
Gesamtgewicht von 2100 Kg mit vollbeladener Maschine).
Vor dem Fahrt, vergewissern Sie sich, dass die Pritsche nicht angehoben ist. Vermeiden Sie immer,
mit angehobener Pritsche zu fahren.
AUSSCHALTEN DES MOTORS
Nachdem Sie alle Schalthebel in die Leeraufstellung gestellt haben, stellen Sie den Zündschlüssel auf die
Stopp-Position (Abb. 2 Nr. 12. Ziehen Sie die Handbremse hoch (Abb.1 Nr. 4).
1
Page 37

PARKEN DER MASCHINE
Befolgen Sie die folgenden Schritte:
Schalten Sie den Motor aus und ziehen Sie die Handbremse hoch; (Abb. 1 Nr. 4)
Die Räder sollen eingeschlagen sein.
Wenn die Maschine in einem starken abfallenden Gelände geparkt ist, sollten die Räder auch durch einen
Keil oder einen Stein blockiert werden.
HANDBREMSE
Der Handbremshebel (Abb. 1 Nr. 4) befindet sich auf der linken Seite des Fahrsitzes. Um die Handbremse
zu aktivieren, ziehen Sie den Hebel hoch. Damit wird die Maschine blockiert. Es reicht normalerweise
aus, bei ebenem Boden die Handbremse hochzuziehen.
VORSICHT Wenn Sie Probleme damit haben, sollen Sie sich an das Grillo Kundendienstnetz wenden, um
die Regelung auszuführen.
WARTUNG UND SCHMIERUNG
MOTORENÖL
Während der Fahrzeit, soll der erste Ölwechsel nach 20 Arbeitsstunden und dann alle 130 Arbeitsstunden
durchgeführt werden. Verwenden Sie das Motorenöl 15 W 40, Menge: 2,4 kg. Überprüfen Sie das MotorenölNiveau jede 8 Arbeitsstunden. (Halten Sie sich an das Motoren-Handbuch).
Abb. 15 Bez. B Motorenöleinfüllschraube.
Abb. 12 Bez. A Motorenölfilter.
Abb. 14 Bez. B Motorenölabflussschraube.
Abb. 13 Bez. B Motorenöl-Niveau.
Abb. 16 Bremsflüssigkeitsbehälter
HYDRAULISCHE KIPPVORRICHTUNG - SERVOLENKUNG
Überprüfen Sie das Niveau ungefähr alle 130 Arbeitsstunden durch die Tankstange (Abb. 5 Nr. B). Wenn es
notwendig ist, fügen Sie das Getriebeöl OSO 46 hinzu. Wechseln Sie das Öl einmal pro Jahr aus. Um das
alte Öl aus dem Tank abzulassen, lösen Sie die Ölabflussschraube, die sich unter dem Öltank befindet (Abb.
5 Bez. D). Die einzugießende Menge beträgt 7,5 Liter.
Der hydraulische Ölfilter befindet sich unter dem Öltank (Abb. 5 Bez. B). Wechseln Sie ihn einmal pro Jahr.
GETRIEBEÖL
Wechseln das Öl alle 1000 Arbeitsstunden mit Getriebeöl BLASIA 220 (ISO-L-CKD, DIN 51502 PGLP). Die
einzugießende Menge beträgt 2,5 Liter. Die Ölabflussschraube befindet sich unter dem vorderen Getriebe
(Abb. 18 ). Die Öleinfüllschraube befindet sich auf dem Getriebe (Abb. 17). Der Getriebeölstandanzeiger
(Abb. 17)
BREMSFLÜSSIGKEIT
Überprüfen Sie alle 8 Stunden die Bremsflüssigkeit in dem Behälter, der sich auf dem Armaturenbrett
befindet (Abb. 3 Bez. 9). Wenn es notwendig ist, fügen Sie die Bremsflüssigkeit PLUS DOT.4 (SAE J 1703)
zu. Überprüfen Sie regelmäßig die Bremsanlage auf Flüssigkeitverluste.
Bei Bedarf führen Sie die Entlüftung durch, indem Sie die folgenden Schritte befolgen: wenn man das
Werkzeug zur Verfügung hat, verbinden Sie es mit dem Deckel des Behälters; entlüften Sie zuerst die
hinteren Bremsschläuche und dann die vorderen Bremsschläuche.
Wenn die Entlüftung ohne Werkzeug durchzuführen ist, arbeiten Sie am besten an der Maschinenpumpe;
aber nicht immer gelingt dieses Unternehmen. Die Entlüftungsschraube finden Sie auf dem Bremssattel
(Abb. 19 Bez. A).
WICHTIG: Machen Sie die Schraube des Bremsflüssigkeitsbehälters (Abb. 2Bez. 11) und die umgebenden
Oberfläche sorgfältig sauber. Achten Sie darauf, dass keine Unreinheiten oder schmutzige Partikel in den
Behälter gelangen, wenn Sie die Schraube des Bremsflüssigkeitsbehälters öffnen. Um den Behälter wieder
zu füllen, benutzen Sie immer einen Trichter mit einem integrierten Sieb-Filter von max. 0,12 mm.
VORSICHT! Die Bremsflüssigkeit saugt die Feuchtigkeit auf. Deshalb wenn die Maschine in sehr feuchten
Bereichen benutzt wird, muss die Bremsflüssigkeit einmal pro Jahr gewechselt werden.
VORSICHT! Die Bremsflüssigkeit ist giftig und höchst korrosiv. Nach Kontakt mit dieser Flüssigkeit, waschen
Sie sich mehrmals sorgfältig mit Wasser und Seife.
1
Page 38

BREMSENEINSTELLUNG
Die Handbremse ist mit selbst-regulierenden Scheibenbremsen ausgestattet.
Die Handbremse kann eingestellt werden, indem Sie den Regler auf dem Kabel benutzen (Abb. 4 Bez. a).
WICHTIG!
Die Kardangelenk, die Übersetzung, das Drehgelenk des Fahrzeugs und die Lenkköpfe regelmäßig
einfetten.
LUFT FILTER
Der Luftfilter befindet sich unter der Pritsche (Abb. 22). In staubigen Räumen ist es empfehlenswert den
Filter täglich zu reinigen.
GUMMISCHLÄUCHE
Um die Gummischläuche der Bremsanlage und die Versorgungsschläuche zu warten, befolgen Sie die
Anweisungen in diesem Kapitel. Das Ozon, hohe Temperaturen und längerem Flüssigkeitsmangel in der
Anlage könnten zu Verhärtung und Brüchen der Gummischläuche führen und deshalb Flüssigkeitsverluste
verursachen. Es ist deswegen notwendig, die Gummischläuche sorgfältig und regelmäßig zu überprüfen.
STROMANLAGE (SCHMELZSICHERUNGSKASTEN)
Die Stromanlage wird durch Schmelzsicherungen geschützt, die bei Unterbrechungen die Versorgung
unterbricht. Der Schmelzsicherungskasten befindet sich vor dem Beifahrersitz (Abb. 23). Nachdem die
Ursache der Störung ausfindig gemacht und repariert wurde, muss die defekte Schmelzsicherung durch eine
mit denselben Eigenschaften ersetzt werden. Es darf absolut keine Schmelzsicherung mit anderen
Eigenschaften eingesetzt werden. Sollten die Störungen andauern, wenden Sie sich an einen GrilloFachhändler.
ELEKTROVENTIL ZUR ANHEBUNG DER LADEPRITSCHE
Auf Abb. 25 ist das Elektroventil zur Steuerung des Kippvorgangs der Ladepritsche abgebildet.
PRIORITÄTSVENTIL
Auf Abb. 26 ist das Prioritätsventil abgebildet, das den Ölzufluss der Servolenkung vom Elektroventil des
Motorabgaskolbens trennt.
SCHMIERNIPPEL DES REGLERS ABB. 29
ANHÄNGERKUPPLUNG ABB. 27
VORDERE ANHÄNGUNG ABB. 28
ELEKTROVENTIL DES ALLRADANTRIEBS ABB. 24
HEIZUNGS-KIT (ZUBEHÖR AUF ANFRAGE) ABB. 30
SCHEIBENWISCHERSCHALTER ABB. 31
1
Page 39

WARTUNG AM SAISON-ENDE
Wenn das Fahrzeug für längere Zeit stillsteht, befolgen Sie die folgenden Anweisungen:
Führen Sie eine gründliche Reinigung der Maschine durch.
Stellen Sie die Maschine in einem nicht feuchten und nicht staubigen Raum.
Nehmen Sie die Batterie heraus und bewahren Sie in einem trockenen und frostfreien Raum auf. Die Batterie einmal pro
Monat aufladen.
Legen Sie Holzbretter zur Isolation unter die Maschinenräder, um das Fahrzeug vom Boden zu trennen. Das Fahrzeug mit
einer Schutzdecke bedecken.
ZUSAMMENFASSENDE TABELLE ZUR WARTUNG DER MASCHINE
Die folgende Tabelle wird Ihnen dabei helfen, Ihre Maschine stets im optimalen Zustand zu halten, im Bezug auf Sicherheit und
Effizienz. Sie finden darin die Liste der wichtigsten Kontroll-, Wartungs- und Schmierarbeiten, und wann genau diese Kontrolle am
besten durchzuführen sind. In den daneben stehenden Kästchen können Sie notieren, wann (Datum oder Betriebsstunden) Sie diese
Operationen durchgeführt haben. VORSICHT! Die erste Generalüberprüfung muss unbedingt nach den ersten 50
Arbeitsstunden durchgeführt werden. Motoröl und Filter auswechseln.
Danach halten Sie sich an die folgende Tabelle:
ZUSAMMENFASSENDE TABELLE ZUR WARTUNG DER MASCHINE
ARBEITSGANG
ALLE 8
STD.
DIE
ERSTEN
50 STD.
ALLE 100
STD.
ALLE
200 STD.
ALLE 250
STD.
ODER
JÄHR-
LICH
Befestigung der Muttern an den Rädern prüfen
• •
Gummischläuche der Bremsanlage, Versorgungsanlage und
Hydaulikanlage prüfen
•
Reifendruck prüfen
•
Bremsabnutzung prüfen
•
Batteriespannung prüfen
•
Motor, Getriebe und Rohrleitungen prüfen
•
Luftfilter des Motors prüfen und reinigen
•
Bremsflüssigkeitsstand prüfen
•
Kühlflüssigkeitsstand prüfen
•
Getriebeölstand prüfen
•
Motorölstand prüfen
•
Kühlflüssigkeit wechseln
•
Motoröl wechseln
• •
Bremsflüssigkeit wechseln
•
Luftfilter wechseln
*
Kraftstoffilter wechseln
•
- Bitte das Motorenhandbuch mit der kompletten Liste und dessen Ausführungsweise nachschlagen.
- Die Schmierung aller Teile der Maschine sollte jedesmal durchgeführt werden, wenn ein langer Stand der Maschine vorgesehen ist.
● empfohlener Arbeitsgang
٭ bei Bedarf auszuführender Arbeitsgang
1
44
Page 40

Comandi - Fig 2
Comandi – fig. 1
1
2
3
4
5
6
7
8
9
10
11
Page 41

1- Brake control pedal
2- Throttle pedal
3 - Gear control lever – High – Low
– reverse gear
4- Parking brake lever
5- Differential locking engagement
selector
6- Dumper activating button
7- Emergency light switch
8 - Flashing light beacon
9- Lights commutator and horn
10- Brake fluid
11- Key for start, services
predisposition, engine start and
stop
1- Pedale pedale freno
2- Pedale acceleratore
3 - Leva comando marce – lenta –
veloce – RM
4- Leva comando freno di
stazionamento
5- Selettore inserimento
bloccaggio differenziale
6- Pulsante azionamento
ribaltabile
7- Pulsante luci di emergenza
8- Commutatore luce
lampeggiante
9- Commutatore luci e clacson
10- Liquido dei freni
11- Commutatore a chiave per
accensione e arresto motore
1- Pédale de commande des freins
2- Pédale de l'accélérateur
3- Levier de commande des
vitesses – réduites – rapides –
marche arrière
4- Levier de commande du frein de
stationnement
5- Sélecteur pour l'enclenchement
du blocage différentiel
6- Bouton-poussoir d'actionnement
de la benne basculante
7- Bouton-pressoir feu
d'émergence
8 - Commutateur feu clignotant
9- Commutateur feux et clacson
10- Liquidedes freins
11- Commutateur à clé pour le
démarrage, et arrêt du moteur
1- Bremspedal
2- Fahrpedal
3 – Ganghebel für reduzierte und
schnelle Gänge u. Rückwärtsgang
4- Handbremshebel
5- Differenzialsperreinschalter
6- Hubvorrichtungsschalter für
Ladepritsche
7- Druckknopf Warnblinklicht
8- Blinklichtschalter
9- Schalter für Licht und Hupe
10- Bremsflüssigkeit
11- Zündschloss
1 - Pedal de mando de los frenos
2 - Pedal del acelerador
3- Palanca de mando de variación
de velocidad- reducida y veloz
4- Palanca de mando del freno de
mano
5 - Selector de accionamiento de
bloqueo diferencial
6 - Botón de accionamiento de
vaciado
7 - Conmutador testigo luces de
emergencia.
8 - Conmutador de las luces
9 - Conmutador de las luces y del
clacson
10 – Líquido de los frenos
11 - Conmutador de llave para
arranque y detención del motor
Page 42

1. Button for 4-drive
2. Electric socket 12V 180W.
3. Hour-meter.
4. Fuel reserve.
5. Differencial lock
6. Brake fluid container
1. Deviatore 4 ruote sterzanti
2. Presa elettrica 12V 180W.
3. Contaore
4. Riserva carburante.
5. Spia bloccaggio differenziale
6. Vaschetta liquido freni
1. Bouton-pressoir déviation 4 roues
motrices
2. Prise électrique 12V 180W.
3. Compte heure
4 Réserve de carburant.
5 Témoin blocage différentiel
6 Réservoir liquide des freins
1. Allradlenkungsdruckknkopf
2. Steckdose 12 V 180 W
3. Stundenzähler
4. Kontroll-Leuchte für Treibstoffreserve
5. Differentialsperren - Warnblinklicht
6. Bremsflüssigkeitsbehälter
1. Botón de deviación de las 4 ruedas
motrices
2. Prensa eléctrica 12V 180W
3. Cuenta-horas
4. Reserva carburante
5. Testigo bloqueo de diferencial
6. Depósito de líquido de frenos.
Plancia Strumenti - Fig 3
2 3
4
1
5
Page 43

Fig. 3
Fig. 4
Fig. 5
Fig. 6
Fig.7 Fig. 8
C
A
B
A
B
Page 44

Fig. 9
Fig. 10
Fig. 11
Fig. 12
Fig. 13
Fig. 14
B
B
A
Page 45

Fig. 15
Fig. 16
Fig.17 Fig. 18
Fig. 19
Fig. 20
B
A
A
Page 46

Page 47

Fig. 21
Fig. 22
Fig. 25
Fig. 26
Fig. 23
Fig. 24
Page 48

Fig. 28
Fig. 30
Fig. 31
Fig. 28
Fig. 26
Fig. 27
A
Page 49

Page 50

Page 51

Grillo S.p.A. Via Cervese, 1701 - 47521 Cesena ( FC ) – Italia / www.grillospa.it / e-mail: grillo@grillospa.it
EC DECLARATION OF CONFORMITY / DICHIARAZIONE DI CONFORMITÀ CE / CERTIFICAT DE CONFORMITE CE /
EG-KONFORMITÄTSERKLÄRUNG / CERTIFICADO DE CONFORMIDAD CE / DECLARAÇÃO CE DE CONFORMIDADE
(2006/42/CE, II.A)
The undersigned / Io sottoscritto / Je soussigné / Der Unterzeichner / Yo suscrito / Eu abaixo assinado:
Ing. Andrea Pinza
Authorized officer of / In qualità di legale rappresentante della / En qualité de représentant légal de la / Als rechtlicher Vertreter der / En calidad de legal
representante de la / Na qualidade de representante legal da
GRILLO SPA – Via Cervese, 1701 – 47521 CESENA (FC) – ITALY
Hereby certifies that the underwritten machinery / Dichiaro che la
macchina sotto indicata / Certifie que la machine indiquée ci-dessous /
Bescheinigt, dass die untenstehende Maschine / Certifico que la máquina
indicada a continuación / Certifica que a máquina abaixo indicada:
Authorized person to compile the relevant technical documentation /
Persona autorizzata alla compilazione del fascicolo tecnico / Personne
autorisée à constituer le dossier technique / Person, die
bevollmächtigt ist, die technischen Unterlagen zusammenzustellen /
Persona facultada para elaborar el expediente técnico / Pessoa
autorizada a compilar a documentação técnica relevante:
Lawn mower / Rasaerba / Tondeuse / Rasenmäher / Cortacésped /
Cortadora de relva
Cenni Giancarlo
Grillo Spa Via Cervese, 1701 – 47521 CESENA (FC) – ITALY
Machine model / Maccina tipo / Machine type / Maschine Typ / Máquina tipo : PK600
Serial n° / Numero / Numéro / Nummer / Número :
Engine / Motore / Moteur / Motor / Motor : BRIGGS AND STRATTON 18 HP
Is in compliance with the relevant provisions of the Directive / Rispetta le disposizioni pertinenti della Direttiva / Satisfait à l'ensemble des dispositions
pertinentes de la Directive / Entspricht allen einschlägigen Bestimmungen dieser Richtlinie / Cumple todas las disposiciones aplicables de la
presente Directiva / Está em conformidade com as disposições relevantes da Directiva
2006/42/CE
And it is in conformity with the relevant provisions of the following EC Directives: / Inoltre essa è conforme alle disposizioni pertinenti delle seguenti
direttive comunitarie: / Et elle est conforme aux dispositions pertinentes des suivantes directives communautaires: / Und stimmt mit den einschlägigen
Bestimmungen folgender gemeinschaftlicher Richtlinien überein: / Y es conforme con las disposiciones pertinentes de las siguientes directivas
comunitarias / E está em conformidade com as disposições relevantes das directivas comunitarias:
EN1553 – EN836
CESENA, ________________
NOISE LEVELS: 87 dBA, 3300 rpm engine speed.
RUMOROSITÀ: 87 dBA, motore a 3300 giri/min.
NIVEAUX SONORES: 87 dBA, régime moteur de 3300 tr/min.
GERÄUSCHEMISSION: 87 dBA, Motordrehzahl 3300 UpM.
NIVELES DE RUIDO: 87 dBA, motor a 3300 rpm.
VIBRAZIONI
VIBRATION
SCHWINGUNG
VIBRACIONES
m/s
2
X 4,87 0,42
Y 4,52 0,3
Z 2,21 0,18
Page 52

 Loading...