

Page 1

BOP 7303 AB - BOP 7303 AX - BOP 8526 AX - BOP 8826 AX
NAVODILA ZA UPORABO ZA PIROLITINO VGRADNO PEICO MOD. BOP7303 - BOP8526 - BOP8826
INSTRUCTION FOR USE FOR BUILT IN PYROLITIC OVEN MOD. BOP7303 - BOP8526 - BOP8826
GEBRAUCHSANLEITUNG FÜR PYROLYT ISCHE EINBAUBACKOFEN MOD. BOP7303 - BOP8526 - BOP8826
INSTRUCTIONS POUR L’ USAGE DES FOURS A ENCASTREMENT PYROLITIQUE
MOD. BOP7303 - BOP8526 - BOP8826
BRUGSANVISNING TIL INDBYGNINGSOVNE MED PYROLYSE MOD. BOP7303 - BOP8526 - BOP8826
KÄYTTÖOHJEET KAAPISTOON UPOTETUILLE PYROLYYSI-PUHDISTUS BOP7303 - BOP8526 - BOP8826
UPUTE ZA UPORABU I ODRŽAVANJE UGRADBENA PENICA MOD. BOP7303 - BOP8526 - BOP8826
NÁVOD NA OBSLUHU A ÚDRŽBU VST AVANÁ RÚRA MOD. BOP7303 - BOP8526 - BOP8826
VESTAVNÁ TROUBA MOD. BOP7303 - BOP8526 - BOP8826
BRUKSANVISNING OCH SKÖTSELANVISNING FÖR INBYGGDA UGNAR BOP7303 - BOP8526 - BOP8826
BRUKS- OG VEDLIKEHOLDSANVISNING FOR INNBYGGINGSOVNER BOP7303 - BOP8526 - BOP8826
BOP7303 - BOP8526 - BOP8826
GEBRUIKS- EN ONDERHOUDSAANWIJZING VOOR PYROLYTISCHE INBOUWOVENS
MOD. BOP7303 - BOP8526 - BOP8826
INSTRUCCIONES DE USO PARA HORNOS PIROLÍTICOS MOD. BOP7303 - BOP8526 - BOP8826
PAIGALDAMISE JUHISED MOD. BOP7303 - BOP8526 - BOP8826
IEK RTAS UZST D ŠANAS PAM C BA MOD. BOP7303 - BOP8526 - BOP8826
INSTRUKCJA USTAWIENIA MOD. BOP7303 - BOP8526 - BOP8826
ÜZEMBE HELYEZÉSI UTASÍTÁSOK MOD. BOP7303 - BOP8526 - BOP8826
MONTAVIMO INSTRUKCIJA MOD. BOP7303 - BOP8526 - BOP8826
Page 2

Page 3
SL
Simbol na izdelku ali njegovi embalaži označuje, da z izdelkom ni dovoljeno
ravnati kot z običajnimi gospodinjskimi odpadki. Izdelek odpeljite na
ustrezno zbirno mesto za predelavo električne in elektronske opreme. S
pravilnim načinom odstranjevanja izdelka boste pomagali preprečiti
morebitne negativne posledice in vplive na okolje in zdravje ljudi, ki bi se
lahko pojavile v primeru nepravilnega odstranjevanja izdelka. Za
podrobnejše informacije o odstranjevanju in predelavi izdelka se obrnite na
pristojen mestni organ za odstranjevanje odpadkov, komunalno službo ali
na trgovino, v kateri ste izdelek kupili.
EN
The symbol on the product or on its packaging indicates that this product
may not be treated as household waste. Instead it shall be handed over to
the applicable collection point for the recycling of electrical and electronic
equipment. By ensuring this product is disposed of correctly, you will help
prevent potential negative consequences for the environment and human
health, which could otherwise be caused by inappropriate waste handling of
this product. For more detailed information about recycling of this product,
please contact your local city office, your household waste disposal service
or the shop where you purchased the product.
DE
Dieses Produkt darf am Ende seiner Lebensdauer nich über den normalen
Haushaltsabfall entsorgt werden, sondern muss an einem Sammelpunkt für
das Recycling von elektrischen und elektronischen Geräten abgegeben
werden. Das Symbol auf dem Produkt, der Gebrauchsanleitung oder der
Verpackung weist darauf hin. Die Werkstoffe sind gemäß ihrer
Kennzeichnung wiederverwertbar. Mit der Wiederverwendung, der
stofflichen Verwertung oder anderen Formen der Verwertung von Altgeräten
leisten Sie einen wichtigen Beitrag zum Schutze unserer Umwelt. Bitte
erfragen Sie bei der Gemeindeverwaltung die zuständige Entsorgungsstelle.
FR
Ce symbole figure sur le produit ou sur son emballage en application de la
directive européenne 2002/96/CE sur les Déchets d’Équipement Électrique
et Électronique (DEEE). Cette directive sert de règlement cadre à la
reprise, au recyclage et à la valorisation des appareils usagés dans toute
l’Europe. Ce produit doit donc faire l’objet d’une collecte sélective. Lorsque vous
ne l’utiliserez plus, remettez-le à un service de ramassage spécialisé ou à une
déchèterie qui traite les DEEE ; vous contribuerez ainsi à éviter des
conséquences néfastes pour la santé et l'environnement. Pour tout
renseignement sur la mise au rebut et le recyclage de ce produit, veuillez
contacter la mairie ou le service de la propreté de votre commune, ou encore le
magasin dans lequel vous l'avez acheté.
1
Page 4

DK
Elektrisk og elektronisk udstyr indeholder materialer, komponenter og
stoffer, der kann være skadelige for menneskers sundhed og for miljøet,
hvis kasseret elektrisk og elektronisk udstyr ikke håndteres korrekt.
Elektrisk og elektronisk udstyr er mærket med nedenstående overkrydsede
skraldespand. Den symboliserer, at elektrisk og elektronisk udstyr ikke må
bortskaffes sammen med usorteret husholdningsaffald, men skal indsamles
særskilt. Alle kommuner har etableret indsamlingsordninger, hvor elektrisk og
elektronisk udstyr gratis kann afleveres af borgerne på genbrugsstationer og
andre indsamlingssteder eller bliver afhentet direkte fra husholdningerne.
Nærmere information kann fås hos kommunens tekniske forvaltning.
FI
Symboli joka on merkitty tuotteeseen tai sen pakkauk seen, osoitt aa, että
tätä tuotetta ei saa käsitellä talousjätteenä. Tuote on sen sijaan
luovutettava sopivaan sähkö- ja elektroniikkalaitteiden kierrätyksestä
huolehtivaan keräyspisteeseen. Tämän tuotteen asianmukaisen
hävittämisen varmistamisella autetaan estämään sen mahdolliset ympäristöön ja
terveyteen kohdistuvat haittavaikutukset, joita voi aiheutua muussa tapauksessa
tämän tuotteen epäasianmukaisesta jätekäsittelystä. Tarkempia tietoja tämän
tuotteen kierrättämisestä saa paikallisesta kunnantoimistosta,
talousjätehuoltopalve lusta tai liikke estä, josta tuote on ostettu.
HR
Simbol na proizvodu ili na njegovoj ambalaži označuje da se s tim
proizvodom ne smije postupiti kao s otpadom iz domaćinstva. Umjesto toga
treba biti uručen pr ik la dnim s abi rni m t očkama za recikliranje elektroni čkih i
električkih aparata. Ispravnim odvoženjem ovog proizvoda spriječit ćete
potencijalne negativne posljedice na okoliš i zdravlje ljudi, koje bi inače mogli
ugroziti neodgovarajućim rukovanjem otpada ovog proizvoda. Za detaljnije
informacije o recikliranju ovog proizvoda molimo Vas da kontaktirate Vaš lokalni
gradski ured, uslugu za odvoženje otpada iz domaćinstv a ili trgovin u u kojoj ste
kupili proizvod.
SK
Symbol na výrobku alebo na jeho obale znamená, že s výrobkom sa
nesmie zaobchádzať ako s domovým odpadom. Namiesto toho ho treba
odovzdať v zbernom stredisku na recykláciu elektrických alebo
elektronických zariadení. Zabezpečte, že tento výrobok bude zlikvidovaný
správnym postupom, aby ste predišli negatívnym vplyvom na životné prostredie a
ľudsk é zdra vie, čo by bolo spôsobené nesprávnym postupom pri jeho likvidácii.
Podrobnejšie informácie o recyklácii tohto výrobku získate, ak zavoláte miestny
úrad vo Vašom bydlisku, zberné suroviny alebo obchod, v ktorom ste výrobok
kúpili.
2
Page 5

CS
Symbol na výrobku nebo jeho balení udává, že tento výrobek nepatří do
domácího odpadu. Je nutné odvézt ho do sběrného místa pro recyklaci
elektrického a elektronického zařízení. Zajištěním správné likvidace tohoto
výrobku pomůžete zabránit negativním důsledkům pro životní prostředí a
lidské zdraví, které by jinak byly způsobeny nevhodnou likvidací tohoto výrobku.
Podrobnější informace o recyklaci tohoto výrobku zjistíte u příslušného místního
úřadu, služby pro likvidaci domovního odpadu nebo v obchodě, kde jste výrobek
zakoupili.
SE
Symbolen på produkten eller emballaget anger att produkten inte får
hanteras som hushållsavfall. Den skall i stället lämnas in på
uppsamlingsplats för återvinning av el- och elektronikkomponenter. Genom
att säkerställa att produkten hanteras på rätt sätt bidrar du till att förebygga
eventuellt negativa miljö- och hälsoeffekter som kan uppstå om produkten
kasseras som vanligt avfall. För ytterligare upplysningar om återvinning bör du
kontakta lokala myndigheter eller sophämtningstjänst eller affären där du köpte
varan.
NO
Symbolet på produktet eller på emballasjen viser at dette produktet ikke må
behandles som husholdningsavfall. Det skal derimot bringes til et mottak for
resirkulering av elektrisk og elektronisk utstyr. Ved å sørge for korrekt
avhending av apparatet, vil du bidra til å forebygge de negative
konsekvenser for milj ø og helse som gal håndtering kan medføre. For nærmere
informasjon om resirkulering av dette produktet, vennligst kontakt kommunen,
renovasjonsselskapet eller forretningen der du anskaffet det.
RU
Символ на изделии или на его упаковке указывает, что оно не
подлежит утилизации в качестве бытовых отходов. Вместо этого его
следует сдать в соответствующий пункт пр
иемки электронного и
электрооб
орудования для последующей утилизации. Соблюдая
правила утилизации изделия, Вы поможете предотвратить причинение
окружающей среде и здоровью людей потенциального ущерба, который
возможен, в противном случае, вследствие неподобающего обращения с
подобными отходами. За более подробной информацией об утилизации
этого изделия просьба обращаться к местным властям, в службу по вывозу
и утилизации отходов или в магазин, в кот
ором Вы приобрели изделие.
3
Page 6

NL
Het symbool op het product of op de verpakking wijst erop dat dit product
niet als huishoudafval mag worden behandeld. Het moet echter naar een
pla at s wor d en geb r a c ht wa ar el ek tr i s ch e en el ek t r onisc h e a ppa r at u ur wo r dt
gerecycled. Als u ervoor zorgt dat dit product op de correcte mani er wordt
verwijderd, voorkomt u mogelijk voor mens en milieu negatieve gevolgen die zich
zouden kunnen voordoen in geval van verkeerde afvalbehandeling. Voor meer
details in verband met het recyclen van dit product, neemt u het best contact op
met de gemeentelijke instanties, het bedrijf of de dienst belast met de
verwijdering van huishoudafval of de winkel waar u het product hebt gekocht.
ES
Este aparato lleva el marcado CE en conformidad con la Directiva
2002/96/EC del Parlamento Europeo y del Consejo sobre residuos de
aparatos eléctricos y electrónicos (RAEE). La correcta eliminación de este
producto evita consecuencias negativas para el medioambiente y la salud.
El símbolo en el producto o en los documentos que se incluyen con el producto,
indica que no se puede tratar como residuo doméstico. Es necesario entregarlo
en un punto de recogida para reciclar aparatos eléctricos y electrónicos.
Deséchelo con arreglo a las normas medioambientales para eliminación de
residuos. Para obtener información más detallada sobre el tratamiento,
recuperación y reciclaje de este producto, póngase en contacto con el
ayuntamiento, con el servicio de eliminación de residuos urbanos o la tienda
donde adquirió el producto.
ET
Tootel või selle pakendil asuv sümbol näitab, et seda toodet ei tohi
kohelda majapidamisjäätmetena. Selle asemel tuleb toode anda
vastavasse elektri- ja elektroonikaseadmete taastöötlemiseks kogumise
punkti. Toote õige utiliseerimise kindlustamisega aitate ära hoida
võimalikke negatiivseid tagajärgi keskkonnale ja inimtervisele, mida võiks
vastasel juhul põhjustada selle toote ebaõige käitlemine. Lisainfo saamiseks selle
toote taastöötlemise kohta võtke ühendust kohaliku linnavalitsuse, oma
majapidamisjäätmete utiliseerimisteenuse või kauplusega, kust te toote ostsite.
LV
Simbols uz produkta vai tā iepakojuma norāda, ka šo produktu nedrīkst
izmest saimniecības atkritumos. Tas jānodod attiecīgos elektrisko un
elektronisko iekārtu savākšanas punktos pārstrādāšanai. Nodrošinot
pareizu atbrīvošanos no šī produkta, jūs palīdzēsiet izvairīties no
potenciālām negatīvām sekām apkārtējai videi un cilvēka veselībai, kuras
iespējams izraisīt, nepareizi izmetot atkritumos šo produktu. Lai iegūtu
detalizētāku informāci
ju par atbrīvošanos no šī produkta, lūdz
u sazinieties ar jūsu
pilsētas domi, saimniecības atkritumu savākšanas dienestu vai veikalu, kurā jūs
iegādājāties šo produktu.
4
Page 7
PL
Symbol na produkcie lub na opakowaniu oznacza, że tego produktu nie
wolno traktować tak, jak innych odpadów domowych. Należy oddać go do
właściwego punktu skupu surowców wtórnych zajmującego się
złomowanym sprzętem elekt rycznym i elektr onicznym . Właściwa utylizacja i
złomowanie pomaga w eliminacji niekorzystnego wpływu złomowanych
produktów na środowisko naturalne oraz zdrowie. Aby uzyskać szczegółowe
dane dotyczące możliwości recyklingu niniejszego urządzenia, należy
skontaktować się z lokalnym urzędem mi asta, służbami oczyszczania miasta lub
sklepem , w którym produk t został zakupiony.
HU
A terméken vagy a csomagoláson található szimbólum azt jelzi, hogy a
termék nem kezelhető háztartási hulladékként. Ehelyett a terméket el kell
szállítani az elektromos és elektronikai készülékek újrahasznosítására
szakosodott megfelelő begyűjtő helyre. Azzal, hogy gondoskodik ezen
termék helyes hulladékba helyezéséről, segít megelőzni azokat, a környezetre és
az emberi egészségre gyakorolt potenciális kedvezőtlen következményeket,
amelyeket ellenkező esetben a termék nem megfelelő hulladékkezelése
okozhatna. Ha részletesebb tájékoztatásra van szüksége a termék
újrahasznosítására vonatkozóan, kérjük, lépjen kapcsolatba a helyi
önkormányzattal, a háztartási hulladékok kezelését végző szolgálattal vagy azzal
a bolttal, ahol a terméket vásárolta.
LT
Šis ant produkto arba jo pakuotės e
santis simbolis
nurodo, kad su šiuo
produktu negalima elgtis kaip su buitinėmis šiukšlėmis. Jį reikia perduoti
atitinkam surinkimo punktui, kad elektros ir elektronikos įranga būtų
perdirbta. Tinkamai išm esdami šį produktą, jūs prisidėsite prie apsaugos
nuo galimo neigiamo poveikio aplinkai ir žmonių sveikatai, kurį gali sukelti
netinkamas šio produkto išmetimas. Dėl išsamesnės informacijos apie šio
produkto išmetimą, prašom kreiptis į savo miesto valdžios įstaigą, buitinių
šiukšlių išmetimo tarnybą arba parduotuvę, kuri oje pirkote šį produktą.
5
Page 8
6
Page 9

Navodila za namestitev
Opozorilo in varnostni napotek
Pred prvo uporabo pečice pozorno preberite ta navodila za uporabo, da bi se
povsem seznanili z varno namestitvijo, uporabo ter nego oz. vzdrževanjem
svojega novega aparata.
Ta aparat je potrebno pravilno namestiti v skladu s proizvajalčevimi navodili;
namestitev naj opravi ustrezno usposobljena oseba.
Proizvajalec zavrača vsako odgovornost za poškodbe oseb ali materialno škodo, ki
nastane zaradi neustrezne ali napačne namestitve te naprave.
Poskrbite, da bosta napetost in frekvenca napajalnega omrežja ustrezala podatkom
na napisni tablici, ki se nahaja na spodnjem delu sprednje stranice pečice.
Opozorilo: ta aparat je potrebno ozemljiti.
Naše podjetje zavrača vsakršno odgovornost v primeru napačne ozemljitve ali
ozemljitve, ki ne ustreza veljavnim predpisom.
Pred kakršnimi koli vzdrževalnimi ali servisnimi opravili je potrebno izklopiti napajanje
z elekt ri čno energijo, iz sicer tako, da izvlečete vti kač priključnega kabla iz vtičnice,
ali odstranite ustrezno varovalko.
V skladu z našo politiko nenehnih inovacij si pridržujemo pravi co do prilagoditev ali
sprememb proizvoda brez predhodne ga obvest i la.
Med uporabo pečice ne dovolite otrokom v njeno bližino, saj se njena zunanja
površina, vključno s steklom, močno segreje; tako obstaja nevarnost opeklin ali
drugih poškodb. Otroci ali onemogle osebe ne smejo uporabljati tega aparata brez
nadzora. Pazite, da se majhni otroci ne bodo igrali z aparatom.
Kadar pečico uporabljajo starejše ali slabotne osebe, nadzirajte delovanje aparata.
V predalu pod pečic o ni kako r ne s hr anj ujt e vn etl ji vi h sno vi al i mat er ial ov, sa j ob staj a
nevarnost požara. Ne postavljajte težkih predmetov na vrata pečice in ne sedajte
nanje, saj lahko s tem poškodujete tečaje.
Kadar pečete z oljem ali mastjo, ne puščajte pečice brez nadzora, saj obstaja
nevarnost požara.
7
Page 10

Da bi prep rečili poškodbe emajliranih površin v notranjosti, ne postavljajte posod ali
pekačev na dno pečice in ne oblagajte dna pečice z al umi ni jevo folijo .
Med peko hrana oddaja paro. Da ne bi prišlo do presežnega kopičenja pare v pečici,
le-ta odvečno paro odvede skozi prezračevalne odprtine. Ta para lahko kondenzira in
tako na hladnih zunanjih stenah pečice nastanejo kapljice; zato bo morda med peko
potrebno z mehko krpo obrisati odvečno vlago. Tako boste tudi preprečili nalaganje
umazanije ali razbarvanje zunanjih površin pečice, ki bi ju lahko povzročila para, ki
med peko izhaja iz hrane.
Pred prvo uporabo
Pred čiščenjem izklopite pe čico, tako da izvlečete vtikač priključnega kabla iz vtičnice
ali odstranite varovalko. Odstranite morebitne dele embalaže ter pripomočke iz
pečice. Obrišite notranjost pečice z vročo vodo ter blagim detergentom.
Pozorno izperite pečico s pomočjo vlažne krpe. Police pečice ter pripomočke pomijte
v pomivalnem stroju, ali z vročo vodo in blagim detergentom; nato jih temeljito
posušite.
Tehnični podatki
Ta aparat ustreza standardom 73/23 CEE ter 93/68 CEE EMC 89/336 CEE.
Napetost ≈ 220-240 V faza + nevtralni vod
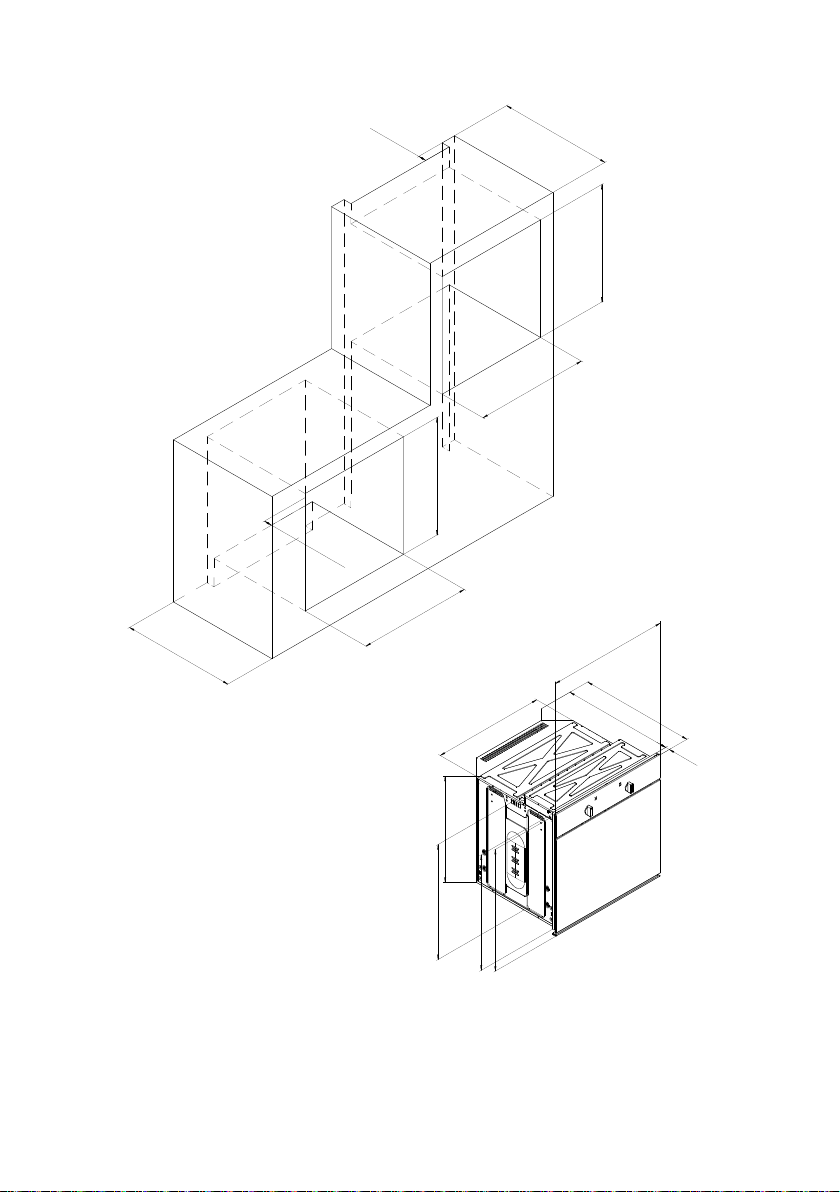
Mere vgradne pečice (mm):
Dolžina: 598
Globina: 565,5
Višina : 600,3
Prostornina: 61 litrov
Obremenitev pečice
: 2,9 – 3,4 kW
8
Page 11

Vgradnja pečice
POMEMBNO: Aparat je potrebo pravilno namestiti v skladu z navodili proizvajalca;
namestitev sme opraviti le ustrezno usposobljena oseba. Pred izvajanjem
vzdrževalnih ali servisnih opravil je potrebno izklopiti pečico iz električnega omrežja.
ELEKTRIČNA POVEZAVA: Pred priključitvijo aparata na električno omrežje poskrbite
za naslednje:
• da napetost omrežja ustreza napetosti, navedeni na napisni tablici na dnu ohišja;
• da naprava za prekinitev ob preobremenitvi ter hišna napeljava lahko preneseta
obremenitev aparata (glej napisno tablico);
• da je na napajalni električni sistem opremljen z delujočim učinkovitim
ozemljitvenim vodom ter da je vtičnica ali stikalo z razmikom med kontakti vsaj 3
mm po namestitvi aparata lahko dostopno.
• Če vtikač ni lahko dostopen mora oseba, ki namešča pečico, namestiti stikalo z
razmikom med kontakti 3 mm ali več.
Če je potrebno podaljšati priključni kabel, mora presek kabla znašati vsaj 1,5mm,
kabel pa mora biti tipa H05RR-F. Za preprosto vzdrževanje aparata mora biti kabel
dovolj dolg.
Opozorilo: Ta aparat je potrebno ozemljiti.
Za ta aparat je potrebno priskrbeti ustrezno ozemljitev.
Proizvajalec zavrača vsako odgovornost za napake na ozemljitvi, če ta ni izvedena v
skladu z veljavnimi predpisi. Ta aparat je predviden za vgradnjo v standardno 600
mm široko odprtino oz. ohišje za pečico. Ohišje (odprtina), pohištvo okoli njega ter vsi
materiali, uporabljeni pri namestitvi, morajo v času delovanja pečice prenesti vsaj
temperaturo, ki je 85°C višja od temperature okolja. Poleg tega morajo biti vrata
sosednjih omar na vseh točkah vsaj 4 mm oddaljena od aparata. Določene vrste
vinilnega ali laminatnega kuhinjskega pohištva so posebej občutljive na vročino, ki na
njih povzroči poškodbe ali spremembe barve. Vsaka poškodba ali razbarvanje
materialov, četudi do tega pride pri temperaturi, ki je nižja od seštevka temperature
okolja + 85°C, na materialih, ki niso oddaljeni vsaj 4 mm od aparata, so izključno
odgovornost lastnika oz. uporabnika.
Za vgradnjo pod delovno površino so dimenzije namestitve naslednje (glej sliko
spodaj):
Pozor:
Ko ustrezno usposobljena oseba namesti pečico v bližini drugih električnih
aparatov, bodite pozorni, da noben električni kabel ni v bližini ali v stiku z vročimi
stranicami pečice.
9
Page 12
BOP 8826 AX
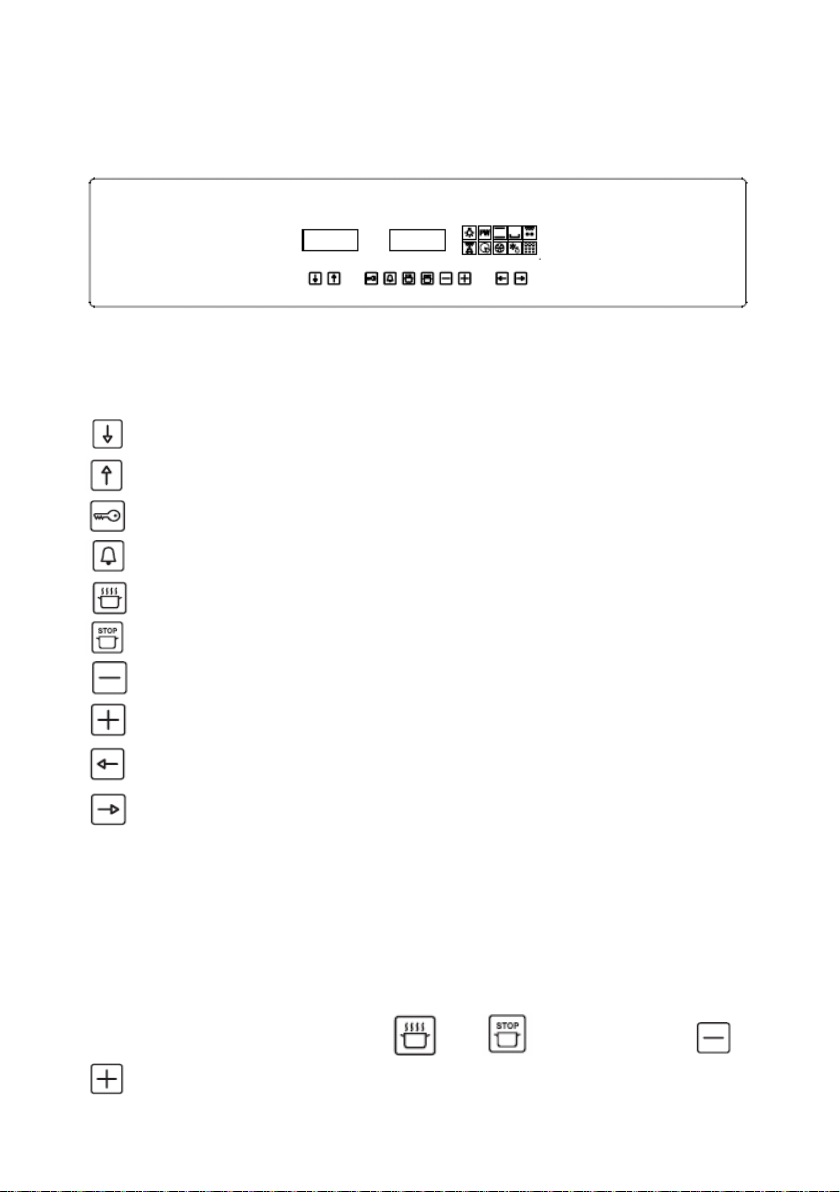
TIPKE FUNKCIJE
Znižanje temperature
Zvišanje temper ature
ON/OFF in BLOKADA UKAZOV
Minutni števec
Trajanje pečenja
Zaključek pečenja
Znižanje funkcije
Zvišanje funkcije
Izbor programa pečenja
Izbor programa pečenja
DELOVANJE
Ob prvi priključitvi pečice na el ektr ično omrežje ali po izpadu elektrike zaslon timerja
utripa. Pečica še ni dejavna: za aktiviranje je najprej potrebno izvesti "nastavitev ure".
NASTAVITEV URE
Hkrati pritisnite in nato izpustite tipki
in ter z uporabo tipk in
nastaviti točen čas.
10
Page 13

Opomba: postopek je potrebno izvesti v roku 3 sekund, ko se na zaslonu pojavijo
utripajoče pike; ob zaključku nastavitve počakajte, da osvetljene pike prenehajo z
utripanjem.
ZVOK
Pečica oddaja zvočne signale, s katerimi oznanja različne funkcije, kot je na primer
zaključek pečenja.
Intenzivnost zvoka je mogoče spremeniti: ob pritisku na tipko
pri ugasnjeni
pečici (OFF) , pečica predvaja 3 razpoložljive nivoje.
Avtomatsko se nastavi zadnji predvajan nivo.
VKLOP PEČICE
Pritisnite in izpustite tipko
; zaslišali boste zvočni signal (pip).
Na zaslonu timerja se pojavi napis ON, simbol žarnice se osvetli in lučka znotraj
pečice se prižge.
V tej točki lahko n astav ite funkcij o pečenja.
MINUTNI ŠTEVEC
Min ut ni št evec sl uži sam o za š tet j e časa in je v celoti neodvisen od funkcij pečenja,
koristen je za nastavitev opozorila za zaključek pečenja.
Za nastavitev minutnega števca vklopite pečico preko
, pritisnite na
tipko
: zaslon bo prešel na ničto vrednost in pikice bodo začele utrip ati; v roku 3
sekund s pomočjo tipk
in nastavite želeni čas, do največ 23 ur in 59
minut, ob izteku le-tega se odda zvočni signal in simbol
utripa. Za prekinitev
zvočnega signala in utripanja zadostuje pritisk na eno izmed tipk , ,
, , .
11
Page 14
ROČNO DELOVANJE Z NEDOLOČENIM ČASOM
Vklopite pečico; izberite eno izmed razpoložljivih funkcij
in : za vsako
vrsto pečenja pečica predlaga indikativno, prednastavljeno temperaturo, ki jo je
mogoče spremeniti s pomočjo tipk
in .
Pečica se bo začela segrevati na nastavljeno temperaturo, simbol za stopinjo Celzija
° pa bo utripal, kar pomeni, da pečica deluje.
Ob dosegi temperature vas na to opomni zvočni signal, simbol stopinje pa bo
prenehal z utripanjem.
Za izklop pečice pritisnite in izpustite tipko
.
Prikaz temperature in funkcij se izklopi in pojavi se napis OFF; odda se tudi zvočni
signal (pip).
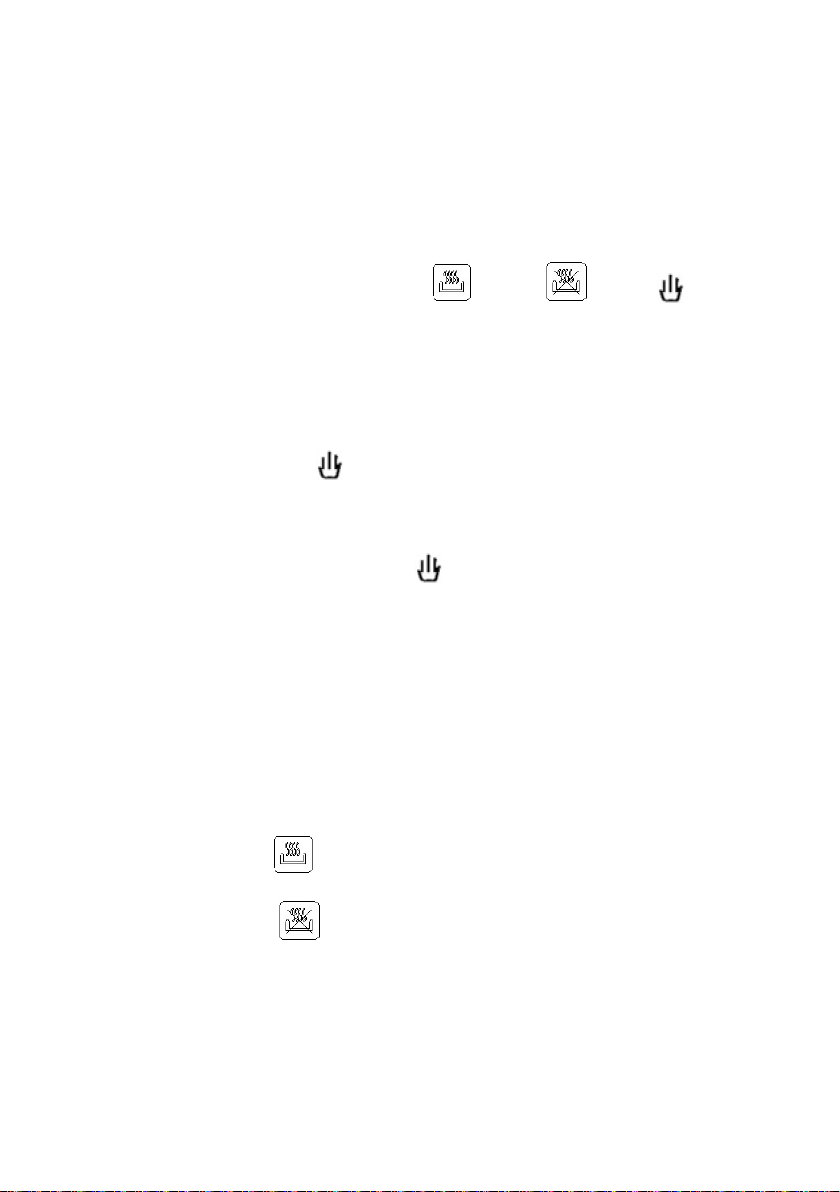
POLAVTOMATSKO DELOVANJE TRAJANJA PEČENJA
Za nastavitev časa pečenja
Vklopite pečico tako, da pritisnete in izpustite tipko
; pritisnite in izpustite tipko
ter nastavite želeni čas pečenj a s p omočjo ti pk in , najdaljši možni
čas je 10 ur in 00 minut.
Na zaslonu se prikaže črka A (avtomatsko delovanje). Počakajte, da se timer vrne na
prikaz trenutnega časa, nato izberite funkcijo pečenja s tipkama
in ,
izbirate med razpoložljivimi funkcijami. Za vsako funkcijo pečenja pečica predlaga
prednastavljeno temperaturo, ki jo je mogoče spremeniti s pomočjo tipk
in
.
12
Page 15
Pečica sproži pečenje za nastavljeni čas, po preteku le-tega se avtomatsko izklopi;
Ob zaključku časa pečenja se sproži prekinjajoči zvočni signal, zaslona s
temperaturo in funkcijami se ugasneta, zaslon timerja prikaže trenutni čas, simbola
lončka in A pa utripata. Za izklop zvočnega signala in izhod iz cikla pritisnite na eno
izmed tipk
, , , , .
Pečica je pripravljena za sprejem novih ukazov; izberite novo funkcijo pečenja ali jo
ugasnite tako, da pritisnete in izpustite tipko
.
POLAVTOMATSKO DELOVANJE ZAKLJUČKA PEČENJA
Za nastavitev časa zaključka pečenja
Vklopite pečico tako, da pritisnete in izpustite tipko
, pritisnite in izpustite tipko
ter s pomočjo tipk in nastavite čas zaključka peče n ja, k i mora biti v
okviru 23 ur in 59 minut. Po tej operaciji počakajte, da se timer vrne na prikaz
trenutnega časa.
Nato med razpoložljivimi funkcijami pečenja izberite želeno s pomočjo tipk
in
: pečica predlaga prednastavljeno temperaturo, ki jo je mogoče spr emen iti s
pomočjo tipk
in .
Pečica sproži pečenje, ki traja do nastavljenega časa in se nato av tomatsko izklopi.
Ob zaključku časa pečenja se sproži prekinjajoči zvočni signal, zaslona s
temperaturo in funkcijami se ugasneta, zaslon timerja prikaže trenutni čas, simbola
in A pa utripata. Za izklop zvočnega signala in izhod iz cikla pritisnite na eno
izmed tipk
, , , , .
Pečica je pripravljena za sprejem novih ukazov; izberite novo funkcijo pečenja ali jo
ugasnite tako, da pritisnete in izpustite tipko
.
13
Page 16

AVTOMATSKO DELOVANJE
Za nastavitev trajanja pečenja in čas za ključka pečenja
Vklopite pečico tako, da pritisnete in izpustite tipko
, pritisnite in izpustite tipko
ter s pomočjo tipk in + nastavite potrebni čas pečenja. Počakajte, da
pikice med urami in minutami prenehajo z utripanjem; timer se vrne na prikaz
trenutnega časa; nato pritisnite na tipko
in nastavite čas zak lju čka pečenja s
pomočjo tipk
in . Ponovno počakajte, da pikice prenehajo z utripanjem;
med razpoložljivimi funkcijami pečenje izberite želeno: pečica predlaga
prednastavljeno temperaturo, ki jo je mogoče spremeniti s pomočjo tipk
in
.
Ko pikice timerja prenehajo z utripanjem, pečica preide v način preloženega pečenja:
avtomatsko se vklopi za nastavljeni čas p ečenja in se zaustavi ob nastavljenem času.
Na prikazu je še vedno prikazana izbrana temperatura, trenutni čas in izbrani cikel.
Lučka znotraj pečice ugasne.
Sicer je tako temperaturo kot nastavljeno funkcijo mogoče spremeniti tako, da
ponovite zgoraj opisani postopek.
Ob zaključku časa pečenja se sproži prekinjajoči zvočni signal, zaslona s
temperaturo in funkcijami se ugasneta, zaslon timerja prikaže trenutni čas, simbola
in A pa utripata.
Za izklop zvočnega signala in izhod iz cikla pritisnite na eno izmed tipk
,
, , , :
Pečica je pripravljena za sprejem novih ukazov; izberite novo funkcijo pečenja ali jo
ugasnite tako, da pritisnete in izpustite tipko
.
14
Page 17
OMEJITVE UPORABE POLAVTOMATSKEGA IN AVTOMATSKEGA PEČENJA
Funkcije uvodnega segrevanja (PRH) in odmrzovanja niso združljive s časovno
določenim pečenjem, zato:
- če je ena izmed teh funkcij nastavljena, ni mogoče sprožiti ne trajanja ne zaključka
pečenja;
- če je pečica programirana za način avtomatskega delovanja, ni mogoče izbrati
funkcije uvodnega segrevanja (PRH) ali odmrzovanja.
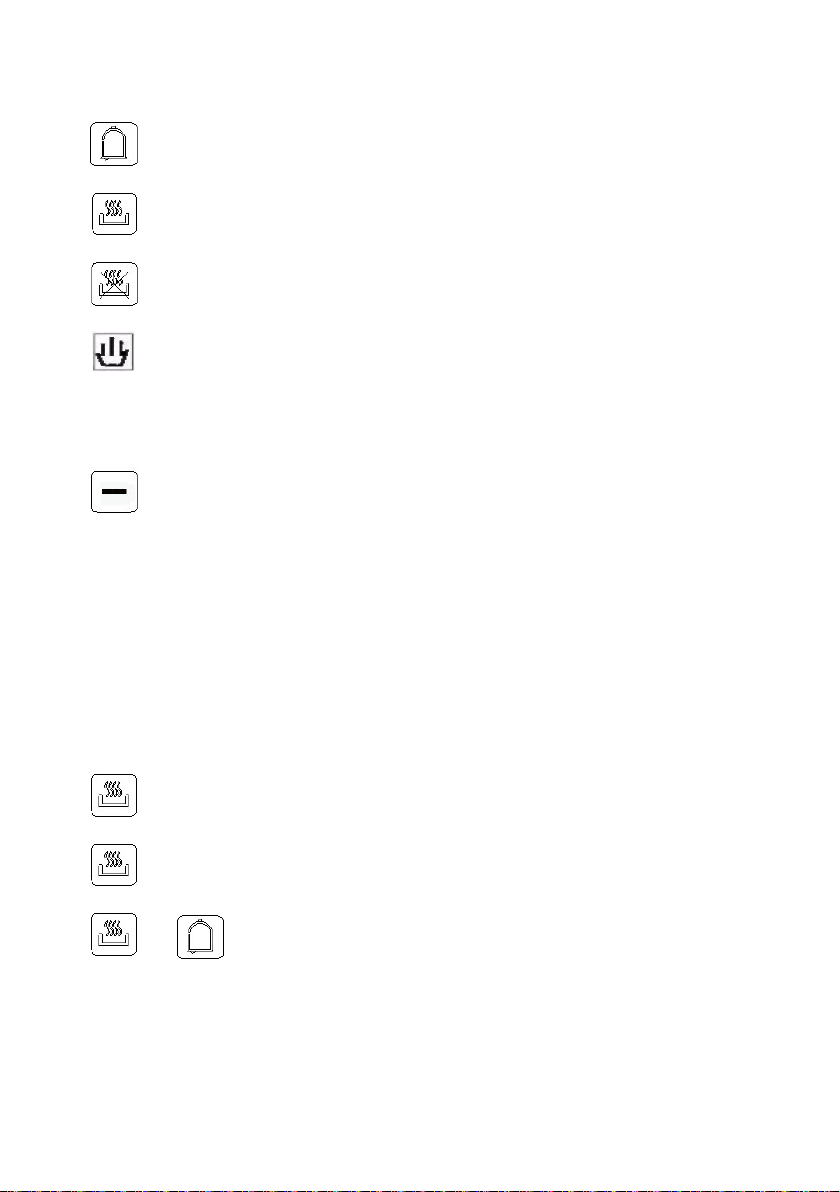
IKONE NA ZASLONU
Lonček: če je vklopljena, pomeni, da je ena izmed funkcij pečenja aktivirana.
Ikona lončka pa je ugasnjena, ko so aktivirane funkcije luči, PRH (uvodno
segrevanje) in odmrzovanje.
Če utripa, je to znak zaključka časovno določenega pečenja. Med fazami
avtomatskega delovanja je simbol ugasnjen, ponovno se vklopi v trenutku
programirane sprožitve pečice.
A (avtomatsko): če je vklopljena, pomeni, da je bil nastavljen čas pečenja; če utripa,
pomeni, da se je nastavljeno pečenje zaključilo.
Zvonec: če je vklopljen, pomeni, da je števec minut aktiviran; če utripa,
pomeni zaključek štetja min ut.
IZBOR TEMPERATURE PEČENJA
Pri vklopljeni pečici je s pomočjo tipk
in mogoče nastaviti temperaturo
med najnižjo in najvišjo vrednostjo v presledkih po 5°C, ki so označeni na zaslonu.
Opomba: za vsako funkcijo pečenja je tovarniško nastavljena priporočena
tem pera tura, ki jo je mogoče poljubno spreminjati z uporabo tipk
in .
IZBOR FUNKCIJ PEČENJA
Pri vklopljeni pečici se z uporabo tipk
in ustrezni simboli vklopijo in
posledično om ogočijo izbor želene funkcije pečenja.
15
Page 18

FUNKCIJE:
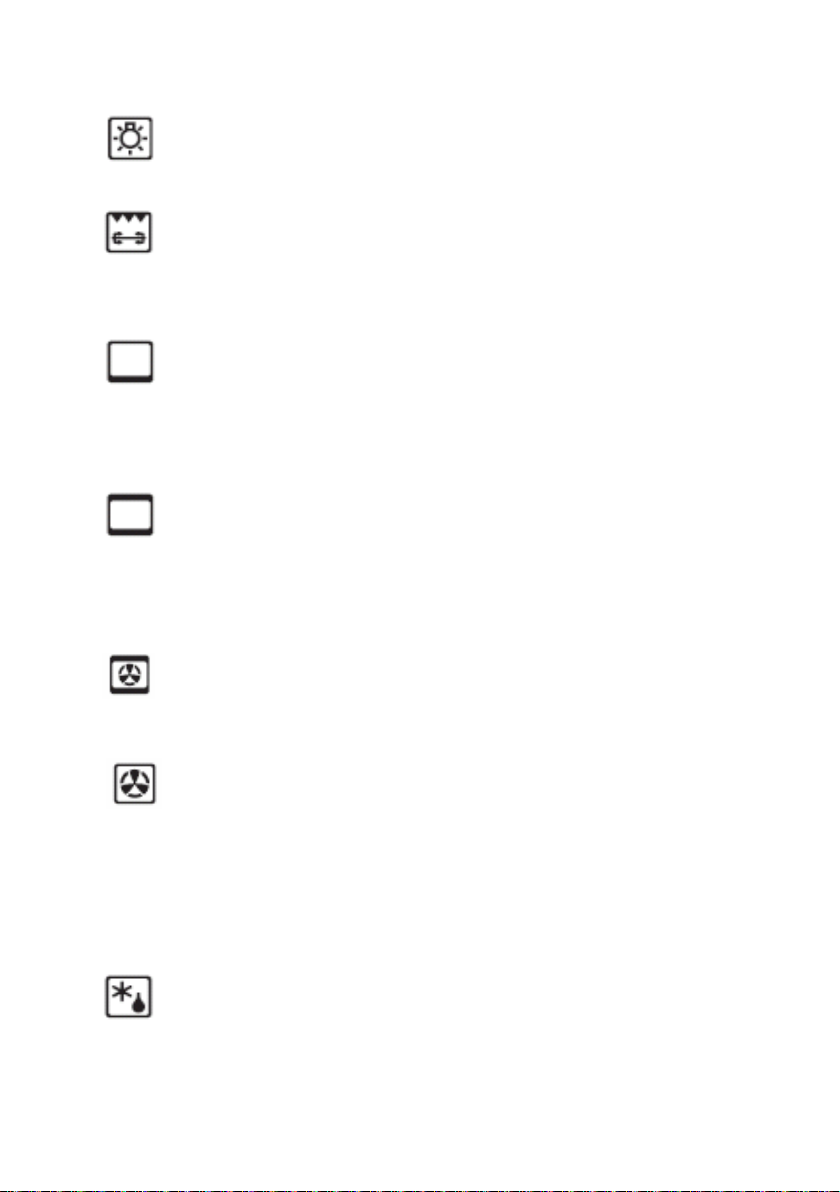
LUČKA PEČICE
Notranjo lučko pečice je mogoče prižgati tako, da pritisnete in izpustite tipko
;
za ugasnitev lučke ponovno pritisnite in izpustite tipko
.
Izberite funkcijo pečenja, notranja lučka se prižge in ostane prižgana 3 minute po
dosegi nastavljene temperature. Med funkcijo pečenja ali odmrzovanja je lučko
mogoče ponovno prižgati s pritiskom na eno izmed tipk
, , ,
: lučka ostane prižgana za minuto. Lučko pečice je mogoče prižgati tudi z
aktivirano blokado ukazov tako, da pritisnete na eno izmed tipk
, ,
, , .
UVODNO SEGREVANJE
Funkcija omogoči hitrejše segr etje pečice pred izborom funk cije p ečenja.
Na prikazu temperature se pojavi gibajoči se simbol.
Uvodno segrevanje se zaključi ob dosegi prednastavljene temperature (ki je ni
mogoče spreminjati), takrat se odda zvočni signal, prižge se simbol žarnice in lučka
pečice; nato je mogoče izbrati želeni cikel pečenja z uporabo tipk
in .
TRADICIONALNO PEČENJE
Tradicionalno pečenje z delovanjem zgodnjega in spodnjega grelnika.
SPODNJI GRELNIK
Ta način pečenja je primeren za počasno pečenje ali segrev anje živil .
ŽAR + ROŠTILJ
Primerno je za pečenje na žaru in roštilju.
VENTILIRAN GRILL + ROŠTILJ
Primerno je za lahko pečenje živil na žaru in roštilj.
16
Page 19

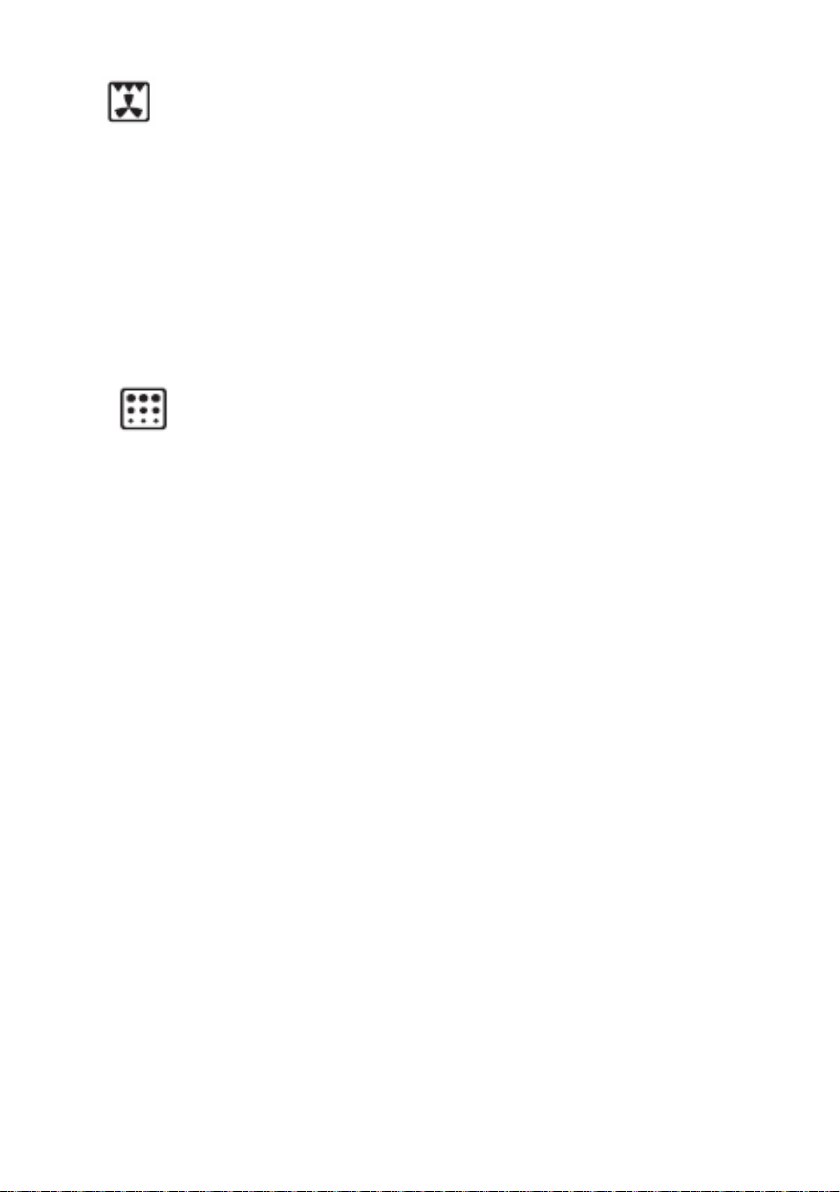
FUNKCIJA PICE
Posebej primerna za pico in zelenjavne krožnike.
VENTILIRANO PEČENJE
Funkcija omogoča enakomerno in redno pečenje v vseh delih pečice.
Peči je mogoče dvoje različnih ži vi l.
ODMRZOVANJE
Omogoči odmr znitev živil v krajšem času.
Sproži se samo loputa pečice, pečica se ne segr eje.
Na zaslonu s temperaturo se prikaže napis dEF (Defrost), ki označuje delovanje
pečice v načinu odmrzovanja.
PIROLIZNO ČIŠČENJE
Vklopite pečice in izberite funkcijo avtomatskega čiščenja.
Na zaslonu s temperaturo se prikaže napis PIRO, medtem ko se na zaslonu s
funkcijami prikaže predlagan prednastavljeni čas 1 ure in 30 minut.
Pikici med števkami (1:30) utripajo za 4 sekunde, to pomeni, da je mogoče nastaviti
čas trajanja pirolize oziroma uro zaključka postopka, za nastavitev le-tega sledite
zgornjim navodilom za programirano pečenje.
Najdaljši čas, ki ga je mogoče nastaviti, je 3 ure, najmanjši pa 30 minut; za
spremembo časa pritisnite na tipko
, nato izvedite nastavitev s pomočjo tipk
in .
Ko nastavite čas, se poleg časa trajanja prižge črka A, ki nakazuje sprožitev
avtomatskega cikla. Vrata se blokirajo in sproži se funkcija blokade ukazov, ki jo
nakazuje vklop simbola ključ.
Med pirolizo je mogoče prikazati, ne pa tudi spreminjati, preostali čas in uro zaključka
cikla. Funkcija omogoča čiščenje pečice tako, da se temperatura zviša do 465°C.
Usedline pepela, ki se pri tem oblikujejo, je mogoče odstraniti z vlažno krpo, ko se
pečica ohladi, vendar je še mlačna. Med avtomatskim piroliznim čiščenjem je lučka
pečice ugasnjena.
Opozorilo:
Iz notranjosti pečice je pred sprožitvijo funkcije avtomatskega čiščenja potrebno
odstraniti vse pripomočke.
Priporočamo uporabo funkcije avtomatskega čiščenja izključno pod nadzorom osebe.
Vse večje ostanke živil je iz pečice potrebno odstraniti pred sprožitvijo funkcije
avtomatskega čiščenj a.
17
Page 20

DRUGE FUNKCIJE
NAČIN IZKLOPLJENE PEČICE
Pri izklopljeni pečici sta zaslona s temperaturo in funkcijami ugasnjena, medtem ko
zaslon timerja prikazuje trenutni čas.
FUNKCIJA BLOKADE UKAZOV (OTROŠKA ZAŠČITA)
Funkcijo je mogoče aktivirati kadarkoli, da bi otrokom onemogočili uporabo pečice.
Če blokado aktivirate ob ugasnjeni pečici, le-te ni mogoče prižgati: za sprožitev
kakršnekoli funkcije pečenja je potrebno odstraniti blokado.
Za aktivacijo blokade ukazov pritisnite in zadržite tipko
, dokler se ne prikaže
simbol ključa (približno 5 sekund), ki mu sledi napis ON, nato se zaslon vrne na
prikaz trenutnega časa.
Opomba: po tem ni mogoče izvesti nikakršnih nastavitev pečenja, razen regulacije
minutnega števca.
Če pa blokado aktivirate po katerikoli nastavitvi pečenja (ročni, polavtomatski,
avtomatski), je mogoče nastaviti samo minutni števec ali pečico ugasniti tako, da
pritisnete in izpustite tipko
. Če pritisnete na katerokoli drugo tipko, vas bo
prikaz ključa spomnil, da je zaš čita a kt ivi rana .
Ročna ali avtomatska ugasnitev pečice ne sprosti blokade ukazov. Za sprostitev
blokade ukazov pritisnite in zadržite tipko
, dokler se ne prikaže simbol ključa
(približno 5 sekund), ki mu sledi napis OFF; nato se zaslon vrne na prikaz trenutnega
časa.
Ko je pečica blokirana, je ni mogoče vklopiti s pr itiskom na ti pko
, mogoč je
samo izklop (OFF).
18
Page 21

TIPKA ON/OFF
Tipka
omogoči v vsakem trenutku in z vsako nastavljeno funkcijo izklop pečice,
če je vklopljena.
Vse nastavitve pečenja se izničijo; za nadaljnje pečenje sl edi te zgor njim navodi lom
za pečenje.
Če je pečica vklopljena in je nastavljena funkcija za blokado ukazov, pritisnite in
izpustite tipko
, da se pečica izklopi, funkcija blokade ukazov pa ostane
nastavljena. Za sprostitev blokade ukazov pritisnite in zadržite tipko
vsaj 5
sekund: na zaslonu se prikaže ključ, ki mu sledi " OFF ", nato se ponovno prikaže
ura.
SIMBOL “ ° “
Predstavlja stopinje Celzija.
Če utripa, pomeni, da se pečica segreva z namenom dosege nastavljene
temperature.
Če je lučka neprekinjeno prižgana, pomeni, da je pečica dosegla nastavljeno
temperaturo.
PREKLIC NASTAVITEV TRAJANJA IN ZAKLJUČKA PEČENJA
V kateremkoli trenutku je mogoče preklicati nastavitve trajanja in urnik zaključka
pečenja tako, da hkrati pritisnete na tipki Lonček in Stop ;
POZOR: pečica je še vedno prižgana v funkciji, ki ste jo izbrali v ročnem načinu (za
nedoločen čas).
Čas trajanja in/ali zaključka pečenja je mogoče ponovno nastaviti, oziroma pečico
popolnoma izklopiti tako, da pritisnete in izpustite tipko
.
19
Page 22
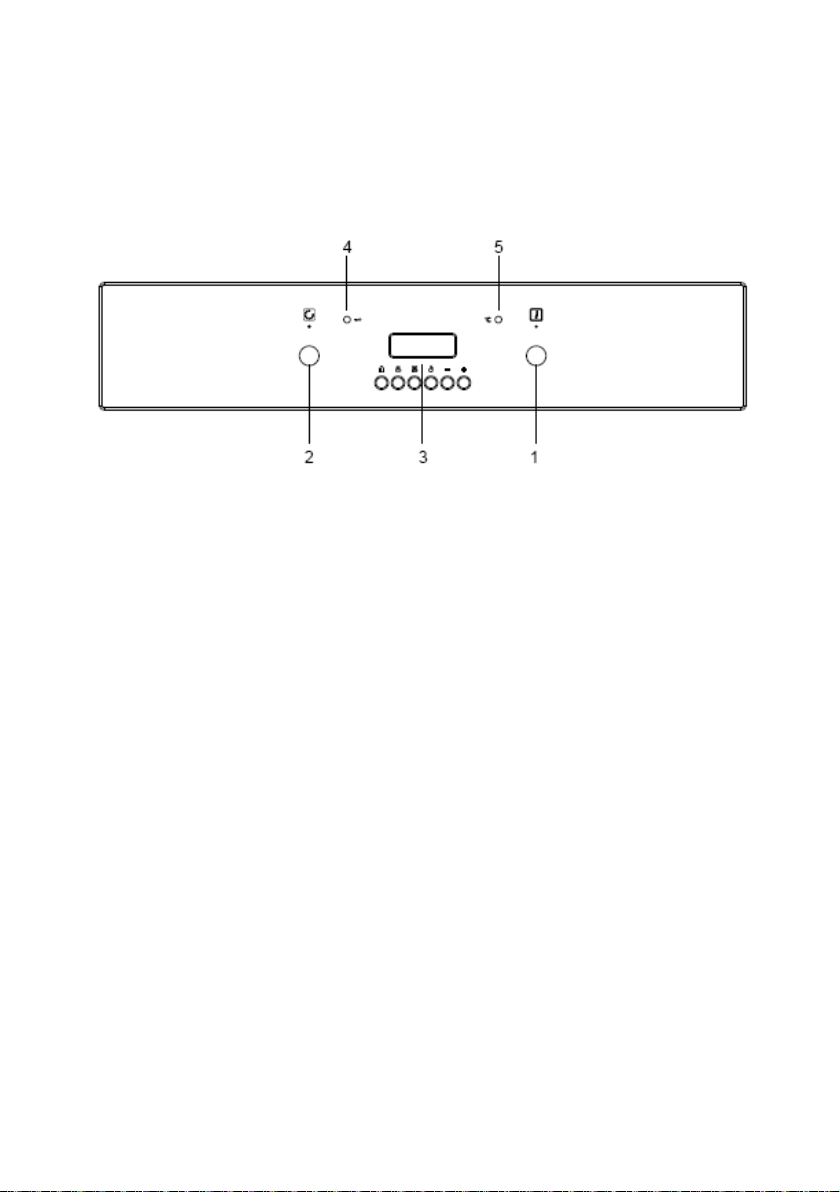
BOP7303AB - BOP7303AX - BOP8526AX
1. Termostat
2. Gumb za izbiro načina delovanja
3. Elektronska naprava za programiranje
4. Rdeča luč
5. R umena luč
Vaša nova pečica je opremljena s sistemom peke z več funkcijami, ki omogoča izbiro
najustreznejše metode segrevanja za vrsto hrane, ki jo pripravljate. Želeno funkcijo
izberete tako, da obrnete gumb za izbiro načina delovanja v smeri urinega kazalca,
tako da kaže ustrezen simbol. Notranjost pečice bo razsvetljena in signalna lučka za
vklop ('ON') bo zasvetila.
Simboli funkcij, ki jih ima vaša pečica, so naslednji:
20
Page 23
Delova nje pečice
1 Samo luč
Luč za razsvetlitev notranjosti pečice zasveti.
2 Polno delovanje žara
Spodnji grelnik, t.j. grelnik v dnu pečice, deluje samostojno. Pečico je pred uporabo
potrebno 15 minut segrevati. Ta funkcija je idealna za "slepo peko" testa za pite. V
tem primeru hrano pecite na polici, nameščeni na najnižji položaj.
3 Samo spodnji grelnik
Spodnji grelnik, t.j. grelnik v dnu pečice, deluje samostojno. Pečica naj pred
uporabo deluje približno 15 do 20 minut, da se segreje. Ta funkcija je idealna za
"slepo peko" testa za pite. V tem primeru pecite hrano na polici, nameščeni na
najnižji položaj.
4 Običajno delovanje grelnikov
Zgornji in spodnji grelnik delujeta kot običaj ni sta tični grelni sistem pečice. Pred
začetkom peke je potrebno pečico segrevati, dokler se signalna lučka za temperaturo
ne izklopi. Priporočamo, da hrano pri peki s to funkcijo postavite le na eno polico.
Ne pecite hrane na najnižjem ali najvišjem položaju za polico, saj jo lahko osmodite.
5 Spodnji/zgornji (uporovni) grelnik + Spodbujena konvekcija zraka
Posebej primerna za pico in zelenjavne krožnike.
6 Spodbujena konvekcija zraka
Ventilator ter grelnik, ki se nahaja za zadnjo (hrbtno) steno pečice omogočata
kroženje vročega zraka, zaradi katerega je temperatura po vsej pečici enakomerna.
Pred uporabo naj pečica deluje dokler se signalna lučka za temperaturo ne izklopi;
takrat je pečica segreta na izbrano temperaturo. Hrano lahko pečet e na v eč policah
hkrati ter tako prihranite čas in energ i jo. Temp eraturo p e čic e v primerjavi z
običajni mi gr elniki zm anjšajte za pr i bli žno 10%.
7
Omogoči odm
Odmrzovanje
rznitev živil v krajšem času. Sproži se samo loputa pečice, pečica se
ne segreje. Na zaslonu s temperaturo se prikaže napis dEF (Defrost), ki označuje
delovanje pečice v načinu odmrzovanja.
21
Page 24
8
Polovično spodbujena konvekcija zraka
Ventilator deluje v kombinaciji z infrardečim grelnikom za žar, ki se nahaja na
zgornjem delu (v stropu) pečice. Pečico naj pred uporabo deluje 5 do 10 minut, da
se segreje. Pri peki mesa lahko s to funkcijo hrustljavo zapečete zunanji del oz.
skorjo, medte m ko vroč zrak zagotavlja enakomerno peko. Polovično spodbujena
konvekcija zraka je uporabna tudi za peko pod žarom, saj je tako hrano potrebno
manjkrat obračati.
Med peko na žaru morajo biti vrata pečice vedno zaprta.
Ne uporabljajte aluminijeve folije za prekrivanje posode oz. pekača, ki ga
uporabljate za peko pod žarom – visoka odbojnost folije lahko poškoduje grelnik.
Med uporabo elementa za žar naj bodo vrata vedno zaprta.
9 Način za sam
Obrnite gum
b za izbiro načina delovanja na to funkcijo; nastavite jo lahko le s
odejno čiščenje pečice (BOP7215 / BOP7115)
programsko uro, čistilni cikel pa traja eno uro in pol. Pred uporabo funkcije za pirolizo
iz notranjosti pečice odstranite vse pripomočke. Med pirolizo je luč za osvetlitev
notranjosti pečice izklopljena.
Korist
ni nasveti
• Pred začetkom pek e prev eri te, če ste iz p ečice odstranili vse pripomočke, ki jih ne
potrebujete.
• Pred uporabo naj pečica nekaj časa deluje pri izbrani delovni temperaturi, da se
segreje.
• Pekače postavite na sredino pečice; če uporabljate več pekačev, pust it e m ed nji mi
nekaj prostora, da omogočite kroženje zraka.
• Med delovanjem pečice čim manj odpirajte vrata (npr. da bi preverili potek peke);
luč, ki razsvetljuje notranjost pečice, ves čas sveti.
• Pri odpiranju vrat bodite previdni, da se ne dotaknete vročih delov oz. da vas ne
opeče para, ki izhaja iz pečice.
22
Page 25

Elektronska programska
Elektronska programska enota oz. programator je naprava, ki združuje naslednje
funkcije:
- 24-urno uro z osvetljenim prikazovalnikom
- programsko uro (odštevanje nastavljenega čas a do 23 ur in 59 m inut )
- programiranje samodejnega začetka in zaključka peke
- programiranje polovično samodejne peke (bodisi samo samodejen začetek bodisi
samo samodejen zaključek peke)
- prikazovalnik nastavljene oz. izbrane temperature
23
Page 26
Opis gumbov
"PROGRAMSKA URA"
"ČAS PEKE"
"ČAS KONCA PEKE"
"ROČNI NAČIN UPRAVLJANJA"
POVEČANJE VREDNOSTI KATEREKOLI NASTAVITVE – PREVERJANJE
NASTAVLJENE TEMPERATURE
ZMANJŠANE VREDNOSTI KATEREKOLI NASTAVITVE – PREVERJANJE
NASTAVLJENE TEMPERATURE
Opis osvetljenih simbolov
"AUTO" (utripajoče) – Programska enota je v samodejnem načinu, vendar ni
programirana.
"AUTO" (sveti neprekinjeno) – Programska enota je v samodejnem načinu in je
programirana.
Ročni način delovanja poteka
+ A Samodejni načni delovanja poteka
+
Programska ura je nastavljena
OPOMBA: Ko izberete način delovanja, sledi kratko obdobje (približni 3 do 4
sekunde), v katerem še lahko spremenite nastavitve.
24
Page 27
Digitalna ura
Na uri so prikazane ure (0-24) ter minute. Ob prvem priklopu pečice na el ektr ično
omrežje ali po izpadu napajanja z električno energijo bodo na prikazovalniku utripale
ničle.
Uro nastavite tako, da hkrati pritisnete tipko
ter tipko ali tipko
, nato pa
ISTOČASNO pritiskate na tipki "+" in "-", dokler ne nastavite točnega časa. Ko
vnes ete t renu tni čas, spustite gumbe in ura začne delovati.
Peka v ročnem načinu brez uporabe programske ure
Če želite upravljati pečico v ročnem načinu, t.j. brez dodatne programske enote, je
potrebno s pritiskom na tipko
izbris ati ut ripajoč znak "A" s prikazovalnika.
Če znak "A" sveti neprekinjeno, to pomeni, da je pečica programirana in je ni možno
neposredno preklopiti v način za ročno upravljanje. V tem primeru najprej prekličite
nastavljen program s pritiskom na tipko
; nato lahko ročno nastavite delovanje
pečice.
Programska ura
S pr ogramsko uro l ahko m er ite čas med 1 minuto ter 23 urami in 50 minutami.
1) Programiranje samodejnega začetka in konca peke
• S pritiskom na tipko
nastavite trajanje peke.
• S pritiskom na tipko
nastavite čas, ko naj se peka zaključi.
• Z gumbom termostata ter gumbom za izbiro načina delovanja nastavite
temperaturo in izberite program oz. način peke.
Ko to storite, bo zasvetil znak "A".
25
Page 28

Primer: peka traja 45 minut, zaključi pa naj se ob 14:00.
Pritisnite tipko
in nastavite vrednost 0.45.
Pritisnite
ter nastavite vrednost 14:00.
Ko nastavite ti dve vrednosti se na prikazovalniku izpiše trenuten čas, znak "A" pa
zasveti. To pomeni, da je čas peke shranjen v programsko enoto. Ob 13:15 (45 minut
pred 14:00) se pečica samodejno vklopi.
Ob 14:00 se pečica samodejno izklopi ter odda zvočni signal, ki traja, dokler ga ne
izklopite s pritiskom na tipko
.
Znak "A" bo začel utri pati .
2) Delno samodejno delovanje
A. Nastavite trajanje peke
B. Nastavite konec peke
A) S pritiskom na tipko
nastavite trajanje peke. Pečica se bo nemudoma
vklopila in znak "A" bo zasvetil. Ko nastavljen čas peke poteče, se bo pečica
izklopila, hkrati pa bo oddala zvočni signal, ki ga izklopite kot je opisano v prejšnjem
razdelku.
Znak "A" začne utripati.
B) S pritiskom na tipko
nastavite čas, ko želite, da se peka konča. Pečica se bo
nemudoma vklopila in znak "A" bo zasvetil. Ob nastavljenem času se bo pečica
izklopila in oddala zvočni signal, ki ga izklopite kot je opisano v prejšnjem razdelku.
Program peke lahko kadarkoli prekličete (zaustavite) s pritiskom na tipko
; nato
lahko pečico upravljate ročno.
Opomba: Funkcije 1), 2) ter 1) + 2) so aktivne le, če pred tem izberete način
delovanja.
26
Page 29
Programska ura oz. alarm
S tem programom lahko nastavite zgolj alarm (zvočni signal); ta se oglasi po
nastavljenem obdobju, ki lahko traja največ 23 ur in 59 minut.
Programsko uro nastavite tako, da pritisnete in držite tipko
, nato pa s pritiski na
tipki "+" in "-" nastavite želeno trajanje, ki se izpiše na prikazovalniku . Po nasta vitv i se
na prikazovalniku pojavita trenuten čas ter simbo l
.
Odšt evan je se za čne nemudoma; na prikazovalniku lahko s pritiskom na tipko
kadarkoli preverite preostali čas.
Ko nastavljen čas poteče, znak
preneha svetiti, naprava pa odda zvočni signal,
ki traja, dokler ga ne izklopite s pritiskom na tipko
.
Nastaviti je možno tudi jakost zvočnega signala (tri ravni: nizka, srednja in visoka); ko
se oglasi, s pritiskom na tipko "–" izberite želeno raven.
OPOMBA: Po koncu peke se zvočni signal oglasi vsako sekundo, oglaša pa se
največ 7 minut.
Preklic nastavljenega samodejnega načina delovanja
Samodejni način delovanja lahko kadarkoli prekličete s hkratnim pritiskom na tipki
in ali na tipko . Pečico lahko zdaj upravljate ročno.
Čiščen je s pirolizo
Izberite funkcijo samodejnega čiščenja
. Ko je funkcija izbrana, se bo čas
delovanja oz. čiščenja samodejno nastavil na 90 minut (če je p ečica zelo umazana,
lahko ta čas podaljšate do 180 minut).
S pomočjo te funkcije se pečica samodejno očisti tako da se njena notranjost segreje
do temperature 475°C. Umazanija tako zgori v pepel, ki ga obrišete z vlažno krpo, ko
se pečica ohladi, a je še nekoliko topla.
Če je potreben daljši čas čiščenja, tega podaljšate z naslednjim postopkom:
Izberite samodejno čiščenje, kot je opisano zgoraj.
Pritisnite tipko za ročno delovanje
in na prikazovalniku se izpiše vrednost 1:30.
27
Page 30

Iz varnostnih razlogov se vrata pečice pri temperaturah nad 300°C samodejno
zaklenejo. Ob tem pečica odda zvočni signal, na sprednji plošči pa zasveti
signal za zaklepanje.
Med potekom čiščenja s pirolizo je luč za osvetlitev notranjosti pečice
izklop ljena.
OPOZORILO
• Pred začetkom čiščenja s pirolizo je potrebno iz pečice odstraniti vse pri pomočke.
• Priporočamo, da med potekom čiščenja s piroli zo ves čas nadzorujete pečico.
Pred začetkom čiščenja s pirolizo odstranite vse večje kose hrane, ki so ostali v
pečici.
28
Page 31

Uporaba vrtljivega ražnja
V vaši pečici lahko uporabite tudi vrtljiv raženj, v kombinac iji z grelnikom za žar. Meso
je potrebno nabosti na nabodalo ter ga pritrditi z dvema sponama.
Sledite nas ledn jim navodilom:
A. Pekač (pladenj) postavite v najnižji položaj.
B. Eno viličasto spono pritrdite na nabodalo (palico iz nerjavečega jekla); nato na
nabodalo nabodite meso ter pritrdite še drugo viličasto spono, da se meso ne more
premikati po nabodalu.
C. Ročaj palice nabodala je izdelan iz izolacijskega materiala. Uporabite ga med
vstavljanjem nabodala v pečico in jemanja iz nje; med peko je potrebno ročaj
odstraniti.
Za piščanca z maso 1,3 kg pecite približno 85 do 90 minut.
29
Page 32

Menjava žarnice
A B
POZOR: pred začetko m tega oprav ila izklop ite aparat iz ele ktričnega omrežja.
Ko je potrebno zamenjati žarnico v notranjosti pečice, najprej snemite zaščitni pokrov
"A" tako, da ga vrtite v nasprotni smeri urinega kazalca. Ko zamenjate žarnico,
ponovno namestite zaščit ni pokrov " A";
žarnico: 25 W, E-14 type, T 500°C.
30
Page 33

Odstranjevanje vrat peči ce
B B
A
A
Da bi olajšali čiščenje ter dostop do notranjosti pečice lahko vrata pečic e prep ros to
odstranite (glej sliko). Za lažje čiščenje lahko pri tečajih odstranite vrata po
naslednjem postopku:
Tečaji s premičnimi vijaki
Na tečajih A sta nameščena dva premična vijaka B. Ko privzdignete vijak B se tečaj
sprosti iz svojega ohišja. Ko to storite, privzdignite vrata in jih odstranite tako da jih
potisnete navzven; pri tem držite vrata s strani v bližini tečajev. Ko želite ponovno
namestiti vrata, najprej potisnite tečaje v njihove reže. Preden zaprete vrata,
ponovno zavrtite dva premična vijaka, s katerima sta pritrjena oba tečaja.
Vrat nikoli ne potopite v vodo.
Emajlirane površine notranjosti pečic e ter stek lo čistite z vlažno krpo ter ustreznim
blagim kremnim detergentom; izperite ter pozorno obrišite z mehko krpo.
Če je potrebno lahko odstranite tudi notranje steklo vrat. To storite tako, da odvijete
dva zunanja vijaka, s katerima je pritrjeno. Preden steklo ponovno namestite v vrata,
se prepričajte, da je povsem suho. Pazite, da med ponovnim nameščanjem stekla
vijakov ne pr ivijete p remočno.
Pripomočki
Police, pekače ter podstavke pomijte v vroči vo di z bl agim deter gent om, nat o pa ji h
temeljito osušite; lahko jih pomijete tudi v pomivalnem stroju.
31
Page 34

Vratca pečice je mogoče razstaviti za čiščenje stekel.
Odstraniti je mogoče zgornji del, kot prikazuje naslednja slika.
Po odstranitvi zgornjega dela izvlecite najprej zunanje steklo (1) in nato še notranji
stekli (2 in 3), kot prikazuje spodnja slika.
Za ponovno namestitev stekel izvedite obratni postopek.
32
Page 35

Razpredelnica za peko v pečici
Vrs ta hrane Temp. °C
Položaj
police (*)
Čas peke
(minute)
Način delo v a nja
Testo
Štručke 180 2 55-65
Sadni kolač 200 1 30-40
Sku t ina torta 180 2 35-40
Vzhajano testo v modelu 200 1 25-35
Rahlo testo z j ajci 190 2 20-30
Rahlo t esto brez jajc 200 2 15-25
Biskvitno testo 190 3 15-20
Lazanja 225 2 40-50
Meso
File govedine 225 2-3 50-80
Goveja pečenka 225 2-3 50-80
Telečja pečenka 225 2-3 60-80
Svinjska pečenka 170-180 2 45-60
Pečeno ovčje meso 225 2 45-55
Pečena govedina 225 2-3 50-60
Pečen zajec 200 2 60-90
Pečen puran 180 2 pribl. 240
Pečena gos 200 2 150-210
Pečena raca 200 2 120-180
Pečen pi ščanec 200 2 60-90
Srnino stegno 200 2-3 90-150
Jelenovo stegno 180 2-3 90-180
Ribe 180 2-3 10-40
Zelenjava
Dušena zelenjava 170-190 2-3 40-50
Pizza 240 1 15-25
Peka pod žarom
Zrezki (kotleti ) 4 8-12
Svinjska klobasa 4 10-13
Piščanec na žaru 3 25-35
Piščanec na nabodalu 50-65
Teletina na nabodalu 50-65
Opomba:
(*) = začeten položaj pladnja velja za pečico, ki jo upravljate z gumb i
Pred uporabo je potrebno pečico segreti na nastavljeno delovno temperaturo.
Ti dve funkciji uporabljajte za peko občutljive hrane ali hrane, ki je že
segreta.
Pri tej funkciji je možna peka iste jedi na drugem položaju police (čas peke
je enak).
33
Page 36

34
Page 37

Installation Instruction
Warning and safety instructions
Before using the oven for the first time, read these operating instructions
carefully for full information on the safe installation, use and care of your new
appliance.
This unit must be correctly installedinaccordance with the manufacturer's
instructions by a suitably qualified person.
The manufacturers decline responsibility for damage to persons or items due to
poor or incorrect installation of this appliance.
Make sure that the voltage and frequency of the mains supply correspond to the
details on the rating plate which can be found on the lower part of the front of the
oven.
Warning: this appliance must be earthed.
Our company declines any liability for failures in the earth connection or for earth
connection that is not in compliance with the regu lation s in for ce .
Maintenance and servicing work must only be carried out after the power supply
has been disconnected by switching off at the wall socket or removing the mains
fuse.
Due to our policy of continuous innovation, we reserve the right to adjust or modify
our product without prior notification.
This appliance is not intended for use by persons (including children) with reduced
physical, sensory or mental capabilities, or lack of experience and knowledge,
unless they have been given supervision or instruction concerning use of the
appliance by a person responsible for their safety.
Children should be supervised to ensure that they do not play with the appliance.
Where an oven is built-under with a drawer beneath, this must be made non
functioning with a ‘dummy’ front.
On no account should flammable materials be stored in a drawer beneath a builtunder oven as there is a risk of fire.
Do not place heavy objects on the open door or sit on it as this could cause damage
to the hinging. When cooking with oil or fat, do not leave the oven unattended as
there is a risk of fire.
To avoid damage to the interior enamel, do not place the oven pan or baking trays
on the bottom of the oven and do not line the base of the oven with aluminium
cooking foil.
During cooking, food natural produces steam which is vented away to prevent an
excessive build-up within the oven. As this steam can condense to water droplets
on the cool outer trim of the oven, it may be necessary during cooking to wipe away
any moisture with a soft cloth.
This will also help to prevent soiling and discoloration of the oven exterior by
cooking vapours.
35
Page 38

Before using for the first time
Switch off the oven at the wall socket or remove the mains fuse before cleaning.
Remove any packaging and the oven accessories from the oven. Wipe the oven
interior using hot water and a mild detergent. Rinse carefully using a damp cloth.
Wash the oven shelves and accessories in a dishwasher or using hot water and a
mild detergent, and dry thoroughly.
Technical details
This appliance conforms to the standard 73/23 CEE and 93/68 CEE EMC 89/336
CEE.
Voltage regulations
220-240 V phase + neutral.
Built-in oven dimens io n (mm):
Length : 598
Depth : 565,5
Height : 600,3
Volume : 61 Lt
Power supply : 2,9
- 3,4 kW
36
Page 39

Built-in installatio n
IMPORTANT: The unit must be correctly installed in accordance with the
manufacturer’s instructions and by qualified person. Maintenance and service m ust
be carried out after the power supply has been disconnected.
ELECTRICAL CONNECTION: Before connecting the appliance to the mains,
ensure that:
• The voltage corresponds to the voltage specified on the rating plate at the bottom
of the surround.
• The overload cut-off device and the domestic system can withstand the load of the
appliance (see rating plate).
• The power supply system is provided with an efficient earth connection and that
the s ocket or omni polar swi tch, wit h minimum contact opening of 3mm , is easi ly
accessible once the appliance has been installed.
• If the plug is not easily accessible, the installation personnel must provide an
omnipolar switch with contact opening distance equal to or greater than 3mm.
If further mains cable is needed, it must be with a minimum section of 1,5 mm - type
H05RR-F. Sufficient cable must be left for easy maintenance of the appliance .
Warning: this appliance must be earthed.
Our company declines any liability for failures in the earth connection that is not in
compliance with the regulation in force.
This appliance is designed for building-in to a standard 600mm wide oven housing.
The housing, adjacent furniture and all materials used in installation must be able to
withstand a minimum temperature of 85°C plus ambient temperature during periods
of opera t ion.
In addition, adjacent furniture cabinet doors must be at least 4mm from the
appliance at all points.
Certain types of vinyl or laminate kitchen furniture cabinetry are particularly prone to
heat damage and discoloration, any delimitation or discoloration of materials which
occurs below 85°C plus ambient temperature or where materials are less than 4mm
from the appliance will be the liability of the owner. For building-under a worktop,
the installation dimen sion s are as f oll ows.
Attention
: when the qualified person install the oven near other electrical
appliances, the power cable mustn’t be near or contact with side heat oven.
37
Page 40

FUNCTION BUTTONS
Decreases temper ature
Incr eases tempera ture
ON/OFF and Controls Lock Function
Minute minder
Cooking time
End time
Time setting
Time setting
Program setting
Program setting
OPERATION
The timer flashes on the display when switched on for the first time or after a power
cut. The oven cannot be operated; follow the “Setting the time” procedure to start it.
SETTING THE TIME
Press buttons
and simultaneously and then release them.
Use buttons
and to set the exact time.
BOP 8826 AX
38
Page 41

Note: this operation must be completed in 3 sec. time, while the 2 dots on the timer
display keep flashing. Once you have completed the time setting, wait for the 2 dots
stop flashing.
SOUND SIGNAL
The oven performs sound signals to show different functions, as for example the
end of cooking. There are 3 different sound levels, which can be modified:
Wh en the o ven i s swi tch ed of f, pr ess t he
key, and with each pressure the
oven performs the sound to a different level; the last one performed will be
automatically set.
SWITCHING ON TH E OVEN
Press and release the
key, then you will hear a sound signal.
The timer display will show ON , the bulb symbol
lights on and the internal
oven light turns on. Now you can proceed to set a cooking function.
MINUTE MINDER
The minute minder is only a counter of time and it is totally independent fr om any
cooking function. It can be useful, f or example, when set to remember to stop a
coo king oper ation. I t can be used also w hen th e oven is swi tched off .
To set the minute minder, switch on the oven by pressing and releasing the
key, then press the
key;
the display reset to zero and the 2 dots start flashing for 3 seconds. Now you can
set the desired time by using the
and keys, up to 23h59m.
Once the set time has elapsed, you will hear a sound signal and the
symbol
flashes.
To stop the sound and the flashing symbol just press one of the following keys:
MANUAL OPERATION FOR AN INDEFINITE PERIOD OF TIME
Switch on the oven and select an available cooking function using the keys
and
:
39
Page 42

The oven will suggest a preset temperature, which can be changed by using the
keys
and . The oven will start working up to the preset temperature and
the centigrade degree starts blinking, which means the preheating of the oven.
When the requested temperature is reached this symbol stops blinking and the
oven beeps.
To switch off the oven, just press and release the
key.
COOKING TIME SEMIAUTOMATIC OPERATION
It is recommended to set the duration of cooking
Switch on the oven by pressing and releasing the
, then press and release the
. On the timer display the symbol A appears. Set the desired time of cooking
with the keys and up to 10h and 00m.
Then you will hear a sound sign al and the tim er will sho w the current hour: y ou can
select an available cooking function with the keys
and
On the timer display the symbol
appears.
The oven suggests a preset temperature for each function, which can be changed
with the keys
and . The oven starts working for the set time; when this
time has elapsed the oven automatically stops cooking. You will hear a sound
signal, while the temperature display and the cooking function display turn off, the
timer display shows the current hour and the symbols
and A blink.
To stop the sound and exit to the program, just press one of the following keys
Now the oven is ready to be programmed again; you can select a new cooking
function or switch the oven off by pressing and releasing the key
.
40
Page 43

END OF COOKING SEMIAUTOMATIC OPERATION
It is recommended to set the end of cooking time
Switch on the oven by pressing and releasing the
, then press and release
the
.
On the timer display the symbol A appears. Set the desired end of cooking time
with the keys
and up to 23h and 59m.
Then you will hear a sound sign al and the tim er will sho w the current hour: y ou can
select an available cooking function with the keys
and
On the timer display the symbol
appears.
The oven suggests a preset temperature for each function, which can be changed
by using the keys
and .
The oven starts cooking and when fixed time has elapsed, it will automatically turn
off.
At t he end o f th e fixed cook in g tim e, the o ven beep s, t he t emper at ure dis pla y and
the cooking function display turn off, the timer display shows the current hour and
the 2 symbols
and A blink.
To stop the oven beep or to cancel the program just push one of the following keys:
The symbol
appears on the function display and then the oven light turns on.
Now the oven is ready to be programmed again; you can select a new cooking
function or switch the oven off by pressing and releasing the
.
AUTOMATIC OPERATION
It is recommended to set the duration and the end of cooking
Switch on the oven by pressing and releasing the
, then press and release
the
and set the duration of cooking with the and keys.
Then you will hear a sound signal and the timer will show the current hour. Press
the
and s et the end of cooking wi th the and key.
Another sound signal will be heard and the 2 dots stop blinking: this means the
time has been set.
41
Page 44

On the display you will see th e set tim e, the temperature and function. The oven
light turns off. Now select an available cooking function with the < and > keys.
The oven suggests a preset temperature for each function, which can be changed
by using the keys
and .
Once the 2 dots have stopped blinking, the oven begins the delayed start mode: it
will automatically start for the requested duration and stop at the requested time.
When the oven is cooking, you see the selected temperature, the current hour and
the selected function on the corresponding displays. The internal oven light turns
off.
However, both the temperature and the function can be changed by repeating the
above mentioned instructions.
At the end of the program, the oven beeps, the temperature display and the cooking
function display turn off, the timer display shows the current hour and the 2 symbols
and A b link.
To stop the soud signal or to cancel the program just push one of the following keys
The symbol
appears on the function display and then the oven light turns on.
Now the oven is ready to be programmed again; you can select a new cooking
function or switch the oven off by pressing and releasing the key ON/OFF.
AUTOMATIC AND SEMIAUTOMATI C COOKING RESTRICTIONS
The preheating (PRH) and defrosting functions are not compatible with the above
mentioned automatic and semiautomatic operation.
-After setting the preheating or the defrosting function, it is not possible to set either
the duration or the end of cooking.
-When programming the oven with the automatic operation, you cannot choose the
preheating or the defrosting function.
42
Page 45

DISPLAY SYMBOLS
Pot: when it lights up, it shows that a cooking function is on.
The pot does not light up when the oven light, preheating or defrosting function is
activated.
When the pot is flashing, it shows the end of a cooking time. During the delayed start
phase, the symbol is off and lights up when the oven starts cooking.
A (automatic): when it lights up, it shows that a cooking time has been set; when
flashing, it means the end of a cooking program.
Bell: when it lig hts up, i t means that the min ute minder is on .
Wh en fla shing, it mean s the en d of t he minute count .
SELECTING THE COOKING TEMPERATURE
With the oven switched on, the cooking temperature can be selected by using the
and
keys : the tem peratu res inc reases between t he low a nd high s ettin g with 5
degrees increases, which are shown on the temperature display.
Note: each cooking function has a preset temperature, which can be changed as
described above.
SELECTING THE COOKING FUNCTION
With the oven switched on, the cooking functions can be selected by using the
and
keys: the cooking function icons sequentially light up.
43
Page 46

COOKING FUNCTIONS
OVEN LIGHT
The internal oven light turns on by pressing and releasing the
key. To turn it off
press and release again the same key.
When selecting a cooking function, the oven light turns on, and once the selected
temperature is achieved, the light remains on for another 3 minutes.
During a cooking operation or defrosting it is possible to turn on the oven light by
pressing one of the following keys. The light re mains on for 1 minute.
The ligh t can also be turned on when the C ontrols Lock f uncti on is active b y pressin g
one of the following keys
PREHEATING
This function allows to preheat faster the oven, before choosing a cooking function.
When this function is operating, a moving symbol appears on the temperature display.
The preheating ends when its preset temperature is achieved by the oven; this
temperature cannot be changed. At this point, the oven beeps, the light symbol and
the oven light turn on. Now you can choose an available cooking function with the
and
keys.
TRADITIONAL COOKING
This provides traditional cooking with heat from the top and bottom elements.
LOWER ELEMENT MODE
This is f or slow cooking or for warmin g up meals.
GRILL HEATING ELEMENT WITH TURNSPIT
It is suggested for grilling food.
GRILL HEATING ELEMENT WITH FAN AND TURNSPIT
This function is suggested for a gently grilling of food.
PIZZA FUNCTION
This kind of cooking is ideal for pizza and vegetable dishes.
44
Page 47

FAN OVEN MODE
This provides even heating with the fan and allows different dishes to be cooked at the
same time on different levels.
DEFROST MODE
This function allows to reduce the defrost time for frozen food. The fan runs without
any heating of the oven. On the temperature display appears the message dEF ,
which means this function is active.
PI ROLITIC CL EANING
Switch on the oven and select the self-cleaning function.
On the tem peratu re di spla y you will see the m essag e “PI RO”, whil e on t he fu nctio n
display you see a self-cleaning set time of 1h 30m.
The 2 dots betwen 1 and 30 blink for a 4 secs. time, which means you can set your
favorite self-cleaning time or the ending time of that operation.
To do that, follow the previous instructions concerning the programming of cooking.
The maximum time which can be set is of 3 hours, the minimum is of 30 minutes; to
set the time press the
key, then use the + and - keys.
Once the time is set, the symbol A enlights on the time display, which means an
automatic operation is on.
The door is locked and the Controls Lock Function is on, as you can see by the key
symbol on the display. During the self-cleaning function it is possible to see the
remaining time, but you cannot neither change the remaining time nor change the
ending time. The oven light remains off during this operation.
This function allows to clean the oven by increasing the temperature up to 465°C.
The ashes which can result at the end of the operation can be removed with a soft
cloth, once the oven has cooled down.
Warning:
All the accessories and all the considerable food residuals must be removed from
the oven inside before proceeding with the self-cleaning operation.
45
Page 48

OTHER FUNCTIONS
OVEN OFF MODE
When the oven is switched off, the temperature and program displays are off and the
timer shows the current hour.
“CHILDREN CARE” – CONTROLS LOCK FUNCTION
This function can be activated in any moment to prevent children to play with the oven.
In particular, if this function is activated with the oven turned off, it will not be possi ble
to switch the oven on: to operate with the oven it is necessary to remove the lock.
To activate the locking function, hold down the key
until the display shows the
symbol of the key (about 5 sec.) followed by ON, then the display shows again the
current hour.
Note: once you have done this operation, it cannot be set any program or cooking
function, except for the setting of the minute minder. If the lock is activated after any
program or cooking function, it will only be possible to set the minute minder or switch
off the oven by pressing and releasing the
key.
By pressing any other key, the key symbol on the display will remember you that the
locking function is activated.
The automatic or manual switching off of the oven will not disable the locking function.
To disable the locking function hold down the
key until the key symbol on the
display (about 5 sec.) followed by OFF, then the display shows again the current hour.
When the locking function is activated it is not possible to switch it on with the
key, but only to switch it off.
ON / OFF BUTTON
Wh en th e ov en i s s wi tc hed o n, th e
key l et s y ou t o s wit c h of f th e ov en wh at ev er
function is selected and in any moment. To switch off the oven, just press and release
the
key.
When switching off the oven, any cooking function or program is cancelled. To set a
new cooking program, follow the corresponding instructions from the beginning.
When the oven is switched on and the locking function is activated, you can switch off
the oven just pressing and releasing the
key, but the locking function keeps
active.
To disable the lock hold on the
key for about 5 seconds until the key symbol on
the display followed by OFF, then the display will show the current hour.
46
Page 49

“ ° “ SYMBOL
This symbol appears on the temperature display and represents the centigrade
degrees. If the symbol is blinking it means the oven is heating up to reach the
tem pera ture that has b een set.
If the symbol is permanently on it means that the set temperature has been reached.
TIMER RESET
Wi th the o ven s witch ed on , it i s pos sibl e to res et t he set tin gs of th e tim er by pushi ng
togeth er the
and keys.
Attention: the oven keeps switched on with the set function, and in manual operation.
It is possible to set again a cooking program, or also switch off the oven by pressing
and releasing the
key.
47
Page 50

OVEN OPERATION
1. Thermost at
2. Selector
3. Electronic programmer
4. Red light
5. Yellow light
Your new oven incorporates a multifunction cooking system, enabling you to select the
most appropriate heating method for the type of food you are preparing.
The function required is selected by turning the oven function selector knob in a
clockwise direction to the appropriate symbol. The oven interior light will illuminate and
the ‘On’ indicator light will glow.
BOP7303AB - BOP7303AX - BOP8526AX
48
Page 51

Oven functions
Light only
The oven interior light comes on.
Grill with turnspit
This function operates the centre grill element as well as the turnspit motor. An
ideal way to produce a healthy small roast as all the fats are drained whilst
cooking. Always make sure that the oven pan is in place to collect the fats and
meat juices when cooking.
Grilling must always take place with the oven door closed.
Lower heating element only
The element under the floor of the oven operates on its own. The oven, should be
preheated for 15-20 minutes before use. This function is ideal for ‘blind baking’ pastry
cases for quiches and tarts. In this case, the food should be cooked w ith the ove n shelf
on the lowest shelf position.
Traditional cooking
The elements in the roof and floor operate to give a conventional static oven heating
system. The oven should be preheated before use until the temperature indicator light
goes out. It is recommended that food is only placed on one shelf position when
cooking with the conventional heating function. Do not use the lowest or highest shelf
positions or the food may overcook.
Traditional cooking and forced air convection
This kind of cooking is ideal for pizza, lasagne, bread and vegetable dishes.
Forced air convection
The fan and an element behind the rear wall of the oven circulate hot air to give an
even temperature throughout the oven. The oven should be pre-heated before use
until the temperature indicator light goes out. Food can be cooked on several shelf
positions at once, saving both time and energy.
The oven temperature should be reduced by approximately 10% compared to
conventional oven heating systems.
49
Page 52

Defrosting
The fan operates but without its element, so the oven is not directly heated. The oven
door must remain closed. Frozen food can be quickly defrosted by placing in the oven
pan and sliding onto the lowest shelf position. Defrosting time will be reduced by up to
one third using this system.
Ventilated grill
The fan operate
s with the infra-red grill element in the roof of the oven.
The oven should be pre-heated for 5-10 minutes before use. When roasting meats,
this function will crisp the outside of the food whilst the circulating hot air ensures even
cooking. Semi forced air convection can also be used for grilling, so that food does not
need to be turned so often.
Grilling must always take place with the oven door closed.
Do not use aluminium foil to cover the grill pan or heat items wrapped in aluminium foil
under the grill – the high reflectivity of the foil can damage the grill element. Keep the
oven door closed when using the GRILL.
Oven self-clean mode
Turn the selector knob to this function which can only be set via the timer, the cleaning
cycle is 1,5 hours. All internal oven accessories must be removed before using the
pyroli t ic f unction. During t he pyrolitic funct ion the ov en li ght is disabled .
Helpful hi nts
Before cooking, check that any unused accessories are removed from the oven.
Preh eat the o ven at cooking temperatur e before use.
Place cooking trays in the centre of the oven and allow gaps when using more than
one tray f or ai r t o circulate.
Be careful when opening the door to avoid contact with hot parts and steam.
50
Page 53

ELECTRONIC PROGRAMMER/ TEMPERATURE DISPLAY
The electronic programmer is a device, which groups together the following functions:
- 24 hours clock with illuminated display
- Timer (up to 23 hours and 59 min.)
- Program for automatic beginning and end of cooking
- Program for semi-automatic cooking (either start or finish only)
- Displaying the required temperature.
When selecting a required temperature, the temperature is displayed in centigrade
degrees (°C)
Description of buttons
“ TIMER ”
“ COOKING TIME ”
“ END OF COOKING TIME ”
“ MANUA L POSITI ON ”
“ ADVANCEMENT OF THE NUMBERS OF ALL
PROGRAMS - CHECK THE INSERTED TEMPERATURE”
“ TURNING BACK OF THE NUMBERS OF ALL
PROGRAMS - CHECK THE INSERTED TEMPERATURE”
51
Page 54

Description of lighted symbols
« AUTO » - (flashing) - Programmer in automatic position but not programmed.
« AUTO » - (always lighted) - Programmer in automatic position with inserted program.
Manual cooking taking place
+ A Automatic cooking taking place
+
Timer in operation
NOTE: After having selected the operation, a period of time will pass (about 3-4
seconds) before confirmation, during which the data may be modifies.
Digital clock (the clock must be set before operaing with the programmer)
Clock numbers show hours (0-24) and minutes. -------
Upon immediate hooking up of the oven or after a blackout, three zeros will flash on
the programmer panel.
To set the hour it is necessary to first push and release the button
.
Then using the “+” or “-” button set the correct time of the day. When the actual time is
inserted, release the buttons in order to make function the clock.
Manual cooking without using the programmer
To use manually the oven, that is, without the auxiliary programmer, it is necessary to
cancel the flashing «A» by pushing the button.
If the «A» message is displayed in permanent mode, indicating that the oven is
programmed, it is impossible to set the timer to manual function and there fore the oven
cannot be switched on. In this case the program must be firstly cancelled by pressing ,
then the manual function can be set. You can now select the required cooking function
and temperature.
52
Page 55

Timer
The timer can be used to measure a time period between 1 minute and 23 hours & 59
minutes.
1) Automatic cooking (start and end)
Set temperature and cooking program required by using the thermostat and the
selector knobs.
Set the length of cooking time by pushing the button
.
Set the end of cooking time by pushing the button
.
After this setti n g th e symbol «A» will lig ht .
An example: cooking lasts 45 minutes and is expected to stop at 14.00. First select the
required temperature and cooking function by using the appropriate control knob.
Push
and release the press the + button until you have set 0.45.
Push
and release the press the + button until you have set 14.00.
After having finished the setting, the clock hour will appear on the panel and «A»
symbol will lig ht. Thi s means the cooking program has been memorized.
At 13.15 h. (14.00 h. minus 45 minutes) the oven turns on automatically.
At 14.00 h. the oven turns off automatically, a buzzer goes on until it is stopped by
pushing the but ton . The symbol «A» will flash.
2) Semi-automatic cooking
A. Set the length of cooking time
B. Set the end of cooking time
A) Set the length of cooking time by pushing the button .
The o ven wi ll turn o n i m mediately, the symbol «A» will light.
When the set cooking time has elapsed, the oven will turn off, a buzzer will ring until it
is stopped as above described. The symbol «A» will flash.
B) S et the end of cooking tim e by pushing the b utton .
The o ven wi ll turn o n i m mediately, the symbol «A» will light.
At the set time, the oven will turn off and a buzzer will ring until it is stopped as above
described. The cooking program may be cancelled at any moment by pushing
the button , the oven can work manually.
NOTE: 1) and 2) functions or 1)+ 2) functions are active only if a cooking
function has been selected.
53
Page 56

Timer = buzzer
The timer program consists only of a buzzer, which may be set for a maximum period
of 23 hours and 59 min.
To set the timer, push the button and, at the same time, + or - until you read the
desired time on the display.
After the setting, the clock hour and the . symbol wi ll a ppear .
The countdown will start immediately and may be seen at any moment on the display
by simply pressing the button.
At the end of the set time, the symbol will turn off and the buzzer will ring until it is
stopped by pressing the button.
It is possible to change the sound (3 levels: low - medium - high): when it sounds, push
“-” button.
NOTE: At end of cooking time, the sound beeps every second for a maximum of 7
min utes. To c ancel the b eeps press and release the button.
Cancelling an automatic cooking program
An automatic cooking program can be cancelled whenever by pushing
the button. Now the oven can work manually.
It is advisable not to leave food in the oven for long periods of time before automatic
coo ki n g p r oc eed s. A l w ay s en su r e c om merc i all y p r ep ar ed f o od is w el l w it hi n its u s e by
date and that home prepared food is fresh and of good quality.
When cooking is complete, do not l eave food to stand in oven, but remove and cool it
quickly if the fo od is not to be con sum ed immediately.
(DO NOT PUT HOT FOOD IN THE REFRIGERATOR OR FREEZER).
54
Page 57

How to us
e the turnspit
In same ovens it is possib le to use the turningspit an d th e grill t o g et her.
Meat has to be inserted onto the skewers and blocked by the two clamps.
Proceed now as follows:
A. Plac e oven t ray on the lowest position of the o ven.
B. Place one of the forks support along the stainless steel rod and secure. Insert the
meat onto the skewer and then put the other fork support on, securing it firmly into the
meat.
C. The spit handle made of isolating material must be used for extracting the stainless
steel rod fr om the oven and mu st be taken of f wh en cooking.
For example the chicken weighing about 1,3Kg will take approximately 85-90minutes to
cook.
55
Page 58

Replacing t
Warning: disconnect the appliance from the power supply.
If the oven light needs to be replaced, the protective cover “ A ” must be removed by
turning it a ntic lockwis e.After the light has b een rep laced, refit the p rotecti ve co ver “A”.
Note: use only 25 W, E-14 type, T 500°C bulbs.
he oven light
A B
56
Page 59

Removing
B B
A
A
To aid cleaning and make access to the oven interior easier, both oven doors can be
simply removed (see diagram). To make the cleaning operation easier, the door can be
removed from the hinges as follows:
The h ing es A ar e provided w ith two mo vabl e bolt s B.
When bolt B is raised, the hinge is released from its housing. Having done this, the door
must be lifted upwards and removed,sliding it towards the outside;
grip the sides of the door near the hinges when performing these operations.
To refit the door, firstly slide the hinges into their slots.
Before closing the door, remember to rotate the two movable bolts B used to hook
the two hinges.
Do not soak the door in water.
Clean the enamelled interior surface and the glass using a damp cloth and a proprietary
mild cream cleaner, rinse, then dry carefully using a soft cloth.
If necessary,the inner door glass can be removed by unscrewing the two lateral fixing
screws. Make sure that the glass is driedthoroughly before re-fitting.
Take care not to over tighten the fixing screws when re-fitting.
Oven accessories
The oven shelves, oven pans and trivets should be washed in hot water with a mild
detergent then dried carefully, or they can be washed in a dishwasher.
the oven door
57
Page 60

The door can be disassembled to facilitate cleaning of the glasses:
it is possible to remove the upper part, please see the drawing below.
Once having extracted the upper part, slide out the external glass panel (1),
and then the internal ones (2 and 3); please see the drawing below.
Then fit back the glasses in their places by reversing the procedure.
58
Page 61

Oven cooking chart
Food Temp.°C Shelf position (*)
Cooking
time (min)
Cake
Bun 180 2 55-65
Fruit Cake 200 1 30-40
Buttermilk
180 2 35-40
Cooking
function
cake
Mould leaven cake 200 1 25-35
Choux pastry 190 2 20-30
Puff or flaky pastry 200 2 15-25
Biscuits 190 3 15-20
Lasagne 225 2 40-50
Meat
Fillet beef 225 2-3 50-80
Roast beef 225 2-3 50-80
Roast veal 225 2-3 60-80
Roast pork 170- 180 2 45-60
Roast lamp 225 2 54-55
Roast beef 225 2-3 50-60
Roast hare 200 2 60-90
Roast turkey 180 2 240
Roast goose 200 2 150-210
Roast duck 200 2 120-180
Roast chicken 200 2 60- 90
Thigh roe deer 200 2- 3 90-150
Thigh stag 180 2-3 90-180
Fish 180 2-3 10-40
Stewing
170-190 2-3 40-50
vegetable
Pizza 240 1 15-25
Grill cooking
Chop 4 8-12
Pork sausage 4 10-13
Grill ckichen 3 25-35
Spit chicken 50-65
Spit roast veal 50- 65
Note: (*) The shelf position number is referred starting from the oven bottom.
The oven should be preheated before use.
This function is recommended for cooking delicate food and/or preheated
dishes.
This function allows to cook 2 different types of food in the same time, without
mixing their flavours.
59
Page 62

60
Page 63

Installationsanweisungen
Sicherheitsanweisungen und Hinweise
Die in der vorliegenden Anleitung enthaltenen Anweisungen vor der ersten
Benutzung des Backofens genau lesen, um über alle Informationen zu
verfügen, die für eine sichere Installation, eine korrekte Benutzung und die
Pflege Ihres Geräts notwendig sind.
Dieses Gerät muss von Fachpersonal nach den Herstelleranweisungen installiert
werden.
Der Hersteller haftet nicht für Personen- oder Sachschäden, die durch eine
unkorrekte oder ungenügende Installation des Geräts verursacht werden.Sicher
stellen, dass Spannung und Frequenz der elektrischen Versorgung mit den Daten
übereinstimmen, die auf dem Kennschild am vorderen Rand des Backofens
angegeben sind.
Wichtiger Hinweis: dieses Gerät muss geerdet werden.
Unsere Firma übernimmt keinerlei Haftung im Falle eines Defekts in der Verbindung
zur Erde oder im Falle einer Erdung, die den gültigen Vorschriften nicht entspricht.
Vor Reparatur- oder Wartungsarbeiten die elektrische Versorgung durch Betätigung
des Schalters oder der Hauptschalttafel abschalten. Da es im Sinne unserer
Betriebspolitik ist, unsere Produkte ständig zu verbessern, behalten wir uns das
Recht vor, dieselben ohne vorherige Benachrichtigung zu regulieren oder zu
ändern. Während des Betriebs des Backofens werden die Außenfläche und das
Glas sehr heiß; um Verbrennungen und Verletzungen zu vermeiden, nicht
zulassen, dass sich Kinder dem Backofen nähern. Dieses Gerät darf von
Kleinkindern und Unverantwortlichen ohne Beaufsichtigung nicht benutzt werden.
Kleinkinder dürfen mit dem Gerät nicht spielen.
Alte Leute oder Behinderte müssen kontrolliert werden, wenn sie den Backofen
benutzen. Falls unter dem Backofen eine Schublade vorgesehen ist, so darf diese
nicht funktionieren und muss eine vorgetäuschte Front haben.
Auf keinen Fall darf entzündbares Material in der Schublade unter dem Einbauofen
aufbewahrt werden, da es Feuer fangen könnte.Keine schweren Gegenstände auf
die geöffnete Tür legen und sich nicht auf die Tür setzen, da die Scharniere
beschädigt werden könnten. Den Backofen beim Kochen mit Öl oder Fett nicht
unbewacht lassen, da Brandgefahr besteht. Um eine Beschädigung der emaillierten
Innenfläche zu vermeiden, keine Pfannen oder Kochtöpfe auf den Boden des
Backofens legen und die Ofenbasis nicht mit Alufolie zudecken.
Beim Kochen erzeugen Lebensmittel auf natürliche Weise Dampf, der
herausgelassen wird, um Ablagerungen im Ofen zu vermeiden. Dieser Dampf kann
sich in Wassertropfen verflüssigen, die sich auf den kalten Außenteilen des Ofens
ablagern, daher könnte es notwendig sein, diese Feuchtigkeit mit einem weichen
Tuch zu entfernen, damit die Außenfläche des Ofens nicht entfärbt oder zu
schmutzig wird.
61
Page 64

Bevor der Backofen zum ersten Mal benutzt wird
Das Gerät vor der Reinigung ausschalten, indem der Schalter an der Mauer betätigt
oder die Hauptversorgung abgeschaltet wird. Alle Verpackungs- und Zubehörteile
aus dem Ofen nehmen. Die Innenfläche des Backofens mit warmem Wasser und
einem neutralen Reinigungsmittel reinigen.Sorgfältig mit einem feuchten Tuch
nachwischen. Die Backbleche und die Zubehörteile im Geschirrspüler oder mit
warmem Wasser und einem neutralen Reinigungsmittel waschen, dann sorgfältig
trocknen.
Technische Daten
Dieses Gerät ist mit den EWG-Richtlinien 72/23, 93/68 EMC und 89/336 konform.
Vorschriftsmäßige Spannung
≈ 220-240 V Phase + Nullleiter.
Abmessungen des Einbaubackofens (mm) :
Länge : 598
Tiefe : 565,5
Höhe : 600,3
Volum en : 61 Liter
Leistungsaufnahme des Backo
fens : 2,9 – 3,4 kW
62
Page 65

Einbau des Backofens im Möbel
WICHTIG : das Gerät muss korrekt nach den Anweisungen der Herstellerfirma und
von Fachpersonal installiert werden. Vor Reparatur- oder Wartungsarbeiten muss
das Gerät von der elektrischen Versorgung abgetrennt werden.
ELEKTRISCHER ANSCHLUSS : Vor dem Anschluss des Geräts an der
elektrischen Versorgung ist sicher zu stellen, dass :
• die Spannung jener entspricht, die auf dem Kennschild am Rand des Backofens
angegeben ist;
• die Überlast- und Schutzvorrichtung und das Versorgungsnetz des Haushalts der
Belastungsspannung des Geräts standhalten (siehe Kennschild);
• die Versorgungsanlage mit einer effizienten Erdung und allpoliger Steckdose oder
Schalter mit mindestens 3 mm Abstand zwischen den Kontakten versehen ist, die
auch nach der Installation leicht zugänglich sein muss;
• falls die Steckdose nicht leicht zugänglich ist, muss die Installation mit einem
allpoligen Schalter mit Abstand zwischen den Kontakten von oder über 3 mm
erfolgen.
Falls ein längeres Versorgungskabel notwendig ist, muss dieses ein Kabel Typ
H05RR-F mit einem Mindestquerschnitt von 1,5 mm sein. Das Kabel eine für eine
leichte Wartung des Geräts ausreichende Länge hat.
Wichtiger Hinweis: dieses Gerät muss geerdet werden.
Es ist Pflicht, das Gerät korrekt an der Erde anzuschließen. Der Hersteller
übernimmt keine Haftung im Fall von Defekten durch eine Erdung, die mit den
gültigen Vorschriften nicht übereinstimmt.
Dieses Gerät wurde für den Einbau in ein Standardmöbel für Backöfen mit 600 mm
Breite entwickelt. Das Einbaumöbel, die Möbel daneben und alle zur Installation
benutzten Werkstoffe müssen während der Benutzung des Backofen einer
Temperatur von mindestens 85 °C plus Raumtemperatur standhalten. Die Türen
benachbarter Schränke müssen einen Mindestabstand von 4 mm von jedem Punkt
des Geräts haben. Bestimmte Küchenschränke aus Vinyl oder Laminat sind
besonders wärmeempfindlich und können beschädigt werden oder verbleichen. Ein
Schaden und/oder Verbleichen der Materialien, bei einer Temperatur unter 85°C
entstehend oder falls sich diese weniger als 4 mm vom Gerät entfernt befinden, ist
nur dem Eigentümer zuzuschreiben. Für Einbaubacköfen, die unter einer
Arb eit splatte installiert w erden , sind die Inst alla t ionsvor schr iften wie fol gt.
Achtung : wenn das Fachpersonal das Gerät in der Nähe anderer Elektrogeräte
installiert, darf das Versorgungskabel nicht in der Nähe oder in Kontakt mit der
Seitenwand des Backofens verlegt werden.
63
Page 66

TASTEN FUNKTIONEN
Temperatursenkung
Temperaturerhöhung
O N/OFF (EIN/AUS) und BLOCKIERUNG DER BEDIENFUNKTIONEN
Minutenzähler
Kochdauer
Ende des Kochvorgangs
Zeit verringern
Zeit erhöhen
Wahl des Kochprogramms
Wahl des Kochprogramms
BEDIENUNGSANLEITUNG
Wenn der Herd zum ersten Mal an das Stromnetz angeschlossen wird oder nach
einem Stromausfall blinkt die Anzeige des Timers.
Der Herd ist noch nicht aktiviert: zu diesem Zweck muss zunächst die "Einstellung
der Uhr" vorgenommen werden.
EINSTELLUNG DER UHR
Glei c h zei t i g di e T as t en
und drücken und loslassen und mit den Tasten
und die genaue Uhrzeit einstellen. .
Bitte beachten: Die Einstellung muss innerhalb von 3 Sekunden vorgenommen
werden, während auf der Anzeige blinkende Punkte zu sehen sind;
Nach dem Einstellen warten bis die beiden Leuchtpunkte aufhören zu blinken.
BOP 8826 AX
64
Page 67

AKUSTISCHE SIGNALE
Verschiedene Funktionen des Herdes werden durch akustische Signale angezeigt,
z.B. das Ende des Kochvorgangs.
Die Lautstärke der Signale kann verändert werden: beim Drücken der
entsprechenden Taste
bei ausgeschaltetem Herd (OFF), gibt der Herd die 3
möglic hen Einstell niveaus wieder.
Es wird automatisch das zuletzt wiedergegebene Niveau eingestellt.
HERD EINSCHALTEN
Die T aste
drücken und wieder loslassen; ein akustisches Signal (Piep) ertönt.
Auf der Anzeige des Timers erscheint der Hinweis ON, das Symbol der
leuchtet
auf und das Innenlicht des Herdes schaltet sich ein.
Nun kann eine Kochfunktion eingestellt werden.
MINUTENZÄHLER
Der Minutenzähler dient lediglich als Zeituhr und ist von den Kochfunktionen völlig
unabhängig. Er kann sehr nützlich beim Einstellen eines Signals für das Ende des
Kochvorgangs sein. Kann auch bei ausgeschaltetem Herd benutzt werden.
Zur Einstellung des Minutenzählers, den Herd mit
einschalten, dann die
drücken: die Anzeige springt auf Null und die Punkte beginnen zu blinken; mit den
Tasten
und innerhalb von 3 Sekunden die gewünschte Zeit bis zu einer
maximalen Dauer von 23 Stunden und 59 Minuten einstellen; nach Ablauf der
eingestellten Zeit ertönt ein akustisches Signal und das
Sym bol bli nkt. Um
das akustische Signal und das Blinken des Symbole abzustellen, genügt es,
die
zu drücken.
MANUELLER BETRIEB OHNE ZEITEINSTELLUNG
Den Herd einschalten; mit den Tasten
und eine der möglichen
Kochfunktionen auswählen: für jede Kochart schlägt der Herd eine voreingestellte
Richttemp eratur vor, di e mit den Tasten und verändert werden kann .
Der Herd beginnt, sich auf die eingestellte Temperatur aufzuheizen und das
Celsiusgradsymbol ° blinkt, um den Heizbetrieb anzuzeigen.
Sobald die gewünschte Temperatur erreicht wird, ertönt ein akustisches Signal und
das Gradsignal hört auf zu blinken.
Zum Ausschalten des Herds, die Taste
drücken und wieder loslassen.
Die Temperatur- und Funktionsanzeigen erlöschen und es erscheint der Hinweis
OFF; außerdem ertönt ein akustisches Signal (Piepton).
65
Page 68

HALBAUTOMATISCHER BETRIEB MIT EINGESTELLTER KOCHDAUER
Zum E instell en der Kochzeit
Den Herd einschalten, indem die Taste
gedrückt und wieder losgelassen wird;
dann die drücken und wieder loslassen. Auf dem Timer-Display leuchtet das
Symbol A auf. Die gewünschte Kochzeit mit den Tasten
und bis zu einer
maximalen Dauer von 10 Stunden und 00 Minuten einstellen.
Wenn nach dem akustischen Signal auf dem Timer wieder die aktuelle Uhrzeit
angezeigt wird, kann mit den Tasten
und eine Kochfunktion ausgewählt
werden. Für jede Kochfunktion schlägt der Herd eine voreingestellte
Richttemp eratur vor, di e mit den Tasten und verändert werden kann .
Der Herd beginnt den Kochvorgang mit der eingestellten Zeit, nach deren Ablauf er
automatisch abschaltet. Nach Beendigung des zeitgesteuerten Kochvorgangs wird
ein intermittierendes akustisches Signal ausgelöst, während die Temperatur- und
Funktionsanzeigen erlöschen und das Timer-Display die aktuelle Uhrzeit anzeigt.
Die beid en Symbole
und A blinken.
Zum Abschalten des akustischen Signals und zum Verlassen des Kochzyklus eine
der folgenden Tasten drücken:
.
Der Herd ist für eine neue Bedienfunktion bereit; wählen Sie eine neue kochfunktion
aus oder schalten Sie den Herd aus, indem Sie die Taste
drücken und weider
loslassen.
HALBAUTOMATISCHER BETRIEB MIT EINGESTELLTEM ENDE DES
KOCHVORGANGS
Zum Einstellen der Uhrzeit für das Ende des Kochvorgangs
Den Herd durch Drücken und Wiederloslassen der Taste
einschalten, dann die
Taste
drücken und wieder loslassen. Auf dem Timer-Display leuchtet das
Symbol A auf. Mit den Tasten
und die Uhrzeit für das Ende des
Kochvorgangs einstellen, das innerhalb der nächsten 23 Stunden und 59 Minuten
liegen muss.
Wenn nach dem akustischen Signal auf dem Timer wieder die aktuelle Uhrzeit
angezeigt wird,
kann mit den Tasten
und eine der verfügbaren Kochfunktionen auswählen.
Auf dem Timer-Display leuchtet das Symbol
auf. Der Herd schlägt eine
vor ein ges tel lt e Tem per at ur vo r, die mi t d en T ast en
und verändert werden
kann.
66
Page 69

Der Herd beginnt mit dem Kochvorgang und setzt ihn bis zur eingestellten Uhrzeit
fort; dann schaltet er automatisch ab.
Nach Beendigung des zeitgesteuerten Kochvorgangs wird ein intermittierendes
akustisches Signal ausgelöst, während die Temperatur- und Funktionsanzeigen
erlöschen und das Timer-Display die aktuelle Uhrzeit anzeigt. Die beiden Symbol e
und A blinken.
Zum Abschalten des akustischen Signals und zum Verlassen des Kochzyklus eine
der folgenden Tasten drücken:
.
Auf dem Funktionsdisplay leuchtet das Symbol
auf schaltet sich das Licht im
Of en ein.
Der Herd ist für eine neue Bedienfunktion bereit; wählen Sie eine neue
Kochfunktion aus oder schalten Sie den Herd aus, indem Sie die Taste
drücken und weider loslassen.
AUTOMATIKBETRIEB
Zum Einstellen der Kochdauer und der Uhrzeit für das Ende des Kochvorgangs.
Den Herd durch Drücken und Wiederloslassen der Taste
einschalten; dann die
Taste
drücken und mit den Tasten und die gewünschte Kochdauer
einstellen.
Es ertönt erneut ein akustisches Signal und die Punkte hören auf zu blinken, um die
Übernahme der eingestellten Uhrzeit bestätigen.
Auf dem Display wird weiterhin die ausgewählte Temperatur,die aktuelle Uhrzeit
und die ausgewählte Kochfunktion angezeigt.
Das Licht im Ofen schaltet sich aus.
Mit den Tasten
und eine Ko chfunktion auswählen. Der Her d schlägt eine
voreingestellte Temperatur vor, die mit den Tasten auf und ab verändert werden
kann
Nachdem die Punkte des Timers aufgehört haben zu blinken, geht der Herd in di e
verzögerte Kochmodalität über. Sowohl die Temperatur als auch die eingestellte
Funktion können durch Wiederholung des oben beschriebenen Vorgangs verändert
werd en. Der Herd wird später autom atis ch für die ei ngest ellt e Dauer a kti viert und
wird zur angegebenen Uhrzeit ausgeschaltet.
Nach Ende des Kochvorgangs zur eingestellten Zeit wird ein intermittierendes
akustisches Signal ausgelöst, während die Temperatur- und Funktionsanzeigten
erl ösc hen, das Tim er -Dis play die a ktuel le U hrzei t a nzeig t und di e beid en Sym bol e
und A blinken. Zum Abschalten des akustischen Signals und zum Verlassen
des Kochzyklus eine der folgenden Tasten drücken:
.
Der Herd ist für eine neue Bedienfunktion bereit; wählen Sie eine neue
Kochfunktion aus oder schalten Sie den Herd aus, indem Sie die Taste
drücken
und weider loslassen.
67
Page 70

EINSCHRÄNKUNGEN FÜR DIE ANWENDUNG DER AUTOMATISCHEN UND
HALBAUTOMATISCHEN KOCHFUNKTIONEN
Die Vorheiz- (PHR) und Abtaufunktionen sind nicht mit den Funktionen des
zeitgesteuerten Kochvorgangs kompatibel, daher gilt:
- Wenn eine dieser beiden Funktionen aktiviert ist, kann weder die Dauer noch das
Ende der Kochzeit eingestellt werden.
- Wenn der Herd mit dem automatischen Kochmodus programmiert wurde, können
die Vorheiz- (PHR) und Abtaufunktion nicht aktiviert werden.
SYMBOLE AUF DEM DISPLAY
Topf: wenn dieses Symbol aufleuchtet, ist eine Kochfunktion aktiviert.
Das Topfsymbol leuchtet hingegen nicht, wenn die Funktionen Licht, PHR
(Vorheizen) und Abtauen aktiv sind..
Wenn es blinkt, zeigt es das Ende eines zeitgesteuerten Kochvorgangs an.
Während des automatischen Betriebs bleibt das Symbol ausgeschaltet und leuchtet
erst auf, wenn das Herdprogramm gestartet wird.
A (Automatik): wenn dieses Symbol aufleuchtet, zeigt es an, dass eine Kochzeit
eingestellt wurde; wenn es blinkt, zeigt es das Ende eines eingestellten
Kochvorgangs an.
Glocke: wenn die Glocke aufleuchtet, zeigt sie an, dass der Minutenzähler
aktiviert wurde; wenn sie blinkt, zeigt sie das Ende der eingestellten Minutenzeit an.
AUSWAHL DER KOCHTEMPERATUR
Während der Herd eingeschaltet ist, kann mit den Tasten
und die
Temperatur in 5°-Schritten auf einen auf dem Display angezeigten Wert zwischen
Min dest- un d H öchs t tem pera tur eingestellt w erden . .
Bitte beachten: für jede Kochfunktion ist eine Richttemperatur vorprogrammiert, die
nach Belieben mit den Tasten
und verändert werden kann.
AUSWAHL DER KOCHFUNKTIONEN
Währen der Herd eingeschaltet ist und die Tasten
und akti vi ert wer den,
schaltenj sich die entsprechenden Symbole nacheinander ein, um die Auswahl der
gewünschten Kochfunktion zu ermöglichen.
68
Page 71

Funktionen:
HERDLICHT
Das innere Licht des Herdes wird durch Drücken und Wiederloslassen der Taste
eingeschaltet; zum Ausschalten erneut die Taste ON/OFF drücken und dann
wied er l osla ssen.
Beim Auswählen einer Kochfunktion schaltet sich das innere Herdlicht ein und
brennt bis 3 Minuten nach Erreichen der eingestellten Temperatur.
Wahrend einer ochfuntion oder beim Abtauen kann das Herdlicht durch Drücken
einer der folgenden Tasten wieder eingeschaltet werden:
:das Licht bleibt eine Minute lang eingeschaltet.
Das Herdliocht kann auch eingeschaltet werden, wenn die Blockierung der
Bedienfunktionen aktiv ist, indem eine der folgenden Tasten gedrückt wird:
.
VORHEIZFUNKTION
Mit dieser Funktion kann der Herd vor Auswahl der Kochfunktion vorgeheizt
werden.
Au f der Temperaturanzeigebewegt sich ein Symbol.
Der Vorheizprozess endet mit dem Erreichen der vorprogrammierten
(unveränderlichen) Temperatur; daraufhin ertönt ein akustisches Signal und werden
das Symbol der Glühbirne und das Herdlicht eingeschaltet; jetzt kann mit den
Tasten
und der gewünschte Kochzyklus ausgewählt werden.
HERKÖMMLICHES GAREN
Herkömmliches Garen der Speisen mit Unter- und Oberhitze.
UNTERHITZE
Geeignet für langsam zu garende Speisen oder das Aufwärmen von
Fertiggerichten.
GRILL MIT BRATSPIEß
Dient zum Grillen von Speisen.
65
Page 72

HEISSLUFTGRILL MIT BRATSPIEß
Dient zum sanfteren Grillen von Speisen.
PIZZA FUNKTION
Besonders geeignet für Gemüsegerichte und das Backen von Pizzas.
HEISSLUFTGAREN
Durch diese Funktion wird ein gleichmäßiges Garergebnis erzielt. Es können zwei
verschiedene Speisen unter Berücksichtigung der erforderlichen Garzeiten gegart
werden.
AUFTAUEN
Das Gebl äse setzt sich i n B etrieb, die Heizelem ente (Unter- und Oberhitze) bleiben
jedoch ausgeschaltet. Dank dieser Funktion können Speisen schneller als auf
herkömmliche W eise aufgetaut werden. A uf dem Display mi t Temper aturanzei ge
erscheint die An zeige " dEF "
PYROLYTISCHE REINIGUNG
Nach Einschalten des Backofens, die Funktion Selbstreinigung wählen.
Auf dem Temperaturdisplay erscheint die Schrift PYRO, während das
Funktionsdisplay eine vorgegebene Pyrolysezeit von 1 Stunde und 30 Minuten
vorschlägt.
Die zwei Punkte zwischen den Zahlen (1:30) blinken für 4 Sekunden und zeigen
damit an, dass die Dauer der Pyrolyse oder das Ende der Laufzeit eingestellt
werden kann, hierfür die vorausgegangenen Anweisungen für die programmierten
Garzeiten befolgen.
Die einstellbare Höchstzeit beträgt 3 Stunden, die Mindestzeit 30 Minuten; um sie
zu ändern, die Taste
drücken, anschliessend die Tasten und
betätigen. Sobald die Zeit eingestellt ist, erscheint der Buchstabe A neben der
Zeitdauer, er zeigt die Aktivierung eines automatischen Vorgangs an.
Die Tür wird blockiert und die Funktion Steuerungssperre aktiviert, als Hinweis
erscheint auf dem Display das Symbol des Schlüssels.
Während der Pyrolyse kann die Restzeit bis zum Ende des Zyklus gezeigt aber
nicht geändert werden. Diese Funktion ermöglicht die Reinigung des Backofens, in
dem die Temperatur bis 465°C ansteigt. Die dadurch entstehende Asche kann
mit einem feuchten Tuch entfernt werden, sobald der Backofen abgekühlt, aber
noch lauwarm ist. Während der pyrolytischen Selbstreinigung bleibt die
Backofenleuchte ausgeschalten.
66
Page 73

Hinweis:
Bevor die Funktion der Selbstreinigung gestartet wird, muss sämtliches Zubehör
aus dem Backofen entfernt werden.
Es wird ausdrücklich darauf hingewiesen, diese selbstreinigende Funktion nur in
Gegenwart einer Person vorzunehmen.
Vor dem Start der Selbstreinigung müssen alle grösseren Speisereste aus dem
Bac kof en entfernt wer den.
WEITERE FUNKTIONEN
MODUS ABGESCHALTETER HERD
Bei abgeschaltetem Herd sind die Temperatur- und Funktionsanzeige nicht aktiv,
während das Timer-Display die aktuelle Uhrzeit anzeigt.
FUNKTION ZUR BLOCKIERUNG DER BEDIENFUNKTIONEN
(KINDERSICHERUNG)
Diese Funktion kann jederzeit aktiviert werden, um die Manipulation des Herdes
durch Kinder zu verhindern.
Bei abgestelltem Herd verhindert diese Funktion insbesondere, dass er
eingeschaltet wird; bevor irgendeine Kochfunktion aktiviert werden kann muss
daher erst die Blockierung entsichert werden.
Zum Einschalten der Blockierung für die Bedienfunktionen die Taste
gedrückt
halten, bis das Schlüsselsymbol angezeigt wird (etwa 5 Sekunden) und dann
ON drück en; d anach zeigt das Display wieder die a k tuelle U hrzei t an.
Bitte beachten: bei eingeschalteter Blockierung kann keine Kochfunktion aktiviert,
sondern nur der Minutenzähler eingestellt werden.
Wenn die Blockierung hingegen nach der Einstellung einer beliebigen Kochfunktion
(manueller Betrieb, Halbautomatik, Automatik) aktiviert wird, kann nur der
Minutenzähler verstellt oder der Herd durch Drücken und Wiederloslassen der
Taste
ausgeschaltet werden. Beim Drücken jeder beliebigen anderen Taste
hingegen erinnert die Anzeige des Schlüsselsymbols daran, dass die
Kindersicherung aktiv ist.
Durch das manuelle oder automatische Abschalten des Herds wird die Blockierung
der Bedienfunktioinen nicht aufgehoben. Zum Aufheben der Blockierung der
Bedienfunktionen die Taste
gedrückt halten, bis das Schlüsselsymbol
angezeigt wird (etwa 5 Sekunden) und dann OFF drücken; danach zeigt das
Displa y wied er die aktuelle Uhrzeit an.
Wenn der Herd blockiert ist, kann er nicht durch Drücken der Taste
ingeschaltet, sondern nur ausgeschaltet werden (OFF).
67
Page 74

TASTE ON/OFF
Mit der Taste
kann jederzeit und egal welche Funktion eingestellt ist, der Herd
ausgeschaltet werden. Alle Kocheinstellungen werden in diesem Fall annulliert. Für
den nächsten Kochvorgang die entsprechenden Anweisungen von Anfang an
befolgen. Wenn der Herd eingeschaltet ist und die Bedienfunktionen blockiert sind,
wird der Herd durch Drücken und Wiederloslassen der Taste ON/OFF
ausgeschaltet, ohne dass jedoch die Blockierung deaktiviert wird.
Zum Deaktivieren der Blockierung die Taste ON/OFF mindestens 5 Sekunden lang
gedrückt halten: das Display zeigt daraufhin erst das Schlüsselsymbol und dann
" OFF " an, danach erscheint wieder die Uhrzeit.
SYMBOL “ ° “
Zeigt die Gr adzahl an.
Wenn das Symbol blinkt, wird der Herd gerade auf die eingestellte Temperatur
aufgeheizt.
Wenn es kontinuierlich angezeigt wird, bedeutet dies, dass die eingestellte
Temper atur erreicht wur de.
ANNULLIERUNG DER EINSTELLUNGEN VON KOCHDAUER UND ENDE DES
KOCHVORGANGS.
Die Einstellungen für die Kochdauer und die Uhrzeit für das Ende des
Kochvorgangs können jederzeit durch gleichzeitiges Drücken der Tasten
und
annulliert werden.
ACHTUNG: Der Herd bleibt jedoch eingeschaltet, und zwar mit der ausgewählten
Funktion im manuellen Modus (ohne Zeiteinstellung).
Die Kochdauer und/oder die Uhrzeit für das Ende des Kochvorgangs können
daraufhin neu eingestellt oder der Herd durch Drücken und Wiederloslassen der
Taste
ganz abgeschaltet werden.
68
Page 75

1 - Thermostat
2 - Wählschalter
3 - Elektronischer Progr am mierer
4 - Roter Leuchtmelder
5 - Gelber Leuchtmelder
Ihr neuer Backofen ist mit einem Multifunktionskochsystem ausgestattet, mit dem
Sie die Kochmethode auswählen können, die am Besten für Ihr Gericht geeignet ist.
Die gewünschte Funktion wird ausgewählt, indem der Drehknopf des
Betriebswählschalters im Uhrzeigersinn auf das entsprechende Symbol gedreht
wird. Die Ofenbeleuchtung und der Betriebsleuchtmelder « ON » schalten ein.
BOP7303AB - BOP7303AX - BOP8526AX
69
Page 76

Die verschiedenen Funktionen Ihres Backofens und die jeweiligen Symbole sind :
Funktionen des Backofens
1 Nur Beleuchtung
Die G lüh birn e i m Ofen schalt et ein.
2 Grill mit Bratspieß
Das Element, das sich unter der Ofenbasis befindet, funktioniert unabhängig.
Vor dem Gebrauch muss der Backofen 15 Minuten lang vorgewärmt werden.
Diese Funktion ist ideal für das Backen von Mürbeteig für nicht süße Torten und
Kuchen. In diesem Fall muss das Backblech ganz unten im Ofen angeordnet
werden.
3 Nur unteres Heizelement
Das Element, das sich unter der Backofenbasis befindet, funktioniert auf
unabhängige Weise.Der Backofen muss vor Gebrauch 15-20 Minuten vorgewärmt
werden. Diese Funktion ist ideal für das Backen von Mürbeteig für nicht süße
Torten und Kuchen. In diesem Fall muss das Backblech ganz unten im Ofen
angeordnet werden.
4 Traditionelles Kochen
Das obere und das untere Element schalten ein für ein statisches, traditionelles
Kochen. Vor Gebrauch muss der Ofen vorgewärmt werden, bis der
Temperaturleuchtmelder erlischt. Mit dieser Funktion darf nur ein Blech zum
Kochen der Lebensmittel verwendet werden. Das Blech nicht ganz unten oder ganz
oben anordnen, da die Speisen zu stark gekocht werden könnten.
5 Zwangsbelüftung und Traditionelles Kochen
Bei dieser Betriebsart sind der Unterhitzeheizkörper und die Heißluft in Betrieb. Sie
ist besonders geeignet für das Backen von Pizza. Feuchte oder schwere Kuchen
auf 2 Ebenen, Obstkuchen mit Hefe- und Mürbeteig und Käsesoufflee gelingen am
besten.
70
Page 77

6 Zwangsbelüftung
Das Lüfterrad und das Element, das sich hinter der Rückwand des
Backofensbefindet, lassen die Warmluft umlaufen, um in jedem Teil des Backofens
eine gleichmäßige Temperatur zu geben. Vor Gebrauch muss der Backofen immer
vorgewä r mt werden, bi s der Temperatu r leuchtmeld er erl ischt.
Man kann verschiedene Speisen auf mehreren Stufen gleichzeitig kochen und auf
dies e W eis e Zei t und E ner gi e sp aren . Di e Ba cko f ent emp eratu r i st i m V ergl ei ch zu r
traditionellen Erwärmung des Backofens um ca. 10% reduziert.
7 Auftauen
Die Backofenbeleuchtung und die grüne Kontrollleuchte schalten sich wie bei allen
anderen Funktionen ein. Nur das Gebläse setzt sich in Betrieb, da der Thermostat
nicht in Betrieb ist, wird keine Wärme erzeugt.
Die Backofentür muss geschlossen ein. Mit dieser Funktion werden Lebensmittel
mit nur einem 1/3 des normalerweise üblichen Zeitaufwandes aufgetaut.
8 Teilzwangsbelüftung
Das Lüfterrad funktioniert in Kombination mit dem Infrarrotgrillelement im oberen
Teil des Backofens.
Vor dem Gebrauch muss der Backofen 5-10 Minuten lang vorgewärmt werden.
Beim Rösten von Speisen wird mit dieser Funktion die Außenseite des Kochguts
knusprig, während die im Backofen umlaufende Warmluft die Speisen fertig kocht.
Die Teilzwangsbelüftung kann zum Grillen verwendet werden; in diesem Fall
müssen die Speis en nicht so häufig umgedr eht w erden .
Der Grill darf nur mit geschlossener Ofentür funktionieren.
Keine Alufolie verwenden, um den Rost oder das Kochgut unter dem Grill
zuzudecken – das Grillelement könnte durch die reflektierende Alufolie beschädigt
werden. Die Ofentür während des Gebrauchs des Grills geschlossen halten.
9 Selbstreinigerfunktion des Backofens
Den Drehknopf auf diese Funktion stellen; die Einstellung ist nur mit dem Timer
möglich; die Selbstreinigung dauert ca. 1,5 Stunden. Vor Gebrauch dieser
pyrolytischen Funktion müssen alle Zubehörteile aus dem Backofen genommen
werden. Während der pyrolytischen Funktion ist die Ofenbeleuchtung
ausgeschaltet.
71
Page 78

Elektronische Schaltuhr mit Temperaturanzeige
Die Schaltuhr hat folgende Funktionen:
- Uhr mit 24-Stunden-Leuchtdisplay
- Zeitmesser (maximal 23 Stunden und 59 Minuten)
- Programmierung von Anfang und Ende des Brat-/Backvorgangs
- halbautomatische Programmierung
(nur Anfang oder nur Ende des Brat /Backvorgangs).
- Anzeige der gewünschten Temperatur.
Beschreibung der Knöpfe
“ TIMER ” MIT AKUSTISCHEM SIGNAL
“ BRAT-/BACKZEIT (DAUER) ”
“ BRAT-/BACKZEIT (ENDE) ”
“ MANUELLER BETRIEB ”
“ ZAHLEN AUF DEM DISPLAY STEIGEND ”
“ZAHLEN AUF DEM DISPLAY ABNEHMEND”
72
Page 79

Bedeutung der beleuchteten Zeichen
« A » - (blinkend) - Schaltuhr in automatischer Position, aber nicht programmiert.
« A » - (ständige Beleuchtung) - Schaltuhr in automatischer Position, programmiert.
Laufende, manueller Brat-/Backvorgang.
+ A Programmierter Zeitmesser.
+ Wenn dieses Zeichen gemeinsam mit «AUTO» blinkt, liegt ein
Programmierungsfehler vor.
Wenn nur die Ziffern der Uhr und keines der Zeichen leuchten, bedeutet dies
manuelle Bedienung.
ANMERKUNG: nach der Auswahl der Funktion verläuft vor der Bestätigung eine
gewisse Zeit (ca. 3-4 Sekunden), in der die Daten geändert werden können.
Digitaluhr
Zeigt die Stunden (0 - 24) und Minuten an.
Gleich nach Anschluß des Backofens (auch nach einer Stromunterbrechung)
erscheinen auf der Bedienungblende DREI blinkende Ziffern.
Um die genaue Uhrzeit einzugeben, muß man gleichzeitig auf die Zeichen +
drücken und GLEICHZEITIG auf einen dern Schalter (+ ) oder (- ), bis man die
genaue Uhrzeit eingestellt hat. Einige Sekunden, nachdem man auf (+ ) oder (- )
gedrückt hat, beginnen die Zahlen auf dem Display schnell durchzulaufen.
Manueller Betrie b ( Ohne Schaltuhr)
Um den Backofen ganz ohne Hilfe der Schaltuhr zu benützen, muß man die
blinkende Anzeige "AUTO" löschen, indem man auf den Schalter drückt.
Wenn "AUTO" (nicht blinkend) anzeigt, daß der Backofen schon programmiert ist,
muß man das Programm durch Drücken des Schalters l öschen und das
Display wieder auf Null ei nst ell en.
Automatischer Brat-/Backvorgang (Anfang und Ende)
1) Die Dauer des Brat-/Backvorgangs mit dem entsprechenden Schalter
programmieren.
2) Das Ende des Brat-/Backvorgangs mit dem entsprechenden Schalter
programmieren.
3) An Thermostat und Wahlschalter die gewünschte Temperatur und Funktion
einstellen.Nach diesen Schritten erscheint auf dem Display die Leuchtanzeige
"AUTO", was bedeutet, daß der Backofen programmiert worden ist.
73
Page 80

Praktisches Beispiel:
Die Backzeit soll 45 Minuten dauern und um 14.00 Uhr enden.
- Man drückt auf und stellt auf dem Display 0.45 ein.
- Man drückt auf und stellt auf dem Disp1ay 14.00 ein.
Danach sind auf dem Disp1ay wieder die tatsächliche Uhrzeit und die Anzeige
"AUTO" zu sehen, was bedeutet, daß die Programmierung verstanden und
gesp eichert worden ist.
Um 13.15 (14.00 Uhr minus 45 Minuten) schaltet sich der Backofen automatisch ein
und während des Backvorgangs sind die Zeichen und "AUTO" zu sehen.
Um 14.00 Uhr schaltet sich der Ofen automatisch aus und zeigt dies durch ein
akustisches Signal an, das man durch Bedienung der Taste ausschalten
kann.
Halbautomatisches Braten oder Backen
A. Programmierung der Brat-/Backzeit
B. Programmierung des Brat-/Backendes
A) Die gewünschte Brat-/Backzeit mit dem Schalter einstellen.
Der Backofen schaltet sich sofort ein, während auf dem Display die Zeichen
"AUT O" und erscheinen.
Nach Ablauf der programmierten Zeit schaltet sich der Backofen aus und
beginnt das akustische Signal, das man wie oben erklärt unterbrechen kann.
B) Das gewünschte Brat-/Backende mit Schalter einstellen.
Der Backofen schaltet sich sofort ein, während auf dem Display die Zeichen
"AUT O" und erscheinen.
Bei Erreichen der eingestellten Uhrzeit schaltet sich der Backofen aus und
beginnt das akustische Signal, das man wie oben erklärt unterbrechen kann.
Man kann jederzeit am Display überprüfen, in welcher Phase der
programmierte Brat- oder Backvorgang ist oder die Programmierung mit Hilfe der
Taste löschen und das Display auf Null einstellen.
Wenn man dann auf Taste drückt, bereitet man den Backofen auf manuelle
Bedienung vor.
74
Page 81

Elektronisches Signal
Der Zeitmesser kann auf eine Maximaldauer von 23 Stunden und 59 Minuten
eingestellt werden und gibt nach Ablauf der entsprechenden Zeit ein akustisches
Signal ab.
Um den Timer einzustellen, bedient man Schalter und gleichzeitig die Tasten
(+ ) oder (- ), bis auf dem Display die gewünschte Zeit erscheint. Nachde m man den
Timer so eingestellt hat, erscheinen auf dem Display die Uhrzeit und das Zeichen
Der Countdown beginnt ab sofort und kann jederzeit mit Hilfe des Schalters
kontrolliert werden - die noch fehlende Minutenzahl erscheint auf dem Display.
Nach Ablauf der eingestellten Zeit schaltet sich das Zeichen aus und beginnt
gleichzeitig das akustische Signal, das nur durch Bedienen des Schalters
unterbrochen werden kann.
ACHTUNG! Bei Unterbrechung der Stromzufuhr werden alle Funktionen, auch
die U hrzei t, gel ösc ht. So bald die St rom zuf uhr wi eder herg estel lt ist , ers chei nen a uf
dem Display drei blinkende Nullen und man kann das Gerät wieder neu
programmieren.
75
Page 82

Die Tür nicht in Wasser tauchen.
Die emaillierte Innenfläche und das Glas mit einem feuchten Tuch und neutralem
Reinigungsmittel reinigen, nachspülen, dann mit einem weichen Tuch sorgfältig
trocknen.
Falls nötig, kann das Glas demontiert werden, indem die beiden seitlichen
Befestigungsschrauben abgeschraubt werden. Vor dem erneuten Einbau des
Glases sicher stellen, dass dieses ganz trocken ist. Die Befestigungsschrauben bei
der Montage nicht zu fest anziehen.
Zubehörteile des Backofens
Die Ofenbleche, die Fettpfanne und die Bratspießhaltung müssen in warmem
Wasser mit einem neutralen Reinigungsmittel gereinigt und sorgfältig getrocknet
werd en, sie können auch im G eschirrspüler gereinigt wer den.
Verwendung des Bratspießes
In demselben Ofen kann der Bratspieß in Kombination mit dem Grill verwendet
werden. Das Fleisch muss auf den Spieß gesteckt und mit den Gabeln blockiert
werden.
Dann wie folgt vorgehen :
A. Die Fettpfanne unten in den Ofen stecken.
B. Eine der Gabeln auf die Edelstahlstange stecken und befestigen. Das Fleisch auf
den Spieß stecken, dann die andere Gabel einstecken, so dass das Fleisch
festsitzt.
C. Der Griff des Bratspießes aus isolierendem Material muss benutzt werden, um
die Edelstahlstange aus dem Ofen zu nehmen, und muss während des Kochens
entfernt werden.
Ein Huhn, das ca. 1,3 kg wiegt, muss zum Beispiel ca. 85-90 Minuten gekocht
werden.
Page 83

Auswechseln der Glühbirne des Backofens (Abb. 1)
ACHTUNG : das Gerät von der elektrischen Verso rgun g abtrennen.
Zum Auswechseln der Glühbirne muss der Schutzdeckel « A » entfernt werden,
indem er gegen den Uhrzeigersinn gedreht wird. Den Schutzdeckel « A »
nach dem Auswechseln der Glühbirne wieder anbringen.
Glühbirne: 25 W - Schraubsockel E-14 - T 500°C.
Demontage der Ofentür (Abb. 2)
Um die Reinigung zu erleichtern und für einen besseren Zugang zum I nnenteil des
Ofens können beide Backofentüren sehr einfach demontiert werden (siehe
Zeichnung). Um die Reinigung des Backofens zu erleichtern, kann die Ofentür
durch Betätigung der Scharniere entfernt werden, wie folgt :
Scharniere mit beweglichen Hebeln
Die Scharniere A sind mit zwei beweglichen Hebeln B ausgestattet.
Das Scharnier geht aus seinem Sitz heraus, wenn der Hebel B gehoben wird. Die
Ofentür kann dann nach oben gehoben und nach außen herausgezogen werden;
die Tür dazu an den Seiten in der Nähe der Scharniere anfassen.
Um die Tür wieder einzubauen, zuerst die Scharniere in ihre Sitze einfügen.
Bevor die Tür geschlossen wird, die beiden beweglichen Hebel B herunterlassen,
die zum Einhängen der Scharniere verwendet wurden.
Abb. 1 Abb. 2
A B
A
A
B
B
Page 84

Die Ofentür kann für die Reinigung der Scheiben ausgebaut werden.
Der obere Teil kann wie auf der nachfolgenden Abbildung aufgezeigt abgenommen
werden.
Nach dem Abnehmen des oberen Teils erst die äußere Scheibe (1) und dann die
inneren Scheiben (2 und 3) herausziehen; siehe unten stehende Abbildung.
Für den Wiedereinbau der Scheiben in der zum Ausbau umgekehrten Reihenfolge
fortfahren.
Page 85

Kochtabelle
Gericht Temp.°C
Stufe des
Backblechs (*)
Kochzeit
(min)
OfenFunktion
Kuchen
Kringel 180 2 55-65
Obstkuchen 200 1 30-40
Kuchen mit Milch und
Butter
180 2 35-40
Kuchen aus Hefeteig 200 1 25-35
Bignè 190 2 20-30
Blätterteig 200 2 15-25
Kekse 190 3 15-20
Lasagne-Nudeln 225 2 40-50
Fleisch
Rindsfilet 225 2-3 50-80
Roastbeef 225 2-3 50-80
Kalbsbraten 225 2-3 60-80
Schweinebraten 170-180 2 45-60
Lammbraten 225 2 54-55
Rindsbraten 225 2-3 50-60
Gebratener Hase 200 2 60-90
Gebratener Truthahn 180 2 240
Gebratene Gans 200 2 150-210
Gebratene Ente 200 2 120-180
Gebratenes Huhn 200 2 60-90
Rehschenkel 200 2- 3 90-150
Hirschschenkel 180 2-3 90-180
Fisch 180 2-3 10-40
Geschmortes
Gemüse
170-190 2-3 40-50
Pizza 240 1 15-25
Grillen
Kotelett 4 8-12
Schweinswurst 4 10-13
Gegrilltes Huhn 3 25-35
Huhn vom Bratspieß 50-65
Kalbsbraten vom
Bratspieß
50-65
Bitte bemerken: (*)die anfängliche Stufe des Backblechs entspricht der Ofentaste.
Der Backofen muss vor Gebrauch vorgewärmt werden.
Diese Funkt i onen müs st en für empf indl ich e Speis en und /od er vorg ewärm t e Speis en
benutzt w erden.
Dasselbe Gericht kann auf verschiedenen Stufen gekocht werden (die Kochzeit
bleibt dieselbe).
78
Page 86

Page 87

Instructions pour l’installation
Instructions pour la sécurité et avertissements
Avant d’utiliser le four pour la première fois, lire attentivement les
instructions contenues dans ce manuel pour pouvoir disposer de toutes les
informations nécessaires pour effectuer une installation sûre, utiliser
correctement et prendre soin de vo tre appareil.
Cet appareil doit être installé correctement par une personne qualifiée selon les
instructions du constructeur.Le constructeur décline toute responsabilité en cas de
dommages aux personnes ou aux biens causés par une installation incorrecte ou
insuffisante de l’appareil.Vérifier que la tension et la fréquence de l’alimentation
électrique correspondent aux données indiquées sur la plaquette d’identification
appliquée sur le bord frontal du four.
Aver tissement: cet appareil doit être br anché à la terre.
Notre Maison décline toute responsabilité en cas de fonctionnement i ncorrect du
branchement à la terre ou en cas de branchement à la terre non conforme aux
normes en vigueur.
Avant d’effectuer n’importe quelle réparation ou opération de maintenance,
débrancher l’alimentation électrique à partir de l’interrupteur ou sur le tableau
principal. Vu que la politi que de notre Maison vi se à l’amélioration continuelle de
ses produits, nous nous réservons le droit de les mettre au point ou de les modifier
sans aucun préavis.
Pendant le fonctionnement du four, la surface externe et la vitre deviennent très
chaudes; pour éviter toute brûlure ou blessure, ne pas laisser que les enfants
s’approchent du four.
Cet appareil n’est pas destiné à être utilisé par des personnes (notamment les
enfants) incapables, irresponsables ou sans connaissance sur l’utilisation du
produit, à moins qu’elles ne soient surveillées, ou instruites sur l’utilisation de
l’appareil, par une personne responsable de leur sécurité.
Surveillez les enfants pour être sûr qu’ils ne jouent pas avec l’appareil.
Si un tiroir est prévu en-dessous du four, celui-ci ne doit pas être fonctionnel et doit
avoir une fausse parois frontale.
Il ne faut jamais conserver de matériaux inflammables dans le tiroir sous le four à
encastrement, car ils pourraient prendre feu. Ne pas placer d’objets lourds sur l a
porte ouverte ou s’asseoir sur celle-ci, car les charnières pourraient s’abîmer.
Pendant la cuisson avec de l’huile ou des graisses, ne pas laisser le four sans
surveillance parce qu’on court le risque d’incendie.
Pour éviter tout dommage à la surface interne émaillée, ne pas déposer de
récipients ou de plat s de cuisson sur le f ond du four et ne pas couvrir la base du
four avec du papier d’aluminium.
Pendant la cuisson, les aliments naturels produisent de la vapeur qui est évacuée
pour éviter un dépôt excessif à l’intéri eur du four. Cette vapeur peut se condenser
en gouttes d’eau qui se déposent sur les garnit ures externes froides du four et il
faut parfois essuyer cette humidité avec un chiffon doux pour éviter que la surface
externe du four se décolore ou se salisse de façon excessive.
79
Page 88

Av ant d’utilis e r le four po ur la premiè re fois
Débrancher l’appareil à parti r de l’i nterrupteur mural ou sur l’alim entation principale
avant d’effectuer le nettoyage. Ôter tou s les emballages et les accessoires du four.
Nettoyer la surface interne du four avec de l’eau chaude et un détergent
neutre.Rincer soigneusement avec un chiffon humide. Laver les gli ssières latérales
du four et les accessoires dans un lave-vaisselle ou avec de l’eau chaude et un
détergent neutre, ensuite séch er avec soin.
Données techniques
Cet appareil est conforme aux directives 72/23 CEE et 93/68 CEE EMC 89/336
CEE.
Normes sur la tension
≈ 220-240V phase + neutre.
Dimensions du four à encastrement (mm):
Longueur : 598
Profondeur : 565,5
Hauteur : 600,3
Volume : 61 Litres
Énergie absorbée par
le four : 2,9 – 3,4 kW
80
Page 89

Installation du four dans le meuble
IMPORTANT : L’unité doit être installée correctement selon les instructions de
Maison constructrice et par du per sonnel qualifié. Avant d’effectuer n’importe quelle
réparation ou opération de maintenance, il faut débrancher l’appareil de l’installation
électrique.
BRANCHEMENT ELECTRIQUE : Avant de brancher l’appareil à l’installation
électrique, vérifier que :
• La tension corresponde à celle indiquée sur la plaquette d’identifi cation appliquée
sur le bord du four.
• Le dispositif de coupe-circuit et le réseau d’alimentation domestique puissent
supporter la tension de charge de l’appareil (voir plaquette d’identification).
• Le système d’alimentation soit muni d’un branchement à la terre efficace et que la
prise ou l’interrupteur omnipolaire, avec distance entre les contacts de minimum 3
mm, se trouve dans un endroit facilement accessible après l’installation de
l’appareil.
• Si la prise n’est pas facilement accessible, l’installation doit être munie d’un
interrupteur omnipolaire avec une distance entre les contacts égale ou supérieure à
3 mm.
Si un cordon d’alimentation plus long est nécessaire, il devra avoir une section de
minimum 1,5 mm du type H05RR-F. Le cordon soit suffisamment long pour
permettre d’effectuer aisément les opérations de maintenance de l’appareil.
Avertissement : Cet appareil doit être branché à la terre.
Il est obligatoire de brancher correctement cet appareil à la terre.
Notre Maison décli ne toute responsabilité en cas de fonctionnement incorrect des
branchements à la terre non conforme aux normes en vigueur.
Cet appareil a été réalisé pour être encastré dans un meuble pour four standard de
600 mm de largeur.
La niche de l’encastrement, les meubles voisi ns et tous les matériaux utili sés pour
l’installation doivent être en mesure de supporter, pendant l’utilisation du four, une
température minimum de 85°C plus la température ambiante. De plus, les portes
des armoires voisines doivent se trouver à une di stance de minimum 4 mm en tout
point de l’appareil. Certaines armoires de cuisine en vinyle ou laminées sont
particulièrement sensibles.
A la chaleur et peuvent s’abîmer ou se dé colorer. N’importe quell e détériorati on ou
décoloration des matériaux qui se produit à une température inf érieure à 85°C plus
la température ambiante ou si les meubles se trouvent à une distance inférieure à 4
mm de l’appareil, sera imputable au propriétaire. Pour les fours à encastrement
installés sous une table de travail, les dimensions d’installation sont les suivantes.
Attention : si le personnel qualifié installe l’appareil à proximité d’autres appareil
électriques, le cordon d’alimentation ne doit pas passer tout près ou être en contact
avec la parois la térale du four.
81
Page 90

TOUCHES FONCTIONS
Diminution de la température
Augmentation de la température
ON/O F F et BLOC AG E DE S COMMANDE S
Compte-minutes
Durée de cuisson
Fin de cuisson
Diminution de l’heure
Augmentation de l’heure
Choix du programme de cuisson
Choix du programme de cuisson
FONCTIONNEMENT
Lors du premier branchement du four sur le réseau électrique, ou après une
coupure de courant, l'écran du timer se met à clignoter. Le four n'est pas encore
activé: pour ceci, procéder d'abord au "réglage de l'horloge".
RÉGLAGE DE L'HORLOGE
Appuyer simultanément et relâcher les touc hes
et , puis régler l'heure
exacte avec les touches
et .
Note: l’opération doit être effectuée sous les 3 secondes lorsque les points sur
l'écran commencent à clignoter;
à la fin du réglage, attendre que les deux points lumineux cessent de clignoter.
BOP 8826 AX
82
Page 91

SONNERIE
Le four émet des signaux acoustiques pour signaler les différentes fonctions,
comme pa r exemple la f in de la cuisson .
Le niveau sonore peut être modifié: à four éteint (OFF) et en appuyant sur la touche
, le four reproduit les 3 niveaux disponibles.
Le dernier niveau sélectionné sera celui qui sera reproduit.
ALLUMAGE DU FOUR
Appuyer et relâcher la touche
; un signal acoustique est émis (bip).
La mention ON s'affiche sur l'écran du timer, le symbole
s'allume ainsi que
l'éclairage intérieur du four.
On peut procéder au réglage d'une fonction de cuisson.
COMPTE-MINUTES
Le compte-minutes est seulement un compteur de temps qui est tout à fait
indépendant des fonctions de cuisson; il peut se révéler très utile pour programmer
un avis de fin de cuisson. Il peut aussi être utilisé à four éteint.
Pour programmer le compte-minutes, allumer le four avec
, appuyer sur la
touche
: l 'écr an se remet à zér o et l es poi nts c ommen cent à clignoter; régler
sous les 3 secondes suivantes le temps voulu, avec les touches - et +, pour une
durée maximale de 23 heures et 59 minutes, apr ès laquelle, un signal acoustique
sera émis et le symbole de la
se mettra à clig noter. Pour f aire cesser le signal
acoustique et le clignotement des symboles, il suffit d'appuyer sur une des touches
.
FONCTIONNEMENT MANUEL À TEMPS INDÉ FINI
Allumer le four; sélectionner une des fonctions de cuisson disponibles avec les
touches
et : pour chaque type de cuisson, le four propose une
température prédéfinie indicative, qui peut être modifiée avec les flèches
et
.
Le four se chauffera à la température programmée et le symbole de degré
centigrade ° clignotera pour signaler le fonctionnement.
L'atteinte de la température est signalée par un signal acoustique et le symbole de
degré cesse alors de clignoter.
Pour éteindre le four, appuyer et relâcher la touche
.
Les écrans de la température et des fonctions s'éteignent, et OFF s'aff iche sur
l'écran; en outre, un signal acoustique est émis (bip).
83
Page 92

FONCTIONNEMENT SEMI-AUTOMATIQUE DE LA DURÉE DE CUISSON
Pour régler le temps de cuisson
Allumer le four en appuyant puis en rel âchant la touche
; appuyer et relâcher
la touche
Le symbole A s'all ume sur l'écran du timer. Régler le temps de
cuisson désiré avec les touches
et , pour une durée maximale de 10
heures et 00 minute.
Pour chaque fonction de cuisson, le four propose une température prédéfinie, que
l'on peut modifier avec les flèches
et .
Le four commence la cuisson pour la durée réglée, puis s'éteint automatiquement;
À la fin de la cuisson à temps, un signal acoustique intermittent est émis, tandis que
les écrans de la température et des fonctions s'éteignent, l'éc ran du timer affiche
l'heure courante et les deux symboles casserole et A se mettent à clignoter.
Pour éteindre le signal acoustique et quitter le cycle, appuyer sur une des touches
suivantes
.
Le symbole de l'“ampoule” s'allume sur l'écran des fonctions, puis l'éclairage du
four s'allume également.
Le four est prêt à recevoir de nouvelles commandes; sélectionner une nouvelle
fonction de cuisson, ou éteindre en appuyant puis en relâchant la touche ON/OFF.
FONCTIONNEMENT SEMI-AUTOMATIQUE DE FIN DE CUISSON
Pour régler l'heure de fin de cuisson
Allumer le four en appuyant puis en relâchant la touche
, appuyer et relâcher la
touche
. Le symbole A s'allume sur l'écran du timer. Régler l'heure de f in de
cuisson avec les touches
et dont la durée est limitée aux 23 heures et 59
minutes suivantes.
Après le signal acoustique et le retour sur le timer de l'affichage de l'heure
courante, sélectionner une fonction de cui sson avec l es touches < et >. Le symbole
de la “casserole” s'allume sur l'écran du timer. Le four propose une température
prédéfinie, qui peut être modifiée avec les flèches
et .
Le four commence la cuisson jusqu'à l'heure programmée, puis s'éteint
automatiquement.
À la fin de la cuisson à temps, un signal acoustique intermittent est émis, tandis que
les écrans de la température et des fonctions s'éteignent, l'éc ran du timer affiche
l'heure courante et les deux symboles
et A se mettent à cl ignoter.
Pour éteindre le signal acoustique et quitter le cycle, appuyer sur une des touches
suivantes
.
84
Page 93

Le symbole de
s'allume sur l'écran des fonctions, puis l'éclairage du four
s'al l um e ég a l em en t.
Le four est prêt à recevoir de nouvelles commandes; sélectionner une nouvelle
fonction de cuisson, ou éteindre en appuyant puis en relâchant la touche
.
FONCTIONNEMENT AUTOMATIQUE
Pour régler la durée de cuisson et l'heure de fin de cuisson
Allumer le four en appuyant puis en relâchant la touche
, appuyer et relâcher la
touche
et régler le temps de cuisson nécessaire avec les touches et .
Attendre que les points des heures et des minutes du timer cessent de clignoter; le
timer montre à nouveau l'heure courante; puis appuyer sur la touche
et régler
l'heure de fin de cuisson avec les touches
et .
Un nouveau signal a coustique est émis et les poi nts cessent de clignoter, ce qui
confirme la validation de l'horaire programmé.
La température sélectionnée reste affichée à l'écran, ainsi que l'heure courante et la
fonction de cuisson sélectionnée.
L'éclairage du four s'éteint.
Sélectionner une des fonctions de cuisson disponibles avec les touches
et
. Le f our conseille une température déjà programmée, que l'on peut m odifier
avec les flèches haut et bas .
Dès que les points du timer ont cessé de clignoter, le four entre en modalité de
cuisson différée. La température et la fonction programmée peuvent encore être
modifiées en répétant les opérations décrites plus haut.
Successivement, le four se mettra automatiquement en marche selon la durée
spécifiée et s'éteindra à l'heure indiquée.
À la fin de la cuisson à temps, un signal acoustique intermittent est émis, tandis que
les écrans de la température et des fonctions s'éteignent, l'éc ran du timer affiche
l'heure courante et les deux symboles
et A se mettent à clignoter.
Pour éteindre le signal acoustique et quitter le cycle, appuyer sur une des touches
suivantes
.
Le symbole
s'allume sur l'écr an des fonctions, puis l 'éclairage du four s'all ume
également.
Le four est prêt à recevoir de nouvelles commandes; sélectionner une nouvelle
fonction de cuisson, ou éteindre en appuyant puis en relâchant la touche
.
85
Page 94

LIMITATIONS D'UTILISATION DES CUISSONS SEMI-AUTOMATIQUES ET
AUTOMATIQUES
Les fonctions de préchauffage (PRH) et de décongélation ne sont pas compatibles
avec les cuissons à temps défini, donc:
- après avoir programmé une de ces deux fonctions, on ne peut activer ni la durée
ni la fin de cuisson;
- si le four a été programmé en modalité de fonctionnement automatique, on ne
peut pas choisir la fonction de préchauffage (PRH) ou de décongél ation.
ICÔNES DE L'ÉCRAN
Casserole: si allumée, elle indique qu'une fonction de cuisson est en fonction.
Au contraire, la casserole reste éteinte lorsque les fonctions d'éclairage, de PRH
(préchauffage) et de décongélation sont en fonction.
Son clignotement indique la fin d'une cuisson à temps. Pendant la phase de
fonctionnement automatique, le symbole reste éteint puis s'allume lors de
l'allumage programmé du four.
A (automatique): si allumée, elle indique qu'un temps de cuisson a été
pro grammé; son clignotement ind ique la f in d'une cuisson programmée.
Cloche: si allumée, elle indique que le compte-minutes est activé; son
clignotement indique la fin du comptage des minutes.
SÉLECTION DE LA TEMPÉRATURE DE CUISSON
Lorsque le fo ur est allumé, on peut rég ler la température avec les fl èches
et
du minimum au maximum, par des augmentations de 5°C comme indiqué sur
l'écran.
Note: une température de référence est préprogrammée pour chaque fonction de
cuisson, et que l'on peut modifier avec les flèches
et .
86
Page 95

SÉLECTION DES FONCTIONS DE CUISSON
Lorsque le four est allumé, on peut allumer alternativement les symboles
correspondants grâce aux touches
et , ce qui permet de choisir la
fonction de cuisson désirée.
Fonctions:
ÉCLAIRAGE DU FOUR
On allume l'éclairage intérieur du four en appuyant puis en relâchant la touche
;
pour l'éteindre, appuyer et relâcher de nouveau la touche
.
En sélectionnant une fonction de cuisson, l'éclairage intérieur s'allume et reste
allumé 3 minutes après l'atteinte de la température programmée.
Pendant une fonction de cuisson ou de décongél ation, on peut rallumer l'éclairage
du four en appuyant sur une des touches
: l'éclairage
reste allumé pendant une minute.
On peut allumer l'éclairage du four même si les comm andes ont été bloquées, en
appuyant sur une des touches
.
PRÉCHAUF FAGE
Cet te f onct ion perm et d e pr éch auff er pl us r apid ement l e four av ant l a sél ect io n de
la fonction de cuisson.
Un symbole animé s'affiche sur l'écran de la température.
Le préchauffage se termine lors de l'atteinte de la température préprogrammée
(non modifiable). Un signal acoustique est alors émis, puis le symbole de l'ampoule
et l'éclairage du four s'allument; à ce point, on peut choisir le cycle de cuisson
désiré avec les touches
et
CUISSON TRADITIONELLE
Cuisson traditionelle avec fonctionnement de la résistance supérieure et inférieure.
RÉSISTANCE INFÉRIEURE
Ce type de cuisson est adapté aux aliments particulièrement délicats et pour
conserver la chaleur après la cuisson.
GRIL
Il est indiqué pour faire griller les aliments.
87
Page 96

GRILL VENTILÉ
Il est indiqué pour faire griller les aliments de manière plus délicate.
FONCTION PIZZA
Particulièrement indiquée pour cuire la pizza et les légumes.
CUISSON VENTILÉE
Cette fonction permet une cuisson homogène et régulière dans chaque partie du
four. Il est possible de cuire différents types de mets en respectant les différents
temps de cuisson.
DÉ CONG ÉLATION
Le ventilateur se met à marche sans aucune chauffage.
Cette fonction permet de décongeler les aliments en moins de temps.
L' écran de la température affiche le message " dEF ".
NETTOYAGE PYROLYT IQUE
Après avoir allumé le four, sélectionner la fonction d'autonettoyage.
Sur l'écran de température apparaît le message PIRO, tandis que sur l'écran des
fonctions est proposé un temps prédéfini de pyrolyse égal à l’ heure et 30 minutes.
Les deux petits points entre le s chiffres (1:30) cli gnotent pendant 4 seconde s, pour
indiquer qu'il est possible de programmer le temps de durée de la pyrolyse ou bien
l'heure à laquelle on souhaite l'arrêter. Pour cela observer les instructions
précédentes concernant les cuissons programmées.
Le temps maximal programmable est de 3 heures, celui minimal de 30 minutes;
pour le modifier appuyer sur la touche
et agir avec les touc hes et .
Une fois le temps programmé, la lettre A à côté du temps de durée s'allume pour
indiquer l'activation d'un cycle automatique.
La porte est bloquée et la fonction de blocage des commandes, indiquée par
l'allumage sur l'écran du symbole clé, s'active.
Durant la pyrolyse, il est possible de voir mais non pas de m odifier le temps restant
et l'heure de fin de cycle.
Cette fonction permet de nettoyer le four en en augmentant la température jusqu'à
465°C. Le dépôt de cendres qui en résulte peut être éliminé avec un chiffon
humide lorsque le four s'est refroidi mais est encore tiède.
Durant l'autonettoyage pyrolytique, la lampe du four reste éteinte.
Recom m andation :
Tous les accessoires doivent être enlevés de l'intérieur du four avant de mettre en
marche la fonction d'autonettoyage.
Il est vivement recommandé d'utiliser cette fonction d'autonettoyage uniquement
en présence d'une personne. Tous les résidus alimentaire s importants doivent être
retirés du four avant de mettre en marche la fonction d'autonettoyage.
88
Page 97

AUTRES FONCTIONS
MODALITÉ FOUR ÉTEINT
Lorsque le four est éteint, les écrans de la température et des fonctions sont
éteints, tandis que l'écran du timer affiche l'heure courante.
FON CTION DE BLOCAGE DES COMMA NDES ( P ROTE CTION ENFANT)
Cette fonction peut être activée à tout moment pou r empêcher l'utili sation du four
par des enfants.
En particulier, si on l'active lorsque le four est éteint, elle en empêche l'allumage:
pour remettre le four en fonction, il faudra désinsérer le blocage.
Pour insérer le blocage des commandes, maintenir la touche
enfoncée jusqu'à
ce que le symbole clé s'affiche (environ 5 secondes) suivi de ON, puis l'écran
retourne à l'affichage de l'heure courante.
Note: à ce point, on ne peut effectuer aucun réglage de cuisson, à l'exception du
réglage du compte-minutes.
Si au contraire on active le blocage après un réglage de cuisson quelconque
(manuel, semi-automatique, automatique), on ne pourra régler que le compte-
minutes ou éteindre le four en appuyant puis en relâchant la touche
.
En effet, en appuyant sur une autre touche, l'affichage de la clé v ous r appellera
que la protection est insérée.
L'extinction manuelle ou automatique ne désactive pas le blocage des commandes.
Pour insérer le blocage des commandes, maintenir la touche
enfoncée
jusq u'à ce que le s ymbole clé s'affiche (environ 5 secondes) suivi de OFF, puis
l'écran retourne à l'affichage de l'heure courante.
Quand le four est bloqué, on ne peut pas l'allumer en appuyant sur la
; on ne
peut que l'éteindre (OFF).
TOUCHE ON/OFF
Si le four est allumé, la touche
permet d'éteindre le f our à tout moment, ceci
avec n'importe quelle fonction programmée.
Tous les réglages de cuisson sont annulés; pour les cuissons suivantes, suivre dès
le début les relatives instructions de cuisson.
Si le four est allumé et que la fonction de blocage des commandes est
programmée, en appuyant puis en relâchant la touche
le four s'éteint, mais la
fonction de blocage des commandes reste programmée.
Pour désactiver le blocage des commandes, maintenir la touche ON/OFF enfoncée
pendant au moins 5 secondes: l'écran affichera la clé, puis " OFF ", et l'heure
s'affichera à nouveau.
89
Page 98

SYMBOLE “ ° “
Il représente les degrés centigrades. Son clignotement indique que le four est en
train de cha uffer po ur atteindr e la température programm ée.
L'allumage fixe indique que la température programmée est atteinte.
ANNULLATION DES RÉGLAGES DE DURÉE ET DE FIN DE CUISSON
On peut annuler à tout moment les réglages de durée et d'horair e de fi n de c uisson
en appuyant simultanément sur les touches
et ;
ATTENTION: le four reste toutefois allumé pour la fonction choisie en modalité
manuelle (à temps indéfini).
On peut reprogrammer les temps de durée et/ou de fin de cuisson, ou éteindre
complètement le four en appuyant puis en relâchant la touche
.
90
Page 99

1 - Thermostat
2 - Sélecteur
3 - Programmateur électronique
4 - Voyant rouge
5 - Voyant jaune
Votre nouveau f our est dot é d’un système de cuisson multi-fonctionnel, qui vous
permet de sélectionnerla méthode de cuisson la plus appropriée au type d’aliment
que vous êtes en train de préparer.
La fonction demandée se sélectionne en tournant le bouton rotatif du sélecteur
fonction dans le sens des aiguilles d’une montre et en le plaçant sur le symbole
adéquat. La lampe à l’intérieur du four et le voyant de fonctionnement «ON»
s’allument.
BOP7303AB - BOP7303AX - BOP8526AX
91
Page 100

Les différentes fonctions du four et leurs symboles respectifs sont les suivants:
1 Lampe uniquement
La lampe à l’intérieur du four s’allume.
2 Gril avec tournebroche
L’élément qui se trouve sous la base du four fonctionne de façon autonome.
Avant d’utiliser le four, il faut l e préchauffer pendant 15 minutes. Cette fonction est
idéale pour la cuisson au four de pâte sans farce pour quiches et tart es. Dans ce
cas, l’aliment doit être placé sur le gradin inférieur du four.
3 Élément chauffant inférieur uniquement
L’élément qui se trouve sous la base du four fonctionne de façon autonome.
Avant d’utiliser l e four, il faut l e préchauffer pendant 15- 20 minutes. Ce tte fonction
est idéale pour l a cuisson au four de p âte sans fa rce pour quiches et tartes. Dans
ce cas, l’aliment doit être placé sur le gradin inférieur du four.
4 Cuisson conventionnelle
L’élément supérieur et inférieur fonctionnent pour une cuisson conventionnelle
statique. Avant d’utiliser le four, il faut le préchauffer jusqu’à ce que le voyant
température s’éteigne. Pour cette fonction, on recommande d’utiliser uniquement
un gradin pour la cuisson de l’aliment. Ne pas utiliser le gradin inférieur ou
supérieur, car l’aliment pourrait cuire excessivement.
5 Convection air forcée et cuisson traditionelle
Cette fonction est conseillé pour cuire pizza et plats avec légumes. Les résistances
de sole et circulaire et le ventilateur s'allument dans le même temps.
6 Convection air forcée
Le ventilateur et un élément qui se trouve derrière la parois arrière du four font
circuler l’air chaud pour fournir une température uniforme dans toutes les parties
du four.
Avant d’utiliser le f our, il faut le préchauffer jusqu’à ce que le v oyant température
s’éteigne. On peut cuire simultanément différents aliments en utilisant plusieurs
gradins et en épargnant, de cette façon, du temps et de l’énergie. La tempér ature
du four est r éduite d’environ 10% par rapport à un système de chauffage d e type
conventionnel.
92
 Loading...