


GSD4000JWW
GENERAL ELECTRIC GSD4000JWW, GSD6900NWW, GSD4060RSS, GSD3300RWW, GSD3300RBB User Manual
...
GEAppliances.com
Owner’s Manual
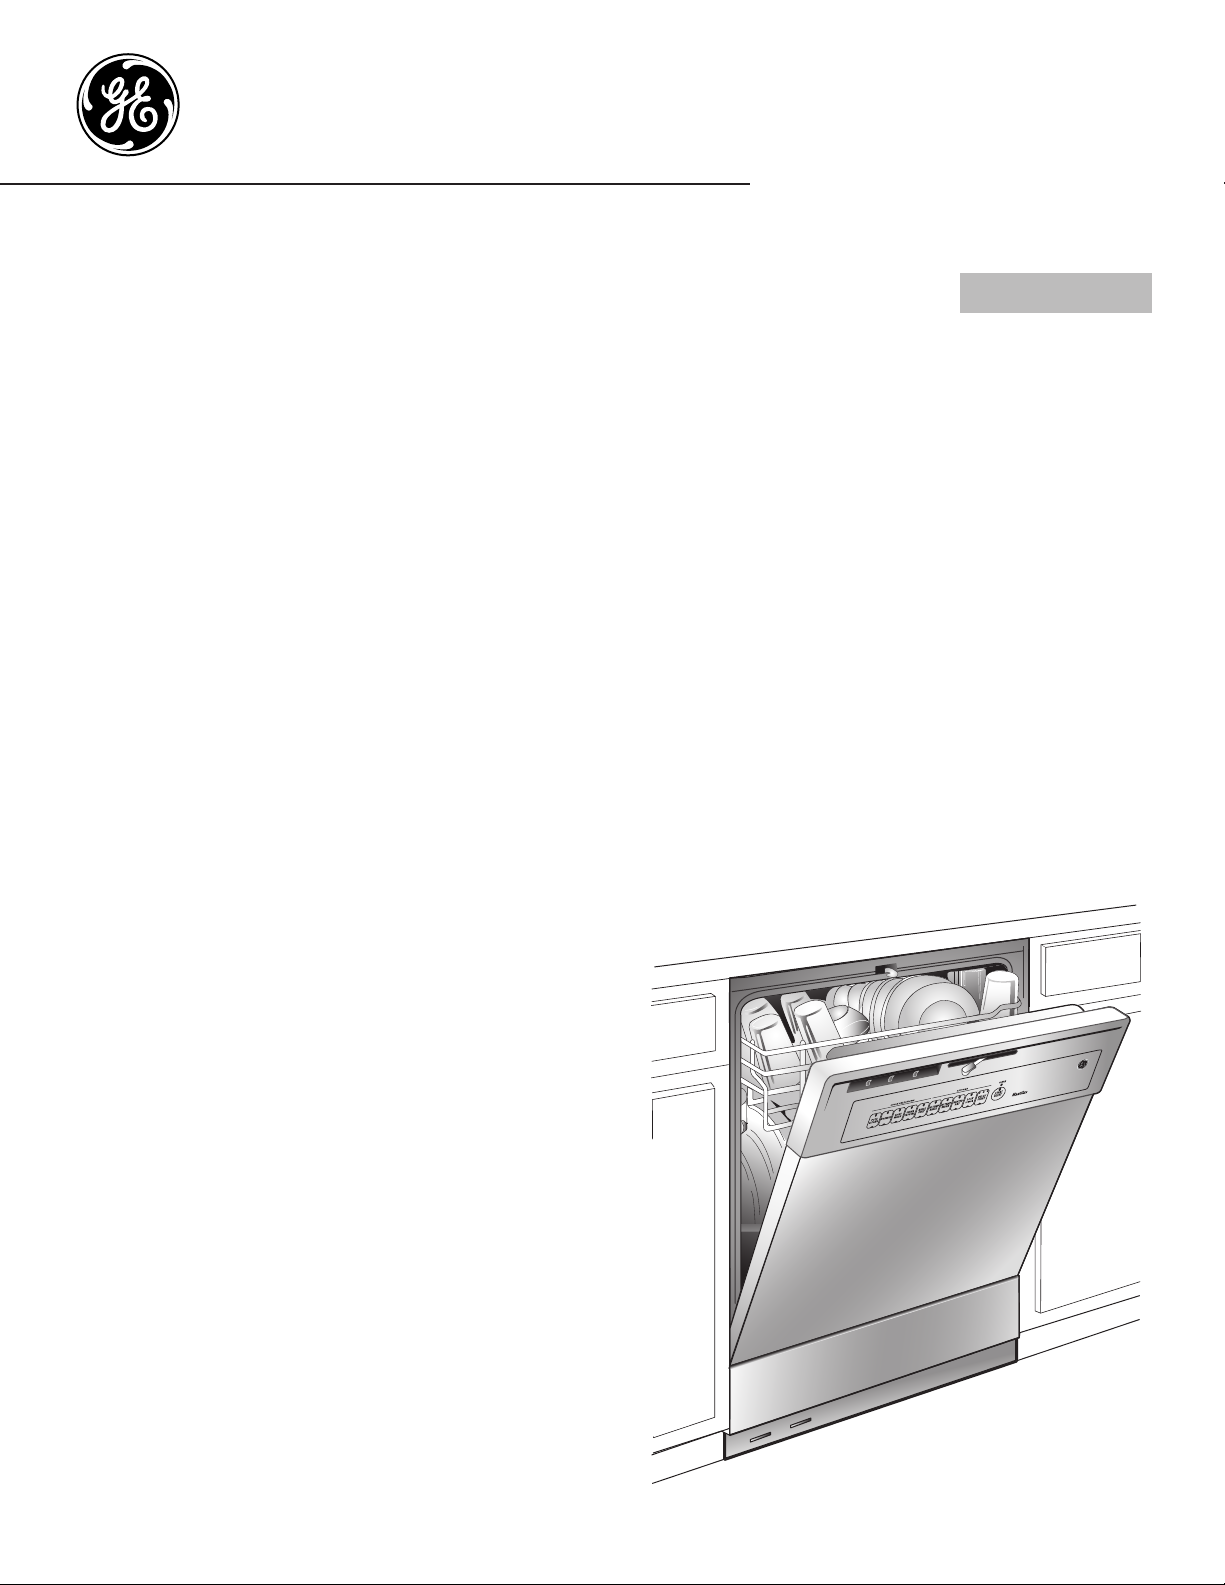
Dishwashers
165D4700P387 49-55063 07-09 JR
Safety Instructions . . . . . . . . 2–5
Operating Instructions
Care and Cleaning . . . . . . . . . . . . . .14
Control Panels . . . . . . . . . . . . . . . . . . . .8
Control Settings . . . . . . . . . . . . . . . 6–7
Dial Cycles . . . . . . . . . . . . . . . . . . . . . . .9
Flashing Display Lights . . . . . . . . . .10
Loading the
Dishwasher Racks . . . . . . . . . . . . . . .12
Loading Place Settings . . . . . . . . . .13
Optional Accessories . . . . . . . . . . . .14
Using the Dishwasher . . . . . . . .10, 11
Troubleshooting Tips . . . 15, 16
Consumer Support
Consumer Support . . . . . . . . . . . . . 18
Warranty . . . . . . . . . . . . . . . . . . . . . . . 17
Write the model and serial
numbers here:
Model #____________________
Serial # ____________________
You can find them on a label on the
tub wall just inside the door.
Standard Tub
Dishwashers

2
Operating Instructions Safety InstructionsConsumer Support Troubleshooting Tips
IMPORTANT SAFETY INFORMATION
READ ALL INSTRUCTIONS BEFORE USING—
SAVE THESE INSTRUCTIONS
WARNING!
For your safety, the information in this manual must be followed to minimize the risk of fire,
explosion, electric shock, and to prevent property damage, personal injury, or death.
WATER HEATER SAFETY
PROPER INSTALLATION AND MAINTENANCE
This dishwasher must be properly installed and located in accordance with the Installation Instructions
before it is used. If you did not receive an Installation Instructions sheet with your dishwasher, you can
receive one by visiting our website at GEAppliances.com.
■ Contents washed in Anti-bacterial mode, if
available, may be hot to the touch. Use care
before handling.
■ Using a detergent that is not
specifically designed for
dishwashers will cause the
dishwasher to fill with suds.
■ If your dishwasher is connected to a wall
switch, ensure that the switch is on prior
to use.
■ On dishwashers with electronic controls,
if you choose to turn the wall switch
off between wash cycles, allow 5-10 seconds after
turning the switch on before touching START/RESET
to allow the control to initialize.
■ Non-Dishware Items: Do not wash items such
as electronic air cleaner filters, furnace filters
and paint brushes in your dishwasher. Damage
to the dishwasher and discoloration or staining
of the dishwasher may result.
■ Close supervision is necessary if this appliance
is used by or near children.
■ Load light, plastic items so they do not become
dislodged and drop to the bottom of the
dishwasher—they might come into contact with
the heating element and be damaged.
■ Connect the dishwasher/appliance to a grounded
metal, permanent wiring system; or run an
equipment-grounding conductor with the circuit
conductors and connect to the equipmentgrounding terminal or lead of the appliance.
■ Improper connection of the equipment-grounding
conductor can result in a risk of electric shock.
Check with a qualified electrician or service
representative if you are in doubt whether the
appliance is properly grounded.
■ Dispose of discarded appliances and shipping
or packing material properly.
■ Do not attempt to repair or replace any part
of your dishwasher unless it is specifically
recommended in this manual. All other servicing
should be referred to a qualified technician.
■ To minimize the possibility of electric shock,
disconnect this appliance from the power supply
before attempting any maintenance.
NOTE: Turning the dishwasher off does not
disconnect the appliance from the power supply.
We recommend having a qualified technician
service your appliance.
WARNING!
CAUTION: To prevent minor injury and property damage
Under certain conditions, hydrogen gas may be produced in a water heater that has not been used for two
or more weeks. HYDROGEN GAS IS EXPLOSIVE.
If the hot water has not been used for two or more weeks, prevent the possibility of damage or injury
by turning on all hot water faucets and allow them to run for several minutes. Do this before using any
electrical appliance connected to the hot water system. This simple procedure will allow any built-up
hydrogen gas to escape. Since the gas is flammable, do not smoke, use an open flame, or use the appliance
during this process.
Consumer SupportTroubleshooting TipsOperating InstructionsSafety Instructions
3
SEGURIDAD DEL CALENTADOR DE AGUA
¡ADVERTENCIA!
Bajo ciertas condiciones, puede producirse gas de hidrógeno en un calentador de agua que no se ha usado
durante dos semanas o más. EL GAS DE HIDRÓGENO ES EXPLOSIVO.
Si el agua caliente no se ha utilizado por dos semanas o más, evite la posibilidad de daños o lesiones
abriendo todos los grifos de agua caliente y dejándolas correr durante varios minutos. Haga esto antes
de utilizar cualquier aparato eléctrico que se encuentre conectado al sistema de agua caliente. Este simple
procedimiento permitirá que se libere cualquier clase de acumulación de gas de hidrógeno. Ya que el gas
es inflamable, no fume o utilice una llama abierta o un aparato durante este proceso.
INSTALACIÓN Y MANTENIMIENTO ADECUADOS
Este lavaplatos debe instalarse de manera adecuada y ubicarse de acuerdo con las Instrucciones de
Instalación antes de comenzar el uso. Si usted no ha recibido una página de Instrucciones de instalación
con su lavaplatos, puede obtener una visitando nuestro sitio Web en GEAppliances.com.
■ Conecte el lavaplatos/aparato a un sistema
de cableado permanente con conexión a tierra
o debe utilizarse un conductor de conexión a tierra
del equipamiento con los conductores de circuito,
y debe conectarse a la terminal de conexión
a tierra o conductor del aparato.
■ Una conexión inadecuada del conductor de
conexión a tierra de equipo puede provocar
un riesgo de descarga eléctrica. Consulte a un
electricista calificado o representante de servicio
técnico si tiene dudas sobre la correcta conexión
a tierra del aparato.
■ Elimine los aparatos que no va a utilizar más y el
material de empaque o envío como corresponde.
■ No intente reparar o cambiar ninguna pieza de
su lavaplatos a menos que esté específicamente
recomendado en este manual. Cualquier otro
servicio debe realizarlo un técnico calificado.
■ Para minimizar la posibilidad de una descarga
eléctrica, desconecte este aparato de la fuente
de energía antes de realizar cualquier clase de
mantenimiento.
NOTA: Apagar el lavaplatos no desconecta el
aparato del suministro de energía. Recomendamos
que un técnico calificado realice el servicio técnico
de su aparato.
■ Los elementos lavados en el modo anti-bacterial,
si se encuentra disponible, pueden quedar
calientes al tacto. Tenga cuidado antes de
tocarlos.
■ Utilizar un detergente no
diseñado específicamente
para lavaplatos provocará
que el aparato se llene
de espuma.
■ Si su lavaplatos se encuentra conectado
a un interruptor de pared, verifique que
el interruptor se encuentre encendido
antes del uso.
■ En lavaplatos con controles electrónicos, si usted
elije apagar el interruptor de pared entre ciclos
de lavado, deje pasar 5-10 segundos después de
encender el interruptor antes de presionar
START/RESET para permitir que el control se inicie.
■ Elementos no aptos para lavaplatos: No lave
elementos como filtros de limpiadores de aire
electrónicos, filtros de hornos y pinceles de pintura
en su lavaplatos. Pueden producirse daños en el
lavaplatos y decoloración o manchas en el
aparato.
■ Se requiere una supervisión estricta cuando
cualquier aparato es utilizado por niños o en
su cercanía.
■ Cargue elementos livianos y plásticos de modo
que no se desplacen y caigan al fondo del
lavaplatos, ya que pueden entrar en contacto con
el elemento calentador y dañarse.
PRECAUCIÓN: Para evitar lesiones menores y daños a la propiedad
INFORMACIÓN IMPORTANTE DE SEGURIDAD
LEA TODAS LAS INSTRUCCIONES ANTES DE USAR—
GUARDE ESTAS INSTRUCCIONES GEAppliances.com
¡ADVERTENCIA!
Para su seguridad, debe cumplirse con la información de este manual a fin de minimizar
el riesgo de incendio o explosión, descarga eléctrica o para prevenir daños a la propiedad,
lesiones personales o la muerte.
4
Operating Instructions Safety InstructionsConsumer Support Troubleshooting Tips
PROPER DISPOSAL OF THE DISHWASHER
Junked or abandoned dishwashers are
dangerous…even if they will sit for “just a few
days.” If you are getting rid of your old
dishwasher, please follow the instructions below
to help prevent accidents.
Before You Throw Away Your Old
Dishwasher:
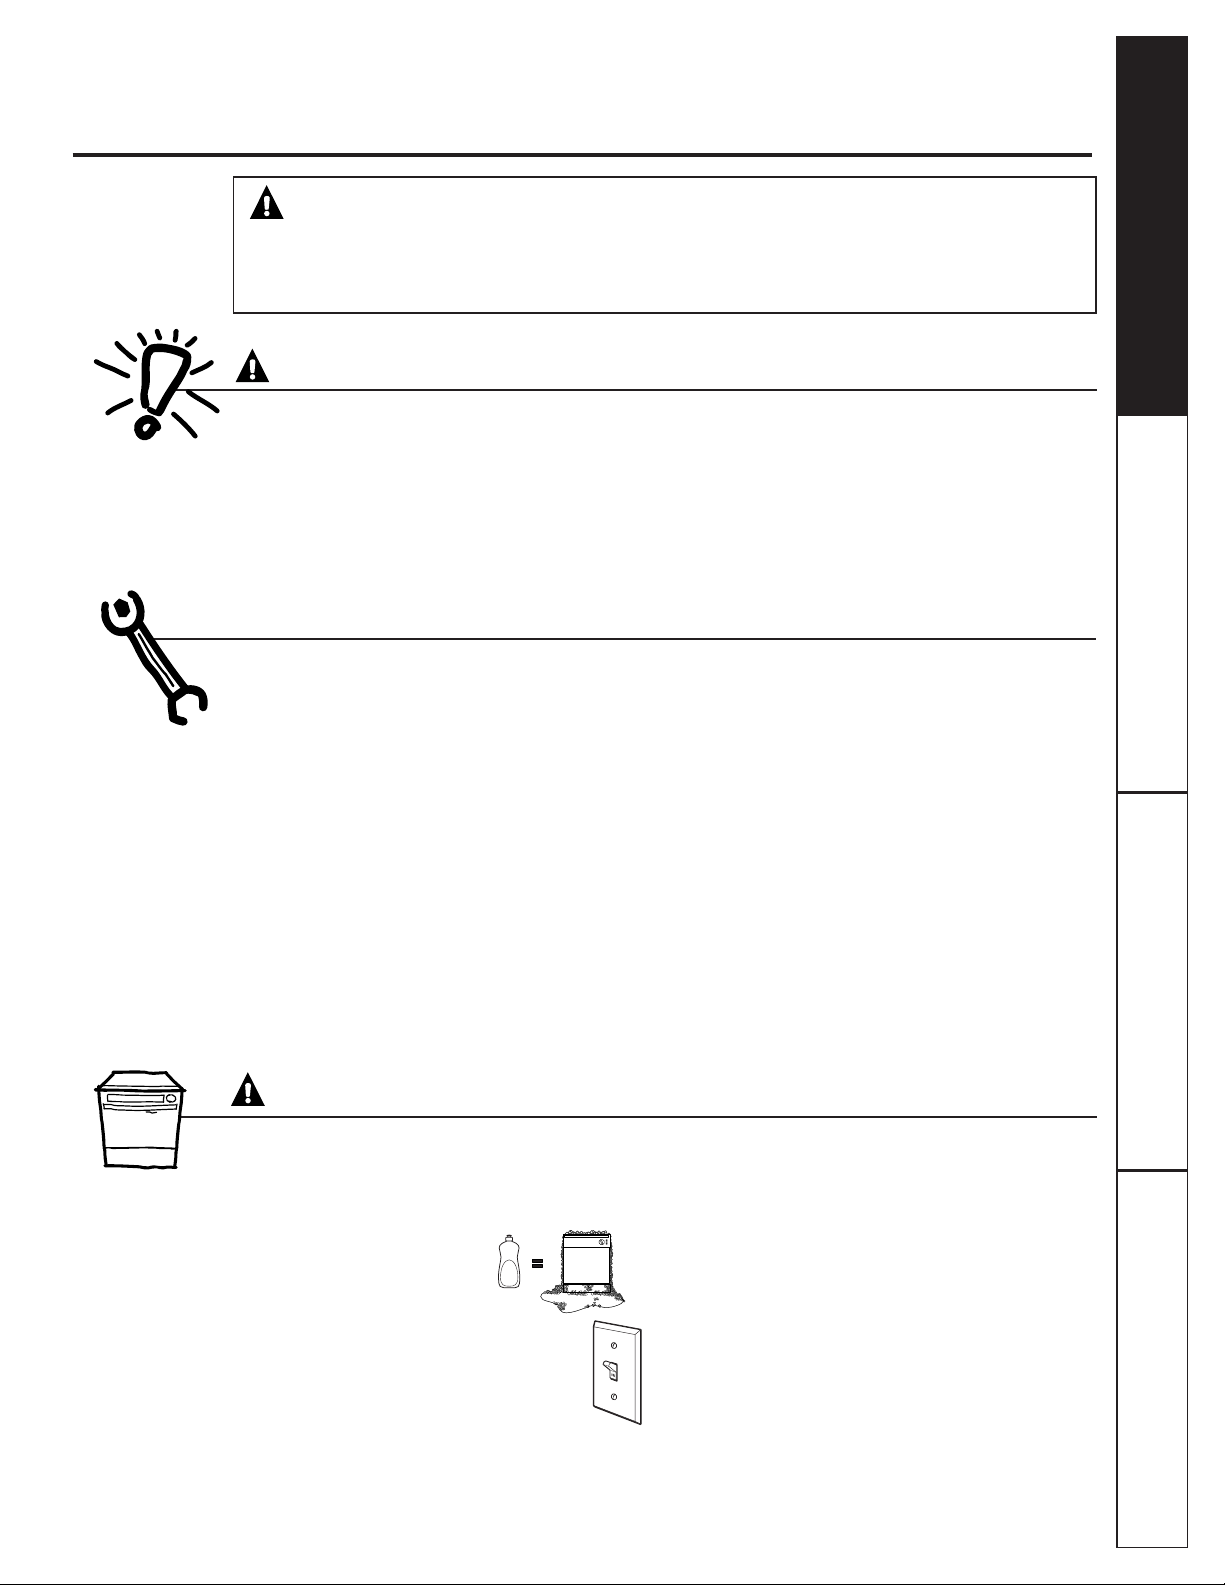
■ Take off the door of the washing compartment
or remove the door latch keeper (as shown).
WARNING! RISK OF CHILD ENTRAPMENT
Door latch keeper
■ Use this appliance only for its intended purpose
as described in this Owner’s Manual.
■ Use only powder, tabs, liquid detergents or rinse
agents recommended for use in a dishwasher
and keep them out of the reach of children.
Cascade
®
, Cascade®Complete Automatic
Dishwashing Detergents, and Cascade Crystal
Clear
®
rinse agents have been approved for use
in all GE dishwashers.
■ Locate sharp items so that they are not likely
to damage the door seal.
■ Load sharp knives with the handles up to reduce
the risk of cut-type injuries.
■ Do not wash plastic items unless marked
dishwasher safe or the equivalent. For plastic items
not so marked, check the manufacturer’s
recommendations.
■ Do not touch the heating element during or
immediately after use.
■ Do not operate your dishwasher unless all enclosure
panels are properly in place.
■ Do not tamper with controls.
■ Do not abuse, sit on or stand on the door or dish
rack of the dishwasher.
■ Do not allow children to play around the dishwasher
when opening or closing the door due to the
possibility of small fingers being pinched in the door.
■ Do not discard a dishwasher without first removing
the door of the washing compartment or the latch
keeper.
■ Do not store or use combustible materials, gasoline
or other flammable vapors and liquids in the vicinity
of this or any other appliance.
■ Do not allow children to play with, on or inside this
or any discarded appliance.
WARNING!
When using your dishwasher, follow basic precautions,
including the following:
READ AND FOLLOW THIS SAFETY INFORMATION CAREFULLY.
SAVE THESE INSTRUCTIONS
IMPORTANT SAFETY INFORMATION
READ ALL INSTRUCTIONS BEFORE USING—
SAVE THESE INSTRUCTIONS
Consumer SupportTroubleshooting TipsOperating InstructionsSafety Instructions
5
ELIMINACIÓN CORRECTA DEL LAVAPLATOS
Un lavaplatos desechado o abandonado resulta
peligroso…aún si quedará en un lugar por “sólo
unos días”. Si va a desechar su viejo lavaplatos,
siga las siguientes instrucciones para prevenir
accidentes.
Antes de desechar su viejo lavaplatos:
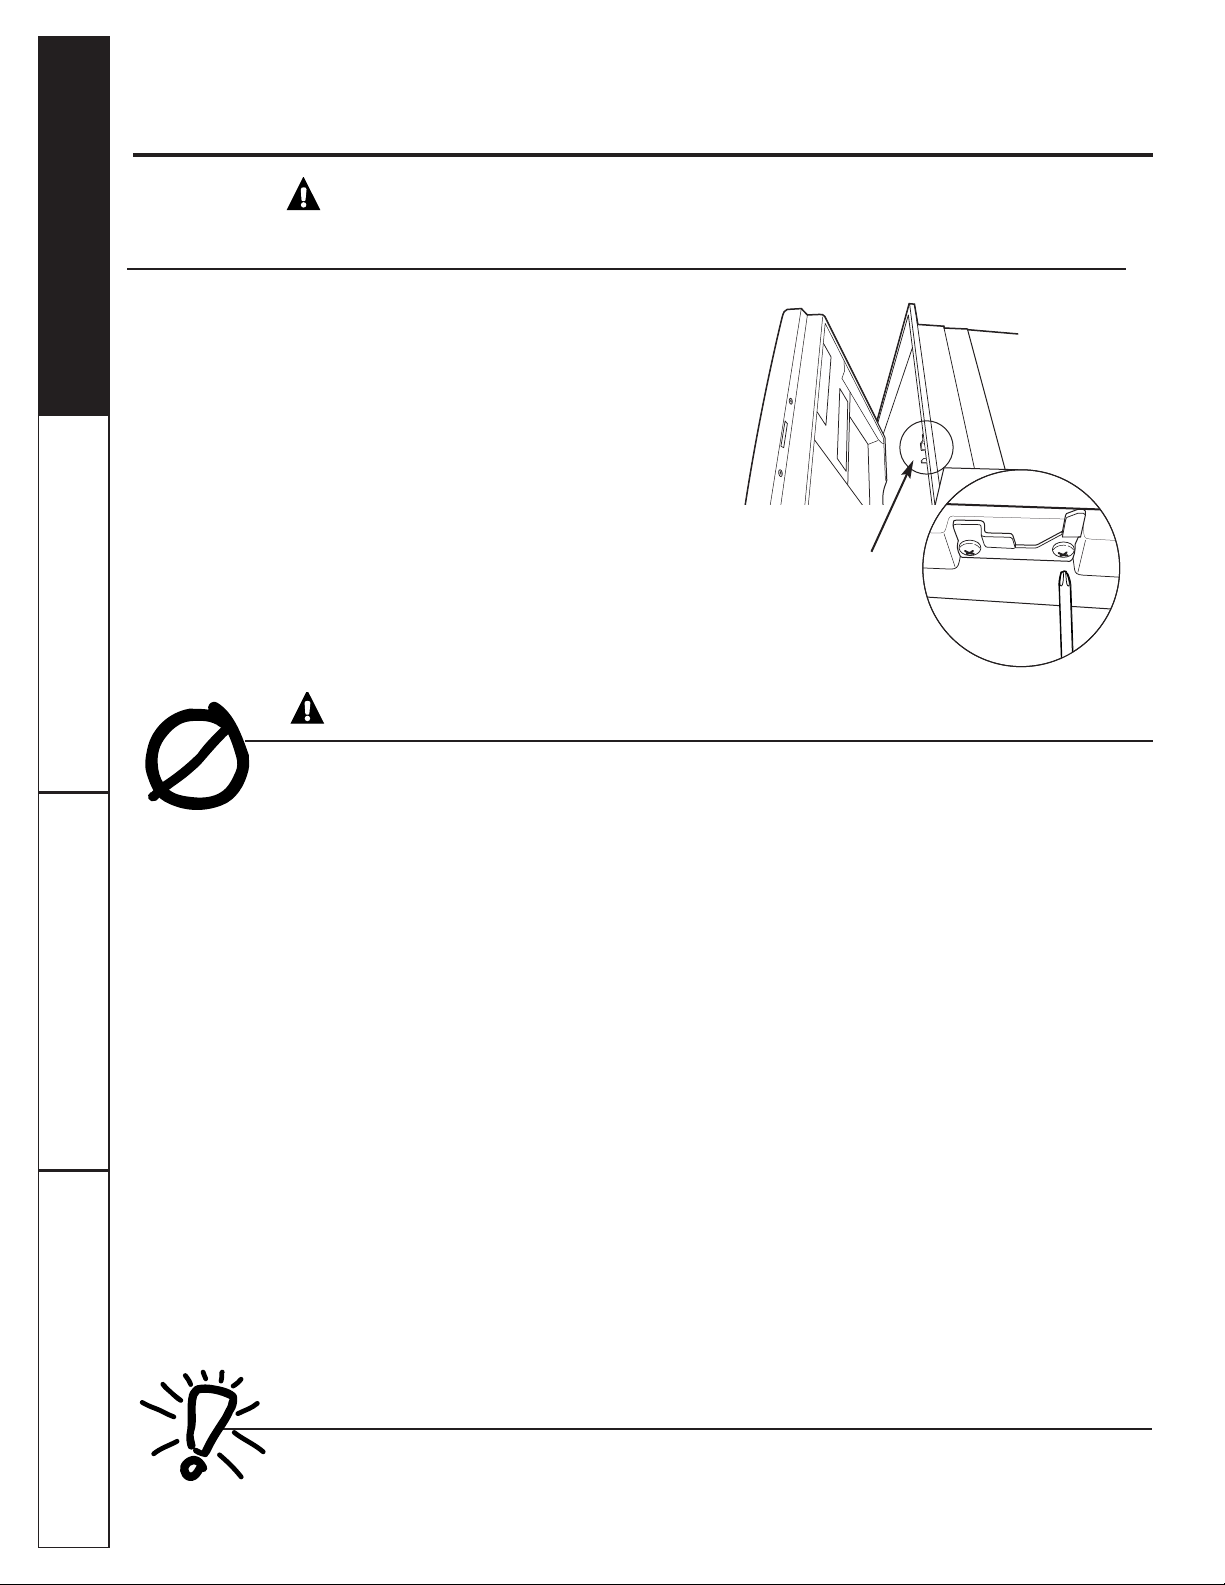
■ Quite la puerta del compartimento de lavado
o saque la traba de la puerta (como puede
verse).
¡ADVERTENCIA! RIESGO DE ENCIERRO PARA NIÑOS
Traba de la puerta
LEA Y SIGA ESTA INFORMACIÓN DE SEGURIDAD CUIDADOSAMENTE.
GUARDE ESTAS INSTRUCCIONES
■ Use este aparato sólo con el objetivo para el que
fue creado, como se describe en este Manual del
Propietario.
■ Utilice sólo detergentes en polvo, líquido o tabletas
o agentes de enjuague recomendados para uso
en lavaplatos y manténgalos alejados del alcance
de los niños. Los detergentes para lavaplatos
automáticos Cascade
®
, Cascade®Complete,
y los agentes de enjuague Cascade Crystal Clear
®
han sido aprobados para el uso en todos los
lavaplatos GE.
■ Ubique los elementos filosos de modo que no dañen
el sellado de la puerta.
■ Cargue cuchillos filosos con los mangos hacia arriba
para reducir el riesgo de una lesión personal.
■ No lave elementos plásticos a menos que estén
marcados como aptos para lavaplatos o
equivalente. En el caso de elementos plásticos
que no estén marcados así, verifique las
recomendaciones del fabricante.
■ No toque el elemento calentador durante el uso
o inmediatamente después de finalizar el uso.
■ No haga funcionar el lavaplatos a menos que todos
los paneles del recinto se encuentren en su lugar.
■ No altere o modifique los controles.
■ No maltrate, ni se siente o se pare sobre la puerta
o bandejas de los platos del lavaplatos.
■ No permita que los niños jueguen alrededor del
lavaplatos cuando abra o cierre la puerta debido
a la posibilidad de pellizcar sus dedos con la puerta.
■ No deseche el lavaplatos sin antes quitar la puerta
del compartimento de lavado o la traba de la
puerta.
■ No almacene o use materiales combustibles,
gasolina u otros vapores o líquidos inflamables
cerca de este o cualquier otro aparato.
■ No permita que los niños jueguen sobre, con
o dentro de este o cualquier otro aparato
desechado.
¡ADVERTENCIA!
Cuando use su lavaplatos, siga precauciones básicas
de seguridad, incluyendo las siguientes:
INFORMACIÓN IMPORTANTE DE SEGURIDAD
LEA TODAS LAS INSTRUCCIONES ANTES DE USAR—
GUARDE ESTAS INSTRUCCIONES GEAppliances.com
Operating Instructions Safety InstructionsConsumer Support Troubleshooting Tips
6
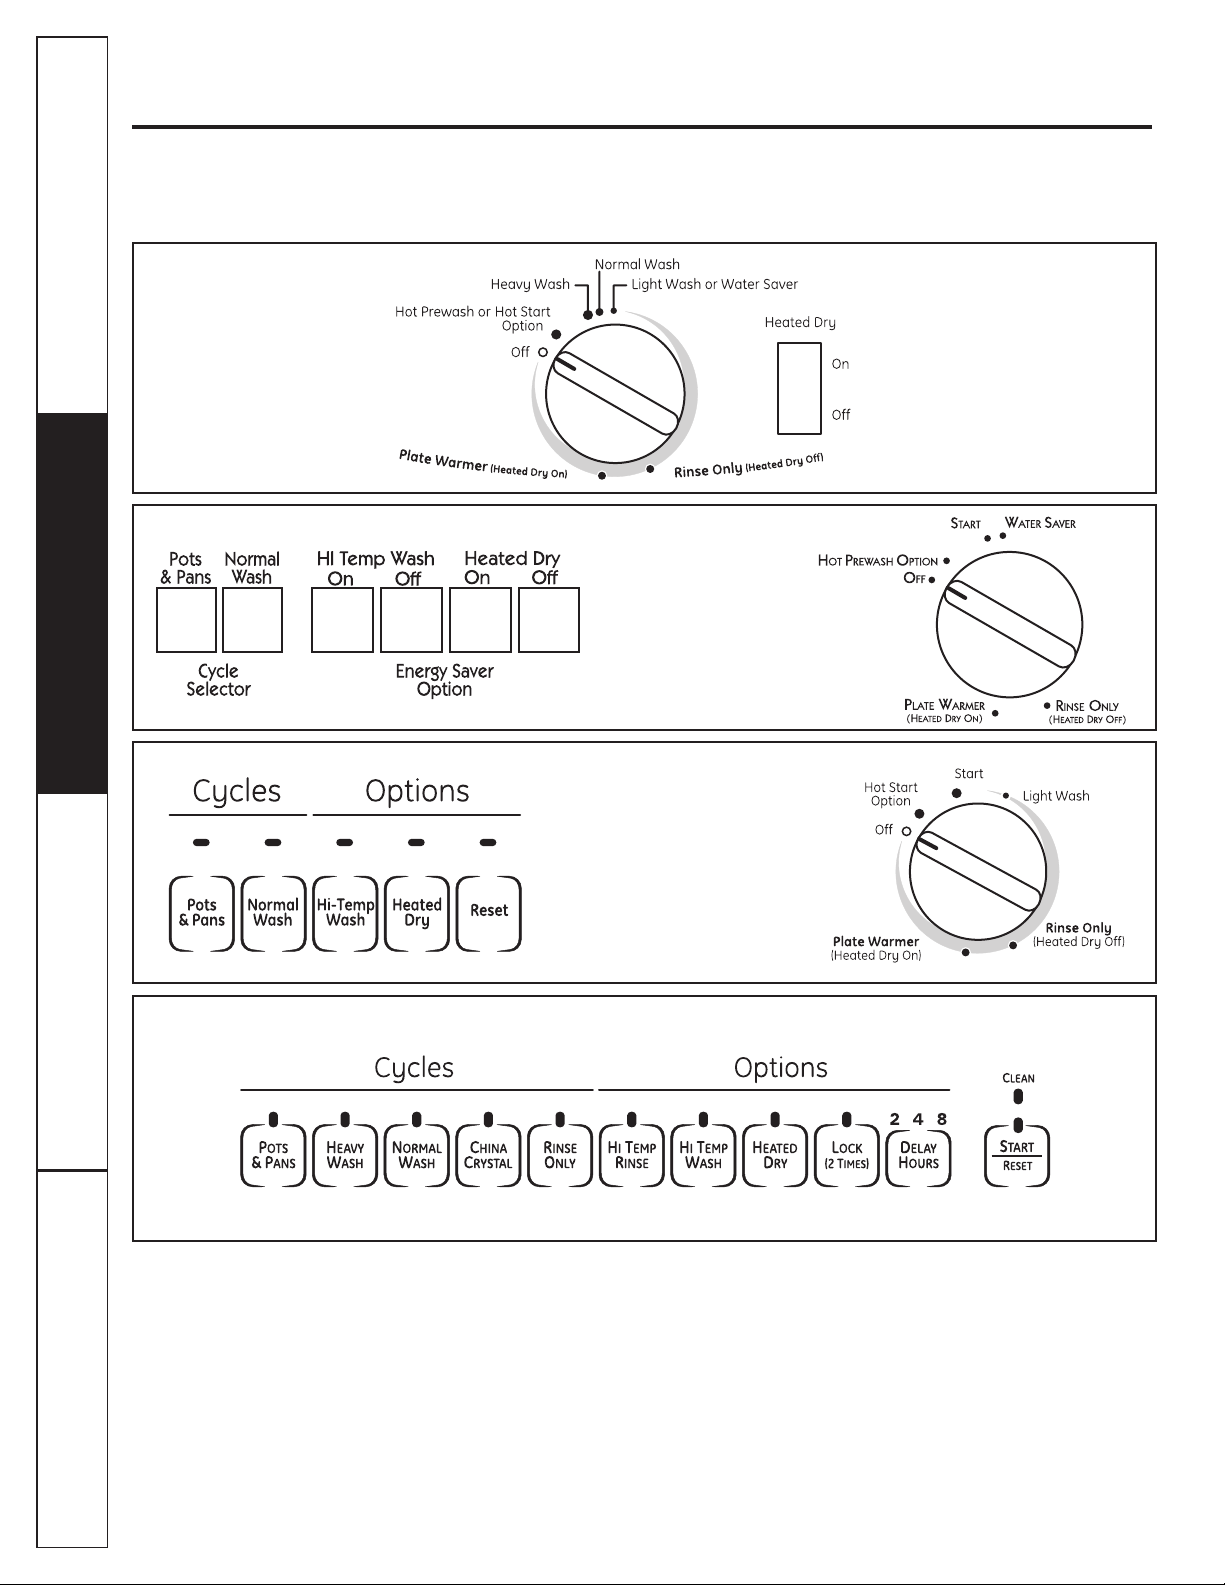
About the dishwasher control panel
Cycles
An indicator light above the selected pad will be ON to indicate which CYCLE has been selected, on some models.
POTS & PANS/ For heavily soiled dishes or cookware with dried-on or baked-on soils.
Everyday dishes may be included.
HEAVY WASH This cycle will not remove burned-on foods.
(on some models)
NORMAL/
For loads of everyday dishes, glasses and cookware with medium soils. NOTE: Many dishes have lighter
NORMAL WASH
soil than normal. Choosing
a cycle other than NORMAL WASH will save energy and water.
SHORT WASH For quickly washing loads of everyday dishes with medium soils
that have not dried on, such as loads
(on some models)
consisting mostly of glasses.
WATER SAVER For dishes with light soils.
LIGHT WASH
(on some models)
RINSE ONLY For rinsing partial loads that will be washed later. Do not use detergent.
DRYING For warming clean dishes and serving plates. This cycle will take approximately 30 minutes.
PLATE WARMER
HOT PREWASH Preheats wash water to the correct temperature.
HOT START
CHINA CRYSTAL For lightly soiled china and crystal.
(on some models)
Control Settings
Options
An indicator light above the selected pad will be ON to indicate which OPTION has been selected, on some models.
HI TEMP Turns on the heater in all final rinse cycles to help prevent spotting on dishware. This option may be
RINSE turned ON or OFF during the wash cycle.
(on some models)
HI TEMP Energizes the heater to boost water temperature in prewash and main wash fill cycles. Recommended
WASH for use with heavily soiled dishes. Option may be turned ON or OFF during the wash cycle.
HEATED DRY Shuts off the drying heat option. Dishes air dry naturally and energy is saved. Open the dishwasher door
OFF to speed drying.
HEATED DRY Turns the heater on for fast drying. This cycle will extend the time to your wash cycle by 30 minutes.
ON DO NOT use with RINSE ONLY cycle.
LOCK
When the LOCK pad is touched twice within 3 seconds, all pads become inoperative. You can lock the controls to
(electronic models
prevent any selections from being made. Or you can lock the controls after you have
started a cycle or selected
only)
DELAY START so the cycle or DELAY START is not interrupted.
Children cannot accidentally start dishwasher by touching pads with this option selected.
To unlock the dishwasher after it has been locked, touch the
LOCK
pad twice within 3 seconds. The light above
the
LOCK
pad will turn off.
DELAY HOURS Delays the start of a wash cycle for up to 8 hours.
(on some models)
RESET Touch RESET to cancel options.
(timer models)
START/RESET Touch START/RESET one time to start dishwasher cycle. Touch START/RESET a second time to pump out
(electronic models) and then turn off the dishwasher. Do not touch START/RESET more than one time unless you intend to
end the cycle.

Consumer SupportTroubleshooting TipsOperating InstructionsSafety Instructions
7
GEAppliances.com
Cycle Chart
Models Cycle Water Usage (gal.) Cycle Time (min.)
Timer Models Hot Start Option
1
2.5 10
Heavy Wash 7.0 120
Pots & Pans 7.0 118
Normal Wash* 5.6 110
Light Wash/Water Saver 4.5 114
Rinse Only 2.2 58
Plate Warmer/Drying 0.0 45
Electronic Models Pots & Pans 8.8 112
Heavy Wash 7.5 108
Normal Wash 5.6 95
China/Crystal 6.3 80
Rinse Only 1.3 5
Control Settings
1
Hot Start Option adds water amount and cycle time shown when selected.
*Normal Wash button should be pushed to run this cycle.
NOTE: Not all models have every cycle listed.
8
About the dishwasher control panel
Operating Instructions Safety InstructionsConsumer Support Troubleshooting Tips
You can locate your model number on the left tub wall just inside the door. Throughout this manual,
features and appearance may vary from your model.
Please match the control panel for your unit to a similar control panel below.

Start (Models with a Dial)
Slowly turn the Dial to the START or ON position, or the selected cycle. Don’t turn it past the START,
ON or cycle position; you could accidentally miss a prewash.
There is a time delay between start-up and water fill so you will not hear any wash action right
away.
■ Latch the door to begin the cycle.
9
Consumer SupportTroubleshooting TipsOperating InstructionsSafety Instructions
Operation of models with cycle dial
GEAppliances.com
Rinse Only
For rinsing partial loads that will be washed later. Do not use detergent.
Make sure HEATED DRY is not selected.
Slowly turn the Dial to RINSE ONLY.
Be sure the door is unlatched. Latch the door to start the cycle.
4
3
2
1
Be sure the door is unlatched.
Slowly turn the Dial to SHORT WASH,
LIGHT WASH or WATER SAVER.
Latch the door to start the cycle.
3
2
1
Plate Warmer or Drying
Load clean dishware to be warmed.
Select HEATED DRY ON.
Be sure the door is unlatched.
Slowly turn the Dial to PLATE WARMER or
DRYING.
Latch the door to start the cycle.
5
4
3
2
1
Hot Start or Hot Prestart Option
Preheats wash water.
Select the HOT START or HOT PRESTART
cycle and any other option on the push
button pad.
Be sure the door is unlatched.
Slowly turn the Dial to HOT START or
HOT PRESTART.
Latch the door to start the cycle.
4
3
2
1
For warming clean dishes and serving plates. This cycle will take approximately 39 minutes.
Short Wash or Light Wash or Water Saver
For quickly washing loads of everyday dishes with light to medium soils that have not dried on.
Operating Instructions Safety InstructionsConsumer Support Troubleshooting Tips
10
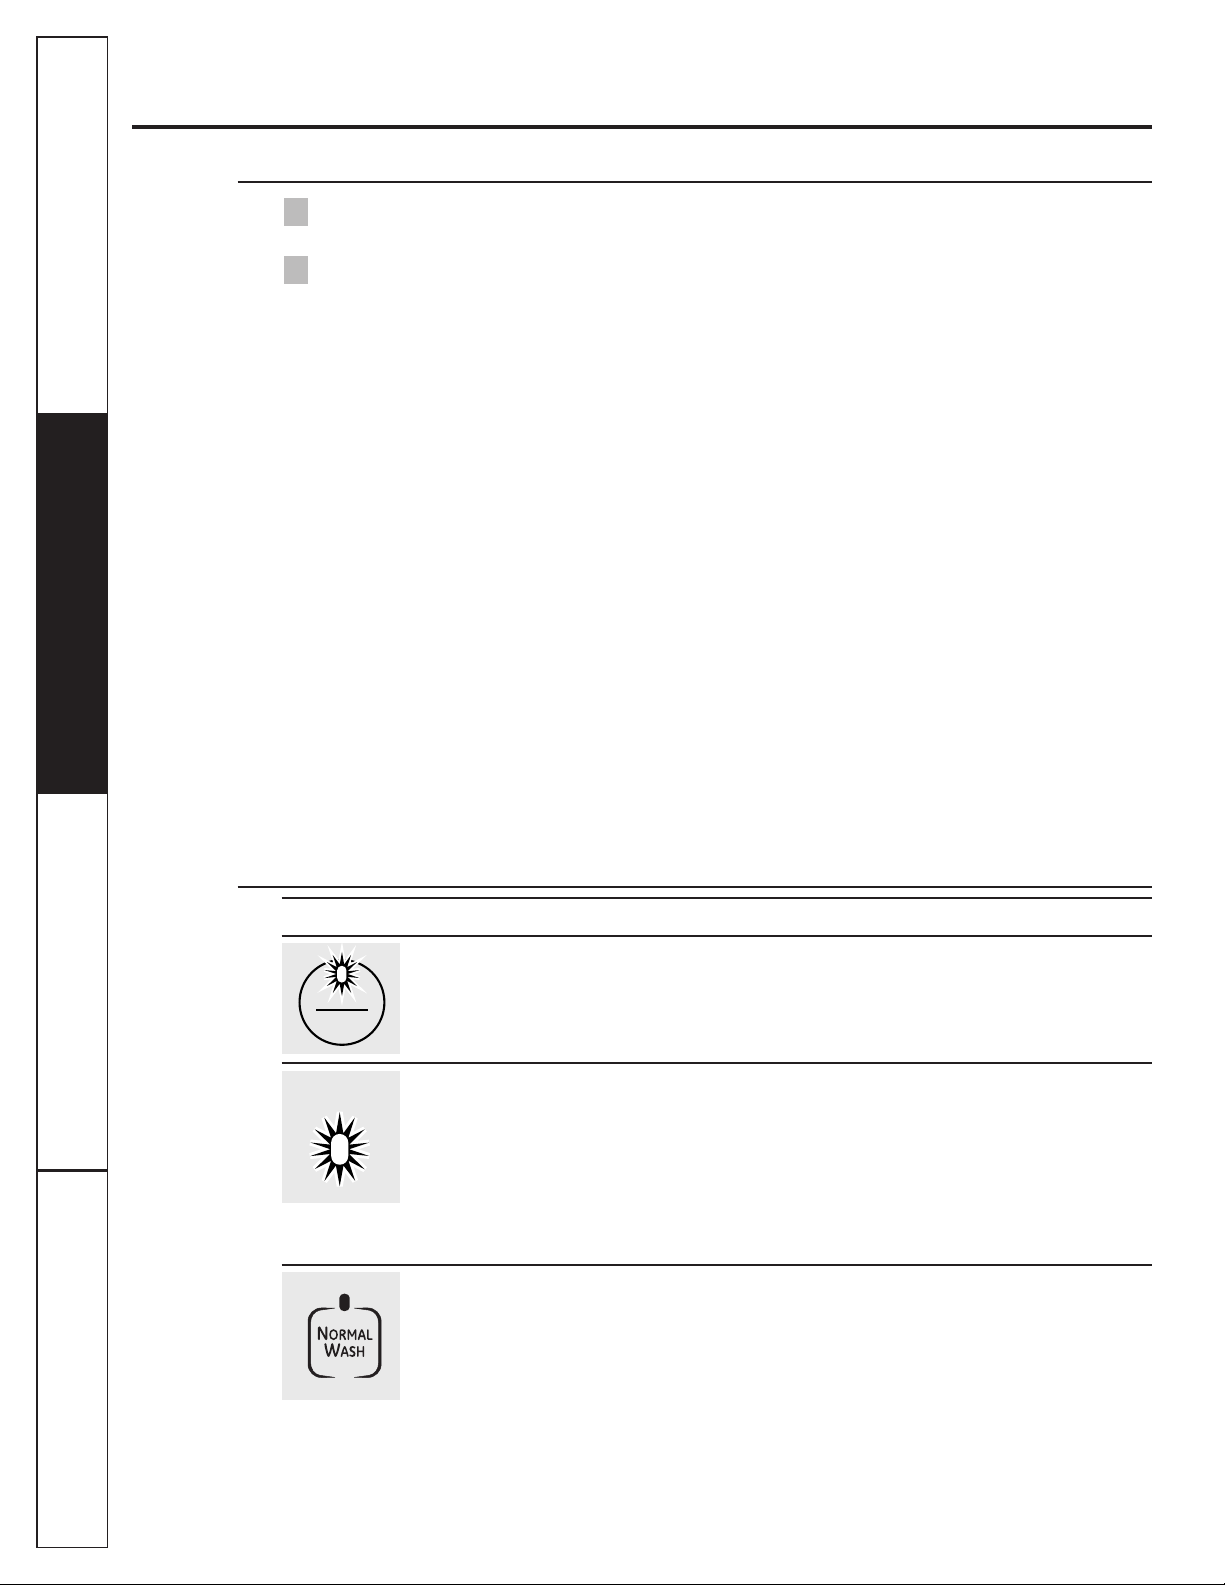
Operation of electronic models (model GSD4000 Only)
Lights What It Means What To Do
This is normal. Allow the dishwasher to drain and reset before you start a new
The START/RESET pad wash cycle.
has been pressed.
Control Error Press the START/RESET pad to turn off the beeper. If the CLEAN
light continues to flash, call for service.
Control Error Press the START/RESET pad to turn off the beeper and the
dishwasher will attempt to reset. Restart the wash cycle.
If this error continues, turn off the power to the dishwasher at
the circuit breaker for 30 seconds. Try the dishwasher again.
If the error is still present, call for service.
PLUS A
BEEPING
SOUND
RESET
STARTSTART
CLEANCLEAN
PLUS A
BEEPING
SOUND
Using the Dishwasher Door
The door must be closed and locked into place to select a LOAD SELECTION or an OPTION.
If the door is opened during a cycle and left open, the dishwasher will beep once every 30 seconds until the
door is closed and latched into place.
2
1
Start
Close and latch the door. Touch the START/RESET pad to begin the cycle. Water fill begins and
approximately 60 seconds later the wash action begins.
NOTE: The dishwasher remembers your last cycle so you don’t have to reprogram each time. When
the dishwasher is loaded and the door latch is in the locked position, the control panel lights will be ON
and display the last settings you selected.
If you don’t want to change any of the settings, simply touch the START/RESET pad to begin
the cycle.
Also, if a power failure occurs, NORMAL and HEATED DRY will automatically be programmed.
Make any new selections and touch the START/RESET pad to begin the cycle.
Clean
This light is illuminated when a wash cycle is complete. The light will stay ON until the door is opened.
Flashing Display Lights
Consumer SupportTroubleshooting TipsOperating InstructionsSafety Instructions
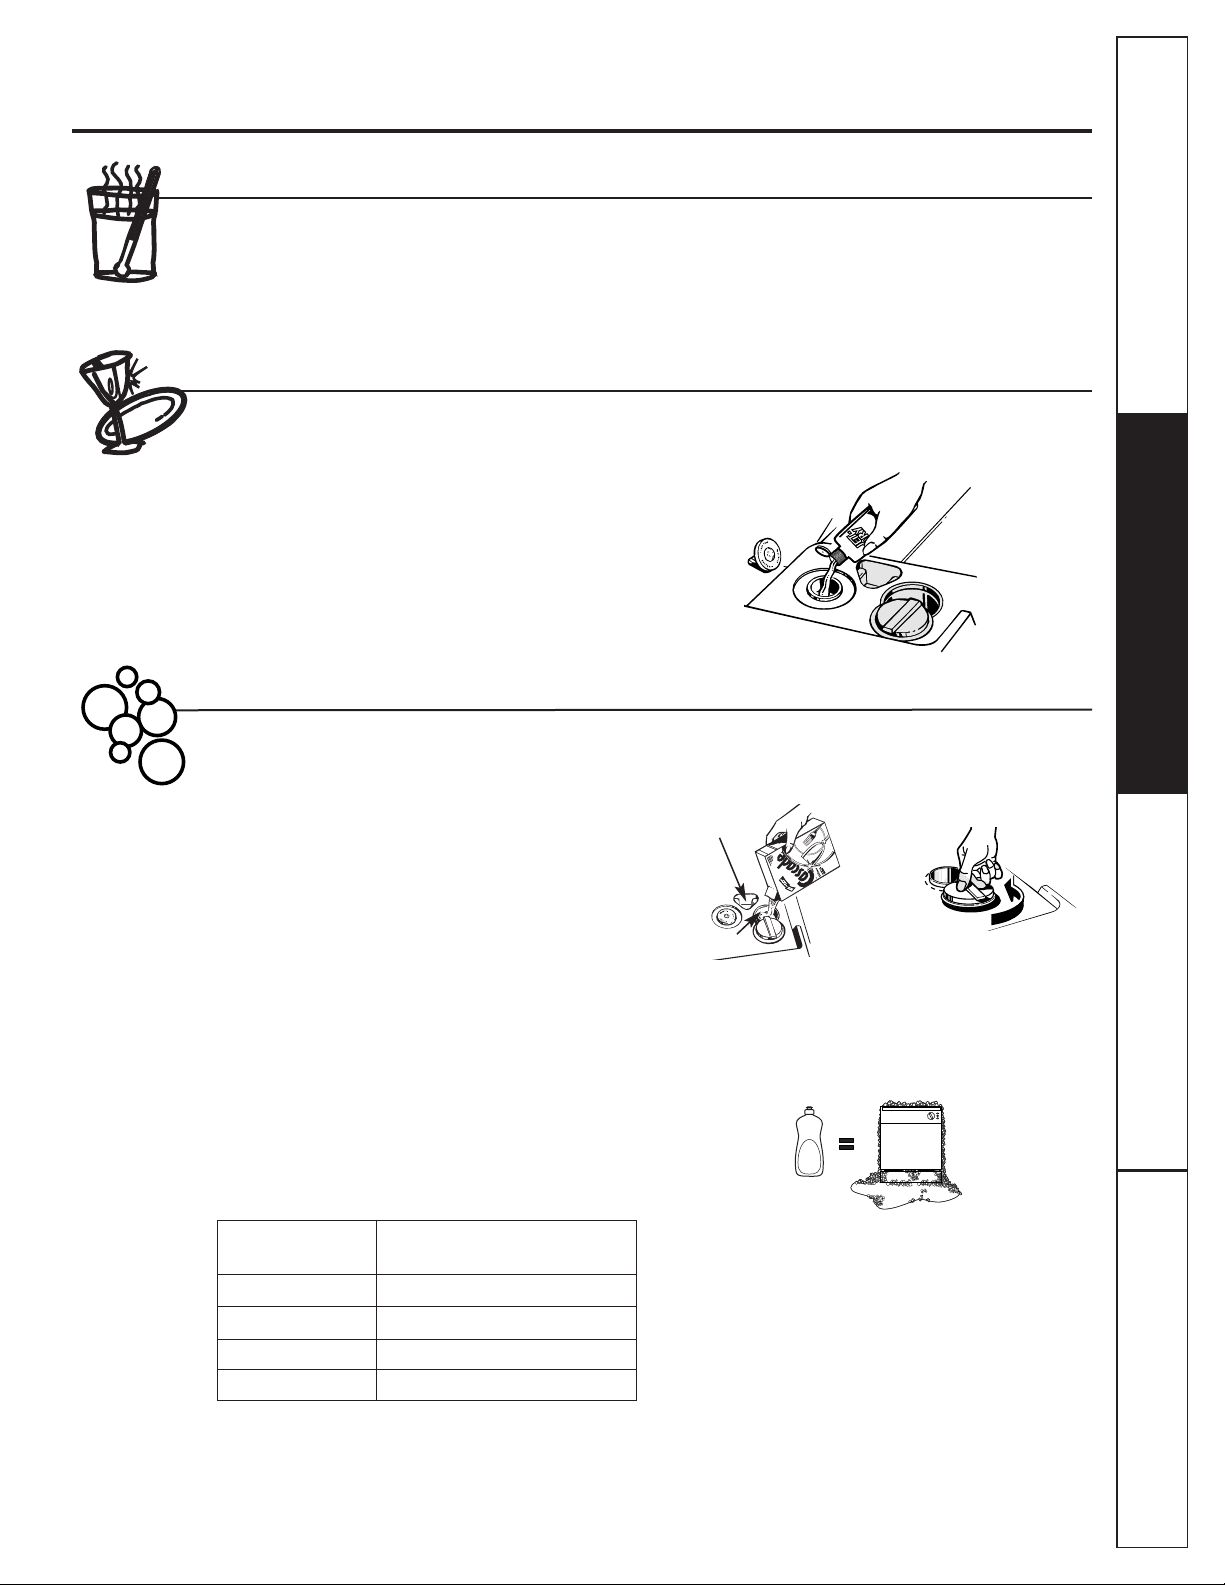
Filling the Dispenser
Fill the rinse agent dispenser until it reaches the bottom of
lip inside the opening. Replace cap.
To check if rinse agent is needed, remove the cap and look
into the dispenser.
A full dispenser should last about one month.
If the rinse agent spills, wipe up the excess.
Check the Water Temperature
The entering water must be at least 120°F and
not more than 150°F, for effective cleaning and to
prevent dish damage. Check the water temperature
with a candy or meat thermometer. Turn on the
hot water faucet nearest the dishwasher, place
the thermometer in a glass and let the water
run continuously into the glass until the temperature
stops rising.
Adjust the maximum/minimum temperature of the
water heater if necessary to deliver water at the
proper temperature.
Use Cascade Crystal Clear®Rinse Agent
Proper Use of Detergent
Cascade Crystal Clear®rinse agents remove spots and prevent new film buildup on dishes, glasses, flatware,
cookware and plastic.
Use only detergent specifically made for use in
dishwashers. Cascade®Automatic Dishwashing
Detergents have been approved for use in all GE
dishwashers. Keep your detergent fresh and dry.
Don’t put powder detergent into the dispenser until
you’re ready to wash dishes.
The amount of detergent to use depends on whether
your water is hard or soft. With hard water, you need
extra detergent. With soft water, you need less
detergent.
Protect your dishes and dishwasher by contacting
your water department and asking how hard your
water is. Twelve or more grains is extremely hard
water. A water softener is recommended. Without it,
lime can build up in the water valve, which could
stick while open and cause flooding. Too much
detergent with soft water can cause a permanent
cloudiness of glassware, called etching.
Use the information in the table below as a guideline
to determine the amount of automatic dishwasher
detergent to place in the dispenser.
You’ll find two detergent dispensers on the inside door
of your dishwasher. All wash cycles require detergent
in the main cup.
When
using automatic dishwashing
detergent tabs, simply place one tab in the main cup
and close.
Be sure the Dial is OFF before adding detergent.
Otherwise, the
detergent cup will not close and latch
properly.
Add detergent then close the main cup.
NOTE: To open detergent cup after it has been
closed, simply turn the detergent cup handle
counterclockwise until it releases. A snapping
sound may be heard.
DO NOT USE HAND DISH DETERGENT
NOTE: Using a detergent that is not specifically
designed for dishwashers will cause the dishwasher
to fill with suds. During operation, these suds will spill
out of the dishwasher vents, covering the kitchen floor
and making the floor wet.
Because so many detergent containers look alike,
store the dishwasher detergent in a separate space
from all other cleaners. Show anyone who may use
the dishwasher the correct detergent and where it
is stored.
While there will be no lasting damage to the
dishwasher, your dishes will not get clean using
a dishwashing detergent that is not formulated
to work with dishwashers.
Using the dishwasher
GEAppliances.com
Detergent Cups to Fill
Fill to 1/3 of main cup
Fill to 2/3 of main cup
Fill main cup
Fill
main cup and open cup
Number
of Grains
Less than 4
4 to 8
8 to 12
Greater than 12
Open cup
Main cup
11

Loading the dishwasher racks
12
Operating Instructions Safety InstructionsConsumer Support Troubleshooting Tips
Upper Rack
The upper rack is for glasses, cups and
saucers. Cups and glasses fit best along
the sides. This is also a secure place for
dishwasher-safe plastics. The upper rack is
good for all kinds of odd-shaped utensils.
Saucepans, mixing bowls and other items
should be placed face down.
Secure larger dishwasher-safe plastics over
two fingers when possible.
Make sure small plastic items are secure so
they can’t fall onto the heating element.
Wash Tower
Keep the center area clear in the lower
rack.
The wash tower rises through the
center of the lower rack during the
wash and rinse portions of the cycle.
Lower Rack
When loading the lower rack, do not load
large platters or trays in the front right
corner. They may prevent detergent from
circulating during the wash cycle.
The lower rack is best used for plates,
saucers and cookware. Large items such as
broiler pans and racks should go along the
sides. Load platters, pots and bowls along
the sides, in corners or in the back. The
soiled side of items should face the center
of the rack.
For best dishwashing results, follow these loading guidelines. Features and appearance of racks and silverware
baskets may vary from your model.
Don’t block the wash
tower or load tall things
next to it.
Be sure items don’t fall
through rack and block
rotation of the spray arm.
Also, be careful not to
let a portion of an item
such as a pot or dish
handle extend through
the bottom rack. This
could block the wash
arm and cause poor
washing results.
Silverware Basket
Put flatware in the removable basket with
fork and knife handles up to protect your
hands. Place spoons in the basket with
handles down. Mix knives, forks and spoons
so they don’t nest together. Distribute
evenly. Small plastic items, such as
measuring spoons and lids from small
containers, should go in the bottom of the
silverware basket with silverware on top.
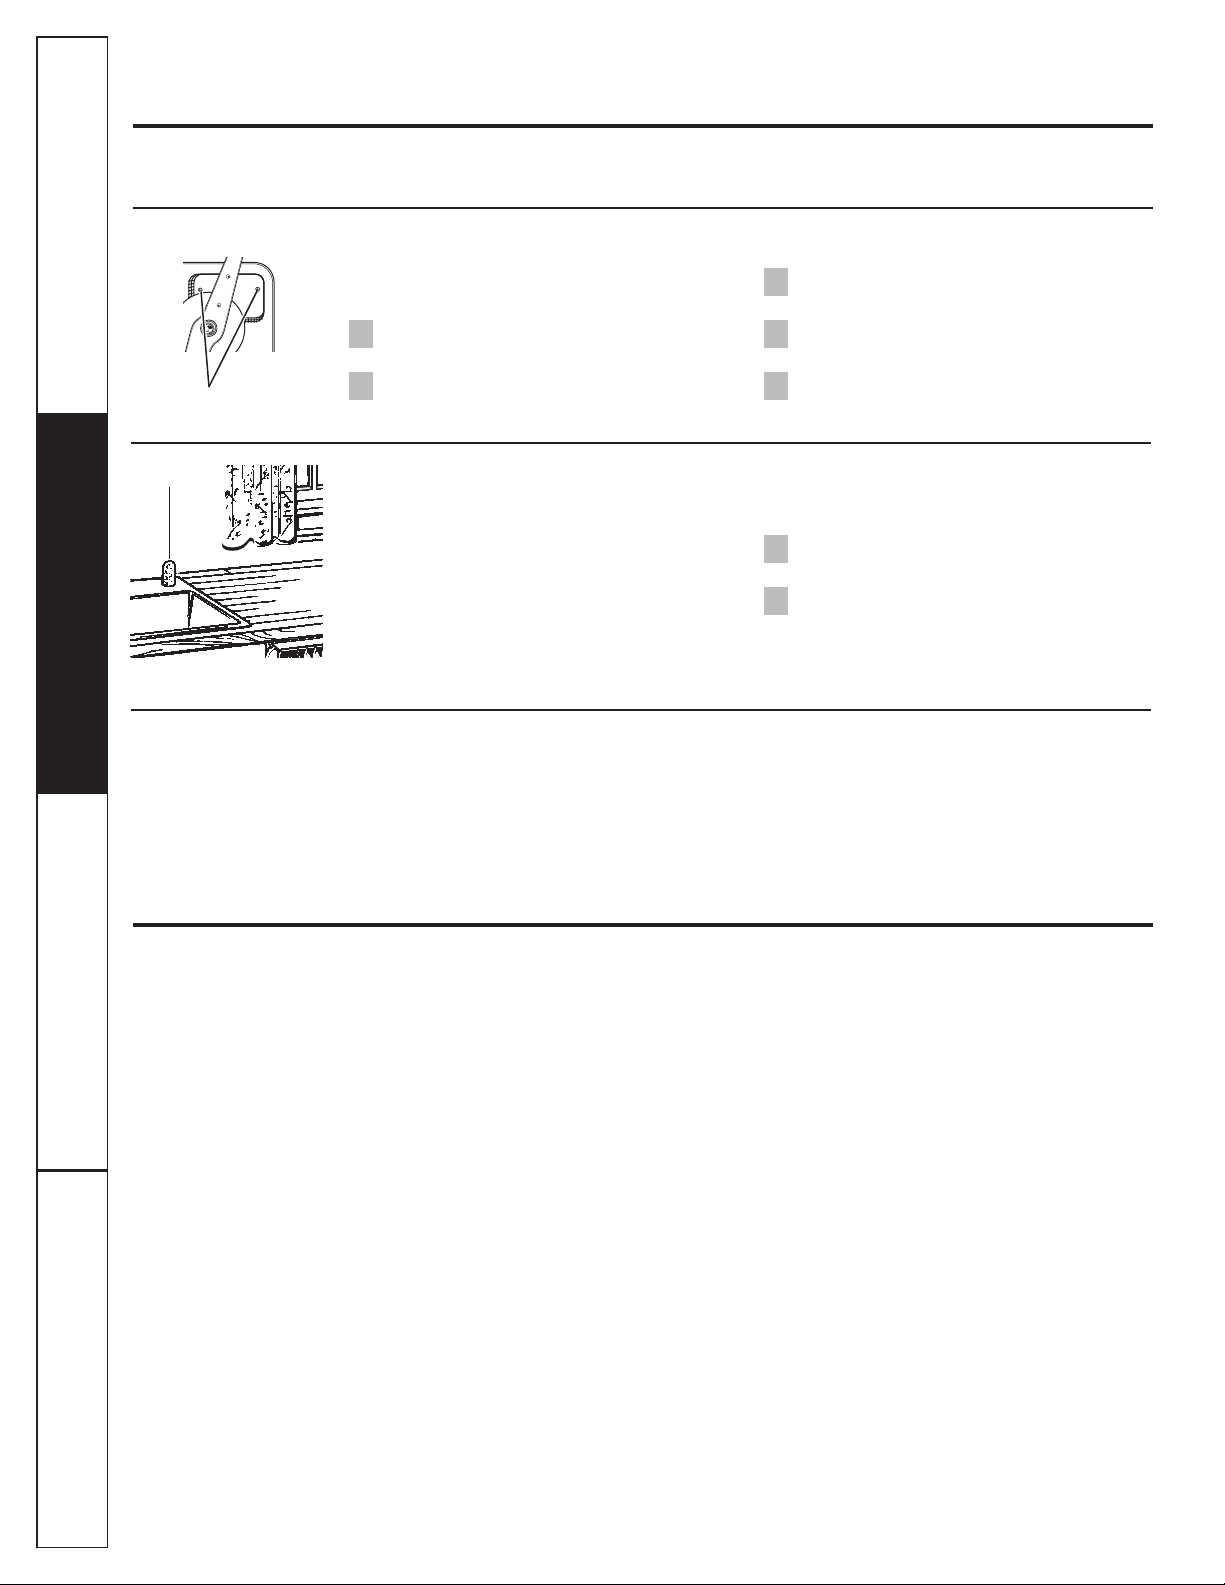
DON’T LET ANY ITEM EXTEND THROUGH
BOTTOM OF SILVERWARE BASKET AND
RACK, TO ENSURE PROPER FUNCTION
OF SPRAY ARM.
Do not cover upper rack tower
(not present on all models)
Tower
Don’t block the upper rack
wash tower.
Consumer SupportTroubleshooting TipsOperating InstructionsSafety Instructions
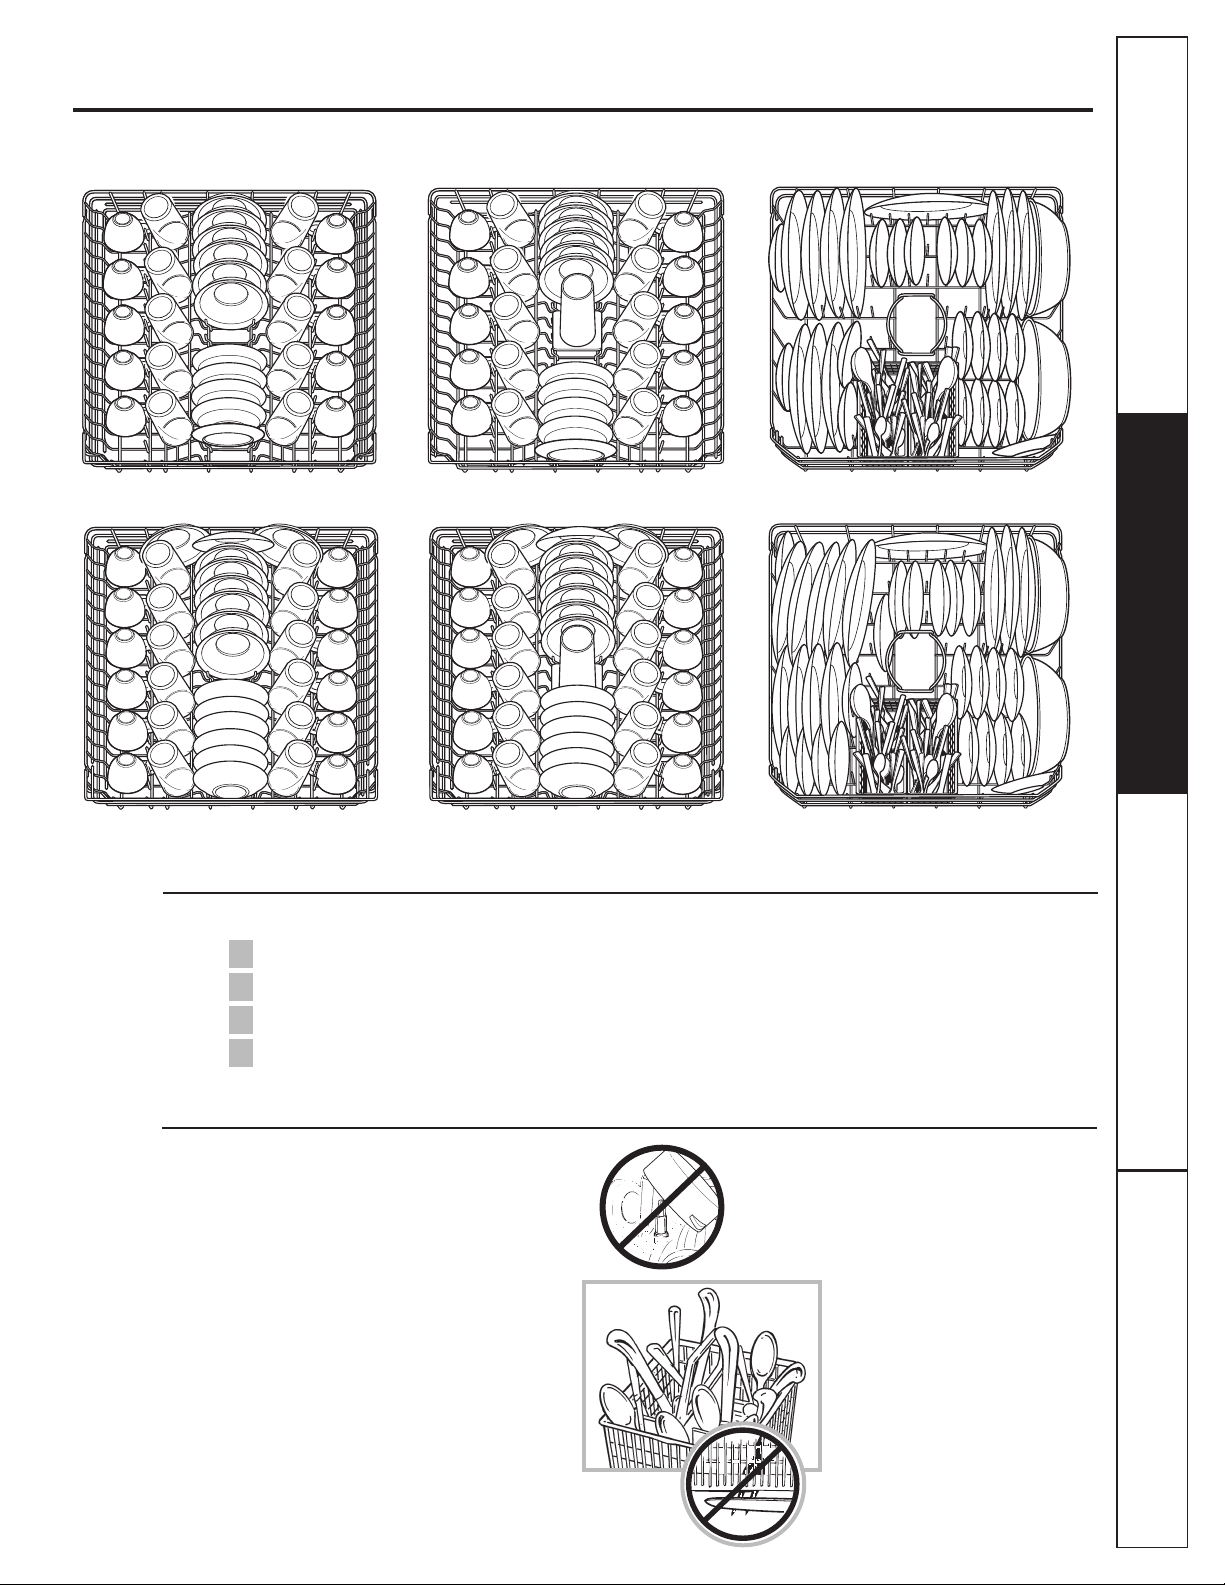
Follow these guidelines for loading 10 place settings. Features and appearance of racks and silverware baskets
may vary from your model.
Upper Rack—10 place settings Upper Rack—10 place settings Lower Rack—10 place settings
Loading place settings… GEAppliances.com
Forget to Add a Dish?
A forgotten dish can be added any time before the main wash.
Push the door latch to the left.
Once the water calms, open the door. Steam may rise out of the dishwasher.
Add forgotten dish.
Close the door and push the latch to the far right.
4
3
2
1
Tips for Loading and Good Wash Performance
■ Don’t block the lower rack wash tower.
■ Don’t let items fall through rack and
block spray arms.
13
Upper Rack—12 place settings Upper Rack—12 place settings Lower Rack—12 place settings
Caring for the dishwasher
To clean the control panel, use a lightly dampened cloth, then dry thoroughly. To clean the exterior, use a good appliance
polish. Never use sharp objects, scouring pads or harsh cleaners on any part of the dishwasher.
If your dishwasher is left in an unheated place
during the winter, ask a service technician to:
Cut off electrical power to the dishwasher.
Remove fuses or trip circuit breaker.
Turn off the water supply and disconnect the
water inlet line from the water valve.
Drain water from the inlet line and water
valve. (Use a pan to catch the water.)
Reconnect the water inlet line to the
water valve.
Remove the plastic sump cover in the tub
bottom and use a sponge to soak up water
in the rubber boot.
5
4
3
2
1
Sump cover screws
An air gap protects your dishwasher against
water backing up into it if a drain clogs.
The air gap is not a part of the dishwasher.
It is not covered by your warranty. Not all
plumbing codes require air gaps, so you may
not have one.
The air gap is easy to clean.
Turn off the dishwasher and lift off the
chrome cover.
Unscrew the plastic cap and clean with
a toothpick.
2
1
Check the air gap any time your
dishwasher isn’t draining well.
Air gap
Does Your Dishwasher Have an Air Gap?
Protect Against Freezing
Operating Instructions Safety InstructionsConsumer Support Troubleshooting Tips
14
The stainless steel panels can be cleaned
with Stainless Steel Magic or a similar
product using a clean, soft cloth.
You can order Stainless Steel Magic
#WX10X15 through GE Parts by calling
800.626.2002.
Stainless Steel Panels
You can change the appearance of your
dishwasher by adding a custom panel trim kit.
1/4″ Wood panel trim kit—This accessory
contains trim and instructions for you to supply
and install a 1⁄ 4″ thick decorative wood door:
■ GPF25B (Black) GPF325B/GPF425B
■ GPF25W (White) GPF325W/GPF425W
■ GPF25C (Bisque) GPF325C/GPF425C
3/4″
Trimless wood panel kit—This accessory
contains parts and instructions for you to supply
and install a 3 ⁄ 4″ thick decorative wood door:
■ GPF375/GPF475
NOTE: The GPF100 dishwasher door spring kit
must also be ordered and installed when the
door panel weighs four lbs. or more. This kit is
included with the 3/4
” trim kits.
Non-wood countertop bracket
kit—This is for
installations which have non-wood countertops
and includes side-mounting brackets and
instructions for securing the dishawasher:
■ GPF65
Consult your GE Appliance dealer to get the correct
kit for your model.
These accessories are available at extra cost
from GE. Call 800.626.2002 to order, or see your
authorized GE Appliance dealer. Visa, MasterCard or
Discover cards are accepted. Specify accessory
number when ordering.
Optional accessories

Problem Possible Causes What To Do
Dishwasher won’t run Fuse is blown, or the • Replace fuse or reset circuit breaker. Remove any other appliances
circuit breaker tripped from the circuit.
• Try pressing the START/RESETpad (Electronic models) two times.
Power is turned off • In some installations, power to the dishwasher is provided through a wall
switch, often located next to the disposer switch. Make sure it is on.
Noise Some of the sounds •Soft food disposal shredding action.
you’ll hear are normal
• Drain valve opening to pump water out.
• Timer control as cycle progresses.
• Detergent cup opening.
• The motor stopping during the drying period.
• Water draining out of tub immediately after touching the START/RESET pad.
Utensils are not secure • Make sure everything is secured in dishwasher.
in rack or something small
has dropped into rack
Rattling dishes when • Make sure dishes are properly loaded. See the Loading the
the spray arm rotates dishwasher racks section.
Motor hums • Dishwasher has not been used on a regular basis. If you do not use
your dishwasher often, set it to fill and pump out once every week.
This will help keep the seal moist.
Water standing in This is normal • A small amount of clean water around the outlet on the tub bottom
the bottom of the tub at the back of the tub keeps the water seal lubricated.
Water won’t pump Drain is clogged • If you have an air gap, clean it.
out of the tub
• Check to see if your kitchen sink is draining well. If not , you may need
a plumber.
• If the dishwasher drains into a disposer, run disposer clear.
Suds in the tub Wrong detergent • Use only automatic dishwasher detergents to avoid sudsing.
was used Cascade®, Cascade®Complete and Electrasol®Automatic Dishwashing
Detergents have been approved for use in all GE dishwashers.
• To remove suds from the tub, open the dishwasher and let suds
dissipate. Add 1 gallon of cold water to the tub. On Models with a Dial:
Close and latch the dishwasher. Pump out water by slowly turning the
Dial until a drain period is reached. Repeat if necessary. On Models with
Electronic Control: Pump out water by pressing the START/RESET pad,
then 10 seconds later, press START/RESET pad again. Repeat if necessary.
Rinse agent was spilled • Always wipe up rinse agent spills immediately.
Stained tub interior Some tomato-based • Use of the RINSE ONLY cycle after adding the dish to the load
foods can cause reddish can decrease the level of staining. GE recommends Cascade
®
stains Plastic Booster to help remove these types of stains.
Tea or coffee stains • Remove the stain by hand, using a solution of 1/2 cup bleach
and 3 cups warm water.
WARNING
Before cleaning interior, wait at least 20 minutes after a cycle for the
heating elements to cool down. Failure to do so can result in burns.
ADVERTENCIA
Antes de limpiar el interior, espere por lo menos 20 minutos después de un ciclo
para que los elementos calentadores se enfríen. No hacerlo puede provocar
quemaduras.
An overall yellow or • A special filter in the water supply line is the only way to correct
brown film can be this problem. Contact a water softener company.
caused by iron deposits
in water
White film on inside • GE recommends Cascade Crystal Clear®to help prevent hard water
surface—hard water mineral deposits from forming.
minerals
• Run dishwasher with citric acid to remove mineral deposits. Citric
acid (Part number: WD35X151) can be ordered through GE Parts.
See back cover for ordering information.
Consumer SupportTroubleshooting TipsOperating InstructionsSafety Instructions
15
Before you call for service… GEAppliances.com
Troubleshooting Tips Save time and money! Review the charts on the following
pages, or visit GEAppliances.com. You may not need to call for service.
 Loading...