

Page 1
CONTENTS
INTRODUCTION ... 30
INSTALLATION ... 31
UNINSTALLING WORMS WORLD PARTY ... 31
LATEST DOCUMENTATION ... 31
STARTING WORMS WORLD PARTY ... 32
OVERVIEW ... 32
PLAYING THE GAME ... 33
ON-SCREEN INFORMATION ... 35
SELECTING YOUR WEAPON ... 36
CRATES ‘R’ US ... 39
MENU SYSTEM ... 40
SINGLE PLAYER MENU ... 40
CREATE A NEW GAME ... 42
BARRACKS ... 43
GENERAL GAME OPTIONS ... 44
WORMPOT ... 45
WEAPON OPTIONS ... 47
GAME OPTIONS ... 48
LANDSCAPES ... 49
NETWORK PLAY ... 50
CREDITS ... 53
29
Page 2
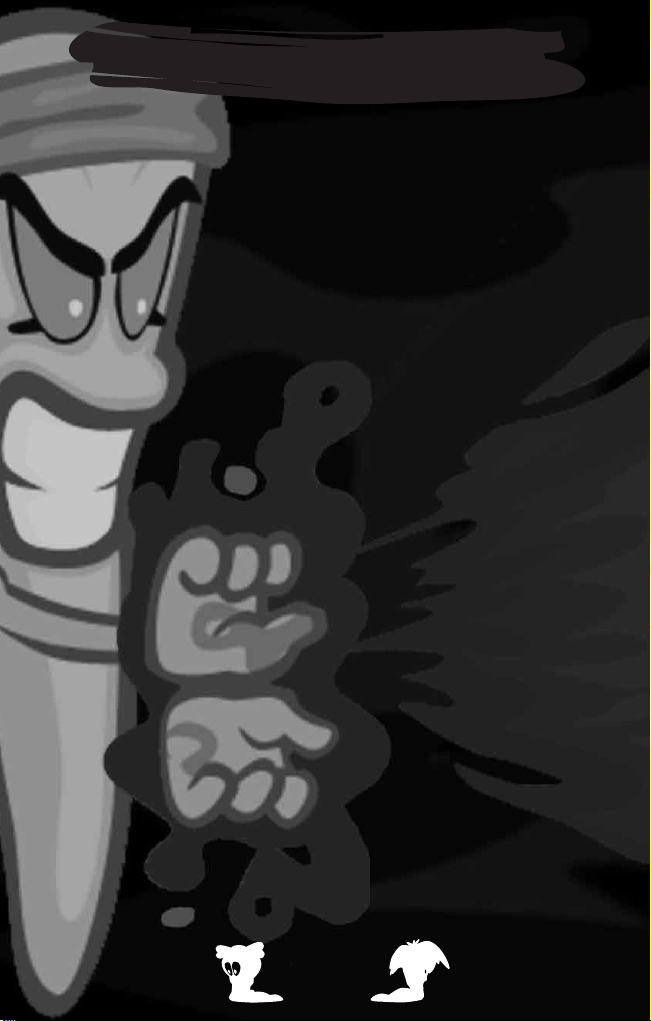
IT’S TIME FOR A PARTY…
INTRODUCTION
It’s a Worms World Party and everyone's invited!
It's a Quarterpounder of a game with some meaty multiplayer action, a
healthy salad of single player and a flap of amusing cheese topped up
with a generous amount of strategy ketchup. We've more weapons than
drinks ranging from the relatively alcohol free bazooka to the superstrength donkey.
Worms World Party is our latest turn based gift in which Worms battle
across zany landscapes either custom or randomly generated. With
Worms already having a reputation for being a party animal, there is just
no reason not to come.
You can also do battle online so if you can't make it to the party you can
always join the fun via the Worms network. There's just no need to be on
your own tonight, you can even chill out after a game and chat in one of
the lobbies.
Our DJ informs us his record box is just bursting with single player
missions and there are dozens of custom landscapes that can be
requested and played at anytime.
If you're new to the party scene don't worry, our friendly training section
will soon have you dancing with the rest of us. There's even a weapons
library available if you don't know the steps.
So ladies and gentlemen, let's gather round and toast our glasses to a
Worms World Party!
INSTALLATION
During installation, follow the on-screen instructions. Whilst there are a
number of options you may change during installation, pressing NEXT
will select the default option and continue with installation automatically.
When Worms World Party has successfully been installed, a Team17
group will be included in the Program group within your Start Menu and
the Worms World Party icon will be placed here, along with the utilities
and the latest documentation.
UNINSTALLING WORMS
WORLD PARTY
To uninstall Worms World Party, click on uninstall from
the Launcher menu.
LATEST DOCUMENTATION
Software is continually improved throughout all stages of development
wherever possible to ensure the finest quality gaming experience. We
advise players to read this document for any last minute changes or
additions that are not reflected in this manual. The document will also be
installed within the Team17 Program group and will be offered to be
viewed after installation.
30
31
Page 3
STARTING WORMS
WORLD PARTY
Ensure the game is successfully installed.
Click Start and select Team17/Worms World Party from the Program
Menu.
Click on Worms World Party, the game will run and play.
PLAYING THE GAME
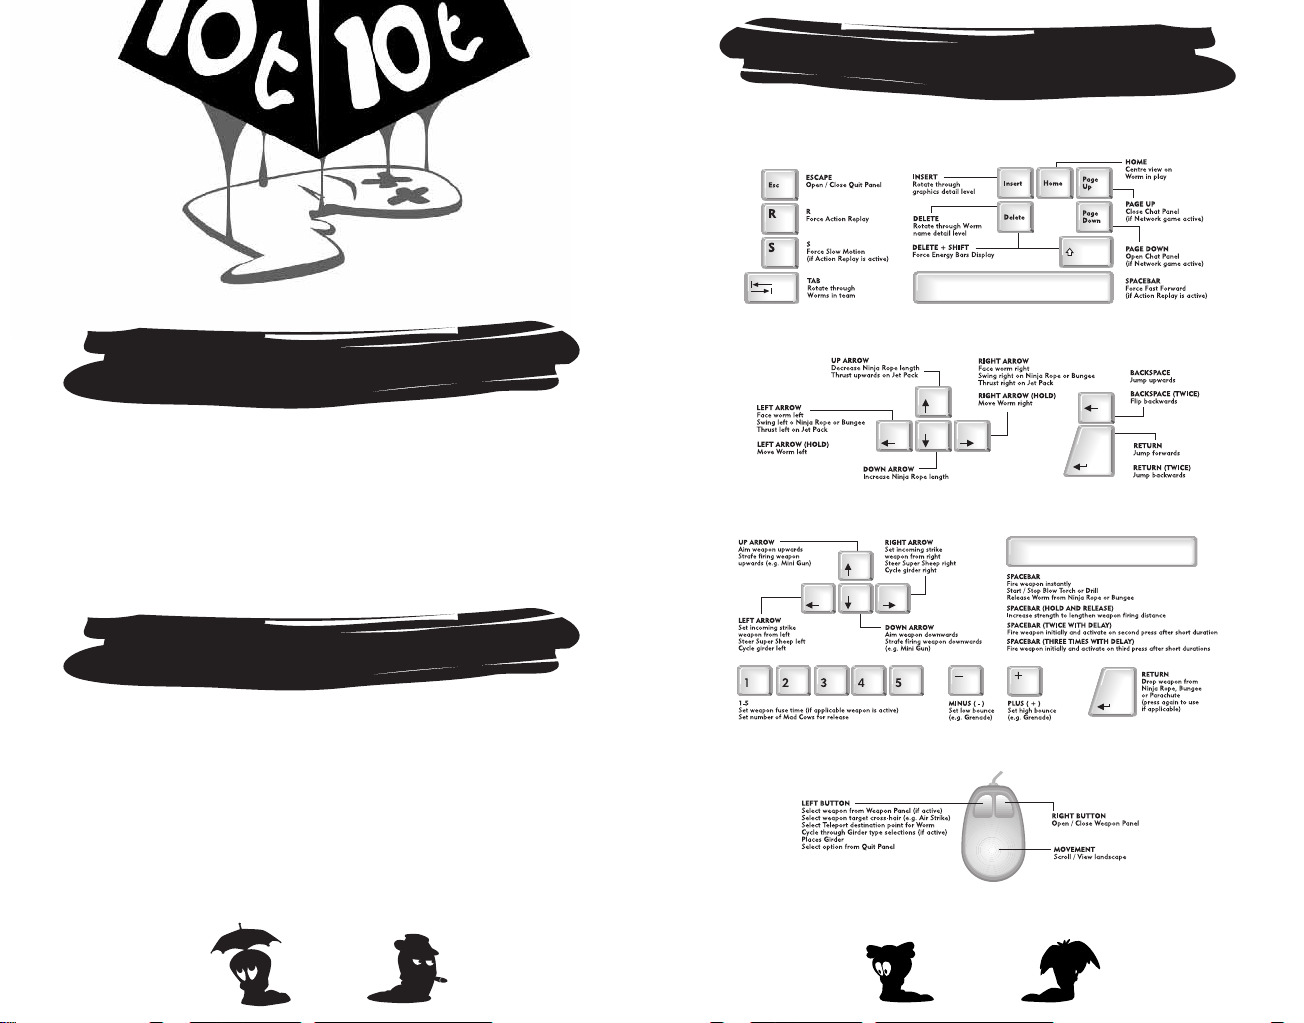
KEYBOARD CONTROLS.
OVERVIEW
Worms World Party is a turn based strategy game, where teams battle
across crazy, randomly generated landscapes or finely crafted custom levels.
Each team takes it in turns to pick off the enemy teams, using the many
crazy weapons, tools and utilities they have or have found to inflict
whatever dastardly strategies they can envision.
Worms will die when they lose all of their energy or drown in the murky
depths. The winning team is the one that manages to survive the
mayhem and have Worms left standing!
32
33
Page 4
MOVING THE VIEW
Use the mouse to scroll around the landscape, simply move it in the
direction you’d like the screen to scroll. Press the HOME key to centre on
the current Worm.
CHANGING WORMS
If Select Worm is enabled, press the TAB key to select a different
member of your Worms Team. You can only change Worms if you haven't
already moved one, or selected a weapon. Select Worm can also be used
as a utility if available.
MOVING WORMS
Move your Worm around by using the CURSOR KEYS. LEFT ARROW
moves your Worm left, RIGHT ARROW moves your Worm right. If the
Worm is blocked it will stop.
JUMPING
Make your Worms jump forward by pressing the RETURN key.
You can also make Worms jump backwards by pressing RETURN twice
in quick succession. Perform an upward jump with BACKSPACE.
Pressing BACKSPACE twice in quick succession performs
a back flip.
TIP:CERTAIN WEAPONS CAN BE USED WHILST YOUR WORM IS JUMPING.
OTHER MOVES
Some of the weapons and utilities have nifty little tricks that can aid
your Worm in its progress. Check out the Wormapaedia section in-game.
ACTION REPLAY
Press the R key immediately after a shot to replay it. You can use the S
key to watch the replay in slow-motion. Pressing the SPACEBAR during a
replay will fast forward it to the end.
NAME SWITCH
Sometimes the visibility of the Worm names can hinder the player. Press the
DEL key to toggle the Worm name visibility setting from full, partial or none.
DETAIL SETTINGS
You can cycle through the detail settings by pressing the INSERT key.
CHAT PANEL
In network games the chat panel can be accessed by pressing the PAGE
DOWN key and can be removed with the PAGE UP key.
QUIT
Press the ESCAPE key to open the Quit Menu. You can select Draw Game,
Force Sudden Death mode and Quit Game by clicking on the option. You
can also view the number of rounds won by each team from here.
When the QUIT menu is accessed, the game is in pause mode. Press
ESCAPE again to resume play. In a network game, action will carry on
behind the menu.
N
OTE:IF THE HOST QUITS A NETWORK MATCH, THE GAME IS OVER.
ON-SCREEN INFORMATION
The game screen is full of useful information - the following explains
what it all means!
TURN/ROUND TIME INDICATOR
Your Turn Time counts down at the bottom left of the screen. When it
reaches zero, play passes to the next team.
WIND BAR
Some weapons e.g. Bazooka are affected by the wind. There is a wind
strength indicator at the bottom right of the screen to help you gauge
your shots.
TEAM STATUS
Each team in the game has an overall energy bar shown at the bottom of the
screen. When this is fully depleted, that team is removed from the game.
WORM STATUS
Worm names and energy values appear above each Worm.
UTILITIES
Enabled utilities (Double Damage, Crate Spy etc.) will appear above the
wind indicator in a small box when they are in use.
3534
Page 5

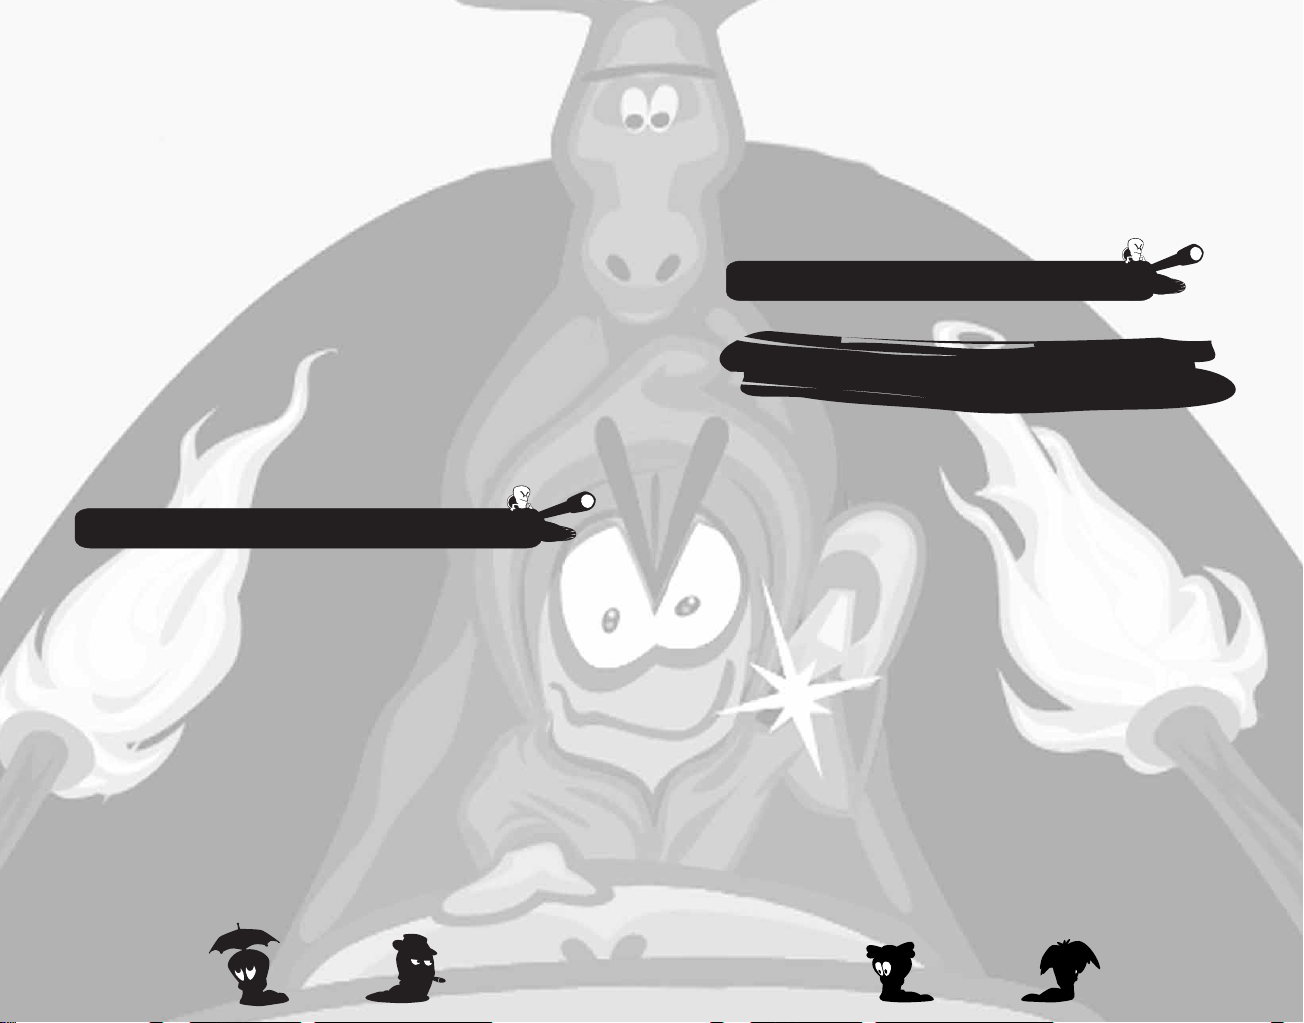
SELECTING YOUR WEAPON
WEAPONS PANEL
The weapons panel is accessible by pressing the RIGHT MOUSE button.
To select a weapon, move the POINTER over your desired weapon and
LEFT CLICK to select it.
To remove the panel from the screen, you can either select a weapon or
press the RIGHT MOUSE button again.
Alternatively you can use keyboard shortcuts as shown on the weapon
selection panel.
WEAPON USAGE
Worms World Party includes around 60 weapons for you to use.
The following section merely indicates how to fire each weapon.
The best way of learning how to use them is by playing the Training,
Missions and Time Attack single player games. The Wormopaedia
section available on the Training, Missions and Scenario menu screens
also offers valuable advice and tips. It is well worth reading to brush up
on the necessary skills.
BAZOOKA
Press the UP and DOWN arrow keys to move the crosshairs. Then press
and hold the SPACEBAR to shoot the weapon (the longer you press it, the
stronger the shot will be).
HOMING MISSILE
Move the target cursor with the mouse pointer and press SPACEBAR to
set the target.
Press the UP and DOWN arrow keys to move the crosshairs and press
SPACEBAR to shoot (the longer you press it, the stronger the shot will be).
MORTAR
Press the UP and DOWN arrow keys to move the crosshairs and press
SPACEBAR to shoot.
HOMING PIGEON / PATSY’S MAGIC BULLET
Move the target cursor with the mouse pointer and press LEFT MOUSE
button to set the target.
Press the UP and DOWN arrow keys to move the crosshairs and press
SPACEBAR to shoot.
SHEEP LAUNCHER
Aim with your UP and DOWN arrow keys and press SPACEBAR to launch.
Once the sheep is off and running, it acts as any self-respecting sheep would.
GRENADE / CLUSTER BOMB / BANANA BOMB /
HOLY HAND GRENADE
Set the fuse setting in seconds (1-5 on the keyboard) and toggle the
bounce setting from min to max (- and + keys). Press the UP and DOWN
arrow keys to move the crosshairs and press SPACEBAR to shoot (the
longer you press it, the stronger the shot will be).
OTE:HOLY HAND GRENADE HAS NO FUSE / BOUNCE SETTINGS.
N
BATTLE AXE / FIRE PUNCH / DRAGON BALL / SUICIDE BOMB / PROD
Stand next to your target and press SPACEBAR.
EARTHQUAKE / INDIAN NUCLEAR TEST / ARMAGEDDON /
SCALES OF JUSTICE
Press SPACEBAR to start, no aiming is required.
SHOTGUN / HANDGUN / UZI / MINIGUN / LONGBOW
Press the UP and DOWN arrow keys to move the crosshairs and press
SPACEBAR to shoot (shotguns have two shots due to their double barrel).
KAMIKAZE
Select a direction with the UP and DOWN keys, then press SPACEBAR.
DYNAMITE / LAND MINE / MING VASE
Press SPACEBAR to drop.
SUPER SHEEP
Press SPACEBAR to release, press a second time to fly. Control the flight via
LEFT and RIGHT arrow keys, or SPACEBAR again to drop.
MOLE BOMB
Press SPACEBAR to release, SPACEBAR to cause the mole to jump up
then dig downwards. Press SPACEBAR a third
time to detonate.
3736
Page 6

AIR STRIKE / MAIL STRIKE / MINE STRIKE / MOLE STRIKE /
MB BOMB / SHEEP STRIKE / CARPET BOMB
Move the target cursor with the mouse pointer and LEFT CLICK to mark
the target and fire (with an X). If you wish to abandon here simply select
another weapon. You can also select the direction of the strike by
pressing the LEFT and RIGHT arrow keys.
BLOW TORCH
Select your direction with the arrow keys pad and press SPACEBAR to
start and stop digging. You can also use the UP and DOWN arrow keys to
move up and down while digging.
PNEUMATIC DRILL
Press SPACEBAR to start digging down and SPACEBAR again to stop.
GIRDER / BRIDGE KIT
Use the mouse pointer to position the Girder and press the LEFT and
RIGHT arrow keys to rotate it. Press SPACEBAR to place it.
BASEBALL BAT
Stand next to your target, aim the crosshairs and press SPACEBAR to
sort them out.
NINJA ROPE
Press SPACEBAR to launch the rope and the LEFT and RIGHT arrow keys
to swing on the rope. Press UP and DOWN to shorten and lengthen the
rope. Press SPACEBAR to detach your Worm from the rope.
BUNGEE
Press SPACEBAR to release your Worm from the bungee or select it and
walk off a cliff!
PARACHUTE
Press SPACEBAR to open your parachute. Also opens on its own after a fall.
TELEPORT
Simply select the location where you want your Worm to end up via the
mouse pointer and press SPACEBAR to activate.
SUPER BANANA BOMB
Just press SPACEBAR after you have thrown it to shower your enemies
in soft fruit and then SPACEBAR again to detonate.
SALLY ARMY / SKUNK / OLD WOMAN / MAD COWS / SHEEP
Press SPACEBAR to release (facing the direction you want) and after a
while watch it explode or press SPACEBAR a second time to manually
detonate it (Old Women and Mad Cows can’t be detonated manually).
CONCRETE DONKEY
Simply select the location where you want the Donkey to land with the
mouse and left click.
FREEZE
Press SPACEBAR to freeze your Worm and protect it from damage.
CRAT ES ‘R’ US
Throughout the game, different crates will drop from the sky, or teleport
into the play-field. There are three distinct types; Weapon Crates, Health
Crates and Utility Crates.
WEAPON CRATES
The contents of Weapon Crates are usually more powerful weapons, or
weapons that are initially handed out in limited supply, such as Super
Sheep, Dynamite, Homing Missiles etc.
HEALTH CRATES
Health Crates offer a way of topping up your energy levels throughout a
match. Collect the crate and the Worm receives an energy boost. Health
Crates also offer an antidote to any infection a Worm may have received.
UTILITY CRATES
These crates contain utilities to help you in various ways. There are two
types; collectable types, which can be stored and used when the time
suits (shown in the utility panel at the top of the weapon panel) and
instant utilities, which come into effect as soon as you collect the crate.
COLLECTABLE UTILITIES
FAST WALK
This lasts for one turn and allows Worms to walk over the land much
quicker than before, excellent for long assaults and critical attacks.
LASER SIGHT
This effect enables a Laser Sight on the following weapons; Uzi,
Minigun, Hand Gun, Kamikaze and Shotgun. This makes it much easier
to judge your shots, but only lasts one turn.
LOW GRAVITY
This incredible effect makes all your shots and movements susceptible
to Low Gravity. This means super-long jumps and more besides!
38
39
Page 7

JET PACK
Use the cursor keys to control vertical and rear thrusters as your Worm
takes to the skies. Particularly useful to reach distant shores if you're short
on Teleports and exceedingly useful if you wish to fly by and drop some
Dynamite on to a bunch of Worms. Join the space age, get the Jet Pack!
INSTANT EFFECT UTILITIES
DOUBLE TIME
Instantly doubles the amount of time remaining on the current turn.
CRATE SHOWER
Randomly drops a few more crates on to the landscape.
CRATE SPY
This effect, which lasts until the end of the round, allows the team to
reveal the contents of any crates around the landscape.
DOUBLE DAMAGE
Lasts for just a single turn and delivers double damage from any explosion
that occurs. Mightily powerful and should be used with caution.
MENU SYSTEM
MAIN MENU
From here you can select to play a single player game, create a
multiplayer game, play online or go to the options menu. The LEFT
mouse button is used for selecting.
Worms World Party features a very useful help system. Simply move the
pointer over any icon, text or dialog box for instant help that appears at
the bottom of the screen.
SINGLE PLAYER MENU
SINGLE PLAYER QUICKSTART GAME
This allows you to get playing very quickly. You will play with
pre-defined team and weapon selections against a series of computer
controlled robots (Wormbots).
Games will be played on randomly generated landscapes, with the
default game options set.
TRAINING
The training arena offers a host of distinct disciplines in which to train.
In all training modes you will work against the clock. Your best times are
logged and can be saved.
Keep an eye on our web page, http://wwp.team17.com for the best
confirmed times in each event. Can you beat us at our own game?
To play, select your team, then your event, then start.
TIME ATTACK
Also available from the Training screen is Time Attack. Similar to
missions, though there are multiple ways to complete the level. The
objective is to find the fastest method.
The times for completion are saved and Team17 record times are listed
as a guideline.
Once the Time Attack tab has been selected, select your
team, then your event, then start.
MISSIONS
Missions in Worms World Party are cunningly
designed to test everyone from beginners to
seasoned veterans. They range in difficulty from
easy to hard and must be completed in order. If
you struggle to complete a mission, the game
realises this and supplies help in the form of extra
weapons / utilities to help you progress. Multiplayer
missions are available when hosting a game via the
MULTIPLAY MISSION button.
N
OTE:IF YOU SUCCESSFULLY COMPLETE A MISSION,
THE CUSTOM DRAWN LANDSCAPE IN THAT MISSION IS
AVAILABLE FOR YOU TO PLAY ON IN NORMAL GAMES
R
EFER TO THE TERRAIN GENERATION SCREEN
SECTION LATER IN THE MANUAL FOR DETAILS.
S
ELECT TEAM, THEN MISSION, THEN START.
!
DEATHMATCH CHALLENGE
Similar in play to standard games, you will take on a number
of computer teams in an ever-increasing spiral of difficulty.
Select your team, then start.
4140
Page 8

CREAT E A NEW GAME
MULTIPLAYER
This is the menu for creating traditional Worms World Party multiplayer
games on your PC. Multiplayer games can be between 2-6 teams, any of
which may be computer controlled at a variety of skill levels.
HOW TO CREATE A NEW TEAM
Whilst there are some default teams provided, to get the best out of Worms
World Party, we recommend that you create your own personal team.
You can also edit a number of other aspects when creating your team.
Click on NEW TEAM and follow the instructions below.
NAME YOUR TEAM AND WORMS
You need a nickname for your squad and troops. If you’re short of ideas,
just click the question mark to generate a random name. Double click for
random generation of the full team.
SELECT THE CONTROL
This can be HUMAN or COMPUTER. For a computer controlled team, you can
also change the skill level from EASY through to DIFFICULT.
SELECT THE SPECIAL WEAPON
You are able to select a special weapon from the list shown which you
take into battle with you. Check out the Wormopaedia, try them out and
pick the one you feel suits your play best.
SELECT THE SOUND BANK
A default bank will be chosen depending on the installed language but this
can easily be changed.
We have created a large range of odd, strange, familiar and bizarre sound
sets. In the unlikely case none of these are suitable, you can create your own
with the supplied utility.
SELECT THE GRAVESTONE
Select the type of gravestone you would like your squad to leave behind
as a mark of respect.
SELECT THE FANFARE
Just for show, a random fanfare is selected for you, this can be
selected by yourself and can be previewed. The fanfare is used in
presentation screens and match results screens.
SELECT YOUR FORT
Forts selected here are used with the Wormpot mode ‘Forts’. All forts
differ in style so try them out before deciding which one is for you.
BUYING WEAPONS
One of the Wormpot modes allows players to use only weapons they
have purchased and here is where you buy them.
ALL DONE?
When you have selected the items you require, click OK to add your team.
Once added, you can use it in Training, Missions, Time Attack and standard
Multiplayer or Network games.
BARRACKS
All teams available for selection are listed in the barracks. To add a team to
a game, simply click on it. Click the right button to edit it.
OTE:DEFAULT TEAMS CANNOT BE EDITED
N
GAME ROSTER
As you add teams into the game, they will appear in the game roster. Up
to six teams can be added. To remove a team and place it back in the
Barracks, just click on it once more.
When the teams are in the ROSTER, you can select several options:
ALLIED TEAMS
You can ally teams together, meaning they will appear in the game on the
same side. Use the left mouse button to cycle through the colours until
the team colour is the same as the team you wish to ally with.
Allied games play exactly like normal games, but with a few notable
exceptions. Allied players get accredited with a victory if their alliance
wins, even if their team is defeated. During the game, alliances take
turns to have their move. Teams within alliances will take turns to move
within that alliance.
HANDICAPPING
Left click on the first icon to toggle through the team handicap
options. A team will have 25% of their energy points added to
(+) or removed from (-) its starting energy level. If neither
symbol is shown (default) then the Worms start with the level
as set in the General Game Options.
NUMBER OF WORMS IN THE TEAM
You can alter the amount of Worms that a team will start the game
with. To do this left click to toggle the amount from 1 to 8.
.
4342
Page 9

GENERAL GAME OPTIONS
WORMPOT
These are options that are very basic and govern simple rules of the game.
Left click on the option required to toggle through the available settings.
TURN TIME
This is the period (in seconds) you have to make your move on your
turn. The lower it is, the more difficult it becomes to make your turn.
ROUND TIME
This is the period (in minutes) before the round ends and the Sudden
Death period begins.
STARTING ENERGY
This is the starting energy of all Worms in the game, before any
handicapping is selected. The default energy level is 100 and is what we
recommend.
VICTORIES REQUIRED
Select the number of victories (rounds won) for the team (or alliance)
to win the match.
The default is two rounds to win the match.
WORM SELECT MODE
During play, it’s possible to play and select which Worm you would like
to move next. However, we feel that Worms World Party is a more skilful
game when the Worms in a team take turns to cycle round to their turn.
Select between NO WORM SELECT (you cannot choose which Worm to
move), and WORM SELECT (you can use the WORM SELECT button to
choose which Worm to move).
MULTIPLAYER
This is the menu for creating traditional Worms World Party multiplayer
games on your PC. Multiplayer games can be between 2-6 teams, any of
which may be computer controlled at a variety of skill levels.
TELEPORT IN
Choose if you want Worms to be placed randomly or if you want to
teleport them in.
The WormPot is a fast and attractive way of experiencing many different
ways to play Worms from just a select few modes (e.g. Wind affects
Grenades). It does this by adding the different modes of play together to
create well over 400 different combinations. The WormPot is so called
because it looks like a Jackpot Fruit machine, with three different reels–
each game mode is represented by a graphic. Add all of these together
and you’ll see what attributes your game will have.
Reel 1: Health Bonanza (maximum heath crate drops)
Reel 2: Low Gravity (low gravity is constantly switched on)
Reel 3:
This would mean that when it came to playing this game you would have
health crates dropping on every single turn, every Worm would jump and be
blown by other weapons super long distances and each team would have the
4 types of specialist Worms (Cannonade, Grenadier, Melée and Engineer).
The best way to learn about the modes is to play them! However for the
newcomers we have a short description.
NO MODE
Nothing selected.
POINTS FOR WEAPONS
Allows users to set their own
weapons, purchased when players
create their team.
SHEEP SHEEP EVERYWHERE
All crates contain sheep.
AQUA SHEEP GALORE
Super Sheep can fly under water.
BLOOD
All Worms have red blood.
WORMS ONLY DROWN
Worms have infinite energy and can
only be killed by falling into the drink.
SUPER HAND TO HAND
Hand to hand weapons do
increased damage.
Specialist Worms (each Worm can only use a selection of weapons)
SUPER FIREARMS
Firearm weapons do increased
damage.
SUPER ANIMALS
Animal weapons do increased
damage.
SUPER CLUSTERS
Cluster weapons do increased
damage.
SUPER ENGINEERS
Engineer type weapons do
increased damage.
SUPER FIRE
Fire weapons do increased damage.
SUPER EXPLOSIVES
Explosives do increased damage.
44
45
Page 10

WEAPON OPTIONS
DAVID AND GOLIATH
One of your Worms is the mighty
Goliath, the rest are Davids.
MAX FALL DAMAGE
Falling a long way will hurt, a lot.
DROPS ONLY
Players start with almost nothing
and collect weapons from crates.
X2 DAMAGE
Everything does twice as much
damage as normal.
CRATES EVERYWHERE
Crate drops all the time.
WEAPONS DON’T END TURN
Once a Worm has fired a weapon it
can fire again and again and again. As
long as it’s in the turn time.
POWER HAND TO HAND
All hand to hand weapons have
increased power (Worms will be
thrown further).
POWER ANIMALS
All animal weapons have increased
power (Worms will be thrown further).
POWER CLUSTERS
All cluster weapons have increased
power (Worms will be thrown further).
POWER FIRE
All fire weapons have increased power
(Worms will be thrown further).
POWER EXPLOSIVES
All explosive type weapons have
increased power (Worms will be
thrown further).
SPECIALIST WORMS
Each Worm is now a specialist and
only has access to certain weapons.
The four specialists are Cannonade,
Grenadier, Melée and Engineer.
NO RETREAT NO SURRENDER
Once a weapon has been fired there
is no going back. Oh, and you can’t
surrender.
MAX HEALTH DROPS
Health drops are cranked up to Max.
LOW FRICTION
Friction is set to low so the land
seems slippery.
WIND AFFECTS ALL
Wind affects almost all weapons and
yes, that does include grenades.
HIGH FRICTION
Friction is set to high so that
Worms don’t slide about.
ONE SHOT ONE KILL
All Worms start with one energy so
one shot does indeed mean one kill.
ENERGY OR ENEMY
All Worms start the game poisoned but
there are health crates about. Decide
whether to go for enemy or energy.
EARTHQUAKES
Every few turns there will be an
earthquake - stay away from the edge.
FORTS
Play a fort game where Worms use
their own fort chosen when
creating your team. More than 2
teams can play but only the first 2
teams forts will be displayed.
SUPER ROPE
Worms now have access to the
super rope, longer and stronger
than your average rope.
NOTE: SOME MODES THAT CONFLICT
WITH EACH OTHER ARE KEPT ON ONE
REEL SO THAT IT IS IMPOSSIBLE TO HAVE
THEM ACTIVATED AT THE SAME TIME
.
The weapon options allow you to configure the way in which weapons and
ammo are distributed to teams in the game, configure the strength of the
weapon and suggest if and when the weapon should arrive as a reinforcement.
Please note that not all the weapons are available to edit, just the
standard ones. Other weapons become available
in special crates dropped during the game.
If you opt to play with team based special
weapons, you can also edit and alter these
weapons, which are in a separate list from
the standard weapons.
AMMO
By default, you will see the AMMO selection,
which shows you how many of each weapon you
will be given at the start of a round. Left click on
the icon to change between NONE, 1-9 or
UNLIMITED.
DAMAGE
Click with the left mouse to increase the damage potential, right
click to decrease it.
DELAY
This shows which round the weapon will become available. Left click to
toggle through 1-9 or OFF (weapon is available at the start).
WEAPON CRATE SUPPLY
You can use this screen to bias how often these weapons will appear in
weapon crates. Click to cycle through OFF and 1-5. This affects the
probability of the weapon appearing in a weapons crate.
OTHER WEAPON OPTIONS
SECRET WEAPONS
Select to play with or without the host of secret, super powerful weapons
that only arrive in crates.
USER SELECTED SPECIAL WEAPONS
If selected then players may use the special weapon chosen when
creating their team.
46
47
Page 11

GAME OPTIONS
LANDSCAPES
From here you can change the options that govern how the game will play.
TURN DELAY
The amount of time a player has to take control in a hot seat game.
RETREAT TIME
The amount of time a player has to retreat after taking a move
(using a weapon).
ROPE RETREAT
The amount of time that a player has to retreat after dropping a weapon
off a rope.
DISPLAY ROUND TIME
Simply selects whether you would like to see the round time or not.
SUDDEN DEATH TIME
Sets how fast the water will rise in sudden death mode. Can be set to
OFF, 5, 20 and 45 pixels every turn.
INTERACTIVE OBJECTS
Sets the type and amount of interactive objects that start on the
landscape. Cycle between NONE, FEW, NORMAL and MANY. If mines are
selected there are some additional options.
FUSE LENGTH
Sets the period before a mine explodes after being triggered.
DUD MINES
If selected, this means that some mines will be dud.
ARTILLERY MODE
The Worms cannot walk, all weapons must be thrown or fired.
STOCKPILING
You keep any collected weapons that are unused and take them into the
next round.
ANTI-STOCKPILING
You only get one round of weapons.
AUTO REPLAY
Turn automatic replays ON or OFF.
FALL DAMAGE
Select whether a Worm will be subject to injuries when it falls too far.
ENERGY REDUCTION
Selects whether a Worms energy will be reduced to 1 during sudden
death, the energy will drain slowly or nothing happens at all.
An outline or thumbnail of the current landscape is shown on the create
game screen. To quickly generate another, simply left click on the thumbnail.
To enter the landscape editor right click on the thumbnail.
LANDSCAPE MENU
Worms World Party features a very powerful editor for creating, editing
and storing landscapes.
MENU OVERVIEW
EDIT/PREVIEW AREA
This initially calculates and displays a preview of the currently selected
landscape. Click with the left button to go to edit mode, click with the
right button to go to preview mode.
OTE:WHEN IN EDIT MODE THE LANDSCAPE WILL BE MONO.
N
ISLAND GENERATION
The top row of thumbnails create islands. Click with the left button to
generate a new island. Click with the right button to transfer this level to
the main screen.
CAVERN GENERATION
The bottom row of thumbnails create caverns. Click with the left button
to generate a new cavern. Click with the right button to transfer this
level to the main screen.
ICON PANEL
Check out the in game help text for details on how to use these tools.
IMPORT
Click this icon to view and load an available custom level. For more
details on custom levels, see the section about custom levels.
SAVE AS
Clicking this icon will save the landscape file, the edited landscape or
custom level and add it to the list of landscapes in the drop down menu. All
related information such as water level, scenario type etc will also be saved.
DELETE
Delete the currently selected landscape. This option is not selectable
unless the landscape has previously been saved.
CUSTOM LEVELS
Worms World Party also possesses a powerful import tool that can
convert almost any type of image format to use as a landscape. There
are two types of image that can be imported.
4948
Page 12

MONO BITMAPS
These act as stencils. They replace the landscape thumbnail and you can
use them to create landscapes using the different scenarios provided.
FULL COLOUR BITMAPS
This powerful and exciting option allows you to use almost any image as
a battlefield! Simply select your image and the game will preview it.
IMAGE FORMAT
Worms World Party will do its best to import most of the common image
formats. This system has to do considerable processing of the image but
it should only take a few seconds.
One thing to consider is that Worms World Party uses a large area for the
game and your image may not fill the area completely, or perhaps be too
large. If it is too large you will be notified and the image will be shrunk. If
the image is smaller than the normal size (1920x696) then the image can be
centralised or stretched to fit. You can use your favourite paint packages to
prepare custom landscapes and share them with your friends.
NOTE:IF YOU SELECT A FULL COLOUR CUSTOM LEVEL NOTE THAT IT IS NOT POSSIBLE
TO EDIT IT OR SELECT SCENARIO TYPE
BACKGROUND SOIL
When using a custom level you can select which background soil to
use from the menu.
N
OTE:FULL COLOUR CUSTOM LEVELS ARE NOT SUPPORTED IN WORMNET
PLAY DUE TO THEIR LARGE SIZE
- THESE OPTIONS WILL BE REMOVED.
.
NETWORK PLAY
This is where the real fun is at.
Playing online means you can play against literally anyone in the World
from the comfort of your own home.
It can be played on a local network, or via the Internet by hooking up to
a WormNet server.
LOCAL NETWORK
To join other players on a local network, click the Networkicon and select
LOCAL NETWORK. You will be taken to a room where you can see other
players, or any games available to join. You can also chat to other players.
CONNECTING TO EXISTING GAMES
To join a game, click on the existing game and you will hook up with the host
of that game. Double click on the team you wish to add from your roster.
You can add more than one team from you list if you wish to have more
than one team operating from your computer. The host will have to grant
you permission before starting a game… so ask!
Once you have added a team, a ready button will be shown (light bulb).
Clicking this shows the host that you are ready. The ready button will
deselect if you view the settings, indicating you are not happy or wish to
review them.
When all players ready buttons are selected the host can start the game
with the Go button. At this point no options can be changed and the
game will launch in a few seconds.
HOSTING A GAME
When you host you have control over the game configuration. You can
chat to other players and work out how you want to play, handicap
players and form alliances.
You create the game exactly like you would in a normal game but have
additional powers to expel players.
Being a game host has a number of extra responsibilities, so make sure
you’re friendly and hospitable to other Wormers that want to join your game.
CHAT
During pre-game setup, you can send messages to the rest of the players.
COMMANDS
There are a number of commands you can use to liven up the chatter.
PRIVATE MESSAGES
Simply highlight the player you wish to send a message to and send as
usual. This could be a group of players, click the group icon to make the
messages public again.
You will continue to receive public messages while chatting privately.
ACTION
To do an action, which also displays the text in a different colour,
use /ME before the action.
SILENCE
Right click on the user name to turn off any messages from this player.
50
51
Page 13

WORMNET
You can play Worms World Party over the internet by connecting to
WormNet, which is an exclusive gaming environment created for Worms
World Party players.
If you are connecting for the first time you must register your team. This will add
your unique player ID to the game system and store your team information.
REGISTRATION
Worms World Party requires all players to register prior to playing for
the first time, this only takes a short time and allows the system to
authenticate your copy of Worms World Party.
PERSONAL DETAILS
These details are used for verification in case of a problem, as well as
supplying us with contact information for competitions.
NICKNAME
How others will see you, this must be unique. The server will prompt you
if the name already exists.
EMAIL
Enter your email address so that you can be contacted about information
regarding Worms World Party.
PASSWORD
Enter a password for your nickname. When you reconnect to WormNet,
the system will prompt you for a nickname and password.
PROXY SETUP
If you are behind a firewall and are using a proxy sever you should
check this box.
GAME CHANNELS
Team17 may change/open channels from time to time at their discretion.
CHANGING AREAS
You can opt to jump into the different areas at any time by going back to
the main WormNet screen. You can see how many people are in each
room. You can opt to jump into the different channels at any time by
going to the channel select screen.
IN-GAME NETWORK CHAT
Open the chat box by pressing the PAGE DOWN key. You can see
messages sent by other players (private messages are indicated but not
revealed to other players).
/me <msg> sends an action to all players
/anon <msg> sends an anonymous message to all players
Other players in the game are listed in the right of the chat panel, the
colour of the player indicates the status of their connection.
Grey Player disconnected
Blue Player not connected
White Player connected
Red Player lagged/connection problems
CREDITS
ARTWORK
Dave Smith - F
USTOM LEVELS • Patrick Romano - CUSTOM LEVELS • Jan Ruud - CUSTOM
C
LEVELS • Paul Robinson - CUSTOM LEVELS • Liam Kemp - CUSTOM LEVELS
Mike Green - CUSTOM LEVELS
CODE
Karl Morton – S
Sascha Kettler – O
DESIGN
John Eggett • Kevin Carthew • Grant Towell
AUDIO
Bjorn Lynne
ORIGINAL CONCEPT
Andy Davidson
PRODUCER
Paul Kilburn
QA
Kelvin Aston – L
Andy Aveyard • Jax Li • Paul Field – QA MANAGER
RONTEND / CUSTOM LEVELS • Dan Cartwright – IN-GAME /
OURCE • Colin Surridge – LEAD SUPPORT CODE •
NLINE SERVER CODE • Paul Scargill – INSTALLER
EAD QA • Brian Fitzpatrick – LEAD QA • Rob Henfrey •
52
53
 Loading...