

Page 1
TUROK®2: SEEDS OF EVIL™©1999 Acclaim Entertainment.All rights reser ved. TUROK: ® & © 1998, GBPC, Inc. All rights reserved. All other characters herein and the distinct likenesses thereof are trademarks
of Acclaim Comics Inc.All rights reser ved. Developed by Iguana Entertainment, an Acclaim Entertainment studio. Acclaim is a division of Acclaim Entertainment.TM, ® & © 1998 Acclaim Entertainment. All rights
reserved. DISTRIBUTED BY ACCLAIM ENTERTAINMENT LTD., Moreau House, 112-120 Brompton Rd., Knightsbridge, London SW31JJ, England. DISTRIBUÉ PAR ACCLAIM ENTERTAINMENT S.A.,12/14 Rond Point
des Champs Elysees, 75008 Paris, France. DISTRIBUIDO Por: New Software Center Company, S.L. c/ Pedro Muguruza, 1a Planta 28036 Madrid. DISTRIBUTED BY ACCLAIM ENTERTAINMENT PTY LTD., 96-106
Pelham Street,Carlton,Vic 3053,Australia. VERSPREID DOOR INFOGRAMES BENELUX ENTERTAINMENT,Parkkaan 81a,Postbus 2367,5600 CJ Eindhoven,Nederland.
LL OO OO KK
LL OO OO KK
®
™
www.turok.com
www.acclaim.net
™
INSTRUCTION BOOKLET
INSTRUCTION BOOKLET
FF OO RR
FF OO RR
Page 2

ACCLAIM Hotline/Consumer Service Department 09068 30 33 30
Calls cost 50p per minute at all times.
Please ask billpayers permission before calling.
Charges correct at time of going to print.
Health Warning
For your health, rest about 15 minutes for each hour of play. Avoid playing when tired or suffering from lack of sleep. Always
play in a brightly lighted room, and stay as far from the television screen as possible. Some people experience epileptic seizures
when viewing flashing lights or patterns in our daily environment. These persons may experience seizures while watching
TV pictures or playing video games. Even players who have never had any seizures may nonetheless have an undetected
epileptic condition. Consult your doctor before playing video games if you have an epileptic condition or immediately should
you experience any of the following symptoms during play: dizziness, altered vision, muscle twitching, other involuntary
movements, loss of awareness of your surroundings, mental confusion, and / or convulsions.
Page 3

Multiplayer with Text-To-Speech – Play Multiplayer with Microsoft’s Text-To-Speech: type a message and
other players will hear what you’ve typed. Note: it takes a bit longer for Turok
®
2 to load in this mode, be patient.
Double-click on Single Player to master the world of T urok
®
2. When you’re ready, challenge
real-world opponents in Multiplayer mode!
NOTE: If you chose an installation option other than the full install, some of these shortcuts may be
missing. We also recommend that you close all other applications while running Turok
®
2.
TWO DEADLY DESTINIES, ONE TIMELESS TASK...
T urok®2 gives you two great ways to play: There is Quest mode, a single player campaign that continues the
T urok
®
story through many new levels of darkness and danger. Or try Internet/LAN multi-player mode:
full-screen competition against remote human opponents across the Internet or a LAN (Local Area
Network). Whichever game you choose, you must conquer your fears and master your skills in order to
survive to victory.
THE LEGEND CONTINUES
When Turok®destroyed The Campaigner and the Chronoscepter, he unwittingly unleashed a new threat, this
one even more menacing than the one he’d mastered. For back when time began, the one they call Primagen
challenged creation and was caught up in a prison of his own making. The Lazarus Concordance realized the
danger and erected a series of Energy Totems at places thought to be vulnerable to the Primagen’s power.
Awakened by the destruction of the Chronoscepter, the ancient Primagen urgently calls upon his hapless
minions to destroy the Energy Totems and free him from his prison. It falls to Joshua Fireseed, the new Turok
®
,
to confront the challenge as he struggles for the very existence of the Lost Land! He must pay close heed to
the wisdom of Adon, the Speaker of Forever Light as she guides him through multiple levels of new adversaries.
As Turok
®
, you will meet some familiar foes, like the hideous Purr-Linn, and come face to face with a
blood-chilling cavalcade of new adversaries. As Turok
®
, you will need daring, cunning, and all the wonderful
weapons at your command to defeat the Primagen and save the Lost Land and perhaps the universe!
GAME LAUNCHER MENUS
When you start T urok®2, the Game Launcher window appears on your Windows desktop. It presents a series
of menus that allow you to choose and configure the type of game you want to play. Use the MOUSE to
highlight an item, and LEFT CLICK to confirm a choice and go to the next screen. Highlight GO BACK and
LEFT CLICK to return to a previous screen.
There are two Main Menu opening screens: a version for Single Player play, and a
version for Multiplayer play.
GAME LAUNCHER: SINGLE PLAYER MAIN MENU
At the Game Launcher Main Menu, you have these choices:
Start Game – Start a "local" Single Player game. You’ll enter the game,
where further choices as to game type and other options can be made.
See "SINGLE PLAYER ACTION" below.
Options – Set controller, audio, and video options.
Help – Online help. Help includes this manual and many other last-minute
details about Internetand LAN play.
Quit –Return to Windows
Once you’ve left the Game Launcher and entered a game, further menu choices are made by using the
I/M
keys to highlight a choice, and the e key to confirm the choice. If a choice has several options, use the I/
M
keys to highlight the choice, and the J/
K
keys to select the option desired.
AUTOPLAY INSTALLATION
Insert the Turok®2 CD into your CD-ROM drive. If you have
Autoplay enabled, After a moment, the installation process will
automatically start. Follow the on-screen prompts. The default
installation installs all options, including some free software.
You will be given the option of not installing some compo-
nents. If you later decide you want those components, you
can run the installation process, choose "Custom", and install
what you wish.
MANUAL INSTALLATION
Double click on "My Computer", then double click on your CD-ROM’s
icon. Proceed as above.
STARTUP
After installation you will able to run the game in either of two ways:
From Windows’ Start menu – Click on Start, Programs,
Acclaim Entertainment, Turok
®
2 Seeds of Evil™.
From your Windows Desktop – The installation process creates a Turok folder on your desktop
containing shortcuts to T urok
®
2.
There are three ways you can start T urok
®
2 (the folder contains a shortcut for each with the following titles):
Single Player – Play the Single Player game on your local PC.
Multiplayer – Play a Multiplayer game over a LAN or the Internet.
MINIMUM SYSTEM
REQUIREMENTS
• Pentium 200 PC with Voodoo or equivalent
performance 3D accelerator video card
• Pentium 166 PC with Voodoo 2 or equivalent
performance 3D accelerator video card
• 32 MB RAM
• 200 MB hard disk space, maximum installation
• 4X or better CD-ROM drive
• Windows
®
95/98
• 3D accelerator video card, 3Dfx Voodoo
equivalent or better
• Sound card
• Supports all DirectInput compatible controllers
1
Page 4
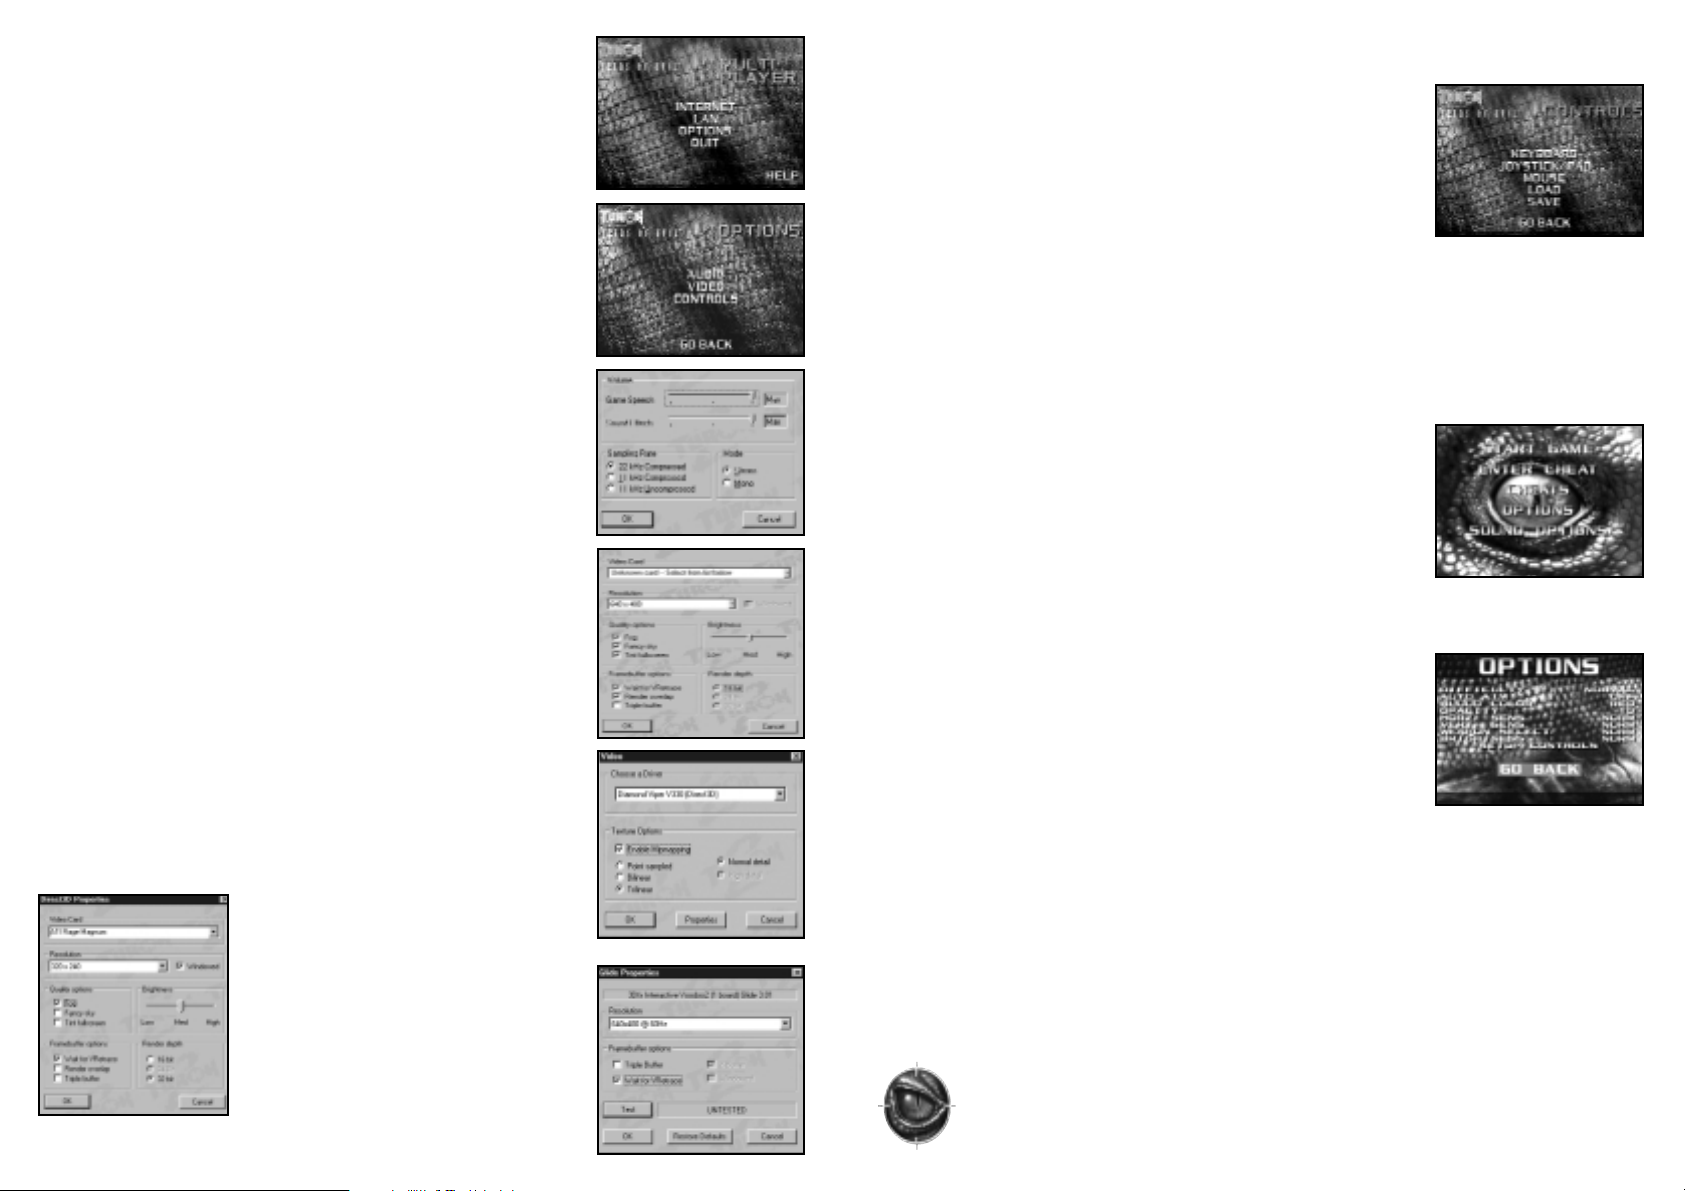
GAME LAUNCHER:
MULTIPLAYER MAIN MENU
Internet – Play Death Match games against remote players on the Internet.
See "Multi-Player Internet and LAN Play" later for further details.
LAN – Play Death Match games against remote players over a LAN. See
"Multi-Player Internet and LAN Play" later for further details.
Options – Set controller, audio, and video options.
Help – Online help. Help includes this manual and many other last-minute
details about Internet and LAN play.
Quit – Return to Windows.
GAME LAUNCHER: OPTIONS
Audio – View/change audio setup. This brings up a Windows®Dialog Box that
allows you to change volume, sound quality, and set stereo/mono play.
Video – As of this writing, Turok
®
2 supports most 3D-accelerator cards via
Direct3D. The first time you run the Game Launcher, the above Windows Dialog
Box will appear listing 3D cards in a "Video Cards" section. While the list of
cards is extensive, yours may not be listed. In this case, choose "Unlisted D3D
Card." Another approach for unlisted cards is to choose a card that uses the
same 3D chipset as yours. If you have a 3Dfx card, you won’t see this Dialog
Box, as a 3Dfx card is automatically detected and 3dfx’s Glide driver
is selected as the default driver (performance should be a bit faster than
under Direct3D). If you change video settings later, this Dialog Box will
reappear when appropriate.
After the first time the game is run, selecting "Options", "Video" will bring
up this Dialog Box.
Choose a Driver – Unless you have a 3Dfx card, the only option
here is Direct3D.
Texture Options – Select "High Detail" for best look. If performance with your
PC is "choppy", selecting "Normal Detail" may result in a performance increase.
Properties – Click on "Properties" for further video options. If your
3D-accelerator card is running under Direct3D, clicking on "Properties" from
the Windows "Video" Dialog box brings up the above Dialog Box.
Recommended settings will appear checked. The primary option you may
wish to set is "Resolution." Higher resolutions will look better, but may run slower.
If your 3D-accelerator card is a 3Dfx card , clicking on "Properties" from the
Windows "Video" Dialog box brings up the above
Dialog Box. Recommended settings will appear
checked. The main option to set is "Resolution".
This selects a screen resolution and monitor
refresh rate. To insure that you’ve chosen a valid
combination for your 3Dfx card and monitor, click
on "Test" and follow instructions.
GAME LAUNCHER: CONTROLS
Keyboard – View/change keyboard setup. This brings up a Windows Dialog Box
that displays current keyboard settings and allows extensive re-mapping to suit
your taste. For both Game Launcher and In Game options, changes will remain
in effect for current and future games or until changed again.
Joystick/Pad – View/change joystick or Joypad settings.
Mouse – View/change mouse setup.
Load – Load a saved controls configuration.
Save – Save currunt controls configuration
.
SINGLE PLAYER ACTION
You are presented with a series of menus that allow setup of a single player game
.
SINGLE PLAYER MAIN MENU
At the Single Player Main Menu, you have these choices:
Start Game – Start a Game.
Cheats – Cheats let you alter the game in amusing and startling ways. Once
you’ve entered a cheat it is stored and will appear on your list, with the option
to turn it on or off.
Options – See Options.
Sound Options – See Sound Options.
OPTIONS
Before you start a game, it is wise to set your options. To set options, highlight
the desired option using the
I/M
keys, then use the J/Kkeys to toggle settings. For options with sliders, moving the slider to the right increases the
effect, while moving it to the left decreases it. Moving the slider all the way to
the left turns some options OFF.
Difficulty – Toggle among Easy, Normal and Hard skill level settings.
Auto Aim – Set to ON for automatic targeting help.
Blood Color – Choose to play with red or green blood, or turn the blood off.
Opacity – Sets the transparency of the on-screen display. Use the Control
Pad/Stick to toggle from Clear up to Opaque.
Horz Sens – This slider controls the horizontal control sensitivity. The higher the sensitivity, the quicker Turok
®
will turn.
Vert Sens – This slider controls the vertical control sensitivity. The higher the sensitivity, the quicker Turok
®
will
look up or down.
Weapon Select – Choose Quick or Normal weapons selection. Quick selection allows you to select weapons
more rapidly by splitting weapons between two "wheels", one brought up by the WEAPONS DOWN key
(
A
is default), and one by the WEAPONS UP key (Zis default).
Brightness – Set the brightness of the display to suit your monitor.
Setup Controls – Set keyboard, mouse, or joystick configurations.When through setting options,
highlight Go Back and press eto return to the Main Menu.
4
Page 5

CLIMBING CONTROLS
There are many places Turok®can climb, such as walls, ladders, vines, etc. These usually look somewhat
different than the surrounding area. Use the basic MOVEMENT and JUMP keys to climb up/down, move
left/right, and jump.
Note: Turok®can only use certain one-handed weapons while clinging to a climbable surface.
SWIMMING CONTROLS
Sometimes in his quest for the Primagen,Turok®will need to swim. It is a good idea to practice your swimming,
as the 3D underwater environment can be disorienting at first. The waters of the Lost Land are too full of dangers to chance without preparation. Turok
®
has special weapons which only work below the water’s surface.
When swimming at surface level, any available weapon may be used.
Note: Turok®can only remain underwater for brief periods before he needs to surface for oxygen.
T urok
®
will begin to see red when he needs oxygen. If he doesn’t surface in time, he will
black out and lose a life. Press JUMP to surface.
Default Swimming Controls:
RIDING
Throughout the Lost World, Turok®will come upon Styracosaurus pens. If he can climb to the mounting rig,
he will automatically climb aboard. From there, control the Styracosaurus as you would Turok
®
(of course,
dinosaurs cannot strafe left and right).
DEFAULT RIDING Controls:
WEAPONS
There are plenty of weapons in Turok®2: Seeds of Evil™, and it’s a good thing, too. Turok®starts his
quest with only basic hand-held weapons (the Talon). As he progresses, he finds increasingly
powerful weapons and ammunition. There are different weapons available depending on whether
T urok
®
is underwater, riding or on foot.
6
SOUND OPTIONS
Music Volume – Use I/Mto adjust the music volume.
SFX Volume – Use
I/M
to adjust the sound effects volume.
Speech Volume – Adjust the volume of the in-game speech.
QUEST MODE
After launching a Single Player game, you’ll come to the Single Player Main Menu. You will have a choice of
New Game or Load. Select Load to resume a saved game from where you left off, or New Game to begin a new
quest. Highlight your choice and press
e
. As T urok®, the player jumps, fights, swims, and rides through
multiple manic levels, trying to find and protect the Energy Totems from destruction at the hands of a wide
variety of creatures willing to do the Primagen’s bidding. T urok’s
®
quest will take him through many strange,
often terrifying new worlds. Only with skill, courage and determination will T urok
®
be able to surmount the
challenges that face him and follow his quest to its ultimate goal: the final destruction of Primagen. Make
sure to carefully study the in-game level descriptions for details about your goals.
Action Map – Press the
J
key to bring up the map display, which can be a useful tool to navigate through
the Lost Land. Each type of region/terrain has the same color scheme across all levels. A yellow arrow
indicates your current position. Press the
J
key again to deactivate the display.
Primagen Keys – Throughout your quest, be watching for keys hidden on each level. You must collect all the
Primagen keys in order to enter Primagen’s prison and successfully complete the game.
Hub Portal – Within the Lost Land is a Hub Portal which allows T urok
®
to teleport from one level to another
by collecting a certain number of keys and accessing the matching hub door. There are multiple hub
keys for each level.
Feathers – On each level, T urok®must find a Feather which allows him to access the Secret Talisman for that level.
DEFAULT CONTROLS
MOVMENT, SHOOTING CONTROLS
Button Action
I
Move Forward
M
Move Backwards
J
, MOUSE
Rotate Left
K
, MOUSE Rotate Right
C
, LEFT MOUSE BUTTON Fire
z
, RIGHT MOUSE BUTTON
Jump
Z
Weapon Select Up
A
Weapon Select Down
HOME Look Up
END Look Down
,
Strafe Right
.
Strafe Left
B
Crouch
L
Toggle Map On/Off
Button Action
,
Strafe Left
I
Forwards
.
Strafe Right
M
Backwards
z
Swim Upwards
J
Swim Left
K
Swim Right
C
Fire Weapon
z
Surface
A, Z
Weapon Select
Button Action
C
, LEFT MOUSE BUTTON
Fire Missile
z
Fire .20mm Cannon
Page 6

USING WEAPONS
1.Aand Zkeys to cycle weapons.
2.
C
/LEFT MOUSE to fire/use current weapon (hold to charge some weapons).
3. When riding, press
z
to fire your secondary weapon.
4. Press
H
to toggle ammo.
5. Press
N
to toggle weapon upgrade.
SNIPER MODE
When using certain weapons, pressing the LEFT SHIFT key or one of the ZOOM keys (; and ‘) will toggle Sniper
Mode On and Off. If a weapon is not compatible with Sniper Mode, the mode will not be engaged. When ON, a
sniper scope will display and you’ll be ready for some serious hunting. Hold the ; to Zoom In or ‘ to Zoom Out.
Note: In Sniper Mode, the Jump function of the
z
is disabled until Sniper Mode is turned off
(by pressing LEFT SHIFT).
QUICK SELECT
Note: If Quick Select was turned on in the Options menu, you will be able to
choose weapons more quickly.
1. Press and hold the WEAPONS DOWN key (default: A). A circle of weapons will appear on screen.
2. Press a number on the Numeric Key Pad (other than the
5
or the 0) that "corresponds" to the weapon
you desire. E.g., the
8
corresponds to the weapon at the top of the weapons circle, the 2key corre-
sponds to the weapon at the bottom of the circle, etc.
3. Release the WEAPONS DOWN key to select and arm the weapon.
4. Repeat process with the WEAPONS UP key (default:
Z
) to choose from a different
circle of weapons.
Note: Whatever other actions had been assigned to the Numeric Key Pad keys will be disabled
until WEAPONS UP/DOWN is released. Also, the mouse or a joystick can be used to quick
select a weapon by moving in the direction of the desired weapon.
PRIMARY WEAPONS
Primary weapons are those Turok®uses on land (excepting the Talon and War Blade, which also work
underwater). Many of these can be upgraded. Should you prefer the "original" version to the upgraded version,
(say, the Shotgun to the Shredder), press the ALTERNATE WEAPON key (default: N) to toggle weapon upgrades.
Likewise, you may wish to conserve more powerful ammo (use standard arrows instead of Tek arrows, for
example). To do so, press the ALTERNATE AMMOkey (default: H) to toggle ammo types.)
Flare – Better to light a flare than to curse the darkness. Unlimited uses,
but must be recharged.
Talon – This basic weapon is a powerful close range weapon in the hands of a
skilled warrior like T urok®. An impressive twin-bladed weapon that is worn strapped to
the hand with leather bands.
War Blade – The War Blade is a far more deadly hand-to-hand combat weapon by
virtue of its size and striking power. A large weapon carved out of wood or Moose
antler, the War Blade is capable of delivering far more powerful blows than the Talon.
Bow – This basic bow fires standard arrows and is T urok
®
’s first distance weapon.
Tek Bow – The high-tech brother of the ancient hunting weapon of the Saquin
Nation, no T urok®would be complete without it. This weapon fires standard arrows, as
well as deadly Tek Arrows.
.9 MM Pistol – The entry-level firearm for the game. Capable of semi-automatic
fire, the pistol is not very useful against larger enemies. Max 50 rounds.
Collect extra ammo.
Mag .60 – This semi-automatic machine pistol represents another leap forward in
firepower. Collect extra ammo.
Tranquilizer Gun – The Tranquilizer Gun provides a non-lethal, but effective means
of temporarily dispatching enemies. Depending on the number of hit points an enemy
has, and whether or not it is immune to the tranquilizer, one or more shots from this
weapon can render the enemy unconscious for a time. Once the tranquilizer wears
off, however, the enemy will regain consciousness, and harbor a serious grudge! Collect extra darts.
Charge Dart Rifle – This is an upgrade of the Tranq gun, and is effective
against more enemies. Charge Darts are electrified flechettes fired at high speed.
The flechette carries a powerful electric charge that can temporarily stun many
enemies with a single hit, giving the player time to select another weapon and
finish the enemy off, or retreat.
Assault Rifle (Multiplayer only) – This light but lethal weapon provides
ample stopping power in Death Match play.
Shotgun – The shotgun is a powerful weapon, but has a slow rate of fire. Extremely
useful in close range situations. Comes with 10 standard shotgun shells. Max 20
standard shotgun shells, 20 explosive shells.
The Shredder – The Shredder is an ugly piece of weaponry. It fires ricochet
rounds which can bounce around corners, giving you all sorts of stealth options.
Plasma Rifle – This high-tech version of an assault rifle fires tracer-like plasma
bursts. Comes with 30 plasma rounds (counted down by 3 each time the weapon is
fired). Max 150 plasma rounds.
Firestorm Cannon – The Firestorm Cannon delivers a literal rain of firepower
that can rip enemies to bits in seconds. Comes with 90 plasma rounds.
Max 150 plasma rounds.
Page 7

Sunfire Pods – Sunfire pods are a mystical weapon devised by the ancients.
Sunfire Pods are smooth, spherical objects made of a substance not unlike polished
obsidian. Said to contain the very essence of the Sun itself, these unique weapons
have no effect outdoors in well-lit areas. However, when used in a dark environment,
they explode with a brilliant white flash, blinding any enemy within range (that is not immune) for a
short time, effectively rendering them helpless and unable to attack. The Sunfire Pod has a more sinister effect when used against the legions of the Blind Ones. After many centuries beneath the earth they
have a lethal allergy to sunlight...the same light trapped in a Sunfire Pod. The Sunfire Pod will effect
certain other cave-dwelling enemies in the same way. Turok®can collect extras.
Cerebral Bore – Sounds like an academic cocktail party, but this is a particularly
nasty bit of alien technology. The Cerebral Bore fires a projectile that locks onto
brainwave activity. Sets of hooked prongs are thrust deep into the victims’ skull upon
impact, draining their brain fluid. Messy! The Cerebral Bore is not effective against
creatures of low intelligence, as the signals given off by their brains are not sufficient for the Bore to
track onto brainwave activity. As a result, the projectile will aim for the head of any enemy it is fired at.
Proximity Fragmentation Mine Layer – Proximity mines offer a particularly
grueling death. Proximity mines are fired forward from a special launcher. A small
green light blinks atop each mine. When an enemy gets too close to a mine, the mine
will let out a high pitched beep and the green light will flash red. A small charge
launches the mine into the air where a second charge detonates the mine. When the mine explodes, it
sends a wall of shrapnel out on a horizontal path at about knee level. This wave of shrapnel can cut a
man off at the knees, and slice smaller enemies into pulpy goo.
(NOTE: individually placed P.F.M.s can be used as a separate trap internal in the game)
This weapon has an extremely slow rate of fire. Comes with 3 P.F.M.s Max 10 P.F.M.s.
Grenade Launcher – Lob some danger at your foes. Each explosion affects an
area around it-including you, if you’re too close! Be on the look out for extra grenades.
Scorpion Missile Launcher –
Firing a barrage of small (4 to 6 inches) yet lethal
missiles, Scorpion Missiles can track multiple targets. Each Scorpion Missile is a heatseeking projectile capable of tracking a target with great accuracy. Indeed, once a Scorpion
Missile has struck a target, other missiles from the same barrage may continue to track the
hapless victim. Due to a built-in system that ensures multiple strikes against a single target (for maximum lethality), three to four Scorpion Missiles from a single barrage may strike an individual before the other projectiles
home on another target. Scorpion Missiles do not have a very fast rate of fire. This is compensated for by the
weapon’s ferocity. Comes with ammo for 3 Scorpion Volleys. Max 4 volleys.
Flame Thrower – Douse hapless enemies with flaming liquid and they aren’t likely
to come back.
Razor Wind – The Razor Wind is a throwing weapon which will slice enemies into
julienne carrot strips, then return like a boomerang.
The Nuke – The most powerful weapon in your arsenal.
UNDERWATER WEAPONS
There is a separate weapon select menu that will appear in place of the normal weapon select menu while
T urok
®
is underwater. This will contain only those weapons that Turok®may use while underwater. Underwater
weapons do NOT upgrade.
Talon – The Talon is the base underwater weapon, just as it was on land.
Even if the player has found the War Blade upgrade, when underwater, the Talon
is the default weapon.
Harpoon Gun – The Harpoon Gun fires a single barbed projectile at high speed.
This is indispensable for dispatching enemies at a distance before they can get too
close and do serious damage.
Concussion Torpedoes – Concussion Torpedoes are a small but effective
underwater grenade. Fired from a special launcher, these small charges can prove
lethal to enemies and T urok®alike. Take care not to discharge these powerful charges
in an area that is too confined.
STYRACOSAURUS’ WEAPONS
.20 MM Cannon – The living war machine that is the Styracosaurus comes
equipped with a fully automatic .20MM cannon. Though its rate of fire is not fast, this
weapon can rip even the most brutal of enemies to shreds.
Artillery – The Styracosaurus is also equipped with a powerful artillery battery
which fires explosive rounds.
QUEST PICK-UPS
HEALTH AND LIFE FORCE
There are a number of health pick-ups that serve to heal T urok®’s wounds, or give him additional
lives in the game.
Silver Health – +2 health. This pick up is special in that it can raise T urok
®
’s health
above its maximum level of 100 points. These +2 health bonuses can accumulate above
the 100-point mark, thus giving T urok®112,114,116 health points, etc. However, silver health
does not permanently affect T urok®’s maximum hit point value of 100 points. If Turok®has 112 points and
takes 20 points of damage, he will be reduced to 92 points. Should the player find another pick-up that
cannot raise T urok®’s health above 100%, it may only heal Turok®to 100 points.
Blue Health – 10 health. This pick-up increases Turok
®
’s health by 10 points, but
cannot raise T urok®’s health above the maximum 100 points.
Orange Health – Full health. This pick-up completely restores Turok
®
to 100%
health. This pick-up cannot raise T urok®’s health above the maximum of 100 points.
Ultra Health – Ultra health. This adds 100 hit points to Turok
®
’s health, and can raise
T urok®’s health above 100 points. Thus if Turok®is at 65% health and picks up the Gold
health, he would be at 165% health. This is temporary,
however. As soon as Turok®takes enough damage to drop below 100 points, he may
only be healed to 100% (unless the player finds another gold health).
9
Page 8

Gold Life Force – 1 life point. Each Gold Life Force token adds one point to T urok
®
’s
Life Force total. When you collect 100 life Force Points, T urok®will be granted one extra
life (reincarnation).
Red Life Force – Adds 10 life force points to T urok
®
’s total.
THE SACRED TALISMAN
The Sacred Talisman are a set of ancient artifacts sacred to the Saquin tribe. Each of the 5 Talisman can
empower Turok
®
with a special ability that will eventually be necessary to complete the game. The Talisman are
meant to be used in a very specific manner, and at very specific points in a level. These points in the level are
clearly marked in the game by special tiles that bear the identical markings found on the Talisman themselves.
Firewalk – This Talisman gives Turok
®
the ability to pass through lava, fire, or
other ‘hot’ regions without being harmed. The flesh of Turok’s body effectively
becomes immune to heat.
Whispers – The power of this Talisman allows Turok
®
to see the voices of the
‘Whisperers’, ancient and benevolent spirits. When T urok®has seen the voices, he may
‘ride’ them to higher areas of a level that may only be accessed through the Whisperers.
The ‘voices’ appear as upward drafts of gentle wind.
Eye of Truth – The Eye of Truth allows Turok
®
to see ‘spirit paths’ that may be hidden
throughout the game. Spirit paths are regions, platforms, or bridges that are otherwise
invisible and impassable. Often marked by rows of pick-ups that seem to float, these
pathways have no substance until T urok®has acquired the Eyes of Truth.
Leap of Faith – When stepped on, this Talisman gives
Turok®the ability to make
great leaps.
Breath of Life – The Breath of Life allows Turok
®
to walk upon the otherwise deadly
waters of the River of Souls. This Talisman is absolutely essential if the player wishes to
purify the River of Souls.
PAUSE SCREEN
You may pause the game at any time by pressing the qkey.
The Single Player Pause screen will appear, with these choices:
1. Resume Game Return to the game where you paused it.
2. Mission Status Review your game in progress.
3. Inventory Review Your current inventory of hub keys, Primagen keys,
feather offerings and talismans.
4. Options Set game options. When done, highlight Go Back and press the
e
key to return to the Pause Screen.
5. Sound Options Set Sound options.
6. Cheats Enter cheats and view cheat menu.
7. Save and Load game You can save your current game at any point, or load a previously saved game. You can
save up to 16 games.
8. Quit Game Quit the current game and return to the Local Main Menu where a new game can be
started. You will be prompted to confirm.
9. Exit to Windows Exit T urok
®
entirely, back to the Windows Desktop.
SAVE POINTS
A screen will appear with these choices: At various points in each level you
will reach a special save point. A screen will appear with these choices:
Save – Save your game progress.
Health – Restore your health.
Ammo – Restore ammo.
Go Back – Return to game play.
Restoring Health and Ammo – At any one of these points (once per level) you can restore both
your health and your ammo to maximum levels (100%). To do so, highlight your choice (Health, for
example) then press theekey.
ENEMIES
Here is a small sampling of the foes Turok®must master. Beware, for there are many, many more...
The Endtrails – Millions of years of evolution have produced the Endtrails.
Descendants of the mighty Tyrannosaurus Rex, the Endtrails are huge, powerfully built
bipeds with a thirst for battle, and no notions of mercy. The Endtrails are the elite of
the Dinosoid troops. They attack from a distance with ion gauntlets that fire powerful
energy charges, and up close they attack with powerful claws.
Hunters – Hunters are the result of centuries of selective breeding. Bred to perform
as reptilian bloodhounds, the Hunters are also used as instruments of terror and
death. Heavily muscled and powerfully built, they can leap great distances and are
extremely deadly.
Sentinels – Sentinels are the grunts of the Flesh-eater society. Despite their low
standing within their race, the Sentinels are responsible for nearly all of the death and
destruction associated with the Flesh-eaters. Competition amongst Flesh-eater
Sentinels is fierce. When a Sentinel has proved himself in battle, he may be chosen to
partake of the "Blood of the Mother", a sacred rite wherein a Sentinel is not only promoted, but literally transformed into a member of the Death Guard, the next order in
Flesh-eater society. Sentinels are armed with huge blades that run the length of their
lower arm and extend two feet beyond the reach of their hand.
The Blind Ones – The Blind Ones live deep beneath the Earth in a twisting maze of
tunnels and caverns. Like their distant ancestors the Flesh-eaters, the Blind Ones too
have a taste for warm flesh, and will occasionally venture towards the surface with
their giant cave spider pets. From beneath a trap door they spring up and drag helpless victims to their deaths. Centuries of existence without light has caused the Blind
Ones to lose their eyes altogether. In turn they have developed an extremely acute
sense of smell, as well as superb hearing. The Blind Ones must take care to avoid sunlight at all costs, as the centuries spent in darkness has caused them to develop a
severe allergy to sunlight. Direct exposure to the sun is fatal to them.
The War Clubs– The mainstay of the Purr-Linn troops, the War Clubs are
seldom armed, but are nonetheless extremely dangerous. The Purr-Linn are agile,
and are capable of great leaps. Purr-Linn can also hurl huge boulders and other
objects at T urok
®
.
Soldiers –
These massive armored behemoths are the single most
dangerous members of the Mantid colony. Huge, fast, and extremely
dangerous, the Mantid Soldiers can make short work of even the most
dangerous opponent. Their heavy exoskeleton protects the Soldiers from many
weapons, making them extremely difficult to kill
.
11
Page 9

Note: Once again, friendly fire may or may not be on. So unless you have an aversion towards
teammates, try not to hit them.
CAPTURE THE FLAG (CTF)
Team game where the goal is not only to kill, but to capture the opponents flag and return it to your base, while
at the same time protecting yours from being taken.
Objectives – Be the first team to hit the predetermined point limit. Varying degrees of points given for capturing
flag, kills, defense, etc. To successfully bring a captured flag to your base, your team’s flag must be at your base
when you arrive with the stolen flag.
Pickups – Scattered throughout the levels, with a red and a blue flag placed at the respective bases.
Players – Two teams play against one another, with anywhere from 1-15 players on a team. Maximum of 16
players in any one game.
Note: It’s always a good idea to know all of the paths to the enemies area, that way if one route is
covered you can take an alternate route. And yes, you can hurt your teammates if friendly
fire is on.
HOSTING A GAME
To start an Internet or LAN game from the Game Launcher’s Main Menu,
select Internet or LAN, then choose Host a Game. Note that for hosting
Internet games over a modem, you must have established a connection to
the Internet prior to starting Turok
®
2. Invoking an Internet browsing program
(e.g., Netscape or Microsoft
®
Explorer) will automatically do this for you, but
you can manually do it by running your Dial-up Networking connection found
in Windows
®
My Computer\Dial-up Networking folder. See Windows®Help
on "Dial-up" for further details.
Choosing Host a Game brings up the Host a Game Dialog Box. – You can configure the
game you wish to play in six steps:
1. Name the Server – You must fill in a name. The game/server name you enter here will be
reported to remote players as "Server Name" on the GameSpy Lite screen (see later).
2. Choose a Game Type – Choose from the five modes of play. The type of game chosen deter-
mines the available Level Set.
3. Choose a Level Set – Level Sets contains a series of Death Match levels.
4. Choose Levels – Select levels to play from the Level Set you’ve chosen. Initially, all levels in the
selected Level Set are chosen. Click on a level (or group of levels) to remove them from the list. The
levels are played in top-to-bottom order. "Randomize" will change the order each time you click it.
5. Set Rules – Gameplay rules and options can be changed here. Options that don’t apply to a par-
ticular game type will be grayed out.
Health – If checked, health pickups will appear in the levels.
Weapons Remain – If checked, a weapon will remain after a player picks it up (rather than disappear and
"re-spawn" after a period of time).
Enemies Drop Weapons – If checked, fragged enemies leave their weapons behind.
All Characters Same – Each character has different attributes (speed, starting health, attack strength, …) that
affect play. If this option is checked, all characters will play with the same attributes.
Friendly Fire Hurts –
If checked, shots from a teammate will cause damage. Otherwise, your
teammates can’t hurt you (team games only).
5a. Arena Options – Available only in Arena games.
Weapons List –
Clicking this brings up a Dialog Box that lets you select which weapons you wish to
play with. All checked weapons will be available during the match.
Deadmen – The fodder of Deadside, the Deadmen are far more than merely rotting
corpses. Despite their advanced state of decomposition, the Deadmen are fleet of foot,
and quite dangerous. Deadmen will get up repeatedly after being knocked down by
gunfire, and prove quite stubborn when it comes to dying. Deadmen wear shabby
armor, more for ornament than for its protection. Deadmen can be literally blown in
half and keep on coming!
Trooper – The Primagen trooper is a humanoid monstrosity. A patchwork of metal
and flesh, it is impossible to tell what type of creature they may have once been.
Whatever the case may be, the Troopers are heavily armed, and quite deadly. They
will attack
T urok®with Laser pistols, or use the massive bayonets that are
attached to them as a sword.
MULTIPLAYER INTERNET AND LAN PLAY
Starting the Multiplayer version of Turok®2 opens up a new world of Death Match play against remote opponents. Five modes of play are available, each with its own set of levels:
ROK MATCH
Kill as many opponents while avoiding death. Simply put, kill or be killed.
Objectives –
Be the first one to the predetermined kill limit or have the most kills when the time limit expires.
Pickups – Scattered throughout the levels. These include weapons, ammo, and health.
Players – Up to 16.
TEAM ROK MATCH
Destroy everyone that is not on your team.
Objectives – Be the first team to the predetermined kill limit or have the most kills when the time limit expires.
Pickups – Scattered throughout the levels. These include weapons, ammo, and health.
Players – Up to 8 teams total, and anywhere from 1-15 players on a team. Maximum of 16 players in any one game.
Note: In this mode of play, there is a switch to turn on/off friendly fire. Therefore unless you know
the game settings in advance, (or you just don’t like your teammates) it’s usually best to
avoid attacking them.
ARENA
A one on one battle that takes place in an arena setting. Simply put, take down your opponent and take out the
next who challenges you. If you lose, you have to get in line and wait until it is your turn to fight again. If you
win, then all health and ammo are restored.
Objectives – To be the first one to hit the predetermined kill limit.
Pickups – None, weapons are assigned to the players.
Players – 2 players do battle at a time, with up to 14 waiting in line. There is a maximum of 16 players in
any one game.
Note: While waiting in line the players may fly around to watch the match from any
vantage point they want.
TEAM ARENA
Same as the regular arena but now you have teammates to help in the battle.
Objectives – Same as Arena.
Pickups – None, weapons are assigned.
Players – Up to 8 teams total, and anywhere from 1-15 players on a team. Maximum of 16 players
in any one game.
13
Page 10

Max Ammo – Each weapon starts with an initial ammo level. When it’s gone, the weapon becomes useless
(since there are no pickups in Arena games). Check this box to set the initial level to its maximum.
Extra Health – Each player starts the game with extra health. This typically leads to longer Arena matches.
6. Set Limits –
Set the point at which play on the current level concludes and play moves to the next level.
Set number of players and teams.
Frag Limit – Move on to the next level when any player makes this many kills. Note that each of the limits
causes a level change regardless of the status of the other limits. Also, a limit can be set to "None". If all
limits are set to "None", play will remain on the first level.
Time Limit – A level change occurs after this many minutes.
Point Limit – Points are awarded for frags and other offensive acts. A level change occurs when any
player’s point score reaches this limit.
Max Players – The maximum number of players allowed in the game.
Note: When hosting a game via modem/Internet, for best performance, you’re playing in
"Integrated Server" mode. Your PC is handling information exchange between all players as
well as running your game. For performance reasons, it’s wise to set Max Players no higher
than 8. Performance may start to degrade as early as 5 players depending on your Internet
connection. "Dedicated Servers" (described in Online Help) can be set up to handle up to 16
players with good performance.
Num Teams – For team games, the number of teams in the game.
Password – If checked, a pasword will be required to enter your game. Type the password in the
box to the right.
Notify GameSpy – Normally checked, this determines whether or not your game is reported to GameSpy
Master Servers (see next). If you want a "private" game, un-check this box.
Note: If you do this, you will have to somehow inform other players of your IP address, otherwise
they won’t be able to find your game! It’s usually best to leave this checked so that others
can join via GameSpy Lite.
Note: See Online Help for more details. Also, parking the cursor over an item in many of the
Dialog Boxes will call up a "tool tip" which will give a brief explanation of the item.
After clicking on OK, you see the Character Selection menu described later.
JOINING A GAME: GAMESPY LITE
To join an existing Internet or LAN game from the Game Launcher’s Main Menu,
select Internet or LAN, then choose Join a Game. After a moment, the GameSpy
Lite screen will appear.
GameSpy maintains multiple "Master Servers" that list all currently running
T urok
®
2 Internet games. When you host a game, the server name you created is
automatically posted to the GameSpy Master Servers, and it becomes visible on
the GameSpy Lite screen of other players searching for games to join. Each time you enter the GameSpy Lite
screen the Master Servers are contacted and information on running games is downloaded to your PC (if
you’re joining a LAN game, GameSpy Lite shows the games currently running on your LAN). At any point during
this screen, you can click on the "Refresh" button to download the latest list.
GameSpy Lite shows game details for each server listed. In the top part of the screen, click once to select a
particular server, and further details about the game it’s running will appear in the bottom part of the screen.
The lower left-hand window shows who’s in the game and game statistics, while the lower right-hand window
shows the game rules and other settings.
For Internet play, a key piece of information is your "Ping" to a server. Ping represents the time it takes for
exchange of data between your PC and the server. The longer the Ping time, the more likely you’ll experience
"choppy" play. GameSpy Lite ranks Ping with a "stoplight" indicator immediately preceding the server name:
green is good, yellow is acceptable, and red is unlikely to result in satisfactory play.
With Internet play, you’re likely to develop "favorite" servers (servers with good ping and game type/levels you
prefer). Click the Check Box next to a server name to add it to a Favorites list. Clicking on the "Favorites" button
will display only your favorites, reducing clutter and decreasing server info download time (if you’ve previously
selected Favorites, only your favorites are contacted for game information upon entering GameSpy Lite).
To select a game to join, double click on the desired server name. You’ll exit GameSpy Lite and return to the
Character Selection menu. Set up your character, click JOIN GAME, and prepare to frag!
CHARACTER SELECTION
Depending upon the type of game you’re joining or hosting, this menu offers the
following selections:
Name –
Choose a name for yourself. Others will see your character playing
listed under this name.
Color –
In Rok Match or Arena mode, you can change your
character’s color.
Password
– If the game you’re joining is password protected, you enter the
password here.
Start Game –
If you’re the host, click on START GAME and wait for poten-
tial victims to join in!
Join Game –
If you’re joining an existing Internet or LAN game, click here to
move on to the Connection Screen.
Observe Game
– If you’re joining an existing Internet or LAN game, you
can also choose to join the game as a spectator. You will be able to "fly" around the game observing carnage as
it happens. You can join the game whenever you choose, as long as the maximum number of players for that
game is not exceeded.
Character
– Choose to play as one of the eleven available Death Match characters. Try each character to
determine strengths and weaknesses. Or, setup your game with "All Characters Same" checked to give all
characters the same set of attributes.
SOME OF THE CHARACTERS:
A nimble warrior, her
mystical powers of
regeneration make up
for her vulnerability.
PURR-LINN: (The Juggernaut)
JOSHUA FIRESEED: (Turok
®
)
ADON: (The Speaker of Forever Light)
A well-rounded fighter.
T urok
®
is swift and sure.
This fearsome warrior
is slow and brutal.
A sluggish beast, his
attacks are powerful.
Perhaps the greatest Turok
®
of all,
Tal ‘Set now brings all his knowledge and fighting skill to the
Death Match.
TAL ‘SET:
This fiery creature is eager for a
chance to prove his considerable
battle prowess.
THE FIREBORN:
This nasty fellow has an evil aura
that will harm those who venture
too close. Fast and versatile, he is
a deadly opponent.
FLESH EATER: (Death Guard)
Page 11

CONNECTING TO A GAME
After clicking on JOIN GAME, your PC must establish Internet or LAN connection with the chosen game server.
The Connection Screen displays various messages during the connection process. If connection is successful,
you’ll jump right into the thick of battle. The Internet being what it is, it’s possible that you might not be able to
establish a good connection with the chosen server. If so, you’ll get an abort message and return to Windows.
Fire up Turok
®
2 and try again! If you still can’t connect to that server, try another.
After the Connection Screen, if you’ve chosen to play in a team-based game (CTF, Team Arena or Team Rok
Match), you’ll get a chance to either join a team, or observe the game before you decide to choose sides.
MULTIPLAYER PAUSE SCREENS
The Pause Screen you see at various times in multiplayer play differs from
the single player Pause Screen. Depending on which flavor of game you’re
playing, and where you are in the game, you’ll see some combinations of the
following choices:
Resume Game –
Go back to the game and keep fragging.
Find the Action –
In Arena mode and the team modes, you may see this
choice. Selecting "Find the Action" will teleport you from your current position to
somewhere you’re likely to find action. If nobody’s around, try again, you’ll
eventually find the battle. This is especially useful if, as a spectator, you’ve managed to fly yourself into somewhere that doesn’t look like Kansas anymore. Just hit ESC and select this option,
you’ll find that things will return to normal.
Join Game –
You’ve been observing, now choose a side and play.
Change Team –
Tired of your teammates? Switch sides and blast them!
Change Character –
Experiment, some characters are better suited to a particular level than others.
Change Color –
Variety is the spice of life.
Options –
Change most settings, including controls.
Sound Options –
Modify sound settings here.
Enter Cheats –
There are some special cheats for multiplayer matches. Find ‘em.
MULTIPLAYER TIPS
IN-GAME STATISTICS
See how well you’re doing by pressing F1 during play. You’ll see:
Frags –
How many folks you’ve killed so far. Best player at the top of the list.
Pain –
Maybe you’re not at the top of the list for frags, but you might be best at inflicting damage.
Deaths –
OK, you’re not perfect, you occasionally get fragged. Here’s the running total.
Time –
Players’ time in the game in munutes.
Ping –
Each player’s ping to the server.
Char –
The player’s chosen Death Match character.
FPS –
Frags per hour.
Press F1 again to turn off statistics display. In team and Arena modes, toggle F2as well to get an alternate set
of numbers that are more focused on whole-game progress.
COMMUNICATING WITH OTHER PLAYERS
T ype M, then type the text you want to send to all other players, followed by the ekey.
Other players will see your message, and, if you’ve run the game with the Text-To-Speech shortcut, your mes-
sage will be heard by other players as well. You can send a message to a specific player (after typing
M
)
by using the
I
and Mkeys to cycle through the list of players. For more details, see online Help.
Pre-recorded taunts
You can send one of 80 pre-recorded taunts to all or any player by typing Mfollowed by a number (1 to 80).
Check them out, pick your favorites.
Console
T urok®2 contains a full set of in-game "console" commands. During a game, use the ^(tilde) key to toggle
Console Mode. When in Console mode, you can set various game parameters, re-map keys, and much more.
A full list of console commands can be found in the on-line Help that’s accessed from the Game Launcher’s
Main Menu.
Note: A history of what’s been typed and displayed on the console can be scrolled through using
the UP, DOWN, PAGE UP, and PAGE DOWN keys. You can also repeat the last line typed
using the F3 key.
Here are a few of the commands you’ll probably use most:
HELP – This lists various console parameters, options etc. To find more info on a particular item (say, VOICE),
type "HELP VOICE." For further details on console commands, see online Help.
SET FOV # – (where "#" is a number between 45 and 90) Sets your field of view. 45 is "normal", while 90 is the
maximum. You may see occasional polygon dropouts if your FOV is set to near 90.
ASSIGN key action – (where "key" is a keyboard key or controller button, and "action" is a game function) E.g.,
"ASSIGN TURNL D-KEY." Key assignments can also be set by pausing the game, choosing OPTIONS, SETUP
CONTROLS. This will take you to the Game Launcher OPTIONS menu. Setup controls from there, then click
GO BACK to return to the game.
SET PING ON – Will display your ping to the server in the upper right-hand corner of the screen. SET PING OFF
turns off the display.
SET TEXT-TO-SPEECH OFF – If you’ve started the game from the Text-To-Speech shortcut, you can disable this
function with this command (maybe you’re tired of getting laughed at). You can re-enable Text-To-Speech with
SET TEXT-TO-SPEECH ON. Remember, you must have started the game from the Text-To-Speech shortcut for
these commands to work.
18
GANT: (The Cold One)
This ruthless dinosoid is very hard to
conquer, and can revive once
attacked.
RAPTOR:
This vicious beast can’t hold a
weapon, but its speed and power
make it more than a match, even for
well-armed foes.
ENDTRAIL:
A huge, powerful descendant of
T-Rex, this merciless creature is
fond of blood. Make sure it’s
not yours!
Page 12

NOTES
20
NOTES
19
Page 13

END-USER LICENSE AGREEMENT
PLEASE READ THIS LICENSE CAREFULL Y BEFORE BREAKING THE SEAL ON THE DISC P ACKAGE. BY BREAKING SUCH SEAL,
YOU ARE AGREEING TO BE BOUND BY THE TERMS OF THIS LICENSE. IF YOU DO NOT AGREE TO THE TERMS OF THIS
LICENSE, PLEASE DO NOT OPEN THE DISC PACKAGE AND PROMPTLY RETURN THE UNOPENED SOFTWARE TO THE PLACE
WHERE YOU OBTAINED IT AND YOUR MONEY WILL BE REFUNDED.
1. License: The software in this package (hereinafter "Software"), regardless of the media on which it is distributed, is licensed
to you by Acclaim Entertainment, Inc. on behalf of itself and third party owners ("Licensers") of copyrighted material and trademarks which may be incorporated into the Software. You own the medium on which the Software is recorded, but ACCLAIM
and ACCLAIM's Licensers (referred to collective as "ACCLAIM") retain title to the Software and related documentation. You may
use the Software on a single computer and make one copy of the Software in machine-readable form for backup purposes
only. You must reproduce on such copy ACCLAIM's copyright notice and any other proprietary legends that were on the original copy of the Software.
2. Restrictions and Termination: The Software contains copyrighted materials, trade secrets and other proprietar y material. In
order to protect them, and except as permitted by applicable legislation, you may not: (a) decompile, reverse engineer, disassemble or otherwise reduce the Software to a human-perceivable form; (b) modify, network, rent, lend, loan, distribute or create derivative works based upon the Software in whole or in part; or (c) electronically transmit the Software from one computer to another or over a network. You may terminate this License at any time by destroying the Software, related documentation and all copies thereof. This License will terminate immediately without notice from ACCLAIM if you fail to comply with
any provision of this License. Upon termination you must destroy the Software, related documentation and all copies thereof.
3. Limitations and Exclusions of Warranties:
(a) ACCLAIM warrants to the original purchaser that the tangible media on which the Software is recorded to be free from
defects in materials and workmanship under normal use for a period of ninety (90) days from the date of purchase as
evidenced by a copy of the receipt. ACCLAIM's entire liability and your exclusive remedy will be, at ACCLAIM's option,
the repair or replacement of the media not meeting ACCLAIM's limited warranty and which is returned, postage prepaid,
to ACCLAIM's Factory Service Center with a copy of the receipt. ACCLAIM will have no responsibility to replace any media
damaged by accident, abuse or misapplication. ANY IMPLIED WARRANTIES OF MERCHANT ABILITY AND FITNESS FOR
A PARTICULAR PURPOSE, ARE LIMITED IN DURATION TO NINETY (90) DAYS FROM THE DATE OF PURCHASE.
(b) You expressly acknowledge that use of the Software is at your sole risk. The Software and related documentation are pro-
vided "AS IS" and without warranty of any kind. ACCLAIM EXPRESSLY DISCLAIMS ALL WARRANTIES, EXPRESS AND
IMPLIED, INCLUDING, BUT NOT LIMITED TO, THE IMPLIED WARRANTIES OF MERCHANT ABILITY AND FITNESS FOR
A PARTICULAR PURPOSE. ACCLAIM DOES NOT WARRANT THAT THE FUNCTIONS CONTAINED IN THE SOFTWARE
WILL BE UNINTERRUPTED OR ERROR-FREE, OR THAT DEFECTS N THE SOFTWARE WILL BE CORRECTED, OR THE
RESULTS OF THE USE OF THE SOFTWARE OR RELATED DOCUMENTATION IN TERMS OF THEIR CORRECTNESS,
ACCURACY , RELIABILITY, CURRENTNESS, OR OTHERWISE. NO ORAL OR WRITTEN INFORMATION OR ADVICE GIVEN
BY ACCLAIM SHALL CREATE A WARRANTY OR IN ANY WAY INCREASE THE SCOPE OF THIS WARRANTY, SHOULD
THE SOFTWARE PROVE DEFECTIVE, YOU (AND NOT ACCLAIM) ASSUME THE ENTIRE COST OF ALL NECESSARY SERVICING, REPAIR OR CORRECTION.
(c) UNDER NO CIRCUMSTANCES INCLUDING NEGLIGENCE, SHALL ACCLAIM, OR ITS DIRECTORS, OFFICERS, EMPLOY-
EES OR AGENTS, BE LIABLE TO YOU FOR ANY INCIDENTAL, INDIRECT, SPECIAL OR CONSEQUENTIAL DAMAGES
(INCLUDING DAMAGES FOR LOSS OF BUSINESS PROFITS, BUSINESS INTERRUPTION, LOSS OF BUSINESS INFORMATION, AND THE LIKE) ARISING OUT OF THE USE, MISUSE OR INABILITY TO USE THE SOFTWARE OR RELATED
DOCUMENTATION, EVEN IF ACCLAIM HAS BEEN ADVISED OF THE POSSIBILITY OF SUCH DAMAGES. In no event shall
ACCLAIM's total liability to you for all damages, losses, and causes of action (whether in contract, tort (including negligence) or otherwise) exceed the amount paid by you for the Software.
(d) Some states do not allow exclusions or limitations of implied warranties or of damages, so that the above exclusions and
limitations may not apply to you. This warranty gives you specific legal rights, and you may also have other rights which
vary by jurisdiction.
4. Inquiries/Technical Support: Any questions concerning this Agreement should be addressed to:
Acclaim Entertainment Ltd.
Moreau House
112-120 Brompton Rd.
Knightbridge, London SW3 1JJ ENGLAND
For technical support, please refer to the enclosed Technical Supplement for assistance. If your Software requires repair after
the expiration of the 90-day Limited Warranty Period, you may contact the Consumer Service Department at the number listed
below. You will be advised of the estimated cost of repair and shipping instructions.
ACCLAIM Hotline/Consumer Service Department 09068 30 33 30
Calls cost 50p per minute at all times.
Please ask billpayers permission before calling.
Charges correct at time of going to print.
This Product is exempt from classification under U.K. Law. In accordance with The Video Standards Council Code of Practice it
is considered suitable for viewing by the age range(s) indicated.
TUROK®2: SEEDS OF EVIL™©1999 Acclaim Entertainment.All rights reserved.TUROK: ® & © 1998, GBPC, Inc.All rights reserved.All other characters herein and the distinct likenesses thereof are trademarks
of Acclaim Comics Inc.All rights reser ved. Developed by Iguana Entertainment, an Acclaim Entertainment studio.Acclaim is a division of Acclaim Entertainment. TM, ® & © 1998 Acclaim Entertainment. All rights
reserved. DISTRIBUTED BY ACCLAIM ENTERTAINMENT LTD., Moreau House, 112-120 Brompton Rd., Knightsbridge, London SW31JJ, England.
 Loading...