

Page 1
A W H O L E N E W U N I V E R S E O F 3 D C O M B A T S I M
“The game is fast and fun with dazzling 3D landscapes.”
“The game is fast and fun with dazzling 3D landscapes.”
- G A M E P O W E R
- G A M E P O W E R
w w w . s t a r s i e g e . c o m
w w w . s t a r s i e g e . c o m
“Clearly the frontrunner in
the industry-wide mech war.”
Go for the ‘Goad’...
Go for the ‘Goad’...
To purchase call 1 (800) 757-7707 or visit your local retailer.
© 1998 Sierra On-Line, Inc., Bellevue, WA 98007 ® and/or TMdesignate trademarks of, or licensed to, Sierra On-Line, Inc. All rights reserved. 8366710
- O G R . C O M
Page 2
Tab l e o f C o n t e n t s
1. Overview and Introduction 3
2. Quick Start 4
3. Timeline and Fiction 5
4. Menu System 28
5. Playing the Game 35
6. Personal Digital Assistant 52
7. Mission Types 59
8. Advanced Reference Section 61
9. Credits 76
Index 79
What is Starsiege TRIBES?
Starsiege TRIBES is a unique first-person shooter set in the Starsiege universe. Combining breathtaking visual
displays with seamless gameplay, TRIBES will revolutionize the world of multiplayer squad-level games.
With never-before-seen features like the "commander view," full support for team multiplayer games and worlds
that stretch out for kilometers, TRIBES will revolutionize the way you look at and play first-person shooters.
Installation Instructions
Insert the Starsiege TRIBES CD-ROM into your CD drive. The Autostart program will automatically
begin the installation procedure. Follow the instructions listed on the screen to install and begin playing
Starsiege TRIBES.
System requirements and a troubleshooting guide are found in the “README” file on the T RIBES CD-ROM
as well as the Starsiege TRIBES website at http://www.tribesplayers.com, in addition to an on-line manual
containing the most up-to-date information about TRIBES setup.
2 3
Page 3
Note: If this is your first time playing TRIBES, it is highly recommended you start by playing the single-player
“training” missions in order to acquaint yourself with the controls and feel of the game. Once you feel
comfortable enough to jump into a multiplayer game, follow the steps below:
• Dial up your ISP (Internet Service Provider) to get connected to the Internet.
• Open TRIBES, either by double-clicking on the TRIBES icon on your desktop or by selecting
it from your START menu.
• Select the PLAY GAME button.
• Type in a name for your player and click on DONE.
• Click on the NEXT button in the lower right-hand corner of the screen.
• Select JOIN MULTIPLAYER. Click on N EXT when done.
• Select a server from the list that is not grayed out. The server list may take a few moments to appear.
For the best performance, choose a game that has a green or yellow circle in the Connection
Quality column. A red circle indicates that you may suffer from “lag.” (see PING and Lag on page 33)
• Click on JOIN GAME to join the server.
• Kick some butt.
• You can disconnect from the server and quit from the game at any time by pressing the Esc key and
choosing DISCONNECT.
Newblood
by Blake Hutchins
Minax Phasma III
Month of the Burning Swan,
3940 Old Earth Reckoning
“Pay attention, newblood!” Minerva yells
across your comlink. Too
late, you spot the Blood
Eagle hoplites waiting on
the rise below.
Instinctively, you cut
power to your flight pack
and plummet downward.
A spinfusor disk slices
overhead in a blue-hot
whirl, instant death missing by an arm’s length.
Around you, your tribesmates engage the scarletarmored Blood Eagle
in bright candle flare
bursts of plasma and the
4 5
Page 4
Tr i b e s F i ct i o n Tr i b e s Fi c t io n
sharp, popping crackle
of laser bolts.
Someone to your left
screams and explodes
in white fire.
Remember your training, your father’s voice
whispers from
memory, and you
realize you must follow
your lessons to the letter if you are to survive
this day. This is no
training game, and
you’re not facing the
prospect of bruises or
embarrassment. These
are Blood Eagle, your
people’s ancient foes,
and they will kill you if
they can.
You fall through a deceptively peaceful blue sky
toward rocky hills covered with the barbed, brittle
stuff that passes for grass in this place. Dry alien air
stings your nostrils despite the filter plugs. The sun
is a distant white glow, and you hold the hard, reas-
suring weight of a Telamonian-made minigun, multiple barrels poised to begin their deadly spin. The
familiar tingle of a phased-shield aura across your
skin indicates your Hoplite armor is active, but right
now the nano-threaded polybronze breastplate and
greaves feel
like small
protection
amid the
chaos erupting around
you.
Keep moving,
Minerva told
you as the
warband’s
dropship
creaked and
rocked its
way down
from the
blackness of
orbit only a
few hours
ago. It’s the
main thing that’ll keep you alive -- that and not
panicking! Trust your instincts, newblood! Phoenix
knows enough scroffin’ time’s been spent developing
them, ayia?
Triggering your flight pack again, you arrest your fall
with a jolt and swing the minigun at the foe. The
Telamonian’s
barrels blur;
explosive
flechettes
shred alien
soil into
chaff around
the Blood
Eagle. The
hoplites activate their
flight packs,
and they’re
agile enough
to evade the
brunt of
your deadly
spray. Only a
few of your
rounds hit,
sparking
harmlessly off the shield-reinforced crimson armors.
A warrior in heavy Myrmidon-class armor simply
stands there, grinning behind his transteel faceplate.
You curse your poor aim, and land with bone-jarring
impact in a soft crunch of dry pseudo-grass, your
powerful legs absorbing the shock easily.
6
7
Page 5
Tr i b e s F ic t i o n Tr i b e s Fi ct i o n
Your lessons. Yes, you remember how you sat with
the other children on the training ground of your
birthworld, listening to Old Kantele as he lectured in
his rasping whisper ... There are only three foes wor-
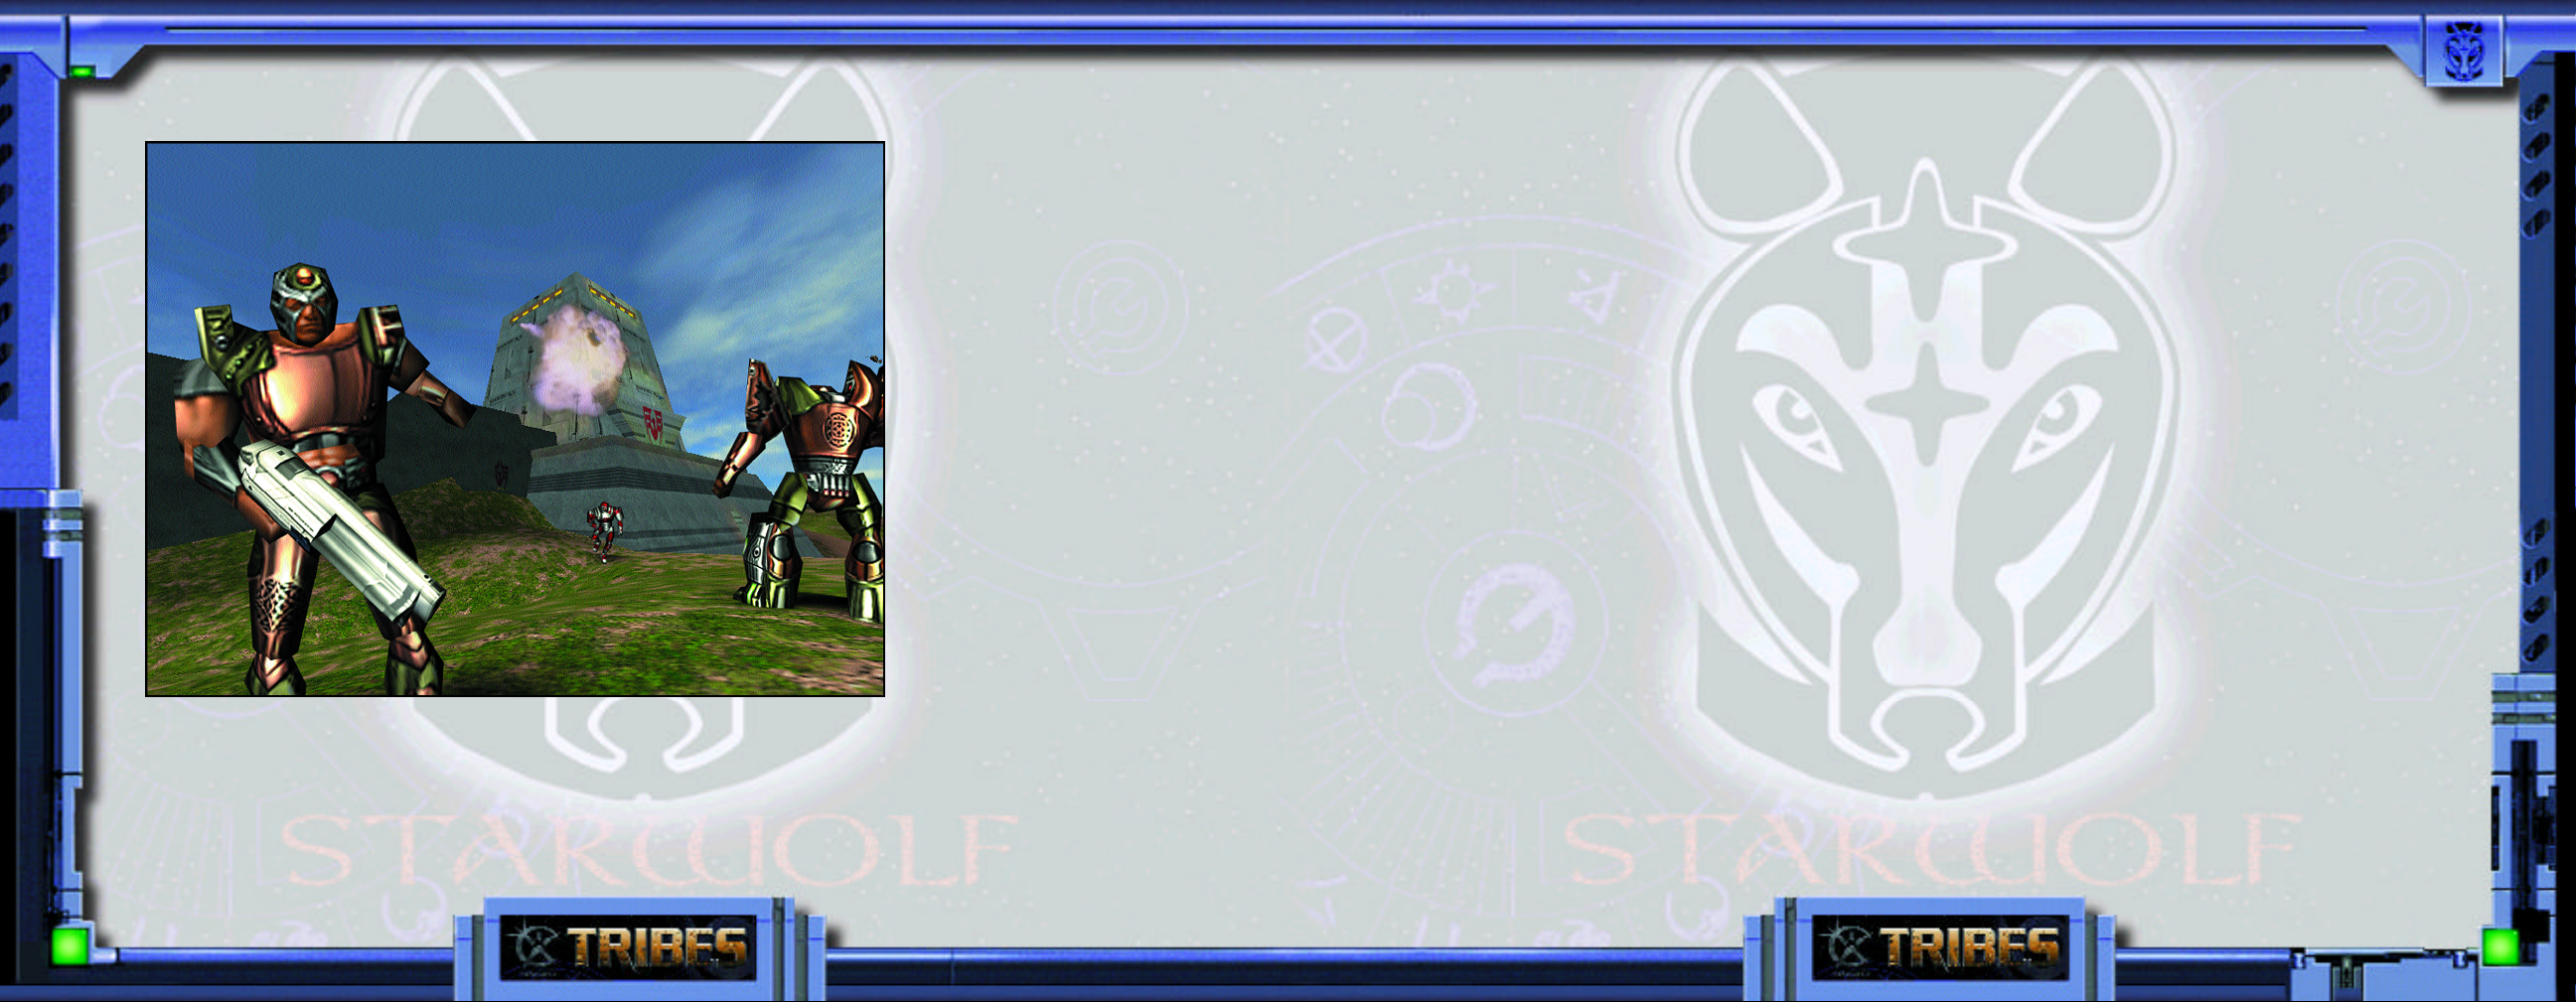
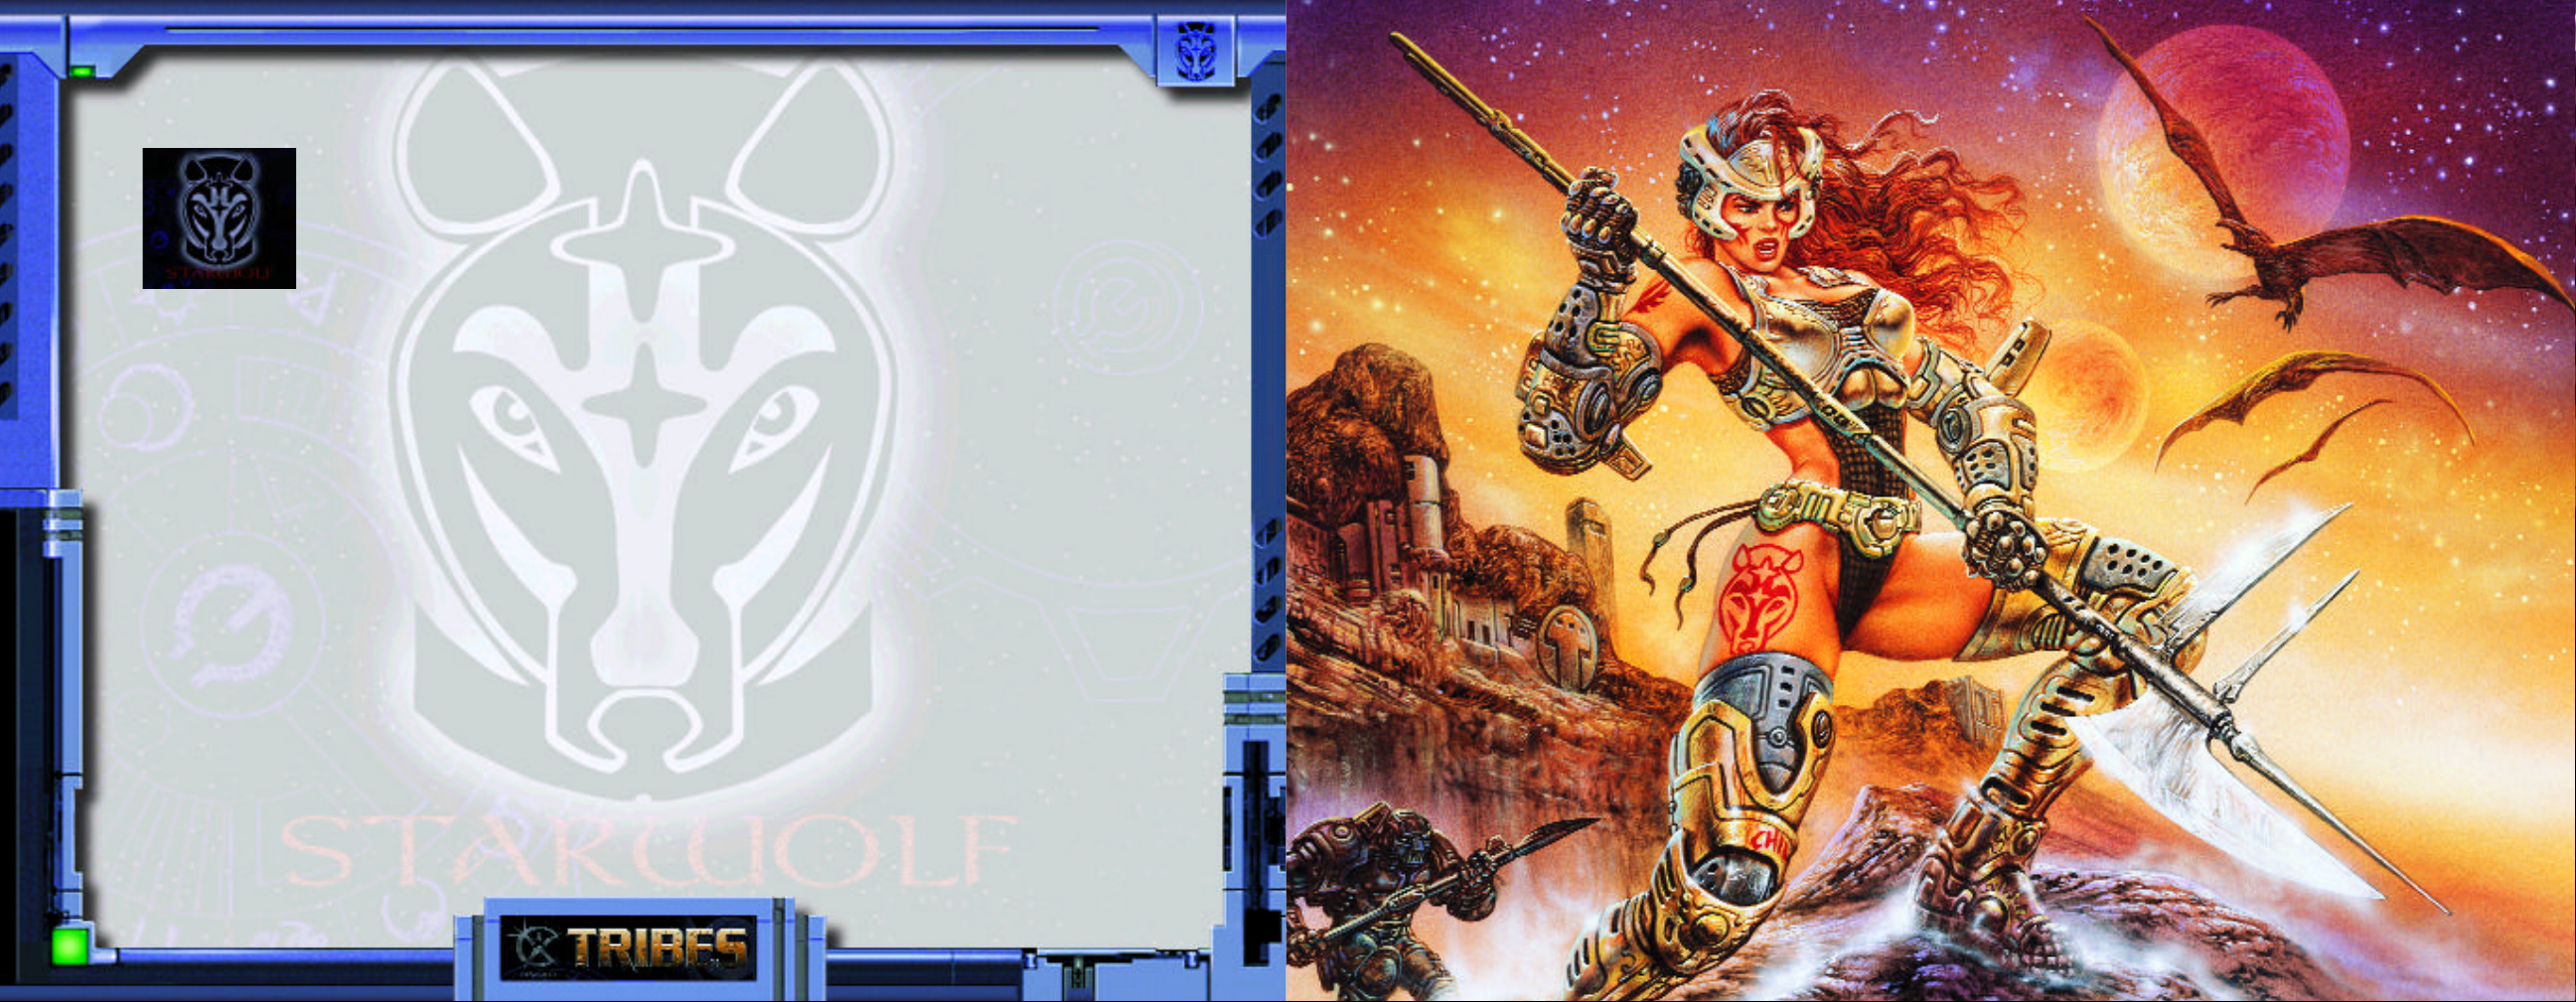
thy of our mettle, young ones. The Starwolf, who
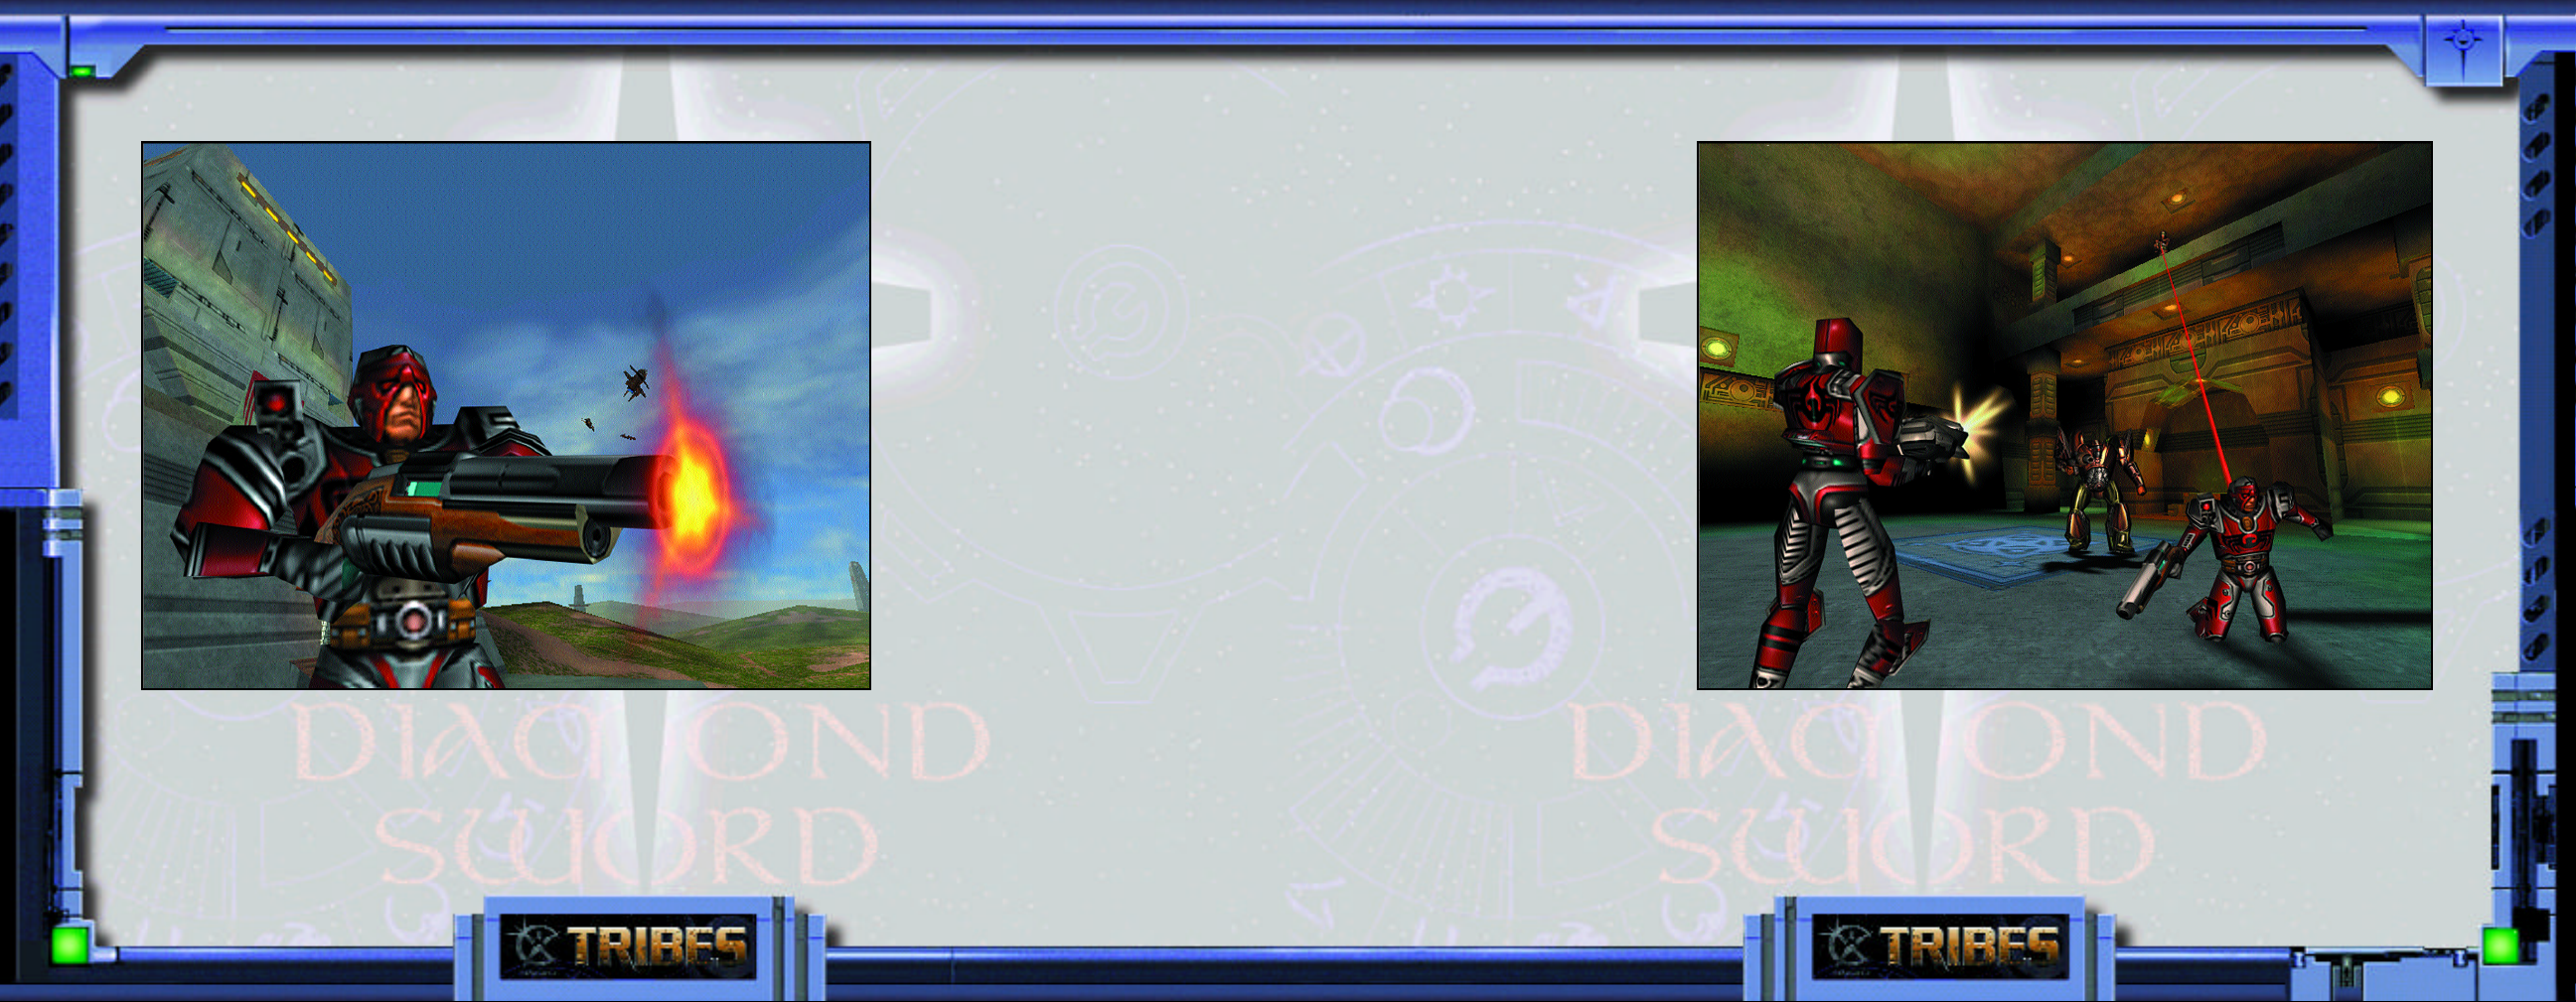
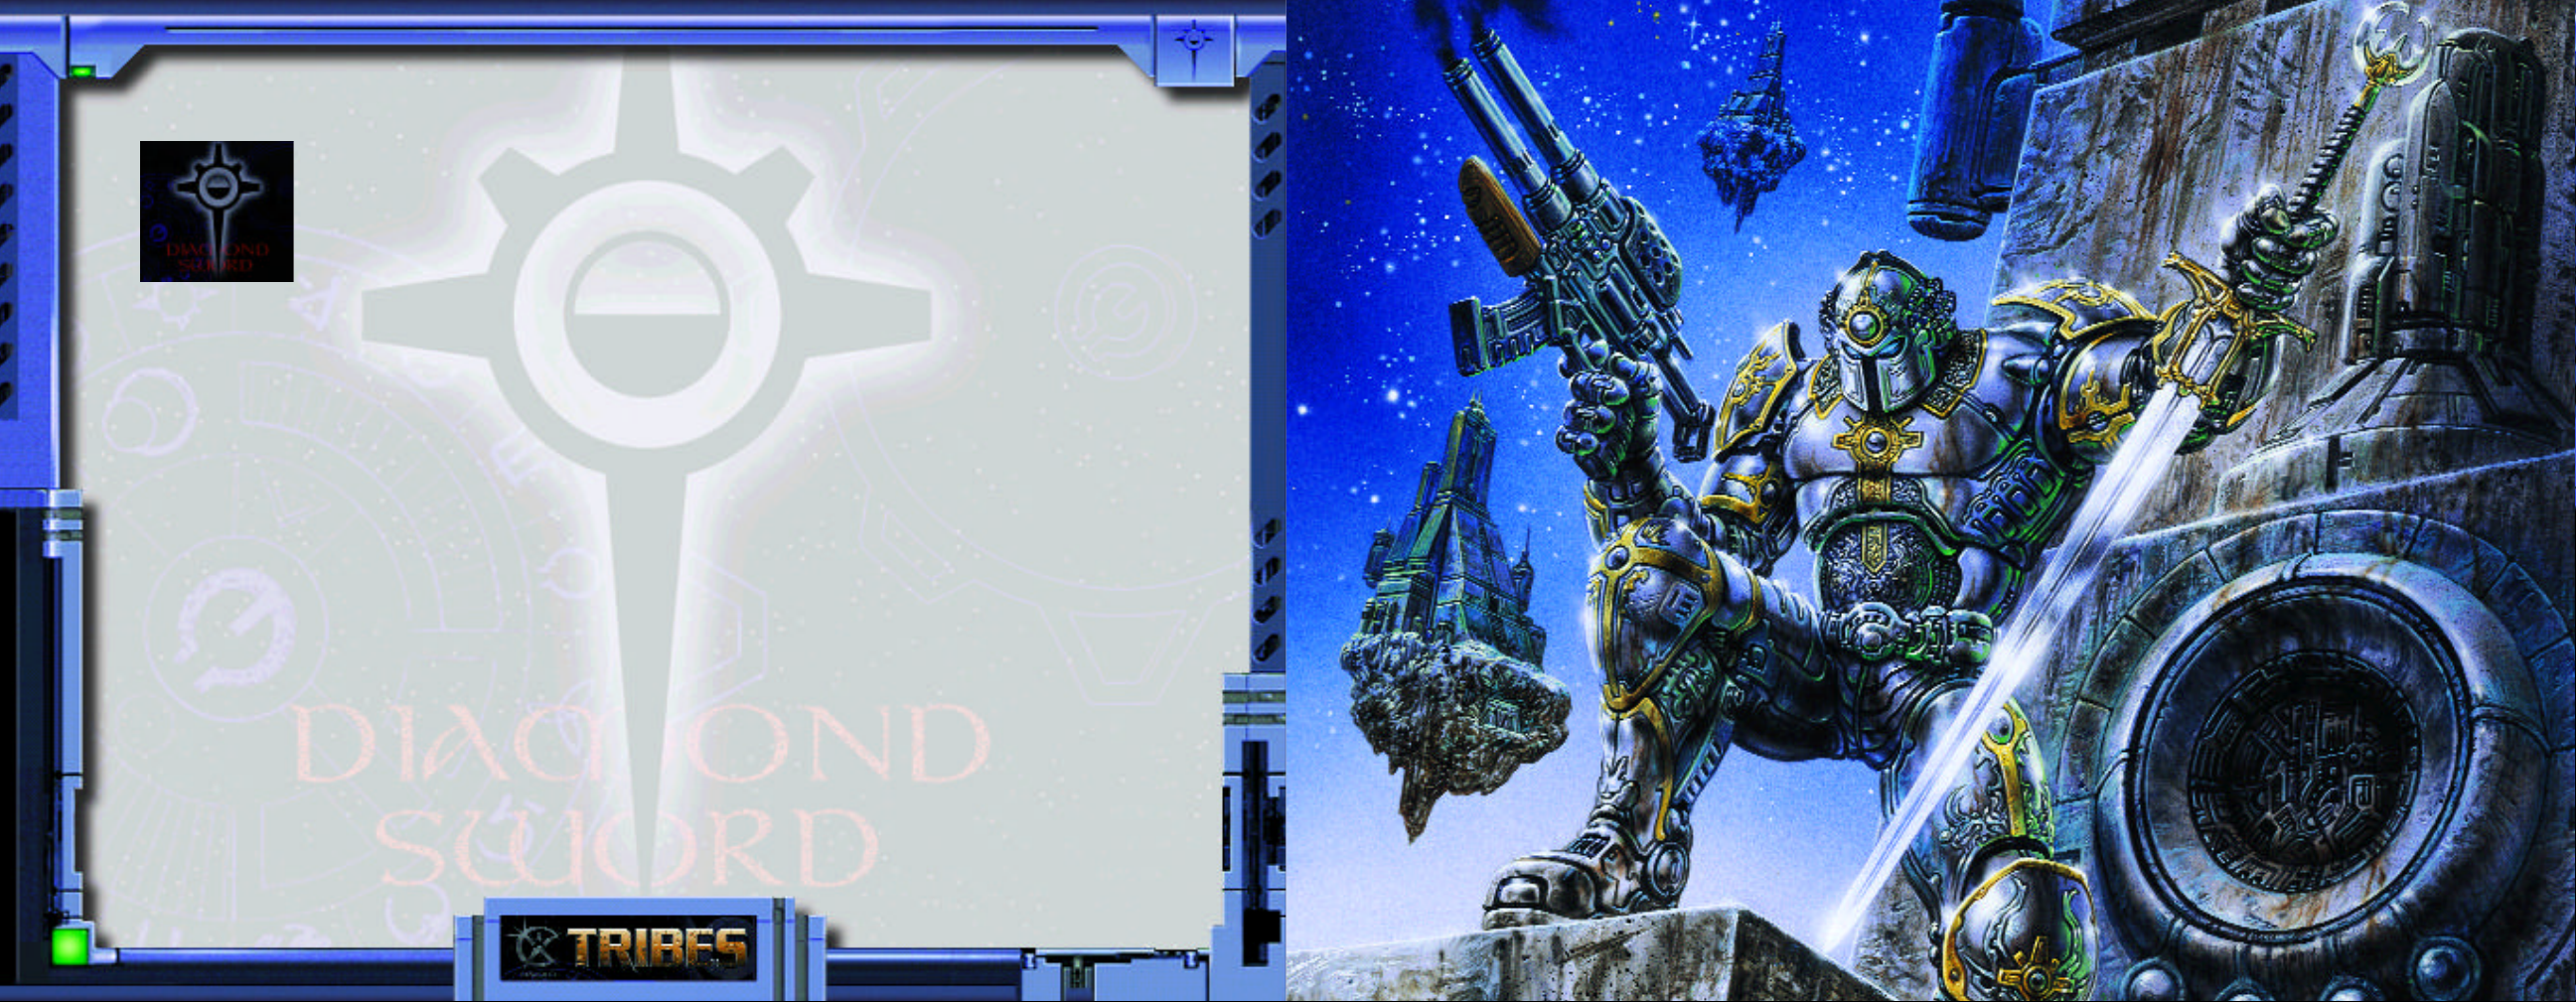
favor swiftness and daring. The Diamond Sword,
who weave strategies of
shadow and steel. And
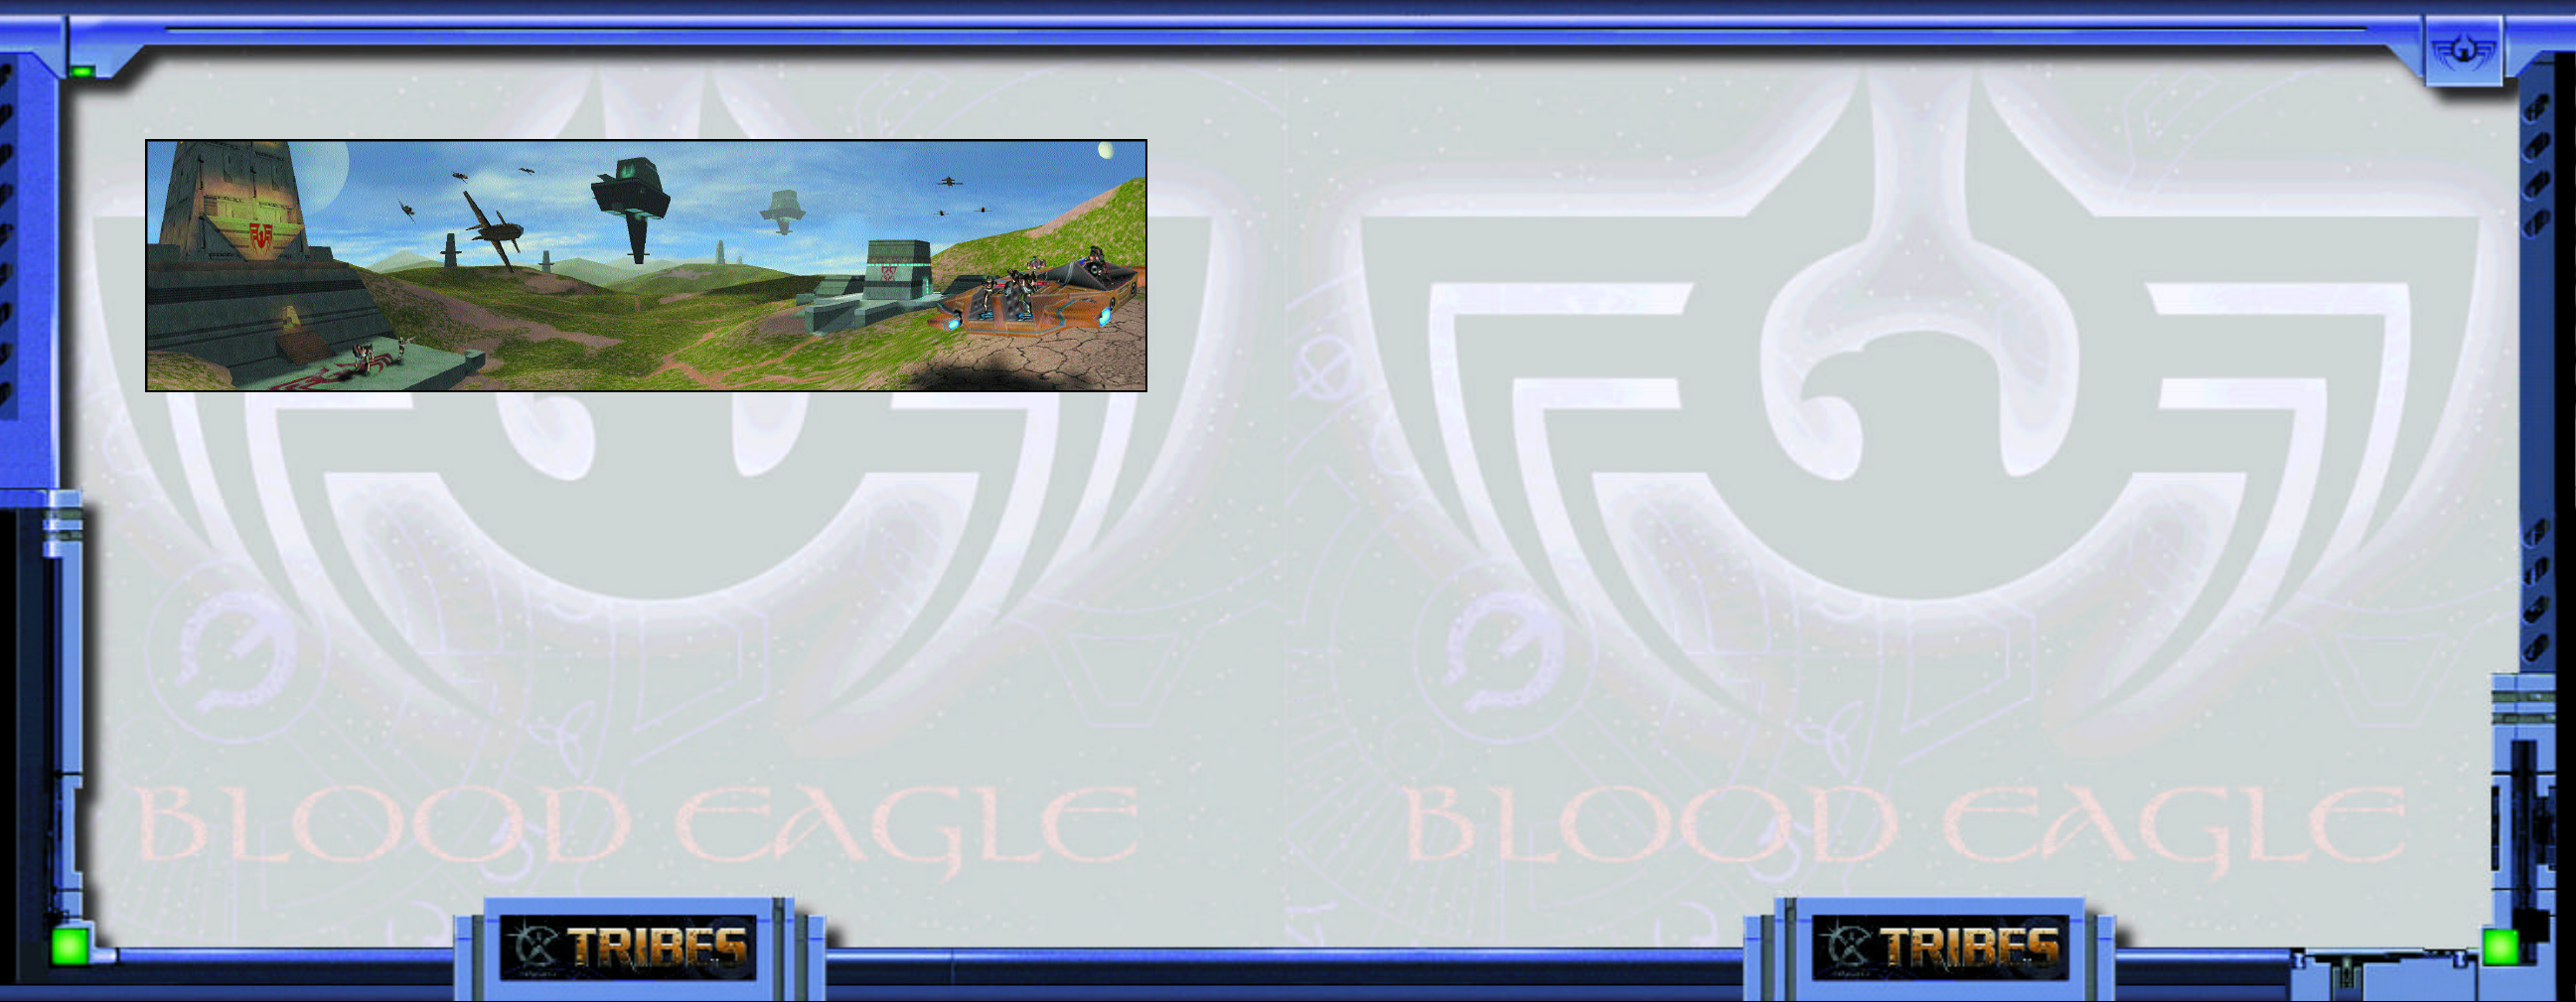
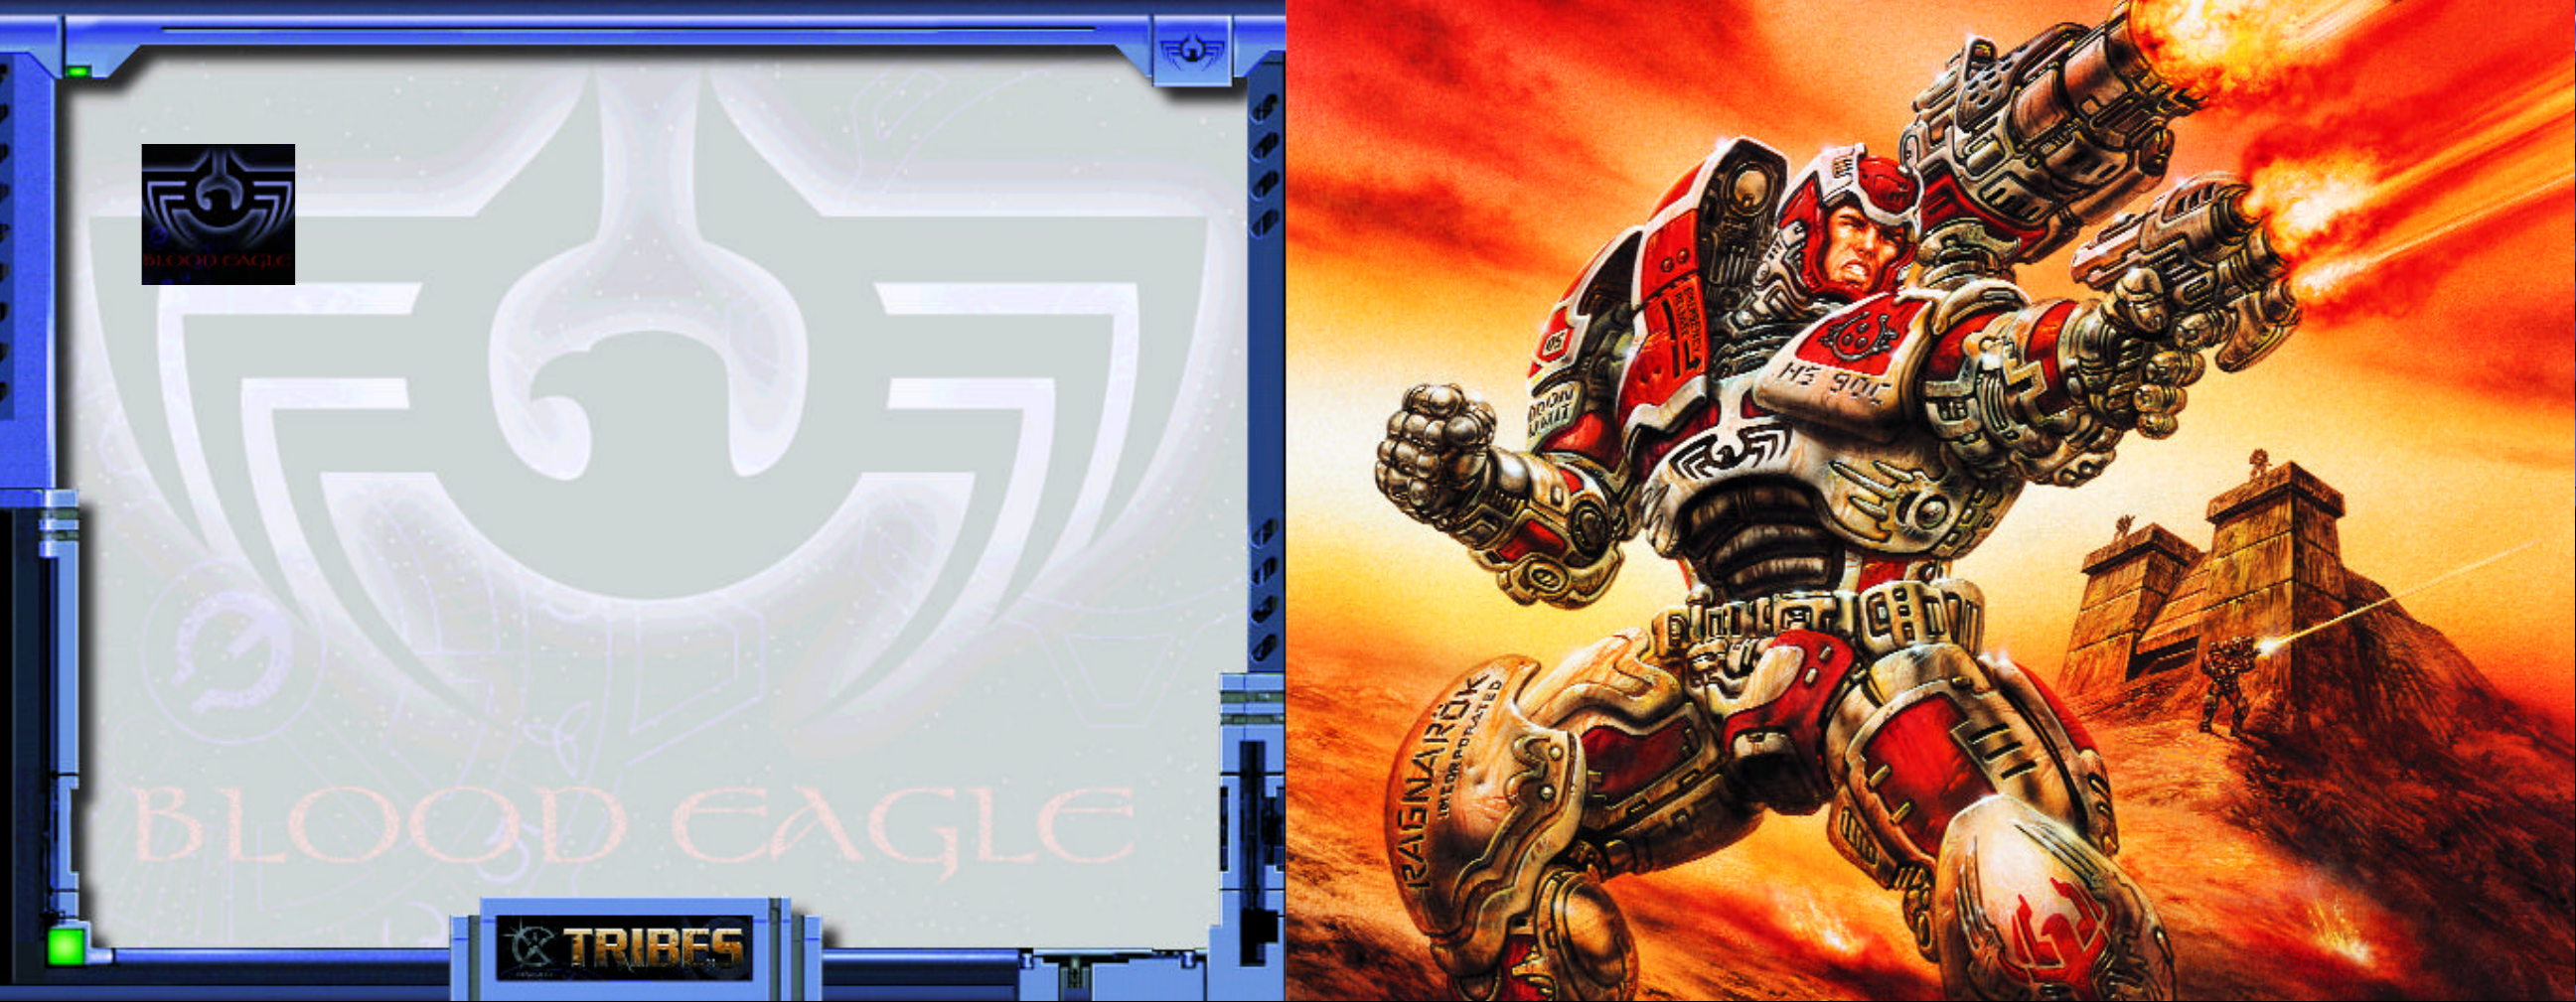
the Blood Eagle, butchers
who laugh in the face
of fire...
Minerva swoops up on a
blue trail of phosphorescence and fires a brace of
grenades at the myrmidon. The Blood Eagle
warrior leaps ponderously aside, but the grenades’
staccato explosion swats
him away like a broken
doll and hammers you
back a few steps. A
Blood Eagle hoplite
scores Minerva with a
laser as she descends
onto the hillside. An
instant later, you regain your balance and hose the
bastard down with your minigun. The Blood Eagle
staggers under the incandescent hail and falls as
your flechettes finally penetrate and find meat to
explode in. You have marked your first kill, and you
scream in triumph, but there’s no pleasure in it. The
stench of blood and ozone and burnt flesh fills you
instead.
It is better to die than suffer capture by the Blood
Eagle, you once told your father’s sister years ago.
She looked into your eyes serenely and replied,
Ayia! Fear is their weapon, true. But you are of the
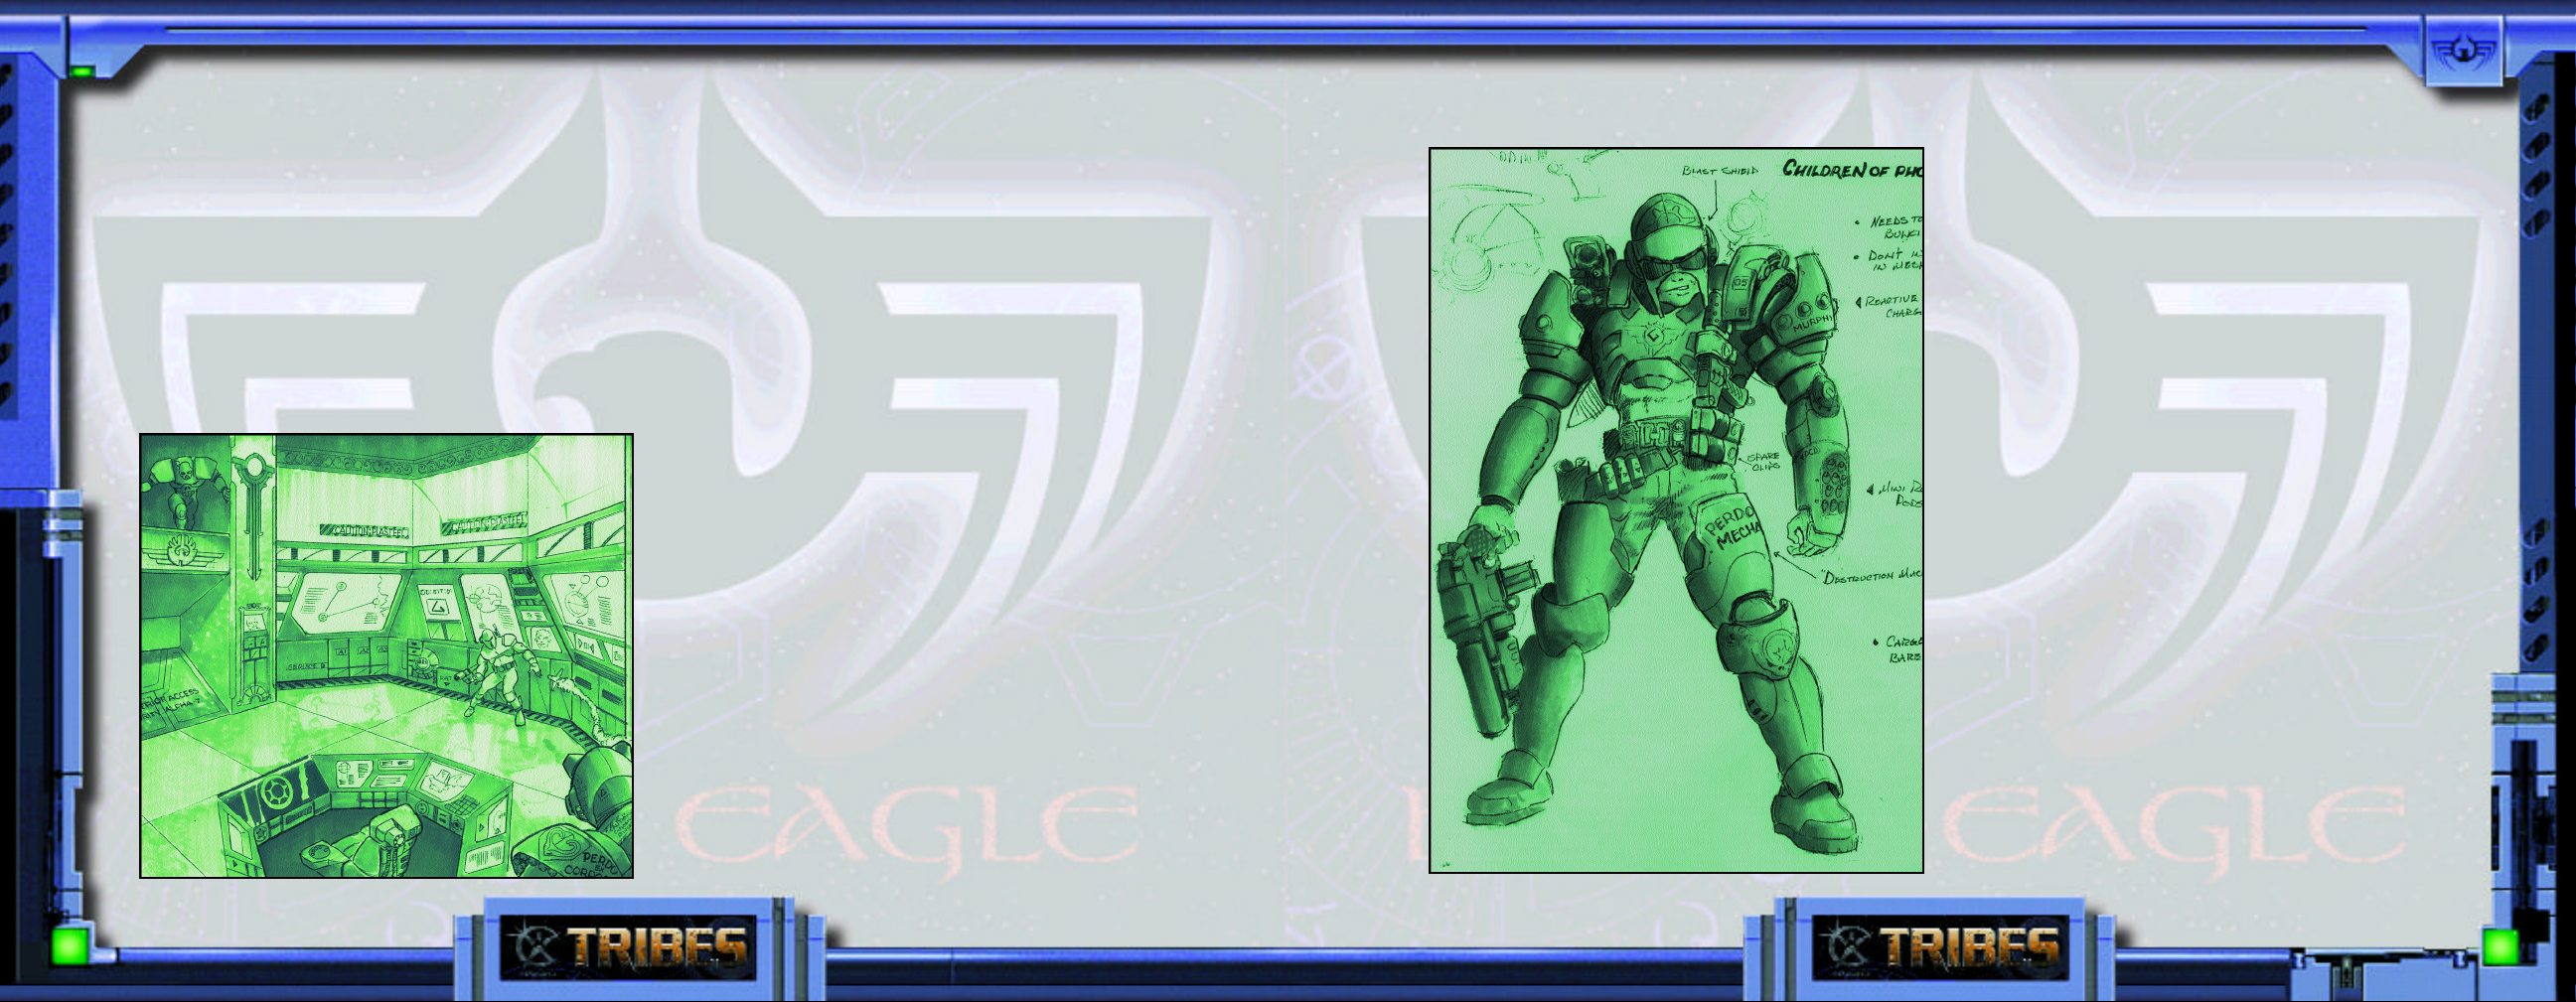
Children of the Phoenix, the first tribe, the eldest
tribe, the pure ones sprung from the Blessed
Harabec himself, hero of the Cybrid Wars, savior of
humanity. Such knowledge will spur you above fear.
A couple of laser pulses hit you in the back, searing
even through the shield aura, and you grunt in pain,
but the armor holds. You look over your shoulder
and trigger your flight pack to thrust you into that
indifferent blue sky. Another bolt scorches a furrow in the ground under you, and you vector
toward the sniper, a female hoplite, emptying the
Telamonian at her as she tries to maintain cover in
the rocks of the hilltop. A bellyful of fear gives your
hands speed as you let the useless minigun snap
back to standby on the warharness while you pull
up your plascannon. The Blood Eagle raises her
longrifle too late as you drop directly onto her and
crash a boot into her faceplate. The next instant, you
unload white-hot plasma into her at point-blank
range. You can’t even hear her scream under the
roar of the flames.
Minigun. Longrifle. Disker. Grenade launcher.
Blaster. Hellshot. Lascarbine. Hawktorps.
Plascannon. Sword. Shockchain. Knife. Tetrahook.
Club. Hand. Foot. Teeth. You’ve trained with all
these weapons since you were old enough to walk,
and their use is now deeply instinctive for you. Still,
you remember your father’s words to you upon
Presentation after your received the Dragon Marks
of adulthood: Your life, too, is a weapon.
You land on your belly and skid down a slope in a
dry cloud of dirt, through charred patches where
blaster bolts scored the ground. Two Blood Eagle
peltasts snipe at you, first one, then the other, as you
scramble to reload the minigun with a second
ammo canister. Your shield aura won’t hold much
longer, and you’re bleeding from a half-dozen
minor wounds. The flamer is lost, dropped by the
smouldering remains of your last kill. Come on!
you pray. You’ve done this hundreds of times
before, under fire, underwater, in the dark -- all in
training -- but now your fingers can’t get a good
grip on the canister. Then you fetch up against a
rock and the ammo’s gone. Dust is everywhere. A
hyper-vee round whangs off your cuirass, and you
8
9
Page 6
Tr i b e s Fi ct i o n Tr i b e s F i ct i o n
know you’re going to die.
Two standard weeks back, the Blood Eagle dropped
onto a world held by your people, slaughtering the
populace and setting the flayed bodies of their victims on spears around their LZs. The ghosts of our
people cry out for
vengeance, the elders said.
The famed Scar Captain
assembled a battalion of
warriors to strike in retribution. You joined quickly, eager to serve your
people and win glory in
the eyes of Phoenix.
One way or the other,
you’re high in the favor of
Phoenix today. One of the
two Blood Eagle about to
destroy you erupts in a
spinfusor explosion, and
the second one breaks off
to meet the new threat.
Harach’Xu. -- another
newblood of your tribe -salutes you as he skims by.
“That’s three for me!” he calls with a grin, chasing
the Blood Eagle into a gully with another spinfusor
shot.
Even you, newblood, should be worth any four of
these Empire-loving scrofs, Minerva joked as you
disembarked from the
dropship. I’ll have four
markers on my belt by
moonsrise, you boasted.
She’d replied with a
raised eyebrow. You
know now you hadn’t
any idea what you were
in for.
You grope for the ammo
canister, find it, and slam
it into place on the
Telamonian with a sharp,
metallic click. Relief fills
you, but it’s only
momentary. The Blood
Eagle peltast rockets back
out of the gully with a
minigun leveled and
buzzing. Caught offguard, Harach’Xu tumbles out of the sky in pieces. You leap aside as
flechettes reach for you in a wake of fury. A quick
thrust from your flight pack scoots you beneath the
Blood Eagle peltast, and you open up with the
Telamonian, but the peltast is too damn fast ...
You remember the bruises left by your weapons
instructor, Azendai, and how he taught you to focus
through the pain, to keep your attention on the tar-
get. But never lose your awareness of your surround-
ings, he would say. Always know where the nearest
ditch is, and grow eyes in the back of your head. The
10 11
Page 7
Tr i b e s Fi c t io n Tr i b e s F i ct i o n
enemy does not forgive blindness or laxity.
“Left, newblood! Left, damn it!” Minerva’s voice
screams in your ear and you tear your gaze away
from the peltast to see a battered scarlet myrmidon
drawing a bead on you with something big and
black. You roll up and boost hard for cover. The
myrmidon sidesteps to avoid fire from Minerva as
she pokes a longrifle over the crest of the hill and
snaps off a couple of shots. The Blood Eagle peltast,
her true target, never makes it to the ground. The
laser pulses blow his head off neatly; the sudden
blast of blood reminds you fleetingly of one of the
roses in your mother’s garden, its petals dissolving
into gentle red mist. You glimpse the slumped body
drifting downward on its flight pack’s thrust as you
drop over the rocky lip of the hilltop. A heartbeat
later, before myrmidon’s rockets shatter the world
and turn your day into night.
Dawn casts long shadows over you as the last warriors climb laughing into the dropships. Beyond the
mobile landing pads, golden hills roll gently down
to a calm sea. Your mother is there, and your sisters,
offering you a luck gift: the blaster pistol your
grandfather won from the Starwolf -- what? Two
jumpgates ago? Three? You tell Mother not to
bother, that you were killed on Minax Phasma III,
but she just smiles. You are of the Phoenix, my
bright one, she says. We more than any other tribe
return reborn from the ashes of defeat. Go now,
and return.
“We’ll strip their armor after we’ve destroyed their
brethren,” the Scar Captain orders in his gravelly
voice. The Blood Eagle myrmidon’s blackened
corpse lies in a small crater at the foot of the hill.
You rest your head on your knees while Minerva
plays a knitterbeam over you. Your helmet lies
nearby, blown off from the force of that last
explosion. You’re exhausted, your head hurts, and
your burns pulse raw agony, but you’re almost too
tired to cry out, and pride keeps your teeth gritted.
As the nanodocs do their work, blackened flesh
flakes away to reveal pink new skin spreading across
your wounds with incredible speed. The pain fades.
You relax and stretch gingerly. Around you, Phoenix
warriors reload their weapons and run nano-repair
kits over their armor. The sight of their gleaming
wingmask helmets fills you with resolve. Minerva
grins and winks as she spies you clipping the
Telamonian back onto your warharness.
“Welcome back ... warrior,” she says, and tosses you
your helmet. “Remember, you owe me two more
by moonsrise, ayia?”
12 13
Page 8
Tribe Descriptions
regiments called Pyres, and squads called Flames.
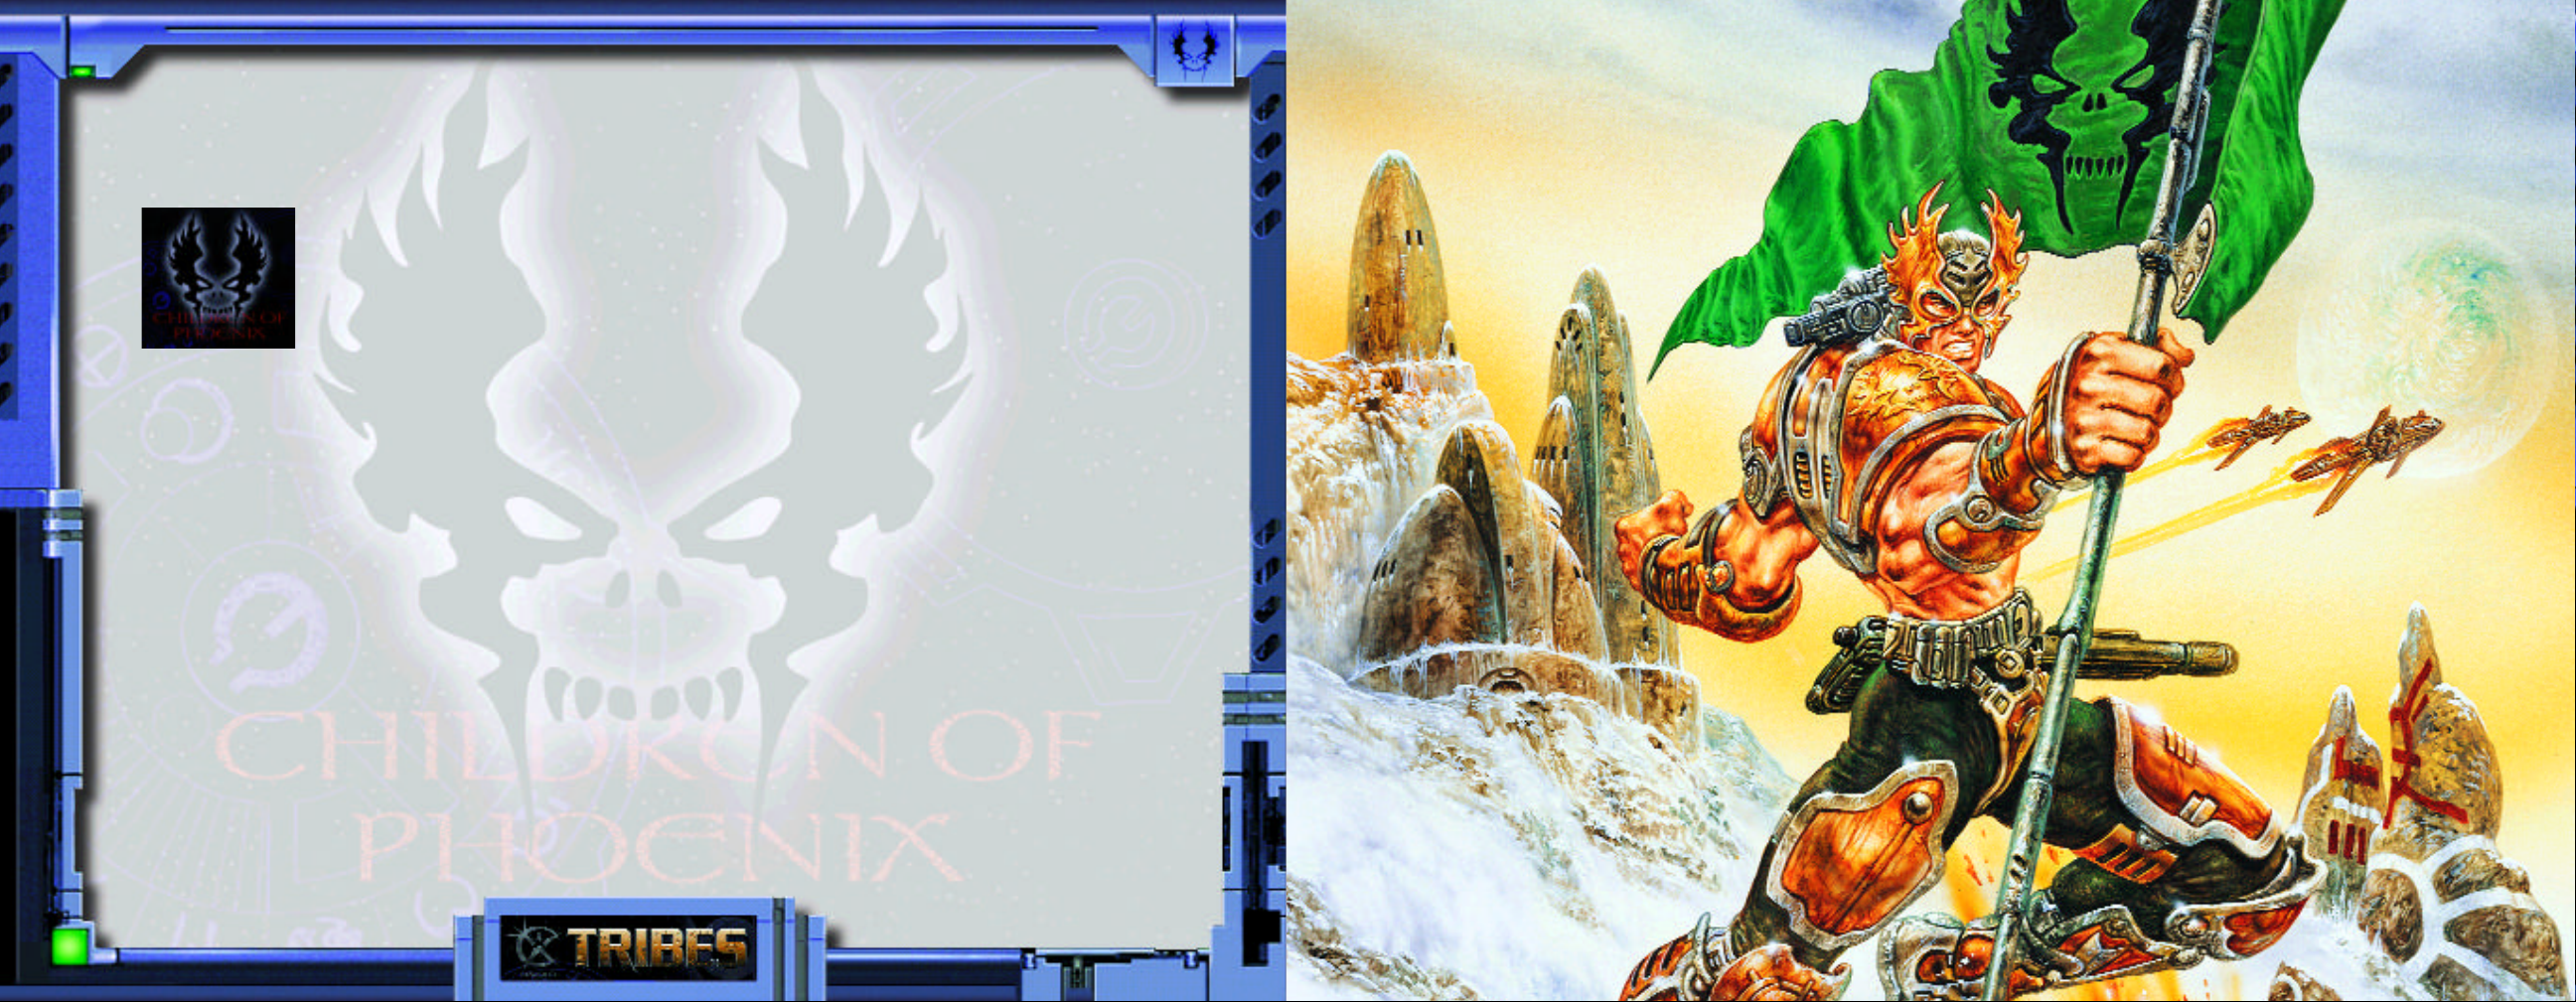
Children of
the Phoenix
“Someday, perhaps, the tribes will
be one again. Let us keep that flame
burning. Until that day comes, we
must remain vigilant against those
who would extinguish the light and cast us into the
darkness of anarchy.”
— Renn Gistos yl-Harabec, Phoenix Prime
he oldest and most traditional of the tribes,
the Children trace their ancestry back to the
T
legendary Harabec, the immortal Phoenix.
Their ultimate goal is reunification of all tribes
under the Phoenix banner. The Children adhere to a
body of custom called "The Tenets of Harabec" and
expect other tribes to follow it as well.
Although the Children speak of peace among the
tribes, they are warriors without peer, and finish
their battles with terrifying finality. The Phoenix take
pride in their elite status. And so far, no other tribe
has succeeded in shattering that reputation.
They organize themselves into armies called Wings,
On the Starwolf: "They turn disadvantage to advantage,
adversity into asset. A worthy ally and a dangerous
enemy, they are yet too fond of roaming to accept the
wisdom of our teachings."
On the Diamond Sword: "Everything is a question to
them, a puzzle to solve, a mystery to unravel. But not
everything is gray, and the Sworders lack the strength of
conviction necessary to act decisively."
On the Blood Eagle: "Butchers united only by bloodlust
and their preposterous claim to be the oldest tribe. How
they have fallen from their noble origins."
On lesser tribes: "Those who join us are welcome.
Those who choose otherwise will suffer. We can only
hope to show them the truth."
On the Empire: "Let it rot in decadence and greed.
Someday Phoenix will return, and we will raise something infinitely finer in place of mere Empire."
On Immortals: "Some deny that Harabec and other
ancient warriors still walk among us. Fools! Have they
not listened to the histories? The Immortals exist!"
14
Page 9
Tr ib e D e s c r i p t i on s
Starwolf
“Victory is within our jaws today.
The Great Wolf walks with us this
day, and those who fall shall walk
with him for all eternity.”
— Viktor Abanath, Great
Sergeant, Third Claw, Hepta
Ourubis Pack
The Starwolf tribe evolved from humble
origins. But adversity bred strength, and the
T
Starwolf eventually exploded into the tribal
wars and carved out a large holding with predatory
swiftness.
The Starwolf follow a shamanistic religion, with
"The Great Wolf" as their tribal totem. Warriors
who fall in battle are said to "walk with the Great
Wolf." Starwolf holdings spread across vast regions
of space, and Starwolf warriors are the first to
explore new worlds and follow jumpgates into the
unknown. This great dispersal makes massing large
armies difficult, and so the Starwolf favor fluid,
guerrilla-style tactics and mobility.
Claws, and then into Squads.
On the Children of the Phoenix: "The Phoenix want
everyone to suck up to them, but they'll never make
us bow our heads. Never. We choose our own way."
On the Blood Eagle: "They favor slow and heavy
fighting, which makes them our meat. Don't let them
capture you, though."
On the Diamond Sword: "Too much thinking, not
enough fighting. The quickest way through a knot is
a sharp knife."
On the Empire: "Feh! Crabs. Crack their war
machines, and it's all soft flesh inside."
On lesser tribes: "If they cross us, we cut them out
of the herd."
On Immortals: "Make the sign of the Wolf when
you mention Harabec. Not that I believe that scrof
about Immortals, but you never really know, ayia?"
16
Starwolf organize themselves into Packs named for
their world of residence. Packs are broken down into
Page 10
Tr ib e D e s c r i p t i on s
Diamond Sword
“The sharpest sword cannot compare
to the sharpest mind.”
— Wylim Totoro,
Warrior/Philosopher
he Diamond Sword craft the most innovative
and dangerous strategies of any tribe. They say
T
the mind is the greatest weapon, and practice a
philosophy derived from the Zen Buddhist teachings
of ancient Terra. Tribe members tend to be enigmatic, even cryptic. When not fighting, they are usually
meditating on obscure riddles. The phrase "talking to
a sword" comes from the Sworders' reputation for
answering with a question.
The Diamond Sword tend to rely overmuch on
their elaborate plans. If caught unprepared (a rare
event), they become surprisingly disorganized and
vulnerable.
Diamond Sword forces fall into three main armies:
the Unyielding Facet, the Reflective Facet, and the
Pure Facet. A Facet contains from three to eight
Bolts, which in turn contain up to fifteen squads
called Blades.
On the Children of the Phoenix: "Their aim is true,
but the distance is far greater than they think."
On the Starwolf: "There is a time to fight and a
time not to fight. The Starwolf have yet to learn the
second lesson."
On the Blood Eagle: "Their dark past devours
their hearts."
On the Empire: "Hollow and blind, wrapped in the
gilded veils and perfumed smoke of illusion."
On the lesser tribes: "In the forest there are many
paths. Those without light lead to oblivion."
On Immortals: "They need to exist. Logic alone
cannot answer all the questions of the universe."
18
Page 11
Tr i b e D es c ri p t i o ns
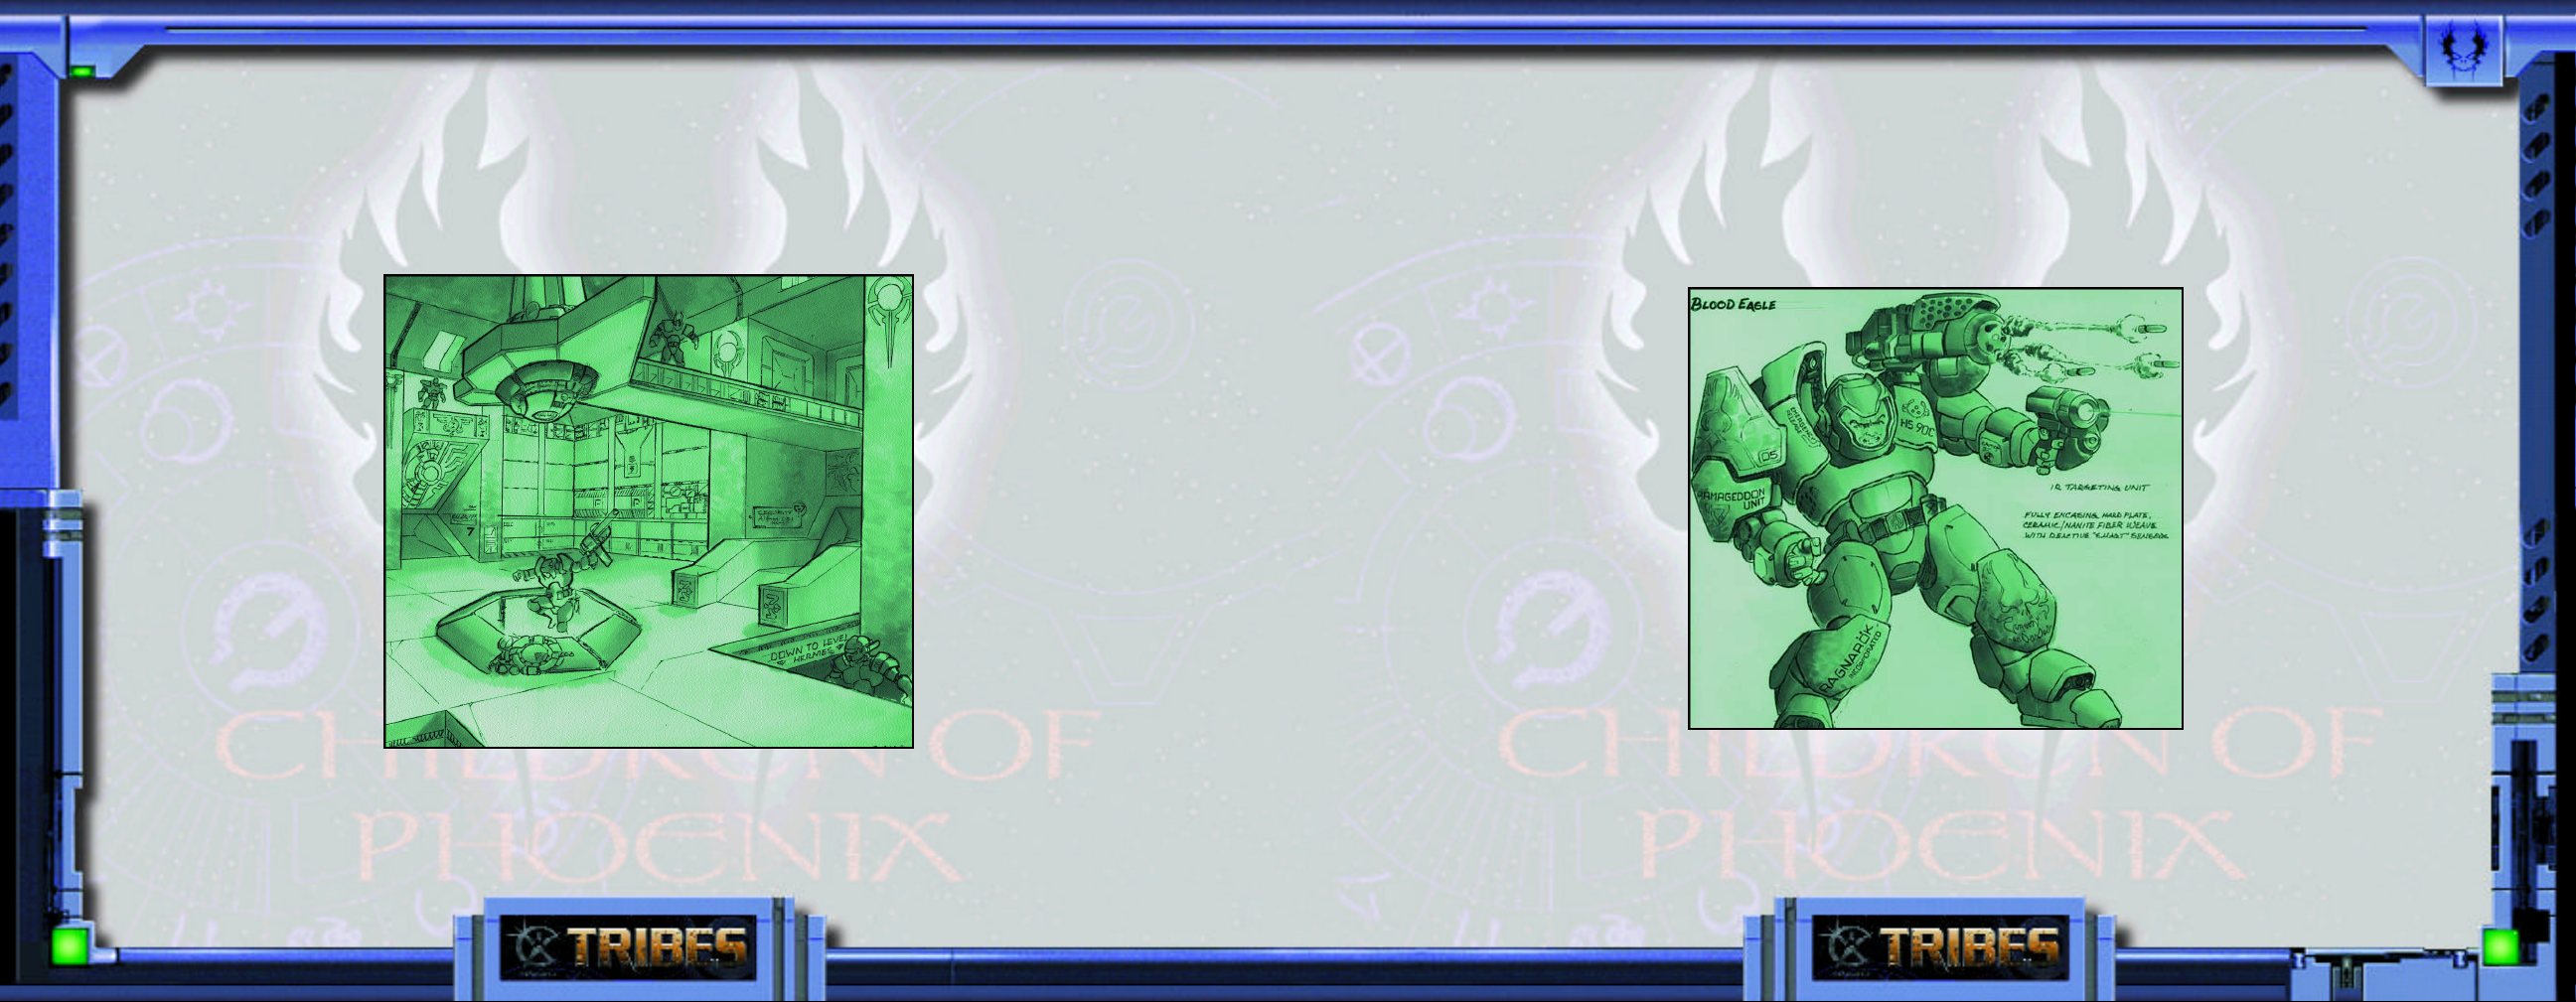
Blood Eagle
"There's one simple rule in war: Win
and live, or lose and die. If the other
tribes are too weak, we'll carve the
blood eagle on their sorry carcasses
and carry the remains as banners
into battle."
- Brakus D'Vehne, Blood Eagle Talon Prime
he Blood Eagle claim descent from an Order
of Imperial Knights sent to conquer the tribes
T
long ago. They maintain a formal military
hierarchy marked by byzantine politics. Rumors say
they maintain contact, perhaps even trade, with the
Empire. Blood Eagle technology is the most
advanced of any tribe.
In combat, the Blood Eagle are unmatched for sheer
ferocity. They use the flayed bodies of fallen enemies
as banners, follow a scorched earth strategy, and
never accept or offer surrender. Despite their brutality, they follow a rigorous code of honor and are the
most courteous of hosts during a parley. They never
break their sworn word. Never.
sions called Talons. Talons are divided into Squads. Most
units use colorful titles, for example, the Second Pennant,
Third Talon, is known within the Blood Eagle as "the
Eviscerator Talon of the Wolfslayer Pennant."
On the Starwolf: "Don't waste my time. I have a wolfskin
rug in my quarters."
On the Diamond Sword: "Words make poor weapons.
The sandrakers pose little threat with their mumblings."
On the Children of the Phoenix: "Dreamers easily
placated with honeyed words. Beware, though, for they
fight almost as well as we do."
On the Empire: "We remember our roots, and the
Empire respects our strength. It's enough... for now."
On the lesser tribes: "Target practice."
On Immortals: "Give me a break. My plascannon says
no one's immortal."
20
Blood Eagle forces are precisely organized into
Pennants, which are in turn broken down into divi-
Page 12
Tr i b e s T i m e l i n e
TRIBES Timeline
ca. 2832 — Starsiege ends.
2845 — Beginning of the
defeated Cybrids to other star systems using new
FTL technology.
3245 — Beginning of
discovery of first interstellar transfer conduit, or
“jumpgate.”
Chase
. Humans pursue
Cyberstorm
corporate wars;
3289 — Discovery of first “meta-jumpgate,” allowing
travel over far greater distances.
3291 —
of the meta-jumpgate.
3350 — Meta-jumpgate discovered to be part of a
network of such gates. Beginning of the
humanity begins to spread throughout the galaxy.
“Those Who Jumped,” the first people travelling
through the jumpgate, forsake the security of the Great
Human Empire to journey into the unknown. These
pioneers develop a nomadic tradition and find new pride
in their ability to survive away from the trappings of
civilization.
ca. 3400 — Settlers begin to refer to themselves
as a “tribe,” the
follow the teachings of the renowned warrior Harabec
Weathers, hero of the Cybrid Wars.
3450 — A powerful force of Imperial Knights, the
Blood Eagle, appear in tribe space to “subdue” the
Children of the Phoenix
The conflict fractures the Children as groups break
away to form their own tribes. This event becomes
known as the Splintering.
Cyberstorm
Children of the Phoenix
corporations battle for control
for the Great Human Empire.
Diaspora
, claiming to
, as
3455 — The
from renegades of the
Blood Eagle
3480 — Tribal culture is now a perpetual state of
war.
The Blood Eagle
decades, begin to consider themselves a “tribe.”
Finding Hercs impossible to maintain, they adopt the
flexible armors used by the many tribes.
3530 — Formation of the
under the tutelage of the Enlightened Master.
3641 — First Firetruce held by the
Phoenix
each century on a planet chosen by the
collective tribes gather on these worlds in an event
similar to the ancient Olympics on Terra.
Much is accomplished. A convention of
up, and all tribes agree to abide by them.
3670 — Using innovative strategies and striking
with precision and economy, the
rapidly carve out a large holding for themselves.
3741 —
battling some “scourge” abound, as Imperial advances
. They declare this event will take place twice
Starwolf
.
Third Firetruce
tribe forms, supposedly
Children of the Phoenix
, far from their home bases for
: Whispers of the Empire
Diamond Sword
Children of the
Diamond Sword
tribe
Children
tenets
and
. The
is drawn
22 23
Page 13
Tr i b e s T i m e l i n e Tr i b e s T i m e l i n e
into tribal space falter and fade. It is a time of much
prosperity among the tribes, and a lengthy period of
peace ensues. Many smaller tribes fall back in line with
the
Children of the Phoenix
3831 — Hector
Komarosu, Great Eagle
of the
Blood Eagle
assassinated. The culprit is never caught or
identified, but the
Eagle’s
nemesis, the
are blamed.
3841 — The ultimate
purpose of the
Firetruces
has been to try to
reunite the tribes, but
the harsh reality is that
little progress is ever
made toward unity, and
splinter groups from
larger tribes often take the opportunity to be recognized
as independent tribes.
This year is no different, as the
age-old
, is
Blood
Starwolf
historically
.
,
Blood Eagle
leadership,
still undecided, is unable to hold the allegiances of the
Wolfsbane, Excelsior, and Shadow Stalker
skirmishes break out between
warriors.
of 106. His son, Renn Gistos yl-Harabec, is elevated to
Phoenix Prime.
3904 — Alexandre Konovalev, grandson of Illya Ajax,
The Diamond Sword
Blood Eagle
champion humiliates the
chief of the
Killers
peace at this “time of
reconciliation.”
3844 — Illya Ajax
Konovalev is named Great
Eagle of the
The
rejoins the
but the
Shadow Stalker
choose to remain independent.
3903 — Phoenix
Prime Alexi Stefanos
yl-Harabec, leader of the
Children of the Phoenix
dies in his bed at the age
groups. Many
and
Starwolf
Gorgon
. There is little
Blood Eagle
Wolfsbane
Excelsior
tribe
Blood Eagle
and
tribes
assumes the mantle of Great Eagle. In an effort to reconcile age-old differences with the
Freya Cloudchaser, daughter of a
chieftain, as his wife.
3905 — Birth of
Ulysses Konovalev to
Alexandre and Freya.
3922 — The
tribe settles on Theta
.
,
,
Draconis IV after lengthy
battle with
Sword
the planet.
3924 — The union
between Alexandre and
Freya decays to the point
where she leaves him to
rejoin her pack. Ulysses
Konovalev takes command
of his father’s Marathon
Pennant to recapture her.
3925 — Most of the Marathon Pennant dies in
battle with the
Konovalev is not found among the survivors. An incon-
over possession of
Starslayer
Diamond
Starwolf
Hepta Ourubis Pack. Ulysses
Starwolf
Starwolf
, he takes
solable Illya Ajax Konovalev vows to destroy the
Starwolf
3925 — The
on Hepta Ourubis II.
entire Ourubis Pack, nearly 80,000 strong, is wiped
out. The
resort to using ecocidal weapons, outlawed for
once and for all.
Blood Eagle
Starwolf
Starwolf
are outraged that any tribe would
Wolfslayer Pennant,
including the elite
Eviscerator and
Deathbringer talons,
begins an offensive
against the Starwolf
holdings in the Hepta
Ourubis system.
3929 —
tribe vanishes from Theta
Draconis IV. No trace of
the 100,000 tribesmen
remains, and no clue
sheds light on their
disappearance.
3932 —
forces prevail in the Hepta
Ourubis system following
use of ecocidal weapons
losses are high, as the
Starslayer
Blood Eagle
24 25
Page 14

Tr i b e s T i m e l i n e Tr i b e s T i m e l i n e
centuries, and call for all tribes to aid them in
destroying the
3933 — Many
upon the
The
Children of the Phoenix
Blood Eagle
Starwolf
Blood Eagle
, declaring all-out war upon them.
once and for all.
swear an Oath of Vengeance
decline to enter battle but
offer to act as judges and mediate the conflict.
3935 — First attempt at mediation by the
of the Phoenix
Eagle
factions results in thirty-eight dead, over 200
wounded. The
between warring
Children
declare this outcome a “promis-
Starwolf
and
Children
Blood
ing beginning.”
3938 — Two full packs of
Starwolf
attack
Blood Eagle
holdings on Deus Sanguinus in a massive frontal
assault, reportedly coming in under a flag of truce.
The Red Paladin Pennant is wiped out to the last man
and woman. Alexandre Konovalev is now being
described as either “determined” or “insane,” depending
upon whom you talk to.
3939 — The
Children of the Phoenix
decide to use
the now-dead world of Hepta Ourubis II for the next
Firetruce. Both the
Blood Eagle
and
Starwolf
show little
pleasure at this choice.
shows that of the hundreds of smaller,
independent tribes, an “alarming number”
have either allied with or agreed to nonaggression pacts with either the
or
Blood Eagle
. Already, the skirmishes
Starwolf
have increased, and bloodfeuds grow
more common. The Phoenix Prime is said
to remark that “this path to unity would
be a fearful one.”
Even some
Starwolf
and
Blood Eagle
express reluctance to join in a total war.
However, these voices remain a minority
for now.
It is only one year from the next
Firetruce, and the war between the
Starwolf
and the
Blood Eagle
threatens
to drag all tribes into a maelstrom of war
and destruction even as the Imperials
begin to penetrate tribal systems. It is
a time of great opportunity and a time
of terrible reckoning.
26
3940 — Rough census by the
Children of the Phoenix
27
Page 15

Menu System: From the startup screen, click on
either the quick Start or Play Game buttons to start playing
the game. Click on the Demo button to view previously
recorded game demos. To go to the Starsiege TRIBES
website, click on the Website button.
To chat in IRC, click on the I RC/CHAT button. To modify
the game controls, click on the OPTIONS button. These
are present in all of the menu screens. To quit out of
Starsiege TRIBES, press the at any time. Note: This
and all PLAY GAME screens will automatically default to
the previous values that have been selected.
Play Game: Takes you through the SETUP menus.
Demos: Used to view movies taken of actual game play.
Q u i c k S ta rt a n d D e mo s
Advanced Reference section on page 61 on how to start a
server). If you joined a server last time, you will be taken to
the JOIN SERVER screen. If this is your first game, you will
go to the PLAYER SETUP screen.
Demos
Selecting this button will take you to the DEMO PLAYBACK
menu. This screen will display all currently saved demos.
From here you can play, rename, and remove demos that you
have recorded with the RECORD DEMO option. Select a
demo you wish to view by highlighting it and press PLAY
DEMO. To return to the MAIN menu, click on BACK.
Note: You may trade demos with your friends, but to view a demo of a specific mission you must have a copy
of the mission(s) that the demo was recording in your mission folder. To remove a demo from the list, select it
and click on REMOVE. To rename one, select it and click on RENAME.
To record demos, check the Record Demo box present in the JOIN SERVER, CREATE SERVER and
TRAINING screens.
Website: Takes you to the Starsiege T RIBES website.
Website
Quick Start
If you have played the game before, the Quick Start feature allows you to bypass some menu screens, saving
time in joining or creating a game.
If you started a server last time, selecting QUICK START will take you to the HOST SERVER screen (see the
28 29
Clicking on the WEBSITE button will launch your default browser and go to the Starsiege TRIBES website at
http://www.tribesplayers.com. Here, you can find current information about the game, updates, message
forums and other items of interest, as well as an online version of this manual and a troubleshooting guide.
Page 16

P l a y e r Se t - U p S t a r t i n g an d J o i n i n g a G a m e
Play Game
Player Setup Screen At the MAIN MENU screen,
press PLAY GAME to go to the P LAYER SETUP screen.
If this is your first time playing TRIBES, a dialog box will
appear, prompting you for a player name. Enter the name
for your player, then click on DONE to continue. The
dialog box will also appear if you select NEW to create a
new player.
To remove an existing player, select that player’s name from
the player list and click on REMOVE, then press OK at the
prompt to confirm.
Select either male or female for your player’s gender by checking the appropriate box. Gender determines how
your player will appear to other players in the game.
VOICE SET INFORMATION: When you issue commands, taunts, etc., this is the voice other players
will hear. Select one from the ones listed. Press the SPEAKER button to hear a sample of the voice you select.
PLAYER SKIN SELECTION: Allows you to select a skin for your player. Select a skin from the pull-down
menu. Some servers may not allow the use of individual skins. In such cases you will default to wearing the
skin of the team that you join.
PLAYER INFORMATION: Real Name, E-mail, Tribe, Tribe URL, Chat Room, Other Info: This informa-
tion can be viewed by other players from the server menu in the game. This is useful for setting up matches
between tribes or finding your buddies.
The Custom Script field allows you to enter the name of a script file to be executed whenever you use this
player. For more information on scripting in general, visit the TRIBES website.
If you wish to edit controls for your player, click on the OPTIONS button in the upper left of the screen.
Once you are satisfied with your new control options, click on PLAY to return to the PLAYER SETUP screen
(see page 61 for more information on customizing your control options).
Click on NEXT to continue to the next screen. To return to the MA IN MENU screen, click on BACK.
Choose Game Type Select the type of game you wish to
play. You can select from joining a multiplayer game, single
player training mission, or hosting a multiplayer game.
Starting a Training Mission To start a single-player training
mission, select the SINGLE PLAYER TRAINING button from
the CHOOSE
GAME TYPE
menu and click
on NEXT.
You will be
presented with
a list of all the training missions in the TRAINING screen.
Select a mission to get a brief synopsis of mission goals. To
start a training mission, highlight the one you want to start
from the list, then click on PLAY GAME. Click on BACK to
return to the previous screen.
30 31
Page 17

J o i n i n g a G a m e P I N G a n d L a g
To record a demo while playing, check off the Record Demo box.
Joining a Multiplayer Game To join an Internet
game, select JOIN MULTIPLAYER from the
CHOOSE GAME TYPE menu.
To play a multiplayer game over the Internet you
must be connected to your ISP (Internet Service
Provider).
A list of servers will appear in the server list box.
This list will automatically refresh upon entry. The
process may take some time. It can be stopped at any
time by clicking on the CANCEL button on the
progress bar. Click on REFRESH to update the list
again. The server list box will display a list of all of
the servers currently running on the Internet that
pass the filter that you have chosen (see Filter Setup on page 71 for more information about filters). You
can sort the server list by any of the columns being displayed by clicking on the column heading (see
Column Setup on page 71 for more information about customizing the columns). A second click will
reverse the sort order.
The Status column will display the status of the server. If the server is ready to join, a green circle will
appear in the column. If the server is dedicated, a green box will appear in addition to the green circle (a
non-dedicated server is both hosting and playing the game, a dedicated server is only hosting the game). If
the server is locked (a password is required for entry), a green lock symbol will appear next to the circle or
box. If the server is full, you will be denied entry.
If you wish to see more information about a specific server, highlight the server in the list and press the
INFO button. Some servers on the list may be grayed out and cannot be highlighted. These servers may be
running a different version of the game that you will be unable to join.
To see the Message of the Day, press the M.O.T.D. button. Updates and information about TRIBES is
usually displayed here.
Select the server you want to join, then click on the JOIN GAME button to go into the game.
For the best possible game play, you will want to choose a server that offers the best performance. Look for
a fast computer running a dedicated server in the CPU column. Under the Connection Quality column,
look for a green or yellow circle for the best game play. A red circle means that your connection to the
server may be slowed or interrupted (which is a bad thing).
PING and Lag PING is the time it takes for information to go from your computer to the server and
back again (see Columns in the Advanced Reference section for viewing PING rates). The lower the P ING,
the faster information is shared between computers, and the smoother the game play. PING rate is measured in milliseconds (1/1000ths of a second). A PING of 100, for example, means information is taking
one-tenth of a second to reach the server and return.
Lag occurs when the information being sent between your computer and the server over the Internet is
slowed down by various factors, including the computers that operate the Internet and ISPs. When you are
experiencing lag, you will get delayed responses when trying to fire weapons and use inventory. Enemy
players and vehicles will not move in a linear fashion, but will “jump” from point to point, making it difficult
if not impossible to fire weapons accurately or track them in the game.
Generally, the lower the PING, the less lag you will experience. You can, however, have a lag-free game
32 33
Page 18

P I N G an d La g
with a high PING rate and a lagging game with a low PING rate. As long as the flow of information
between computers is consistent, you should have no problems playing over the Internet. When the PING
rate fluctuates wildly, that is when you will start having problems with lag.
If you have continuous problems with lag, make sure you are playing on fast servers with low PING rates.
If this does not solve your problem, make sure you are using a dependable ISP. Upgrade to ISDN, DSL or
a cable modem if these services are available in your area.
Choosing a Team
There are several possible modes in which a server you join may be set up to run. Each mode can affect the
mechanics of joining a team. Some modes will automatically place you on a team while others will allow
you to pick before joining.
Auto Team Mode: In auto team mode, as players join they are automatically assigned to a team and placed
in the game. This is the default mode for game play.
Competition Mode: In competition mode, all players must first pick their team. Once everyone has
chosen a team, the game will count down to zero at which the game will begin.
To change teams, refer to the Advanced Reference Section on page 61.
Server Menu and Score
Press Tab to bring up the server menu. This displays the list of how many players are in a mission, what
team they belong to, and the current mission score. Press Tab again to toggle the menu off.
Other options available at this screen are discussed in the Advanced Reference section of the manual.
Exiting The Game
To exit from a game in progress, press the Esc key. This will take you to the GAME SERVER screen,
displaying information about the server you are connected to. To jump back into the game, click on
RETURN TO GAME. To get access to IRC and the Options, press the IRC/CHAT or OPTIONS button
in the upper left-hand corner of the screen. To leave the game, click on DISCONNECT.
34 35
Page 19

P l ay er B a s i c s P l a y e r Ba s ic s
Player Basics
The player has a 360-degree range of motion and is capable of running, crouching (light armor only),
jumping, sidestepping, and a host of other actions.
W = Move Forward X = Crouch
S = Move Backward Num. Pad 6 = Turn Right
A = Sidestep Left Num. Pad 4 = Turn Left
D = Sidestep Right Num. Pad 8 = Look Up
Space = Jump Num. Pad 2 = Look Down
Num. Pad 5 = Center
Toggling Between First- and Third-Person Views The player can be seen from either a first- or third-
person viewpoint, depending upon your preferences. To switch, press R. Using the third person may aid you
in navigating tight spaces, while first person is ideally suited to close-quarters combat.
Armor Each player comes with powered armor, providing defense from opponents’ weaponry (discussed
on page 41). All armors come with a standard self-recharging energy cell, which is also used to power
other items.
Armor Jets Each player’s armor is equipped with armor jets, enabling them to fly for short distances. The
jets feed off the armor’s energy cell. The longer the jets are used, the more power they drain, until the cell
is out of energy, at which point the player must wait for them to recharge. Running out of energy at high
altitudes can lead to a rough landing (and sometimes death). To activate the jets, press Mouse Button 2.
Packs The player has access to packs designed either to augment the battle armor or to be deployed across
the battlefield. See page 44 for more information about specific packs. Press the P key to use or deploy a
pack, CONTROL-P to drop a pack.
Inventory Items Inventory items can augment armor or can be dropped or thrown to produce other
effects. These can be bought or sold at inventory stations in designated areas in the missions.
Image Enhancer Another feature of battle-armor is the built-in image enhancer. This feature provides a
field of vision zoom that can be toggled to 2x, 5x, 10x, or 20x normal vision - a versatile feature when used
with certain weapons. Press E to activate the image enhancer. Press Z to toggle magnification levels.
In-Game Chat Players can send messages to one another using the chat window (see HUD on following
page). There are two types of messaging available to players: team chat and global chat. Press Y to send a
Team Chat message. Press T to send a Global Chat message.
There is also a built-in menu of voice/animations that can be accessed by pressing V, then pressing the keys
of the appropriate selection you want to play. This menu will appear underneath the chat window in the
center of the screen. Press the Esc key to close this menu.
Personal Digital Assistant At any time, you can press C to toggle a top-down map view, or “commander
view,” press I to toggle your inventory or press O to toggle your current mission objectives using your
Personal Digital Assistant (PDA). These are discussed in further detail on page 53.
Weapon Selection Press the 1 through 9 keys to choose from available weapons. To fire, press Mouse
Button 1. Press Control-W to drop the currently selected weapon. To cycle to the previous weapon in your
inventory, press Q. To cycle to the next weapon in your inventory, press SHIFT-Q.
36 37
Commands In multiplayer games, you may receive commands from player or players you have selected as
commanders. In response, the command can either be acknowledged, completed, or declined. Press
Control-X to acknowledge the command, Control-C to indicate completion, or Control-D to decline the
command.
Page 20

H U D H U D
Heads-Up Display (HUD)
1. Armor Level Meter Displays the current status of your armor. The bar will change from green to red
once it dips below 25%. Once the armor falls to zero, your player dies. Armor can be repaired with the use
of a repair pack or kit (see page 45 for more information on repair packs).
3.
2. Energy Level Meter Measures the amount of
power presently stored in the armor’s energy cell.
If your energy level is at zero, items requiring
energy from the cell, as well as your armor jets,
will not function.
3. Compass and Waypoint Indicator
The compass is used to orient a player as well
as navigate to waypoints. A waypoint will appear
on the compass as a green triangle, with the
distance to the waypoint displayed in meters in
the center of the compass (see Section 6 for more
information on setting waypoints). A red line also
denotes which direction due north lies.
4. Weapons/Pack Bar Displays the type of
weapons, ammunition and pack
currently carried by the player.
5. Center Crosshair The center crosshair
is always found at the center of the screen,
used to targeting opponents.
6. Targeting Indicator A targeting indicator forms on your
HUD when one or more of your teammates is using the target-
ing laser or has deployed a targeting beacon. Each targeting item
will create a targeting indicator so it is possible to see more
2.
4.
6.
1.
5.
7.
10.
8.
9.
than one on your screen at the same time. If you are currently in range of the target with your selected
weapon, a targeting icon will appear on your HUD in light blue. If you are out of range of the painted
target, the icon will appear dark green.
If you are in range of the target and have selected the heavy mortar or grenade launcher, a vertical line will
extend upwards from the target point with two light blue triangles. The two triangles indicate where you
must aim to hit the target with either a low or high trajectory. Line up your crosshair with the lower point of
the triangle for maximum accuracy with minimum flight time.
7. Chat Window The chat window displays system messages, score updates, and messages being sent from
one player to a team or the entire server. System messages are in white, team chat messages are in green,
global chat messages are in yellow. The window will also display the last command given to a player. If the
command is acknowledged, the message is in green. If the command is has not yet been acknowledged, the
message is in red. You can toggle the size of the chat window by pressing U. See Personal Digital Assistant
on page 53 for more information.
8. Mission Timer The Mission Timer counts down to the end of the mission. If there is no time limit, the
timer will display the time elapsed since the mission started.
9. Sensor Indicator The indicator will flash red whenever your player is being scanned by enemy pulse
sensors, yellow when you are being jammed, and green you are not being scanned or jammed. See Sensors
and the Sensor Network on page 51 for more information.
10. Sensor Network Icons Every enemy player detected by your sensor network will have a red triangle
above his or her position when seen in your HUD view. Your teammates are seen with a green triangle
above their position. The player’s name and health status is also displayed when that player is at close range
under your center crosshair.
38 39
Page 21

A r m o r
A r m o r
HUD Component Configuration The various HUD components may be repositioned
on the screen or turned off entirely.
Press K to toggle the HUD menu. HUD items that are active will be checked in the box
to the left of the name. Click on the check box to toggle these items on and off.
You may also move HUD items around the screen in this mode. To do so, click on each
item and drag it to where you want it placed on the screen. Any changes you make will save and automatically restore the next time you play.
Network Lag Icon This will flash when you are experiencing “lag.” See PING and Lag. If your
connection to the server is lost, this icon will appear permanently on the screen. If the connection
is not restored, the Server Connection Lost dialog box will appear. Click on OK to return to the JOIN
SERVER screen.
Armor Descriptions
When it became apparent that the maintenance of a Herc would be prohibitive far from the confines of
the Human Empire, the tribes adapted and began wearing powered armors for combat. Armor augments
the strength and carrying capacity of the player, with heavier armors providing greater strength and
protection at the cost of agility.
There are three classes of armors worn by the tribes. Both male and female armors are available in light and
medium configurations, but heavy armor is unisex.
Light Armor
Speed: Fast Protection: Low
Weight: Light Max. Weapon Load: 3
Classified as light armor, Peltast offers the least resistance to weapon fire but gives the
wearer almost unrestricted mobility and freedom of motion. The armor jets on this
armor allow the wearer to traverse large distances in a single burst.
Medium Armor
Speed: Medium Protection: Moderate
Weight: Medium Max. Weapon Load: 4
Not quite light, not quite heavy, Hoplite falls in between the two extremes. While it
offers far more protection from weapon fire than Peltast, it does not have the jump
range the lighter armor offers.
Heavy Armor
Speed: Slow Protection: High
Weight: Heavy Max. Weapon Load: 4
The wearer of Myrmidon armor is essentially a miniature Herc, capable of taking
tremendous amounts of punishment. Conversely, this armor is extremely slow
and its armor jets will get it only a few meters off of the ground.
Armors can only be purchased at inventory stations at a cost of team energy, depending upon the armor.
Medium and heavy armors are more expensive than light armors.
40 41
Weapon Descriptions
Many tribal weapons are centuries old; others are recent Imperial inventions that have made their way into the
Tribes’ arsenals. A large and varied choice of weaponry is available to the average tribesman.
Page 22

We a p o n s We a p o n s
Blaster It is said that tribal children learn how to use this weapon before they learn
how to walk. A simple low-tech pulsed energy pistol, the Blaster is linked to the
player’s energy cell, providing limitless ammunition. To use, press 1.
Plasma Gun A relic of the old Imperial armies, this weapon
has found new life with the tribes thanks to the Forge of
Hephaestus tribe, long renowned for their skills as the armorers
and weaponsmiths of all the tribes. Spitting out superheated balls of plasma, the “plas-
cannon” is capable of immolating a target in one shot. A versatile weapon, it is useful
at both close and medium range, as well as either indoors or outdoors. To use, press 2.
Chaingun The originators of the chaingun, or “minigun,” are lost to history, but it has
been in use by the tribes for over 300 years. A simple low-tech weapon that churns out
explosive flechettes, the Rolling Thunder, as the Starwolf like to call this gun, can chew
up a target at short range extremely quickly. Outside of that, however, the weapon loses
much of its effectiveness. To use, press 3.
Disk Launcher Another invention from the Forge of
Hephaestus, the disk launcher uses existing mag-lev technology to create a fearsome
magnetic cannon, colloquially referred to as the “disker.” Spinning up a magnetic
“spinfusor” disk, the launcher can then fire it at extremely long distances. Few weapons
can match the Stormhammer, as many tribes refer to it, for the amount of
destruction it can deal. To use, press 4.
Grenade Launcher The Crader-Dudek 62mm grenade launcher is another Imperial weapon
that rapidly found its way into tribal arsenals. Essentially a mid-range weapon, the launcher
spews smoke trails from its projectiles that are often the last thing an enemy tribesman ever sees.
It is also very effective at extricating an enemy from a well-fortified position. To use, press 5.
Laser Rifle (light armor only) An invention of the Diamond Sword tribe, the
Artemis, or “longrifle,” named for the Greek goddess of archery, is most often used by
them. A deadly long-range weapon that, like the pulse gun, feeds off an armor’s energy
supply, the Artemis can pierce the hardest armor from kilometers away. Keyed to an
image enhancer, a sniper can take out an enemy from relative safety from some distance.
The amount of damage dealt out is proportional to the amount of stored energy in the
armor’s power cell. The more energy discharged with the shot, the more damage is dealt
to the target. A complex and delicate weapon, it can be used only by a tribesman in
Peltast light armor. To use, press 6.
Electron Flux Gun The Electronic Flux Gun, or ELF is a short-range energy-based
weapon. While it deals little actual damage, it rapidly drains a target’s energy supply,
making energy based weaponry and equipment useless. To use, press 7..
Heavy Mortar (heavy armor only) Capable of lobbing
highly explosive shells over long distances, nothing else used by the
tribes can match its destructive capabilities. Because of its extreme
weight, only Myrmidon armor is capable of using it. This weapon is
especially useful when aimed with the aid of a targeting laser. Using this weapon in an
enclosed setting, however, is not advised. To use, press 8.
Targeting Laser Technically not a weapon, this simple rangefinder
has been modified into the Delphi targeting laser. The user of this device can “paint” a
target for a teammate with another weapon, such as the Heavy Mortar. allowing for exact
targeting. To activate press 9.
Mines A tribesman may carry up to three antipersonnel mines. Once deployed, mines
will burrow into the ground and will explode when any warrior, friend or foe, comes
42 43
Page 23

P a c k s P a c k s
within their detection range. To deploy a mine, press M. The longer you hold the key, the farther from the
player the mine will deploy.
Grenades A thrown grenade lacks the range of a grenade fired from the launcher, but does give the user
more accuracy against nearby targets. Light armor can carry up to five grenades, medium up to six, and
heavy can carry eight. To throw a grenade, press G. The longer you hold the key, the farther from the player
the grenade will be thrown.
Packs
There are two types of packs available, permanent and deployable. Some require energy from the armor’s
power cell to function.
Permanent These packs are carried by tribesmen to augment their armor. Each pack has special abilities
that can aid mobility, defenses, or ammo storage.
Ammo Increases the maximum ammo the armor can hold. This pack does not
require any energy from the power cell to operate. If this pack is dropped, all extra
ammo beyond what the armor will carry is left in the dropped pack.
Energy Increases the recharge rate of the armor power cell. This
miniature fusion pack is especially useful when combined with an
energy based weapon, like the laser rifle. It is also well suited to aid
the lighter armor types in speedy escapes.
Shield Requires energy from the armor’s power cell. To activate,
press P. The shield pack creates an auxiliary energy shield around the
user as long as the power cell has energy. While the pack is operating the shield will
absorb some, if not all, damage directed toward the player. The pack can be deactivated by pressing P.
It will automatically deactivate once the power cell runs out of energy.
Jammer Requires energy from the armor’s power cell. To activate, press P. The jammer
pack will make the user and any other players within 20 meters undetectable to enemy
pulse sensors. The pack can be deactivated by pressing P. It will deactivate
automatically once the power cell runs out.
Repair A battlefield repair kit, this pack comes with what is colloquially referred to as
the “repair gun.” Using exotic nanotechnology, it can repair armor, vehicles, and base
emplacements such as turrets and generators.
To use this item, press P. The repair gun will now be available in the player’s hand. Aim
the repair gun at a damaged teammate or equipment and “fire” it. The gun has a very
short range; you must be within three meters of the target to repair it. If there are no
targets within range, it will repair any damage you have taken. It will deactivate automatically once the power
cell runs out of energy.
Deployable To deploy a pack, press P. You must be looking directly at the deploy point and be in range,
or else you will get a “cannot deploy, out of range” prompt. If you try and place a pack at your feet or too
close to a wall or other object, you will get an “item in way, cannot deploy” prompt.
With the exception of the camera pack, deployable packs cannot be placed on overly steep surfaces. All
deployable packs come with their own internal power supply and do not require genera-
tor power to work (see Generators).
Remote Pulse Sensor The small Argus pulse sensor works along the same lines as its
larger counterpart (see Sensors and The Sensor Network on page 51). The deployable
44 45
Page 24

P a c k s Ve h i c l e s
pulse sensor enables the user’s team to increase the range of its sensor network.
Remote Motion Sensor The Cerberus motion detector is small and unobtrusive,
often missed by an enemy rushing into battle—often a fatal mistake. The motion sensor
will detect enemy movement along. Non-moving items will NOT be detected by the
motion sensor. Unlike its pulse sensor brethren, it cannot be jammed.
Remote Jammer The Buzzbox pack creates a
short-ranged jamming “umbrella” making any tribesman within
it’s field effectively invisible to pulse sensors.
Remote Turret The Claptrap miniature turret is a nasty and
unexpected surprise for many an enemy. Firing energy bolts and
equipped with a built-in motion sensor, it’s small size makes it
ideal for placement indoors, in caves, and in other hard to reach places, or large numbers may be used to create an effective defensive perimeter. There are, however, limitations on the number that can be placed in one area. Because of the weight of the turret,
only the medium and heavy armors can bear the weight; light-armored individuals cannot purchase the turret pack from the inventory stations. Like the larger permanent turrets, remote turrets
may be controlled via the PDA (see Personal Digital Assistant on page 53 for more information about controlling turrets).
Remote Inventory and Ammo Stations These deployable
stations provide ammunition and supplies away from a player’s base.
They can only be carried by a tribesman in medium or heavy armor
and have a limited energy supply. See Stations on page 50 for further
information.
Miscellaneous Inventory Items
Repair Patch A one-shot fix, the repair patch restores a percentage of your armor.
To use, simply run into one. These are found primarily in deathmatch-style missions.
Repair Kit Larger but more effective, the repair kit
restores a percentage of your armor. It can be stored in your
personal inventory for future use. Only one may be carried
at a time. To use, press H.
Target Beacons These small items function similarly to the target-
ing laser. Deploy one and it creates a target for your entire team (see Targeting Laser on
page 43). They are ideal for placing at an enemy base for multiple heavy mortars to aim
at. Just be sure to get out of the way before the shells come flying in! Up to three beacons may be carried at any one time. To deploy, press B.
Remote Camera The Scryer miniature camera that can be positioned most anywhere
and can be accessed with the PDA. Properly placed, the viewer is just like a “fly on the
wall” when observing enemy activities. Unlike its counterparts, it can be placed on any
surface.
46 47
Vehicles
Controlling Vehicles To pilot a vehicle, jump into it. To get out, press the Jump key. Only a player in
light armor can pilot. With vehicles that hold multiple players, the first player in light armor to jump aboard
becomes the pilot. Vehicles are not team-specific; it is possible (and often desirable) to steal an enemy’s
vehicles, since there is only a limited number that can be purchased in a mission by each team.
Page 25

Ve h i c l e s a n d Tu r re t s Tu r r e t s an d G e n e r a t o r s
All vehicles use the same movement keys as the player. All vehicles have vertical takeoff and landing (VTOL)
capabilities. Pressing the jetpack key will cause the vehicles to move vertically if you are not pressing any other
movement keys.
Scout Flyer The Gyrfalcon one-man flyer is an invaluable advance reconnaissance
vehicle, highly maneuverable, and armed with rockets. While very fast, it has a low
ceiling and is extremely vulnerable to ground fire.
Light Personnel Carrier (LPC) The Wyvern
Light Personnel Carrier can carry up to two players in addi-
tion to a pilot. Tribesmen being carried in the LPC can fire
from their position. Functions similarly to the Gyrfalcon, but
is slower and less maneuverable.
Heavy Personnel Carrier (HPC) The Dragon Heavy
Personnel Carrier holds up to four players in addition to a
pilot. Being able to hold this many players, it also functions as a floating gunship,
raining death and destruction upon an enemy position. It is, however, far slower and
less maneuverable than the smaller Wyvern.
Turrets
Turrets form the primary defensive fortifications for your base. While
they are designed to operate automatically, a tribesman using a command
station can take command of one using his or her PDA.
All turrets, with the exception of the Sentinel, come with a built-in pulse
sensor to detect incoming enemies. They are also tied to the sensor net-
work that surrounds a base. Anything they can detect is passed on to the
sensor network, just like a pulse sensor. This does, however, make them vulnerable to jamming.
All turrets require energy that is provided by the base’s generators. If these generators are disabled or
destroyed, the turrets will become inactive until power is restored.
Fusion Turret The Hellfire fires energy bolts. It is deadly at
both short and long range.
ELF Turret The Scorpion has a built-in Electron
Flux Gun. It drains less power but deals more damage
than the handheld version.
Mini-Fusion Turret The small Sentinel turret, found primarily
indoors, fires pulsed energy bolts. Unlike its larger brethren, it uses a motion sensor
instead of a pulse sensor, making it impossible to jam. Clever tribesmen will find that it
may be possible to “sneak” past an Sentinel.
Missile Turret The Diogenes fires energy-seeking
missiles from great distances. Vehicles and players using armor jets, having high energy
signatures, often fall victim to this turret.
Mortar Turret Using the same mortar available to heavy armor,
the Wrath is unmatched for destructive capabilities. Like the
missile turret, the use of a targeting laser greatly increases its
accuracy. This turret does not operate automatically like other
turrets; it must be manually controlled via a command station.
48 49
Page 26

S t a t i o n s S e n s o r s an d T he N e t w o r k
Generators
All power for a base — for turrets, stations, doors, etc. — comes from its generators. Without
power, these devices will not function. The larger Solaris and smaller Tokamak are most fre-
quently used. In a well-lit environment, solar panels are also used to produce energy. Enemy
tribes often target generators, so be sure to defend them well. These, like most other objects,
can be repaired with the repair pack.
Stations
Stations are used to obtain equipment, ammunition and control turrets, and are keyed to only one team. An
opposing team cannot use them. If damaged or destroyed, they can be repaired with a repair pack. The inventory and ammo stations are also linked to your team energy reserve. When this has been exhausted, neither station
will work. To use a station, simply walk into one. With the exception of the Ammo station, this will bring up
the appropriate PDA screen. All stations require generator power to function.
Inventory From here, you can “buy” and “sell” equipment and weapons and refit the
player as you want (see Inventory View on page 58).
A remote version of this station also exists that can be deployed out in the battlefield.
It has a limited inventory as compared to the larger version, and a limited energy supply.
Once this supply is exhausted, the station will no longer function. In addition, both the
permanent and remote stations will also repair your armor as long as you are standing
within range.
Ammo This station automatically reloads your ammunition to its maximum, but only
for the weapons you are currently carrying.
Command The command station is used to gain access to remote objects, like turrets.
See Personal Digital Assistant on page 53 for more information.
Vehicle Similar to the ammo and inventory stations, you can purchase vehicles here,
such as the scout flyer and personnel carrier. Once purchased, a vehicle will appear on
the vehicle pad, ready to pilot.
Sensors and The Sensor Network
An invaluable part of any tribe’s defensive fortifications, sensors form the first line of defense against intrusion into their territory. They come in two varieties, pulse and motion. Pulse sensors are based on the same
principle as ancient “radars,” using broad-band EM emissions, and are far more accurate and reliable.
Motion sensors, as the name implies, become active when a moving object is detected. Most bases will have
several permanent sensors in place. Any object or player within range of your sensors will appear on your
PDA’s map view. Detected enemy players also appear on your HUD with red triangles. Like the turrets, all
sensors require energy provided by the base’s generators. The sensor network can also be expanded by
tribesmen placing deployable sensors, turrets and cameras throughout the mission area.
Pulse Sensors The Horus (long range) and Oracle (short range) are found on fixed
surfaces. Pulse sensors are strictly line-of-sight and cannot penetrate terrain features.
They are always active as long as they have power. They can also be jammed.
Cameras Remote cameras also increase the sensor
range. Anything that comes within their field of view is
added to your sensor network. Like all deployable devices,
it has its own internal power supply.
There is also a remote version of this station as well.
50 51
Page 27

E l e v a t o r s an d D o o r s
Image Enhancer Any object detected by any member of your team using their
image enhancer is also added to your sensor network. This can counteract jamming, for example, a turret
that had been nullified by a sensor jammer will fire on a target being spotted by a player with the image
enhancer.
Jammers Jamming devices can nullify pulse sensors. Motion sensors, cameras and image enhancers,
however, vannot be jammed (see Remote Jammer on page 48).
Elevators and Doors
Elevators and doors are proximity-activated, moving when a player approaches or touches them. Some
however, may be team-coded, and will only function for members of that team. If a base’s generators are
destroyed, all doors open and elevators return to their starting position as a safety feature.
Miscellaneous Objects
Missions are populated with many different types of static objects that can be shot and destroyed but otherwise serve little or no tactical importance. Some objects that are either lit or animated, such as antennae,
will only animate if they are powered (see Generators on page 49).
Every armor comes equipped with a Personal Digital
Assistant, or PDA. The PDA provides the player with a
top-down view of the mission area referred to as the
“commander view.” Here you can access the inventory
and mission objectives, as well as receiving key tactical
information and giving the player the ability to control
certain objects. At any time, you can click on the close
CLOSE button to return to the normal game view.
Commander View
Press C to activate. You can do this from any game
screen. The commander view can show all of your
teammates, enemy players, objects within sensor range,
and static objects and buildings.
Your player is represented by the green wedge symbol. The wedge points in the direction that you are facing.
If a player has been assigned a waypoint, then a line will extend from that player to the waypoint. If other
players have been assigned waypoints, these lines will appear in the map view as well.
Pan/Zoom/Center To activate the zoom function, click on the ZOOM button on the PDA or press
and hold the Z key. Left-clicking will zoom in, right-clicking will zoom out. To turn off the zoom function,
click on the ZOOM button again or release the Z key. You cannot use the pan feature while in Zoom mode.
To center the map on an object or player, select the object from either the map view or the object list, then
click on the CENTER button in the lower right-hand corner of P DA. The map will automatically center at
52 53
Page 28

P e r s o n a l Di g it a l A s s i s t a n t S e l e c t Co m ma n d e r
that object or player. If it is a player that is moving, the map will scroll with the player and remain centered on
him or her. Selecting another player or object will center the map on that player or object. Clicking on the
CENTER button again or clicking on the map will turn off the center mode.
Selecting Items To select an item from the commander view, left-click on it or create a bounding box around
it by clicking and dragging the left mouse button. You can also select an item by highlighting it in the object list
on the right side of the PDA. You cannot select items in the map area while in Zoom mode.
Map Overlays
Sensor Circles Click on the SENSOR button to see the ranges of the sensors on the map. Blue circles
show pulse and motion sensors, yellow circles show jammers.
Name Tags Click on the NAMES button to turn the name of static objects (like turrets) on and off.
Map Marker Click on the MARKER button to identify bases and fortifications. These will be marked
by a diamond on the map.
Commander View Lists There are three different map view lists available in the PDA. Select the appropriate
icon in the upper right-hand corner of the screen to view.
Player List Click on the Player icon to display the player list. The name of each player on your team will
be displayed, as well as two icons showing armor and command status.
Toggling the bar underneath the Player Icon will toggle the player display on the commander view on and off.
indicates if the player’s armor has been damaged. A green icon indicates it is in good condition; yellow
indicates it has been damaged; red indicates heavy damage
indicates command status. If it is blank, that player has no current command. Yellow indicates that the player
has been issued a command but has not yet acknowledged it. Once the order has been acknowledged, the icon
turns green. The icon will disappear if the command has been either completed or declined.
Issuing Commands To issue a command, select one or more players from the player list, select a command
from the root menu provided under the player list, and then click on the map at the desired location to assign
a waypoint. The command menu can also be accessed by pressing the key assigned to that command, listed on
the display. To select multiple players, hold the Shift key while selecting. Double-clicking on a commander
will select that player and all players under his or her command.
You can only issue commands to players that have either been placed under your direct command, or if you
are in command of those players’ commander.
Select Commander To select a player as your
commander, select that player’s name and click on
the ADD AS COMMANDER button.
De-select Commander To remove a player as
your commander, click on the REMOVE
COMMANDER button.
Teammate View The actions of another teammate can
be seen through the Teammate View function. Select
your teammate’s name from the list, then click on the
Teammate View button. A small screen will
appear in the lower right hand corner, allowing to you
to view their actions from a first-person viewpoint.
Bars to the right of the screen will show that player’s health and energy status.
54 55
Page 29

C o n t r o l l a b l e Ob je c t s M i s s i o n Ob j ec t i v e V i e w
Due to the limitations of this device, the transmission may be somewhat jerky and not updated on a regular basis.
To turn the Teammate View function off, click on the Teammate View button again.
Controllable Objects List Click on the
Controllable Objects icon to display the controllable
objects list. The name of each controllable object
belonging to your team in the mission will be displayed.
Each item in this list can be controlled by any team
member using a command station.
Toggling the bar underneath the controllable objects
list will toggle the display of controllable objects on
the map view.
To take command of a turret or camera, click on it,
either from the list or the map view, then click on the
Control Object button. Double-clicking on the stat
from the list will perform the same operation. You
will then be taken to the turret’s-eye view. While in control of the turret, the look keys will be identical to
your player’s setup. To fire, press the fire key.. To abandon control, press C or the jump key.
Next to each item on the list are two icons, representing damage state and power/activity.
indicates if the damage status. A green icon indicates it is in good condition; yellow indicates it has been
damaged; red indicates destroyed.
indicates if the object is powered and is active. If the object has power, the icon will be green. If the icon
has a solid center, then the device is active. If the icon is
dark green, it is not powered and is not active.
Static Objects Click on the Static Objects icon to
display the static objects list; generators, pulse sensors,
stations, etc.
Toggling the bar underneath the Static Objects menu will
toggle the display of all static objects on the map view.
Next to each item on the list are two icons, representing
damage state and power/activity.
indicates the damage state. A green icon indicates
it is in good condition; yellow indicates it has been
damaged; red indicates destroyed.
indicates if the object is powered and is active. If the
object has power and is active, the icon will be green. If
the icon is dark green, it is not powered and is not active.
Missions Objective View From the PDA, click on the
OBJECTIVE button or press O from any game
screen to view. This will display the current score, mission
status, and the objective or objectives of the mission.
The mission objective list will update in real time over
the course of the mission.
56
57
Page 30

I n v e n t o r y V i e w
Inventory View From the PDA, click on the
INVENTORY button or press I from any
game screen to view the player’s current inventory
and items available for purchase if the player is at an
inventory station. The current available team energy
is also displayed.
The list on the left displays your current inventory,
the list on the right displays the items you can buy
when at an inventory station. To “sell” an item, click
on it from the list on the left and press SELL. To buy
an item, click on the list on the right and press BUY.
Items can also be bought or sold by double-clicking
on them.
You can create up to five sets of “favorites.” Select a number (1-5) and then click on MARK AS
FAVORITES. This will mark all your current inventory items as “favorites” in the selected set. When you
are at an inventory station, select a set you want to purchase and click on the BUY FAVORITES button, all
your “favorites” are automatically purchased. This greatly decreases the time to refit your player and get back
on the battlefield. You may get one of many error messages when attempting to purchase items, due to
weight restrictions of armor, number of weapon slots, or lack of team energy. These messages will appear
in the chat window.
If you select an item from your inventory and click on DROP, it will drop that inventory item to the ground.
If you select and item and click on USE, you will automatically use that item, such as a health pack.
The objectives for all missions are displayed on the Mission Objectives Screen and are updated as the mission
progresses, such as the number of times your flag has been captured.
Capture the Flag
A capture the flag, or C TF, mission consists of two or more teams. Each team has a base to which they are
trying to bring back an enemy flag to “score.” The basic form involves penetrating an enemy base, taking
their flag, and touching it to your flag while it is at your base. You get extra points for defending your flag
and protecting your flag carrier. At the end of the mission, the team with the most captures wins.
Capture and Hold
Capture and hold missions are about controlling locations. Points are awarded for capturing locations as
well as holding them for periods of time. Each location has a switch that must be touched to bring it under
that team’s control. Once the location is under that team’s control, any objects associated with that locations, such as sensors, turrets, stations, etc., go under that team’s control. The team with the most points
wins the mission.
Defend and Destroy
The objectives of “D&D” missions are fairly straightforward. Protect your base from enemy attack and
destroy the enemy’s base. A base will be considered “destroyed” when all of the “goal” items have been taken
out. Goal items can be identified on the Mission Objectives Screen.
Find and Retrieve
There are X number of items scattered throughout a mission. Your team must find these items and bring
58 59
Page 31

M i s s i o n Ty p e s
them back to your base to place them on their pedestals. Once your team captures all the items, you win
the mission. Items can also be captured from your enemy’s base. If no team has captured all the Items by
the time the time limit is reached, the team with the most items in their base wins.
Deathmatch
There are two flavors of deathmatch; single-player and team. In single-player, it’s every player for
himself (or herself), and whoever has the most kills at the end of the mission wins. In team deathmatch,
you get a point for killing an enemy player and lose a point for killing a teammate. Whichever team has the
most kills at the end of the mission wins.
Server Menu Options
Press the Tab key to bring up the Server Menu Options during the game. To return to the game, press Tab again.
Information displayed in the left list shows the current team score of the mission, the current players in the
mission, and their current scores. This information is updated in real time. The menu on the right of the screen
provides access to mission and player functions. These menus are accessed by pressing the appropriate key in
front of the function name.
60
Training
The training missions are single-player exercises designed to acclimate new players to the features of TRIBES.
Missions vary from simple player movement to multiple objective missions.
The menu system is configurable and may vary from server to server. It allows players to change teams, choose
administrators, kick or mute players and change missions. To perform operations on a player, that player must
be selected from the player list. Information entered about the selected player, such as tribe affiliation and their
actual name, will be displayed on screen.
Voting Kicking players, changing missions or choosing an administrator requires a vote of all players in the
mission. Once a vote is called, a message will appear in the chat box. To respond, press Tab, then choose the
appropriate response from the menu. Server operators can determine what qualifies as a passing vote. Players
not voting are counted as a “no.”
Administrator An administrator has supreme power over a mission and can kick players, reassign teams
and change missions without calling for a vote.
Muting Once a player has been muted, you will no longer receive messages or commands from that
player. Players can be unmuted at any time.
61
Page 32

H o s t i n g a G a m e I R C
Hosting a Game
Hosting a game will start a TRIBES server on your computer that other players can join.
Note: If you are hosting a game and you quit from the game, all of the other players will be disconnected
automatically.
To host a multiplayer game, go to the CHOOSE GAME
TYPE screen. Select HOST MULTIPLAYER from the
CHOOSE GAME TYPE menu. Click on the NEXT
button to proceed to the CREATE SERVER screen.
In order to run a server across the Internet, you must be
connected to the Internet via an ISP. Your computer will
become a server, registered with the Dynamix
Master Server, that other players can join. Please note
that a high-speed Internet connection is required for
adequate game play. We recommend an ISDN
connection or better.
Configure your server and fill in information you want
displayed about your server that will be seen by other
players who are looking for a game.
Server Name: The name of your server. When other players are looking for games to join, this name will
appear in the Server Name column on their JOIN SERVER screen.
Max. Players: The maximum number of players you will allow onto your server.
Password: You can require a password to connect to your server. This is useful in limiting access to your server.
Record Demo: Check this box if you want to record a demo as you play.
Mission Type: Select a type of mission (CTF, Deathmatch, etc.) from the pull-down menu. The type of
mission that is selected controls what missions are displayed in the Mission list.
Mission: Select a mission from the list to be run. The screen below will display a brief description of the
mission and objectives.
Press HOST GAME to start the game. You will be playing as well as hosting, and you automatically become
an administrator.
IRC
What is IRC? Internet Relay Chat, or IRC, is an Internet chat standard integrated into the game. You can
connect to the Dynamix IRC chat server on the Internet and talk to other players. Using IRC, players can find
teams to play on, issue challenges or just share past battle stories with their tribemates. It is also a good place
for new players to learn strategies from seasoned players.
IRC Login TRIBES uses the Dynamix IRC server as its
default. You may change this to a different server if you
desire. If you wish to join a server that is not listed in
the IRC server list box; you can add it by going to the
IRC/CHAT page on the Options screen.
IRC Server: This list box will contain the default
Dynamix chat server as well as any servers that you add.
Nickname: This is the name that you will use during
your chat session. Note: Some characters are not supported by IRC and may not appear on your screen. IRC
servers require that a nickname be unique. You may be
prompted to change your nickname if another player is
using your selection.
62 63
Page 33

I R C I R C
Once you have chosen a server and a nickname, click on the CONNECT TO IRC button.
Chatting in IRC
Once you have logged into IRC, you will automatically
enter the TRIBES chat room on IRC. All IRC chat
occurs in “rooms.” You can be in several rooms at
once, but only one room is displayed at a time. The
title and current topic of the room will be displayed
underneath the room scroll bar.
If you are in multiple rooms, these rooms will be displayed across the top of the screen on the room scroll
bar. You can switch from room to room by clicking
on the room you wish to enter. If you are
connected to more than five rooms, an arrow will
appear to the left and/or right edge of the bar, enabling
you to scroll through the rooms. If a room
off-screen has unread messages, the arrow or arrows will blink.
You will always belong one room, the special “status” room that is used to display system status and error mes-
sages sent by the I RC server. The current room will be highlighted along the room scroll bar. If any room has
unread messages, it will blink in the scroll bar.
To post a message into the currently active room, type it into the chat message entry box at the bottom of
the screen and press Enter.
The list on the right displays all the current players in the room. Those with the crown icon next to their
name are room operators. Those with balloons icons are room moderators. Those with the eye
icons are room observers. If the user is away, the door icon will be next to their name. More information
is available at our website.
Disconnecting from IRC To disconnect from IRC, press IRC DISCONNECT from the IRC CHAT
screen.
Special IRC Commands There are several special IRC commands that allow you to perform certain
functions that can be typed into the chat message entry box. More information is available at the Starsiege
TRIBES website as well as links to other pages describing I RC in more detail.
Options
To modify the game to your preferred settings, press the OPTIONS button to go to the OPTIONS main
screen. At any time, you can switch between back to the PLAY or CHAT menu screens by selecting one or
the other from the upper left portion of the screen.
Select an option from the menu on the left to select an Option page. Any changes you make to an Option
page will automatically save when you leave that page.
To join a new room, click on the JOIN button and either select a room from the list box or type in the name
of the room you want to join in the dialog box that will pop up. If the room you want to join does not exist,
it will be created automatically. To exit a room, select the room to exit and click on the LEAVE button.
64 65
If you make changes that you do not wish to keep, press the CANCEL button before leaving the page.
Page 34

O p t i o n s - M o v e m e n t O p t i o n s - G e n e ra l
Controls These screens allow you to customize the
game controls.
Movement You can modify how you want the keyboard
set for player movement here using the menus provided.
Forward: Player moves forward.
Backward: Player moves backward.
Turn Left: Rotates the player left.
Turn Right: Rotates the player right.
Step Left: Player steps left.
Step Right: Player steps right.
Jetpack: Turns on the jet thrusters in the current
movement direction, straight up if no direction is chosen.
Jump: Player jumps.
Crouch: Player crouches.
Look Up: Rotates the player view upward.
Look Center: Centers the player view.
Look Down: Rotates the player view downward.
Free Look: When free look is off, the looking direction will automatically center at horizontal when a look
key is not depressed.
Free Look Checkbox: When checked, mouse free look is always active and view is not centered automatically.
Flip Mouse Horizontal: Flips the horizontal controls for mouse free look.
Flip Mouse Vertical: Flips the vertical controls for mouse free look.
Mouse Sensitivity: Adjusts the sensitivity of mouse controls.
Click on CANCEL to undo any changes you have made. To revert to the default settings, click on DEFAULT.
All settings automatically save once you leave the page.
General You can modify what keys are bound to
general game functions at this screen.
Chat Menu: Brings up the chat menu on the
screen.
Toggle Message Size: Toggles the size of the chat
window.
HUD Config: Brings up the HUD menu.
Game Chat: Sends a message to all players.
Team Chat: Sends a message to players on your
team only.
Score List: Brings up the current score and server
menu.
Commander: Brings up the top-down map view.
Objective: Brings up the Objective screen.
Inventory: Brings up the Inventory screen.
Cmd. Ack: Acknowledges a command.
Cmd. Unable: Informs the commander that you are unable to comply.
Cmd. Complete: Informs the commander that you have completed a command.
Zoom: Activates the zoom function.
Zoom Range: Toggles the degree of zoom.
Player View: Returns to player view from other screens.
1st/3rd Toggle: Toggles between first- and third-person viewpoints.
Click on CANCEL to undo any changes you have made. To revert to the default settings, click on DEFAULT.
All settings automatically save once you leave the page.
66 67
Page 35

Op ti o n s - I n v en t o r y O p t i o n s - V i d e o
Inventory You can modify how you want the
keyboard set for weapon and inventory selection here.
Weapons: Blaster, Plasma Gun, Chaingun, Disk
Launcher, Gren. Launcher, Laser Rifle, ELF Gun,
Mortar, Targeting Laser: Selects that weapon from
your inventory.
Fire Weapon: Fires currently selected weapon.
Prev. Weapon:Cycles to the previous weapon in
your inventory.
Next Weapon: Cycles to the next weapon in your
inventory.
Deploy Mine: Deploys a mine.
Throw Grenade: Throws a grenade.
Deploy Beacon: Deploys a beacon.
Use Pack: Activates or deploys the current pack carried by the player.
Use Repair Kit: Uses an armor repair kit.
Drop Weapon: Drops currently selected weapon.
Drop Ammo: Drops ammo for currently selected weapon.
Drop Pack: Drops currently carried backpack.
Click on CANCEL to undo any changes you have made. To revert to the default settings, click on DEFAULT.
All settings automatically save once you leave the page.
Video You can modify your video and driver
preferences at this page using the pull-down menus.
Full Screen vs. Window: Selects whether or not to
play the game in full screen mode or in a window.
Windowed Driver: This sets the type of rendering
API used for windowed mode. If you have a
compatible hardware accelerator installed that
supports windowed rendering, then that driver will
automatically be the default. If a windowedcompatible hardware accelerator cannot be found,
then the default will be software.
Full Screen Driver: Selects the type of rendering
API the game will use when in full screen mode.
If you have a compatible hardware accelerator installed,
this will automatically default to hardware mode.
Full Screen Resolution: This sets the screen size for full screen rendering. The default screen resolution is
640x480. The available screen sizes will vary depending on the type of hardware detected in your computer.
Gamma Correction: Adjusts the screen brightness in the game. Note: not all drivers will support this
feature.
Click on APPLY to see the changes made immediately. Otherwise you will not see them until the
game is restarted. Click on CANCEL to cancel all changes made. To revert to the default settings, click
on DEFAULTS.
68 69
Page 36

O p t i o n s - S o u n d O p t i o n s - G r a p h i c s D et ai l
Sound You can modify your sound preferences at
this screen using the slide bars shown.
2D FX Volume: Adjusts the volume of all non-3D
sounds (mouse clicks, voice commands, etc.).
3D FX Volume: Adjusts the volume of all 3D
sounds in the game (explosions, etc.).
Music Volume: Adjusts the volume level of CD
audio.
CD Music: Turns the CD audio track on and off
when playing the game.
Voices: Turns player voices on and off when playing
the game.
3D Sound: Select from software, DirectSound and
Aureal3D as your sound driver. Unless you have an
accelerated sound card, you should not select DirectSound or Aureal3D.
Once you leave the page, all changes you have made will be automatically applied. Click on CANCEL to
cancel any changes you have made. To revert to the default settings, Click on DEFAULTS.
Graphics Detail You can modify the game graph-
ics at this page. Use the slide bars to adjust graphic
quality. You can also select the LOW, MEDIUM or
HIGH buttons to set the graphics to these
pre-selected defaults.
Texture Detail: Adjusts the amount of texture
detail on buildings and terrains.
Terrain Detail: Adjusts the polygon detail of the
terrain.
Lighting Detail: Adjusts light detail of weapon
effects, explosions, etc.
Shadow Detail: Scales the complexity over distance
of shapes, such as players and static objects.
Shape Detail: Scales the complexity over distance
of shapes, such as players and static objects.
Damage Detail: Controls how much damage is shown on all damageable items. The higher the setting,
the more unique damage skins are generated, but more textures are created, possibly slowing down game
performance.
Show Custom Skins: Primarily for deathmatch; turns custom skins designed by players on and off. If off,
the default skin will be used for all players.
Once you leave the page, all changes you have made will be automatically applied. Click on CANCEL to
cancel any changes you have made. To revert to the default settings, click on D EFAULTS.
70 71
Page 37

O p t i o n s - N e t w o r k i n g O p t i o n s - I R C C ha t
Network You can adjust the network settings using
the menus provided on this page.
Port Number: The port that your computer uses for sending and
receiving packets from other players. The default setting is 26000.
Packet Size: Sets the size of the packets sent to and from the
server. The default setting for packet size is
200 bytes. We recommend you use the T1, ISDN or modem
defaults that best fit your Internet connection.
Packet Rate: Sets the rate that packets are sent to and from the
server. We recommend you use the T1, ISDN or modem
defaults that best fit your Internet connection.
T1+ : Sets the networking defaults to levels that work well for
T1 or better connections.
ISDN : Sets the networking defaults to levels that work well for I SDN performance levels (cable modems and
ADSL connections).
Modem : Sets the networking defaults to values that work well over a 28.8 - 56k modem.
Register With Master Server: If this box is not checked, it will not be registered with the Dynamix Master
Server and will not be displayed on anybody’s server list. If the box is checked, it will be registered and will be
seen on all server lists.
Automatically Refresh Server List : If checked, the first time you enter the Join Server screen the server list
will automatically refresh.
Master Server List: Select your master server. When joining a game, this is the master server that will be
queried for the list of all active games. When hosting a public game, your game will be registered on this master
server. The Dynamix master server is the default.
Once you leave the page, all changes you have made will be automatically applied. Click on CANCEL to cancel
any changes you have made. Visit the Starsiege TRIBES website for further information about adjusting network
settings for multiplayer play.
IRC Chat You can modify your chat options at this
page and add new IRC servers to your list.
Connect on Startup: When this box is checked,
each time you start the game you will automatically
connect to the last chat server that you used.
Send Server IP on Join Game: When you join a
game server and this box is checked, all of the people
in the current chat room will get a message saying
what server you just joined. This is useful for
directing your tribemates and friends to a game.
Disconnect on Join Game: Will log you out of the
chat server when you join a game server. This is
particularly useful for modem players, as it reduces
the amount of data sent to your computer.
Capture Logfile: Writes all text messages to a text file for reviewing later.
Logfile Name: Name of the file that you wish to use for the chat log.
Scroll Back Buffer Size: The number of lines that each room remembers.
At the bottom of the screen, there is an IRC Server pull-down menu that will display all the I RC servers
available for you to join from the IRC Login Screen. You can add or delete servers from the list by clicking
on the ADD or REMOVE buttons. You can also alter the address, port number or default room by clicking
on the field and editing it manually.
Once you leave the page, all changes you have made will be automatically applied. Click on CANCEL to
cancel any changes you have made.
72
73
Page 38

O p t i o n s - F i l t e r s O p t i o n s - C o l u m n s
Join Display These pages are used for customizing the Join Server screen Filters
Filters Filters are used to weed out servers that you
don’t want to see listed in the Join Server list.
Standard usage includes filtering out servers with
pings that are too high, with no players currently
attached, etc. Each filter is a collection of conditions
that are applied to each server; those that do not pass
are not displayed.
You can create a new filter by pressing ADD
FILTER, or removing an existing one by pressing
REMOVE FILTER.
Once you add a filter, you can then add multiple
conditions to the filter that will narrow down the list
of servers. Select the filter to modify from the dropdown menu, then click on the ADD button to add a new condition. A condition dialog box will pop up.
A condition consists of three parts; the column to test, the test to perform (greater than, less than, etc.) and
the value to test against. Click on DONE when finished. To remove a condition, select the condition and
click on REMOVE.
Columns You may adjust the number and order
of columns that appear on the JOIN SERVER
screen. To deactivate a column, click on the Display
column to toggle it to NO. To activate a deactivated
column, click on the Display column to toggle it
to YES.
You can also change the order of the columns by
dragging them to the position that you want. To do
so, click and drag the Name field to the desired
location, then release.
74
These filters will be selectable from the JOIN SERVER screen.
75
Page 39

Product Returns:
Sierra On-Line Returns
4100 West 190th Street
Torrance,CA 90504
NOTE:To replace your disk(s) please send only Disk #1 (or the CD) and copy of your dated
Receipt,if less then 90 days. After 90 days please include a $10 handling fee along with Disk
/ CD #1. For Documentation,please include a $ 5.00 handling fee and a photocopy ONLY of
disk #1. Payment should be made at the time of your request. Sorry,no credit cards.
* Returns to this address valid in North America only.
TECHNICAL SUPPORT
North America
Sierra On-Line offers a 24-hour automated technical support line with recorded answers to the
most frequently asked technical questions.To access this service,call (425) 644-4343,and
follow the recorded instructions to find your specific topic and resolve the issue.If this fails to
solve your problem,you may still write,or fax us with your questions,or contact us via our
Web site.
Sierra On-Line Technical Support
P.O.Box 85006
Bellevue,WA 98015-8506
Main:(425) 644-4343
Monday-Friday,10:00 a.m.- 6:45 p.m. PST
Fax: (425) 644-7697
http://www.sierra.com
support@sierra.com
United Kingdom
Cendant Software International Limited offers a 24-hour Automated Technical Support line with
recorded answers to the most frequently asked technical questions. To access this service,call
(0118) 920-9111,and follow the recorded instructions to find your specific topic and resolve
the issue.If this fails to solve your problem,you may still write,or fax us with your questions,
or contact us via our Internet or CompuServe sites.
Sierra On-Line Fulfillment
4100 West 190th Street
Torrance,CA 90504
Jeff “MotoMan” Tunnell, Executive Producer
Ken “Slime Boy” Embery, Producer
Tim “Slacker” Gift, Director
Mark “Got Milk?” Frohnmayer, Lead Software Engineer
Mark “Coiler” Brenneman, Art Director
Scott “CornBoy!” Youngblood, Lead Designer
Game Programming
Mark “Got Milk?” Frohnmayer, Lead Software Engineer
Tim “Slacker” Gift, Director
Nels “Nailz” Bruckner, Software Engineer
Dave “Symlink” Moore, Software Engineer
Tinman “Thulsa Doom”, Software Engineer
“Missing” Lincoln Hutton, Software Engineer
Robert “Fenrir” Mobbs, Software Engineer
EngineProgramming
Tim “Slacker” Gift, Director
Mark “Got Milk?” Frohnmayer, Lead Software Engineer
Rick “Lurker” Overman, Director, Starsiege
Dave “Symlink” Moore, Software Engineer
Clark “Shark” Fagot, Software Engineer
Brian “Who Does Number 2 Work 4” Lee, Software Engineer
John “ÜberBob” Folliard, Software Engineer
Dave Scott, Software Engineer
Louie McCrady, Software Engineer
Robert “Fenrir” Mobbs, Software Engineer
Art
Mark “Coiler” Brenneman, Art Director
Barry “Boogie Knight” Drew, Lead 3D Artist
Shawn “Cuchulain” Sharp, Conceptual Art Design
Craig “Crusader” Maitlen, Lead 3D Interior Artist
Luis Royo, Illustrator
3D Interiors and Locations
Weston “Phantasm” Tracy, 3D Artist
Tom “Tominator” VanVelkinburgh, 3D Artist
K. Maren “Cavewoman” Wyatt, 3D Artist
Tyrone “Dark Thunder” Woodland, 3D Artist
3D Artists
Ti-Ning Kwa, 3D Artist
Eric “Griffon” Soulvie, 3D Artist
Jade “Arhat Scream” Dhabolt, 3D Artist
Textures and Skins
Weston “Phantasm” Tracy, 3D Artist
Chaiporn Panichrutiwong; Artist
Saritdikhun Somasa; Artist
Barry “Boogie Knight” Drew, Lead 3D Artist
Shayne Herrera; Artist
Mission Design
Scott “CornBoy!” Youngblood, Lead Designer
Mark “Got Milk?” Frohnmayer, Lead Software Engineer
Dave “Diamondback” Meddish, Assistant Game Designer/Writer
Mitch “Skeet” Shaw, Software Engineer & Mission Editing
John “Sne/\ker” Alden, Mission Scripting & Mission Editing
Greg “Jett” Lancaster, Mission Scripting & Mission Editing
Manual
Dave “Diamondback” Meddish, Assistant Game Designer/Writer
Blake “Spiff Cat” Hutchins, Writer
Lynne Ertle, Copyeditor
Jerry Wiant, Manual Layout
WWW
Blake “Kamosa” Carper, Web Support
Quality Assurance
Lloyd “Tank” Madden, Lead Quality Analyst
David “Shaman” Peterson, Lead Quality Analyst
Eric “Trek” Freel, Tester
Parker “Phang” Hylton, Tester
Eddy “Ginsu2000” Manso, Tester
Eric “Lombar” Schwake, Tester
Peter “Fides” Wittig, Tester
Dusty “Headhunter” Wright, Tester
Drew “Mongo” Zilm, Tester
Darion “Gibs Spice” Lowenstein
Marketing
Shannon “She-RA” Bross, Marketing
Jeff “Pilgrim” Hoff, Marketing
Michelle “Legs” Stephens, Marketing
Creative Services
Egil "Red Dobie" Gløersen, Assistant Account Manager
Motion Capture
Troy McFarland, Motion Capture Technical Director
Brian Wright, Motion Capture Editor
Jackie Haley, Motion Capture Editor
Cosmo Hom, Male Talent
Chari Hunter, Female Talent
Voice Talent
Mark Berry
Kiamalise Budak
Jason Cottle
Andromeda Dunker
Craig English
Kit Harris
Jay Hopper
Kate Myre
Matt Reidy
Kelly Wright
United States
U.S.A.Sales Phone:(800) 757-7707
International Sales: (425) 746-5771
Hours:Monday-Saturday 7AM to 11 PM CST,
Sundays 8 AM to 9PM CST
FAX:(402) 393-3224
Sierra Direct
7100 W.Center Rd,STE 301
Omaha,NE 68106
United Kingdom
Cendant Software International Limited
Main:(0118) 920-9111
Monday-Friday,9:00 a.m.- 5:00 p.m.
Fax: (0118) 987-5603
Disk/CD replacements in the U.K.are £6.00,
or £7.00 outside the UK.Add “ATTN.:Returns.”
2 Beacontree Plaza,
Gillette Way,
Reading,Berkshire
RG2 0BS United Kingdom
France
Cendant Software International Limited
Phone:(01) 46-01-46-50
Lundi au Vendredi de 9h ‡ 19h
Fax:(01) 46-30-00-65
Parc Tertiaire de Meudon
Immeuble “Le Newton”
25 rue Jeanne Braconnier
92366 Meudon La ForÍt Cedex
France
Germany
Cendant Software International Limited
Tel:(0) 6103-99-40-40
Montag bis Freitag von 9h - 19Uhr
Fax:(0) 6103-99-40-35
Robert-Bosh-Str.32
D-63303 Dreieich
Germany
On-Line Sales
CompuServe United Kingdom: GO UKSIERRA
CompuServe France: GO FRSIERRA
CompuServe Germany: GO DESIERRA
Internet USA: http://www.sierra.com
Internet United Kingdom: http://www.sierra-online.co.uk
Internet France: http://www.sierra.fr
Internet Germany: http://www.sierra.de
THE SIERRA NO-RISK GUARANTEE
The Promise: We want you to be happy with every Sierra product you
purchase from us.Period.If for any reason you’re unhappy with the
product,return it within 30 days for an exchange or a full refund...EVEN IF
YOU BOUGHT IT RETAIL.(Hardware ordered direct must be returned within
ten days.) Please send back your product,signature required if mailing via
US Postal Service.
The Only Catch:You’ve got to tell us why you don’t like the game.
Otherwise,we’ll never get any better.Send it back to us and we promise
we will make things right.(If you bought it at a retail outlet,please send
your original sales receipt.)
* Returns valid in North America only.
Disk and or Manual Replacement:
76 77
Page 40

Cendant Software
International Limited
2 Beacontree Plaza,
Gillette Way,
Reading,Berkshire
RG2 0BS United Kingdom
Main:(0118) 920-9111
Monday-Friday,9:00 a.m.- 5:00 p.m.
Fax: (0118) 987-5603
http://www.sierra-online.co.uk
France
Cendant Software International Limited
Parc Tertiaire de Meudon
Immeuble “Le Newton”
25 rue Jeanne Braconnier
92366 Meudon La ForÍt Cedex
France
TÈlÈphone:01-46-01-46-50
Lundi au Vendredi de 9h ‡ 19h
Fax:01-46-30-00-65
http://www.sierra.fr
Germany
Cendant Software International Limited
Robert-Bosh-Str.32
D-63303 Dreieich
Deutschland
Tel:(0) 6103-99-40-40
Montag bis Freitag von 9 - 19Uhr
Fax:(0) 6103-99-40-35
Mailbox:(0) 6103-99-40-35
http://www.sierra.de
Spain
Cendant Software International Limited
Avenida de Burgos 9
1∫-OF2
28036 Madrid
Spain
TelÈfono:(01) 383-2623
Lunes a Viernes de 9h30 a 14h y de 15h a 18h30
Fax:(01) 381-2437
Italy
Contattare il vostro distribotore.
Sierra Warranty & Legal Information
You are entitled to use this product for your own use,but may not copy,reproduce,translate,publicly perform,display,or reduce to any electronic medium or machine- readable
form,reproductions of the software or manual to other parties in any way,nor sell,rent or
lease the product to others without prior written permission of Sierra. You may use one
copy of the product on a single computer. YOU MAY NOT NETWORK THE PRODUCT OR
OTHERWISE INSTALL IT OR USE IT ON MORE THAN ONE COMPUTER ATTHE SAME TIME.
UNAUTHORIZED REPRESENTATIONS:SIERRA WARRANTS ONLY THATTHE PROGRAM
WILL PERFORM AS DESCRIBED IN THE USER DOCUMENTATION.NO OTHER ADVERTISING,
DESCRIPTION,OR REPRESENTATION,WHETHER MADE BY A SIERRA DEALER,DISTRIBUTOR,AGENT, OR EMPLOYEE,SHALL BE BINDING UPON SIERRA OR SHALL CHANGE THE
TERMS OF THIS WARRANTY.
IMPLIED WARRANTIES LIMITED:EXCEPT AS STATED ABOVE,SIERRA MAKES NO WARRANTY, EXPRESS OR IMPLIED,REGARDING THIS PRODUCT.SIERRA DISCLAIMS ANY
WARRANTY THATTHE SOFTWARE IS FIT FOR A PARTICULAR PURPOSE,AND ANY
IMPLIED WARRANTY OF MERCHANTABILITY SHALL BE LIMITED TOTHE NINETY (90) DAY
DURATION OF THIS LIMITED EXPRESS WARRANTY AND IS OTHERWISE EXPRESSLYAND
SPECIFICALLY DISCLAIMED. SOME STATES DO NOTALLOW LIMITATIONS ON HOW LONG
AN IMPLIED WARRANTY LASTS,SO THE ABOVE LIMITATION MAY NOTAPPLY TOYOU.
NO CONSEQUENTIAL DAMAGES:SIERRA SHALL NOT BE LIABLE FOR SPECIAL,INCIDENTAL,CONSEQUENTIAL OR OTHER DAMAGES,EVEN IF SIERRA IS ADVISED OF OR AWARE
OF THE POSSIBILITY OF SUCH DAMAGES.THIS MEANS THAT SIERRA SHALL NOT BE
RESPONSIBLE OR LIABLE FOR LOST PROFITS OR REVENUES,OR FOR DAMAGES OR
COSTS INCURRED AS A RESULT OF LOSS OF TIME,DATA OR USE OF THE SOFTWARE,OR
FROM ANY OTHER CAUSE EXCEPT THE ACTUAL COST OF THE PRODUCT.IN NO EVENT
SHALL SIERRA’S LIABILITY EXCEED THE PURCHASE PRICE OF THIS PRODUCT.SOME
STATES DO NOTALLOWTHE EXCLUSION OR LIMITATION OF INCIDENTAL OR CONSEQUENTIAL DAMAGES,SO THE ABOVE LIMITATION OR EXCLUSION MAY NOTAPPLYTOYOU.
This End User License Agreement grants you a limited license to use the Redistributable
Code licensed to Sierra On-Line,Inc.by Microsoft Corporation,Inc.together with Microsoft
operating system products. All intellectual property rights in Microsoft’s Redistributable
Code contained in this product belong exclusively to Microsoft Corporation,Inc.
Copyright (1998 Sierra On-Line,Inc.)
Administrators, 61
Advanced Reference Section, 61
Armor Level Meter, 38
Armors
Light, 41
Medium, 41
Heavy, 41
Auto Team Mode, 35
Blaster, 42
Cameras, 51
Center Crosshair, 38
Chaingun, 42
Chat Window, 39
Choose Game Type screen, 31
Choosing A Team, 35
Commander View, 53
Compass, 38
Competition Mode, 35
Create Server Screen, 62
Custom Scripts, 31
Demos, 29
Demo button, 29
Disk Launcher, 42
Elevators And Doors, 52
ELF Gun, 43
Energy Level Meter, 38
Exiting The Game, 35
Filters, 74
Generators, 49
I n d e x
Grenade Launcher, 42
Grenades, 43
Heads-Up Display, 38
Configuration, 40
Heavy Mortar, 43
Heavy Personnel Carrier, 48
Hosting A Game, 62
Image Enhancer, 37, 51
Installation Instructions, 3
IRC, 63
Chatting in, 64
Disconnecting from, 65
IRC Login screen, 63
Issuing commands, 55
Jammers, 52
Join Server screen, 32
Joining A Multiplayer Game, 32
Lag, 33
Laser Rifle, 42
Light Personnel Carrier, 48
Menu system, 28
Message of the Day, 33
Miscellaneous Inventory Items, 47
Miscellaneous Objects, 53
Mines, 43
Mission Timer, 39
Mission Types, 59
Capture And Hold, 59
Capture The Flag, 59
Deathmatch, 60
Defend And Destroy, 59
Find And Retrieve, 59
Training, 60
Muting Players, 61
Network Lag Icon, 40
Options Screens, 65
Controls
General, 67
Inventory, 68
Movement, 66
Graphics Detail, 71
IRC Chat, 73
Join Server
Columns, 75
Filters, 74
Networking, 72
Sound, 70
Video, 69
Overview, 3
Packs
Deployable, 45
Remote Ammo Station, 47
Remote Camera, 46
Remote Inventory Station, 47
Remote Jammer, 46
Remote Motion Sensor, 46
Remote Pulse Sensor, 45
Remote Turret, 46
78 79
Page 41

I n d e x
Permanent, 44
Ammo, 44
Energy, 44
Jammer, 45
Repair, 45
Shield, 44
Personal Digital Assistant, 53
Center mode, 53
Commander View, 53
De-selecting A Commander, 55
Issuing Commands, 55
Player List, 54
Selecting A Commander, 55
Teammate View function, 55
Controllable Objects List, 56
Favorites, 58
Inventory View, 58
Map Marker, 54
Map Overlays, 54
Marker button, 54
Mission Objectives View, 57
Name tags, 54
Names button, 54
Selecting items, 54
Sensor button, 54
Sensor Circles, 54
Static Objects List, 57
Zoom mode, 53
PING, 33
Plasma Gun, 42
Play Game button, 28
Play Game Screen, 30
Player Basics, 36
Player Skin selection, 30
Pulse Sensors, 51
Quick Start, 4
Quick Start button, 28
Record Demo button, 32
Repair Kit, 47
Repair Patch, 47
Scout Flyer, 48
Sensor Indicator, 39
Sensor Network Icons, 39
Sensors And The Sensor Network, 51
Cameras, 51
Image Enhancer, 37, 51
Jammers, 52
Pulse Sensors, 51
Server Menu, 35
Options, 61
Server Score, 35
Starting A Training Mission, 31
Stations, 50
Ammo, 50
Command, 50
Inventory, 50
Remote Ammo, 47
Remote Inventory, 47
Vehicle, 51
Target Beacons, 47
Targeting Indicator, 38
Targeting Laser, 43
Training Screen, 31
Tribe descriptions
Children of the Phoenix, 14
Starwolf, 16
Diamond Sword, 18
Blood Eagle, 20
Tribes fiction, 5
Tribes timeline, 22
Turrets, 48
ELF, 49
Fusion, 49
Mini-fusion, 49
Missile, 49
Mortar, 49
Remote, 46
Vehicles, 47
Controlling, 48
Voice Set Information, 30
Voting, 61
Waypoint Indicator, 38
Weapons, 41
Weapons/Pack Bar, 38
Website, 29
80
 Loading...